How to Make a Summer Gathering Pouch with Stitched Embellishments
Here’s a sweet summer bag from textile artist, author, and teacher Terry White, with instructions to PLAY while you explore a variety of stitches, threads, and embellishments. A perfect place to showcase some of those pretty beads and buttons you’ve been hoarding for years, hidden in a box on a shelf – bring them out and enjoy them!
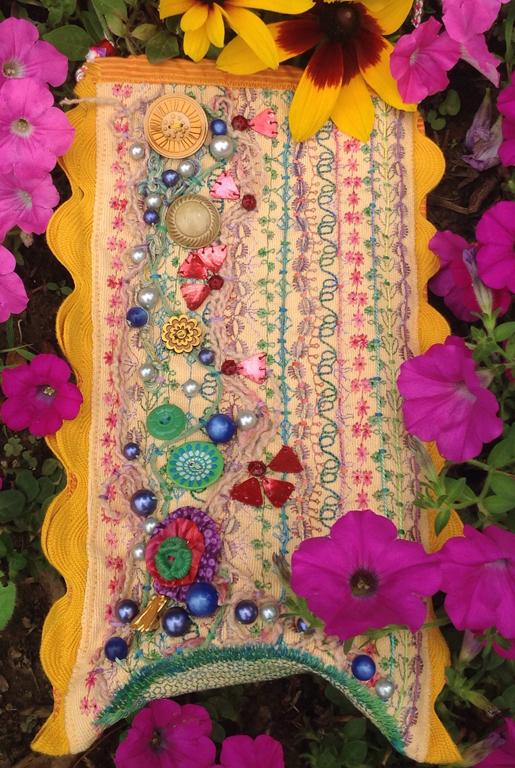
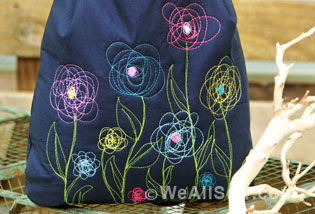
The primitive shape and the wonderful texture of a bark gathering basket were the inspiration for my “Summer Gathering Pouch.” This is one of those projects where you can play with the stitches on your machine that you haven’t tried yet. Experiment with stitches, use double threads, mix pinks and greens, combine yellow and soft greens, try new combinations – whatever you feel like doing. Your finished pouch will be a sampler of your experiments.
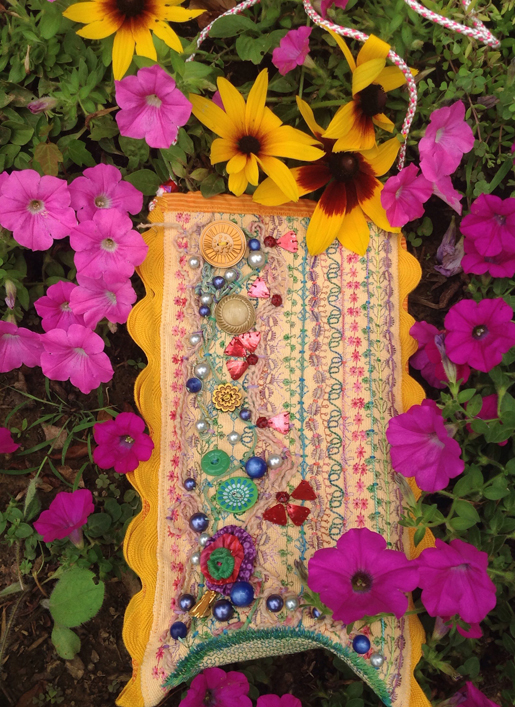
This was a design-it-as-I-went-along project. I had ideas, but I wasn’t sure how it would turn out – it was completely experimental. Originally, it wasn’t going to have so many embellishments, but the embellishments won out. The jumbo rick-rack wasn’t part of the plan, it just showed up on my work table after a trip to the AQS show in Paducah! How did that happen?
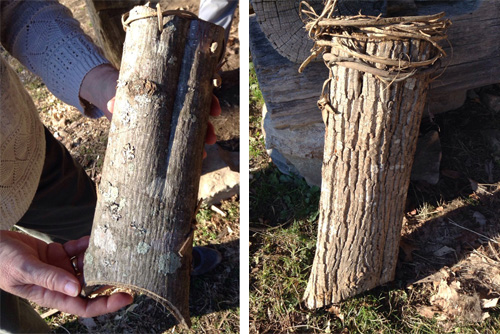
The Inspiration: A Bark Gathering Basket
This is a bark gathering basket (front and back) which I saw in a Kentucky state park at Barkley Lake in November. It is made completely from the bark of a tree and stitched with vines.The simple shape with its wonderful complex texture made me think that needlework on such a form could be very interesting.
Supplies
- 12″ x 27″ rectangle of heavyweight drapery or lightweight upholstery fabric (mine is the butter yellow piece)
- 7″ x 25″ rectangle of heavy craft stabilizer
- 8″ x 27″ rectangle of lining fabric (mine is the orange stripe)
- 40″ of nylon cord for the handle
- 1 yard jumbo rickrack or other big trim for the edge treatment
- A small piece of clear plastic on which to trace and cut out the gusset pattern
- Embellishments: beads, baubles, buttons,etc.
- A variety of colorful cotton machine-quilting or machine embroidery threads
- A variety of novelty yarns and cotton threads
- Polyester hand-quilting thread for stitching the embellishments onto the pouch
- 90/14 Embroidery needle (this is important!)
- 100/16 Topstitch needle
- A variety of hand-sewing needles
- Glue
Step 1) Select your fabrics and threads.
I chose a butter-colored medium-weight upholstery fabric; the weave gave me a great vertical design as the ground for my needlework. I also wanted to see how the decorative stitches looked on a warm yellow background with the thread colors.
I’ve done this type of work using different background colors but not this butter yellow. I realize that the choice of the yellow is a huge departure from the inspirational bark gathering basket. I will have to make another one in wood tones. I have the stuff for that!
So, think about that, even the background fabric you choose can be a part of the experiment.
The orange stripe batik is my lining fabric. I love this piece of fabric – I’ve used it in so many projects.

I began with the butter-color fabric, choosing the thread colors that looked good against the color. There have been times when I started with a group of threads I wanted to use and then chose the fabric.
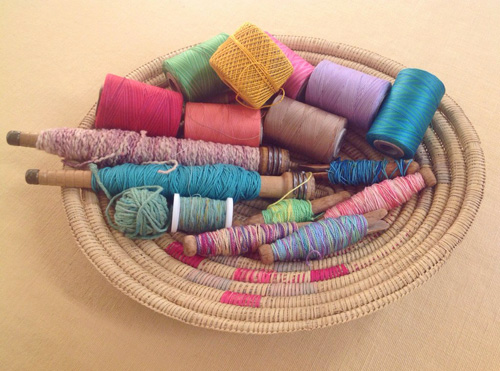
Cotton variegated color threads (including some that I designed for Star Cotton) were my choice for the decorative stitching. I wanted to use natural matte threads for this project, not shiny and smooth.
To continue using natural matte materials, I chose some yarns I had dyed and some of Laura Wasilowski’s beautiful hand-dyed cotton threads (which I wrapped on old clothespins). There is also a YLI Tentakulum blue/green gimp cord in the mix.
Gathering the yarns and threads; making a mix of colors, types and content; starting out with gorgeous materials –wonderful! – enjoying the process . . . all are reasons why we do what we do.
Step 2) Prepare the lining and interfacing.
Download and print the gusset pattern. Summer_Gathering_Pouch_-_Gusset_Template.pdf
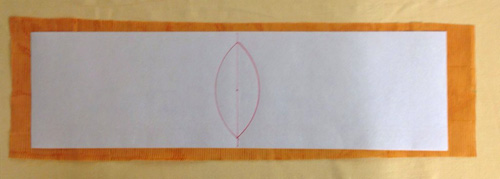
Tip: When I make a clear plastic template for something, I have to make sure I don’t lose it. So, I make a big outline in the color red, glue on a piece of paper with the name of the pattern, and put some stickers on the edges.
Fold the craft interfacing in half crosswise and finger press.
Trace the gusset pattern on the fold line. You will have 3/4″-wide seam allowance on each end of the pattern.
Set aside the interfacing and lining.
Step 3) Prepare the outside fabric.
I made the outer (butter yellow) fabric several inches longer and wider than the lining and interfacing because I knew it would distort with the dense stitching.
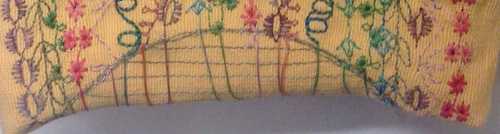
Fold the fabric in half and trace the gusset. The first thing to stitch is the outline of the gusset. Knowing that there would be lots of distortion with all the stitching, I reinforced the gusset first simply by stitching the outline of the shape and stitching some criss-cross lines of straight stitch inside.
I did not use stabilizer for this stitching for two reasons: The fabric is heavy enough to take the stitching well, and I wanted some puckering and distortion for texture. This is not a perfect project!
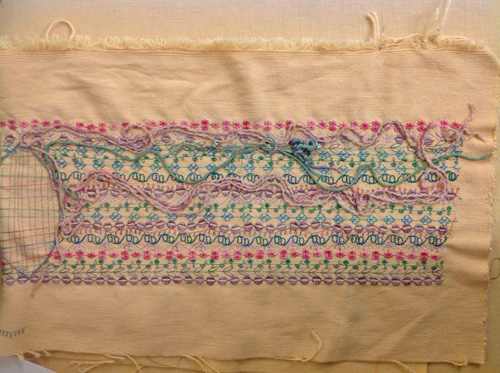
Step 4) Play with decorative stitches.
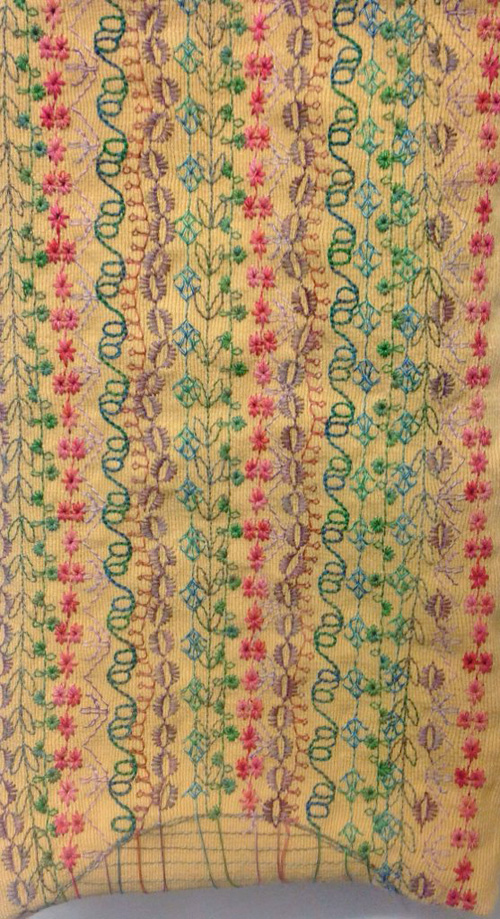
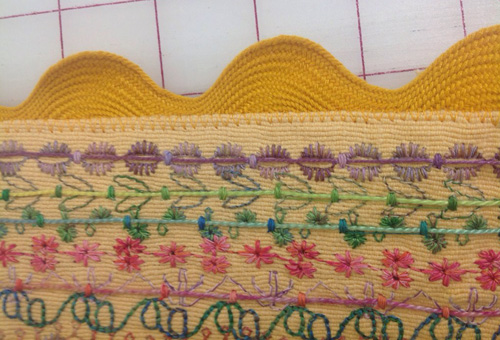
I used stitches that I haven’t used before and stitched all the way across the bag so both sides were decorated with the stitches. I did not stitch in perfect rows, things are not lined up perfectly on this bag I wanted a livelier, more natural, imperfect look.
I used a jump stitch across the gusset and continued to stitch on the other side. To do this, sew up to the gusset, secure the stitches, raise the presser foot, and move the fabric forward. Begin stitching again on the other side of the gusset, securing the stitches as you start. The back of the bag looks the same as the front except for the extra embellishments.
I used two variegated threads through the eye of the needle at the same time, using the 90/14 machine embroidery needle for all the decorative stitching. This gives the stitch a fullness achieved no other way. I used two different pinks together, two lavenders together, etc.
I just randomly chose programmed stitches and colors for my bag. I began by stitching the four lavender rows. Next, I stitched the three pink rows. Then I stitched the two blue/green rows. This established a loose pattern.
Step 5) Reinforce the gusset.
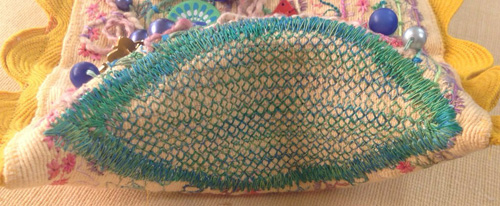
I stitched the gusset in the middle of the panel, using a decorative stitch to fill in and then several rows of zigzag stitching to create the shape at the bottom. By simply stitching this area heavily, it forms the shaped base of the pouch. You will notice that there is some distortion; this is okay, it will be folded in half at this point.
Step 6) Add bartack-couched cords and yarns.
I couched assorted cords over the decorative stitches using bartacks spaced evenly along the length, jumping from one bartack to the next. Afterwards, I cut the jump stitches between the bartacks. I only did this on the front of the bag (one half of the embellished panel). Notice that I didn’t “exactly match” the yarn colors with the stitching threads. Varying the shades of a color creates a more interesting look – it is just more colorful!
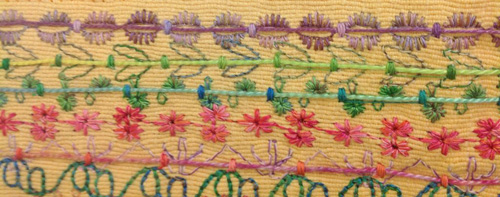
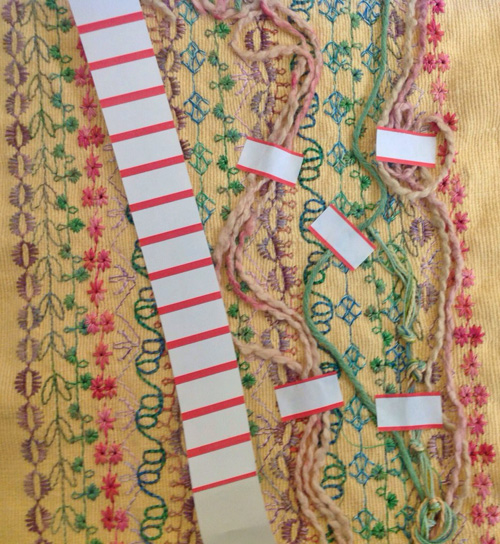
I also laid out some yarns over the stitching, choosing to “vine” them along one side of the embroidered panel in meandering lines. I grouped several yarns together to make more substantial vines. I used bartacks to secure them to the panel, using different stitch widths according to the size of the yarn and to create different effects.
Tip: Use little paper sticky tabs to anchor the yarns while couching.
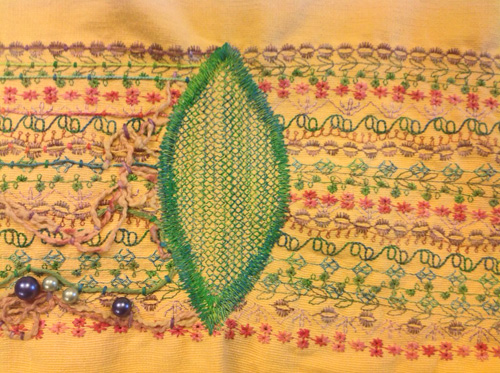
Some of the yarns were knotted together before being placed over the stitching. Manipulating the yarns like this adds so much to the work! Consider crocheting or knitting little bits to add even more dimensional texture.
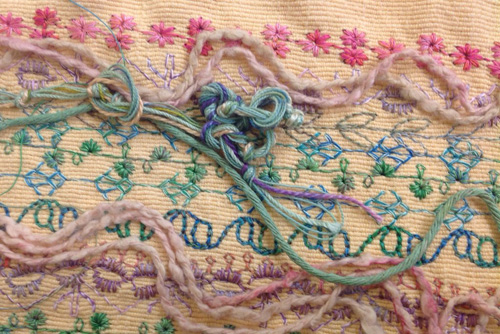
Here is a close-up of the yarns stitched down with the bar-tack. The knotted yarns create an embellishment feature with the pearls snuggled into the spaces.
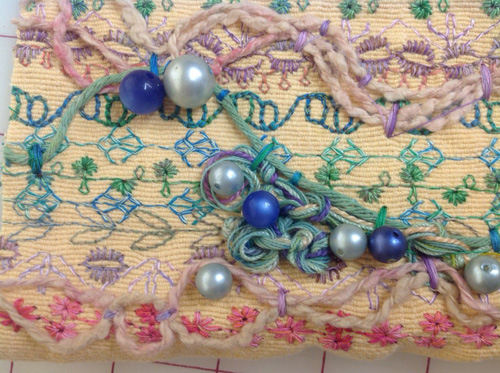
Step 7) Add hand-stitched embellishments.
I like to use elements from old broken costume jewelry. That is where the blue pearls came from. After couching down the yarns, I placed the pearls, took a photo of the placement (using my iPad) then, using my photo as a guide, hand-stitched them into place.
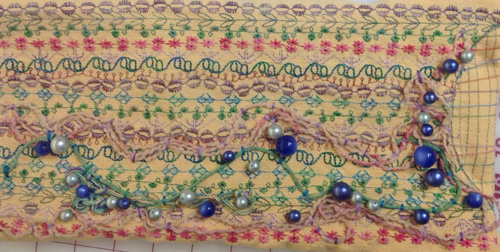
So, you can see that by layering the embellishments – first the yarns, then the pearls – you get a more cohesive design than by just randomly stitching things all over the place.
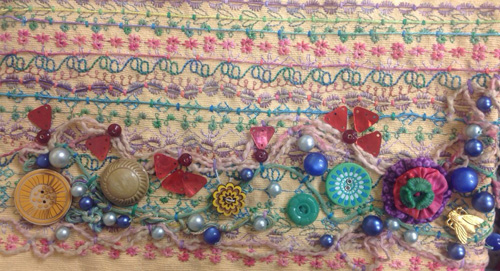
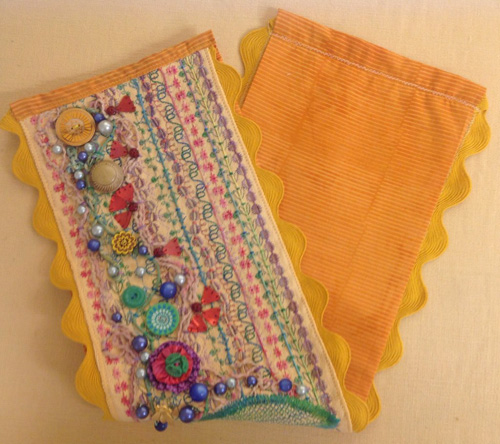
Now it’s playtime! At this point I started adding embellishments – beads from old jewelry, buttons, shaped discs, a bee, a button stack made with two yo-yo’s, and flower buttons. This took some time. I moved around the pieces until I liked the design. Sometimes, I walked away and came back later for a fresh look.
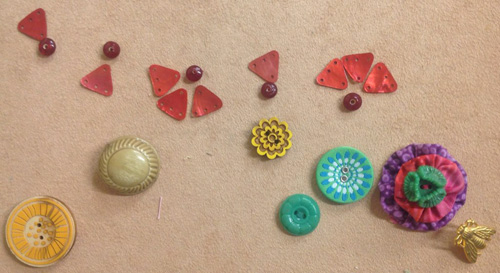
I set the embellishments aside on a fabric surface, trying to mimic the placement on the panel. Use polyester hand-quilting thread to stitch the embellishments to the panel.
Tip: When I like the embellishment layout, I take a photo of the layout and use it as a placement guide.
Step 8) Add rickrack trim.
Trim the sides of the panel so that each side is the same width as the lining (8″).
Trim the ends of the panel so that each end is 1/2″ shorter than the lining (26″).
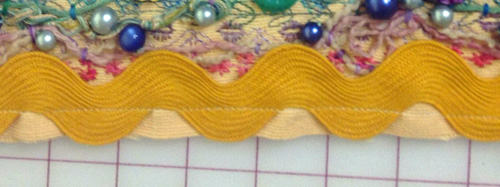
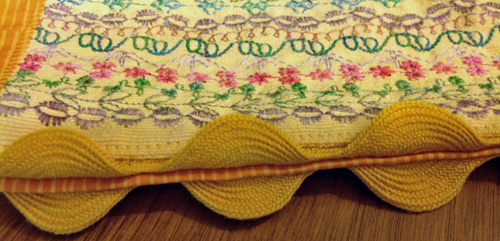
Switch needle to a size 100/16 Topstitch needle. Line up the edge of the rick rack with a side edge of the panel. Stitch as shown below.
Fold the the seam allowance under and sew along the edge with a zigzag stitch. Repeat for other side.
Step 9) Assemble the layers.
Fold the long edges of the lining under 1/2″ and press.
Fold the ends of the lining fabric under 1/4″ and press.
Layer the panel with the interfacing and lining.
Fold the lining fabric over the ends of the bag and stitch. Press. This finishes the top of the pouch.
Fold the pouch in half and stitch up the sides through the edging,the lining, and interfacing.
This is what the gusset looks like when the sides are sewn together. It gives the pouch its nicely curved bottom.
Step 10) Make the handle/strap.
I put glue on the ends of the cord, folded them over, and inserted them into beads to cover the ends. Then, I trimmed any extra frayed cord peeking out from the other end of the bead and added more glue.
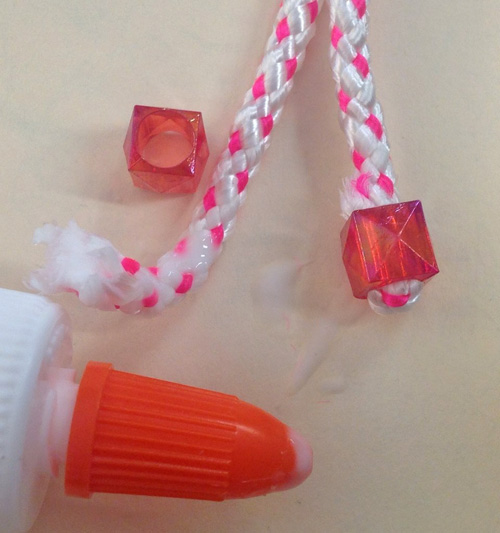
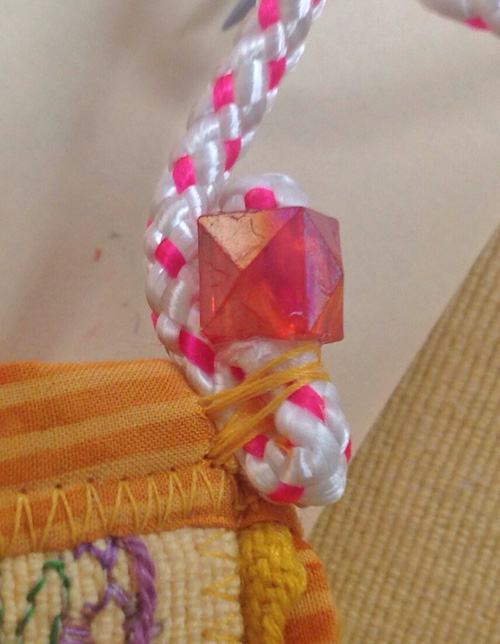
PHOTO 26- Stitch the cord to the pouch. (26 actually whip stitch)
Whipstitch the cord to the side of the pouch with strong thread. Fold the bead end up and stitch that as well.For this I used strong hand-quilting thread with a polyester core.
Then, I whipstitched over that with a pearl cotton thread for a nice finish.
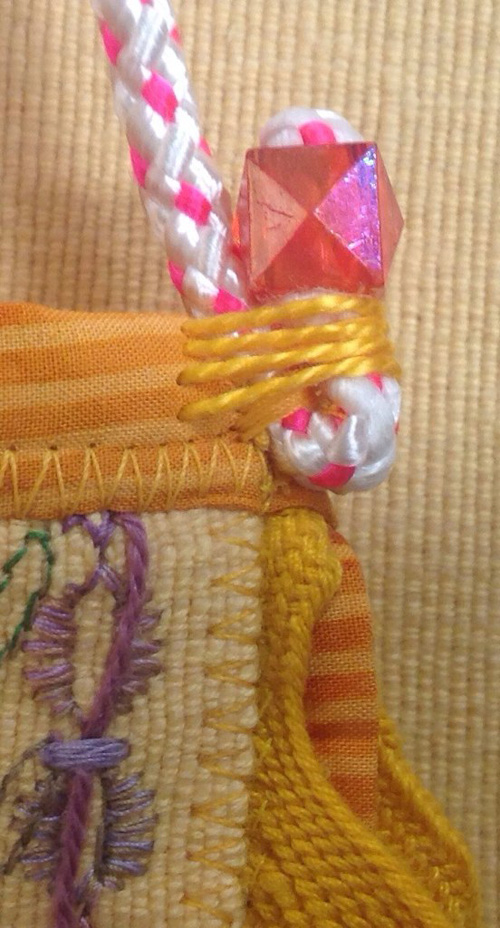
I knotted the handle to shorten it and add an extra design element.
Making this gathering pouch was fun! The only resemblance between my gathering pouch and the bark gathering basket is the form. The basket inspired me to look at nature and interpret it the way I see it in summer. Designing it as I went was great because I had no idea what the end product would look like. I hope you enjoy this project.
Enjoy the Process!
Terry
Visit Terry’s website and blog at www.threadpaint.com. Be sure to take a peek at her gallery! – Jo
Used Products


What you might also like


One comment on “How to Make a Summer Gathering Pouch with Stitched Embellishments”
Leave a Reply
You must be logged in to post a comment.

This a a cute quick project. Terry did a great job presenting it with very nice photos. I particularly enjoyed the reference to the log basket she had seen in Kentucky and the photos.