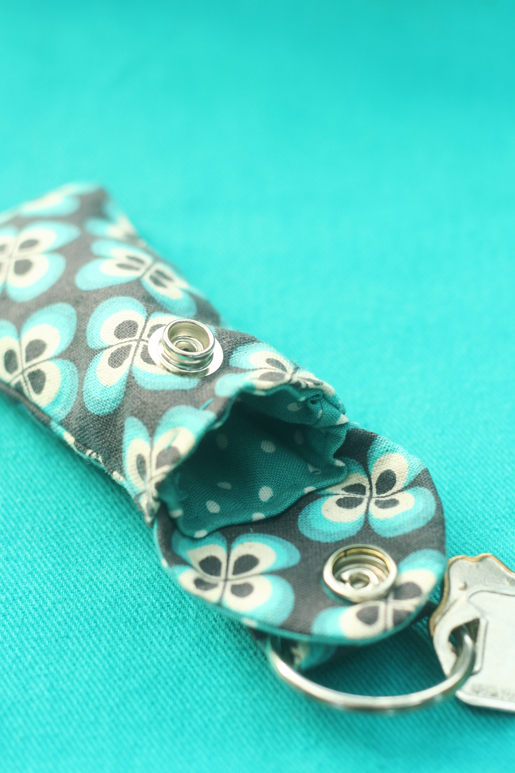
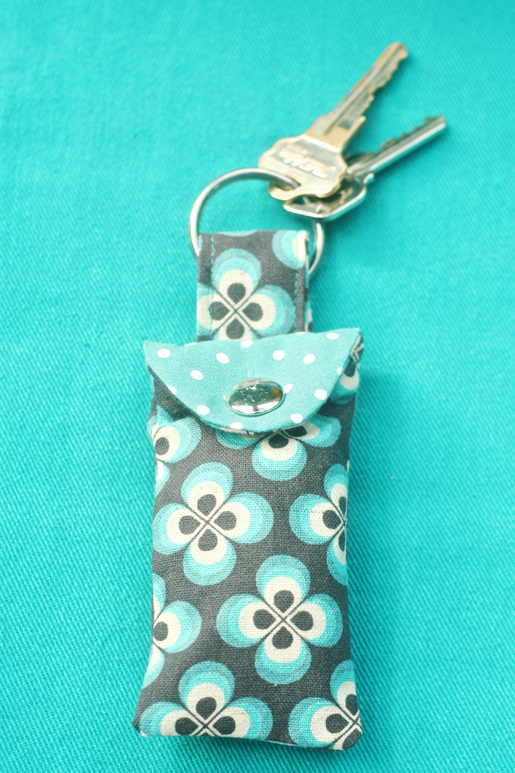
How to Make a Keychain Ear Bud Pouch
One of my kitchen cupboards does not stay closed. I spent a year closing the cabinet, leaving the kitchen and sitting down in the dining room only to hear it squeak open before I finally did something about it and put a piece of tape on the front of it. It’s a little annoying to have to peel back the tape to open the cupboard but believe me, it’s way less irritating than the squeaking sound I dealt with before.
We all have squeaky cupboards in our lives… things that exasperate us on a daily basis but that we just learn to live with, like leaky faucets, ice trays that make extracting the ice a nearly impossible feat or tangled headphones.
I’m the queen of saying, “Just a second,” when someone calls me as I dig through my purse to find my headphones. Then when at last I’ve uncovered them, I spend a minute or two trying to untangle them. I’ve often wondered how it is possible for them to get so tangled while they’re just sitting in my purse. Last week I stopped trying to figure it out and decided to do something about it! I created this headphone pouch to not only keep my ear buds from twisting into a jumbled mess but also so that I always know where they are.
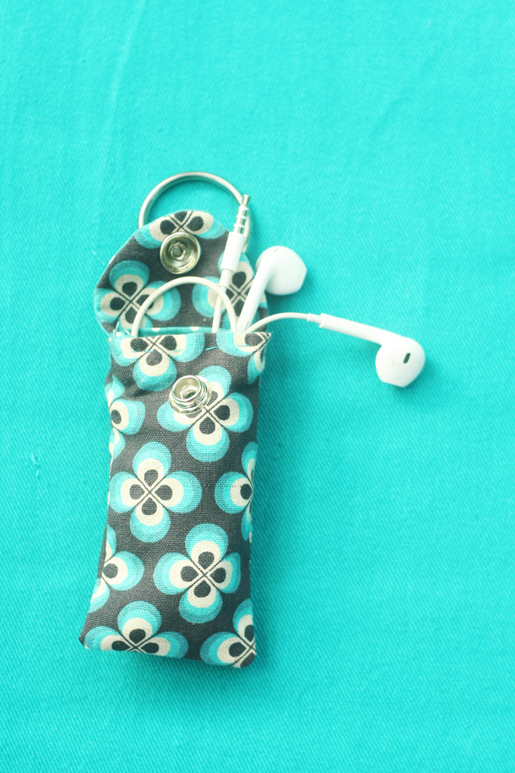
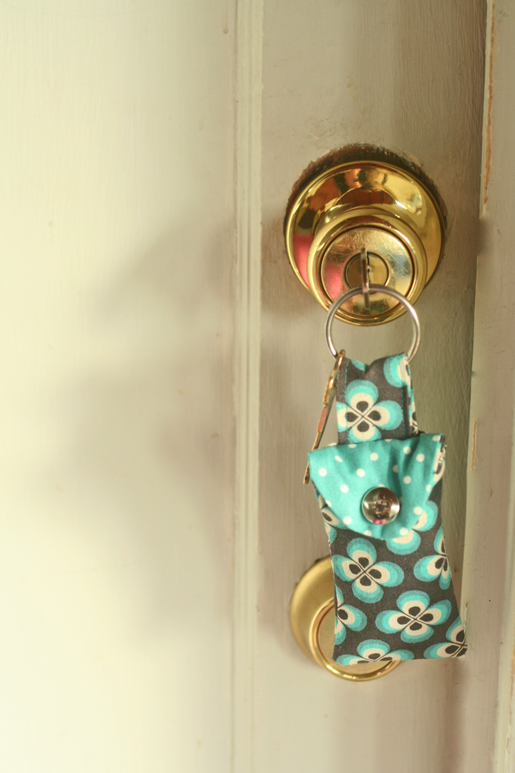
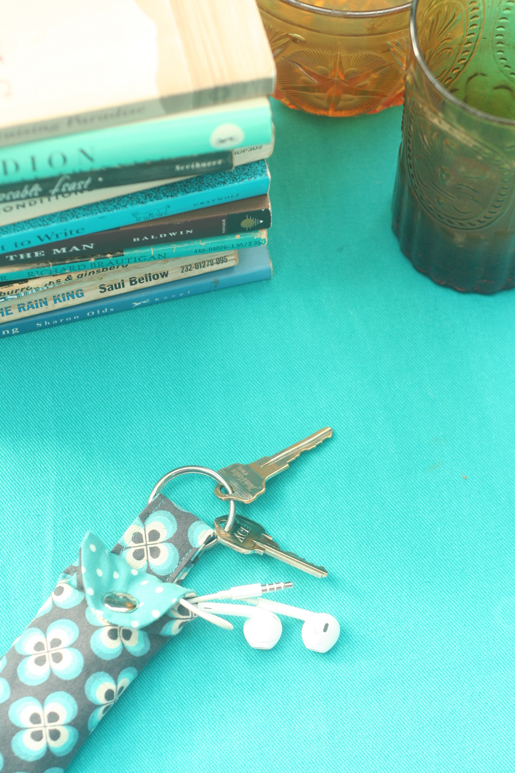
In the few days since I’ve started using the pouch, I relished in the thought that I always know exactly where my headphones are when I get a phone call or head out on my morning walk. I’ll be honest, it’s a little annoying to have to put them back when I’m done with them but way less infuriating than not knowing where they are. So, if lost and tangled ear buds are on your “squeaky cupboard” list, then take some time and create this keychain ear bud pouch.
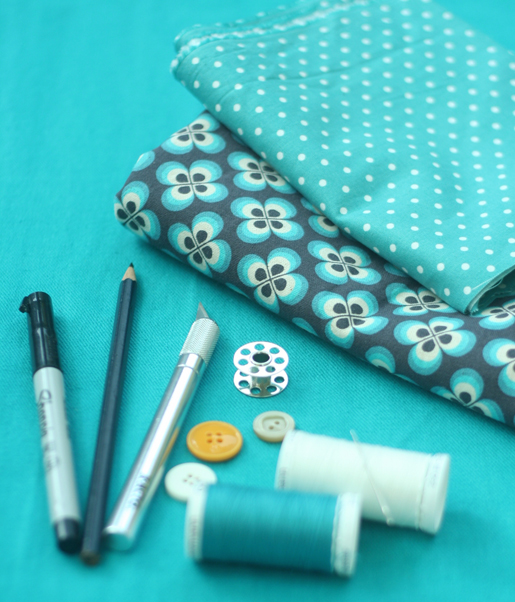
Supplies
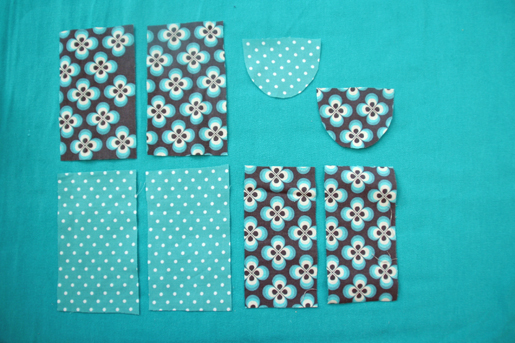
- 2 pieces of the outside pouch fabric, each 4-1/2″ x 3″ (A)
- 2 pieces of the inside pouch fabric (the lining), each 4-1/2″ x 3″ (B)
- 2 half circles of fabric – one is the same fabric as the outside and one is the same fabric as the inside – each 3″ across the straight top and 2-1/2″ from the middle of the top to the bottom of the curve of the circle (C)
- 2 pieces of the outside fabric 5-1/4″ x 2-1/2″ for the strap (D)
- 1 metal snap with tools to install it
- Thread to match your fabric
- One 1-1/2″-diameter keyring
- Scissors
- Sewing machine
- Hand sewing needle
- Cardstock
- Pen
- Ruler
- X-Acto knife
Note: All seam allowances are 1/4″ wide.
Step 1) Prepare the fabric pieces.
Download and print the template file. DIY_Keychain_Headphone_Pouch_templates_121314.pdf
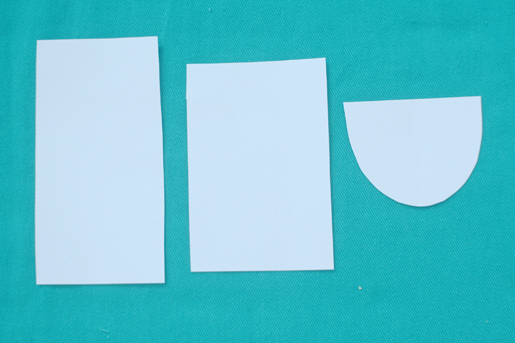
Cut out the fabric pieces using the printed templates.
- Two outer pouch pieces (A)
- Two pouch lining pieces (B)
- One outer flap piece (C1)
- One inner flap piece (C2)
- Two strap pieces (D)
Step 2) Construct the pouch components.
Place the two outer pouch pieces (A) together with the right sides (printed sides) facing in.
Stitch around all four sides, leaving one short end open.
Repeat for the two inner pouch pieces (B).
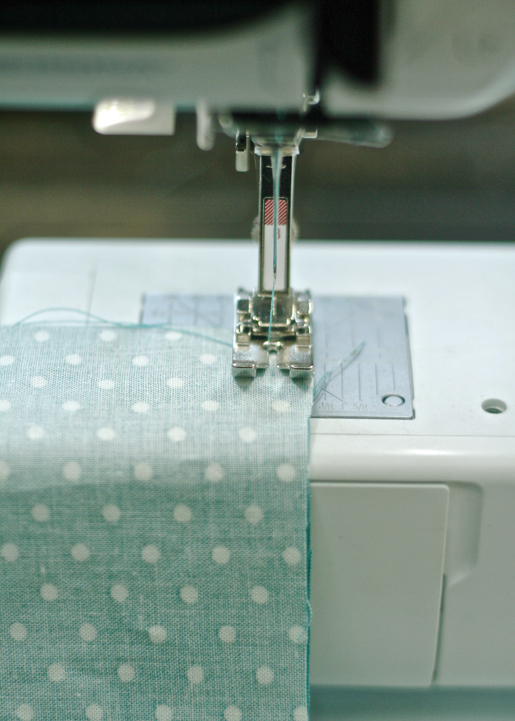
Sew the flap (C1 and C2) pieces together, right (printed) sides facing in, leaving the straight edge open.
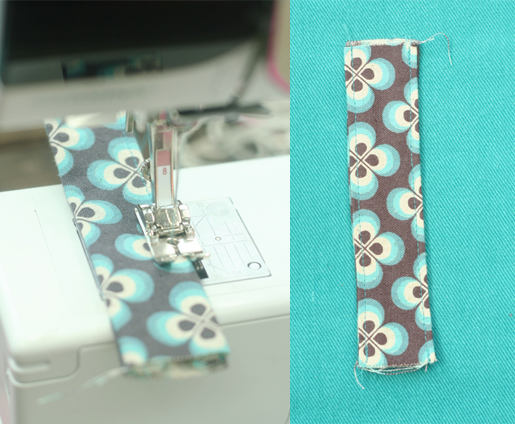
Sew the strap (D) pieces together, right (printed) sides facing in, leaving both short sides open.
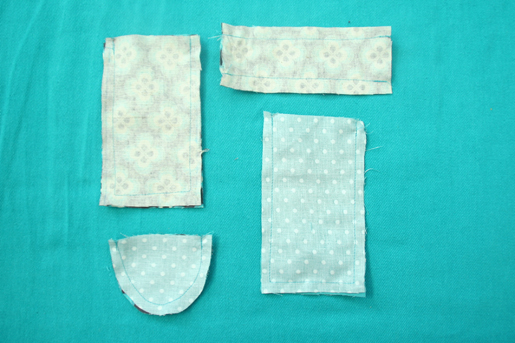
Turn your pouch (A) and pouch lining (B) right side out.
Turn the flap (C) right side out and press.
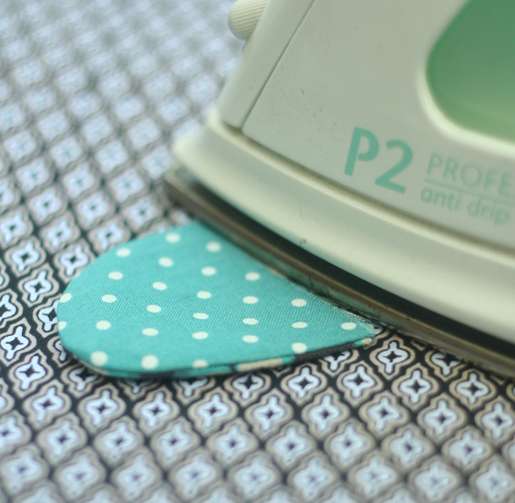
Turn the strap right side out and press.

Topstitch close to both long edges.
Turn under 1/4″ around the open end of the outer pouch (A); press.
Turn under 1/4″ around the open end of the pouch lining (B); press.
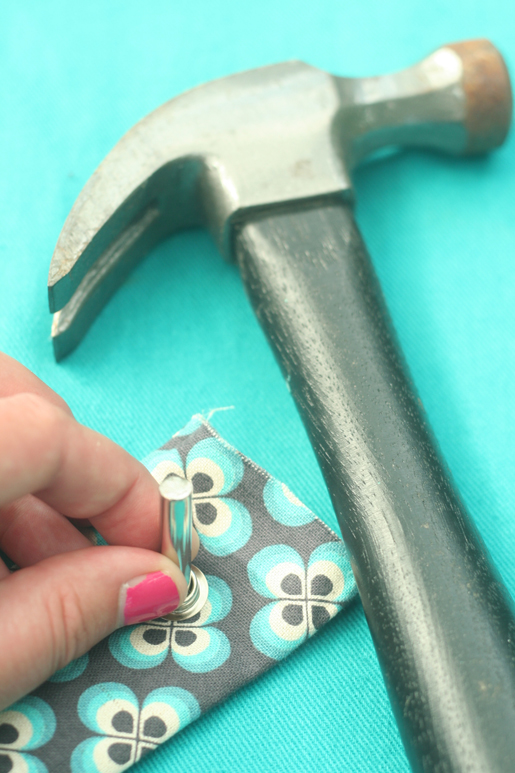
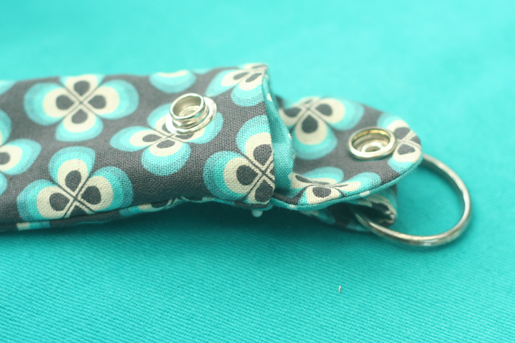
Step 3) Install the snap.
Attach the top/female half of the snap to the flap (C) and the bottom/male half of the snap to the outer pouch (A) following the instructions included with the snaps and/or snap-setter.


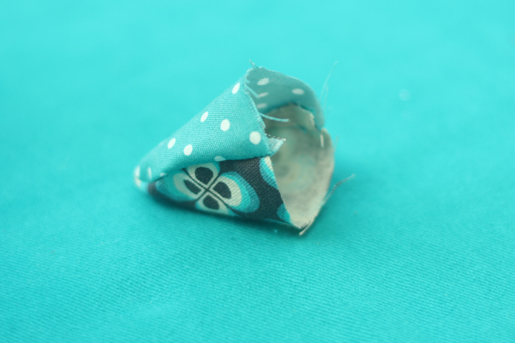
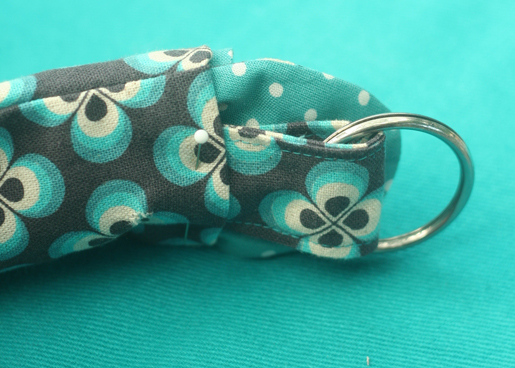
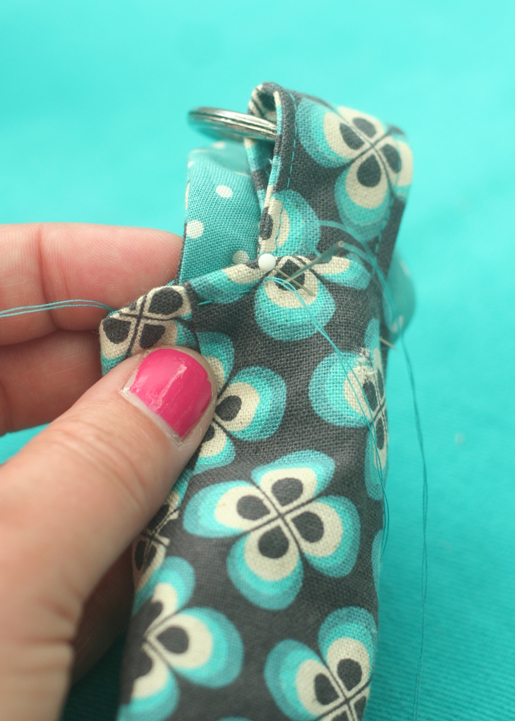
Step 4) Assemble the keychain pouch.
Turn the pouch lining (B) wrong side out.
Slip the pouching lining (B) into the outer pouch (A), wrong sides together.
Slip the end of the flap (C) between the outer pouch (A) and pouch lining (B).
Slide the key ring onto the strap (D), then fold the strap in half and slip the ends between the outer pouch (A) and flap (C).
Pin through all layers to hold them in place.
Using a hand sewing needle and a running stitch, sew around the top edge of the pouch, securing all layers in the stitching. Make sure the flap (C) and strap (D) stay in place as you stitch through them.


8 comments on “How to Make a Keychain Ear Bud Pouch”
How about updating this App? NO graphics! Sounds like a cute project, but without illustrations I’m not about to attempt it.
Hi, Kathy – We know our WeAllSew app isn’t working, and hope to have a new version soon. Meanwhile you can see entire posts – including photos and videos – by visiting WeAllSew.com using your device’s web browser. We apologize for the inconvenience. Jo
Cute project!
I would appreciate being able to print a copy of this project without having to make a word document so I can reduce the size of the pictures. The current form of the directions takes too many pages of paper and too much expensive toner. The project looks like it will make a nice gift for a teenager.
We don’t have a Print feature at WeAllSew, but it’s on our Wish List for future development. Jo
Go to
https://www.printfriendly.com
enter your webpage address that you want converted to pdf, works great to remove ads, etc.
~Mary
Thanks Mary, this is a very handy site.
Cindy