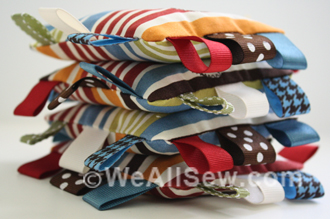
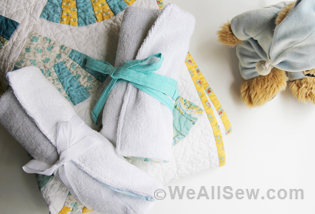
DIY Designer Burp Cloths
These DIY designer burp cloths by guest blogger Rheney Williams are a great gift for new parents. Extra burp cloths are always welcome!
As a first-time expectant mother (my son will be here in January!), I have everything “baby” on the brain. From bedding to burp cloths, I want to stock his nursery and his diaper bag with things that are not only functional but are also pretty to look at. And although I’m not necessarily a matchy-matchy person, I do want everything to coordinate.
Which brings me to today’s project: DIY burp cloths that are inspired by another baby season staple, personalized stationery!
Whether on shower invitations, thank you cards or birth announcements, beautiful baby-centric designs on printed card stock abound. This got me thinking: Why not translate some of these creative concepts onto fabric instead of paper? And that’s precisely what we’ll do now.
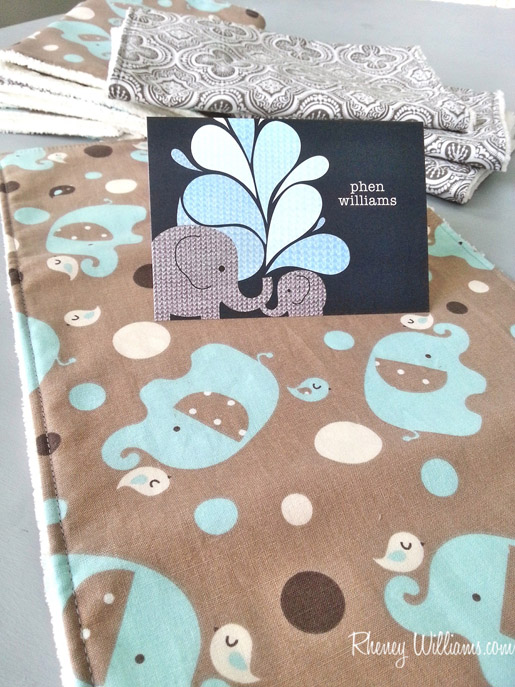
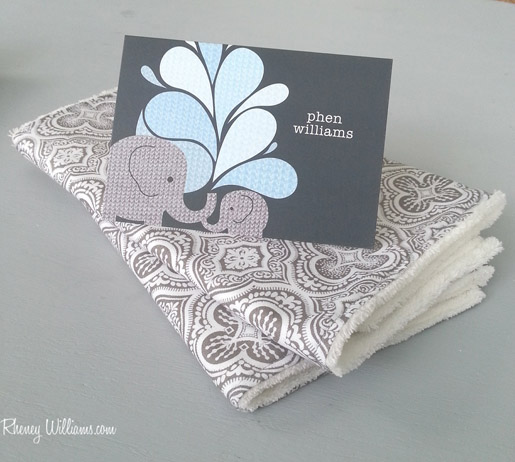
I adore these cards by Tiny Prints (“Elephant Applique: Slate”) that I personalized with my son’s name. Not only do the shades of blue and gray coordinate perfectly with my thematic colors, but they also feature a sweet mama and baby elephant. As if that wasn’t enough, the elephants and water spouts resemble an applique pattern that you might attach to fabric. Perfect, right?
Supplies
- 10″ x 18″ rectangles of your chosen fabric
- 10″ x 18″ rectangles of chenille cloth
- 10″ x 18″ rectangles of white cotton fabric
- Thread
- Sewing Machine
- Iron
Step 1) Start by cutting out your fabric.
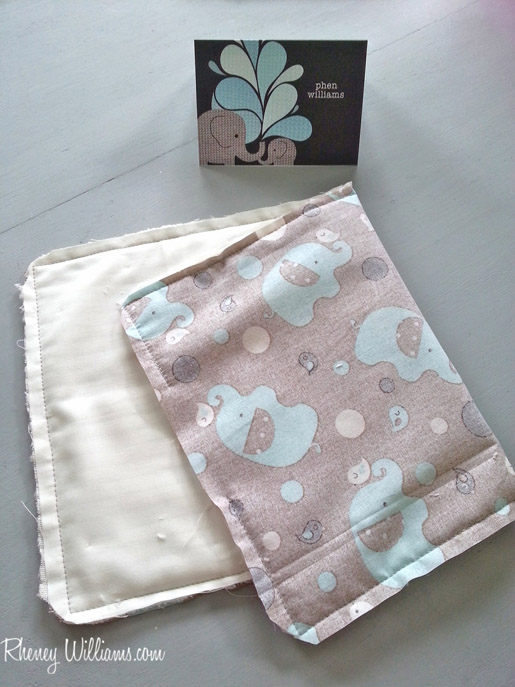
Out of a single yard of fabric at 36″ long, you can get two rows by cutting the yard in half lengthwise and then either four or six separate rectangles from each half (depending on whether the fabric measures 42″ or 60″ wide). I used a sweet little elephant pattern fabric from Jo-Ann and coupled that with an absorbent chenille cloth.
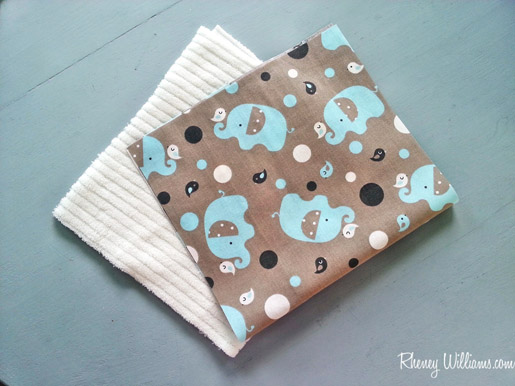
For the third and final layer, I used a basic white cotton fabric to further enhance the absorbency of the burp cloths and also to add stability to my fabric sandwich once I started stitching. Although beautiful, the chenille is extremely stretchy and can be difficult to work with if you don’t have an extra buffer between it and the presser foot.
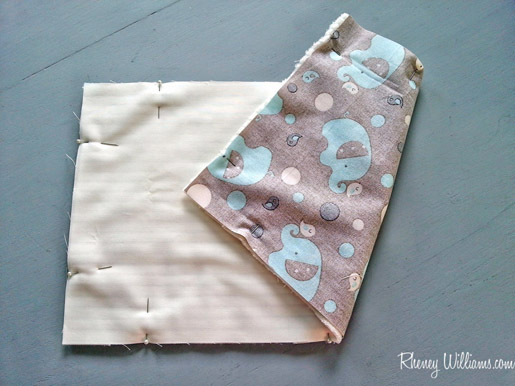
Step 2) Make a “sandwich.”
Iron both pieces of fabric (I didn’t iron the chenille) and pin together your fabrics as follows: the patterned fabric face up on the bottom, the chenille soft-side down in the middle and the white fabric on top.
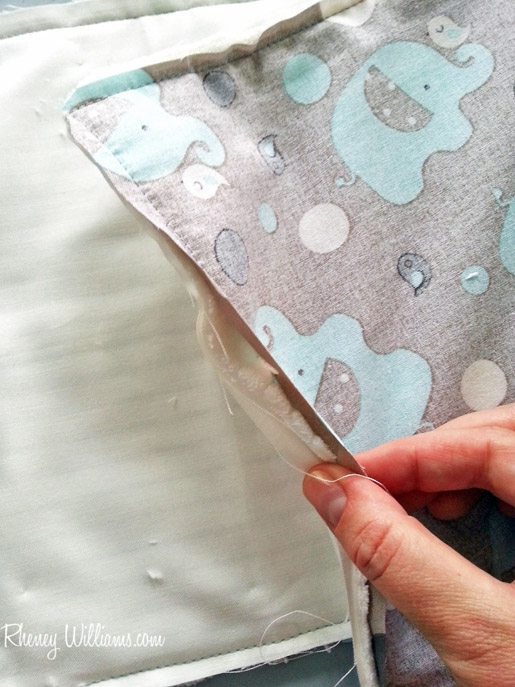
Step 3: Time to sew!
I used my walking foot for this step and I found that it really helps to keep all three layers from shifting while machine stitching around the edge.
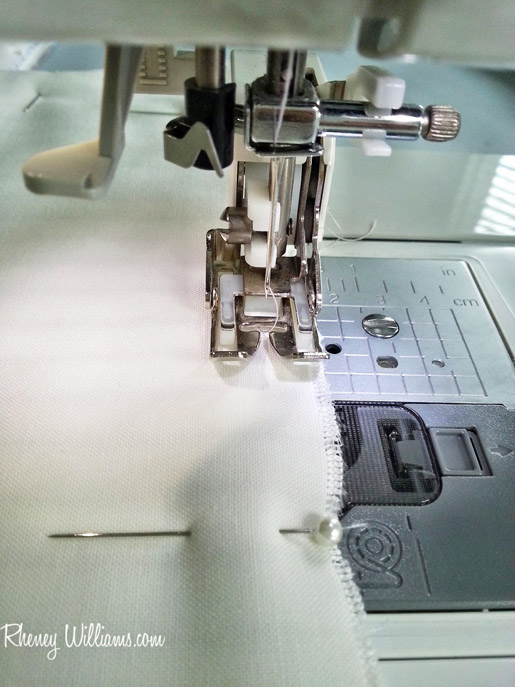
Leaving a center opening (about 4 inches or so wide) on one of the short sides, and using a 1/4 inch-wide seam allowance, backstitch about three inches from the bottom edge, continue all the way around the perimeter and backstitch to close about three inches from the opposite top edge on the original short side.
Step 4: Trim corners.
Trim all four corners to minimize the bulk in the edges, and be sure not to snip the corner stitches.
Step 5: Turn right side out.
Using the center opening, turn the entire sandwich inside-out like a pillow case, leaving the patterned sides of the fabric on the outside. To help push out those crisp corner edges from the inside, I use a long bamboo skewer. You could also use a knitting needle or anything else with a pointed end; just be sure not to poke through the fabric.
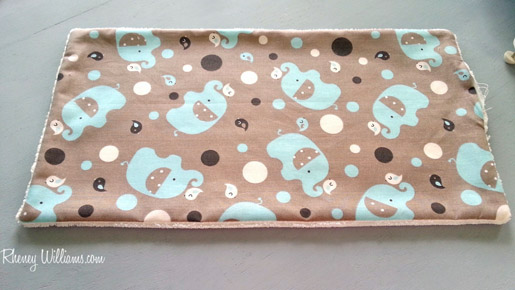
Step 6: Press.
Iron the entire cloth again on the elephant fabric side to ensure the top is flat and even for the final round of stitching.
Step 7: Topstitch.
Stitch all the way around the top of the cloth, 1/4 inch from the edge. Make sure to stitch the side opening closed.
In addition to the cloths using the elephant fabric, I also selected a gray and white Moroccan patterned fabric that works with the gray in the cards. Both fabrics coordinate with my diaper bag, so we’re covered on all fronts!
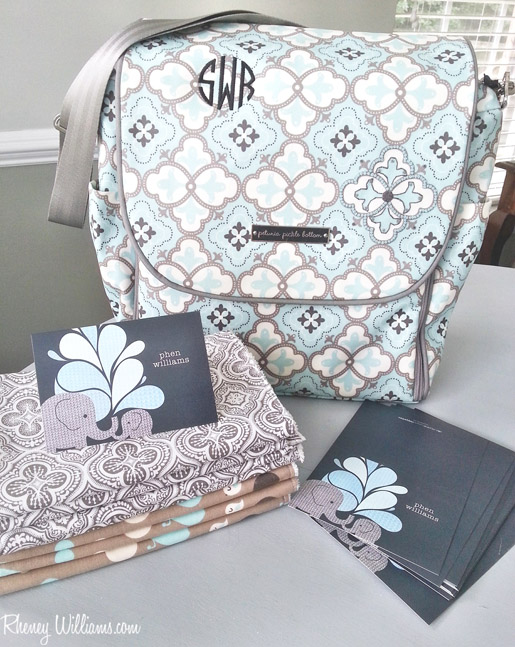
Making DIY designer burp cloths like these is a great way to stock your own nursery storehouse without spending a lot of money. At the same time, they also make fantastic gifts for mothers-to-be, especially when coupled with coordinating personalized stationery.
Have you noticed any adorable designs on stationery or card stock that you want to replicate on boutique-style burp cloths?
Rheney Williams is a writer and concept creator with a passion for home improvement projects. Between baking, sewing, gardening, building and beautifying, she keeps busy working on her fixer-upper home in Charleston, S.C. and sharing her escapades with readers at TinyPrints.com and numerous other publications.