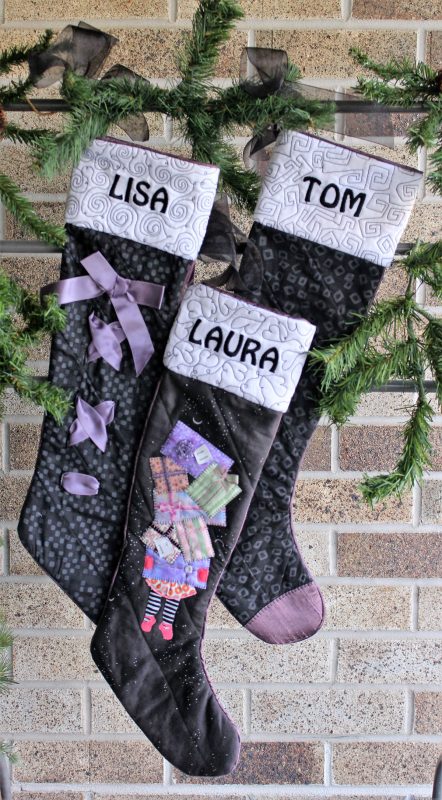
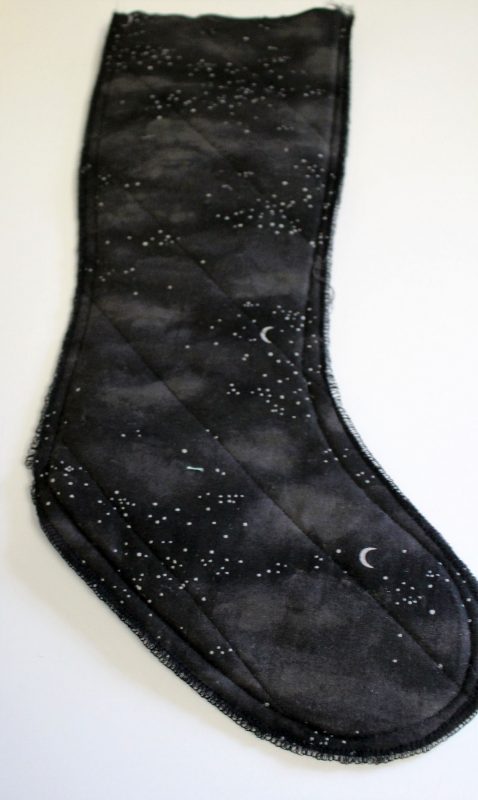
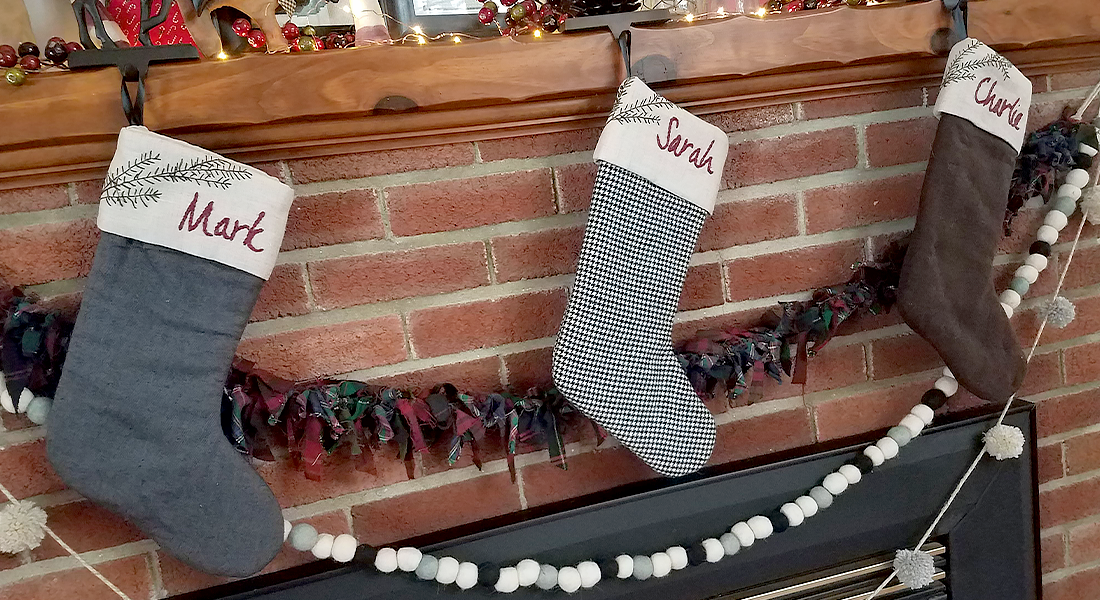
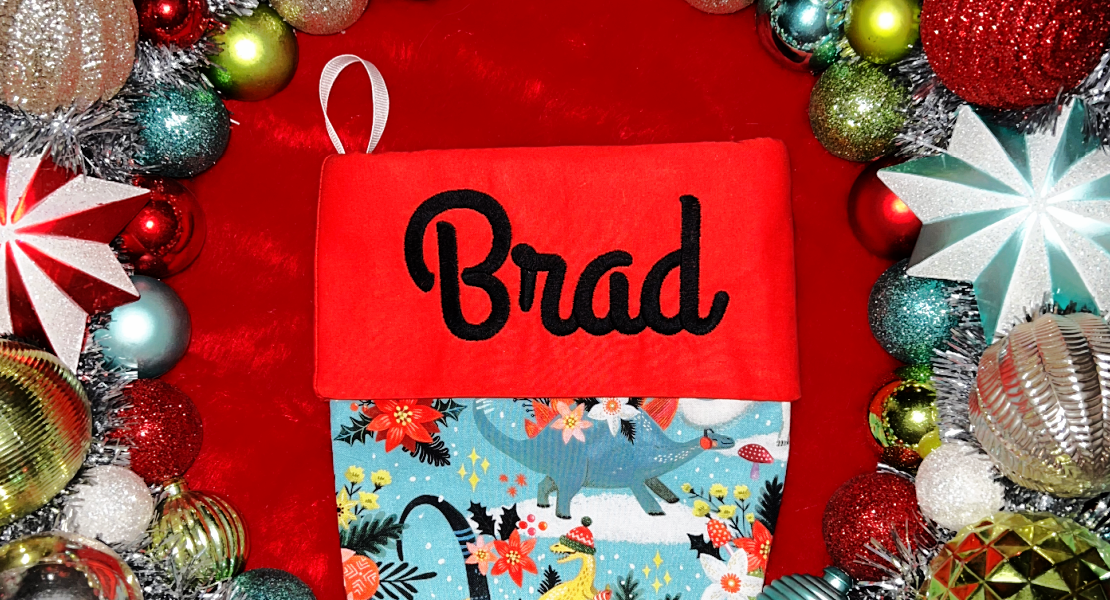
Nice Girl Christmas Stocking Tutorial
Make a whimsical appliqué stocking personalized with an embroidered name, ready for stuffing with this Christmas Stocking Tutorial from Diane Gloystein of designonawhim.com.
Materials:
- Christmas Stocking Appliqué Pattern
- Stocking fabric: 2-12″ x 18″ rectangles
- Stocking Backing: 2-12″ x 18″ rectangles
- Stocking Batting: 2-12″ x 18″ rectangles
- Stocking Cuff: 1-14″ x 5″ (you may want a slightly bigger piece of this fabric to give you plenty of room for centering the name and hooping the fabric in your embroidery machine)
- Stocking Cuff Backing: 1-14″ x 5″
- Cuff Lining: 1-14″ x 5″
- Cuff Batting: 14″ x 5″
- Bias Piping (optional): 56″
- Loop: 1″ x 3″ of fabric, or a 3 inch length of ribbon
- Assorted small scraps for the applique
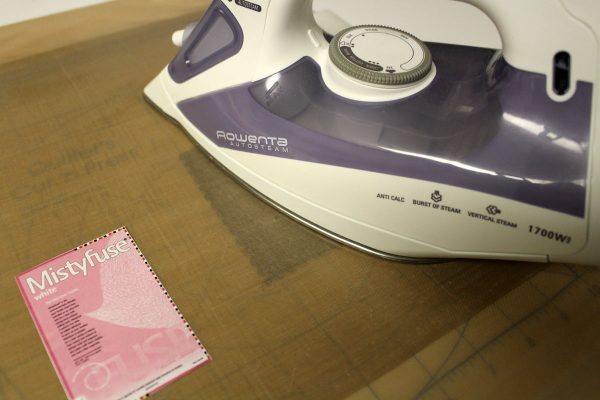
- Misty Fuse
- Stabilizers: Sulky Printable Sticky Fabri Solvy, Sulky Tender Touch, Sulky Totally Stable, Sulky Tear Easy
- Temporary spray adhesive KK2000
- Sulky Invisible thread, Sulky 30 wt. Cotton thread (for machine quilting), Sulky 40 wt. Rayon thread (embroidered name)
THE EMBROIDERED STOCKING CUFF
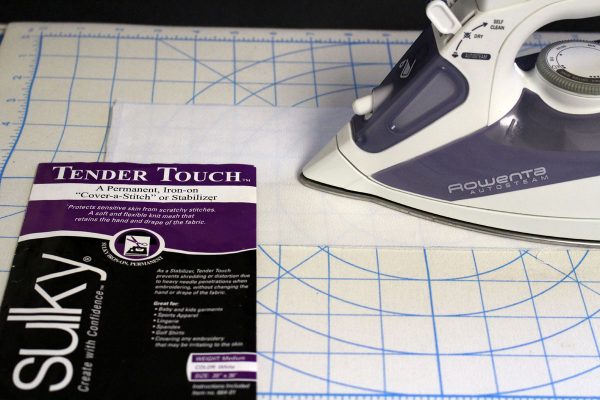
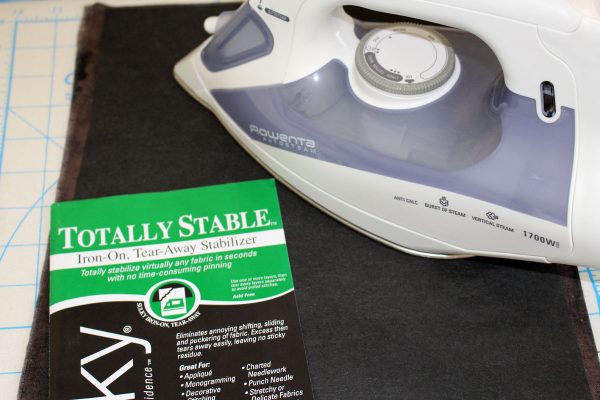
1. Fuse Sulky Tender Touch to the WS of the cuff fabric. Since the fabric is white, the Tender Touch prevents the other fabrics from “shadowing through”.
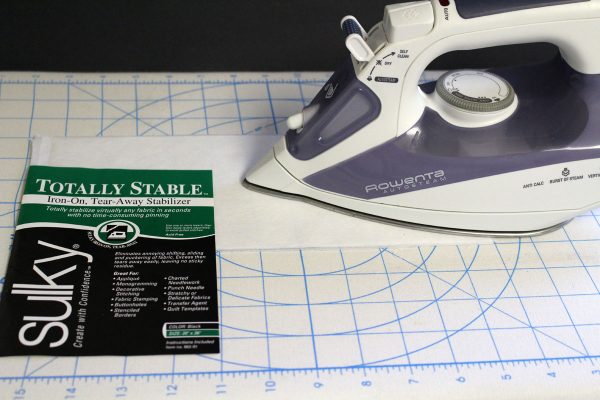
2. Press Sulky Totally Stable to the Tender Touch you adhered in Step 1.
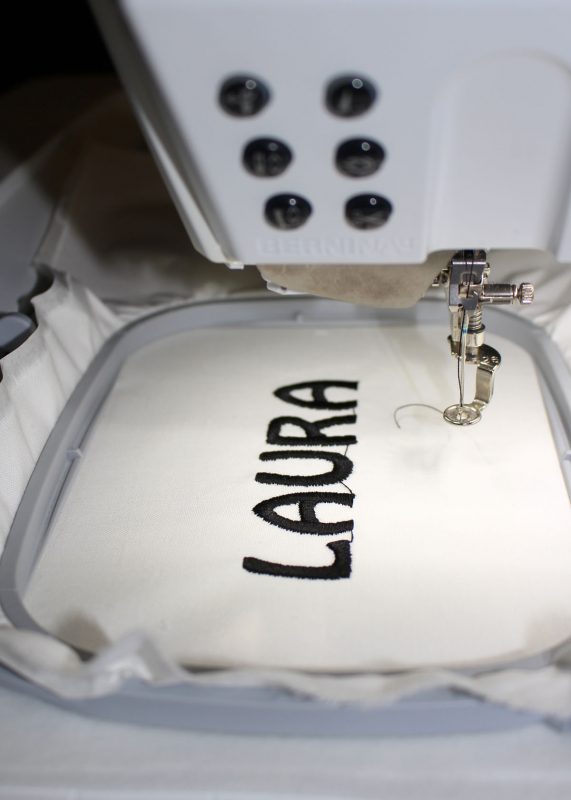
3. Hoop the stabilized white fabric in the BERNINA embroidery hoop.
4. Spray Sulky Tear Easy with temporary spray adhesive and position it beneath the hooped stabilized fabric from Step 3.
5. Embroider the name of your favorite little “nice girl”. I used 40 wt. Sulky Rayon black thread #1005.
6. Carefully remove each layer of the Tear Easy and Totally Stable from the WS of the embroidered stocking cuff.
7. Layer the embroidered stocking cuff in the following order and secure the layers with temporary spray adhesive.
Bottom: Backing Fabric
Middle: Warm & Natural Batting
Top: Embroidered Stocking cuff (RS facing up)
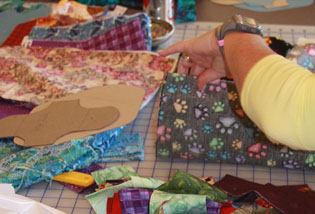
APPLIQUE PATTERN PIECES
1. Photocopy the applique pattern pieces on an 8-1/2″ x 11″ sheet of Sulky Printable Sticky Fabri Solvy.
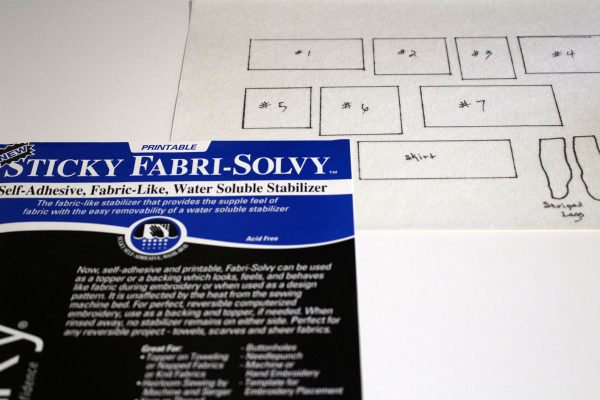
2. Rough cut the applique pattern pieces, peel away the paper to expose the sticky side. Place the sticky side to the fabric. Cut out your appliqué pieces. Peel away the sticky pattern.
THE NICE GIRL APPLIQUE
1. Serge the bottom of the skirt with a rolled hem. If you don’t have a serger, simply turn under the raw edge of the skirt ¼” to the WS and stitch close to the edge.
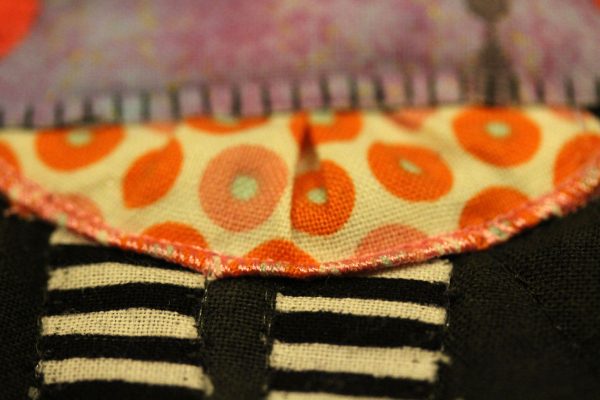
2. Press the “side seams” of the skirt to the WS of the fabric, pressing the edge under ¼”.
3. Baste 2 parallel lines of stitching along the top of the skirt. Gather.
Stitch: Straight
Length: 4.0
4. Adhere Misty Fuse to the WS of the fabric scraps for the legs, shoes and mittens.
5. Cut out the striped legs, shoes and mittens.
EMBELLISHING THE PRESENTS
1. Stabilize a variety of “package” fabrics by spraying 1 layer of Tear Easy with temporary spray adhesive. Adhere to the WS of the package fabric. Stabilize a 2nd layer of Tear Easy and attach to the previous layer of Tear Easy.
2. Embellish each “package fabric” with BERNINA decorative stitches or embellishment items of your choice. Have fun decorating your presents with the huge array of BERNINA decorative stitches you have to choose from. It’s also a fun place to add ribbons and decorative trims as well! It is easiest to embellish the package fabric scraps first and then cut out the package shapes.
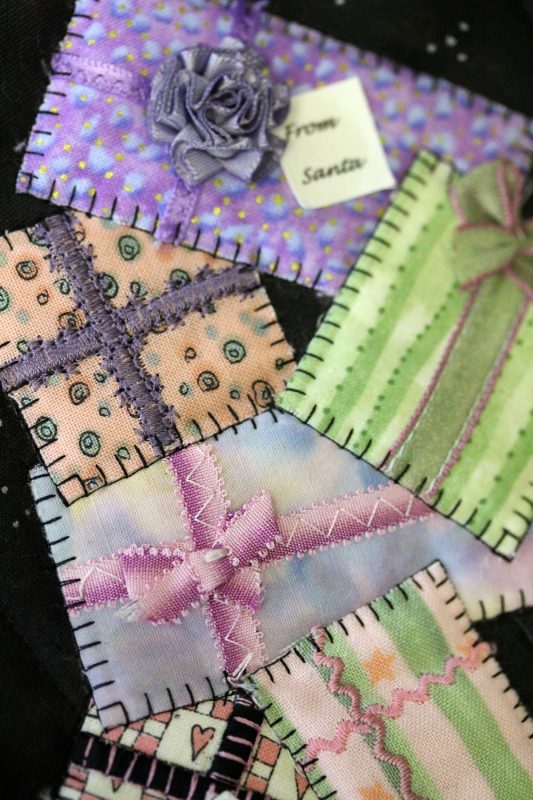
3. Carefully remove the 2 layers of Tear Easy, removing 1 layer at a time.
4. Press Misty Fuse to the WS of the embellished packages. Cut apart the pattern pieces that you printed on the sheet of Sulky Printable Sticky Fabri Solvy. Place the package patterns over each of your embellished fabric pieces and cut out. Remove the Sulky Printable Sticky Fabri Solvy pattern pieces. I recommend sealing the threads of your embellished packages with Fray Check. You don’t want those beautifully stitched package embellishments to come unstitched!
APPLIQUEING THE PIECES TO THE STOCKING
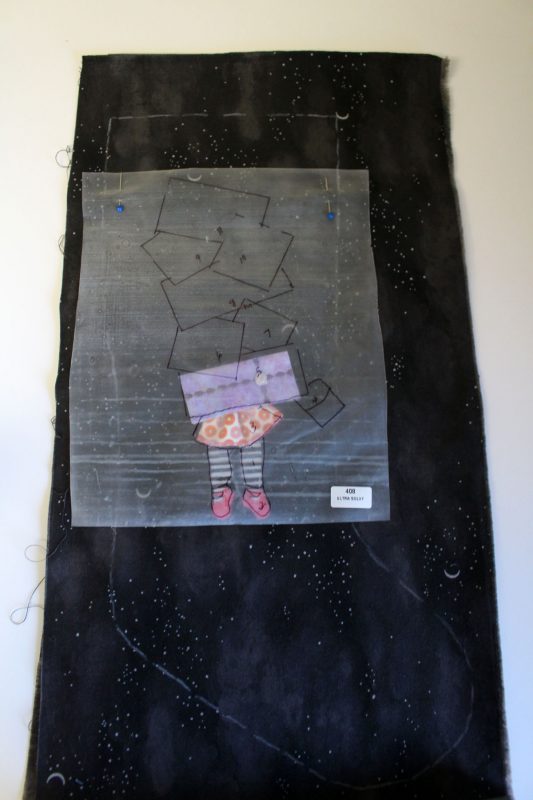
1. Trace the appliqué placement on Sulky Ultra Solvy with a Sharpie permanent finepoint marker.
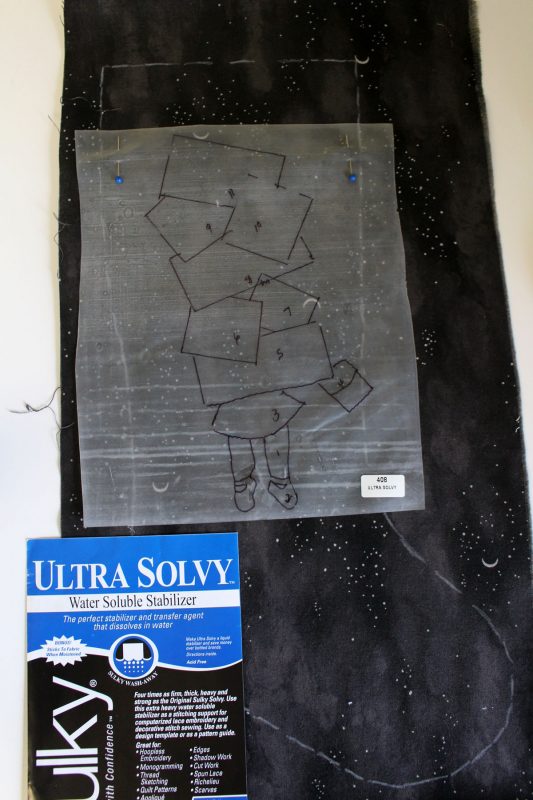
2. Press Sulky Totally Stable on the WS of the stocking front. Spray the Sulky Tear Easy with temporary spray adhesive and position on the Totally Stable. Using 2 layers of tearaway stabilizer ensures beautifully executed appliqués.
3. Determine the best place for the appliqué. Pin the top edge of the Ultra Solvy placement sheet to the front of the stabilized stocking front so you can lift the Ultra Solvy sheet as you position the individual appliqué pieces. Begin by positioning and stitching the legs, shoes and skirt. Position the “gift package” appliqué piece in the order listed on the positioning pattern and stitch down one individual piece at a time. Then position the next gift appliqué piece. Stitch in place. Etc.
Top & Bobbin Thread: Sulky Invisible thread
Foot: Open Toe Foot ADD IN NAME AND LINK
Stitch: Blanket Stitch
Width: 2.0
Length: 3.0
4. Remove the 2 layers of tear away stabilizers, 1 layer at a time.
QUILTING THE STOCKING
1. Layer the stocking front and back pieces in the following order temporarily securing the layers in place with temporary spray adhesive.
Bottom: Backing Fabric
Middle: Warm & Natural batting
Top: Appliqued Stocking top
2. Position the stocking pattern pieces on the stocking front and back. Mark the outline of the stocking with a chalk marker.

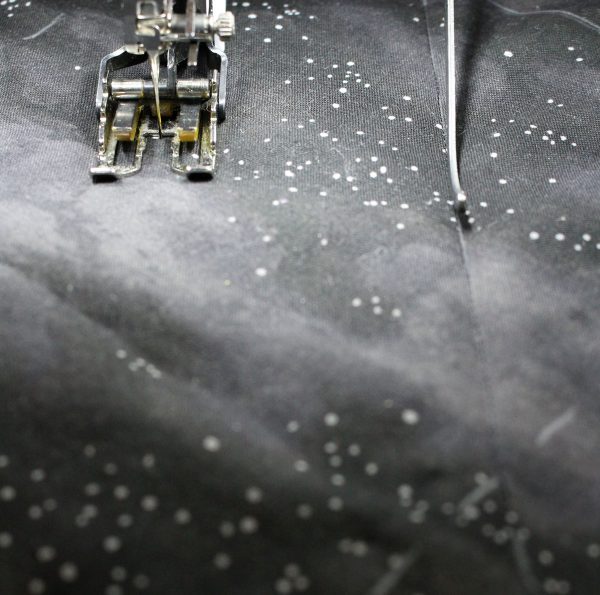
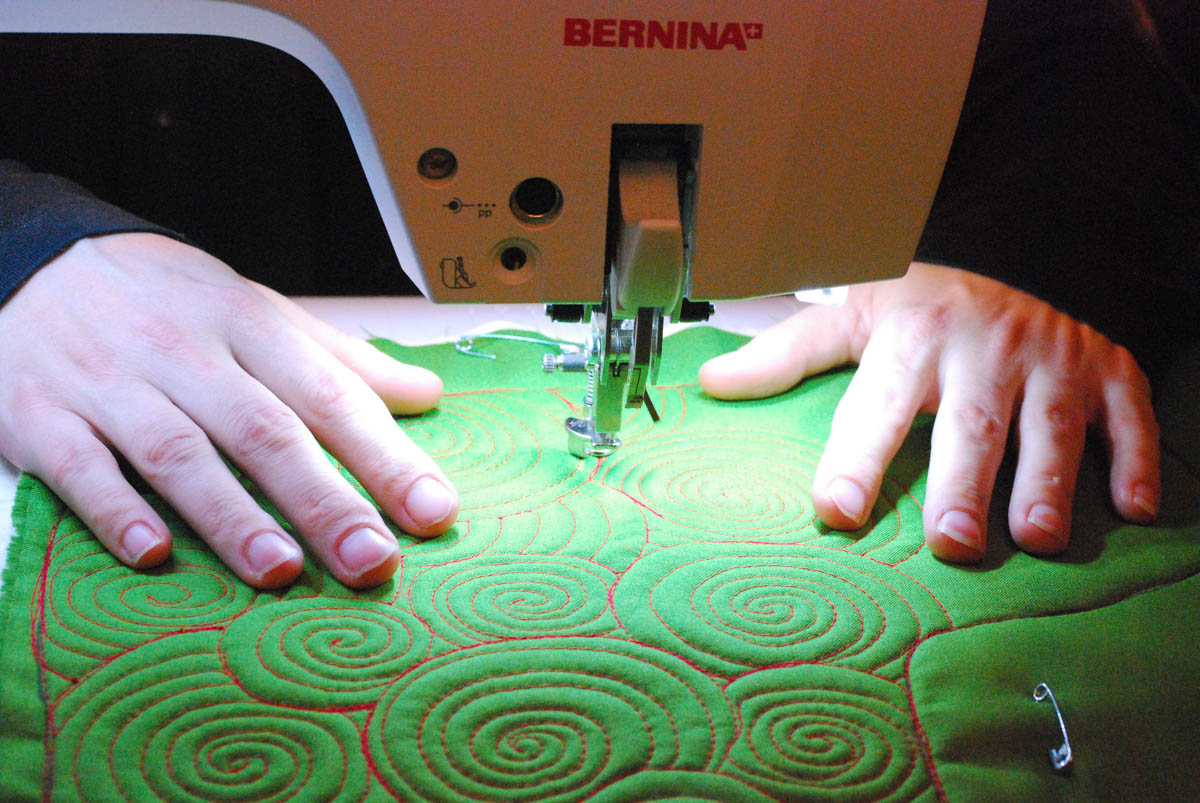
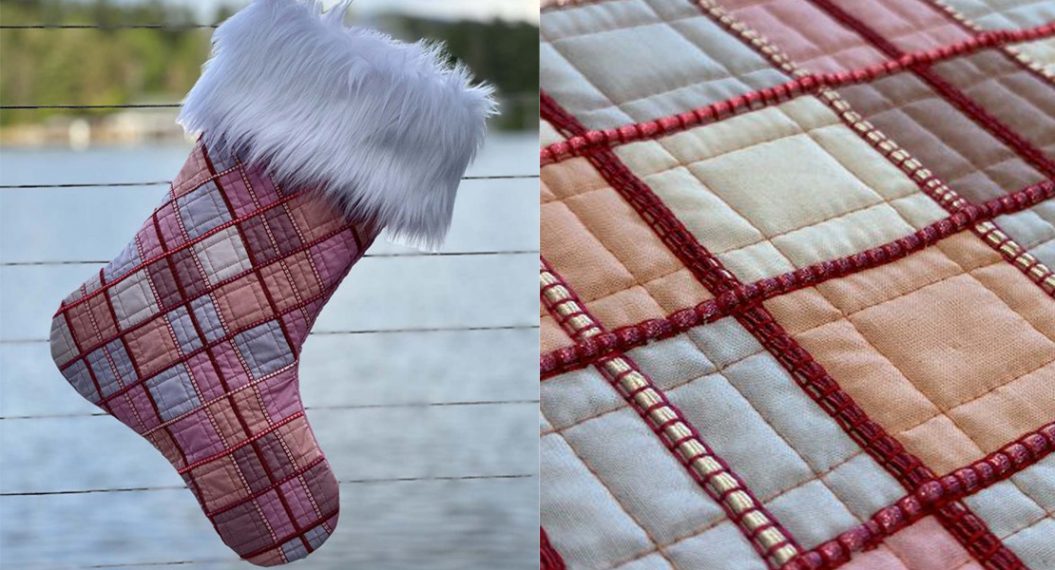
3. Machine quilt perpendicular lines on a 45 degree angle, spaced about 2″ apart. Do not run the quilting lines through your appliqué design.
4. Cut the front stocking on the chalked cutting line. Place the Front Stocking RST to the Back Stocking piece. Cut out the back stocking piece. This ensures that after the quilting is completed, your front stocking will match up exactly to your back stocking piece.
CONSTRUCTING THE STOCKING
1. Sew the front stocking to the back stocking at the side seams with RST. I added contrasting piping to my side seams for a decorative touch.
2. Turn the stocking right side out. Press.
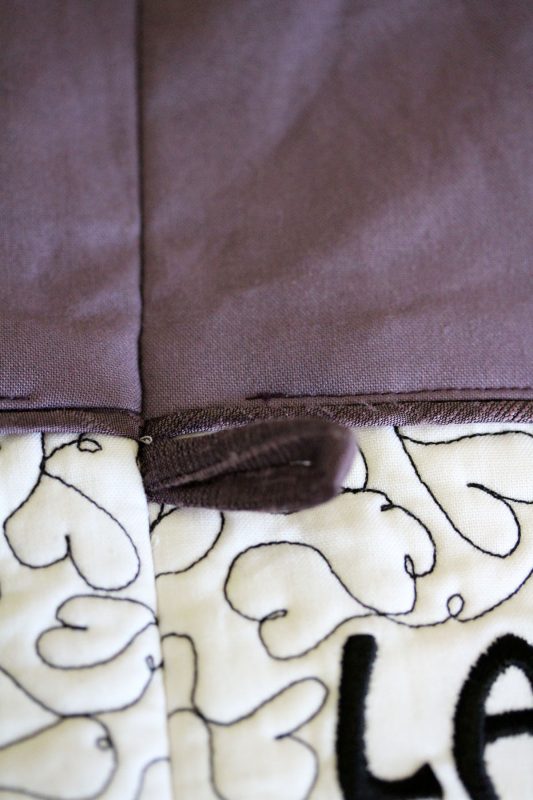
3. Sew the loop. With RST, fold in half lengthwise. Stitch the 3″ long sides together, using a ¼” seam allowance. Attach a safety pin to one end of the loop and turn the loop right side out. Press.
4. Fold the loop in half and position it ¾” from the top edge of the personalized cuff. Machine baste it in place.
5. Press Sulky Tender Touch to the WS of the stocking cuff lining. The Tender Touch gives the lining just the right amount of body!

6. Stitch the top edge of the cuff lining to the top edge of the personalized cuff with RST. Stitch. I added contrast piping to the top edge of the cuff for a beautiful, finishing touch.
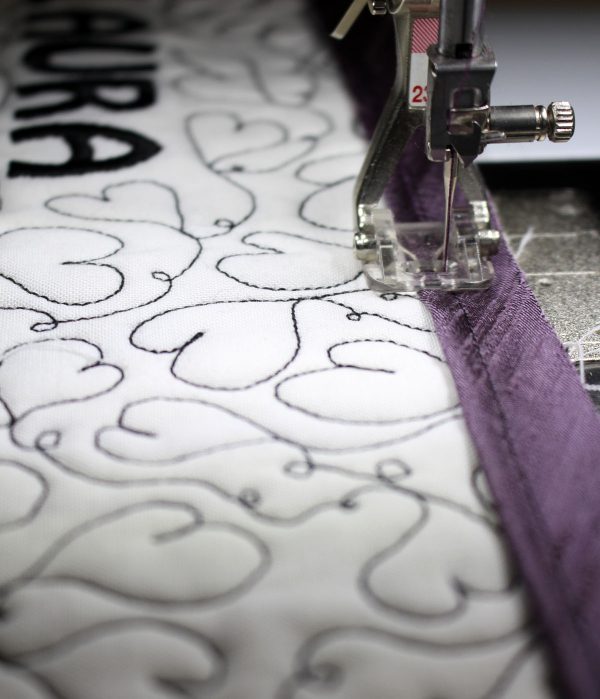
7. Stitch the joined cuff and lining side seams RST. Press the seam open.
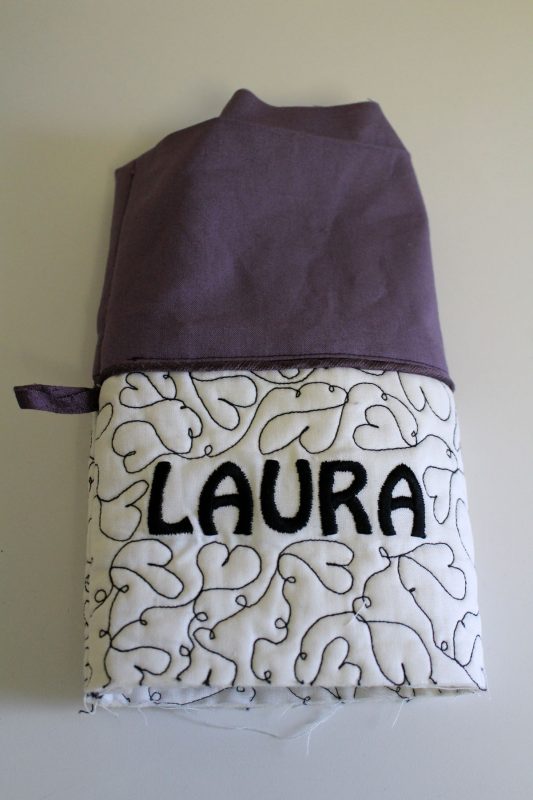
8. Stitch the bottom edge of the personalized cuff to the top edge of the stocking body, RST. Stitch. Press seams toward the cuff.

9. Turn the edge of the cuff lining under ½”. Press. Handstitch the edge of the cuff lining to the edge of the stocking top with a slipstitch.
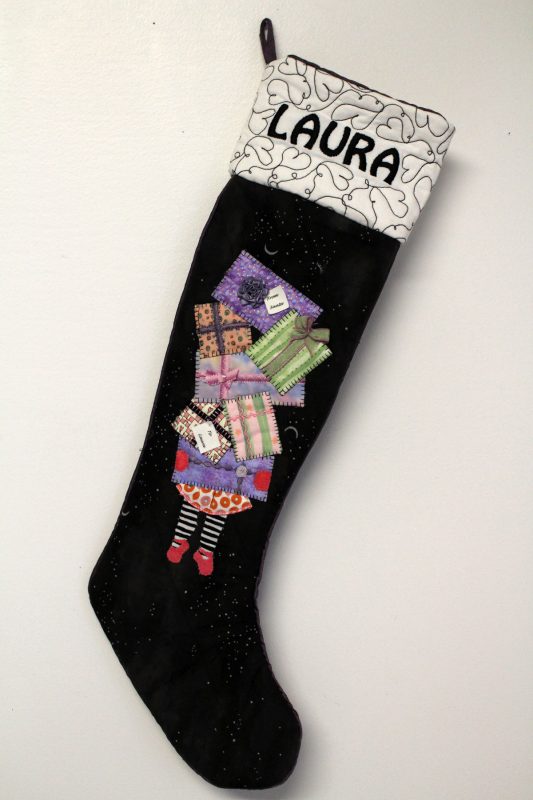
Wasn’t that fun? May this Christmas stocking bring great delight each Christmas for the special little “someone” in your world!
Our December 18 Gift For You
Today’s gift is one embroidery design of the Continuous Line Holiday from OESD to all of our awesome WeAllSew fans!
Please download your free embroidery design “Continuous Frosty” here: Continuous Frosty #12616-04
Good luck!
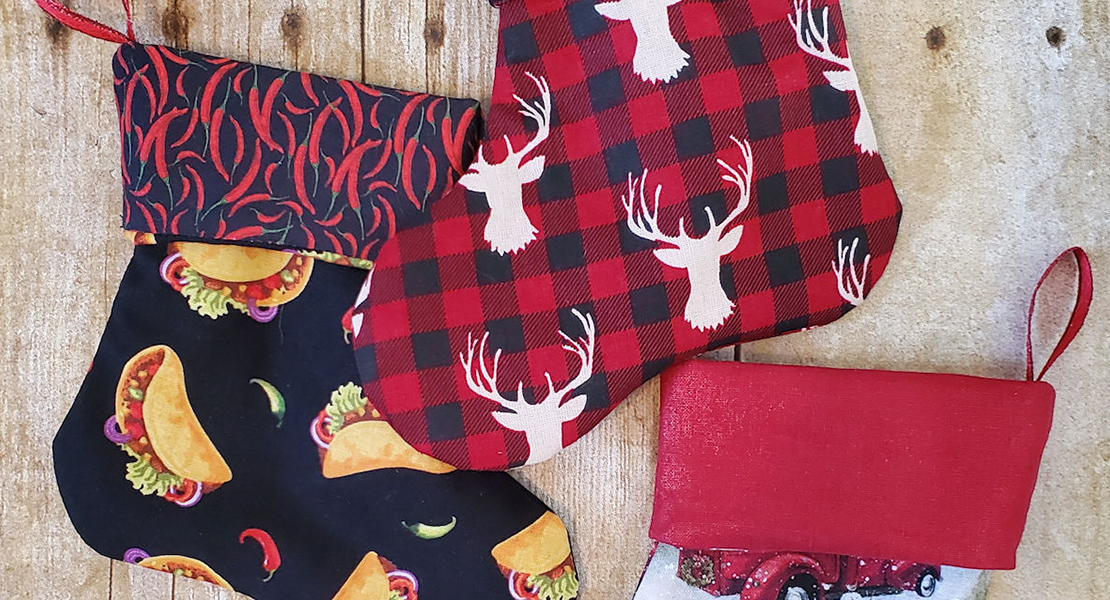
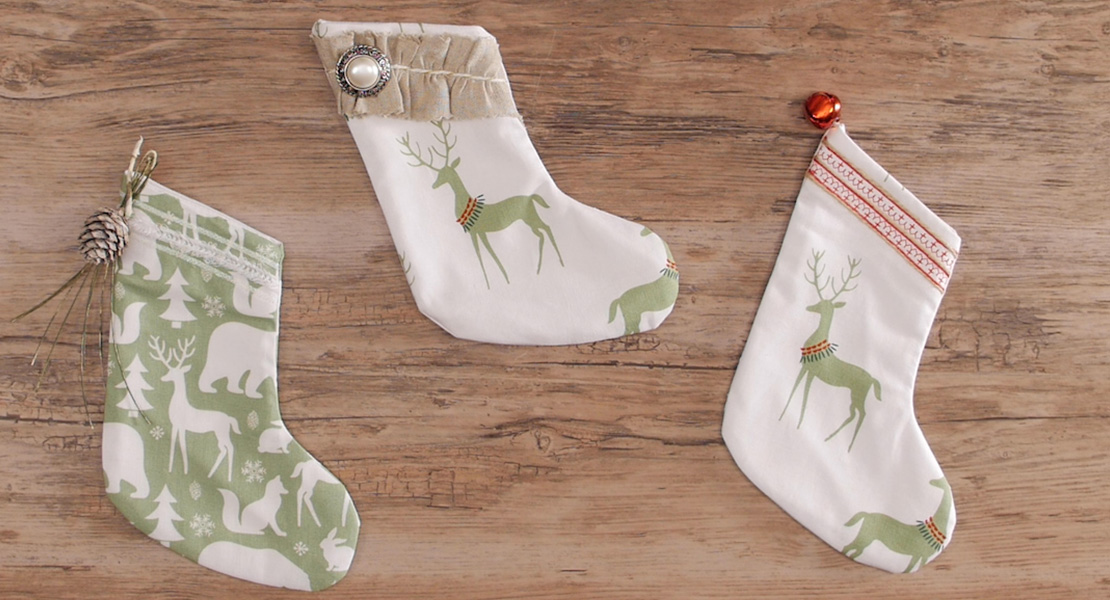
What you might also like


33 comments on “Nice Girl Christmas Stocking Tutorial”
-
-
Cute appliqué idea! Thanks for Frosty 🙂
-
Thank you!!
-
fun appliqué idea! to play with
-
-
Thanks for the design and the creative stocking tutorial.
-
The Christmas Stocking is really cute, and the detailed tutorial is very well written. I would like to make one myself !
-
Great stocking! I like the quilting you did on the cuff.
-
Thank you! Cute stocking idea!
-
this is awesome! I am saving all of these hoping I will get a little red beauty under my tree for Christmas 🙂
Thanks Bernina for a great month.
-
Love this tutorial and thank you for the embroidery design. Just in time for the snowy holidays.
-
These are adorable! Thank you to all who give so much to this contest and Bernina.
-
Thank you for the free embroidery design.
-
Great tutorial – well done! Definitely a keeper!
-
Thank you for the download.
-
I love the little presents; they would make great ornaments.
-
Another great idea! Thanks.
-
Very cute. Thank you.
-
I appreciate the Frosty and the stocking project. There are some new products to consider too. Hope you keep these projects on the web for a while to refer to.
-
Stockings have been a favorite since I completed some my mother started when I was young.
These have some good instructions. -
Thank you for the cute design and stocking idea!
-
Wow!! What a beautiful project!!
-
Thank you for the Frosty design.
Love the detail instruction for the stocking.
All of the projects are great.
Thanks for the great prizes.
Looking forward to getting started on the projects.
Happy Holiday’s -
What a fund stocking. Snowmen are a favorite in my house, thank you.
-
We’ll be very busy this year trying all of these demos!
-
I’ve saved this for next year and at the rate I go I had better get started on it the second week of January.
-
Thanks for the great ideas and download.
-
It’s been on my list for a while to make each of my family members a personalized stocking for Christmas. This one is adorable and love the freebie, too! Thanks.
-
super cute stocking!
-
Fun projects I’m looking forward to after the holidays so I can just spend time creating these fun projects
-
These are lovely. Do you suppose these can be done with hand embroidery as well?
-
Hello justsewcris, I do think you could hand embroider these as well! Happy stitching – Erika
-
-
Adorable!
-
Thank you so much for sharing this post and the Continuous Frosty design. It has been such fun following your posts each day…..much inspiration.
Leave a Reply
You must be logged in to post a comment.

Love the stockings. I am so enjoying all of the fun holiday projects