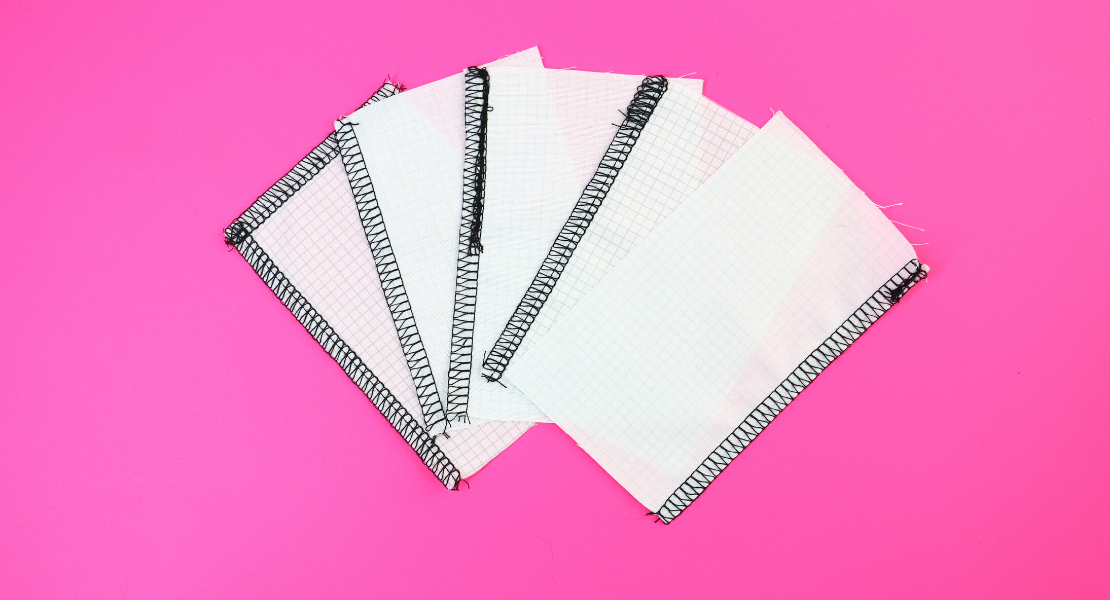
5 Ways to Upcycle Vintage Linens
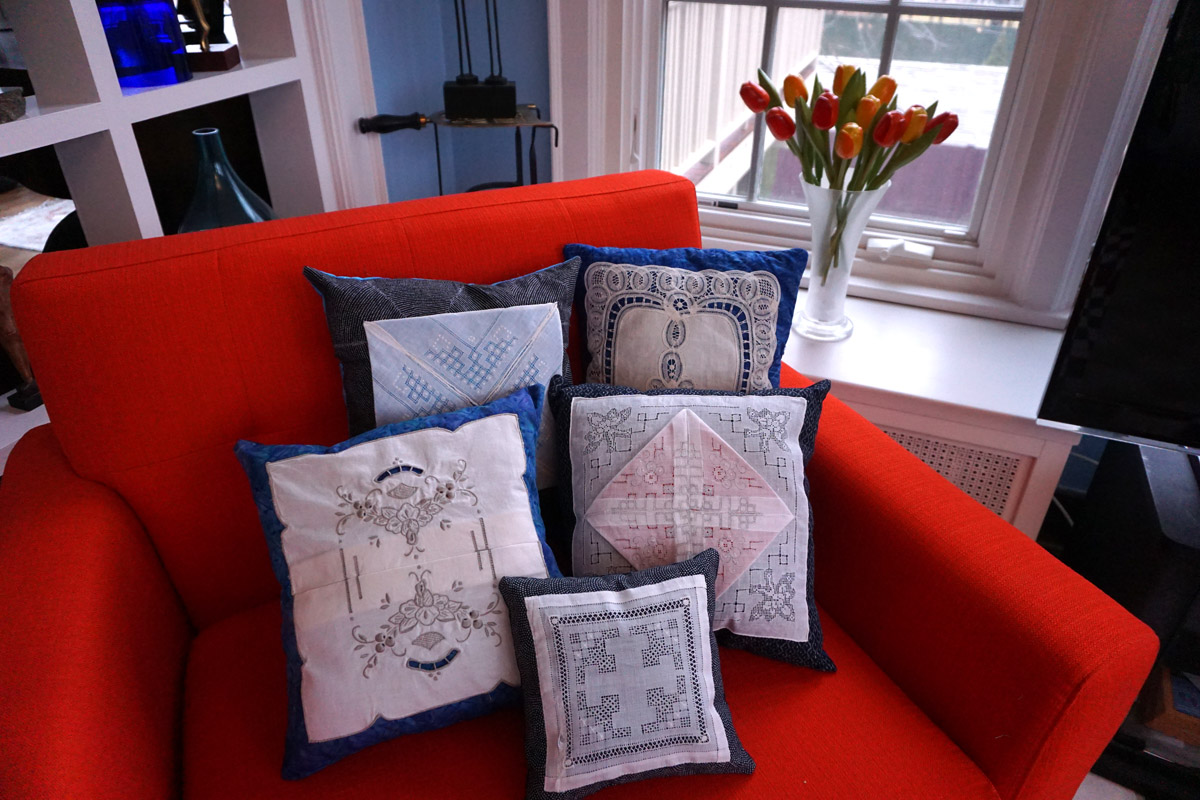
If you are like me, you find yourself collecting lovely antique and vintage linens, and have no idea what to do with them. Tablecloths, napkins, handkerchiefs, table runners—you name it—there are a lot of very pretty old embroidered and cutwork linens out there just dying for a new life.
There are lots of ways to use these linens; make pillows, put them on garments, on handbags, as the centerpiece for quilts or as the start of textile art all by themselves. In my collection there is one common downside to many of the pieces I want to upcycle—most have decorated corners or edges and nothing going on in the center. I also have an idiosyncrasy you might not share—I don’t like to permanently alter a textile when I re-use it for another purpose. Silly, since I will probably never remove it from whatever I make; but unless it is torn or stained, I like to leave it intact if possible.
Whatever you decide to do with your upcycled linens, here are five ideas about how to take full advantage of their assets.
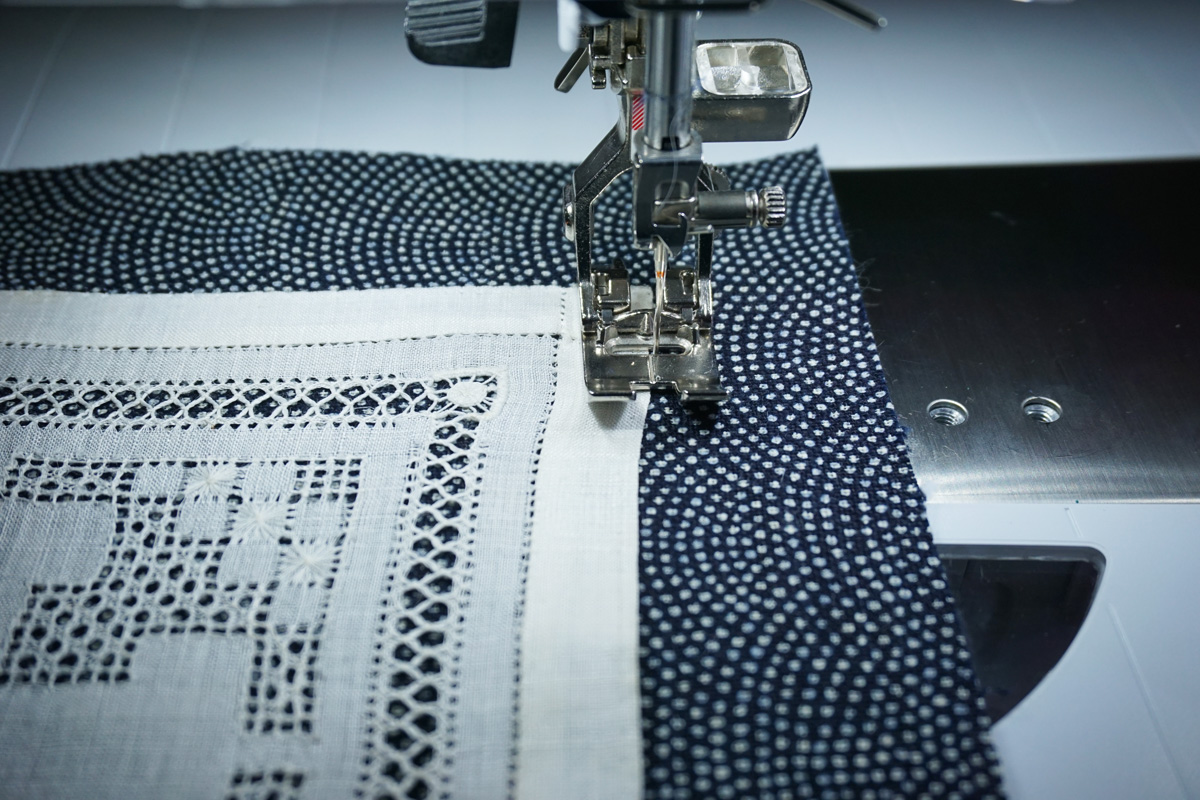
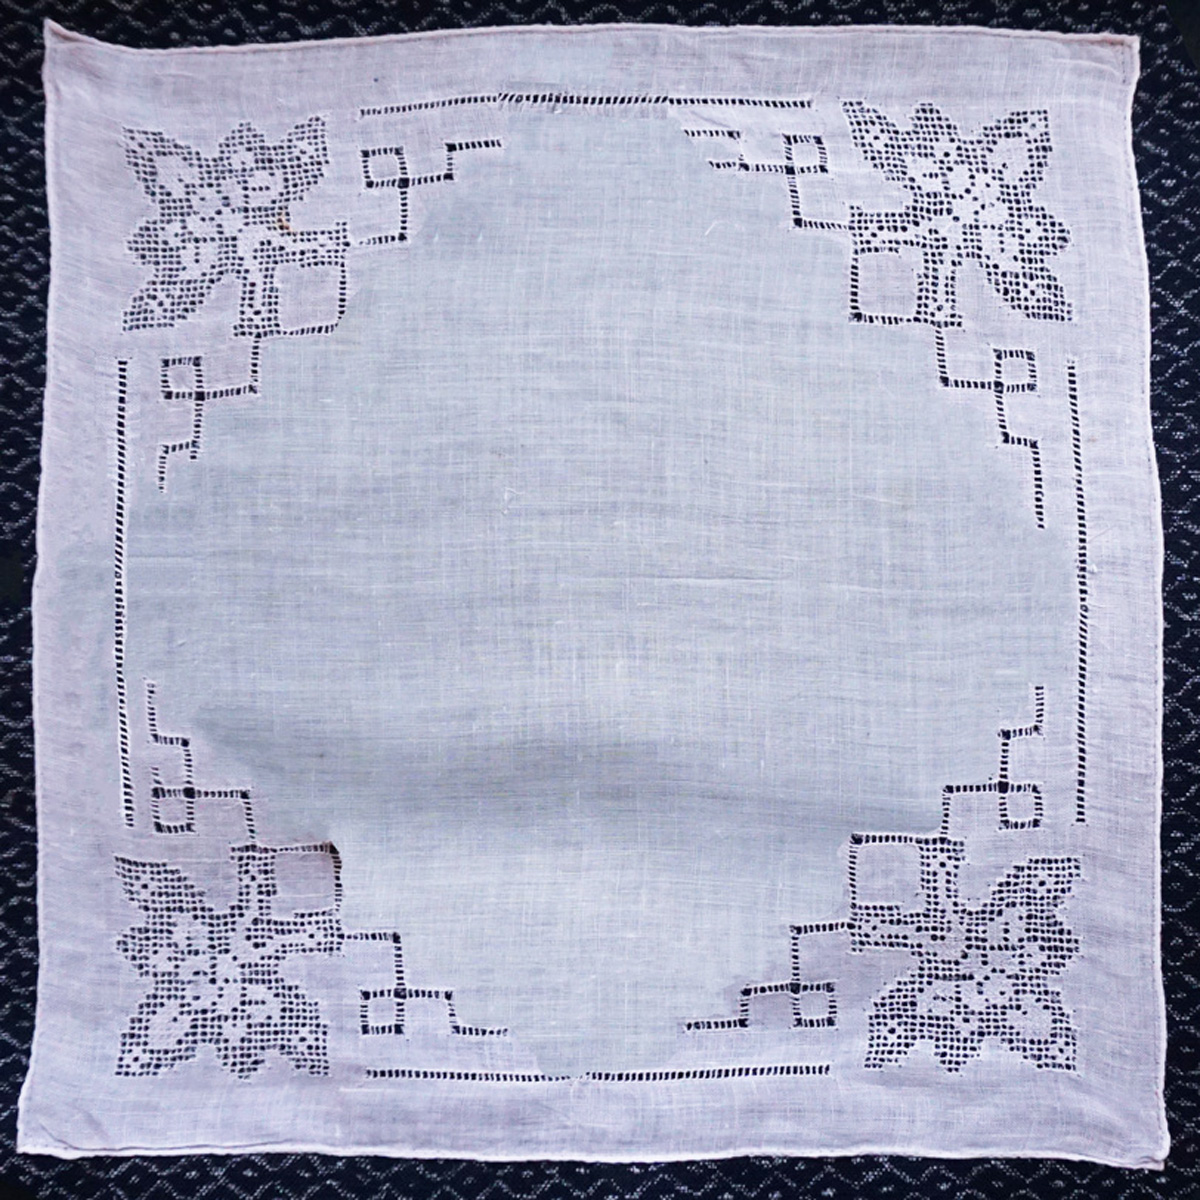
1. Straight up
The easiest way to utilize a linen is straight up, meaning exactly as it is. Here is one with a lovely design in the center, it is pretty all by itself without doing anything else to it. It would be nice on a quilt block or a tote bag, or on the back of a denim jacket, but I decided to make it into a small pillow. Whatever use, you will need to secure it to a base fabric; using something highly contrasting really shows off all the details.
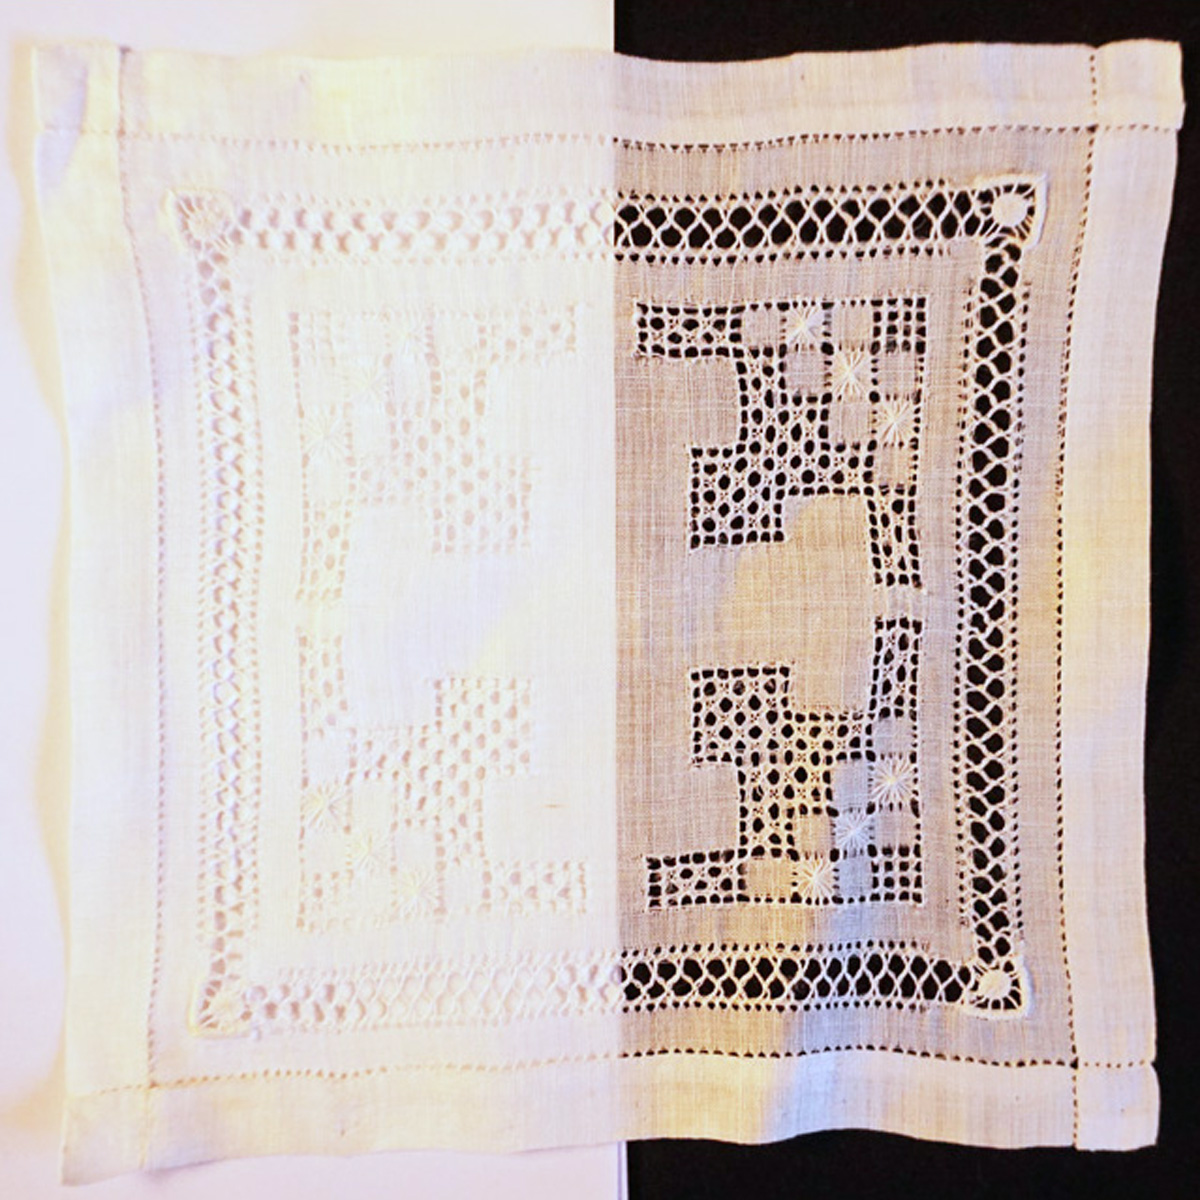
Many of these linens are very delicate so trying to coax them into a perfect square can tear them (I know from sad experience). For that reason, I try to help them along the best I can while pressing, but in the end I let them be the shape they want and consider the fact that they are not perfect squares or rectangles part of their charm.
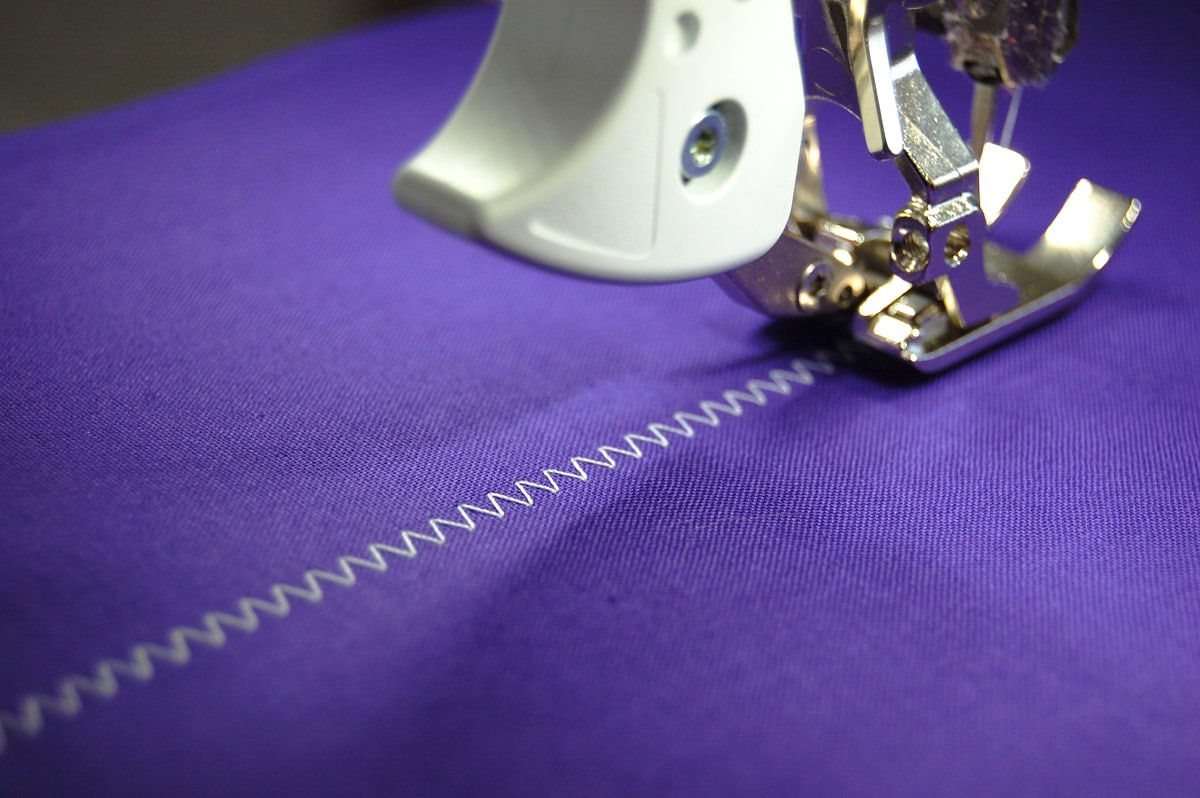
The fabric to which you attach your linen piece should be backed with a lightweight fusible interfacing. This helps keep things nice and flat while sewing. Even a piece of golden threads or tracing paper underneath the base fabric helps insure these fragile linens don’t bunch up while sewing. I use either a matching thread or a clear monofilament with a white bobbin thread. You can use a straight stitch, a zigzag or a blanket stitch which runs along just outside the edges and takes a little “bite” in every few stitches to attach it to the fabric.
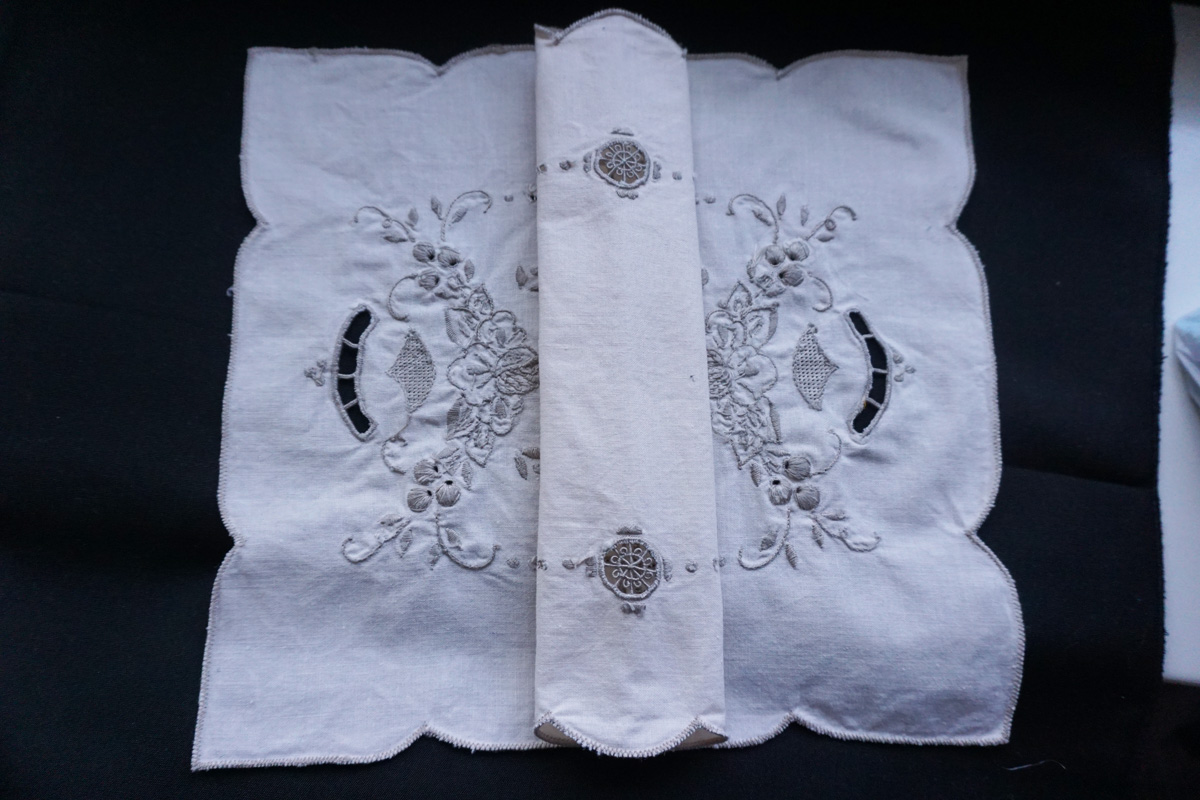
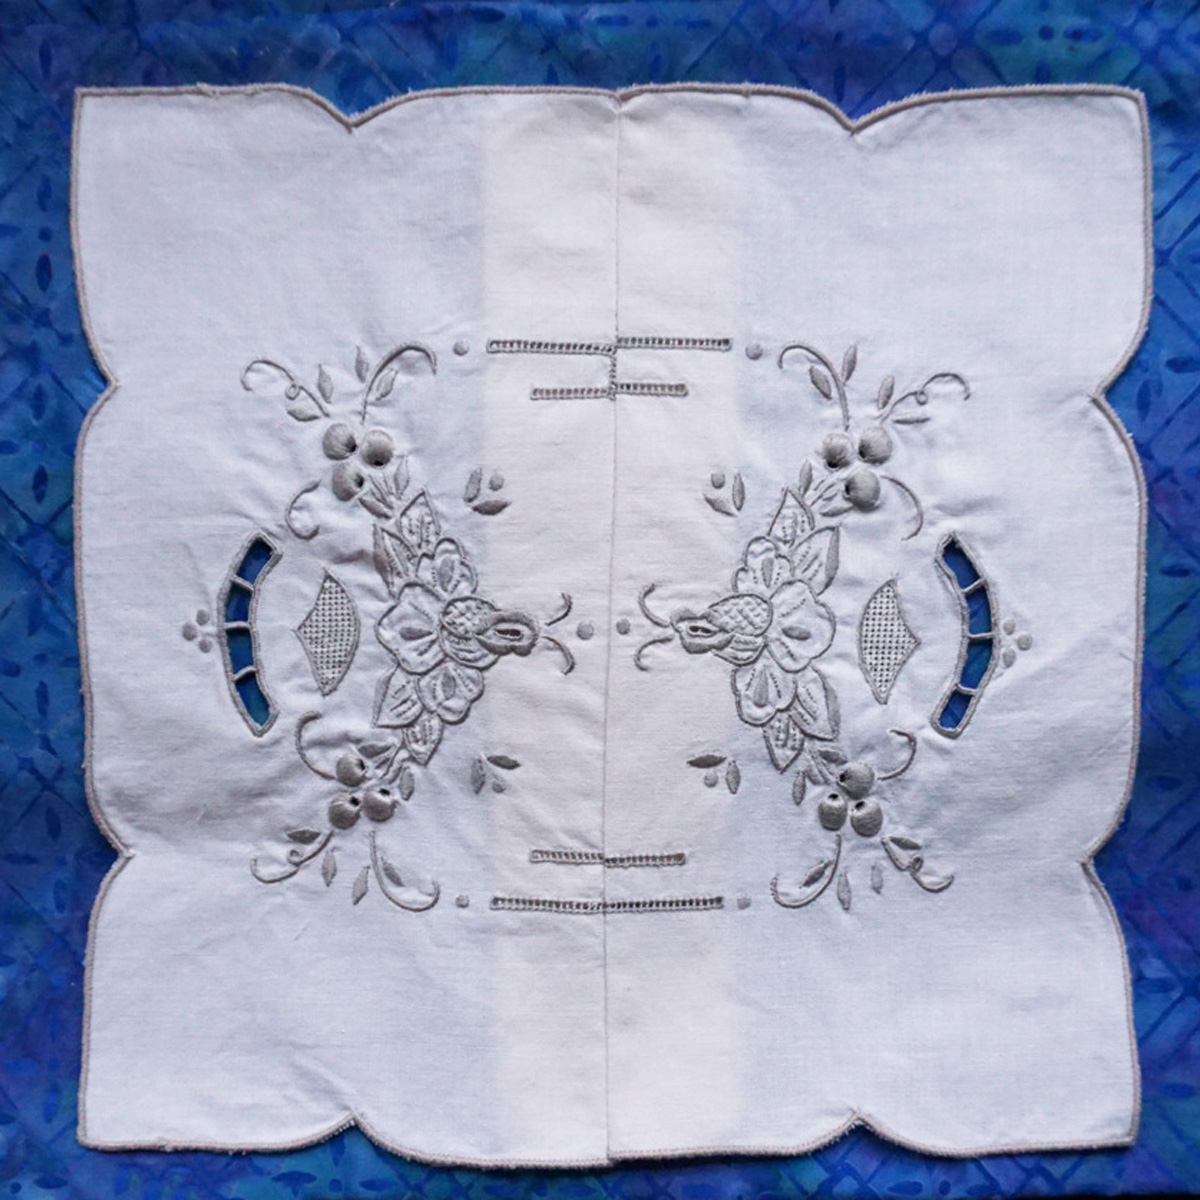
2. Folded end to end
I am not sure what these were originally used for but I was given more than a dozen of them. They were probably placemats, they are long and narrow with nothing particularly interesting in the center, but I liked the pretty embroidery and cutwork on the ends and edges.
To maximize the best of the embroidery, I fold the pieces at the edge of the embroidered area and pull the two folded edges together to create a square with embroidery in the center.
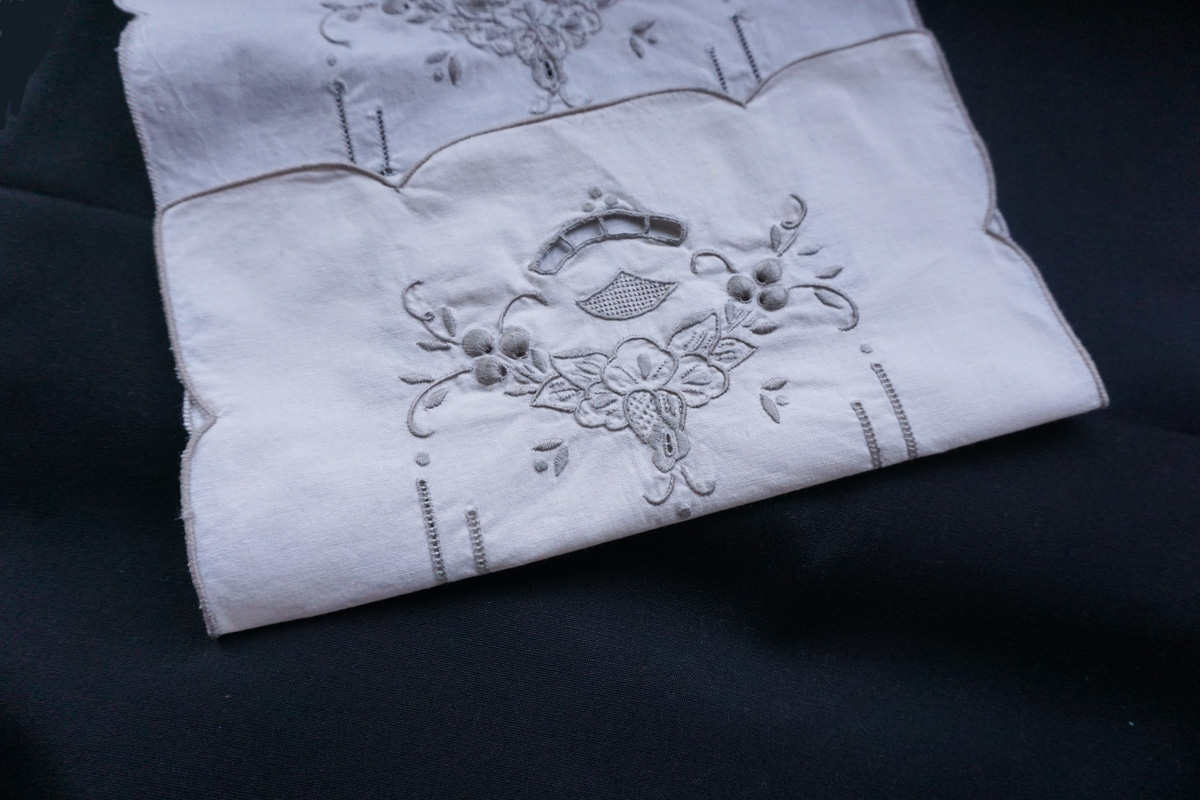
Because I want to keep this as unaltered as possible, I set my stitch length slightly longer than the default length so it could be more easily undone if necessary. I then press the remaining bulk in back to either side of the seam. If you aren’t as concerned about preservation, cut that bulk in the back to a reasonable seam allowance.
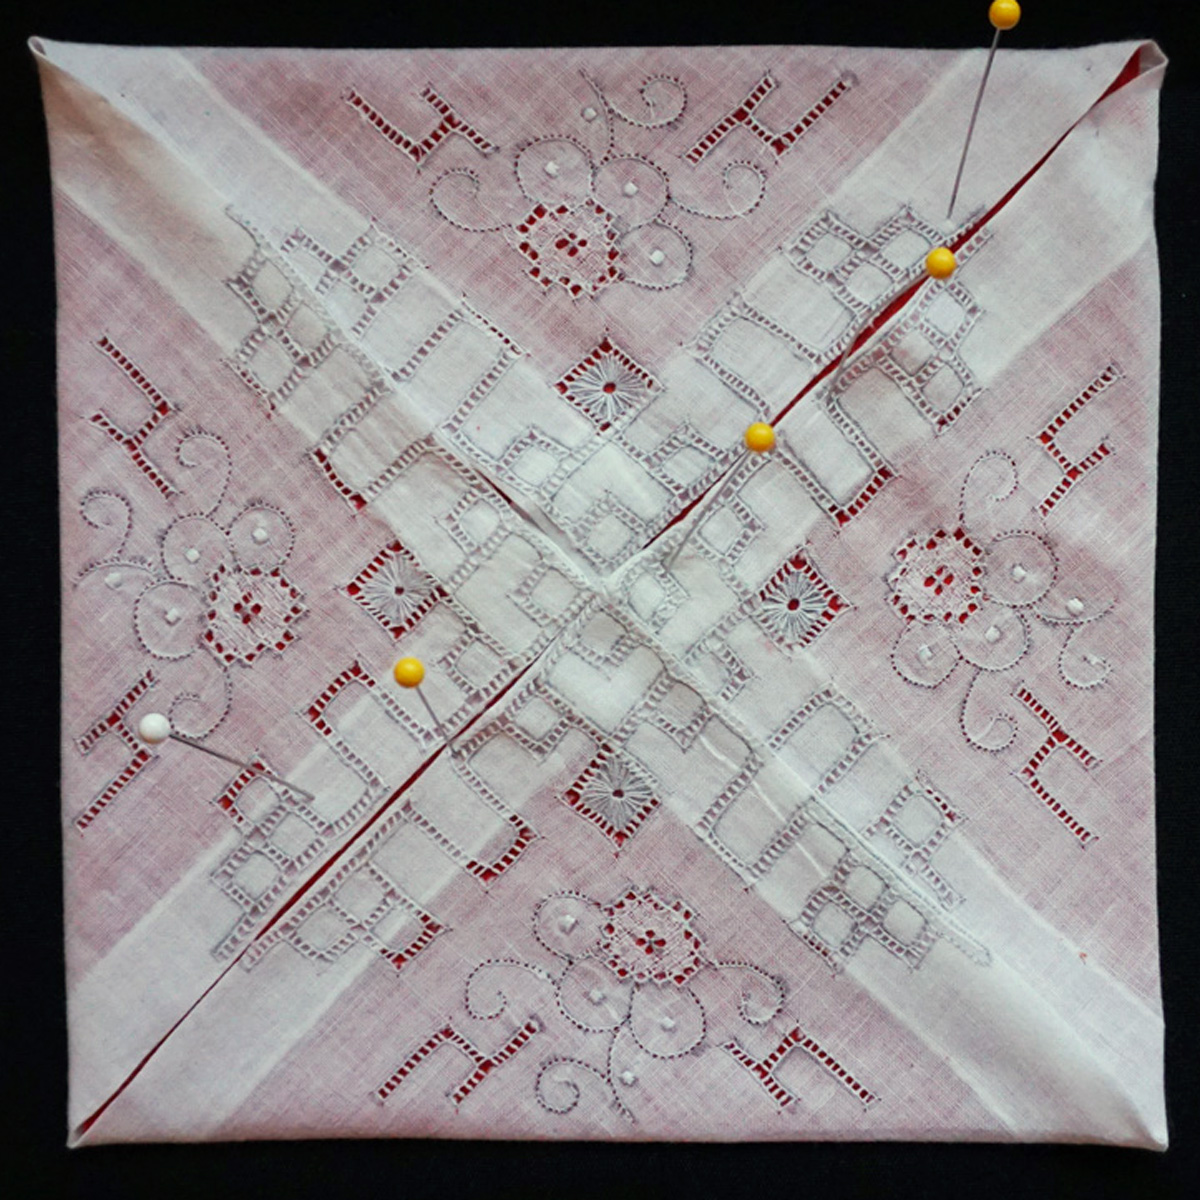
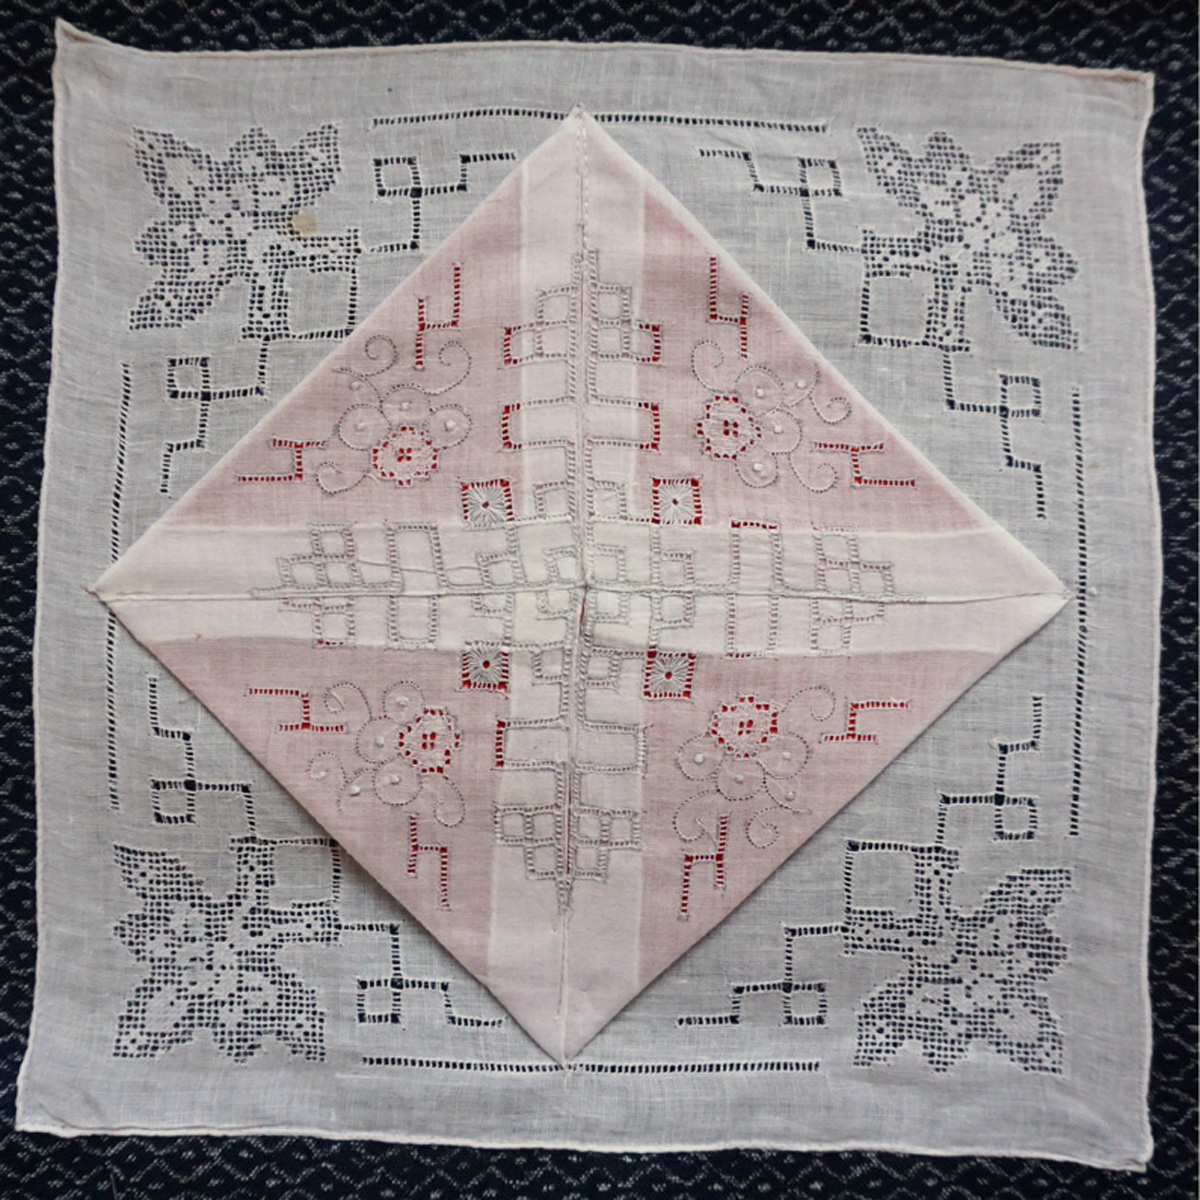
3. Corners folded in
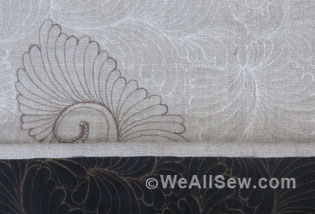
A large number of the pieces I come across are handkerchiefs with pretty corners and plain centers. I want to use the corners without cutting the handkerchief so I have a technique for folding the corners instead.
First identify the front of the embroidery. Yes, there is a front and back on all these lovely linens. It is subtle, but look closely and you will see nice clean edges (especially on areas that are round) on the front and the jump threads that connect them on the back.
I start by pressing the handkerchief as square as possible and then pressing in half horizontally and vertically. These press lines become your guidelines for folding the corners. Gently fold each corner into the fold marks so they meet in the center, with the front of the embroidery facing up. Remember, they may not be perfect. If you look carefully at the unfolded corner in this photo you can see those jump threads.

Measure the resulting square and cut a piece of fabric with a light fusible stabilizer the same size. Press the stabilizer to the back of the fabric and trim to a quarter inch smaller square than the folded piece. Slip this fabric square inside under the folded corners. Don’t worry about the raw edges, they are fused and encased in the folds of the handkerchief. Using a slightly longer than default stitch length and an ecru thread to match the handkerchief (clear would also work), I sew along the edges of these corners to secure them to the base fabric. The edges of this very delicate fabric are now bias, so in order to attach it to my pillow front, I just sew the corners using a few zig zag stitches and holding it still or dropping the feed dogs so it doesn’t move.

4. Layered
When you have a straight on linen that is smaller than another, or you have created a piece either folded end to end or corners folded in you can use these to layer onto another linen that is plain in the center.
Overlapping either square or at an angle, choose the configuration that looks the nicest. Again, the bottom layer is attached to my pillow fabric in the same way I would for something straight on, and the layered piece attached on top.
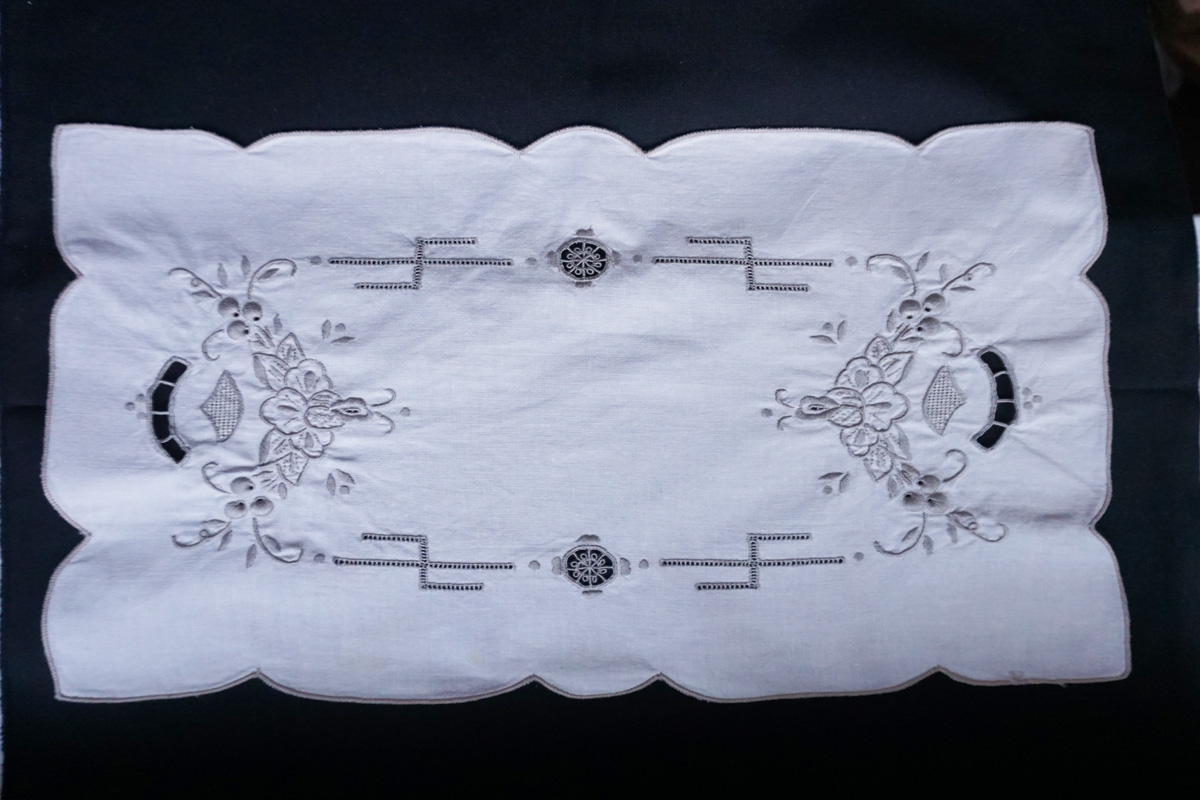
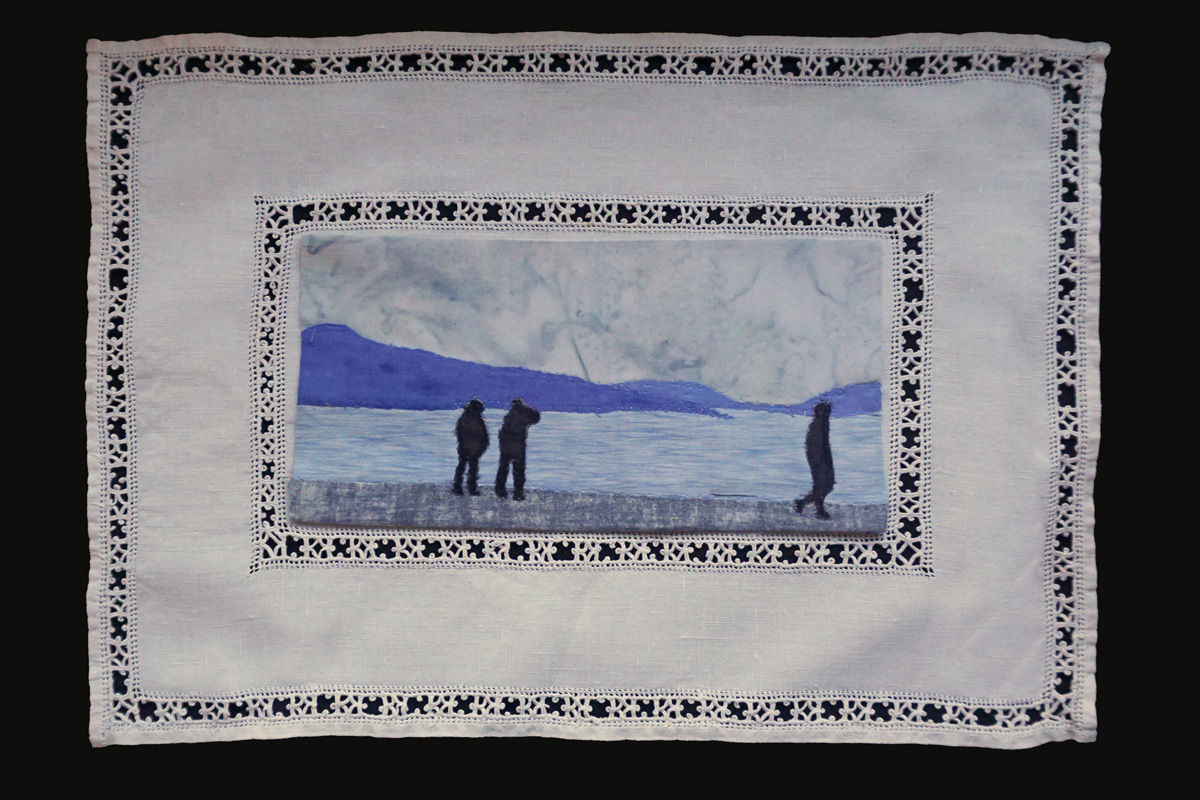
5. Used as a frame for other work
This must have been some sort of placemat, but I only have one. The cutwork is pretty but the rest is fairly plain. I think the center would be a wonderful place to showcase other work framed by the delicate cutwork and border. Embroidery or painting would be lovely here if you like to do that kind of work, I want to make a small art quilt the size of the center rectangle and place it onto the linen.
![]()
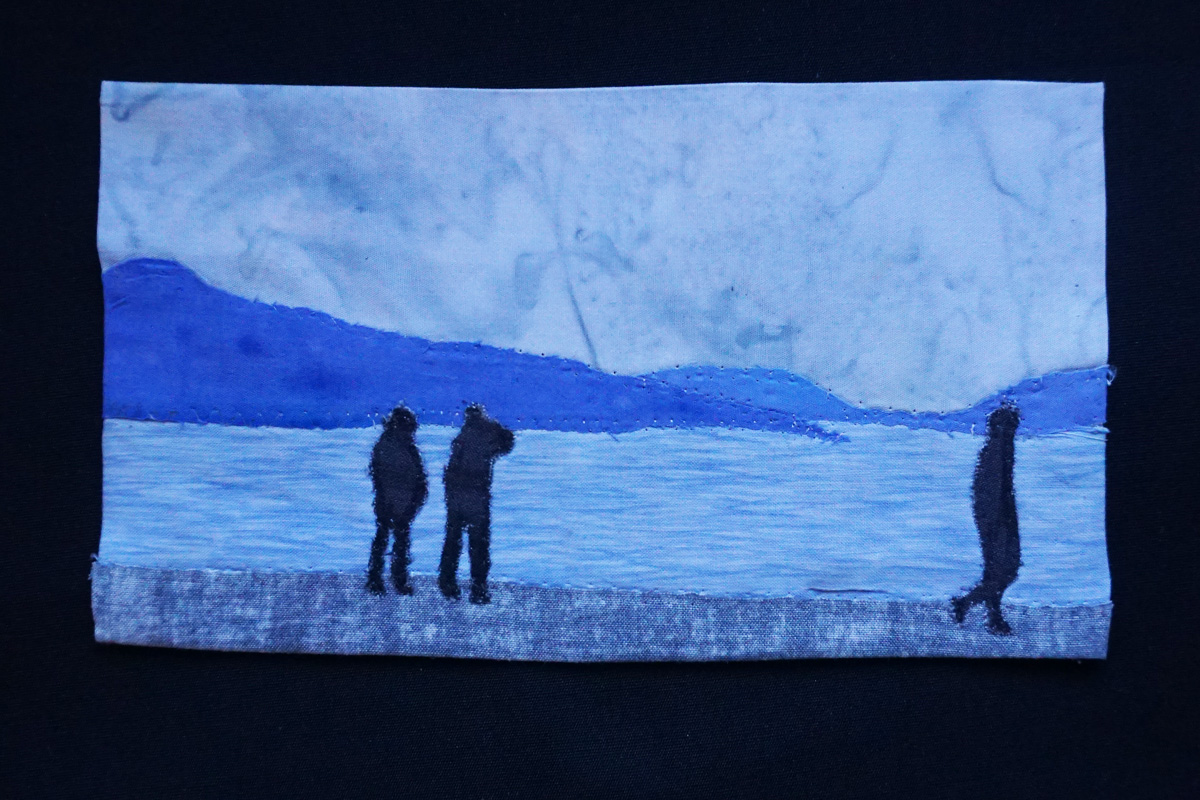
The art quilt is made just a bit smaller than the center section and backed with stabilizer to give it some body. It is then attached to the original linen.
Hopefully, now you can go look at all the things you have collected with a new way of seeing their potential.

What you might also like


8 comments on “5 Ways to Upcycle Vintage Linens”
-
-
You could be right, in fact the last one that I used as a frame probably was a dresser topper. The others I have a dozen of–that would have been a big bedroom with lots of dressers!! I also remember my grandmother using things like these over the tops of chairs and the sofa or over the arms to protect the fabric. Whatever their original use, I prefer to use them this way. Thanks!
-
I loved these ideas, some similar to things I have done. The linens that were used on chairs are called antimacassars and were used for decoration and also for protection since they could be easily laundered.
I have used old table cloths to make pillow shams for my bed pillows, using the folding techniques you have described. The are very lovely.-
Thanks, I figured those linens had a name but never heard the name antimacassars before! I do remember them in my grandmothers’ houses, on the back of every chair and across every arm. A cacophony of embroidered linen. How I wish I knew where they all went to.
-
-
-
-
The first nurse’s caps (Mine began life that way) were made from folded handkerchiefs, and I’ve also seen beautiful baby bonnets made that way. Somewhere I have a pattern for a handkerchief for a bride to carry and later adding a few stitches to some clever folds and a couple of ribbons will make a baby cap. That hanky is then passed on to the “baby” to use on his/her wedding day after snipping the threads and removing them. A lovely tradition!
-
For those interested, I have found instructions for the hankie bonnet here:
http://bumblebeelinens.com/hankiebonnet.php-
What a lovely idea, and thank you for sharing the pattern. I had never heard of this but would love to make it a family tradition!
-
-
Pingback: what size discount cartier bracelet gold
Leave a Reply
You must be logged in to post a comment.

FYI. I think those long rectangular pieces are dresser toppers. They would lay on top of either a chest of drawers dresser or a high top dresser to protect them from scratches and for decoration. Great upcycle project!