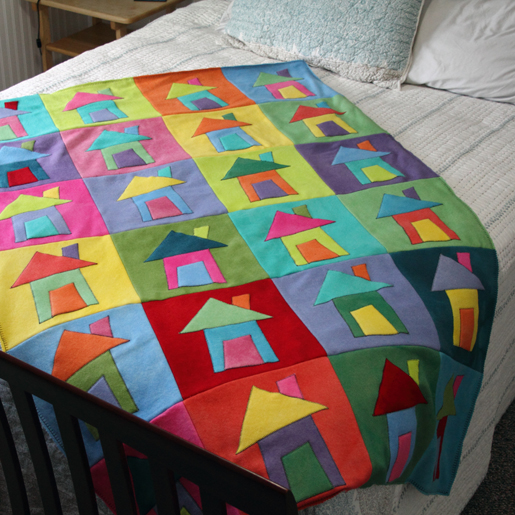
Little Houses All In A Row: DIY Wool Blanket
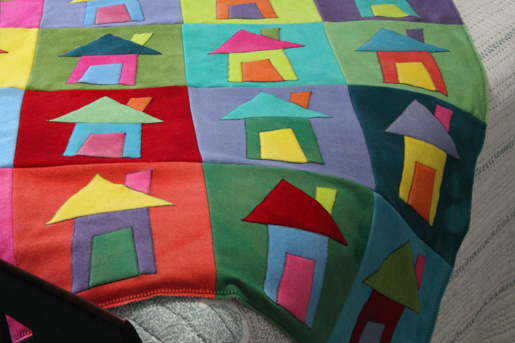
Keep warm on chilly winter days with this wool blanket from fiber artist Sue Bleiweiss. The appliquéd house blocks are easy to make. Why not double the “recipe” and make two? We’re sure you know someone who’d love to receive one as a gift!
This wool throw uses beautiful hand dyed wool from Weeks Dye Works and is wonderfully soft and warm. It goes together pretty quickly and, thanks to fusible appliqué, no piecing is required. My finished blanket measures 62ʺ x 41ʺ but you can make your blanket larger or smaller by increasing or decreasing the number of house blocks that you make.
Supplies
- Weeks Dye Works hand-dyed wool – I used fat quarters in 11 different colors
- Contrasting thread for the blanket stitching on the house blocks – I used Weeks Dye Works sewing thread in black
- Neutral thread for assembling the quilt
- Optional: 2 yards of gray fleece for the back of the throw
- Mistyfuse fusible web
- Craft paper (optional)
- Tracing paper (optional)
- All-purpose presser foot (BERNINA Clear Sole Foot #34/34C/34D)
Step 1) Create the house appliqué pattern.
I always begin my projects by making a full-sized pattern drawing. This not only saves me a lot of wasted fabric but it gives me a chance to adjust the scale of my design so I can make any changes before I start cutting into my fabrics.
Cut an 11ʺ x 11ʺ square of craft paper and draw your house design. Keep your shapes simple! When you are happy with your house shape trace it onto tracing paper and cut the copy into pieces to use as templates for cutting the appliqué pieces. This allows you to save and re-use the craft paper.
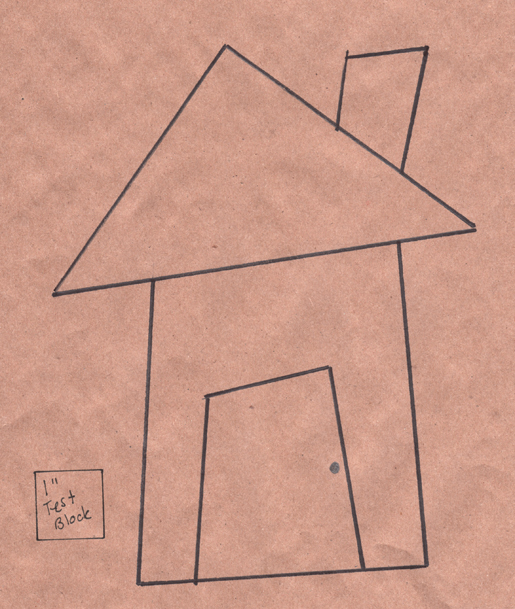
If you’d like to use my house drawing, download and print the applique template: Wool_House_Throw_Applique.pdf
To make sure that your printer hasn’t sized the drawing up or down, make sure the 1ʺ test block printed on the pattern is actually 1ʺ square.
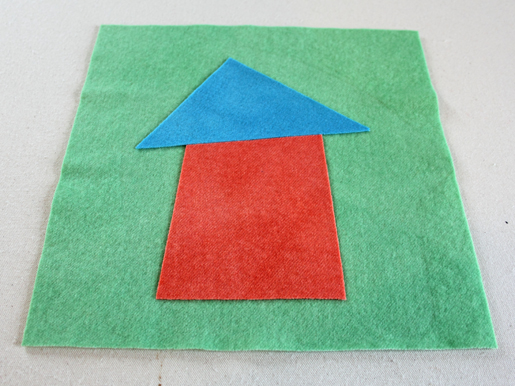
Step 2) Cut and fuse the appliqué shapes.
Cut 24 squares measuring 11” x 11” from the wool fat quarters for the background squares.
After cutting all of my background squares I applied a layer of Mistyfuse fusible web to one side of the leftover scrap wool pieces, which I then used to cut out the house pieces. You could skip this step, but I found that having the shapes fused to the background square kept them from shifting while I stitched them in place.
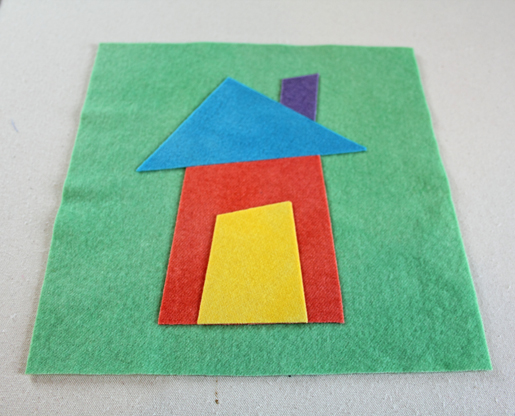
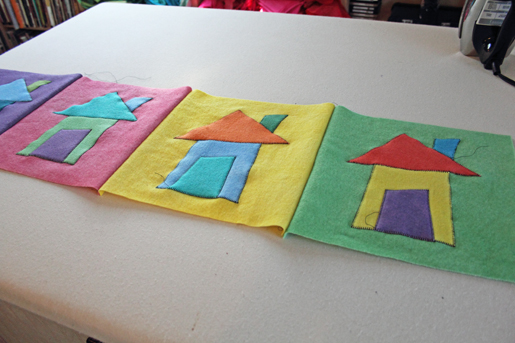
Using the tracing paper pattern pieces, cut the house and roof shape out of your wool fabric scraps and position them on a background square.
When you like the arrangement, fuse the pieces to the background.
Tip: You will need a lot of heat for an extended period of time to allow enough heat to penetrate the wool and activate the Mistyfuse. If your iron has a steam button, a good burst of steam will help. After I fused the pieces in place, I flipped the block over and pressed it from the opposite side to make sure that the pieces were fused securely.
Using the tracing paper patterns, cut the door and chimney pieces out of your wool scraps and fuse them in place on the house. Again, remember that you have to use a good amount of heat to penetrate the wool to activate the Mistyfuse.
Repeat until you have created 24 blocks.
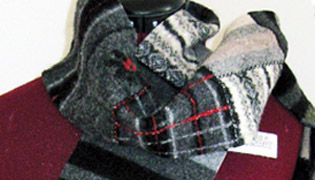
Step 3) Blanket-stitch appliqué the houses.
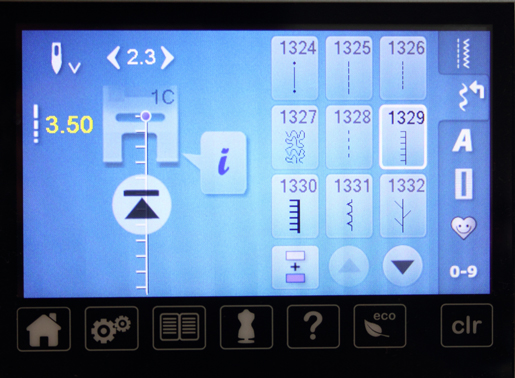
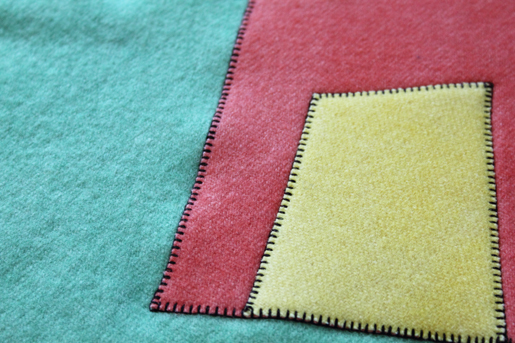
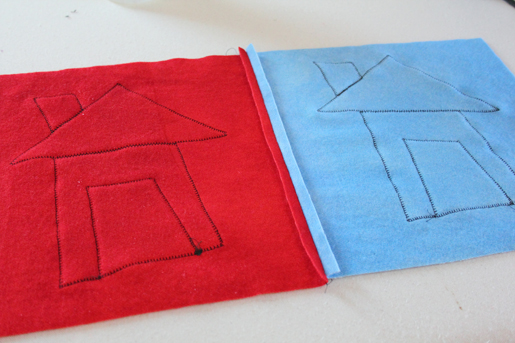
Set up your sewing machine for a blanket stitch. I used a blanket stitch and increased the length to 3.5 mm so it would be more visible and wouldn’t get lost in the loft of the wool.
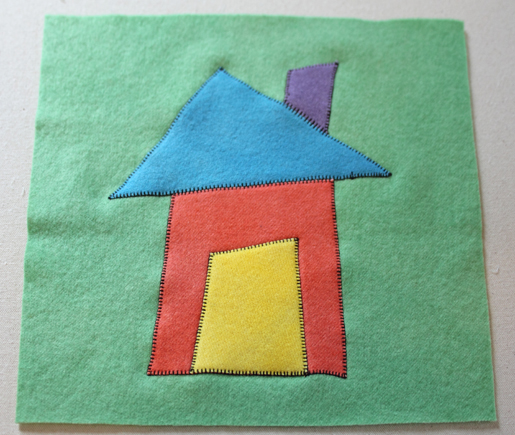
Stitch along the edges of the house, roof, chimney and door.
Step 4) Join the blocks.
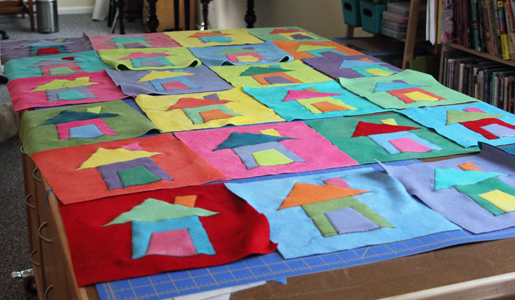
When I finished appliqueing all of my blocks, I laid them out on a large table so I could arrange them the way I wanted to sew them together.
Set your machine for a straight stitch and sew the blocks together in rows of four using the edge of the presser foot as a guide, aligning the edge of the presser foot with the edge of the fabric.
After sewing the rows together, press the seams allowances open.
Tip: A spritz of water and a hot iron will help get them to lay flat.
Sew the rows together, matching the intersections and again using the edge of the presser foot as the guide.
Step 5) Add a backing. (Optional)
I wanted to give my blanket a nice neat finish and hide all the intersecting seams and stitching on the back, so I laid it wrong sides together it on a piece of fleece cut a few inches larger than my finished blanket.
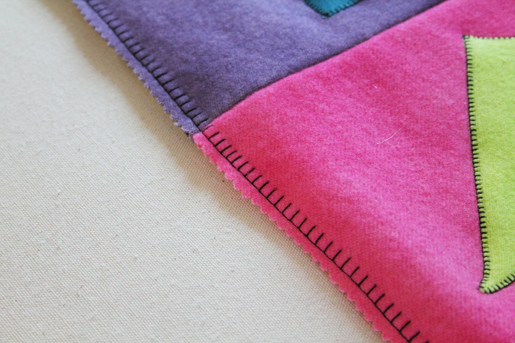
Set up your machine for a wide, elongated blanket stitch. Sew all the way around the edge of the blanket, aligning the edge of the presser foot with the edge of the wool squares (not the fleece!)

Step 6) Finish the blanket.
Trim the edge of the blanket using pinking shears or other decorative-edge scissor or rotary cutter and it’s done!
Check out Sue’s new book, Colorful Fabric Collage, for more bright and colorful projects. Her book is available for pre-order from Amazon and Interweave Press.