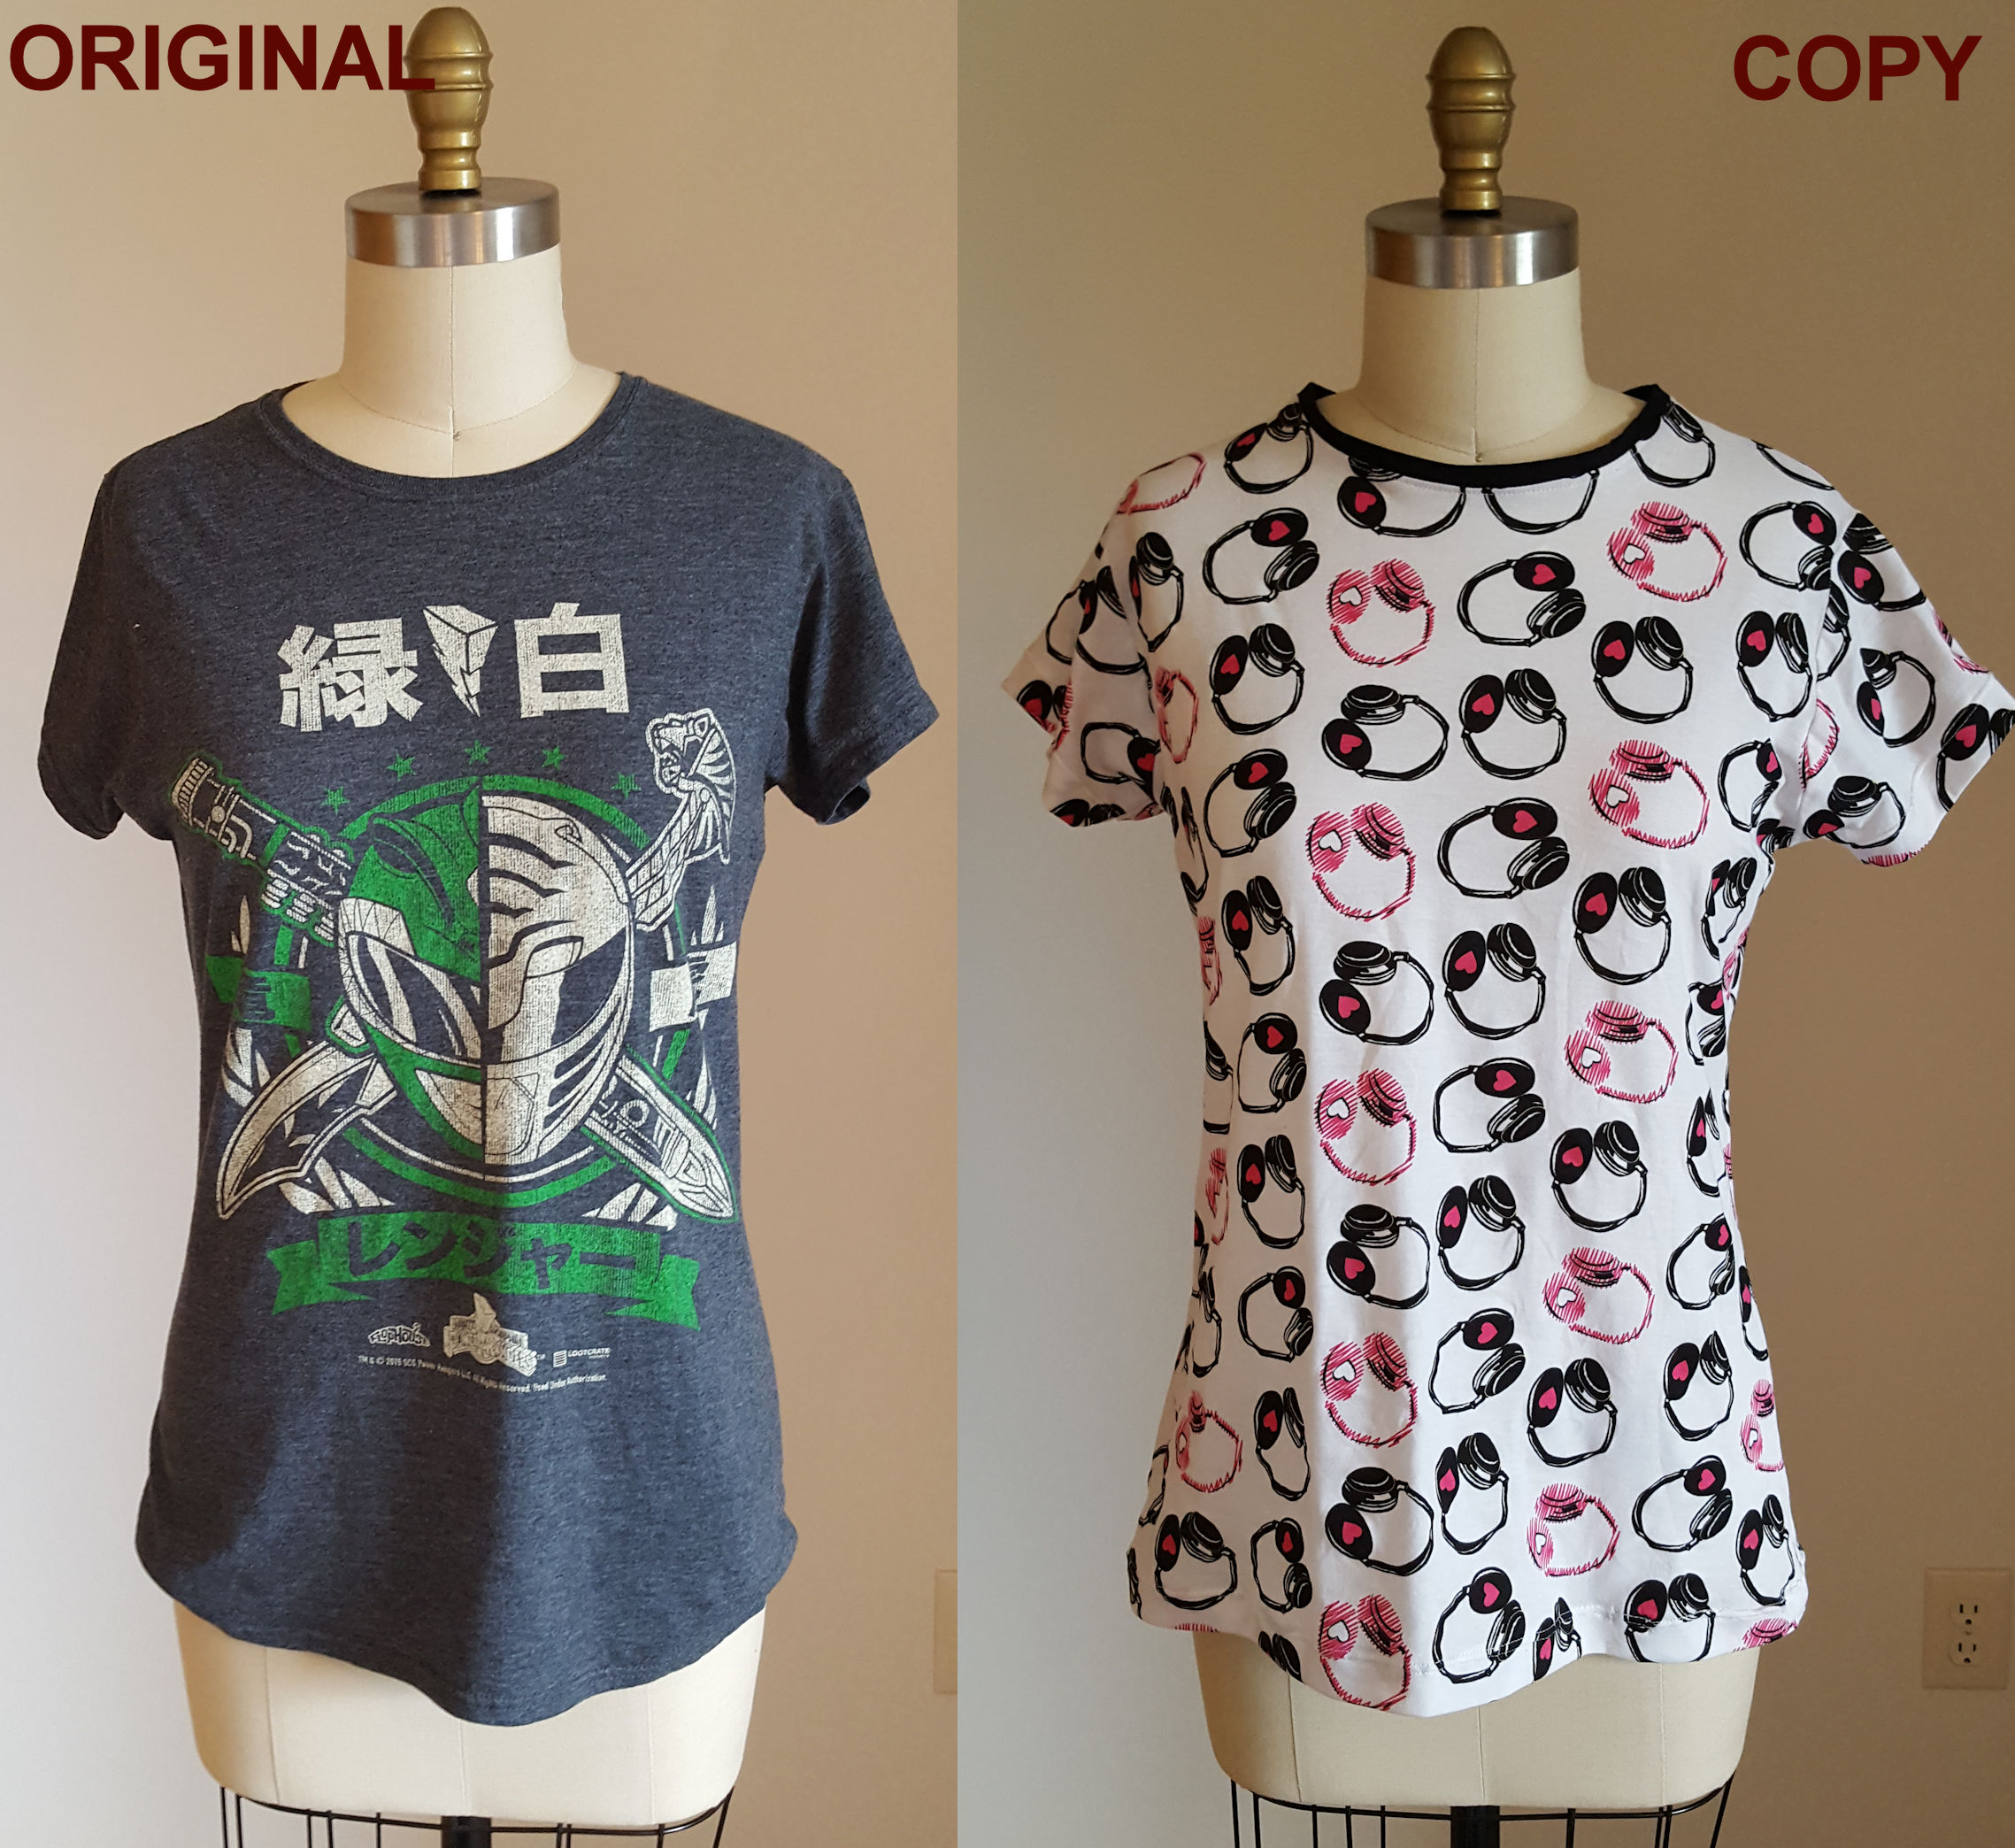
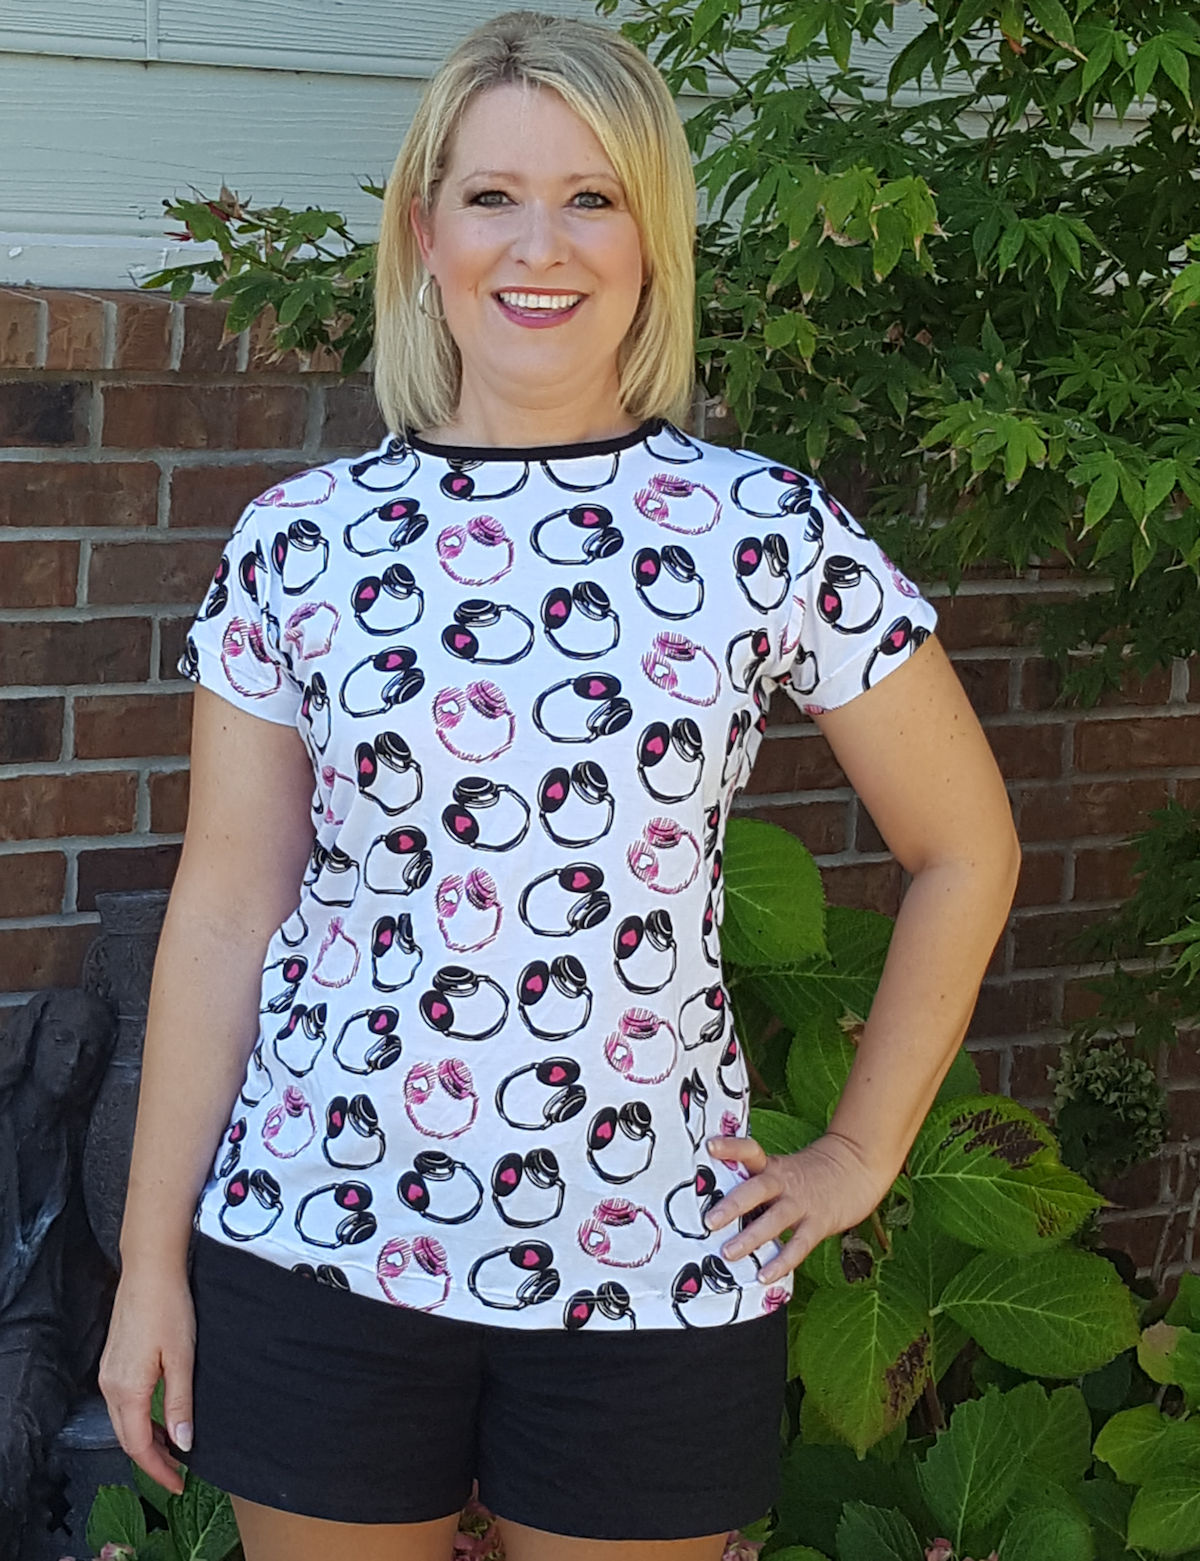
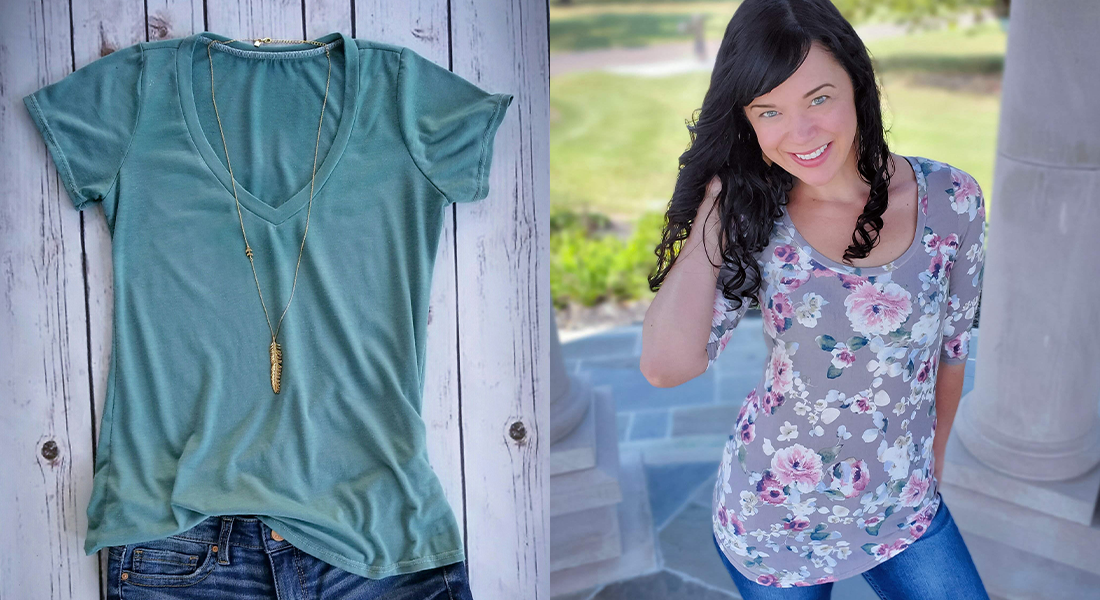
Copy Your Favorite Tee
Everyone has that one shirt. You know the one—it’s the most comfortable tee you own. It’s the one shirt that you wish you could wear every day of the week. And now you can! Learn how to recreate your favorite tee without taking it apart, and change it up with your favorite fabrics. Plus learn some knit-tips that make sewing with stretch fabrics more successful.
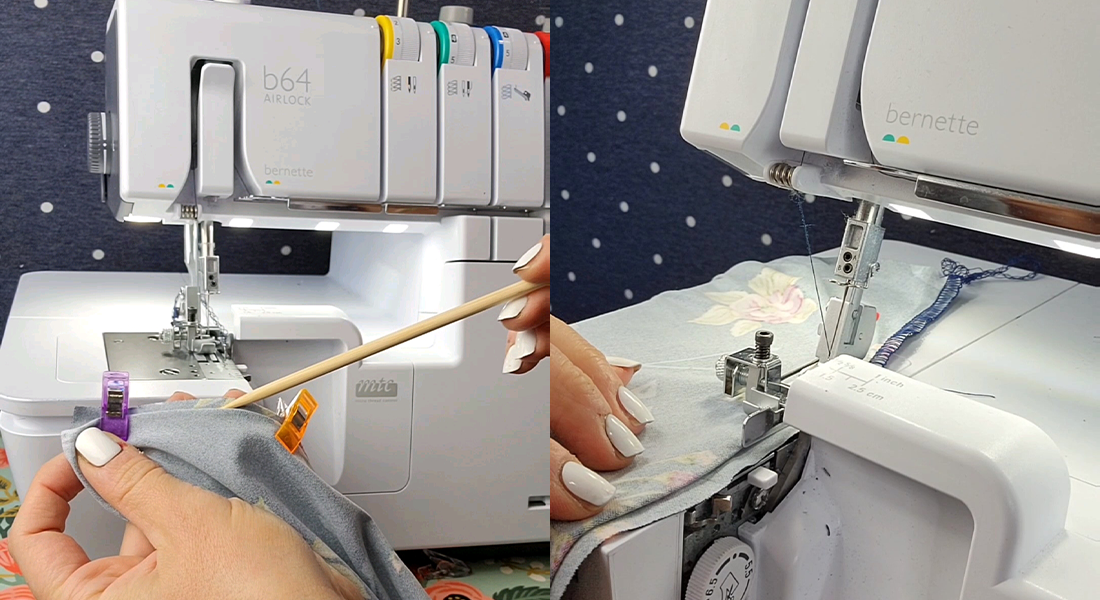
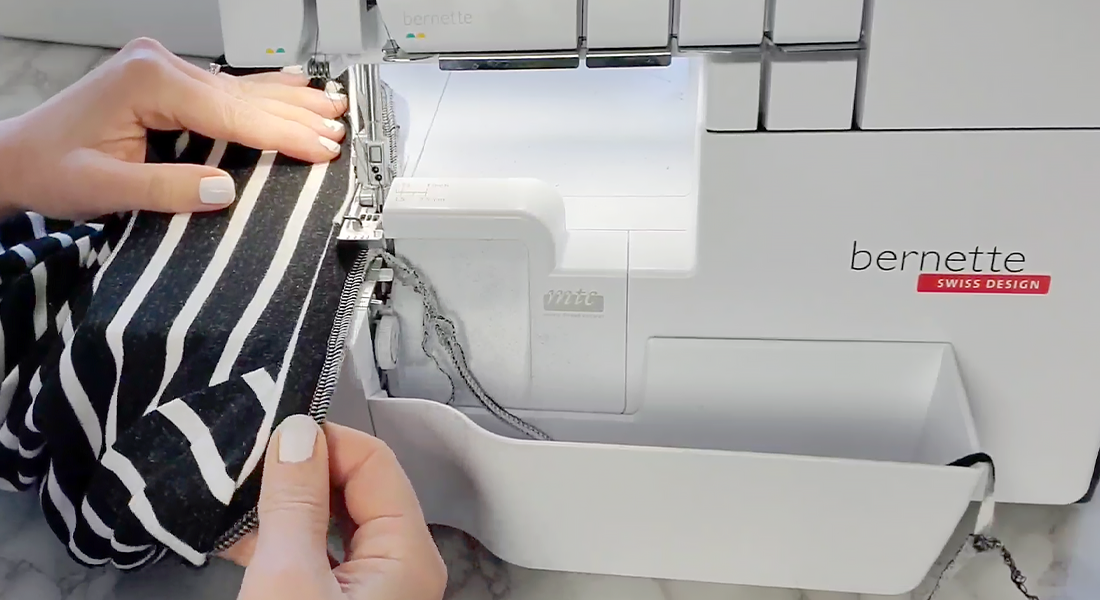
Tips for Sewing Knit Fabrics
- The best thing about knits is they don’t fray, so finishing the seams isn’t necessary.
- Always use a ball point needle when sewing with knits as their rounded tip will push through the fibers instead of piercing them, limiting fabric damage. Jersey needles will work best with most fabrics. However, if your material has a significant amount of rayon\lycra or stretch (think active-wear), then you may want to switch to a stretch needle.
- Resist stretching the fabric as you sew as this will distort your project. Ideally, you should support the weight of your fabric both in front and from behind. This is a great time to use an extension table if you have one. You can also use a Walking Foot #50 to help keep your material feeding through the machine evenly and prevent stretching.
- Don’t panic if you stretch and\or distort your fabric while sewing! Use the steam setting on your iron, and place the iron approximately 1″ above the overstretched area. The combination of heat and moisture will often help the material shrink back to its original size.
- When constructing your shirt, always use a zig-zag or similar stitch (be sure to check your manual to see which stretch stitches your machine is capable of) to keep your seams stretchy. Using straight stitches will cause your seams to ‘pop’. Try setting your zig-zag stitch at 2.2 mm length and 1.5 mm width. Use a scrap piece of material to test and adjust as necessary.
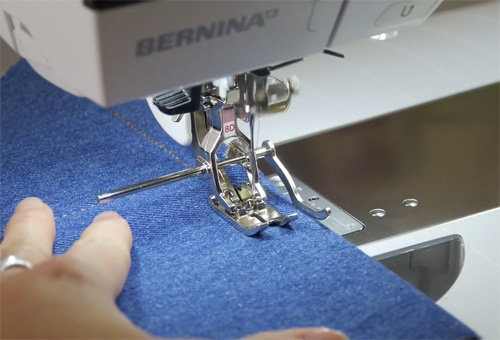
- When hemming your garment, you can use narrow zig-zag stitch or switch your ball point needle out for a stretch twin needle. Twin needles sew two rows of stitches simultaneously with two rows of straight stitches on the front of the garment, and a zig-zag stitch on the back. This not only gives the appearance of a ready-to-wear garment, but also keeps the hems stretchy. When using a twin needle, be sure that you use a straight stitch setting on your machine and sew on the right side of the fabric.
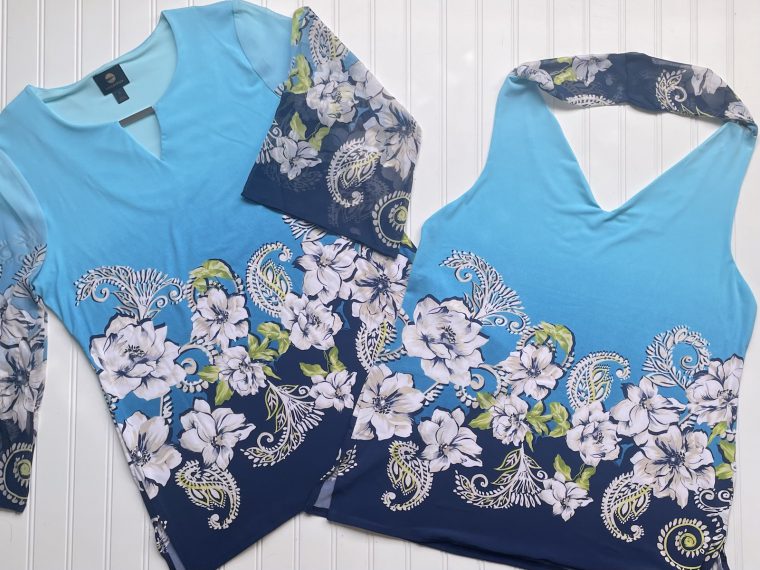
Selecting Fabrics for Your Favorite Tee
Not all fabrics are created equal. When it comes recreating your favorite shirt, it’s important to use a material that is similar in weight, drape, and stretch as the original. Using a fabric that has less stretch than the original shirt will make a garment that is too small. So what’s the easiest way to find out if your new material has enough stretch?
First take a piece of paper and mark 2″. Take your original shirt and hold 2″, then stretch the fabric as far as it will go and mark. Next, take the new fabric and repeat, this material should stretch at least as far as the line indicated (more is fine!). If your new fabric has 4-way stretch (it stretches both vertically and horizontally), be sure you are comparing the length that has the most stretch.

Materials to Sew Your Favorite Tee
- Favorite T-shirt
- Knit Fabric
- Wax Paper
- Ruler
- Permanent Marker
- Ball Point Needle
- Your sewing machine, I sew on a BERNINA 580 E
- Walking Foot #50 (Optional)
- Stretch Twin Needle (Optional)
Making Your Pattern to Create Your Favorite Tee
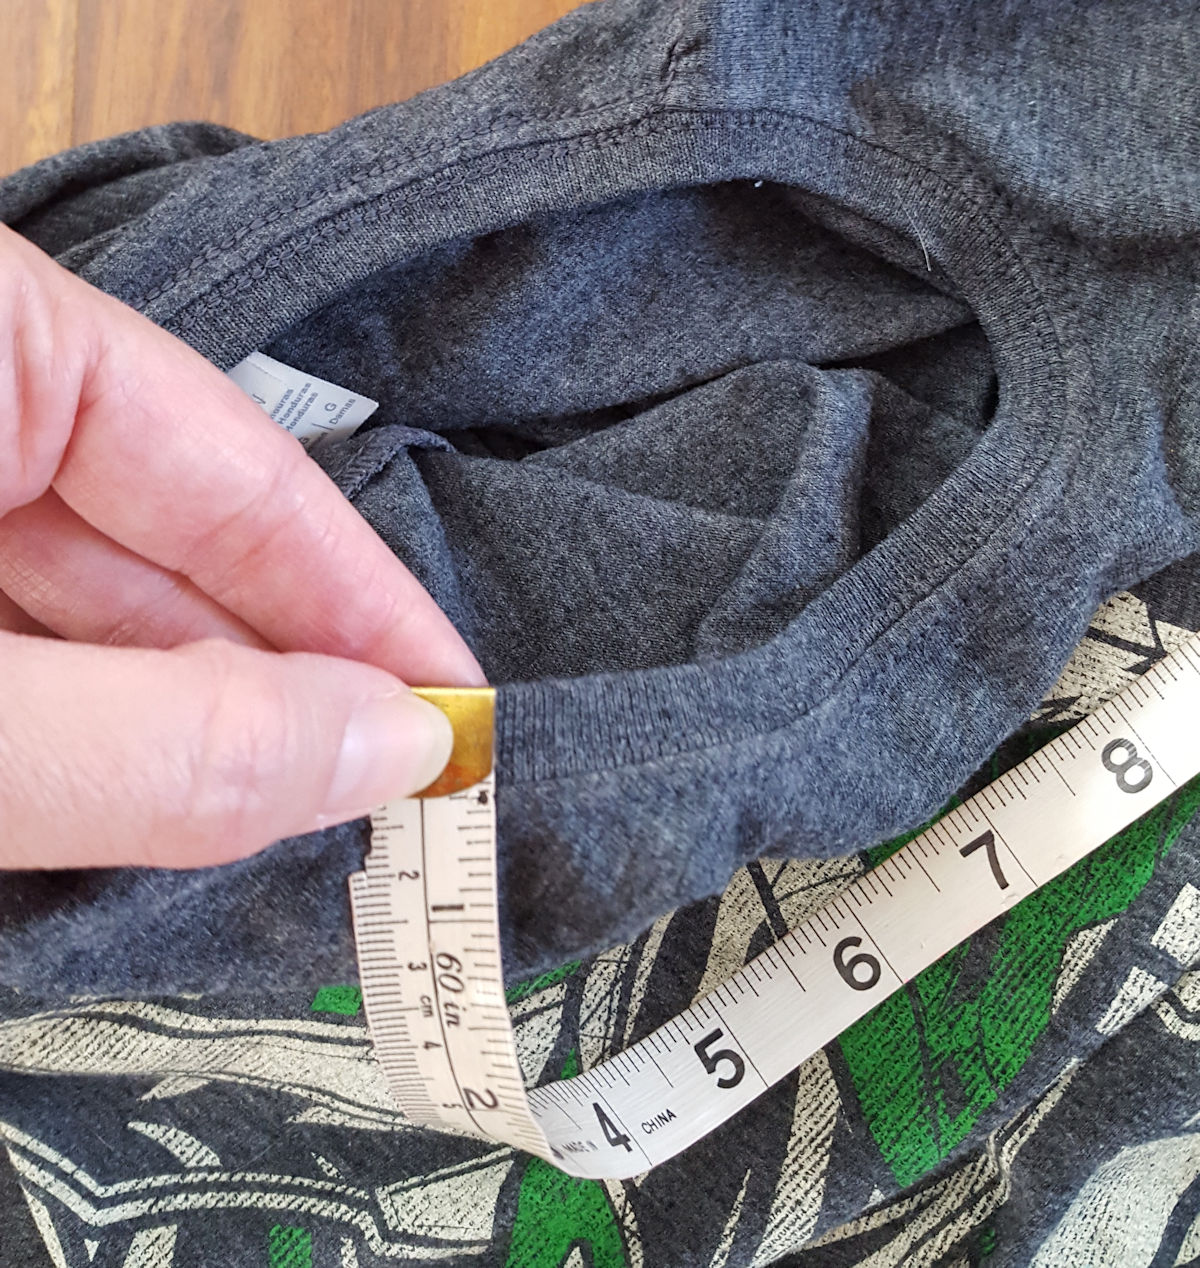
Measure the length and width of the neckband of your shirt, and write down the measurements. Add 3/4″ to the length of the neckband measurements. Then double the width measurement of your neckband and add 3/4″.
For example, my neckband measurement is 20 1/2 in length, and 3/8″ in width. Adding 3/4″ to the length equals 21 1/4″ for the adjusted length. Doubling the width of 3/8″ equals 3/4″, then adding an additional 3/4″ equals a total of 1 1/2″ for the adjusted width.
These measurements are important for cutting the neckband in a later step.
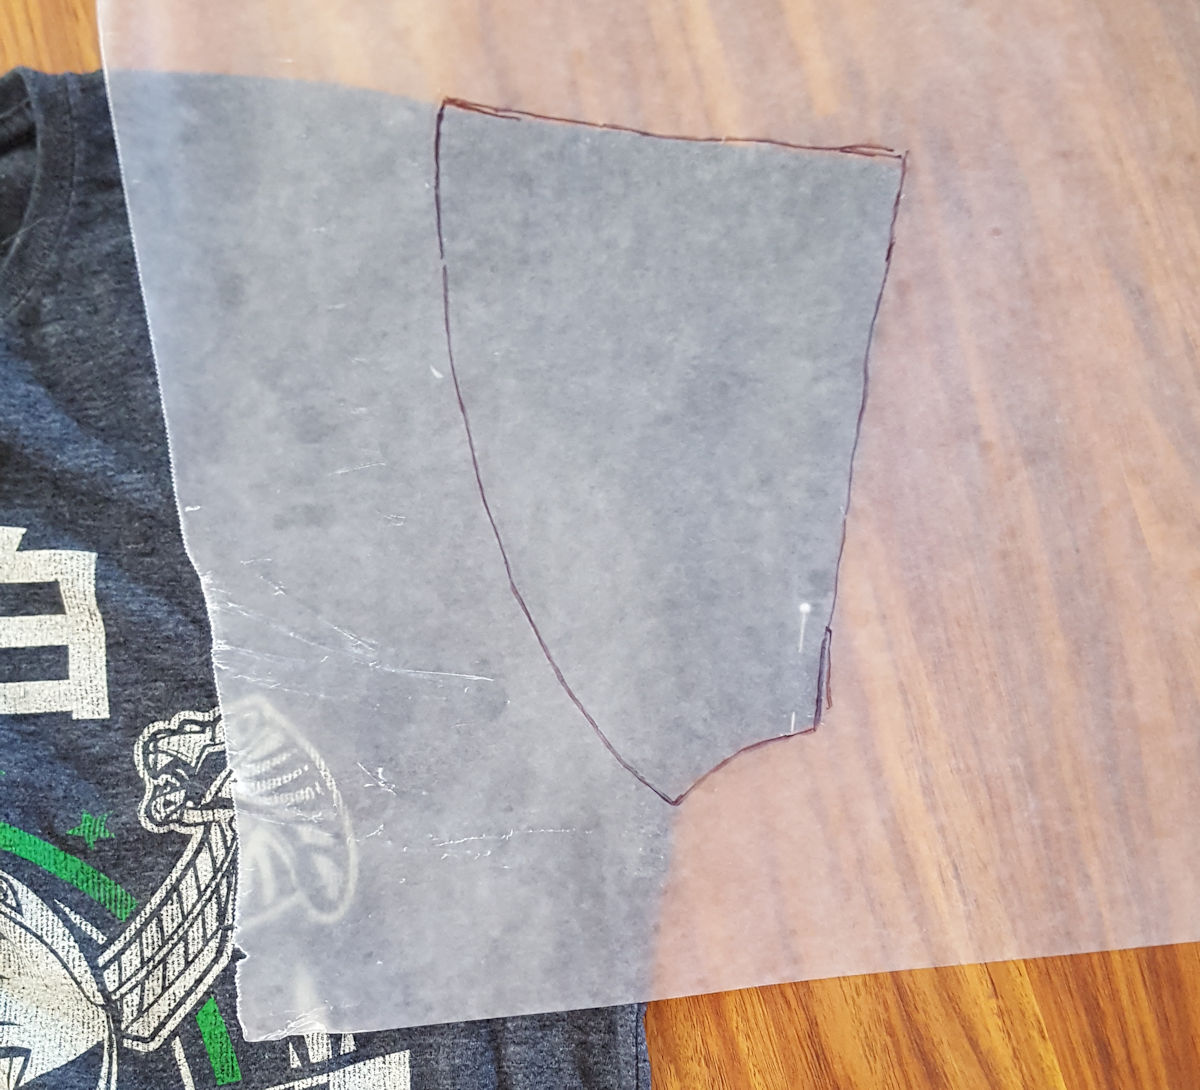
Fold the sleeve in half along the bottom seam. Lay a piece of waxed paper over the sleeve and trace around the sleeve. It’s a good idea to mark the seams (the sleeve seam and the seam that connects to the shirt), the hem, and fold line.
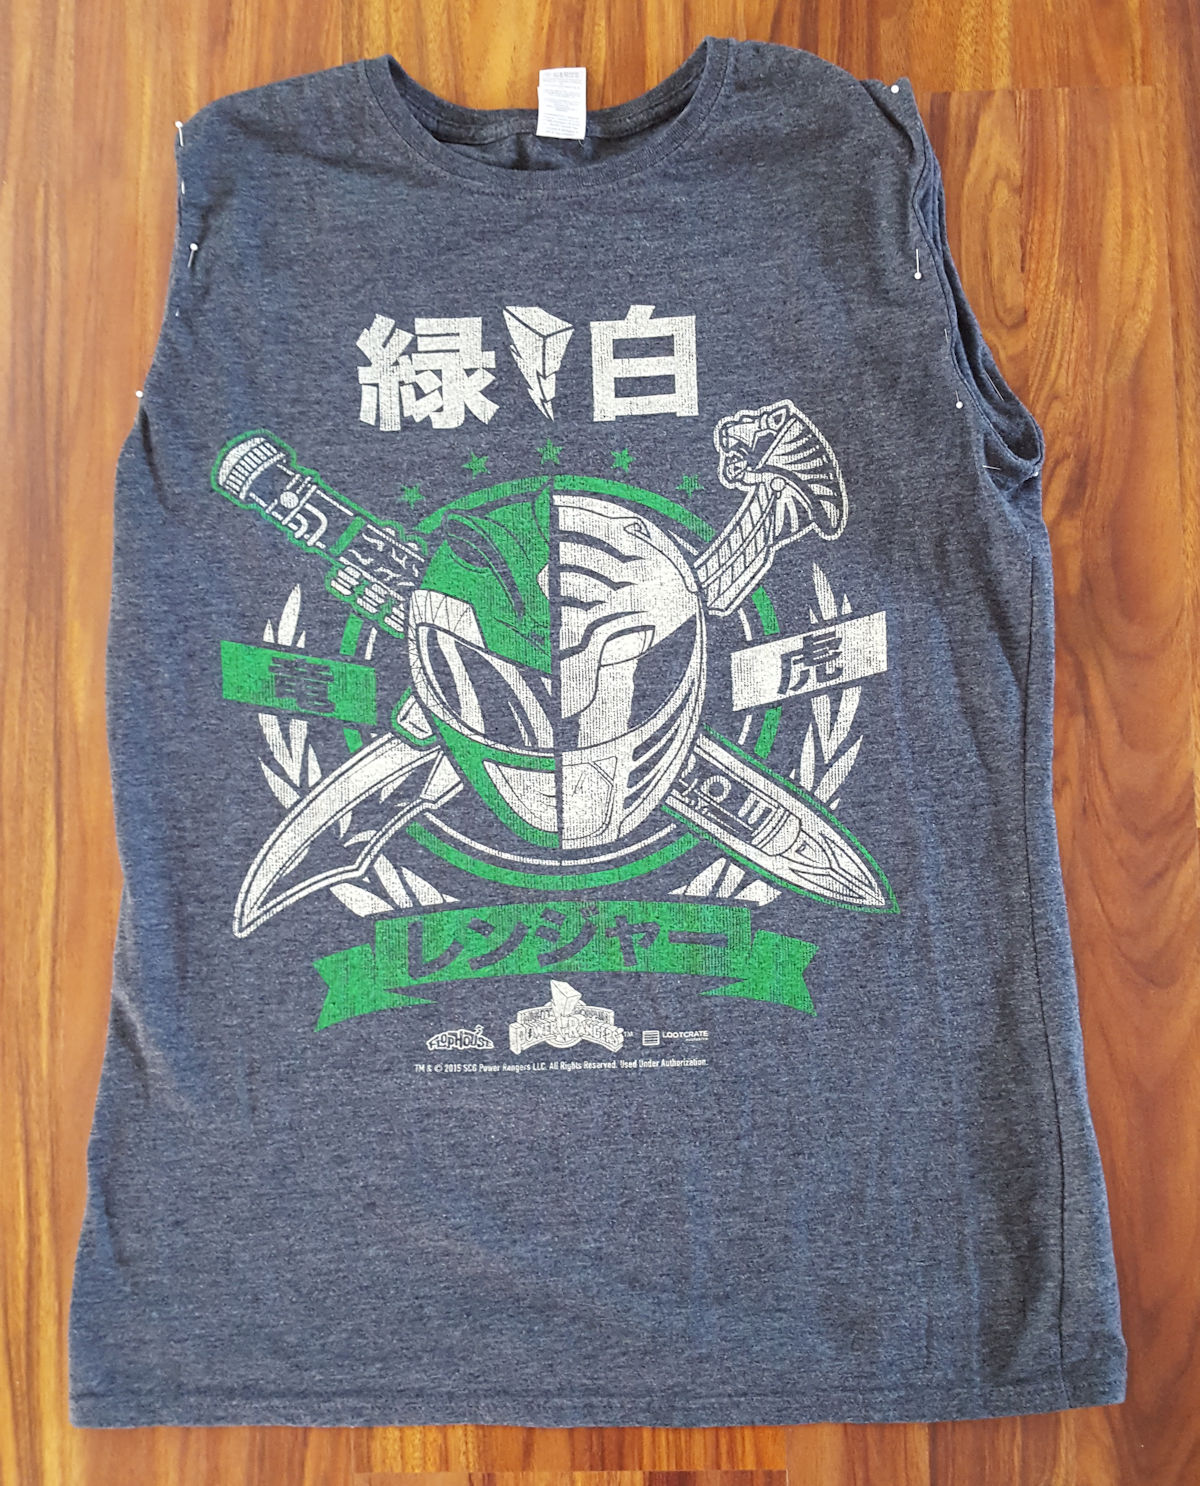
Tuck the sleeves inside the shirt along the seamline. If you find that your sleeves won’t stay in place, go ahead and pin them.
Fold the shirt in half along the front. Place waxed paper over the shirt and trace, noting the fold line and seams. Be sure when tracing the front that you are tracing the seam line where the neckband is attached to the shirt, and not the finished neckband.
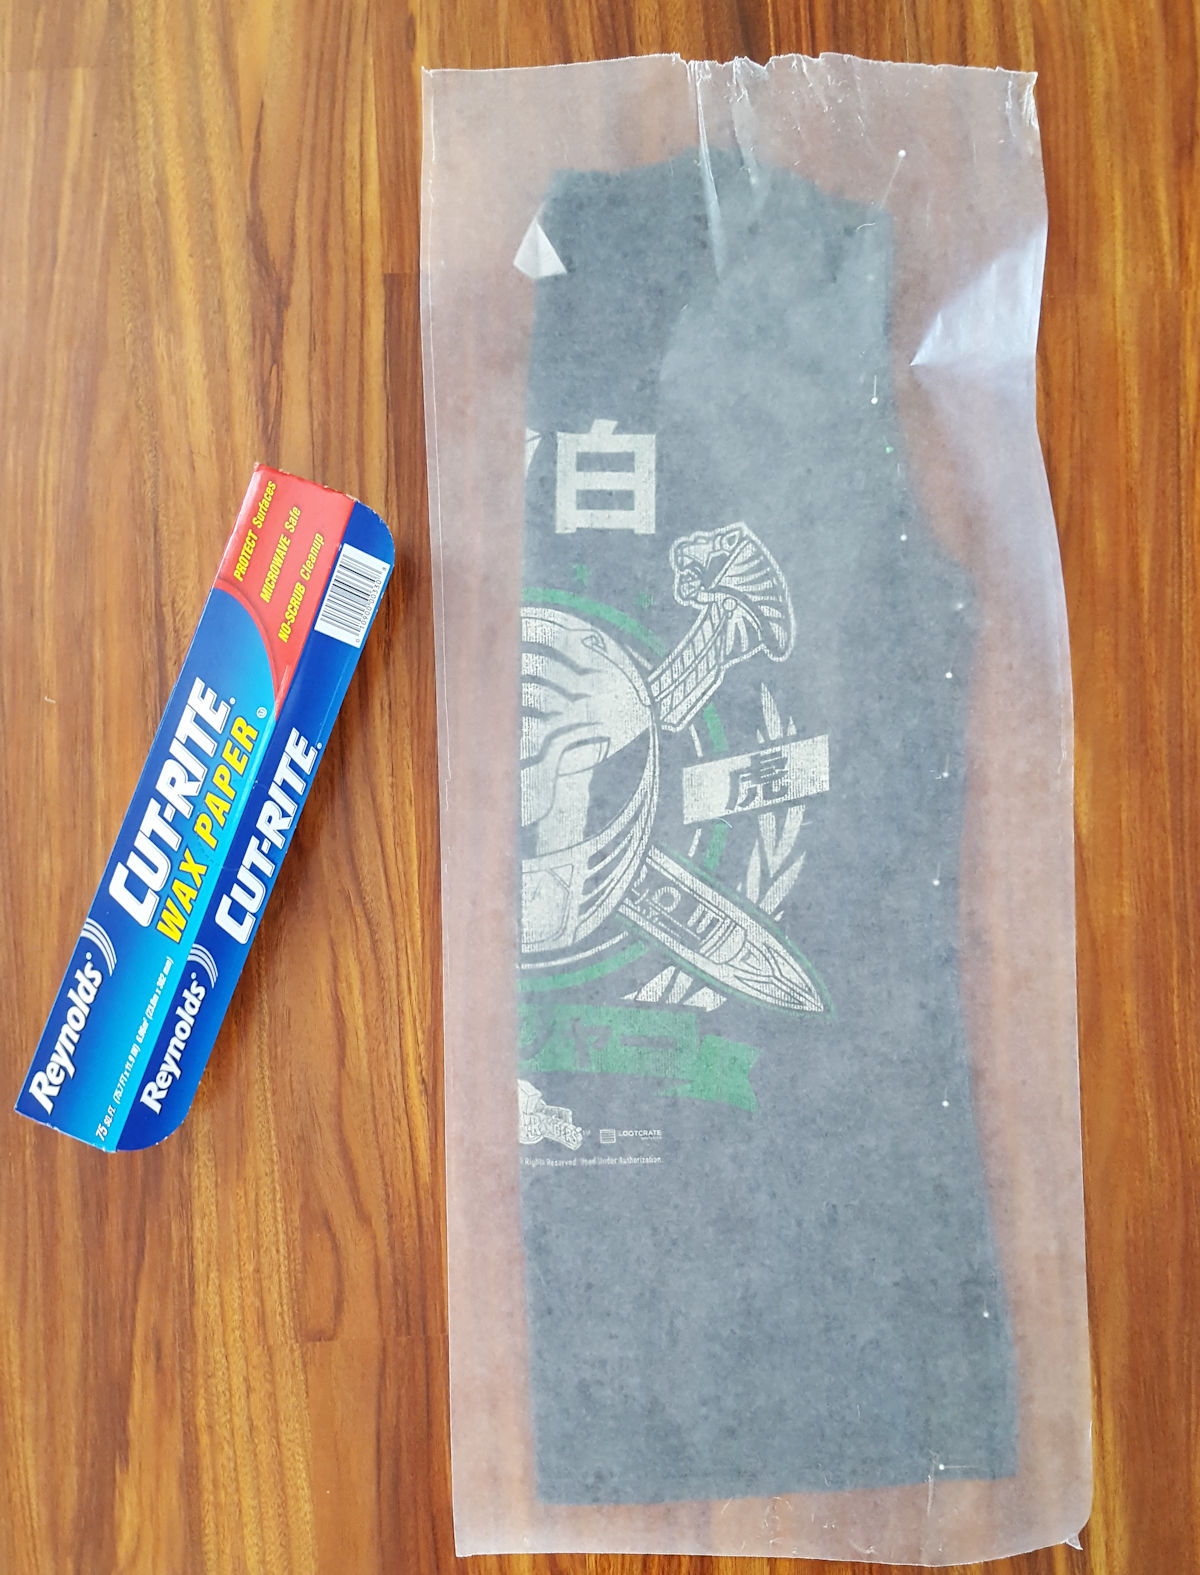
Fold your shirt in half along the back. Place waxed paper over the shirt and trace, noting the fold line and seams. Be sure when tracing the back that you are tracing the seam line where the neckband is attached to the shirt, and not the finished neckband.
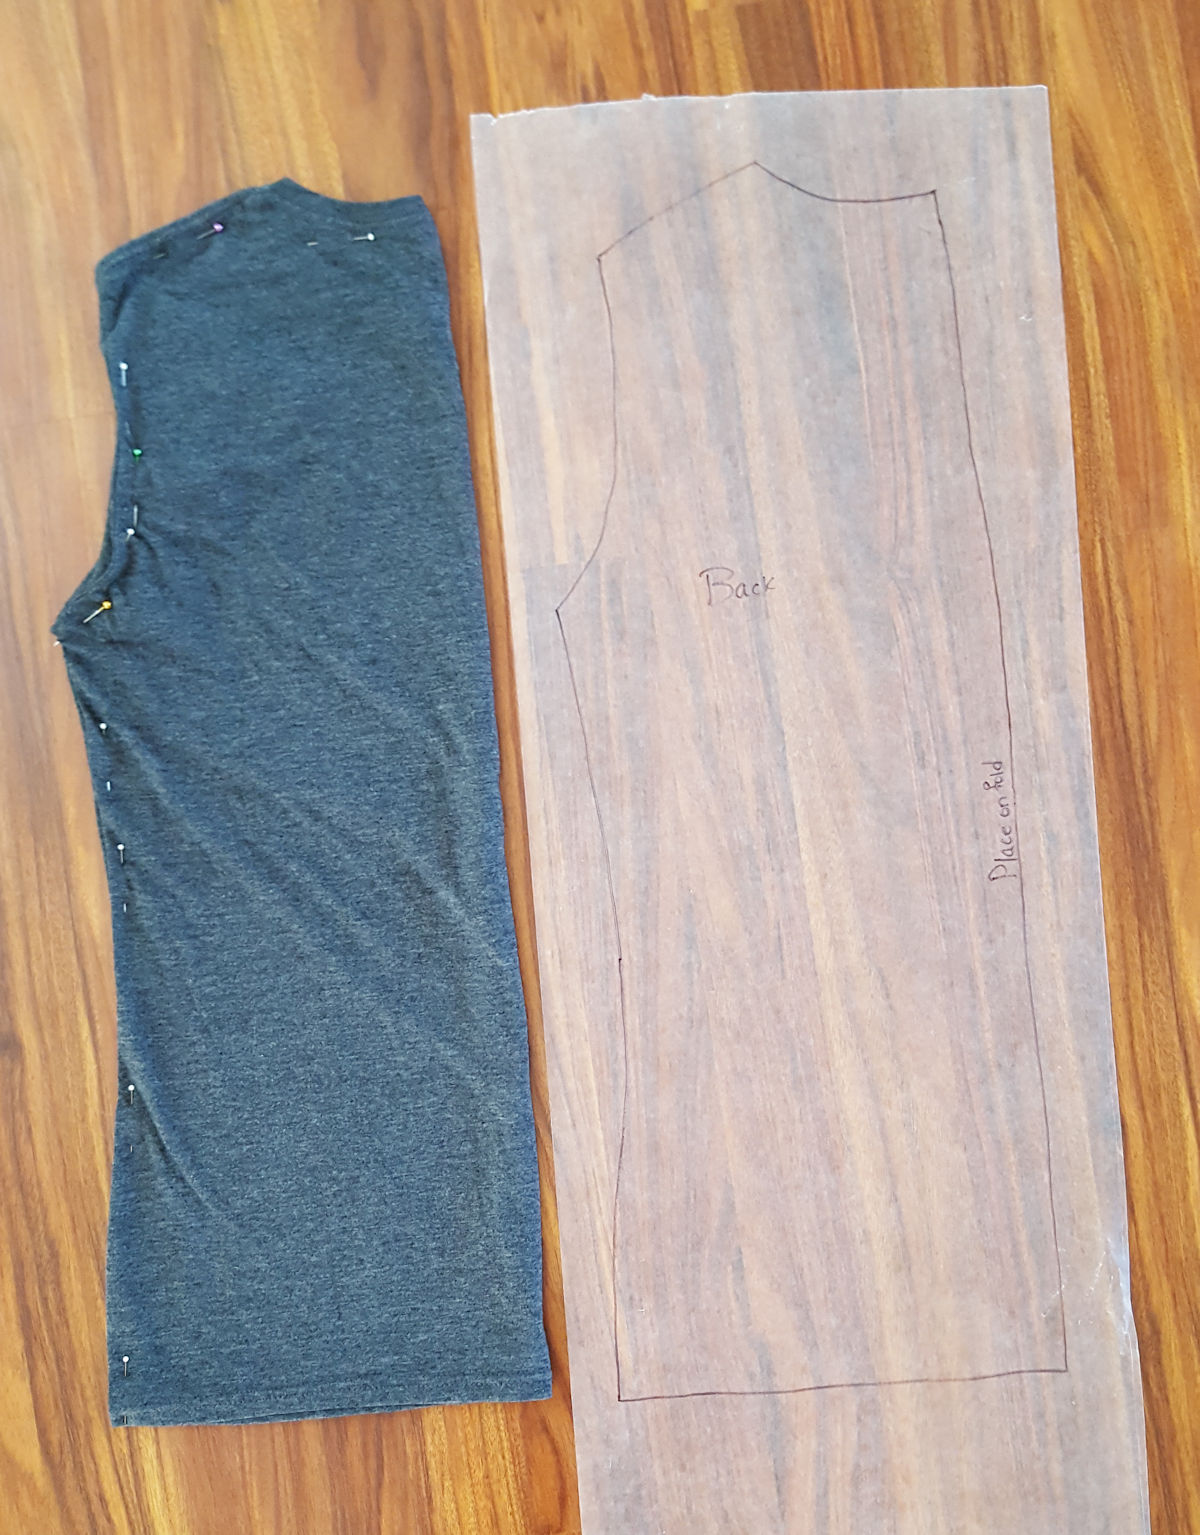
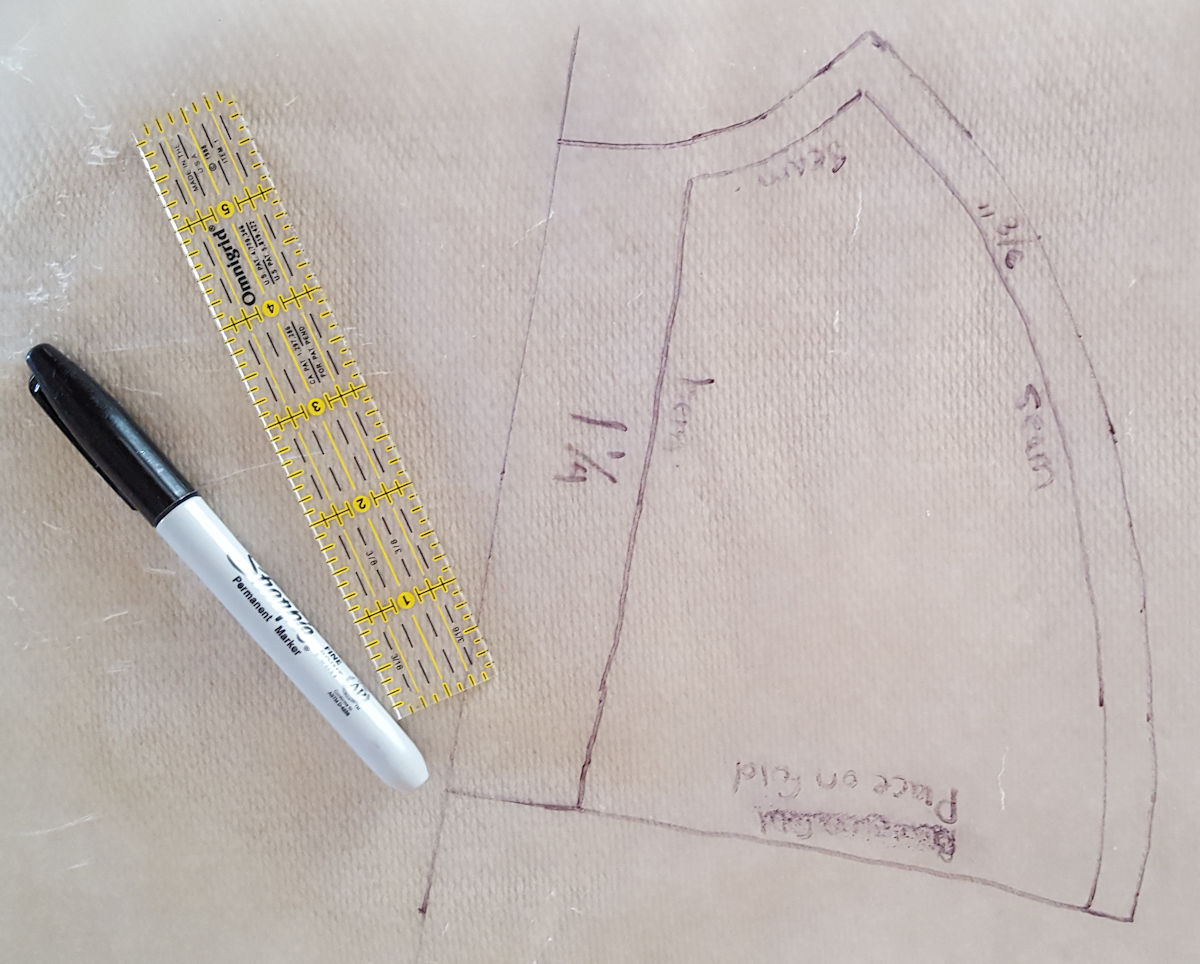
Using your ruler, add 3/8″ seam allowances to your pattern pieces and 1 1/4″ hem allowances for the bottom edges of the shirt and sleeve (1 1/4″ allows for a 1/4″ of the hem to be folded under for a more finished interior, if you chose to skip this step, seams should only be 1″). Cut out pattern pieces.
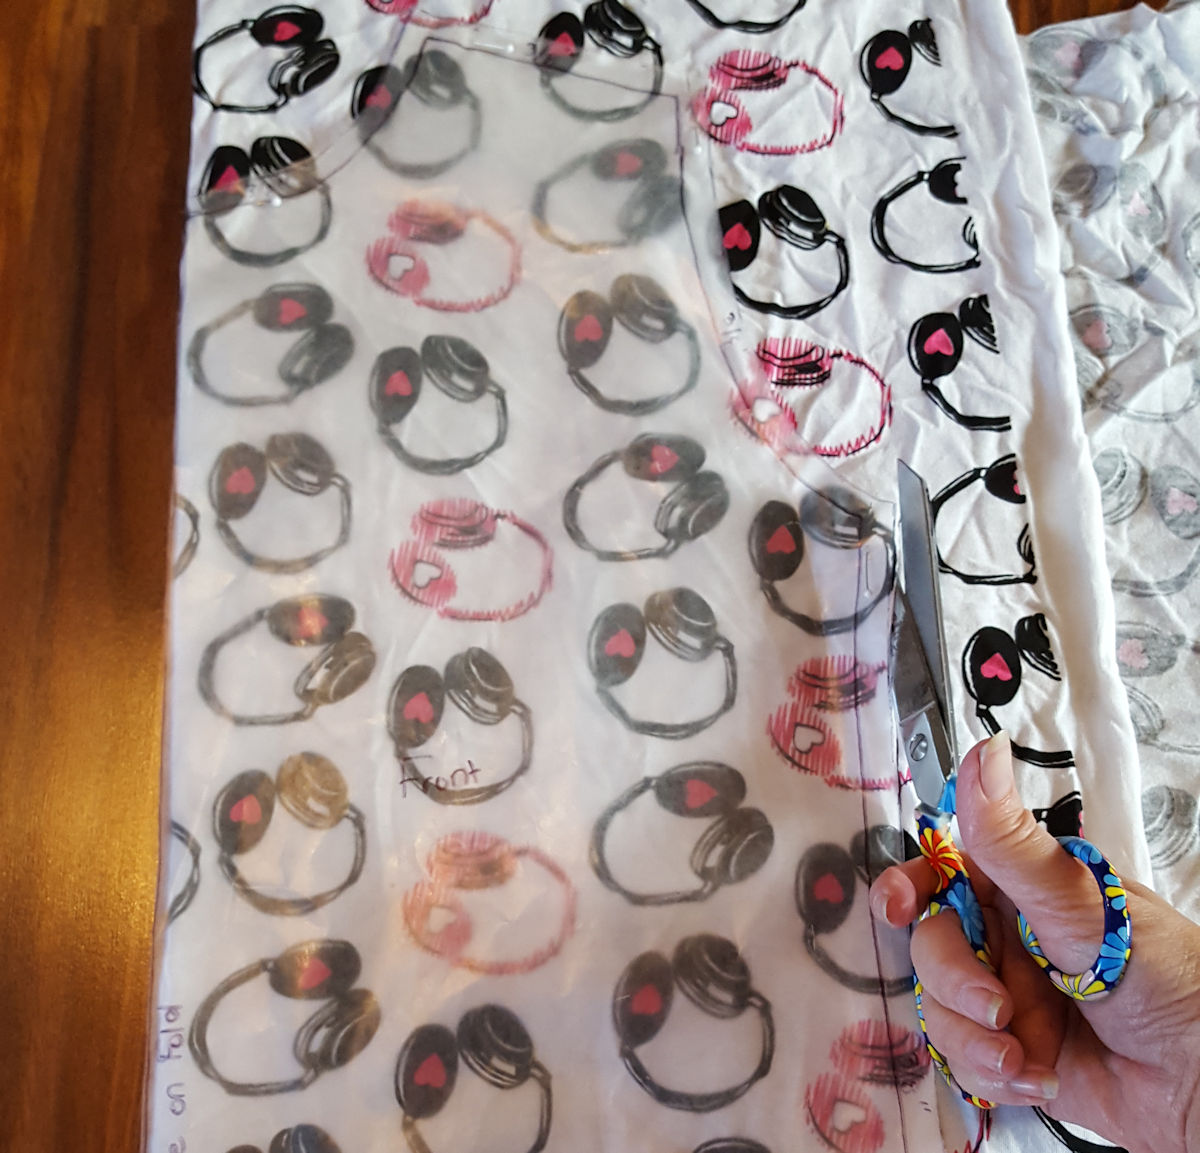
Cutting the Fabric for Your Favorite Tee
From your fabrics cut:
- 1 front on the fold
- 1 back on the fold
- 2 sleeves on the fold
- 1 neckband using the measurements from above
Sewing Your Favorite New Shirt
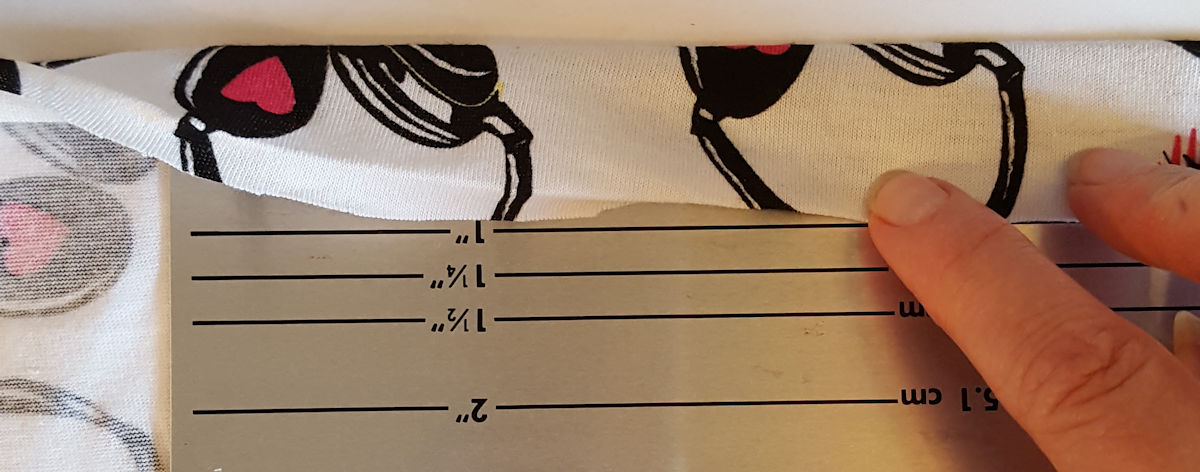
Press up the hem allowance on the sleeve and bottom edges of the shirt. For the finished hem: Fold under 1/4″ to the wrong side, then fold under 1″ again. For the unfinished hem: fold under 1″ (for unfinished hem). Pressing the hems now, makes it easier to set the hem later.
With right sides together sew the shirt front and back together at the shoulder seams.
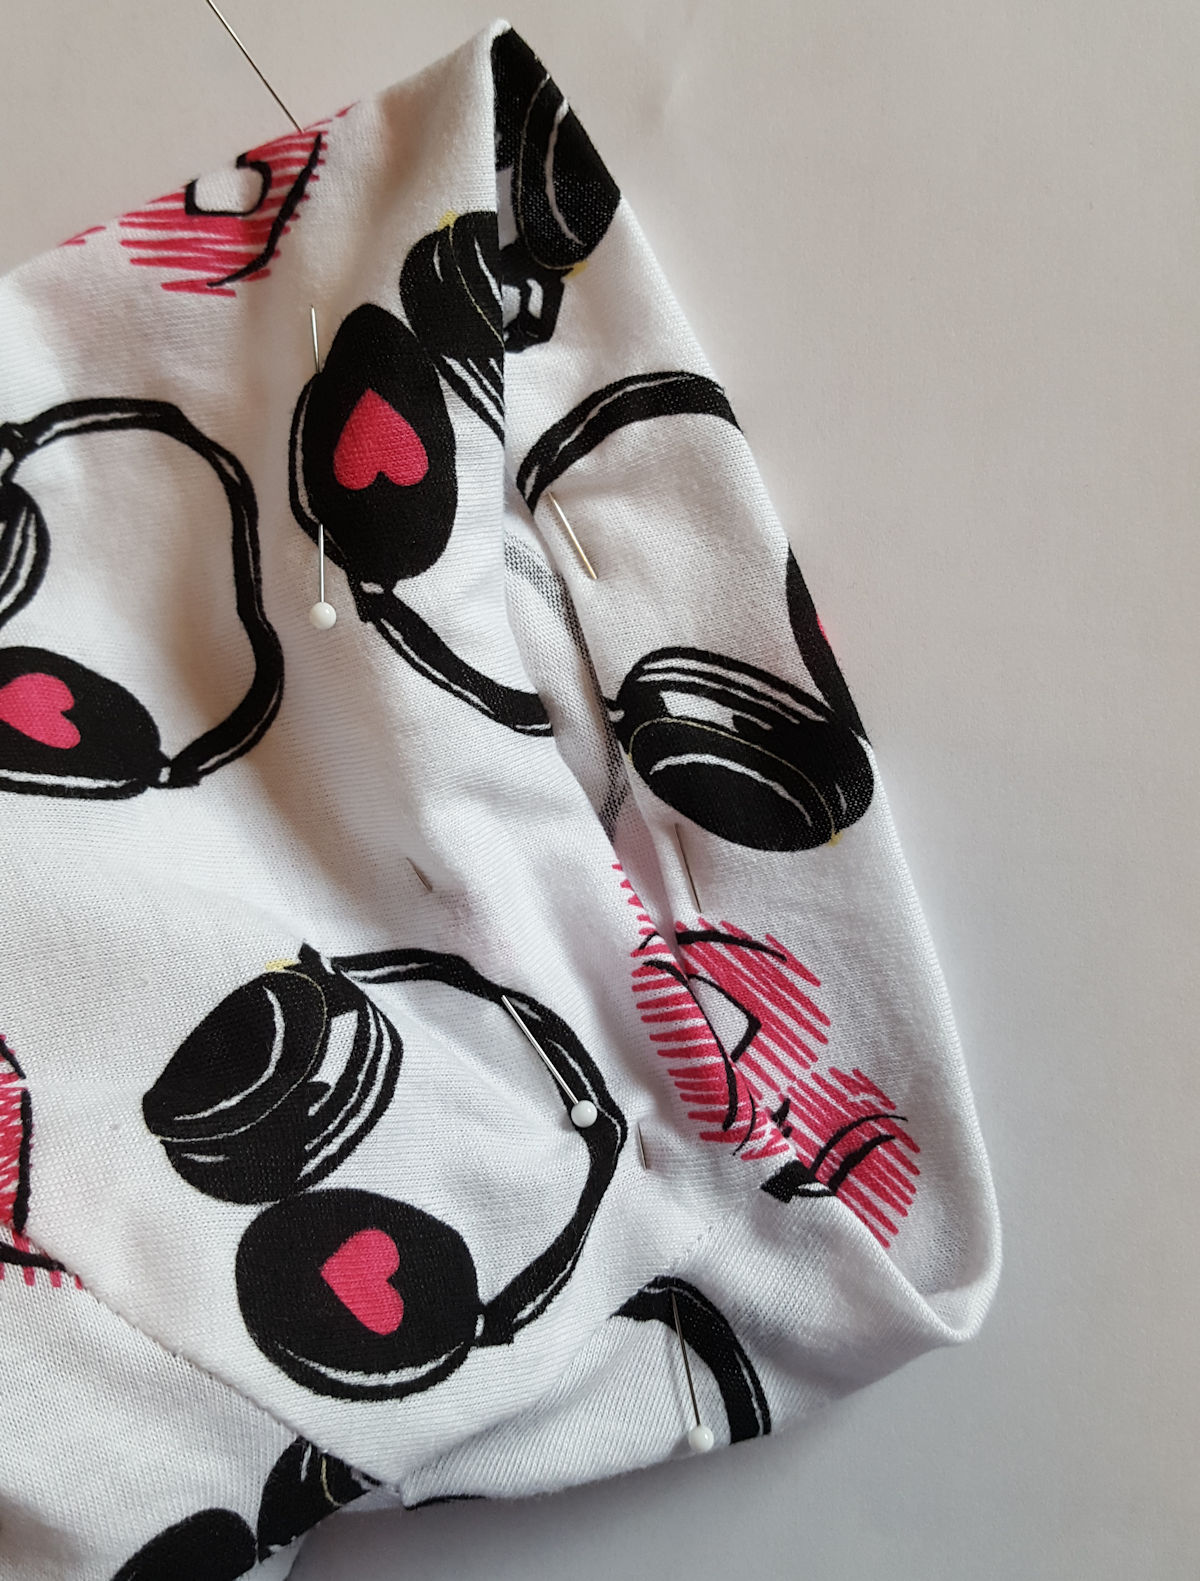
With right sides together, sew sleeve to shirt, matching the sleeve fold with the shoulder seam.
With right sides together, sew the sleeves and sides of the shirt, being sure to match the sleeve seams together.

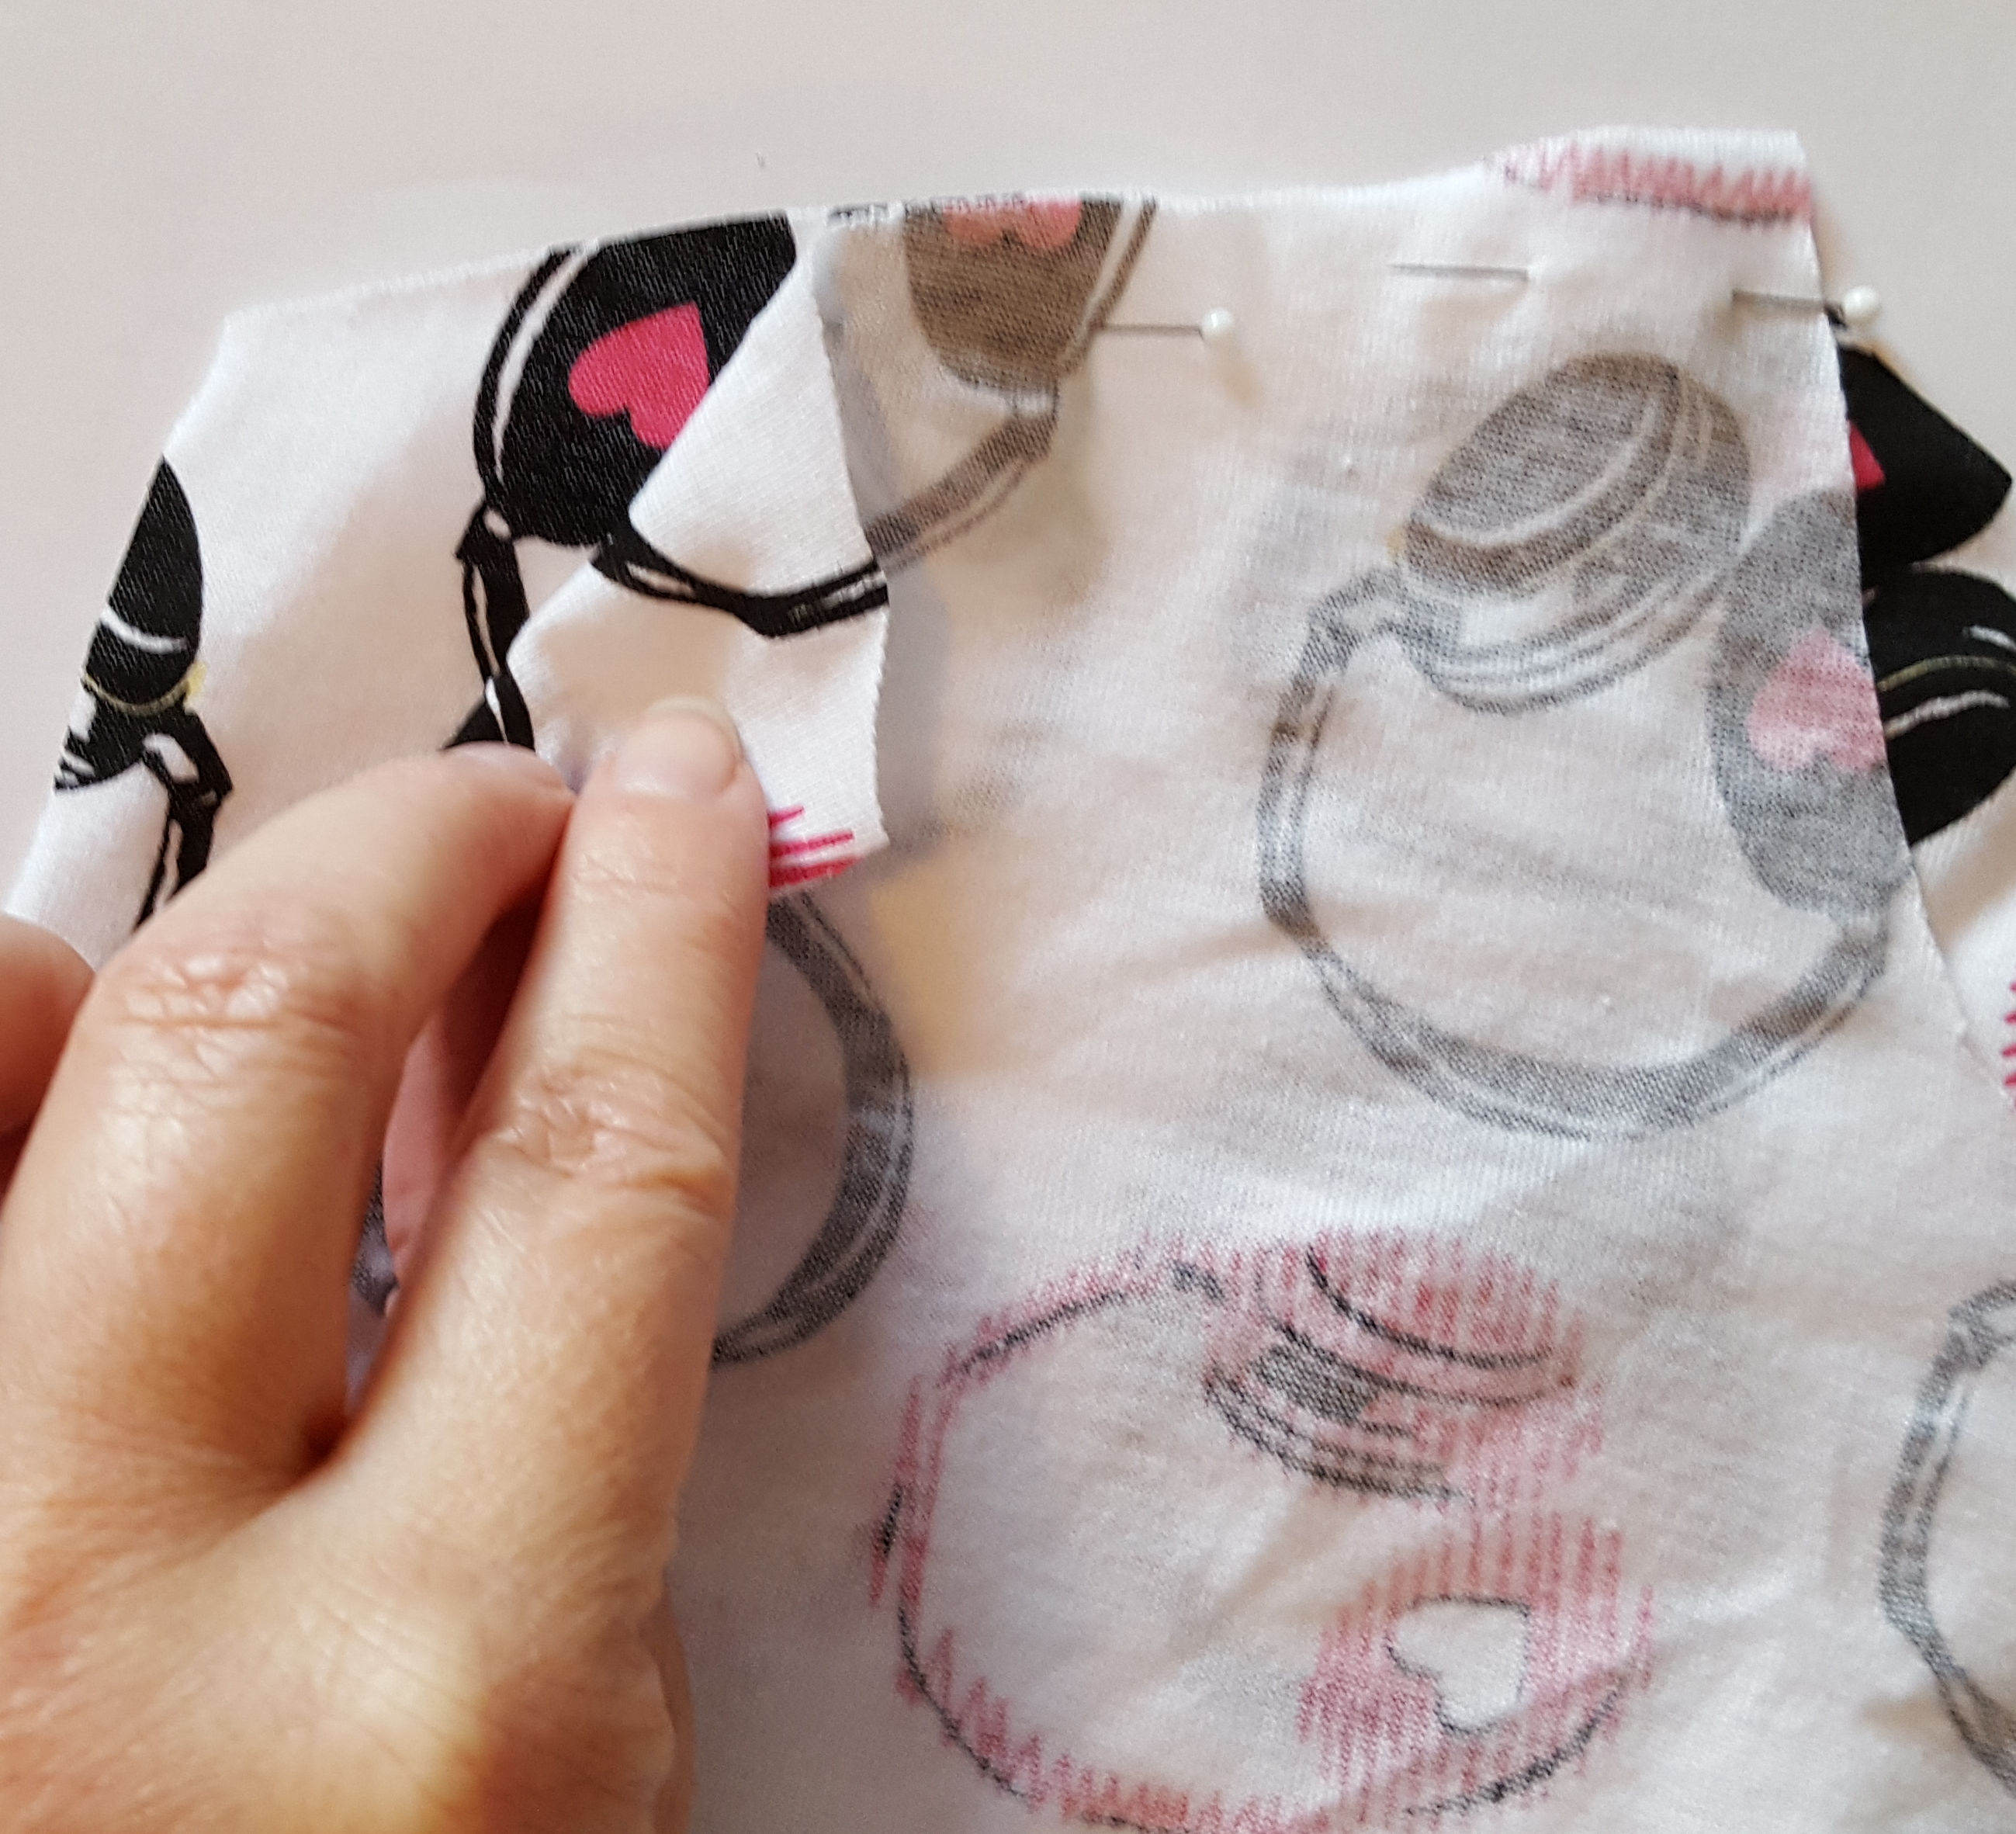
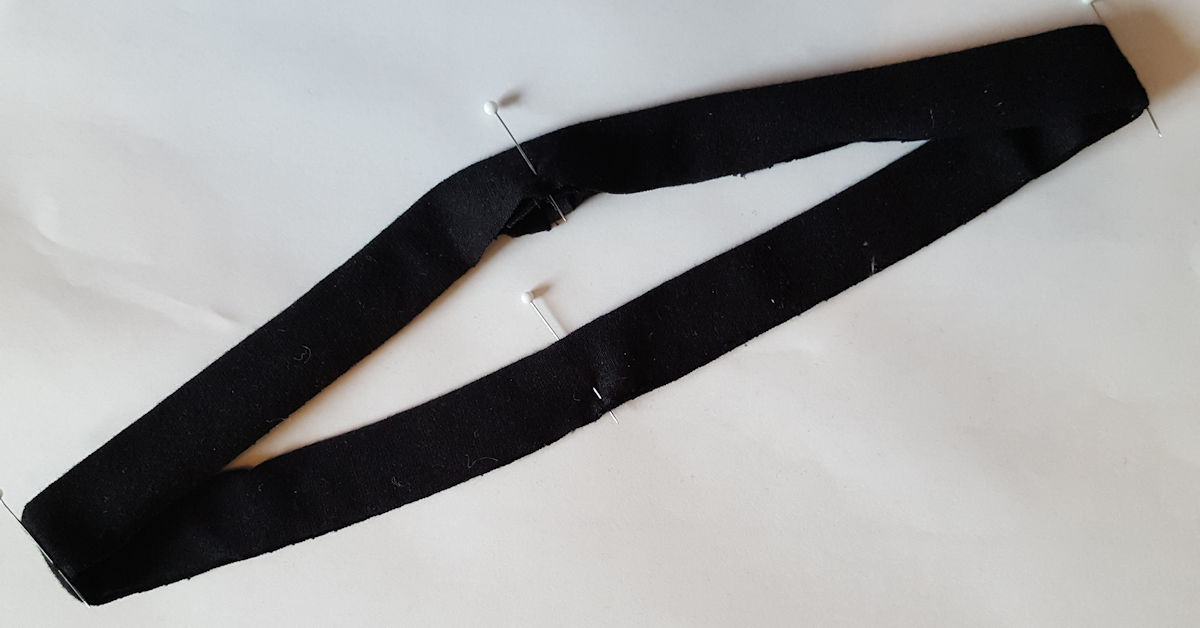
With right sides together, sew the short ends of the neckband.
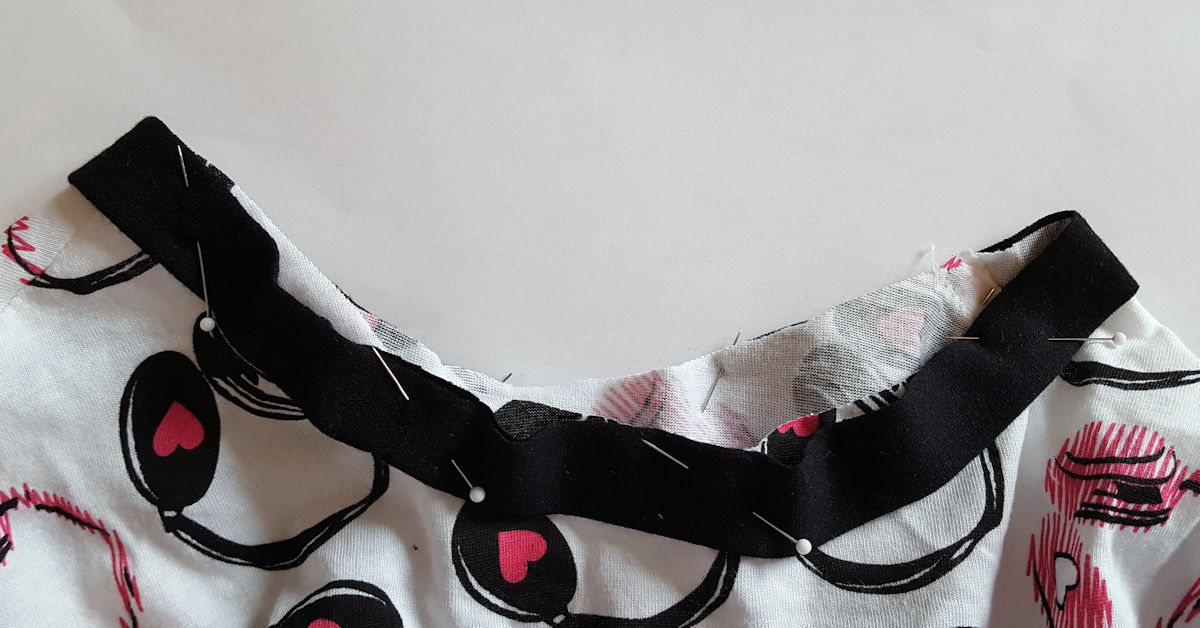
With wrong sides together fold the neckband in half and press. Mark around the neckband in quarters and do the same with the neck opening of the shirt.
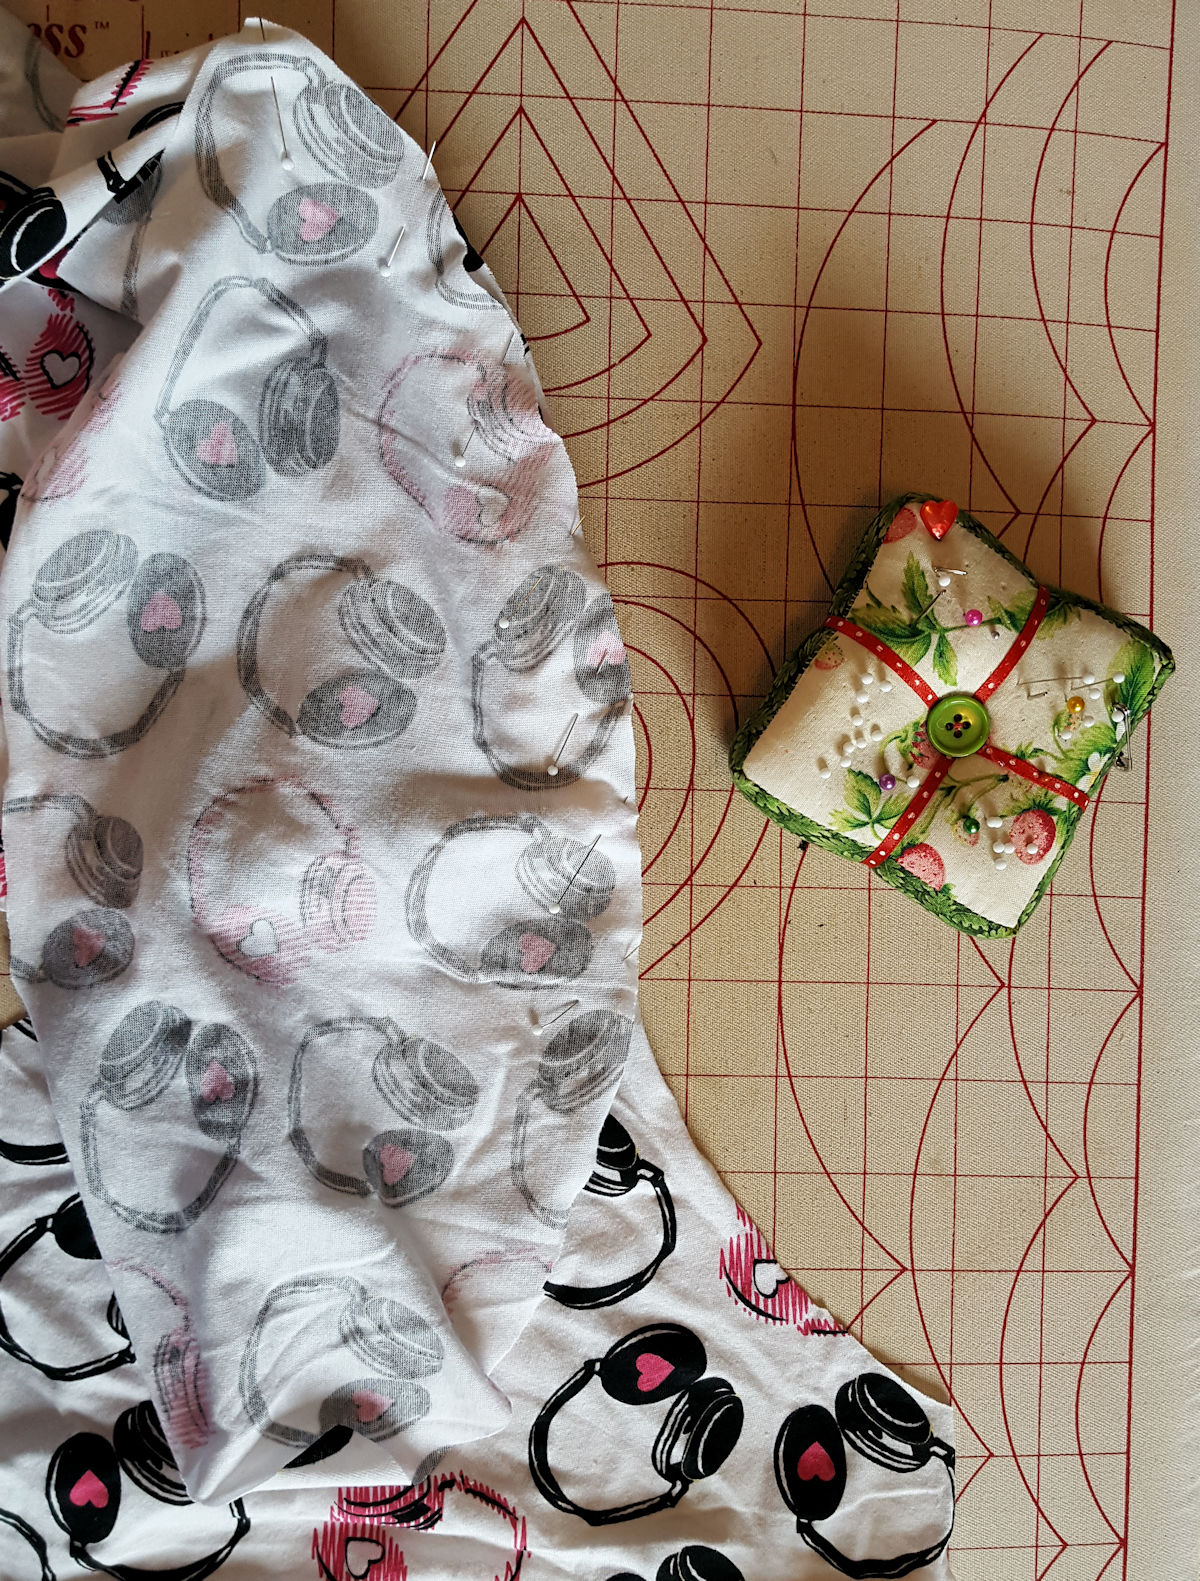
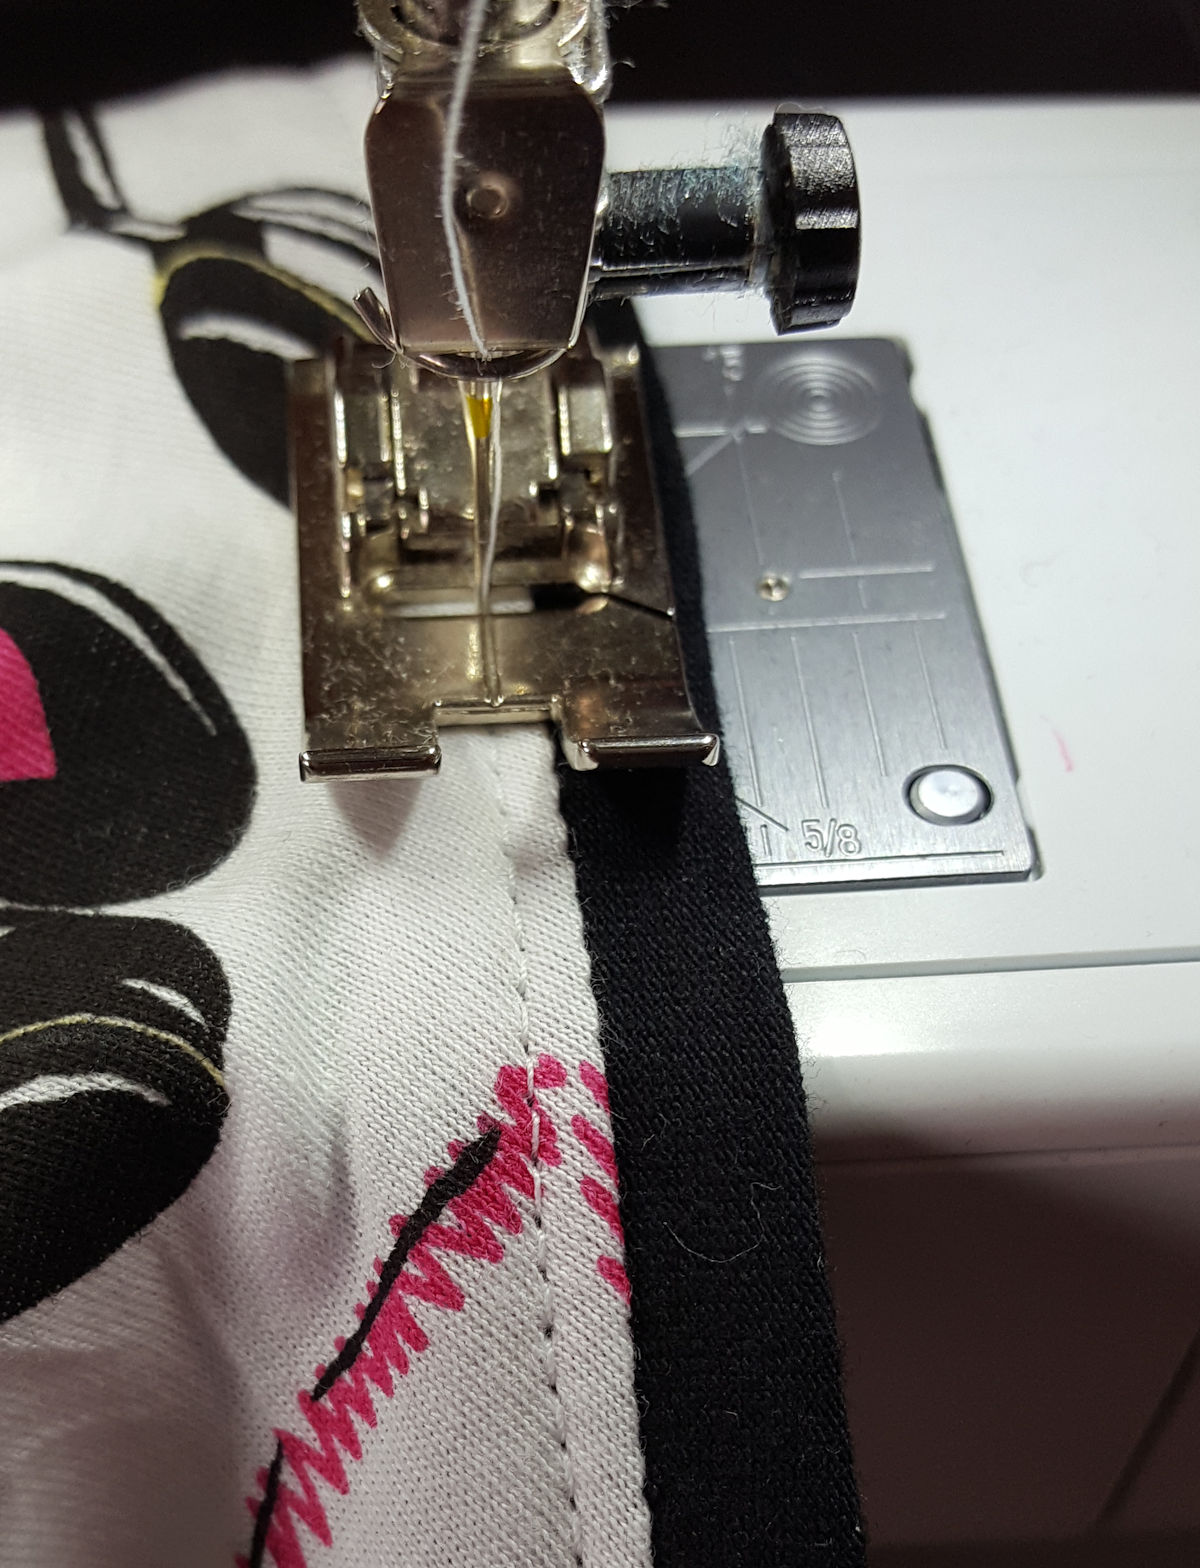
With right sides together, place neckband along the neck opening of the shirt, matching quarter marks, and sew.
Press neckband up. If necessary, you can add a row of stitching 1/8″ away from the seam allowance to keep the neckband in place and the seam from ‘flipping up’ (this is particularly useful if your neckband is a relatively small width).
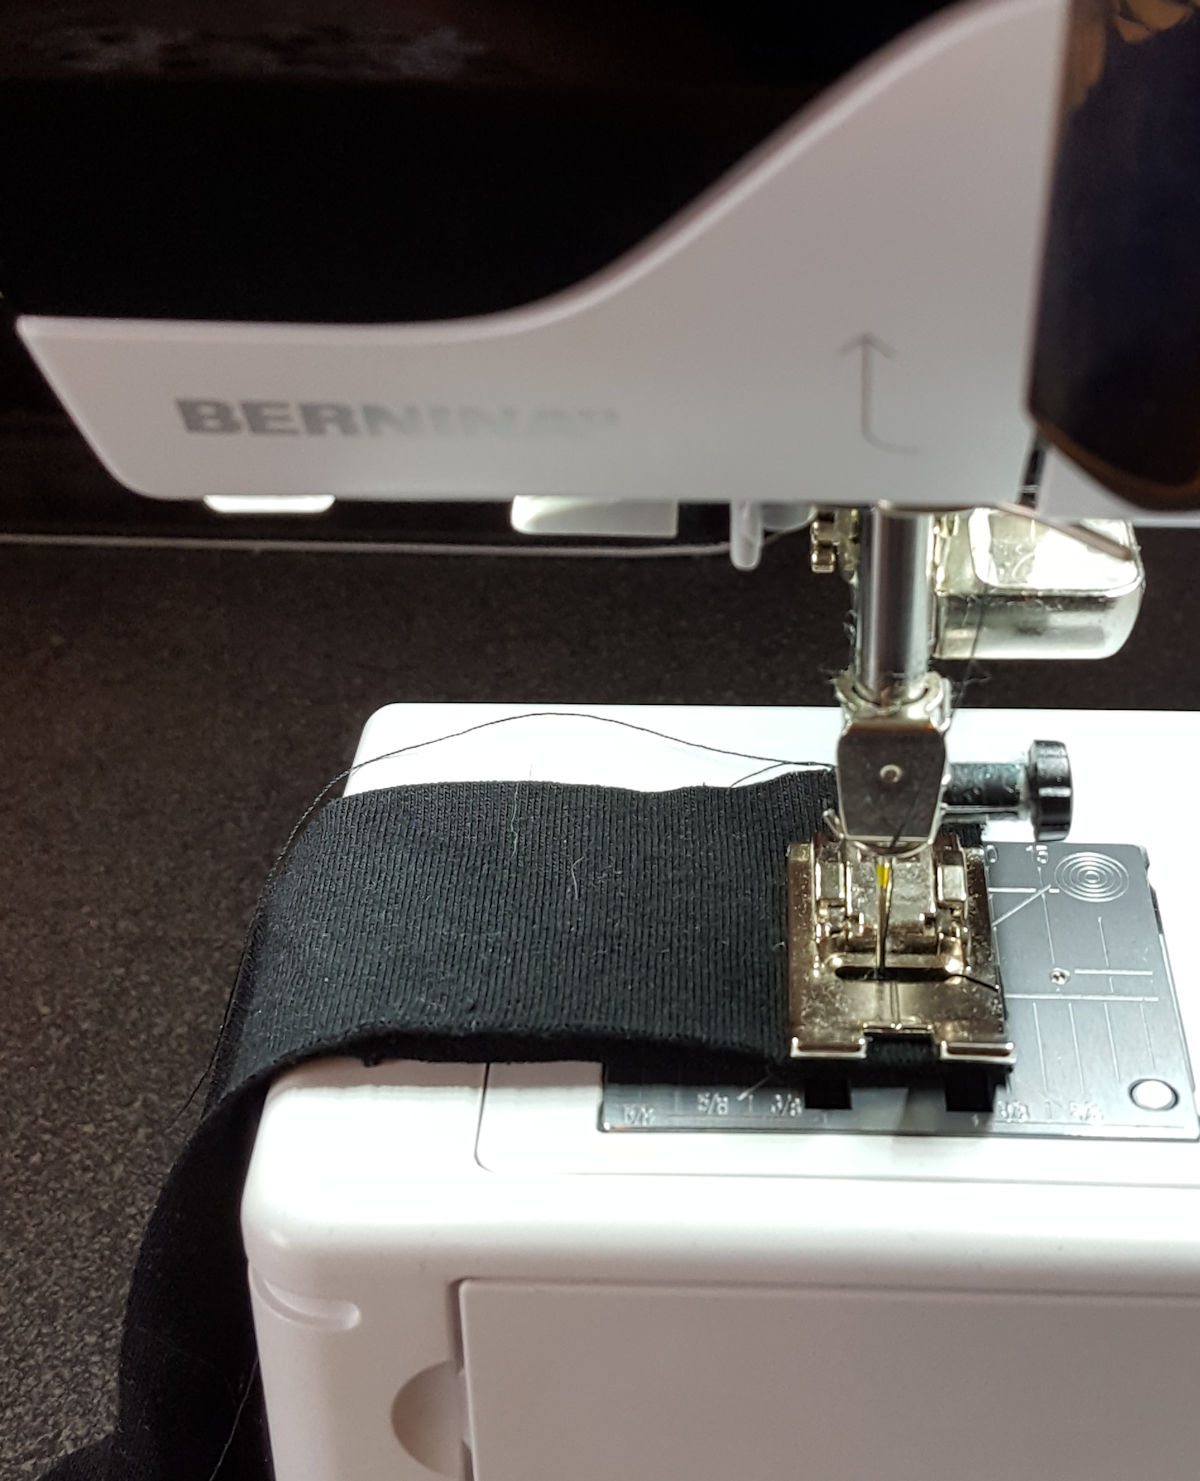
Pin the sleeve and bottom shirt hems and sew, using a twin needle, if desired.
Done! Now rock all those new comfy shirts!


I never thought of using wax paper. This article encourages me to try this with not only t-shirts but other garments.