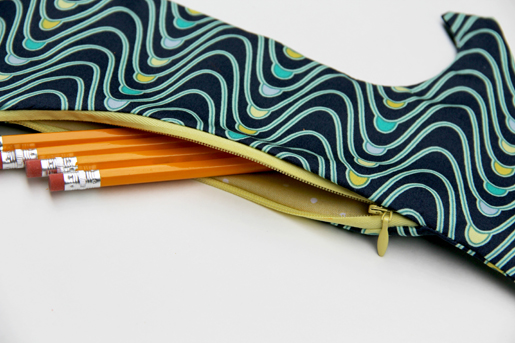
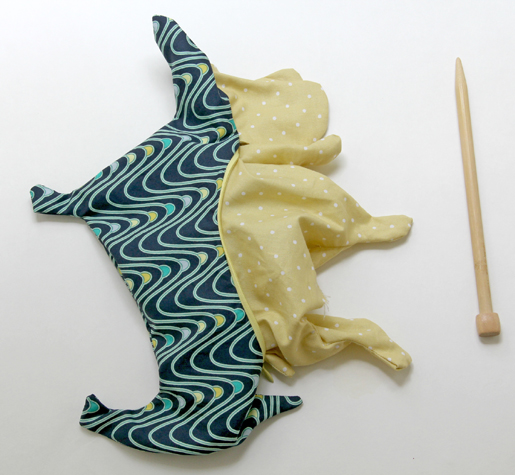
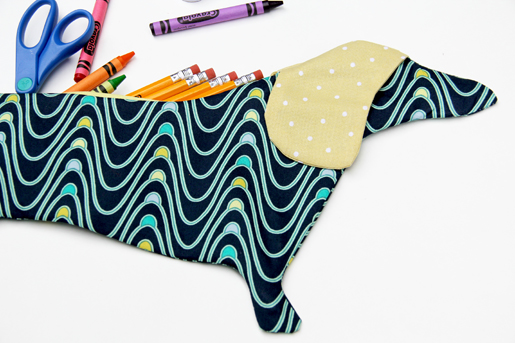
Dachshund Pencil Case
It’s a well-known fact that little ones lose school supplies faster than you can procure them. The solution: Let their new best buddy keep track of their pencils. This zipper pouch is so cute your little one won’t want to part with it… problem solved.

Supplies
- One fat quarter cotton print for exterior
- One fat quarter cotton print for lining and ears
- Lightweight stabilizer (optional)
- One 9ʺ zipper
- Thread to match fabric
- Wash-away pen or pencil
- Point turner or knitting needle
- Standard presser foot (BERNINA Reverse Pattern Foot #1)
- Zipper foot (BERNINA Zipper Foot #4)
Tip: A fat quarter is 18” x 22”. Why is it called a “fat quarter”? A regular quarteryard of fabric is 9” x the width of the fabric (typically 45”), so a regular (AKA “skinny”) quarter yard is a 9” x 45” strip. But… Take a half-yard of fabric (18”) and cut it in half through the middle, and you have a “fat” quarter of 18” x about 22”. Even this cute little dachshund is too tall to fit into a “skinny” fat quarter!
Step 1) Prepare the pattern pieces.
Download and print the dachshund pattern: dachshund_zipper_pencil_pouch_-_111414.pdf
Dachshund Pattern Printing Tips
- Print pages on standard paper.
- Make sure “Auto Rotate and Center” is checked and that “Scaling” is NOT checked. If you have a newer version of Adobe Reader, your options might look like “Fit to Size” or “Actual Size.” If so, be sure to choose “Actual Size.”
- To make sure your pattern is printing at the right size, measure the 1” x 1” test square.
- To connect the pages, trim each sheet along the gray borderline (do NOT cut off the gray border) and match the letters in the corners of the pages.
- Tape the pages together.
- Once the pattern is printed and taped, cut along the black lines.
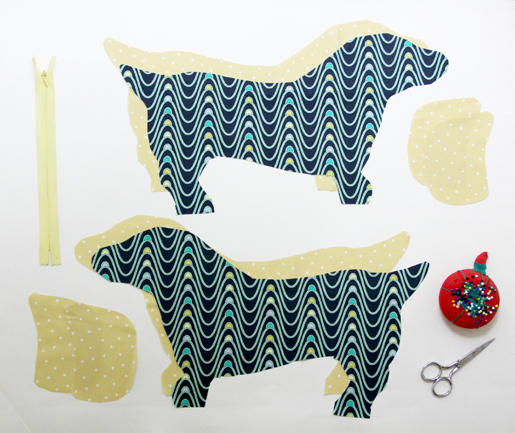
Cut out all pattern pieces.
If desired, fuse lightweight interfacing to the wrong side of the exterior fabric for added sturdiness.
Trace around the pattern and transfer markings from the pattern to your fabric using a wash-away pen or pencil.
Cut out pieces, leaving 1/2”-wide seam allowance outside the drawn lines.Trace pattern onto the wrong side of your fabric.
Tip: Fold fabric, then place and cut pattern pieces on the double layers. This ensures that you will have right and left pieces, as well as ears facing both ways.
Step 2) Make the ears.
Place two ear pieces right sides together, matching the raw edges; pin. Using your standard presser foot and a straight stitch, sew around the ears along the drawn lines, leaving the top of the ear open.
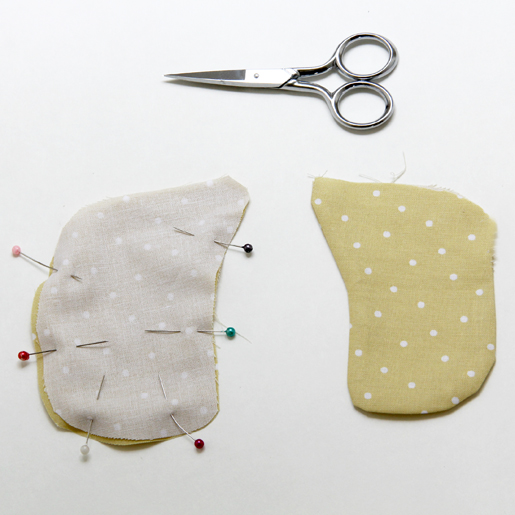
Clip seam allowances, turn ear right side out, and press.
Repeat for the remaining ear pieces.
Pin the ears to the dachshund head pieces, positioning them between the two black dots.
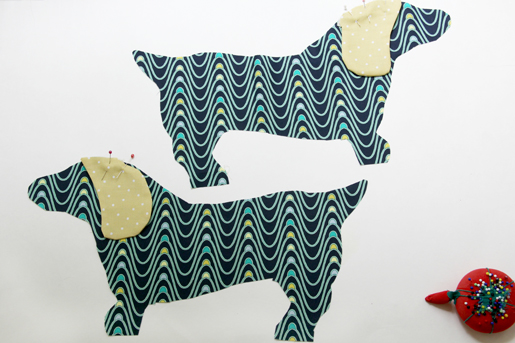
Baste ears in place to secure them.
Tip: A basting stitch is a long (5 mm) straight stitch used to temporarily hold layers of fabric in place; the long stitches are easy to remove when they’re no longer needed.
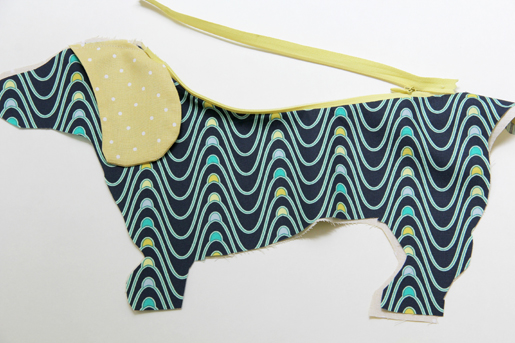
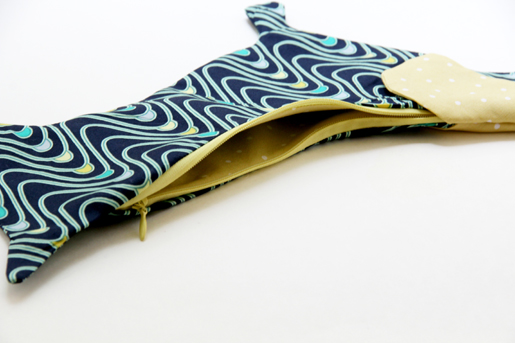
Step 3) Install the zipper
Turn your zipper so the teeth and pull are face down. Place it along the top of the dachshund exterior fabric piece, with the bottom of the zipper at the “x” indicated on the pattern piece. Pin in place.
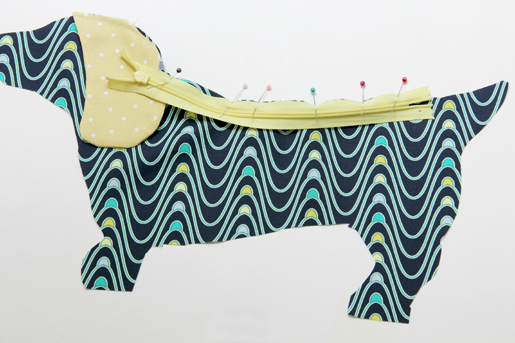
Attach a zipper foot to your sewing machine and adjust the needle position to the far left or far right as needed.
Using the zipper foot, baste the zipper foot in place along the “back” of the dachshund.
Note: You are only sewing one side of the zipper at this time. The other half will be sewn in place later.
Place one lining piece right sides together with the exterior fabric piece (the one with the zipper attached), aligning all the raw edges. Pin the lining to the exterior fabric, sandwiching the zipper between them. Adjust placement so both ends of the zipper extend ½ʺ beyond the pattern pieces and are exposed (not sandwiched between the fabric layers).
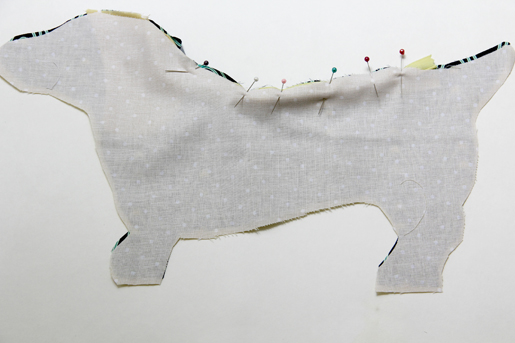
Stitch the lining to the zipper/exterior fabric using a zipper foot and a ½ʺ-wide seam allowance.
Clip seam allowances at the curves, as close to the stitching as possible, including the zipper tape.
Fold the lining and exterior fabric pieces “right side out,” exposing the zipper. Press.
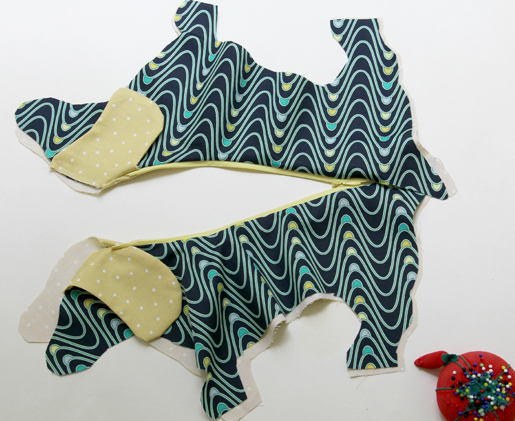
Repeat for the second side of the zipper using the remaining exterior and lining fabric pieces.

The zipper should now be properly installed. Check to make sure it lines up on both sides; fix if needed.
Step 4) Complete the pouch assembly.
Unzip the zipper about halfway. This is very important, as you will turn the fabric through this opening later.
Place the two exterior fabric pieces right sides together, and the lining pieces right sides together, matching all edges.
Pin, leaving the “underbelly” of the lining unpinned.
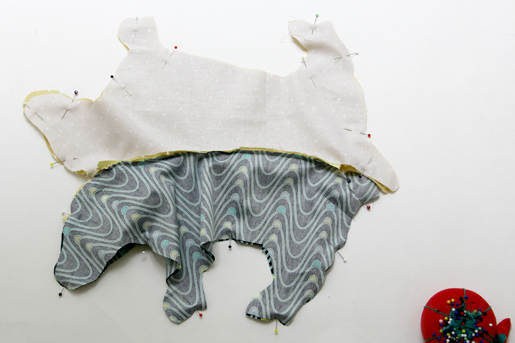
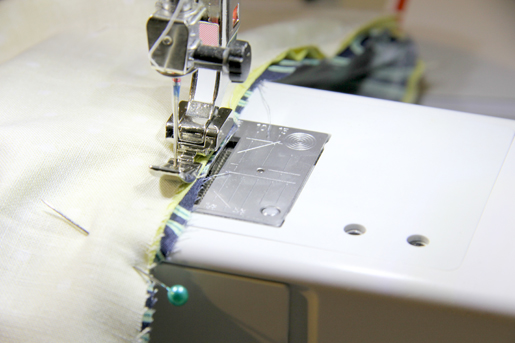
Sew around the outer edges using the standard presser foot. When you reach the point where the lining and exterior fabric join, simply sew directly over the zipper about ½ʺ from the zipper edge in a small straight line.
Clip seam allowances all around the outer edges, as close to the stitching as possible.
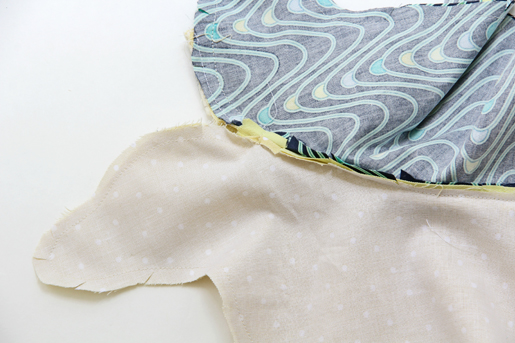
Turn right side out through the zipper opening. Using a point turner or other blunt, pointy object, push out all corners carefully. Press.
Whipstitch the bottom of the lining closed.
Push the lining to the inside of the pouch, once again using a point turner to push the feet, head, and tail parts into place inside the pouch.
Press. You’re finished!

For more projects visit Jessica at her blog, The Sewing Rabbit, at mesewcrazy.com.


6 comments on “Dachshund Pencil Case”
This is adorable and I am going to make this for my 4 grandchildren. However, if I need to cut 1/2″ outside of the lines, why don’t you include that in the pattern? I am no having to toss out a yard of fabric because I followed the pattern before I realized about that 1/2″. No fabric stores where I live so now I have to wait for it to be delivered and that’s throwing off my timing.