Decorative Stitching with the BERNINA Tailor Tack Foot
Sandy Fitzpatrick of Hissyfitz Designs shares her decorative stitching technique with the BERNINA Tailor tack foot #7.
Have you ever started to appliqué a project and felt that it needed a little extra something to make it sing? Sometimes we get stuck in a rut with appliqué and continue to use the same stitches, satin stitch or blanket stitch, for the appliqué process. Why not try something new? We have so many wonderful decorative stitches on our machines and they are just sitting there patiently waiting for you to discover how wonderful they can be!
Occasionally, I like to jazz things up a bit by trying some of those stitches. The process is the same as any other fusible machine appliqué. Once you have your pattern pieces fused in place, simply stitch along the edge of your appliqué piece with something a little more fun and exciting. When you are ready to start your stitching, be sure to use a foot that allows you clear visibility. On my BERNINA sewing machine, there are a couple of feet that I love to use.
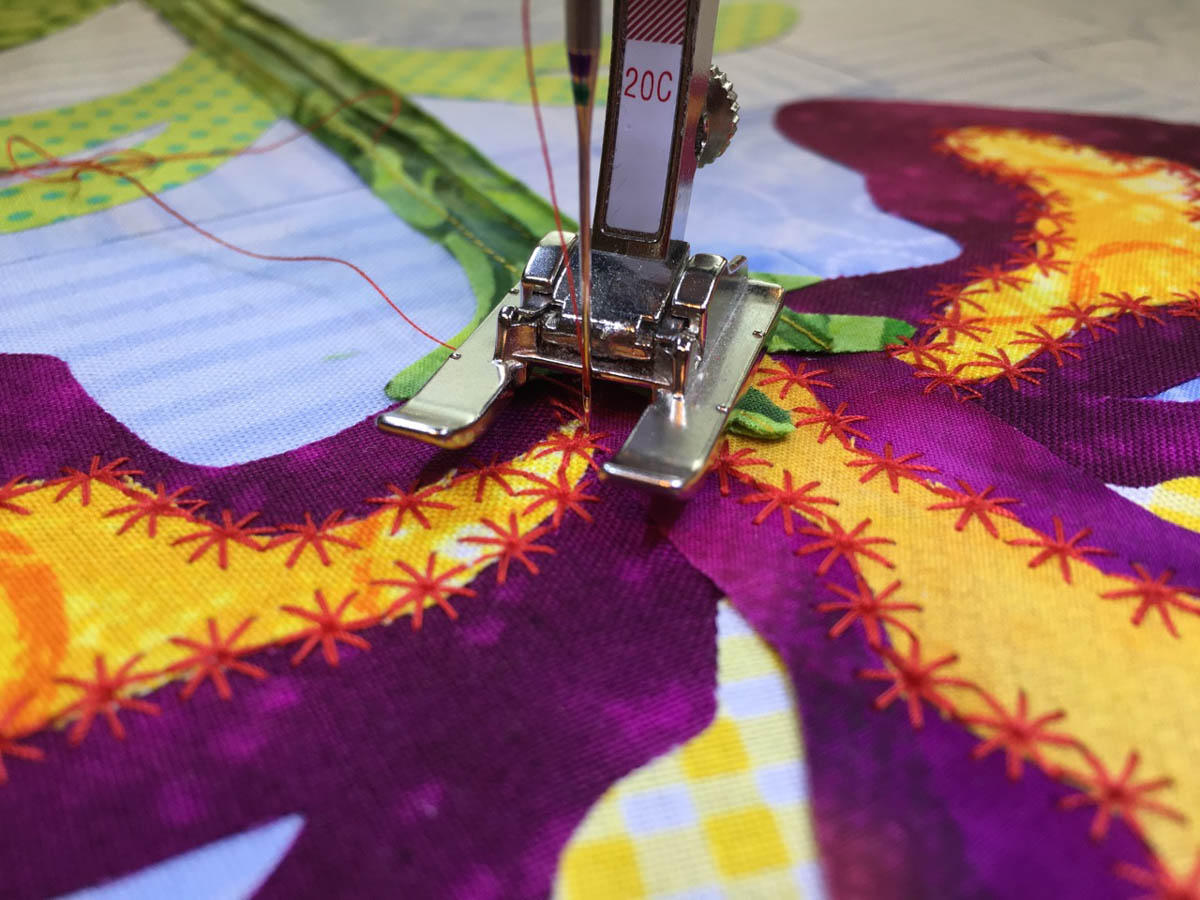
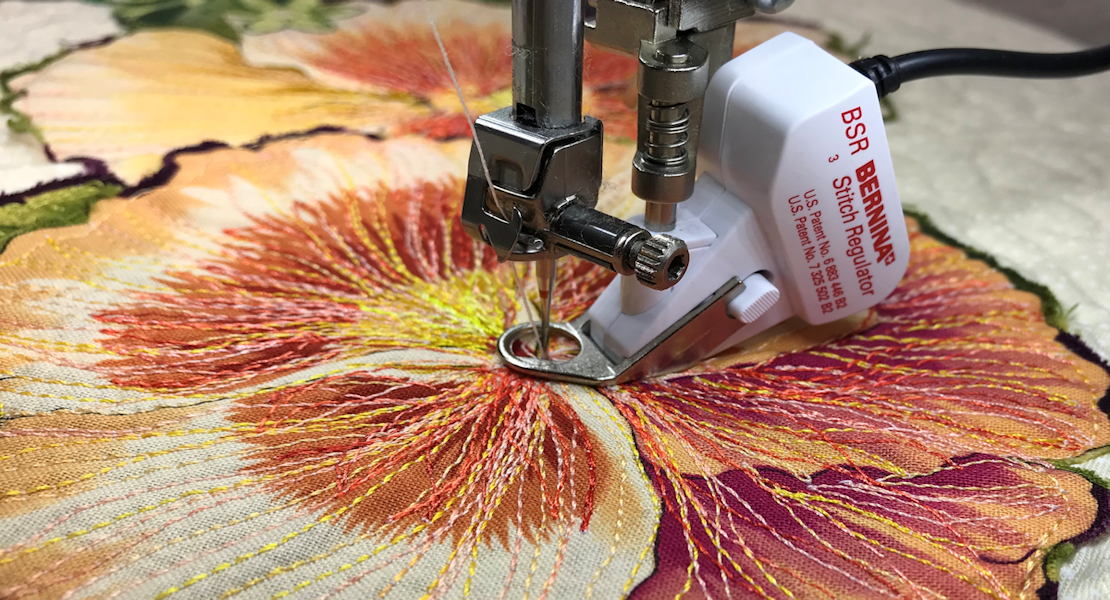
The BERNINA Open embroidery foot #20 is usually my “go to” foot because the view of my stitches is totally clear. When you are doing any type of appliqué you want to be able to see your stitches without any obstruction. Especially, when you are using a decorative stitch, you want to be able to see exactly where your needle is coming down for the next stitch so that you can turn a corner or follow a curve and still have your stitches looking the best that they can be.
Before you jump right into your project, I’d suggest testing out the stitches you want to try on some scrap fabric so that you can get an idea of the size and exactly how that particular stitch will look. Maybe you would like to change the length or width of a particular stitch. By doing this “practice stitching” on a scrap you will be able to decide exactly how you want the stitches to look. Most of the time, I simply use the default setting on these decorative stitches but there may be an occasion where I need to tweak them slightly.
In order to guarantee successful looking decorative stitches, it is a good idea to use a light-weight stabilizer behind your fabric. This will ensure that your fabric remains flat and doesn’t pucker or distort with the large amount of stitches.
Once you have decided on the stitches you want to use, dive right in. For a little extra fun you can also use a thread color which contrasts with the fabrics you are using.
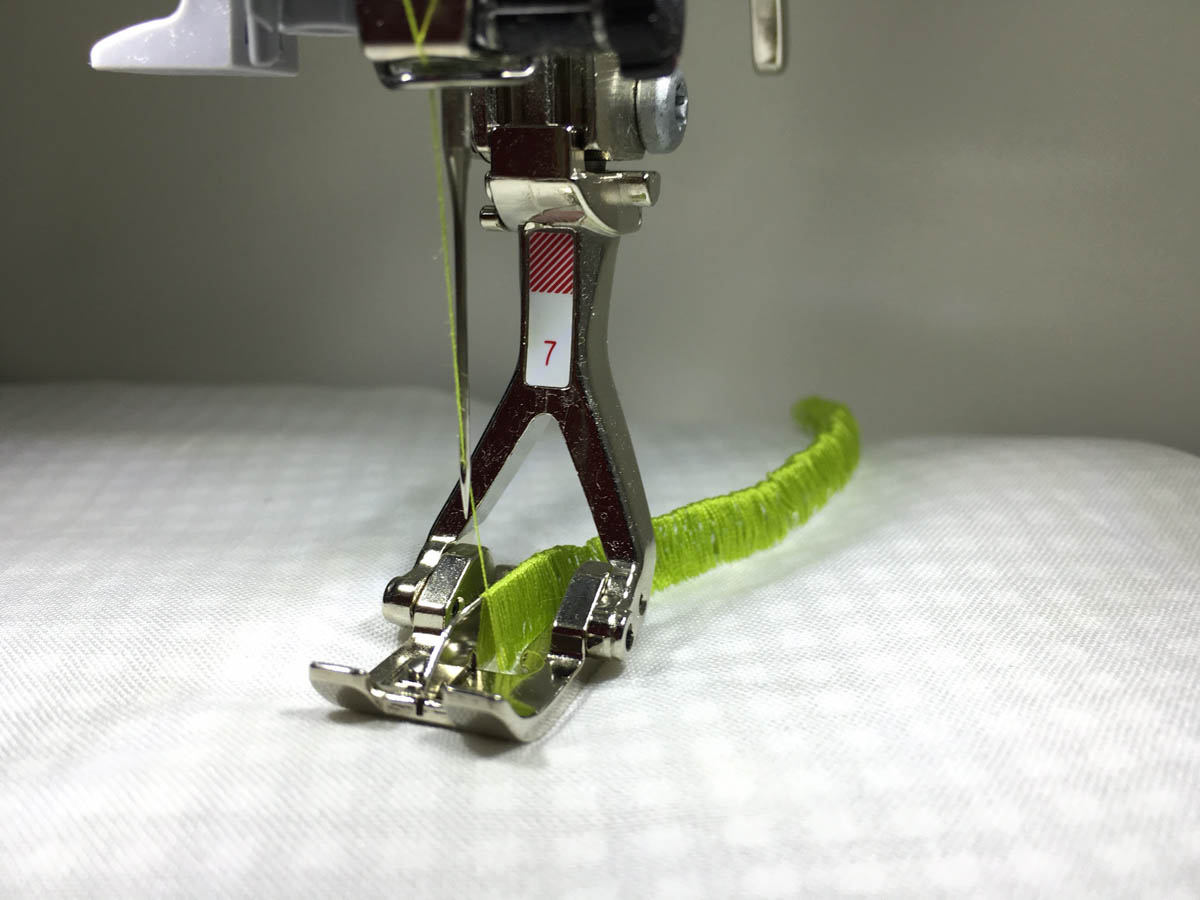
Now, how about amping it up just a little more? You can use your BERNINA Tailor tack foot #7 to add even more interest and dimension.
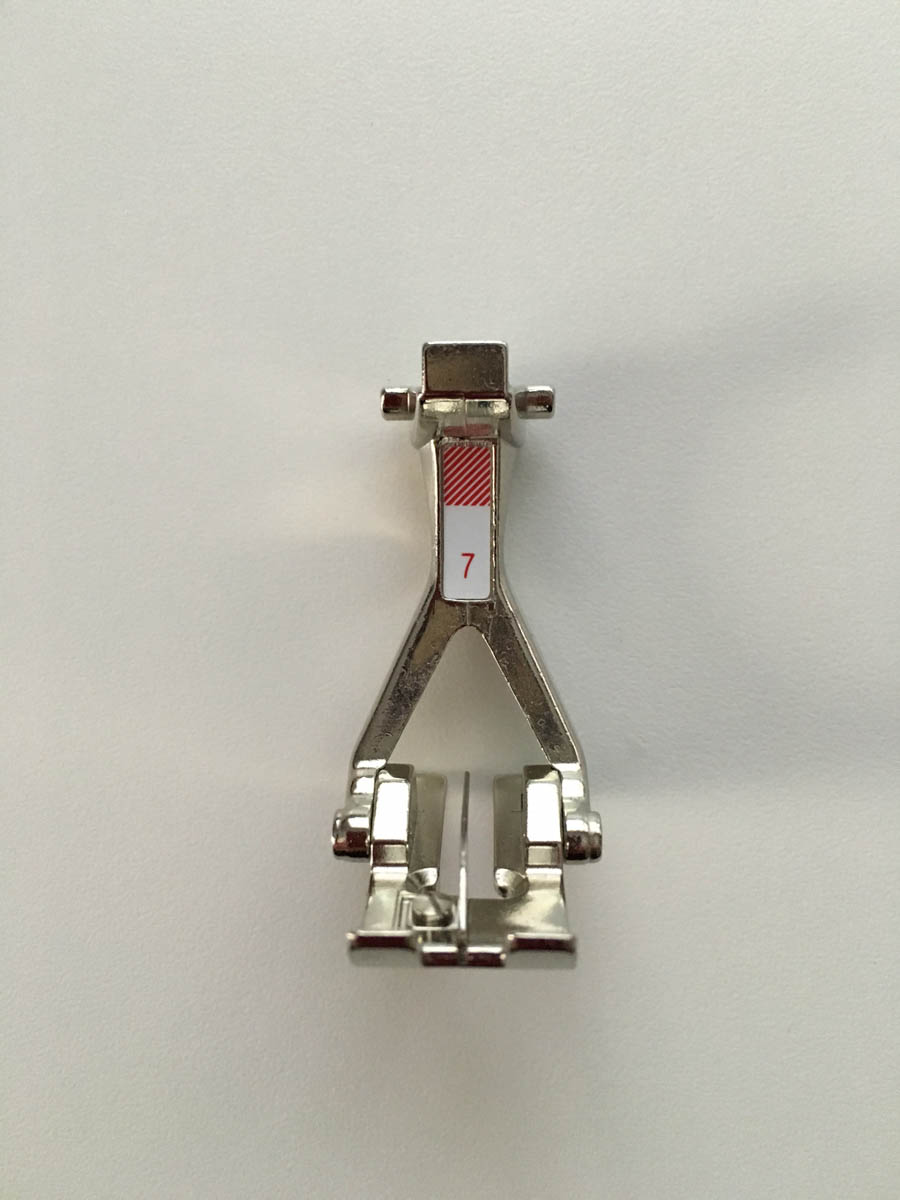
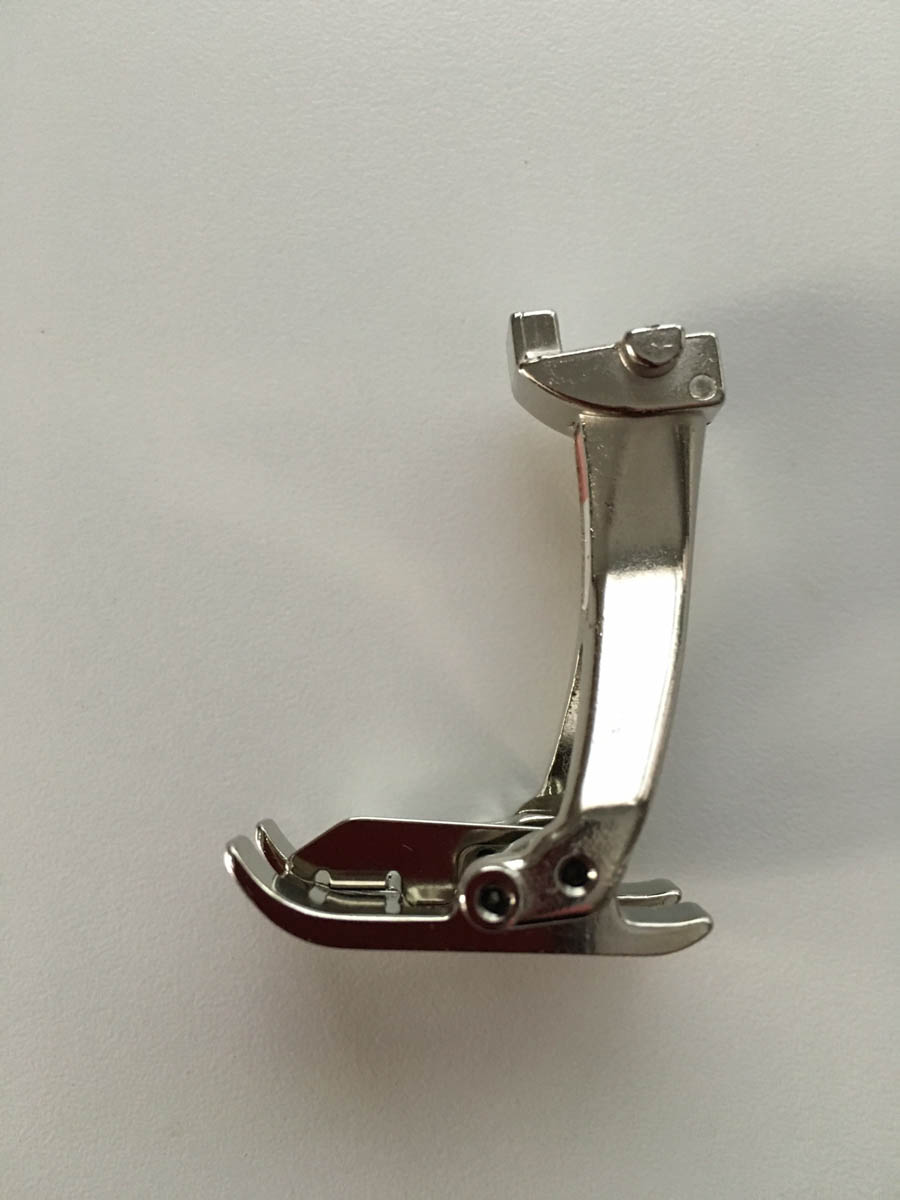
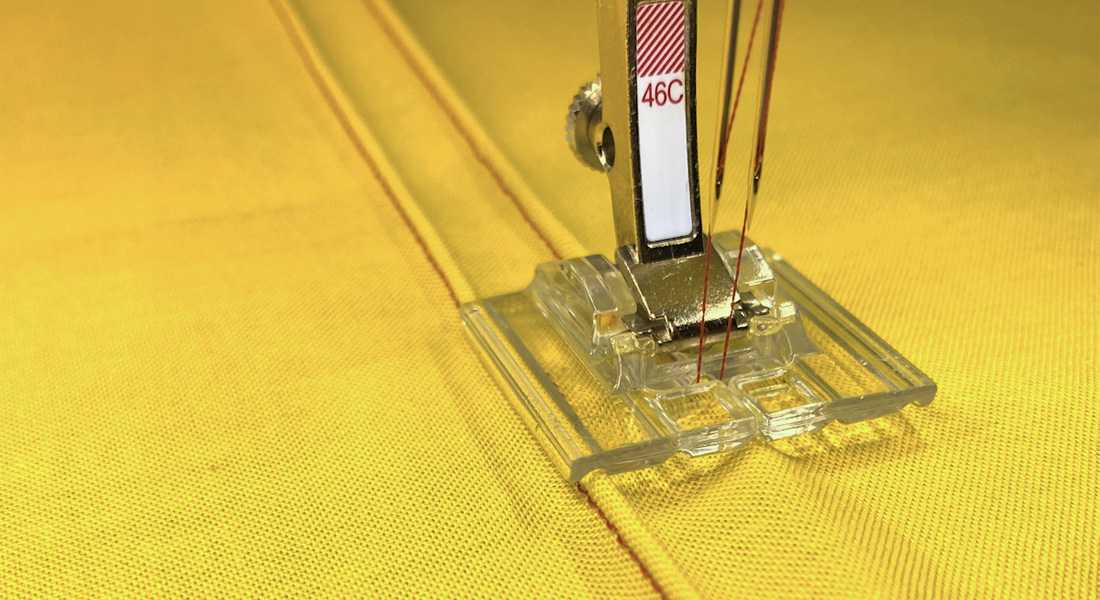
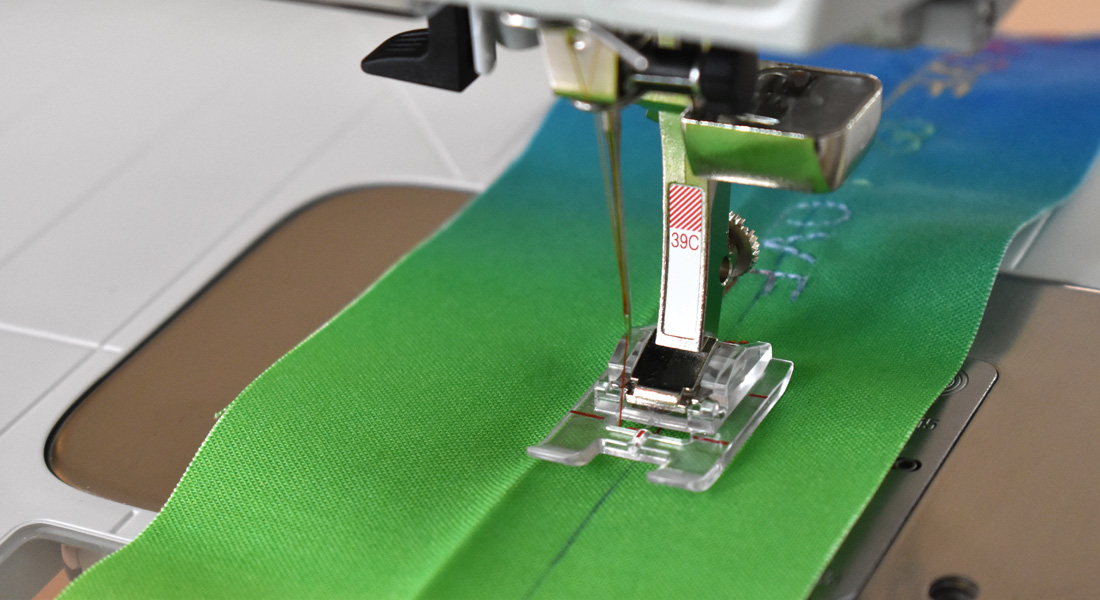
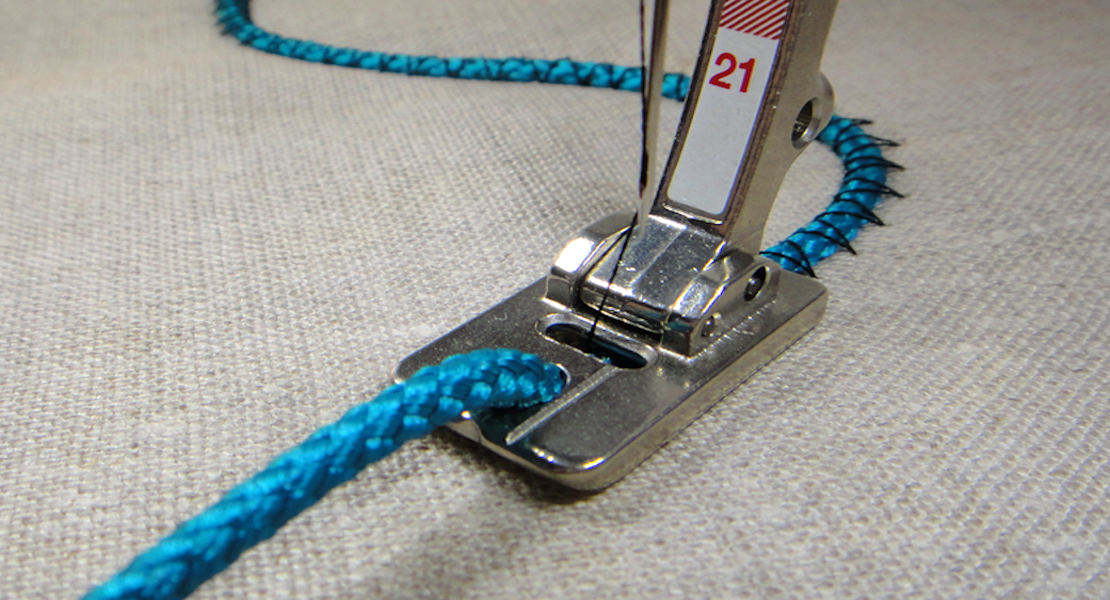
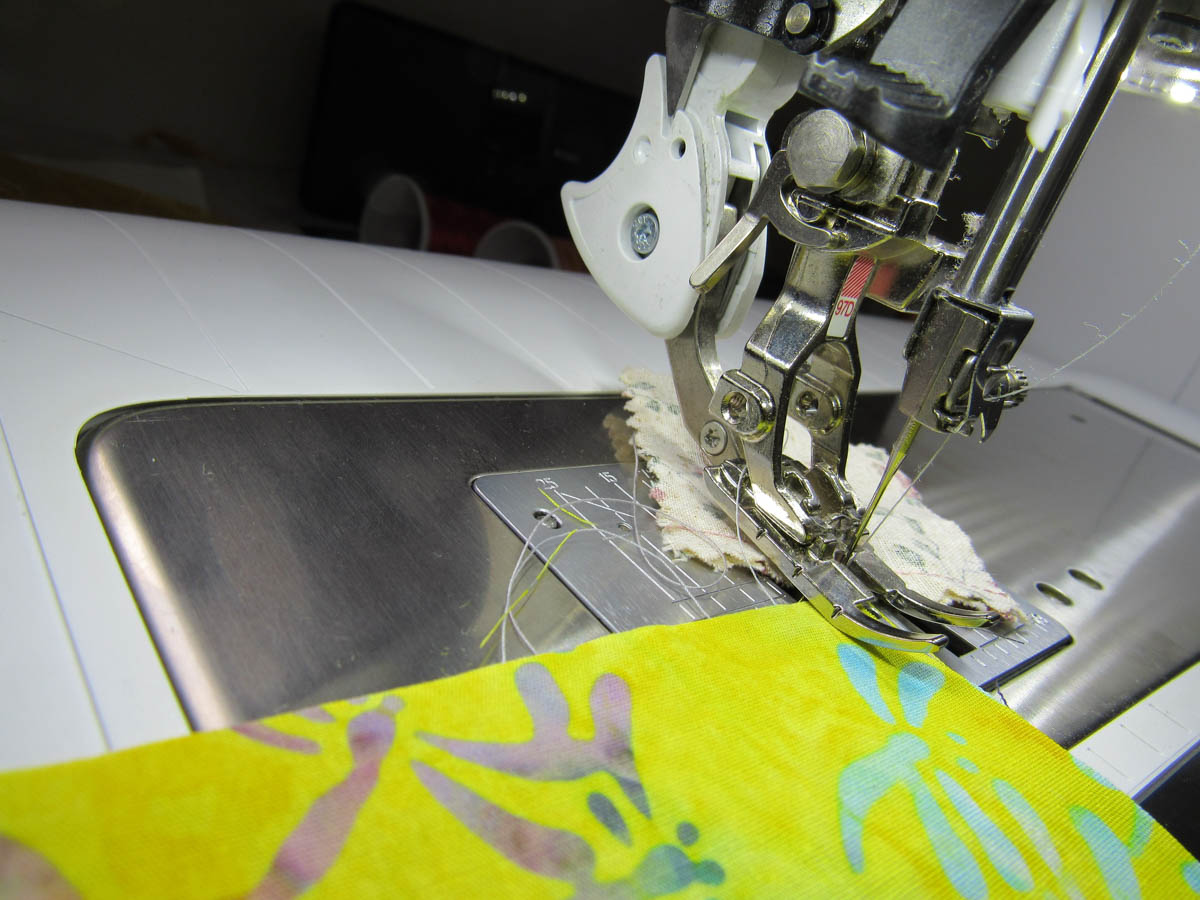
You can see from these photos that the BERNINA Tailor tack Foot has a ¼ inch metal ridge that runs down the middle of the foot. For people that actually do tailoring, this allows you to mark your fabric during clothing construction so that you know where to place darts, pockets, etc. By stitching a couple of zigzag stitches and then clipping the thread, these stitches are easily removed during the clothing construction process.
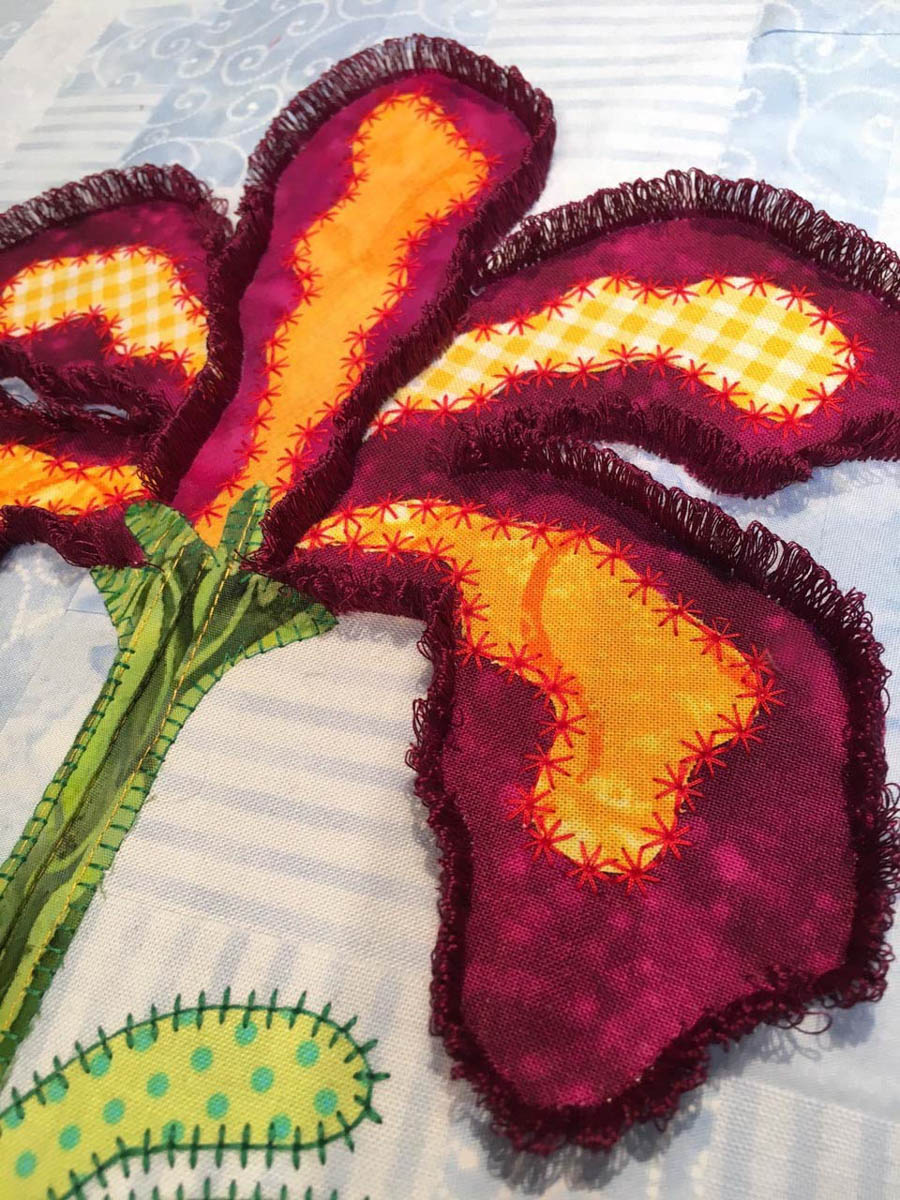
However, our goal here is to leave the stitches in and create some great dimensional fringe. There are a couple of things we have to do to make this happen and to make sure that the stitches don’t pull out easily when we are finished with the project.
First of all, since we will be using a zigzag stitch, which is basically a satin stitch, we need to have some type of stabilizer behind the fabric to keep the stitches from tunneling. In this sample, I’ve used Thermore by Hobbs, which is a very thin, light-weight polyester batting.
Now, choose whatever gorgeous thread you want to use. I’ve used Aurifil thread for this project.
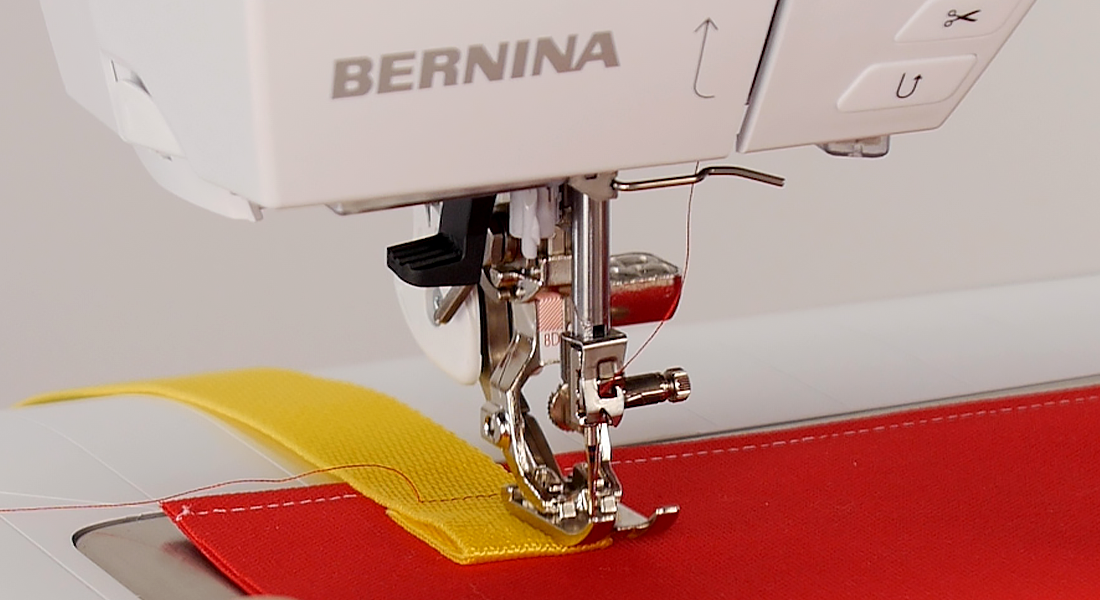
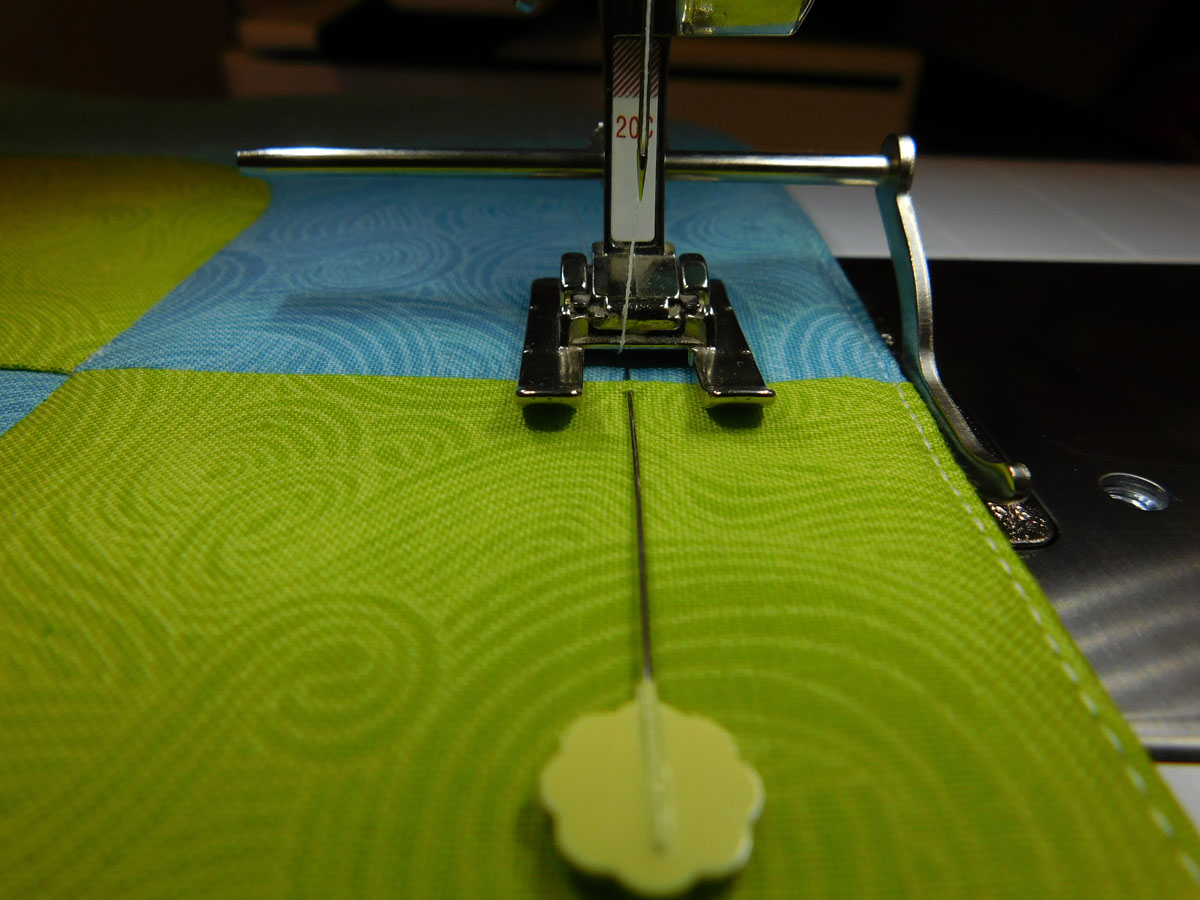
When setting up your machine for stitching using the BERNINA Tailor tuck foot #7, it is important to remember to use a zigzag stitch to create the fringe. However, I do like to secure the stitches at the beginning and the end of stitching with a straight stitch at a length of about .5 or in the case of my BERNINA 380 the length will be towards the bottom of the stitch length indicator, where the four little lines are.
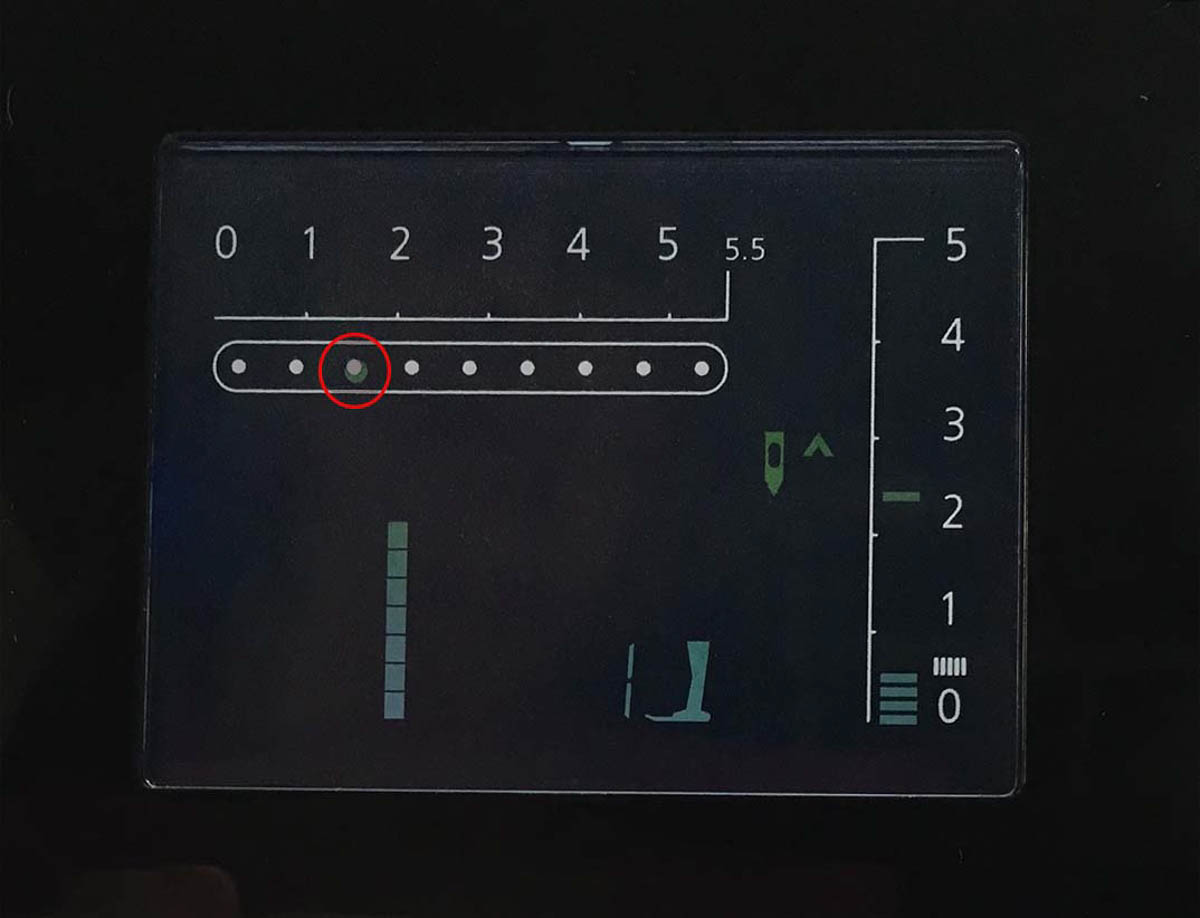
In order to make this work, choose stitch number one (straight stitch) and move your needle position two steps to the left of center so that you don’t run the risk of breaking your needle. If you leave your needle position in the center, you will certainly be swearing at me around this point. You can see from the photo that I have the needle position at two steps left of center as indicated by the red circle and the stitch length has been shortened to around .5mm. Take about five or six stitches to secure your thread.
Next, choose stitch number two (zigzag stitch). Stitch width of 3mm and stitch length at around .5mm or just slightly less.

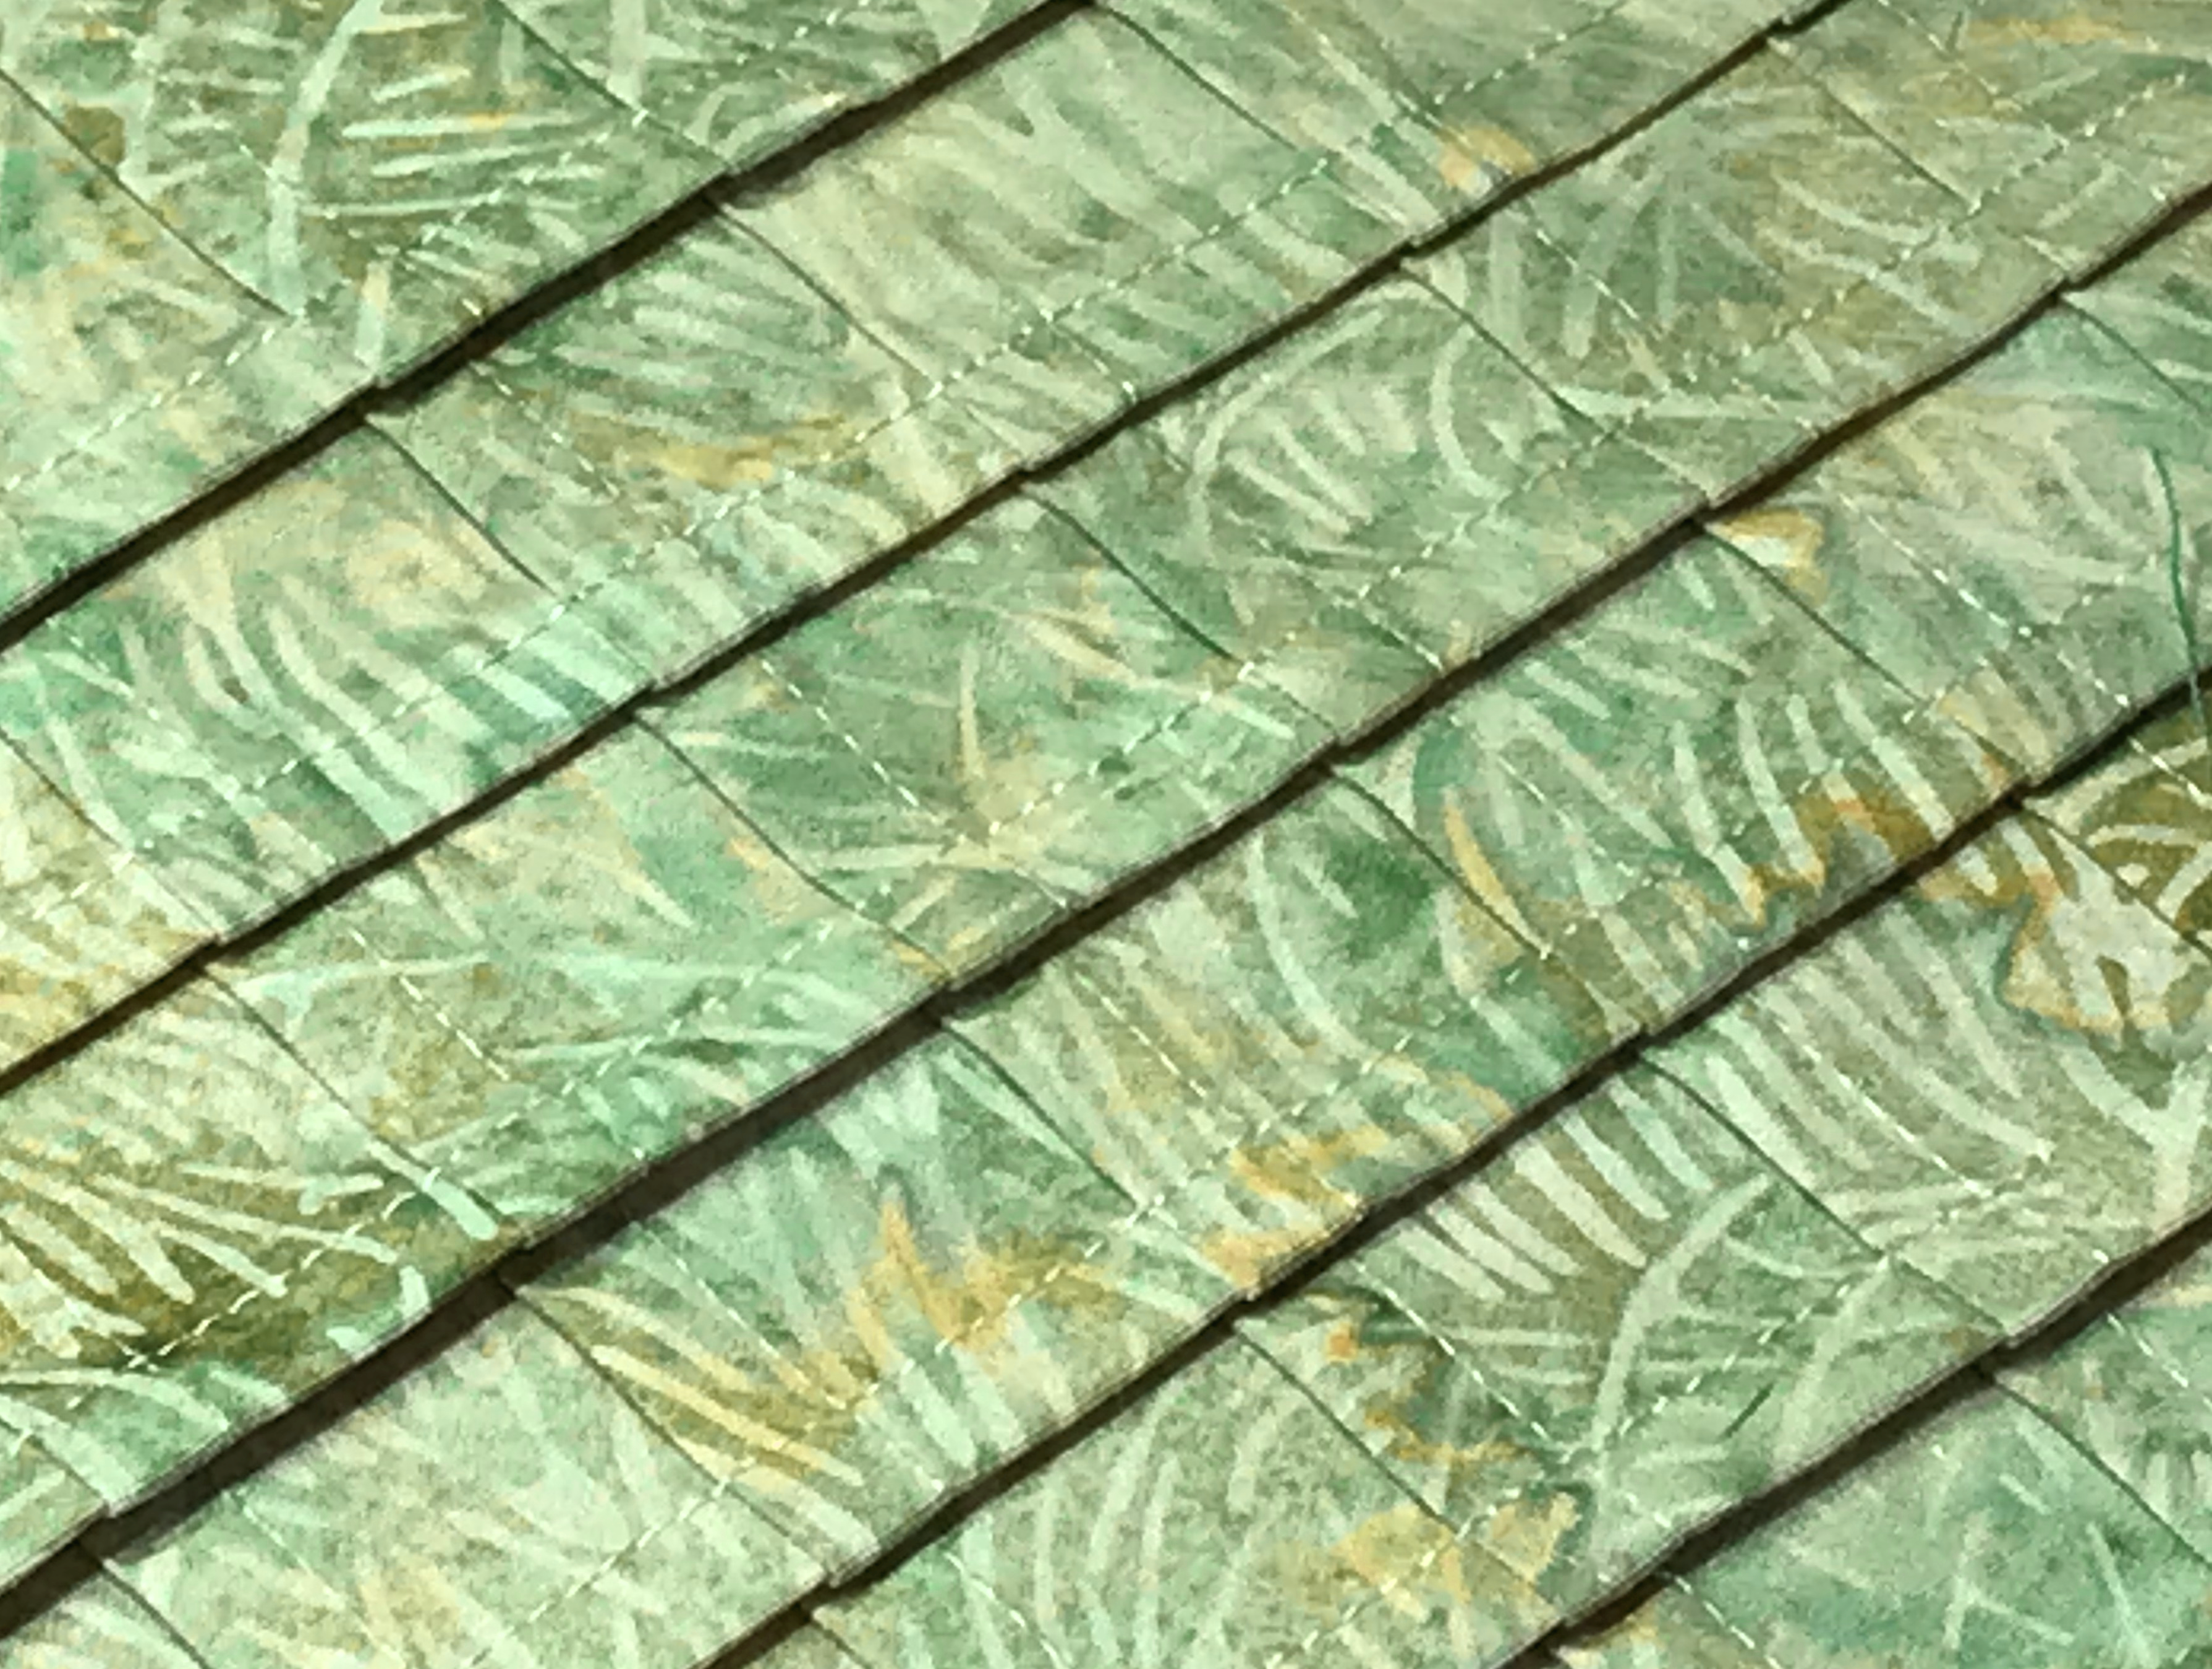
Begin your zigzag stitching. You will notice that as you begin your stitching, the loops of thread will form over the metal ridge and slide off the back as you continue stitching. Carefully make your way around your design.

When you are ready to finish up your row of stitching, secure your stitches at the end by reverting back to your straight stitch with the needle position moved two spaces left of center and a shortened stitch length. If you are using a BERNINA sewing machine, your machine has temporary altered stitch memory and your settings will still be as you previously set them.
After your stitches have been secured, carefully slide the remaining zigzag stitches off of the metal ridge and cut your thread. Take your thread tails to the back of your project by threading them through a hand sewing needle and pulling them to the back. Tie a double knot with the thread tail from your bobbin thread.
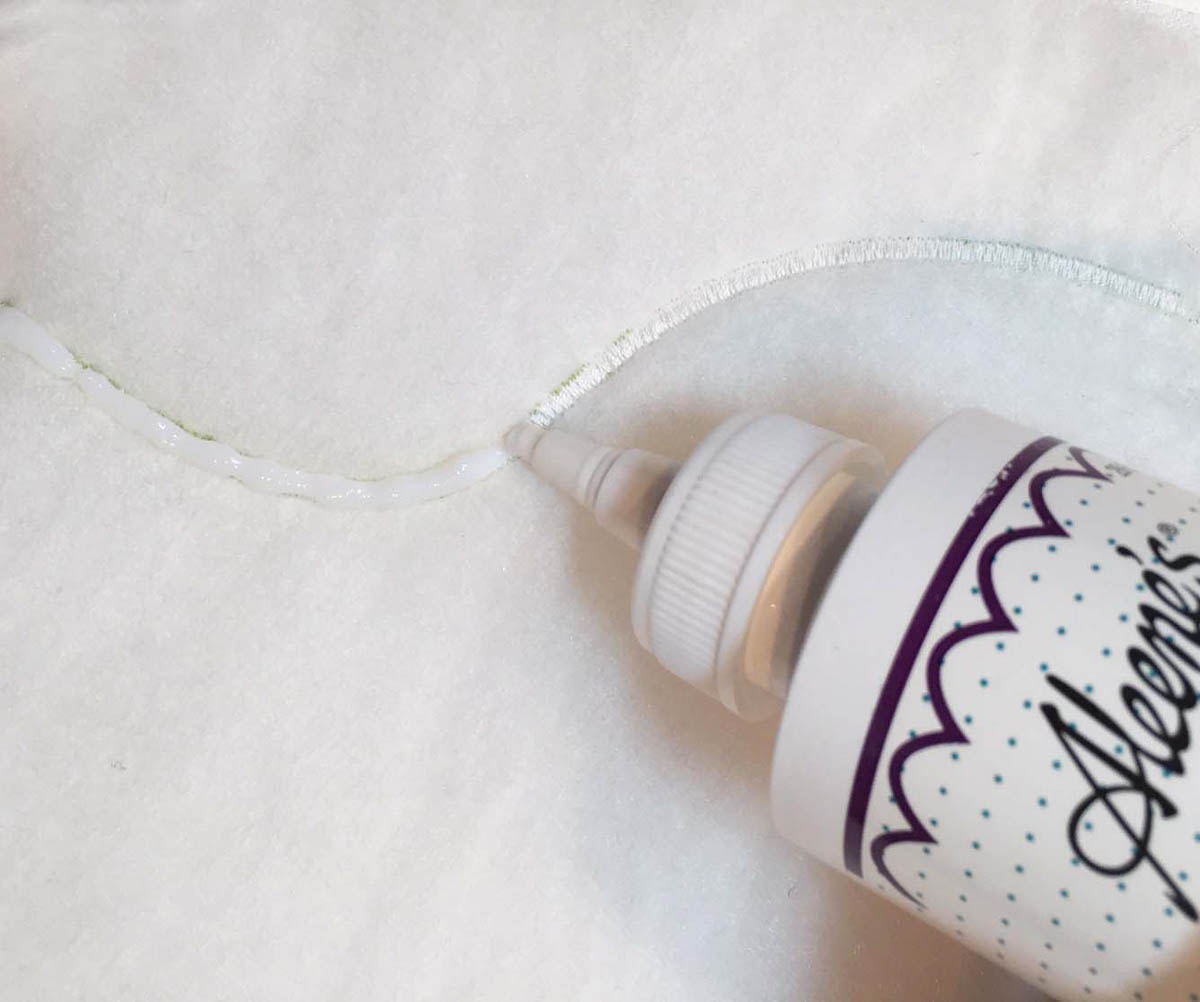
We’re not “out of the woods” yet! If you were to leave your stitches as they are now you run the risk of them tearing out if they should snag on something. To make sure that your stitches stay secure, run a bead of glue along the back of your zigzag stitching line and let it dry. I use Aleene’s OK to Wash-It glue because it dries clear, soft, and remains flexible.
Keep in mind that this stitch may still snag if it is handled roughly, so you may want to use this in something that won’t be handled a lot.
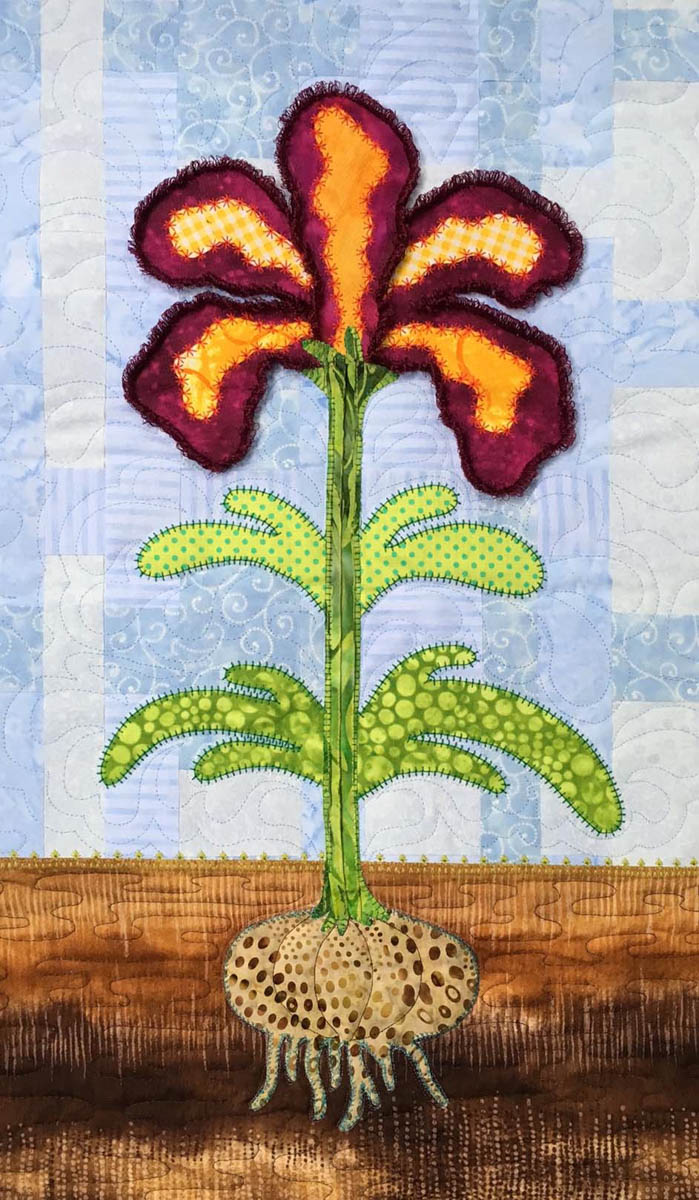
I’m sure you can find some great imaginative uses for this unique stitch and hope that you have some fun trying it in your future projects.
What you might also like


8 comments on “Decorative Stitching with the BERNINA Tailor Tack Foot”
-
-
This is really fabulous! Love it!
-
I bought this foot today. Thanks for this great idea
-
That is super cool, when I grow up and start seriously quilting I wanna do this!
-
lovely! I can hardly wait to try it.
-
Sandy this is such a clever idea! I love it <3
-
I LOVE THIS FOOT! I never thought about using it for FRINGE!!! Thanks!!!
-
Awesome! My Bernina is an 1130 and still sewing beautiful stitches. Great tutorial as I continue to learn how to use the presser feet over and over again.
Leave a Reply
You must be logged in to post a comment.

Very cool and creative!!!!