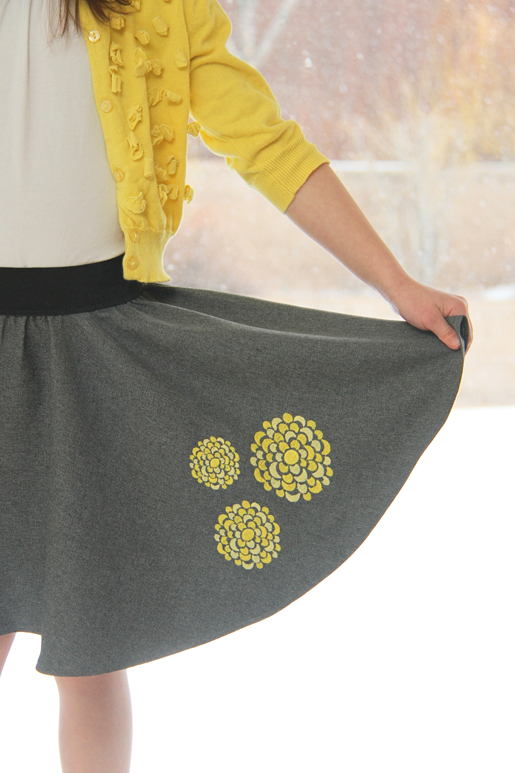
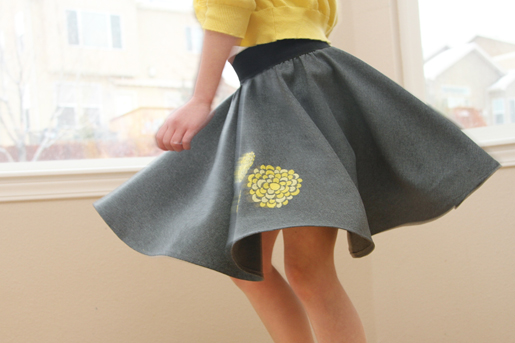
DIY Retro-Inspired Embroidered Circle Skirt
To make a fashion classic for the next generation, an embroidered circle skirt:
- Start with a simple, classic shape: The Circle.
- Add a touch of floral embroidery.
- Put a fun new spin on a junior fashion.
…and your little one is ready for the runway.
Materials to sew an embroidered circle skirt
- Approximately 2/3 yard of 60ʺ-wide fabric, depending on the size of the outer circle
- Approximately 2/3 yard of 1-1/2ʺ-wide elastic, depending on the size of the inner circle
- Matching thread
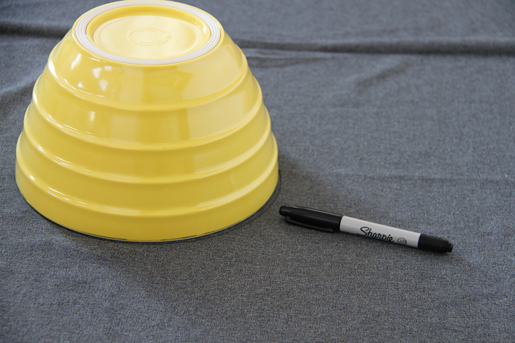
- Circle template or large bowl
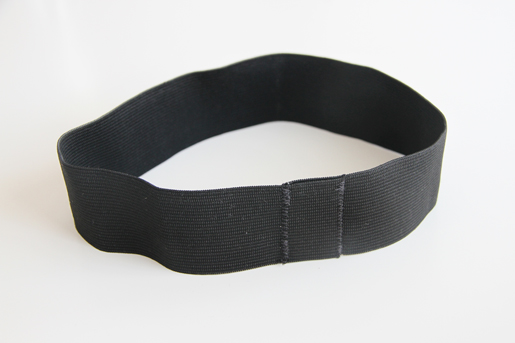
- 1/2 yard of 1-1/2ʺ-wide elastic waistband
- Chalk pencil or fabric marker (a Sharpie was used in the stepby-step instructions so the marks would show in the photos)
- Straight pins
- Rotary cutter and mat (optional)
- All-purpose foot (BERNINA Reverse Pattern Foot #1/1C/1D)
- Zipper foot (BERNINA Zipper Foot #4/4D)
- Serger (optional) for optional embroidery
- Embroidery machine
- Embroidery designs (Dahlias are from swakembroidery.com)
- Tear-away stabilizer
- Embroidery thread in desired colors
- 505 temporary fabric adhesive spray
Step one) Determine the dimensions for your skirt.
Measure from where you want the elastic waistband to sit on your waist (or your subject’s waist), down to the length you’d like the finished skirt to be. Subtract ½ʺ from that number. This is your skirt length measurement. Write it down.
Measure your waist (or your subject’s waist). Add 2ʺ to 4ʺ to that measurement (2ʺ for a baby, 3ʺ for a child, 4ʺ for an adult). The added inches are needed so the skirt will be large enough to slide over the hips to put it on. This is your center circle measurement. Write it down.
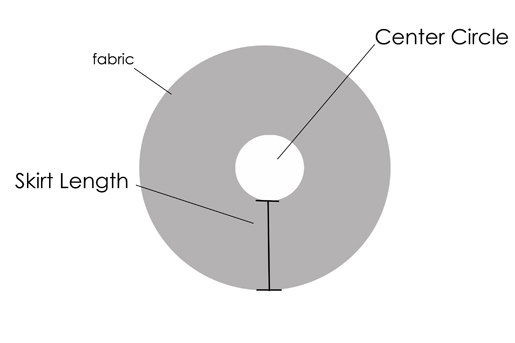
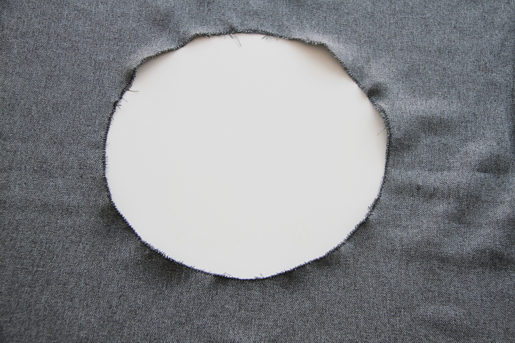
Step two) Trace the skirt outline onto the fabric.
Draw a circle with the same circumference as your center circle measurement to use as a template. If you have a bowl that is the same circumference as your center circle, that will save you some time.
With your fabric right side down, place the bowl (or circle template) on top, making sure there’s enough room all the way around to accommodate your desired skirt length.
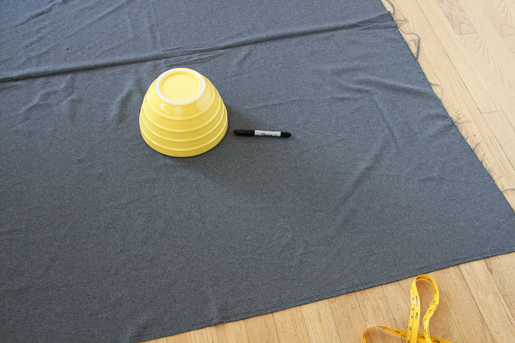
Draw a line around your bowl (or circle template), right onto the fabric.
Measure from the outer edge of your marked circle center, out to the skirt length that you need. Make a mark.
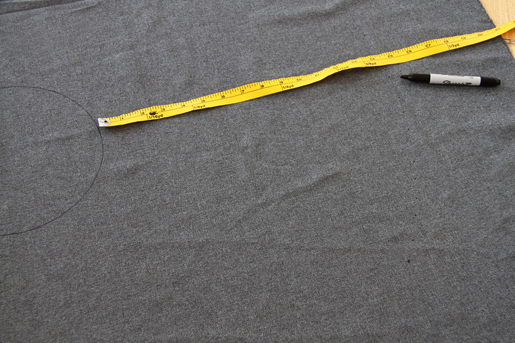
Repeat many times, all the way around the circle, adjusting the measuring tape around the center circle line and making little marks as you go.
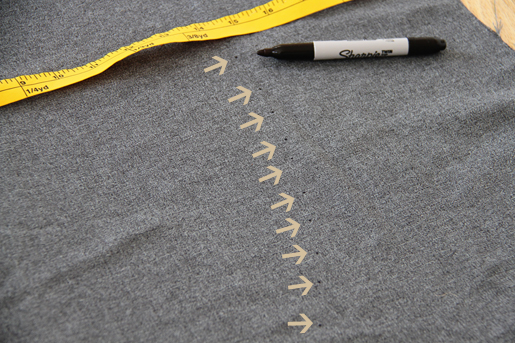
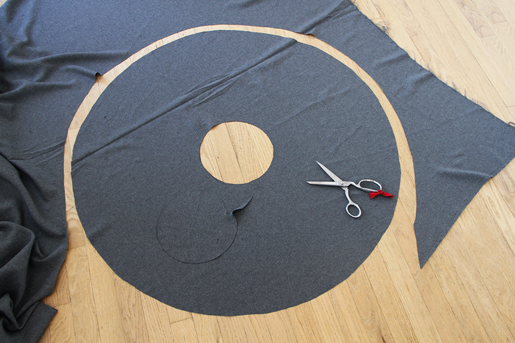
Cut out your circle, connecting all those marks as you go.
Cut out your center circle as well.
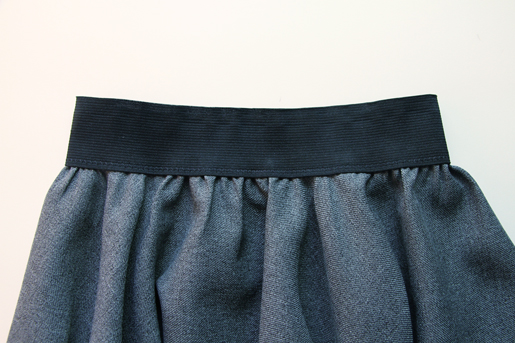
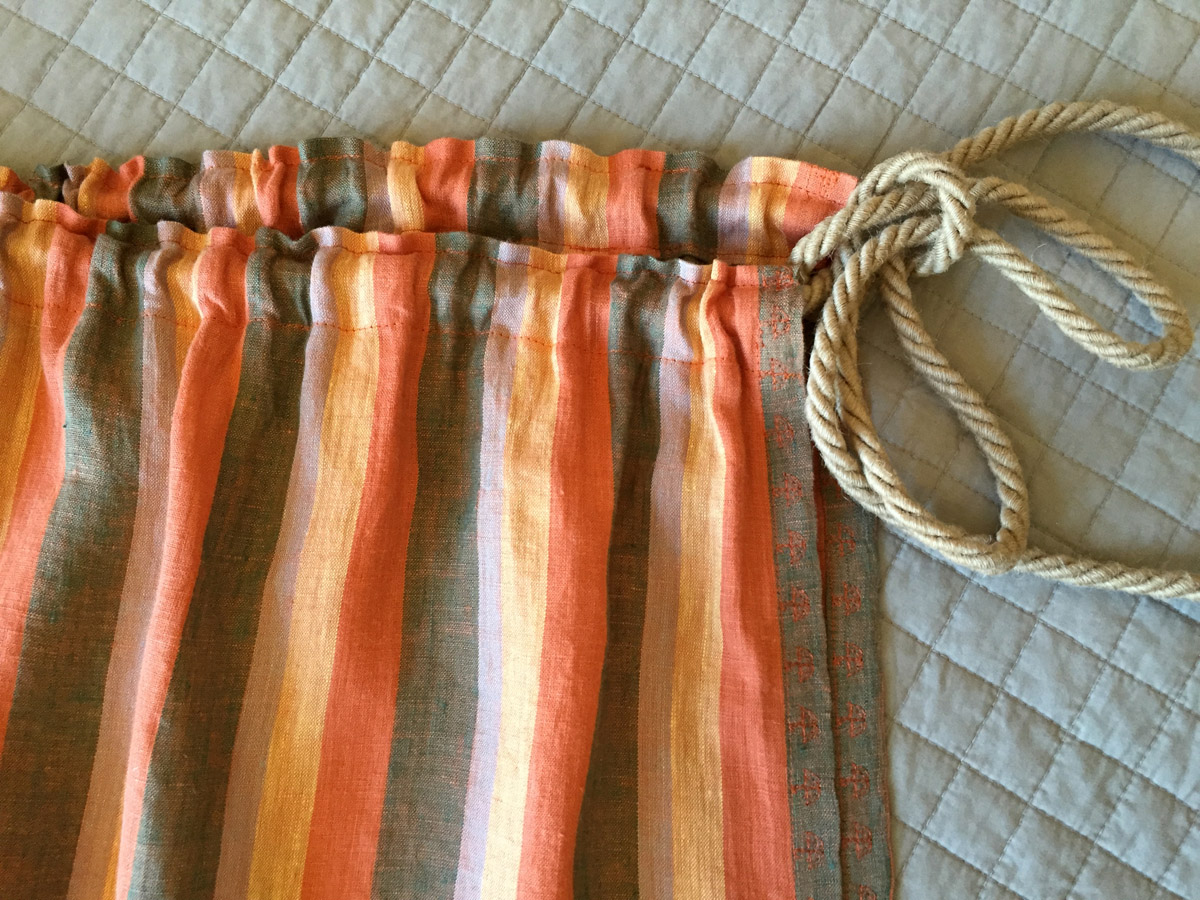
Step three) Make and attach the waistband.
Cut a piece of 1½ʺ-wide elastic the same length as your waist measurement.
Overlap the two ends by 1ʺ and zigzag them together.
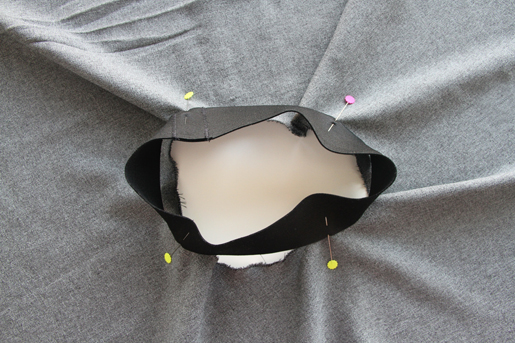
Zigzag or serge around the raw edge of your center circle.
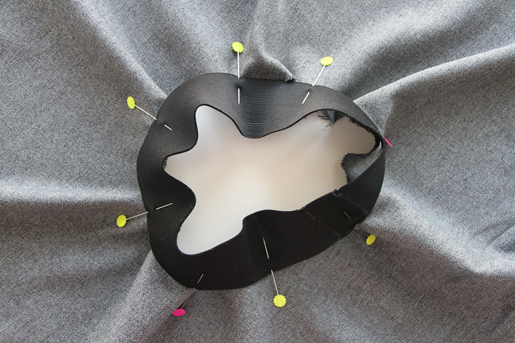
Divide your elastic and center circle into quarters and mark them with pins as shown in the photo.

Match up the pins on the elastic with those around the center circle and pin them together, overlapping the elastic over the outside of the skirt fabric by ½ʺ.
Stretch the elastic between two neighboring pins until it’s the same length as the fabric, and then add another pin in the middle, making sure the elastic is still overlapping the fabric by ½ʺ. When you release the elastic, there will still be puckers of fabric between each pin.
Repeat, adding pins all the way around the center circle.
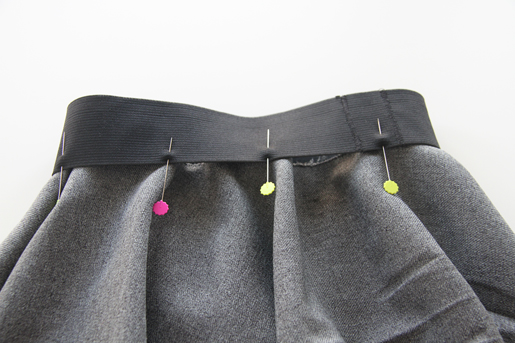
Go around the skirt again, stretching the elastic and adding pins. Do this all around until the pins are close enough for you to comfortably sew the elastic to the skirt.
Using a zigzag stitch (so the elastic will stretch) begin sewing the elastic to the skirt, stitching ⅛ʺ from the edge of the elastic.
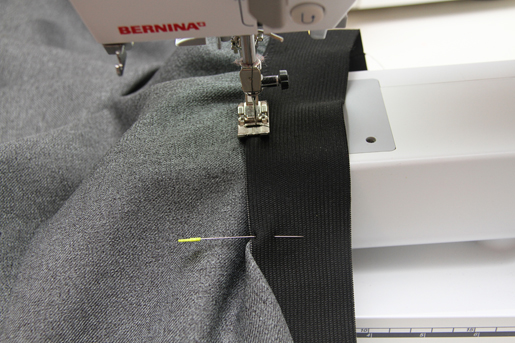
Between each set of pins, hold the elastic in front of and behind the machine needle, and gently pull the elastic until it is stretched to the same length as the fabric beneath it. Hold them with both hands, pulling in opposite directions, slowly stitch the elastic to the fabric. Adjust your grip as needed.

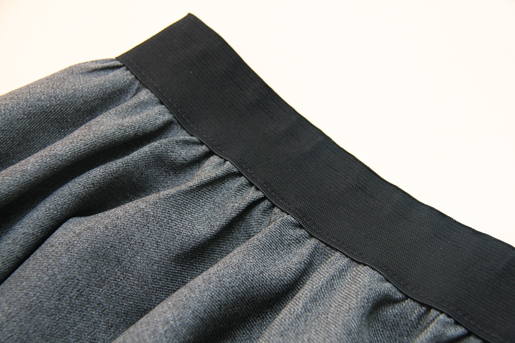
When you’ve made it all the way around the circle, you’ll have a nice elastic waistband at the top of your skirt.
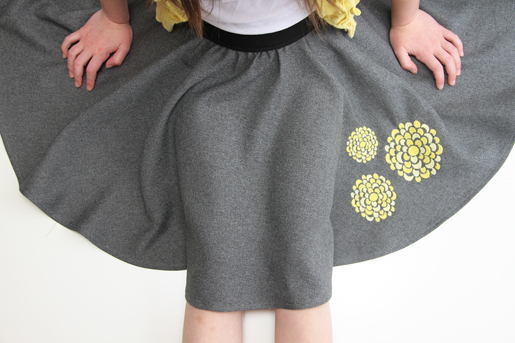
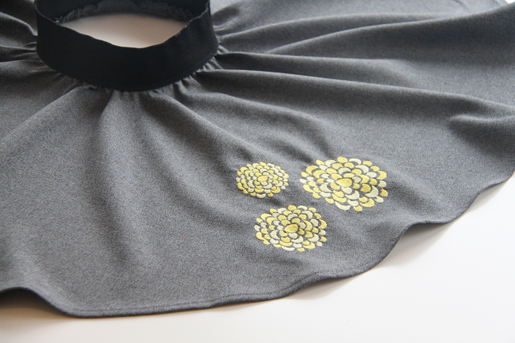
Step four) Add embroidery (or other embellishment)
Tip: If you don’t have an embroidery machine, you can applique a shape or design onto your skirt at this point.
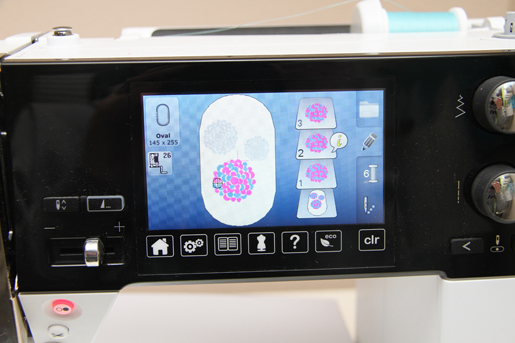
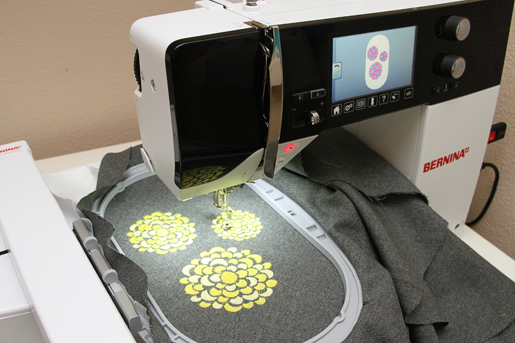
If you have an embroidery machine, decide which design(s) and size(s) you’d like to add to your skirt.
Bond a sheet of tear-away fabric stabilizer to the wrong side of the skirt, right behind where you want to place your design.
To help you visualize the size and placement of your embroidery design, cut out paper shapes in the same measurements as your design and pin them to the skirt.
Tip: If you purchased designs from OESD or BERNINA, you’ll find a PDF of printable paper templates on the collection CD. If your designs didn’t come with printable templates, and you have a computer, download the free Artlink 6 embroidery software at bernina.com, open your designs in the software, and print them to make your own design templates.
Also turn up the bottom edge of the skirt, just to eyeball how it will look with the hem in place.
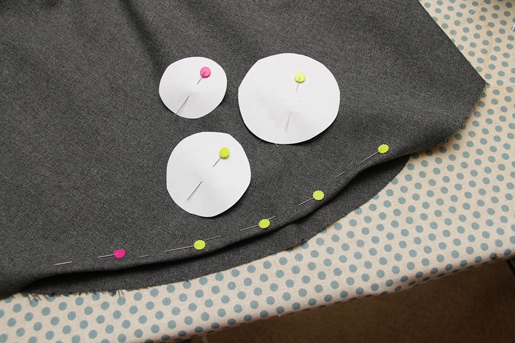
After deciding on your design placement, mark the center of each design.
Remove the pins from the skirt hem and hoop your skirt fabric, making sure the paper templates are inside the hoop.
Remove the pins and paper templates and embroider your designs.
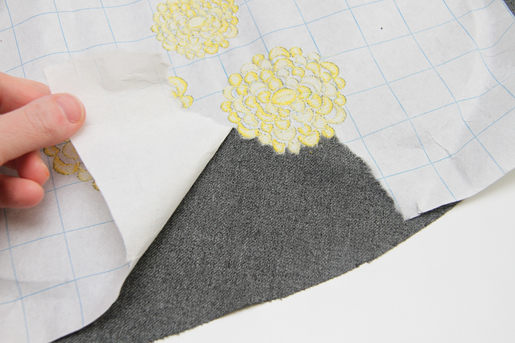
When the embroidery is done, remove the hoop from the embroidery machine.
Remove the skirt from the hoop and gently tear the stabilizer away from the stitches.
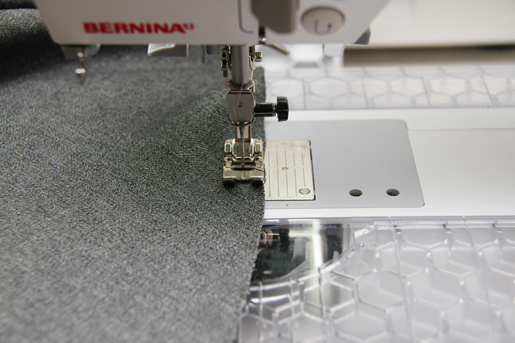
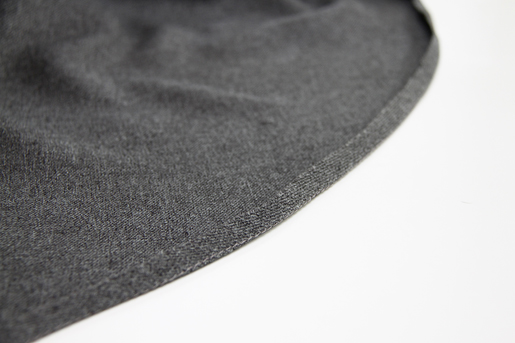
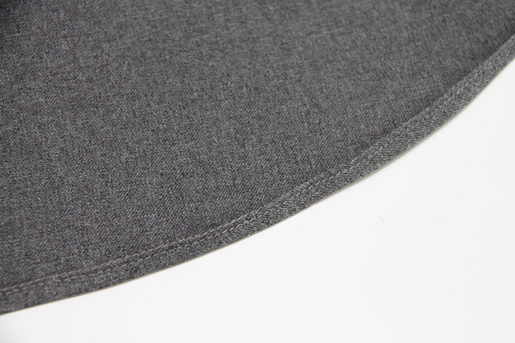
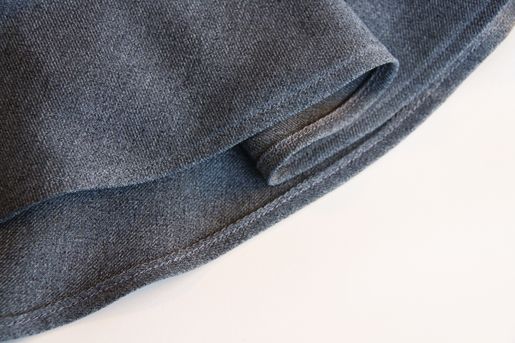
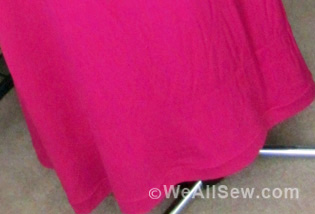
Step five: Hem the lower edge.
Hems can sometimes be tricky along a circle skirt hem. To help with this, sew a line of straight stitch 1/4” from the raw edge at the bottom of the skirt. This line will keep the fabric from stretching, and is a great guide for the next step of the turning hem.
Tip: If you have a serger, you can do this step with an overlock stitch, just barely trimming the edge of the fabric with the knife.
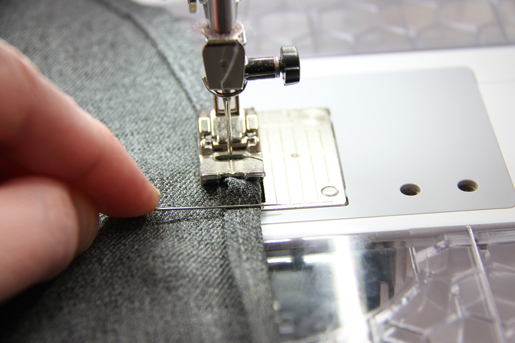
Turn up and press the edge of the hem 1/4ʺ, just beyond the stitched line. See how much easier that is than measuring and turning and pressing all at the same time?
Stitch 1/8ʺ from the edge to hold the folded edge in place. (You may be tempted to skip this step, but it will save you some headache later, so don’t!)

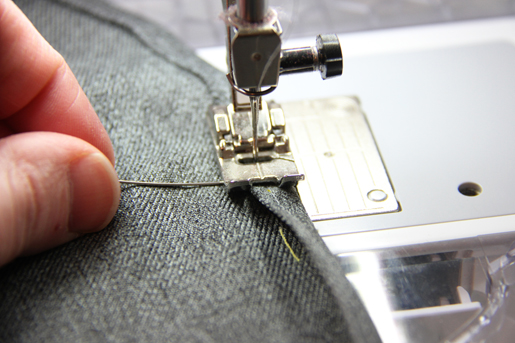
Fold up the bottom edge another 1/4ʺ and then sew this fold in place as well, 1/4ʺ from the outer folded edge.
Now, because the very bottom edge is slightly larger than where you’re sewing it down (because it’s a circle), you may experience some puckering. Or you may not, depending on your fabric. But if you do, it’s okay. Just use a pin to hold down the pucker and help guide it under the needle.
Keep the pin in place as you guide the fabric under the needle. You won’t even notice the pucker from the right side of the fabric, and, most likely, you won’t notice it from the inside, either.
Press your hem flat.
Step six) Finish the skirt.
To flatten the waistline a bit and achieve a more professional finish, steam the fabric right around the waistband, helping the fabric lay a little flatter.
For more projects and tutorials, visit Ashley at www.makeit-loveit.com.


6 comments on “DIY Retro-Inspired Embroidered Circle Skirt”
Thank you for a great pattern and instructions. I can’t wait to try this for my granddaughter. She saw circle skirts at the Cherry Blossom Parade in DC and said, “I want one of those!”