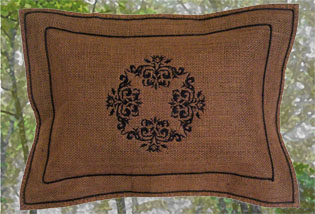
Flange Pillow with Distinctive Edge
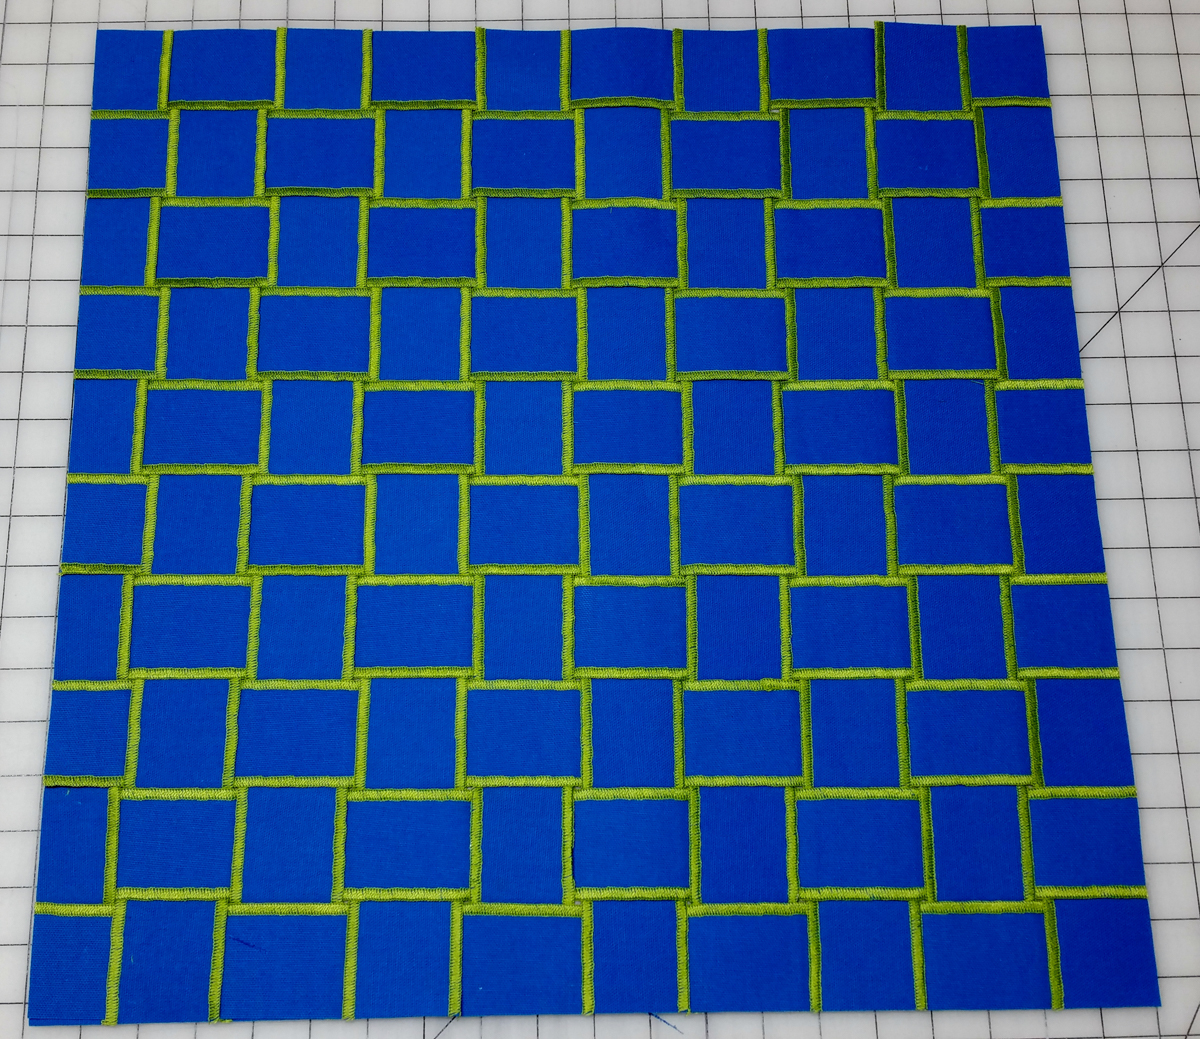
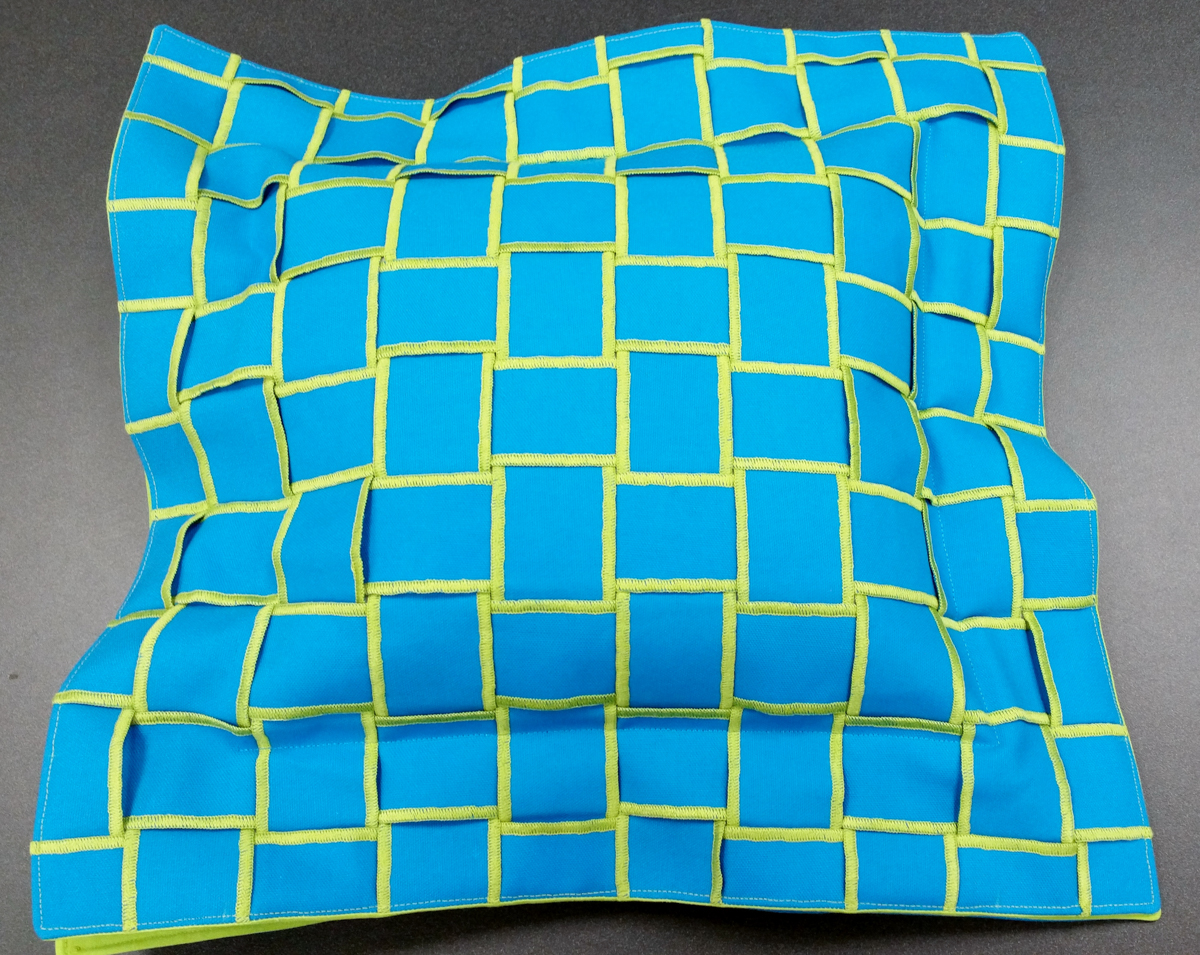
I recently taught an overlocker based class at Sew Expo in Puyallup, WA. Being that my visual design preferences are for lines, colors and textures . . . with practical results, I opted for a decorator pillow where the front is made of woven strips of duck cloth (texture), edged with a thick ( 12 wt. ) cotton thread on an overlocker (more texture!) in a bright color palette. The strips were fused to a fleece to make a panel. The rest was simply following the pattern instructions to complete the double flange pillow.
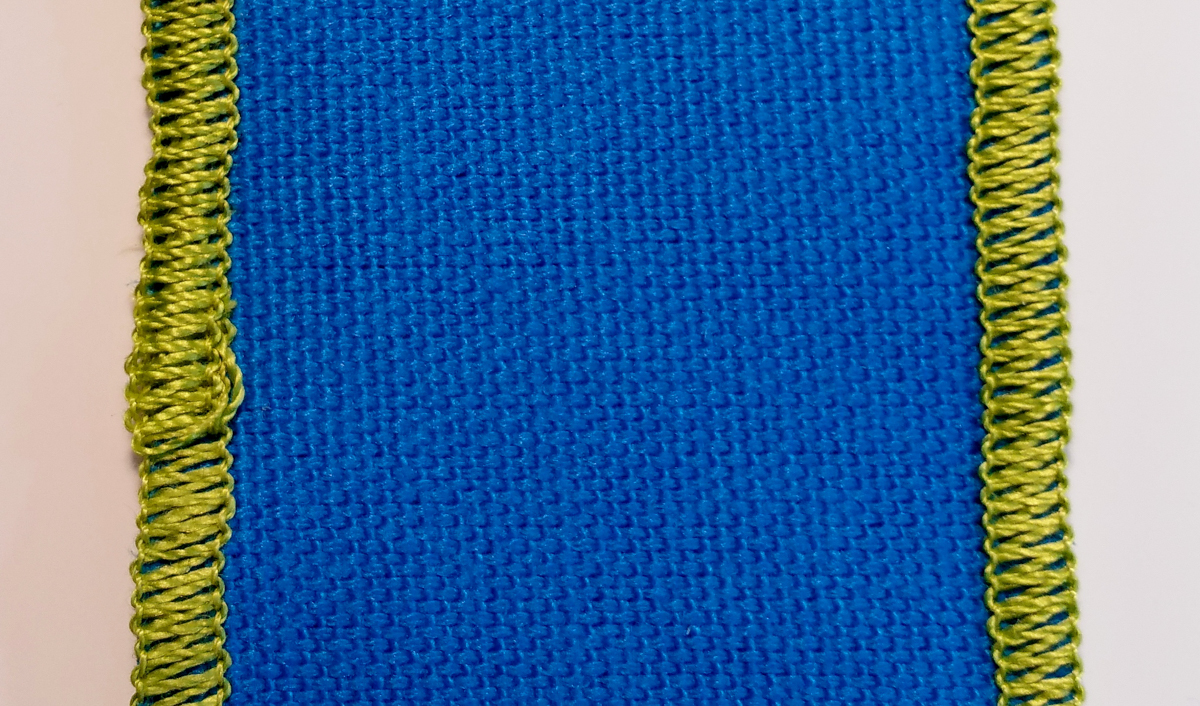
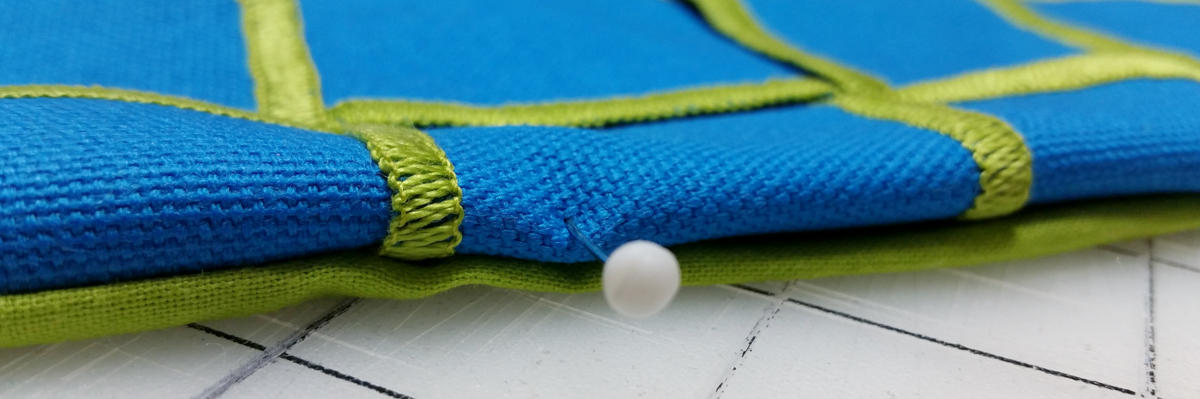
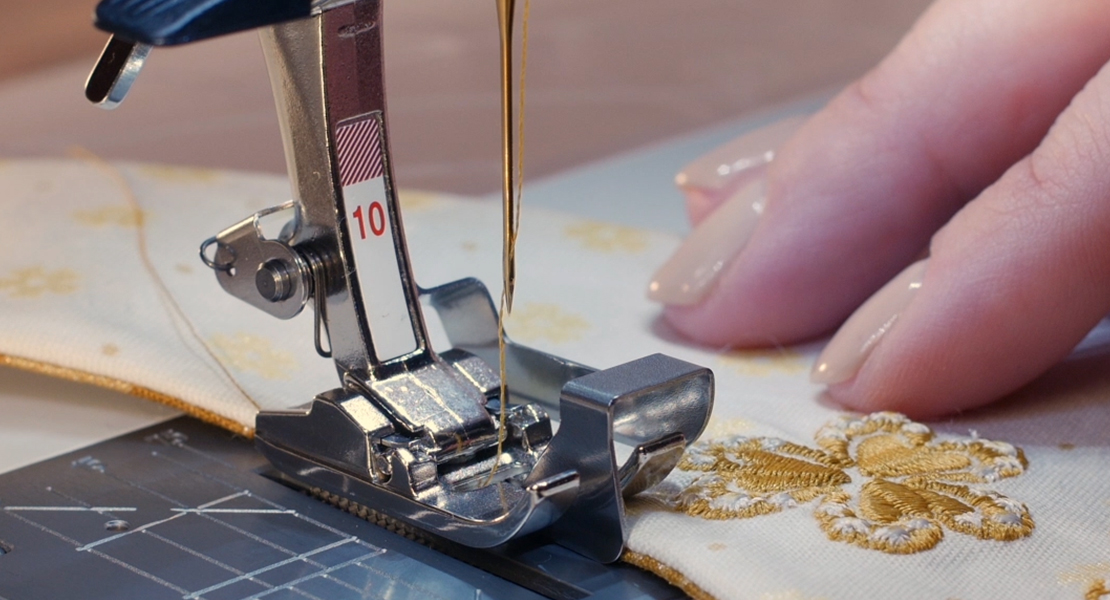
The advantage of using an overlocker to cover the edge of the fabric strips (as opposed to using, say, a satin stitch at the sewing machine) is that the overlocker loopers can lay down a heavy thread and cover the edge perfectly without disturbing it. It’s also way faster in getting all the strips done :-).

The 1-2-3’s of the Pillow
- Simple Double Flange Pillow Pattern by Susan Beck
- Simple and reusable
- Easily adapted to size
- Download the Double Flange Pillow Turorial pdf
- Weave strips of fabric to make your own décor fabric
- Add texture and dimension
- Use the Overlocker to edge fabric strips
- Fast and efficient
- Even, consistent and professional finish
- I sewed on a BERNINA L 450
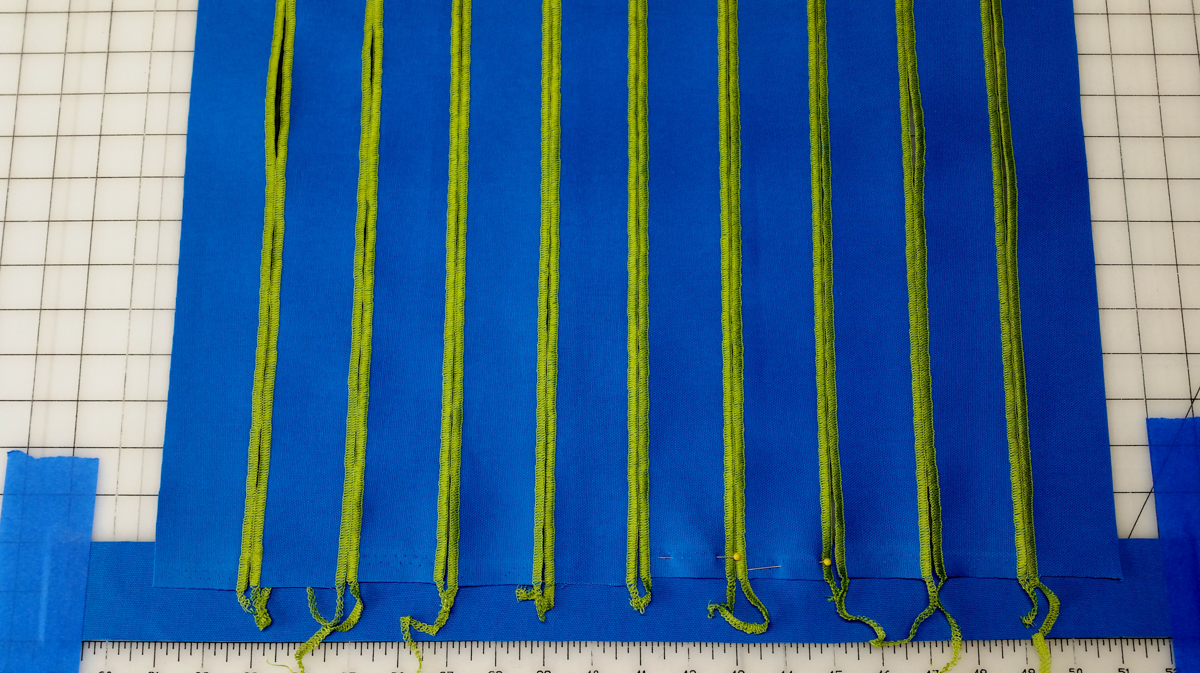
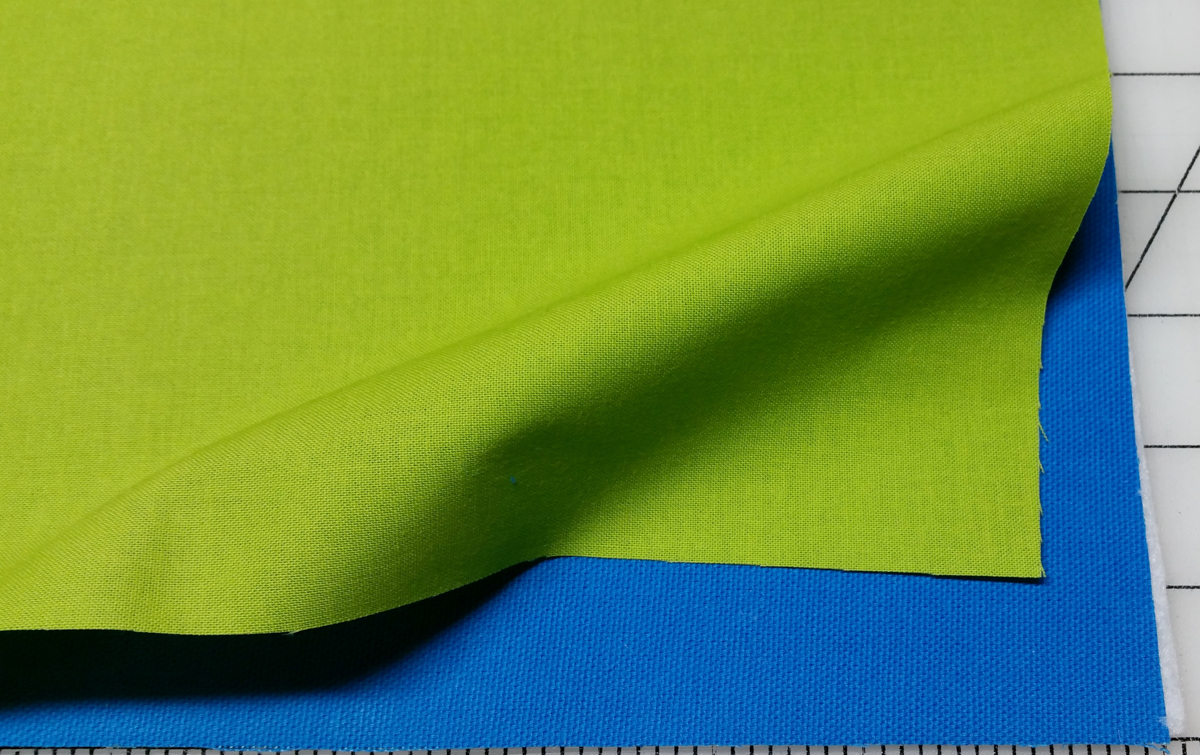
Preparing the Fabric Strips for Overlocker
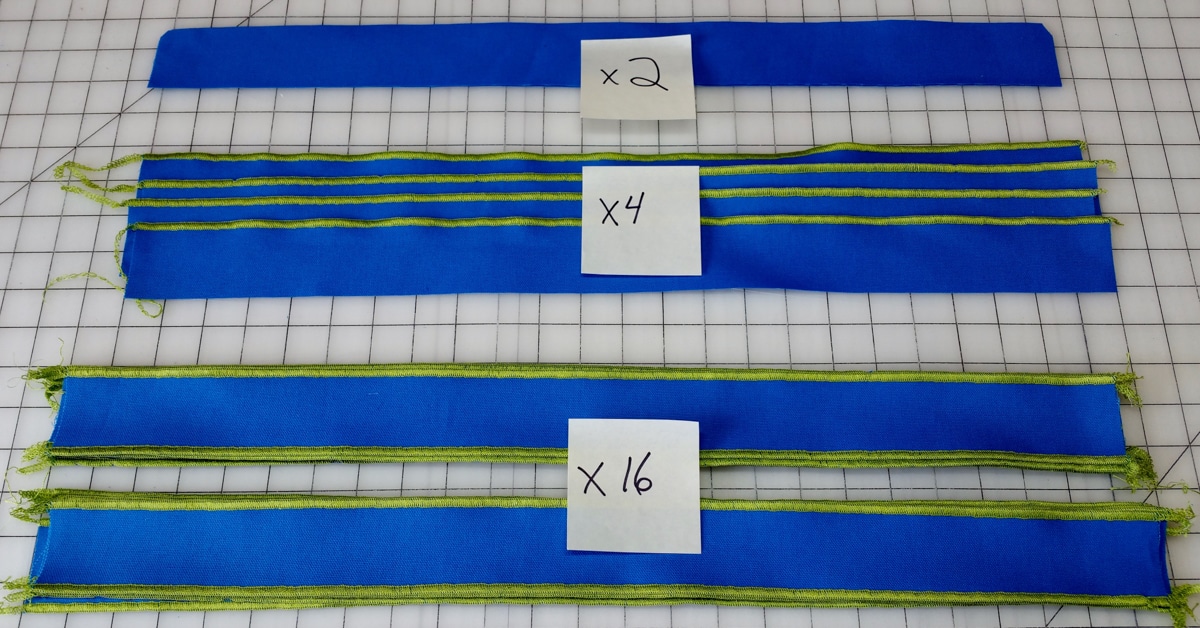
Cut 22 Strips of Fabric
Cut each strip 2 inches wide x 24 inches long.
Note: These will be slightly longer than what is needed to form a full 20″ x 20″ panel while making it easier to weave them together.
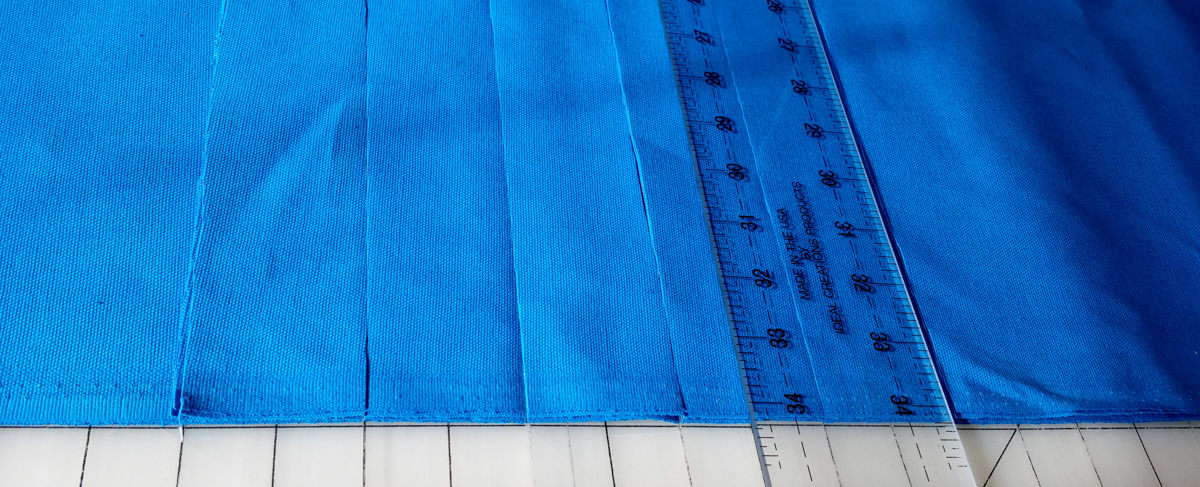
The strips will be processed in 3 groups of 4, 16 and 2 pieces each.
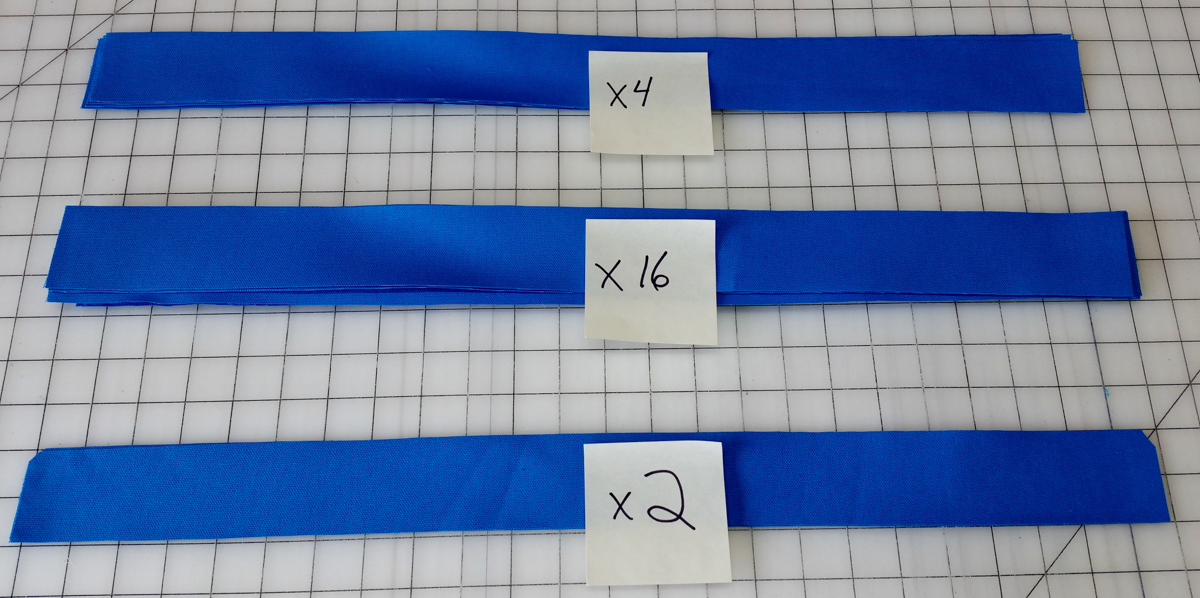
Reserve 2 strips for later (to serve as headers).
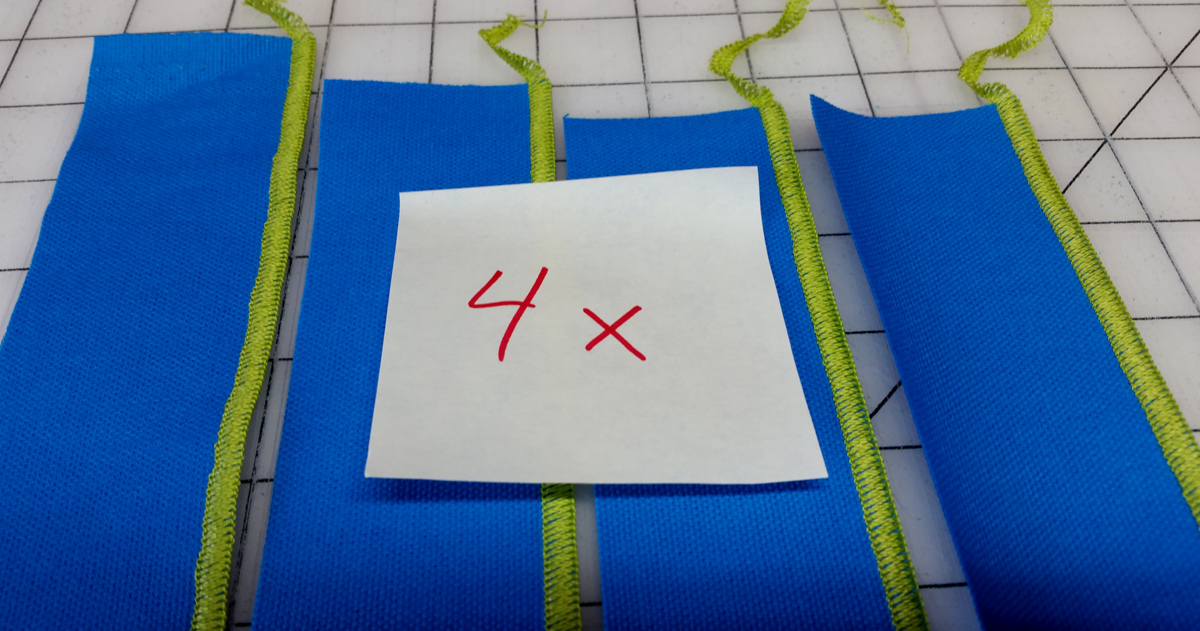
Set 4 strips aside: they will be edged on ONE side only.
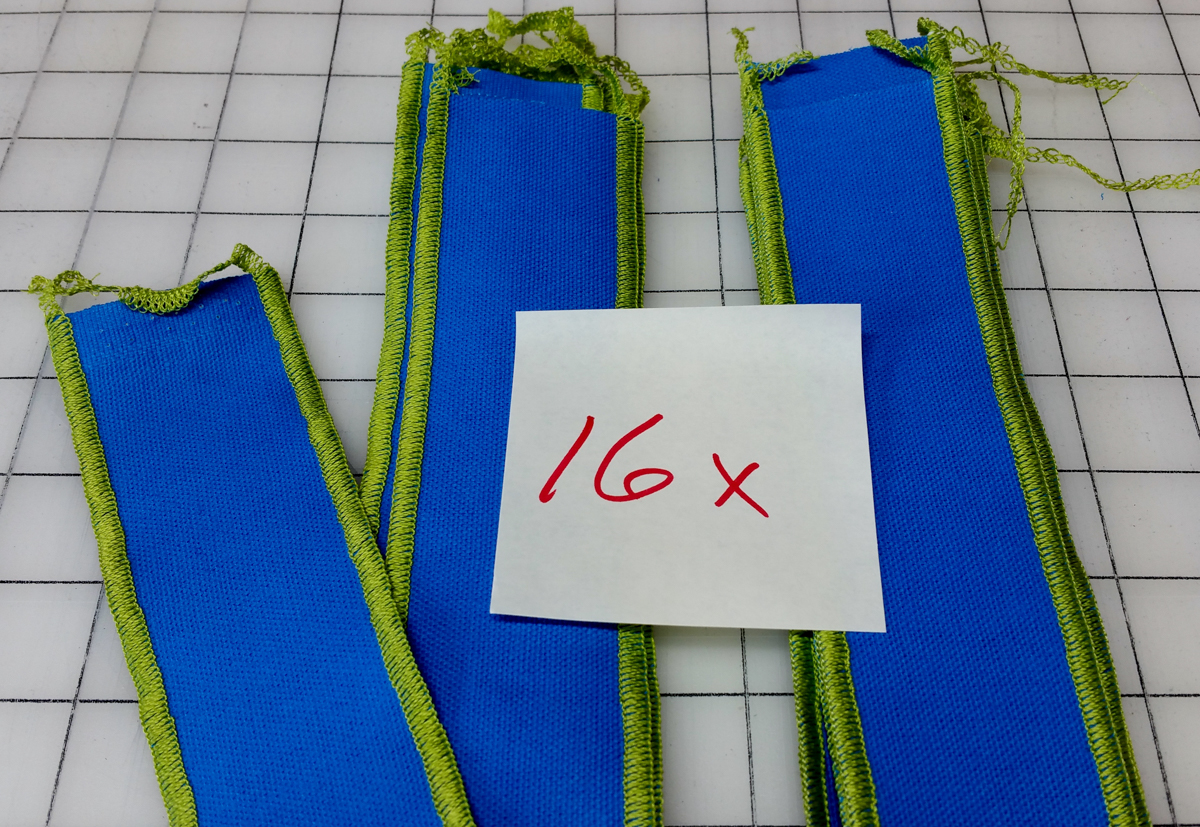
The remaining 16 strips will be edged on BOTH sides.
When all Strips are Edged
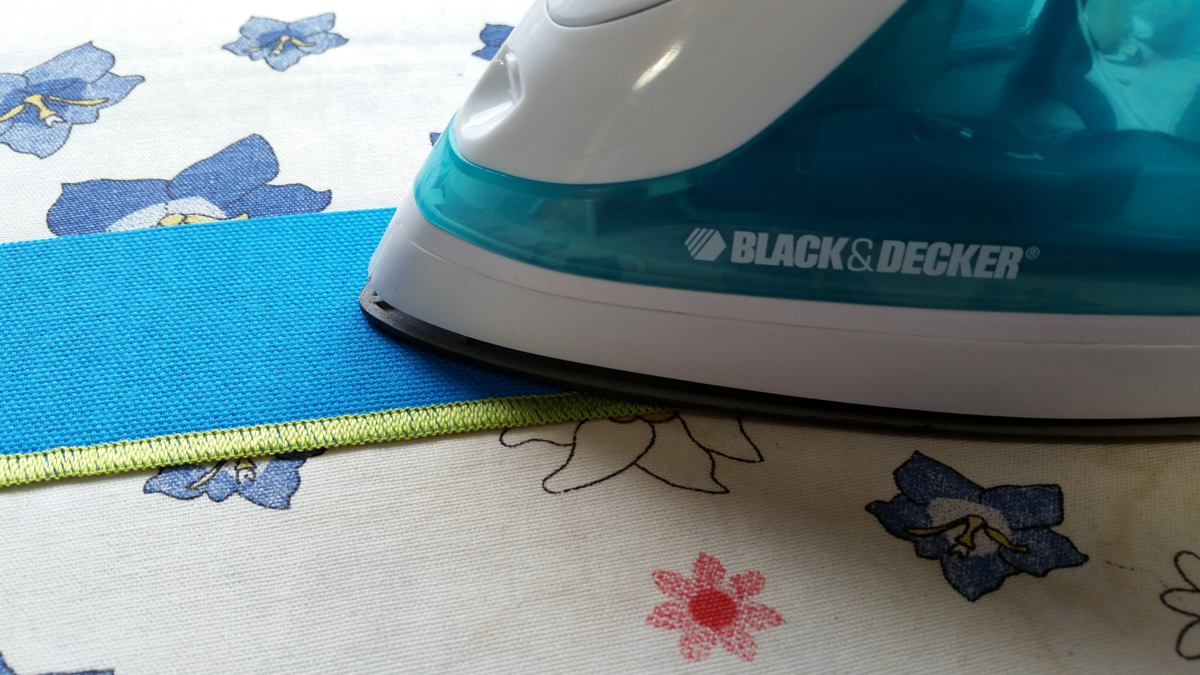
Press with steam. Swipe along each strip for a quick press.
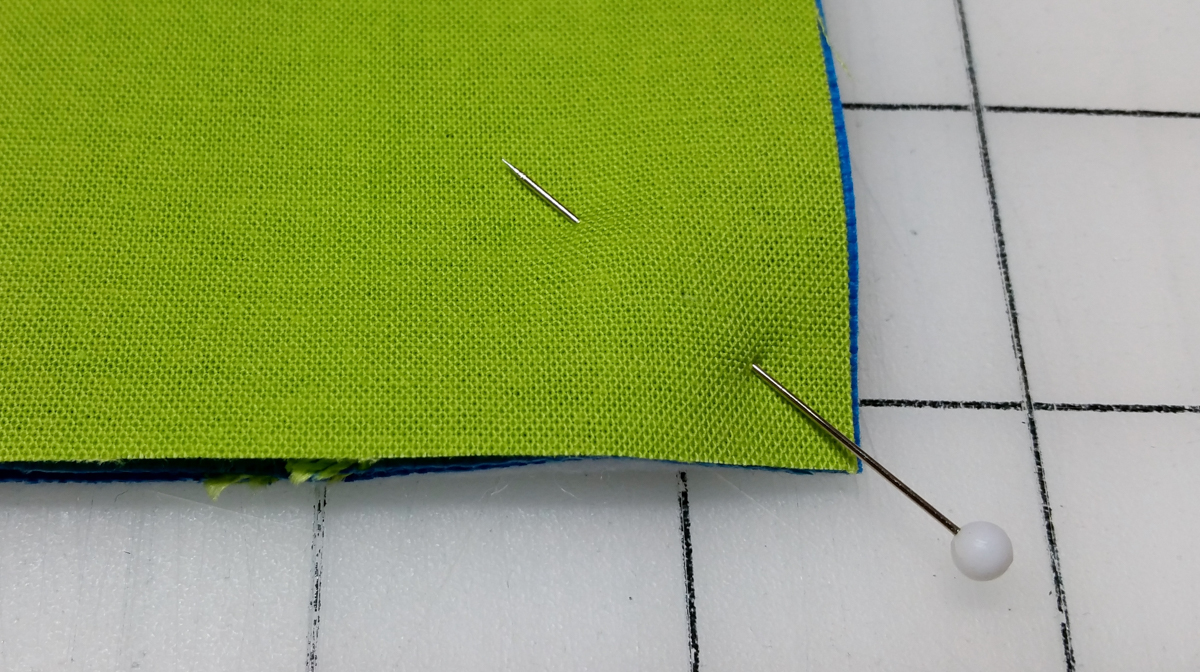
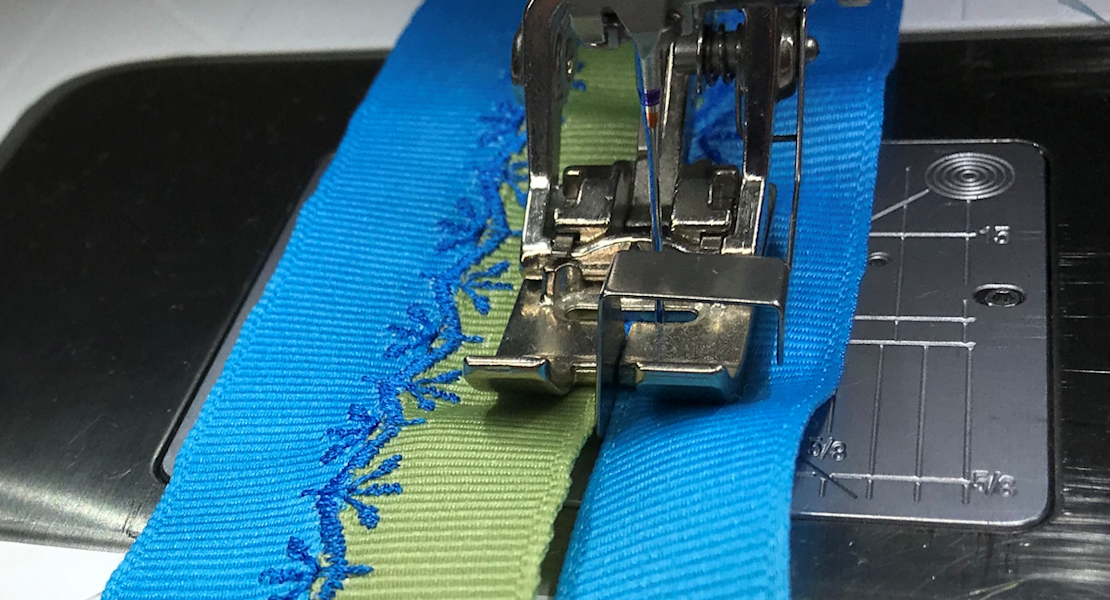
Edging Strips at the Overlocker
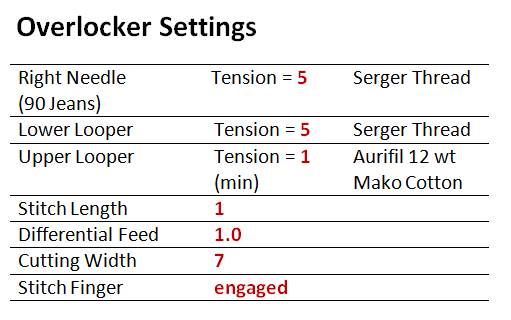

Align the right edge of the fabric strip with the presser foot marking furthest on the right.
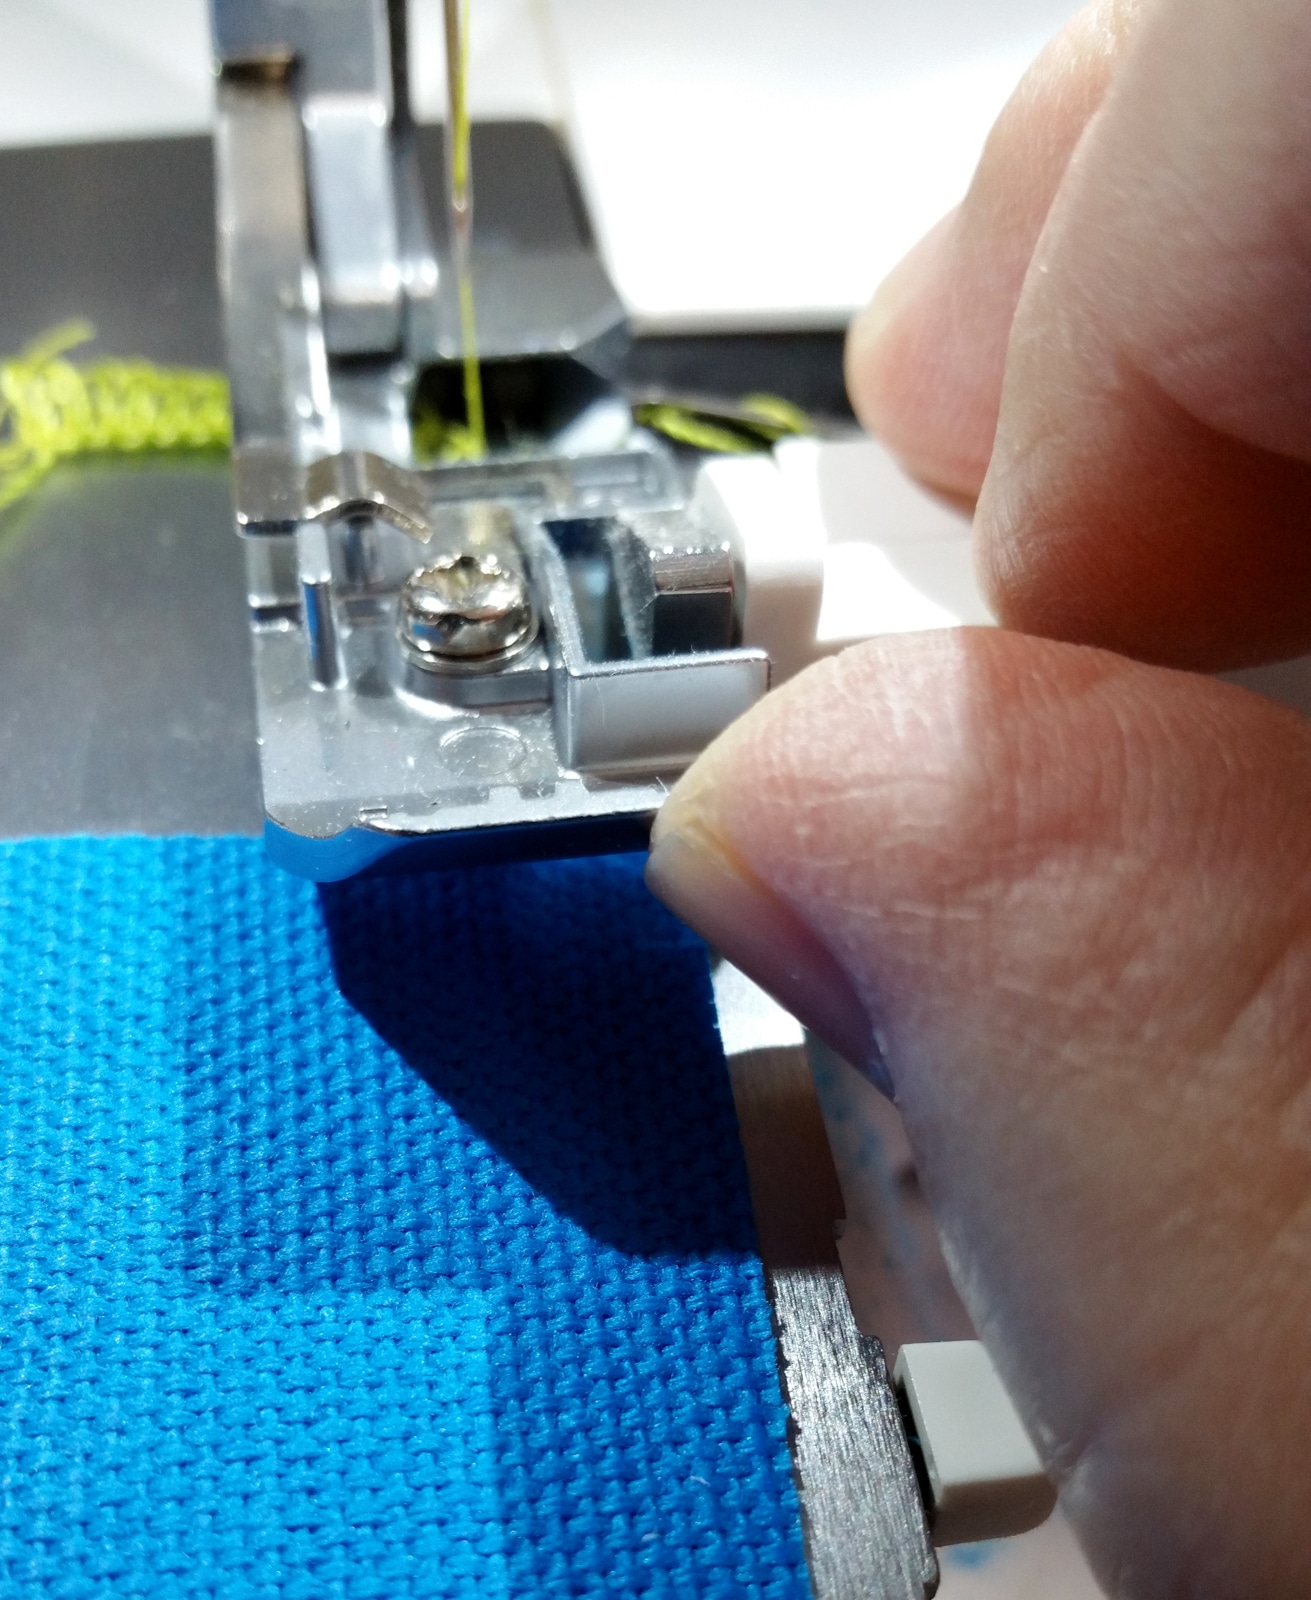
TIP: Lift the toe of the presser foot to make fabric positioning easier.
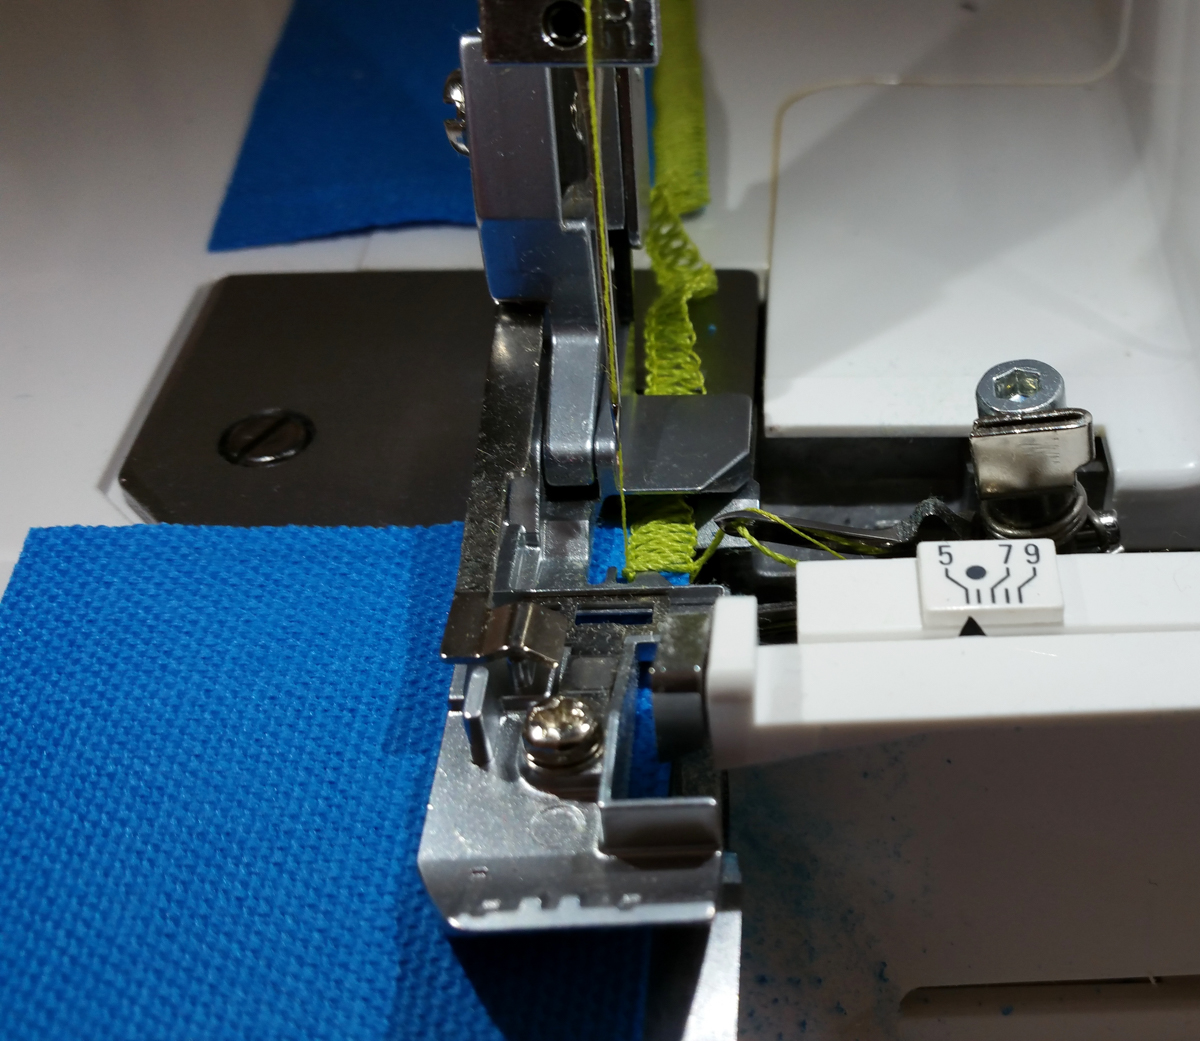
Stitch along the entire length of the strip.
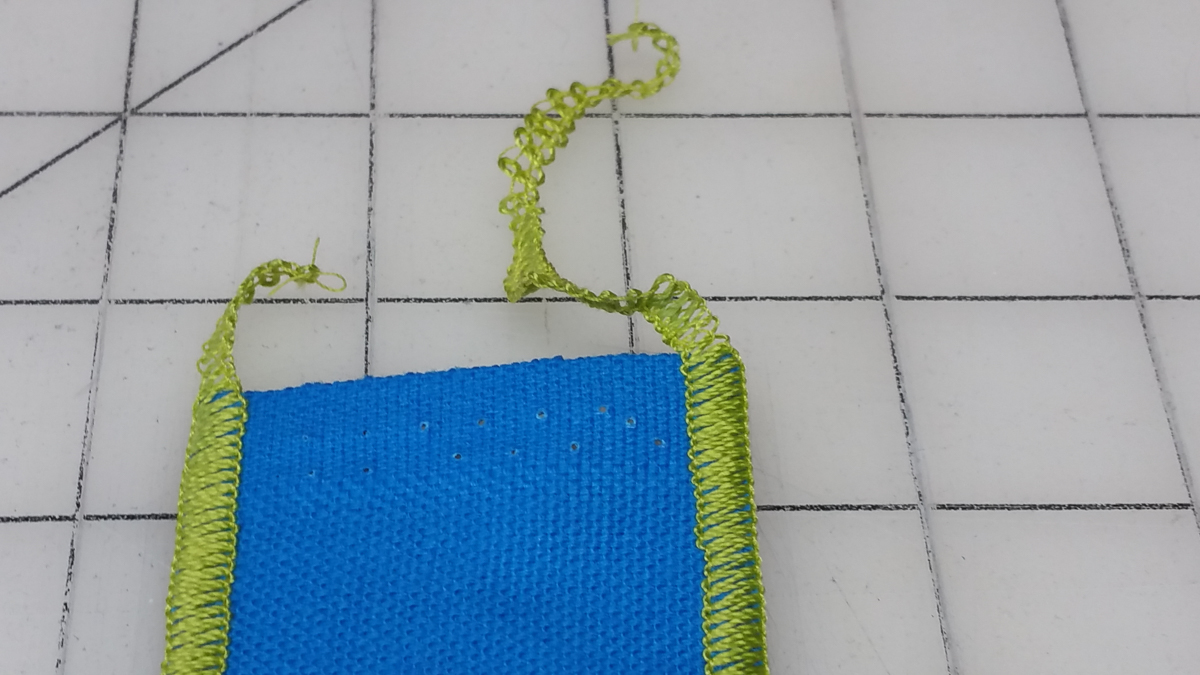
One or both sides according to the strip.
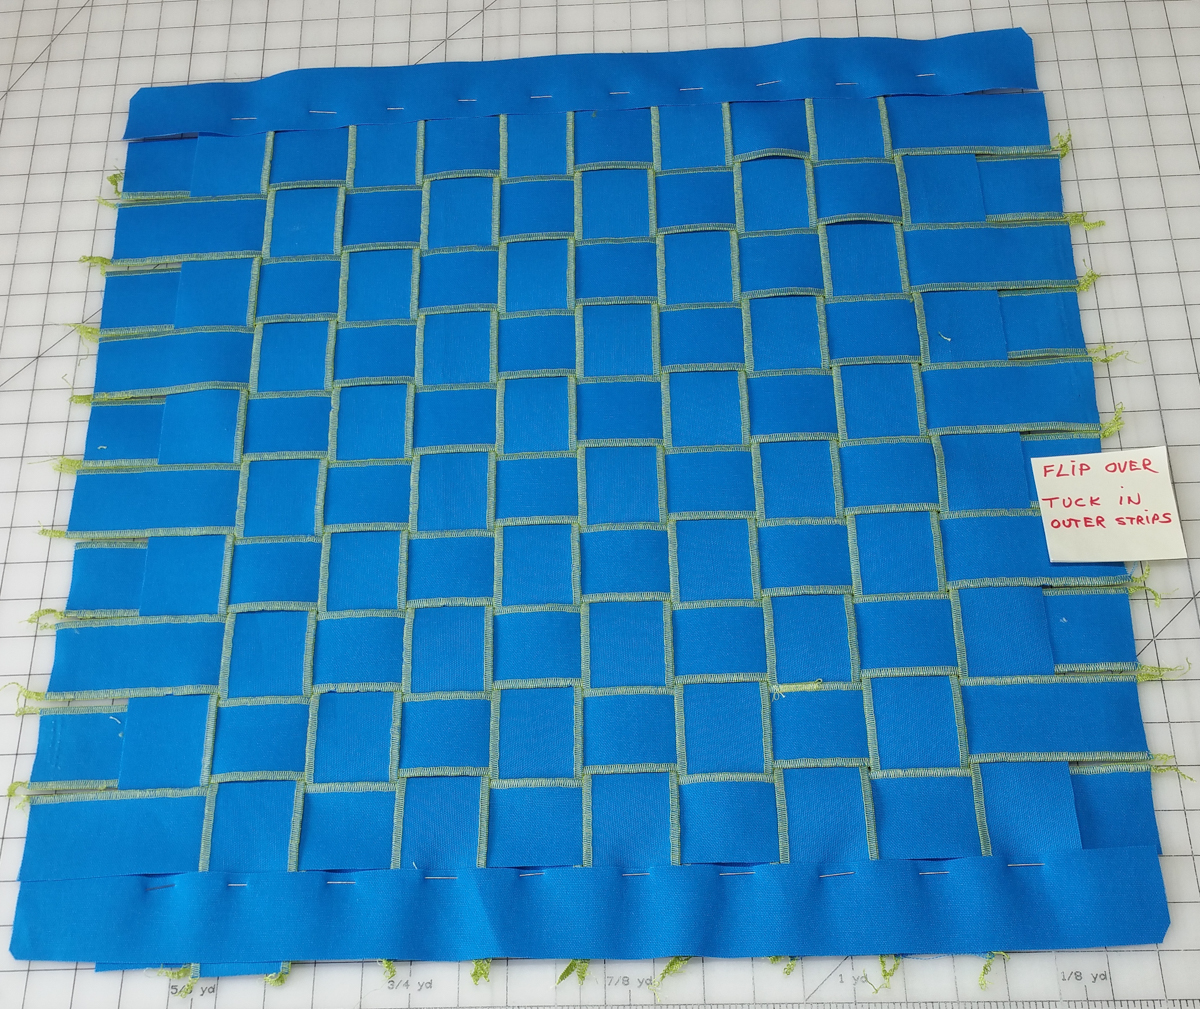
Weaving the Strips into a Fabric Panel
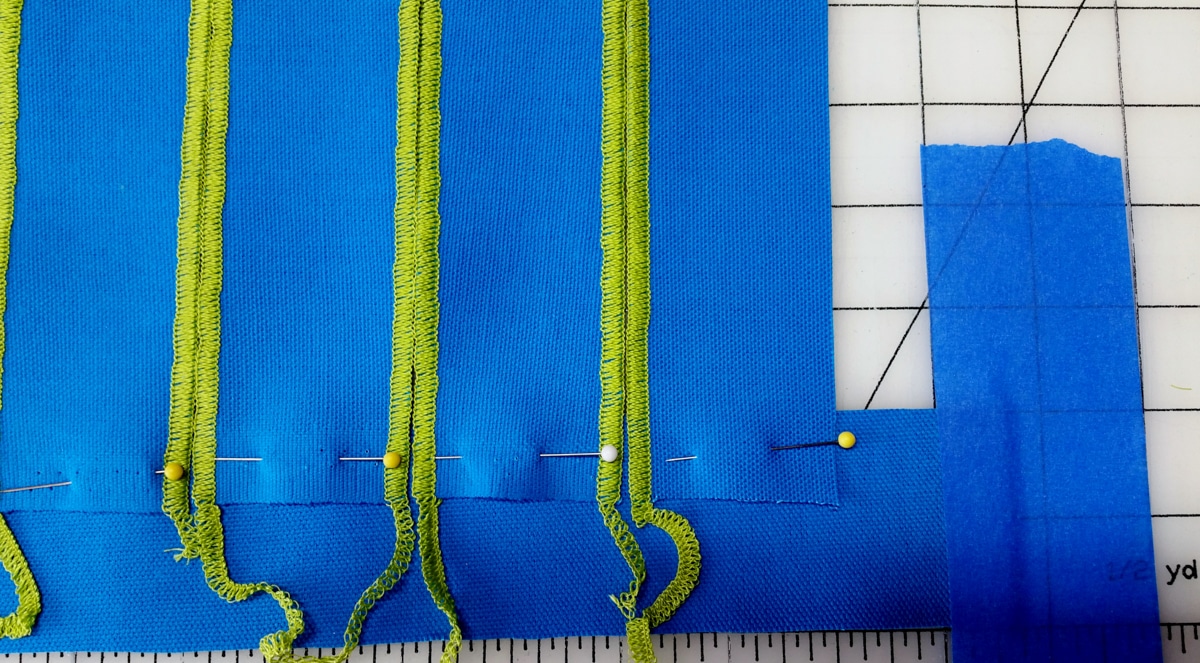
Tape down a ‘header’ strip (overlap tape to strip by 1 inch).
Pin 10 vertical strips to the header. Strips # 1 and 10 are single edged, raw side to the outer edge.
Note: Outer edges (left and right) are raw.
The ‘Warps’ Are in Place
Begin Weaving
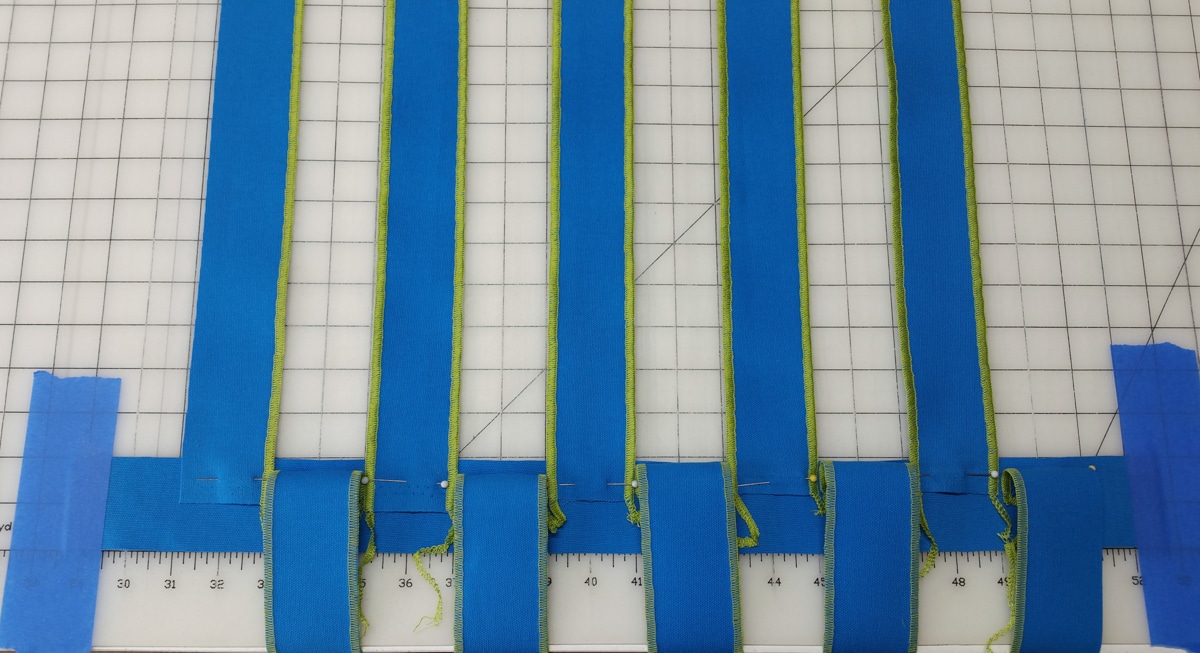
Peel back every other strip toward you, e.g. even numbered strips.
Insert the First ‘Weft’ Strip
First strip has a raw edge.
Align raw edge with the edge of the header.
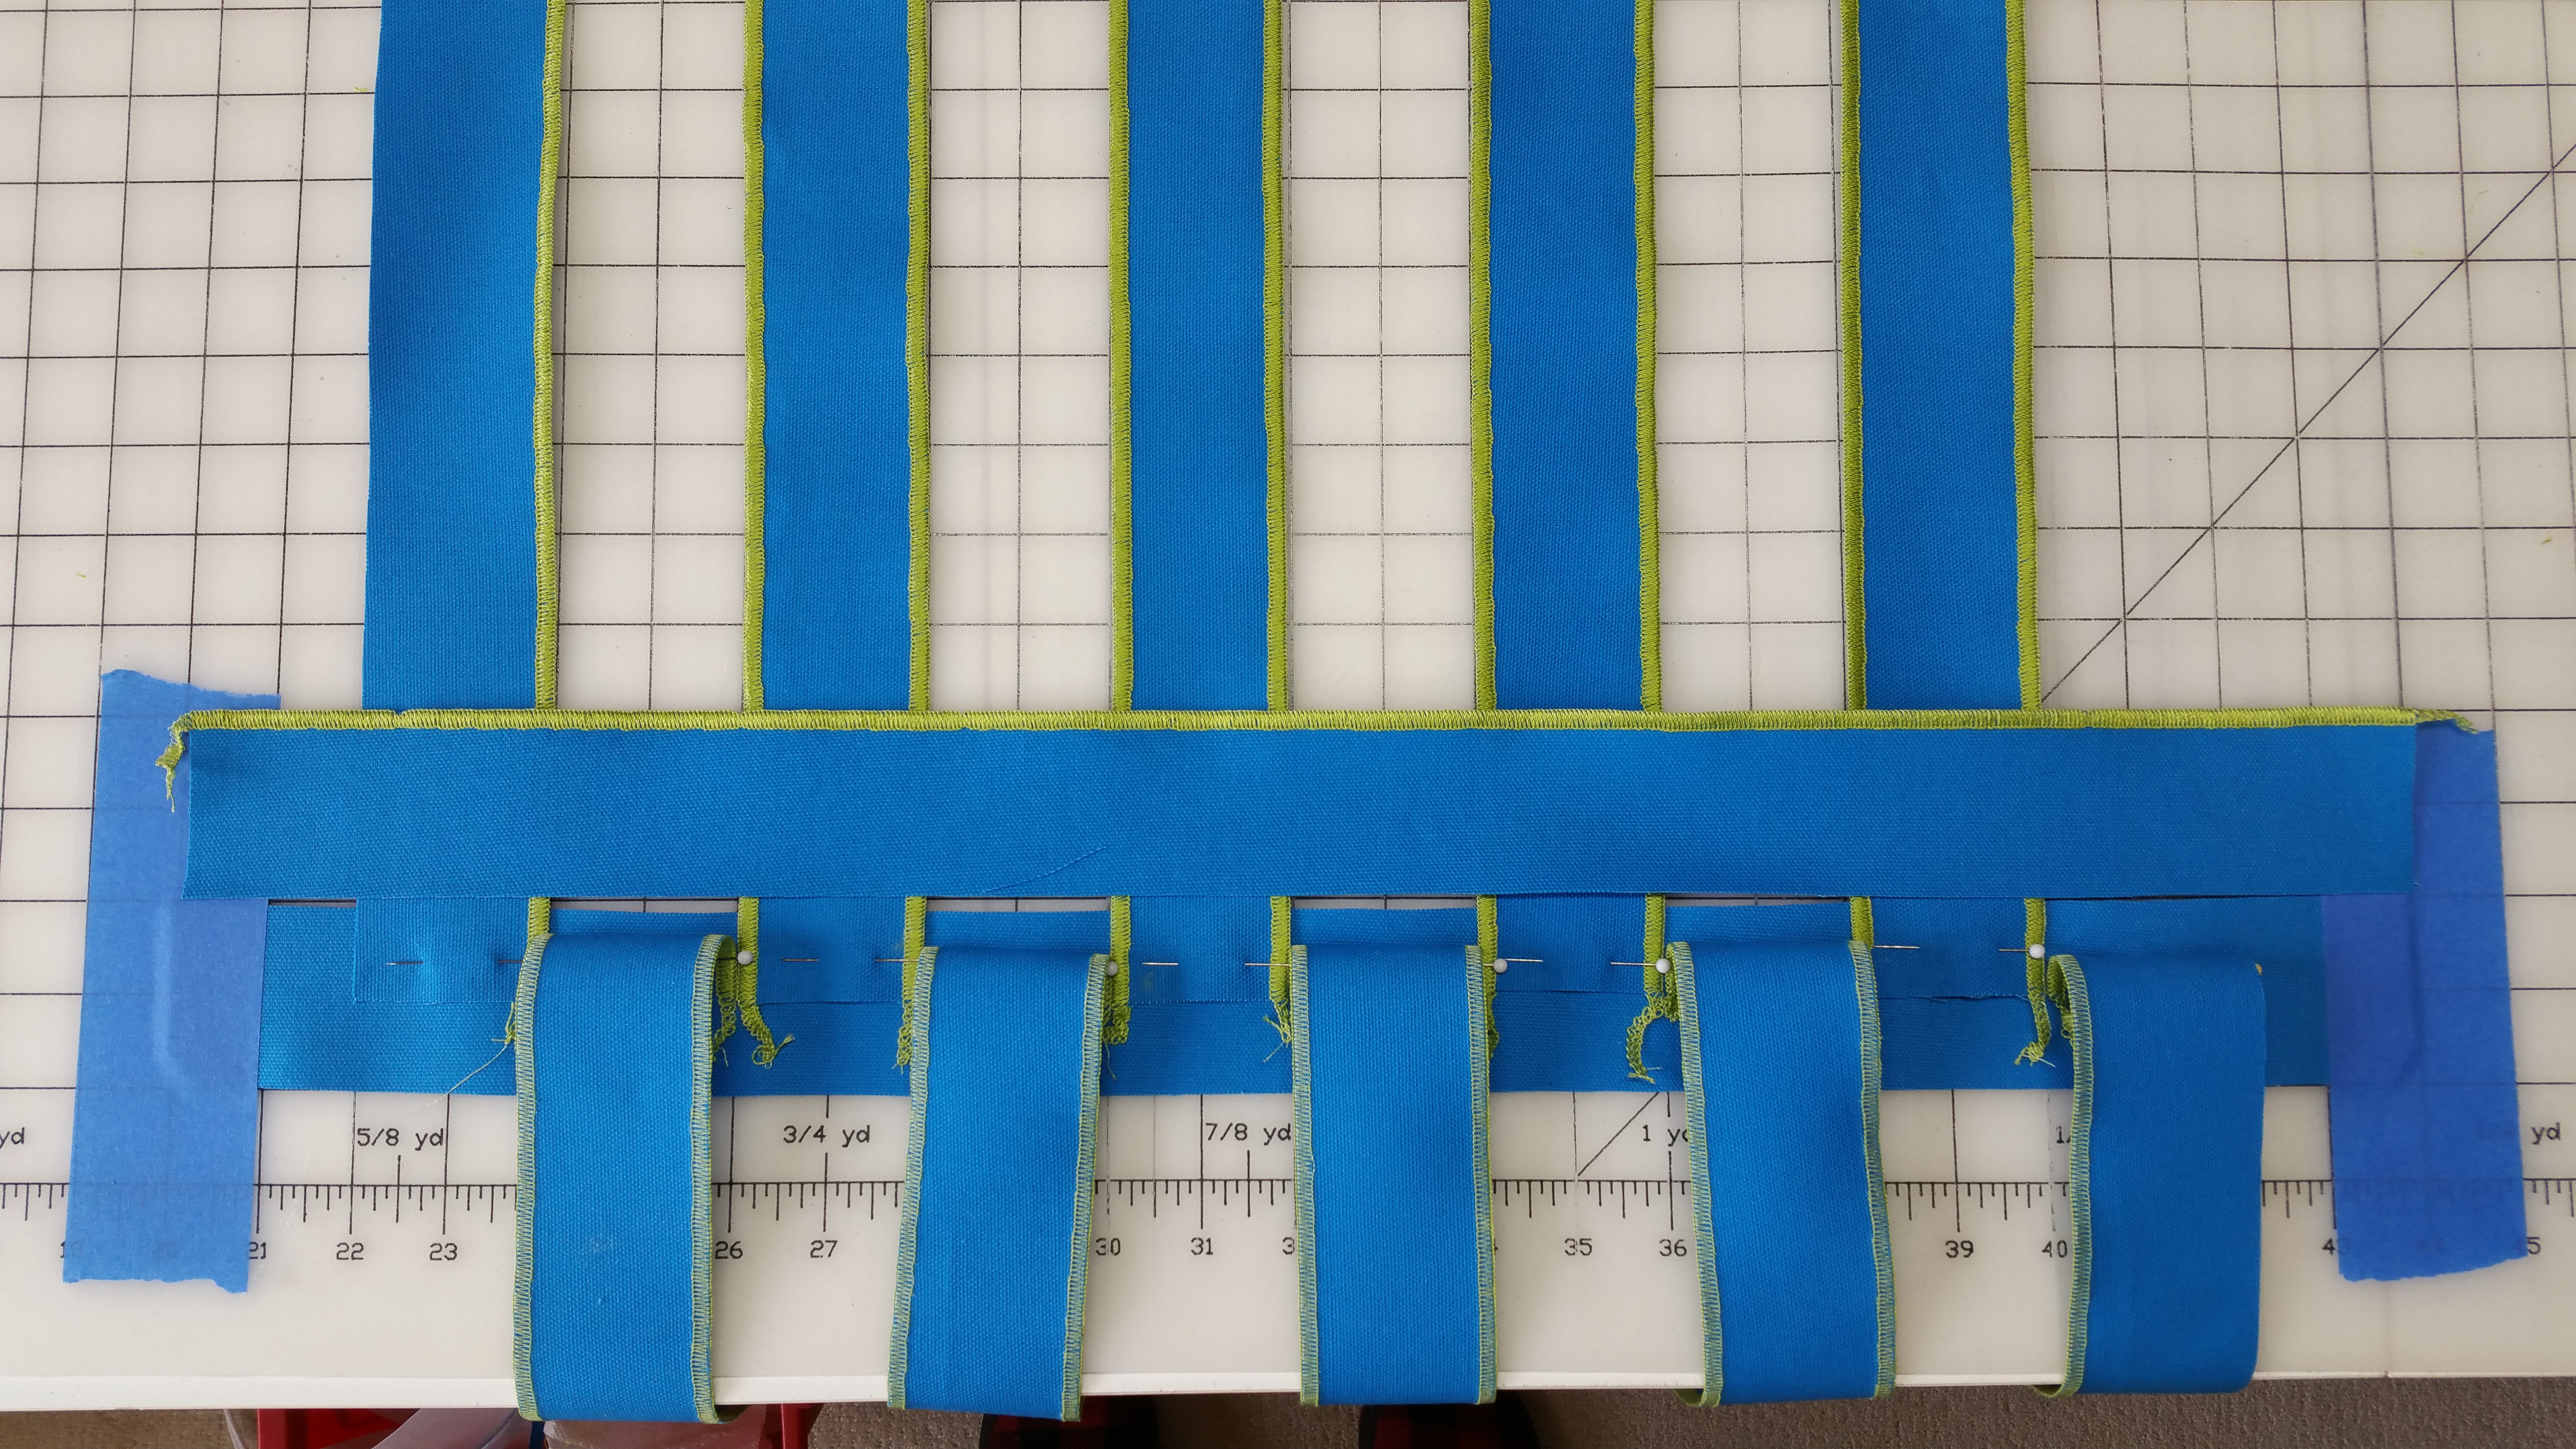
Insert the Remaining Weft Strips

Return peeled back strips to flat position.
Peel back the other 5 strips (odd numbered).
Insert the next ‘weft’ strip (double edged).
Continue alternating warps as you insert wefts 2-9.
Weft # 10 (last strip) has a raw edge.

Insert the last strip with the raw edge facing the outside.

Pin the remaining Header strip at the end of the weave—with the edge of the strip following the edge of weft #10.
The full Weave With the Wrong Side Up
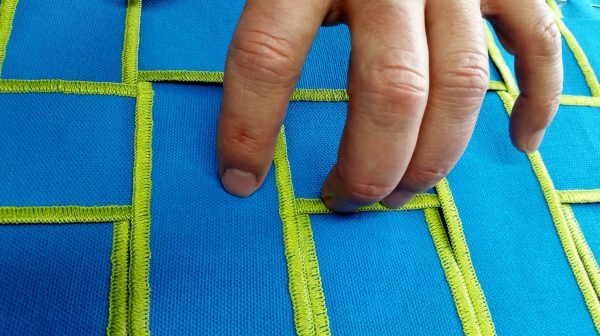
Fusing Down the Weave
Holding the weave by a header strip, carefully flip it right side down (wrong side up).
Tuck in outer warp strip if needed.
Tip: Use your finger nails.
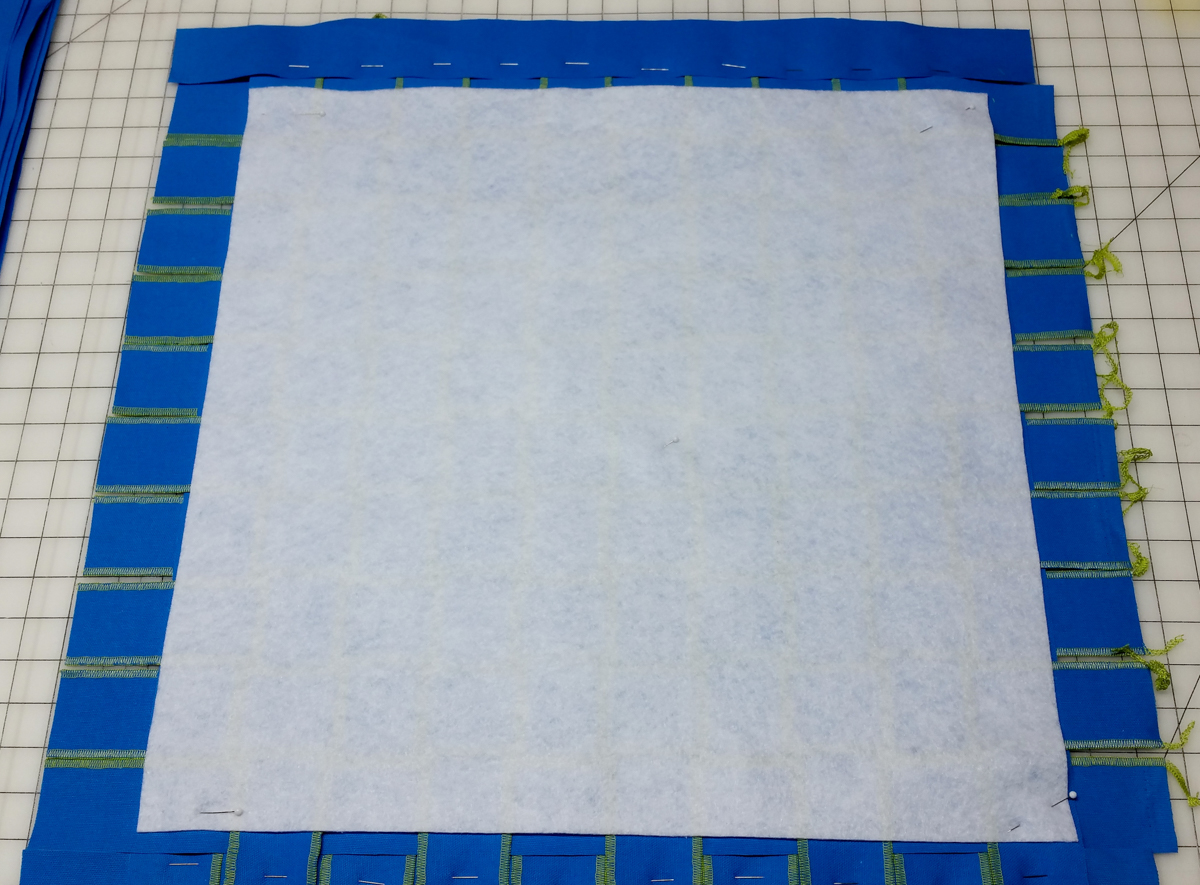
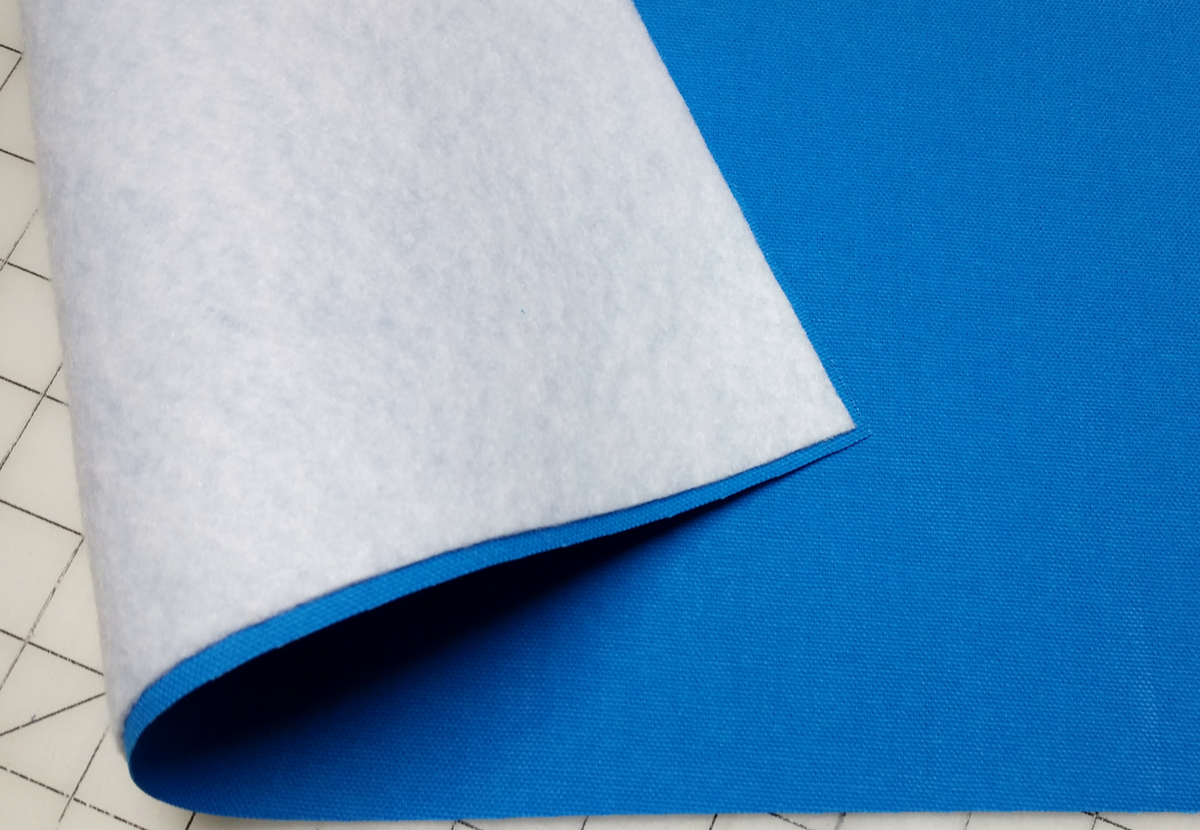
Place a 20″ x 20″ piece of the fusible fleece against the weave:
- Fusible side against the weave
- Center the fleece square against the weave (leave an equal margin of weave on all sides). Check that the outer warp strips are tucked in.
TIP: The weave will be larger than the expected 20″ x 20″ you might expect from adding the mere width of the strips. This is normal.
- Verify that the fleece is fusible side against the wrong the weave: Check twice . . . fuse once
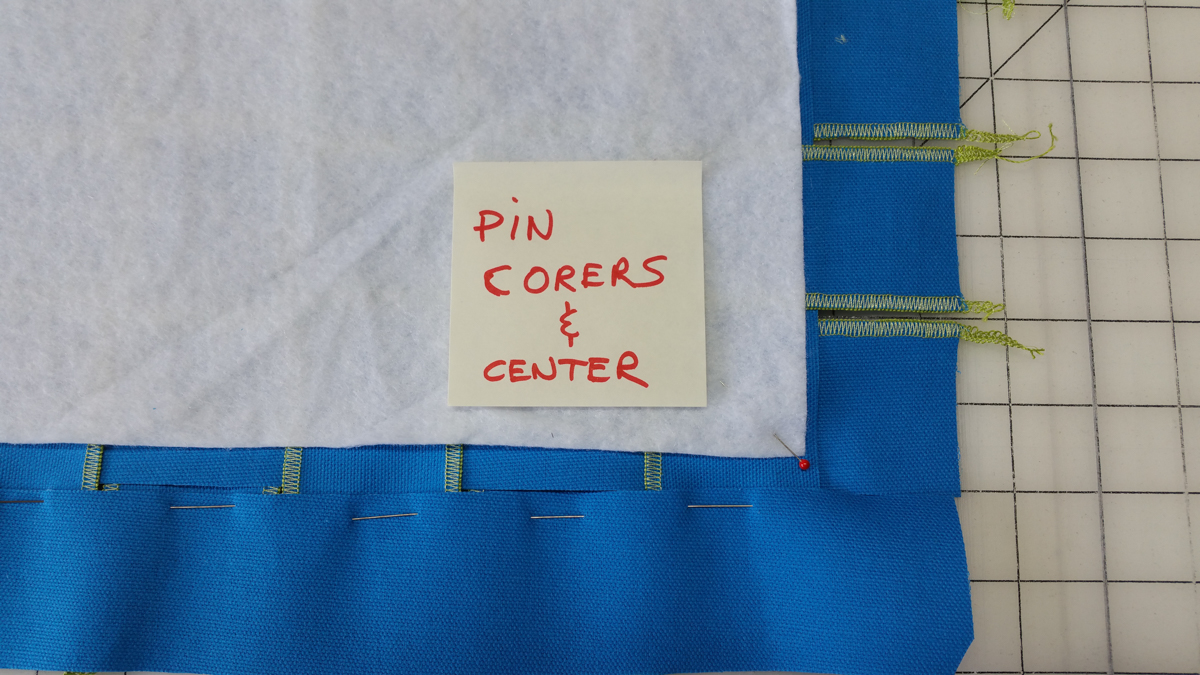
- Pin the fleece in the corners and center to hold in place.
- Transfer the weave to the ironing station and fuse the fleece.
- Iron on Cotton setting, high steam.
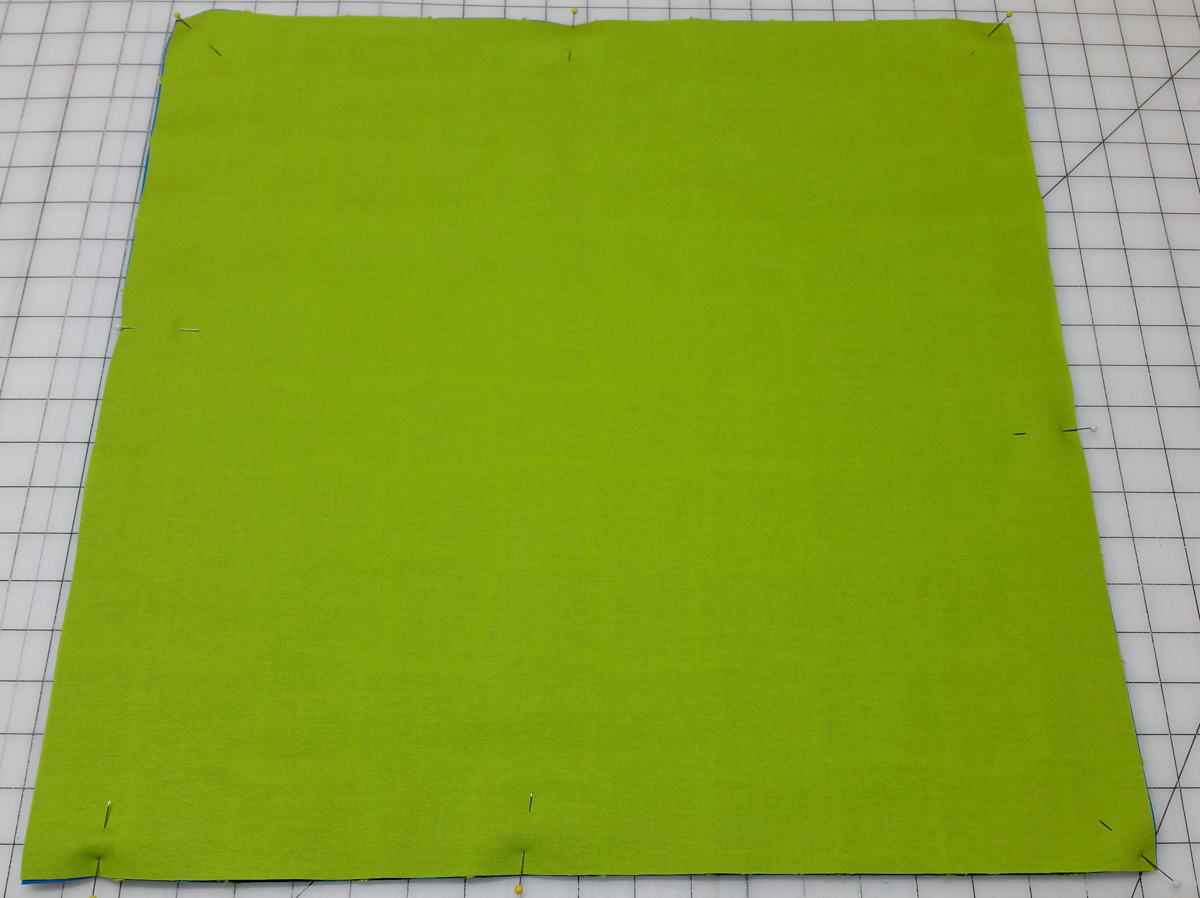
Trim the Weave to the Pattern Size
NOTE: Remove all pins before trimming the main panel. This will release the header strips: Remove them at this point.
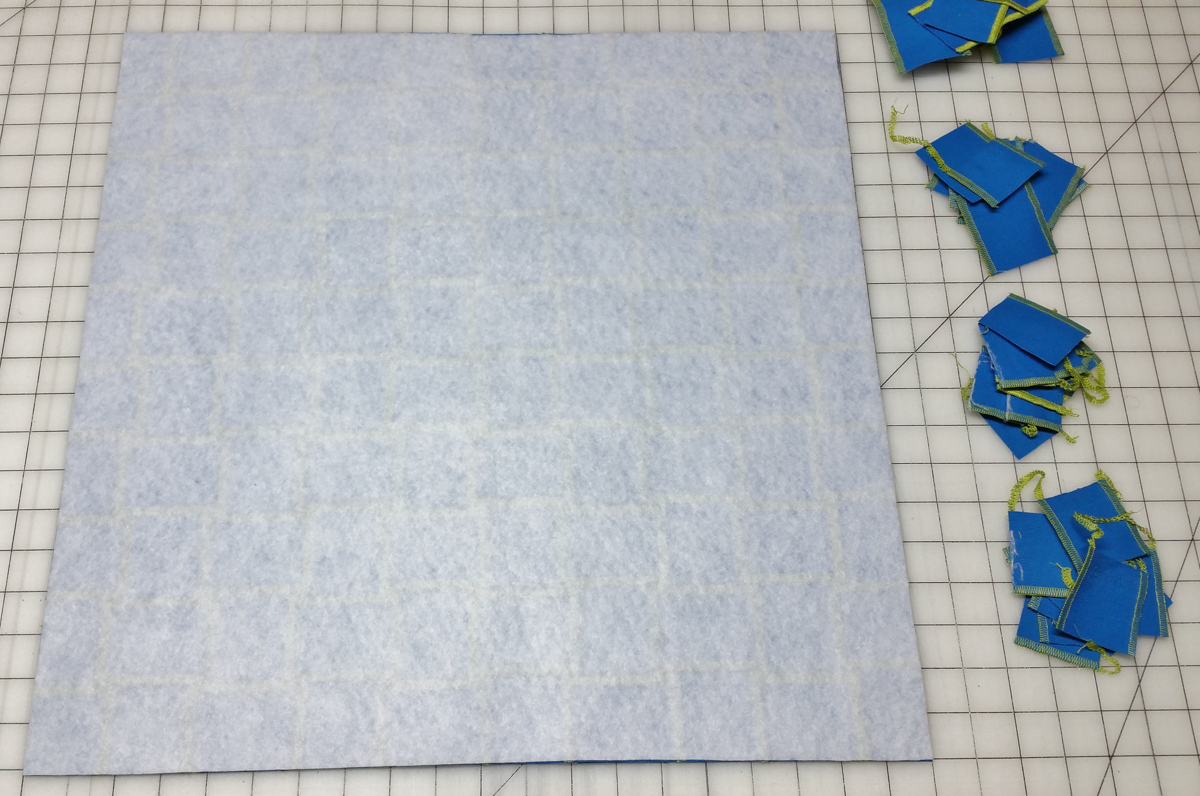
At the Rotary Cutting Station
- With the panel right side down, fleece side up.
- Make sure the loose ends of every other strip are not flipped over.
- Rotary cut the panel to size using the edges of the fleece as your cutting lines
- Flip right side up. This is now the front panel/fabric for your pillow.
The Rest of the Process
Follow the main pattern instructions for the rest of the project. See downloadable pdf at the beginning of this post.
Making the 2 Panels
Fuse fleece to the solid fabric for the back panel.
Pin, stitch and apply lining fabric to both panels: Front/weave and back.
Stitch lining right sides together, leaving a long (10″) opening on one side (to turn right side out later).
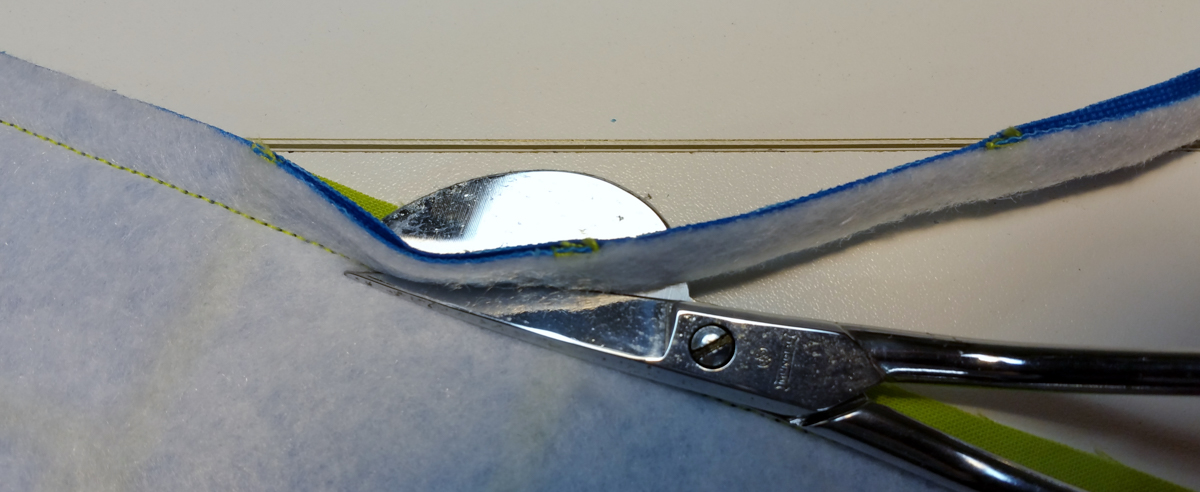
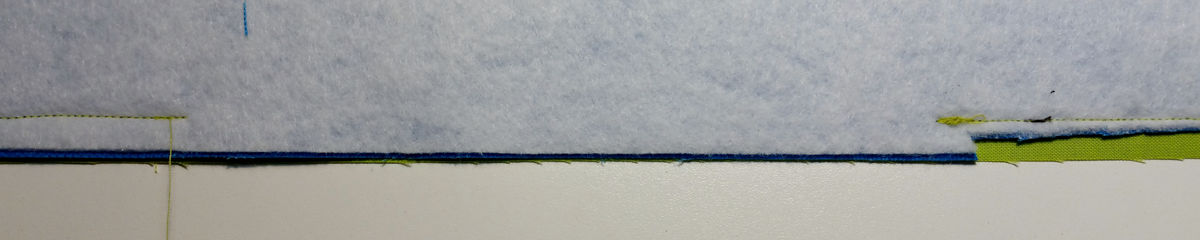
Trim main fabric and fleece seam allowances to reduce bulk except at the opening.
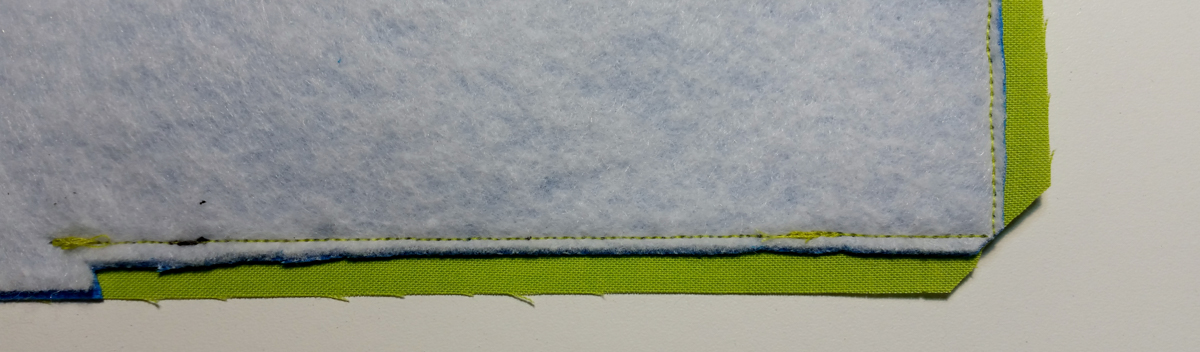
Trim corners (45 degrees).
Turn right side out. Push out corners and press (pin opening closed).
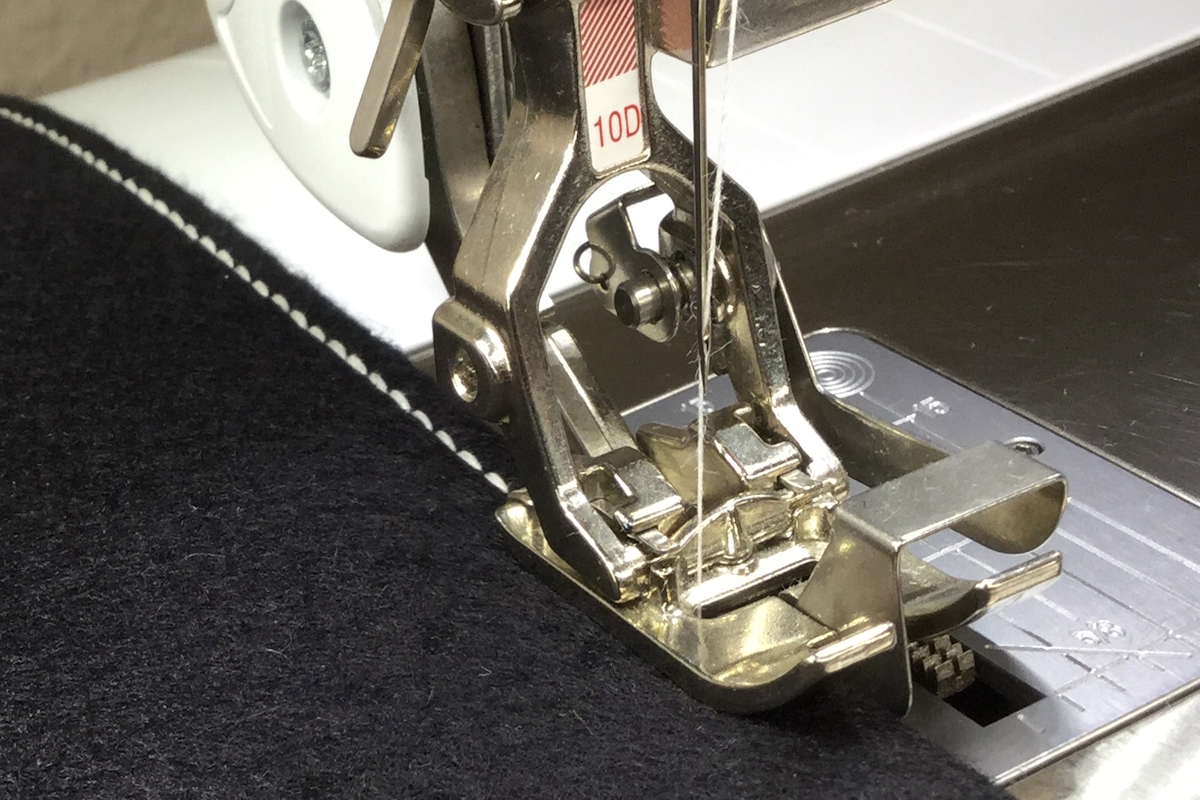
Edge Stitch Lining
- Straight Stitch, Length = 2.5
- Foot # 10D, engage Dual Feed
- Needle Position- 5
Assembling the Pillow
With broth front (weave) and back (plain fabric) panels lining sides together:
- Stitch along 3 sides (2 sides and bottom)
- 3 inches from the edge
TIP: follow the 3″ seam guideline on the machine extension table - Stitch Length = 2.5 / Center Needle Position
- Backstitch at both ends to secure the seam
- Stuff the pillow to desired firmness with loose polyfill
- Stitch the opening closed (top side) and fluff the pillow
OPTIONAL
Before sewing the sides and bottom, insert a 14″ zipper at the top first: This will allow you to service the pillow more easily. You can then use a 14″ pillow form if desired.
Used Products


What you might also like


2 comments on “Flange Pillow with Distinctive Edge”
-
-
Hi Mara,
Note: the ‘Flanging” seams are done 3 inches from the outer edges of the pillow. Since the pattern starts at 20×20 inches, that leaves a 14×14 inches pillow fill area, perfect for a 14″ pillow form.The pattern instructions call for sewing the flanging seams on the sides and bottom first, fill the pillow and sew the last flanging seam at the top at the end to close the pillow.
To make the pillow more serviceable, you can substitute the top flanging seam with a zipper (inserted 3 inches in from the top edge of the panels. To do so:
* sew a 14″ zipper 3 inches below the top of the panels and close the zipper (one side on each panel)
* sew the side-bottom-side seam to close the pillow
* open the zipper and insert a 14″ pillow formThis way, the pillow form can be washed or replaced if it flattens out
I hope this helps clarify the zippered option
Sylvain
-
Leave a Reply
You must be logged in to post a comment.

don’t quite understand how you can have the flange on all 4 sides if you put a zipper in on one side? thanks, Mara