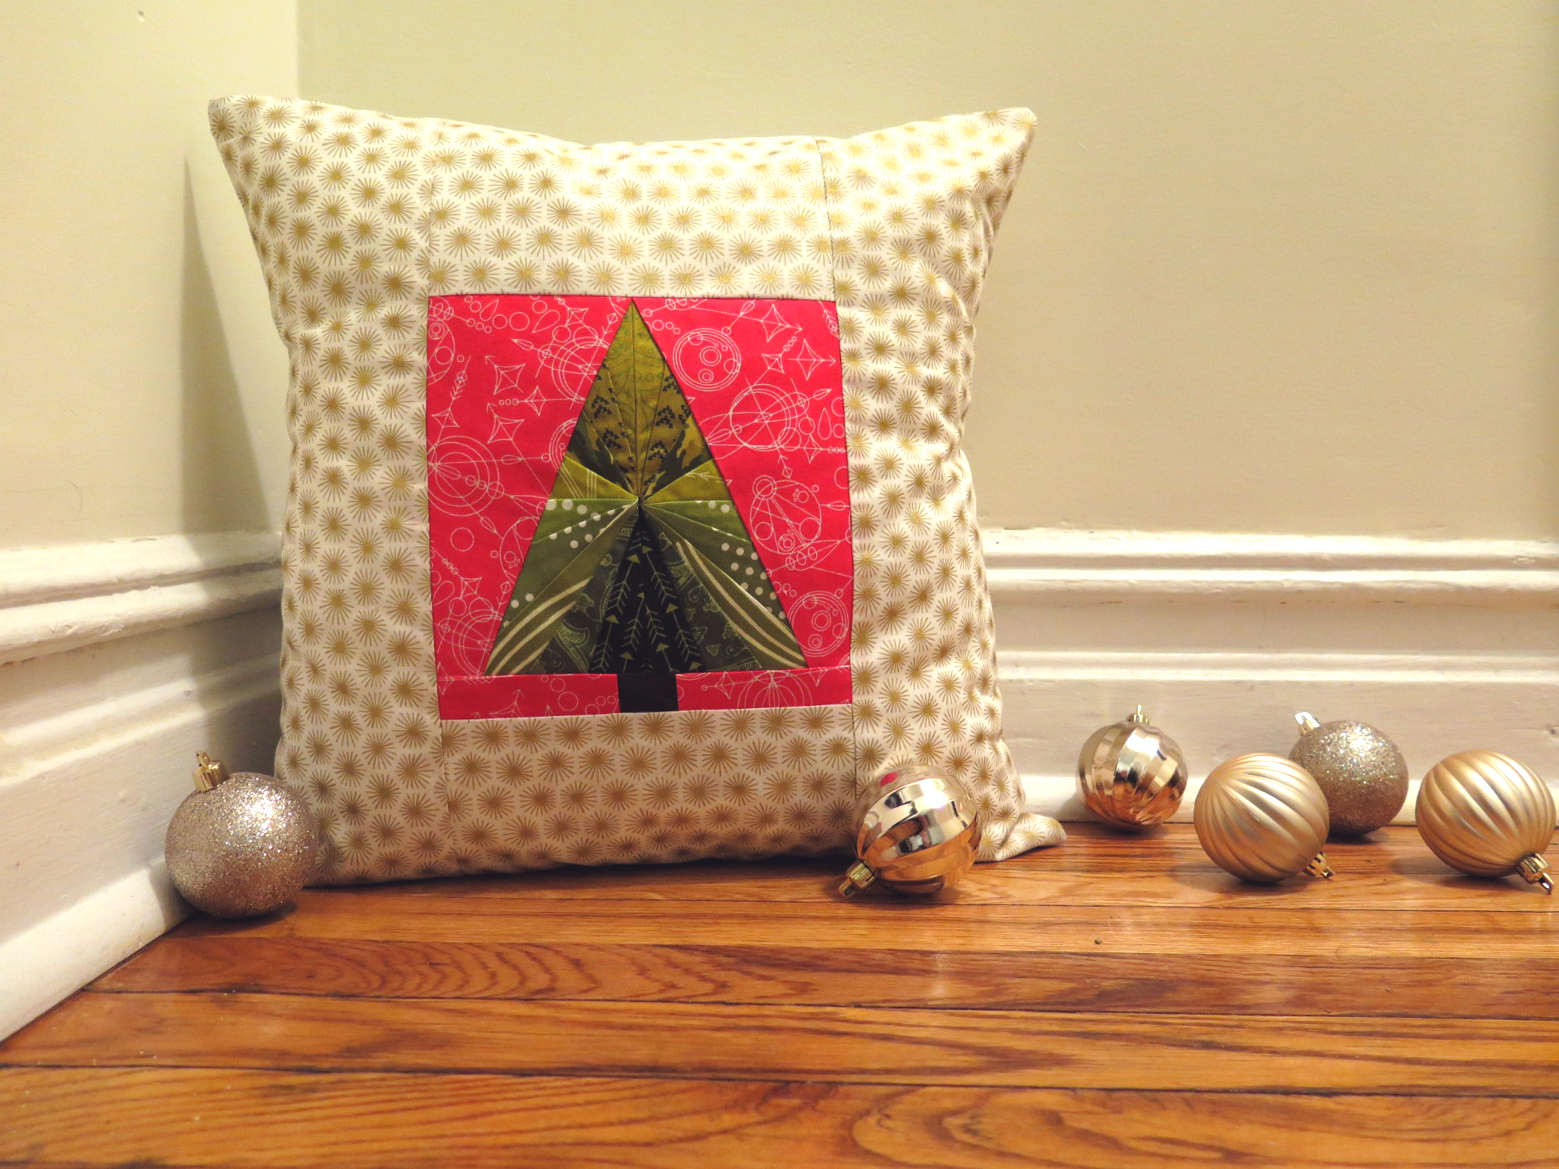
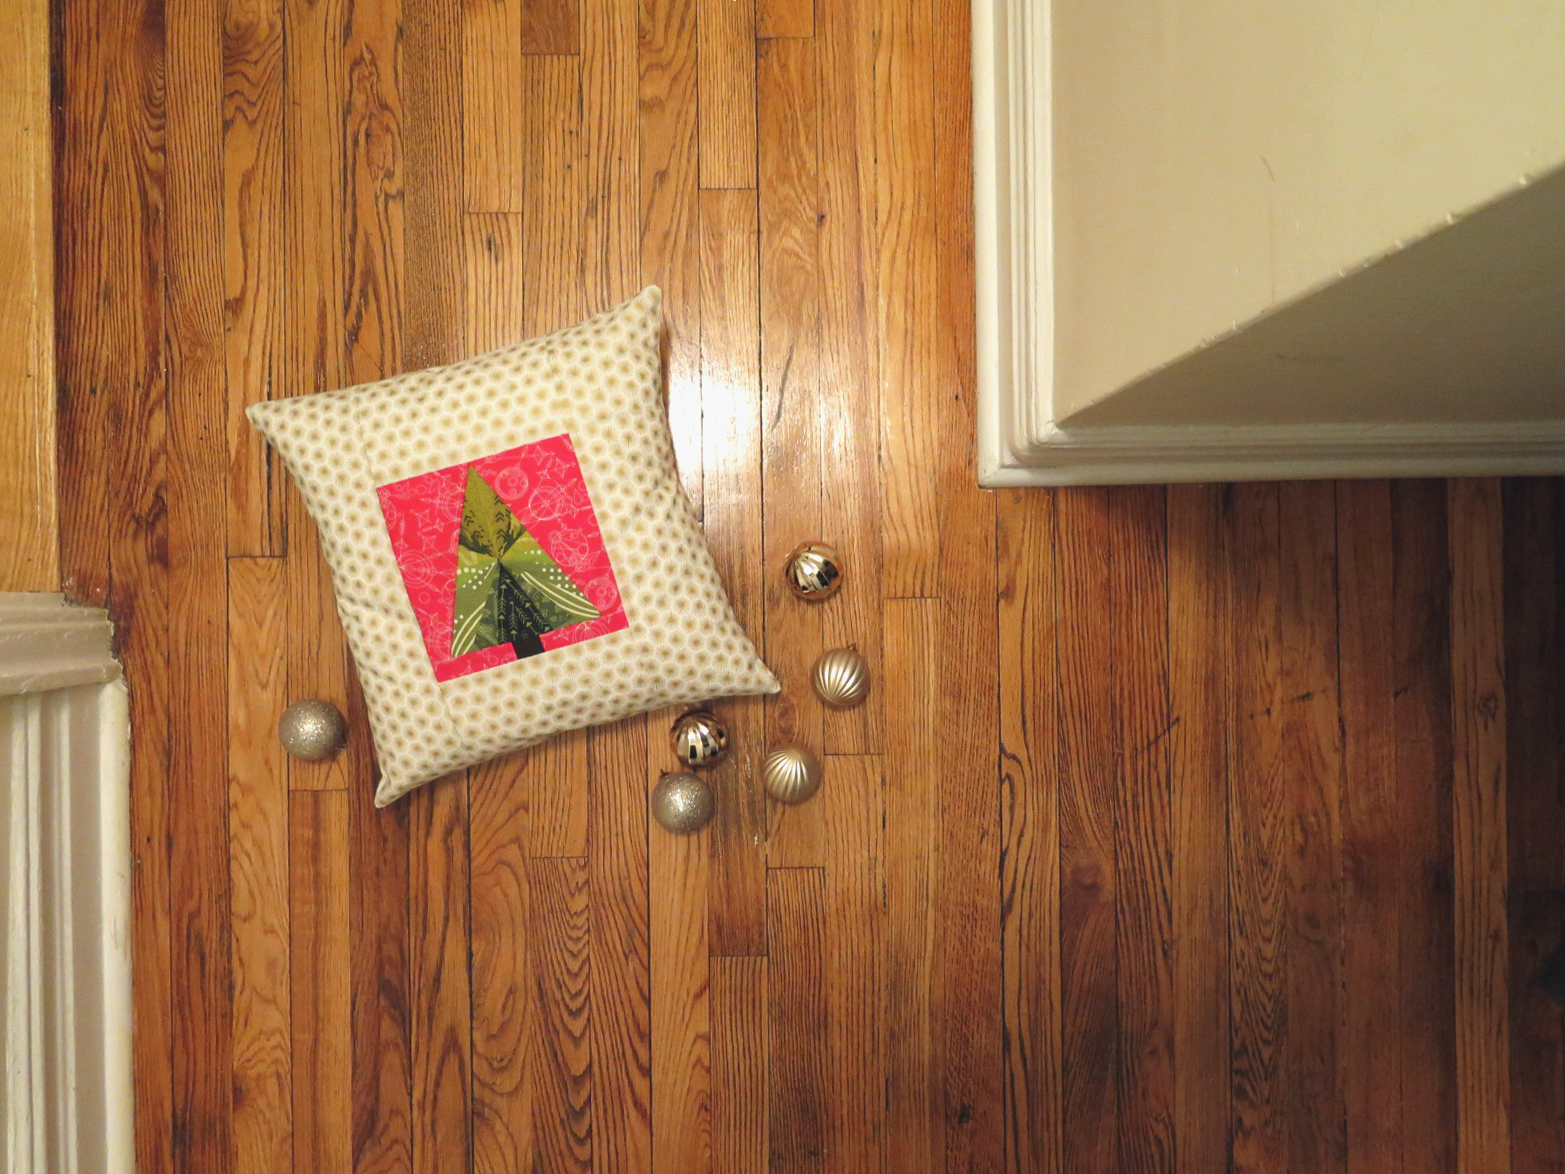
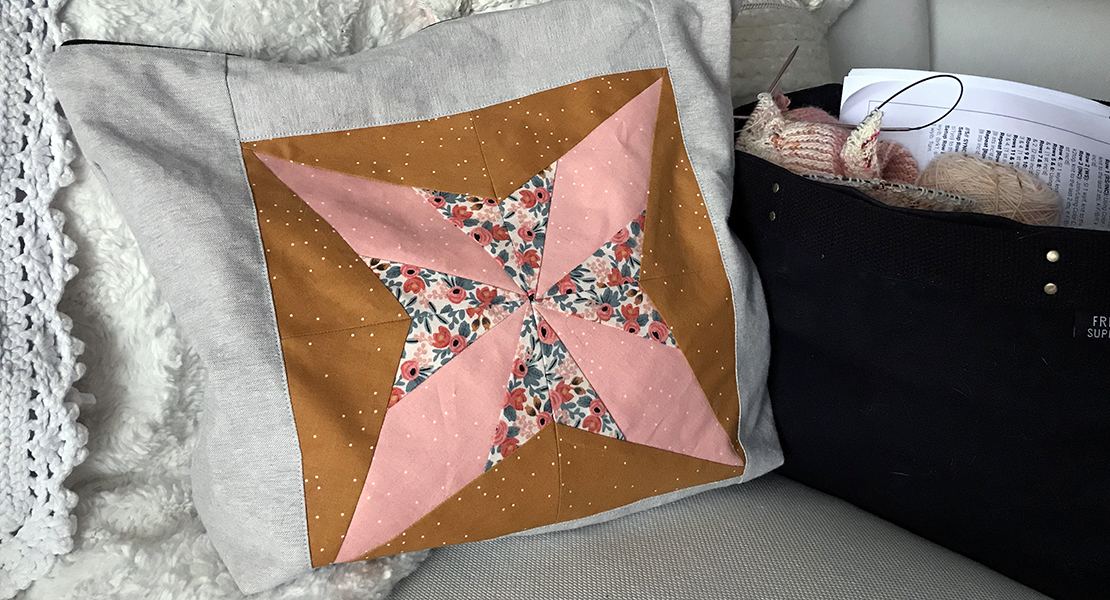
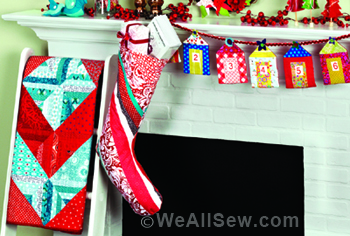
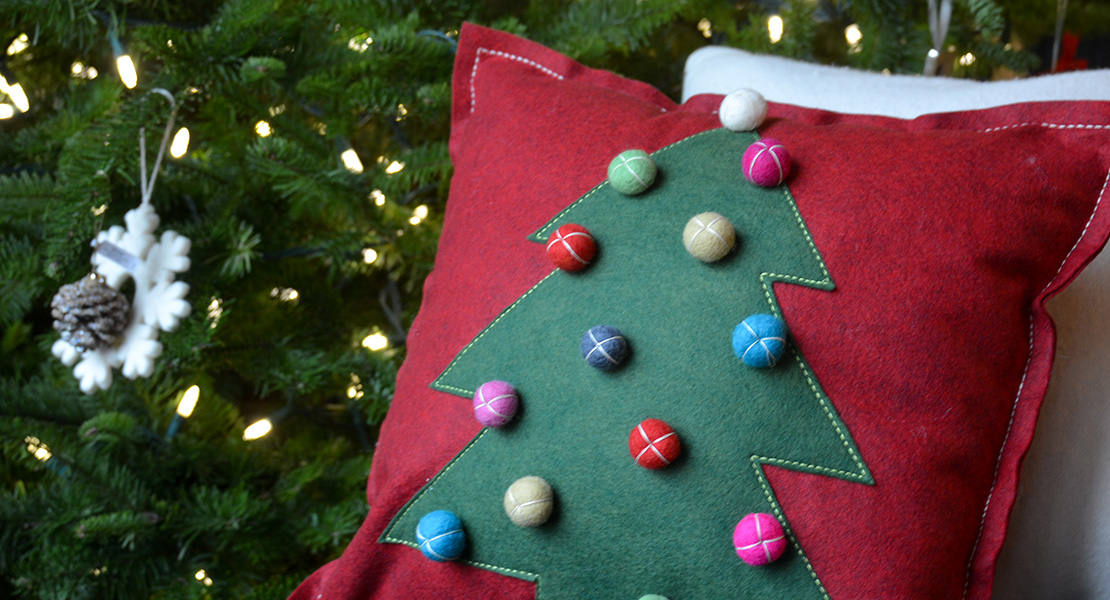
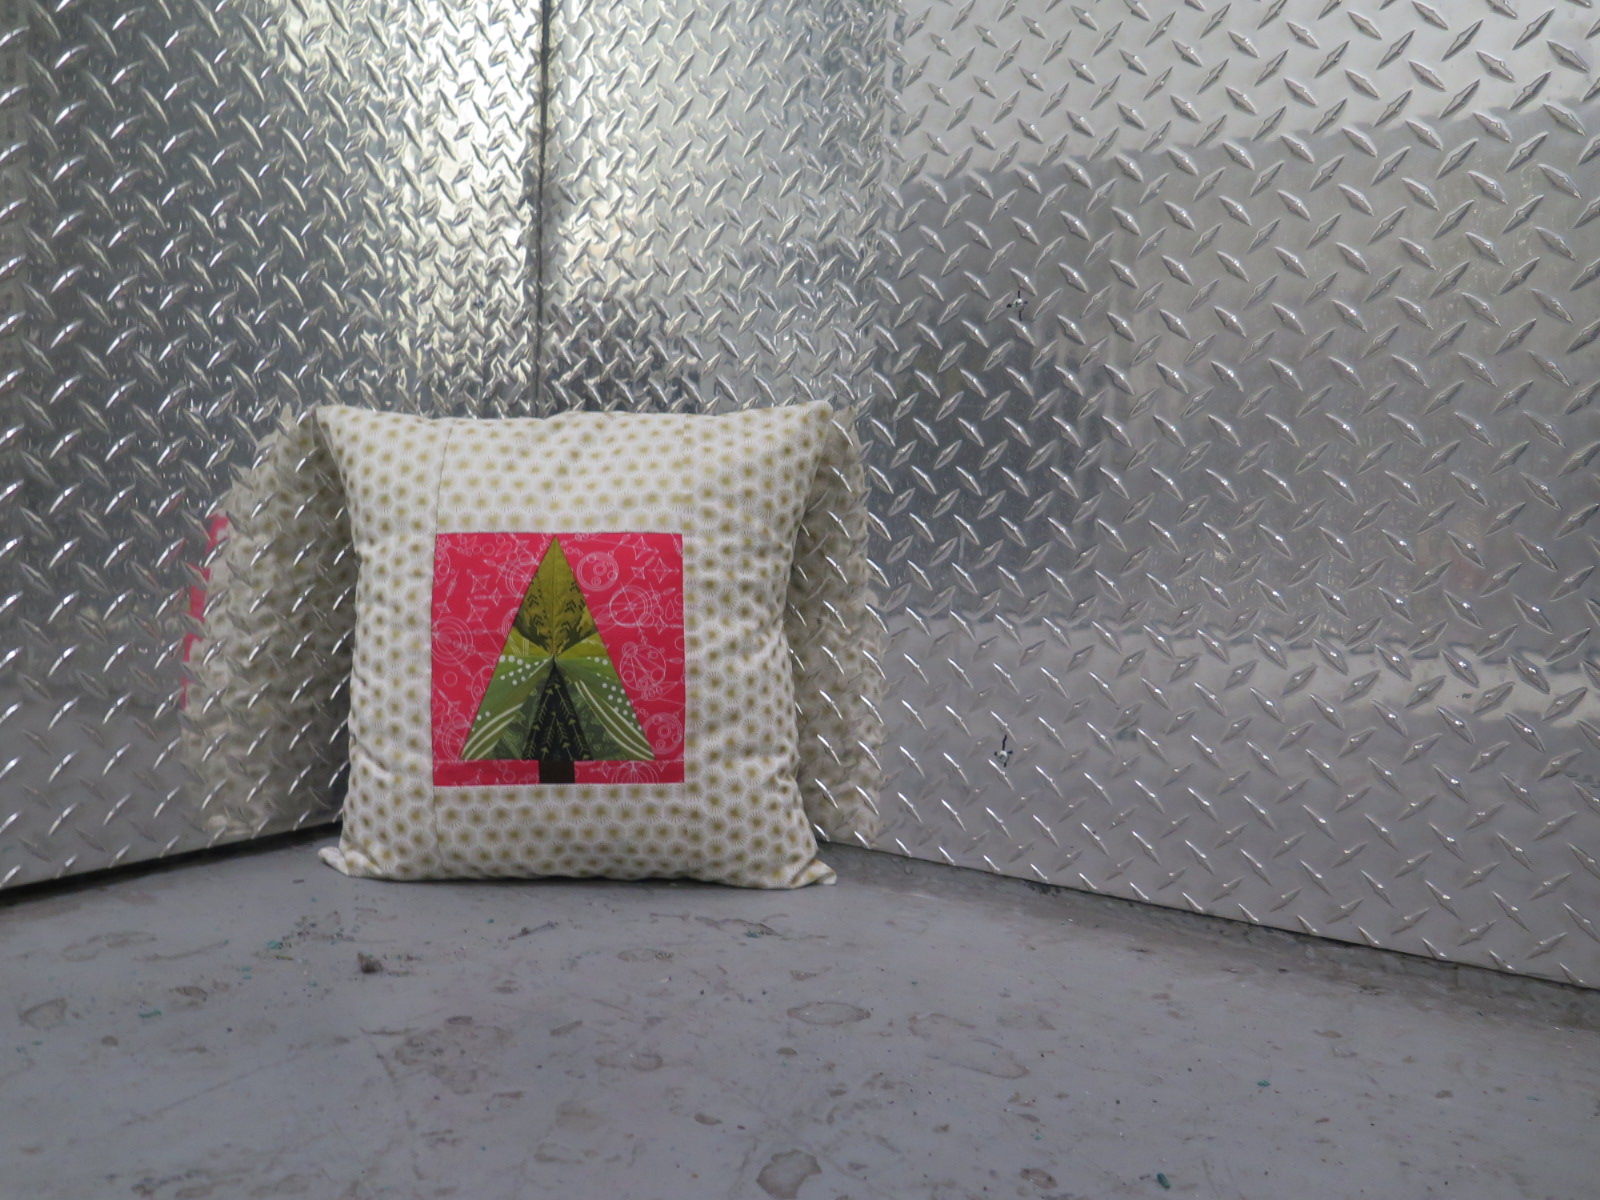
Foundation Paper Pieced Christmas Pillow
Pillows have always been one of my favorite things to make. In fact, this is my second BERNINA pillow tutorial. I love pillows because they are so versatile. You can make them simple, more complex, you can swap them out super easily to change the look of a room… Endless possibilities.
My first pillow tutorial was a bit of a time-consuming project. I made an EPP (English paper pieced) pillow. There was a ton of hand sewing involved, then appliqué, then quilting, then a zipper, then pom pom fringe…don’t get me wrong, I love that pillow, but sometimes you just don’t have time to devote to making a pillow into such a big production. So I wanted to circle back to the pillow and do a much more streamlined version, something you can do all in one night after work.
As I mentioned, my last pillow was EPP. I thought I would hop one letter to the right and do an FPP (also known as foundation paper piecing) pillow this time! FPP is the process of sewing fabric onto a pattern printed on paper. The results are astounding. Warning: once you have tried FPP, you will probably become horribly addicted. It’s one of my absolute favorite methods of sewing.

I’ll break down the steps for you in this tutorial. For another awesome BERNINA tutorial on paper Piecing, check out Perry Layman’s awesome Scandinavian Leaf tutorial.
Materials to make an FPP Pillow:
- 1 16″ pillow form
- Assorted scraps or pieces of fabric
- 1/2 yard background and backing fabric
- Iron
- Pressing tool
- Thread
- Tweezers
- Download the Paper Pieced Christmas Tree template
- Foundation paper piecing tutorial by Crafty Gemini
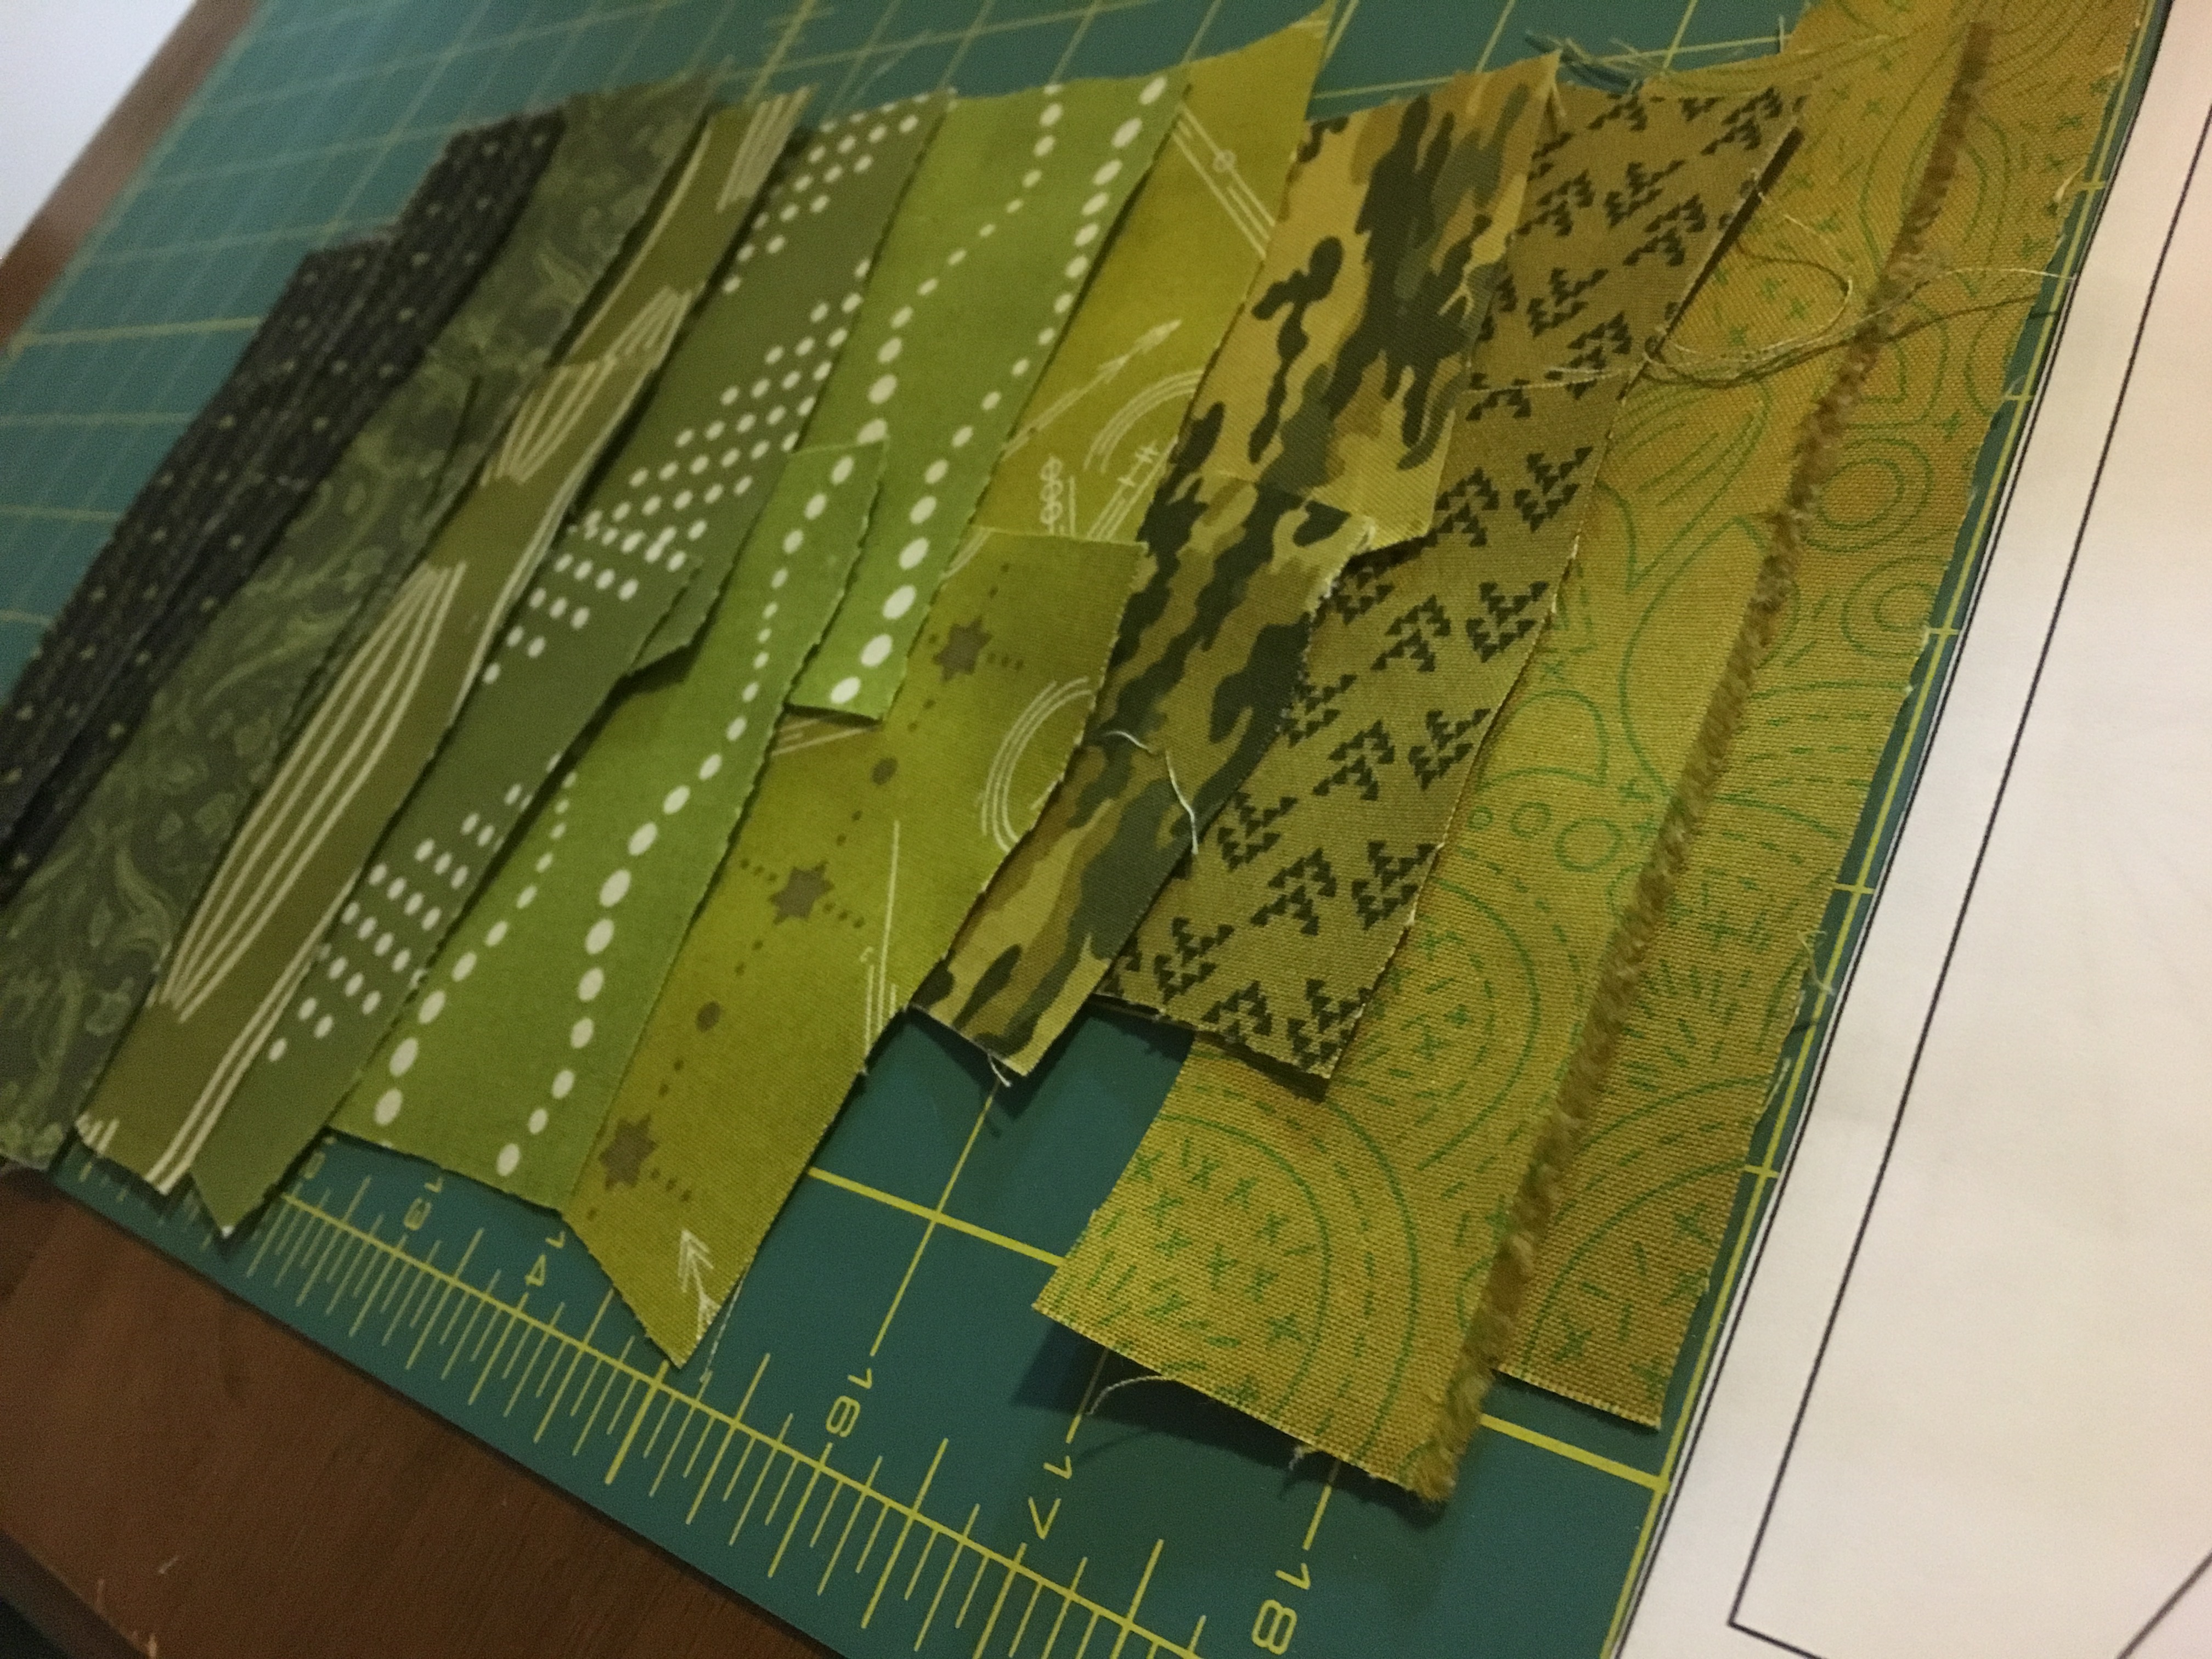
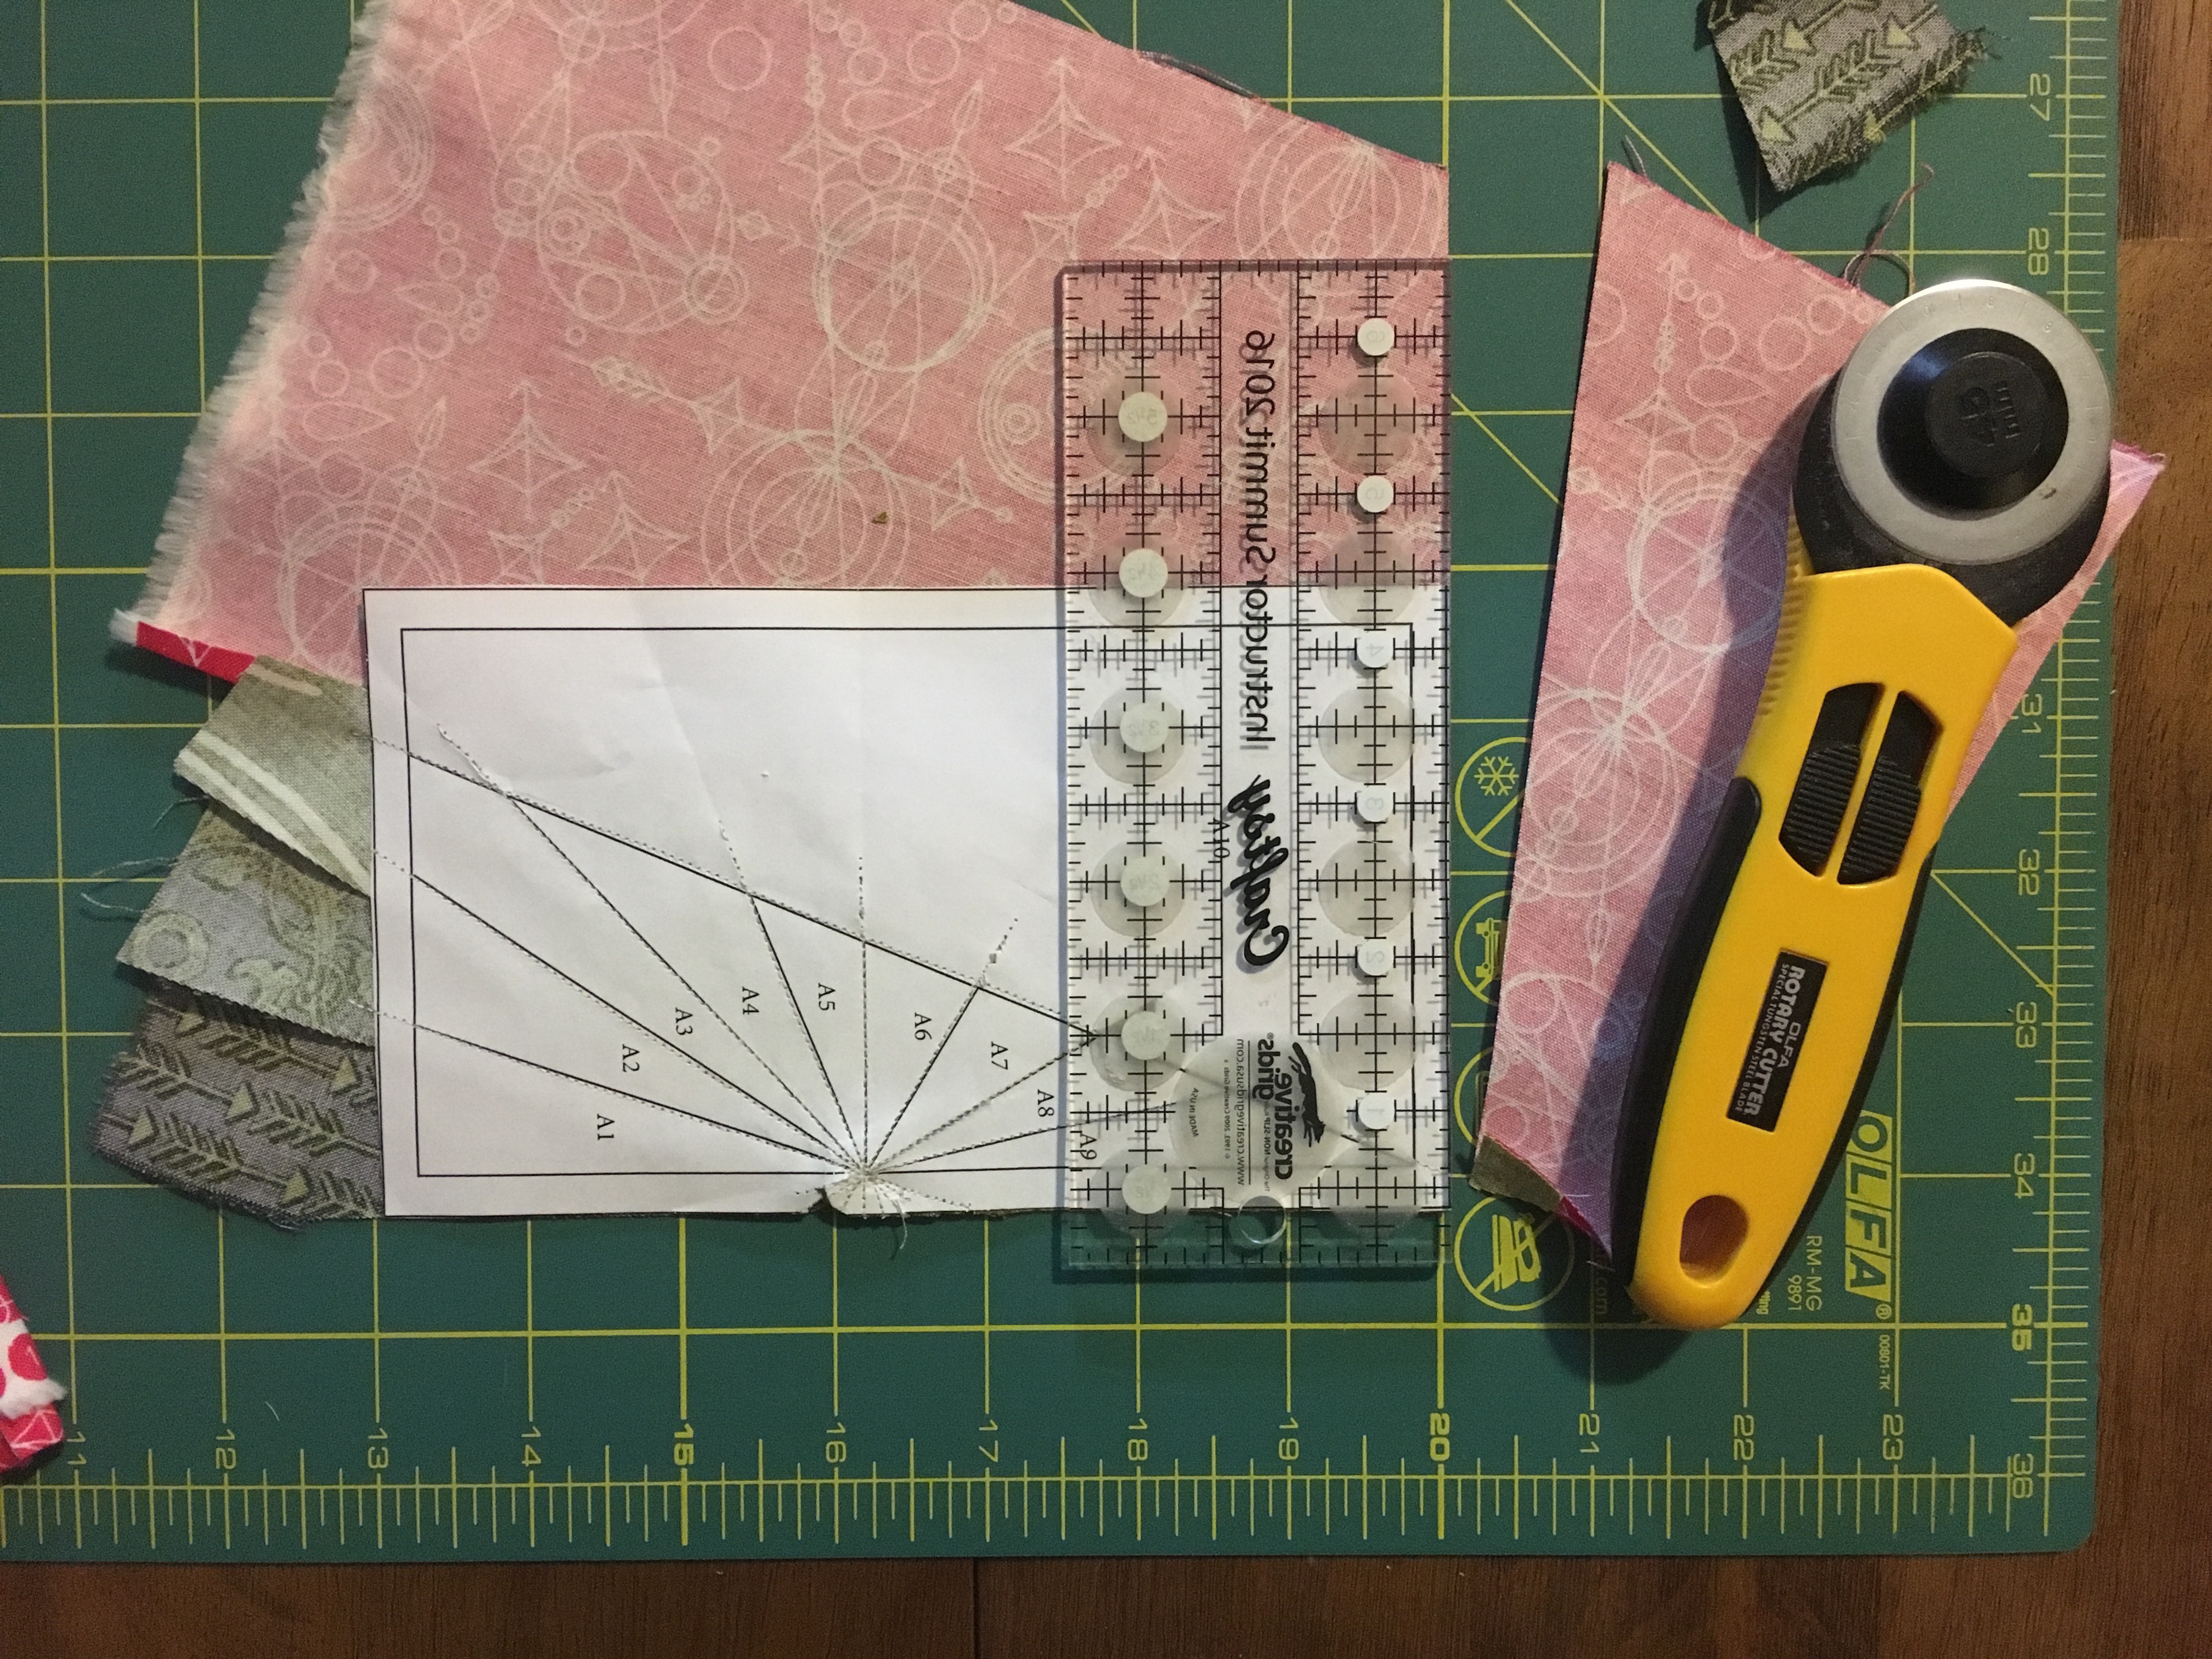
Once you have watched the video tutorial in the link above, start by printing out the tree pattern. Measure the 1″ block to be sure you are working in the right scale. The finished tree is a 7.5″ block. Cut out your pieces, leaving the border around each piece. This is your quarter inch seam allowance.

Begin by cutting all the fabric you’ll need for the project. Cut your background and backing fabric. For a 16″ pillow, you’ll need:
- 2- 5″ x 7.5″ strips
- 2- 5″ x 16.5″ strips
- 1- 9″ x 16.5 ” piece
- 1- 13″ x 16.5″ piece
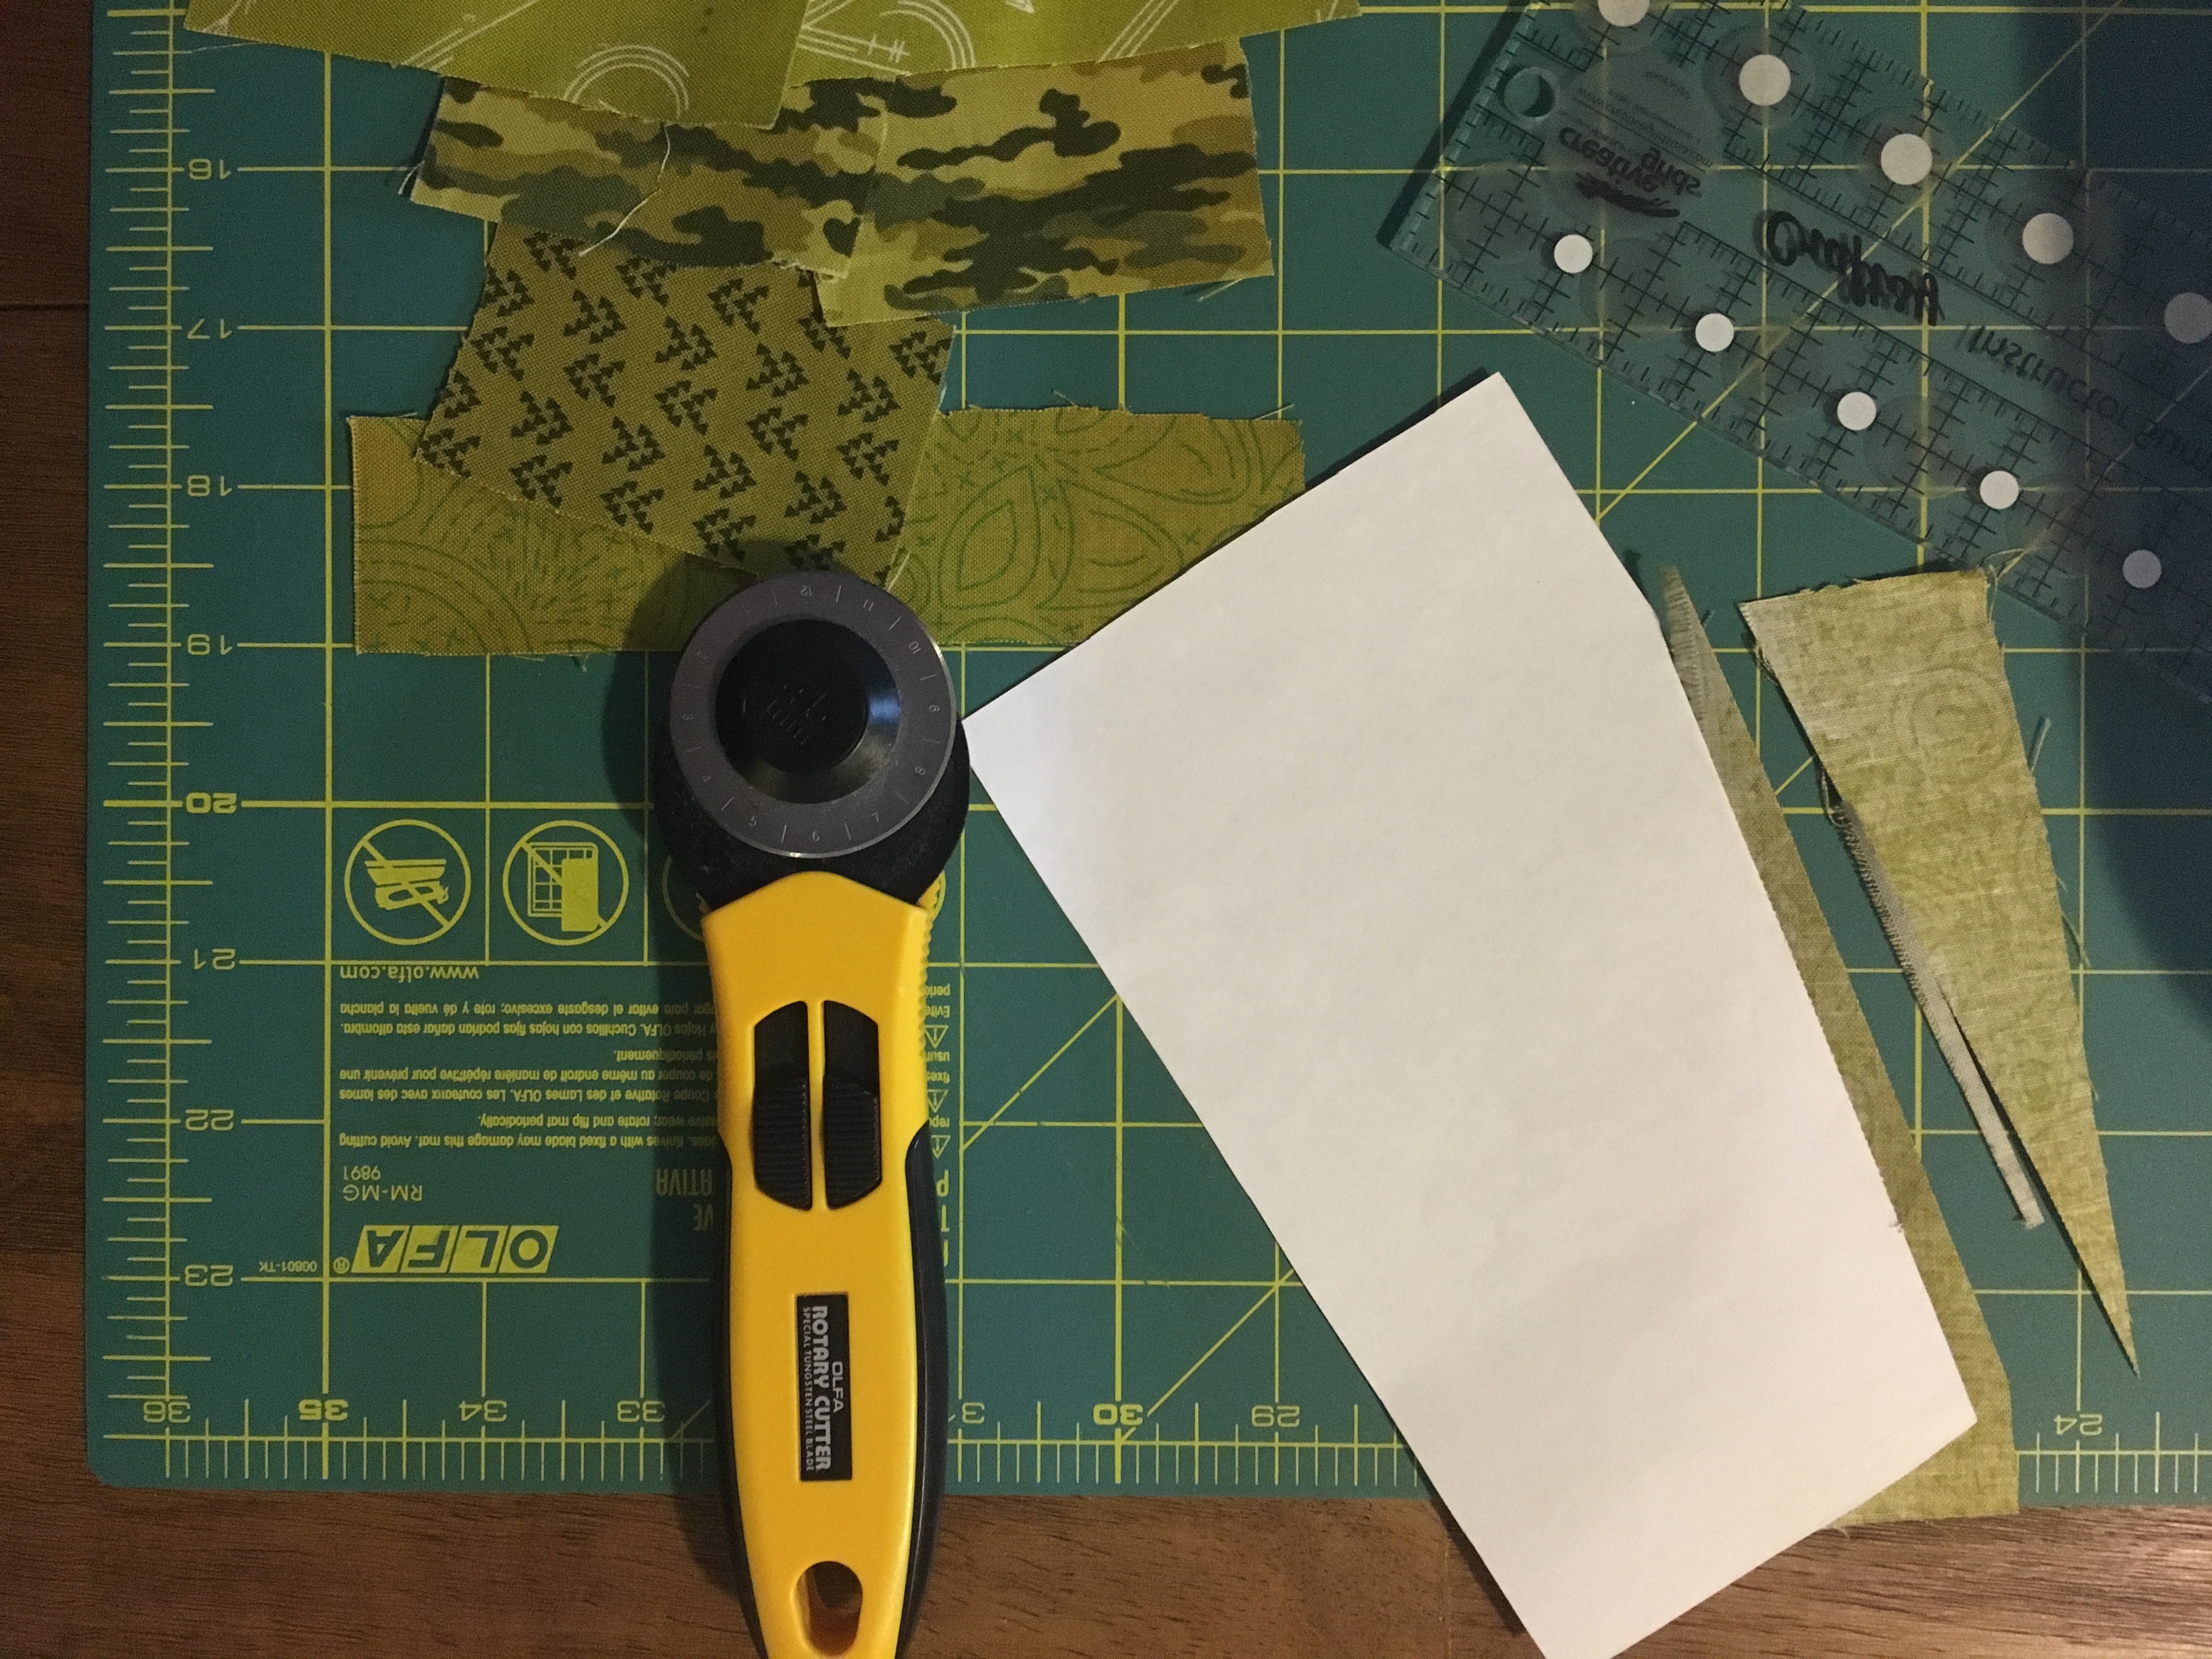
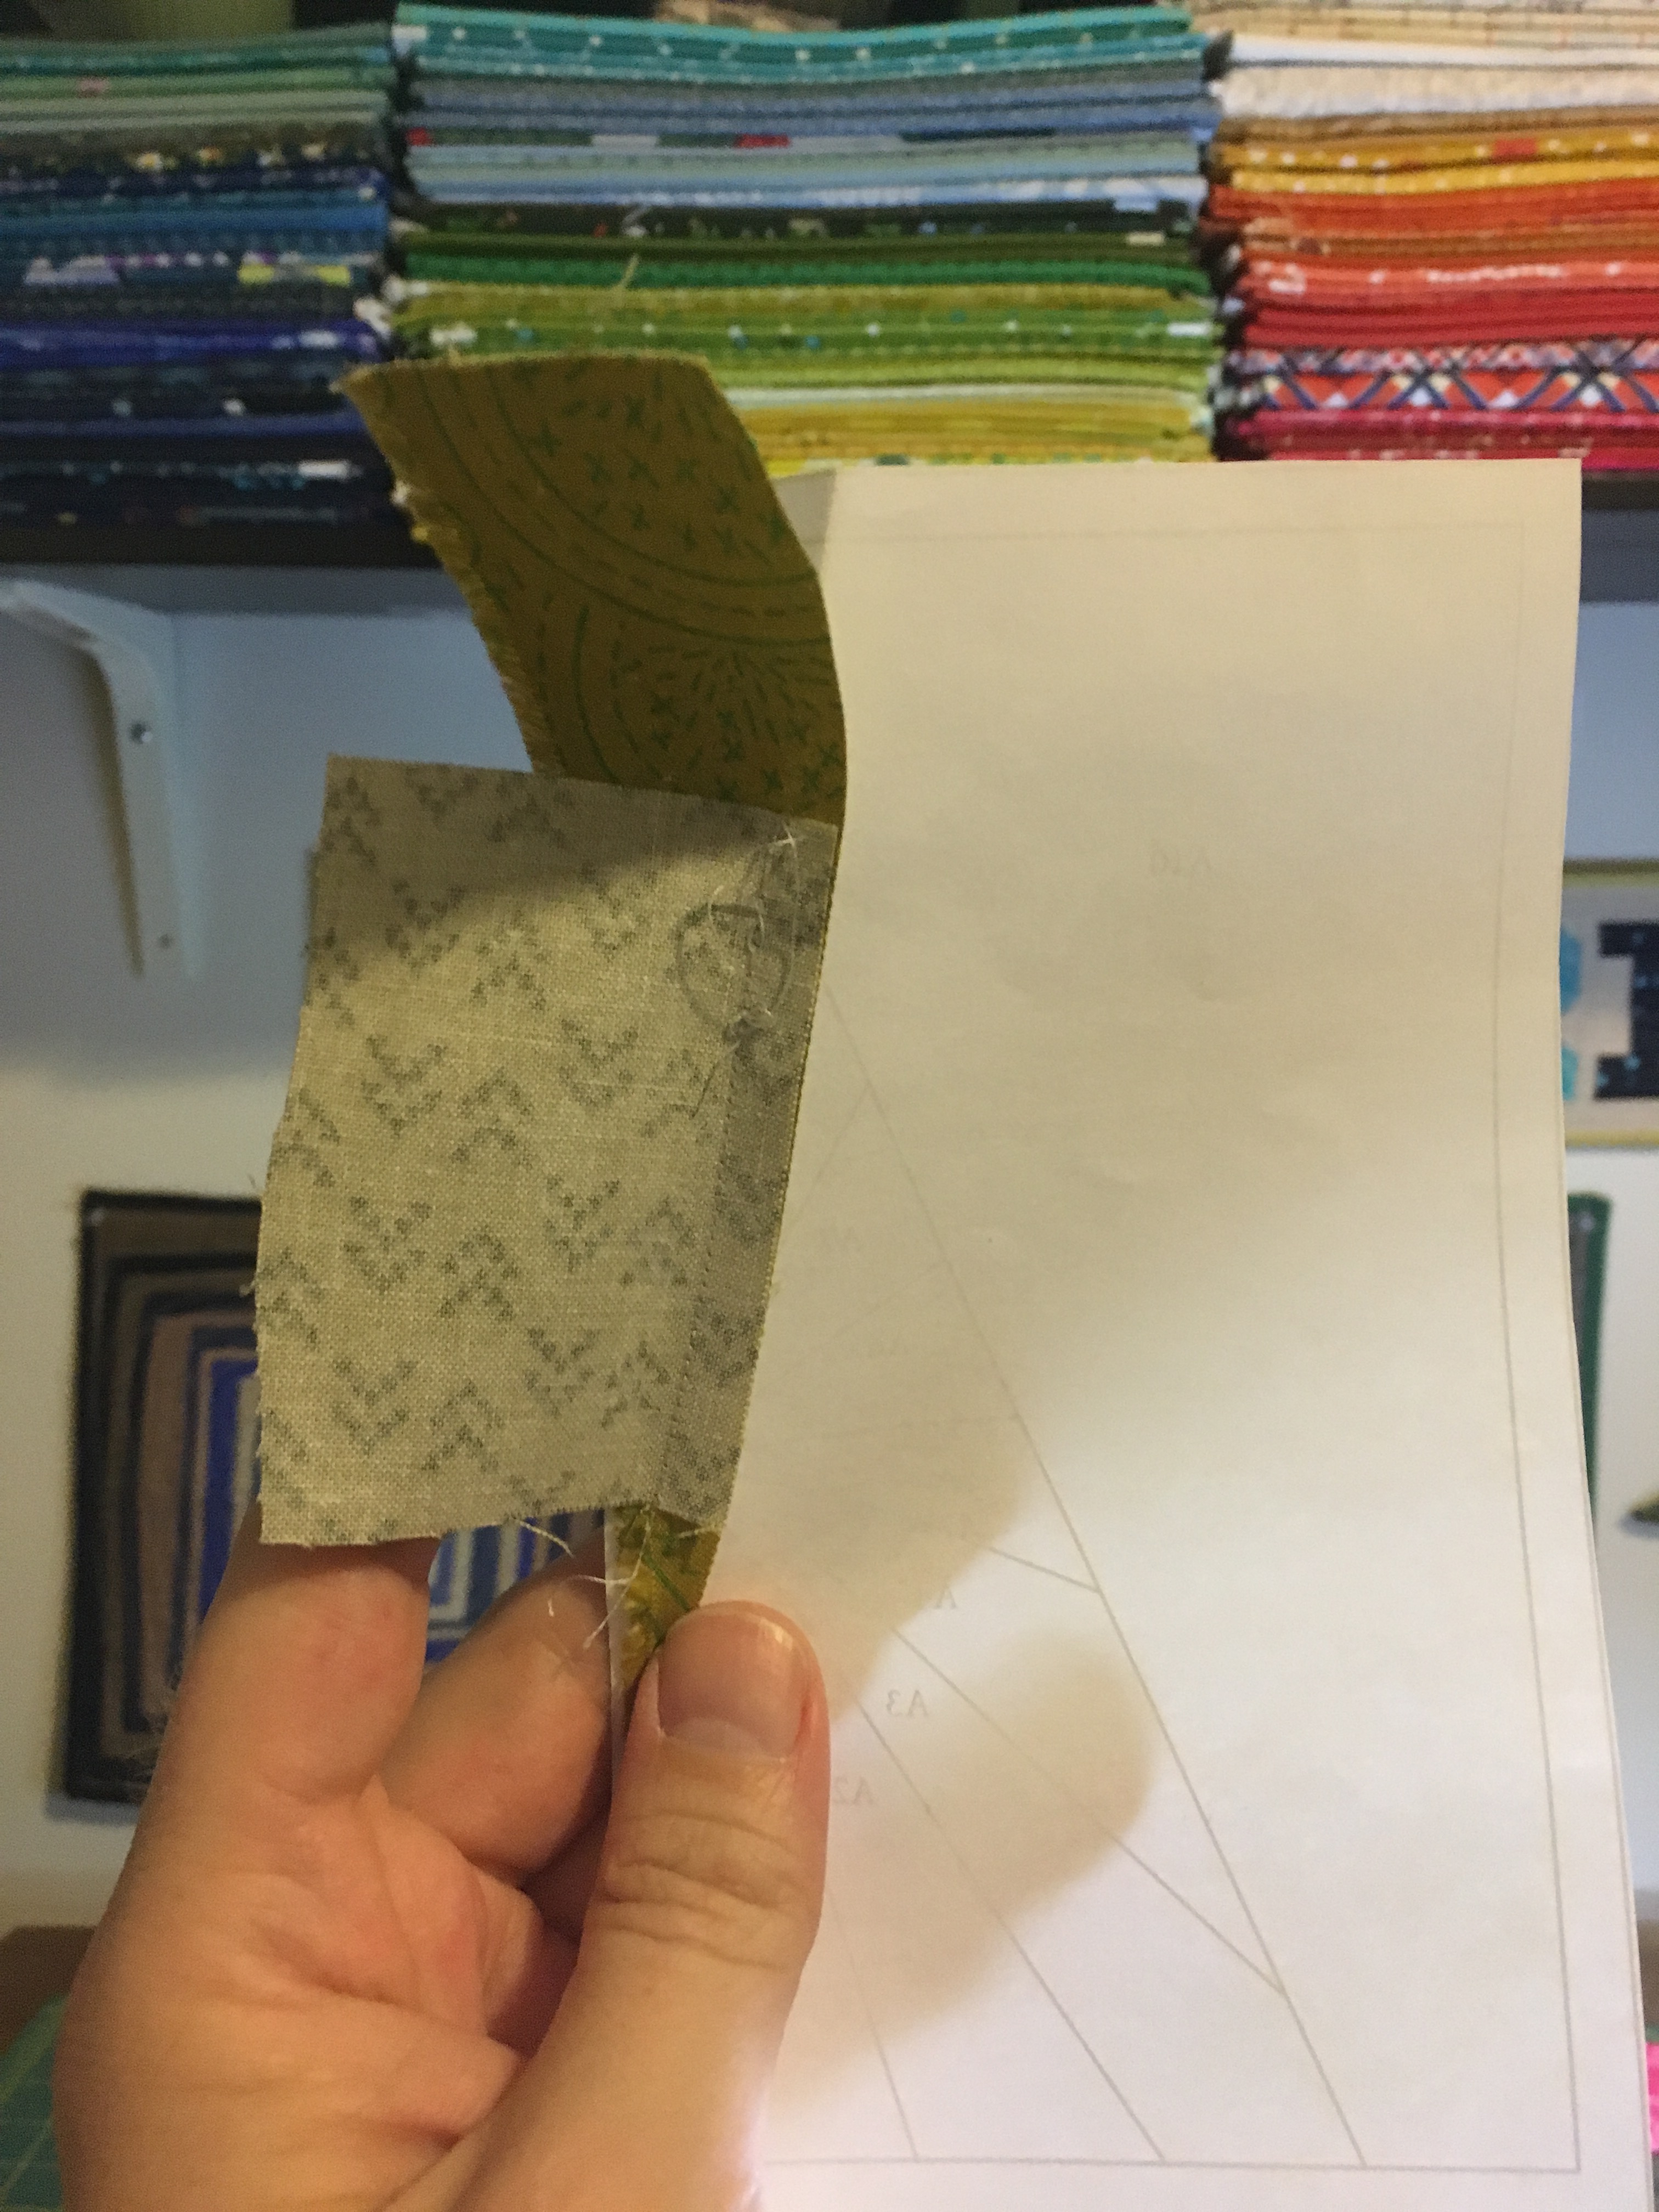
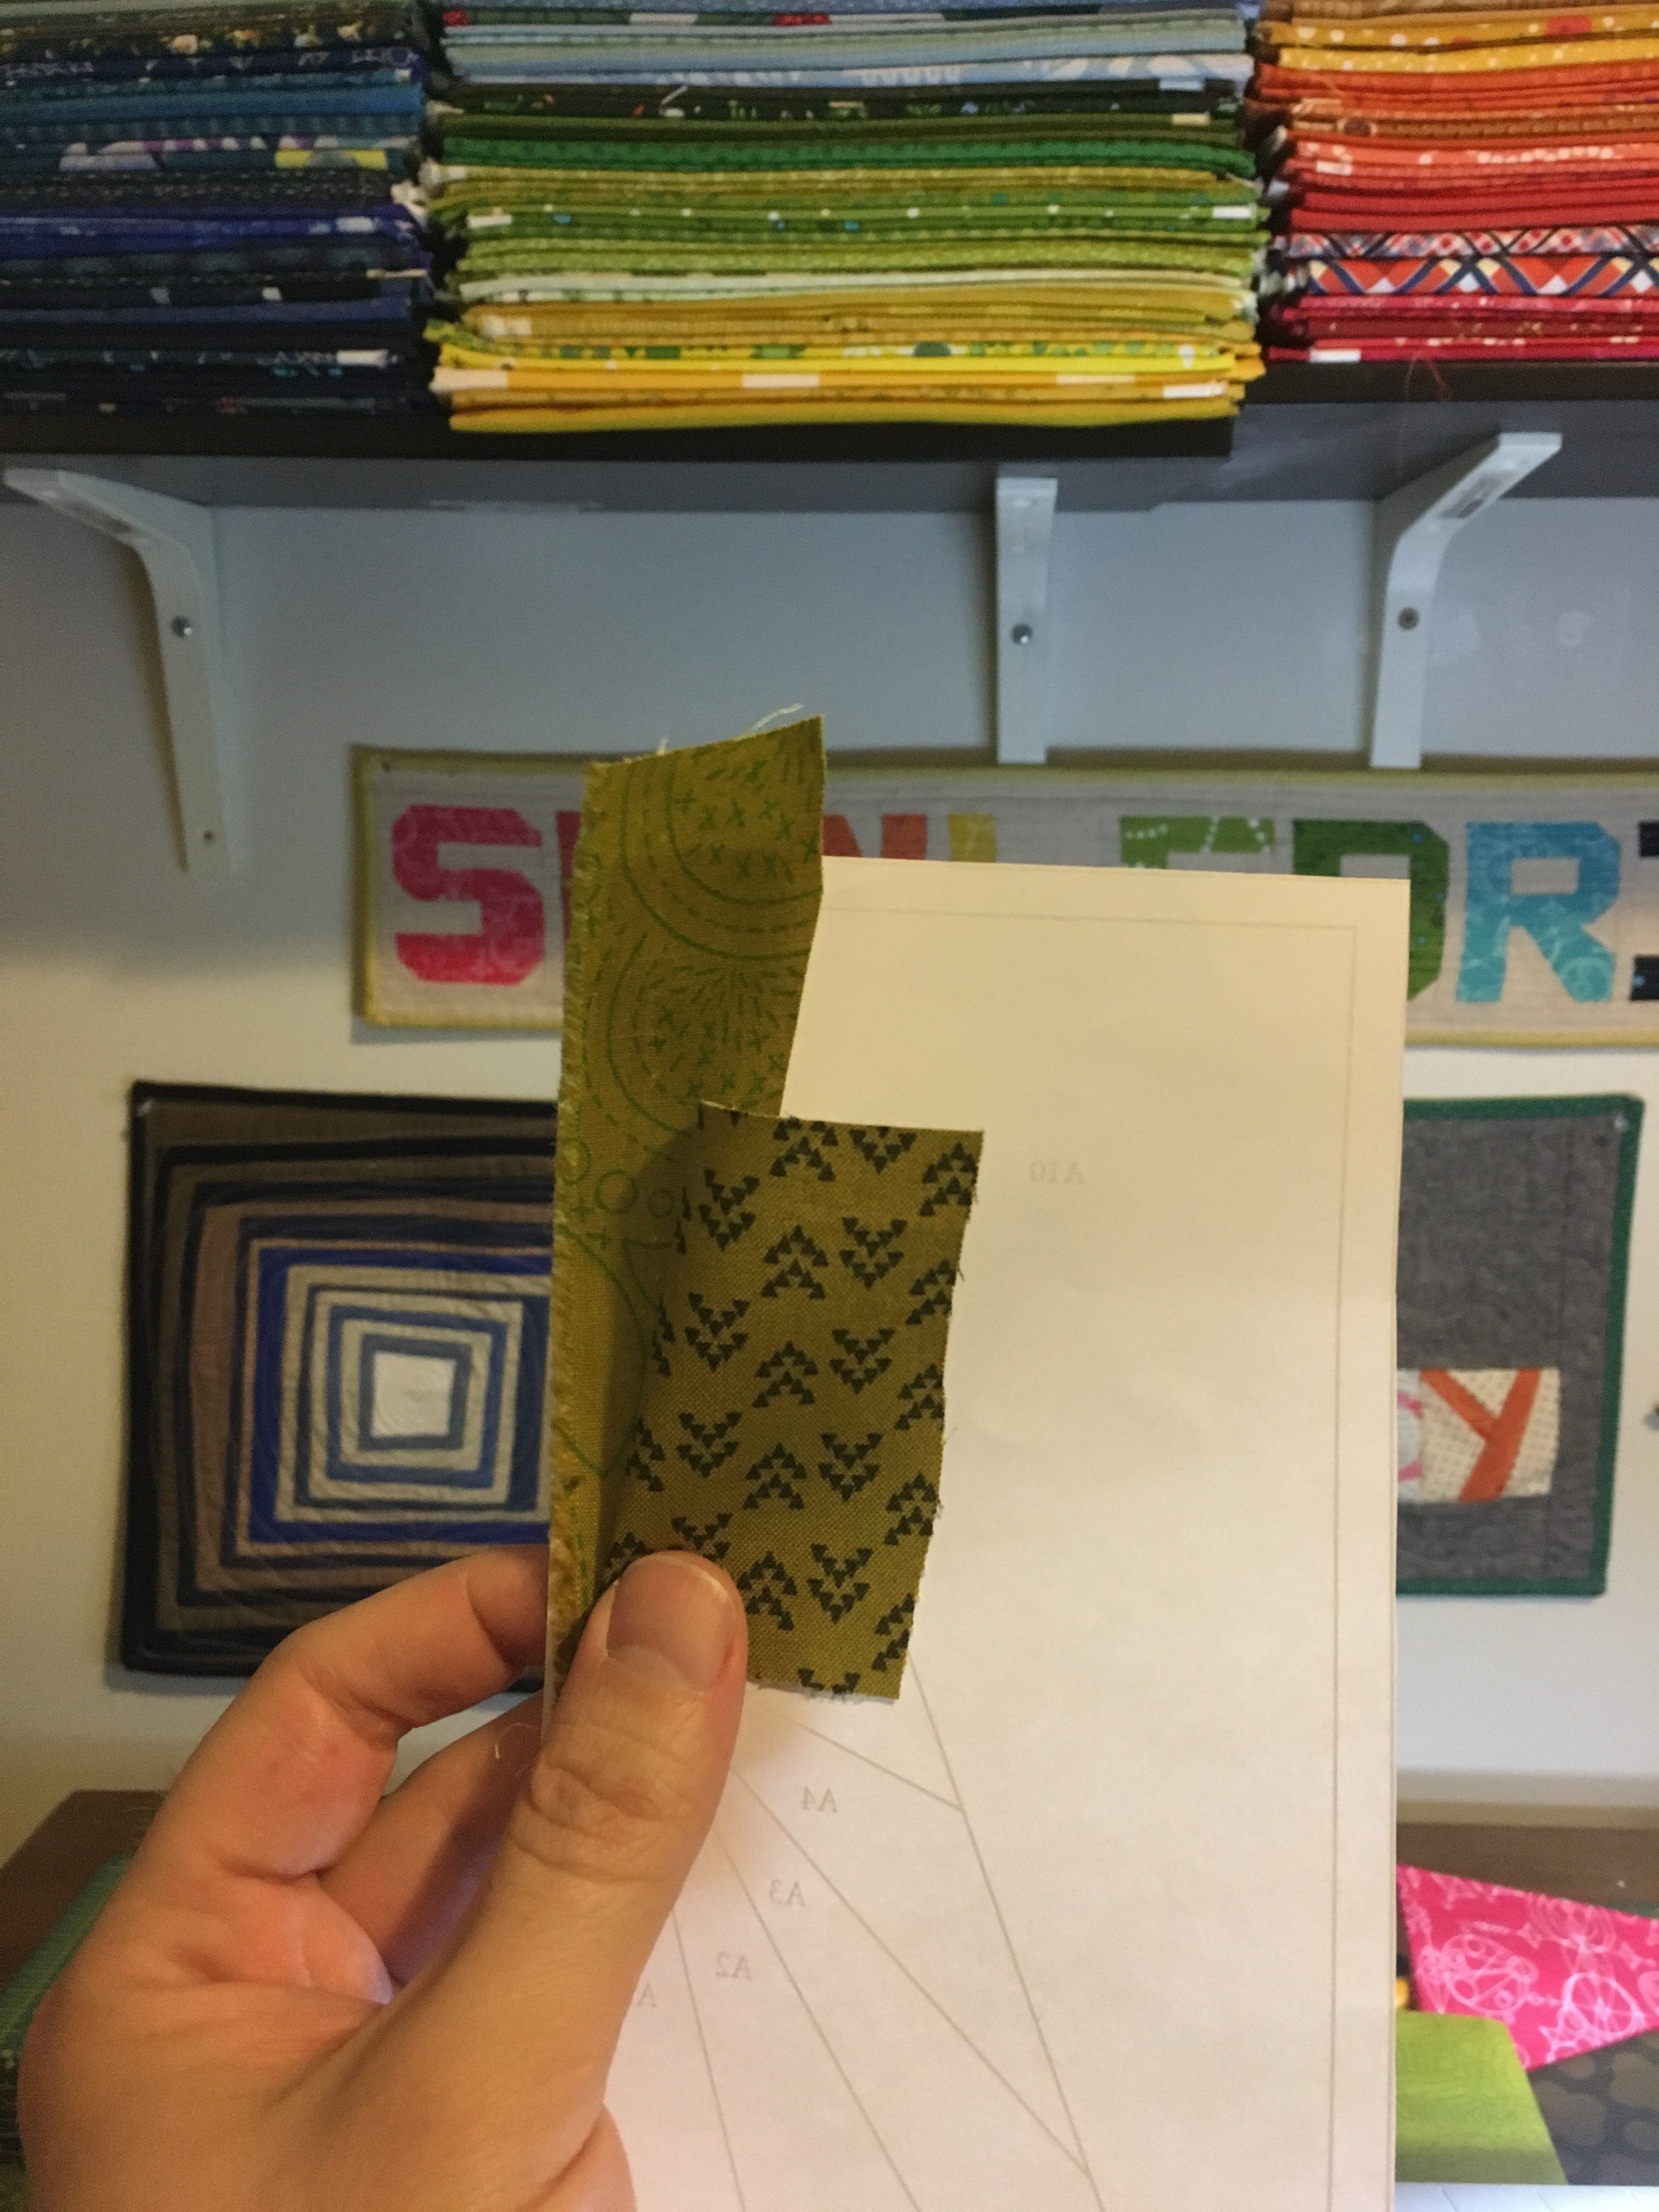
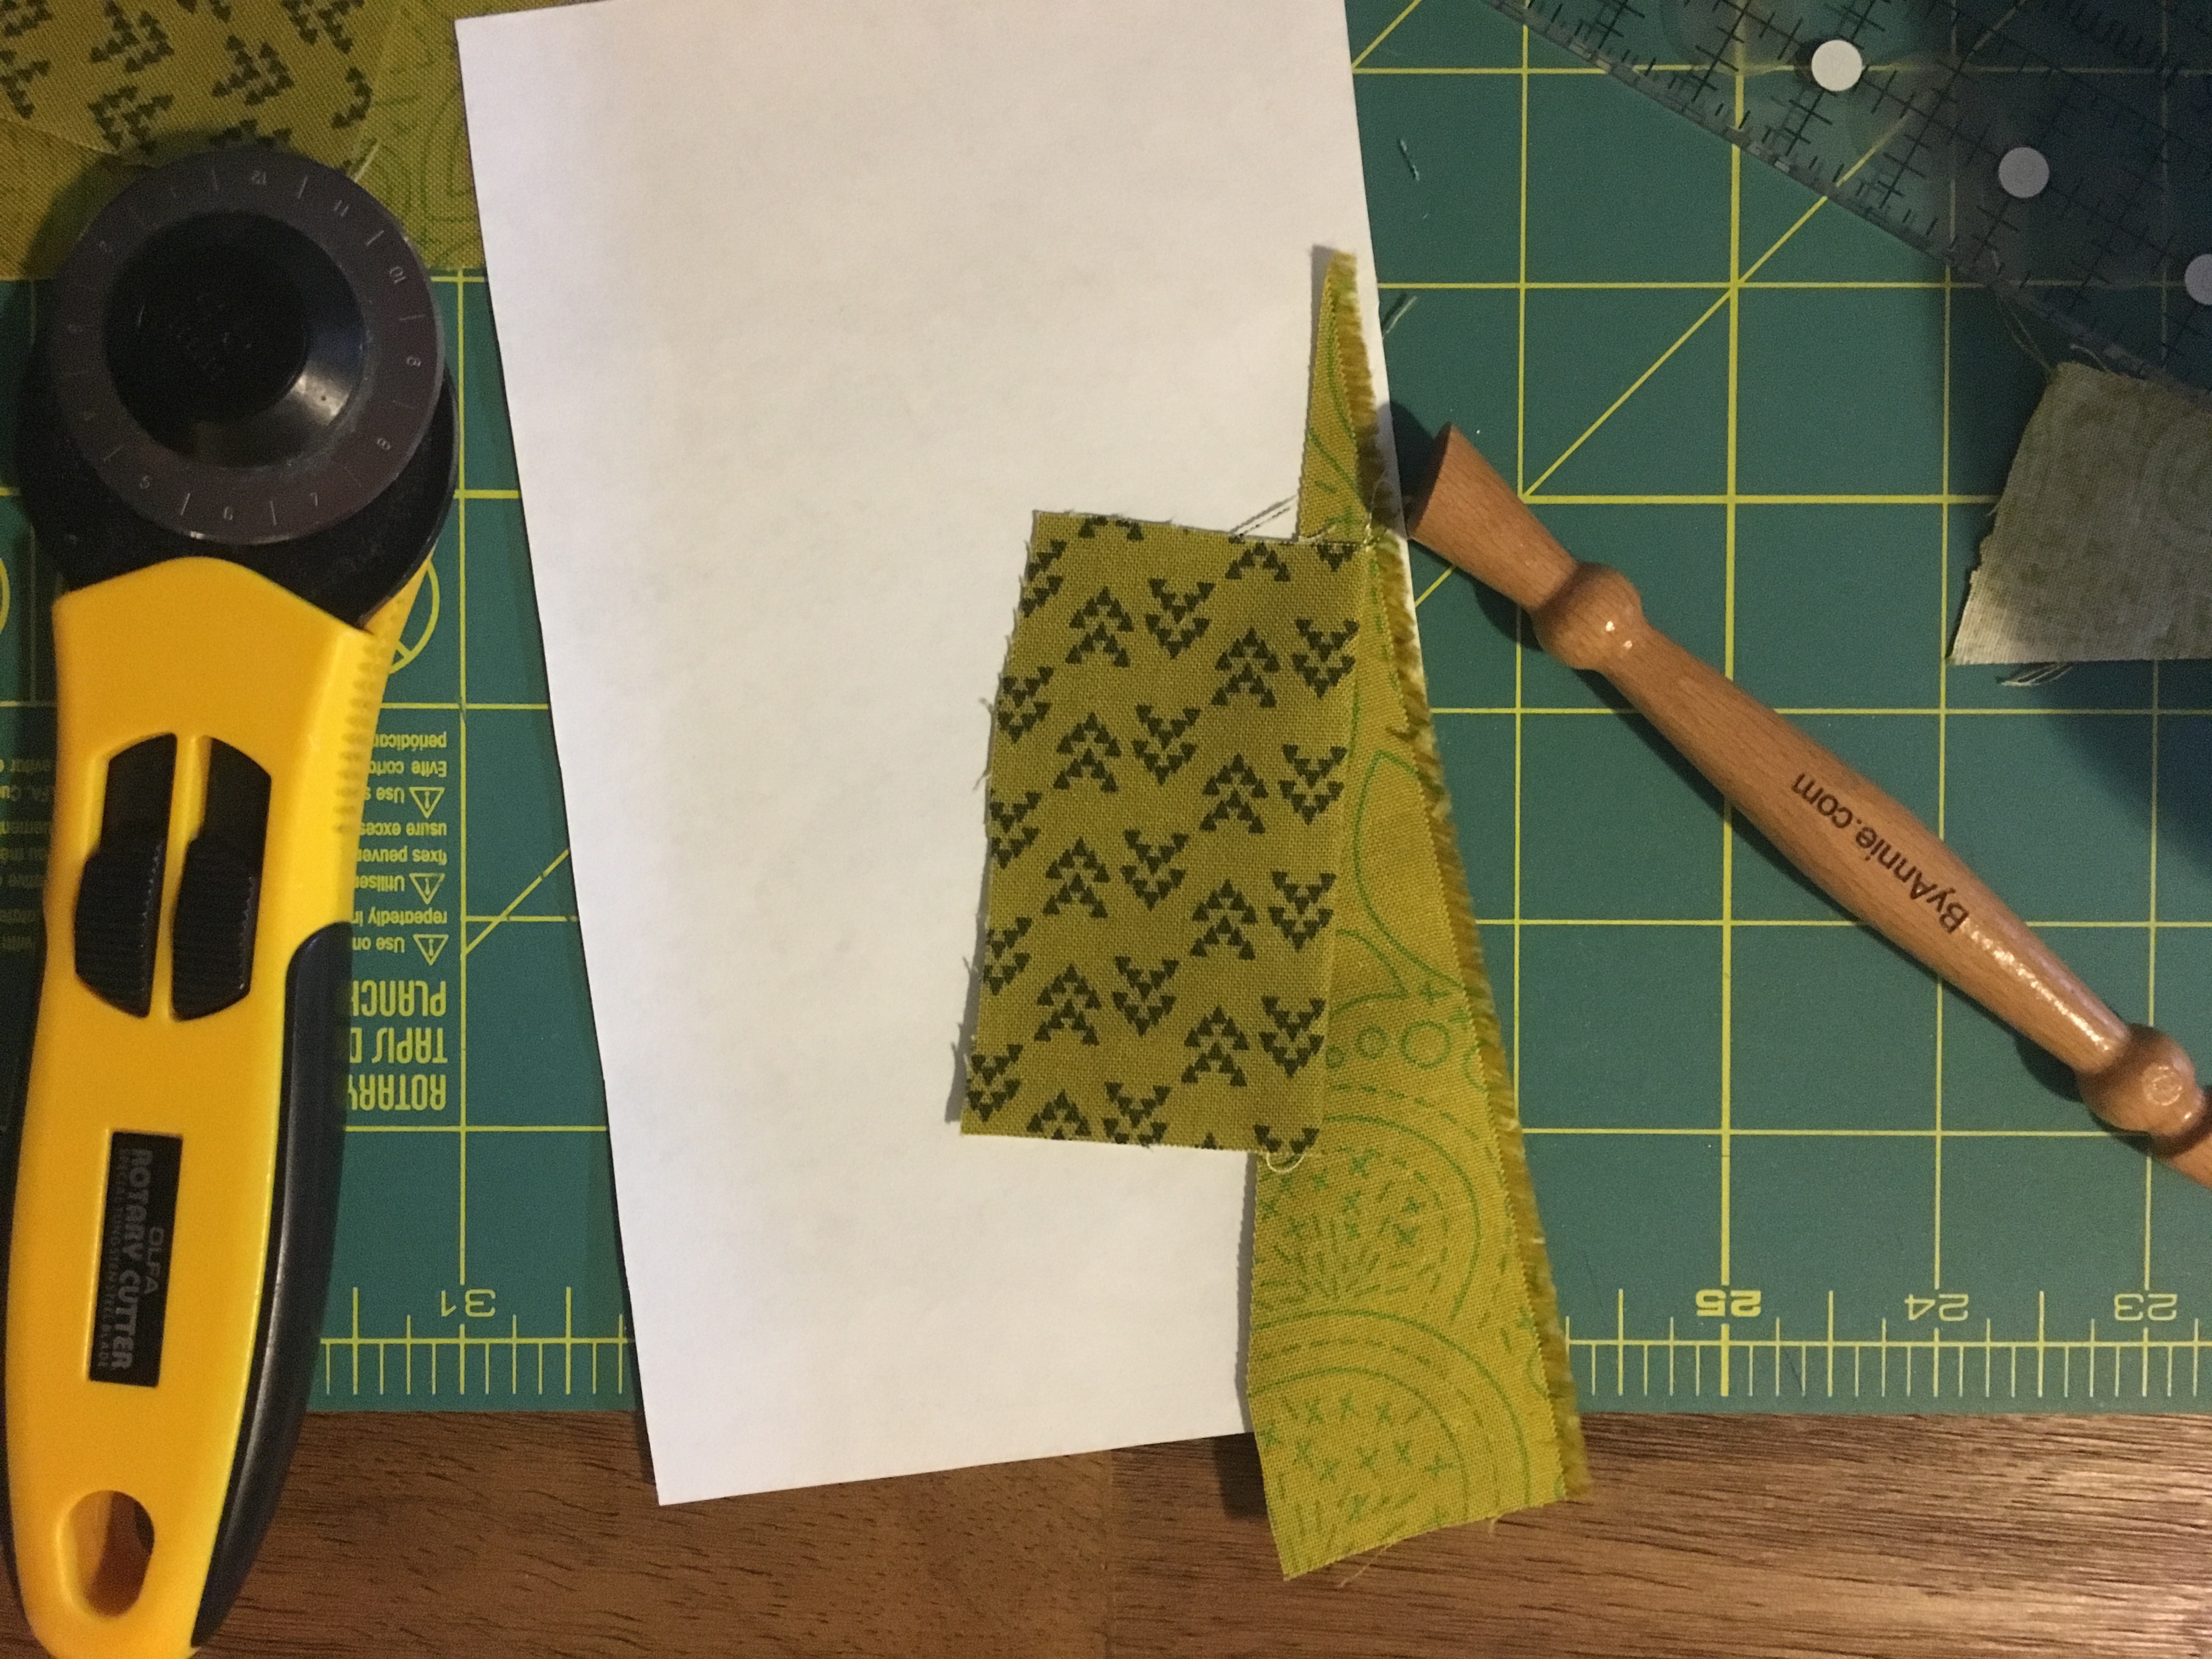
For the tree, you’ll need an assortment of prints. I pulled my favorite greens from my stash, but this is a great way to use scraps.
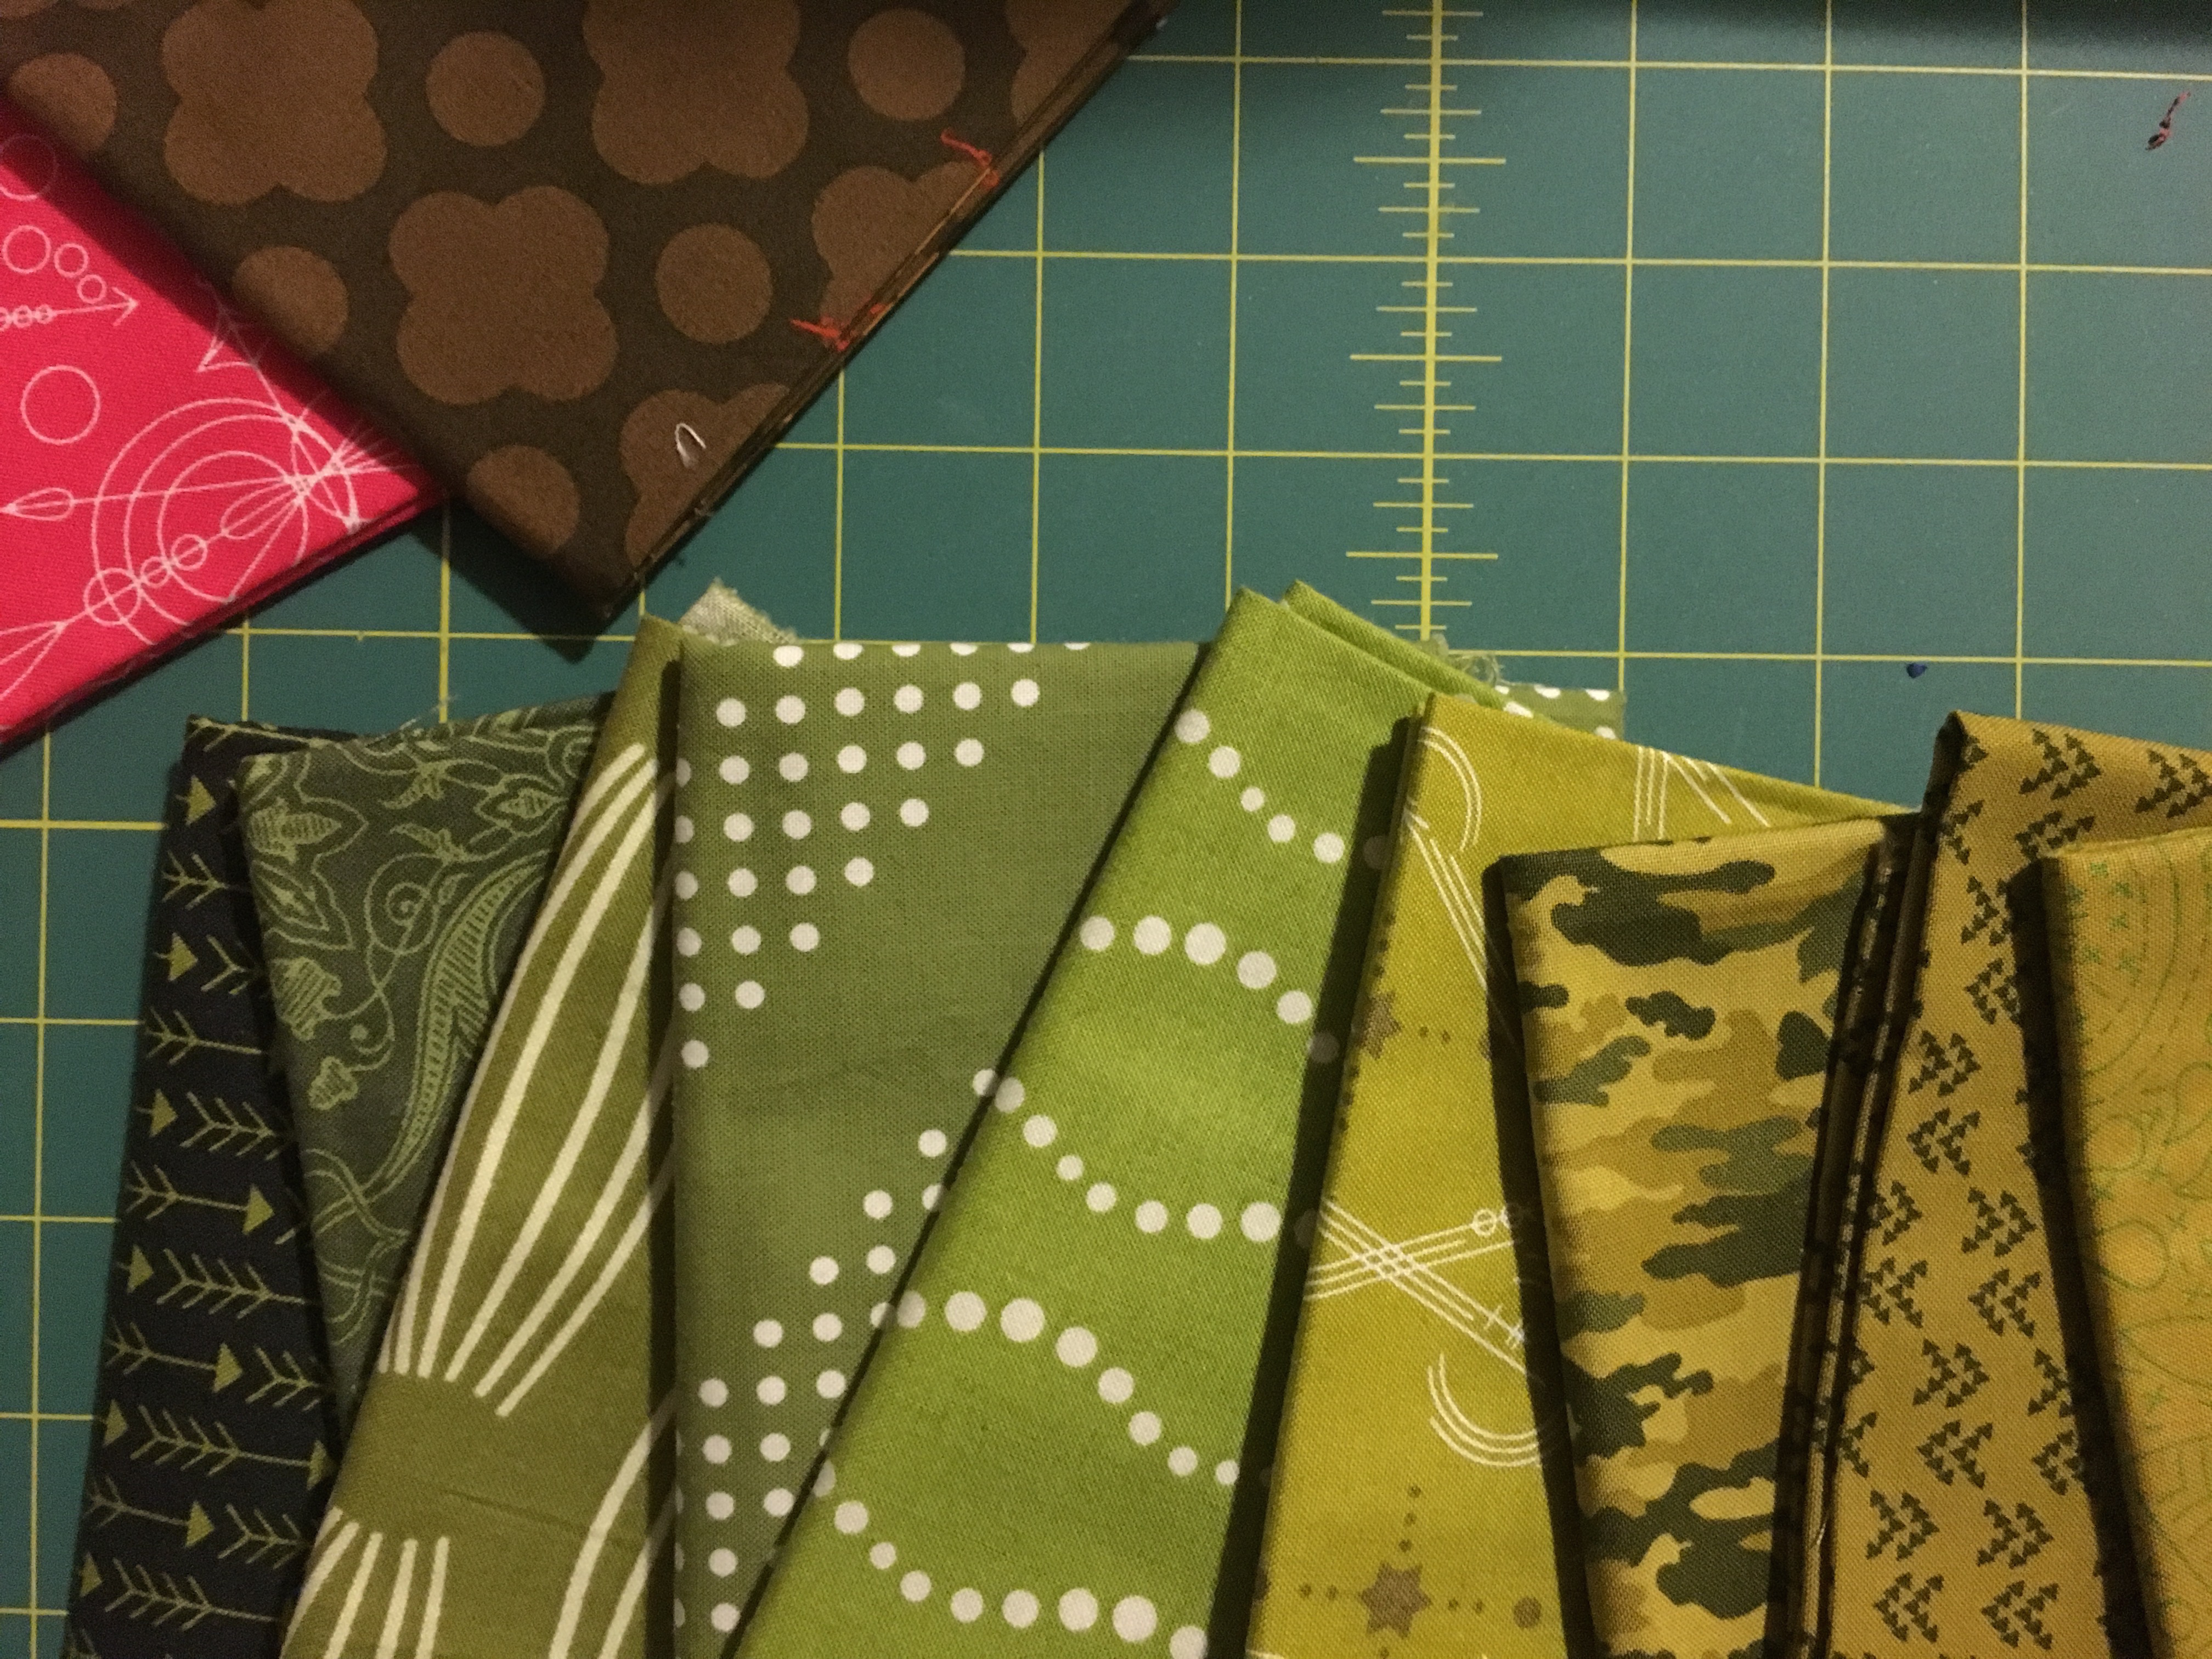
If you are using scraps and this is your first time paper piecing, use big scraps. Particularly for this pattern, which has a lot of steep angles, bigger is better!
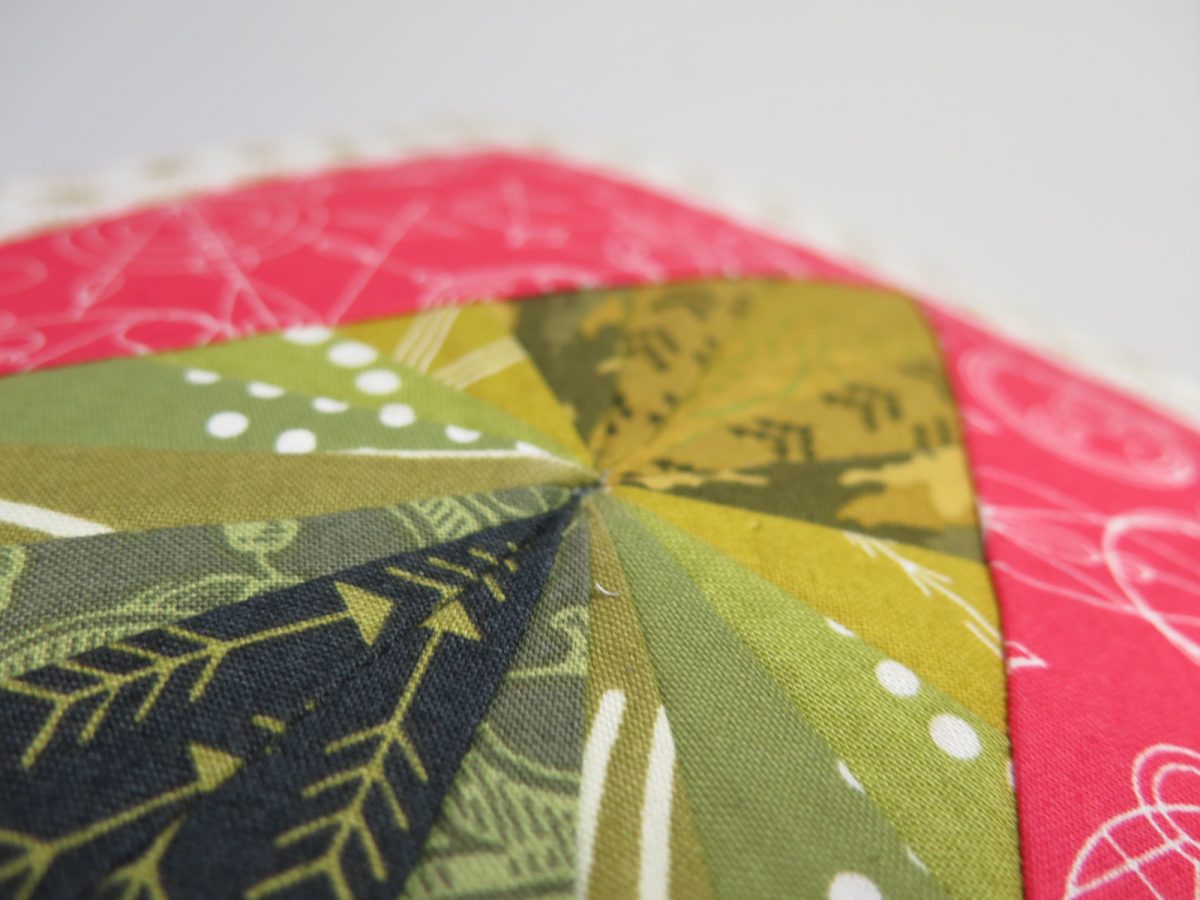
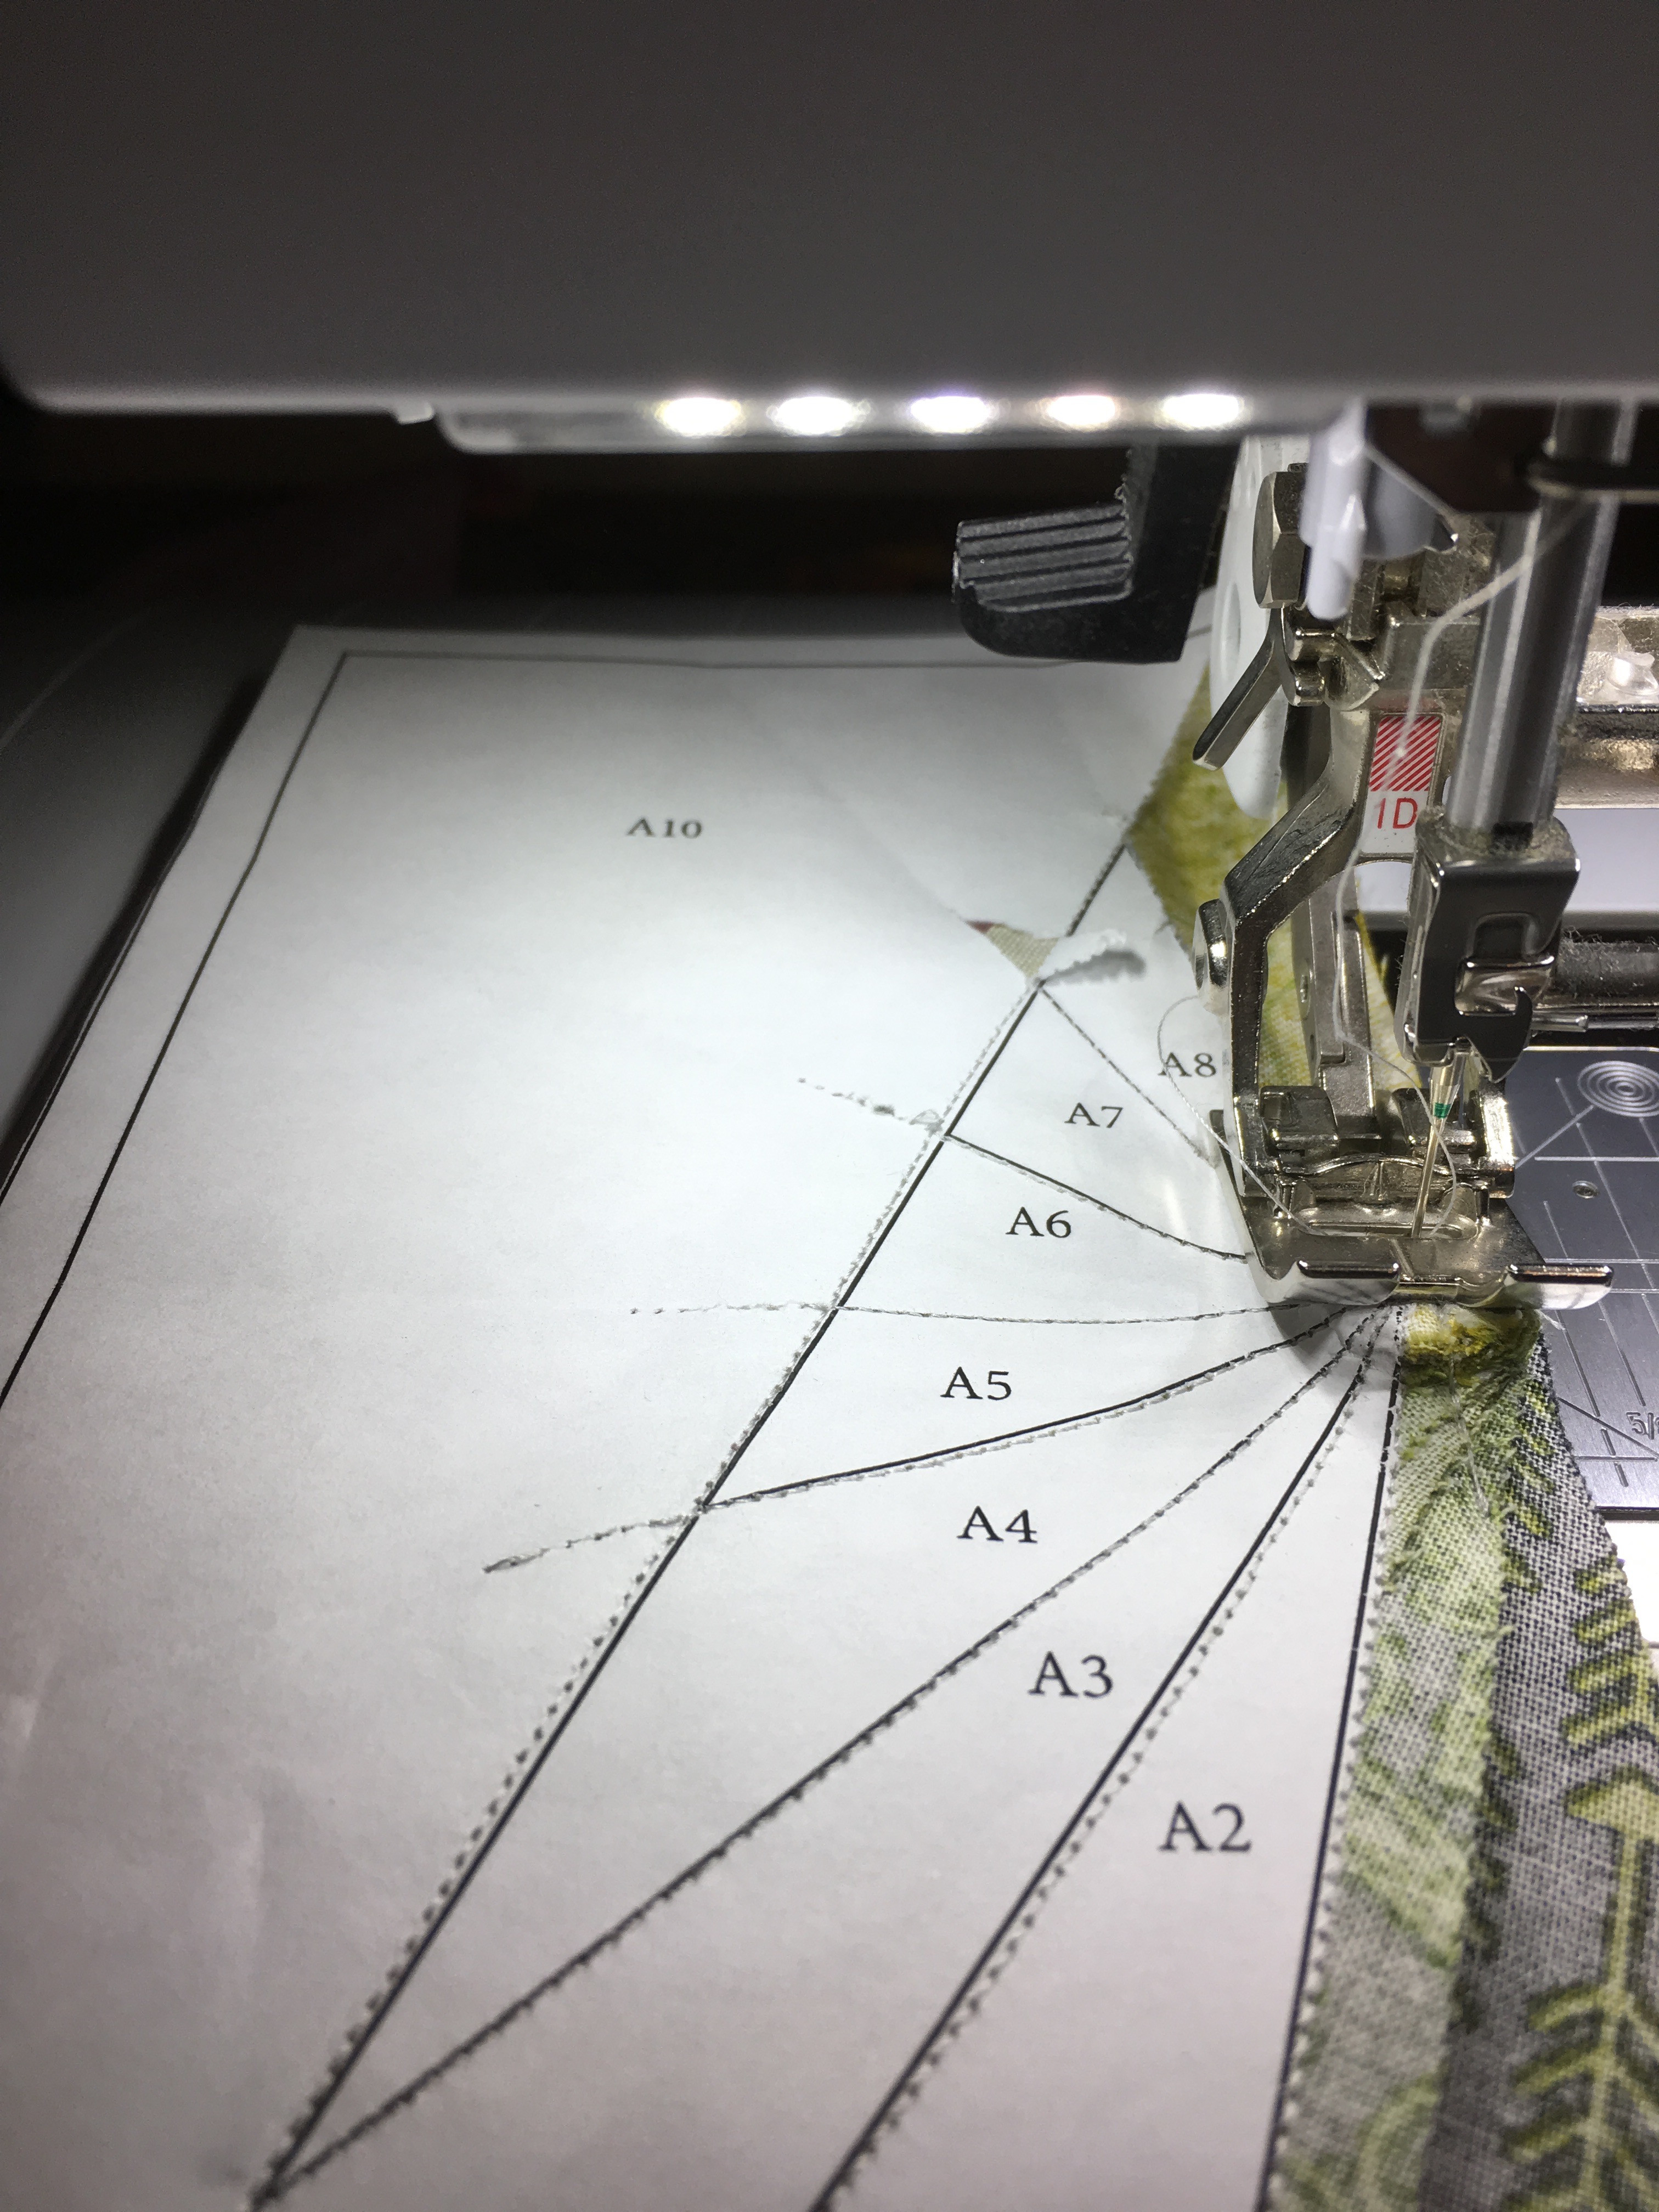
In the pattern, you’ll notice there are three sections: A, B, and C. We’ll start with section A. Notice the numbers. The number indicate where you’ll begin. You’ll add piece A2 to A1, then A3 to that piece, and so one.
PLEASE NOTE: For this pattern, it actually doesn’t make much difference whether you start at the top or bottom of the tree, A1 or A9, since the pattern just spirals. I started at the top of my tree simply because the pieces I wanted at the top were closest to me when I started sewing.
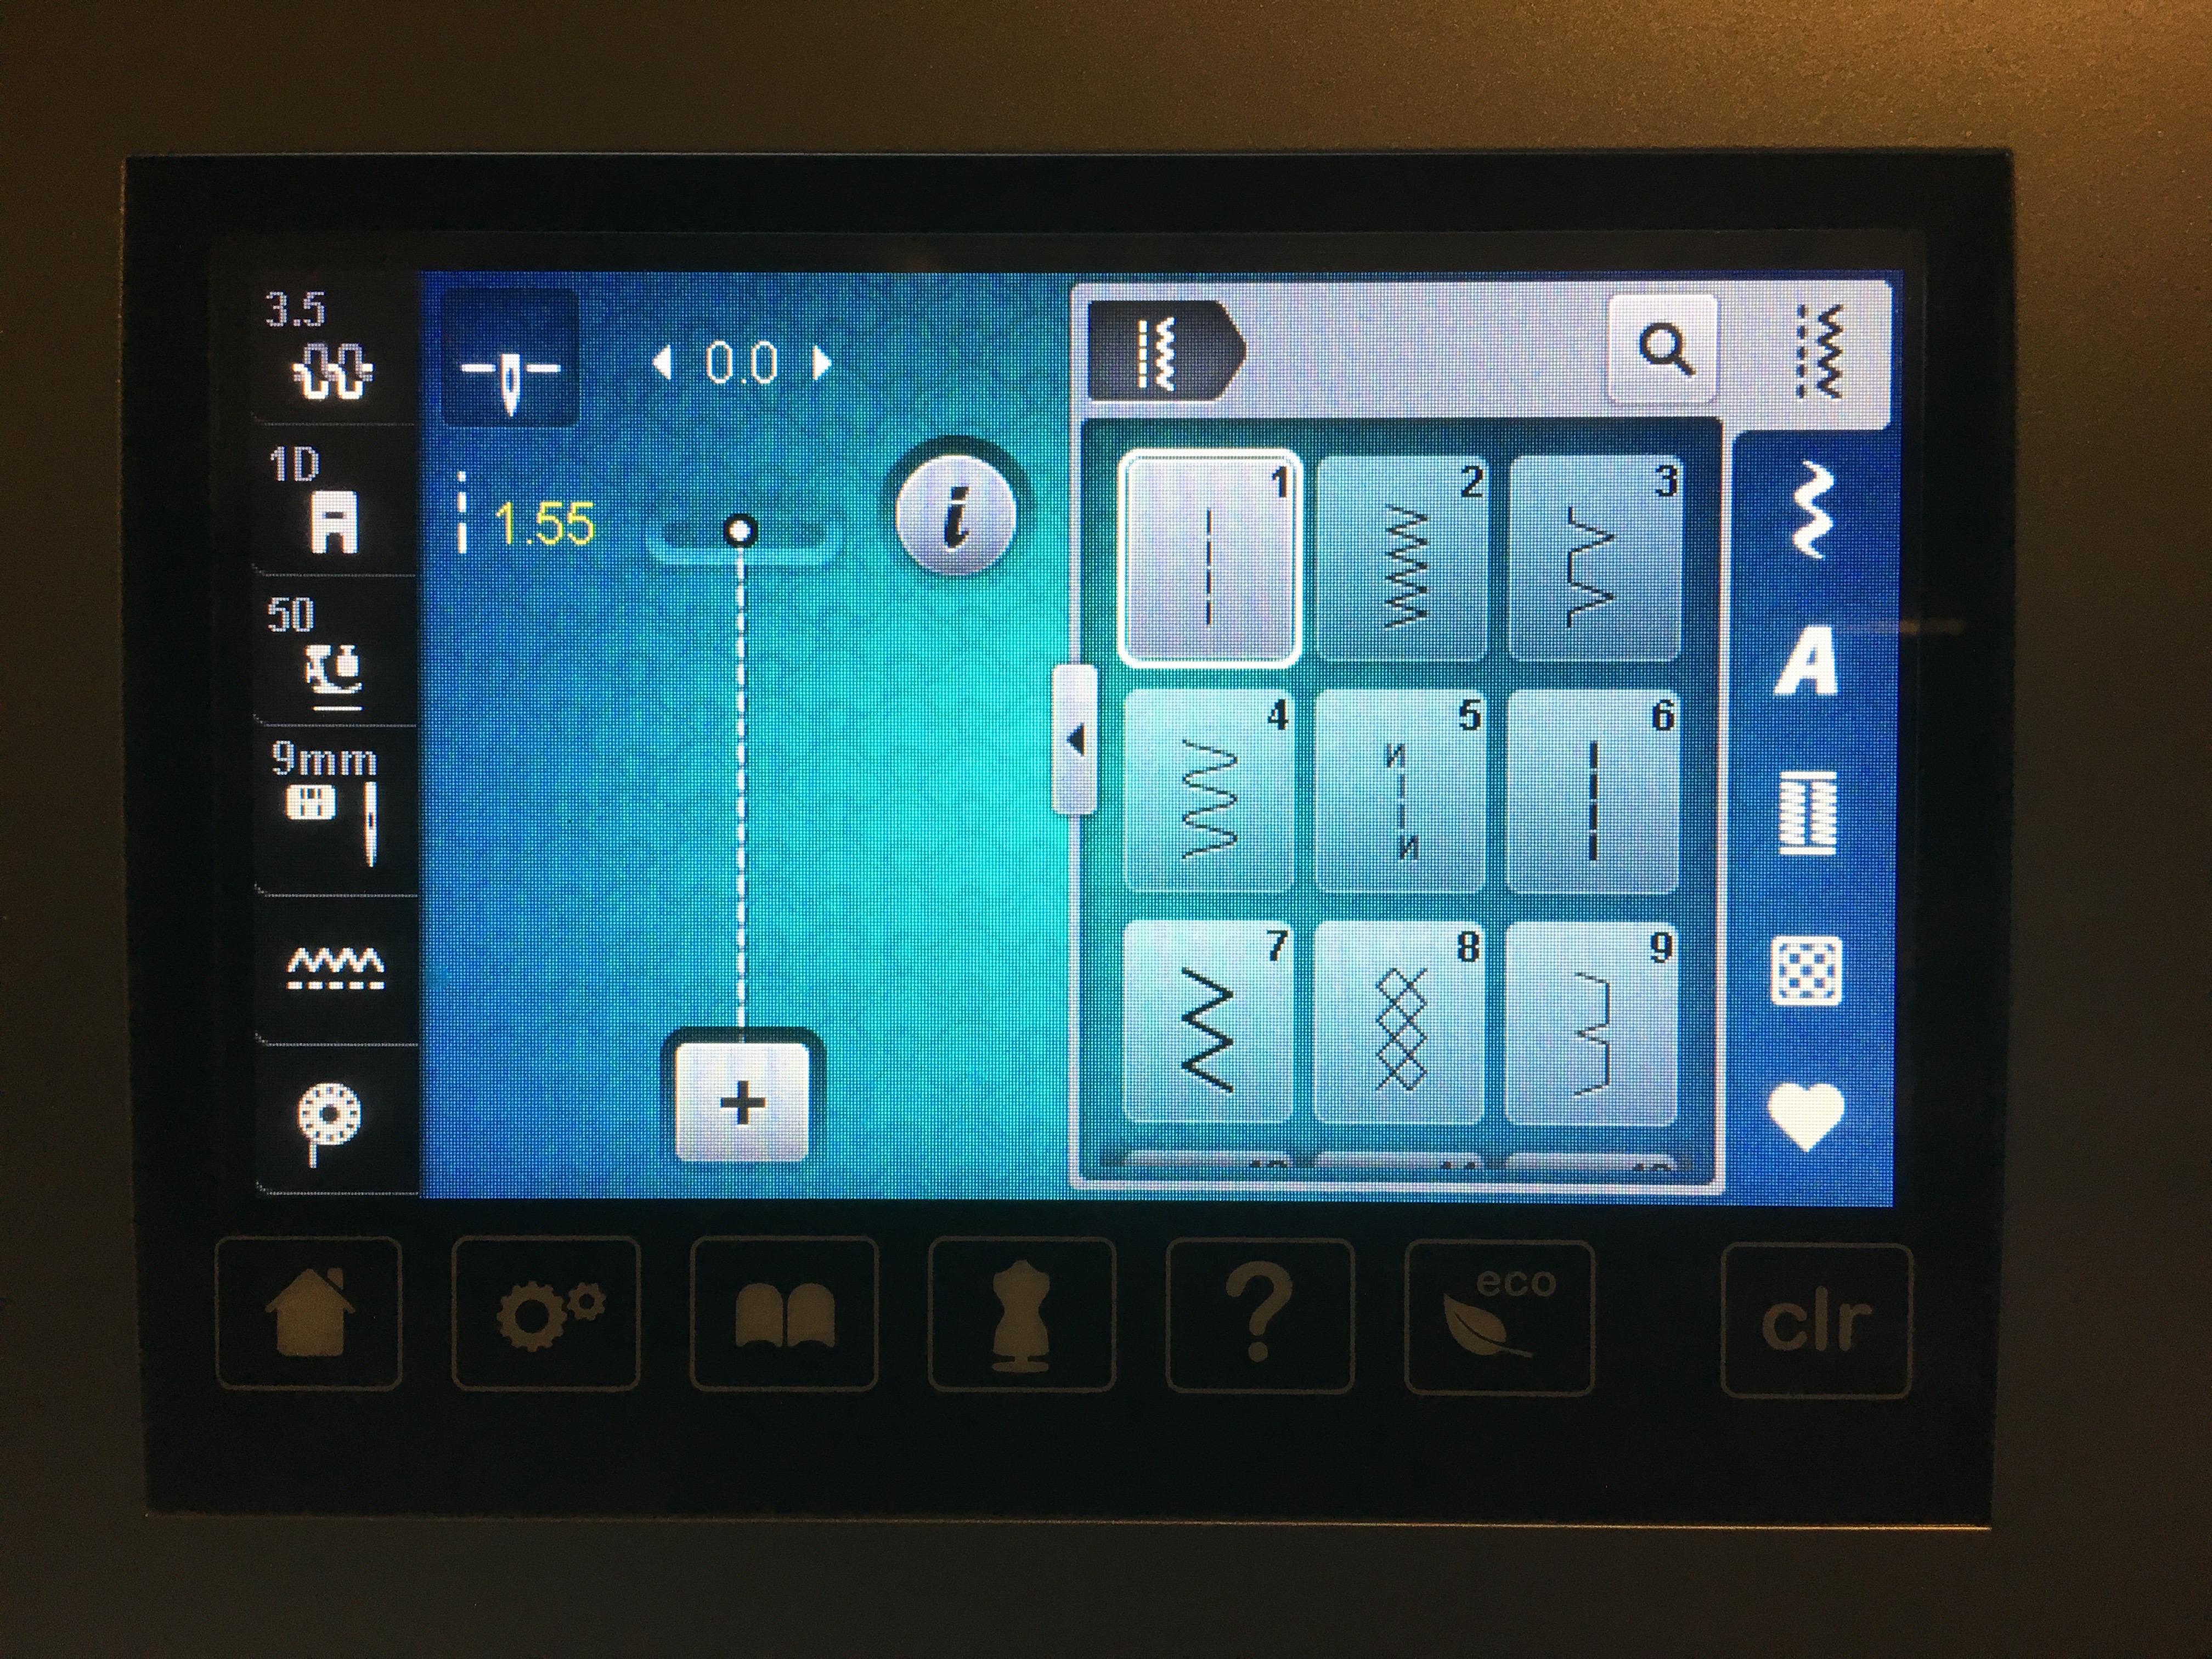
Start by dropping your stitch length down to about 1.5/1.55mm. This will A.) secure your pieces better when we tear the paper out later and B.) perforate your paper more so it’s easier to tear out.
Start with your first and second pieces of fabric. With the pattern facing you, put your first piece of fabric on the first section, the wrong side to the back of your paper pattern. Be sure the fabric covers the entire section. Overlapping the seam line between the first and second pieces, put your second piece of fabric for the second section. You will sew on this line and fold back the second piece. Hold the piece up to the light so you are sure you have overlapped the pieces enough (note how in the photo below, between B7 and B8, you can see the second piece of fabric).
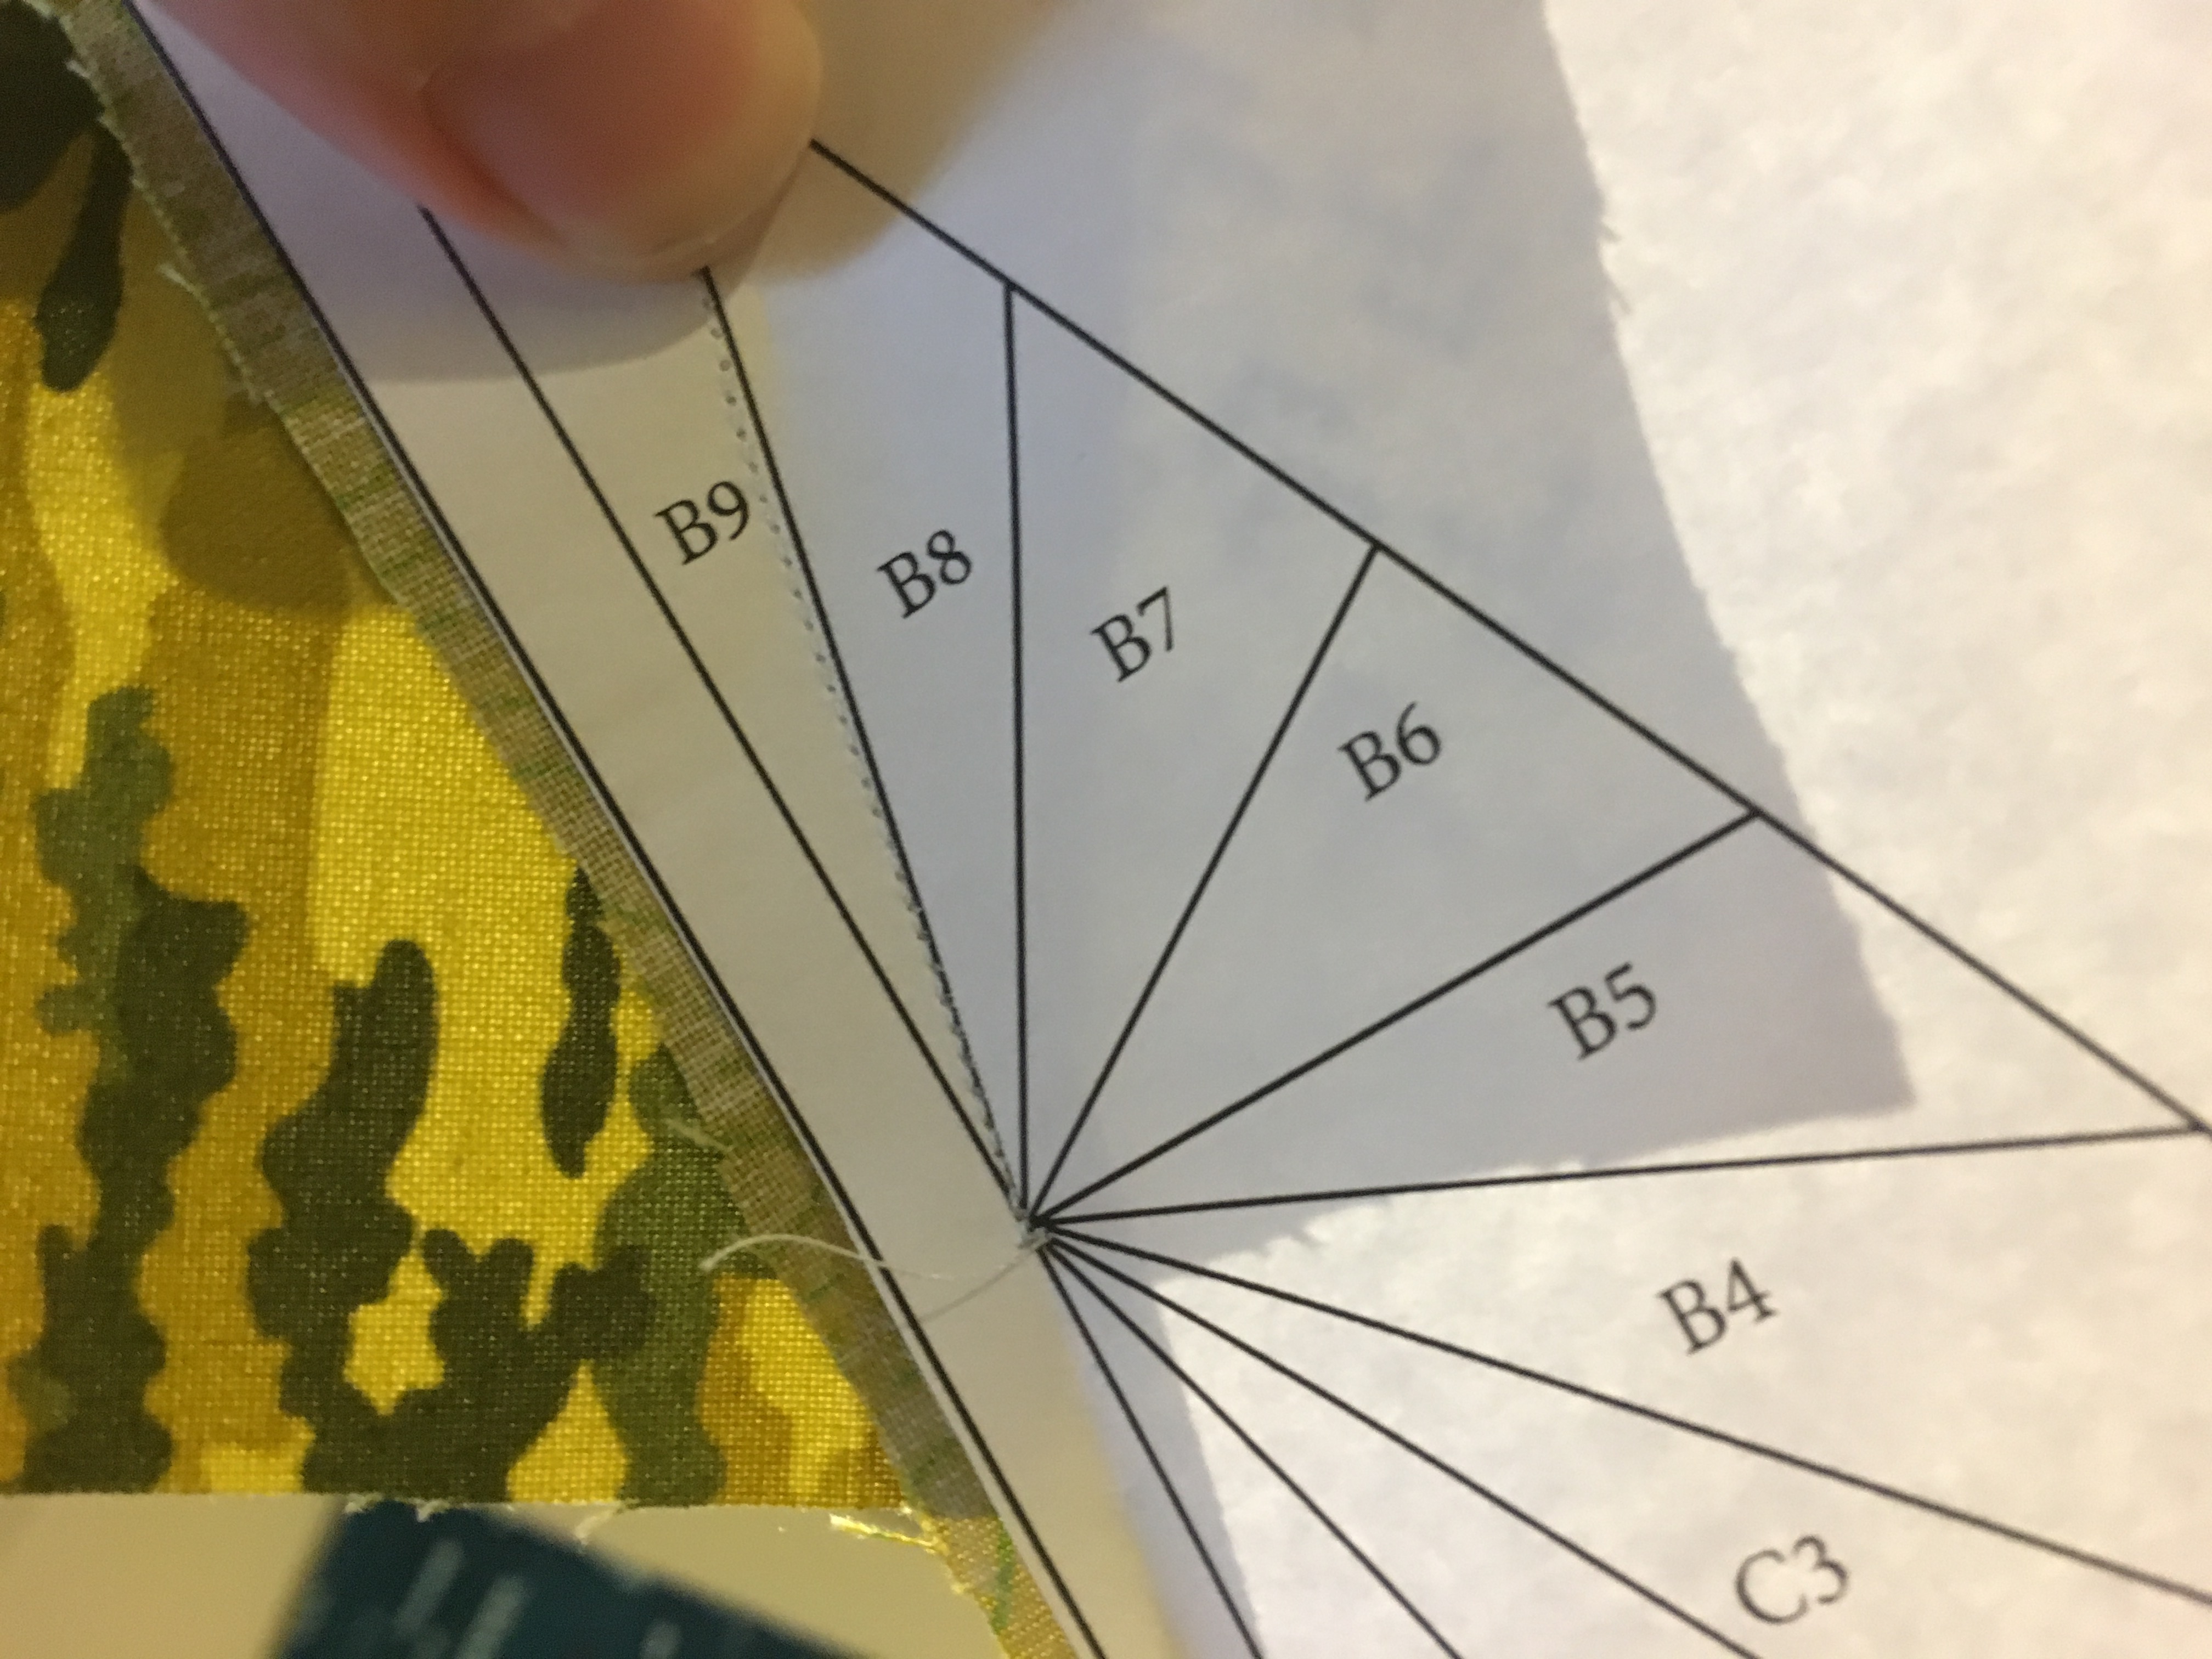
Sew on the line. Once you have done so, fold your paper back and with a ruler, measure 1/4″ from the seam line and cut excess fabric with a rotary cutter.
Now take the second piece of fabric…
… and unfold to so you can see both your first and second pieces of fabric.
Be sure that you have covered all of section two. If you have, press the fabric back with an iron or pressing tool. I like to use a pressing tool like the one in the photo by By Annie because I hate getting up to iron my seam every time I sew a little line.
That’s it! Pretty simple right? Now you’ll just continue around, adding your fabrics as you go. I sewed both sides at the same time so I didn’t mess up my fabric order.
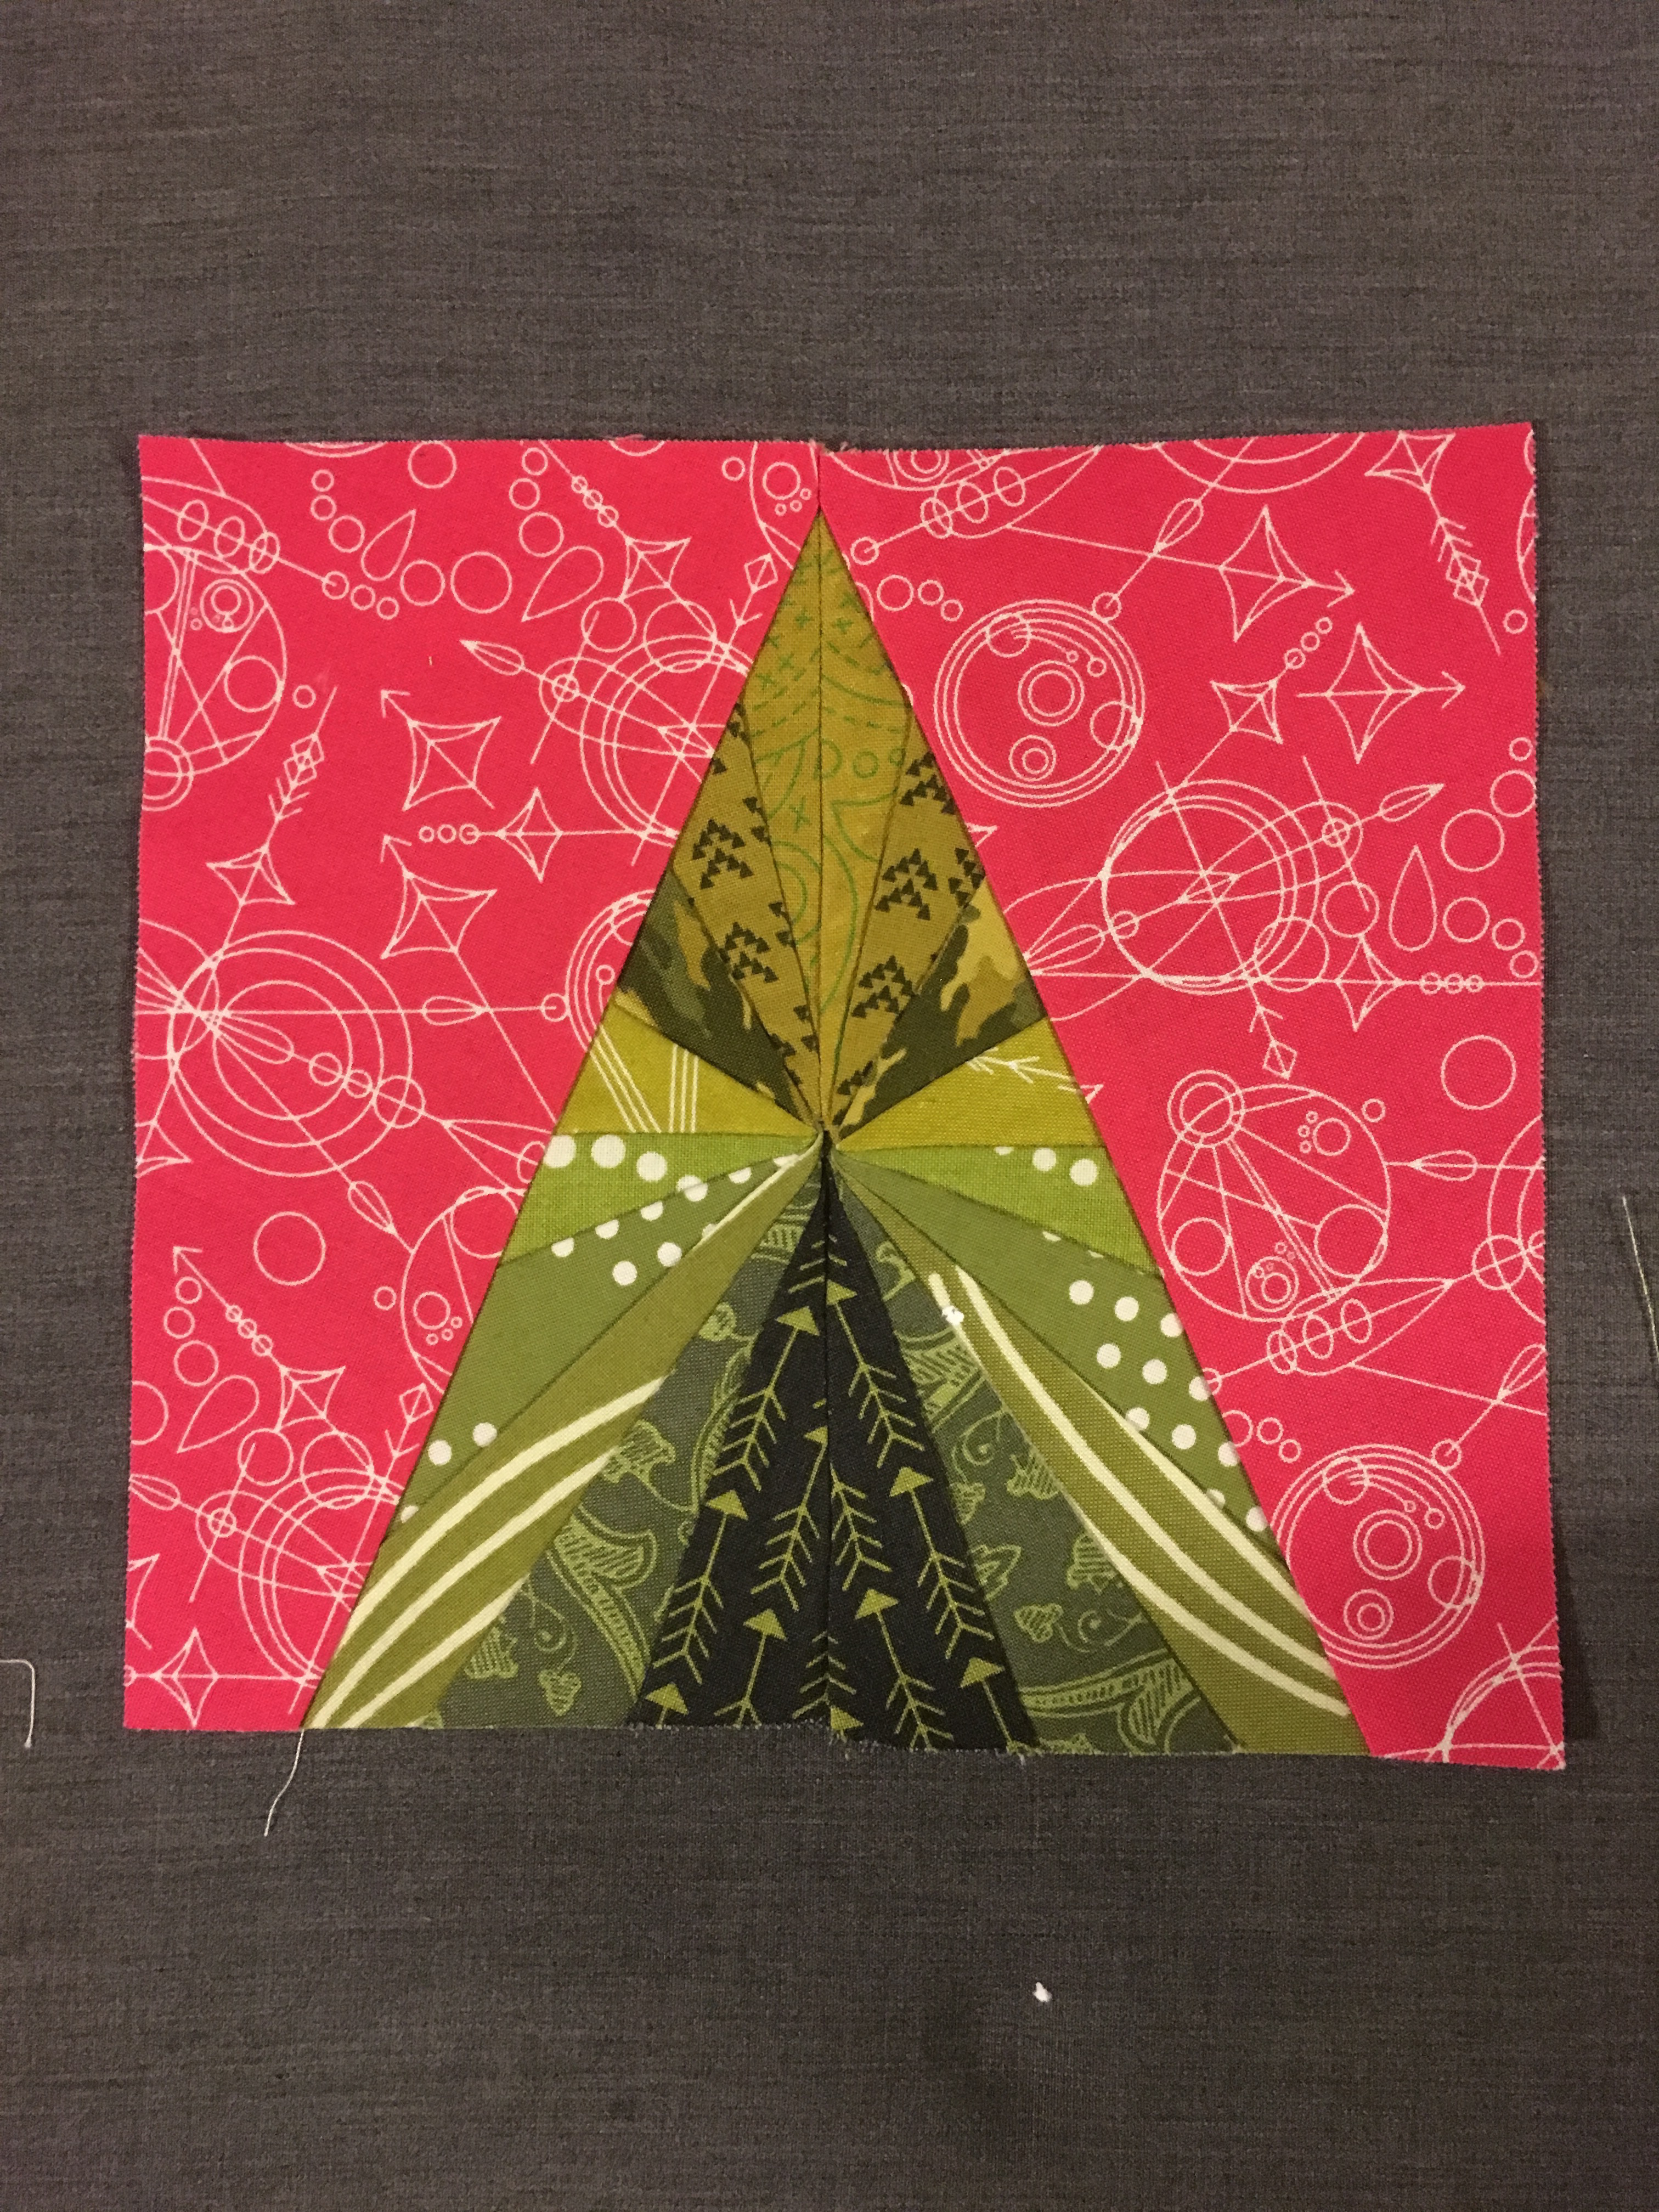
When you are done with the tree, it will look something like this.

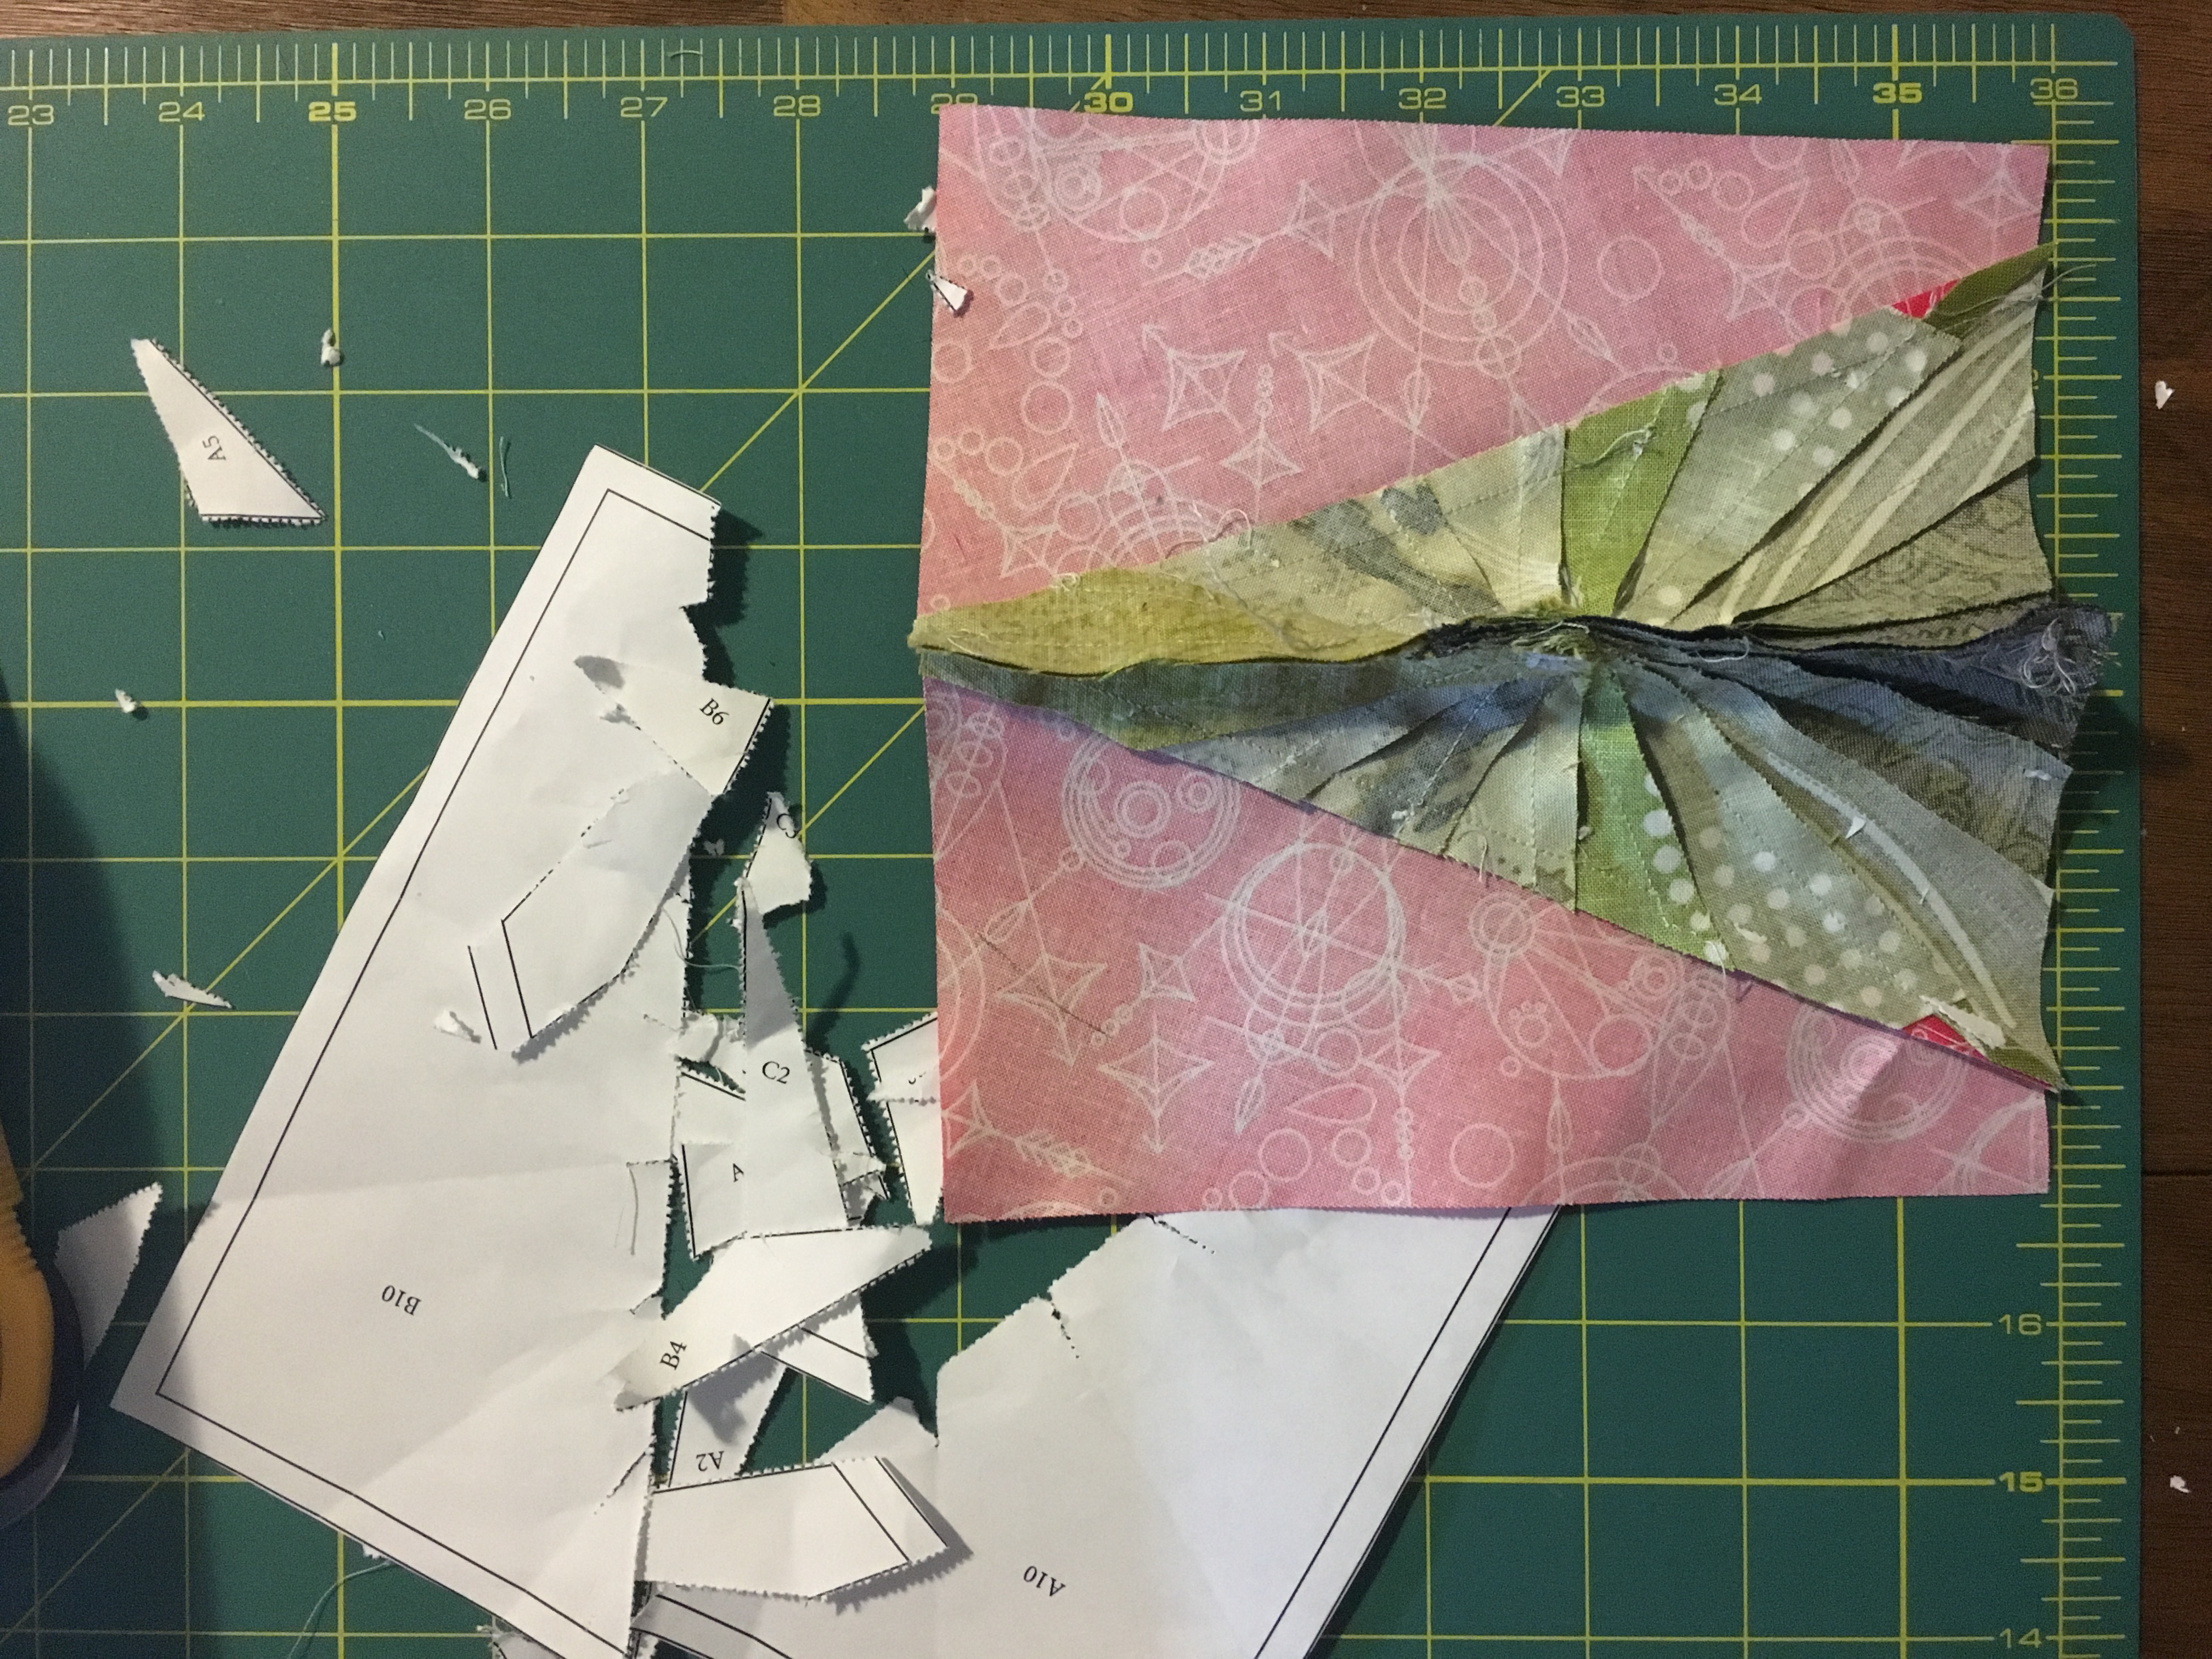
Now add the red (or whatever color you choose to do the outer fabric).
Once you have done that, it’s time to trim up the block. When trimming, I like to measure a 1/4″ from the solid black line. This way, if you have trimmed too much of the 1/4″ seam allowance, you can adjust it so you have enough. Conversely, if you were TOO generous, with your initial cut, this will get you down to 1/4″.
Some people like to make all the sections at once, then join them together. I’m a little too impatient to wait to see how it’s going to look! So when I have two complete sections, I like to join them, then continue piecing and adding the other sections as I go.
Some like to join their pieces with all of the paper still intact. I find that my pieces shift too much when I do that. So I remove the paper around where I am stitching together.

I moved my needle from the center over to a 3 to give me a 1/4″ seam. I also bumped up my stitch length to a 2.
Right sides together, sew together your tree.
Note that the center of the tree where all of the seams join up is rather bulky. Take your time going over this part of the seam. I used the BERNINA Dual Feed when stitching and it went through like butter. Back stitch in the center to secure the seam.
My grandmother sometimes takes the back edge of her scissor and bangs the bulky seam before putting it through the machine to flatten it a bit. It’s an old school trick and it works wonders!
Now remove the papers. Tweezers help a lot in those tight spots where a lot of seams come together.
Press your seam open.
Now add part C to the base of this unit.
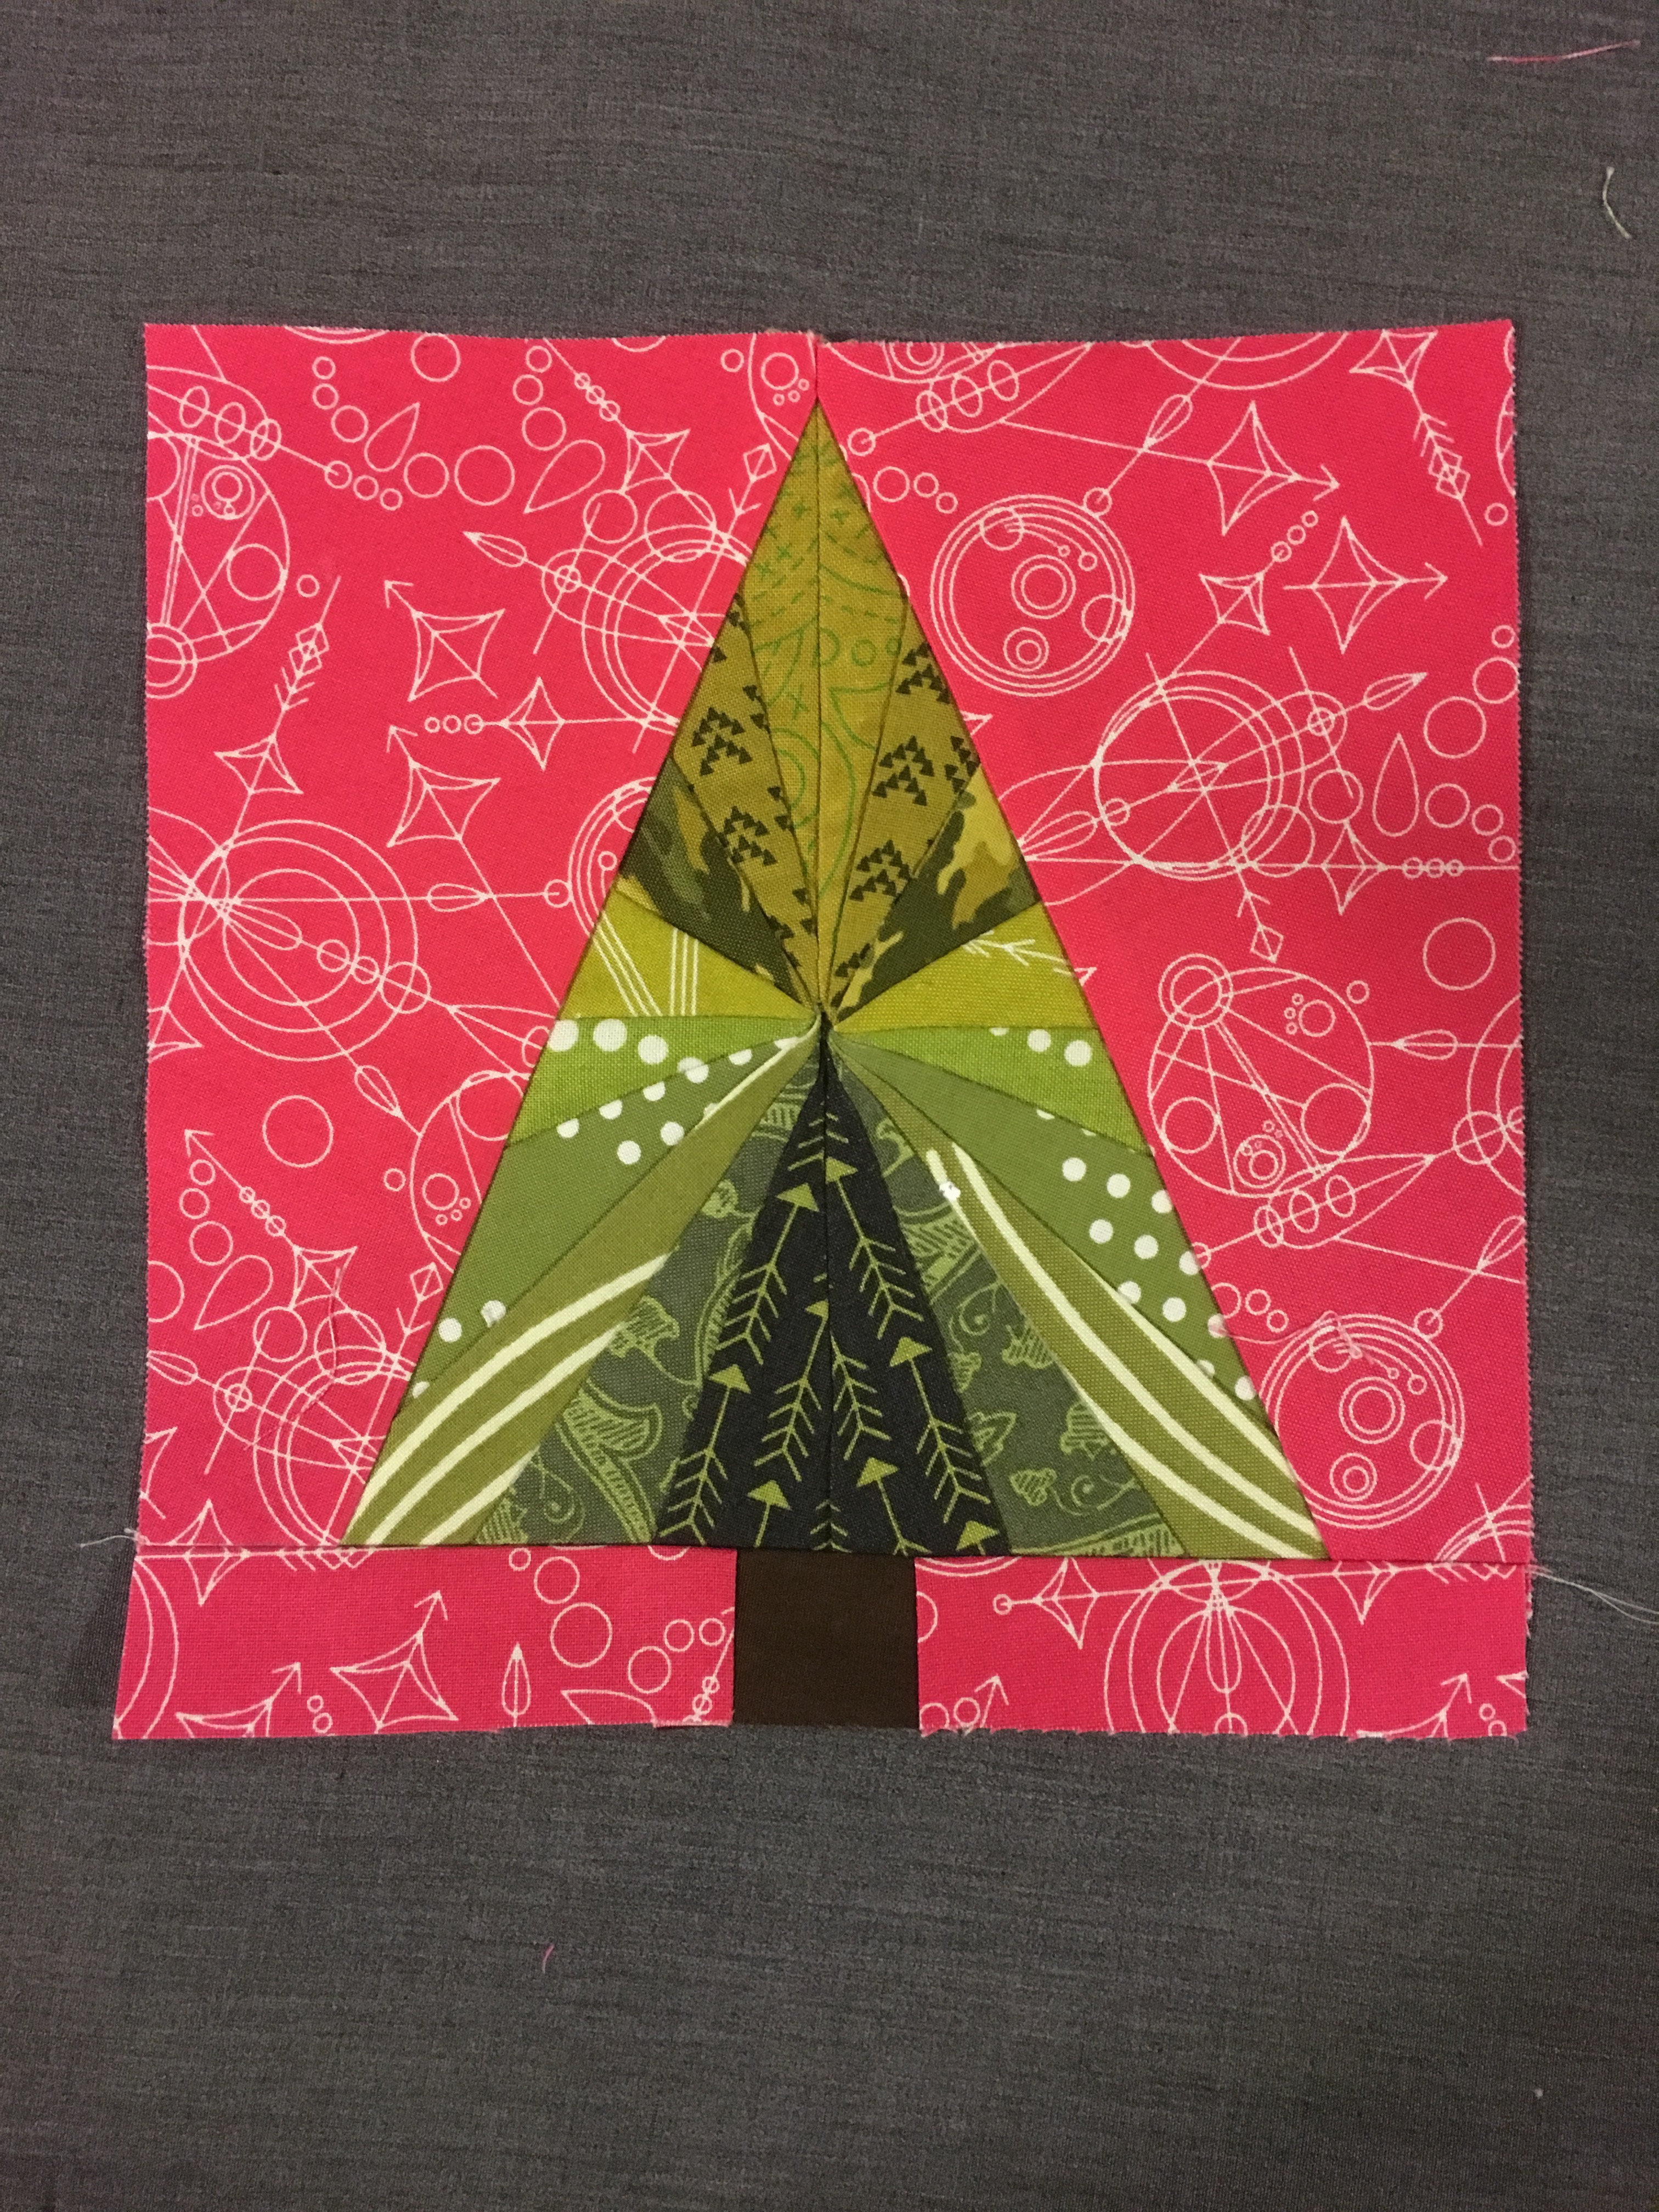
Boom! A tree! Now let’s turn this baby into a pillow!
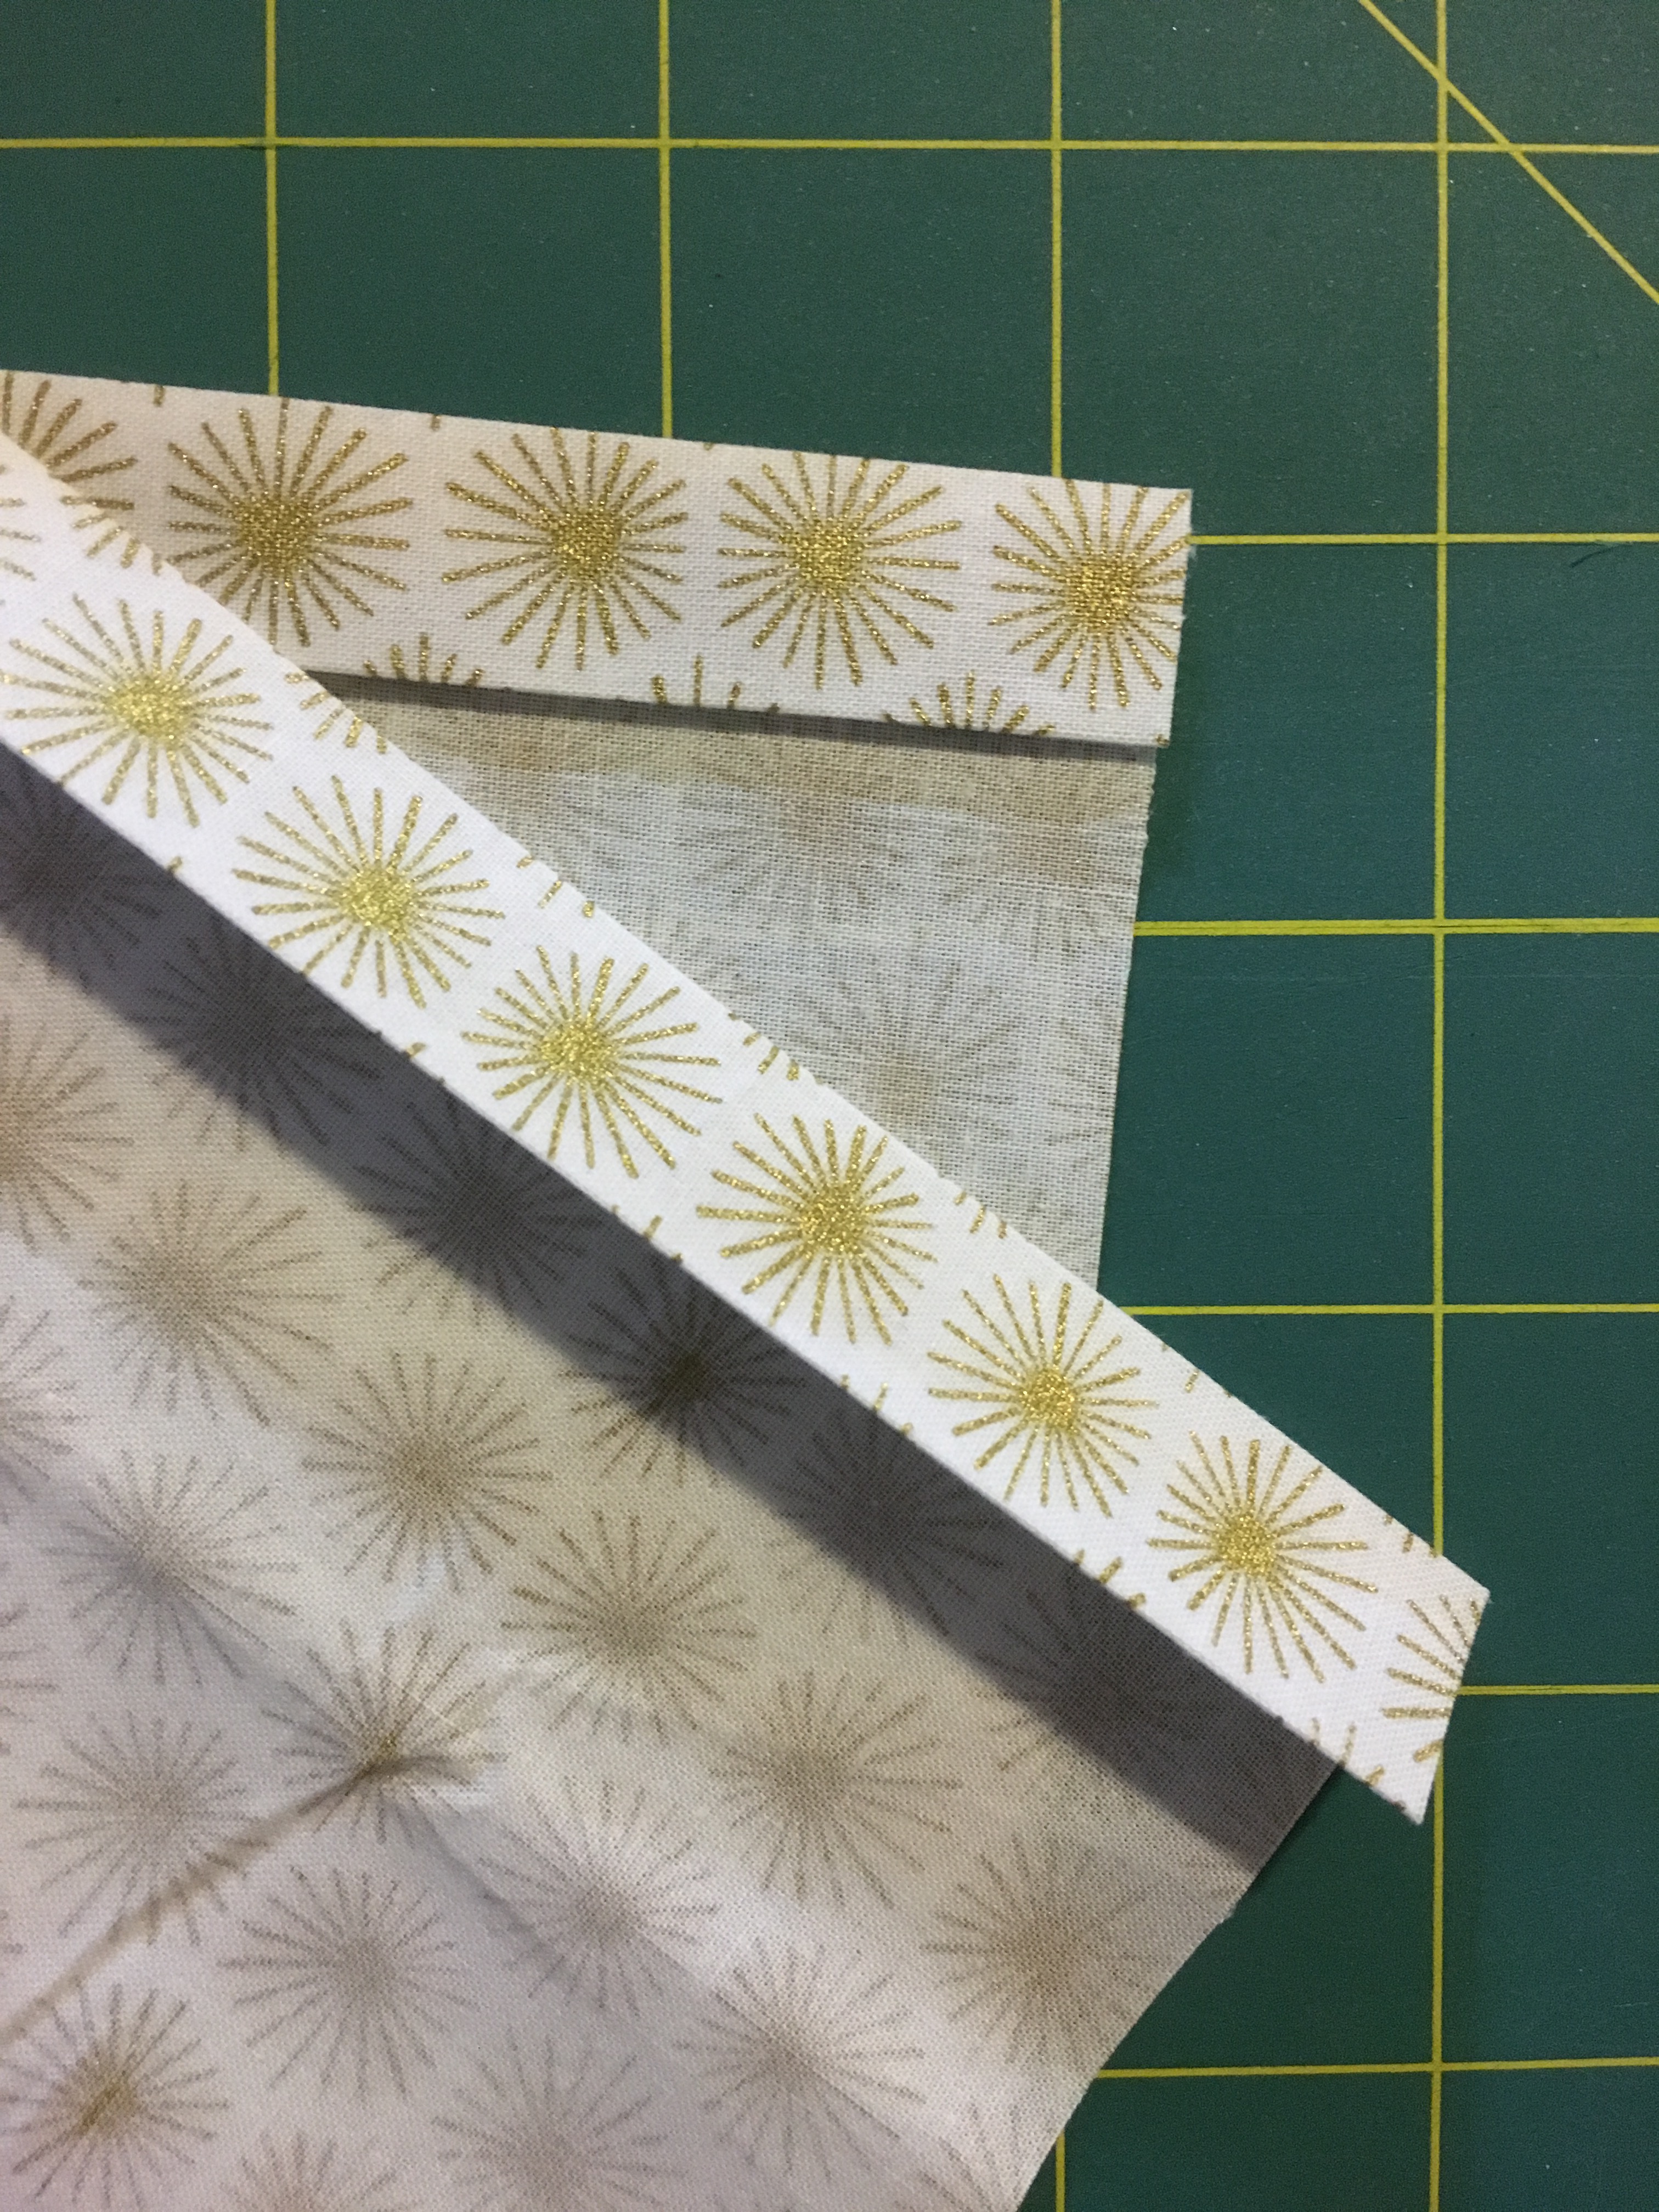
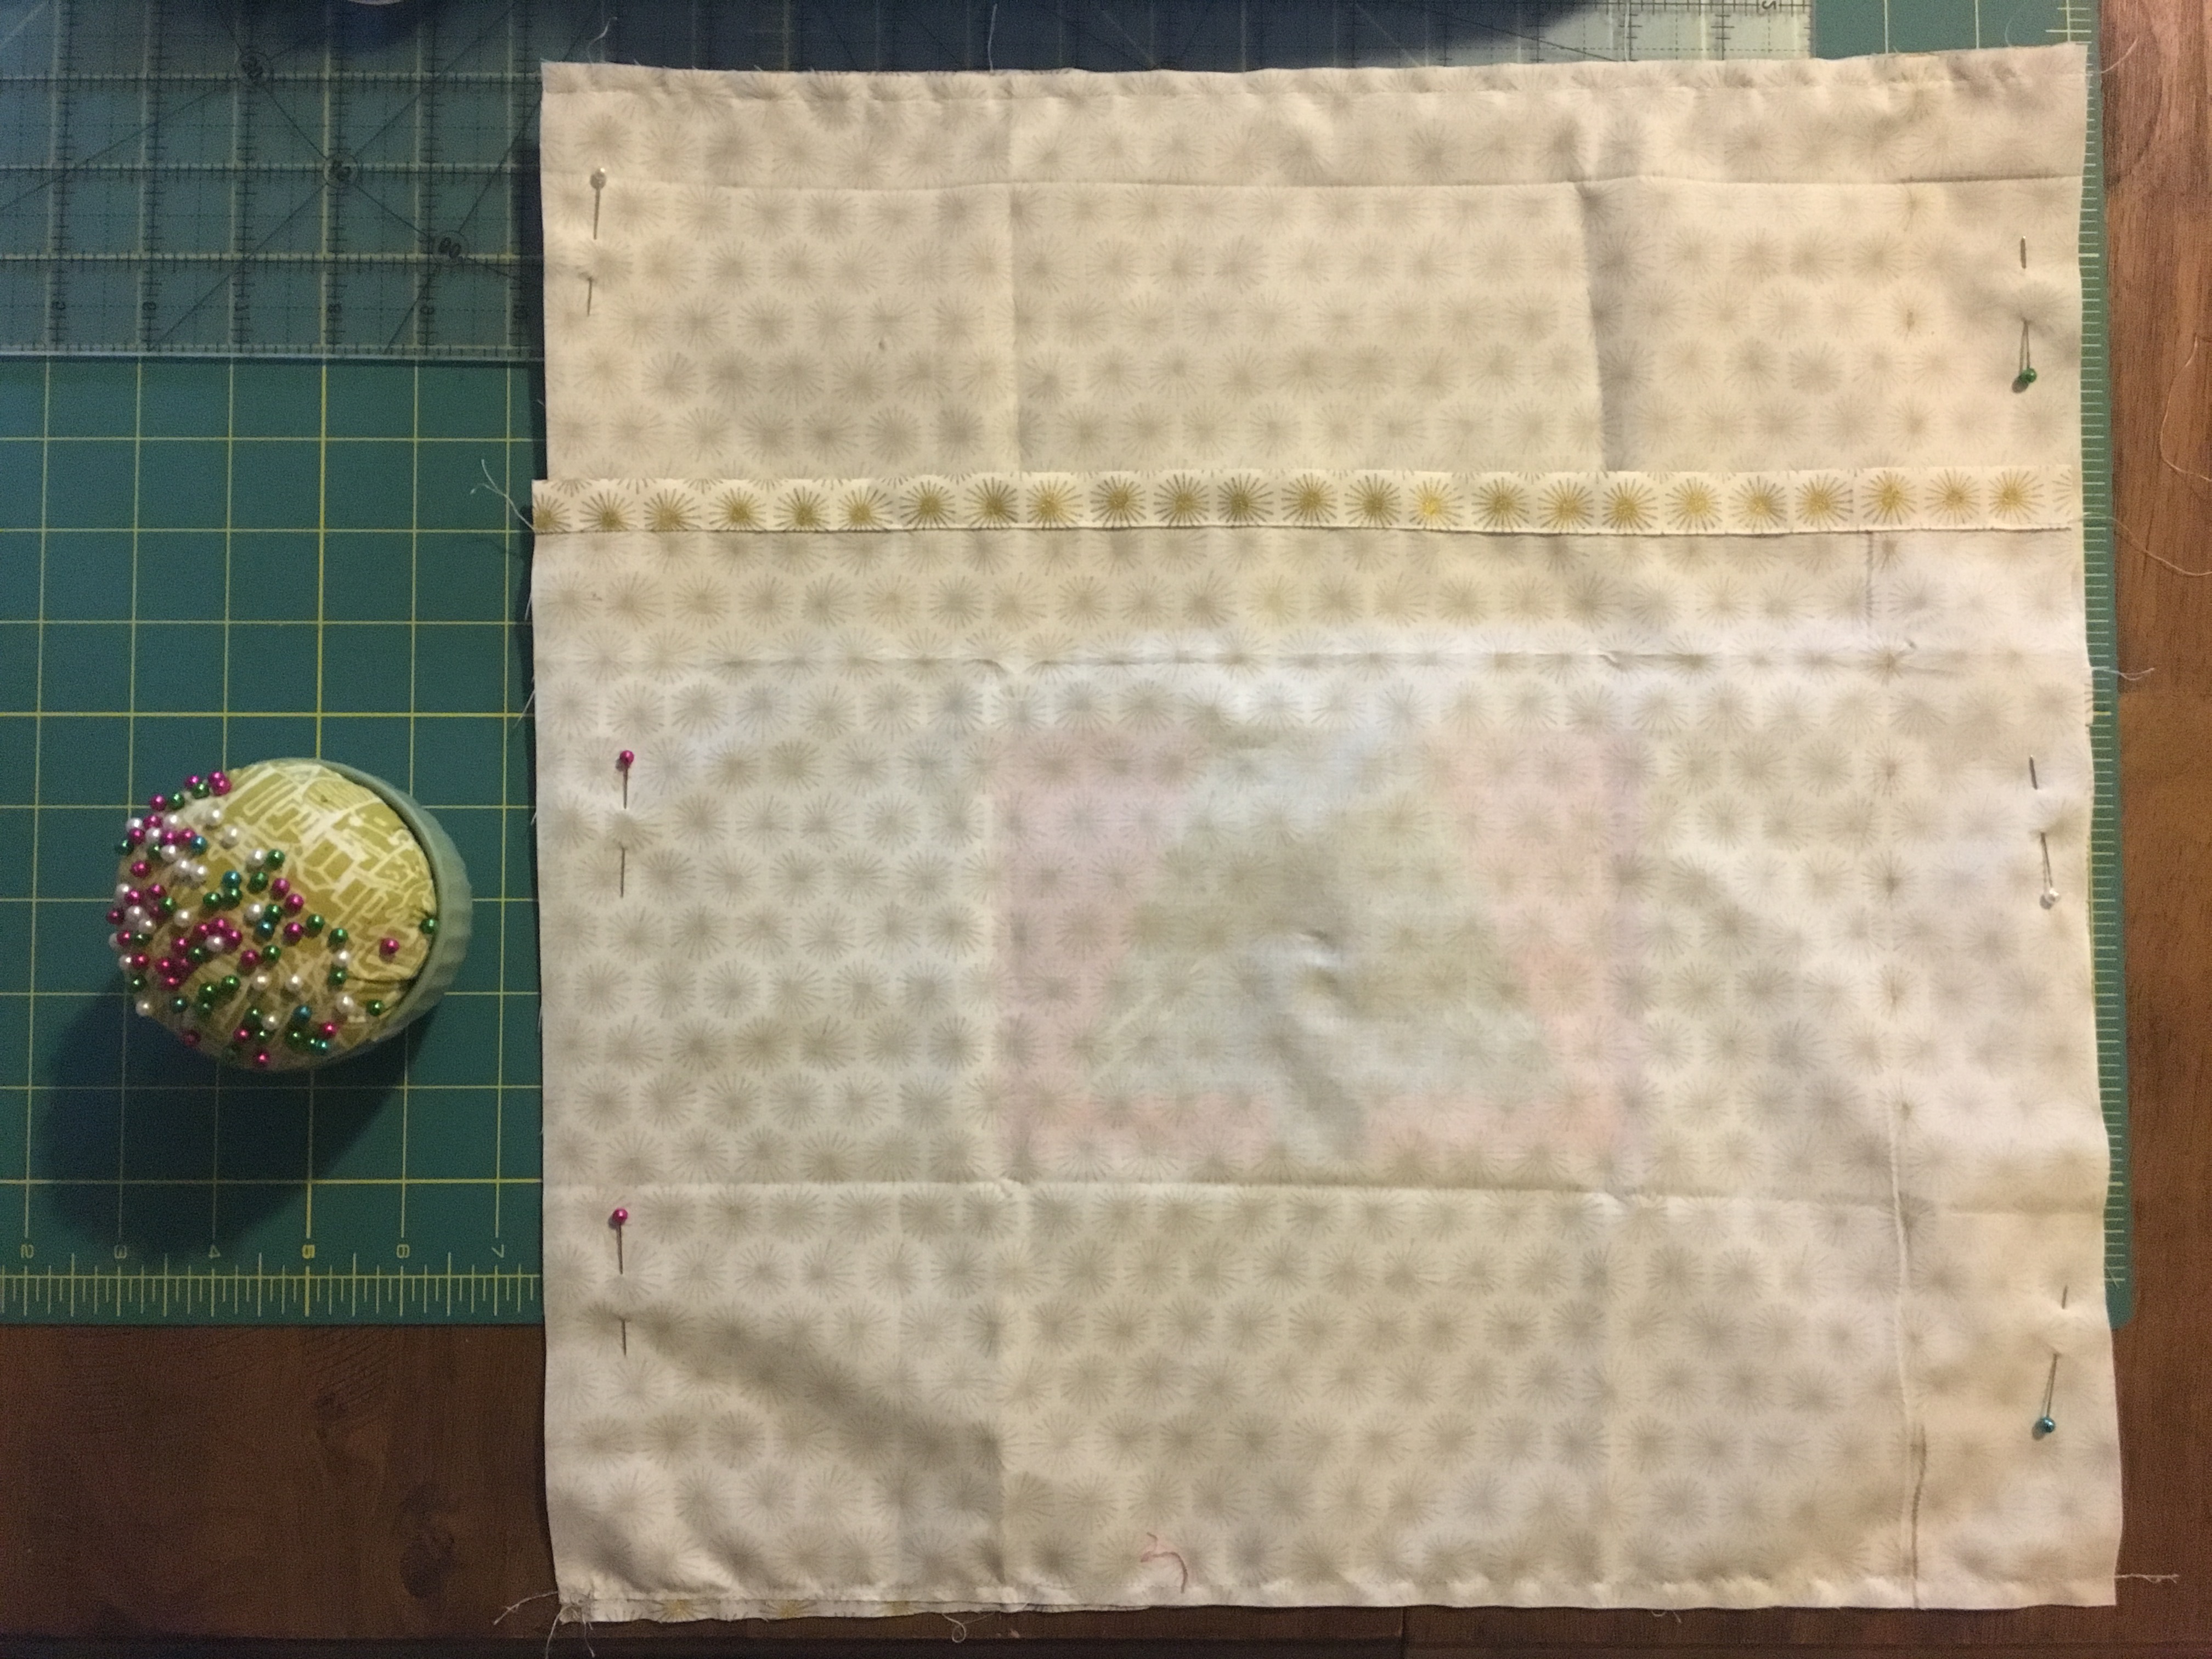
I used a 16″ pillow so the measurements in this tutorial make a slipcover that size, but this pattern is easily adjustable to accommodate any size pillow. Start by taking your 2- 5″ x 7.5″ strips. Sew one strip to the top and one strip to the bottom, continuing to use a 1/4″ seam allowance. You can bump your stitch length up if you like, but I kept mine at a two.
Now add your 2- 5″ x 16.5″ strips to either side.

Your finished pieces should be 16.5″ square.
Now for the back of the pillow.
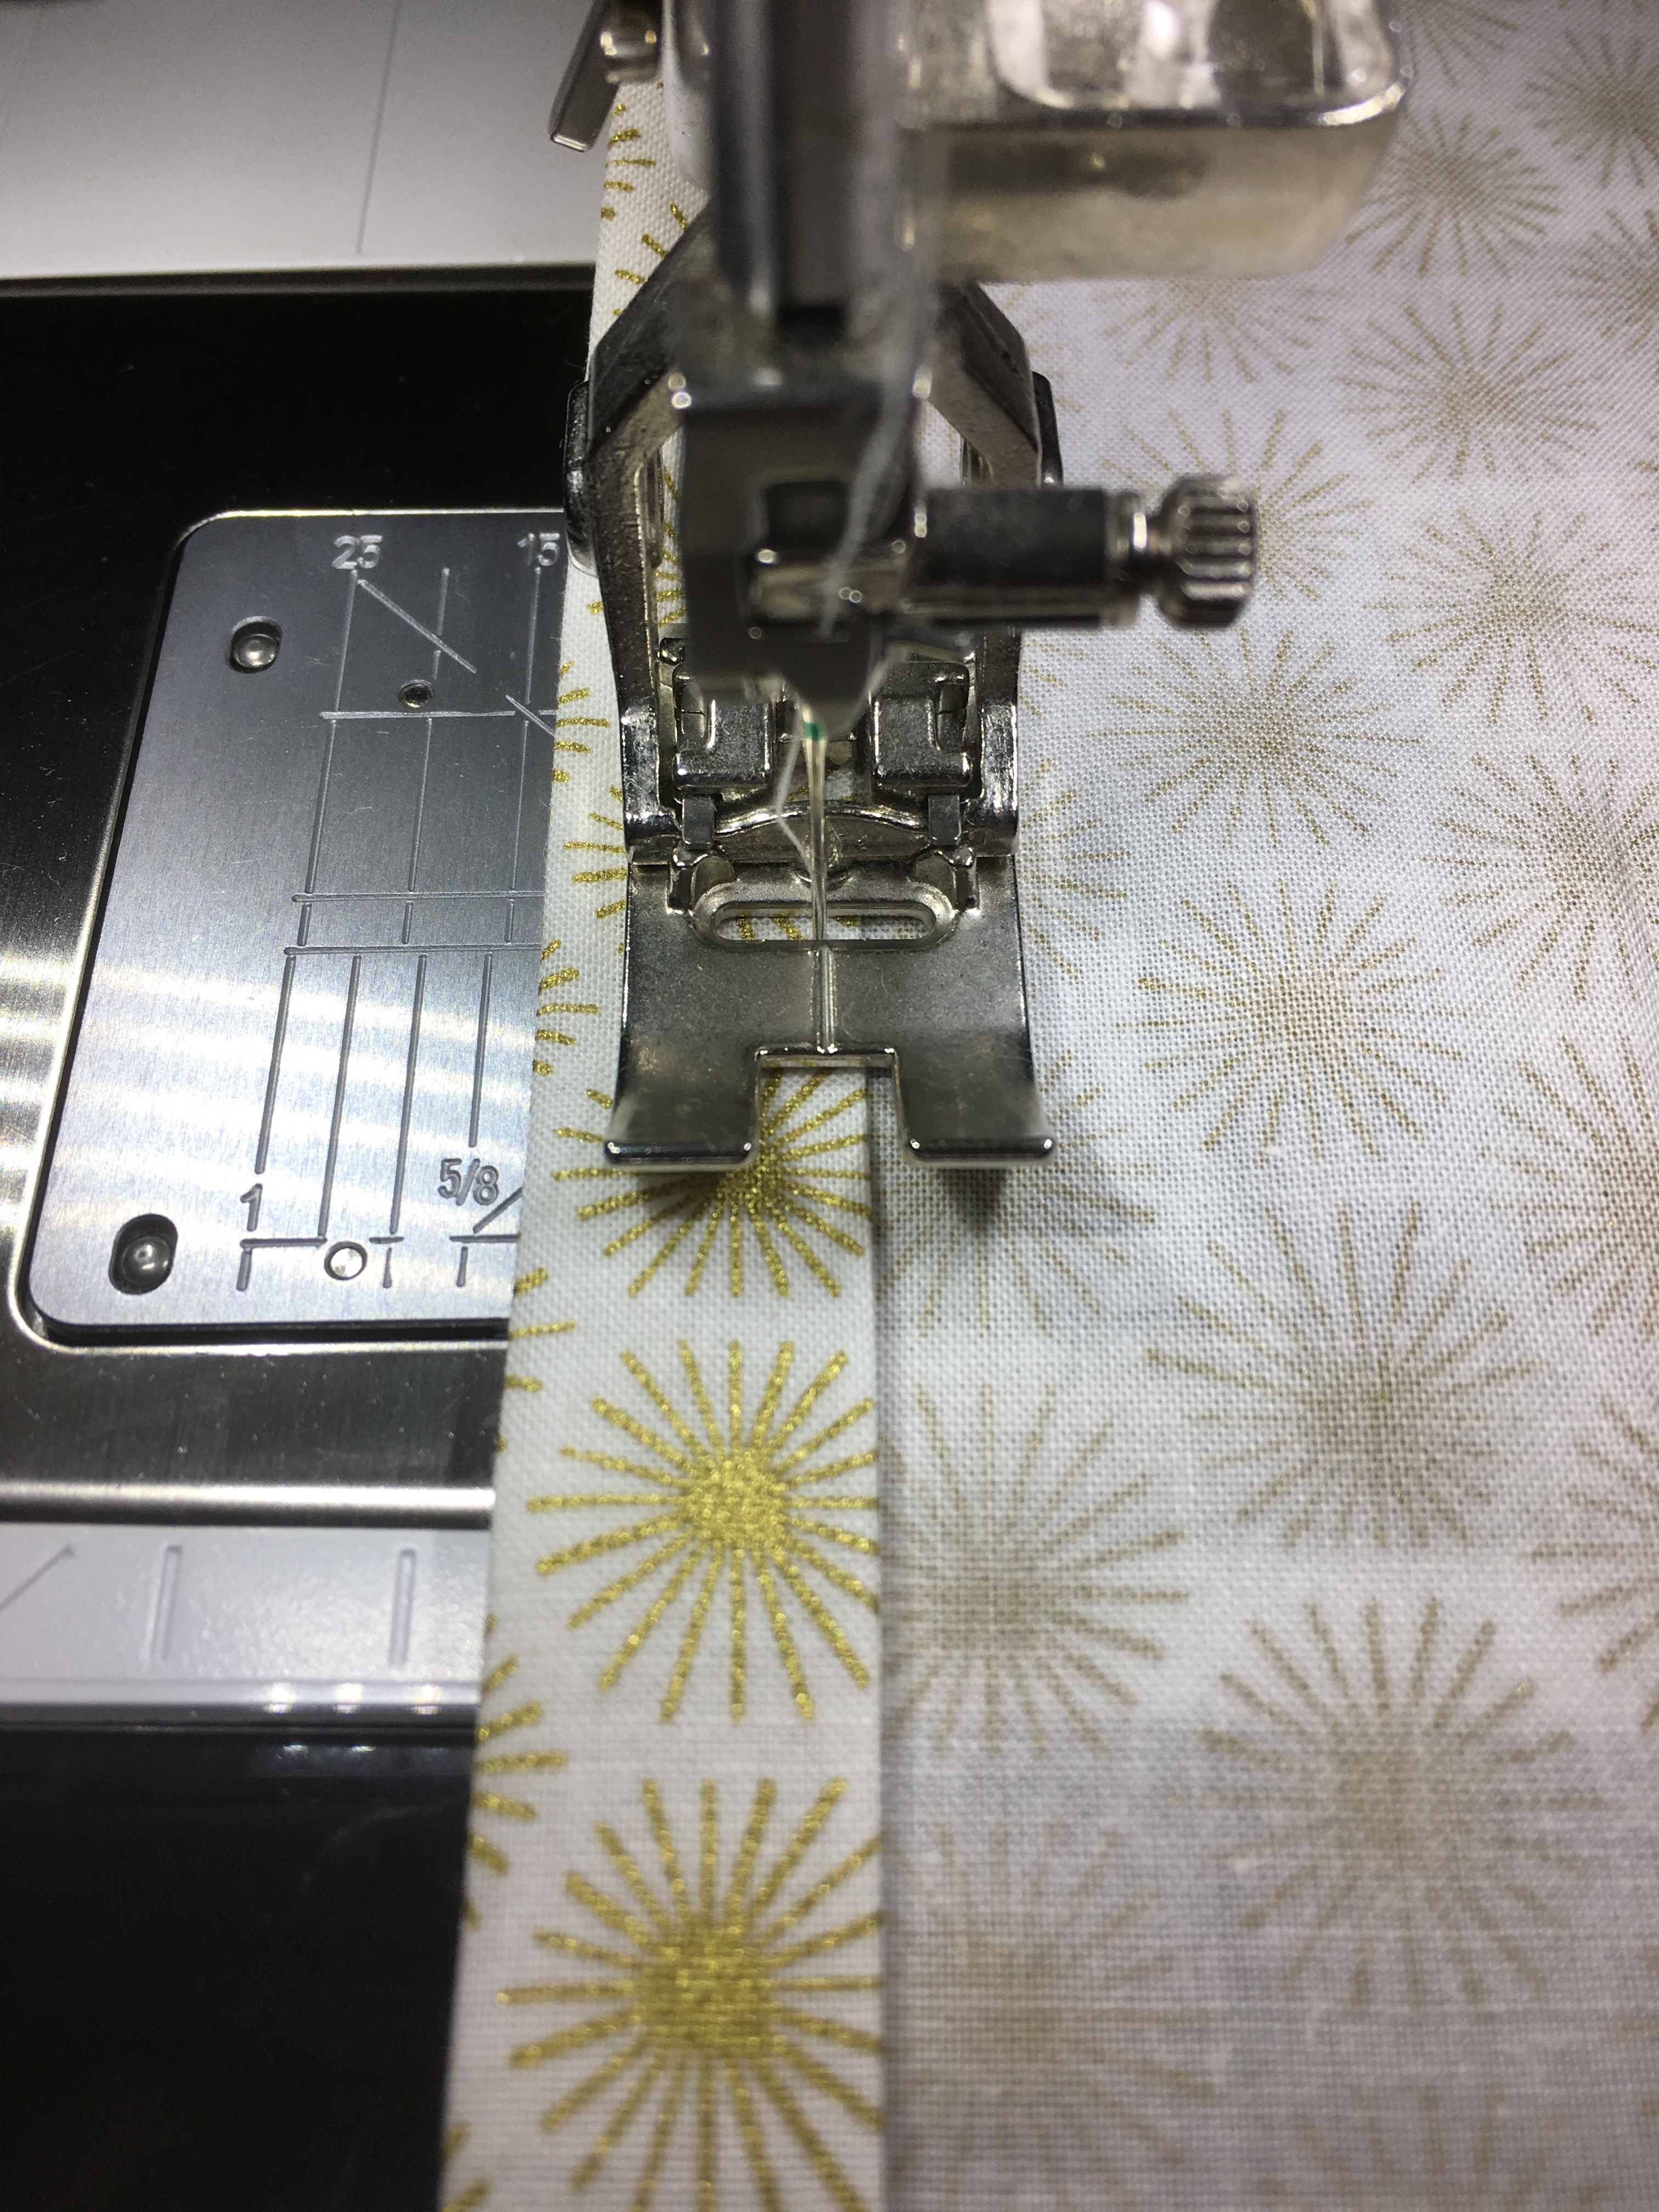
Take your 9″ x 16.5 ” piece and your 13″ x 16.5″ piece and fold and press the wider side with a 1/2″ seam allowance, then fold and press again, like so.
Moving your needle back to the center position (0) and stitch down the fold at the edge.
Right sides together, sew unfinished 16.5″ side of the shorter piece to the TOP of the pillow front with a 1/4″ seam allowance (needle position three), and sew the unfinished 16.5″ side of the longer piece to the BOTTOM of the pillow front.

Right sides together, place the shorter flap under the longer flag and pin like so.
With a 1/4″ seam, sew up the sides. Then just flip the slipcover inside out, press the seams, and you’re done!

Our December 21 Gift for You:
Today’s gift is a clear BERNINA sewing accessory box with a BERNINA red handle for easy transportation to one awesome WeAllSew fan.

All you have to do is post a comment below answering the following question:
What kind of home dec tutorial would you like to see on WeAllSew?
A winner will be chosen at random on December 22 , 2016 and announced the following week!
Good luck!
The contest is open for comments until December 21 at 12:00 midnight Central Time. Click here for contest rules.
Congratulations to WeAllSew reader “sandybangle,” the winner of our December 21st gift. Enjoy!
What you might also like


126 comments on “Foundation Paper Pieced Christmas Pillow”
-
-
How about toaster covers ?
-
-
I’d love to see more pillows and table linens
-
Useful things for the kitchen hot pads and dish towels decorations
-
I would like to see valances and curtains.
-
Thanks for the great tutorial!! I will need to give this a try. I would like to learn more about incorporating piping,buttons and zippers into home dec projects. Thanks for the chance to play : )
-
Would love more paper piecing pillow designs, this one was great, can we have one for Hanukkah.
-
I would like to know more about working with silk to create throw pillow covers or embroidering on silk pillowcases.
-
I would love to see more pillows, curtains and holiday type decorations.
-
I want to make a lap-top carry bag, maybe messenger style!
-
Machine embroidery and applause for towels
-
That was applique
-
-
I’d love to see more on patchwork upholstery, e.g., recovering a sewing chair or easy chair. Thanks for all the great ideas posted here.
-
How about easy-ish window valances and drapes. I need to refresh those in my home and am stuck for ideas.
-
I’m always looking for bag patterns that are not difficult and look great.
-
Grommet top curtains
-
I really like the pillow! I could see using the design in a lot of projects. As for home dec maybe curtains using different style headings.
-
I loved this tutorial and would like to see more like it.
-
I would like to see tablecloth and napkins
-
Love the paper pieced tree! I would like to see a tutorial on sewing grommets for drapes and in place of bag handles. Merry Christmas!
-
Box cushion tutorial
-
I would like to see a tutorial on how to attach cording or piping to pillows.
-
I’d like to see curtains for the different holidays throughout the year!
-
I love beautiful table linens with heirloom details and would like to see tutorials for these type items. PS love the bernina storage box!
-
I would love an in depth tutorial on how to hem store bought curtains. I purchased some for my craft room, but they are way too long for my window. I’ve been too chicken for the past 5 months to attempt to hem them! I don’t make clothes or curtains, so this seems a bit beyond my comfort zone though I told myself I could do it when I purchased them!
-
I need that to keep my grandkids sticky little hands off my sewing stuff!!!!
-
Cute pillow. I have wanted to try paper piecing This would make a great starter project.
-
I agree with susan26. I’d love to see kitchen accessories like hot pads and towels.
-
Always love pillows, but also storage containers and bins!!
-
Small seasonal door/wall hangings.
-
Hey, this was asked yesterday!!! Haha! I’d like to learn how to make my own kitchen items and also simple clothing sewing. Blouses, knit tops, accessories. Easy to follow step by step instructions.
-
Would love to see a tutorial on a very large tree skirt. The skirts for sale are about 4x too small. Good tree stand coverage with a generous radius for lots of presents under a 12 foot tree?
-
I really like this pillow tutorial. I would really like to see some Christ-centered Christmas tutorials. That’s what gets me excited about Christmas and decorating. And those are the things that are getting harder and harder to come by in celebrating Christmas.
-
Bathroom accessories like a decorative tissue cover, toilet seat cover, etc.
-
Pillows!
-
I love holiday table toppers and table runners and would like to see more of those as Home Dec projects.
-
A topper for a small kitchen island or round side tables
-
I would like to see quick, easy placemats.
-
I’d like to see tutorials for mini quilts or wall hangings.
-
I’d love to see how to reuse old table cloth, linens, etc to make other stuff pot holders, pillow covers, etc…
-
I would like a tutorial on bound buttonholes
-
Home decor post – how to make braided rugs using wool fabric strips
-
Thanks for the great tutorial. It looks really pretty and pretty easy. I think you are already doing a great job on the home dec tutorials. Pillows, table runners, napkins, wall hangings are always good. A Christmas card holder would be nice also.
-
Seasonal wall hangings, table runners (coffee, end table, kitchen/dining), and hot pads.
-
I’d like to make a fireplace mantel runner in 2017
-
I would like to see how to make appliance covers and modify them for correct sizing. Also, throw pillow covers with hidden zippers.
-
I’s like to have some ideas for brightening up the bathroom with decorative towels.
-
I’d like to see a pillow with piping and a zipper.
-
I’d like to see window treatments, draperies, curains, etc
-
Chair covers would be nice!
-
Monogrammed napkins
-
I am loving all these tutorials, but this is my favorite so far. Thanks!!!!
-
Slipcovers! Tried them once and is was a horrible FAIL!!
-
Table runners especially holiday themed and seasonal themed with matching place mats using different methods–paper piecing, quilt as you go, scrappy, etc. I always need a quick and easy project to give just about every month for family or as a raffle item for different organizations that I am involved with.
-
I would love to see more pillow patterns, table linens for holidays, hot pads for your table, tree skirts and laundry containers.
-
I’d love to see a tutorial on making a fabric-covered foot stool!
-
Any and all.
-
I’m into the pillow thing but love really any home crafted decor
-
I would be interested in up-cycled home décor tutorials that would utilize some of the Bernina accessories. That way I can continue to appreciate all that my Bernina sewing machine can do. Thank you.
-
I would love to see a tutorial on recycling old jeans and how to deconstruct them for useful things like grocery bags, rag rugs or kitchen items like appliance covers, teapot cozy’s, and table mats.
-
How to make curtains for a Home Theater around the screen.
-
I would like to see different kinds of table toppers.
-
I would like to see a quilt block that has a large enough center space for a 4 x 4 embroidery design to fit!
-
I loved your easy to follow tutorial on the paper pieced pillow. I would like to see more pillows, maybe some bench pillow ones.
-
Rag rugs?
-
Simple, quick, Christmas gift ideals.
-
Would like to see tutorials on ascessories for decorating the kitchen from towels, pot holders, seat covers, window decor, etc.
-
Would like to see quilt as you go table runners. I have used 1 pattern for years so it would be nice to have a change. Love paper piecing. One of my favorite techniques. Thank you
-
All kinds of pillows and table runners
-
Table runners for a sofa table or a mantle.
-
I would like to see for a tutorial chair and sofa covers too. I really like the paper pieced tree pillow. Thank you.
-
I would like to see home dec tutorials for the sewing room – sewing machine & serger covers, pin cushions, mannequin covers, chair pads, etc. Thank you! Linda
-
Curtains/valances.
-
I’d like to see how to make one of those spiral table runners using a wedge ruler.
-
I would like to see something very beginner – something for the newbies! how about a kitchen linen project, or an easy gift to make?
-
How about Roman shades? That would be especially helpful and useful to do this very cold winter (so far)! Many thanks for all the wonderful, well written tutorials, many of which include videos. pjb
-
I would love to see a cover for my food processor or a matzoh cover for passover…
-
I would love a tutorial on making window treatment valences. i did make some, but id like to know how a professional would do it!!!
-
A tutorial for tableclothes
-
Napkins, table runners, and pillows.
-
Placemats and napkins.
-
Cushions for dining room chairs that are all wood. Elegant, not arts and craftsy.
-
unique dog beds
-
I’d love to see a project on decorative padded seats and backs for dining room using metallic thread decorative stitching.
My accessories are in a zip lock bag so I really hope I win this case. -
I’d like to see some tutorials on lighting and lamps made from fabric.
-
I would love to see ideas for apartment curtains and window treatments. Love my Bernina!
-
Making pillows for large bench seats.
-
I love all of the suggestions, but here is one more. What about something that could be made in multiples? For example, table runners that could be made in multiples, with yardages for one, two, or three of them, to make as gifts, or easily varied using seasonal fabrics? I always thought that a great wedding gift would be a set of seasonal table runners or table toppers. Or a gift for a new baby could be a set of seasonal bibs.
-
Window swags would be interesting. I’m not a pillow fan, but I might be a minority of one.
-
slip covers
-
I would like to see more napkins, place mats, hot pad and pot holders.
-
I enjoy making pillow covers, table runners, and mug rugs.
-
I would like to see covers for my machines 880, B700, 225, 1300 serger and cover stitch serger.
-
Buttonhole appliqué on home decor items with the machine. ?
-
More in depth Slipcover instructions Thank you and love the box.
-
Custom fit slipcovers.
-
Slip covers!
-
Quilting room stuff.
-
I would like to see a tutorial on slip covers.
-
to get organized I’d like to see tutorials for some different types of storage containers for different rooms in the house that can be sewed
-
I’d like to see a tutorial on making curtains.
-
I’d like a tutorial on making lined blackout drapes for my bedroom and another on a cover for my KitchenAid mixer with pockets for attachments and another on making purses with lots of pockets
-
Table runners are fun.
-
I would like more tutorials on curtains/drapes..
Would also like a tutorial on making a covering for arms of chairs and headrests. Something quick and easy that could be washed.
-
I would love to see some mug rug or table runner tutorials and how to quilt them. thanks.
-
I need a tutorial on how to focus on finishing projects already started. REALLY!
-
I’d like to learn how to recover outdoor cushions.
-
I would like to another paper piecing pattern I have only made one small project so far.
-
How about simple curtains. Also potholders with good insulation,
-
I am new to Bernina and We All Sew so I don’t know if you have done a tutorial on making curtains. My home is in dire need of new window coverings. I am especially interested in valances, swags and roman shades (insulated). Thank you for this opportunity! I really enjoy your tips ♥
-
Pillows and curtains are what interest me the most.
-
I would like to see a tutorial on how to make a Christmas tree skirt. I love the Bernina storage container.
-
If home dec includes crafts: linen/suede or ? bag or wall hanging embellished with machine stitches, threads, yarns, beading or? Fabric famed/matted photos/art?
-
Cushions with piping. I have fabric and foam and all the stuff to make matching piping but don’t know where to start.
-
love them all. organization items for the sewing room are especially helpful
-
Thanks for this tutorial. I’m looking forward now to trying a paper piecing project. Other projects that would interest me include machine embroidery on terry cloth bath towels and woven cotton dish towels, sewing box pillows, and round placemats.
-
I really need to know how to match or handle the ends of fancy trims on pillows. I have piping down just fine but nothing else makes sense.
-
Love to see more techniques for pillows such as cording, zippers, different edges; and seasonal home decor, Cute pillow!
-
I always struggle with pillows and hidden zippers. I love to quilt my pillow tops and then I measure, measure, measure and the top won’t fit the pillow form I’ve purchased!!!
-
Great looking coasters. Plan to start them soon.
-
I would love to see a tutorial on making different sized Christmas tree skirts.
-
I would like to see ore about Christmas embroidery decoration.
-
Options for zippered throw pillow covers with modern pattern quilting would be fun!
-
Table runners and place mats. Decorated towels, pot holders, etc. — things that I can use in my kitchen or use as hostess gifts. Love the pillow. Would be nice to do a series for each month or season of the year. Really enjoyed the paper pieced tree pillow and can see how it might be adapted for different seasons.
-
I’m not sure this is considered Home Dec, but would like to see more bed runner patterns and instructions. With the minimalist look, a nice quilt on the bed, topped with a bed runner, I think, is a good idea.
-
I would like to learn “How to” make a covers for dining room chairs for holidays.
Leave a Reply
You must be logged in to post a comment.

A tutorial for sofa cover