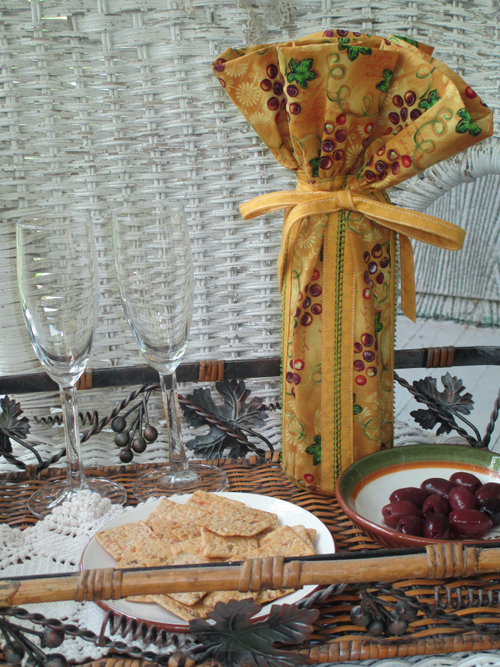
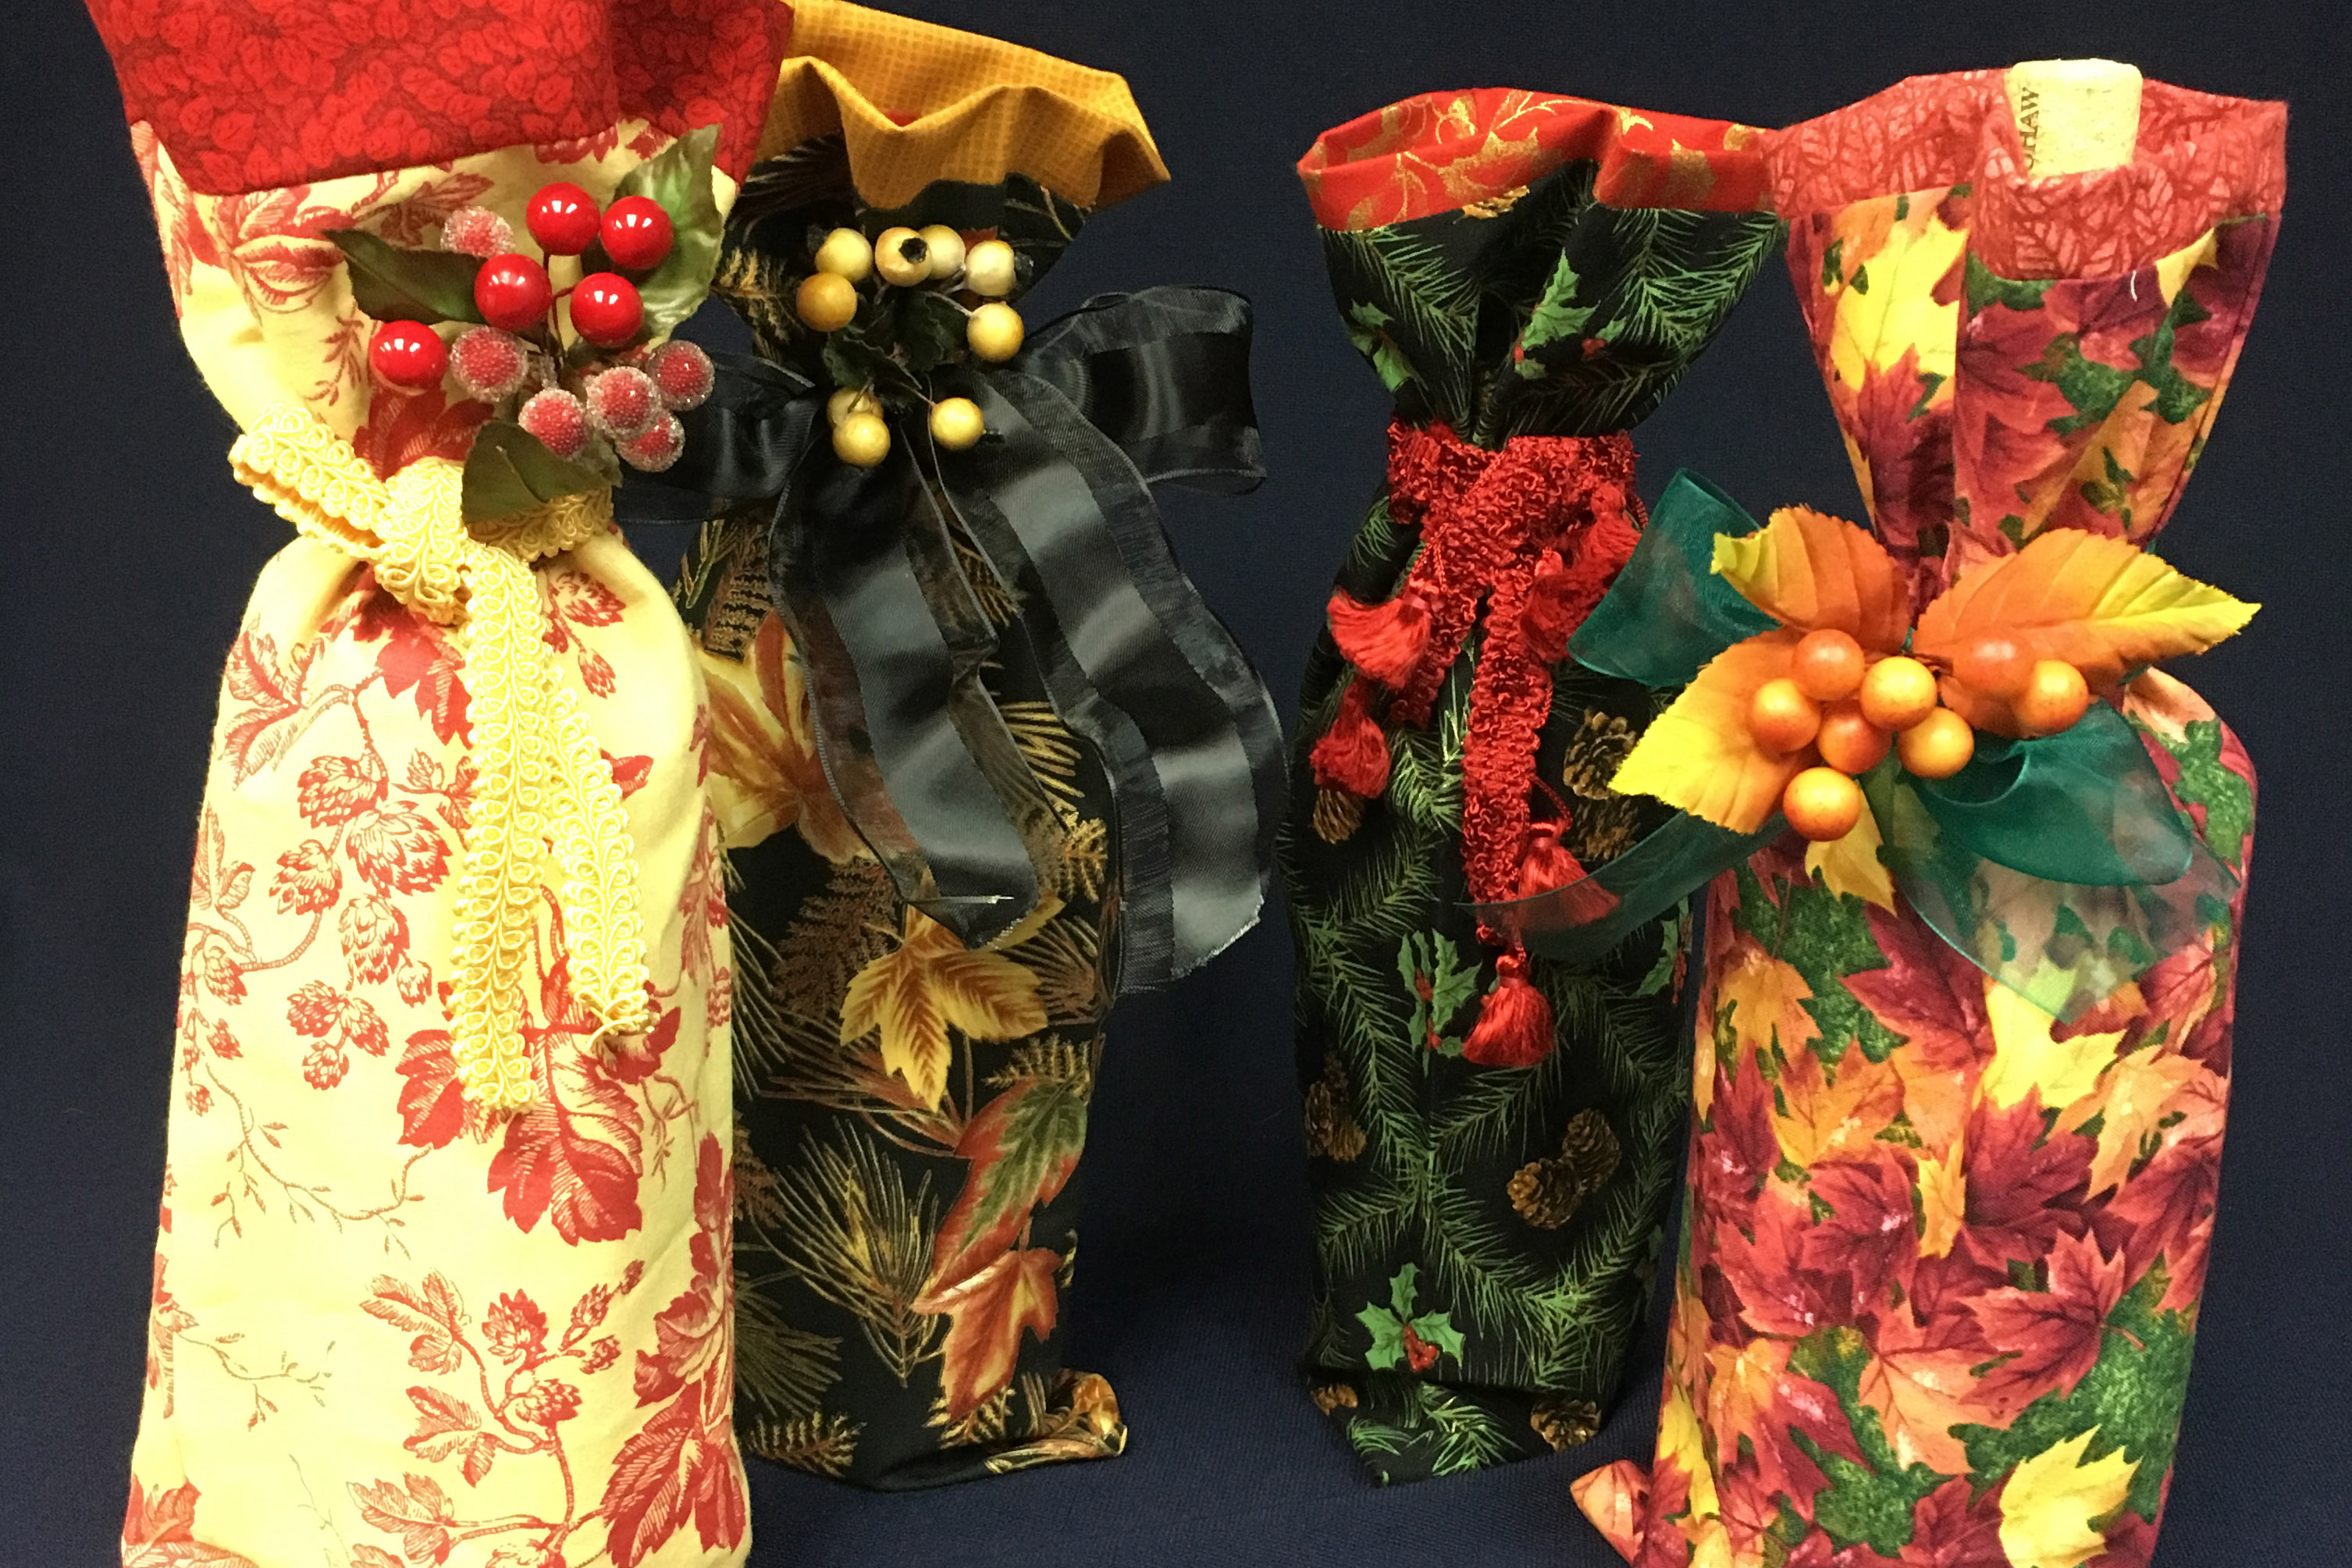
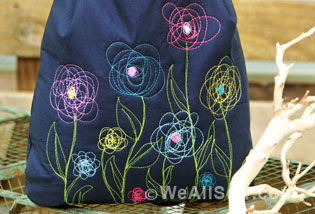
How to Make a Spanish-Hemstitched Bottle Bag
Here’s another quick project from Betty Stoltenburg, Portland OR. Spanish hemstitching adds a wonderful openwork accent to this bottle wrap. Make a coordinating set of Betty’s Wine Slippers/Coasters for a super house-warming or wedding gift.
Supplies
- 2/3 yard of main fabric
- 1/6 yard of coordinating fabric
- Coordinating Isacord embroidery thread
- All-purpose thread to match fabric
- Best Press starch alternative or spray starch
- All-purpose foot (BERNINA Reverse Pattern Foot #1/1C/1D or Clear Foot #34/34D)
- Overedge foot (BERNINA Overlock Foot #2/2A)
- Edgestitch foot (BERNINA Edgestitch Foot #10/10C/10D)
- Open-toe foot (BERNINA Open Embroidery Foot #20/20C/20D)
- Quarter-inch foot (BERNINA Patchwork Foot #37/37D or Patchwork Foot with Guide #57/57D)
- Spanish hemstitch attachment (BERNINA Spanish Hemstitch Attachment #47)
- Ruffler (BERNINA Ruffler #86)
- Binder attachment (BERNINA Binder Attachment #88 and Foot #95C)
- Overlocker/serger – optional
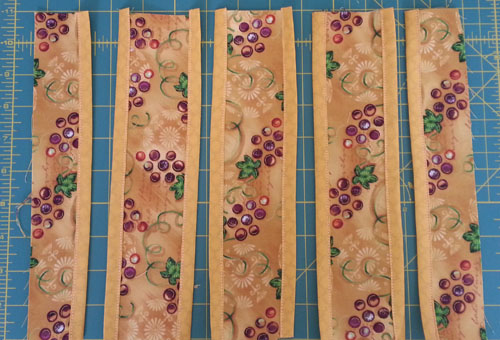
Step 1) Make the bias-bound strips.
Main fabric
- Cut three 2-1/2″ x 14″ strips
- Cut two 1-3/4″ x 14″ strips
- Cut one 8″ x WOF (width of fabric) strip
- Cut one 4″ diameter circle
Tip: Find a jar or mug with a 4″ diameter and trace around it to draw a 4″-diameter circle.
Coordinating fabric
- Press using Best Pressed or spray starch
- Cut three 1-1/4″ x WOF strips
Sew the coordinating fabric strips together end to end, joining them with diagonal seams, to create one long strip. Trim seam allowances to 1/4″ and press open.
Attach the binder attachment and foot to your sewing machine and thread the needle and bobbin with coordinating thread. Using a straight stitch, sew the binding to both long edges of each 2-1/2″ x 14″ strip and to one long edge of each 1-3/4″ x 14″ strip.
After the strip edges are bound, continue sewing the binding closed to create the “ribbon” tie.
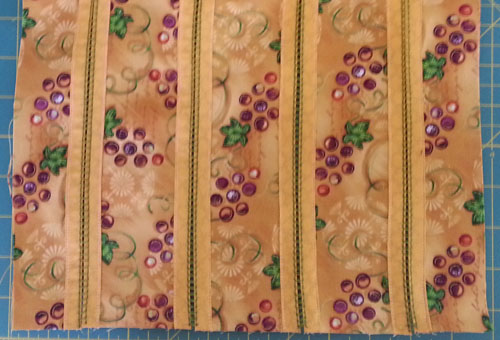
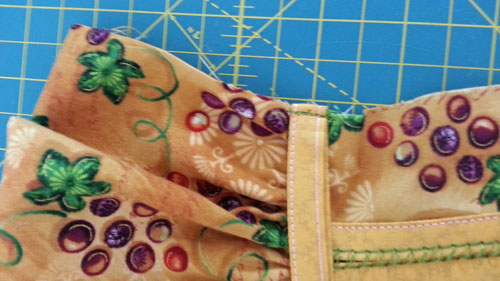
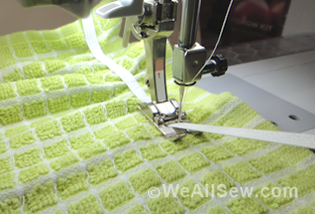
Step 2) Join the strips with Spanish hemstitching.
Remove the bias binder and foot and attach an open toe foot and the hemstitch attachment.
Thread the bobbin and needle with contrasting Isacord embroidery thread.
Set a ladder stitch (#702 on many BERNINA sewing machines) and change the stitch width to 9 mm (leave the length at 4 mm).
Sew the strips together as shown, placing the bound edges of the strips against the sides of the Spanish Hemstitch attachment. Trim the resulting rectangle to 13″ tall.
INSERT DETAIL PHOTO OF STITCHING
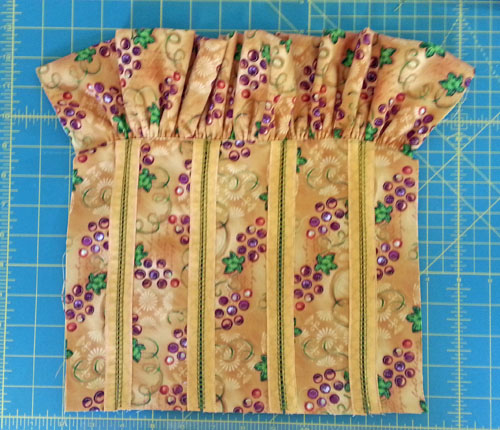
Step 3) Add the ruffle.
Remove the hemstitch attachment and attach the ruffler, set to take 1 stitch between pleats.
Fold the 8″ x WOF strip in half lengthwise, wrong sides together. Stitch along the long raw edge, creating a ruffle.
Change to an all-purpose foot and stitch the ruffle to the top of the hemstitched rectangle using a 1/2″-wide seam allowance.
Change to an overlock foot and select a vari-overlock stitch (#2 on many BERNINA models); overcast the raw edges together.
Tip: If you have an overlocker/serger, use it to seam and overcast the edges in one step.
Attach the edgestitch foot and move the needle three steps to the left (-3). Topstitch along the lower edge of the ruffle.
Step 4) Assemble the wine bag.
Change to a quarter-inch foot.
Fold the tie in half and baste it to the right side of the bag, just above the seam joining the ruffle to the bag.
With right sides together, stitch the long sides of the bag together, including the ends of the ruffle, securing the tie in the stitching.
Overlock the raw edges together.
Fold the circle in half two time. Mark each fold with a straight pin and unfold the circle; it is now marked in quarters.
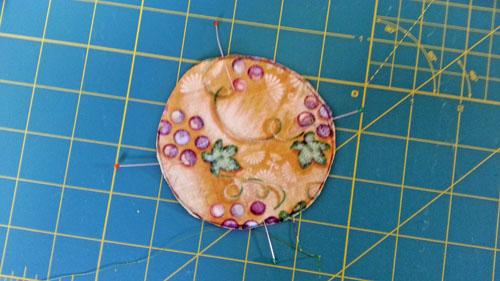
Fold the bag in half, then in half again. Mark the folds with straight pins; the bag is now marked in quarters.
Matching the quarter marks, stitch the circle to the base of the bag using a 1/4″-wide seam allowance, easing the edge as needed.
Turn the bottle cover right side out.
Pin a wine or sparkling cider bottle in the bag, tie a bow, and trim the ends of the tie to the desired length.

Used Products


What you might also like


3 comments on “How to Make a Spanish-Hemstitched Bottle Bag”
-
-
If I’m understanding your question correctly. Once you’ve basted the tie to the bag at the ruffle (folded edge is basted to side seam). Then you sew your side seams together (step 4) and put the bottom on the bag. The tie should be open on each end. If you attached the raw edges of the tie to the bag and then stitched the side seam, then you would need to cut the tie.
Please let me know if this helps.
Thank you for making my bag.
Thx,
Betty
-
-
This is a fun way to practice Spanish hemstitching for sure! I make a lot of bottle bags with scraps… if someone wants a slightly simpler “bottom” than sewing on the circle, I suggest adding 1 ½ – 2 inches in cut height and doing box corners (I use 1 ¼ “) which also works nicely, although not quite as lovely as what is shown here.
Leave a Reply
You must be logged in to post a comment.

The bag was east to put together – the Spanish hem stitch is fun to do. I do have 1 problem and that is the tie. The instructions for putting it on are not clear nor complete it seems to me. I think I must sew it down from both ends and leave some room in the middle so it will close the bag. Does that sound right?