How to Sew A Faced Waistband
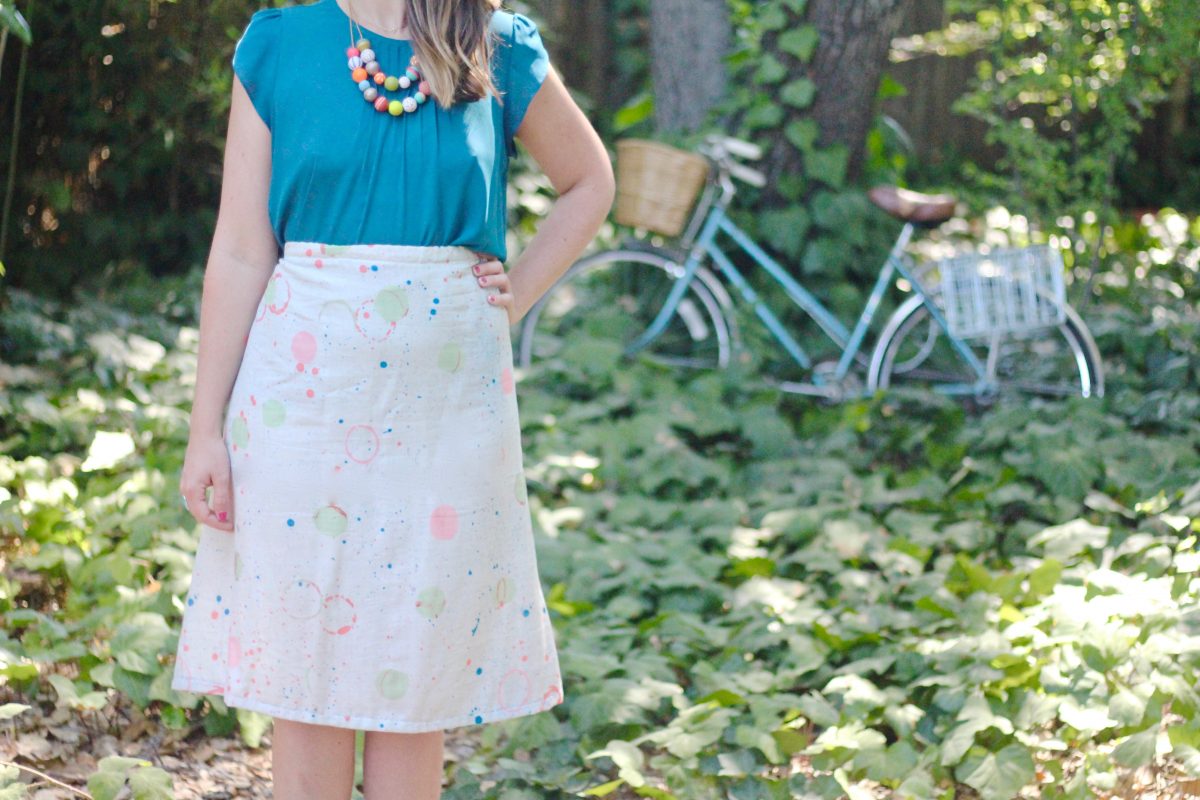
Confession. This was supposed to be my holiday skirt. Oops. Time flies and so does the holidays. So, new year, new you, new skirt. Yeh, I like how that jingles.

In December, I went on a quest to live a semi-handmade holiday by crafting at least a portion of my gifts. Not all because the holidays are chaotic and crafting everything from scratch was unrealistic for me. I believe that gifts don’t have to be tangible. An experience such as a trip to Europe as well as knowledge such as a sewing lesson, can be gifts as well. For two women I work with, this was my gift to them. Sara and Ashley always wanted to learn to sew, and over the course of nights after work, I helped them cut and sew a skirt to wear to our company’s holiday party. I was originally part of that equation, but I dropped out like that last denominator when 85% of the way through it, I tried it on and it didn’t fit over my hips. At some step, I did something that I still can’t quite remember, which made it too tight for my lower half. Don’t you hate when that happens? Oh well! You live, you learn, and you make more garments.
Going into this project, my goal was to build the best waistband. About a year ago, I watched a video where the teacher emphasized the importance of sewing a solid waistband. Around that same time, a sewing friend commented that a proper waistband acts as a belt—anchoring a garment in place. Also, because I make so many garments with waistbands, why not master the technique?

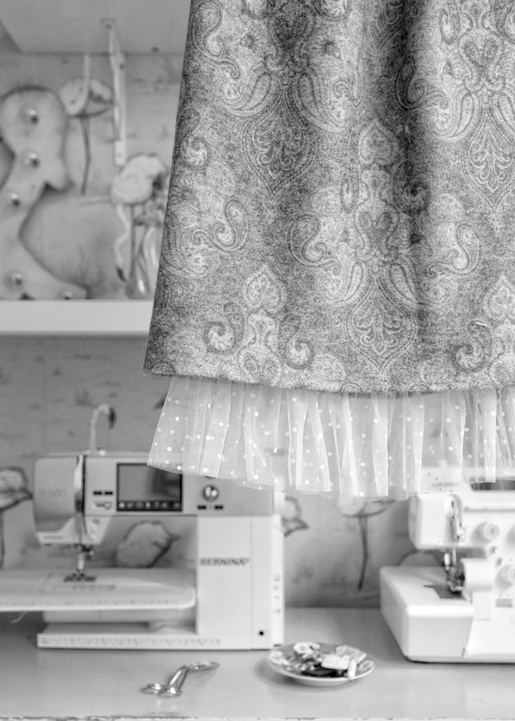
The exterior waistband—which is also the fabric for the skirt—is a wool knit. As with any waistband, but especially this one because it was a knit and therefore stretched, the outer waistband was stabilized with a lightweight fusible interfacing from Fashion Sewing Supplies. The inner waistband is a novelty trim from a local sewing store. Although the trim is rigid, the grosgrain ribbon that was inserted between the inner and outer waistband was how the waistband really became stable. Used a lot in haute couture in the 1950s (and still today), grosgrain is great to use as an interior waistband in thick fabrics because it reduces the thickness of the seam allowances. If the interior waistband was the self fabric, the seam allowances would be thick and if you’re not careful when pressing, could cause an unsightly ridge. Also to note, I chose grosgrain as opposed to petersham because the latter has a scalloped edge, softer touch, and is slightly pliable. With its straight, bound edge, grosgrain has no give, which is what I wanted.
Assembly of the waistband was simple, but a lot of steps. Let me show you exactly what I did!
Supplies
- Self fabric —wool knit—Emma One Sock
- Lining fabric—thrift store
- Interfacing—Fashion Sewing Supplies
- Novelty trim (inside waistband)
- Grosgrain ribbon
- Zipper
- Thread from Fleishman Fabrics & Supplies
- Polka dot lace fabric—Lace Lindsay
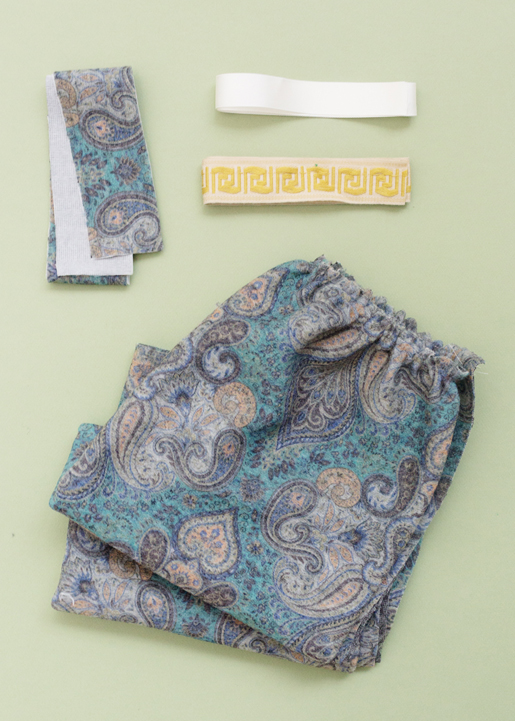
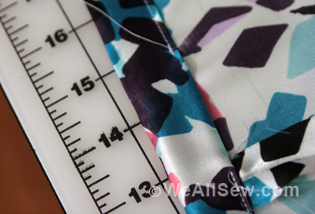
1. Cut waistband, grosgrain and trim to appropriate length and width. The width of the waistband depended on the width of the trim. Because the width of the trim was 1 inch, I made the exterior waistband 1 7/8″. This includes ½” to attach it to the top of the skirt, ¼” overlap the waistband and trim, and 1/8″ for the exterior waistband to roll to the inside. Also to note that I cut the grosgrain 1″ less than the length of the skirt to reduce bulk at the seam allowance.
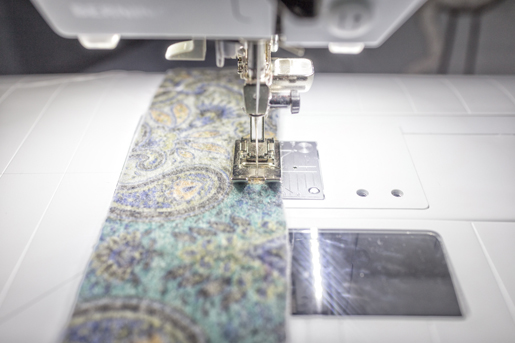
2. Basted a guideline ¼” from top edge of outer waistband.
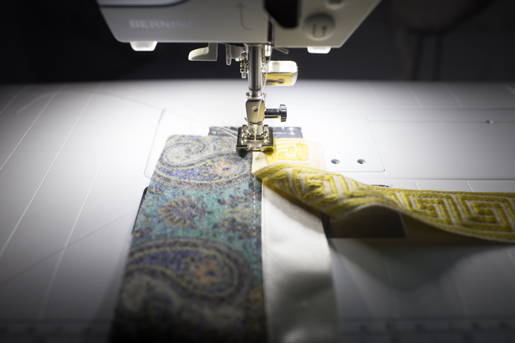
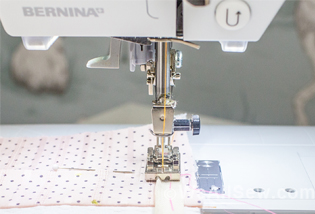
3. Aligned grosgrain with basting and sewed barely 1/8″ from edge.
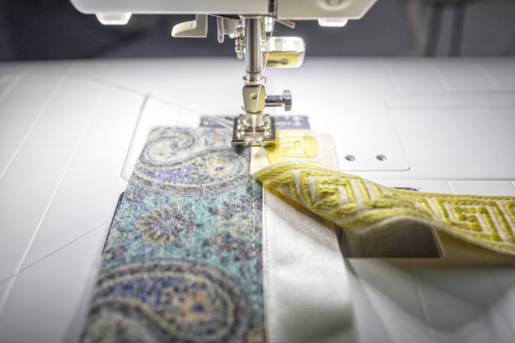
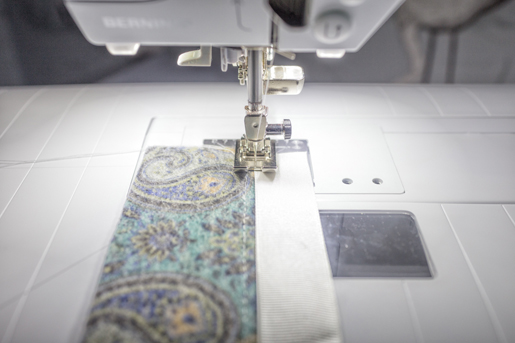
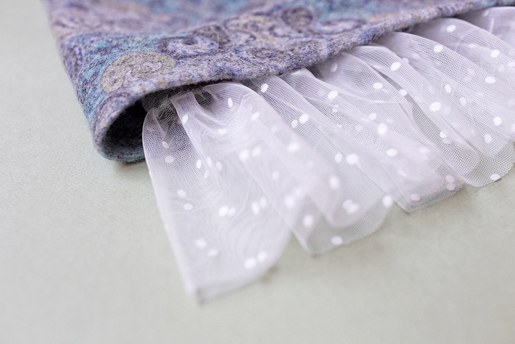
4. Placed trim on top of grosgrain, aligning it so that trim was 1/16″ to the right of the grosgrain. Then sewed 1/16″ from top edge.
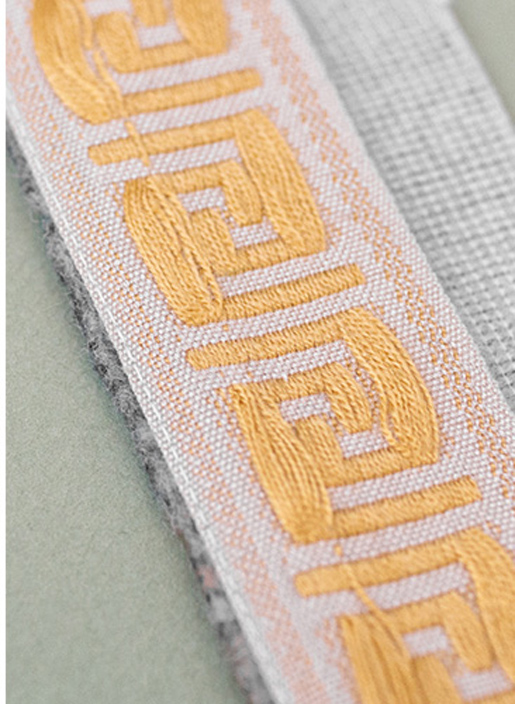
This is how the interior waistband looks after the trim is sewn and before the waistband is attached to the skirt.
 updated February 10, 2015
5. Attached exterior waistband to top of skirt, inserted invisible zipper, and then sewed trim to interior skirt.

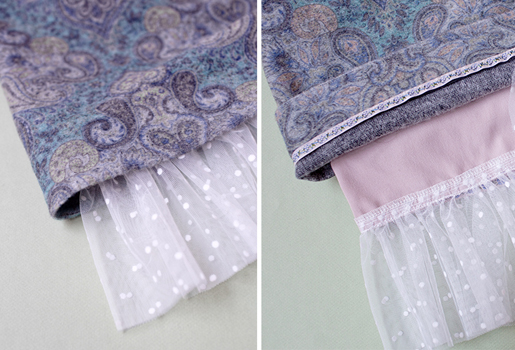
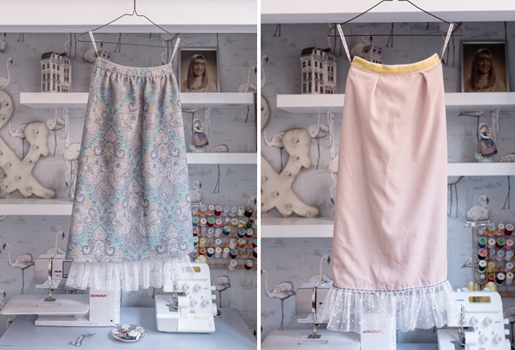
As I was working on the waistband, I added a hodge podge of fun additions that I didn’t originally intend—a light pink lining, which had a shirred bottom ruffle that peeked out from the bottom hem. Where the ruffle meets the lining, I also added a novelty ribbon gifted to me from a sewing friend. I used this same ribbon to add hanger loops at the sides.

Used Products


What you might also like


6 comments on “How to Sew A Faced Waistband”
-
-
Seems like this tutorial is rather incomplete. How about even a picture of the finished waistband?? The inside of the finished skirt??And how does all this work with the zipper insertion?
-
The second image in step 4 shows the interior of the waistband after the trim is attached.
-
The second to last picture shows the interior of the finished skirt (it’s a diptych image) and the second image in step 4 shows a close up of the interior WB.
As for the zipper insertion – great question! I will be covering this separately in a follow up post.
-
Hi Fans, Maddie’s post includes a tip for adding a faced waistband to an already existing pattern. You could use these steps to create this type of waistband for an existing skirt pattern you already have, but refer back to your pattern instructions for zipper insertion or finishing directions. While it’s a great tip meant to inspire you with some new possibilities, it’s not meant to be a complete tutorial on a skirt from start to finish.
-
Thank you for showing these special treatments for an otherwise basic skirt – hope to see more interesting techniques and ideas such as this one.
Leave a Reply
You must be logged in to post a comment.

I’d love to see a close up picture of the waistband after the trim was attached; feel like we’ve been left hanging here. Show how you finish this out please; are we to leave that key trim showing inside or what? Need more info on this project.