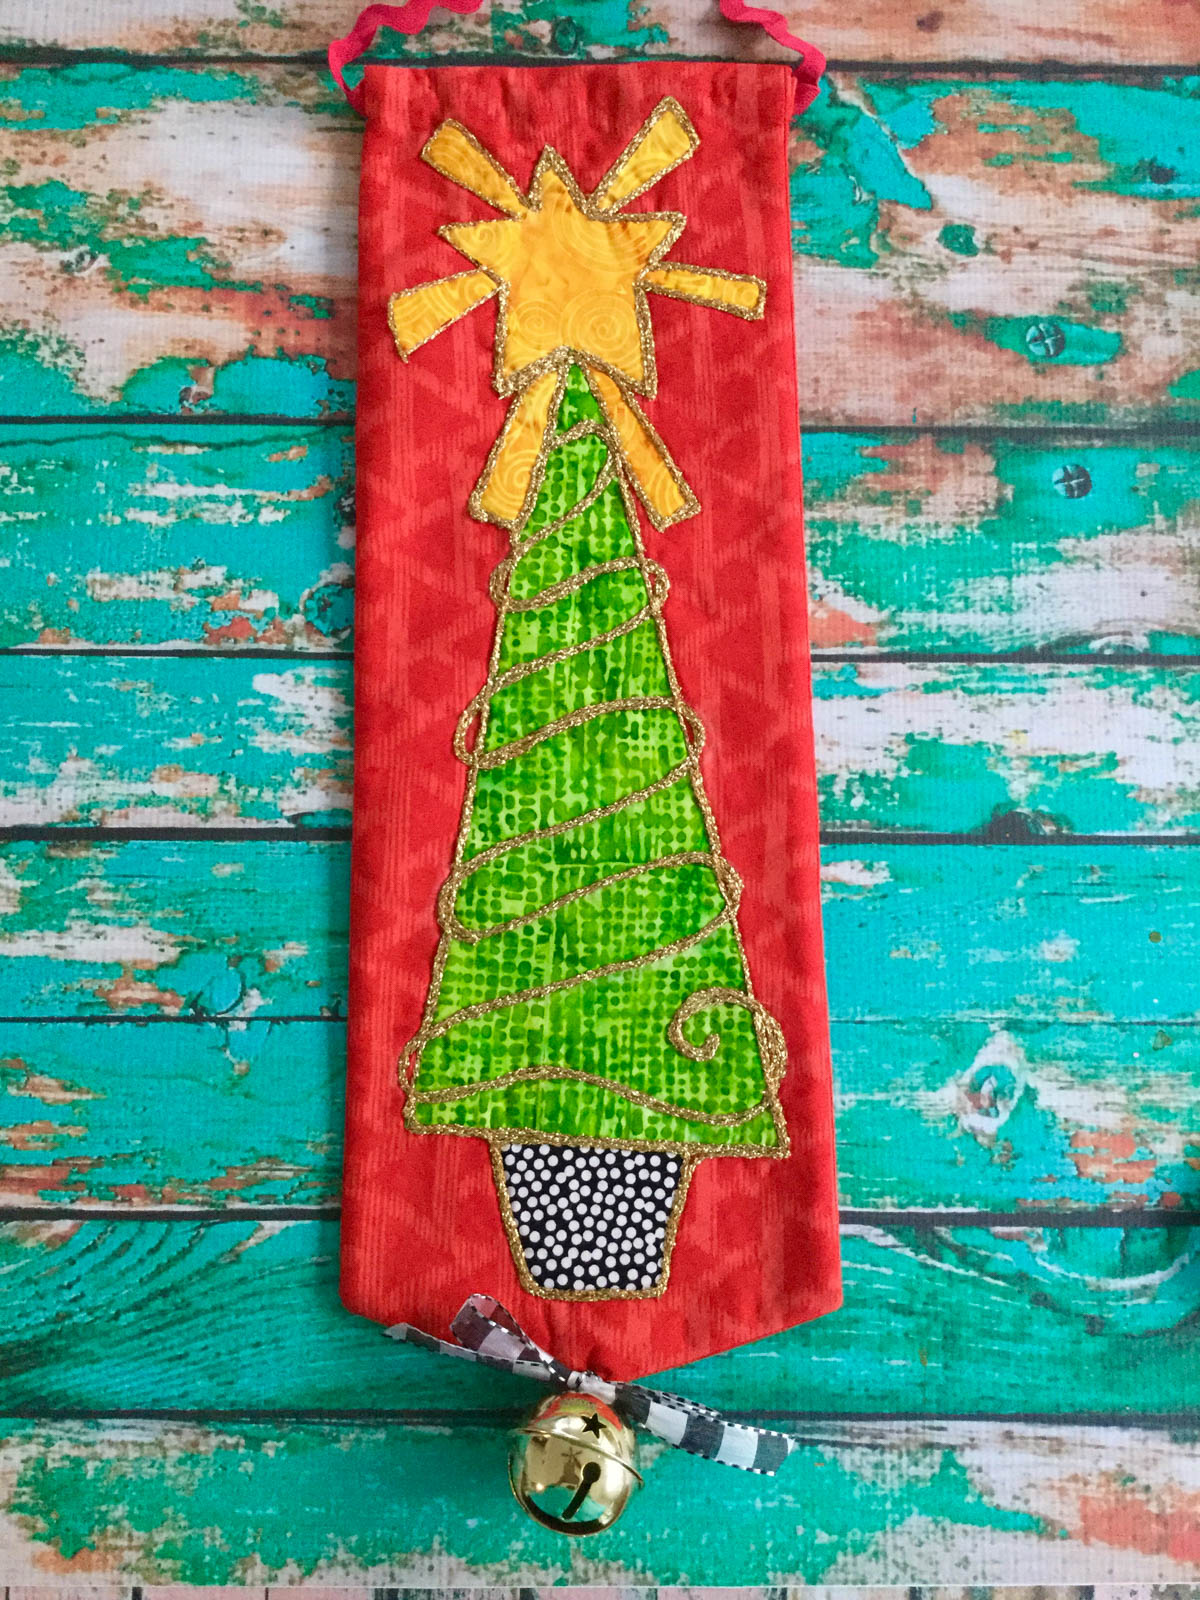
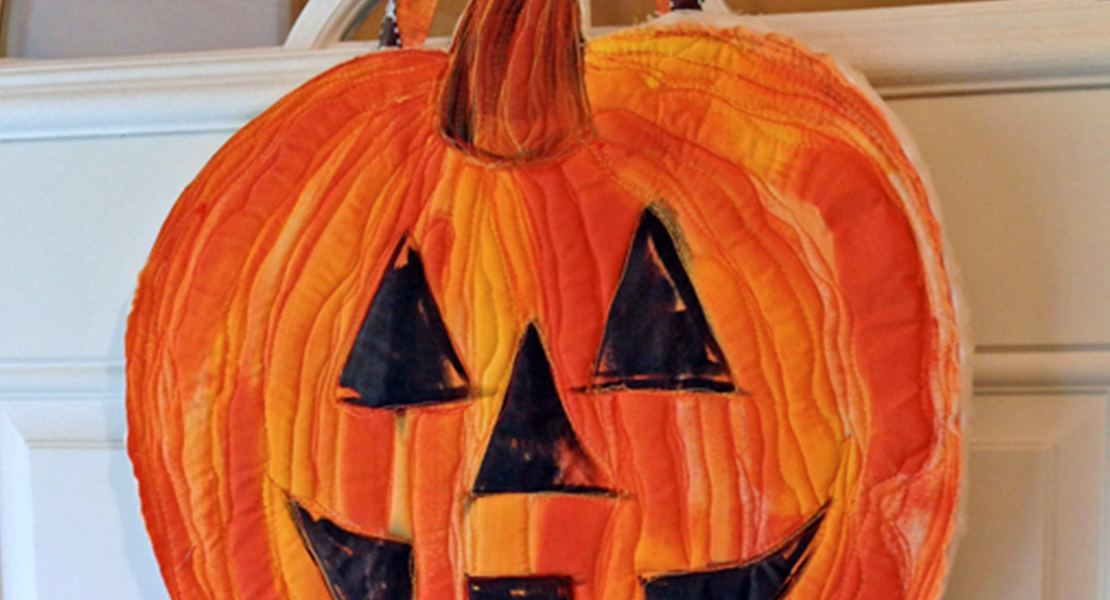
Jingle Bell Door Hanger

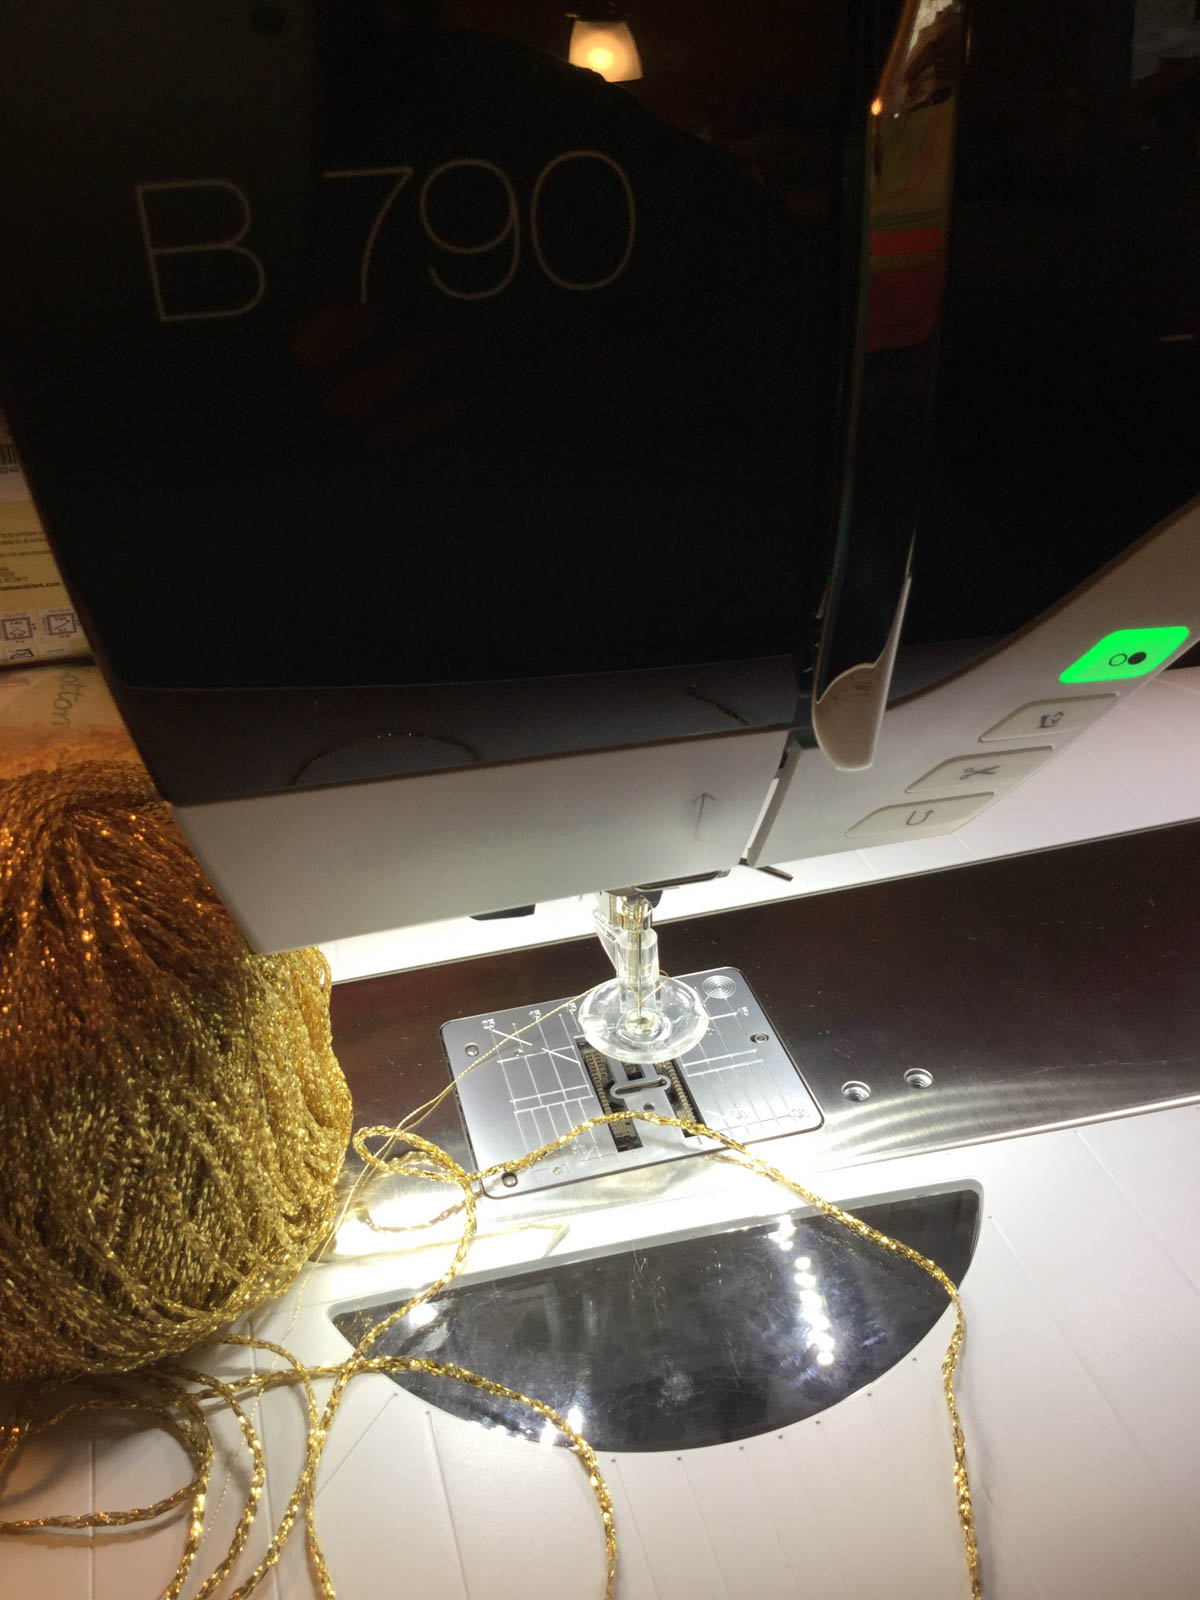
Ever since I learned that my BERNINA Q 20 uses standard BERNINA feet I have become totally obsessed with using the BERNINA Free-motion Couching foot #43 to stitch my art out in free-motion sewing. It’s thrilling to “draw” with chunky threads and yarns watching the foot move the fibers with perfect stitch laying down my free form lines, patterns and designs. Such dramatic, unique textures are created with palettes of assorted yarns, cotton and metallic threads that I can explore. To me the Free-motion Couching foot #43 foot is genius, as I can do couching on my Q20 quilting machine, and even better, on all BERNINA machines models. The holidays are perfect for sewing up playful décor with an abundance of colorful subjects and themes. A whimsical, sparkling Christmas tree is the inspiration for the “Jingle Bell Door Hanger”.
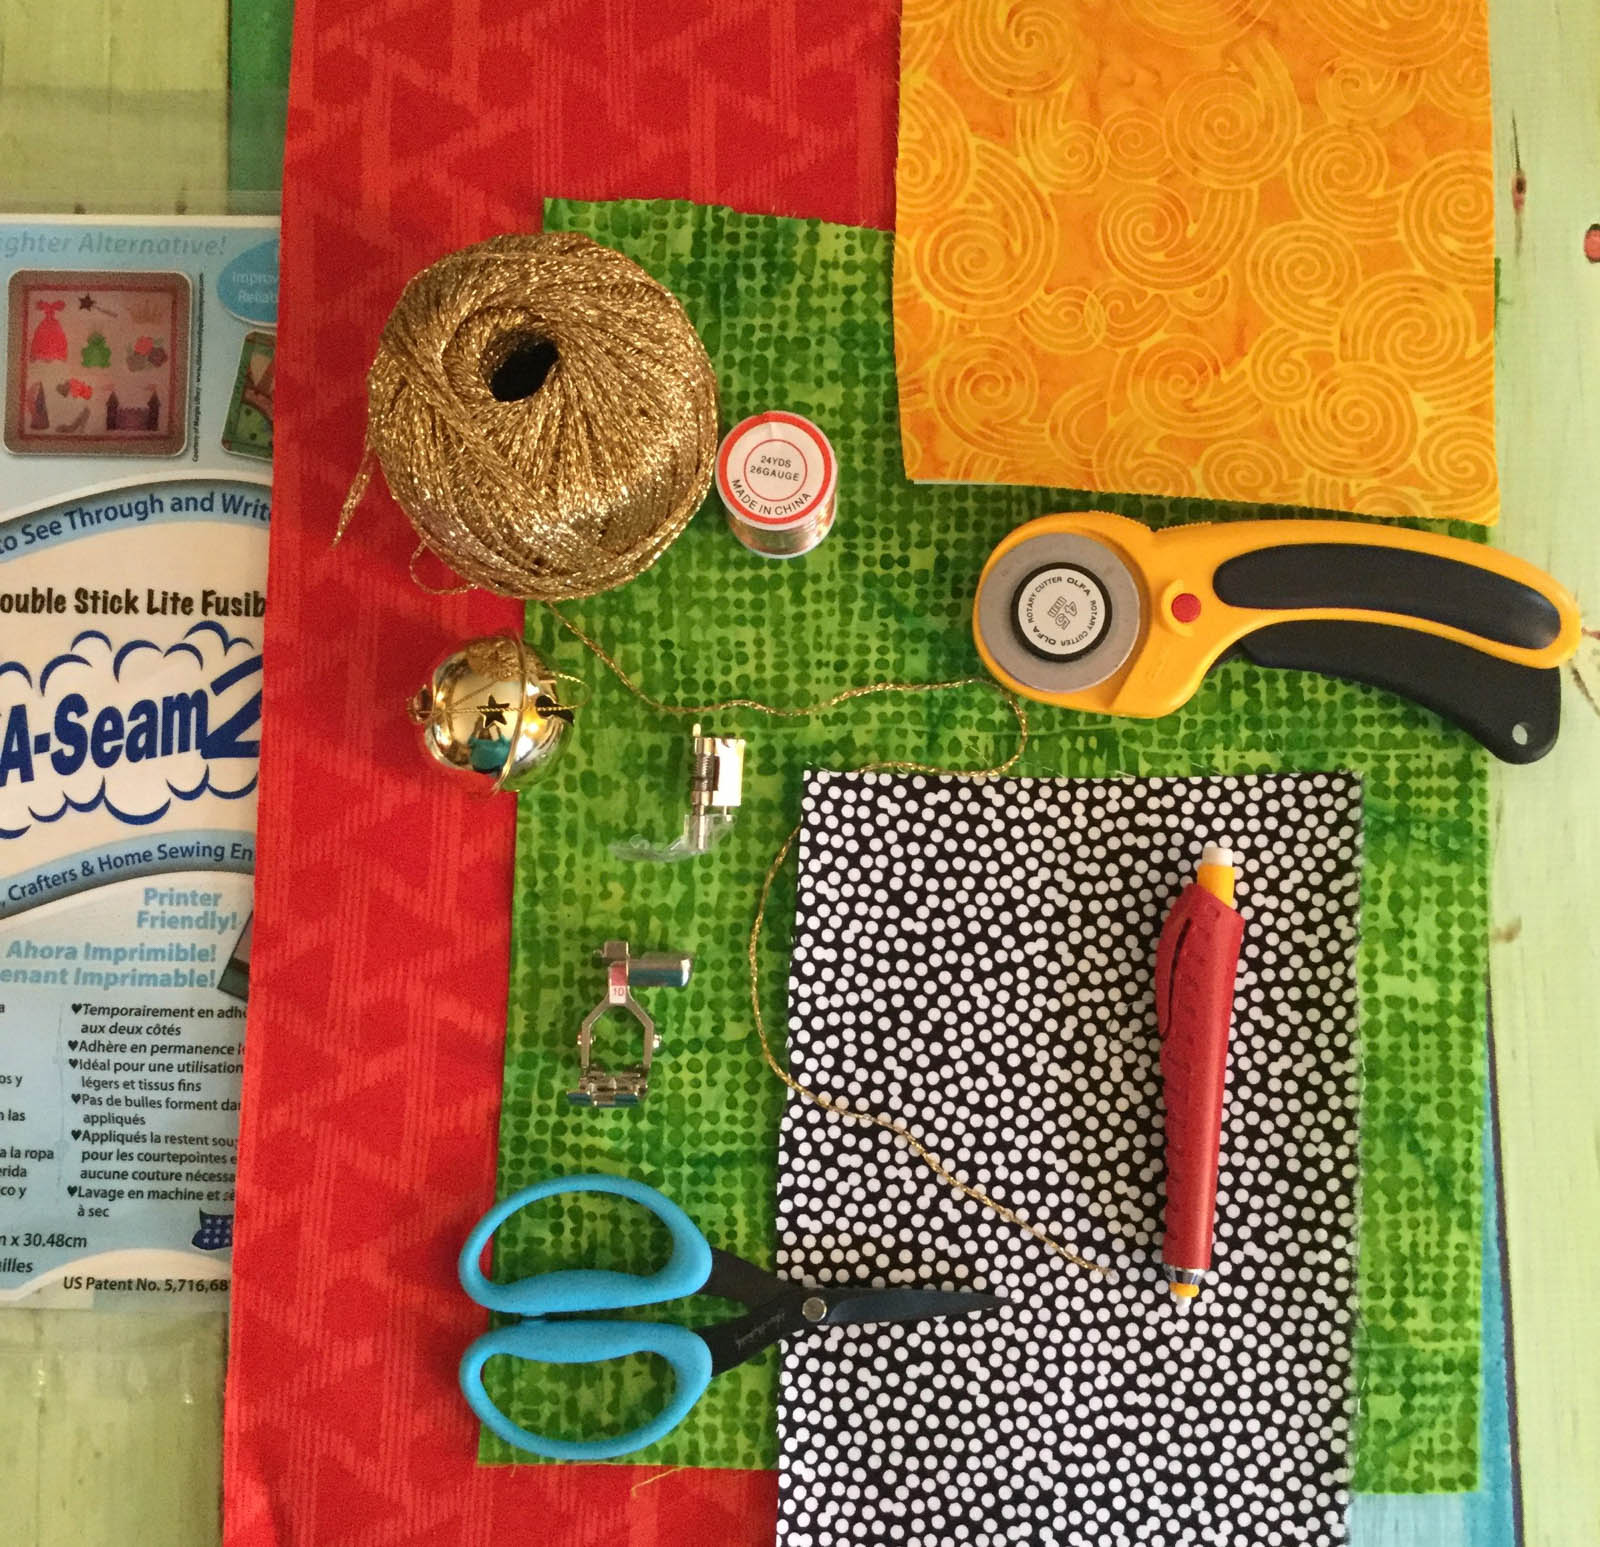
Materials to Create a Jingle Bell Door Hanger
- Assorted small pieces of fabric in holiday and Christmas colors (I use my palette of batiks)
- Fusible interfacing for applique, I used Steam a Seam Lite 2
- Fusible fleece for center
- Metallic yarn or thread, size 1.5mm-2.0mm
- BERNINA Free-motion Couching foot #43
- BERNINA #1 foot for ¼” to sew up the sides of the banner
- Chalk marking pencil
- 80/12 machine needle
- Jingle bell, any craft size is fine. I used a 3″ ornament that was not in the craft aisle. If desired, look in the ornament section of the store to find the large bell.
- RIBBON or RIC-RAC for hanger and bell trim
- Scissors and rotary cutter
- Pins
- Iron
- Needle and matching thread for hand sewing the banner top
- OPTIONAL- 26 gauge copper jewelry wire for easy threading yarn through channels on couching foot
- Your sewing machine, I sew on a BERNINA Q 20
Choose a fabric palette of your favorite Christmas colors
RED-background
Scraps are perfect for:
- GREEN—Triangle tree shape
- YELLOW—star shape
- BLACK/WHITE—tree pot
Sewing Instructions to Create a Jingle Bell Door Hanger
Step 1
Prepare the Appliqué: Apply fusible interfacing to the backs of all the pieces; green, yellow, black and white fabric.
Step 2
Prepare the Sandwich: Cut two red pieces of fleece to the top RED banner shape. Set the bottom piece aside.
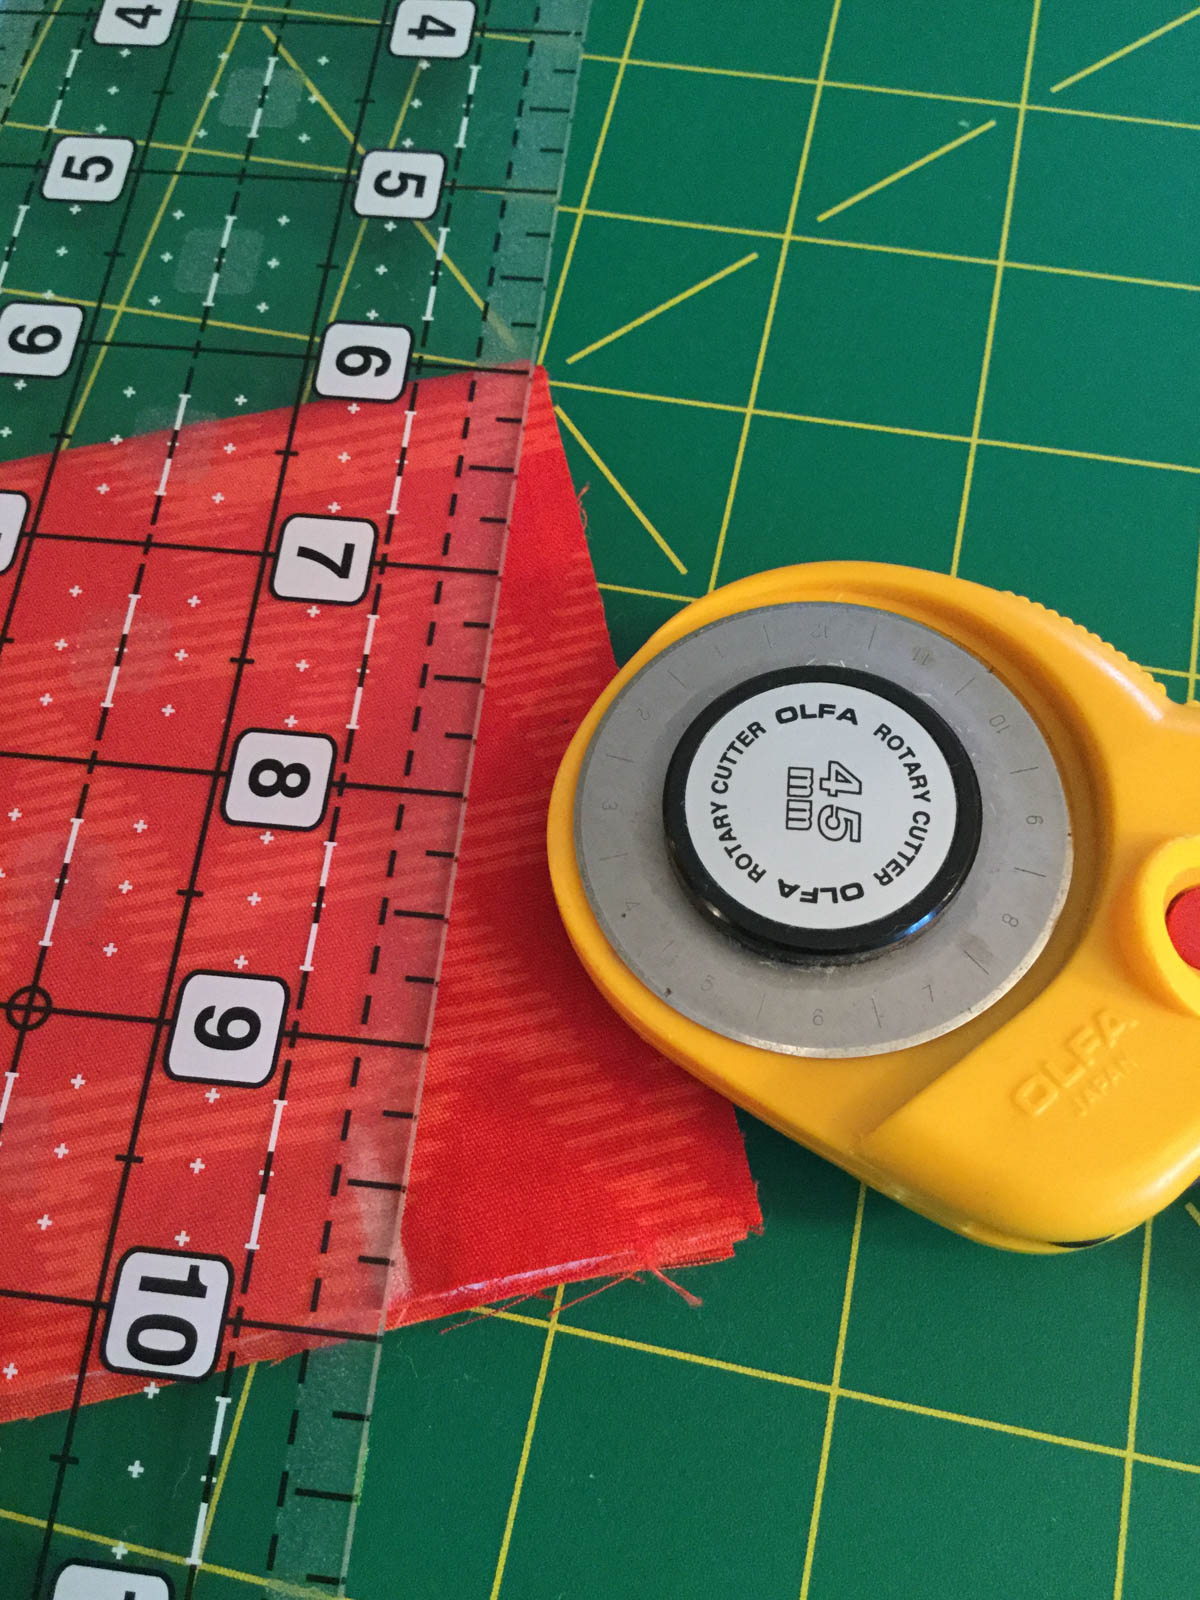
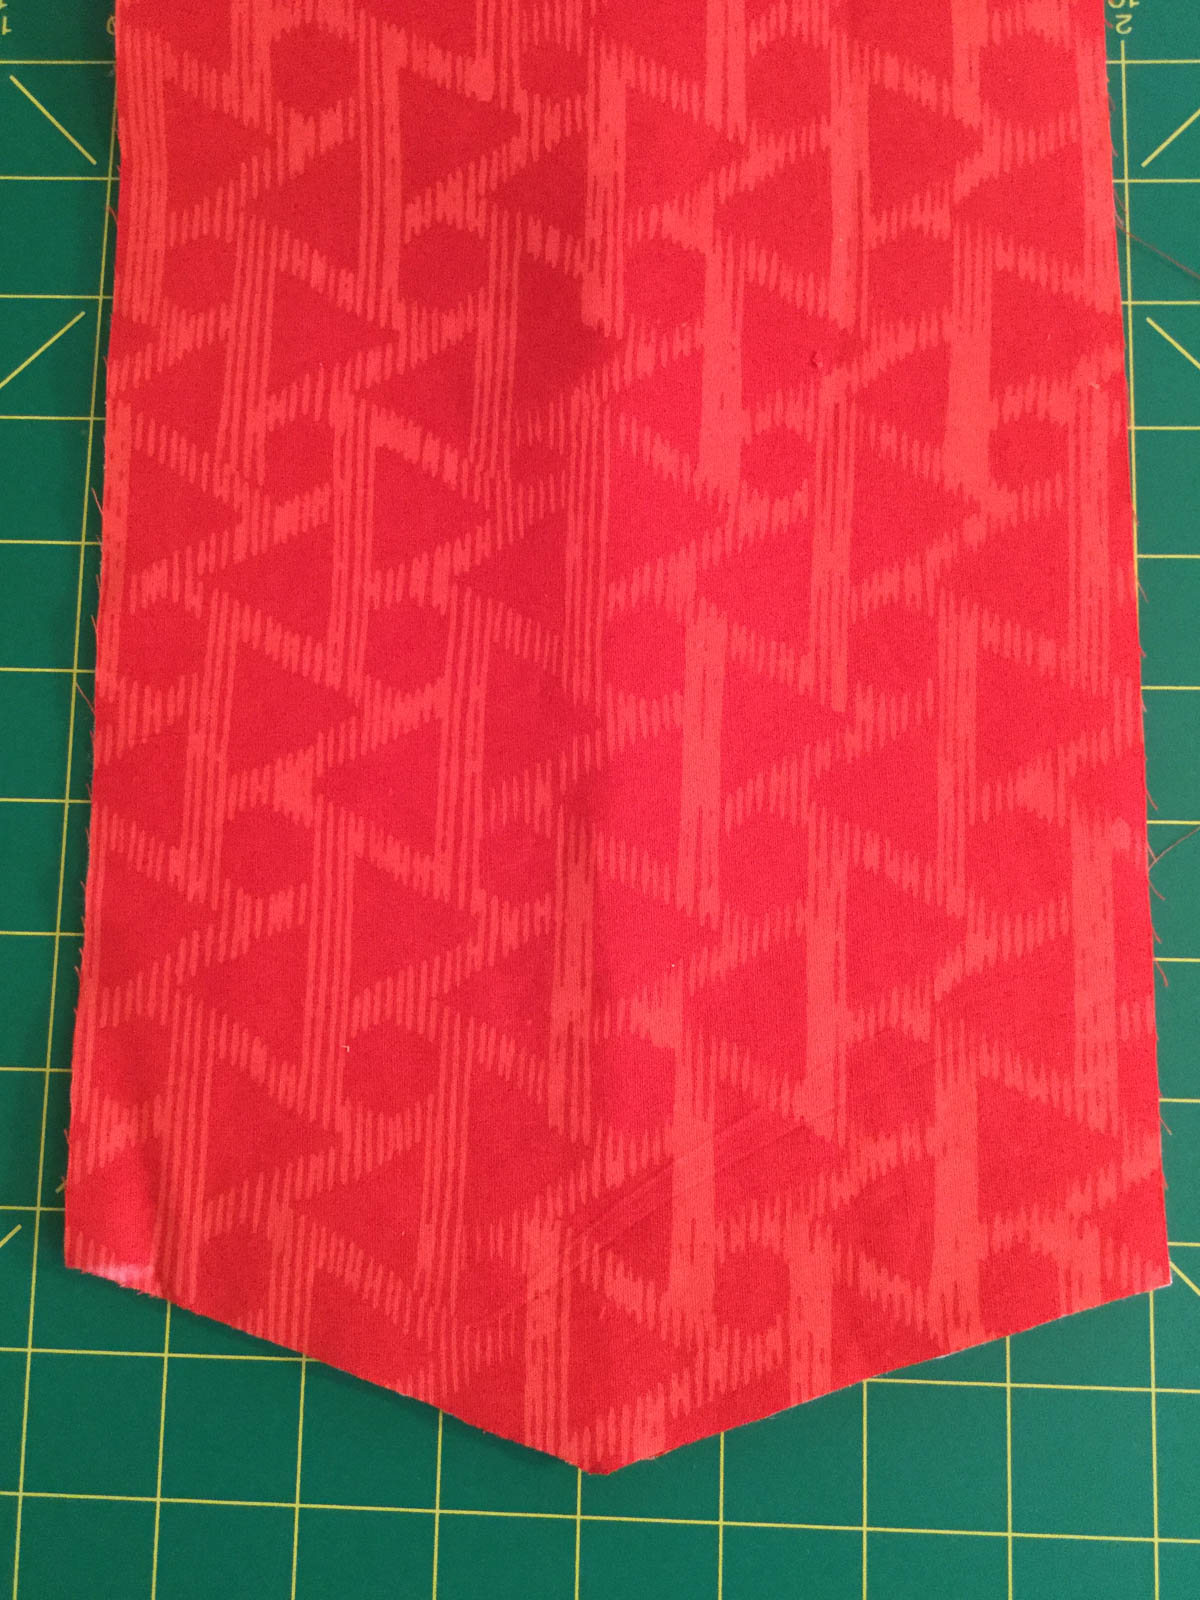
Step 3
Make a Point: With the rotary cutter cut the bottom into a slight point by folding the banner in half, mark 1″ on the raw edge. Align the ruler to the point on the fold and cut.
Step 4
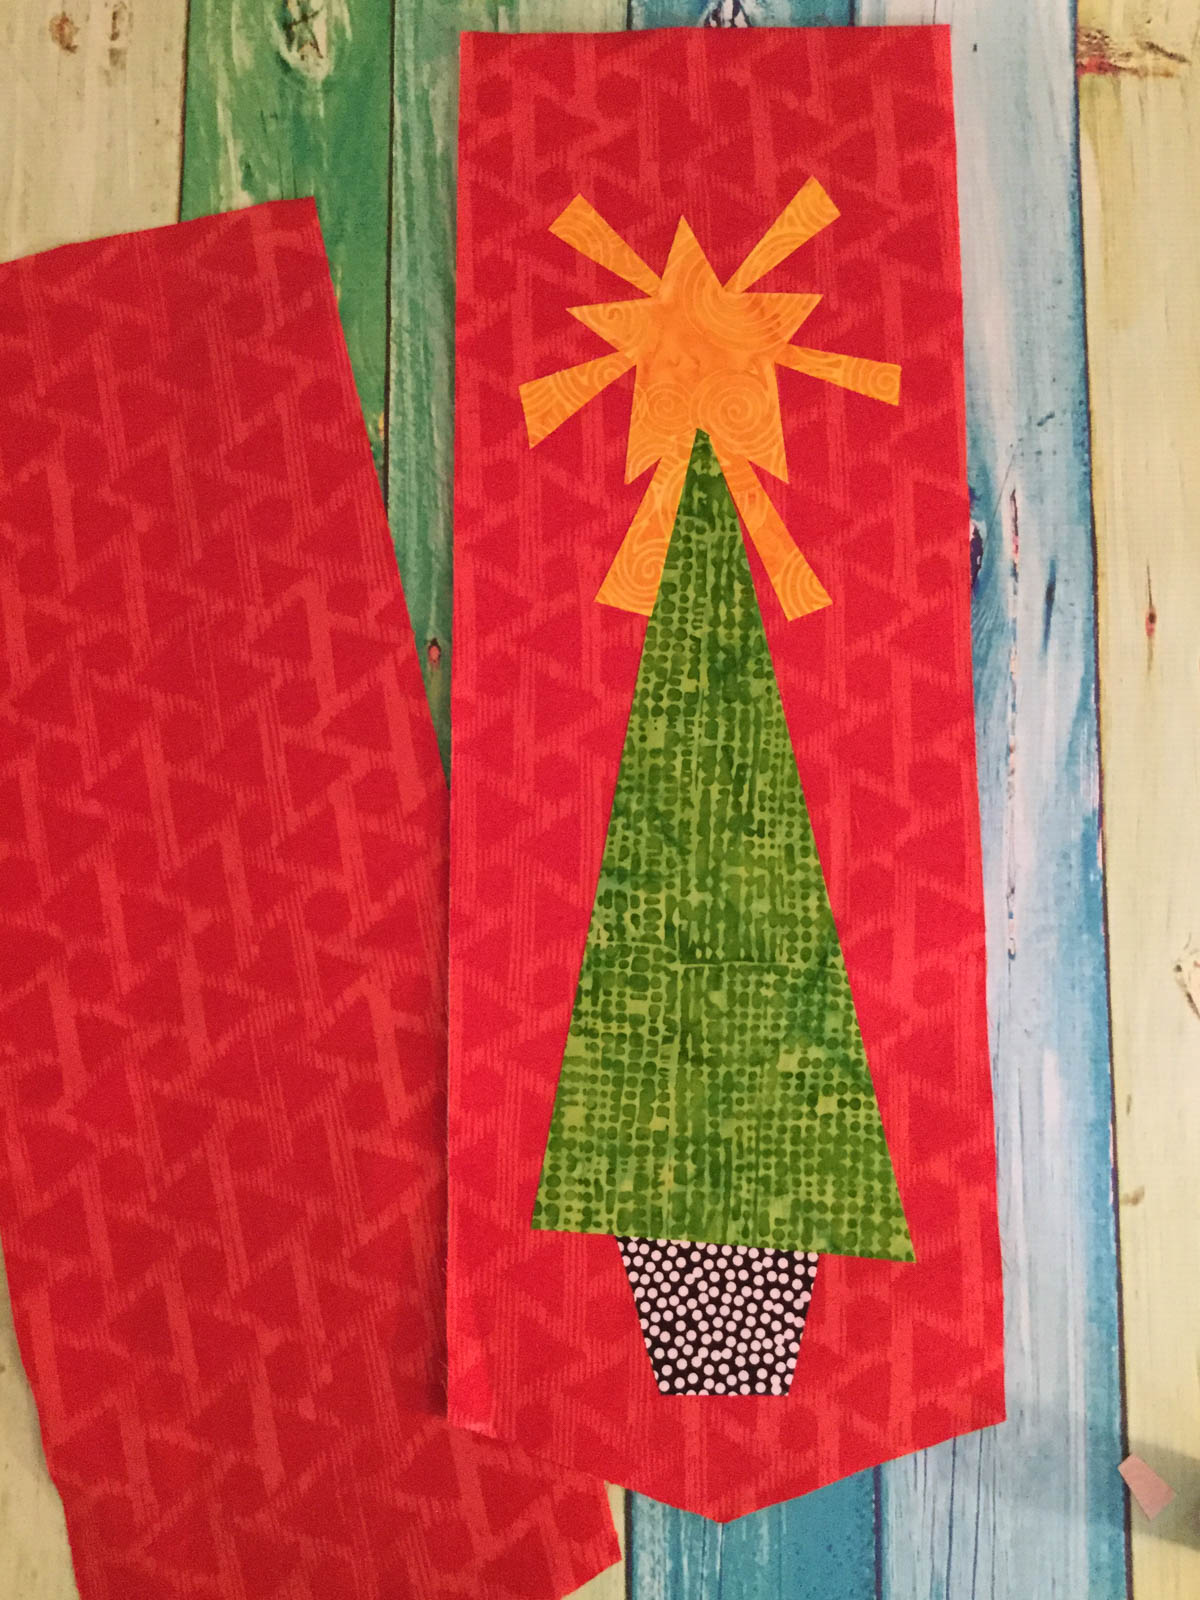
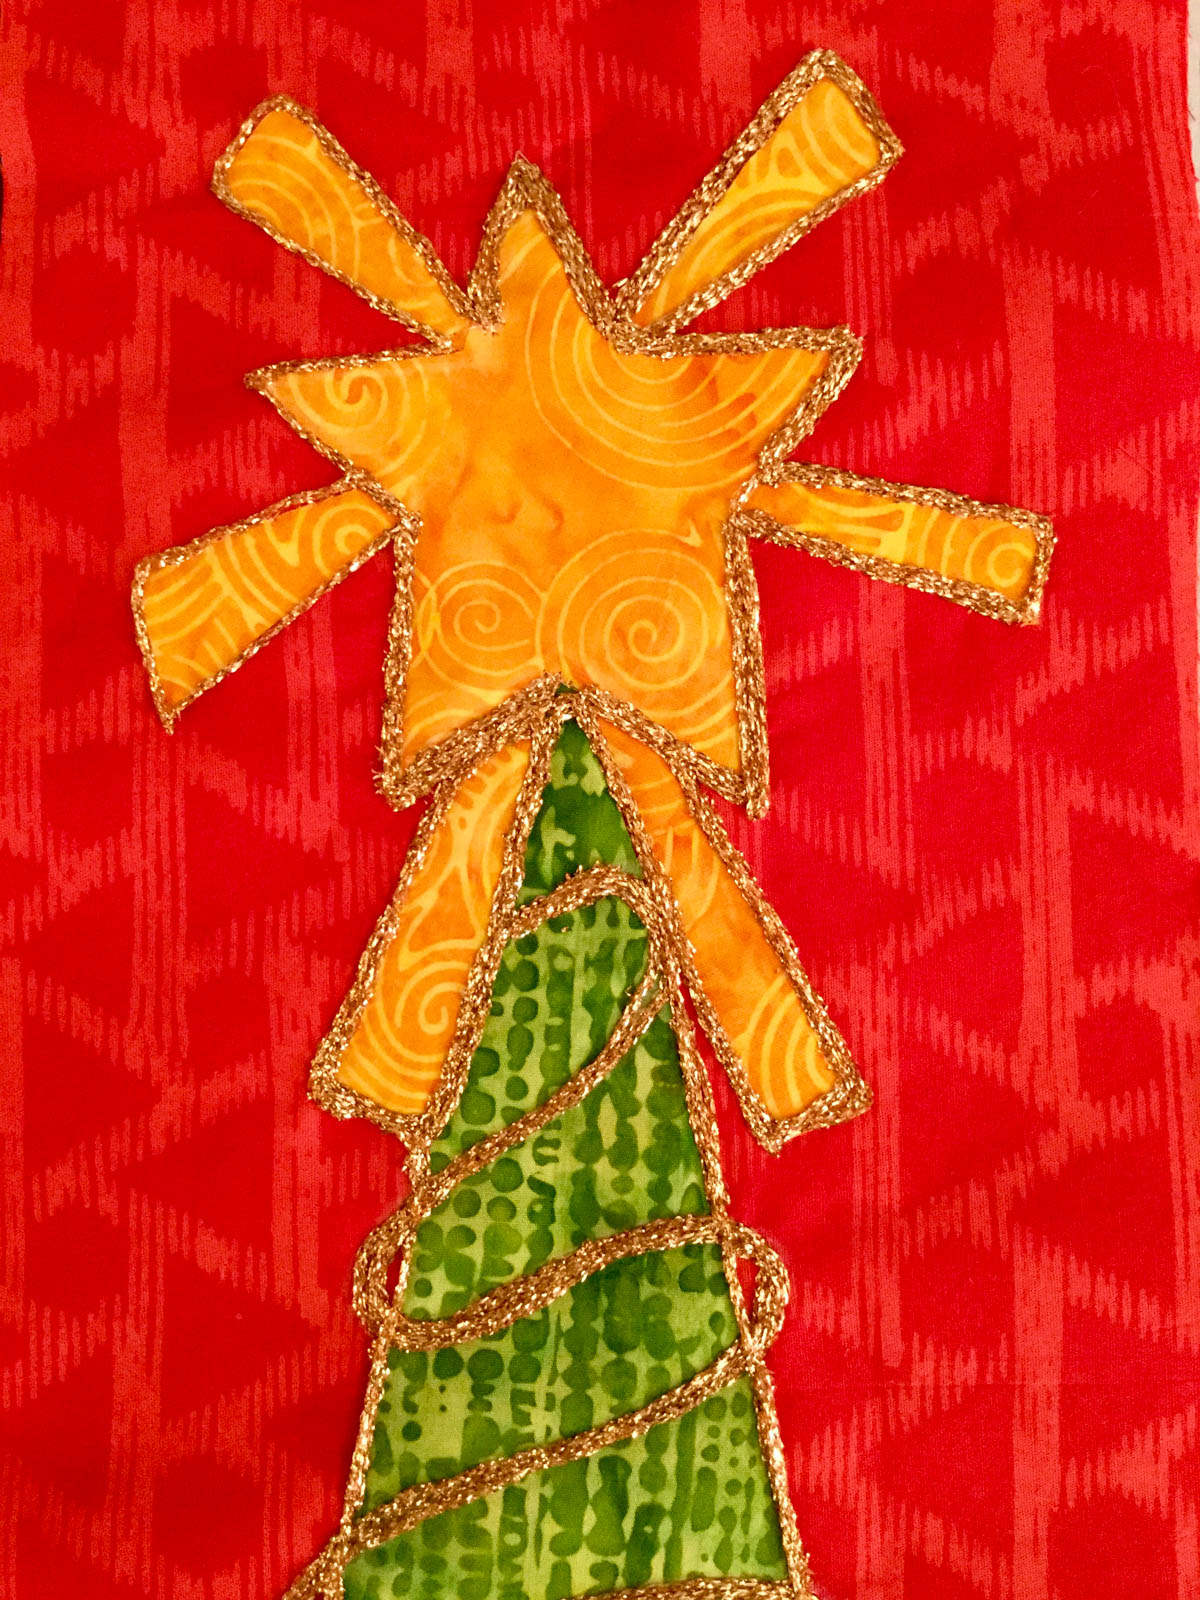
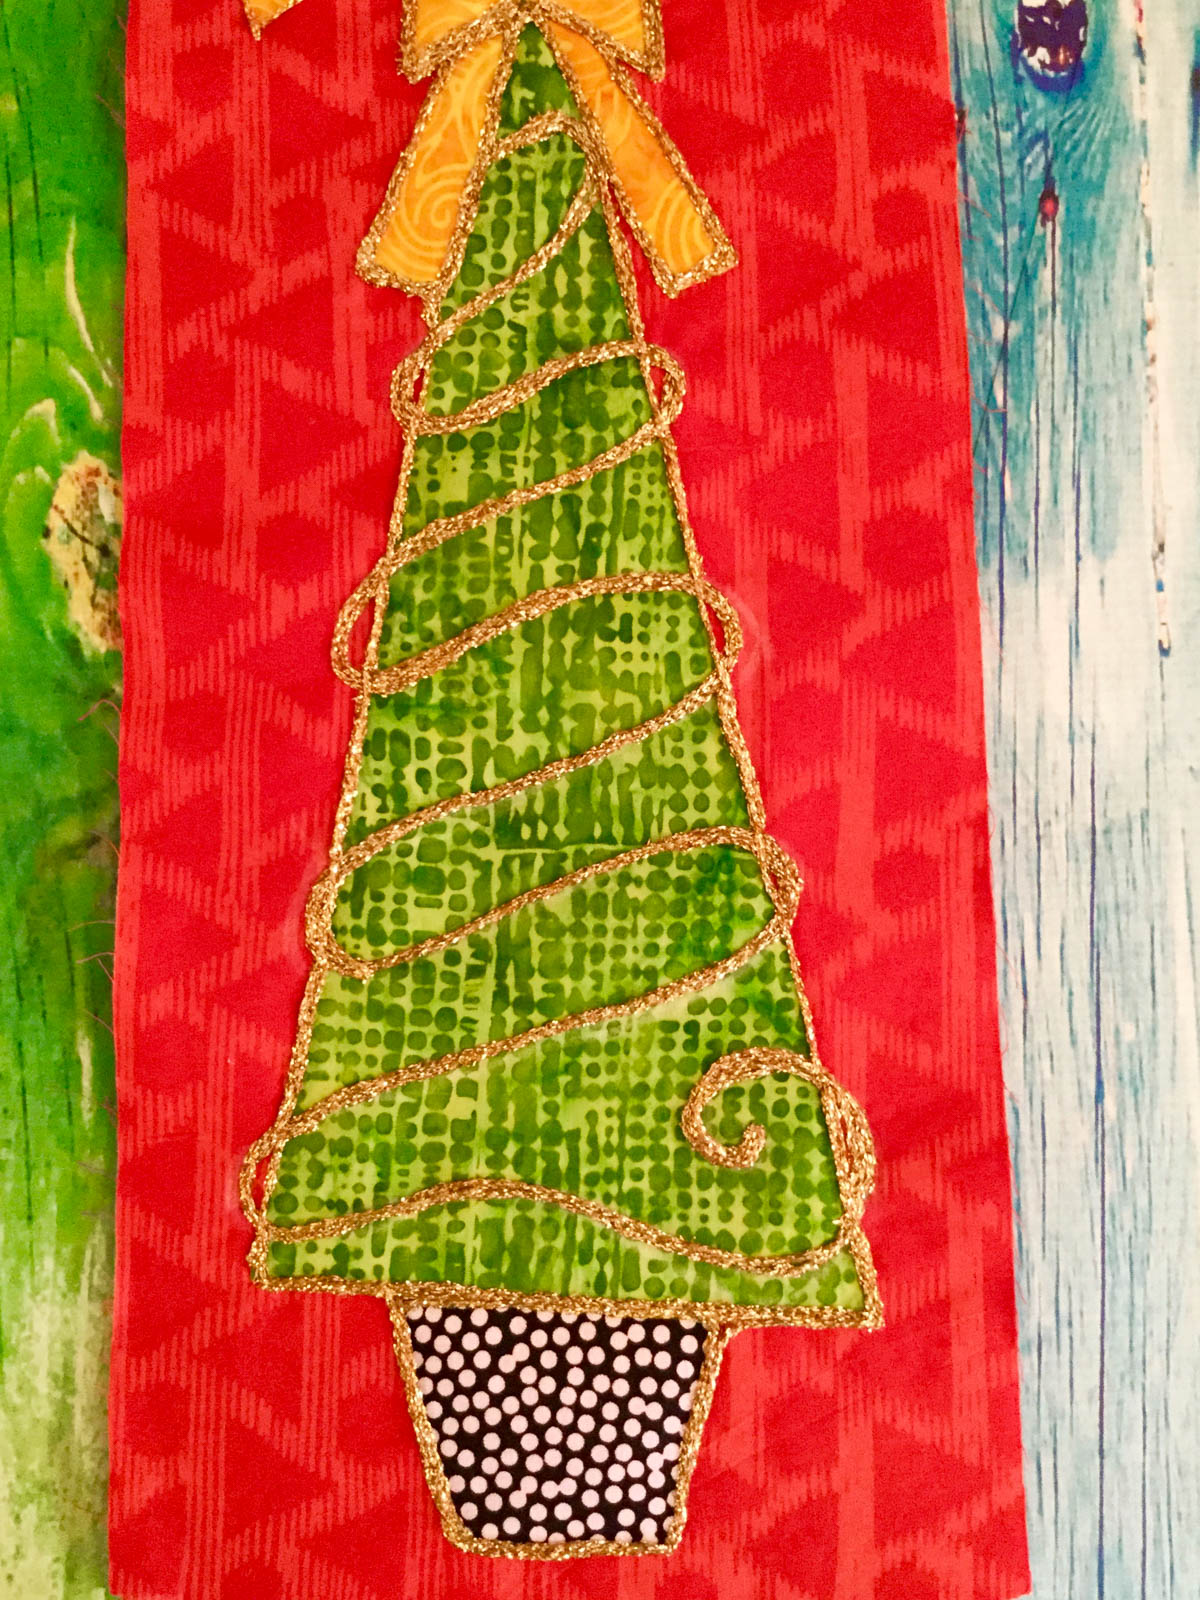
Cut Out the Shapes: Perfectly imperfect is best! Free hand cut GREEN fabric a triangular tree shape (approximately 5″ wide base x 11″ to the point). Cut a wonky rectangle (approximately 2″ x 3″) BLACK/WHITE fabric for the base. Cut your own YELLOW chunky YELLOW star shape (3″ x 3″) and 5-6 rays (2″-3″)
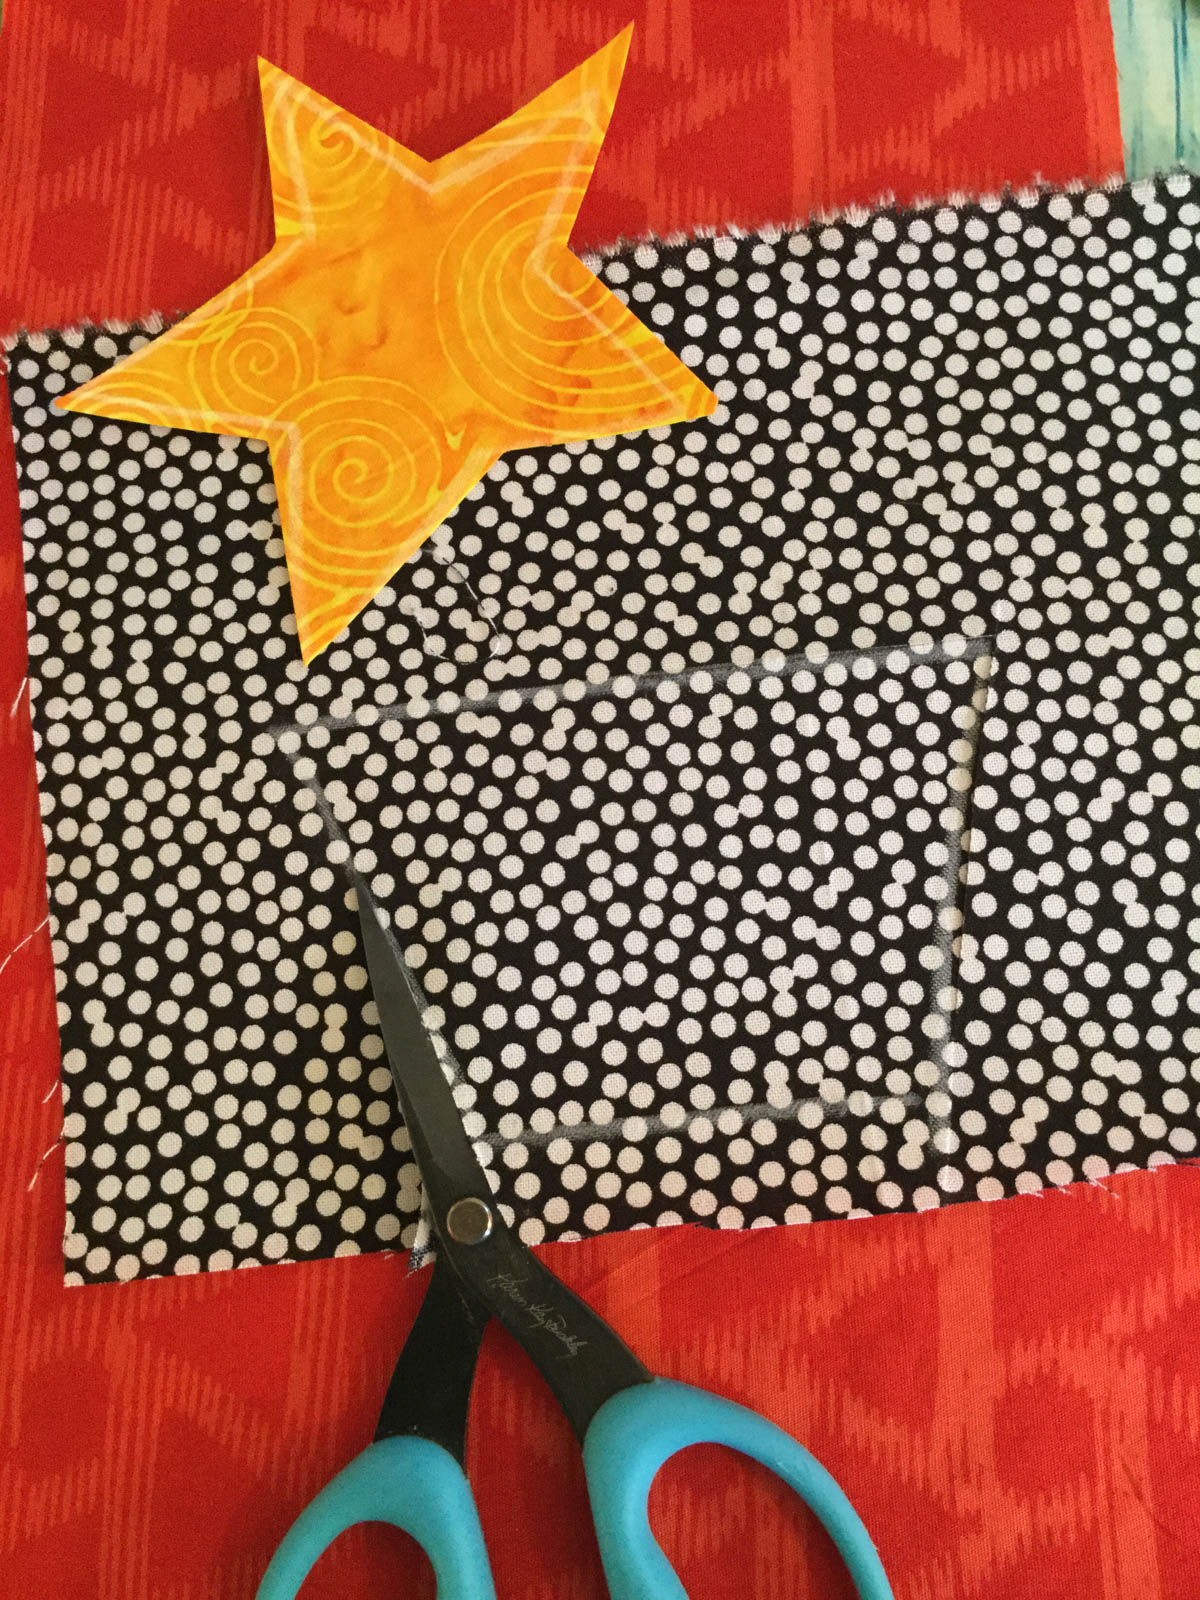
Step 5
Fuse the Shapes: Assemble the tree with the star on top, rays coming out of the star and the tree stand pot at the bottom. Fuse the design elements to the red background.
Step 6
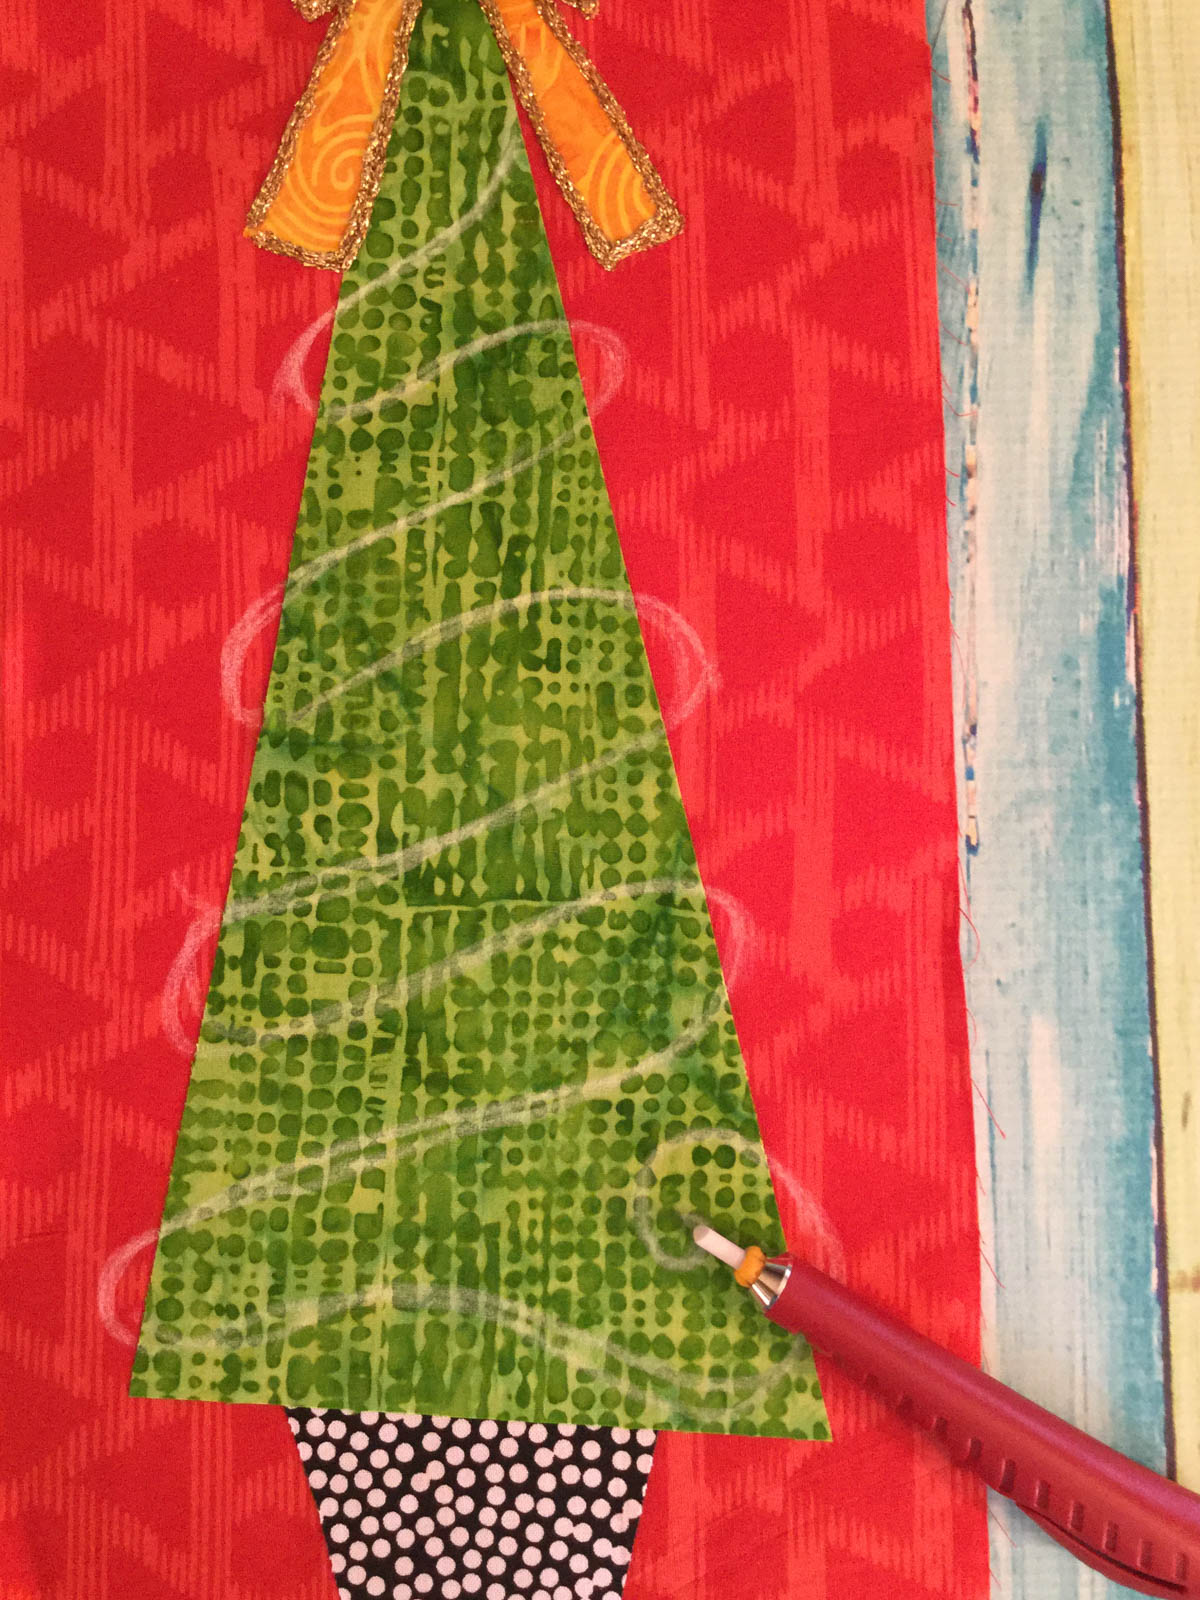
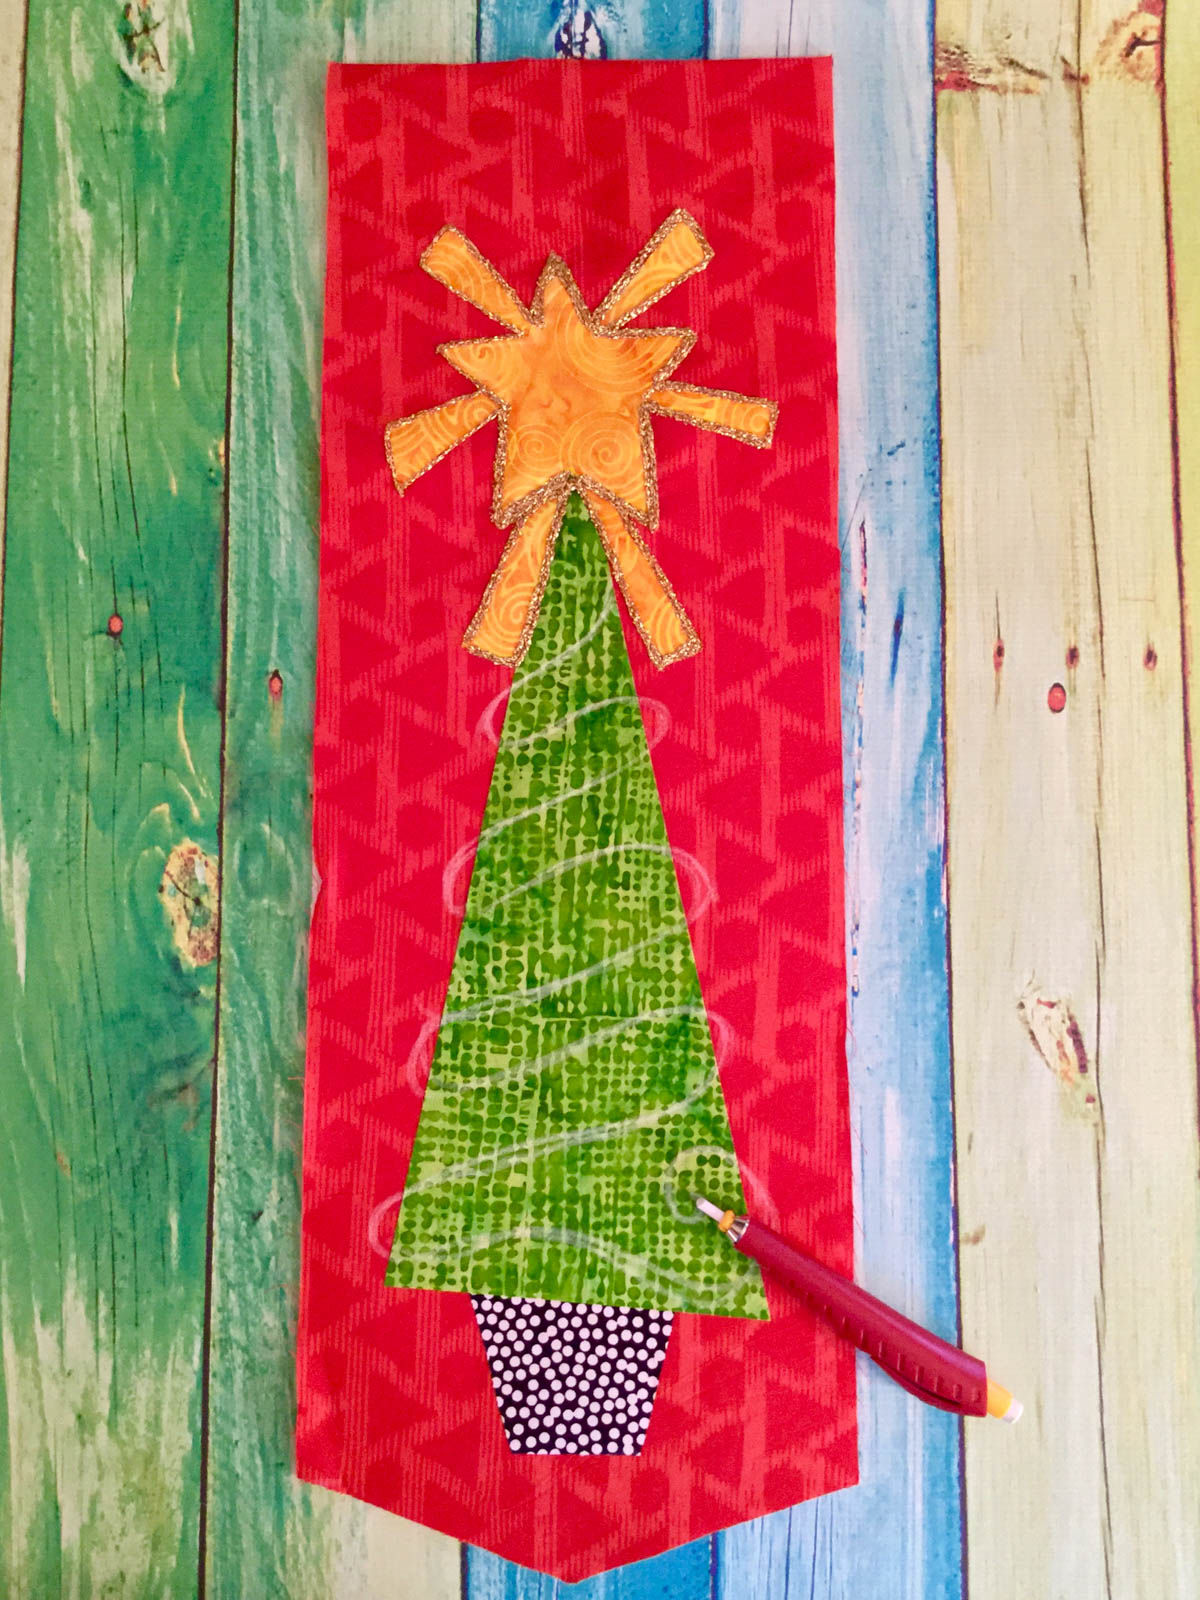
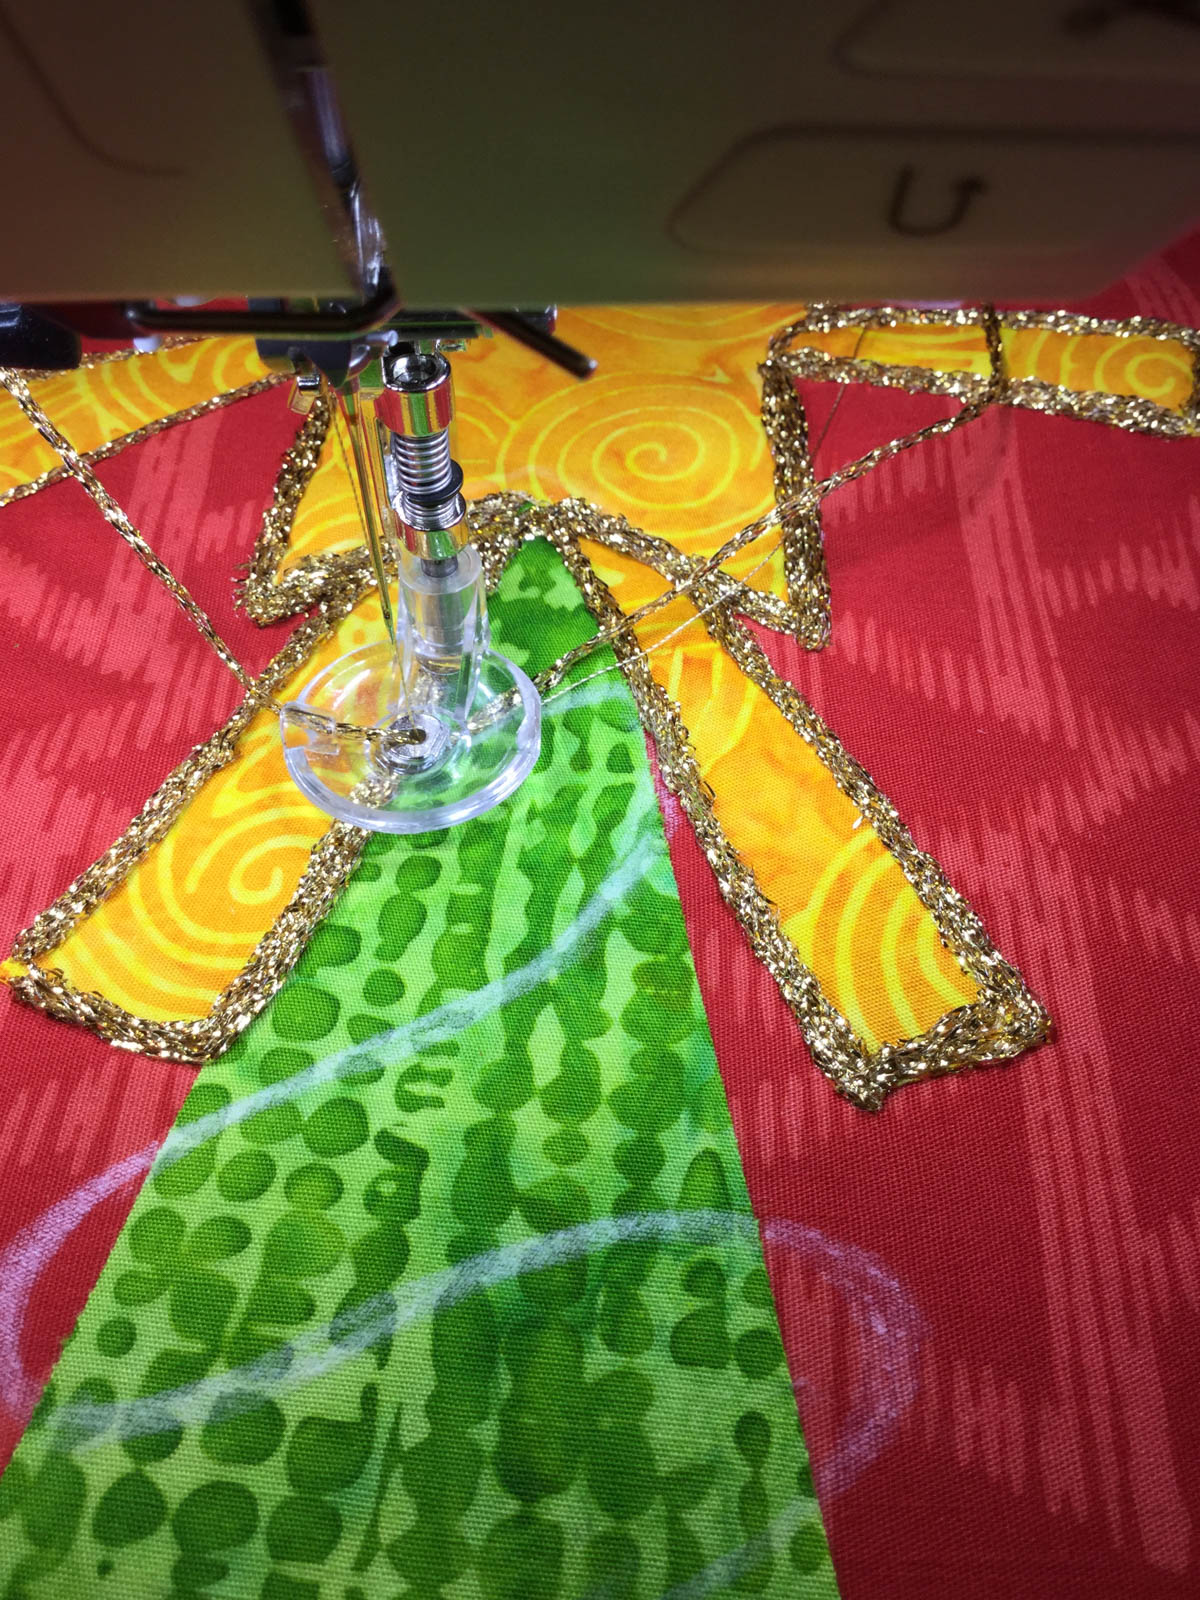
Draw Your Couching Lines on The Tree Shape: With a chalk pencil, mark off doodled lines over the green tree shape to mimic a garland wrapped tree. Start at the top and draw a repeating continuous letter “S” shape all the way to the bottom.
Step 7
What About The Yarns? Use only yarns or threads 1.5mm to 2.0mm in thickness. It’s a good idea to experiment with the yarns and practice free-motion on scrap fabric before you start with your project. If you have a yarn stash, this is a good time to go through it and see if you have yarns or threads that will work with the couching foot.
Step 8
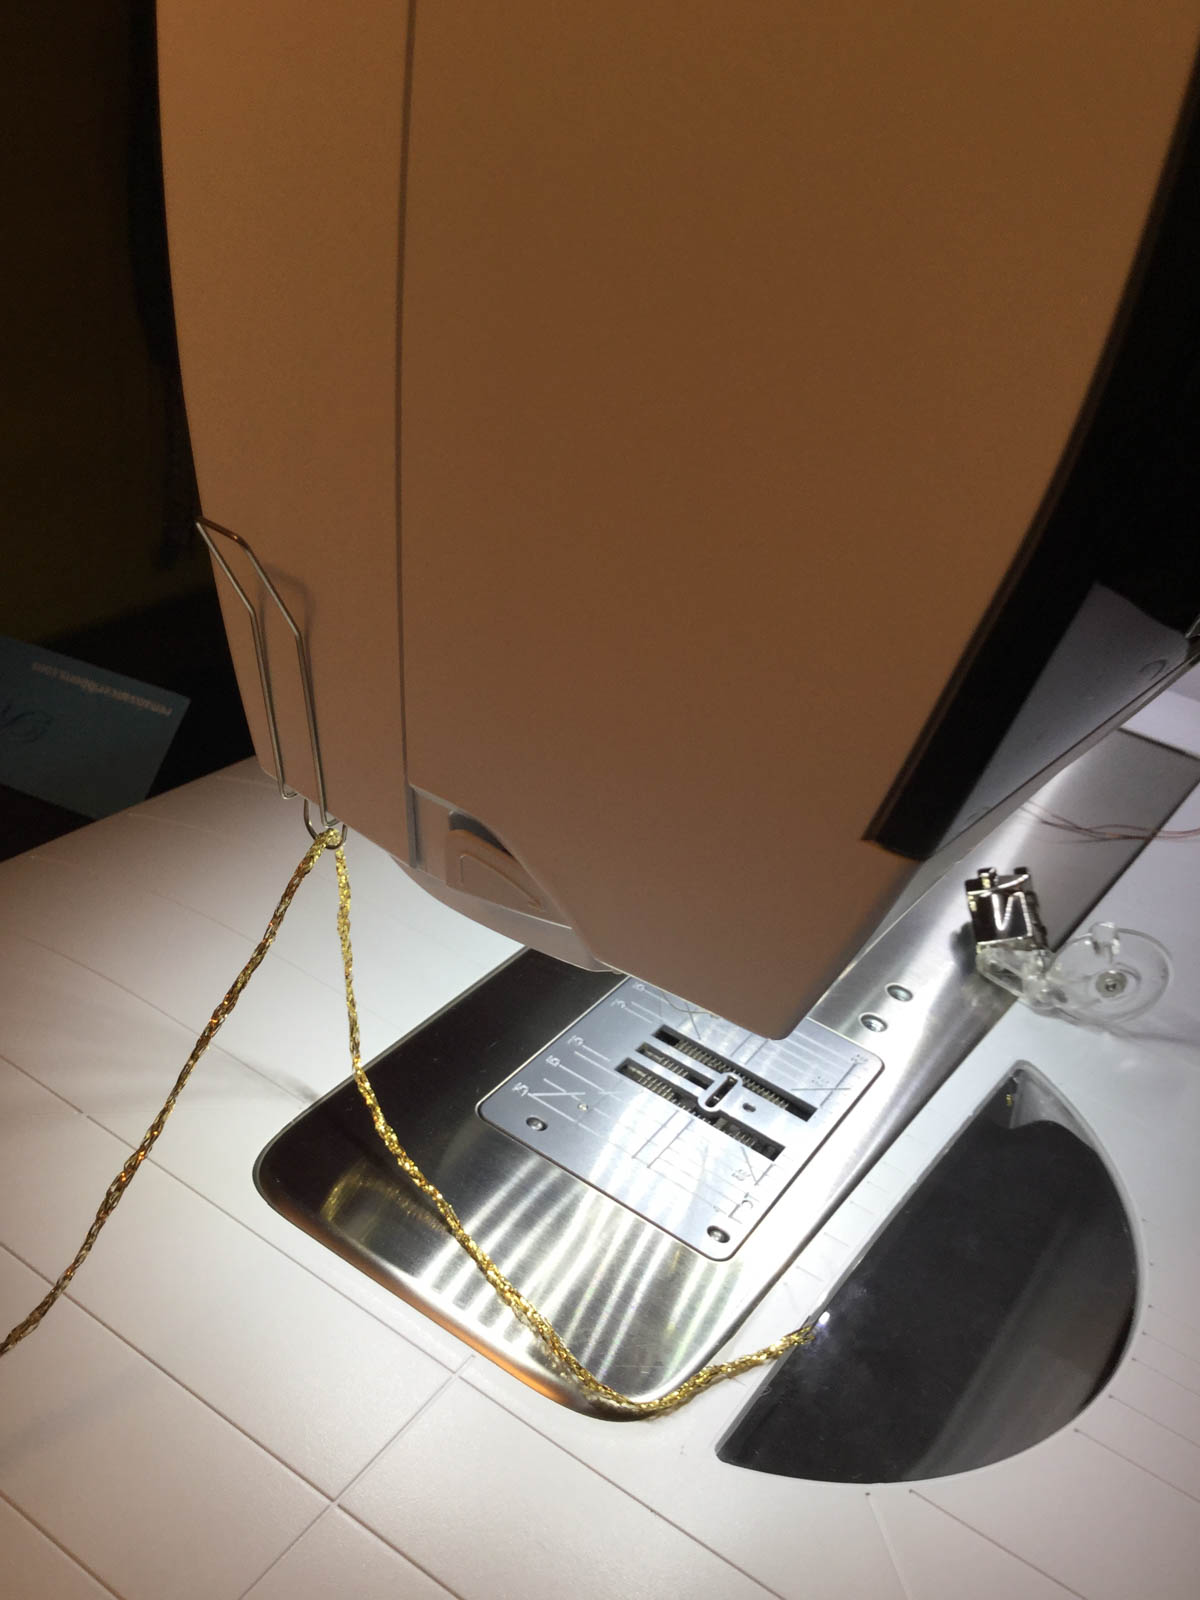
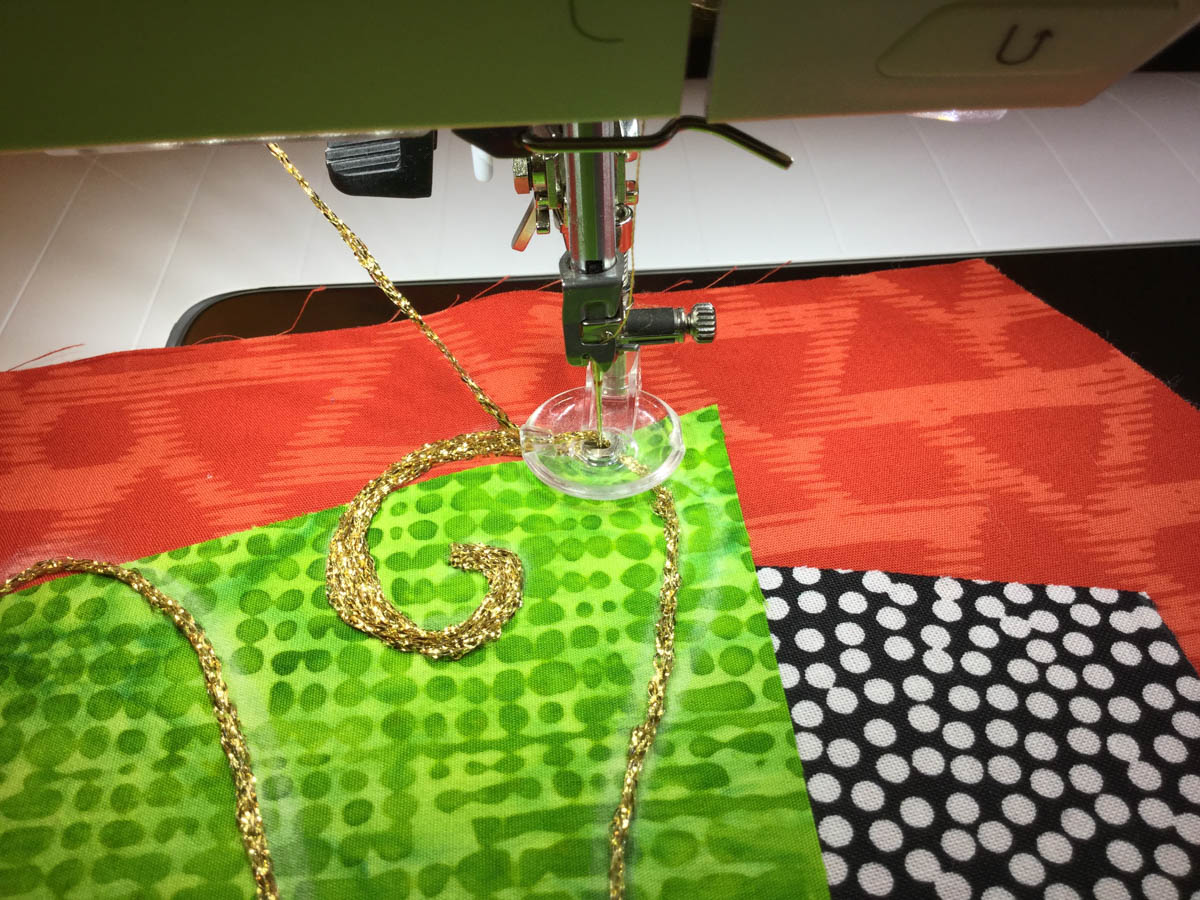
Secure The Thread Guide To The Machine: The foot comes with a wire pieces that will attach to the side of the BERNINA machines. Thread the yarn through the wire and pull towards the presser foot.
Step 9
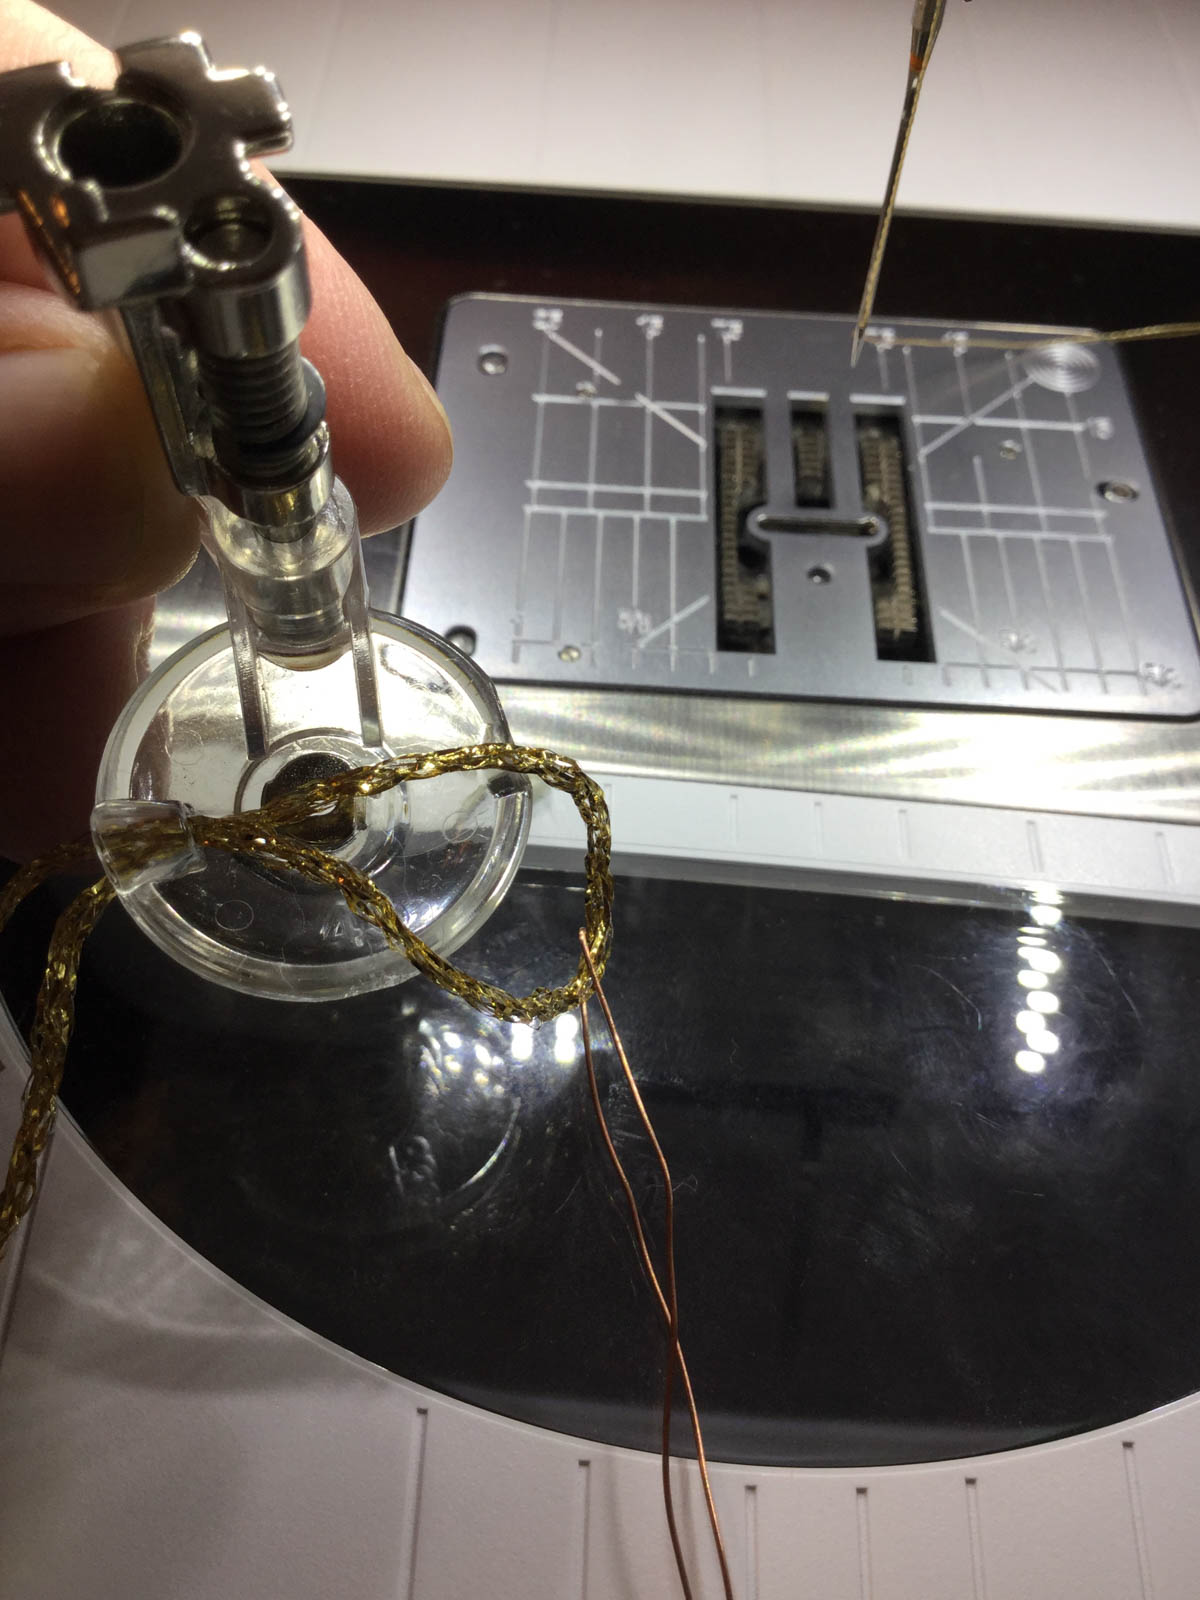
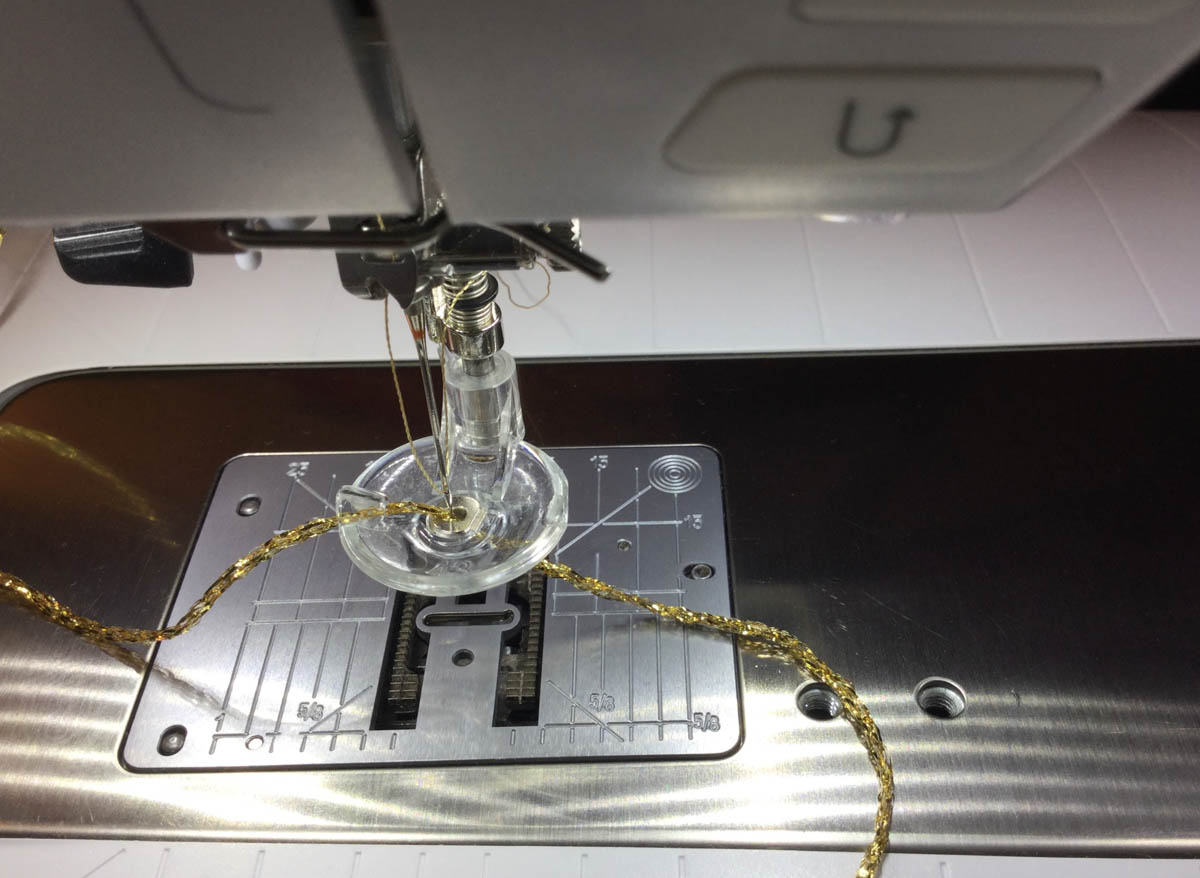
Attach The Couching Foot: First, insert a new 80/12 needle into the machine. Before attaching the couching foot to the machine and thread the metallic yarn through the channels. Use the thin wire thread aid that comes with the foot to east the yarn through the left side and down the center of the foot. Pull the yarn out about 3” and secure the foot to the machine.
Step 10
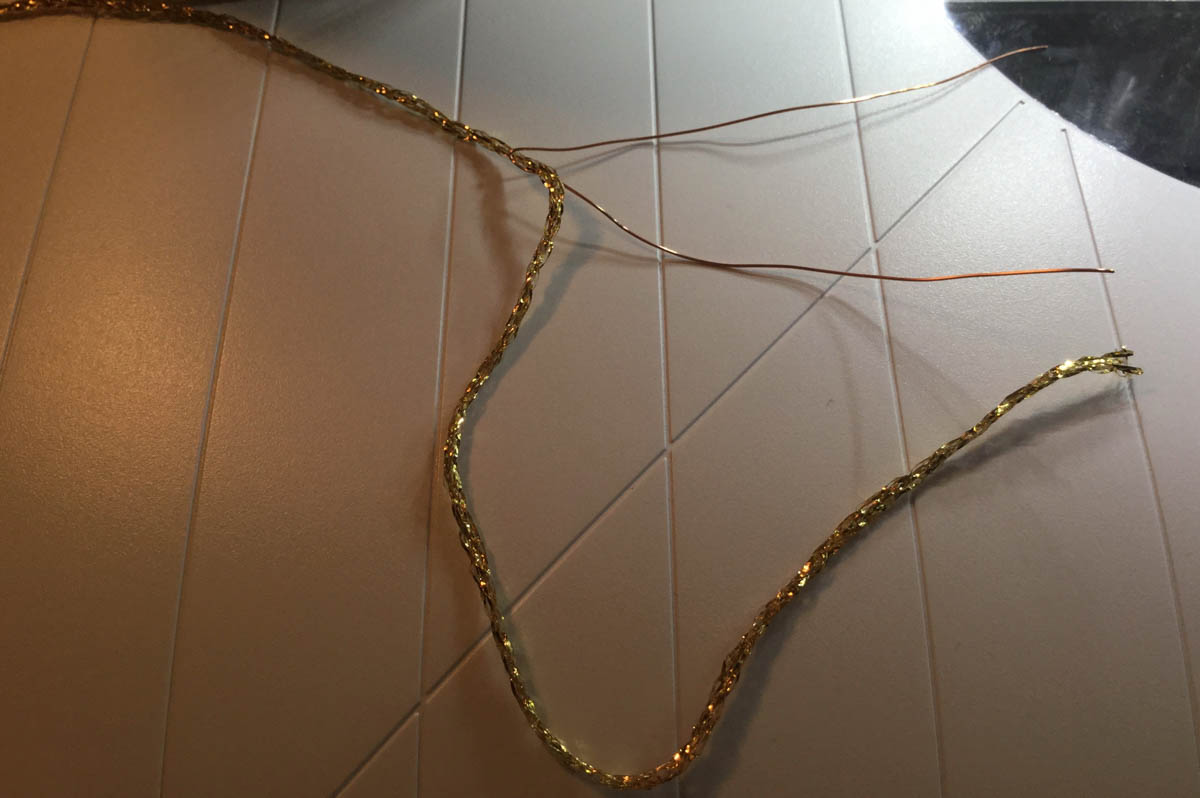
Lost Your Thread Guide? I think I sneezed in my studio the day I opened the package with my #43 foot and the thin wire thread guide was lost down the rabbit hole in my sewing room. A simple alternative solution for threading the yarns through the foot is purchase an inexpensive spool of 26 gauge copper wire (in the jewelry making section) from the craft store and cut into 3″-4″ pieces. Bend the copper wire into a U-shape, insert the yarn and then to thread it through the foot. You’ll never have to feel guilty about losing the original thread guide again!
Step 11
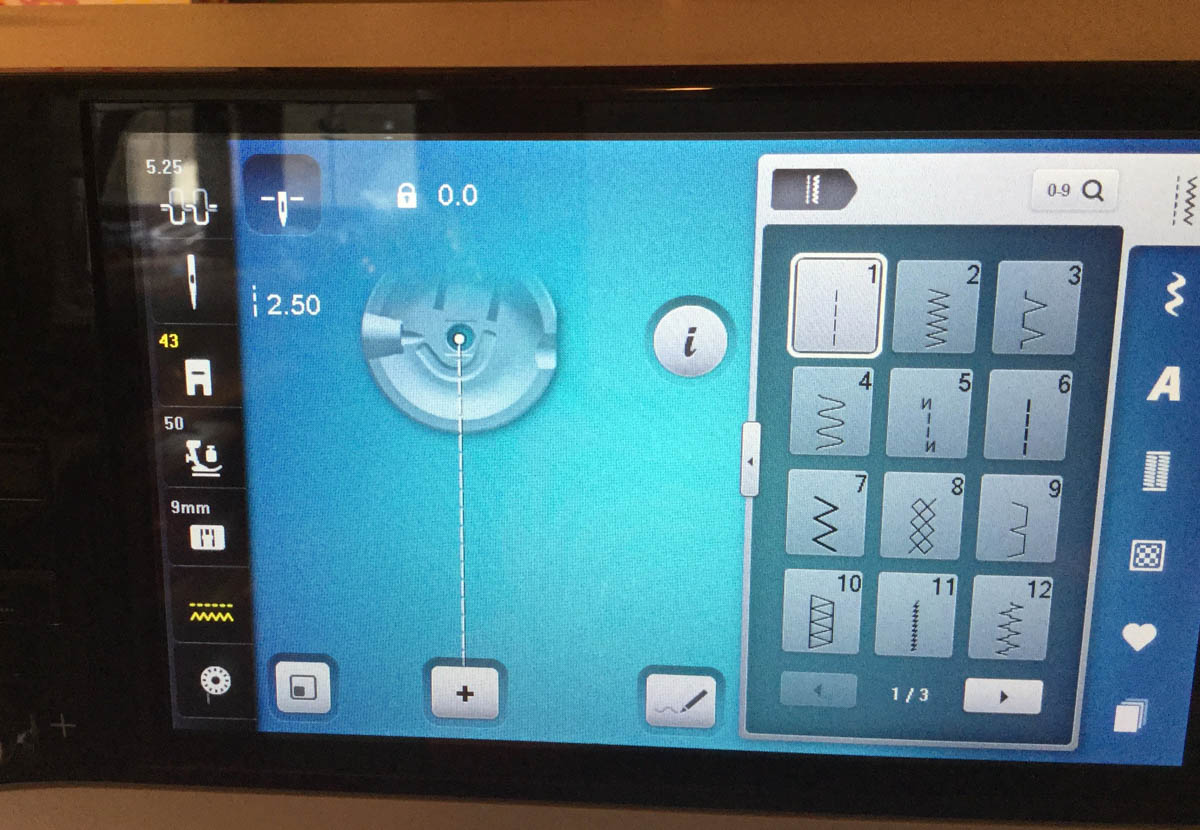
Set the Machine: Program the Free-motion couching foot #43 with the feed dogs down. You are ready to do free-motion stitching.
Step 12
Trace Your Shapes With Couching: Drop your feed dogs and free-motion stitch around the shapes. The yarn will go where you go.

Step 13
You are drawing with the yarn on the raw edge of the appliqué. I like to go over each line 2-3 times to thicken the impression and make sure all the yarns are secure.
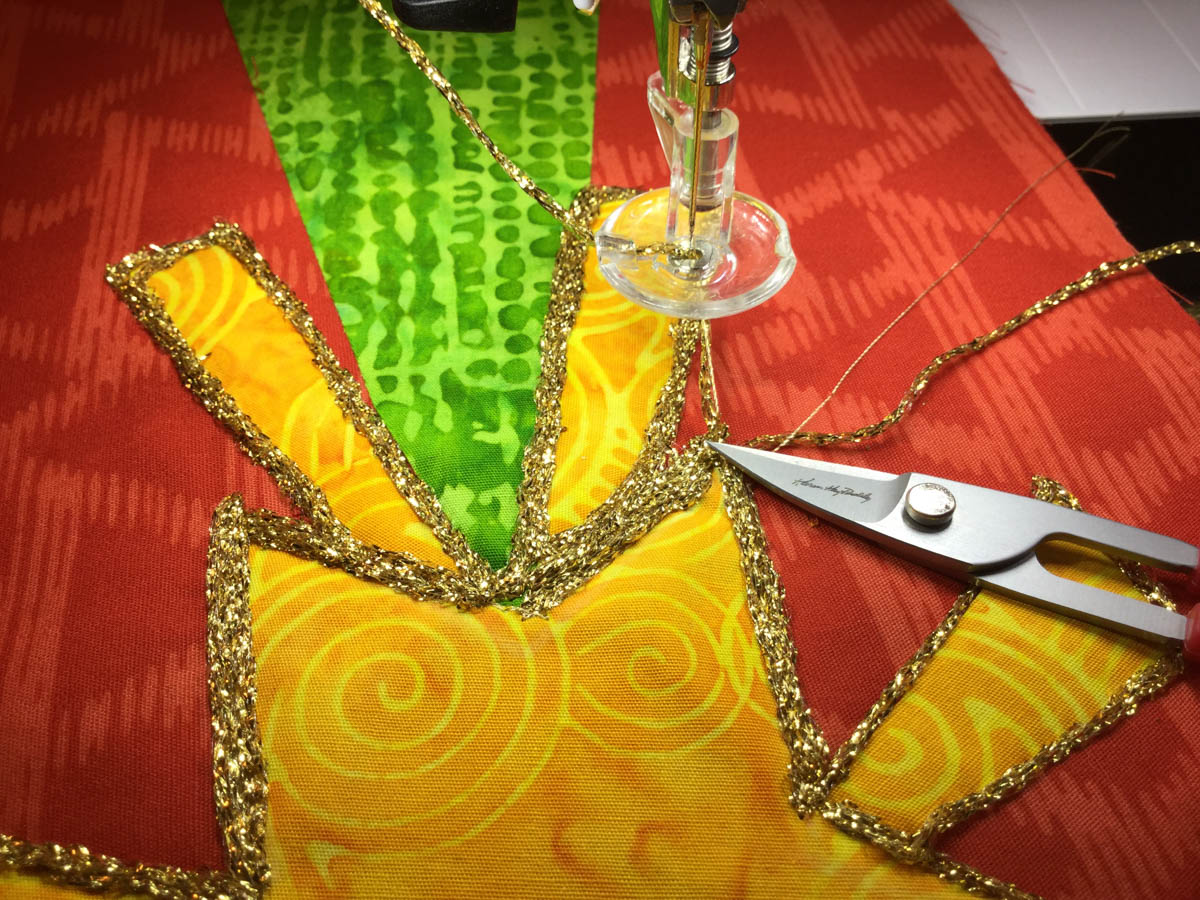
Step 14
To start and finish, go over the first stitch 3 times back and forth to secure it, then cut. This is an art piece so you don’t have to worry about fussing to sew it to the back.
Step 15
Add the Tree Garland: Take your time, go slow and stitch over the hand drawn chalk lines creating a loopy garland that wraps around the tree shape and a swirl at the bottom.
Front side of the banner is complete.
Step 16
Take the back banner fabric and with right sides together stitch around the sides and bottom leaving the top open. Turn the piece right sides out and carefully press on the back side. Don’t press over metallic yarns, as the might react to the hot iron.

Step 17
Top Seam: Use 2 yards of ric rac or ribbon and pin to the top seam on the back of the banner and stitch.
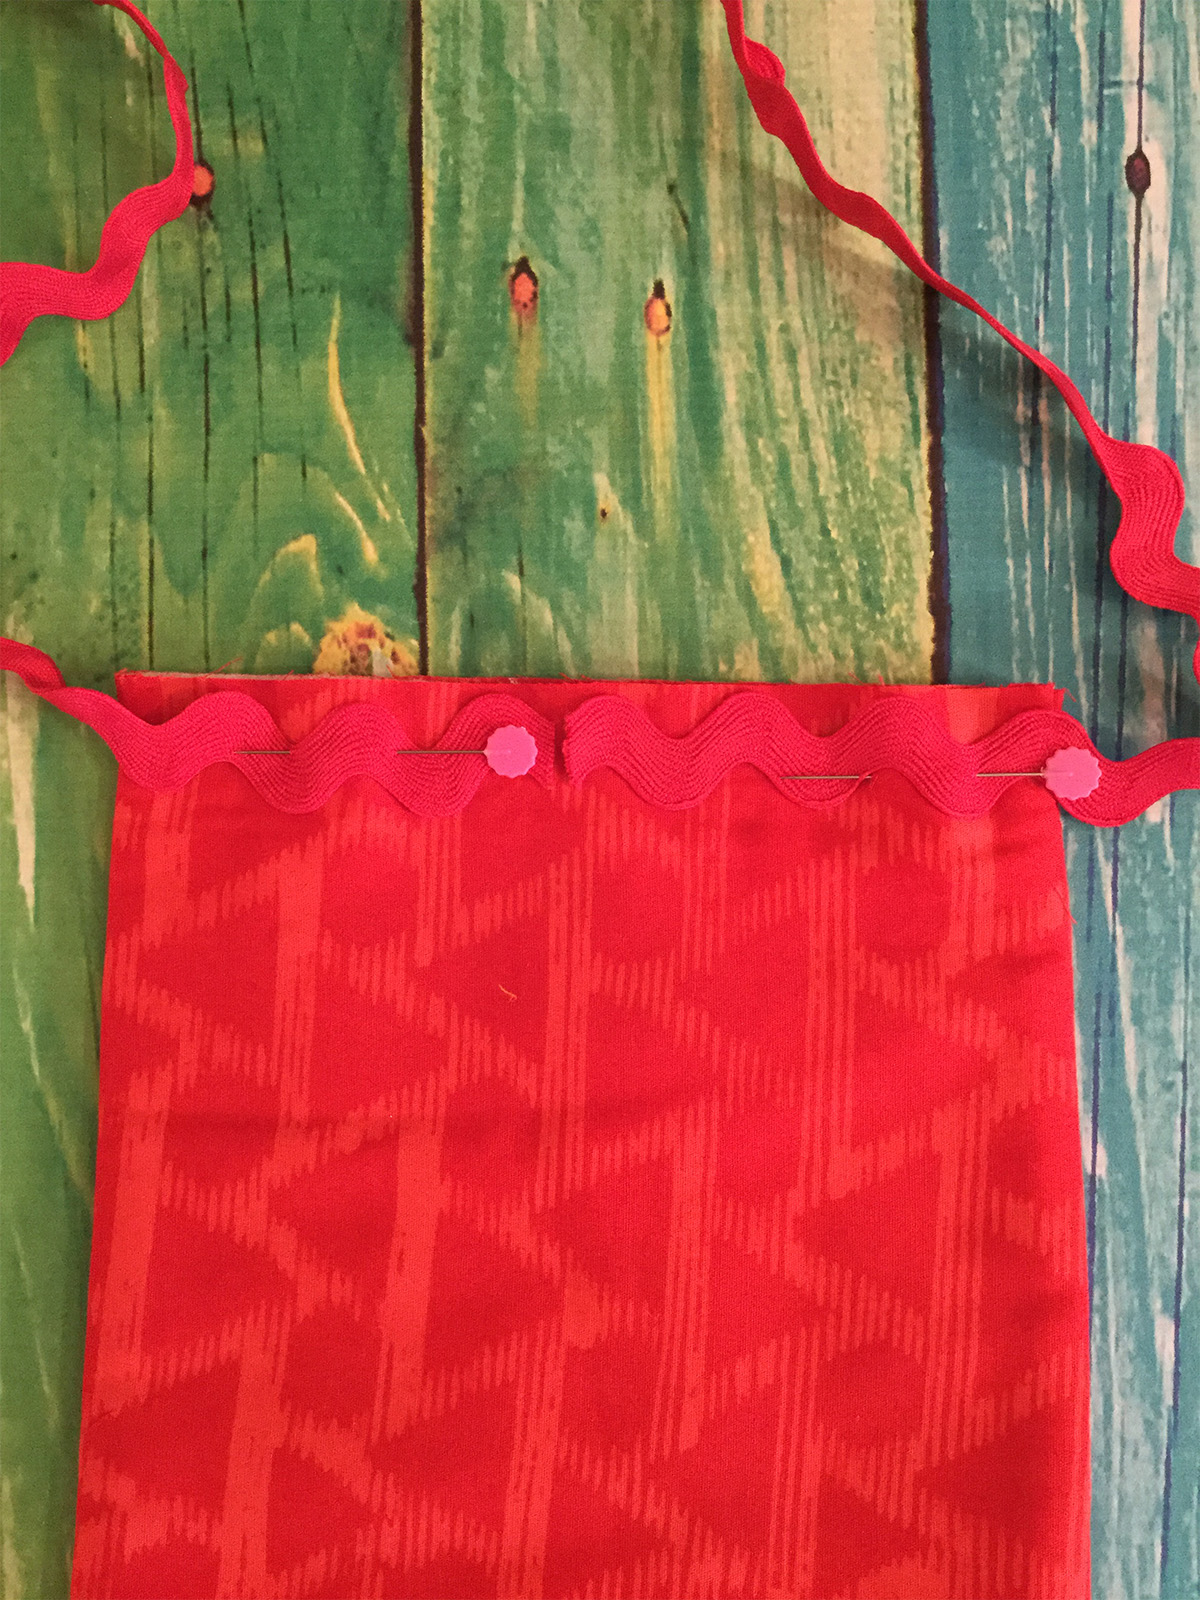
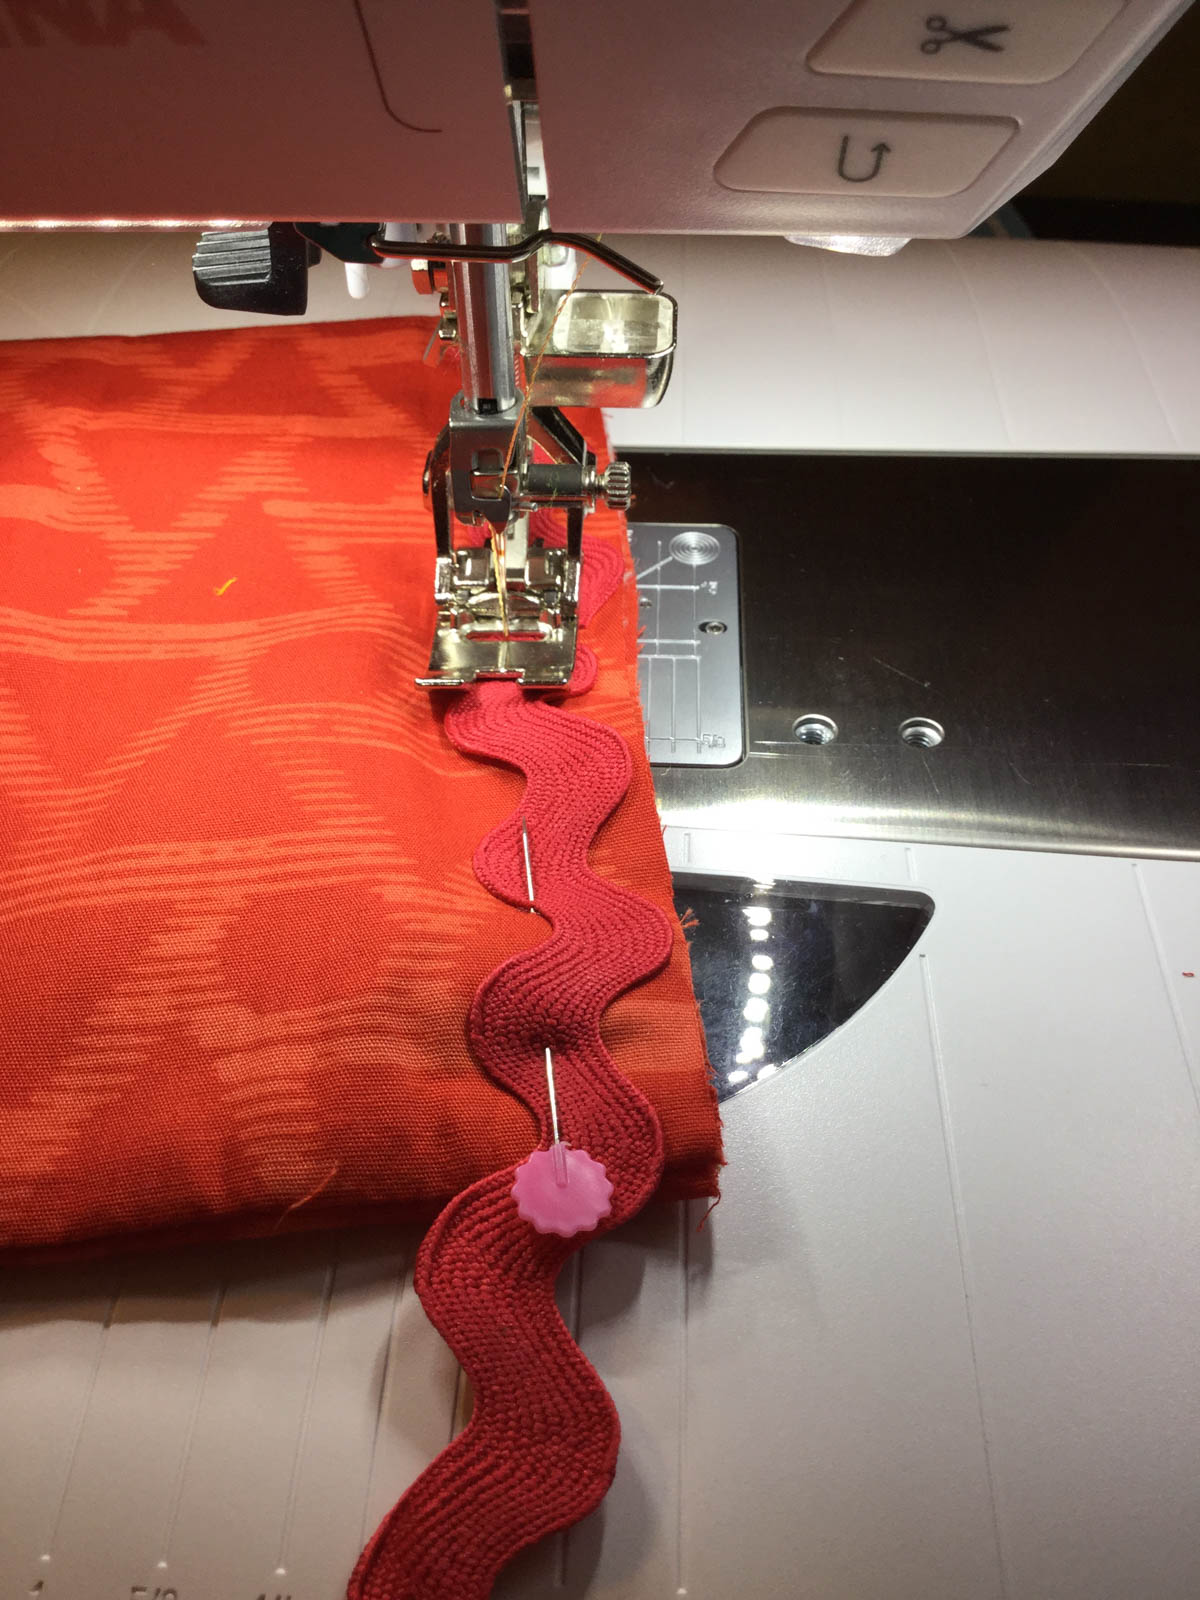
Roll the top twice over the sewn trim creating a thick band across the top.
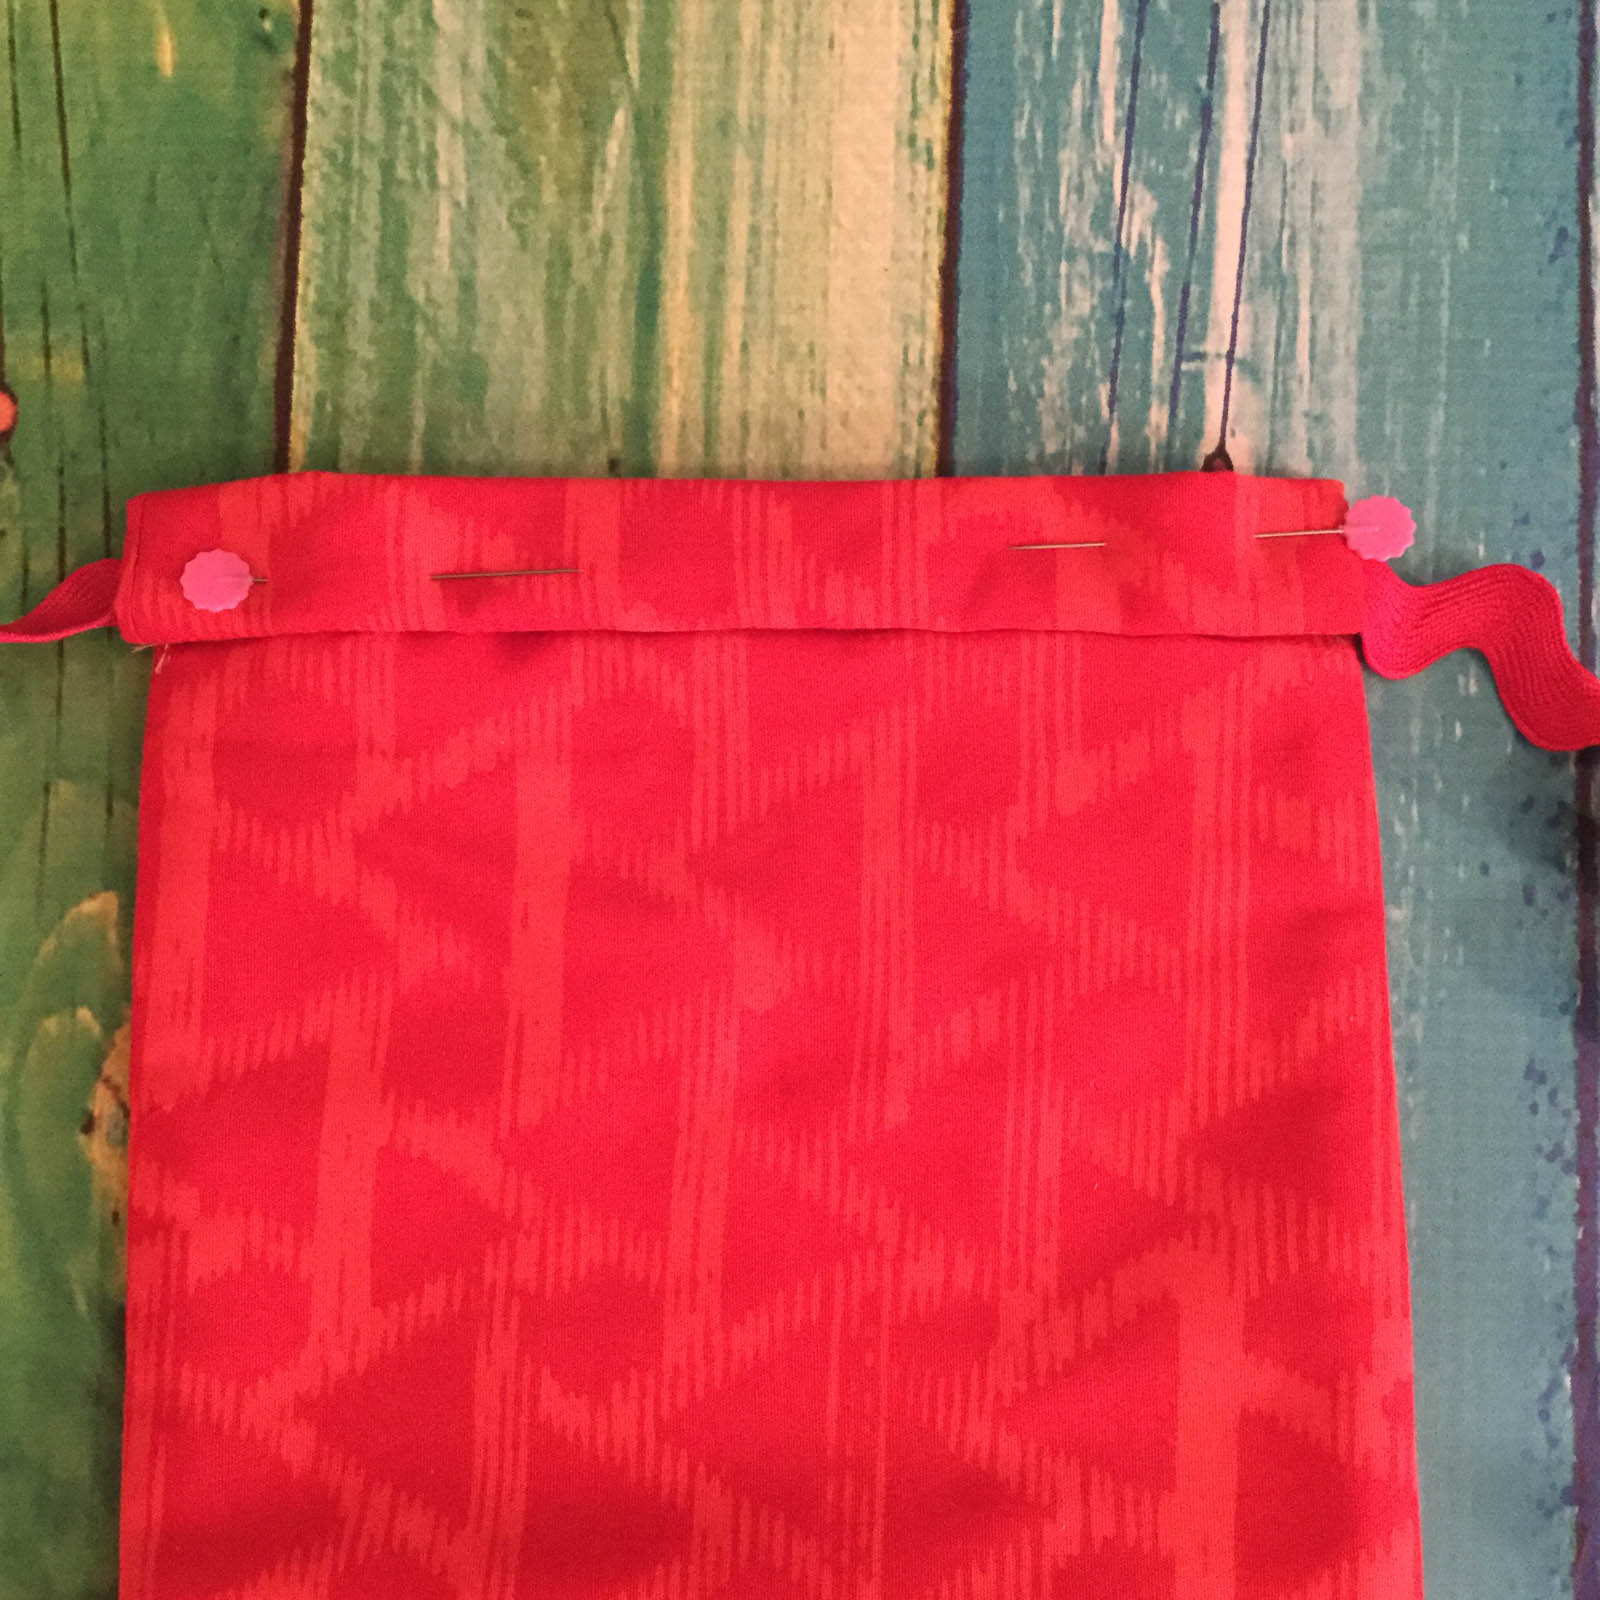
Hand sew a quick whip stitch to close. This becomes the hanger. You could also choose to sew a simple hem for a wire or wooden dowel as a hanger.
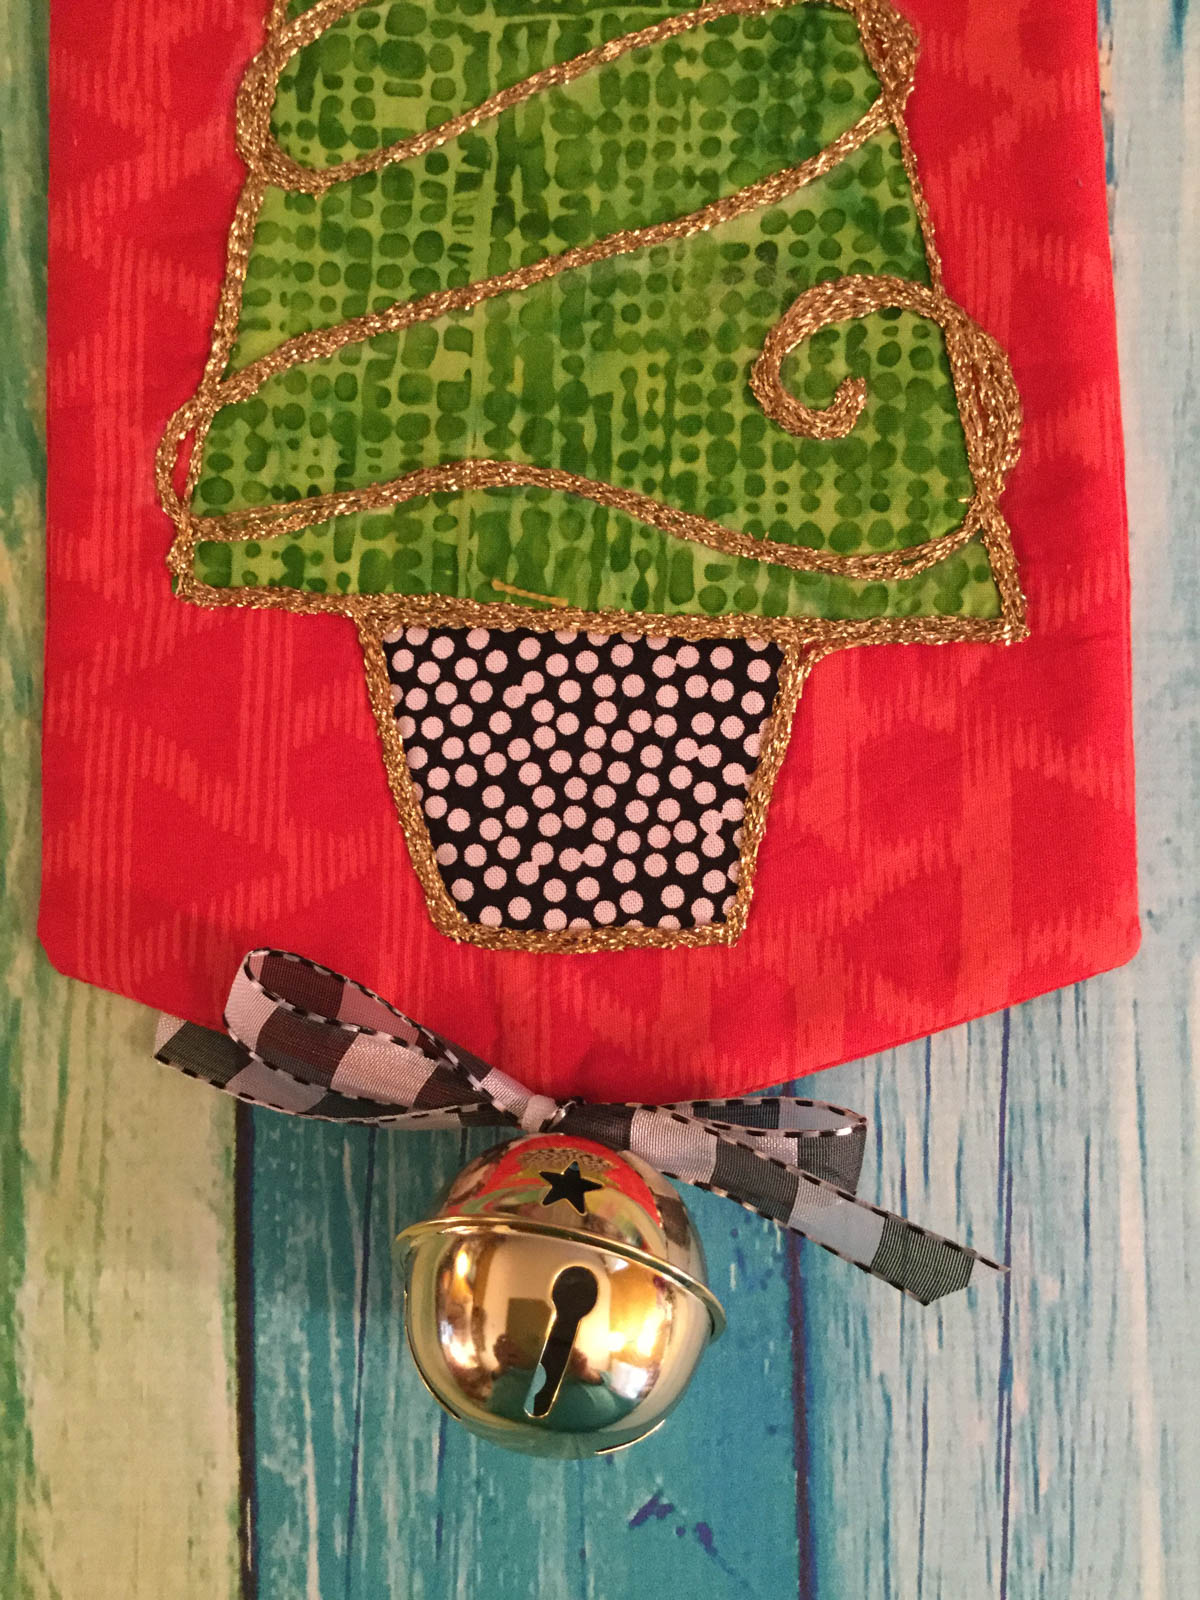
Step 18
Add the Jingle Bell all the Way: Hand sew the bell to the bottom point of the banner. Tie a fun decorative ribbon over the hand stitching.
Step 19
Hang Over a Door: Display your festive joy with a jingle that jangles every time the door opens and closes.

Breathe in joy, breathe out peace. Wishing you and your loved ones a creative, blessed and merry holiday season.
Joanne Sharpe by Joannesharpe.com.
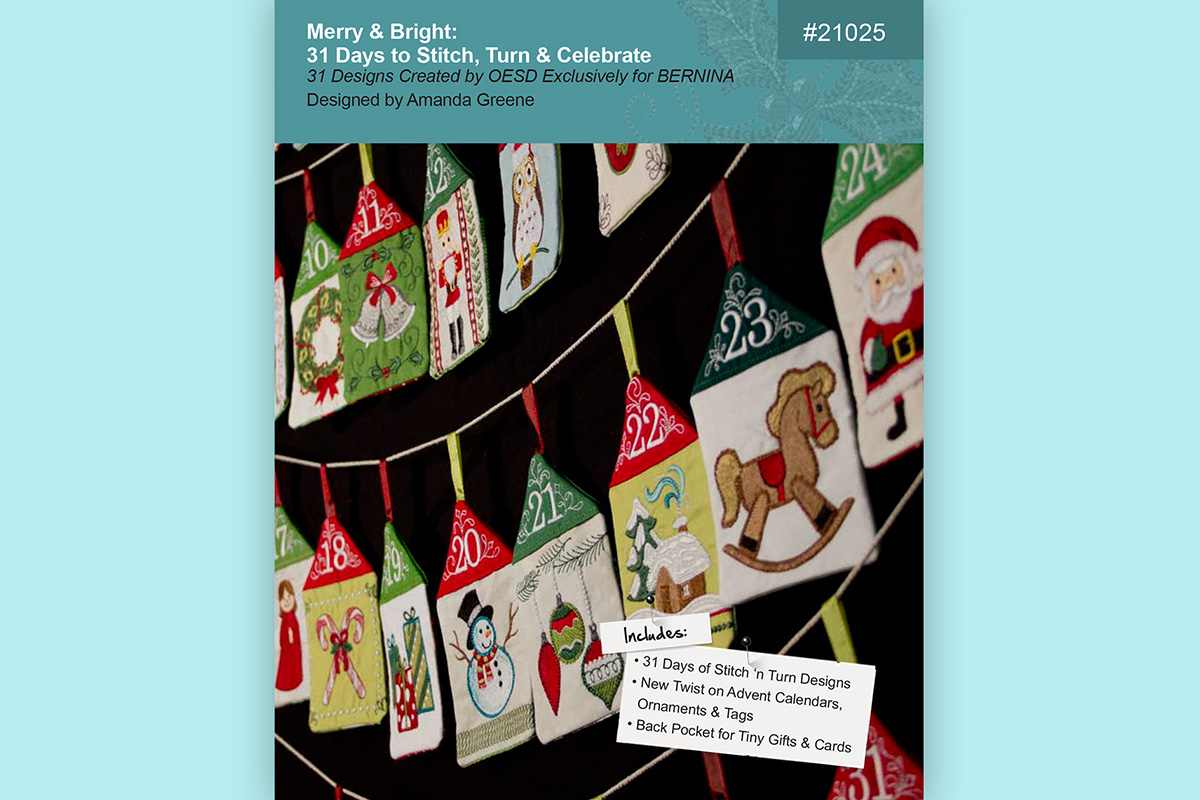
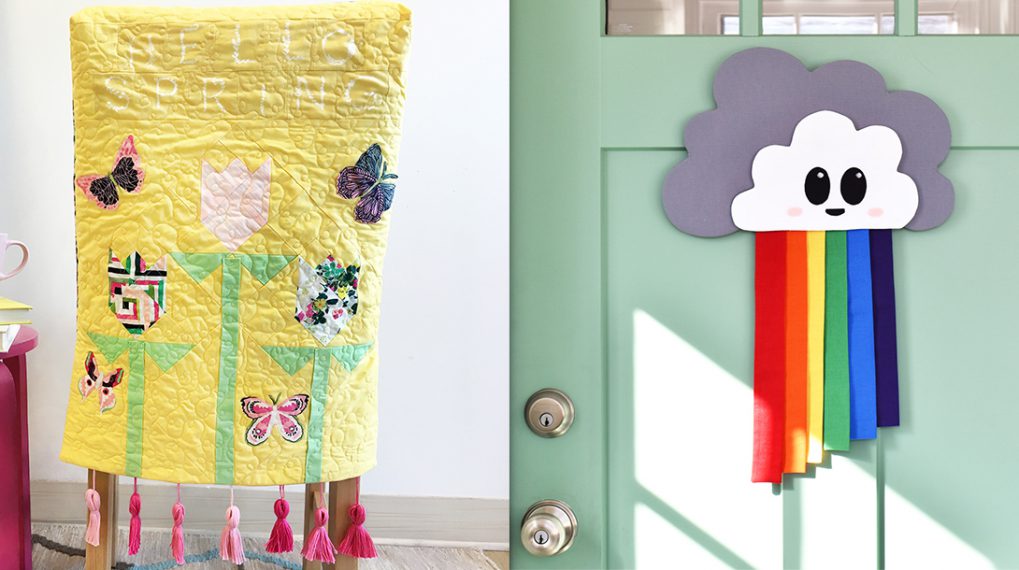
Our December 11 Gift For You
Today’s gift is the Merry and Bright Embroidery Collection created by OESD and designed by Amanda Greene to one awesome WeAllSew fan.
All you have to do is post a comment below answering the following question:
How do you decorate your door for the season?
A winner will be chosen at random on December 12, 2016 and announced the following week!
Good luck!
The contest is open for comments until December 11 at 12:00 midnight Central Time. Click here for contest rules.
Congratulations to our WeAllSew reader “stadust”, the winner of the December 11 gift. Enjoy!
Used Products


What you might also like

![Have a habit of misplacing your keys. Losing your iPod? Forgetting your coupons? Now, with this handy organizer, all your little necessities are in one convenient spot when you're ready to head out the door - right on the door knob! How to Make a Door Organizer Supplies 1/3 yard or heavyweight fabric such as twill, canvas, or denim 1/3 yard of fusible interfacing Coordinating thread Scissors Water-soluble marking pen or tailor's chalk Ruler 1/4" presser foot (BERNINA Patchwork Foot #37 or Patchwork Foot with Guide #57) Download and print the keyhole template: [download id="88"] Step 1) Prepare the fabric pieces. Cut from the heavyweight fabric: Two 5" x 11" rectangles for the organizer body One 5" x 12" rectangle for the large pocket One 5" x 7" rectangle for the small pocket One 6" x 7" rectangle for the hanging pocket Fuse interfacing to the wrong side of both 5" x 11" fabric rectangles following the manufacturer's directions. How to Make a Door Organizer Cut the keyhole: Measure down 1" from the top edge of one 5" x 11" rectangle. Center the top of the keyhole template on this mark. Trace the template. Cut along the traced line. Repeat for the second 5" x 11" rectangle. How to Make a Door Organizer Step 2) Make the large and small pockets. With wrong sides together, fold the large pocket in half to create a 6" x 5" rectangle. Topstitch close to the folded edge. How to Make a Door Organizer Place the large pocket on top of the right side of one 5" x 11" rectangle, matching the raw edges along the sides and bottom edges. Baste in place. How to Make a Door Organizer With wrong sides together, fold the small pocket in half to create a 3 1/2" x 5" rectangle. Topstitch close to the folded edge. Place the small pocket on top of the large pocket, matching the raw edges along the sides and bottom edges. Baste in place. How to Make a Door Organizer Step 3) Make the hanging pocket. With wrong sides together, fold the 6" x 7" rectangle in half lengthwise. Press. How to Make a Door Organizer Unfold the strip and then fold the long raw edges to the center fold line. Press. Refold the strip along the center crease. Topstitch close to both long edges. How to Make a Door Organizer Fold under 1" on both edge of the finished 7" strip. Measure up 1-1/4" from the lower edge on the right side of the second 5" x 11" piece. Center the bottom of the strip on this mark. How to Make a Door Organizer Sew close to the folded ends of the strip, then again 1/2" away from the first stitching. How to Make a Door Organizer Step 4) Construct the door organizer. With right sides together, place the two 5" x 11" rectangles together, matching the raw edges and the keyhole opening. How to Make a Door Organizer Stitch around the entire rectangle, leaving the keyhole open. Do not stitch around the keyhole area! Clip the corners. How to Make a Door Organizer Turn the organizer right side out through the keyhole opening. Press. How to Make a Door Organizer Topstitch close to the finished edges. How to Make a Door Organizer Baste the raw edges of the keyhole opening together. How to Make a Door Organizer Satin stitch close to the keyhole edges. Position the fabric so the needle goes just barely to the right of the raw edges and encloses them in stitches. Tip: A satin stitch is a zigzag stitch with a very short stitch length, so the stitches are very close to each other. How to Make a Door Organizer How to Make a Door Organizer Fill your organizer with keys, pens, letters, etc. so you never leave home without your essentials! How to Make a Door Organizer](https://weallsew.com/wp-content/uploads/sites/4/2011/10/How-to-Make-a-Door-Organizer-WeAllSew.jpg)


76 comments on “Jingle Bell Door Hanger”
-
-
With an evergreen wreath- the weather here is too harsh for anything else!
-
I made 3 lace bells with the OESD 2009 Christmas collection and placed a red ball ornament inside. I layered it with 3 California extra large pine cones and ribbon with a pine needle branch behind it.
-
I usually hang only a wreath…this is waaaay better!!
-
thanks!!!
-
-
Through the years I experimented with lots of different door decorations, including wrapping the door as a gift one year. My favorite, though, is a big wreath made of fresh greens with pine cones and a tartan bow.
-
Because our door faces south I tend to avoid fabric decorations, they fade to fast. Jingle bells wreaths and ribbons.
Q20 or 790 with feed dogs down?
-
I did a little on both of my machines….the Q20 with the couching foot #43 and the same on my 790 with the #43 foot.
-
-
I don’t decorate my door. I put up a small tree in one bay & A Christmas Story lamp in the other bay!
-
A big wreath!!!
-
I usually hang a store bought wreath or Christmas stocking on the outside of my door. We get a lot of high winds and snow here in Pocatello in Dec. so I hate to place something hand made on the door as it gets destroyed. Inside the house, however, I decorate with tons of hand made items – Christmas stockings, pillows, table runners, wreaths, wall hangings, etc., etc.
-
I hang a quilted santa that a friend made for me 10 years ago
-
A nice wreath or evergreen swag
-
Lovely gift.
-
Tiered French horns with big bows or a wreath.
-
Simple red velvet cord with extra-large bells on ends
-
really big wreath with a big red bow and some pinecones
-
My mother-in-law quilted a door wreath made with holiday fabrics. It’s my favorite door hanger for Christmas.
-
I have made a wreath out of evergreens and pine cones and have added red and green sparkly cranberry type sprigs. Then wrapped red and green wire mesh ribbon through it and made a multi-layer bow with different lengths of hanging ribbon. I added two strands of fading lights that fade alternately. On the inside of the door, I made a long strip for bells. One side is burlap. The other is red and white gingham. I used several strands of red yarn and braided it the length of the hanging. I did a row of large cross stitches of the same red yard on each side of the braid, and did a row of green yarn long stitches on each side of the red cross stitches on each side. Then I tied large jingle bells about 6 inches apart all the way on top of the braid.
-
I learned so much reading this post, the couching foot. When I free motion quilt the needle is more exposed and I like that design of the couching foot. I never knew about fusible interfacing for applique – I must go buy some. Was also wondering if there was a practical use for rick rack of which I have an overabundance.
As an aside, I decorate my door with a hanging wreath.
-
I hope you have fun exploring all the new ideas Tami!
joanne sharpe
-
-
I decorate my front door with a ribbon wreath.
-
I decorate with a Christmas Wreath. However, I really like the door hanger. I’ll work on it for next year.
-
My daughter-in-law made a large fabric wreath for my door many years ago. It still looks lovely.
-
It has gotten easier now that we have purchased several decorations, including the tree that come with attached lighting. Decorating the tree, hanging wreaths and decorations from chandeliers, pulling out handmade table runners and placemats to use with Christmas themed china and finally setting up my treasured German wooden nativity pyramide are my steps to preparing a festive house.
-
I have a stuffed “Angry Birds” toy my son gave me that I put in the window by my door. I also have a HoHoHo door hanger
-
I usually hang an artificial wreath with a red bow and gold, unbreakable ornaments on it.
-
We put a wreath on the door with lights.
-
I have an old Mop Head angle that I made 30 years ago that stays on my front door year round!
-
We hang a fresh wreath (which usually lasts a couple months).
-
I have a lighted wreath on the outside of my door and a cross stitch Christmas saying framed by a straw wreath on the inside. The straw wreath is decorated with copper sheet cutout gingerbread men, ribbon, holly leaves and fabric berries with a cinnamon sachet in them.
-
I have a set of antique sleigh bells on a leather strap that I bring out every year to decorate my front door.
-
A Welcome sign painted by our youngest daughter
-
Our front door has a wreath of magnolia leaves and different sizes of ornaments in reds. On the inside I have lots of jingle bells to welcome anyone passing through.
Your idea today of couching while doing free motion is outstanding for appliqué. Thanks so much. -
Honestly, our front door is not decorated for the holidays because we don’t use that door at all. The front of our home has an enclosed 3 season porch with a screen door so our front door is inside that porch and really not very visible from the street. We use our side door, and the same as the front door, it’s not really visible from the street either. If our home was different, I’d have White wreath strung with purple and white lights on it.
This project today however, may be something I would use for the side door next year. I like that it’s simple, yet slightly elegant with the gold threads couched onto it. I really love that look. I have the couching foot for my machine and still have not used it yet. This project may be a very good reason to do so before next Christmas. Thank you.
-
I have a wreath that my mom made hanging on the front door!
-
We have double red doors with red glass. I put cedar boughs in two tall planters with large ribbon bows. These planters are on each side of our doors.
Thank you for all your wonderful Christmas ideas.
-
We like to hang a wreath with lights in it.
-
I guess I don’t really decorate the door. I have a door knob ornament that I put over the door knob but nothing on the door itself. This is a really cute design and I love the idea that it doesn’t have to be perfect. Thanks for sharing.
-
I cover the door with red foil wrapping paper and hang a wreath with green holly and red apples in the center of the door. We also have a red spotlight shine on the front door.
-
I cherish projects like this that can be completed in an afternoon and come away looking so sweet! I’d like to add some colored beads to the “garland” on the tree to look like ornaments. Sadly, our front door does not get decorated. The clearance between it and the storm door is very narrow, so I always hang a wreath beside the front door beneath the porch light. This mini would certainly fit!
-
I have a wreath I made years ago that is on my door. Its made of large stuffed fabric holly leaves, red stuffed holly berries and a big red fabric bow.
-
I hang something at my door so that it will be known that I celebrate Christmas and therefore I wish
peace and happiness to everyone, without any exception of religion, race, etc. -
My sewing room has the first Christmas stocking I knit hanging on it for the holidays.
-
I don’t decorate my door. We really don’t have a door that can be decorated easily. This is a cure idea.
-
unfortunately I can’t put anything on my door but I have an antique sled with a great red bow on it. I love coming home and seeing in the lights of the garland.
-
I decorate my door with a wreath
-
Not super original, but a wreath. Sometimes outlining the door frame with pine boughs and garland.
-
What a cute idea! I have this foot but haven’t used it yet – now I have a reason to : ) We put a wreath on our door. Thanks for the chance to play!
-
I use a traditional green wreath and spruce it up a bit with different do-dads…I like the technique using the free motion foot on this door hanger. It looks great.
-
I always decorate with the standard wreath. I grew up with sleigh bells on a leather strap on our front door. It was magical on Christmas Eve to hear them ring when Santa was leaving!
-
I normally would place a colorful wreath on my front door to decorate.
-
I always put a wreath on the door with hand made bow. To freshen it I mix in real greenery with the artificial.
-
I usually just have wreaths on my door, but this is too cute! Thank you for the excellent tutorial.
-
We put a large wreath on our door.
-
I have a big red bell tied around the door knob.
-
I put a wreath on our front door. I also hang a star above.
-
The snow and wind does a good job in our area
-
I like to buy the live evergreen wreaths and decorate it with pretty ribbon. Very simple but beautiful.
-
We always have an evergreen wreath decorated with sumac berries.
-
I decorate our door with greens ,bows and bells , wishing all a Merry Christmas.
-
We go all out at my house each year, starting with 3 trees and well over 1,000 ornaments. The kitchen tree is all snowmen and all the decorations in the kitchen are snowman themed too. We have a huge manger that belonged to my parents, so it is quite old. All of the main rooms are decorated along with the staircase and some things on the 2nd floor too. The outside has a fresh wreath in each of the windows and the front door has three wreaths and lots of fresh garland. We hang white lights on two huge blue spruces and put up two spotlights to focus on the front door. It’s a lot of work, but we always enjoy once it’s all done. I would be soooo thrilled to win the advent calendar embroidery. I only recently saw it for the first time and fell in love with it. Thanks for the chance to win this great prize.
-
I like tradition so its a Christmas Wreath.
-
Every year I try to do something different to decorate my front door. This year I hung an adorable quilted Snowman a made a few years ago.
-
I have a wreath that I put together a few years ago that goes up every year. I probably need to make a new one.
-
Beautiful wreath
-
We used to use a big Santa shield but now we hve a new double entry door that is deep red with red art glass I the window area.
-
I decorate all of my doors with something homemade. I have several quilted snowmen, wreaths and funky art like today’s project. Just seems more welcoming than a store bought products. Thanks for the new project and idea today.
-
A wreath of fresh greens, decorated with pinecones, pheasant feathers, and miniature jingle bells.
-
I decorate with a wreath given to my husband a few years ago from the school district he worked for in memory of his sister who had just passed away. I use red bows and a “snowy” garland to complete the look.
-
I decorate my door with a wreath that has lights wrapped around it.
-
I have a huge wreath I made a few years ago. It’s very bright and Christmas-y!
-
We have a live wreath plus lights and a slate for Christmas Messages. This will be a great addition!
-
I use a simple wooden plaque that says Noel. I like simple.
-
I love this cute door hanger. Would love it on any door in the house:))
-
Have nothing to decorate my door with, will t try this.
Leave a Reply
You must be logged in to post a comment.

I have super wide shiny red ribbon to decorate my green front door like a Christmas present. It’s the first thing our guests see when entering our house on Christmas eve.