Steam Punk Pillow Featuring the CrystalWork Tool and Circular Embroidery Attachment
Here’s another in our series of Made to Create pillows, this one by Amanda Whitlatch. Don’t you just love her steampunk design? In addition to two assigned accessories – the BERNINA CrystalWork Tool and Circular Embroidery Attachment #83 – Amanda also used the PaintWork and CutWork Tools.
The first step: Come up with a plan. Amanda selected her design elements and laid them out in DesignerPlus software using ArtWork Canvas. When she had a composition she liked, she saved it and printed paper templates. After taping the sheets together she had a full-size template showing the position of each element.

Elements used to create Amanda’s Steam Punk composition:
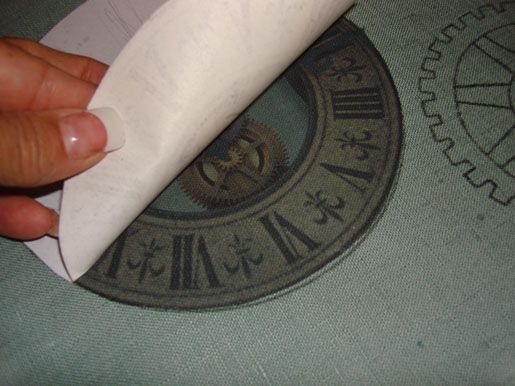
- Steampunk Clock: Photo by Viki Finch-Young from the Deviant Art website. Corel Photo Paint (including in the software) was used to mask and delete everything except the clock face. Printed on TAP (Transfer Artist Paper).
- PaintWork Gears: Extracted from OESD Steampunk Collection #12378, design #15. The file was opened in BERNINA Embroidery Software 7 and the Convert Embroidery to Vector tool selected. The design was copied and pasted into DesignWorks Software to create the PaintWork files.
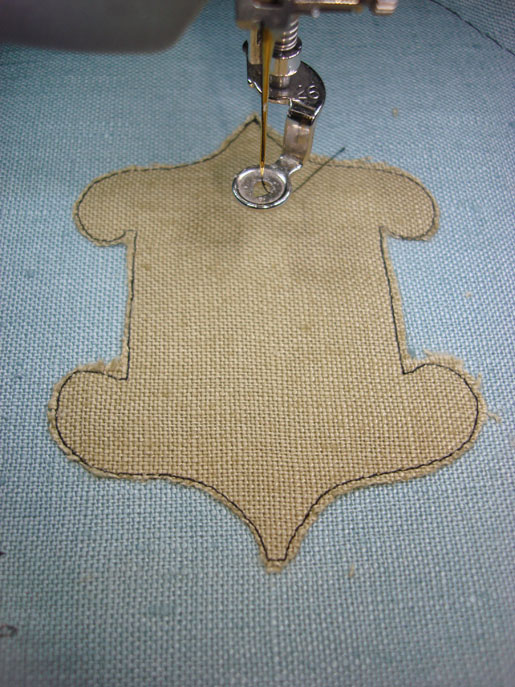
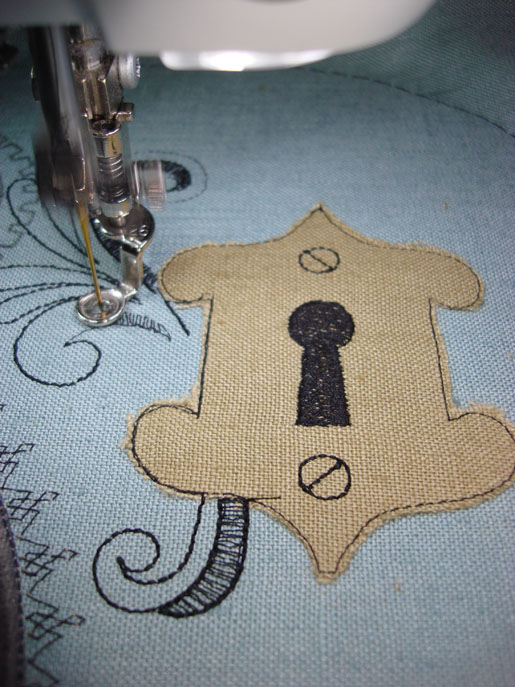
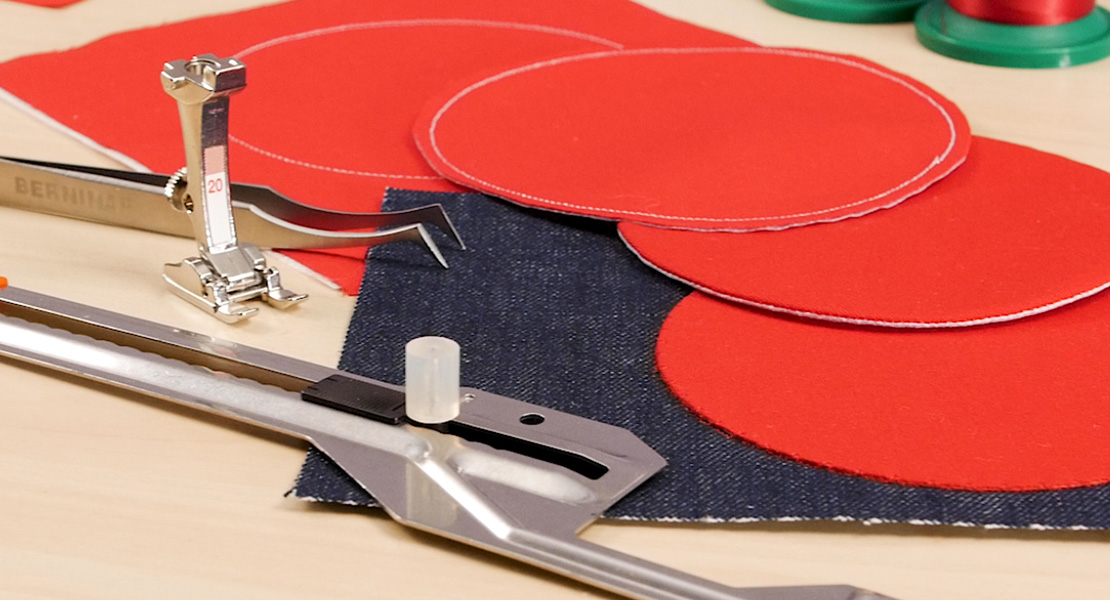
- Lock: Based on Steampunk Collection #12378, design #12. The applique was manually digitized and satin stitching lines added to cover the fabric edges. The applique can be “cut in place” or pre-cut using the CutWork Tool.
- CrystalWork Gears: Same process as for PaintWork, using gear extracted Steampunk Collection #12378, design #3.
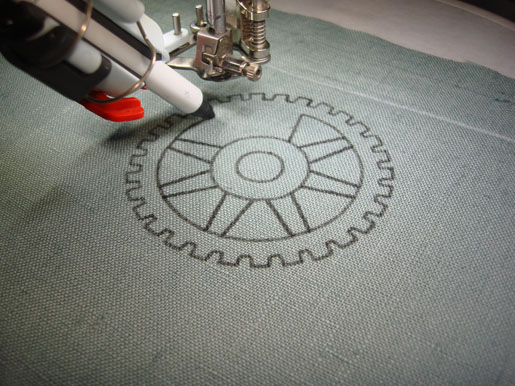
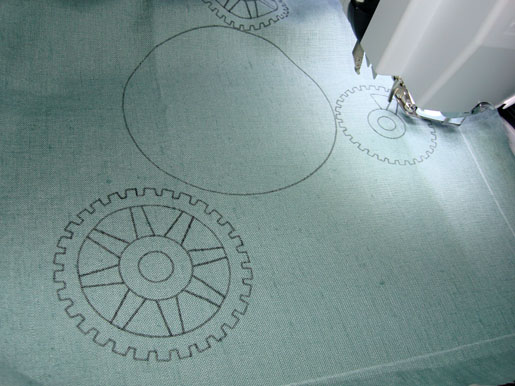
Next: Execute the plan. She started by marking off the center circle where the clock would be, then used the PaintWork Tool to “draw” one large and two small gears on the fabric.
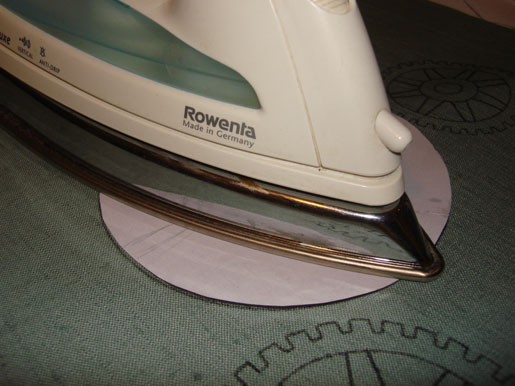
 Afterward, Amanda applied the heat-transfer clock design to the fabric positioning it inside the circular guideline.
 After removing the PaintWork Tool and installing the CutWork Tool, she cut the gold lock fabric piece for the applique. Then she replaced the CutWork Tool, set her machine up for embroidery, and completed the appliqued lock, first stitching down the gold fabric, then covering the edges and adding the swirls and ornaments.
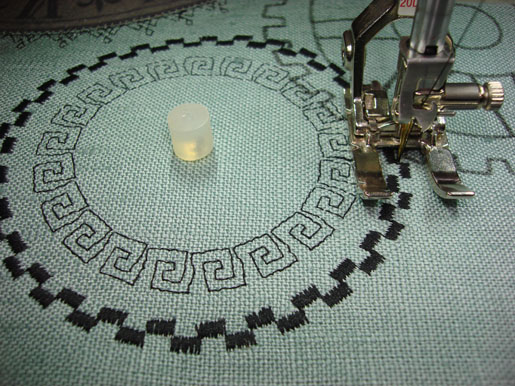
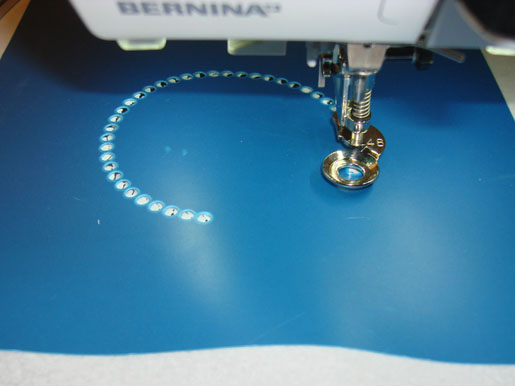
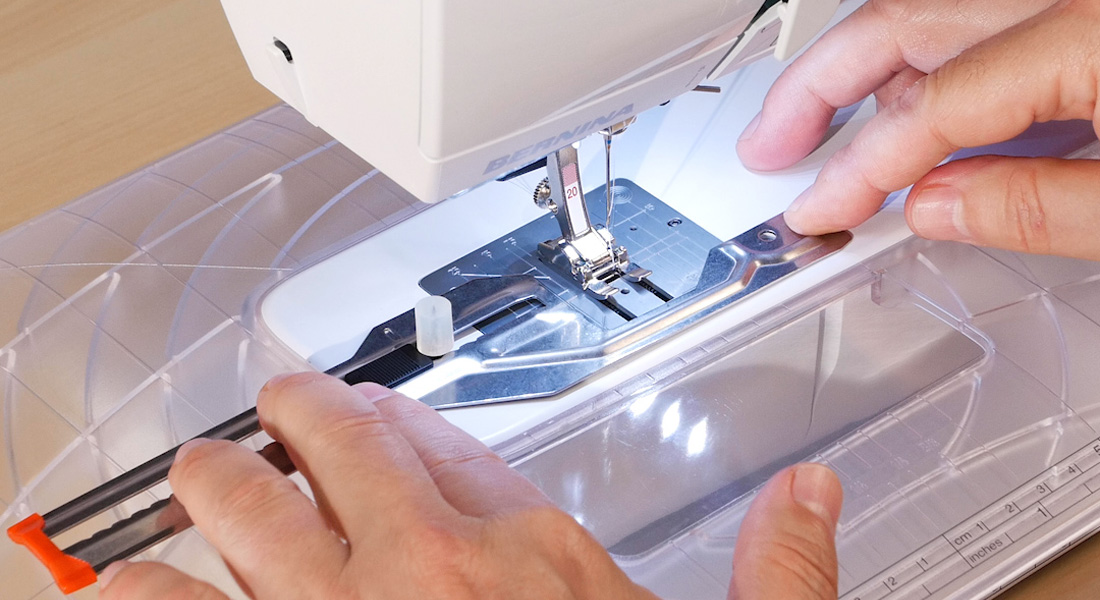
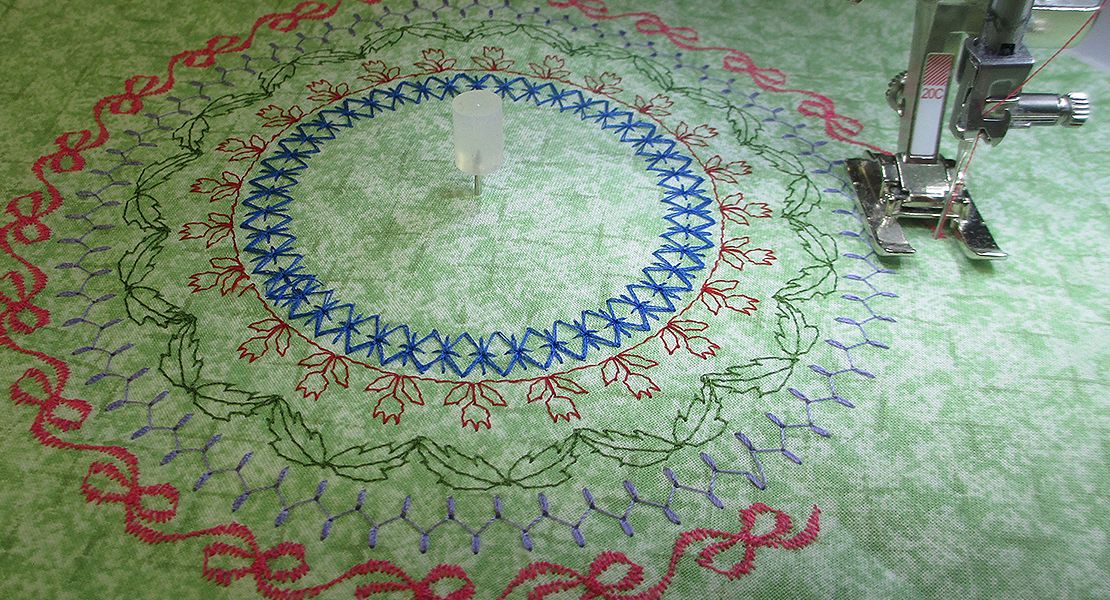
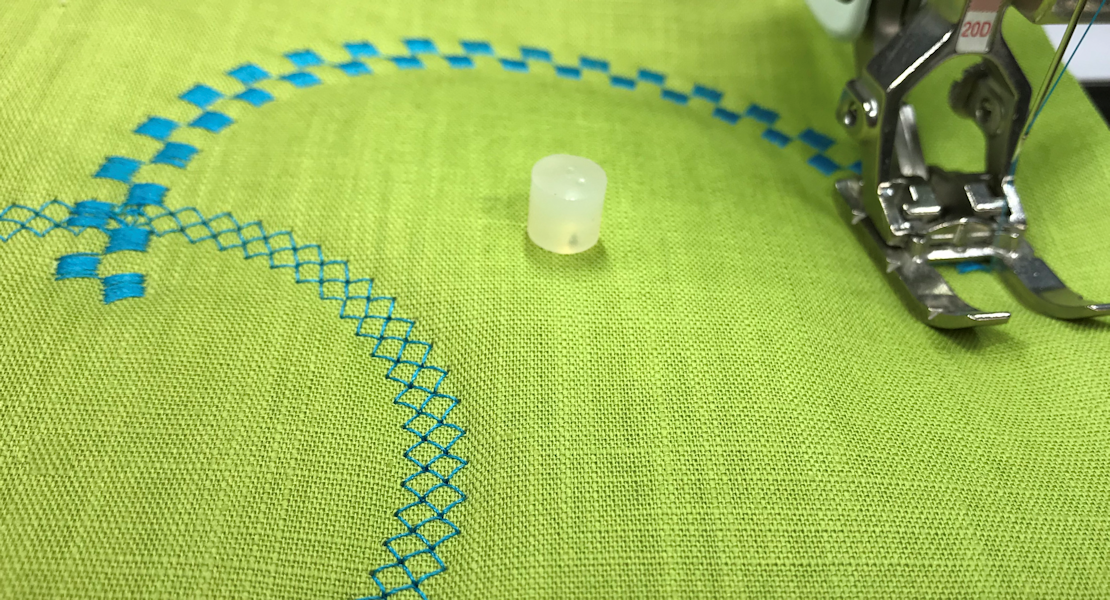
 More stitching, this time using Circular Embroidery Attachment #83 with a variety of decorative stitches to create additional gears and to outline the clock. Such a simple accessory, but with it any machine can stitch perfect circles!

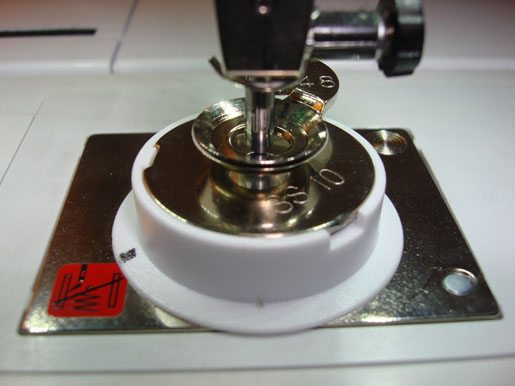
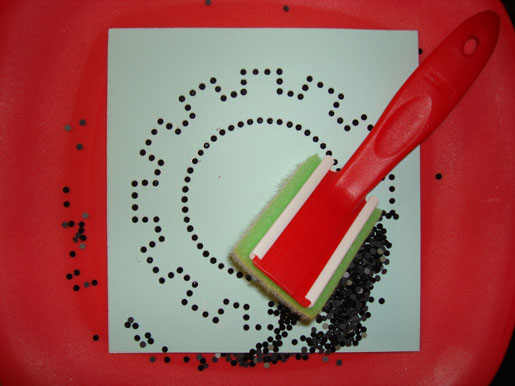
Now for the bling! Amanda installed the CrystalWork Tool on her embroidery machine and used it to punch holes in template plastic . . .
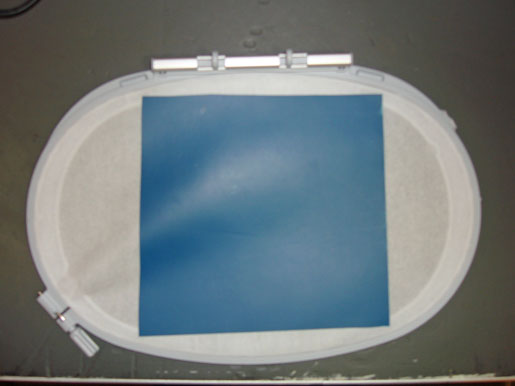
 . . . then affixed the resulting gear template to a backing and filled the holes with crystals.
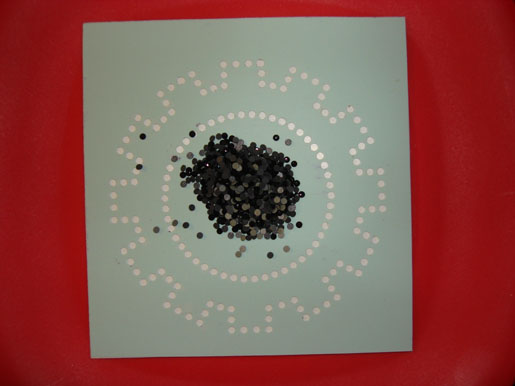
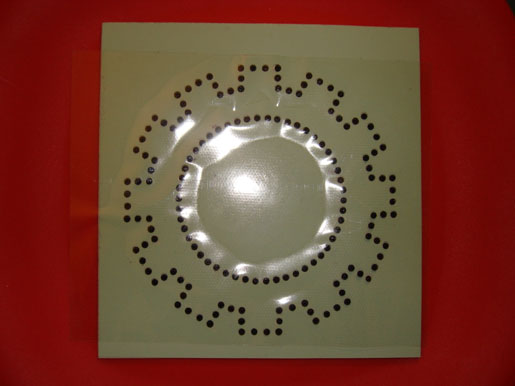
Then she covered the crystal design with a sheet of adhesive and transferred it to a “holding” sheet to make a crystal applique like the ready-made ones found in craft stores. But she’d never have found one with a gears design in the size and color she wanted!
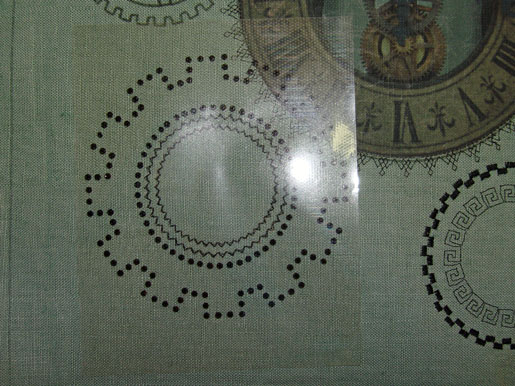
 When Amanda was ready to apply the crystal designs to her pillow front, she carefully detached each crystal-encrusted film from its backing material, positioned it over the fabric, and fused the crystals in place.

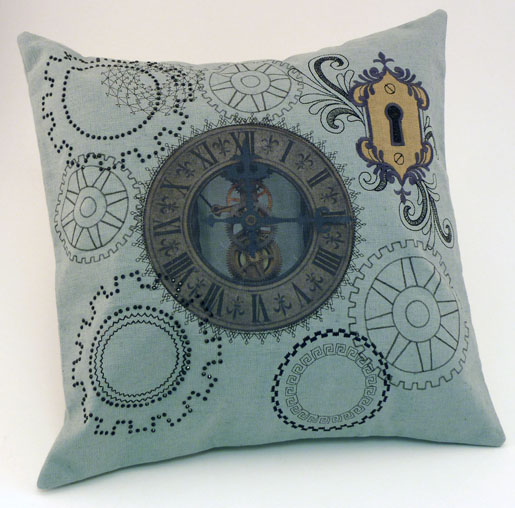
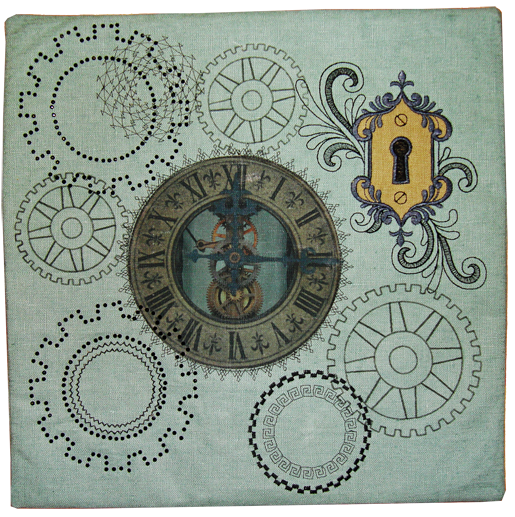
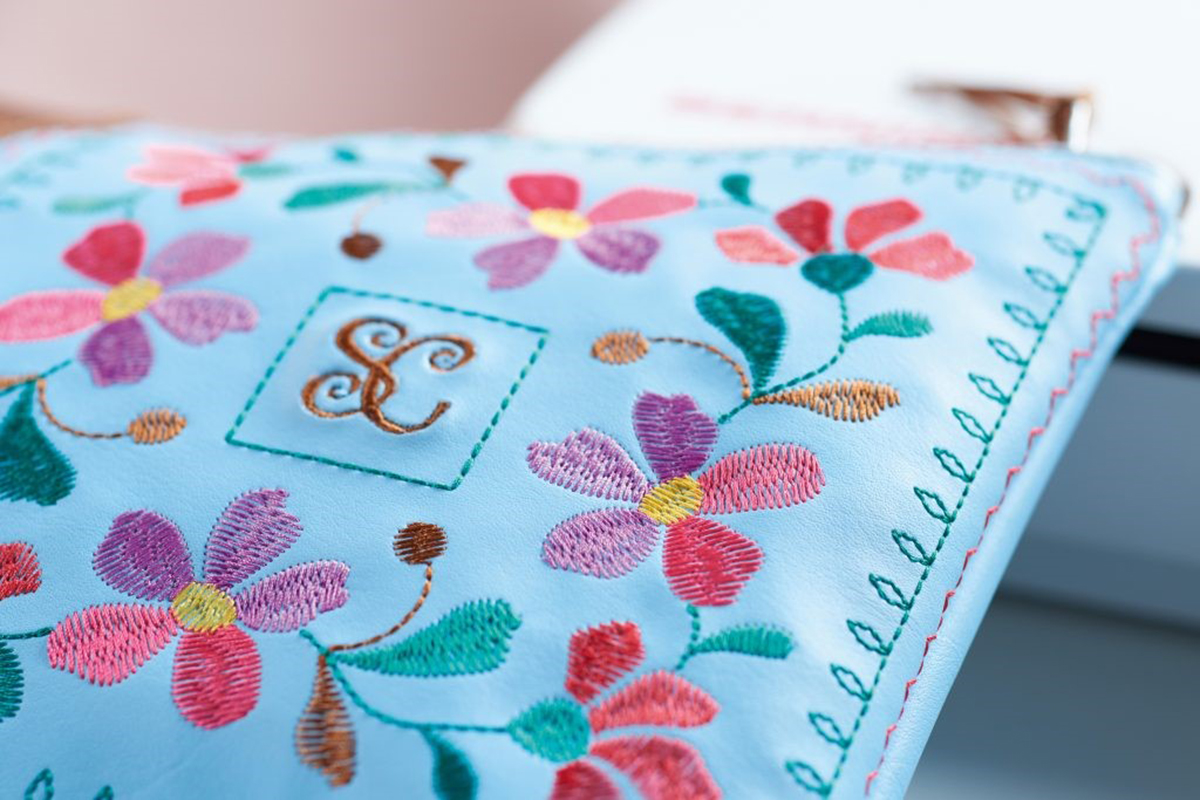
 The completed steam punk pillow front, featuring cogs and gears of stitches, ink, applique, crystals, and photo transfer.
 For more information on DesignWorks, PaintWork, CutWork, and CrystalWork software and tools, visit bernina.com.
What you might also like


3 comments on “Steam Punk Pillow Featuring the CrystalWork Tool and Circular Embroidery Attachment”
-
-
I love the many techniques . Does anyone have an idea abut printing the instructions?
-
There are two methods I use for printing instructions: 1) Select File > Print (or press Ctrl + P on your keyboard), then select only the pages you want to print (otherwise you’ll get all the comments, etc.) 2) Copy and Paste the text and images into a Word.DOC, save, then edit as desired before printing. Jo
-
Leave a Reply
You must be logged in to post a comment.

Oh, my goodness! So many techniques on one project. Love this!