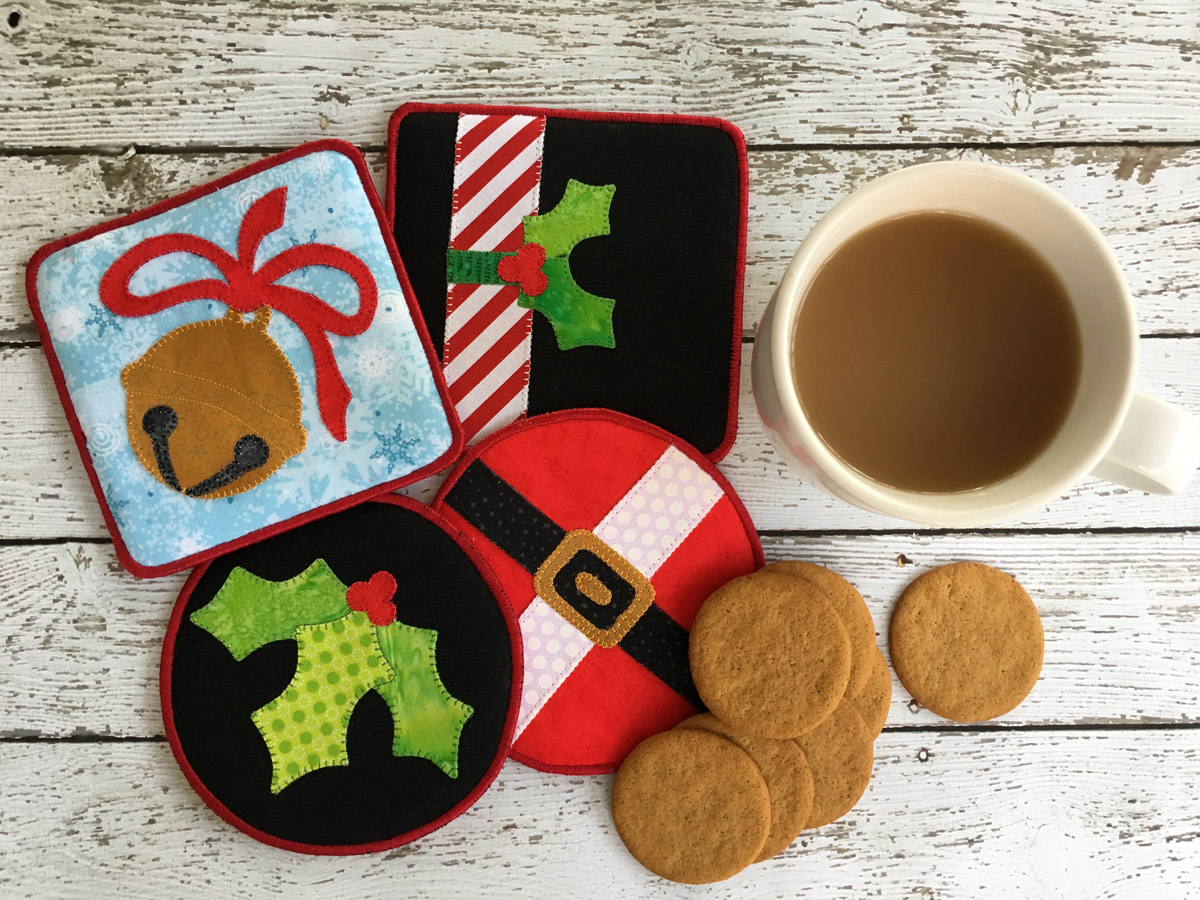
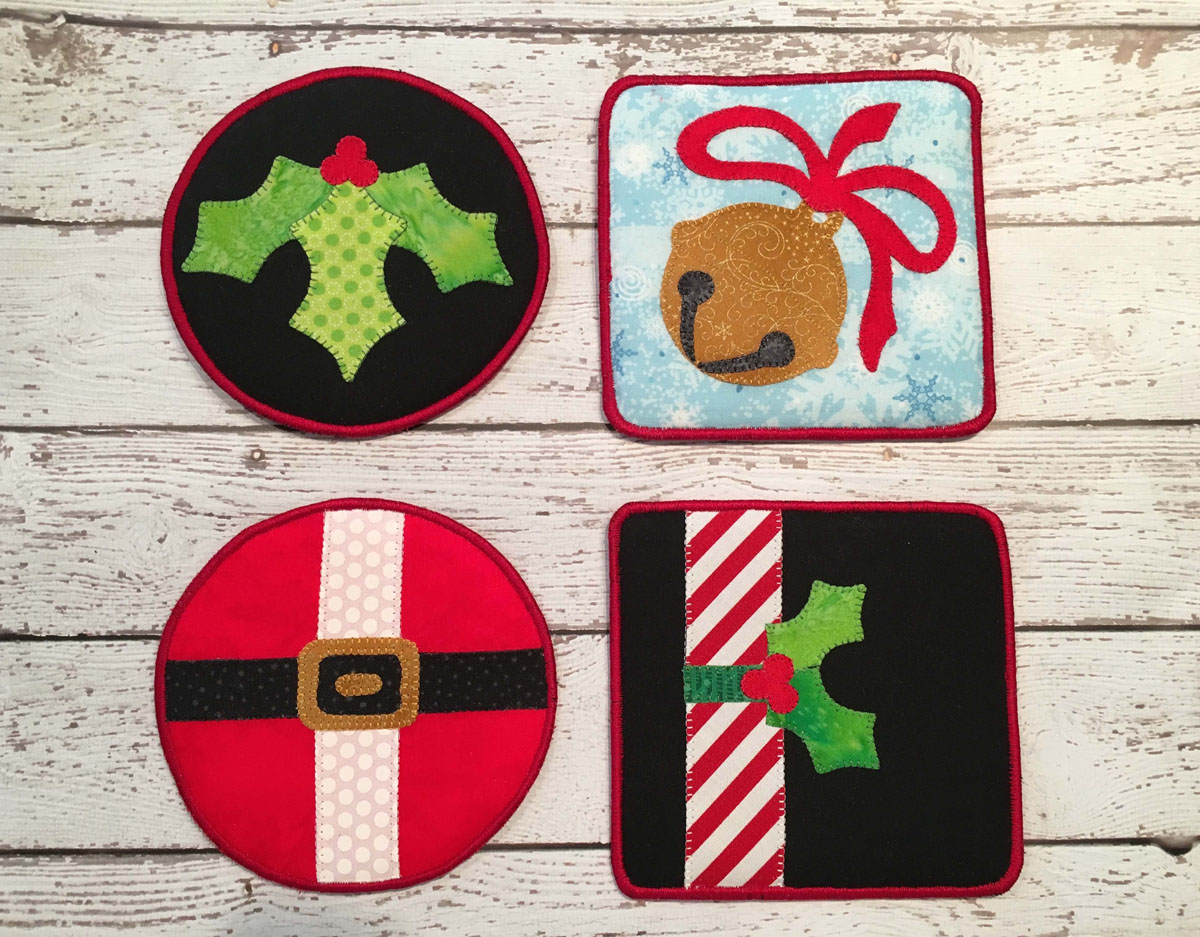
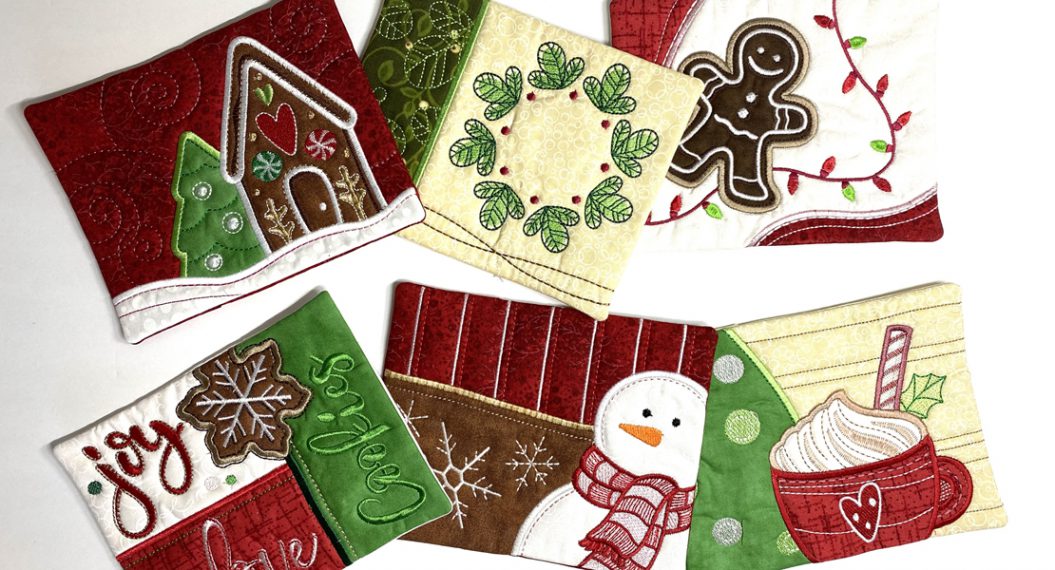
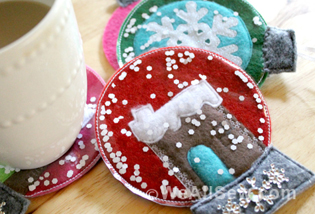
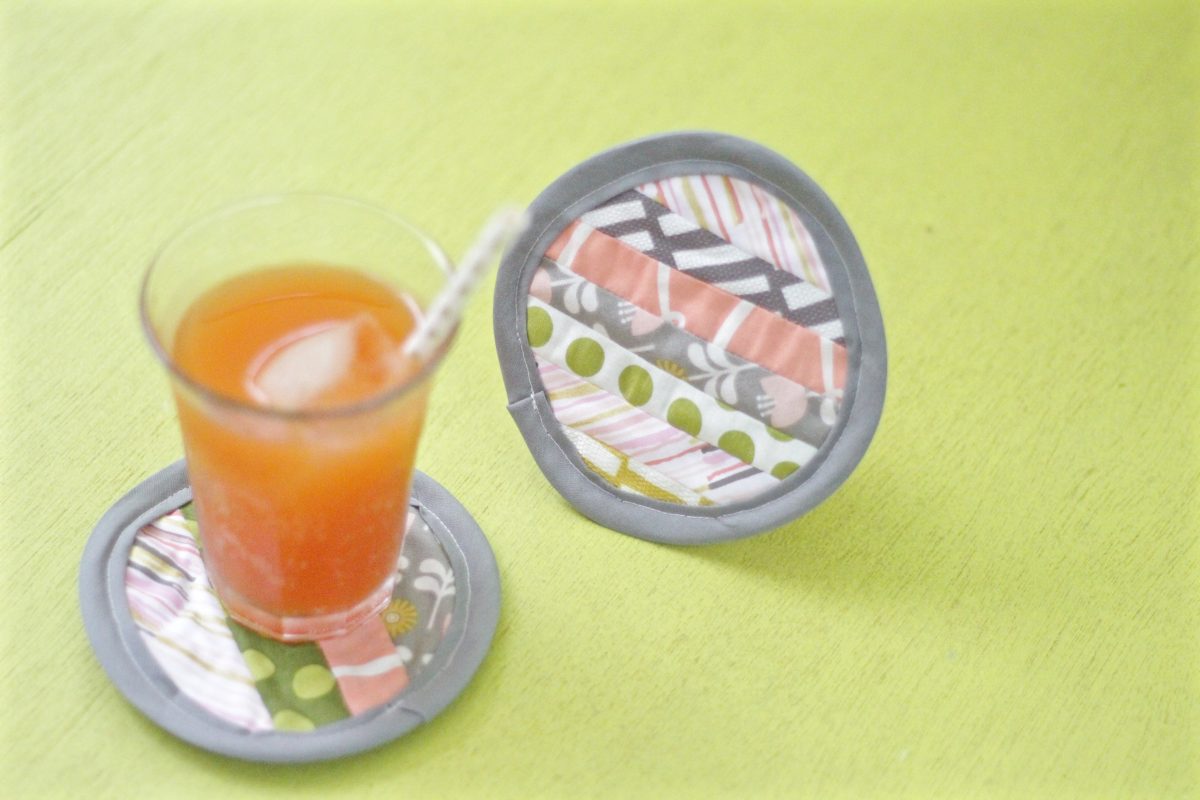
Make It Merry Holiday Coasters
If you are looking for an idea for a quick and easy gift for that special friend, Sandy Fitzpatrick of Hissyfitz Designs has you covered with her Make it Merry Holiday Coasters!
The Christmas music is playing softly in the background, the fireplace is aglow, and the decorations are finally up. If your holiday shopping is complete, you can take some time to yourself to relax. In my world, however, there is always that one last gift that needs to be completed.
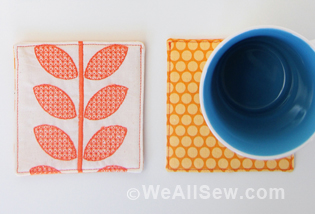
I designed these holiday coasters, which will not only add to your holiday décor, but are functional as well. Although they are great as a resting place for your steaming cup of coffee, tea, or hot chocolate, they work especially well for ice cold drinks. I like to have a glass of ice water handy throughout the day, but always run the risk of the glass “sweating” and leaving a little pool of water next to my work area. These little coasters are great for absorbing that extra condensation.
This project is specifically designed for fusible machine applique but can certainly be adapted to use pieced fabric blocks or any “orphan” designs you have lying around.
Materials to make a set of Make It Merry Holiday Coasters:
- Download the Make It Merry Coasters Pattern
- Scraps of fabric for applique pieces
- Background fabric, 4 squares – Cut 7″ x 7″
- Backing fabric – Fat Quarter or ¼ yard
- Décor Bond – Fat Quarter or ¼ yard
- Timtex – 15″ Square
- Thin Cotton Batting – 15″ square (I used Warm and White)
- Fusible Web such as Heat ‘n Bond Lite – ½ yard
- Thread
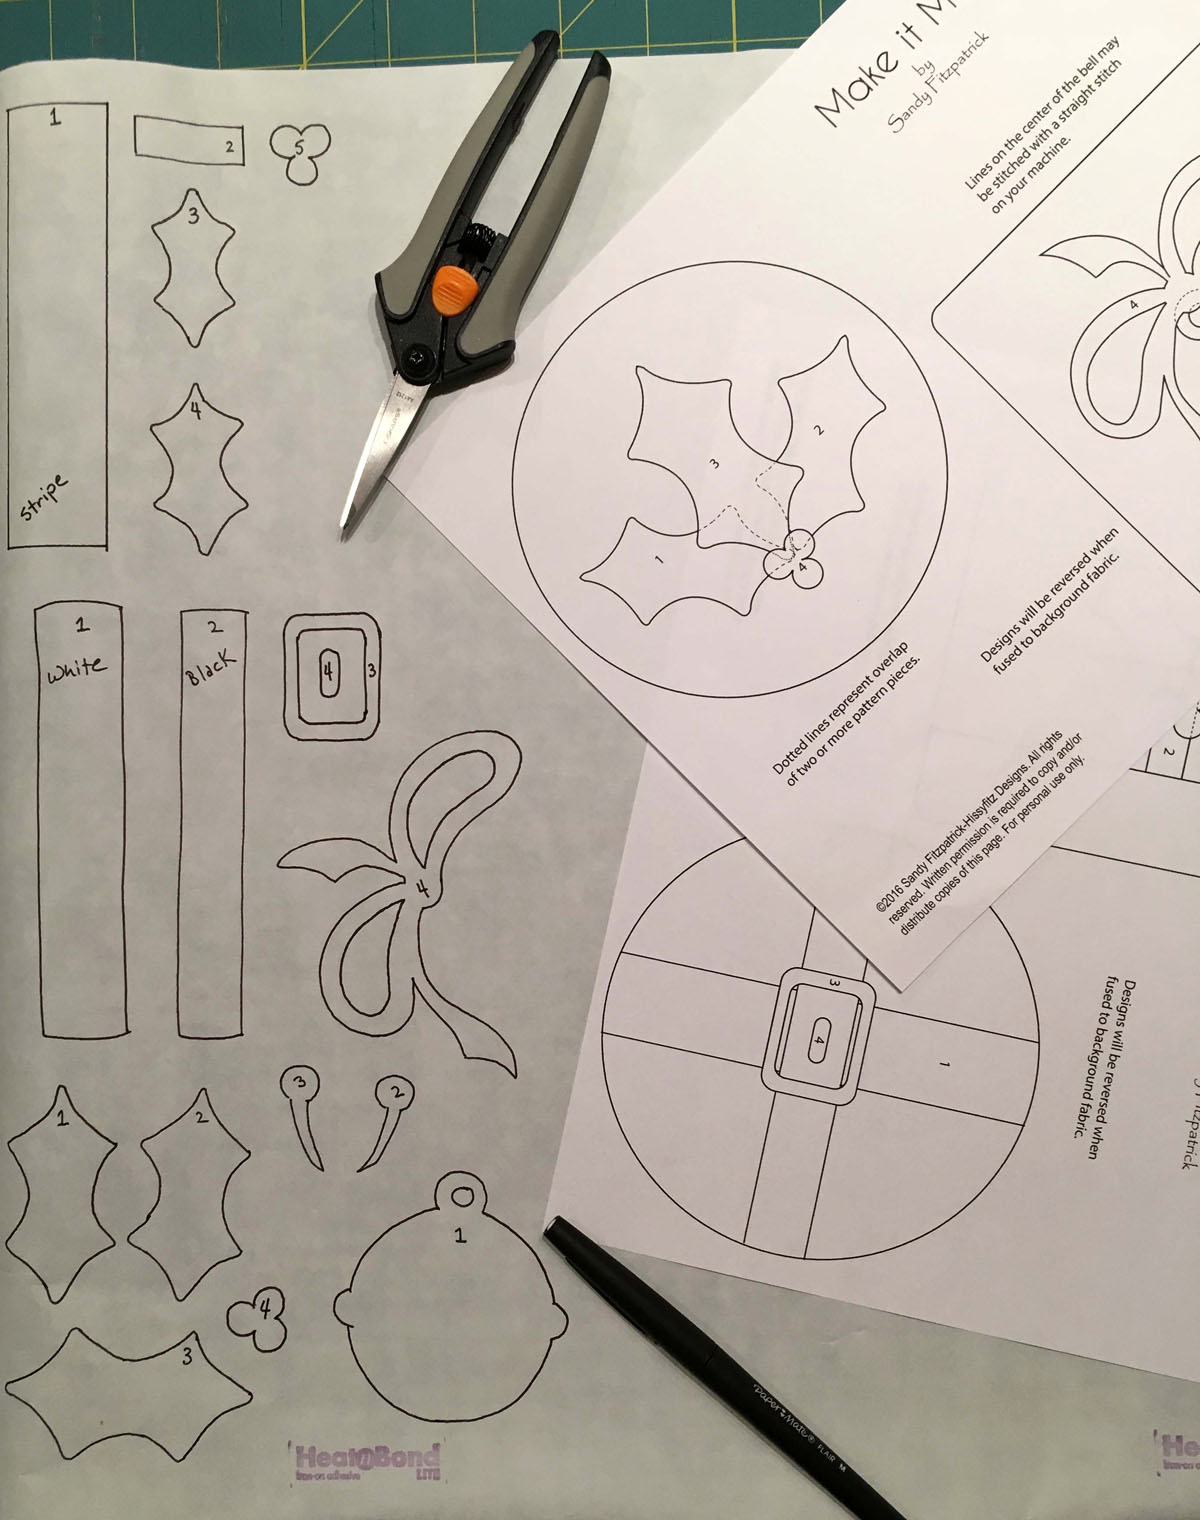
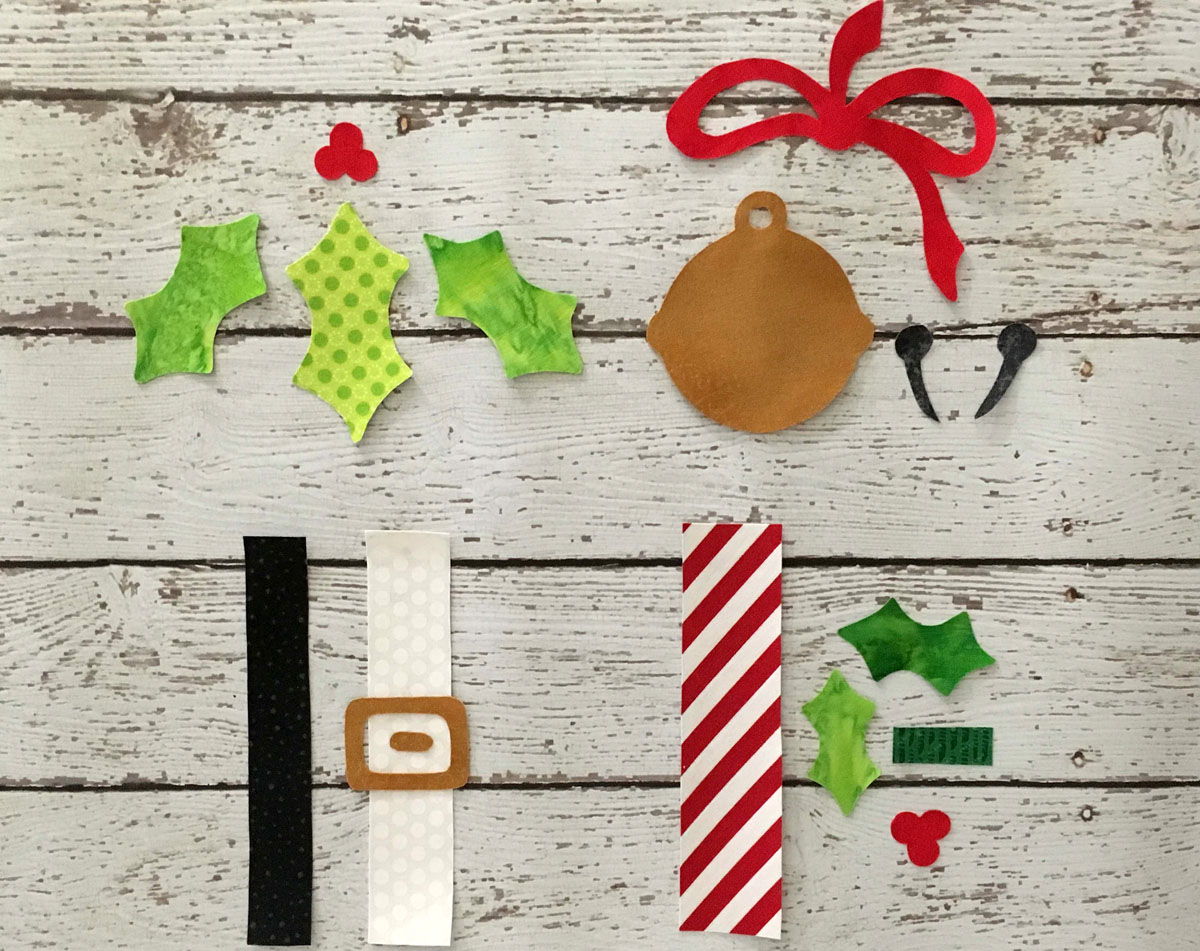
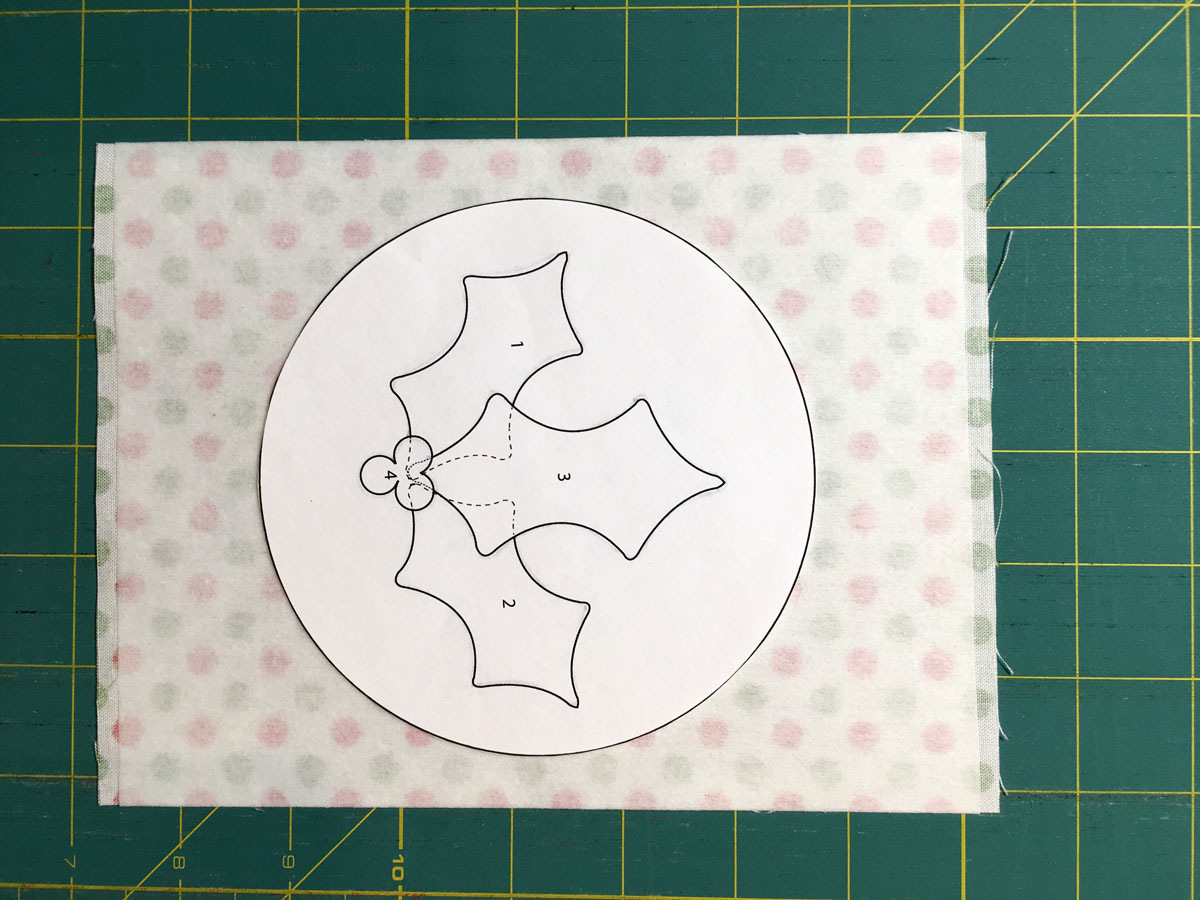
To create these holiday inspired designs, you will need to trace each of your pattern pieces onto your favorite fusible web. Be sure to leave at least ½” between each of your pattern pieces so that you can roughly cut them apart and leave fusible beyond your drawn line. It’s also a good idea to number each of your pieces and maybe even label them with the fabric color you plan to use.
Next, roughly cut your designs apart and iron each piece to the wrong side of the appropriate fabric.
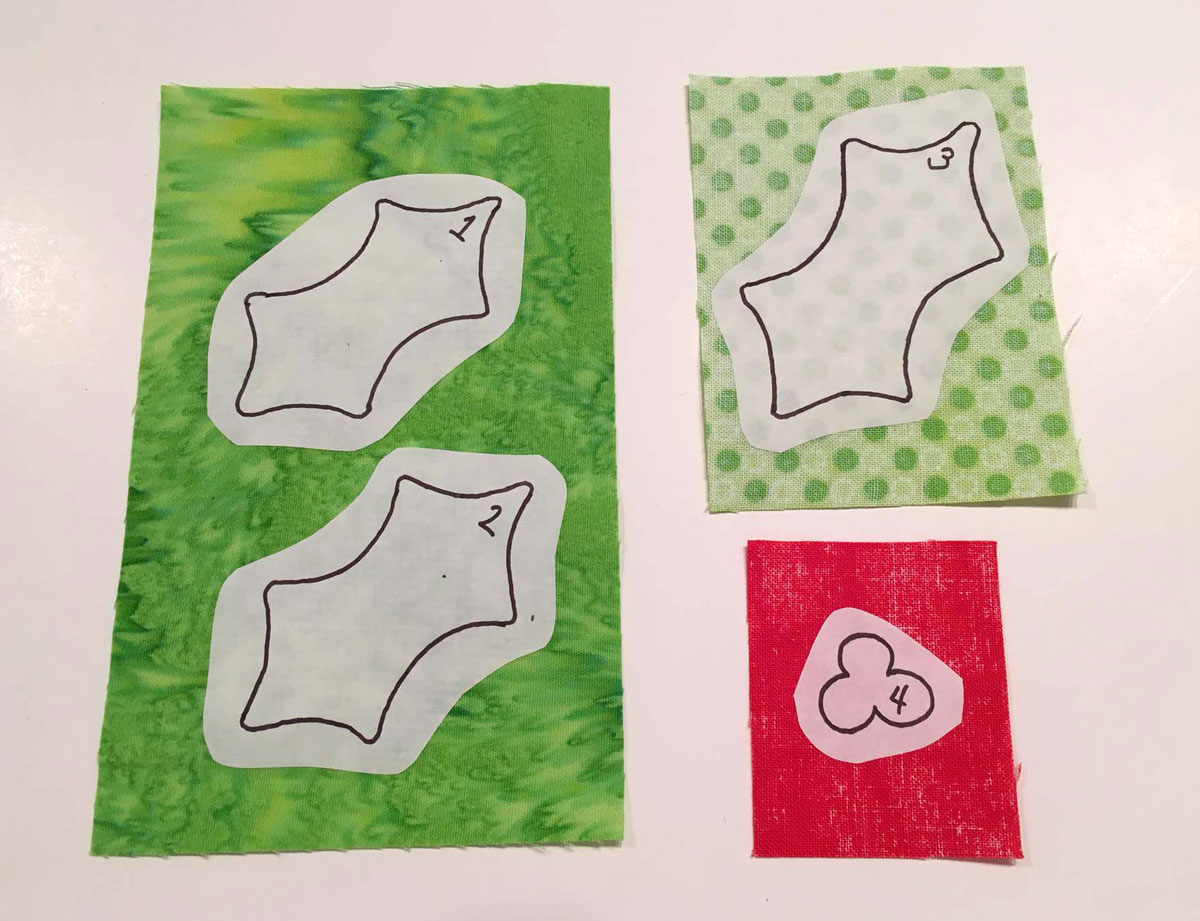
Cut out each of your design pieces on the drawn line.
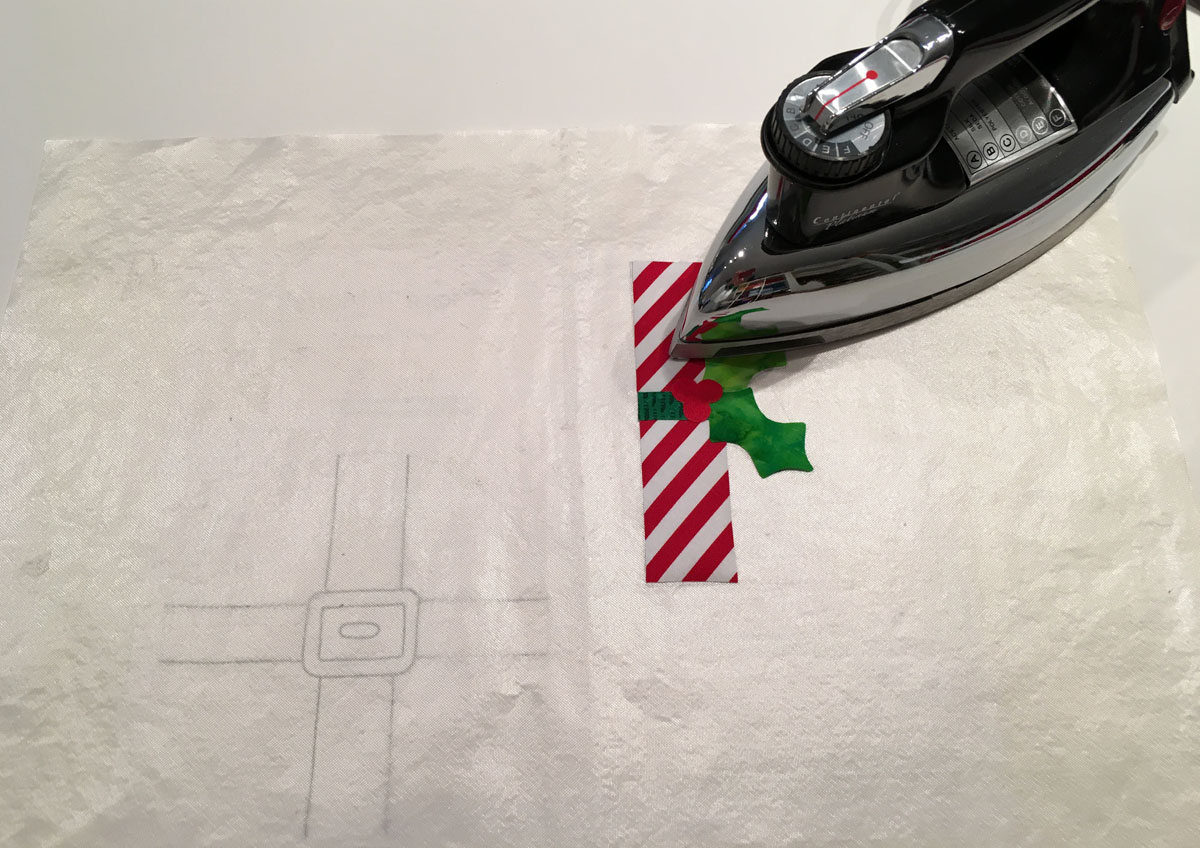
To make your fusing process easier, it’s best to use an applique press sheet to fuse your pieces together. I’ve provided a pressing guide sheet with the designs in reverse to make this process easy for you. Place this sheet underneath your applique press sheet so that you can see the designs through the sheet. Using your iron, on a “silk” setting, remove the paper backing from each of your pieces and begin to fuse them together. For each of the designs, begin with piece number 1 and fuse it to the applique press sheet. Then add piece number 2, piece number 3, etc. until all of your designs have been fused together.
When all of your designs have been fused together, gently peel them from your applique press sheet. Now is the time to “audition” background fabrics. Since you aren’t yet committed to a specific background, you can place your designs on a variety of fabrics to see which one you like the best.

Once you have chosen your background fabrics, cut a 7″ x 7″ square from each fabric.
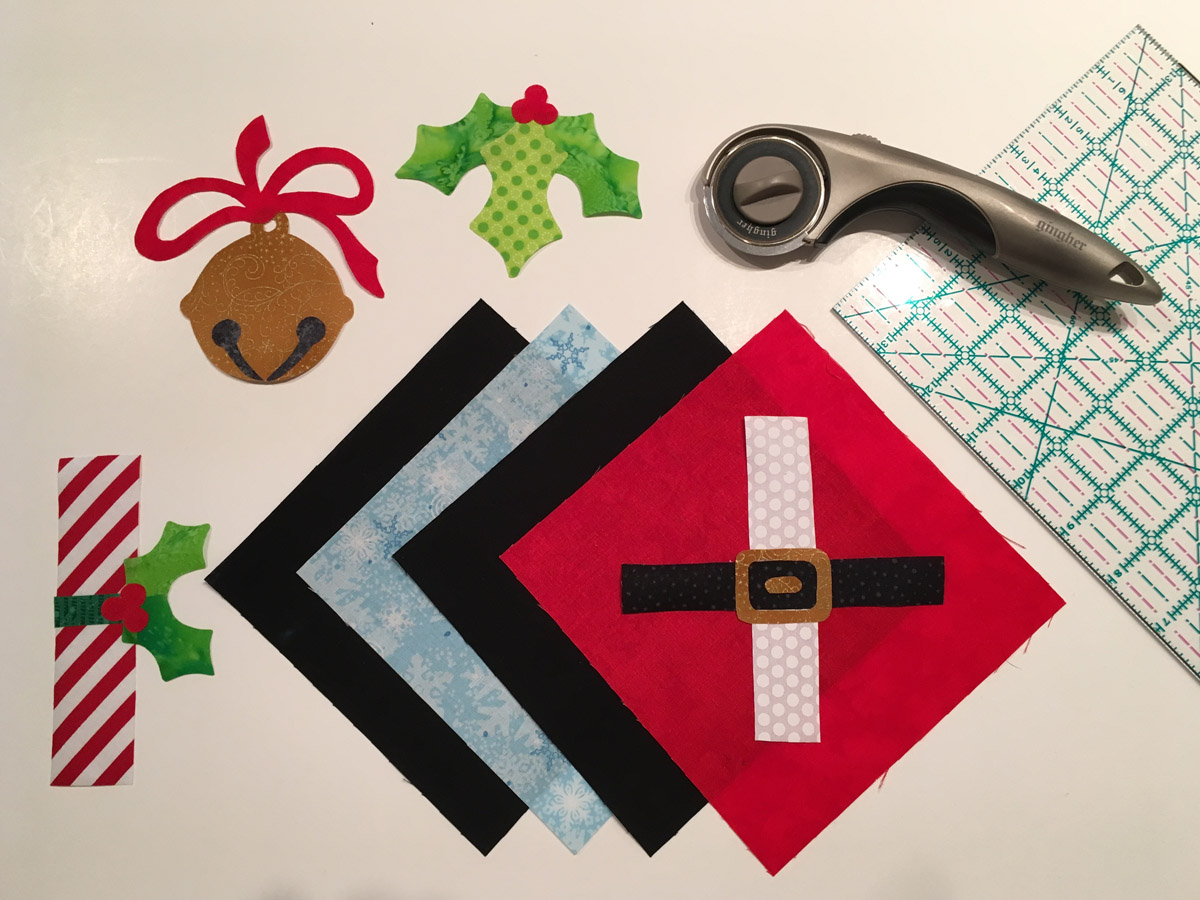
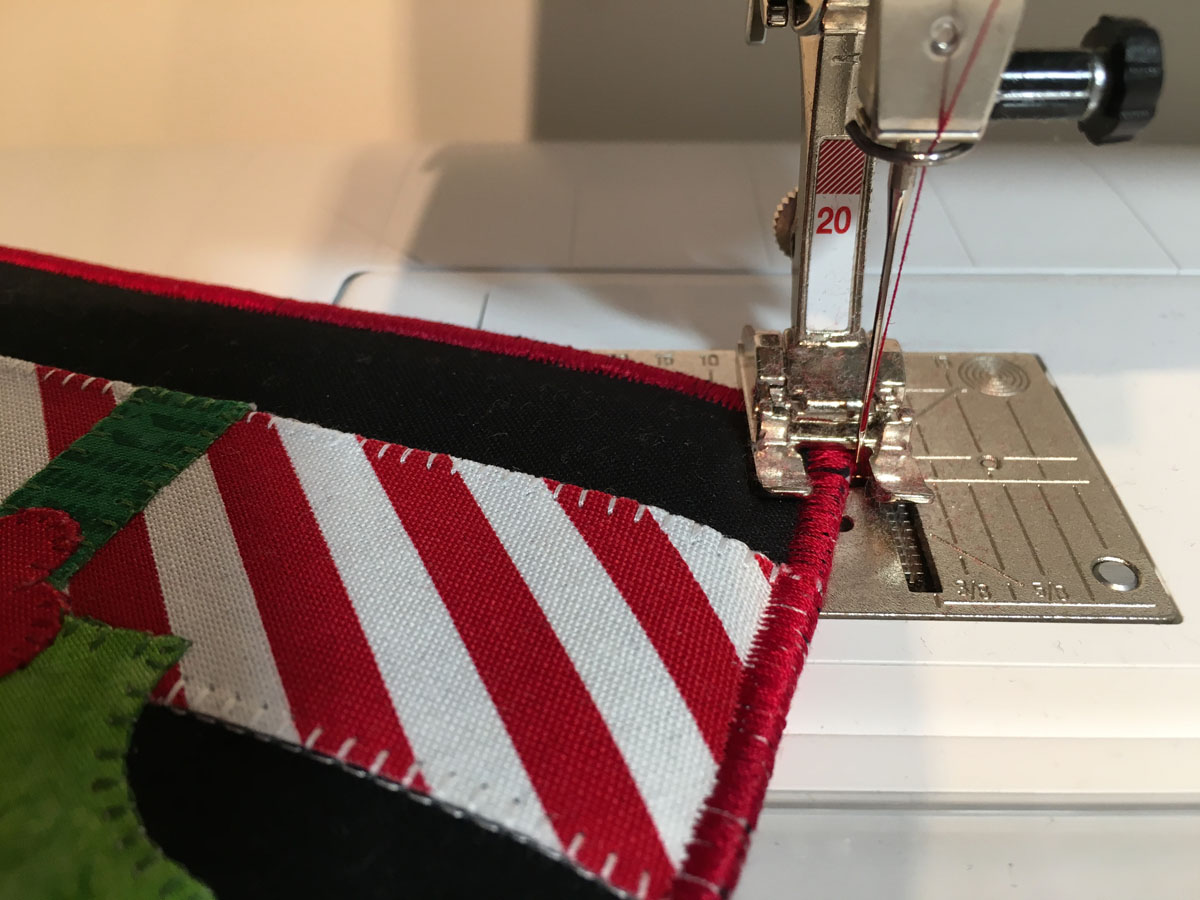
Fuse your completed designs to the appropriate background fabric, let cool, and then stitch around each of the pattern pieces using a blanket stitch on your machine. I’m sewing on a BERNINA 380 and the stitch number on this machine is #107. Since it is a three digit number, in order to access it on my machine I push the # button two times which will bring up the number 1, and then I push 07.
Depending on your machine, this stitch may have a different number. On the BERNINA machines that are in the 5 Series, the 7 Series, and the 8 Series, this stitch number is 1329. If you are unable to find the correct number on your machine, please consult your manual.
Use the Open Embroidery Foot #20/#20C/#20D to be able to have a clear view of your stitching.

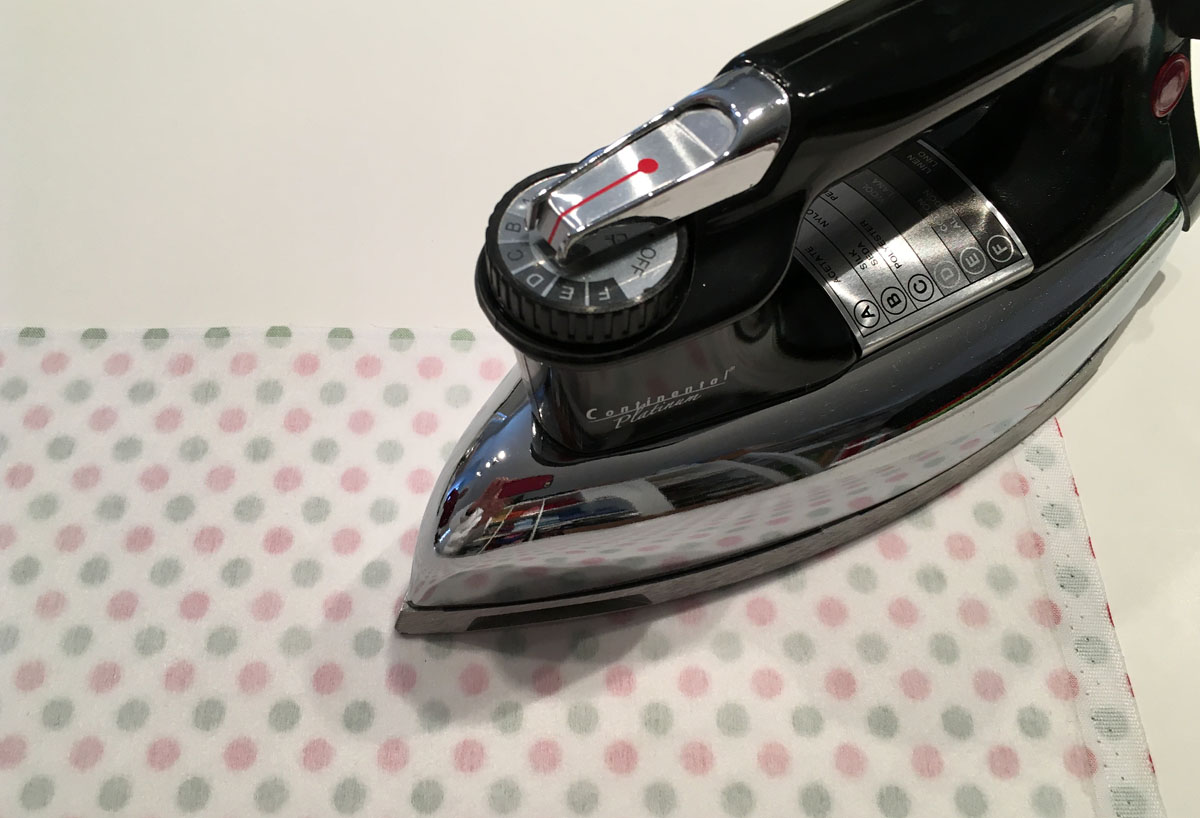
In order to ensure that these coasters are thick enough to do their job, we need to add some heavy interfacing. Cut your backing fabric to measure 8″ x 28″. Next cut a piece of DecorBond slightly smaller than this measurement 7½” x 27½”. With your iron set on a “cotton” setting, fuse the DecorBond to the WRONG side of your backing fabric. Let cool.
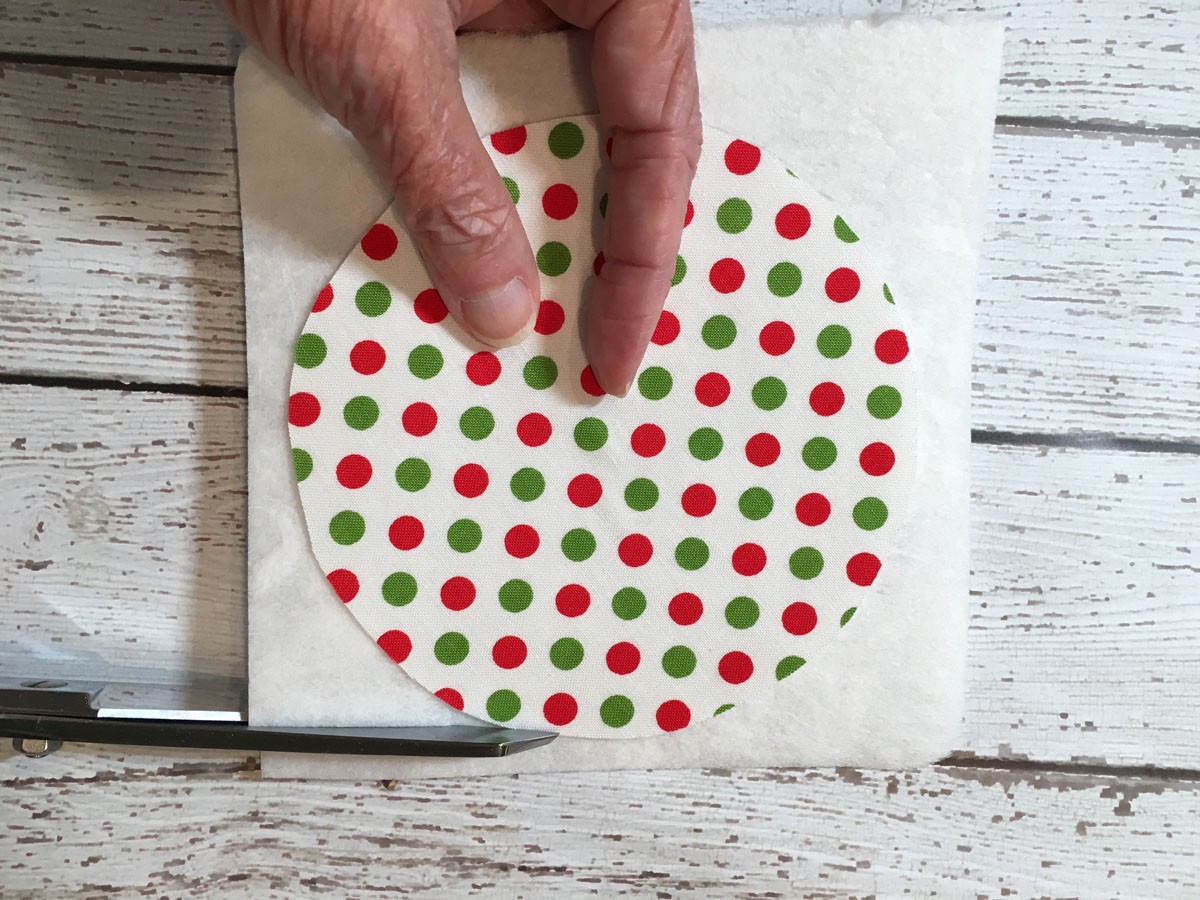
Now cut this fabric into four squares 7″ x 7″. Cut out the circle and square provided in your pattern and use these shapes to cut your backing fabric for each coaster.
Next, use these shapes to cut your Timtex to the proper size and shape.
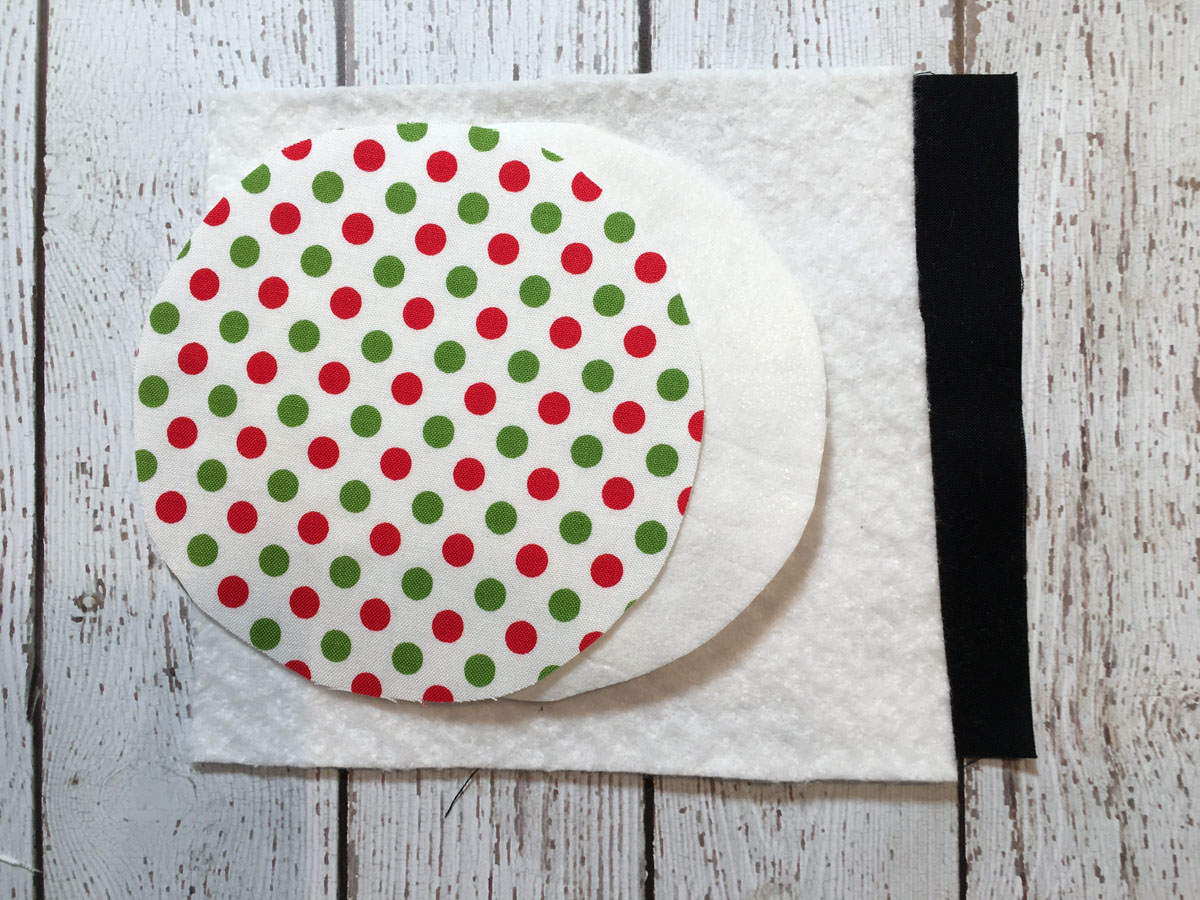
From your batting, cut four squares 7″ x 7″. Now layer your appliqued fabric square (right side facing down)/batting/Timtex/and backing as shown. Center each piece on the previous fabric.
To ensure that your designs will be centered, insert a straight pin in the center of the design through all four layers. The center of each design is indicated on the pattern.
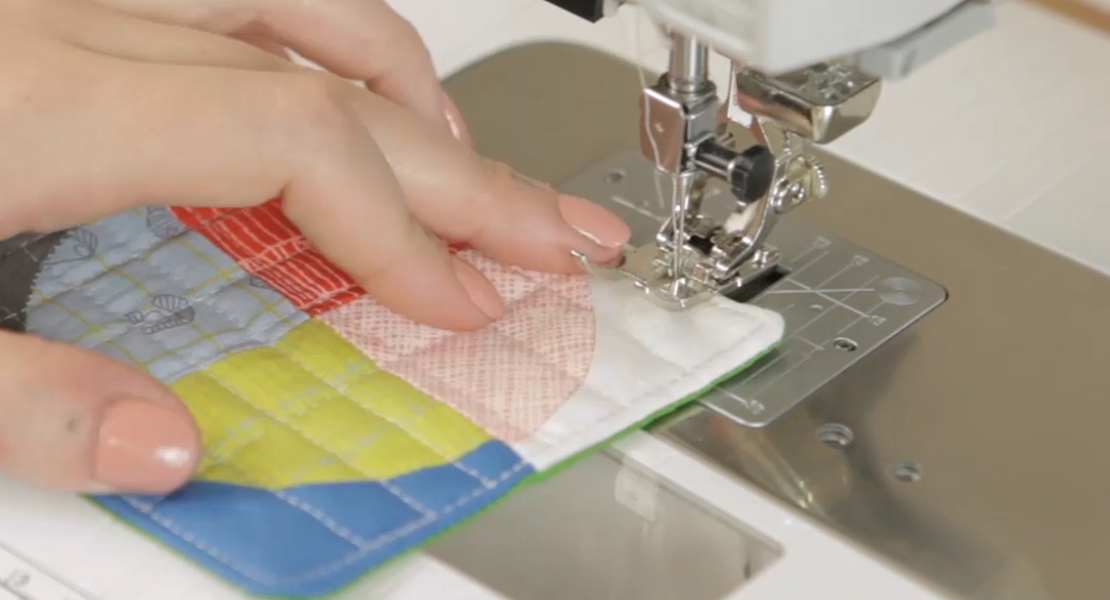
Using the Edge Stitch foot #10/#10C/#10D, line the blade of the foot up with the edge of the Timtex and backing fabric. Use a straight stitch with the needle position moved three positions to the left, to stitch very close to the edge through all four layers.
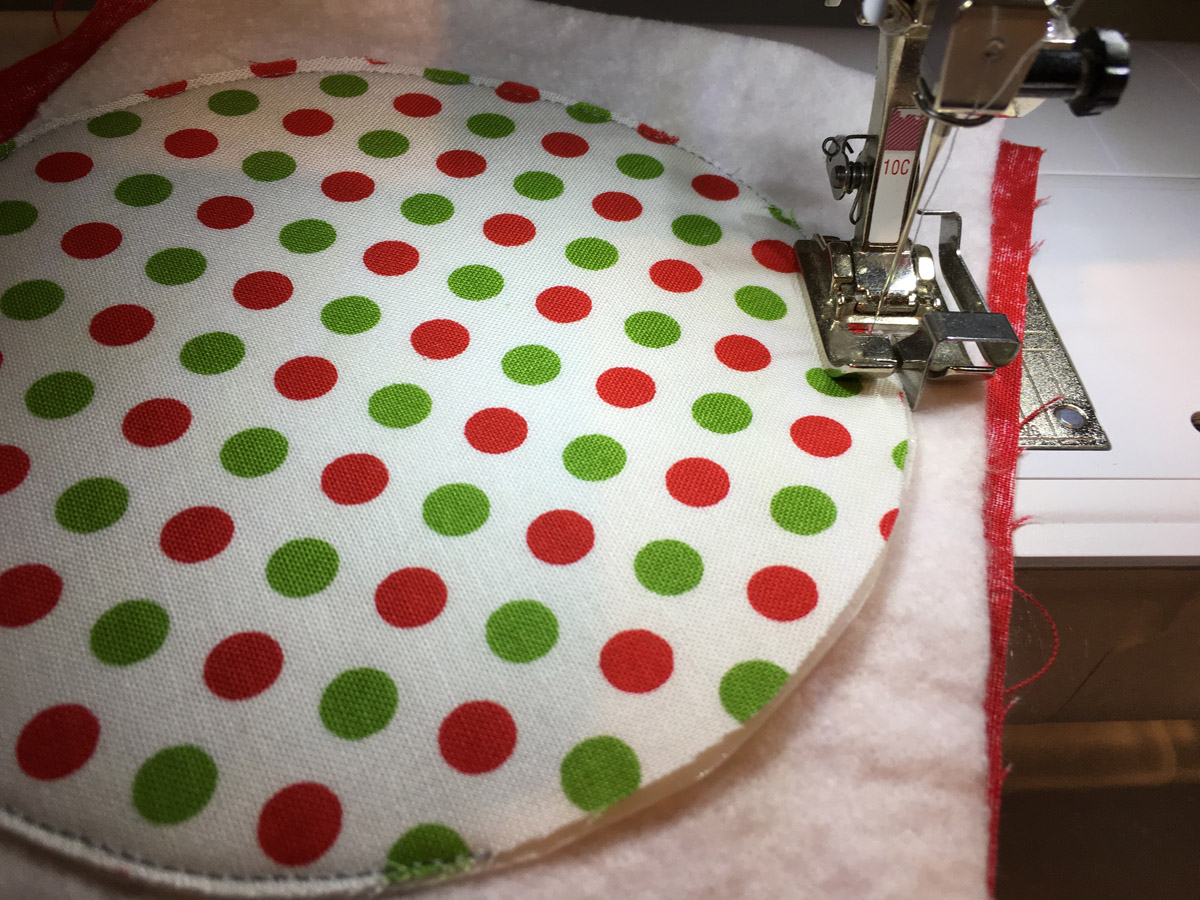
Next, trim away all of the excess batting and appliqued background fabric. Set your machine to do a satin stitch. This is simply a zigzag stitch (Stitch #2) that has been shortened to .5 and widened to a width of 5. Be sure to engage needle down for this particular stitch to making your stitching easier.
Stitch around each of your coasters. To achieve a nice, smooth coverage, stitch around the edge twice.
There you have it! A great little project to create in a short amount of time. I actually liked the look of these so much that I made two sets, one for me and one for my Secret Santa gift. Shhhhhh, don’t tell!
Our December 6 Gift for You
A bright BERNINA red umbrella to keep you dry when skies are gray to one lucky WeAllSew fan!
All you have to do is post a comment below answering the following question:
What holiday themed projects will you make to decorate your home this season?
A winner will be chosen at random on December 7, 2016 and announced the following week!
Good luck!
The contest is open for comments until December 6 at 12:00 midnight Central Time. Click here for contest rules.
Congratulations to our WeAllSew reader “rippinstitch”, the winner of the December 6 gift. Enjoy!
Used Products


What you might also like


114 comments on “Make It Merry Holiday Coasters”
-
-
Some machine embroidery ornaments
-
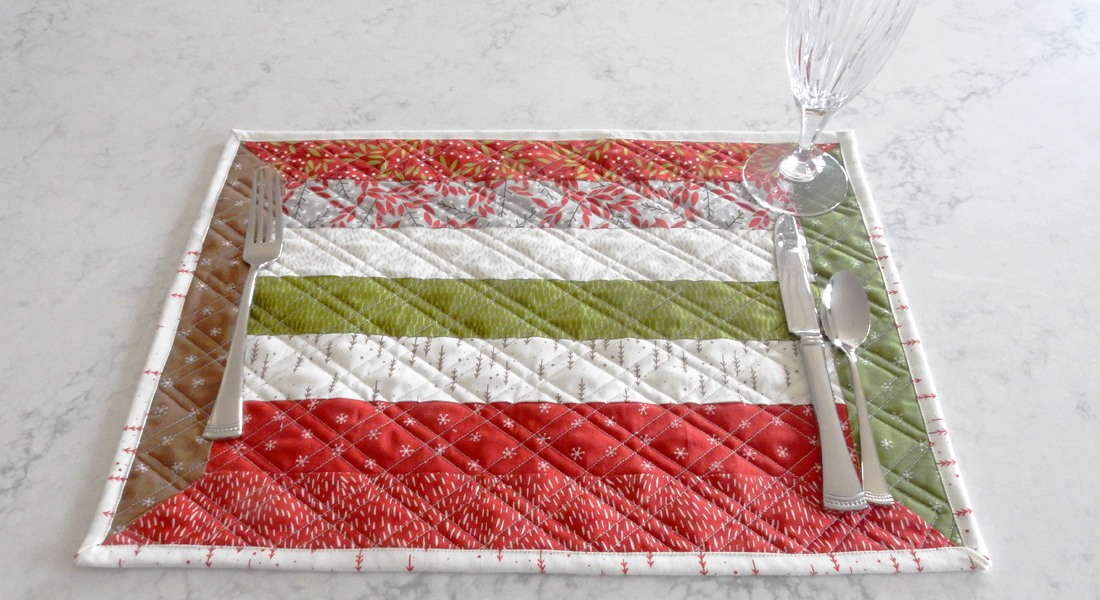
The holiday theme this year at my home is snow-people. I am making snow-people place-mats and new snow-people to go with the collection of snow-people we display.
-
Thanks for this great tutorial! I would love to make a wallhanging for our kitchen but time is running short so these coasters look they would be a wonderful choice! Thanks for the chance to play : )
-
Glad you like my tutorial. Hope you get a chance to make some for yourself?
-
-
I have placemats picked out for my grandchildren. Must sew, sew, sew!
-
We have new family members this year so new stockings!
-
I am in the process of embroidering “The Night Before Christmas”. I love how it is turning out. I will also try to make some Christmas napkins.
-
I’m making holiday themed napkins for this Christmas.
-
I am decorating my walls with all the quilted Christmas themed wall hangings I have made through the years. Last year I started making tree decorations to make our Christmas tree even more special.
-
I will be making Hanukkah decorations
-
These coasters are so cute! What a neat idea for a small handmade thoughtful gifts for my friends who have everything. Plan on saving this for summer projects and gifts next year. Still have five pair of Christmas Jammie’s fort He grandkids to make for a his Christmas.
-
Linda, I hope you are able to make some of these for yourself! Good luck getting those jammie’s made.
-
-
I made a lot of new ornaments and Snow families this year.
-
Making my new daughter her Christmas stocking is on the list for this week!
-
I am thinkng these coasters would be just the thing to make.
-
They are so much fun, Kathleen!
-
-
I am in the process of making several Christmas table runners (snowmen on one, snowflakes on another, candy canes on another). I will place one on the coffee table in the living room, one on my kitchen table, and one on my dining room table.
-
It doesn’t look like I’ll be doing much decorating for Christmas as we still look like a warehouse with everything upstairs while the downstairs is still recovering from a flood. However, I’d love to finish my Christmas quilt or make some cute Christmas coasters.
-
I hope you are able to get everything back to normal soon so that you can get back to sewing!
-
-
The coasters. They will be quick and easy to make. I do not need to shop. I can make these for me and my family
-
Yay, Mary, so happy you are willing to give them a try!
-
-
I am making a Christmas quilt. My first!
-
I am planning on making holiday pot holders/hot pads. I may add some coordinating coasters now!
-
Hope you will give them a try Ann!
-
-
I love these coasters, but I have a Christmas quilt that I started and will finish before Christmas (hopefully!).
-
Thanks, Gloria. Hope you finish your Christmas quilt in time!
-
-
A sewing group I belong to is making a poinsettia applique bread basket cover.
-
I am going to make some of these fun coasters. It will be a great skill builder but not take so much time I run out of it before I am finished!
-
It’s a great project for you. Hope you enjoy the process.
-
-
I am embroidering a table runner!
-
Plan on collect materials from my stash now, so I can start late this afternoon.
-
Easy to make with what you have on hand. Good luck!
-
-
This year is about snowmen – wool applique on batik.
-
A new table runner embroidered with holly and, of course, a new bandana for the puppy!
-
I had to post to say how great this project is. I don’t know if I’ll have time this year, but I will for sure have to try for next year if I don’t. They are super cute.
As far as what I’ll make this year; I honestly don’t know what I’ll make. I think if I can get some gifts made for others I’ll be very lucky with so many other things taking me away from my sewing room happening this year. Not fun things sadly, but I’m still hopeful.
Thank you for this cute coaster project. I don’t think I’ve ever seen any like this. Great idea!
-
Thanks for the wonderful compliments, Vicki! I hope you have a chance to give them a try!
-
-
I want to make some of these coasters! I love your instructions. They are so easy to understand, especially with the helpful photographs. It make me think that even I can do it, lol!
-
Thank you so much. I always try to make my instructions easy for you to follow. Enjoy!
-
-
I’m making placemats.
-
For Christmas- Tree Skirt and many of my tree ornaments are ones that I sewed the first year I was married (36 years ago Dec. 5) and I also have quilted wall hangings that I like to put out for Holloween, Fall wall hangings for Sept. and Nov.- not all that I personally made but still favorites. I try to always have something quilt oriented out year round, even if its something I am currently working on. 🙂
-
Maybe I’ll make these coasters! I want to finish up two table runners started in previous years.
-
Shari, I hope you will give them a try!
-
-
I’m making the JOY card holder and a table runner. Oh, almost forgot! I’ve been making FSL snowflakes! So much fun!!!
-
I’m waiting to take delivery of my B530 before I start on a holiday themed project to decorate my home this season — most likely yesterday’s ornament mini quilt. My version will have a border.
-
Wonderful ideas
-
-
Thanks for developing all of these great projects for your blog followers.
-
So glad that you are enjoying them!
-
-
Placemats!
-
Coasters are really cute! I’m making a pillow cover, and that’s it for this Christmas. Too much Christmas present sewing to do more!
-
Thank you Judy!
-
-
I have made pot holders!
-
I’m still collecting Christmas fabrics for a future quilt but those coaster are adorable and are tempting me to try a few!
-
Go for it, Janet!
-
-
These are darling! Next year I want to make stockings and a fourth placemat and maybe an advent Calendar.
-
You could even use these designs for your placemats!
-
-
Finishing my Christmas wall hanging before Christmas.
-
The PLAN was new Christmas stockings. The REALITY is embroidered lace ornaments because they’re faster.
-
I am making red and green holiday bells for our Christmas tree.
-
Currently making extra large periwinkle shaped coasters to use as doilies for plants, candles, or bowls of soup.
-
I’m going to make ornaments with my girls and a new wreath for our door!
-
Freestanding lace machine embroidery ornaments – holly, 3-D mistletoe, birds and snowflakes.
-
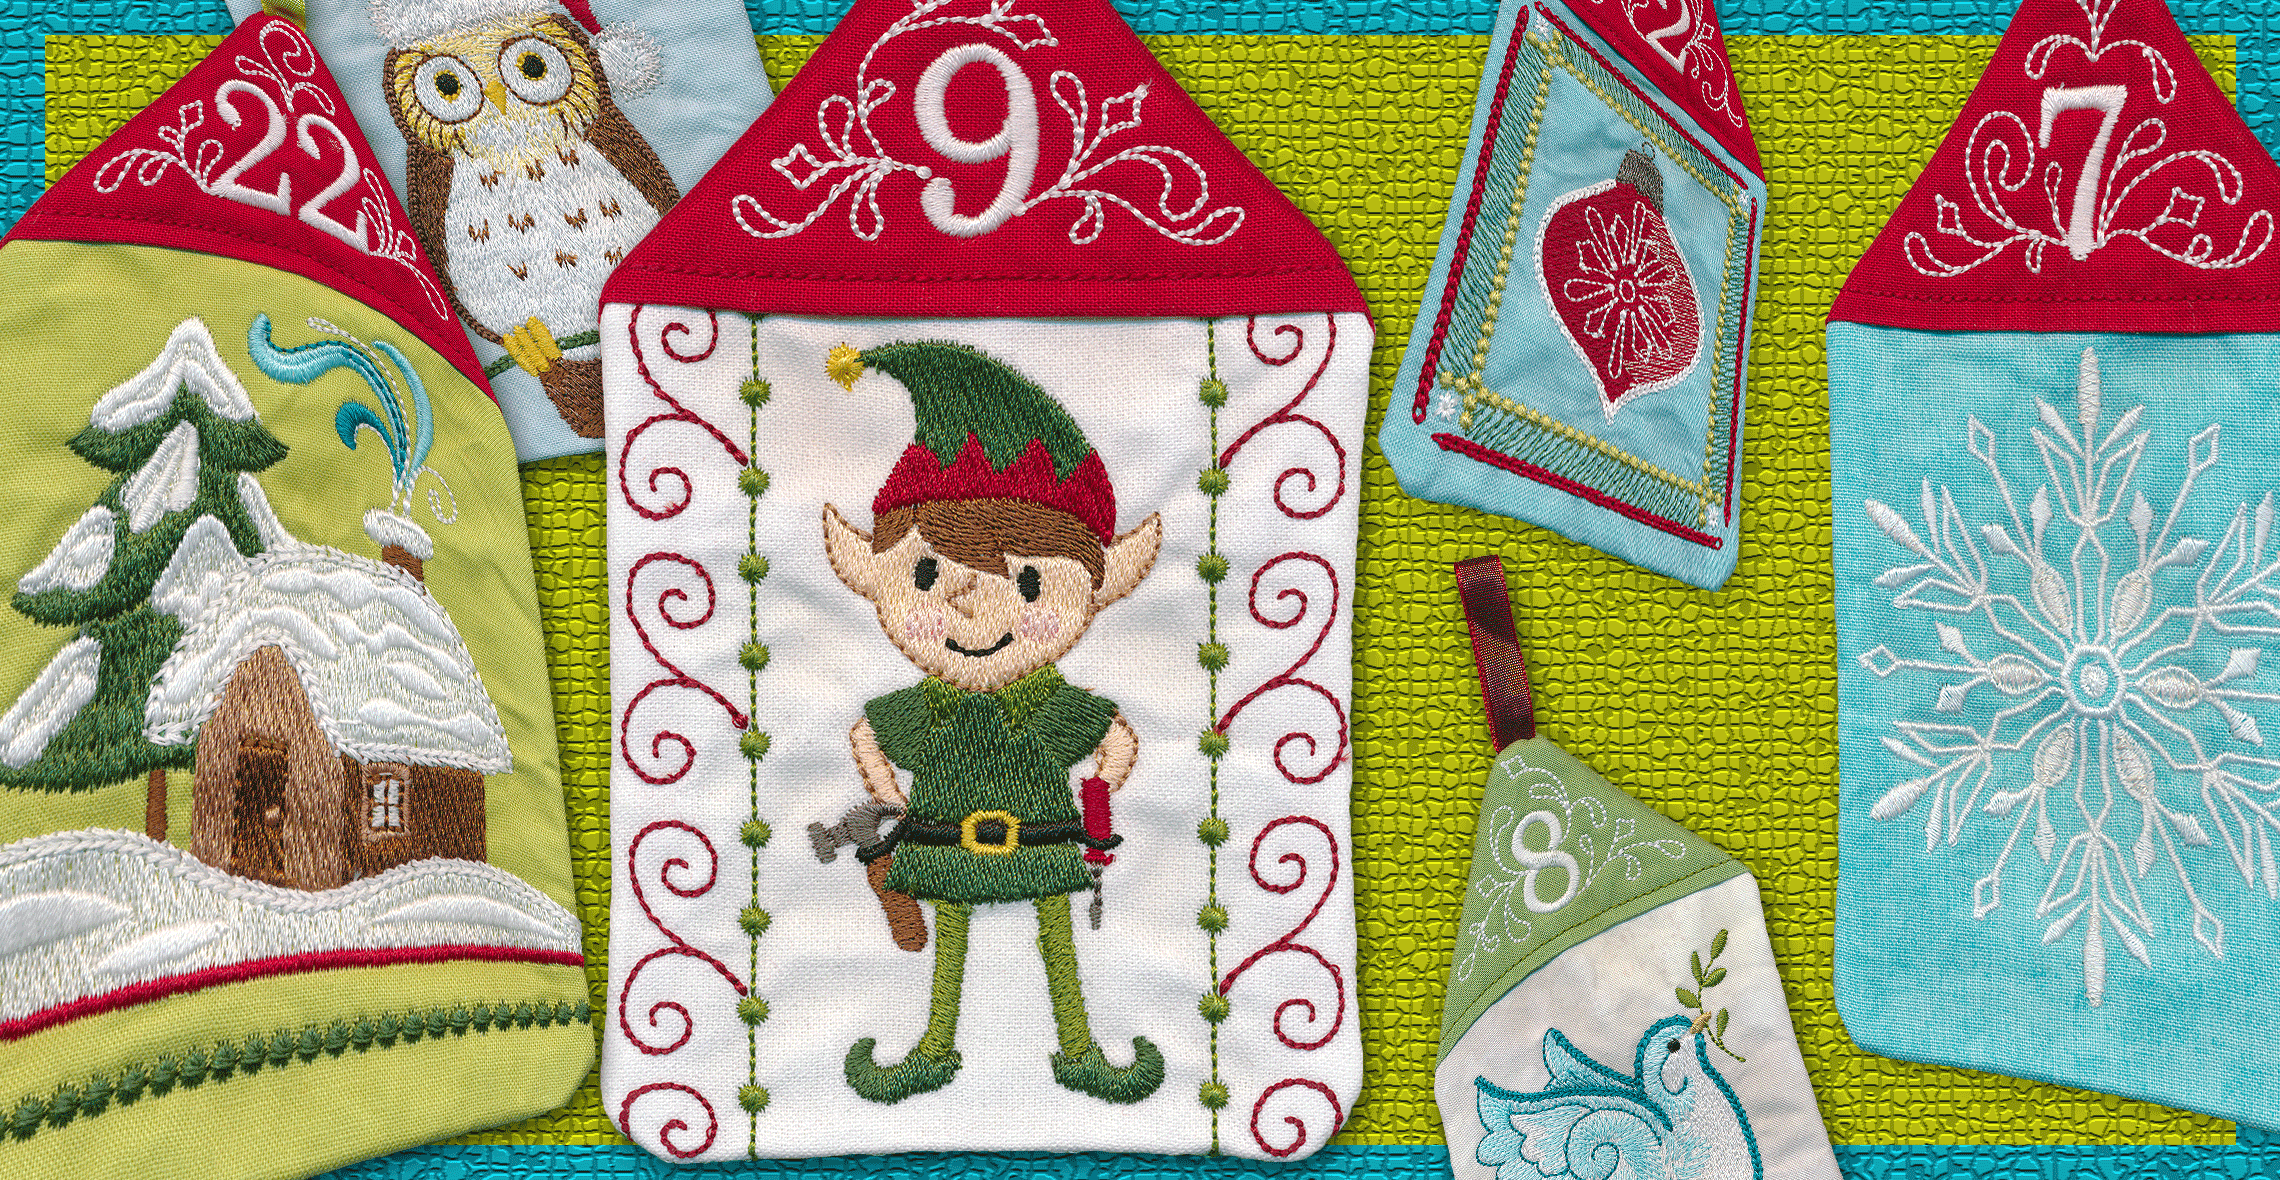
I am making the advent calendar tags. They have pockets in them for small gifts and have wonderful holiday embroidered designs. Best part is they are made in layers in the hoop then turned right side out.
-
I am embroidering Christmas mug rugs and Christmas fabric napkins to match on my Bernina sewing machine.
-
Finish my Christmas quilt?
-
I am working on new kitchen towels and potholders and would like to make Christmas placemats too.
-
Looking to make the coasters featured today as gifts for all my nieces and nephews attending our family Christmas party. It will be a nice token gift that is useful!
-
Yay, glad you like them, Marcie!
-
-
I decorate with handmade stockings and tree skirt. I am making a coordinated table runner this year.
-
I have a few Christmas table toppers and quilts that I use around the house. These are cute!
-
Each year I make ornaments or something for the home for my family. This yesr is going to be mug rugs. Many have been talking about these and of course the theme for each family would be different.
-
All of it. Made quilts and decorative items. Placemats towels pot holders
-
I just finished making a Christmas runner with 16 different Holliday themed fabrics. I am now making a Christmas patchwork pillow from a pattern I saw on Moda Bake Shop. If times permits, I want to embroider a large Christmas pillow. Thanks for the great coaster tutorial.
-
You’re welcome, Lauren. I hope you can work these into your busy sewing schedule.
-
-
I paper pieced a big Christmas tree before I had to set that project aside to accomplish some other things. I’m hoping to get it finished, but now I want to do these coasters!
-
They are super easy, you can do it!
-
-
I’m currently making the Norwegian Snowflake Pillow which was posted here earlier. Fantastically easy and pretty!
-
Baskets, fabric bows and a new stocking. The coasters would be great. Thank you.
-
I made a quilt for a throw on our couch and two table runners, for our dining room table and the coffee table. It looks so festive!!
-
I love all Bernina things,,,
-
New placemats and napkins! Thanks for the giveaway!
-
Finishing some placemats..I love these and would like to make for next year’s celebration. Thanks for the giveaway.
-
You have plenty of time to get them made for next year!
-
-
I hadn’t really picked anything new to make this year but now that I have seen the coaster that may all change. Just love them!
-
Thank you so much!
-
-
I plan on making some Christmas Stockings.
-
I am making some blue Christmas themed placemats.
-
I’m making a sleigh that holds christmas cards
-
I made a table runner.
-
I just finished binding my Twelve Days of Christmas quilt (it still needs some quilting in the borders — that”l happen AFTER Christmas). And I have a table runner using a cross-stitch kit of Christmas candles and holly that was a souvenir from Denmark that just needs some binding and a bit of quilting to be finished.
-
I’m planning to make a Christmas throw for my sofa.
-
My placemats are looking kind of shabby so I thought I would make some new ones.
-
These coasters are so cute. I am hoping to get to them sometime this week. Thank you for the pattern. Also I found out that I was the winner of the Bernina Umbrella! It is something that I needed and will definitely use. Thank you Bernina and to your marketing department for contacting me. I can’t wait to show to the girls at open sew!! You made my day.
-
Sandy, these are so cute!
-
In fact, I just made eight as a gift this morning and they are adorable! Thanks Sandy!
-
Yay, Leni! So glad you like them!
-
-
-
I really need a tree skirt. I’m still looking at patterns and fabrics. Think I’ll get it done by Christmas this year….or next year?
-
Too late to start this year but I getting lots of great ideas for next year.
-
Living in an rv right now so won’t be decorating bit may make some of these for others.
-
Twin granddaughters get a new dress to run around in with a doll dress to match.
-
Each holiday season I make free standing lace ornaments for family and friends. They are a hit with everyone and something they can use every year.
-
Santa’s and Snowmen! The same theme I’ve used for years!
-
I am going to try to do some holiday sweatshirts, but my husband just had heart surgery, so I am pretty busy with him. Thank you so much for the fabulous Merry Christmas coasters.. Love these holiday coasters and I saved all of the info in my computer for next year.
-
I will definitely be making these coasters for the holidays. I will also be making placemats for Christmas gifts. Will probably include these coasters.
-
I plan to do something with stars. I have a lot of star ornaments and I think a table runner with stars would complete the look!
-
I’d love to find the time to make the adorable “Make it Merry” Coasters. They are sooo cute!! Love them all!!
-
I am making garland and table clothes and napkins.
-
I plan to make coasters, ornaments and placemats.
-
Planning to make a new tree skirt and a Christmas banner. I have sew many ideas for items to make for the home this year, including these cute coasters.
-
I’ll be making a Christmas table runner this year.
-
I’m finishing starry night…
-
I’ve been making placemats and napkins. Coasters would be a nice addition.
Leave a Reply
You must be logged in to post a comment.

I have not decided yet! I’m leaning towards a Santa themed wall art/hanger.