Postage Stamp Patchwork Tip
My list of quilts I would like to make in my lifetime includes a postage stamp quilt. If you have never heard of these before, they are quite extraordinary. Each square of the quilt is 1″ finished, and every one of them must be unique to the quilt—no fabric used twice. The result is a symphony of color and pattern, exactly what I love about quilts in the first place.
When I first started teaching I thought it would be fun to save a small piece of every fabric used by my students in my classes, and I did that for awhile, only to find to my dismay that the baggy in which they were kept disappeared in my studio at some point. But not to worry, can anyone say “stash?”
So this being the summer of trying new things, I decided to make my postage stamp quilt. Since every fabric appears only once, there is no way to rotary cut and strip piece this in a quick and easy way. The thought of cutting and sewing all those tiny squares has always been a little intimidating, so my original idea of a queen sized quilt quickly downsized to a lap quilt, then a baby quilt, and I finally settled on the much more manageable postage stamp pillow. I could enjoy the process and cross it off my list without it becoming too overwhelming a project. After all, it is a long list!
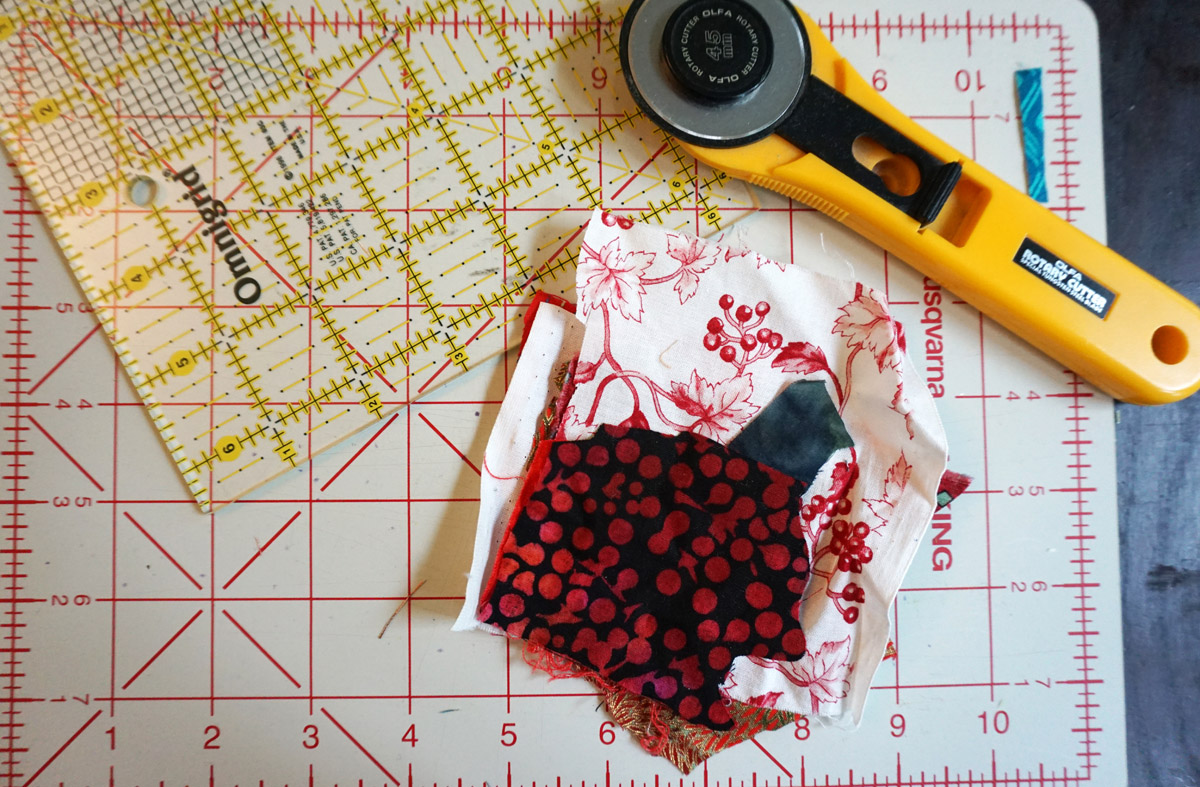
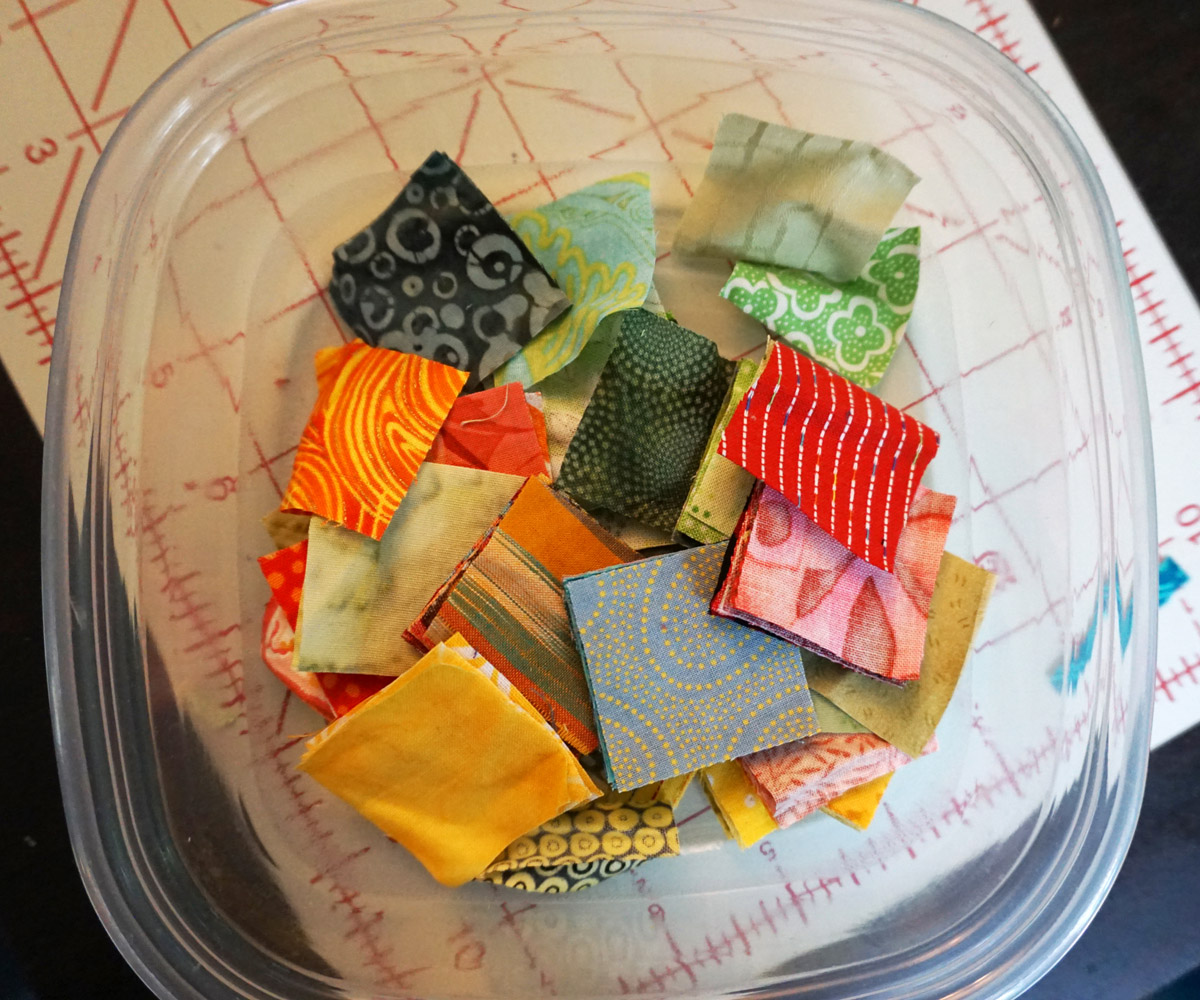
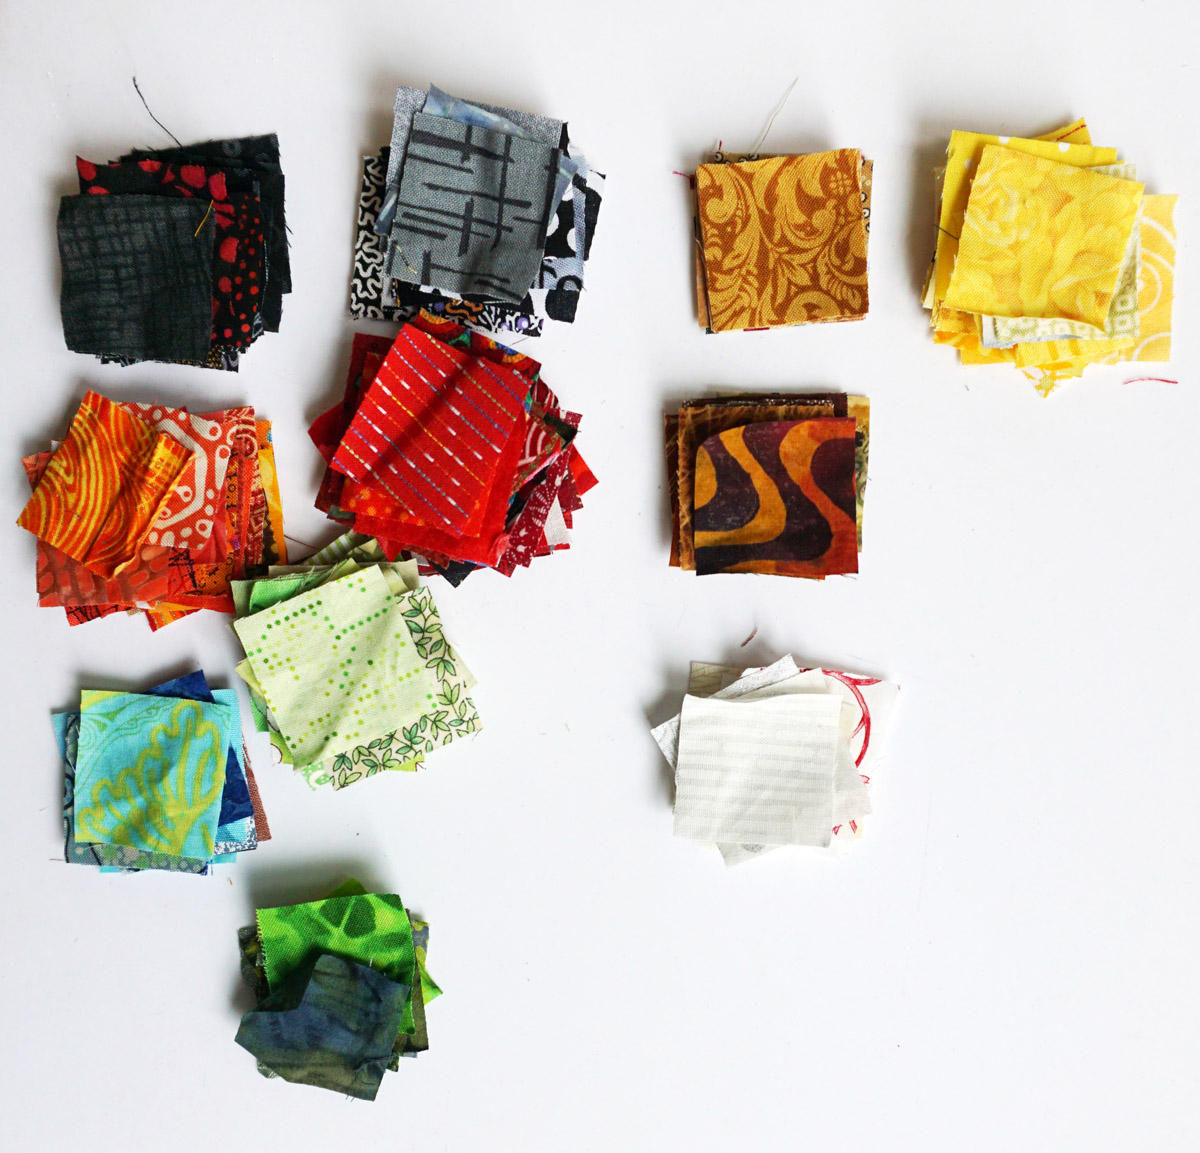
I decided on a 14″ square pillow, which means fourteen rows of fourteen squares each, or 196 little squares. First I had to cut rough pieces out of fabrics in my stash to use in this project. I even wondered if that would take my whole stash—and here is a surprise, it wasn’t even a dent in the number of fabrics I had! Scary. It did give me a chance to see there are a lot of fabrics I have never used and should probably get rid of, but they are perfect for this project. I started with rough cuts of about 200 fabrics, and since I had way more than that in my stash, I kept to a color story—black, gray, white and brighter colors, with a few others thrown in just to make it look more randomly chosen.

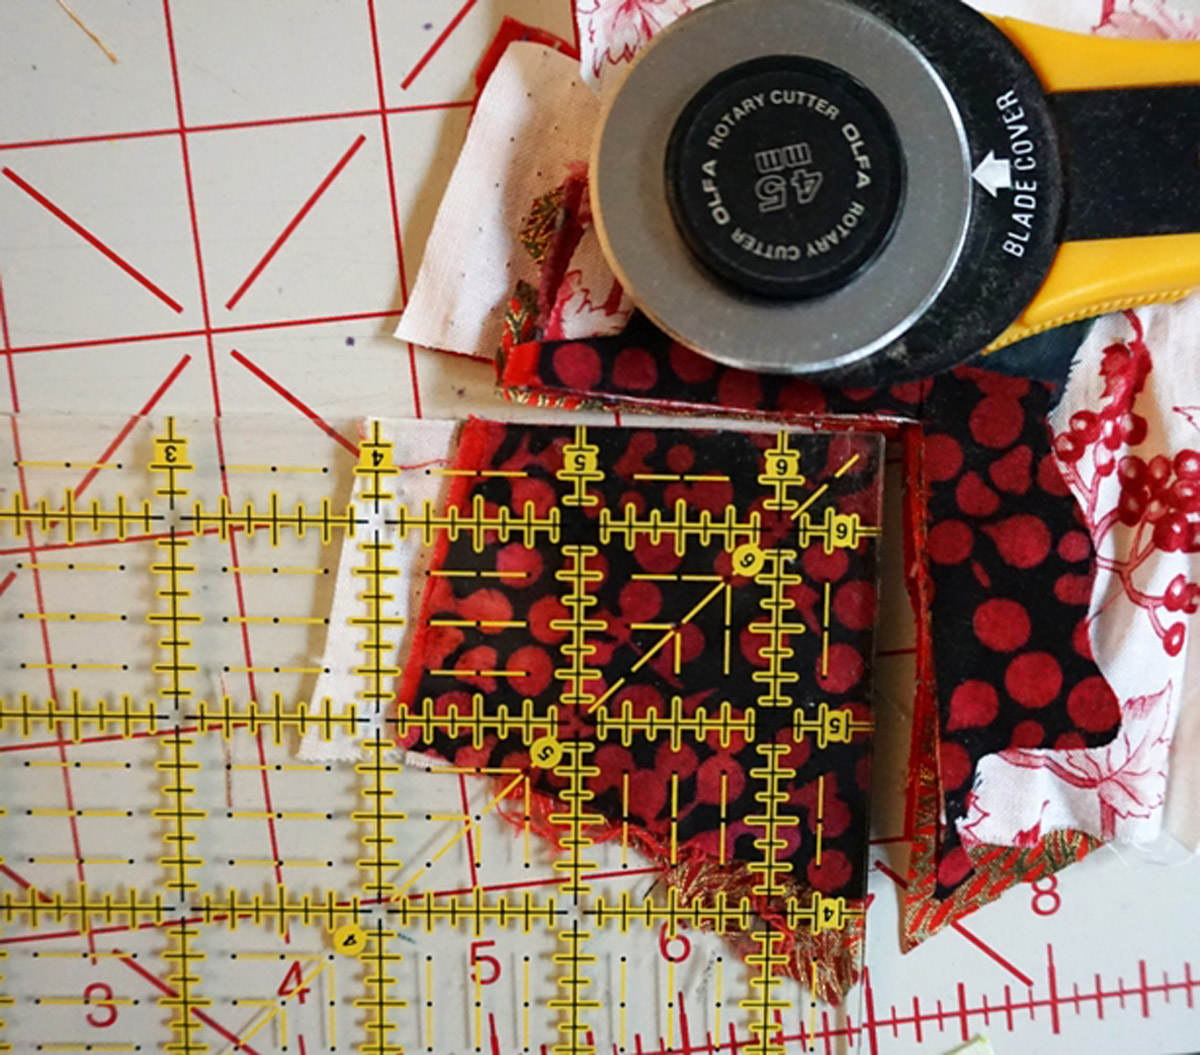
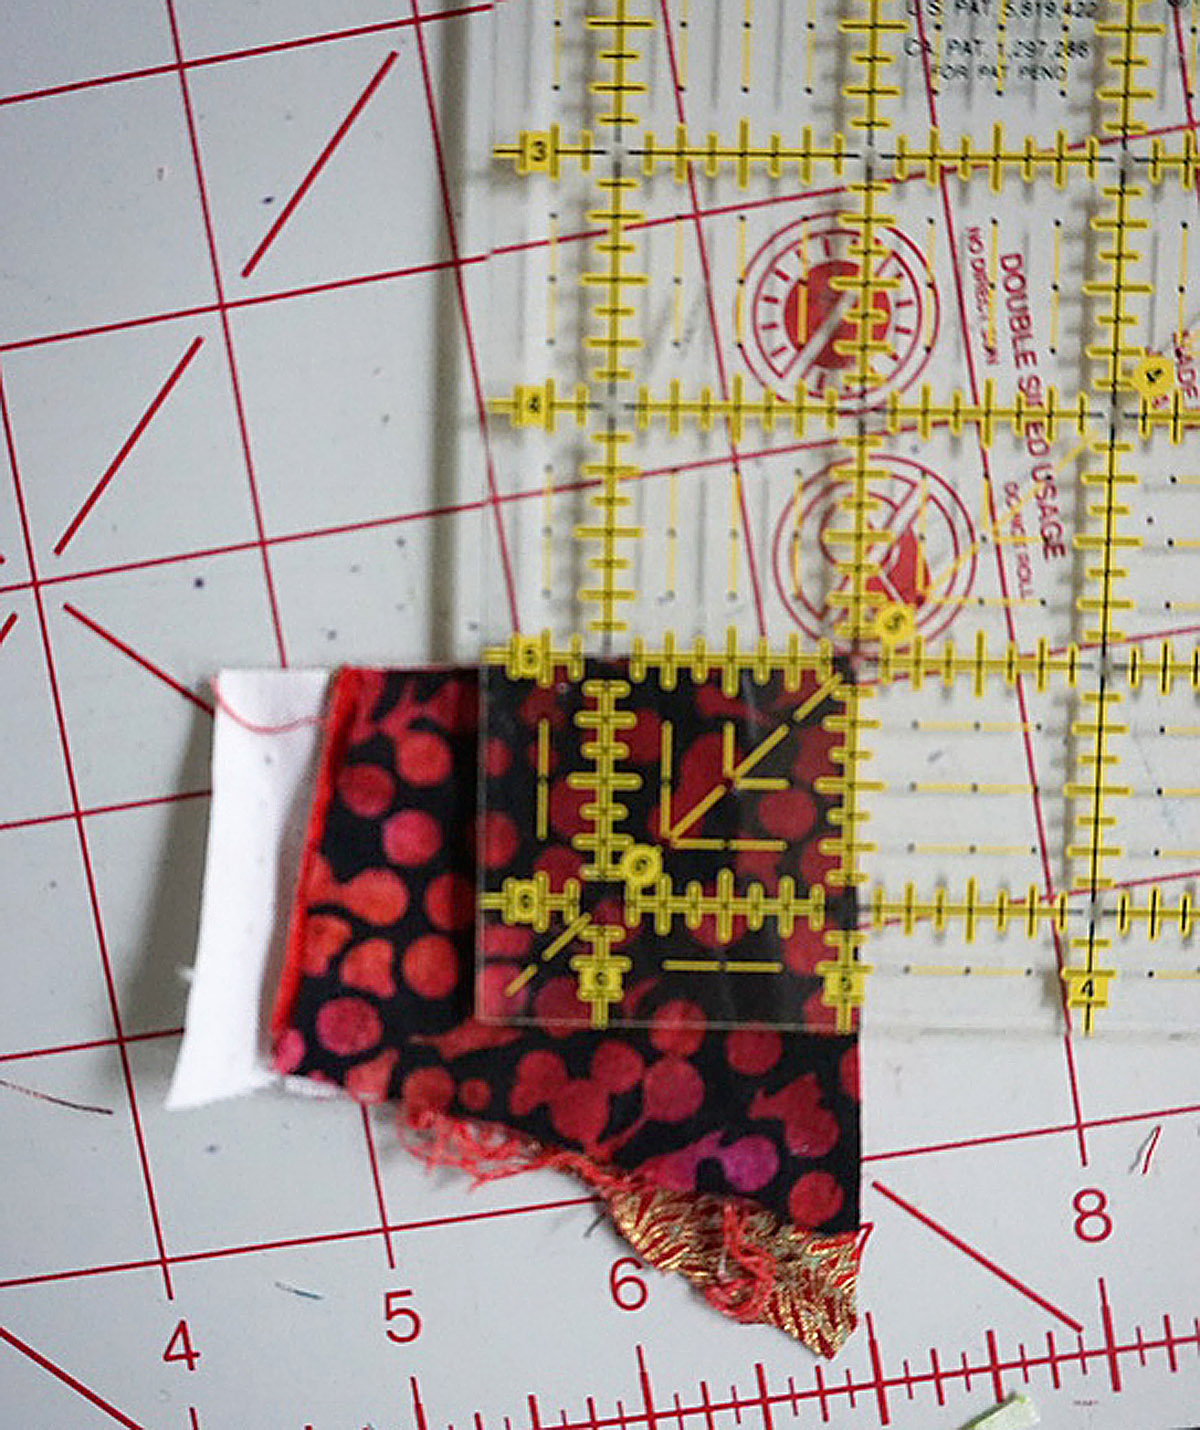
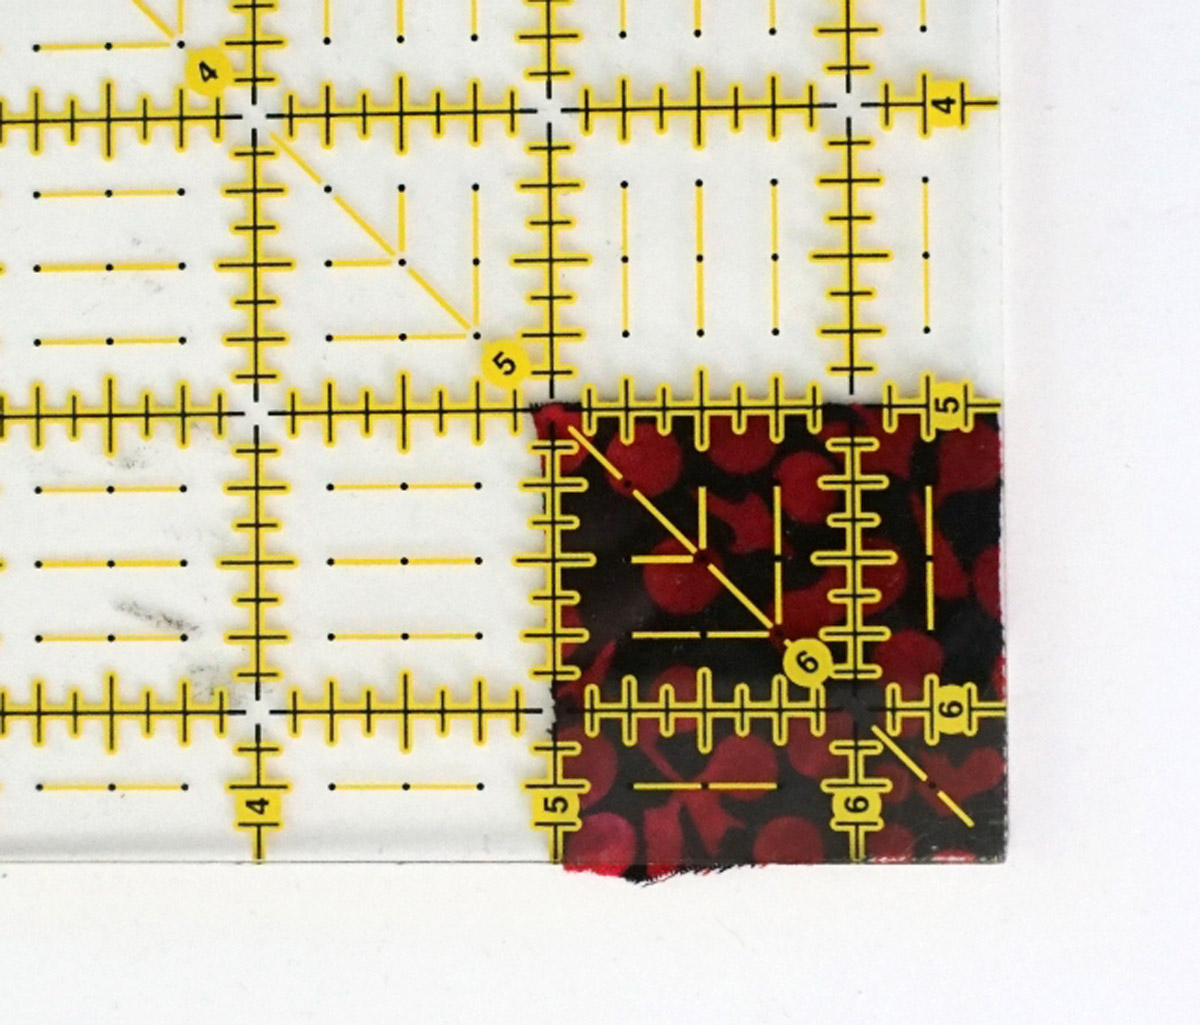
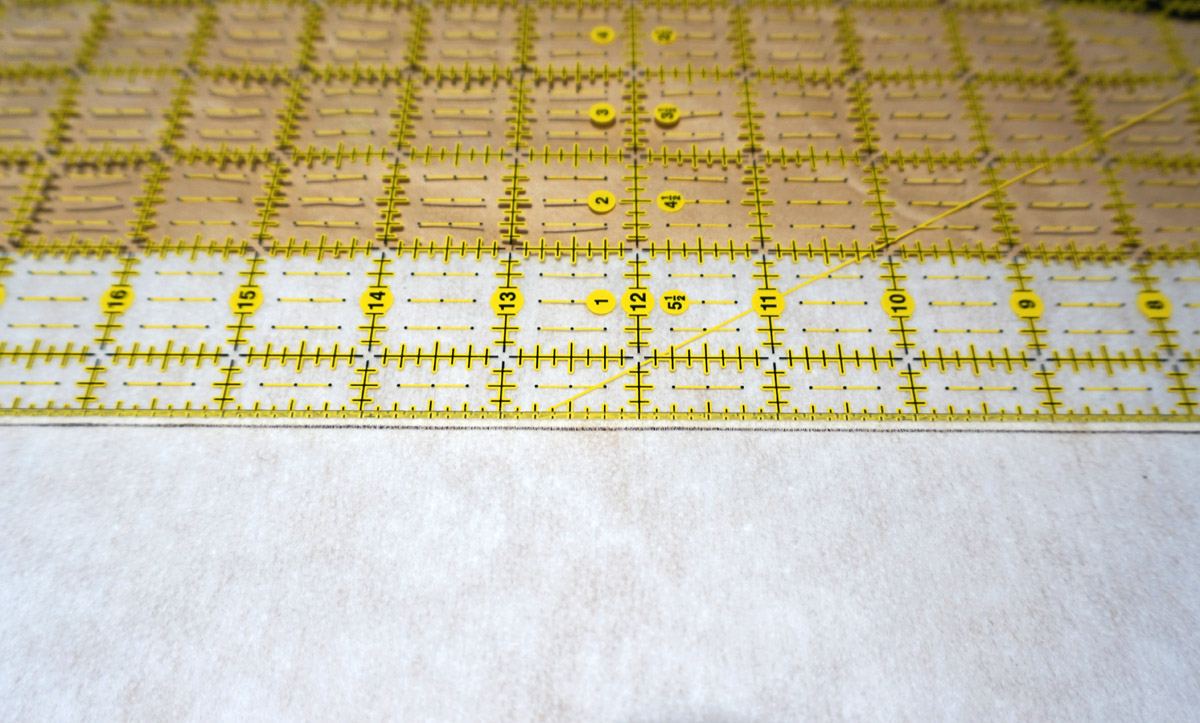
Cutting all these pieces into 1 ½” squares (remember for a 1″ finished square with ¼” seam allowance on each side, I need to cut them 1 ½”) seemed like a daunting task. But not so bad—with a new blade in my rotary cutter I could do up to 10 pieces at once. But for the sake of accuracy and fear they would slip while cutting, I chose to do about six at a time. Stack them up, cut up the right side and across the top, then walk to the other side of the cutting table, line up the cut corners with the 1 ½” markings on my ruler and cut up and over again for perfect 1 ½” squares. It didn’t take as long as I thought.
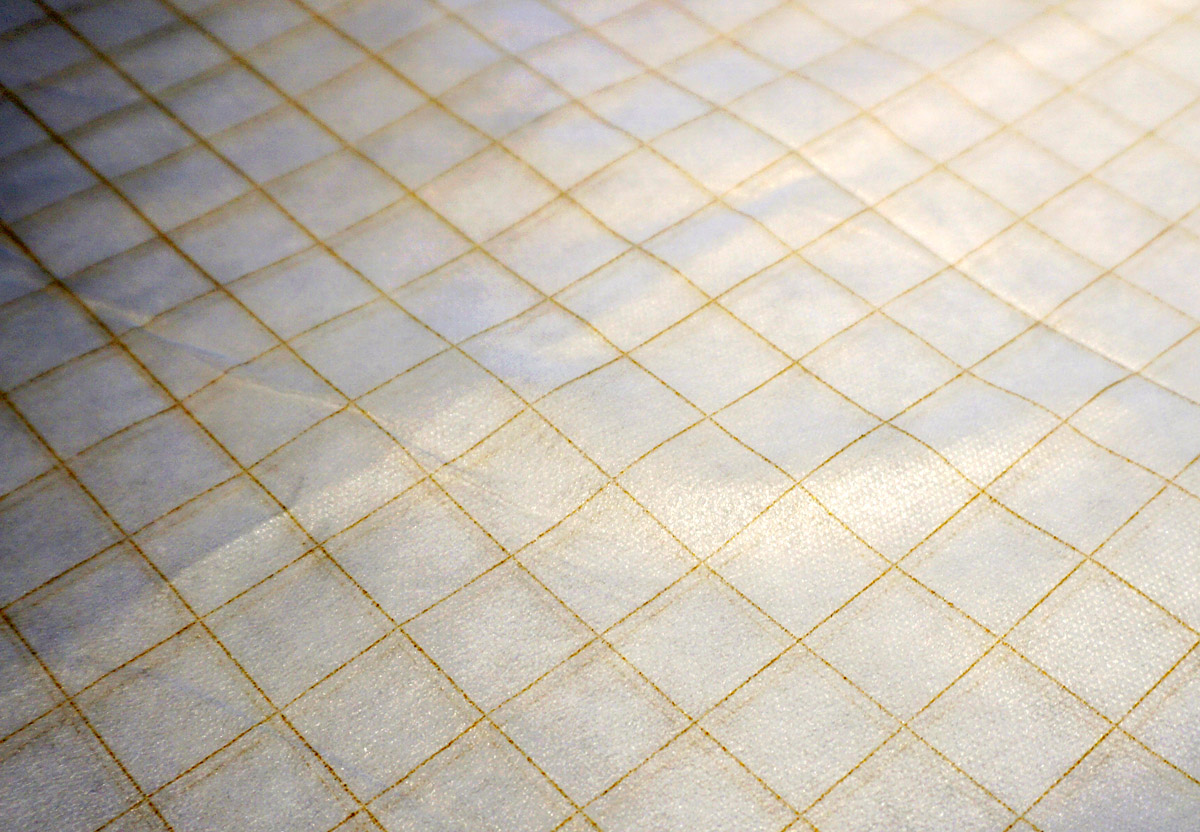
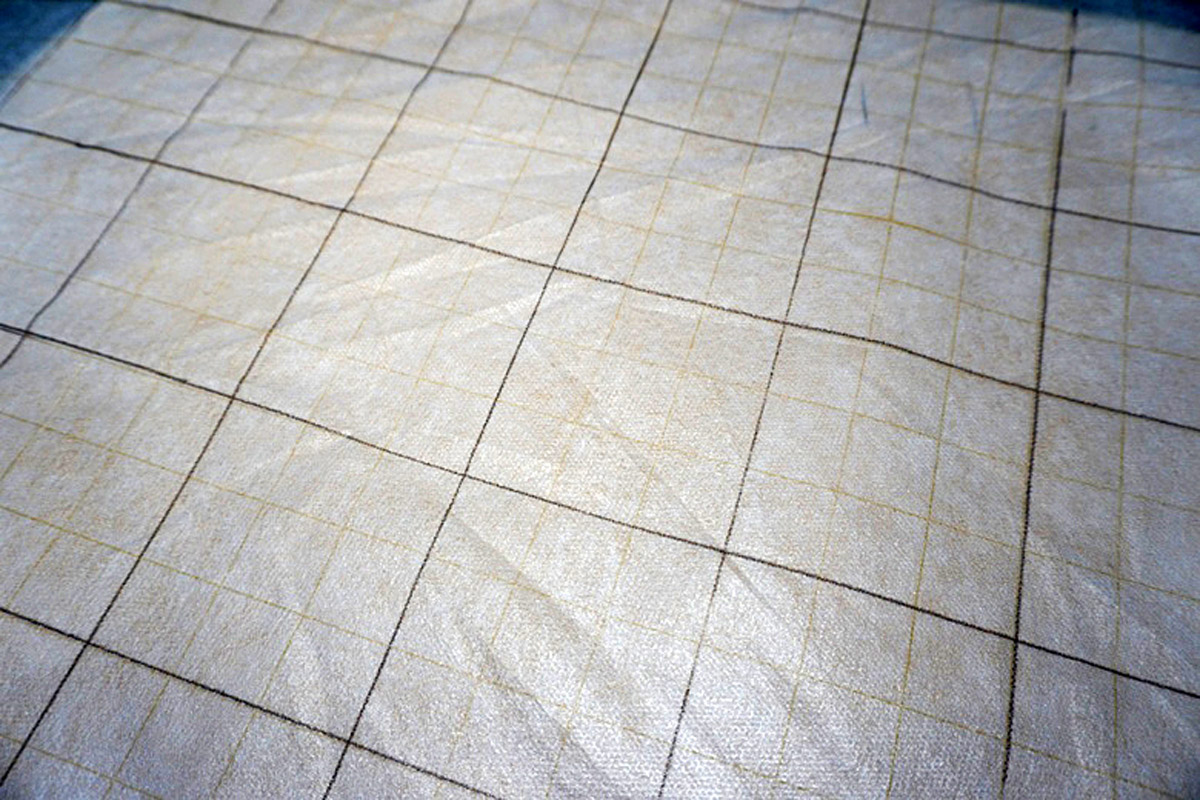
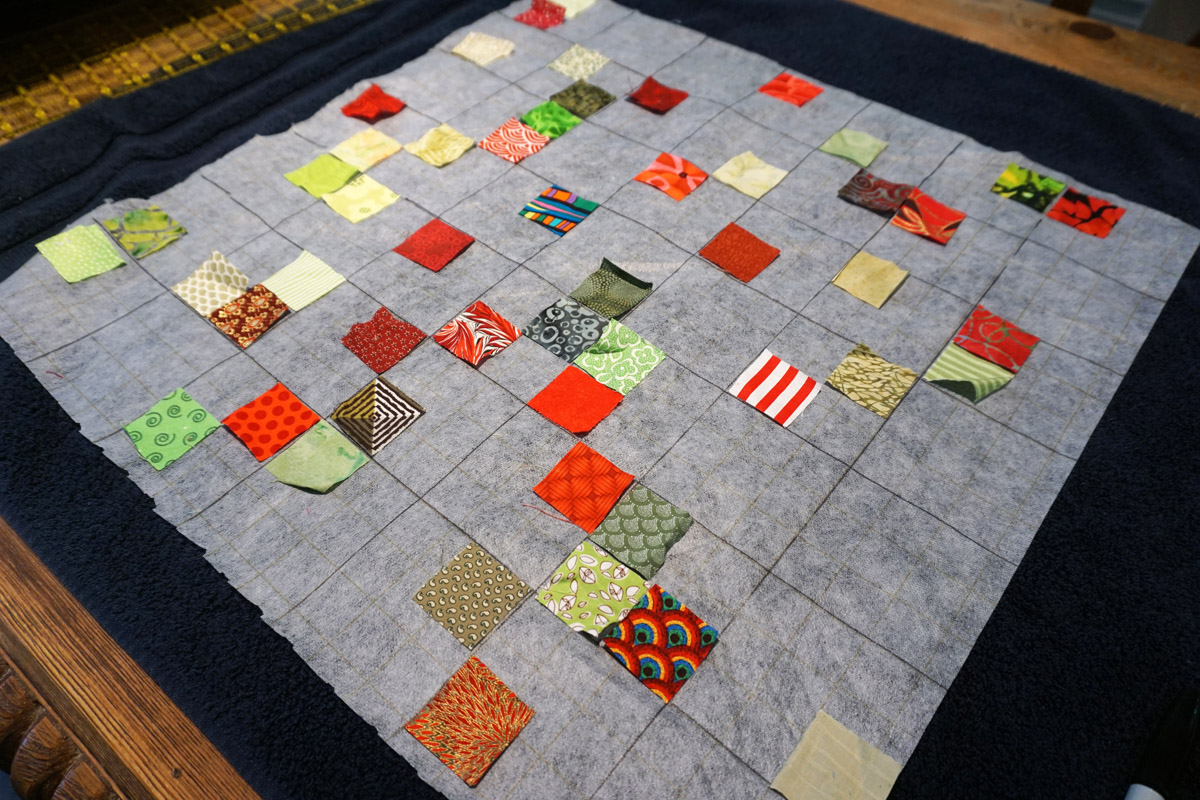
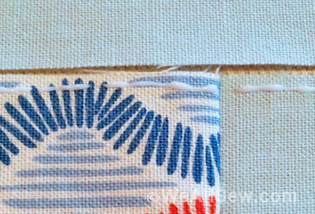
I am not about to sew each and every square separately and then match all the corners, but there is an easier way—with interfacing. I purchased a thin fusible interfacing for this project. My local quilt shop happens to carry one with grid lines already printed on it—which is a great help. The one they carry has a one inch grid, but that works out fine, every two fabric squares will take up three squares of the grid (as you can see in the photos, I did highlight every third box with a sharpie and my rotary ruler). You can also easily mark the grid on any interfacing using your rotary ruler and a sharpie. Remember that you are not starting with a 14″ square piece of interfacing, you are starting with one large enough for the cut size of the squares—1 ½” times 14 or a 21″ square of interfacing.

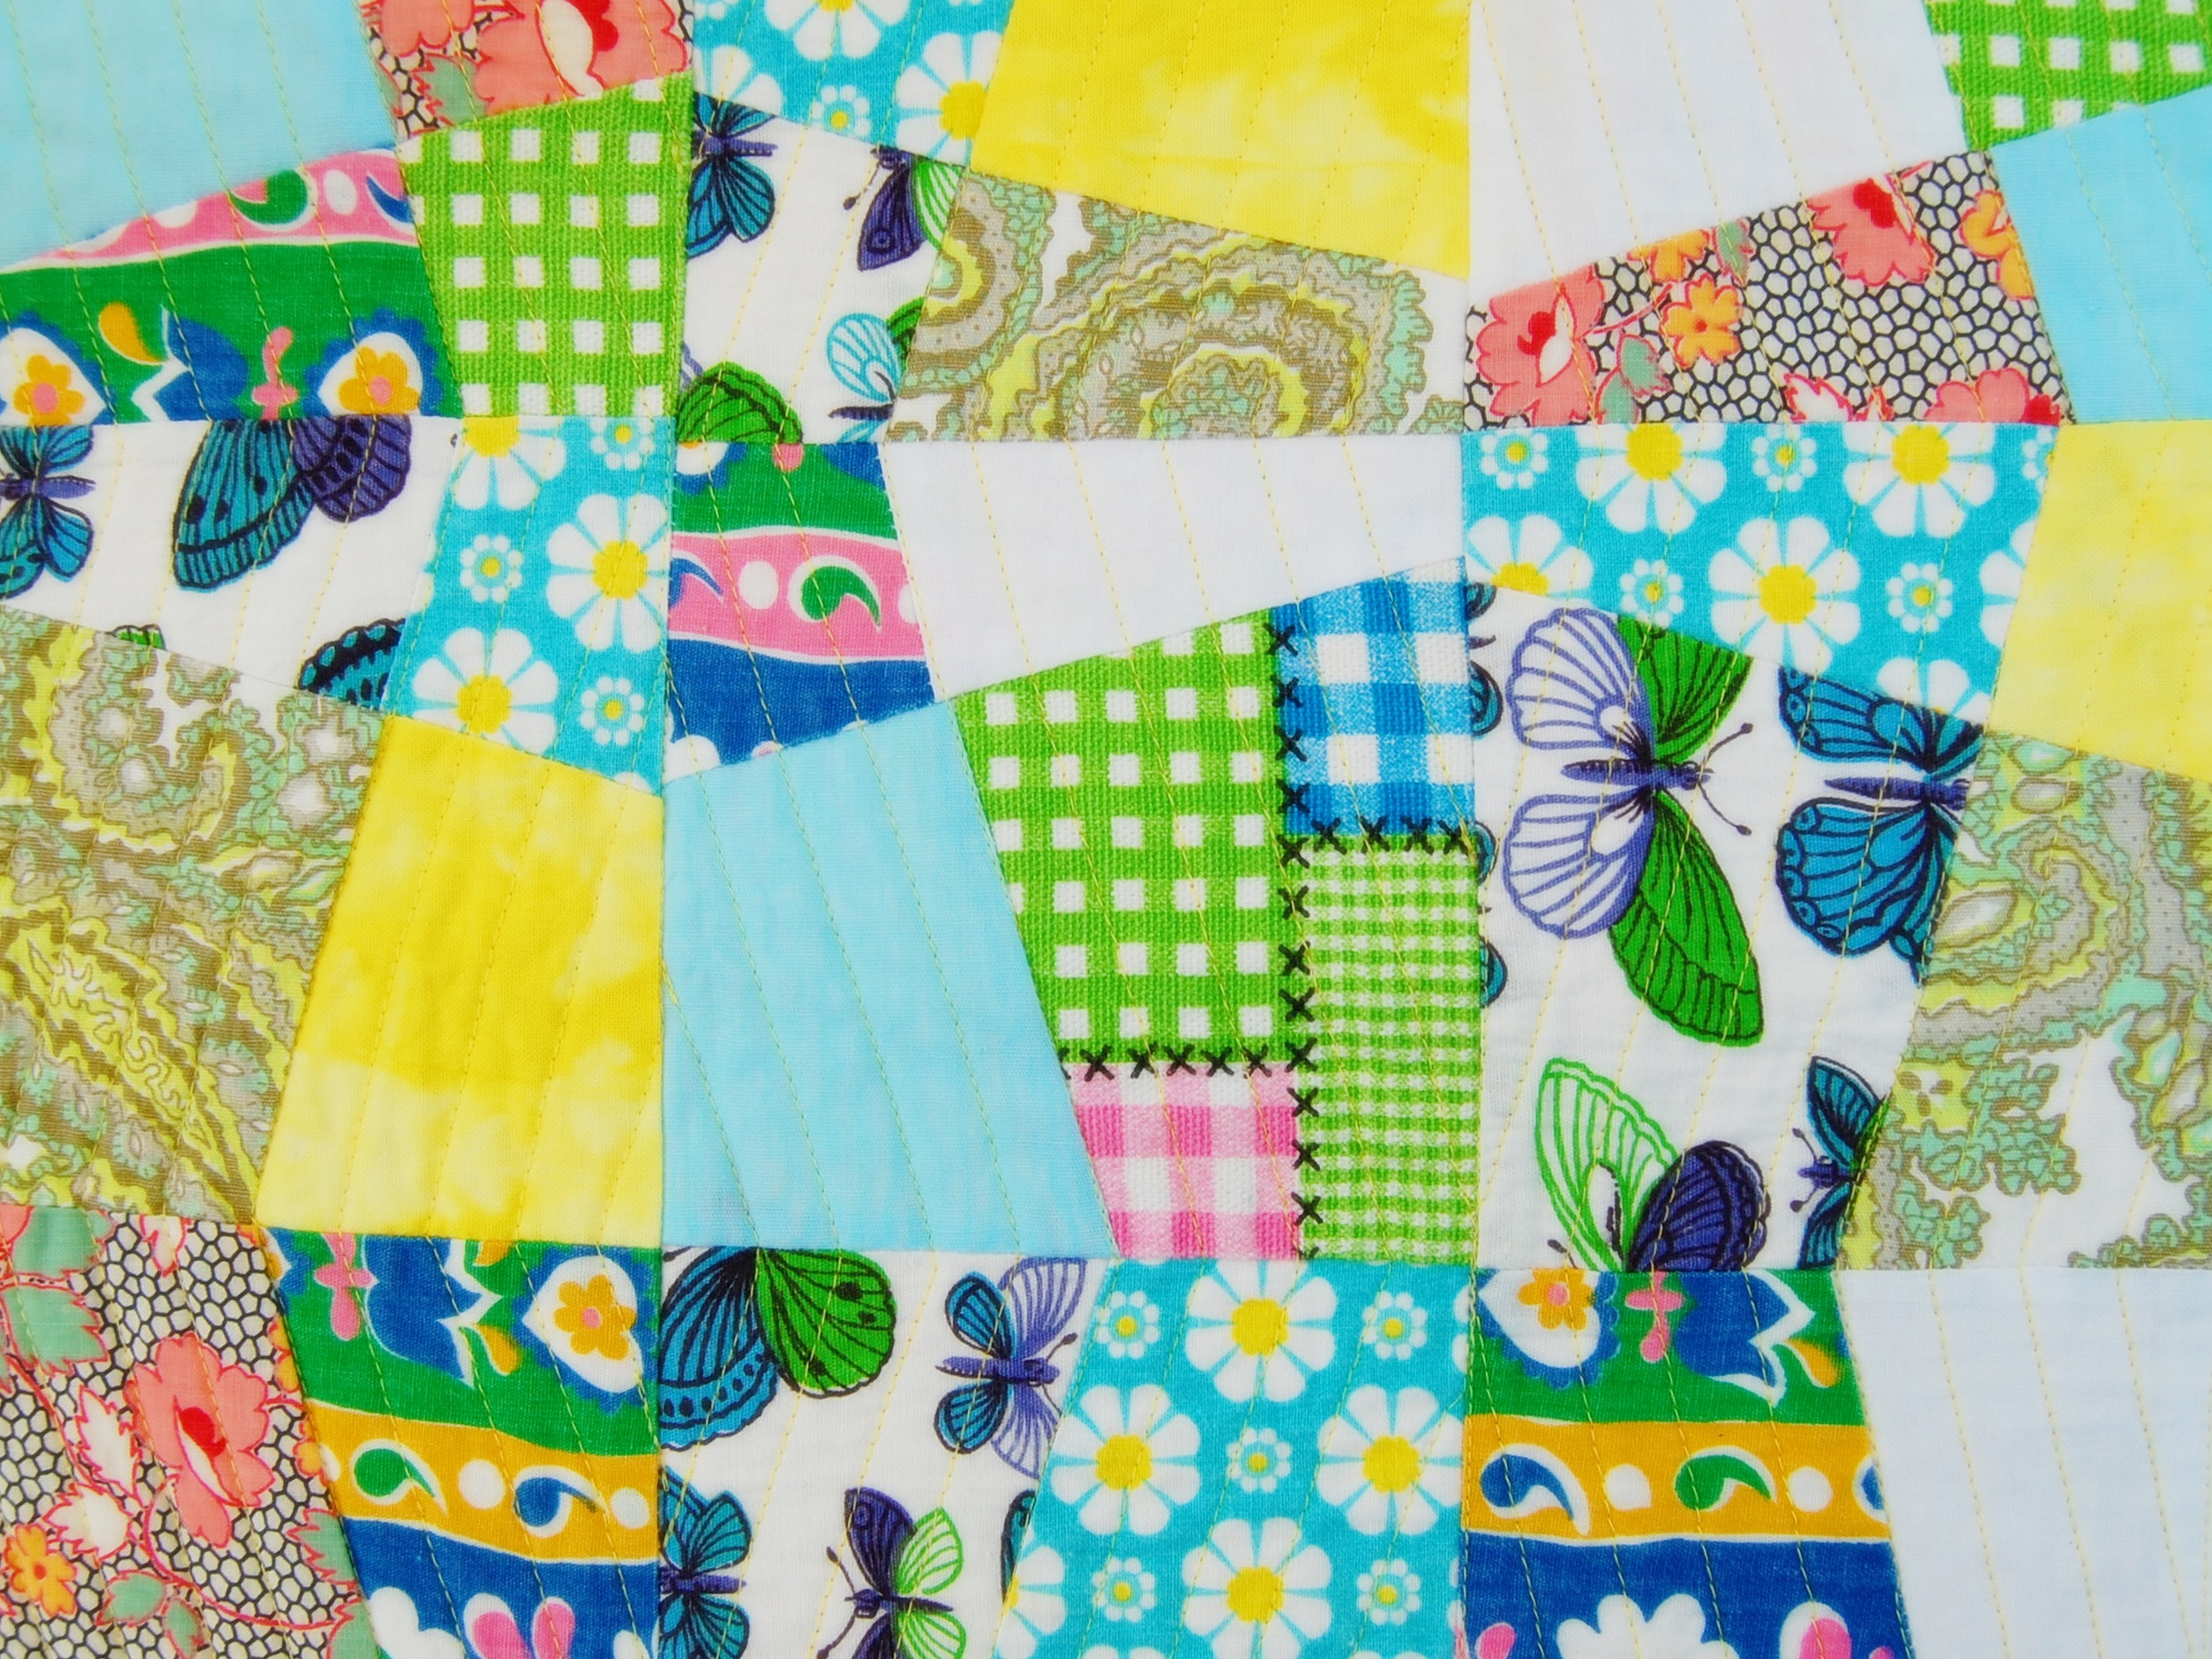
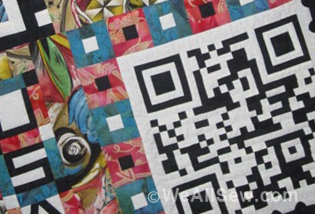
Now I get to lay the squares onto the grid. The placement of squares in a postage stamp quilt is usually random, and I want it to look that way but I always employ a technique I like to call “controlled random” for their placement. Controlled random means the results look as if it came together without a plan but I don’t rely on the universe to get it exactly right.
I laid the fusible on the pressing surface with the fusible side facing up, otherwise when I press I will fuse the interfacing to the pressing surface instead of fusing the squares to the interfacing. How do I know this? Let’s just say it is a mistake I will not make twice.
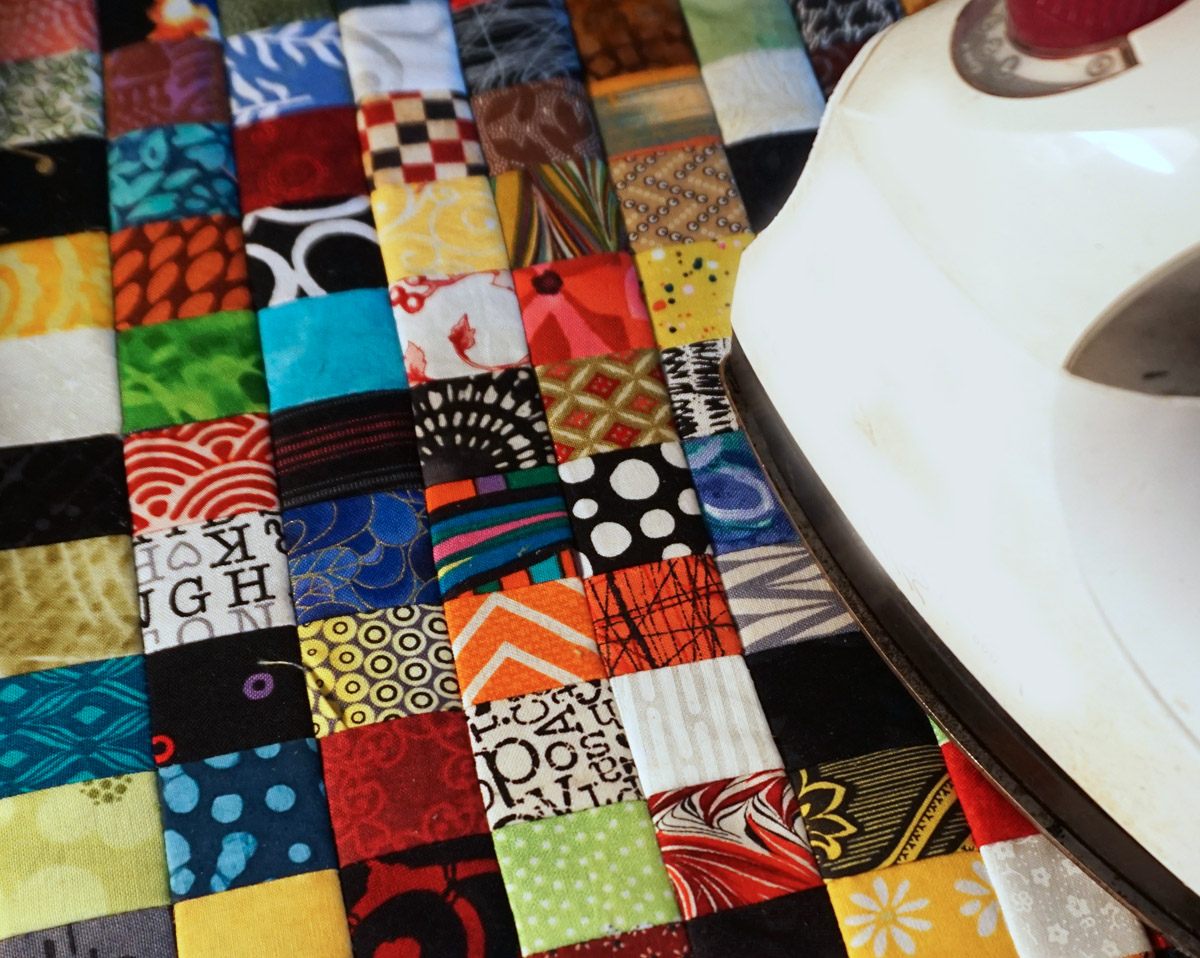
I start by sorting the squares by approximate color and value. Taking one pile at a time, I place them around the surface of my pillow in a way that insures each color/value is represented in all areas of the surface. This is not a science, and I don’t want it to look too manipulated, but working this way insures that I don’t get any unexpected clumps of dark or light or any particular color altogether.

Looking at it I decided to make a few tweaks. This is actually something that can make you insane if you let it, so ultimately I decided I just needed a few more punctuations of very dark fabric. Another trip to the stash, another half a dozen black fabrics to replace some of the beige and paler greens and that is where I stopped, in order to preserve what was left of my sanity.
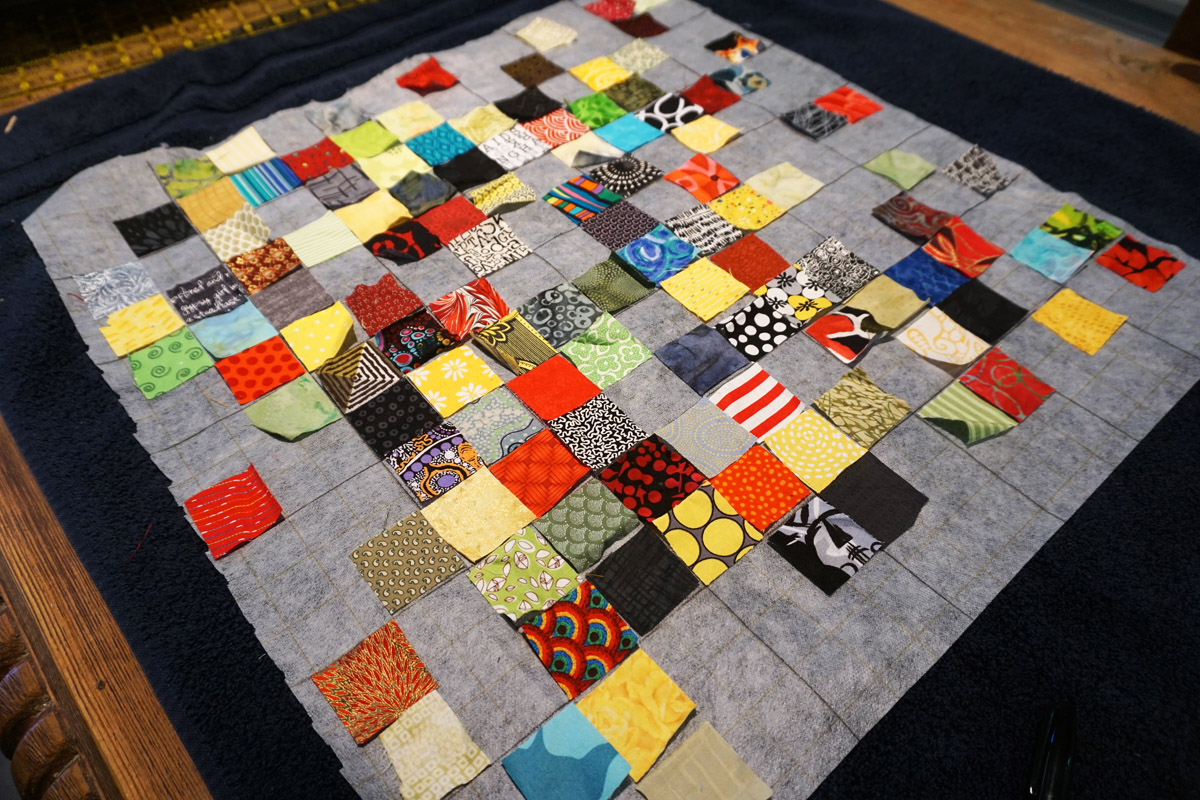
Having decided I like the way it looks, I can now press it onto the fusible. I use a press cloth (actually, any piece of cotton) on top just to keep any fusible from sticking to the iron and to prevent any squares from lifting up while I press. Remember to press (up and down) rather than iron (back and forth) so nothing moves.

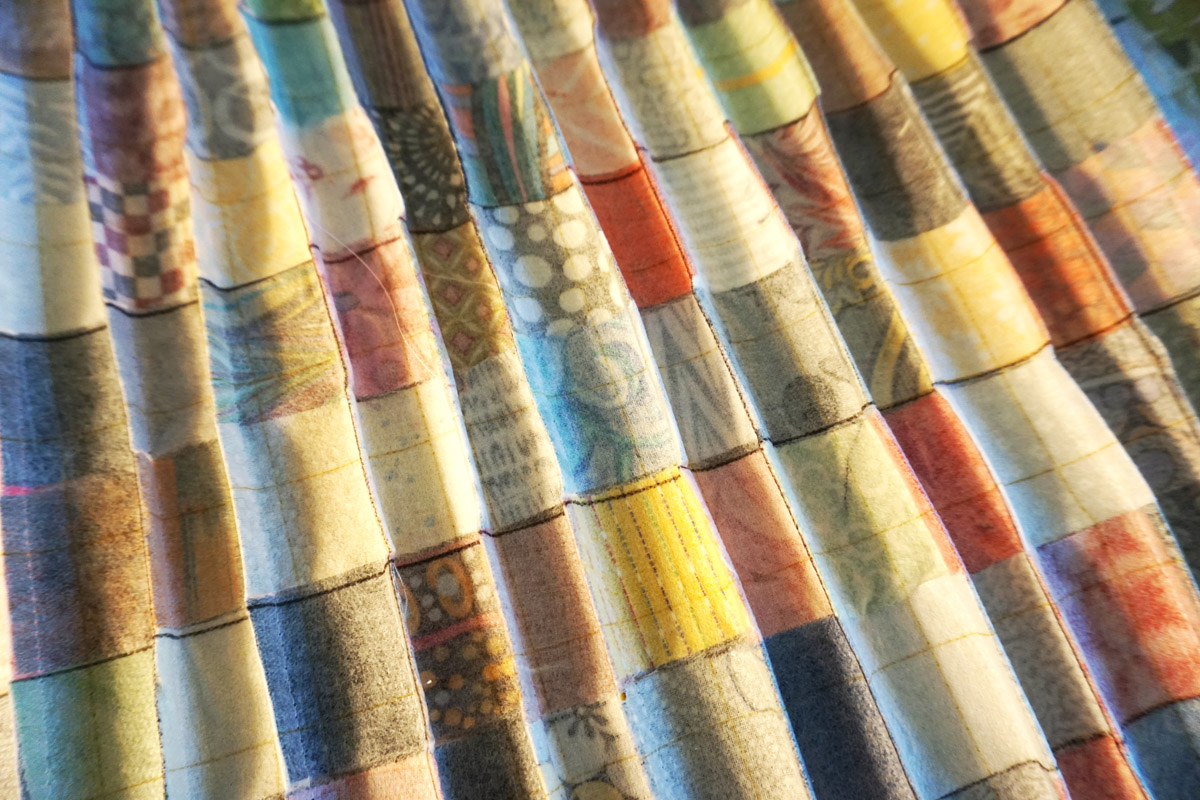
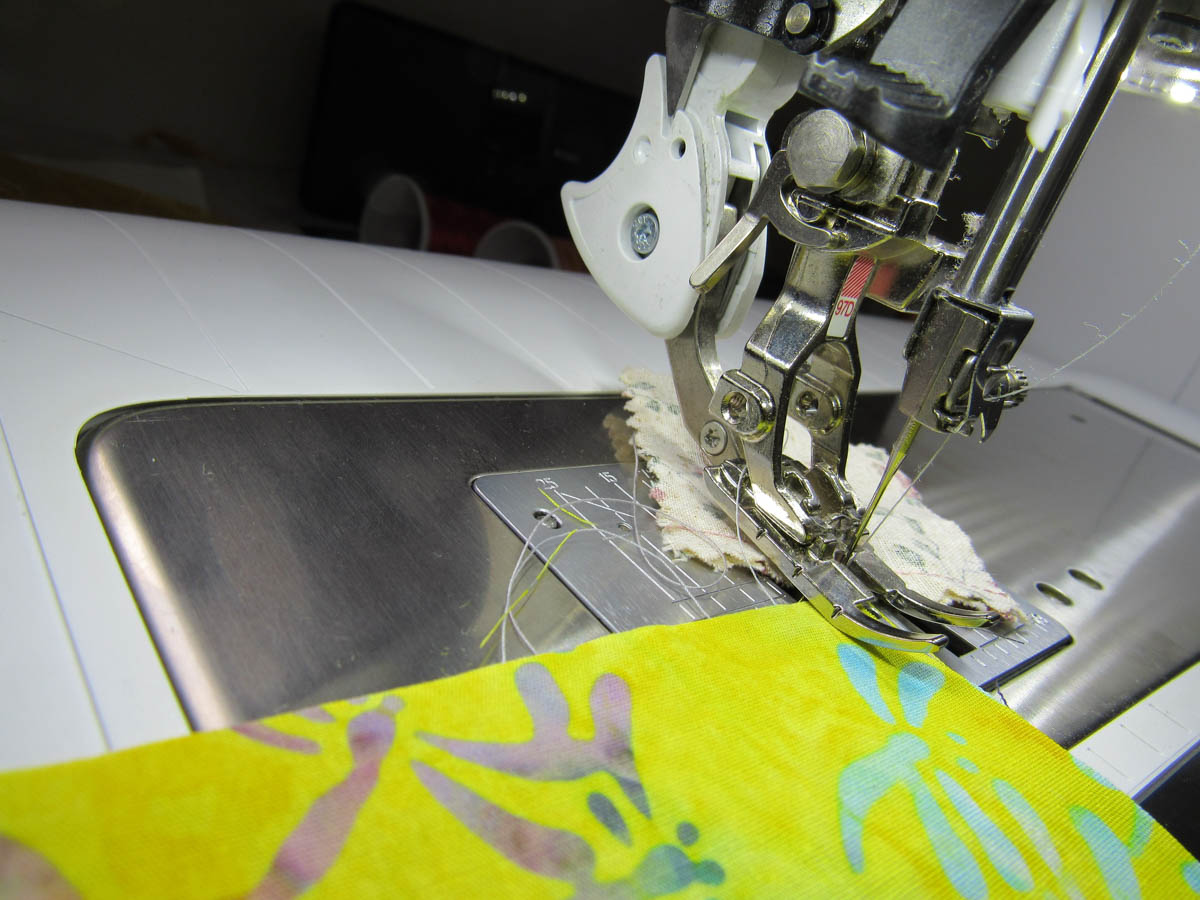
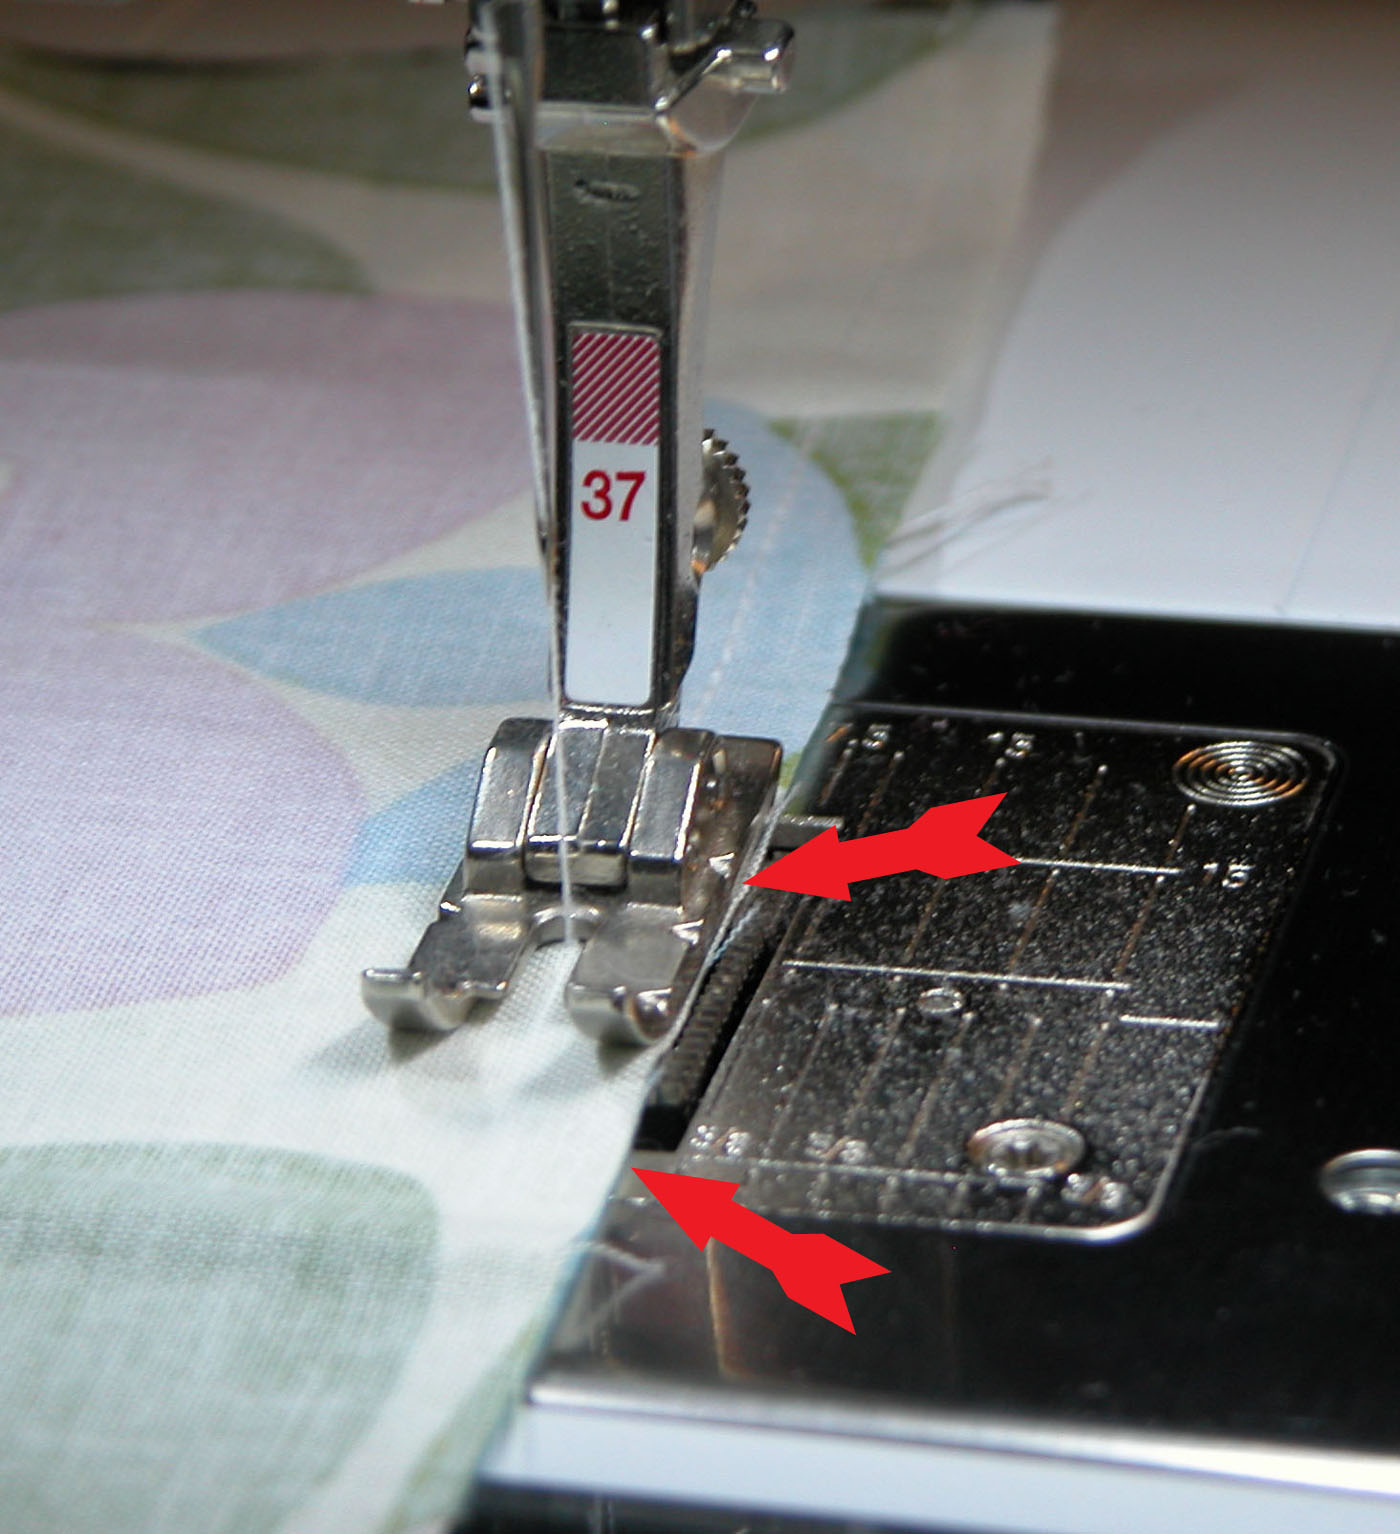
Sewing all these little squares together with perfectly matched corners is easy with the fusible base. I start by folding the first row of squares right sides together with the second row. They fold naturally where the small space occurs between the squares. Using the Patchwork foot #97D for my ¼” seam allowance, I sew all the way down this row, then fold over the next row and do the same. Once the vertical rows are all sewn, the piece looks a little like an accordion. Press from the top to flatten everything out and then again from the back (using a press cloth again) to insure the seam allowances are flat. It does not matter if they all go in the same direction, as long as none of them twist in different directions.
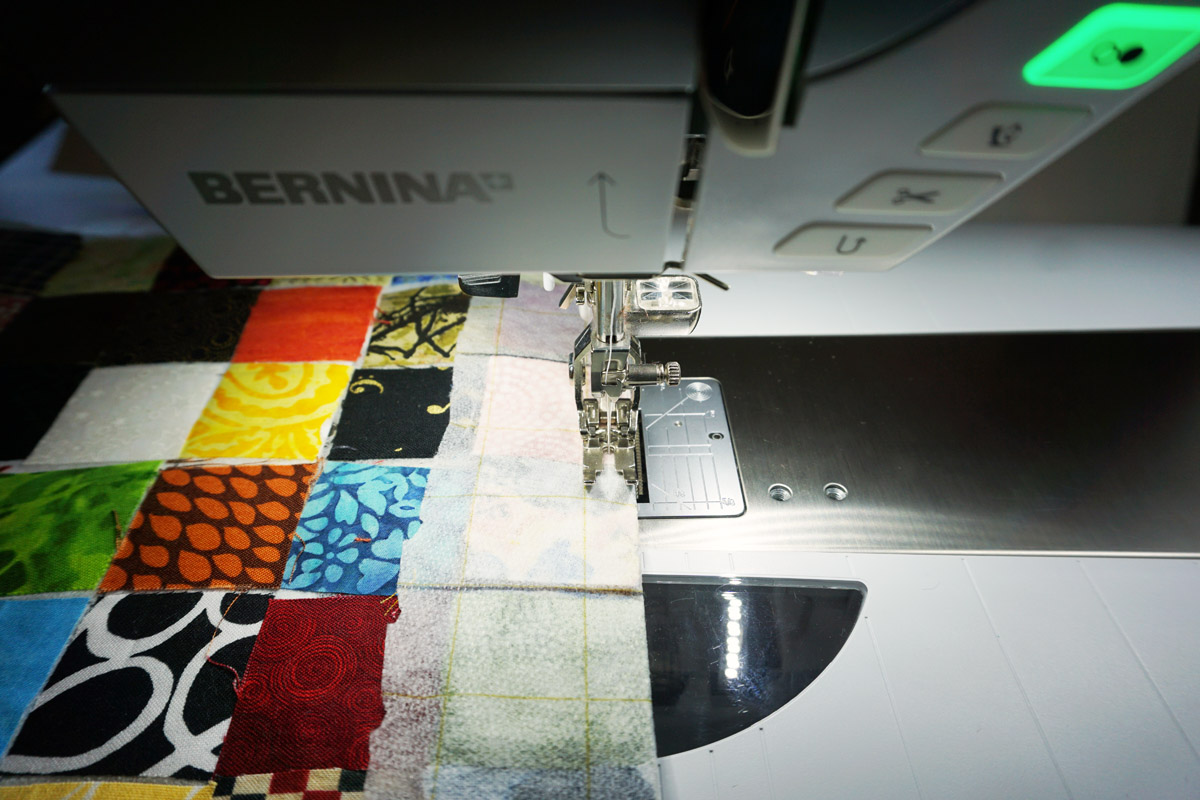

Back to the sewing machine to do the rows in the other direction in exactly the same way; press again, and what do you know—perfect postage stamp squares all lined up! Easy.
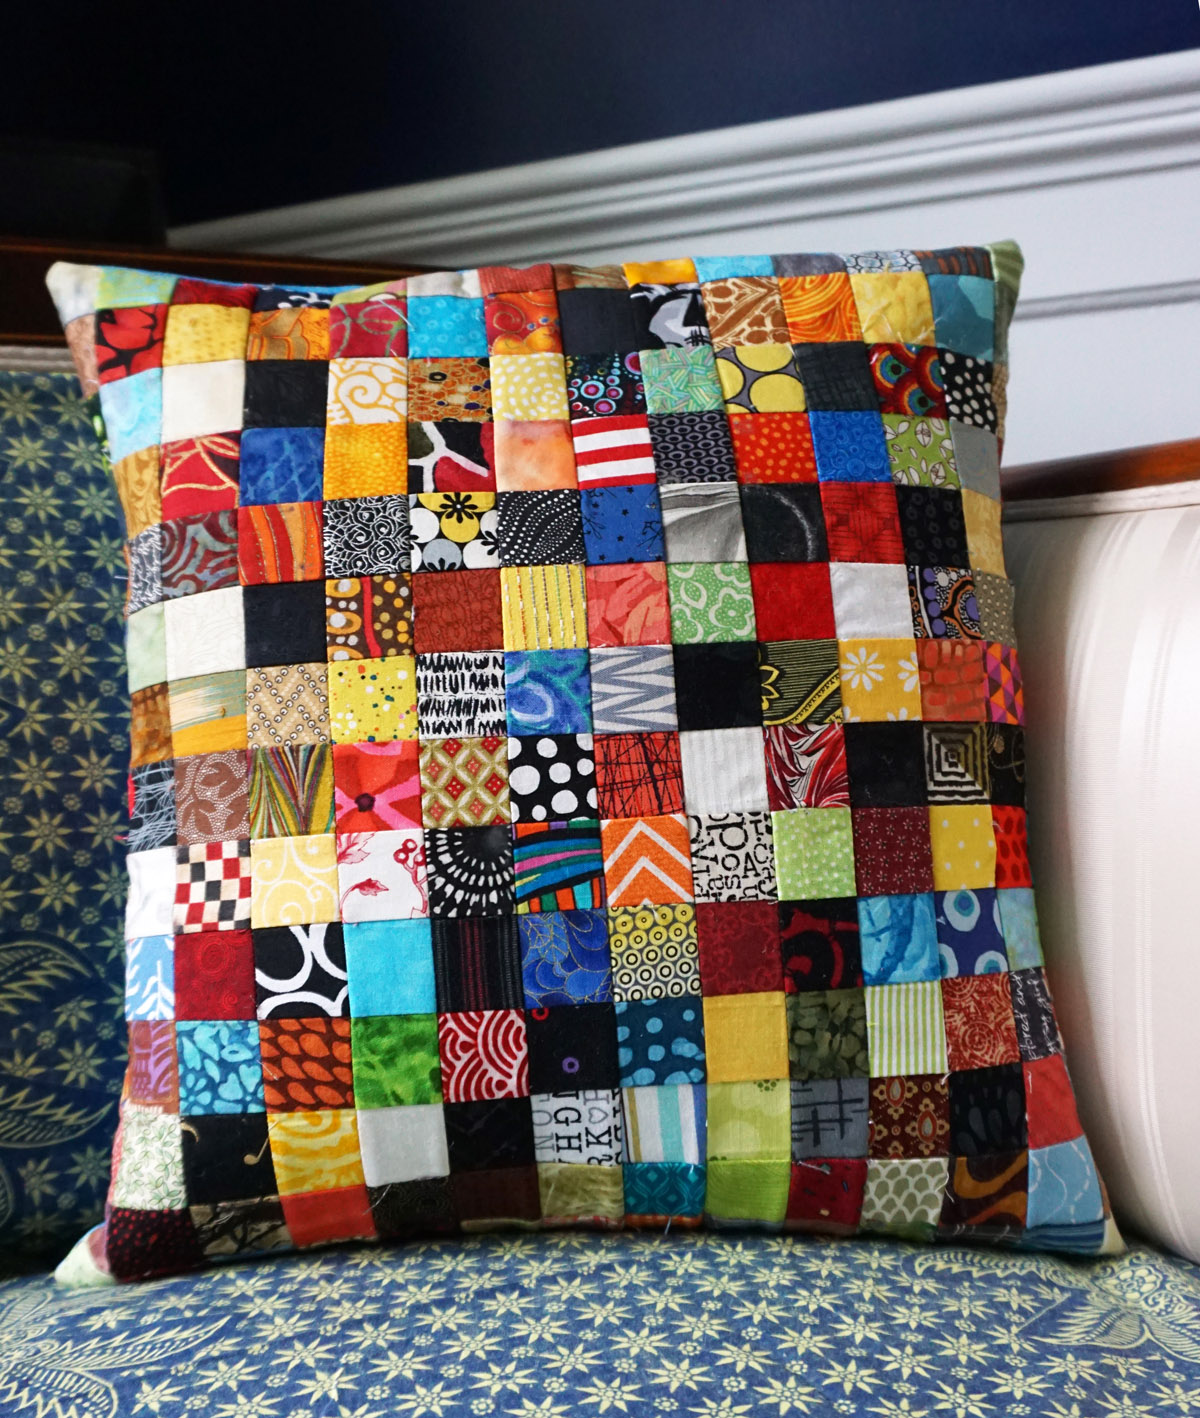
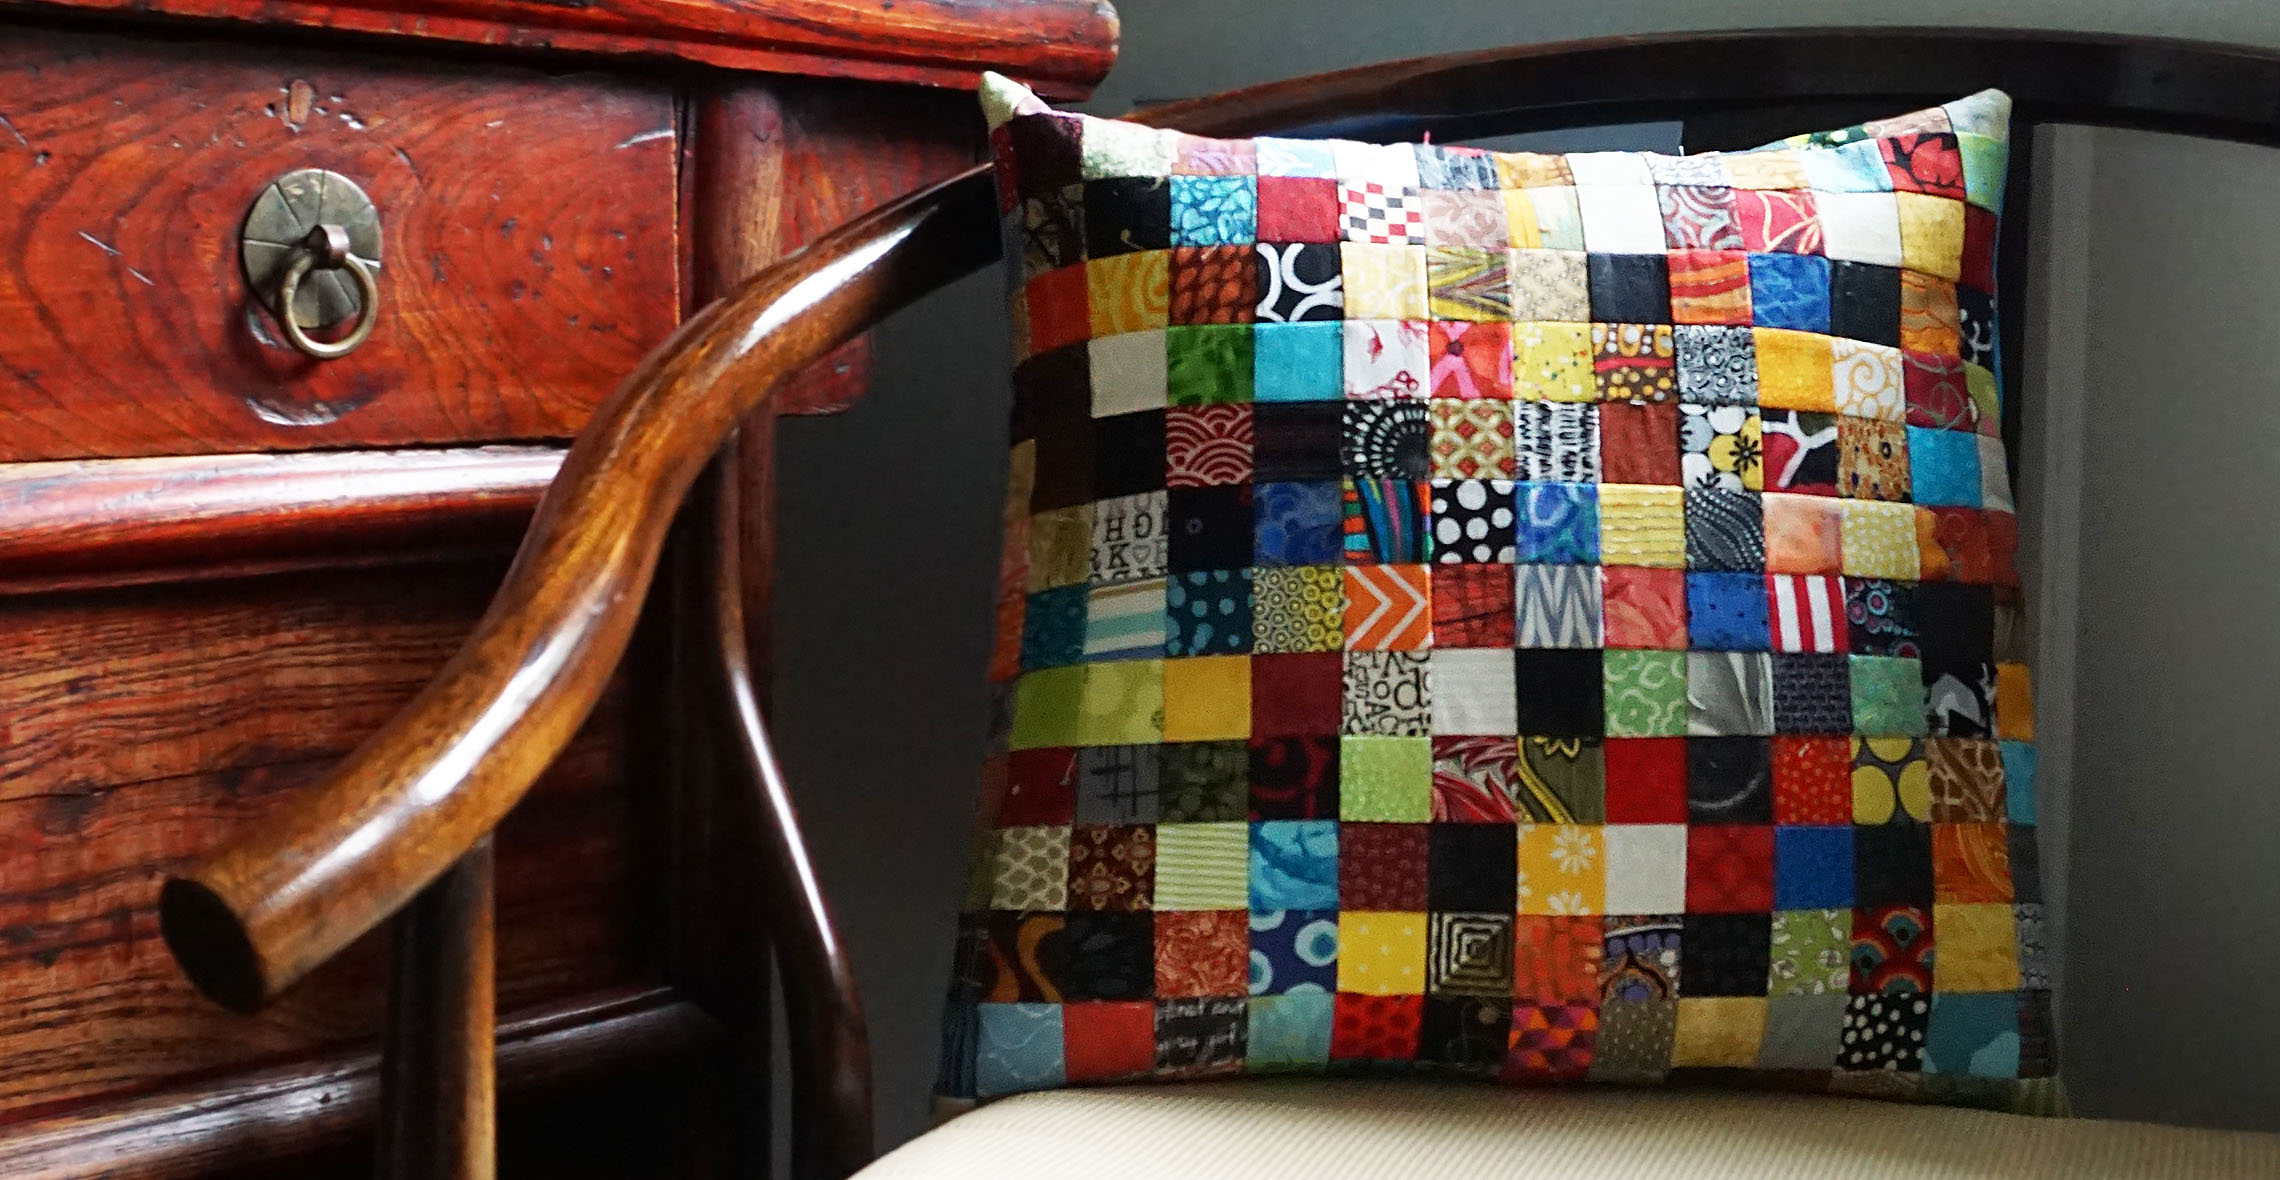
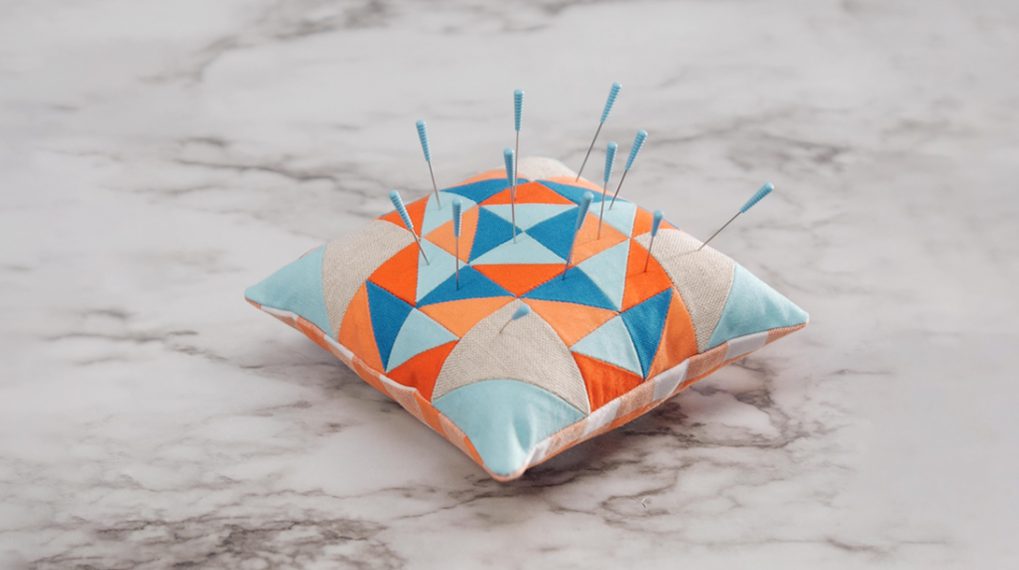
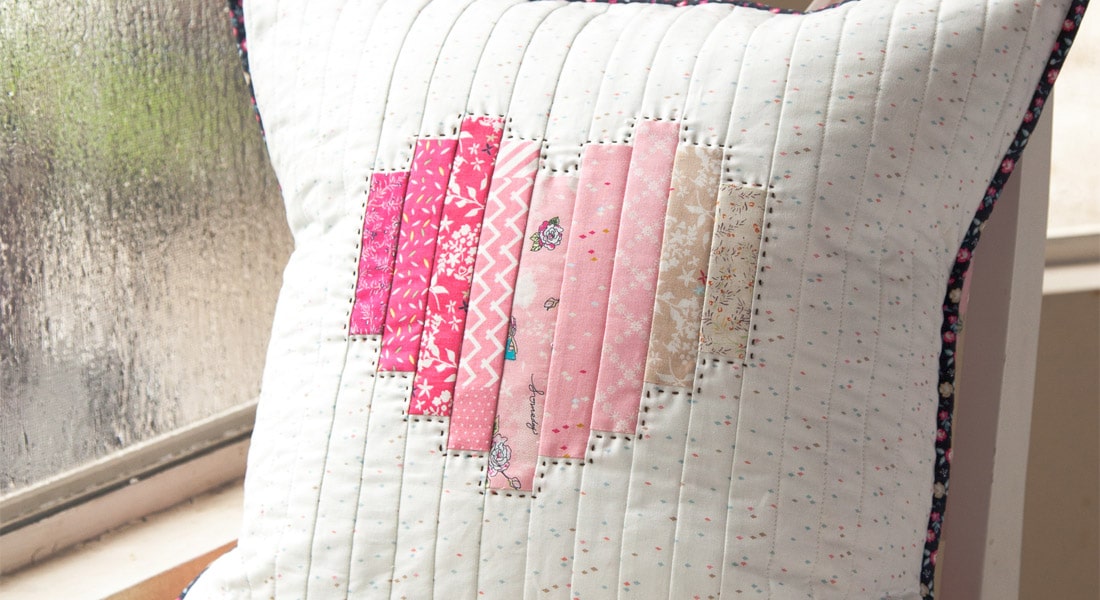
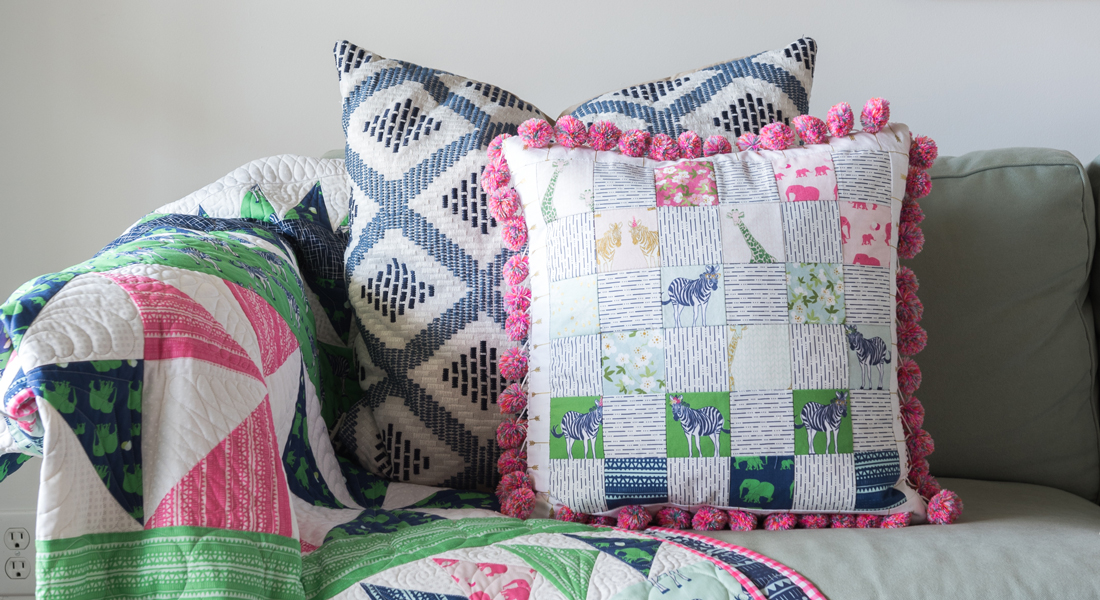
And here is the finished pillow. Beautiful. Now I can cross postage stamp quilt off my list and move onto something else. But, actually, this was faster and easier than I thought it would be, so maybe there still is a bigger postage stamp quilt in my future. How about yours?
What you might also like


23 comments on “Postage Stamp Patchwork Tip”
-
-
That is so good to know–I love the idea of PSQ swaps and I will have to look into that. Yes, the interfacing does make it heavier, but I don’t mind that in a quilt.
-
Just a thought…you could use fusible soluble stabiliser instead…not as wide, I know, but the method would still work. A grid underneath would show through and when washed, all the stiffness would disappear ?
-
Never tried that, it might work. I guess my only concern would be how you draw the grid onto it and what happens to that ink after it is dissolved. I know when I use soluble stabilizer foundation papers for thread sketching, black ink remains and doesn’t wash away. In that case, I print from the computer in draft mode using a pale color like light gray. I would test first and see what happens. Nothing worse than doing all that work only to find out the ink runs on your fabric.
-
-
I speak with no authority nor experience so please forgive a dumb question, but…would opening the seams (I guess by removing a tiny slice off each “fold” with the rotary cutter) and/or perhaps slightly “grading” the seam allowance cut down on the weighty/stiff issue? Maybe that step could also allow the careful removal of the seam allowance’s fusible bits? Would love to hear anyone’s take on this flea bitten idea as I’ve been contemplating a postage stamp project!
-
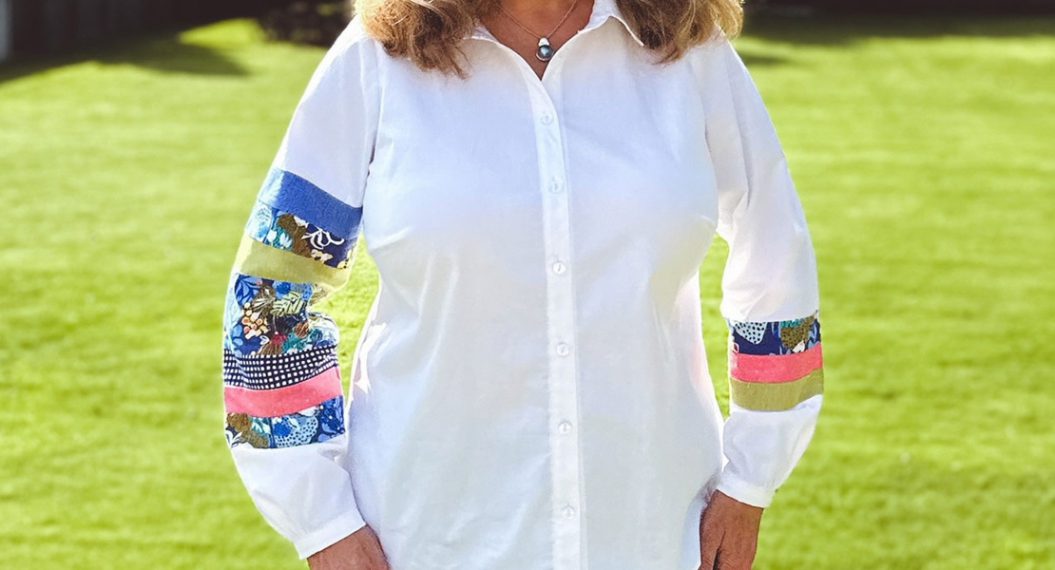
I often do cut the seam allowances opened (simply by running a scissor up the fold on the underside), not so much to remove any fusible (I don’t really think that would be feasible) but to press the seam allowances open and reduce bulk. For squares this small it doesn’t really pay, the seam allowances take up the whole back of the block either way. For larger squares it sometimes helps–especially if flat is important–like when I used this method to make the “fabric” for a jacket. In that case, having it flatter and less bulky was important for the jacket to fall nicely.
-
-
-
Thanx so much, quilters are the smartest people I know. For several years, I’ve had a stack of scraps to make into a couple of postage stamp pillows but couldn’t figure out a quick way to do it — this will work great!
-
-
What is the name and maker of thefuseable you used, please.
-
The one I used is a Pellon, but I don’t remember the item number. Frankly, any gridded interfacing will work, I just purchased whatever was in stock at the quilt store when I went.
-
-
A postage stamp quilt is extraordinarily cool! But I agree with you, Leni! I think a pillow size project would be the perfect postage stamp quilt project for me. Yours is beautiful. I love your color movement.
-
The movement of color around the surface is all due to that theory of mine about “controlled random” placement of the squares. If you look at the progress photos, you can see how I move the greens around the surface, then the reds, and I keep doing that paying attention to color and value and making sure each are represented in all areas of the surface. I use this technique in traditional and art quilts and it always works well for me.
-
Thanks, Leni, for your explanation. As I look at your photos, “I get it”!!! Color (even in scrappy quilts) is my biggest challenge. I have books and I study color concepts, I talk to other quilters, I “play” with my own combinations, and often they just “aren’t right”, unless I look at a pattern and choose the same or similar colors to make the quilt come out…. I’ll add your nuggets of color wisdom to my color toolbox!
-
It isn’t hard and it always works, just try to move each color and/or value around the surface so it is represented in each area–not symmetrically or in any kind of a pattern. Let me know how it works for you!
-
-
-
-
Thanks for the tutorial. I did want to suggest that if anyone has the book Mini Mosaic Quilts by Paula Doyle, there is a printed grid with the book. You can just lay your fusible on top, lay out your pieces, and iron them down. It has an allowance between each row to allow for folding over to sew.
-
And even if you don’t have the book (which is great, by the way) you can make your own grid and lay your interfacing over it and work that way. I have done that before, too.
-
-
Leni,
Do you think that this will work as well with a 5 inch square (maybe for a lap quilt) rather than a pillow?
Helene-
I think it will work for any size squares as long as they are simply sewn together in a grid. You will have to connect sections of the interfacing in order to get it large enough but that isn’t hard. Just lay one piece fusible side up and overlap the adjoining piece by about half an inch and lay your squares on. When you press them into place, the pieces of interfacing will fuse together as well.
-
-
Thanks for the great tutorial – I have used this fusible interfacing with grid and it is a great time saver ….I know walking is good exercise for us, but instead of walking to the other side of the table every time you want to cut a stash, have you tried the rotating cutting mat ? I like quick results, and thought it would be another timesaver.
-
Sometimes walking around the table is the only exercise I get!
-
-
I recently made doll quilts with granddaughters aged 9, 7 and 2 all in one evening. In advance, I cut piles of 2 1/2” squares out of scraps and gave each girl a selection of everything so they could trade for multiples they might want. They were so kind sharing with each other! I also had prepared 5×5 paper 2 1/2” grids for each child and painter tape tacked them to a vinyl table cloth on my dining room table. Over the grids I taped slightly larger pieces of light wash away interfacing. Each girl got a washable glue stick to carefully glue her squares to the interfacing. (The little one got her grid and interfacing taped to a piece of cardboard to make turning it for her short reach easier.) We gently removed the interfacing and headed to the machine to sew. The little one sat on my lap with her hands on mine and helped sew her grid. It was also her job to tell me to stop when my fingertips reached a certain safe spot on my sewing table. The big girls stood with me by their side and sewed their own. (I also reduced the max speed on my Bernina for safety.) I finished the borders, binding and quilting the next day and washed them removing the glue and interfacing. Soft quilts! The girls were thrilled. This is a technique I recently devised to sew some tiny blocks with directional fabric to ensure the fabric design remained upright. I plan to use this technique to make a larger scrap quilt for myself in big sections to be sewn together. BTW…The girls waiting to sew took photos recording the fun while waiting their turns at the machine.
-
What a wonderful project to do with your grand-daughters; and such an efficient way to accomplish what might have been an overwhelming task. I bet they really enjoyed the experience with you and will remember it for a long time. Thanks so much for sharing.
-
-
I tried making a small PSQ for a doll possibly. It was pretty wonky. I have found different articles about the size of the squares, the original ones seemed to be 1/2″ squares. Today I tried some fusible featherweight and it made sewing easier; hopefully it won’t be too thick.
Stabilizer, interfacing, all those things are very confusing to me. I used pellon 906F. Also, do you good the back over or apply regular binding?
I hope to see more about this subject. That’s how I found this group by searching postage stamp quilt.
Bunch (deb) -
Hi, thanks for your comment. The problem with 1/2″ squares is that with a 1/4″ seam allowance on each of the four sides, the back of your square is pretty tight real estate. A slightly larger starting size will leave a bit more room for those seam allowances to rest neatly without fighting for space.
There is a lightweight interfacing that has the grid already printed on it, which makes it quick and easy to place the squares, press to fuse and then sew the rows. In that case, the size of the square you start with will be determined by the size of the square printed on the fusible. Little hint, cut those squares a hair smaller for a perfect fit side by side.
As for the edges, I always find using a binding is a cleaner finish than turning the back over to the front, but that is a personal preference. For something as small as a doll quilt, all you really need to do is use a “pillowcase back” which means back to front, sew around three sides, turn and finish the last side.
Lots of great stuff here on the weallsew site–so search around for other fun projects!!
Leave a Reply
You must be logged in to post a comment.

Using interfacing for a postage stamp pillow or pincushion works out great and makes things so much easier. When making a postage stamp quilt (PSQ), I have found using interfacing in the blocks noticeably changes the texture of the quilt by making it feel a bit weighty or somewhat stiff. I am working on two of them, one with 10 in blocks for an 80 x 80 quilt and one that will consist of 10,000 of the postage stamp charms. Working on my PSQ as a leader and ender project has worked great for me. By participating in online PSQ swaps I have amassed enough charms to make the 80 x 80 have 6,400 different squares but for the 10,000 piece PSQ, strip piecing along with individual charms is working best.
Hopefully you will find the time to make a PSQ. There is a Yahoo group for PSQ and you can see what others are creating with these tiny charms.
tushay3 (at) yahoo (dot) com