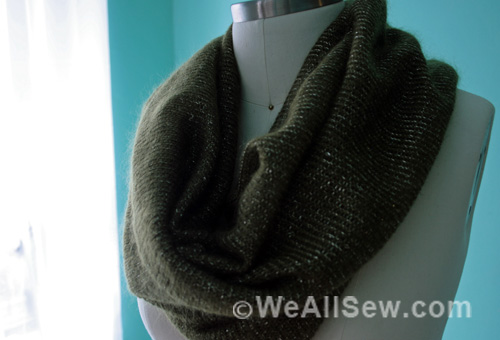
How to Make a Ruffled Scarf
Design a ruffled scarf without ruffling a single feather. Create this unique, playful scarf so quickly and easily that you’ll want one for every outfit and season. By using different fabrics, you can pair a stylish scarf with whatever you wear throughout the year. With spring just around the corner, begin your collection with a light, breezy cotton scarf! Get started by clicking the buttons to download detailed project instructions, learn more about Ashley Johnston who created this project or connect to her blog.
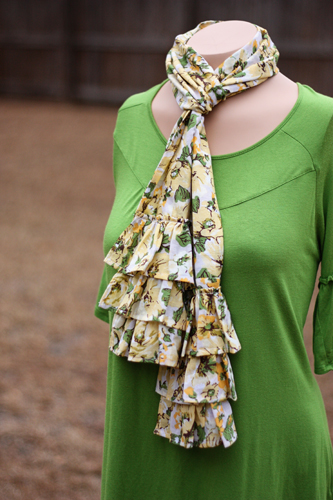
This scarf can be made with any type of fabric, depending on the weather. For this tutorial a lightweight cotton was used, producing a nice and light spring-time scarf.
Supplies
- 1-7/8 yards of fabric
- Coordinated thread
- Ruler or seam gauge
- Rotary cutter, mat, and ruler (optional; makes cutting much easier)
- Iron and ironing board/pad
- Pins
- Edgestitch foot (optional; makes it easy to sew close to edges without “falling off”)
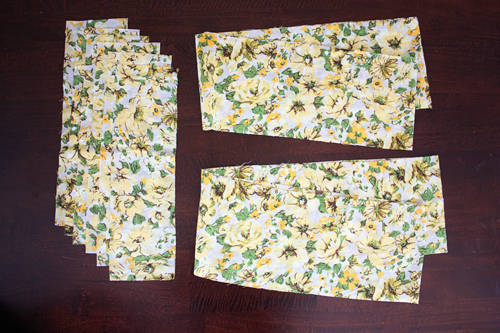
Step 1) Cut the fabric strips.
Cut two 6-1/2″ x 65″ strips of fabric.
Cut six 4-1/2″ x 15″ strips from the remaining fabric.
Step 2) Construct the scarf base.
Place the two large strips right sides together. Using a 1/2″-wide seam allowance, sew the strips together along both long sides and across one short end, leaving the other short end open.
Zigzag or overcast those three edges or use a serger to finish the raw edges.
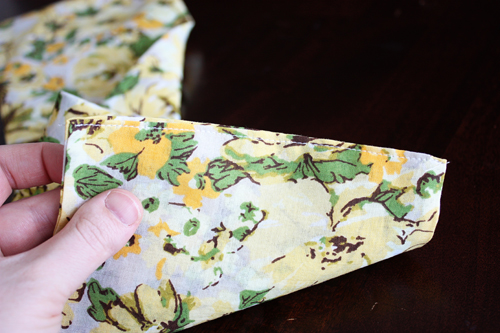
Trim the corners.
Turn the scarf base right side out, poke out the corners, and use an iron to press it flat.
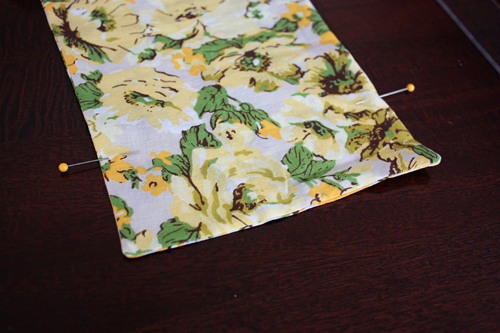
Turn under the edges of the open end 1/2″, tuck them inside, and press flat.
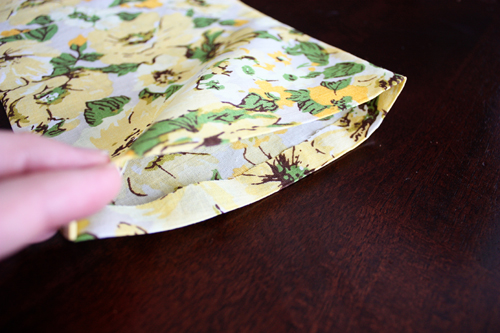
Stitch close to the folded edge to close the end.
Set the scarf base aside.
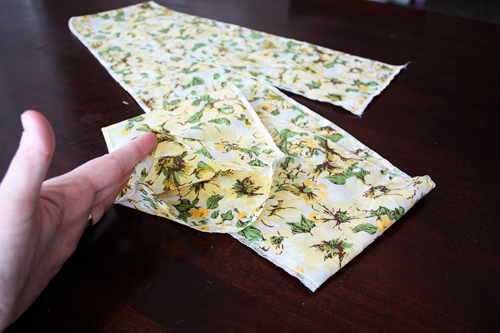
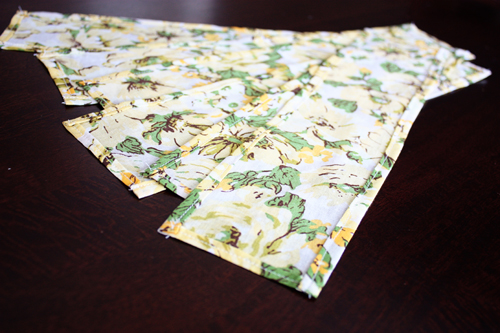
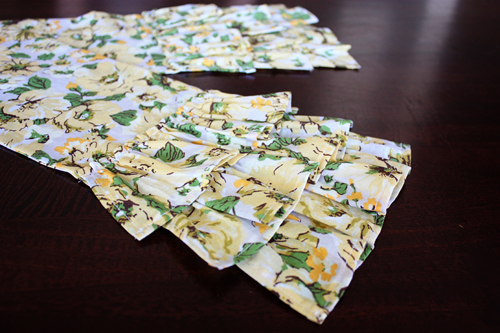
Step 3) Make the ruffled strips.
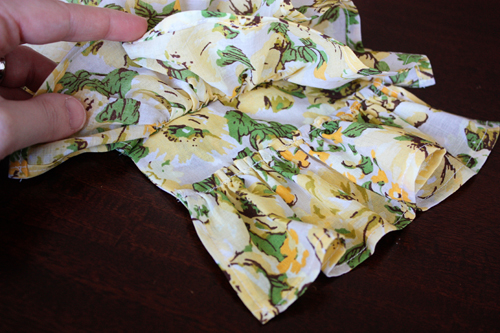
Working with one short strip at a time, fold under each short edge 1/4′” and then another 1/4″; press. Sew the hems in place, sewing with a straight stitch close to the inner fold.
Repeat for the long upper and lower edges of each strip, hemming all four sides of each strip.
Tip: Use an edgestitch foot, such as BERNINA Edgestitch Foot #10/10C, when sewing close to edges and next to seams. Place the edge against the guide in the center of the foot, then adjust the needle position to sew a few steps to the right or left. Some edgestitch feet work by moving the guide rather than the needle; in this case, place the fabric under the needle where you’d like it to stitch, then adjust the guide to sit on the edge.
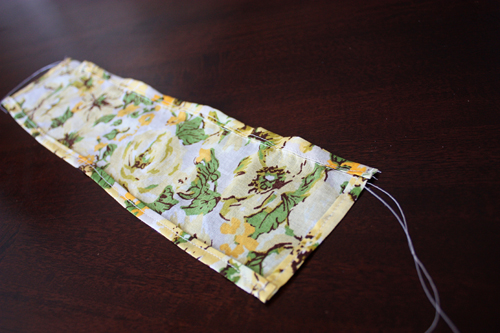
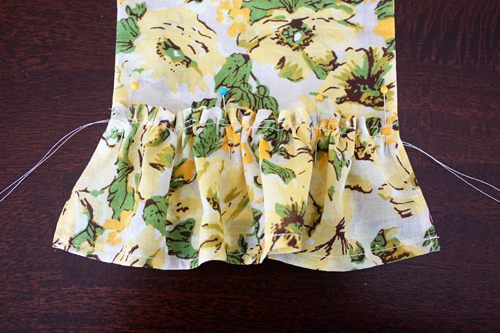
Working with one short strip at a time, sew a basting stitch right below the folded edge of one of the 15″ sides, leaving long thread tails at each end. Be sure to base below the fold, through just one layer of fabric; this will make it easier to gather. Repeat for all six strips.
Step 4) Gather and attach the ruffles to the scarf base.
Place the main scarf piece in front of you, and then measure 2″ up from the lower edge; mark with pins at both sides.
Pull the bobbin threads to gather the upper edge of one short strip until it is the same width as the scarf base. Place it along the lower edge of the scarf, with the top edge at the same level as the pins. Pin the upper edge of the ruffle in place.
Measure up another 2″ from the top of the newly-placed ruffle and place two more pins at the sides of the scarf to mark it. Repeat, placing two more pins 2″ further up the side of the scarf.
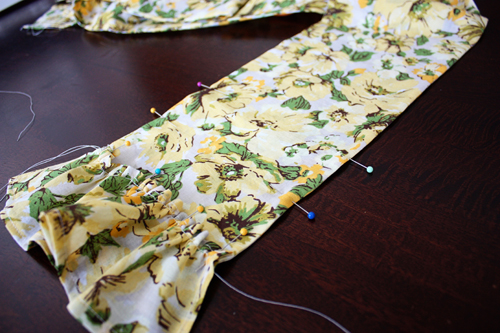
Gather two more short strips and pin them to the scarf base as the newly-marked positions.
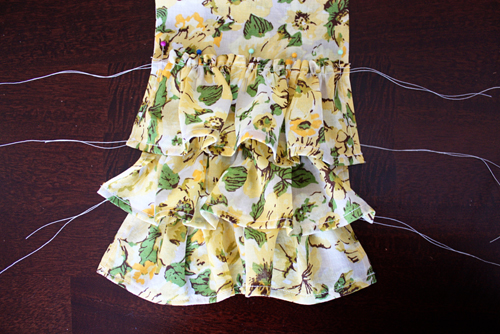
Attach each ruffle to the scarf by sewing right on top of the stitching you made when you hemmed the top edge. Do not sew on top of the basting stitches or they will be difficult to remove later. Repeat for all three ruffles, being careful to keep the other ruffles out of the way while attaching each ruffle.

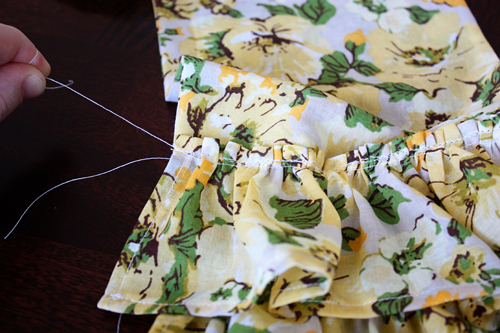
Pull out the basting stitches by gently pulling them from one end.
All three ruffles should now be nicely attached to one end of the main scarf piece.
Repeat for the other end of the scarf using the remaining three short strips. Be sure to place these ruffles on the same side of the scarf as the first three.
The next step is optional, but gives the scarf a more polished look: Lightly place your iron (with steam on) over the ruffles and flatten them down just a bit. Don’t press down hard, as you don’t want to create severe creases.


2 comments on “How to Make a Ruffled Scarf”
Love it. So feminine.