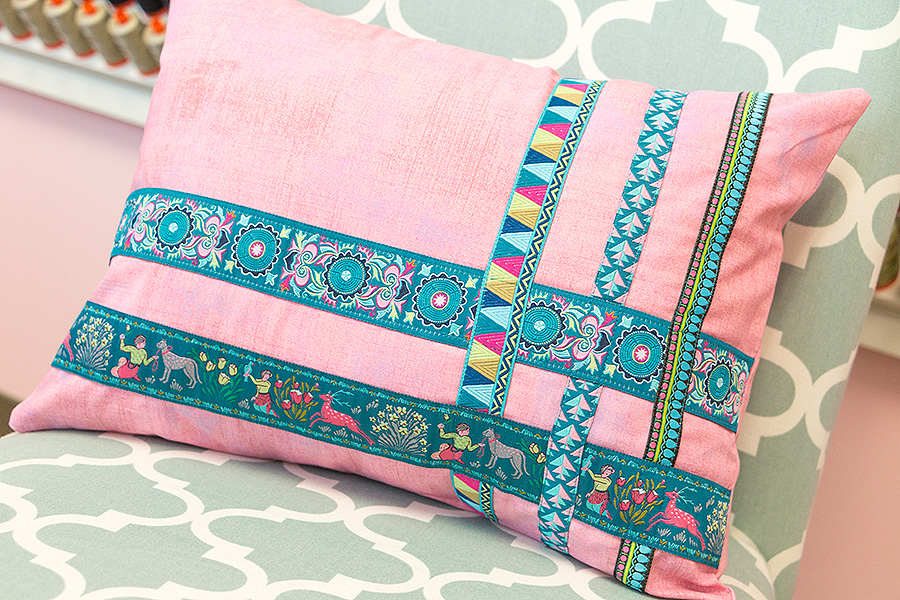
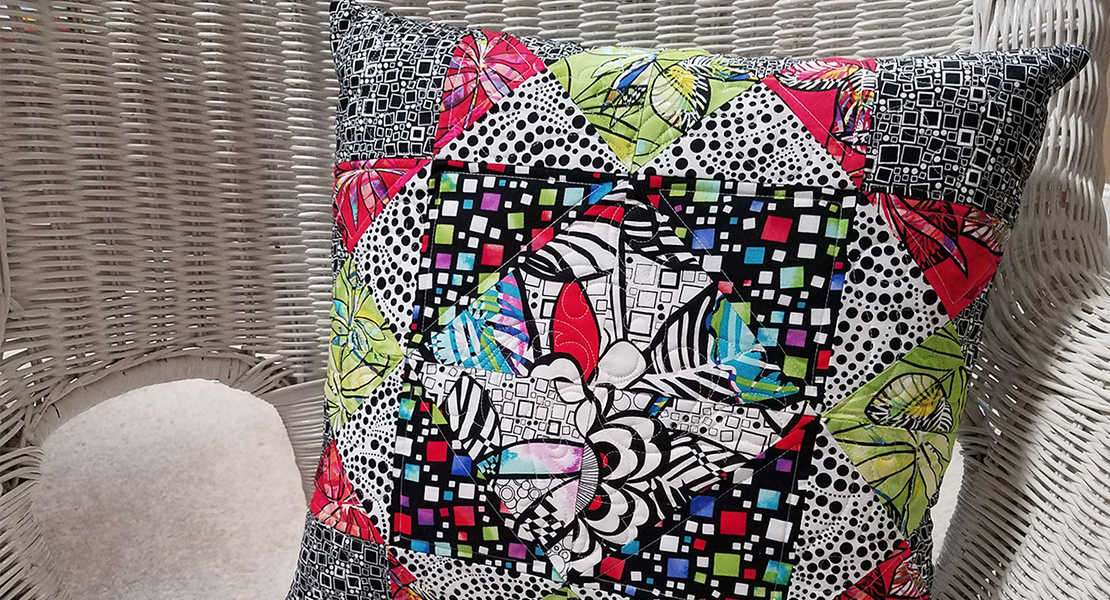
Sugar-coated Dream Pillow by Fat Quarter Shop
Hello again from Fat Quarter Shop! We’re back to bring you a fun, six-month series focused around a cuddly, quilty project—PILLOWS! Each project will feature step-by-step photo instructions to make your own pillow with ease!
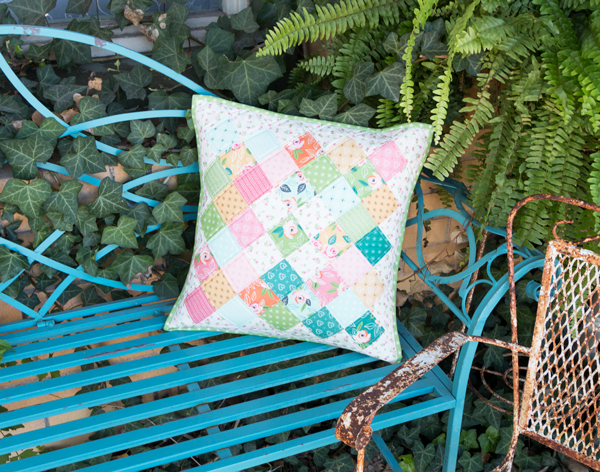
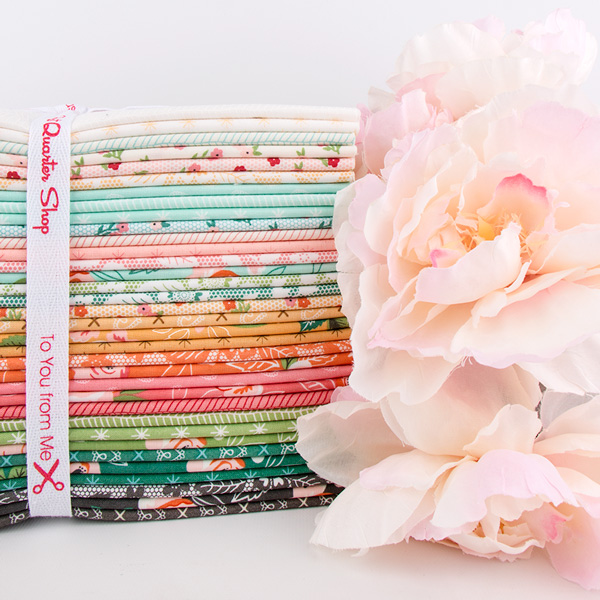
Our first project is titled Sugar-coated Dreams, and features the darling Sugar Pie collection by Lella Boutique for Moda Fabrics!
Materials to Make a Sugar-coated Dream Pillow
- 1 ¼ yards of fabric for border and backing
- One to two Moda Mini Charm Packs (37 – 2 ½” print charm packs), or you can use scraps from your stash for this look!
- Soft and Stable
- Frixion Pen
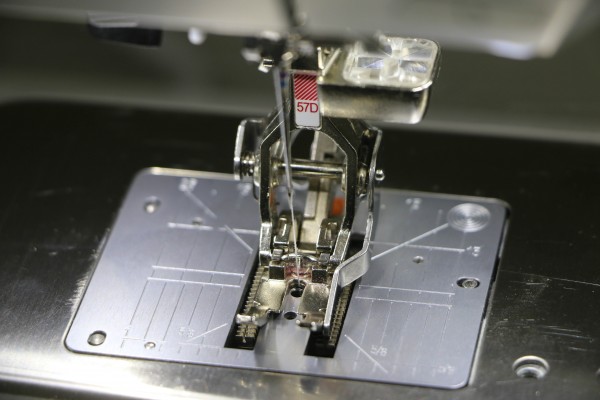
- Sewing machine (We use a BERNINA 770 QE)
- Edgestitch foot #10/#10C/#10D or Walking foot #50 and sole with central guide
Step One
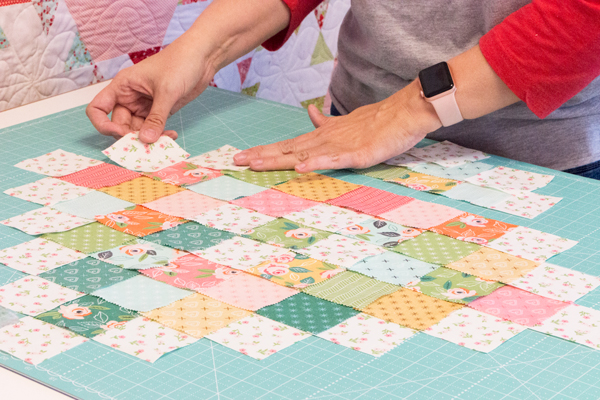
Cut 37 – 2 ½” print squares. Moda Mini Charm Pack works great for this!
Cut 24 – 2 ½” background squares
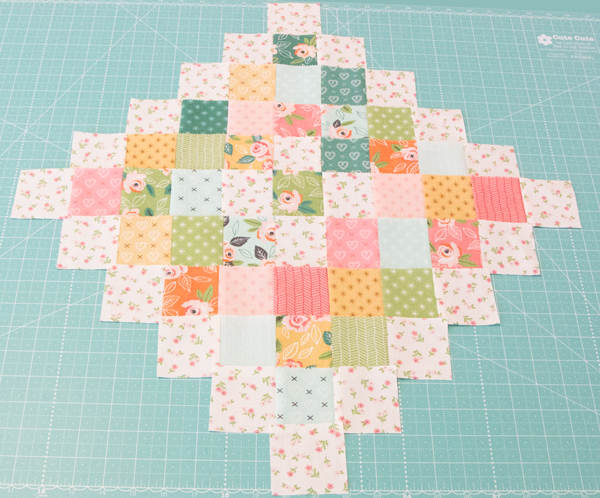
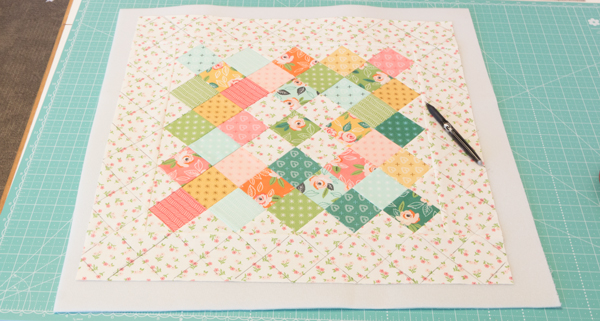
Layout mini charm squares like so…..
Step Two
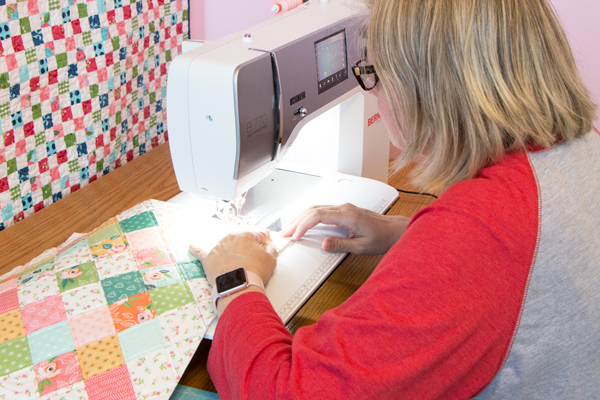
Using ¼” seams and a 2.0 stitch length, sew each row. Use a quarter inch seam foot like the Patchwork foot #97D.
Press each row in opposite directions.
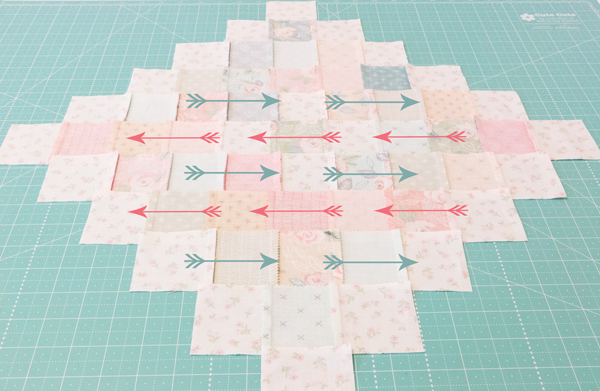
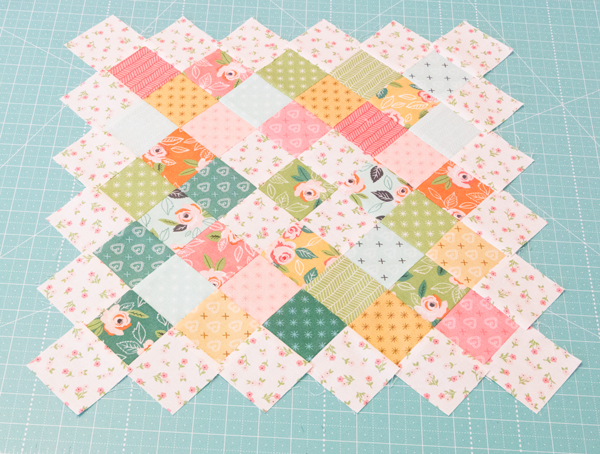
Step Three
Sew rows together with a 1/4″ seam. Press seams over to one side.
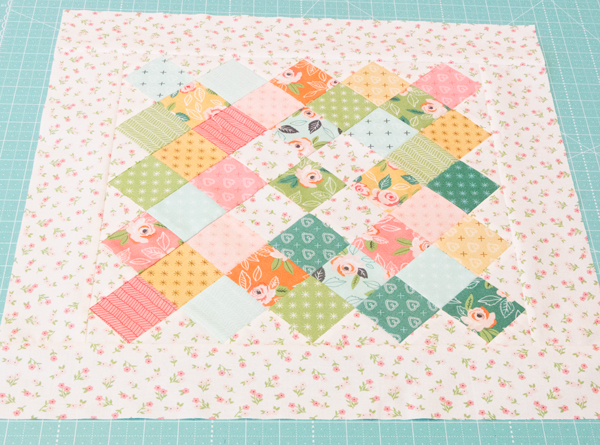
Step Four
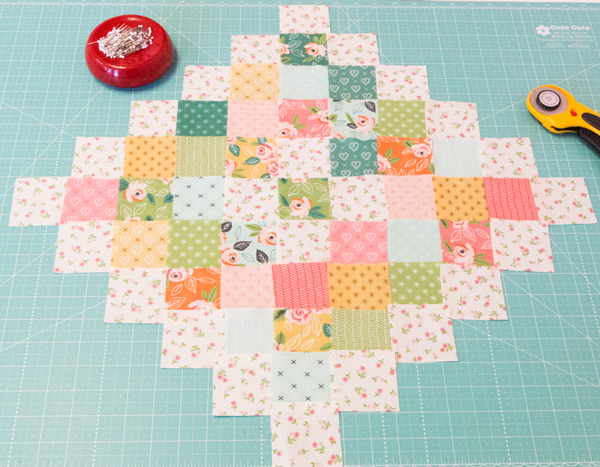
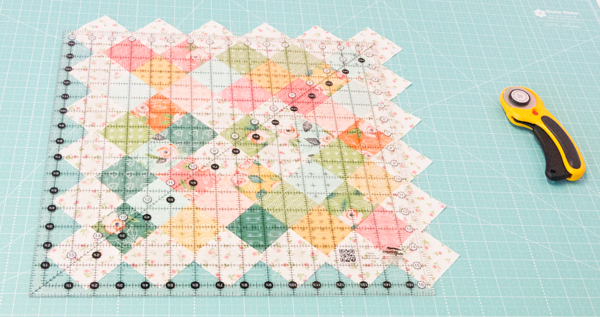
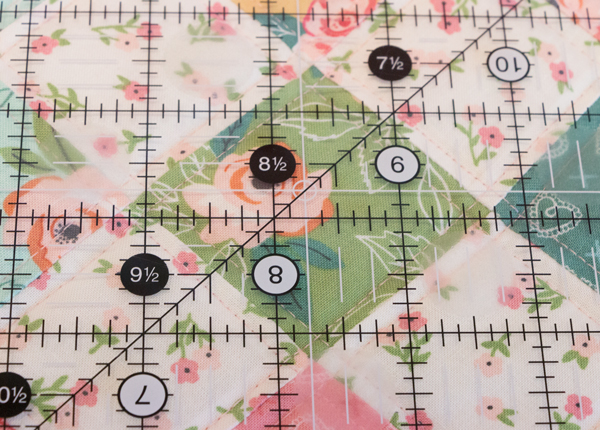
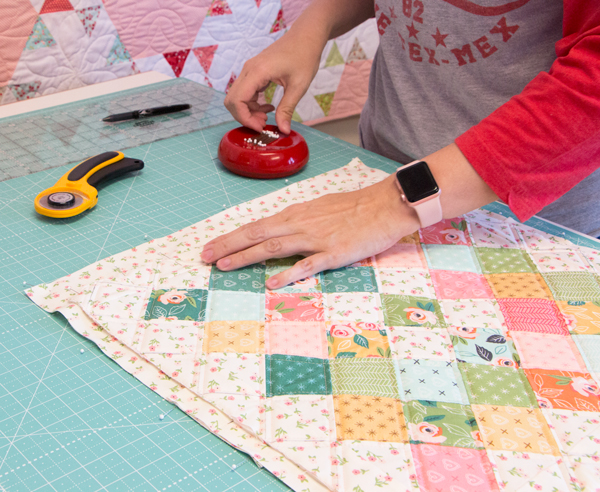
Trim ¼” away from the outside points (Approximately 14 ¾”). I used the 16 ½” Creative Grids ruler and trimmed ¼” from two sides. Flipped and trimmed the other sides.
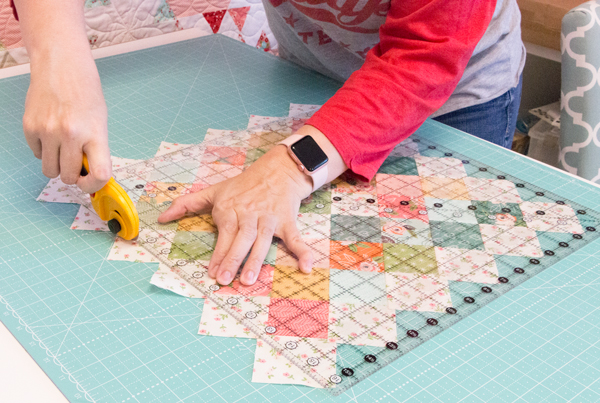
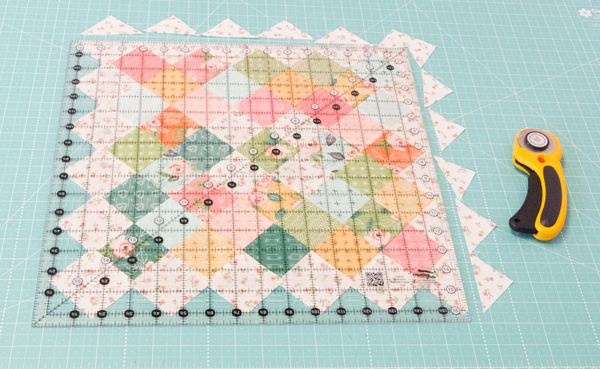
Step Five
2 – 3″ x 14 3/4″ rectangles (border)
2 – 3″ x 19 3/4″ rectangles (border)
Add borders.
Step Six
Cut a 22″ square of Soft and Stable.
Layer the Pillow top and the Soft and Stable.
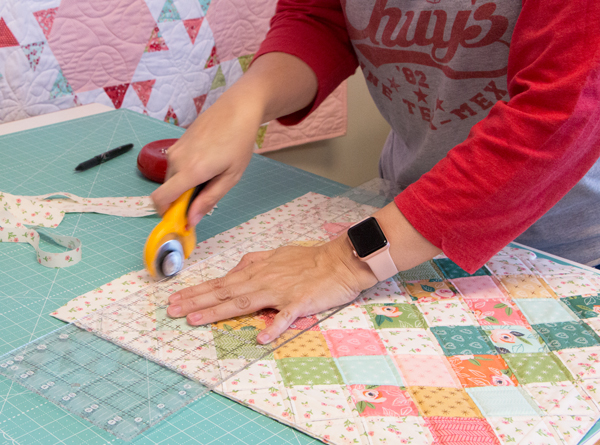
Using a Frixion Pen, draw lines on the border, making sure to follow diagonal lines.
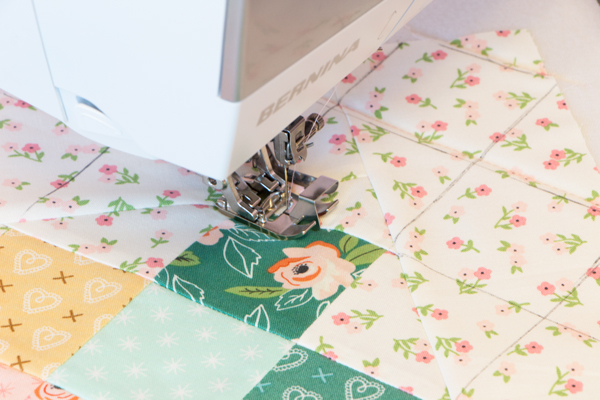
Step Eight
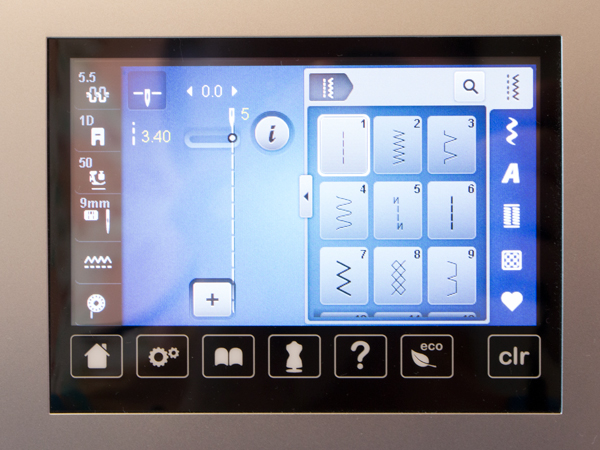
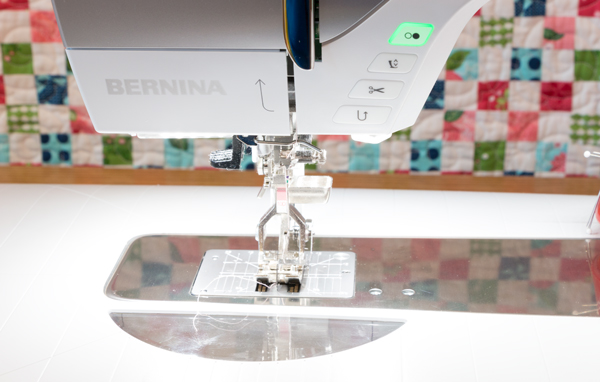
Use the Edgestitch foot #10/#10C/#10D and stitch length 3.4. Move needle position to the right 5 times.
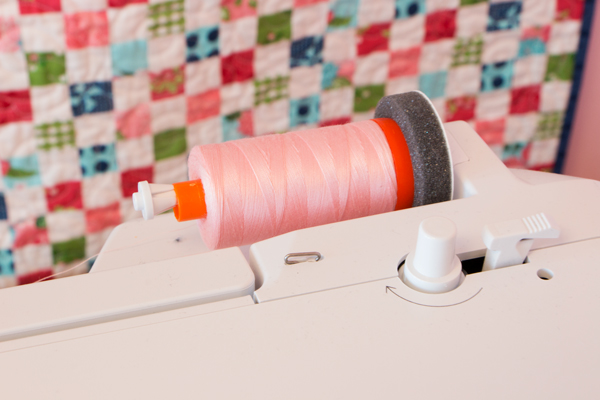
Place center of foot on seam and stitch. I used an Aurifil pink color 2415 for a pop of color!
Also you can move the needle position to the left 5 times for the other side.
Optional: you can also quilt using the Walking foot #50 and the sole with guide following the same settings as above.

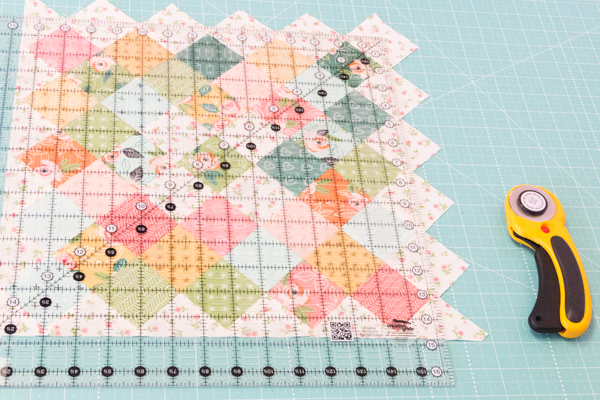
Step Nine
Using the same 16 ½” Creative Grids ruler align the white lines on the center square and trim.
Step Ten
Baste stitch 1/8″ away from the edge.
Iron off the Frixion Pen.
Step Eleven
Cut 2 – 18″ x 25″ rectangles for the pillow back.
Fold both in half wrong sides together.
Lay out with a 4″ overlap with folds in the center and raw edges on the outside. Pin and baste 1/8″ away from the edge.
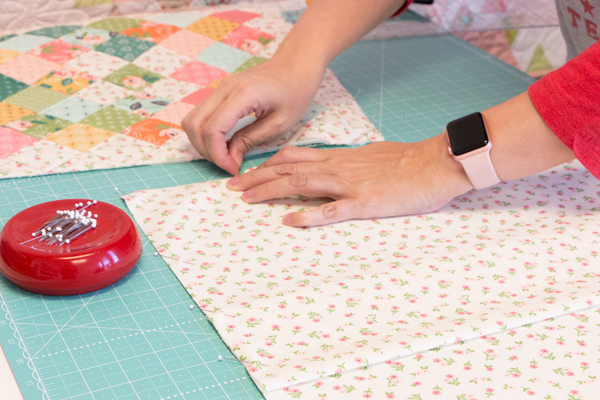
With wrong sides together, layer the Pillow Top and the Pillow Back matching centers. Baste 1/8″ away from the edge. Trim excess backing.
Step Twelve
Cut 2 – 2″ x width of fabric strips (binding). Complete your binding with the help of our easy-to-follow YouTube Video!

We hope you had fun with this first pillow from the In Stitches with Fat Quarter Shop Pillow Series!
Enter to win two Sugar Pie Mini Charm Packs to make your own Sugar Coated Dreams Pillow!
All you have to do is post a comment below answering the following question:
What is your favorite quilted pillow design?
A winner will be chosen at random on April 10 , 2017 and announced the following week!
Good luck!
Used Products


What you might also like


71 comments on “Sugar-coated Dream Pillow by Fat Quarter Shop”
-
-
Love the colors and easy quilting on this pillow-very pretty. I do love paper-piecing, my favorite and for pillows too! Thank you, Susan
-
I love this pillow! I’ve never made one before, but I think I might now. Also, I LOVE, LOVE, LOVE this fabric collection.
-
My favorite pillow design is the log cabin quilt block pillow! I love this tutorial. Thank you for sharing.
-
I love anything appliqued
-
My favorite pillow patttern uses flying geese. It would look darling in the sugar pie fabric. It just looks lake spun candy. Thanks for all the lessons.?
-
I love this one. Or probably a granny square type. Any pillow is great! Would love to make this pillow.
-
Pillows for all seasons, fall, spring, summer and winter.
I am going to love this series of pillow making !!!
Thanks!
-
This is the cutest pillow. It looks so springy but I also love the quilting.
I would love to sew a pattern like this! and with this adorable fabric!!
I do not have a favorite quilted pillow design bc I have never made one, but I have to admit, this design is one I would choose as my favorite. I love the patchwork. I think I like patchwork pillow designs!
Thank you so very much for the inspiration and tutorial!♥️ -
I like Tumbling Blocks for a pillow top. I’d love to win the mini charm pack to try making it in “Sugar Pie”!
-
Such a cute pillow. I love it. Great job Kimberly! I love patchwork pillow designs, they are fun and easy to make using the mini charm packs. Thanks for the tutorial! ❤️?❤️
-
I love this pillow and the fabric you used. I had fun making a quilted pillow with half square triangles made with charm packs and the quilting I did was similar to the quilting in this project. Thanks for the tutorial.
-
I love this pillow pattern! I love seasonal pillows also. I would love to win some Sugar Pie to make one!!!
-
This is a beautiful spring time pillow. I have looked and purchased other pillow kits but this one is my favourite to date. I love how the design is set on point and I can picture this with many different fabrics, adjusting to my friends favourite colours and decorating styles! Thank you!
-
I’m definitely going to give this a try!! I’m just now learning how to do pillows and this looks like a really fun pattern to try. Love Fat Quarter Shop!
-
I love the Grandmother’s Fan block and variations to it. It makes a lovely pillow. Thanks for a great pillow pattern.
-
This is so cute and beautiful fabrics! I usually use straight line quilting, but I think this could become my favorite, thanks!
-
Love this :)! My favorite pillow design is an apple block – and I love to use cross-hatch quilting best for my pillow tops!
-
My favorite quilted pillow design is the log cabin, although I really like the one shown here as well.
-
My favorite quilted pillow is a dresden plate in Christmas fabrics.
-
Love the soft colors
-
Love this fabric, I can’t wait to make this pillow, have never used Soft and Stable for a pillow, interesting, can’t wait to see how that works in the pillow. Love this new series, can’t have enough pillows.
-
Forgot to answer the question, my favorite pillow design, I have only embroidered sayings on pillows, never quilted one, will try though.
-
-
I made a raggy cathedral window pillow for my couch that’s pretty special.
-
Favorite? I have and love strips, triangles, embroidered, triple star, 2 1/2 inch squares (not on point)… Can you tell I like pillows?
-
I just made a pillow like this, wish I had had the tutorial then, lol, would have saved me from doing all the math work. I like all kinds of different pillows, here is my Pinterest board to give you an idea, https://gr.pinterest.com/maracreates/pillow-inspiration/ I pinned this pillow to my charm and mini charm section cause I love finding tutorials that use those.
-
Beautiful pillow and beautiful fabrics! Great job!
I think the Kimberbell monthly pillows are fun! -
I like to use orphan or trial blocks with envelope back. I use my 750 QE Love it.
-
The only pillow I have ever made was an embroidered one. I’m looking forward to using some of my mini charms for this pattern. Thanks.
-
I like log cabin pillows made on my Bernina 1530 which I bought new in 1992. I love her!
-
Pillows made good appliqué projects – small and doable.
-
Love this pillow. The fabric is so springy. Would love to have some Sugar Pie to make one just like it. My favorite pillow design is the Prairie point design. Thanks for a great tutorial. Can’t wait to make this.
-
I don’t know quilted designs yet – I’m a beginner! This pillow and charms look beautiful though!!
-
The cathedral window is my favorite pattern for a pillow. This is going to be a fun series!! Can’t wait for the next pillow.
-
I made the castle pillow from FQS last year for a Chinese auction. It was a huge hit and fun to make. I was thinking of making another pillow for this year’s auction. Love Sugar Pie.
-
The colors used in this pillow are so pretty,it reminds me of spring time flowers. My favorite quilt block for a pillow is a pieced basket with applique flowers.
-
I love this block, but I also think this fabric would look awesome in a cathedral window block. I would love to get this machine, I currently have a Babylock Gold but this machine I believe would convert me to Bernina!
Can’t wait to see the rest of the designs! -
LOOOOOOVE this Pillow! Have not made a quilted pillow before/yet :/ Would love to make this one! Thank you for the Tutorial…and for chance to win your Give-a-way!! 😀
-
I am teaching myself to quilt with the help of tutorials such as this great one and would love the fabric to make this pillow. Thanks for the tutorial.
-
This is a project sent from heaven for me. I buy all my fabric from the Fat Quarter shop and am the proud owner of a new Bernina 770QE. This project will give me the opportunity to try out my new machine and make a really pretty cushion cover at the same time, ( we call them cushions in the UK……pillows are what we sleep on ! ) Love the fabric…..just my colours.
-
I love this pillow sugar coated dream it’s just darling. I would love to win the fabric to make it. Thank you
-
I liked the log cabin and the flying geese but you can’t beat a granny square block can you?
-
I’ve always wanted to try making a cathedral window pillow. I love this fabric!
-
I’ve never made a patchwork pillow, but this one is so pretty I think I will give it a try.
-
I love this pillow, and plan to make one soon. I’m a sucker for all patchwork pillows, so I guess you could say they are my favorites.
-
Pretty pillow. Don’t have a favorite pattern.
-
I like itty bitty hexagons.
-
I really love cathedral window design pillows! But this one with the Sugar Pie fabric is also adorable!
-
My favorite pillow pattern at the moment is the prairie point pillow from modabakeshop.
-
A simple patchwork,, w/straight line quilting.
And picture window quilted blocks…as it’s easy to fussy cut a large motif or picture and piece a frame around it or 2 1/2″ square patchwork too. Thank you…Sugar Coated Dreams is just beautiful. -
This pillow is so pretty and springy…which we all need! My favorite pillow “pattern” was a wonky log cabin that I made last year.
-
This is so cute. Love the simple design.
-
My favorite so far is 4 patch star design by Melissa Mortenson. I am new to most quilting projects, so am eager to learn! 🙂
-
I love all kinds of designs on my throw pillows but I really love the simple Patchwork!
-
I love appliqués on pillows for kids or appliqués with initials
-
I don’t like the hassle of decorating with pillows but I do like the traditional pillowcase idea with quilt blocks on the edge. I’ve made a few to serve as coordinating gift bags for quilts. This fabric is beautiful!
-
Log cabin is my favorite.
-
I like any star pattern used in pillows, but I’ve also made a pillow using moda candy….diagonal lines format with narrow sashing on two sides of squares. this looks like a pillow I could make….and the fabric is right up my alley! Like just about everything that comes out of “Lella Boutique.”
-
I love the fabric and love the pattern. I think I’ll make 3-4 pillows for my couch.
-
I don’t really have a favorite pillow design; I haven’t done anything fancy yet – pillowcases are more at my level 🙂
-
I love this on point pattern! I love traditional granny square and checkerboard designs! Thanks for the tutorial and chance to win!
-
I just love granny squares – especially the Lori Holt style great granny squares. I like to quilt the blocks with hand quilting in complementary Perle cotton for that antique look. This fabric would be great to whip up a pillow like this! Thanks for the chance to win this loveliness!!
-
I love a good Churn Dash!
-
I’m an abstract girl, but I will sew just about anything! And I have FRIENDS who are more traditional so this would make a sweet gift.
-
Currently making some block of month pillow – but would like to try this next in some leftover Christmas fabric – but would love to win this fabric!
-
I like any pattern that are stars and use half-square triangles along with squares. I love the colors in the pillow fabric.
-
The only quilted pillows I’ve ever done is on preprinted panels to practice my free motion quilting. I love this pattern and have already ordered the fabric to make two of these pillows.
-
Hi,
I love most quilting patterns and have done this pillow before but without theborders. I would LOVE to win this pack!!
Thanks for the chance to win the pack.
Sandy
-
Hi-love Kimberly’s tutorial. My most favorite pillow pattern was the Cute Cups Cushion from Lori Holt’s Quilty Fun book. I have made so many of Lori’s patterns into pillows. This is a darling line of fabric!
Julia
-
I love the look of patchwork which could also look like a weave. I can’t wait to try it!!!
Leave a Reply
You must be logged in to post a comment.

I have really been looking forward to Kimberly’s posts…this is the cutest pillow and I am going to try this pattern for myself very soon. I would love to win this sweet fabric!