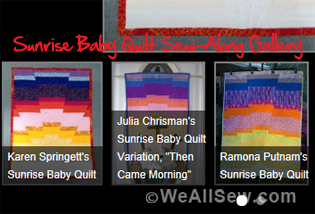
Sunrise Baby Quilt: Let’s Get Quilting!
Did you ever notice that the word “quilt” is both a verb and a noun? This week we’ll tell you how to quilt your quilt. In other words, how to stitch together the layers (quilt = verb) of your bed-covering (quilt = noun).
You’ll be getting very friendly with your walking foot this week as you stitch back and forth across the layered backing, batting, and pieced top.
Why use a walking foot?
First let’s look at how your machine moves fabric along without one. While the needle is up and out of the fabric, the feed dog comes up. The ridged upper side of the feed dog presses against the sole of the foot and “grabs” the fabric while the whole feed dog unit moves one stitch length toward the back of the machine, carrying the fabric along with it. Take a look next time you’re at your machine: With the presser foot up, turn the hand-wheel and watch the feed dog move up and to the back, then down and back to the front, over and over again, once for each stitch.
When stitching two layers of fabric together, you probably won’t notice whether the layers are shifting or not. (Unless you’re matching stripes or plaids, or working with a malleable fabric such as velvet.) But with three layers – backing, batting, and top – there’s more potential for layers to slip a bit. And that little bit – multiplied by all the stitches it takes to sew across your quilt – can cause puckers and keep the quilt from laying flat.
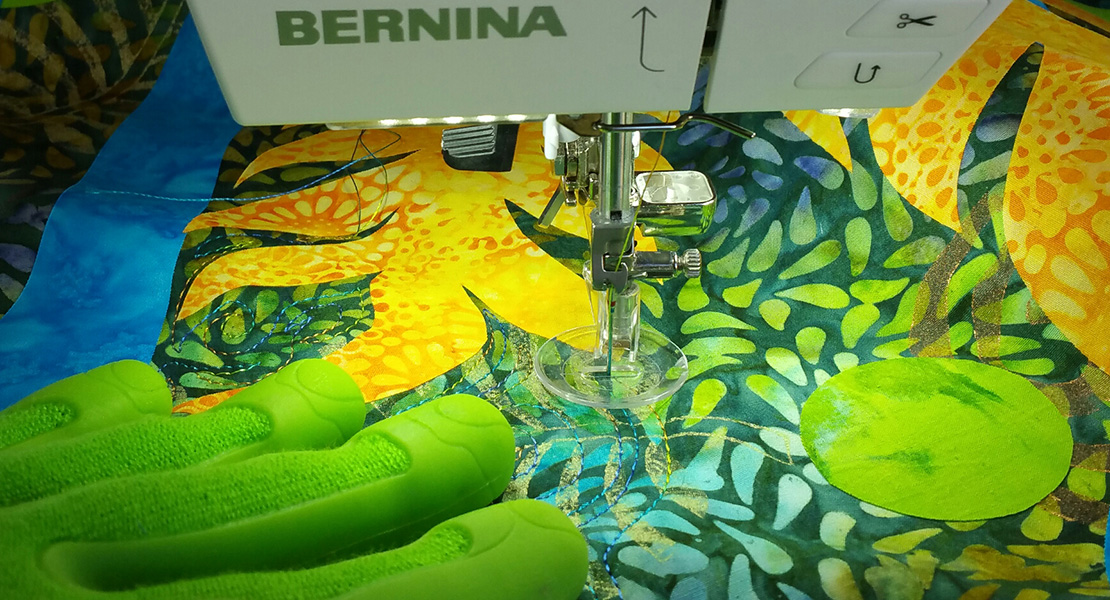
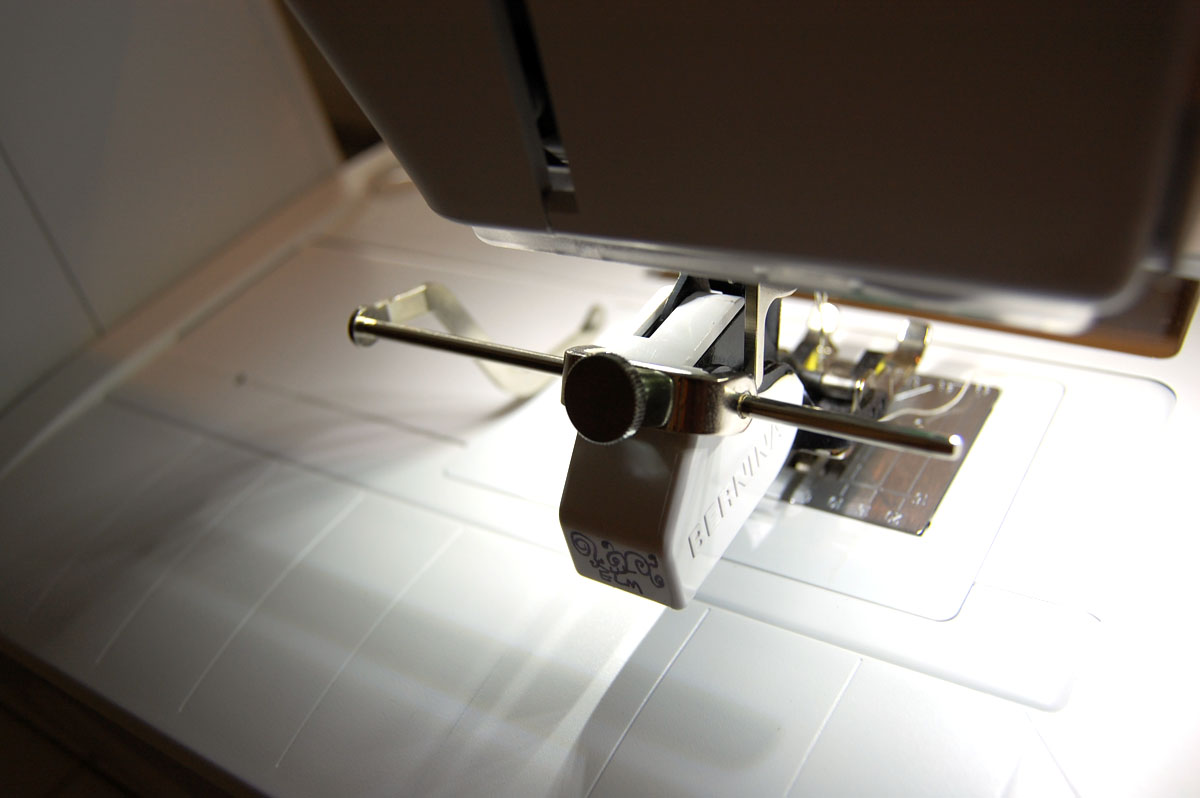
A walking foot eliminates this problem by “pinching” the layers together before moving them. The walking foot’s “fork” goes over the needle bar (green arrow below). When the needle goes up as you sew, the fork goes up with it; this makes the walking foot’s “teeth” (pink arrows below) go down, pinching all the layers between the “teeth” of the walking foot and the “teeth” of the feed dog. (It’s starting to sound dangerous! But it’s not, really.) When the needle goes back down, the fork moves down and the teeth move back up out of the way. The walking foot chomps it’s way along as you stitch, biting all the layers together and moving them along with no slippage.

While the walking foot is doing it’s thing you’ll be feeding your quilt underneath. (“Feeding” the “teeth,” get it? Did a hear a groan?) To maintain an even distance between parallel rows of stitching, use the edge of the foot as a guide. The photos below show this from two angles: From the front, where you’ll be sitting, and from the top, which you can see if you lean way over. (But I don’t recommend sewing with your head up against the machine like that. It’s hard to explain why you have a tiny little well-defined bruise on your forehead. Ask me why I know. I’m just glad my hair was too short to get caught!)
![]()
![]()
Now… Are you ready for this week’s Sunrise Baby Quilt Sew-Along directions? Have fun quilting!
Week Two Recap
Piece the strips together.
Cut striped top into pieces, offset and stitch back together.
Trim edges and square corners.
Week THREE: Quilt the layers.
Step 1) Layer the “quilt sandwich.”
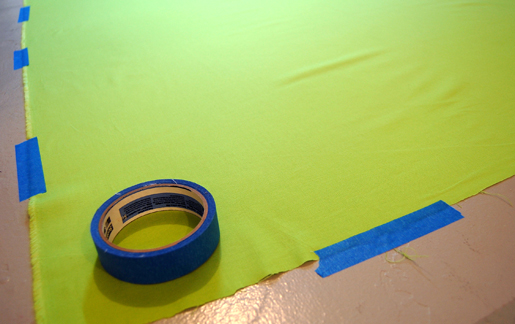
Press the backing fabric smooth using the cotton setting on your iron.
Place the backing fabric right side down on a smooth, hard surface.
Smooth out any wrinkles and secure the fabric edges to the surface with blue painters tape, taking care not to stretch the fabric while taping.
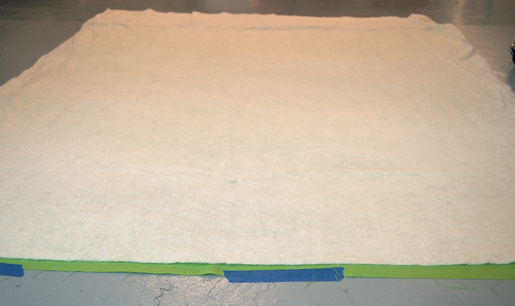
Center the batting over the backing fabric and layer it on top.
Smooth any wrinkles out of the batting, starting at the center and working to the outer edges.
Carefully place the quilt top right side up on top of the batting, checking to make sure it is centered as perfectly as possible over the backing.
Smooth out any wrinkles in the quilt top from the center to the outside edges.
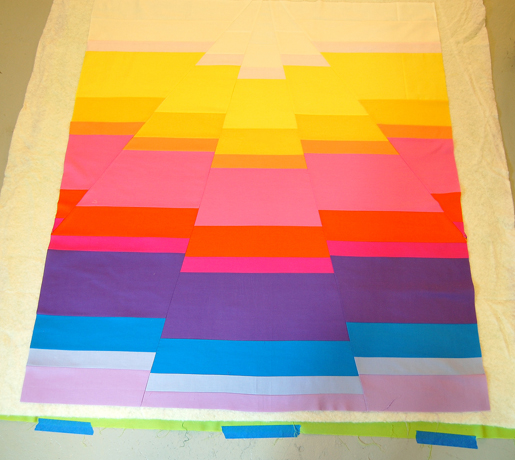
Using curved quilt basting safety pins, baste the layers of the quilt together, beginning at the center of the quilt and pinning through all layers.
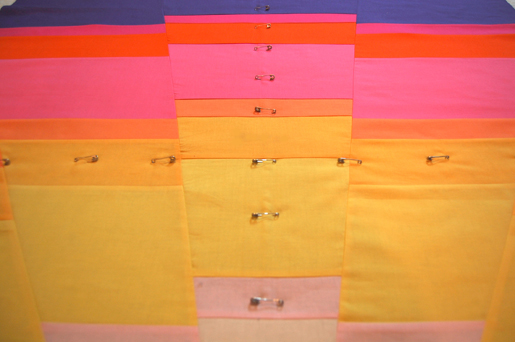
Place pins every 4” to 6”, working from the middle out to the edges until the entire quilt is pin-basted.
Pin all the way to the very edge of the quilt top; the more pins you use, the less chance there will be for puckering when quilting.
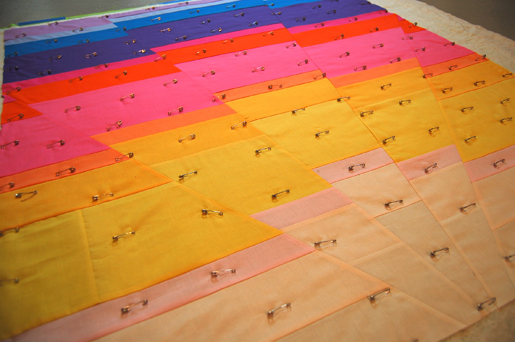
Remove the basted quilt from the flat surface by carefully pulling the painters tape away from the backing.
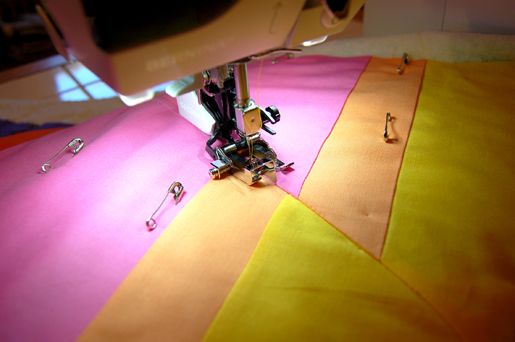
Step 2) Quilt in-the-ditch.
Set up your sewing machine for quilting.
- Insert a Quilting or Microtex Sharp needle, size 80/12.
- Attach Walking Foot #50 with the center guide sole.
- Thread your machine with Gutermann Natural Variegated thread in the bobbin and needle.
- Select a straight stitch and set the stitch length between 2.7 mm and 3 mm.
- Use scraps of fabric and batting to make small “quilt sandwiches” and test your stitches for proper tension.
- Adjust the needle tension if needed for a balanced stitch.
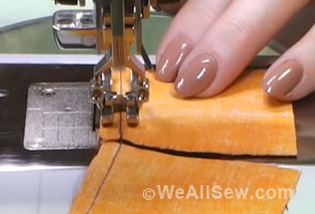
Start quilting “in-the-ditch” of each continuous long seam on the quilt top, lining up the center guide of the walking foot with the seam. Remove pins as you stitch.
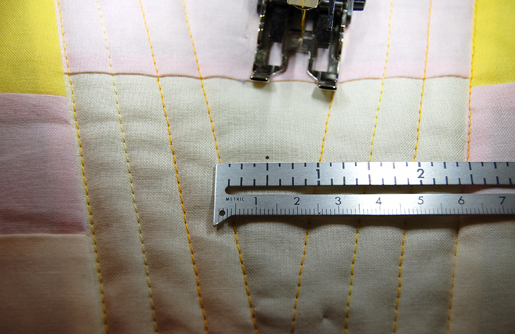
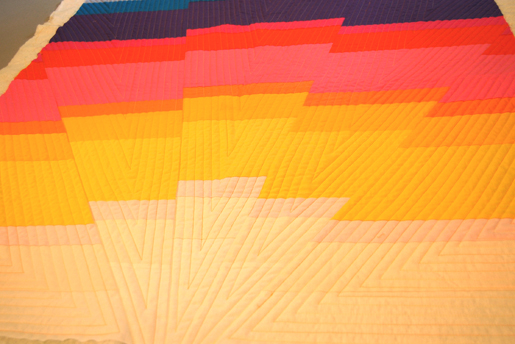
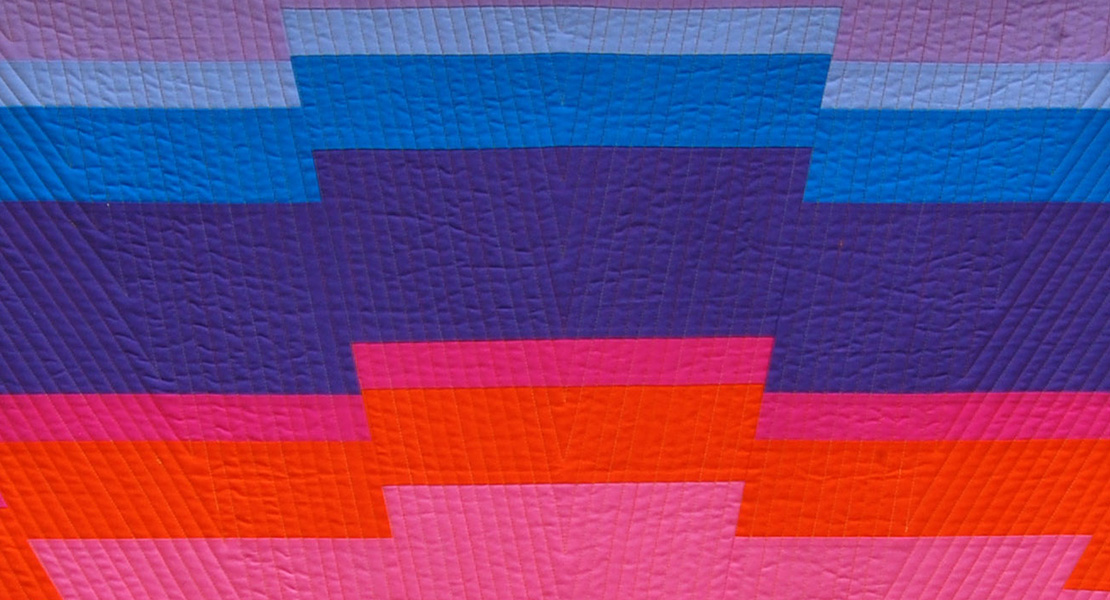
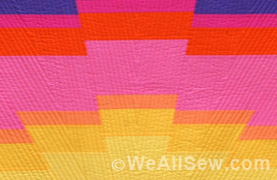
Step 3) Quilt the chevron lines.
Change the sole on Walking Foot #50 from the center guide sole to the closed front sole.
Begin quilting in the middle V-shaped section of the quilt, stitching 1/2” away from the seams using the edge of the walking foot as a guide.
Continue adding stitches spaced 1/2” apart, removing pins as you go. Stop stitching 2” to 3” before reaching the bottom of the V.

Measure across the bottom of the V to find the point where the stitching is 1” across. Use a fabricmarking pencil to make a small dot at the 1/2” spot.
Continue stitching, watching closely and stopping with the needle down through the pencil mark.
Tip: If your sewing machine has a needle stop down feature, engage it when quilting long lines and sharp angles.
With the needle down, lift the presser foot and pivot the fabric to continue up the other side of the V.
Continue stitching until the middle V section is completely filled with lines spaced 1/2” apart.
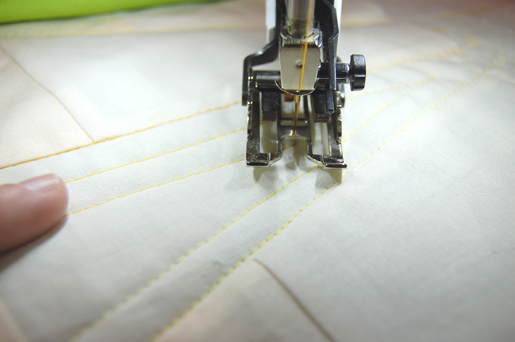
Quilt each of the remaining V-shaped sections of the quilt as above, working from the middle of the quilt to the outside edges, until the entire surface is quilted. Press.
See you next week, Tuesday, March 19, as we continue our Sunrise Baby Quilt Sew-Along.
Our Sunrise Baby Quilt Sew-Along continues on Tuesdays throughout March ( 19 and 26).
Missed a week?


10 comments on “Sunrise Baby Quilt: Let’s Get Quilting!”
Where can I find weeks 4 & 5?
Hello rubyr, Week 4 is the end of the Sunrise Baby Quilt-along, and shows you how to finish binding your quilt. You can find Week 4 here: https://weallsew.com/sunrise-baby-quilt-bind-it/ and I’ve also added it in to this post so that other fans can find it as well. Happy quilting! – Erika
Hi I need some help I’m needing to know If I want to do some block quilting do I do the normal by sandwiching all three layers together then do the block quilting? I usually do stippling and I’m starting to not like it to much