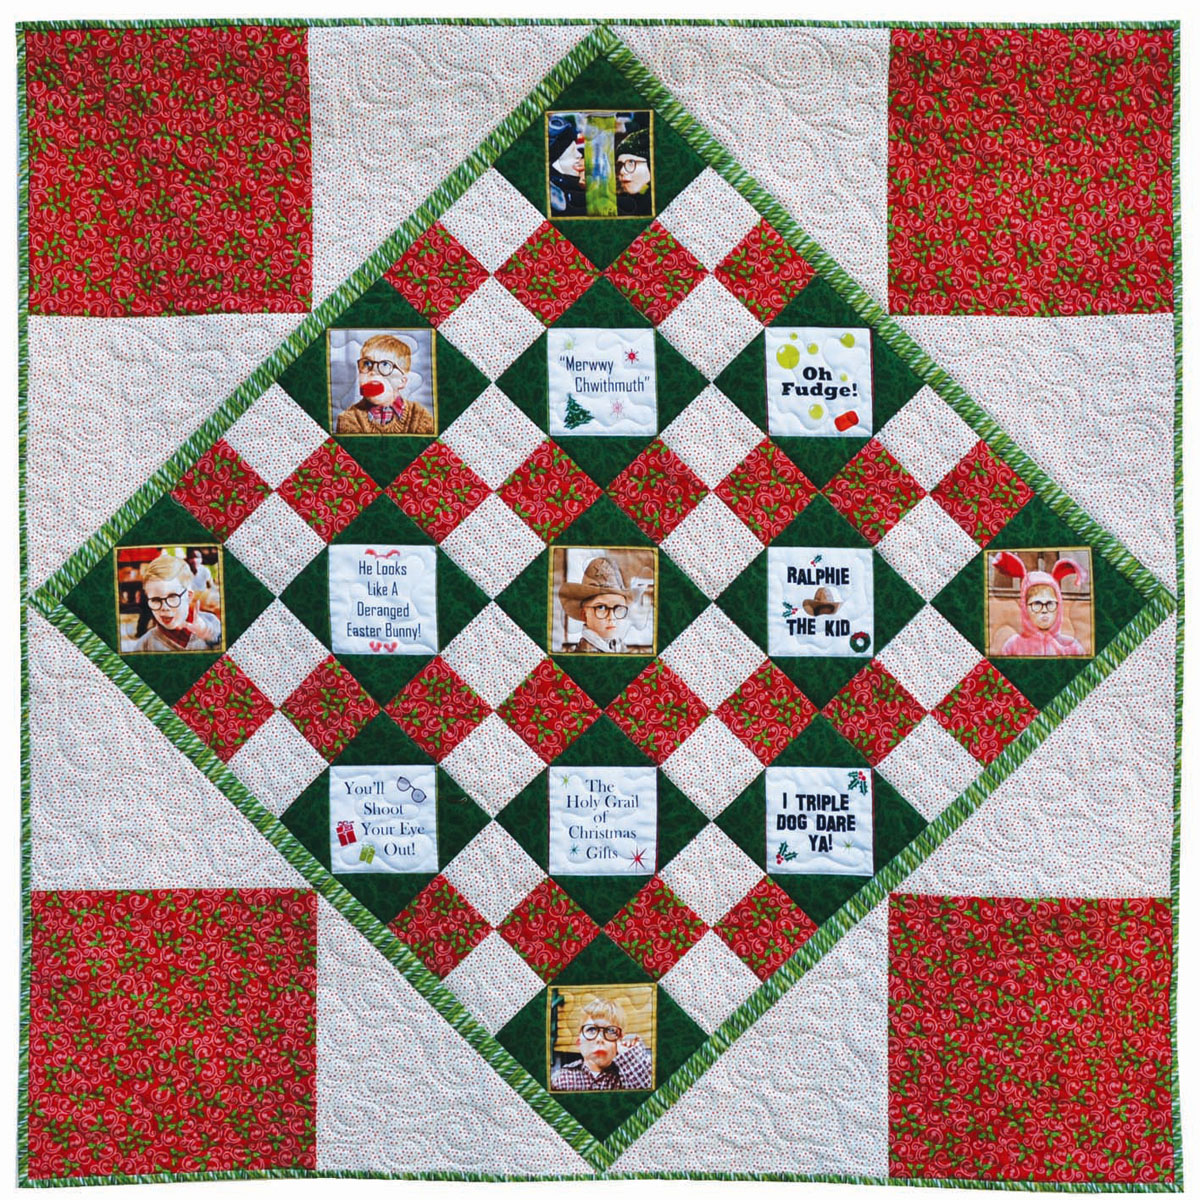
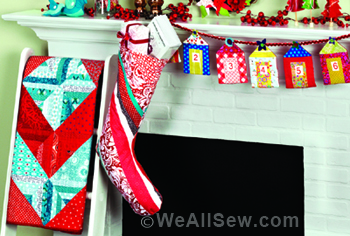
‘Twas the Night Before Christmas Quilt Tutorial

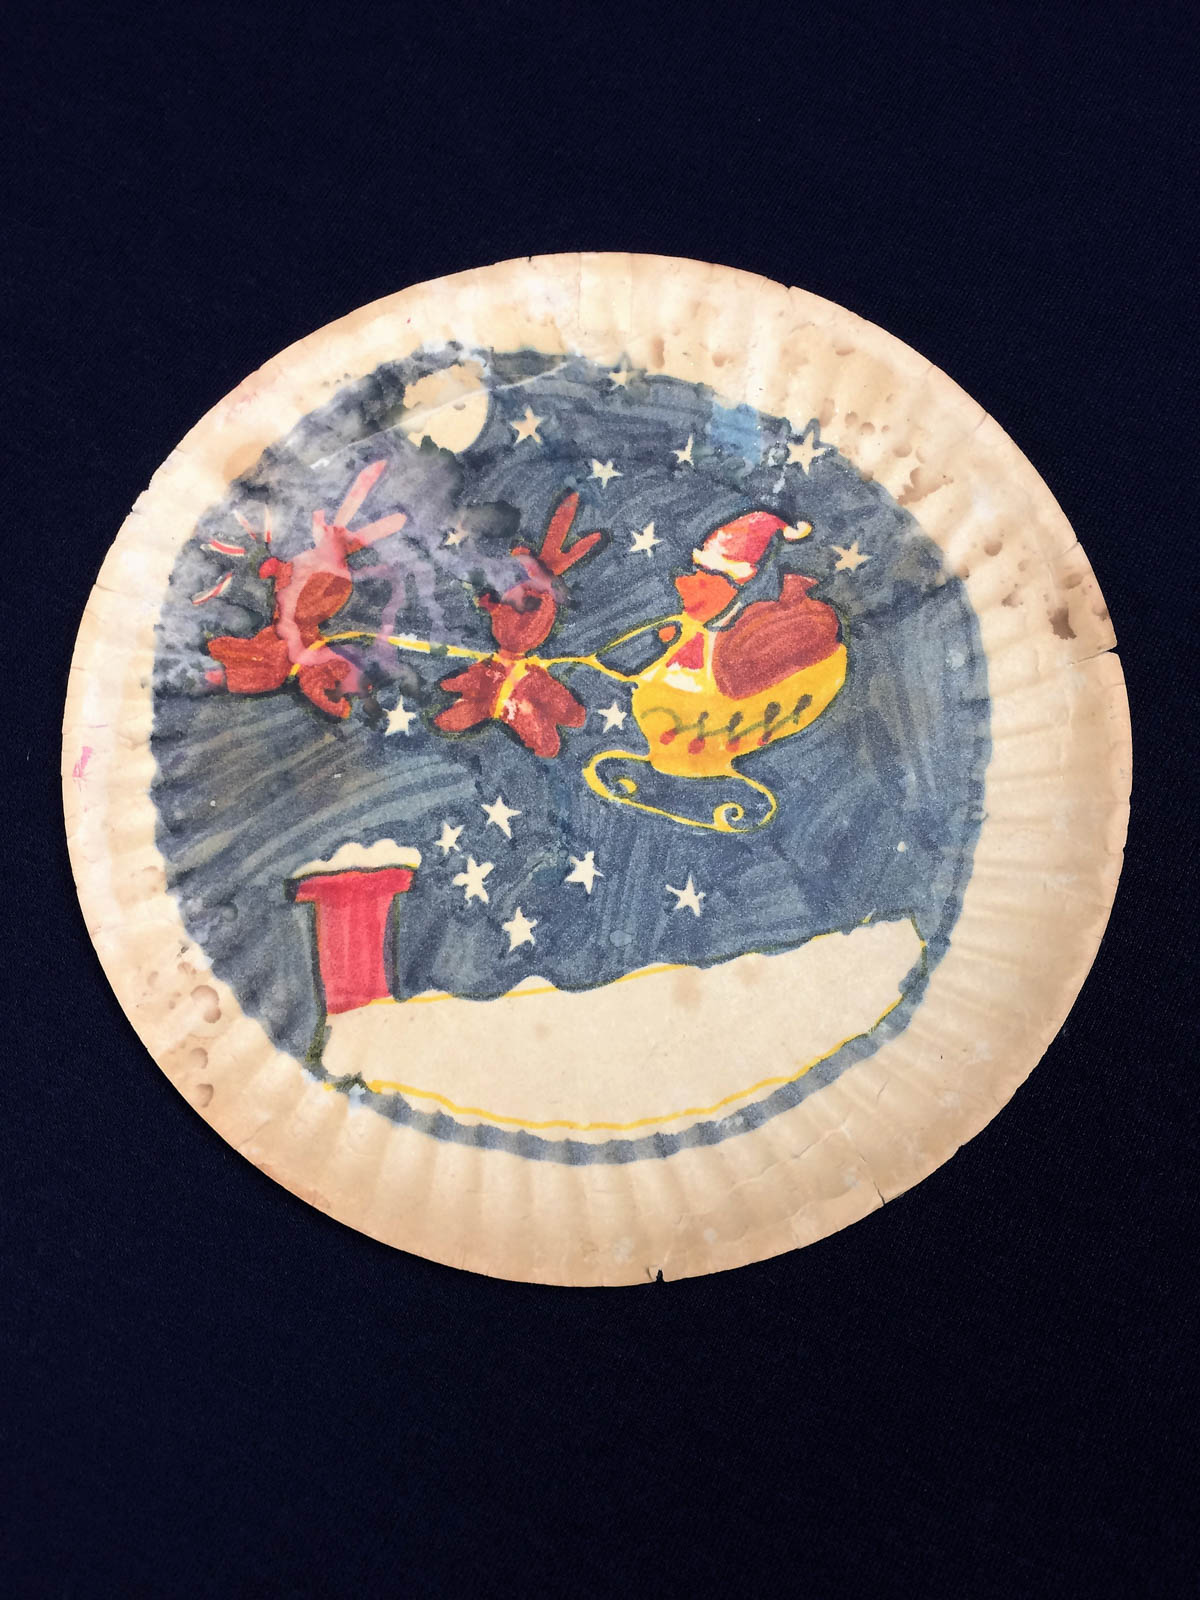
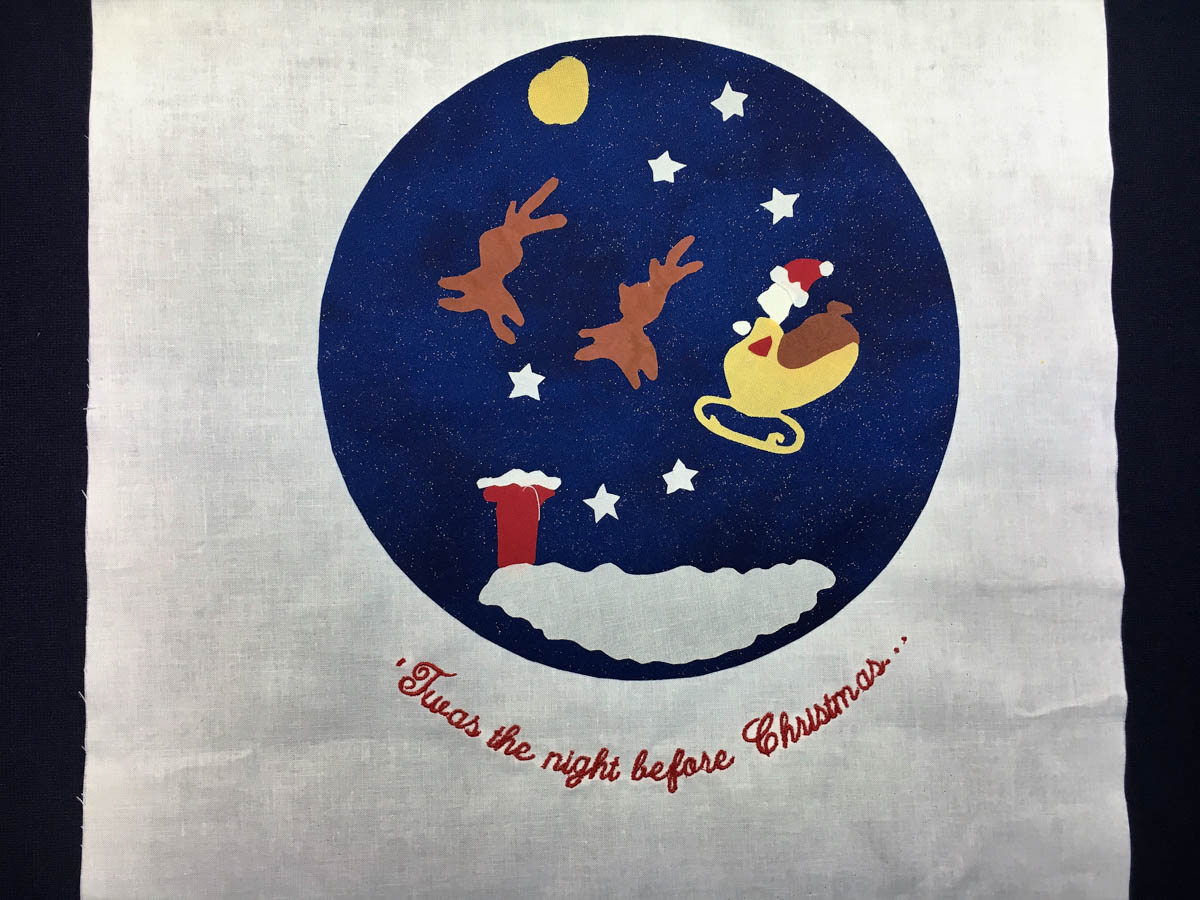
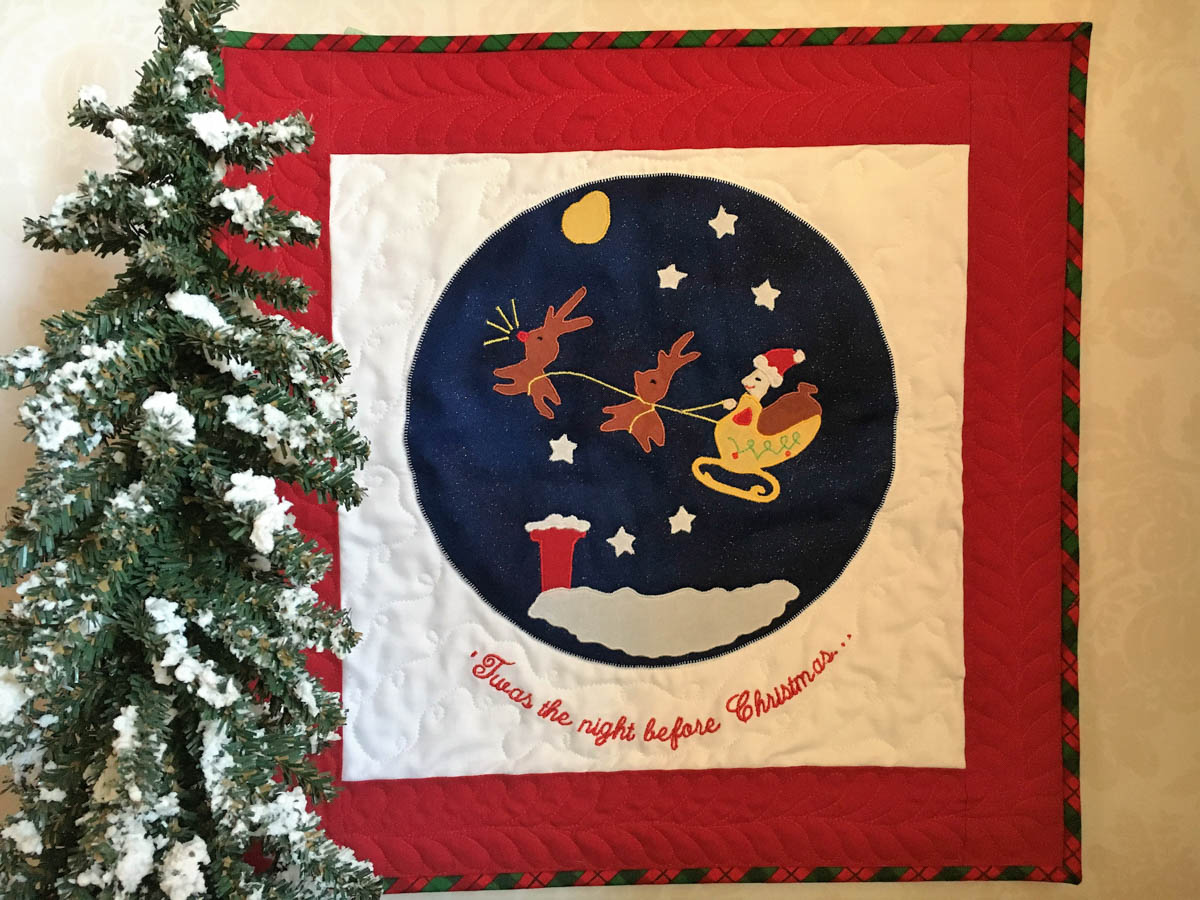
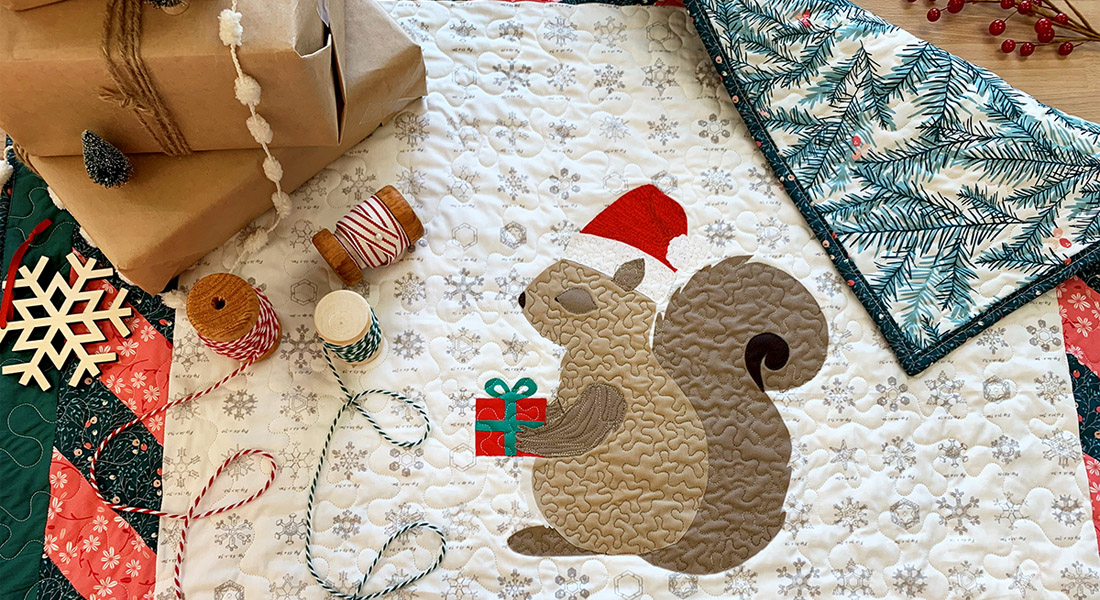
A Christmas tradition in our house includes putting up my children’s artwork. My seven year old daughter made an adorable paper plate drawing of Santa on his rounds that I always loved. Every Christmas it was displayed on the fridge. As time went by, it grew worse for wear and I thought it would make a wonderful little quilt. It is a great way to preserve memories and you might like to use your own child’s art.
Materials to create the Christmas Quilt
- Fabrics
- 15″ white background
- Dark blue 9 ½″ circle
- Scraps of brown, yellow, white, red fabrics
- ¼ yard red fabric for borders
- ¼ yard plaid fabric for binding
- 18″ x 18″ thin batting
- ½ yard backing fabric
- Corresponding thread colors
- Red embroidery thread
- Stabilizer
- Fusible material (lightweight)
- Sewing machine. I sew on a BERNINA 790
- BERNINA Open Embroidery foot #20C
- BERNINA Embroidery foot #26
- BERNINA Patchwork foot 97 D
Instructions on how to Create this Christmas Quilt
Step 1
Cut a white background square a little larger than you’ll need. Mine is 15 inches.

Step 2
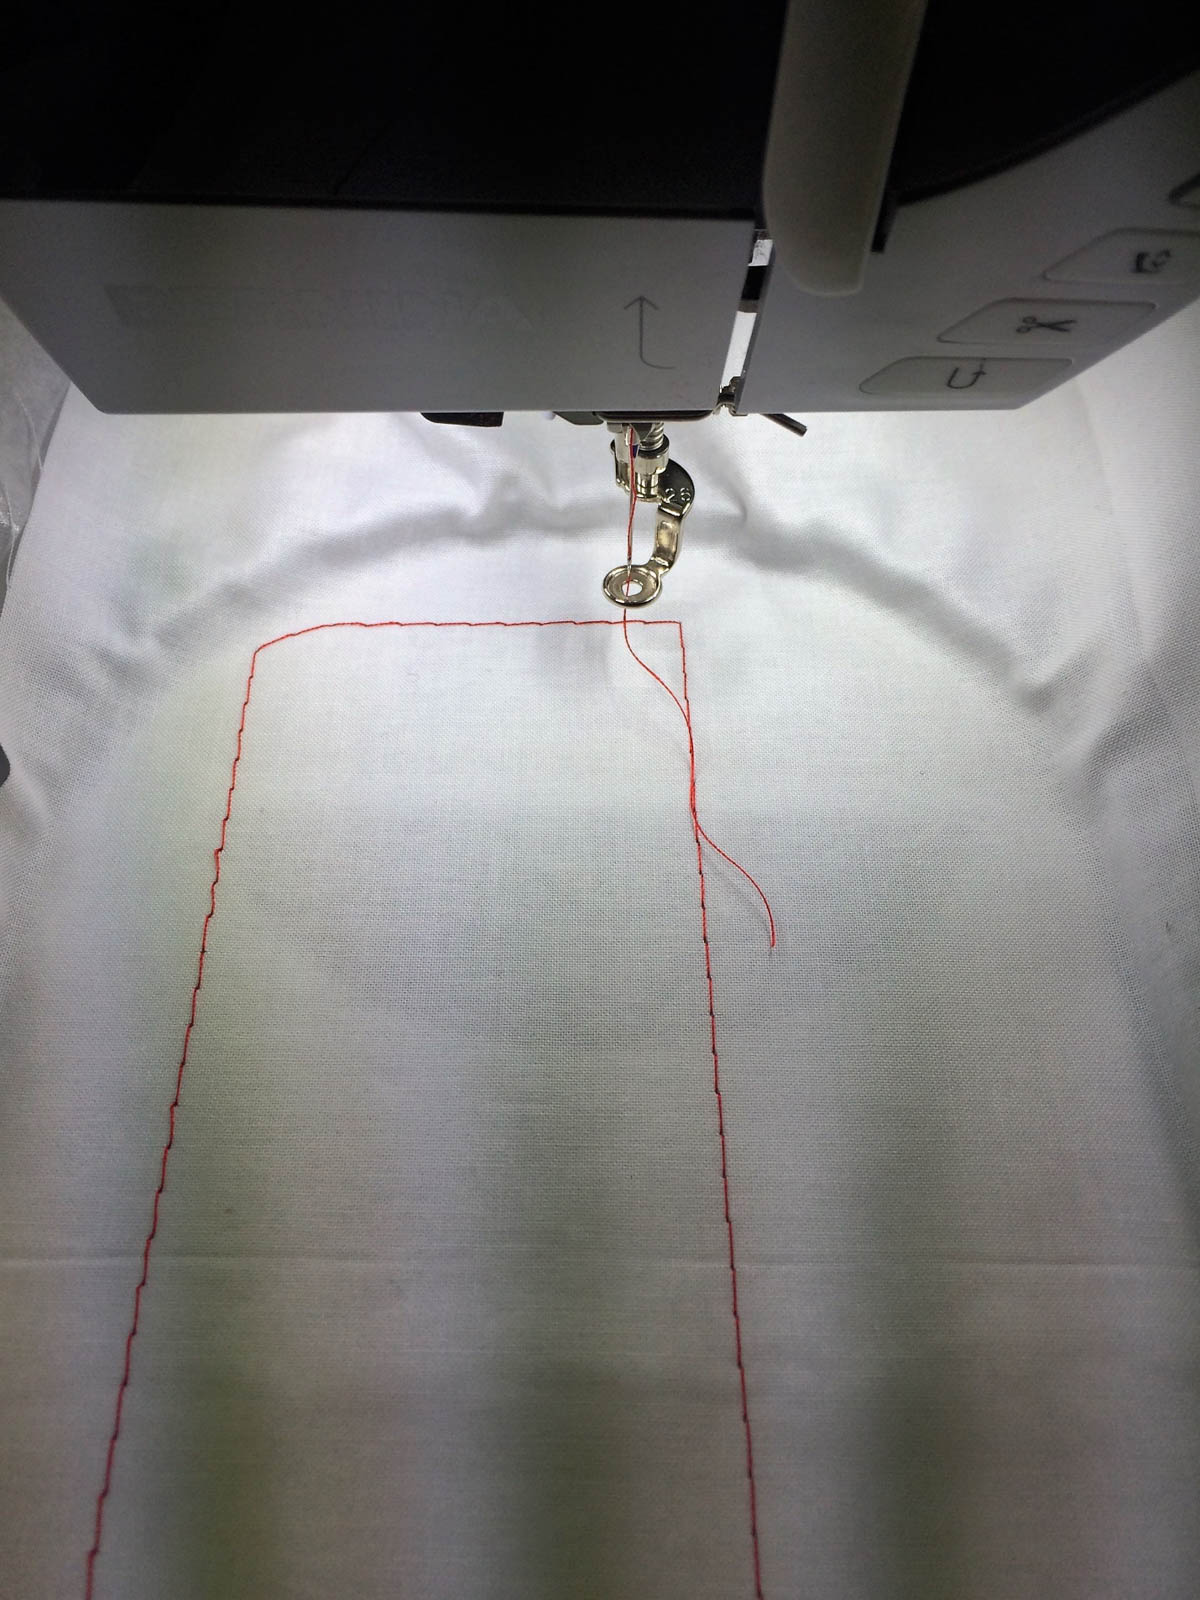
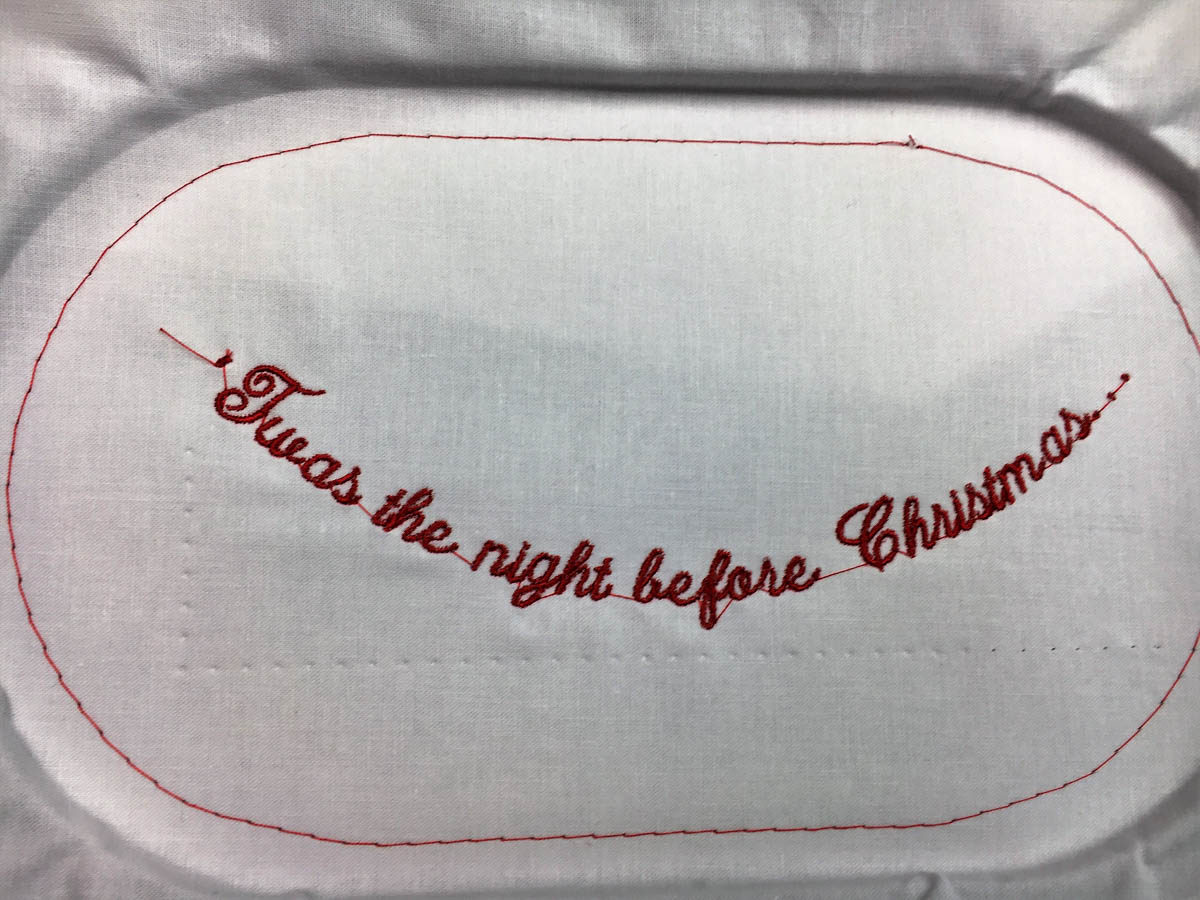
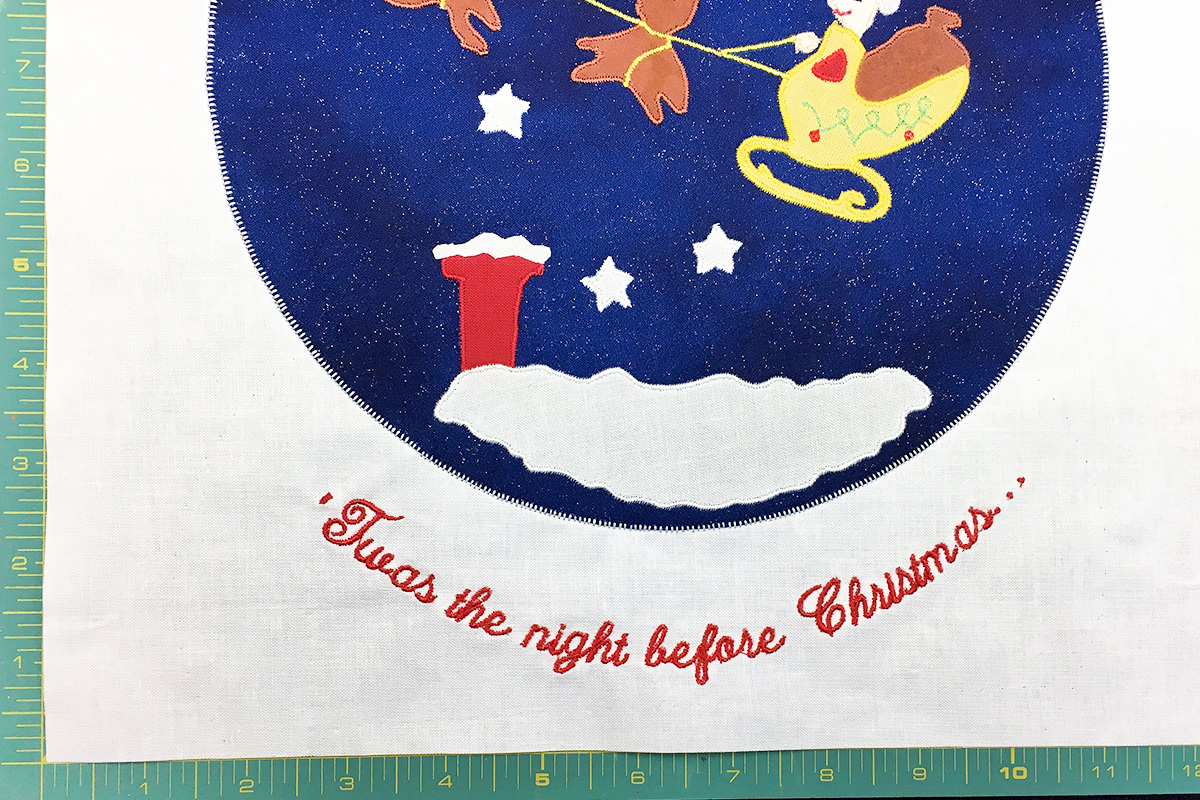
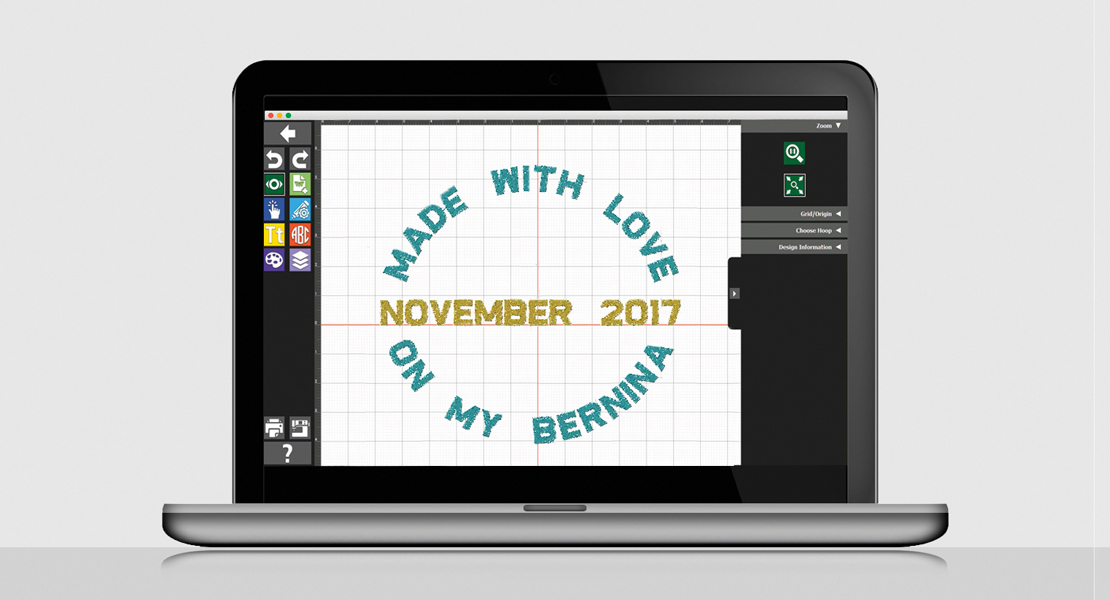
I wanted to embroider the lettering (‘Twas the night before Christmas…) first so that the applique would not be hooped. To do that I put in a new needle, threaded with red top thread and a white lightweight bobbin thread, and got my machine ready. The feed dogs were lowered, the single-hole plate was put on, and I used the BERNINA Embroidery foot #26. For the size embroidery I wanted, I would need the oval hoop. These settings were programmed into the machine. Going into the writing mode in the embroidery settings, I chose the script font. Because of the letter shape, I was not getting the spacing that I liked. My B 790 allows me to customize the spacing with lots of built in features. Using the multi layers, I was able to type the letter T on one layer, and the words “was the night before Christmas…” on the second layer, using the “i” to open the various icons to adjust the embroidery. I worked on the second layer (the longest phrase), opened the rotating motif, and moved to 90 degrees so the words would fit the hoop. I shrank them down to 53% using the icon to proportionally alter the embroidery motif. Then using the bending the text icon, I turned the lower machine knob until it read -8, a curve that I thought would match the shape of the paper plate. After I got that shape I went back to layer one. I shrank that to 53% and rotated it 90 degrees. I used my finger to drag the T into position and fine tune with the two multi-functional knobs. You can use the zoom tool to see that it is just right.


Step 3
I used a sticky stabilizer (so I didn’t need to hoop the fabric) and placed it in the hoop. Hoop the stabilizer first, then use a pin or sharp scissors to score and remove the paper backing on the stabilizer. Position the background fabric so it will stitch out near the bottom allowing room for the appliqué.

Step 4
I like to baste around the embroidery. My BERNINA 790 will baste around the edge, too
Step 5
Stitch out and remove from the hoop.
Step 6
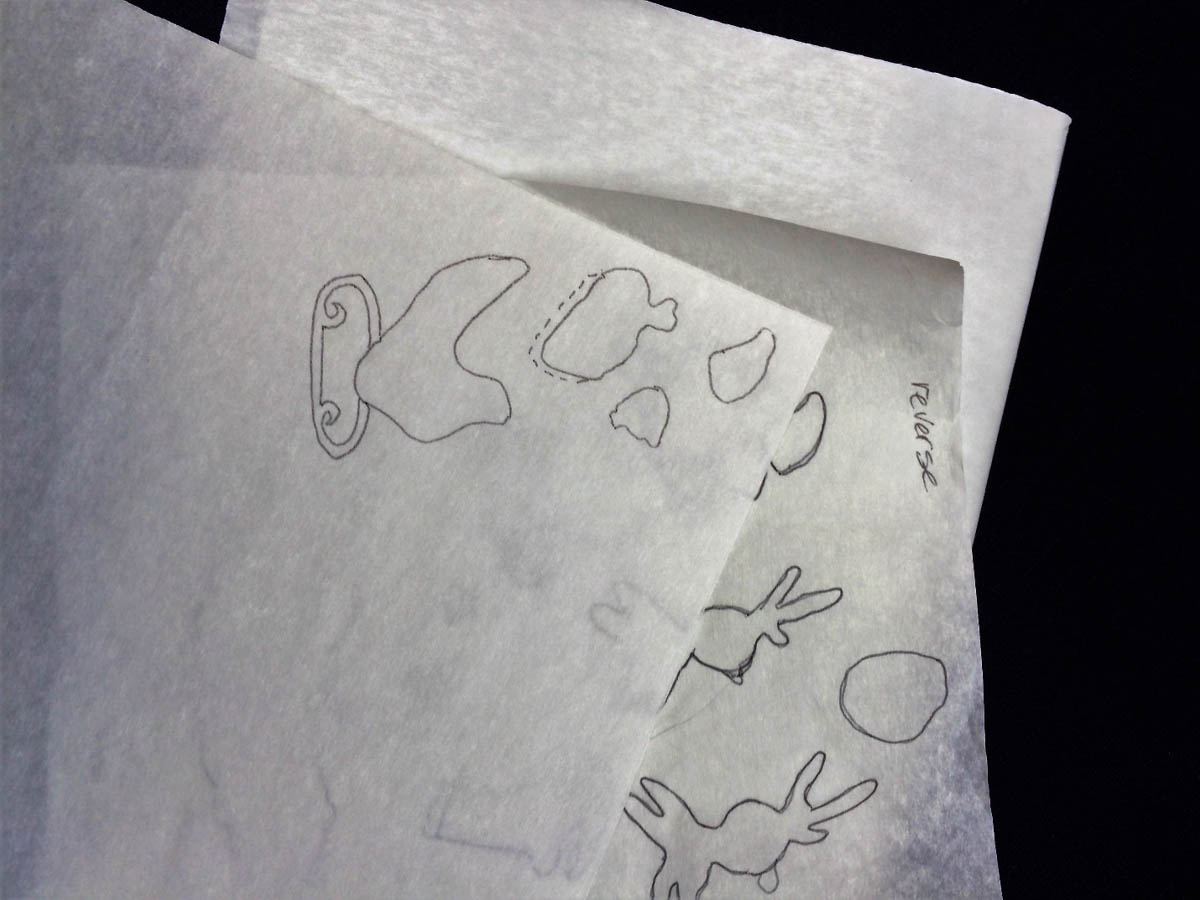
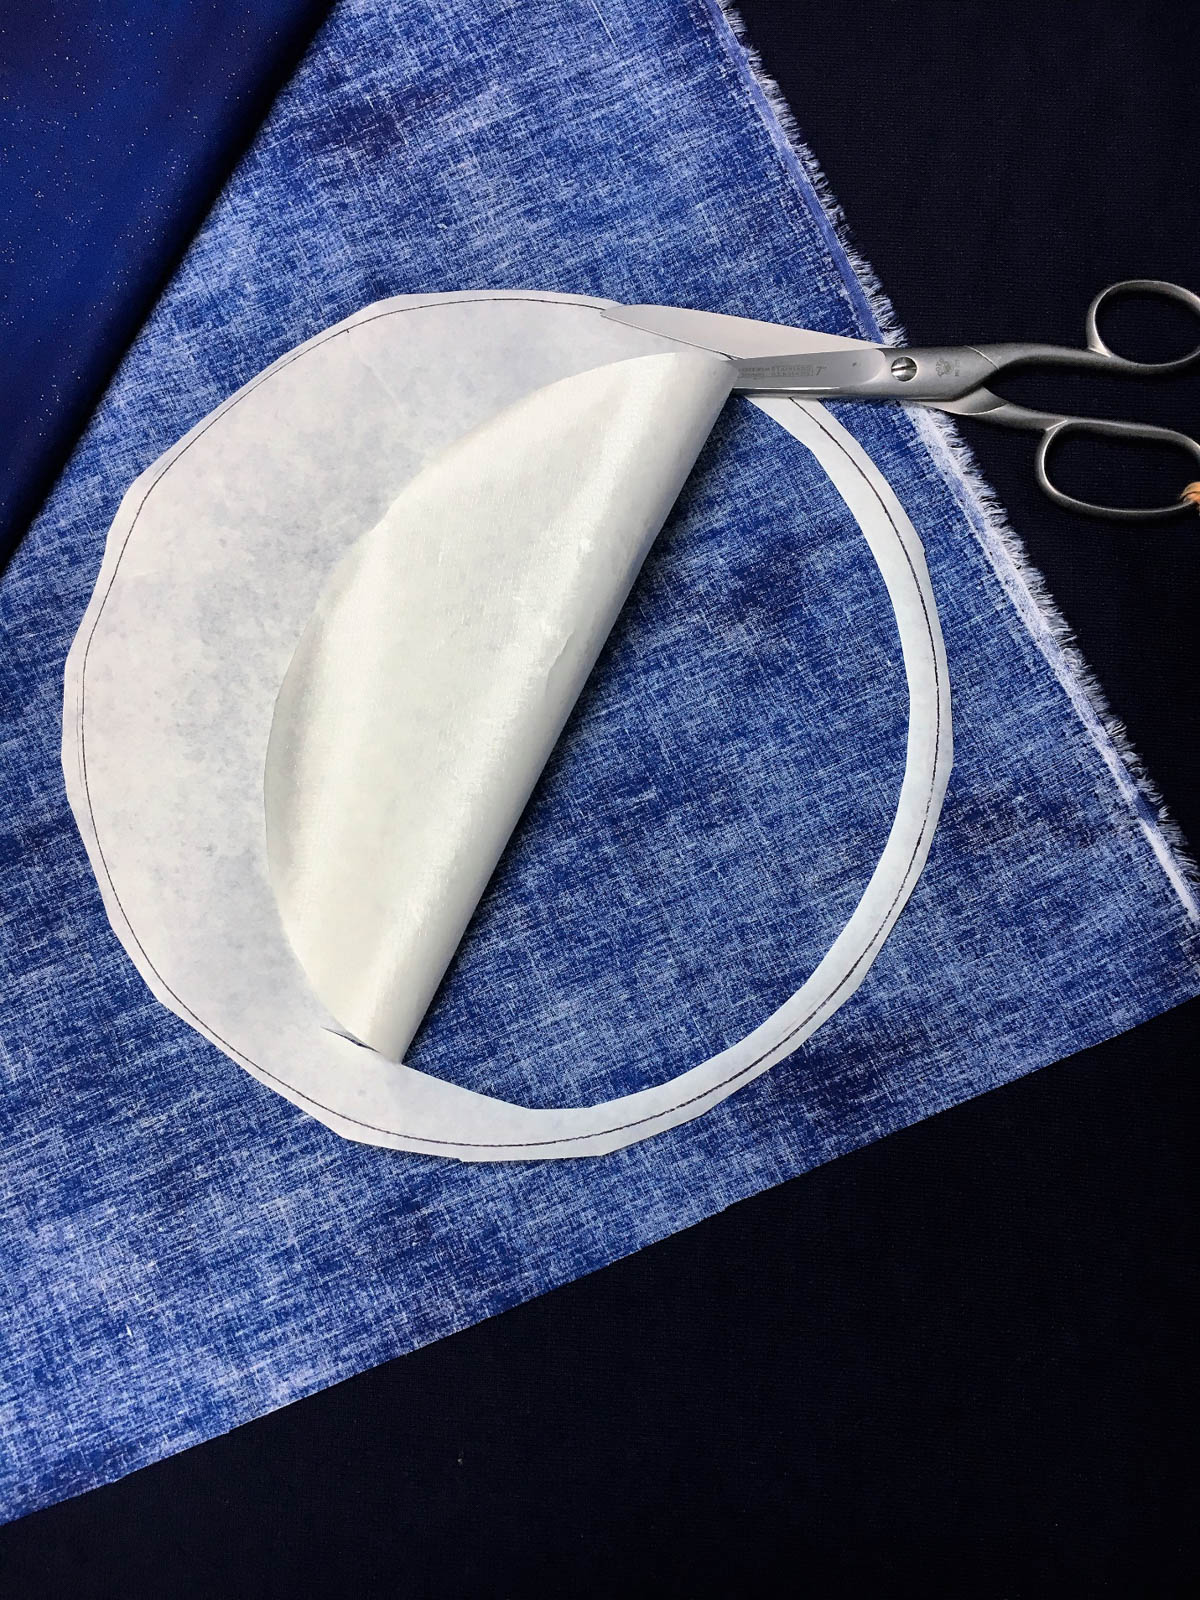
Trace out the appliqué designs using vellum to make a pattern using a black Sharpie pen. If pieces are directional, redraw on reverse side of vellum. Trace onto fusible web—I like Steam a Seam II. Tip: place sheet of white paper underneath to see designs better.
Step 7
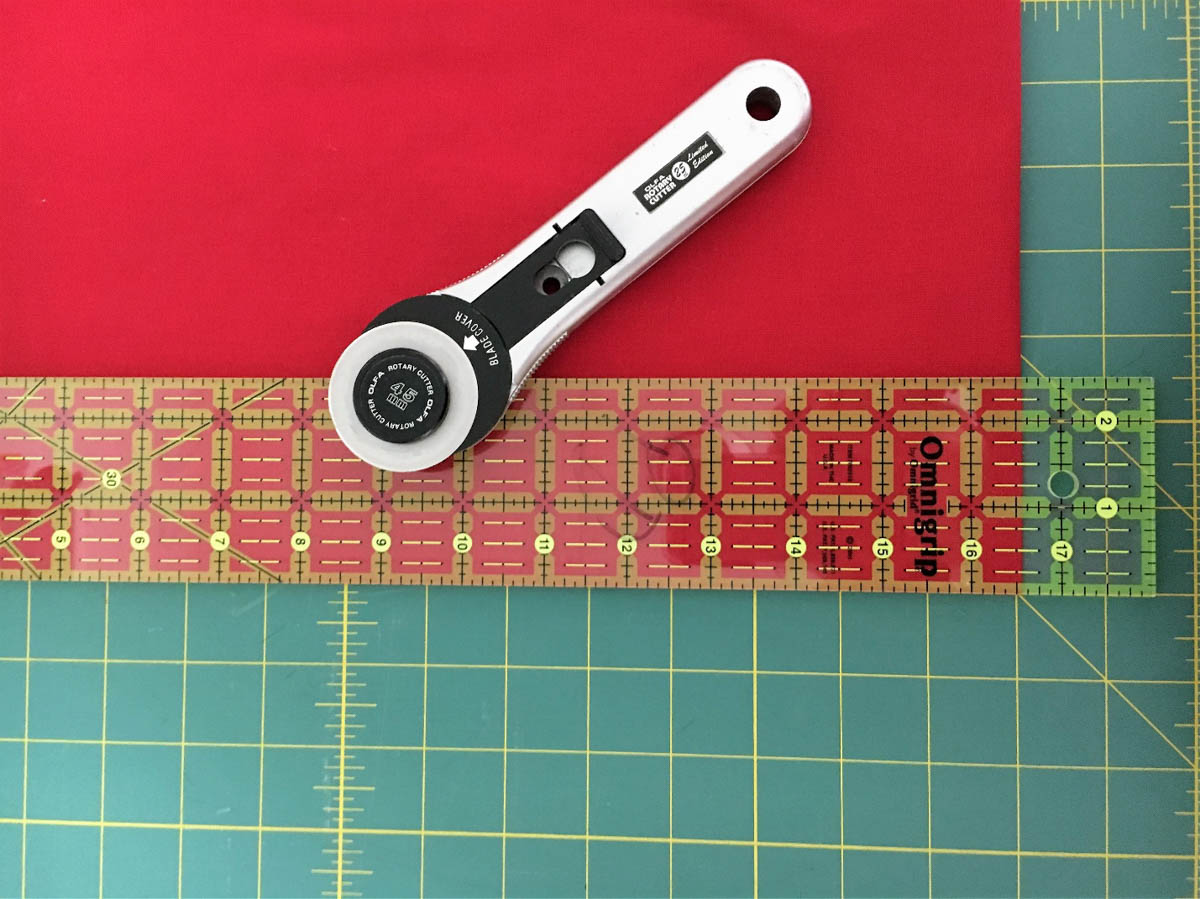
Draw a 9″ circle on fusible and cut away all but ¼″ off of inner circle, leaving 1/8″ more on outer line. Fuse to dark blue fabric following fusible directions and cut a 9″ circle.
Step 8
Fuse designs for each shape and cut.

Step 9
Arrange appliqué pieces onto circle and press. Place on white background centering and spacing evenly above lettering.
Step 10
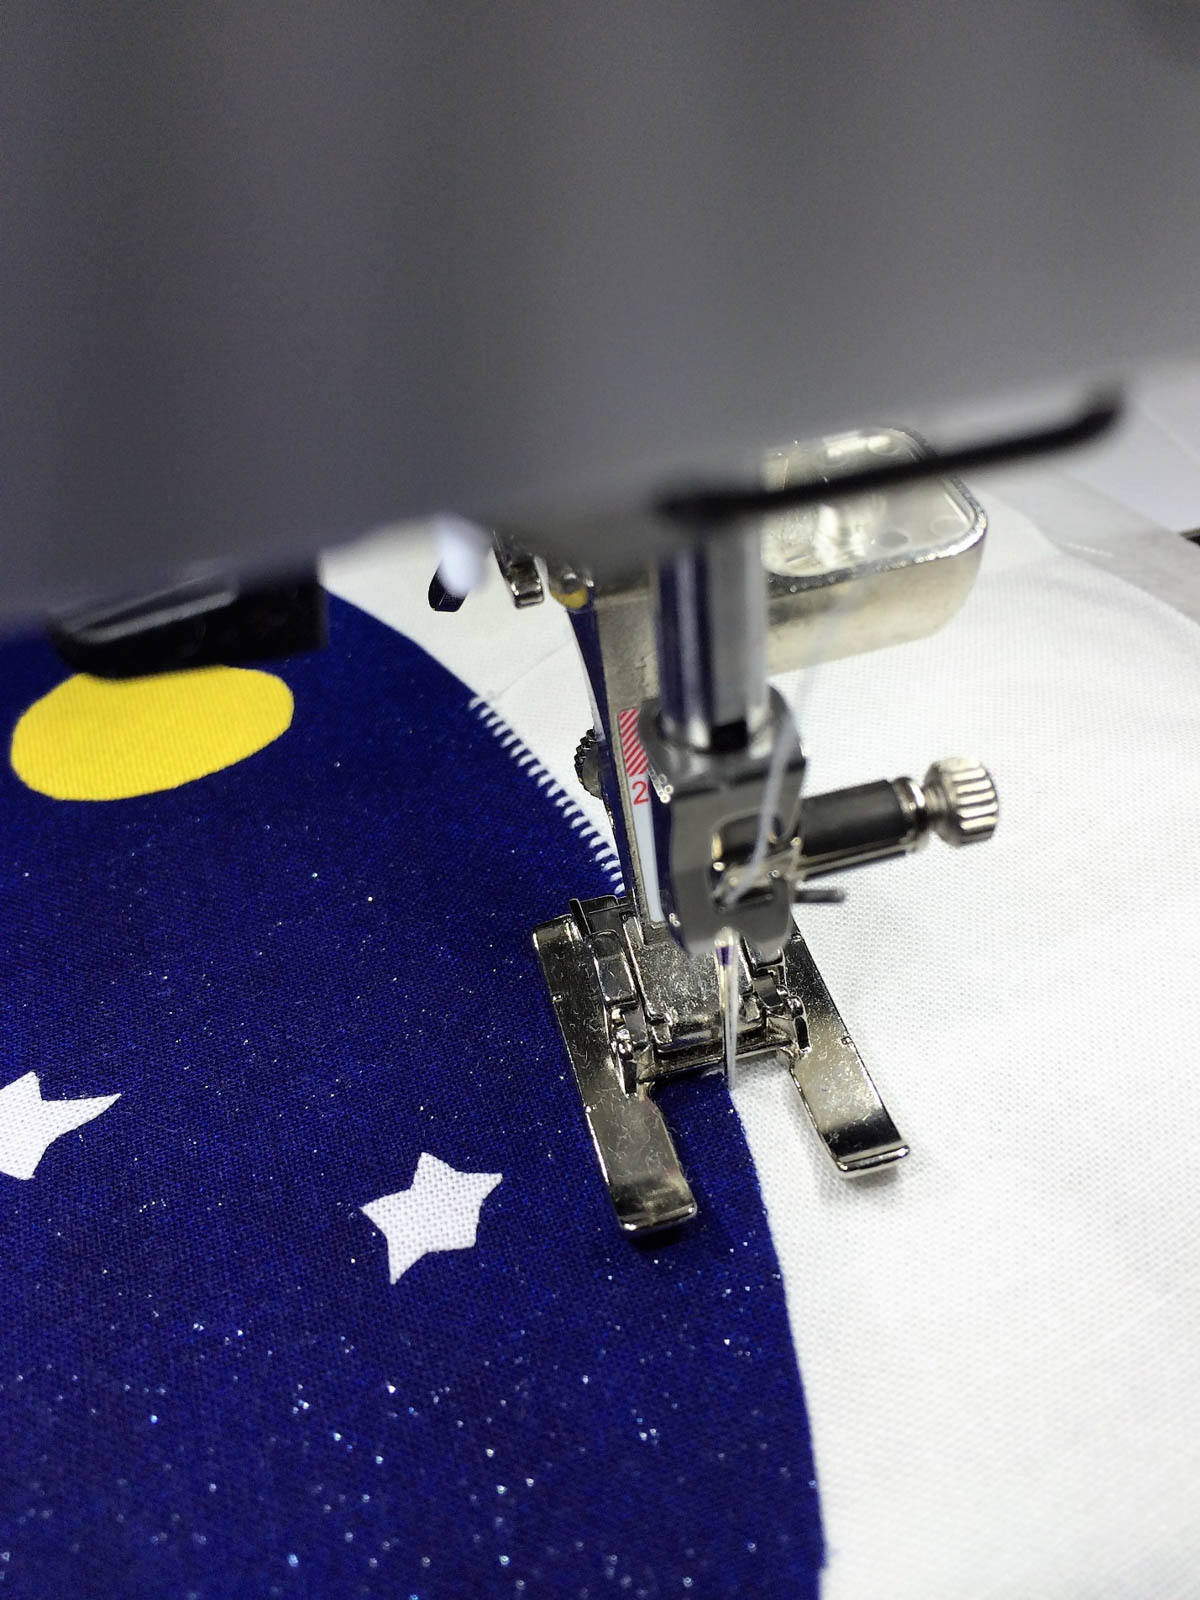
I used a mini-blanket stitch for the blue circle. My settings on the BERNINA 790 were stitch number 1329 with a length of 1.25 and width of 1.8. I changed out to a number 20C foot and changed the throat plate to the 9 mm opening. A piece of stabilizer under all is helpful. It will be torn off at the end.
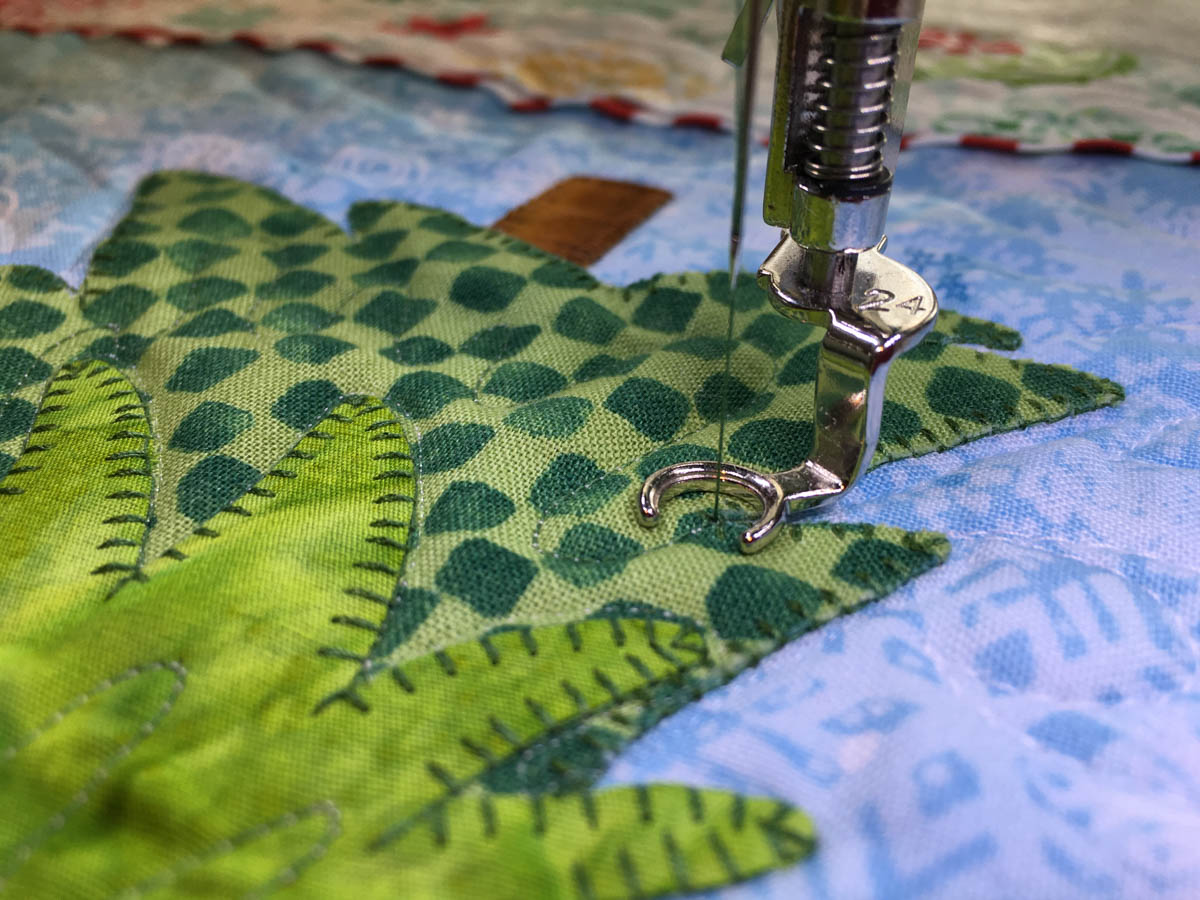
Step 11
The smaller pieces of appliqué were finished with a tiny satin stitch. The settings were stitch number 2 with a 0.25 length and a 1.5 width.

Step 12
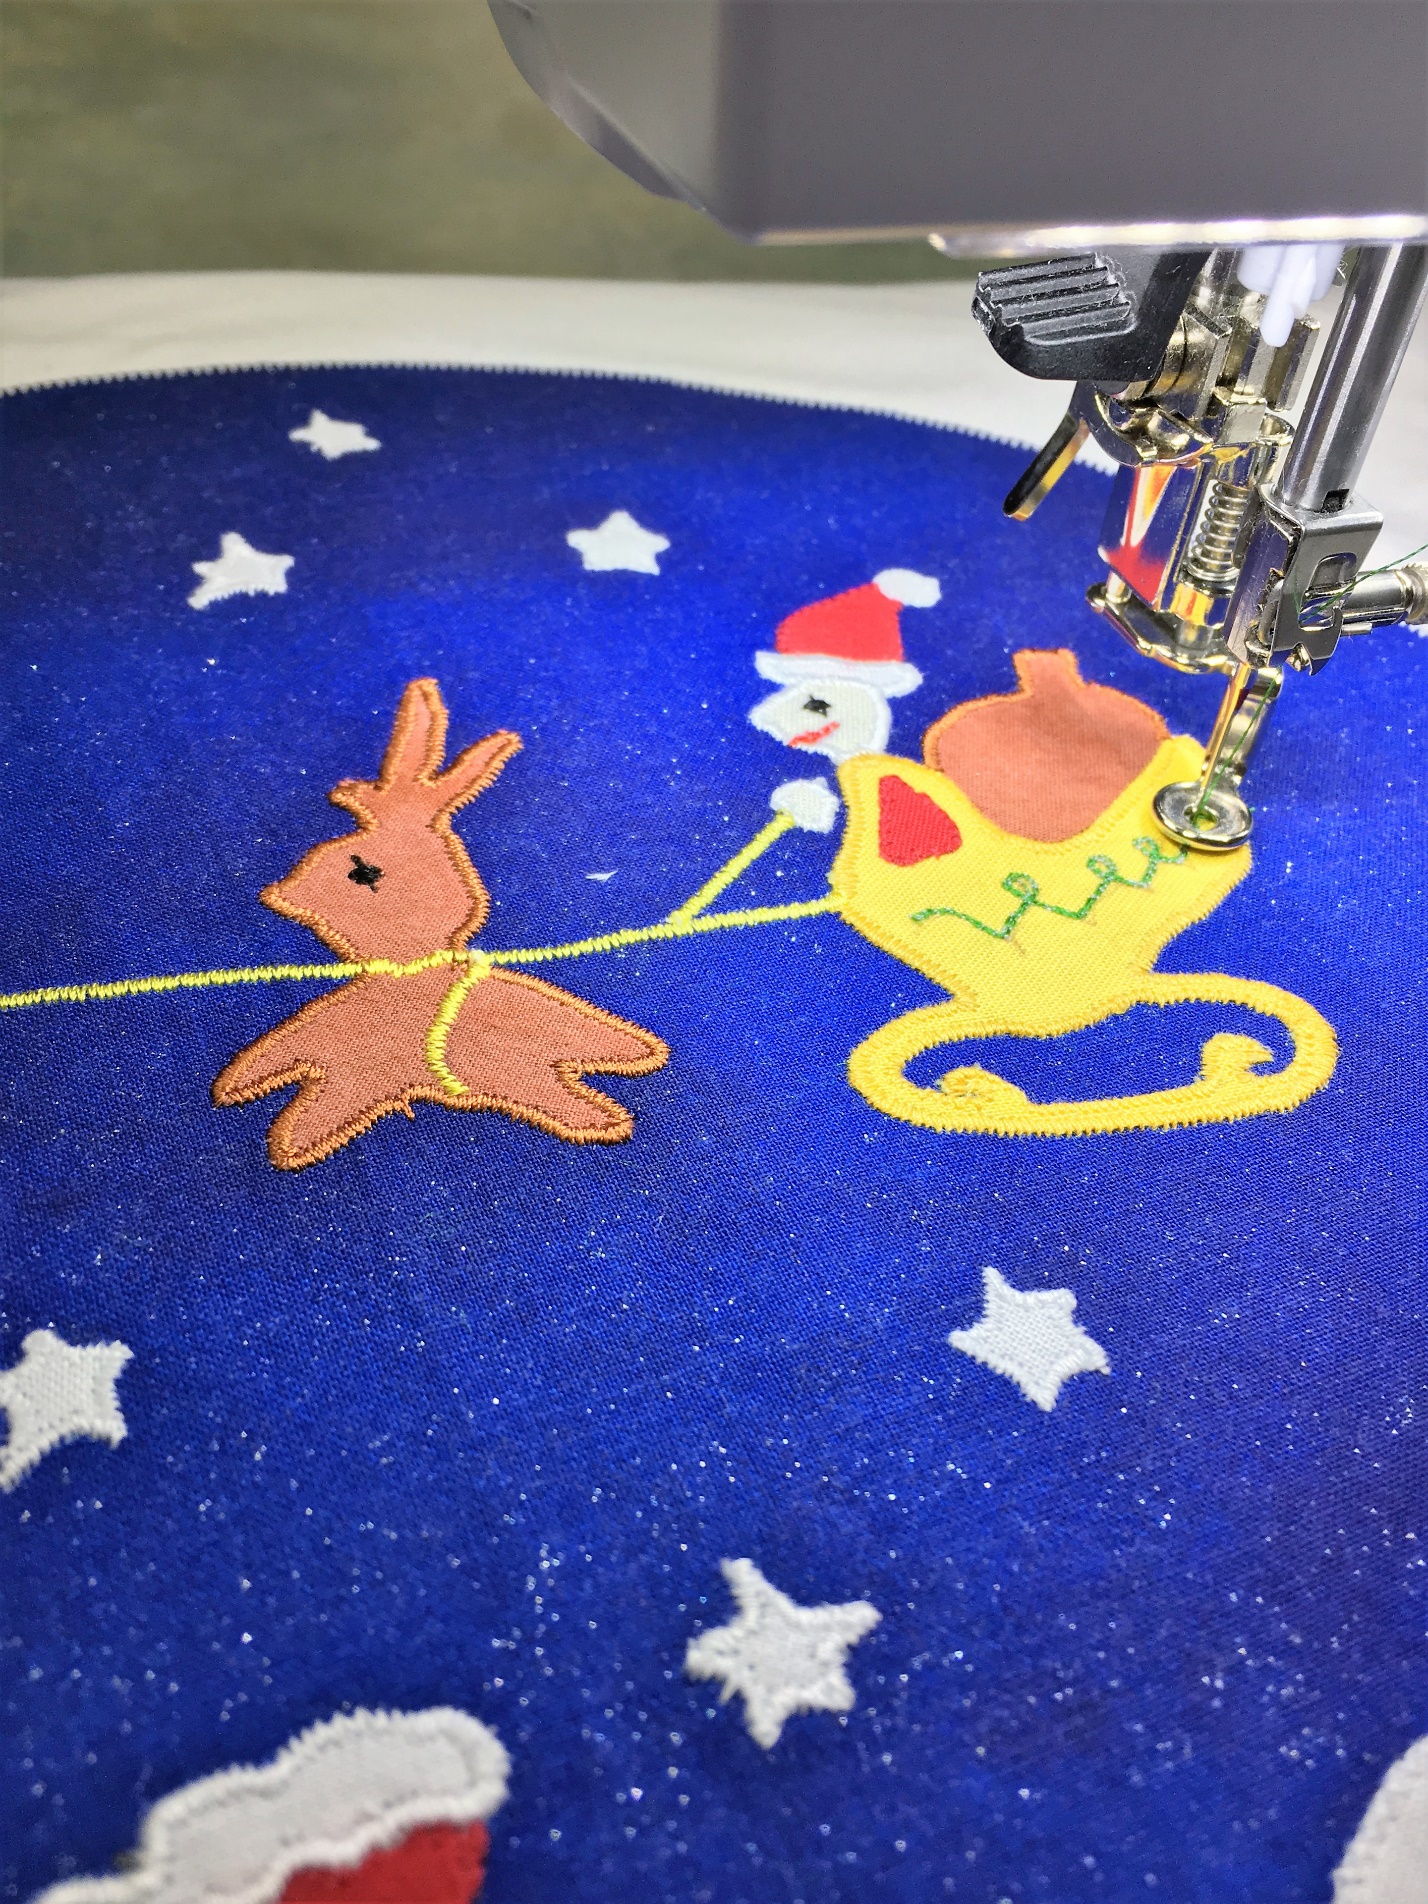
Once all the appliqués are stitched down, I added details with free-motion or additional satin stitch. The sleigh decoration was done free-motion with the BERNINA Embroidery foot #26 foot, straight stitch plate, lowered feed dogs, and a little looser tension.
Step 13
The reins, glow, eyes, and mouth are done with a tiny satin stitch (length 0.25 width 1.5).

Step 14
Trim to a 12 ½” square and remove stabilizer.
Step 15
Add 2 ½” borders.
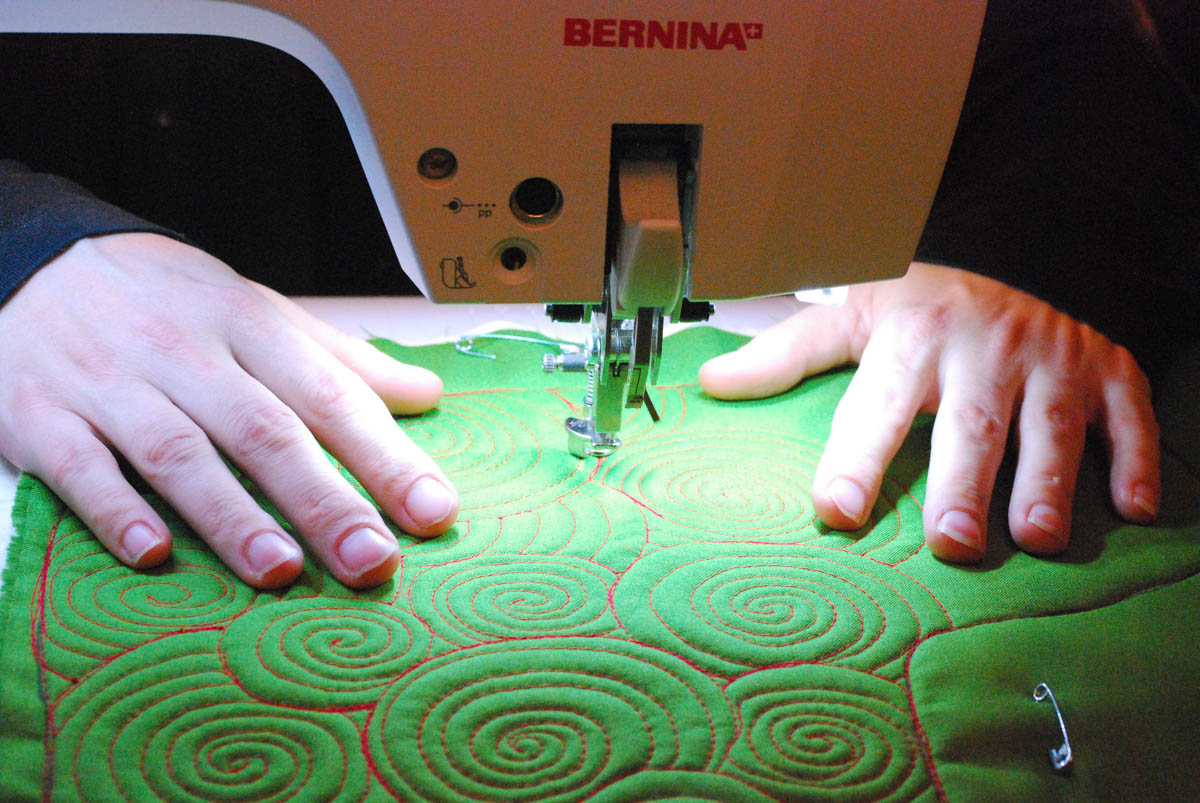
Step 16
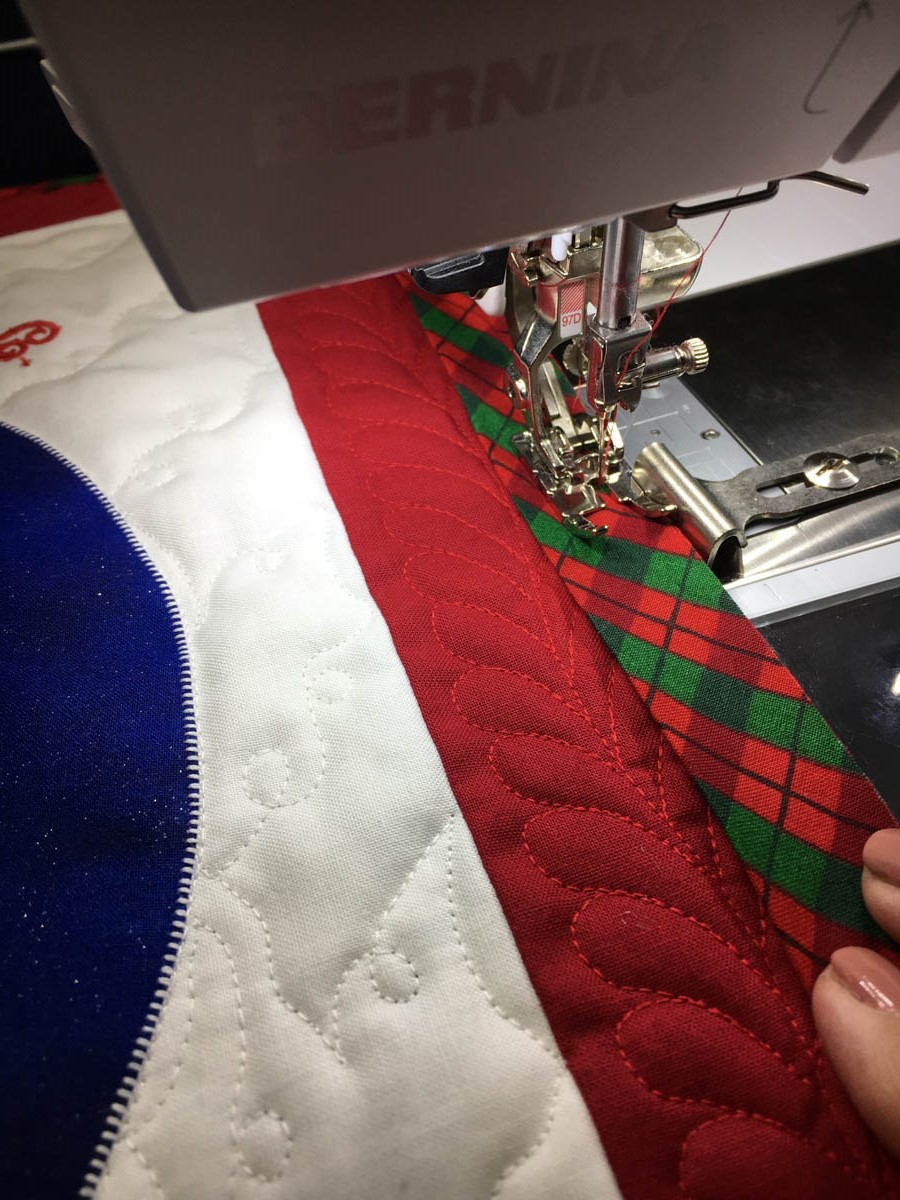
Layer with a thin batting and a backing. Machine-quilt lightly. I avoid the appliqués.

Step 17
Add a binding. I love to use the BERNINA Patchwork foot 97 D for this as the seam guide can be set exactly where I want it.
I think I got as much use out of that one paper plate as anyone could expect, so I am glad now to translate it to a small quilt to use in the future. After all, what would Christmas be without family traditions?
Pat Delaney of Crabtree Lane Quilts.
Our December 8 Gift For You
Today’s gift is a clear BERNINA sewing accessory box with a BERNINA red handle for easy transportation to one awesome WeAllSew fan.

All you have to do is post a comment below answering the following question:
Where do you store your sewing accessories?
A winner will be chosen at random on December 9, 2016 and announced the following week!
Good luck!
The contest is open for comments until December 8 at 12:00 midnight Central Time. Click here for contest rules.
Congratulations to our WeAllSew reader “smiller530”, the winner of the December 8 gift. Enjoy!
Used Products


What you might also like


102 comments on “‘Twas the Night Before Christmas Quilt Tutorial”
-
-
I have dozens of covered clear plastic boxes with pink covers in different sizes. They all are marked with what they contain. Sewing tools, quilting tools, polyester thread, cotton thread, childrens patterns, adult patterns, and then all my large ones with my stock of fabrics, etc. This case would be so handy to keep the items in for the project I am currently working on.
-
-
Store my supplies in shower caddies and boxes my hubby made in his workshop 🙂
-
I recently retired from teaching. My husband and I turned a small 11×11 bedroom into a sewing room. Most of the things I need are stored either on or in a Welsh cupboard or in my cutting table/chest of drawers my husband modified. Because the room is so small I set the cutting table, cupboard and sewing machine cabinet in a triangle – a quick roll of my chair and I can reach most all of my equipment gadgets and gizmos.
-
I have a little yellow box with a clear lid and handle that I use to store some of my sewing supplies. It is ready to go when I want to go sewing with friends, take a class or just sew in my sewing room. The lid is cracked, probably from trying to put to much in it. A new Bernina sewing accessory box would be ever so nice.
I love the idea of making a quilt out of children’s artwork. I wish I would have thought of that years ago, but I will remember when my 18 month old grandson starts to artwork. -
I live in a Northern state and winter in a Southern state so my sewing supplies all always ready to travel. I keep them in a special red box one of my sisters had given me for a past birthday.
-
I have a variety of places to store my accessories. Of course the accessory box – but that is rather full! I also made one of those jewelry hangers with clear pockets – it’s on my wall so I can see some of the presser feet. Then there’s an old fishing tackle box for other things! 🙂
-
What a wonderful idea!! Just one more reason to get a machine that embroiders ; ) I store my sewing accesories in an old wood tool cart and in a set of wood library card catalogue drawers. Thanks for the chance to play!
-
I use the Bernina cabinets that came with the sewing machine and also the drawers of my sewing cabinet.
-
I store my accessories in a sewing basket and also a small multi drawer storage unit.
-
I store my accessories in a variety of places: sewing cabinet, armoire, and rolling cart with plastic storage boxes designed for nuts and bolts.
-
All over! Drawers, cases, nooks and crannies.
-
I store my accessories in the box that came with my 580 and in several nearby drawers.
-
I am blessed to have a huge studio with shelves, cabinets and drawers This keeps me organized, but nothing really keeps me from creating a mess in my sewing room every day. 🙂
-
Everywhere and in anything handy. I have cardboard boxes, kitchen cutlery trays, art bins, etc. The trick is to remember where I put everything!
-
Primarily I use a rolling cart with bins from Ikea. I do have a travel tote with pockets fro when I go to classes.
-
I store sewing supplies everywhere – sewing box, stacked drawers, filing cabinet, chests with drawers, etc.
-
I looked at sewing baskets and discovered just how expensive they are, given that most of them are poorly made. As I was looking for an alternative, I stumbled upon a toolbox that was inexpensive, yet provides everything I need in a storage container. The lid has several compartments for smaller items, which makes for quick and easy access. Inside is a storage tray with individual sections to store other small items and underneath the tray is plenty of space for storing larger items, such as patterns and material.
-
My presser feet are in a drawer in my sewing table. I need to find something better so I can find the one I want more easily.
-
Hi I have small pie plates and saucer and old fashioned cabinet to hold the items but still spend too much time looking so this would be really nice
-
-
I store sewing supplies in plastic boxes, rolling drawers, chest of drawers in a closet, – – basically anyplace I can find some empty space.
-
I store my sewing supplies in my sewing room in chest of drawers, totes shelving, closet shelves,and an old metal pattern cabinet. Also in the basement, attic and upstairs dressers. Sounds like I need to get busy!!!!
-
All over. I do not have a dedicated sewing room, just a corner in my bedroom, so I have kind of taken over the main dresser.
-
They are in a box but not very organized to be honest.
-
In cloth baskets from the Dollar Tree. They fit nicely in a book case.
-
Store mine in anything I can find to recycle for good uses.
-
I store them in the most haphazard way using anything I might have available. One day in my future I will have a sewing studio complete with storage!
-
I store my accessories in the drawers of my sewing cabinet
-
Pen boards and a kitchen accessory wall hook unit (for cutting tools)!
-
I have three of the Bernina boxes that hold my presser feet. I use small totes designed for scrapbooking supplies to hold scissors, glue sticks, marking pens, etc
-
Mine are currently in a little tray meant for pens originally and a cardboard box for the item that don’t fit in it!
-
My sewing accessories are stored in a beautiful sewing cabinet my husband made for me. It has storage for spools of thread on the inside of the door and a stack of four drawers,
-
I store my machine accessories in the cases they came in, next to the machine. I have several machines for different uses, set up, soI don’t like being disorganized, when it comes time to play!
-
In any number of plastic organizer boxes, cloth boxes, and drawers.
-
In the Bernina case that came with my machine, and in my sewing table. But the thread, oh my, I have a LOT of thread in a good size basket.
-
In the prettiest wicker basket
-
My favorite is the Accessory Boxes that came with my Artista 200 and B780, For larger items my Minion Tin mini tool box has room for all the basics I need for traveling.
-
Baskets, Baskets and more baskets in all sizes and my rulers hang up on peg board and hooks.
-
I am lucky that I have a dedicated room for all of my sewing supplies. The tools I use most often stay right beside the machine. My cutting area is a cabinet with a countertop covered with a cutting board, and I leave all my rulers right at the back, some tools in the top drawer, and fabric goes in the other drawers. Worst problem I have had is that the ‘dedicated room’ has been relocated twice, so some stuff didn’t make it to its designated place…I’ll find it someday!
-
I used to keep my sewing supplies in a desk drawer but when we moved I put them in a cardboard box and haven’t moved them. Unfortunately, it’s been several years since we moved so they really should be in a better place by now.
-
I have an entire ikea drawer chest I use to store all my sewing gear I don’t use as frequently as my accessories near my table. I then organized my notions with small plastic containers I had lying around the house.
-
I store my sewing supplies in a box I got at the hardware store.
-
I store most machine accessories in the drawers of my machine cabinet. Rulers and rotary cutters hang on a pegboard on the wall above my cutting table.Other notions (and fabric) are in lots of plastic totes – and bulging out!! I need more storage!
-
I have my machine feet in the cases that came with the machine and various items throughout my room. Cutters in a box, pencils and pens in a box, needles in a case. My room looks like a disaster because it’s so small though (9×9)
-
A portable yellow tool box with pullout see through drawers complete with individual compartments holds my growing collection of Bernina presser feet. To keep track of each foot, I photocopied the image and short descriptor and placed it in each section. That way, when I am done using that foot, I can put it back in its proper place. It’s also handy when going to Bernina machine accessories classes.
I also have a dresser which houses the remainder of the Bernina accessories each separated by sewing and embroidery accessories. Bernina comes out with many new products, I may need to expand. -
I use the bernina accessory boxes that come with machine for feet. For full 830 bobbins I use clear acrylic cylindrical bead storage containers. These come 9 to a clear acrylic box with lid. Each cylinder fits 4 bobbins and I place a sticker on the top of each one to indicate what kind of thread is inside. The clear acrylic allows me to clearly see the color of the thread and they keep the bobbins nicely. Other accessories go on a large wooden spool that has hooks on it (sort of like a mug tree only the hooks are bent antique spoon handles). This is handy for hanging tools with loops like a screwdriver or packages of needles.
-
I have purchased some cabinetry, the accessory caddies that come with my machines, shelving, boxes, I even borrowed my grandson’s book rack that I now use for my sewing books.
-
I have a variety of plastic boxes & bins, also baskets, drawers, tins & shelves. Stored all over the place, actually.
-
Currently they are in boxes all over my house, awaiting the completion of repairs on my flooded sewing room.
-
I just have a drawer that everything gets thrown in….sometimes I think i should get more organized, but it works for now!
-
I use the plastic drawers that combine together for most of my accessories. One for sewing, one for quilting, and one for embroidery. 🙂
-
When I am cleaned up and neat, they go in boxes and drawers organizers; however, I am not very often that organized , so they are all over my work area most of the time.
-
I store them in my sewing cabinet and baskets
-
I store my sewing accessories in drawers, on pegboard, and in drawers. This is cute box. ?
-
Some accessories hang but more are in baskets and various drawers. Some people are by nature organizers which is a trait I admire. I have to work at it!
-
I use the case that came with my Bernina and and a jolly cart.
-
I keep some of my go to items in a plastic container with little dividers. I’ve had it for years. Probably got it at Walmart. It is getting rather full and hard to close. A New Bernina storage accessory box would be wonderful.
-
I use a clear flat box with dividers for all my sewing feet and small accessories I might need to use while sewing. I recently purchased some clear food storage containers with the lift and lock style. I bought 3 different sizes. As I look around my sewing room, I still have so much stuff that should be better organized……oh well maybe my next life. I love the Bernina box you are offering today…..perfect to take to class for my friend’s house to sew.
-
Mine are scattered. I use a small toolbox for taking to workshops and sit and sews. My presser feet are in plastic boxes except for those that I use on a daily basis. Those I keep with other tools in a divided tray meant for office supplies. Plastic containers are my lifesaver.
-
Ha! I like this one. Although fortunate to have turned a spare bedroom into a sewing room once we experienced empty nest (I scramble to get it Murphy bed ready when the kids come to visit!) I have a little bit of sewing supplies in small portable bins so I can stitch in any room I find myself in for the moment!
-
I keep mine in a basket. I need something with a lid.
-
What a cute project. Love all the details you give too. I store some of my feet in a box close to the machine others go into special drawer- cabinet box.
-
All jumbled together in a zipper pouch.
-
My husband and I just moved halfway across the country and I’m still organizing my new sewing space. I’m using Bisley cabinets with various drawer dividers to corral all of my accessories for my serger and my 880, and the accessory case that came with my machine. I love it!
-
I have a variety of storage items but not one centralized container.
-
I have sewing machine items stored in the top drawer of a chest as well as the sewing table drawer, but I need to be more organized.
-
All around the room… in boxes and drawers. in a wooden silverware tray,
-
I have an old plastic sewing box that I have my sewing accessories in. I have just returned to sewing after about 20 years and I just got a new used Bernina sewing machine. I am looking forward to getting used to my machine and I sure could use some new sewing accessories and storage for them.
-
Being a quilt maker, I have lots of necessary sewing accessories. Transporting these accessories to workshops, classes and retreats has always been a challenge. This handy little storage container would be perfect!
-
My accessories are stored in my two Bernini boxes that came with the machine. My seam ripper remains available at all times ✂️✂️
-
So cute
I will make it for my grandson
Thank you so much (great explanation) -
all over the top of my sewing table – I need help! pick me! Thanks for the gift!
-
Accessories are stored in a small 3-drawer carrier for classes. For home storage-many storage items for multiple accessories!
-
I have supplies EVERYWHERE. It’s a mess. I could really use a new organizer especially for taking to quilting class.
-
I use school pencil boxes. Or any box that is available.
-
I store my sewing accessories in a lot of places. I have 2 plastic stack of drawers and a few clear plastic boxes.
-
I use plastic tubs and small plastic containers to keep my sewing items. Each one is designated by sewing category-works for me! Thank you, Susan
-
I have a container on my ironing board for scissors, ripper. A container at my sewing machine
for scissors,ripper, often used machine feet, etc., and a container in the living room when I sit down to watch tv and do handwork. -
I store all my sewing accessories in a set of plastic drawers purchased years ago from Bed Bath & Beyond (no longer available!) and all my feet in an older, white Bernina box that I love!
-
I love the ‘Iris’ brand clear plastic stacking drawers. They come in various drawer heights. Many of them are interchangeable – they have a clip inside that releases/snaps them apart/together. Then I can make any desired configuration… If I need it shorter to fit under a table… pop out one drawer!
-
My husband built a four shelf cabinet, two thread cabinets, and two rolling cabinets with three drawers each and converts into a cutting table when placed together.
-
I have a 4 by 4 cotton drawer that I put my sewing equipment in plus an ancient tiny folding sewing table with 3 little drawers on each side for my pins, scissors, needles and other small things.
-
I store my sewing accessories in two BERNINA storage containers. These storage containers sit on a bookshelf near my sewing machine.
-
Anywhere I can find a space!
-
I store my sewing accessories in a variety of containers and the drawers of my sewing table.
-
My sewing accessories are stored in an orderly fashion in a rollable chest of small drawers.
-
I have a little plastic container and several pixie baskets (fabricmutt tutorial)
-
I still use my original Bernina sewing case from 20+ years ago! Recently it occurred to me that it could fall apart at some point or break and what would I do then! Love that thing for carrying my presser feet, needles, oil, tools, thread, bobbins. I have grown into another plastic 12×12 case that I use for things like sewing machine manual, applique press sheet, gloves, pens, pins, scissors, etc. This new box is very intriguing and would certainly replace my older case as it ages out!
-
I have sewing supplies all over I really need to organize them.
-
Lots of plastic containers, many under the bed, or stacked up in the closet. Also quite a few baskets for the items used most often. Also old suitcases and a box-shaped briefcase. In other words, all kinds of places!
-
I store supplies in a sewing basket, several small plastic drawers and a tool chest with small plastic drawers. I’m semi-organized.
-
I am brand new to sewing, so one of my first projects was a fabric basket to hold my seam ripper, small scissors, marking pen. My husband brought me clear “tackle” boxes for the slowly growing amount of fun sewing accessories. I still need to figure out a better system. Thanks for the chance to win! ✂
-
I was just thinking I need a tool chest like my husband had for his tools. I to have a power tool, my Bernina; with many loose odds n’ ends that keep getting missed placed in baskets, drawers and an old tin box.
-
I store them in a tote bag that has the Eiffel Tower printed on it. It is portable and has compartments; it is falling apart from use.
-
I have some of my accessories on a pegboard and in various containers in my sewing room.
-
I store my accessories in my sewing cabinet and various drawer units near it.
-
I save and use decorative tins. I have a nice flat one with a hinged lid that I use for many of my pressor feet. another one with buttons and one for zippers or rick rack. Some of the larger tins have UFOs in them
-
In two Bernina case that came with my machine, and both there are in one little cupboard, and in my sewing table.
-
My favorite holiday movie is “The Santa Claus” but “Scrooged” is right up there too.
-
My two Bernina cases and an extra little plastic box
-
In a plastic box and canvas bag.
Leave a Reply
You must be logged in to post a comment.

Good question! I’m still looking for a few of them. There’s a basket on the cutting table, a skirt with pockets under the embroidery machine, scissors on pegs on the wall, 2 mugs full of marking tools, lots of plastic storage containers, and the accessory box for my sewing machine runneth over.