Update an Old Basket Liner
This project is one of many featured in the BERNINA 2013 Holiday Look Book. Visit your local BERNINA store for more information.
A few years ago I found a Longaberger basket at a yard sale. At the time I had no specific plans for it, but its $5 price tag was all too appealing for an item that typically commands $50 from a Longaberger representative.

The original liner was boring Williamsburg Blue (no offense to Williamsburg Blue) and I wanted to jazz it up with a new one using a super cute bicycle print from my stash. I gathered the following must-haves together:
- ¾ yard of liner fabric
- ¾ yard of binding material (for strips cut on the bias)
- ¾ yard of fusible interfacing
- ¾ yard of muslin (I used gnome-print fabric instead, but the fabric is never seen so only I know it’s there;) )
- Thread to match binding material
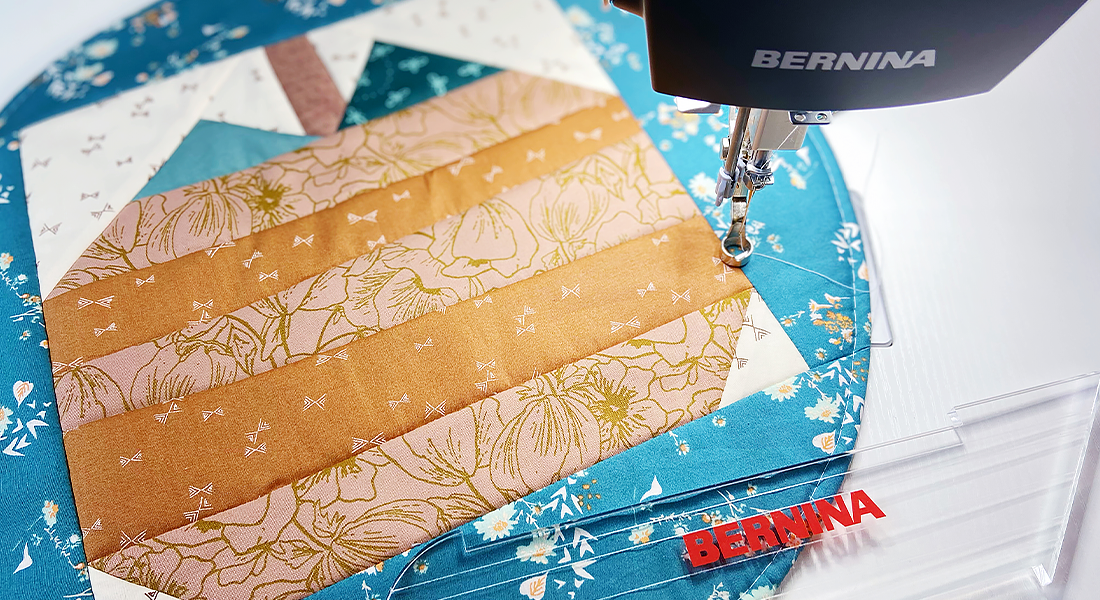
- BERNINA sewing machine (I used my BERNINA 830)
- BERNINA Binder Attachment #88 in 36mm size with Binder Foot #95C
- 1300MDC overlocker/serger
- Overlocker/serger thread to match liner fabric
Since I am not a fan of unstitching and taking articles apart to make pattern pieces, I removed the Williamsburg Blue liner and measured it. The liner needed to be three pieces: Two tall, narrow pieces for the sides, wider at the top than at the bottom; and one wide continuous strip for the body, narrower at the base than at the sides.


For the continuous body I needed a 26” x 12” rectangle, which I defined with a diagram (4″ at each end of the base, 11″ along the sides). You can use my diagram for a similar basket style; just remember to fill in the dimensions of YOUR basket.
- Base = 4″ x 10″
- Total length = 26″
- 26″ minus 4″ for the base leave 22″; split evenly for the front and back = 11″
- The front and back of the bag are 10″ wide at the base and 12″ wide at the upper edges

The side pieces are 11” tall 4” wide at the base and 5” wide at the top.

Transfer these drawings to pattern tissue, shipping paper, or thin drawing paper. Add ½”-wide seam allowances to add edges.
The original basket liner had cut-outs to accommodate handles. If yours does, too, measure the distance between them as well as the width and depth.
- Distance between handes = 5”
- With of cut-outs = 2”
- Depth of cut-outs = 3”

Cut out the openings for the handles, rounding off the edges. Do not add seam allowances.
Use the you created above to cut out your fabric:
- Continuous body: Cut one each from the liner print, interfacing, and muslin.
- Side pieces: Cut two pieces each from the liner print, interfacing, and muslin.
Fuse the interfacing to the wrong side of the liner fabric following the manufacturer’s instructions.
Set your sewing machine up for basting:
- Straight stitch with a length of 5 mm
- All-purpose foot (BERNINA Reverse Pattern Foot #1/1C/1D)
Baste along the vertical and horizontal center lines, then diagonally from corner to corner, and finally around the cut-outs.

Set up your machine with the binder attachment (BERNINA Binder Attachment #88 and Binder Foot #95C). This YouTube video on the BERNINA Channel is very helpful in learning how to use this tool.
If you are making your own bias strips, cut them diagonally from the binding fabric, the width of the binder opening. For the largest BERNINA Binder Attachment #88, this is 38 mm (1-1/2″). Sew the strips together on the bias to reduce bulk.
If you would rather use pre-made bias tape, Binder Attachment #87 is perfect for this. Use the largest size – 38 mm – for wide double-fold bias binding.
At the machine, use the binder attachment to bind the edges of the curved cut-outs first. Trim the excess binding flush with the edges.
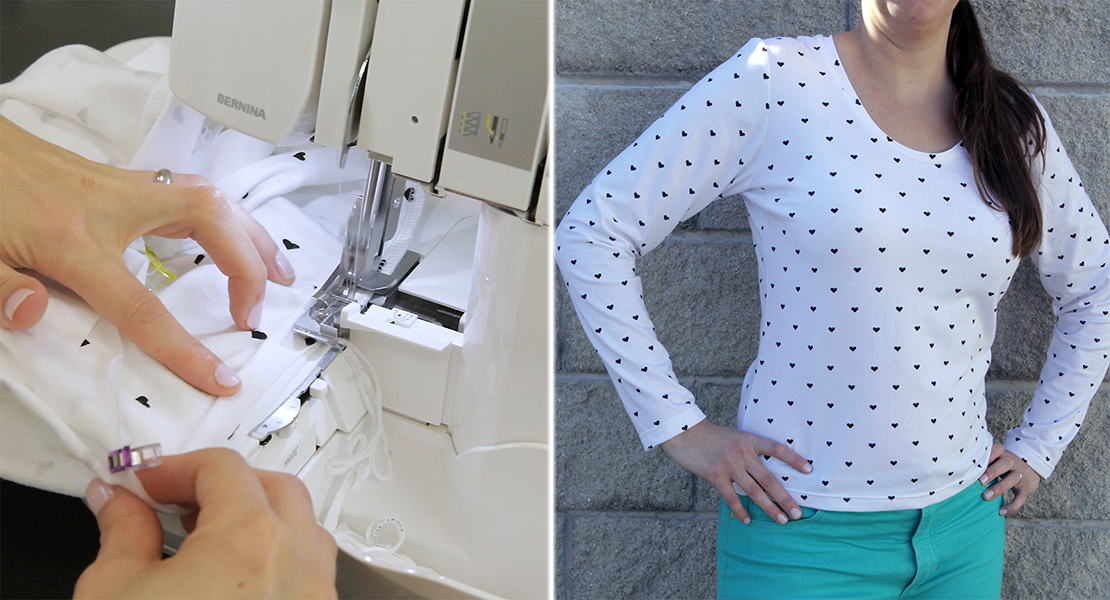
Remove the binder attachment from the machine and reattach the all-purpose foot. Sew the side pieces to the continuous body strip, matching centers and upper edges. Sew the long edges first, then stitch across the base of each side panel.
Serge the edges to prevent unraveling.
Reattach the binder to the machine. Bind each section of the upper edge, leaving 8″ tails at the beginning and end for the ties:
- Insert the end of a bias strip into the binder; bind about 8″
- Insert the edge of the bag between the folds of the bias binding; bind
- Continue feeding bias strips into the attachment, stitching until an 8″ tail has been sewn.
Insert your new basket liner into the basket and tie it on!!! Woot! You have completed your project!


One comment on “Update an Old Basket Liner”