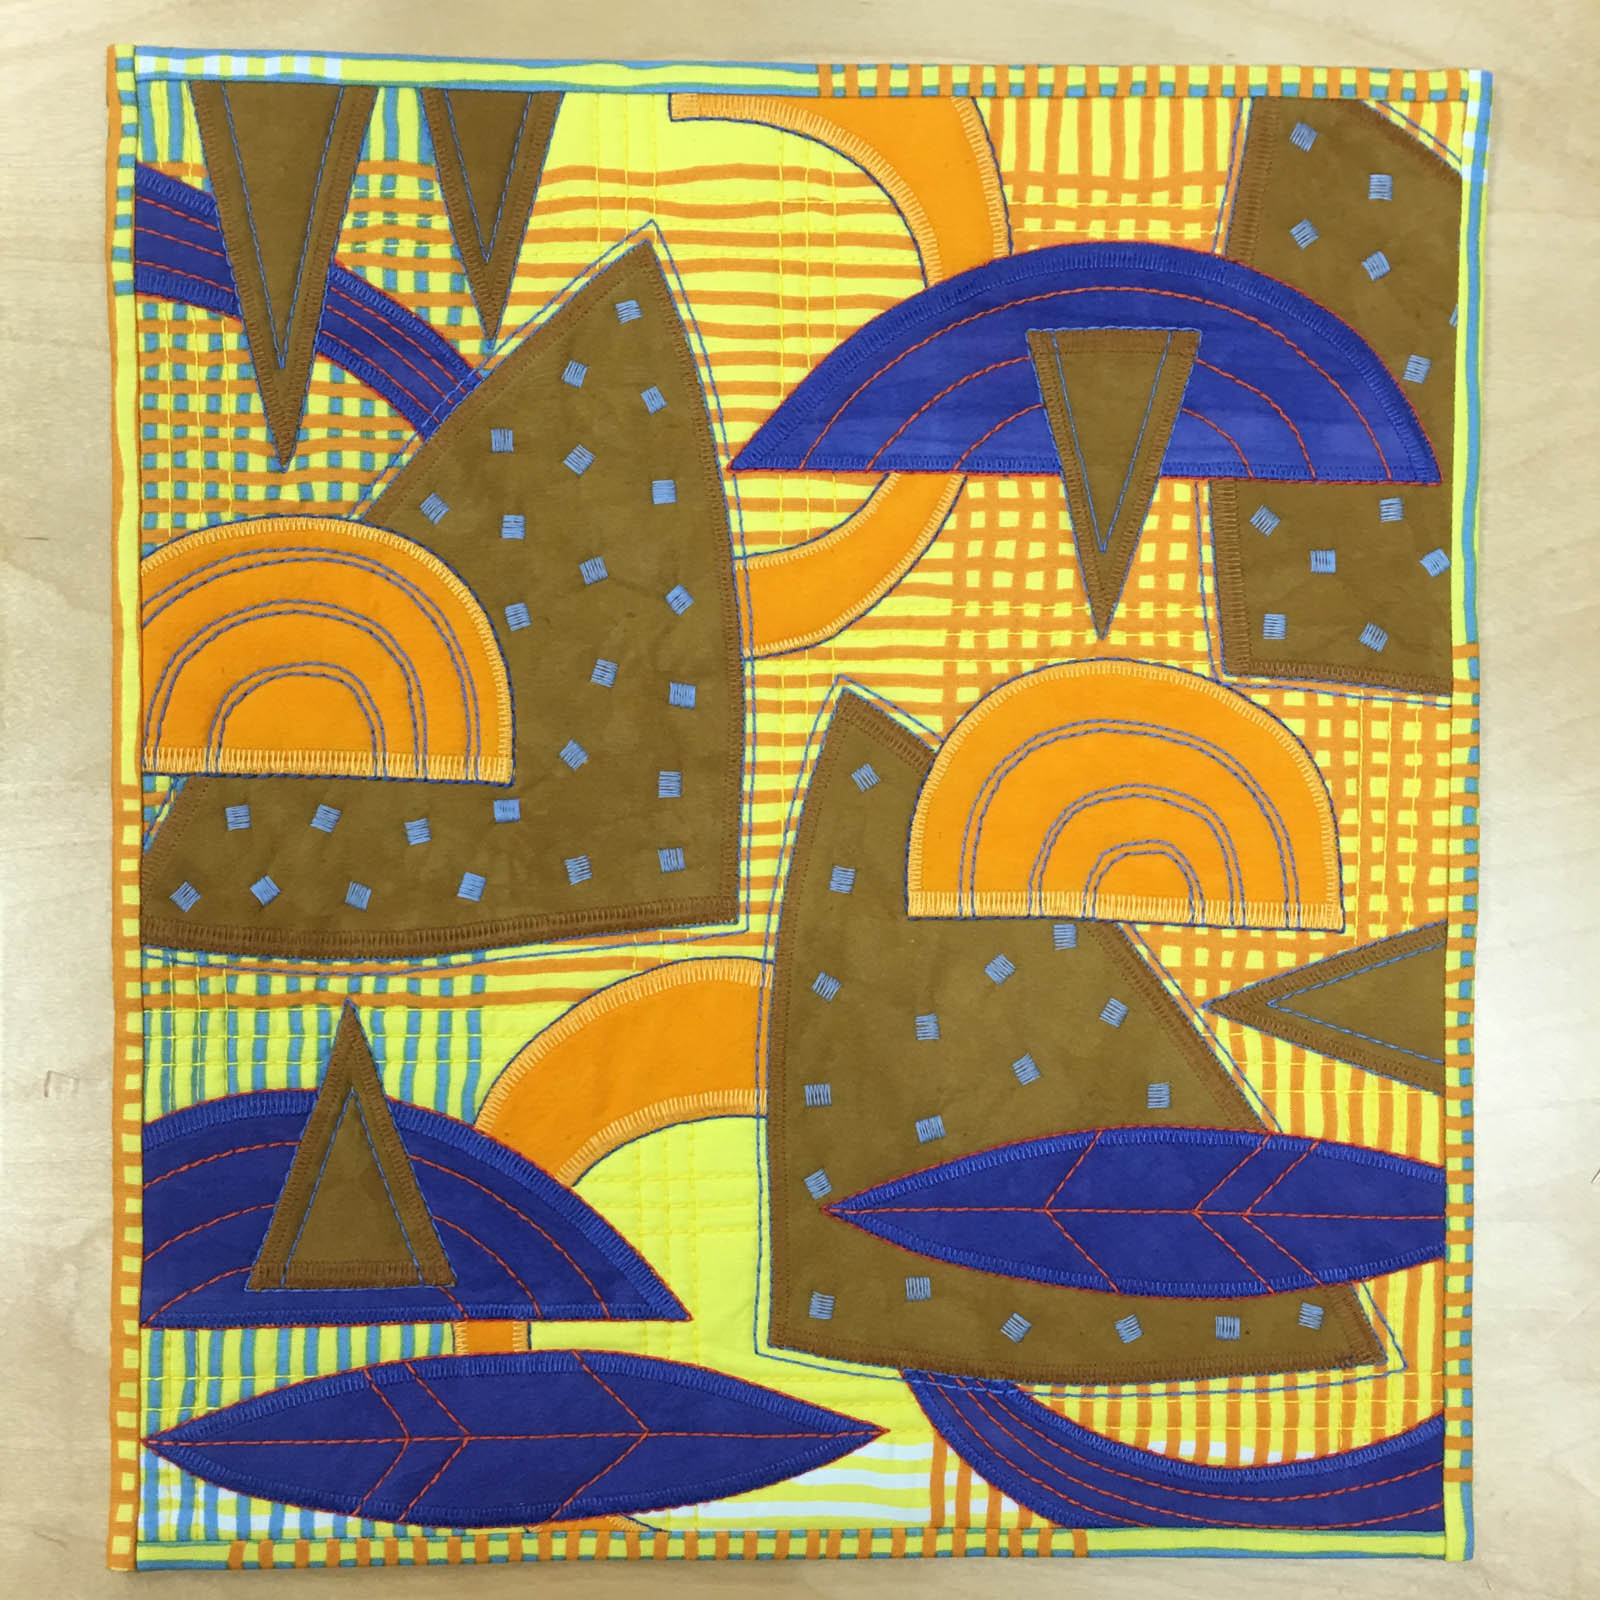
Abstract Appliqué Quilt
Hello! I’m Jane Sassaman and I am a fine art quilter and fabric designer. Recently, I have been making some small abstract appliqué quilts as a way to play with random shapes and colors.
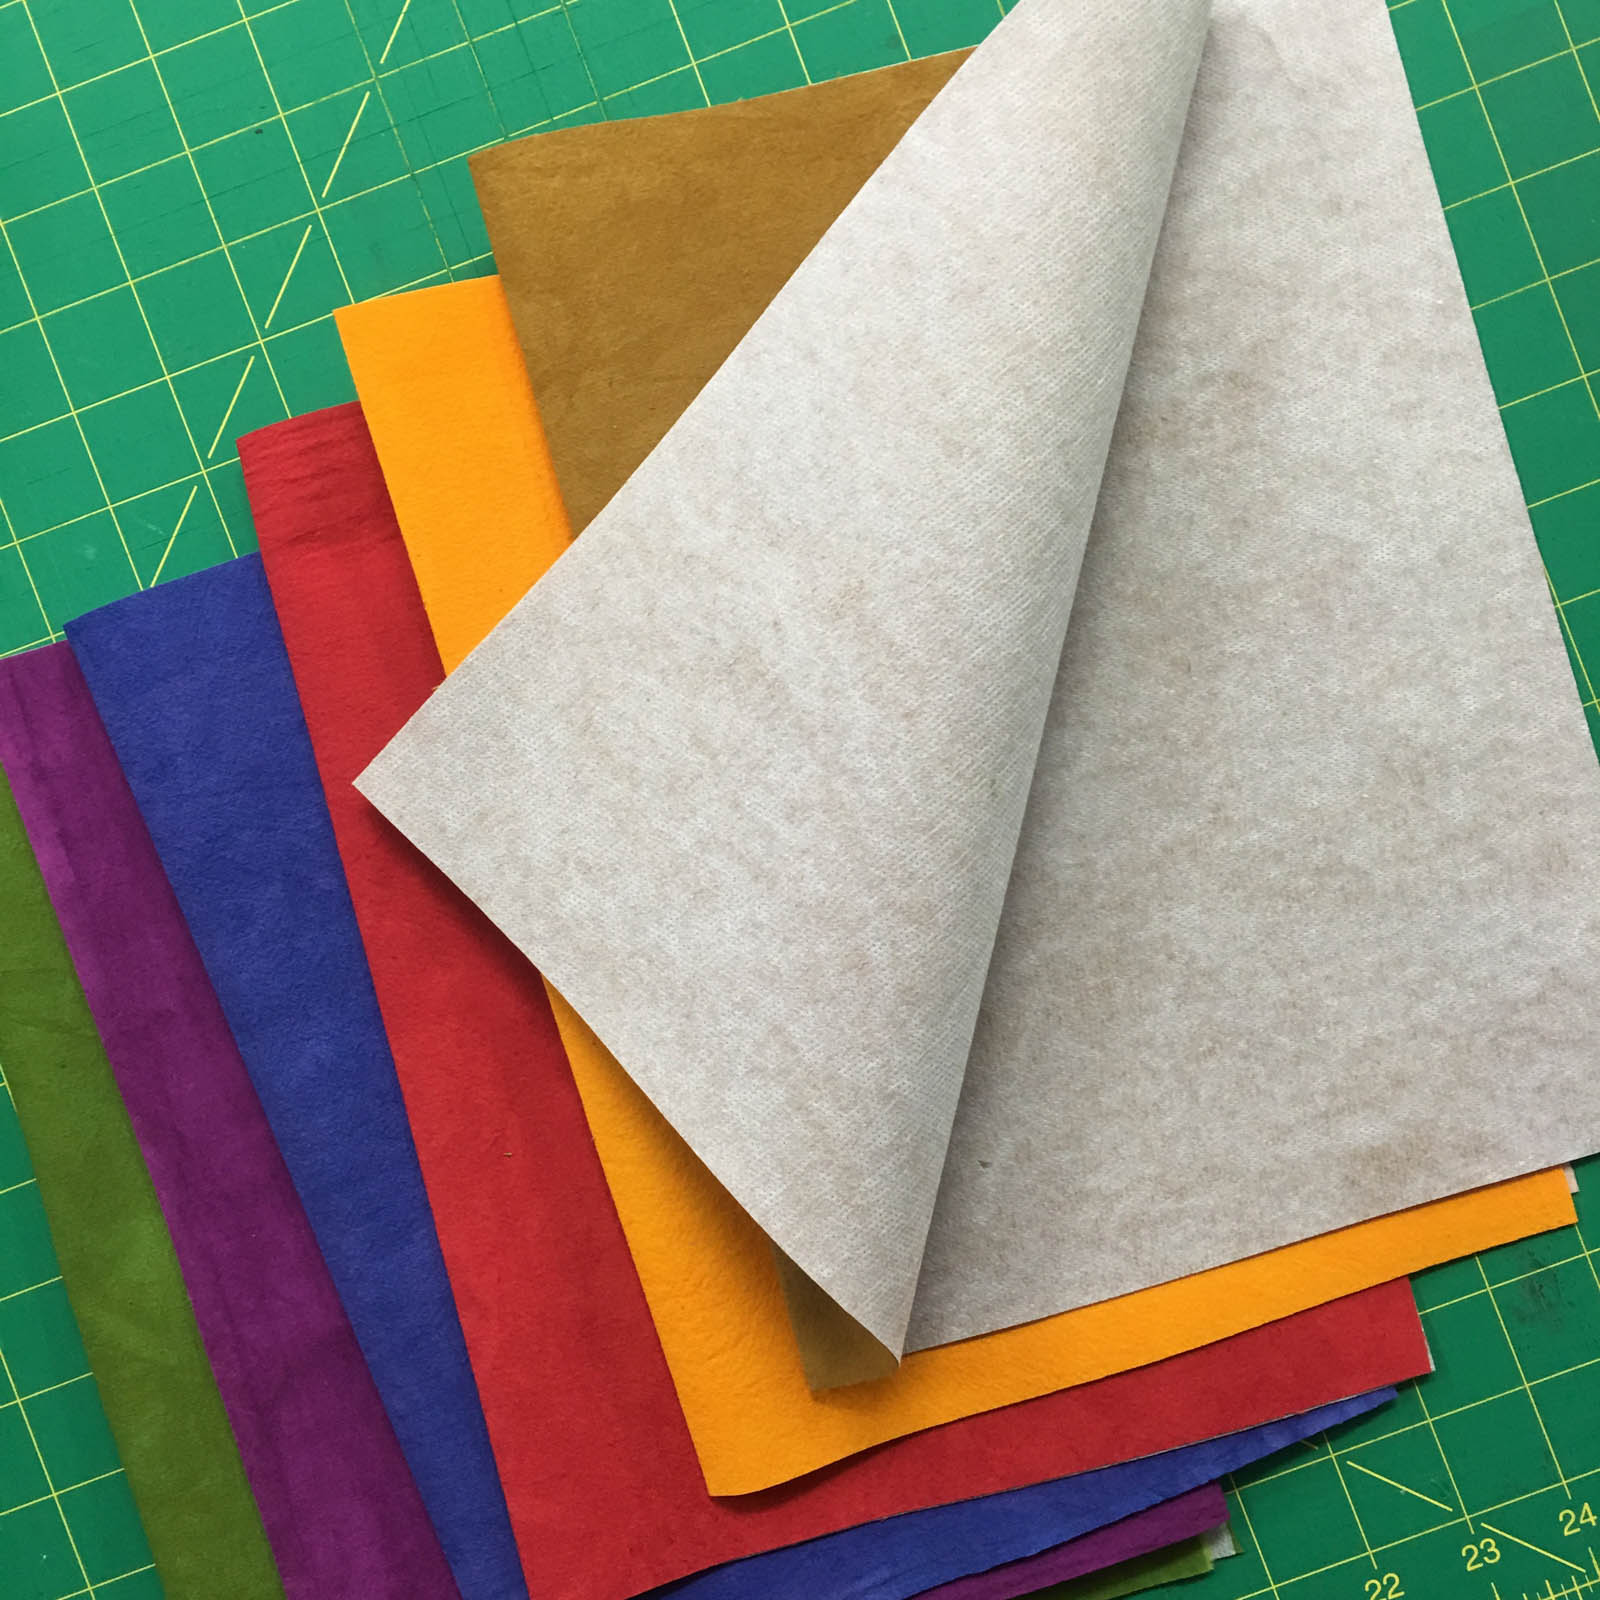
I begin by backing some fat quarter pieces of fabric with an iron-on interfacing. I prefer Shirtailor by Pellon. This interfacing adds stability to my shapes and the extra body also makes them easier to handle. Then I rotary cut each fabric into simple random shapes. It is good to repeat some shapes and to cut a variety of sizes.
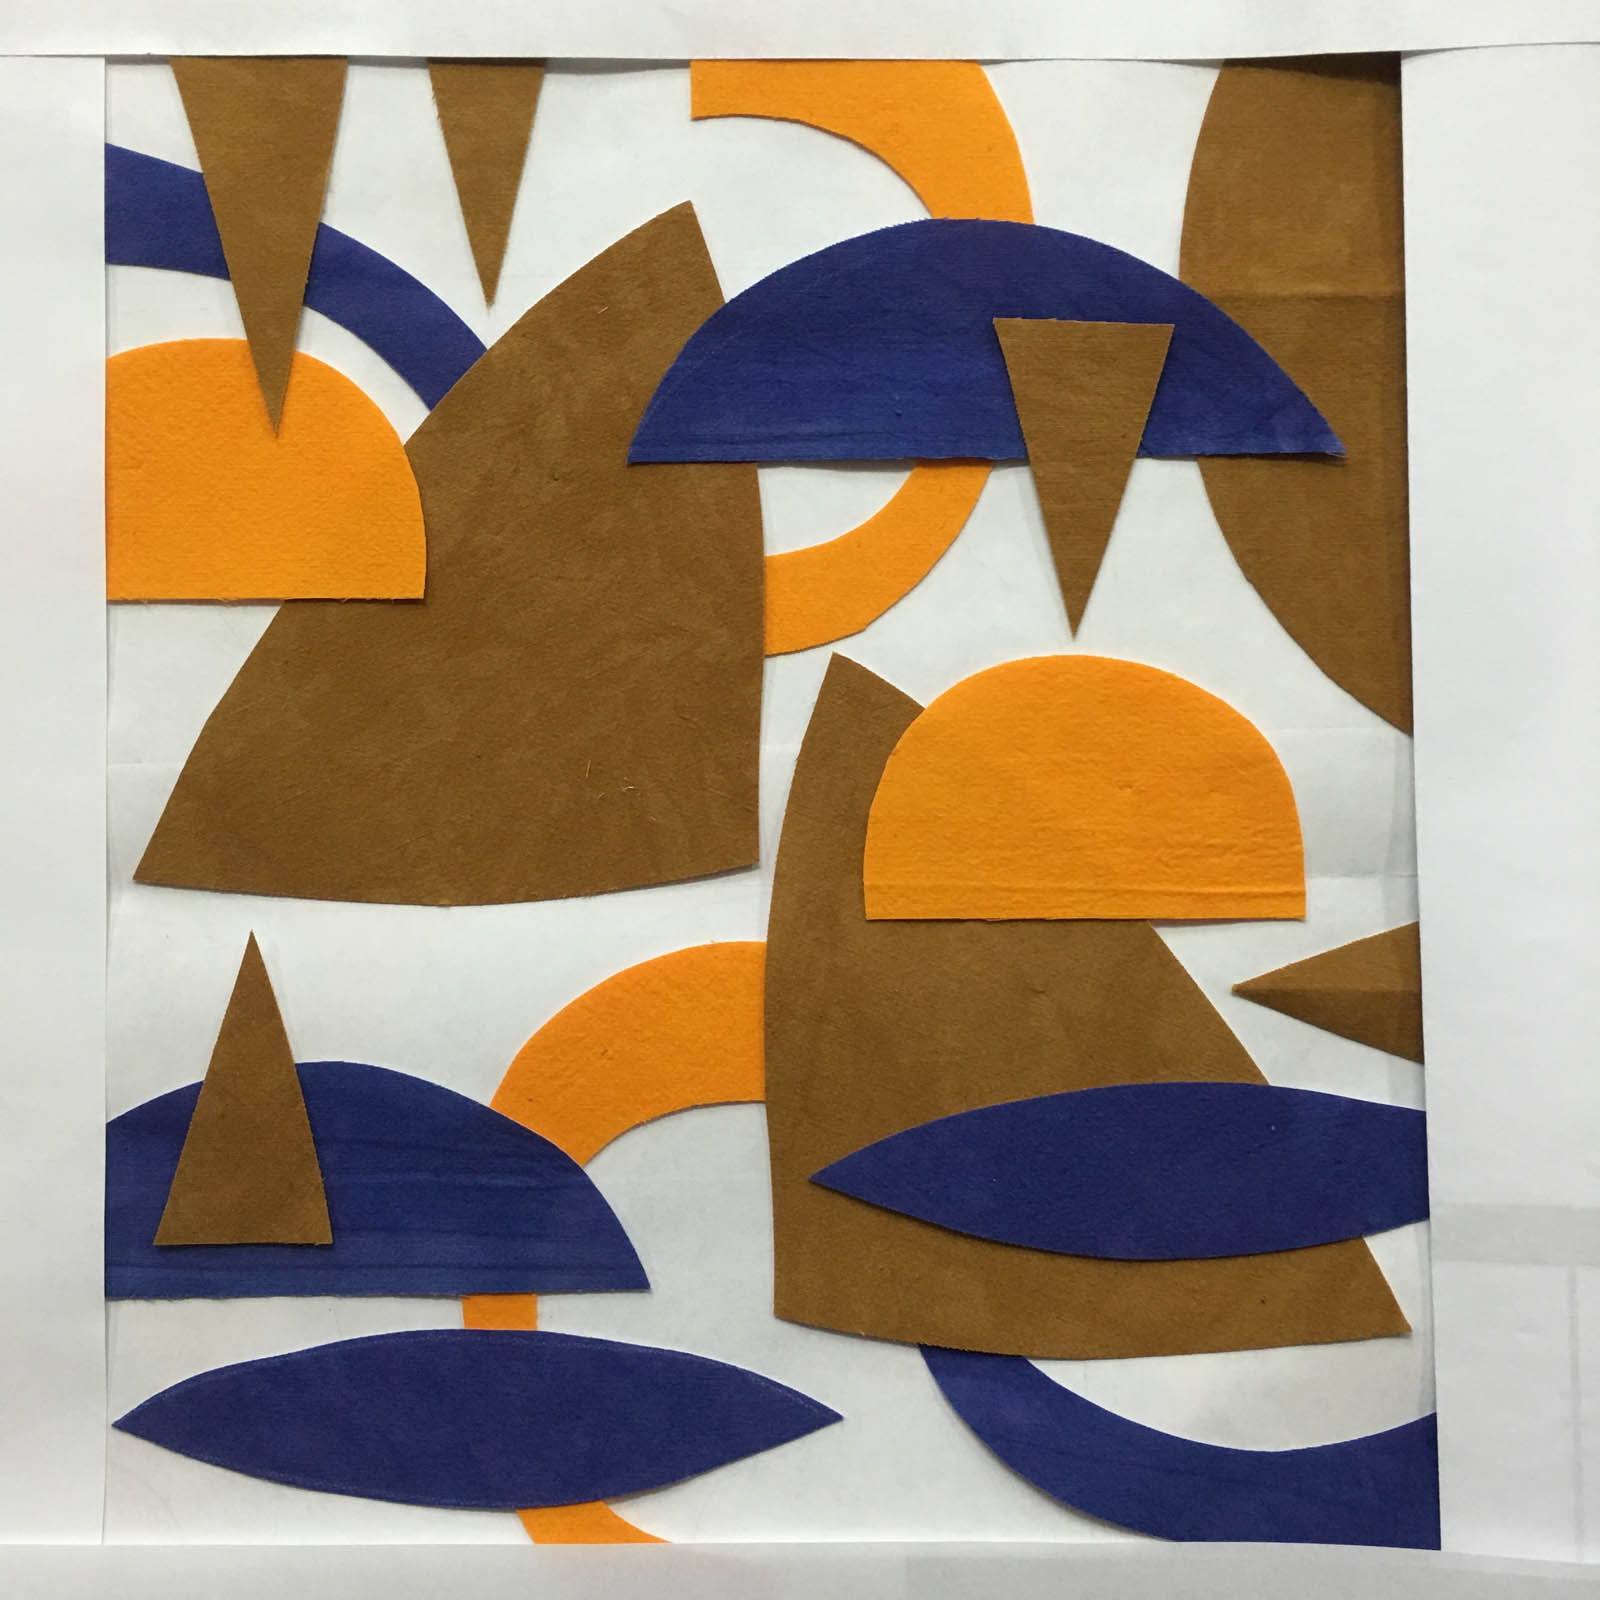
Then I start to “Ouija” the shapes into a composition. I try lots of different possibilities until I finally settle on the one I like best. Then I lay tracing paper over my composition and trace it, Golden Threads paper works fine. This tracing becomes my blue print because I have to take the design apart in order to put it back to gather again.
I can hear some of you groaning out there! You are thinking, “Why didn’t she just back her fabric with fusible web and then she could simply fuse it into place?” My reply is, because I’m the kind of quilter who needs to finish all my edges with embroidery, so a fused composition would actually make my life harder with all the stopping and starting and awkward stitching angles as the shapes intersect with each other. By working from the bottom up and finishing each shape with embroidery (and then cutting away from behind it) before the next layer of shapes are attached my embroidered edges are all clean and continuous.
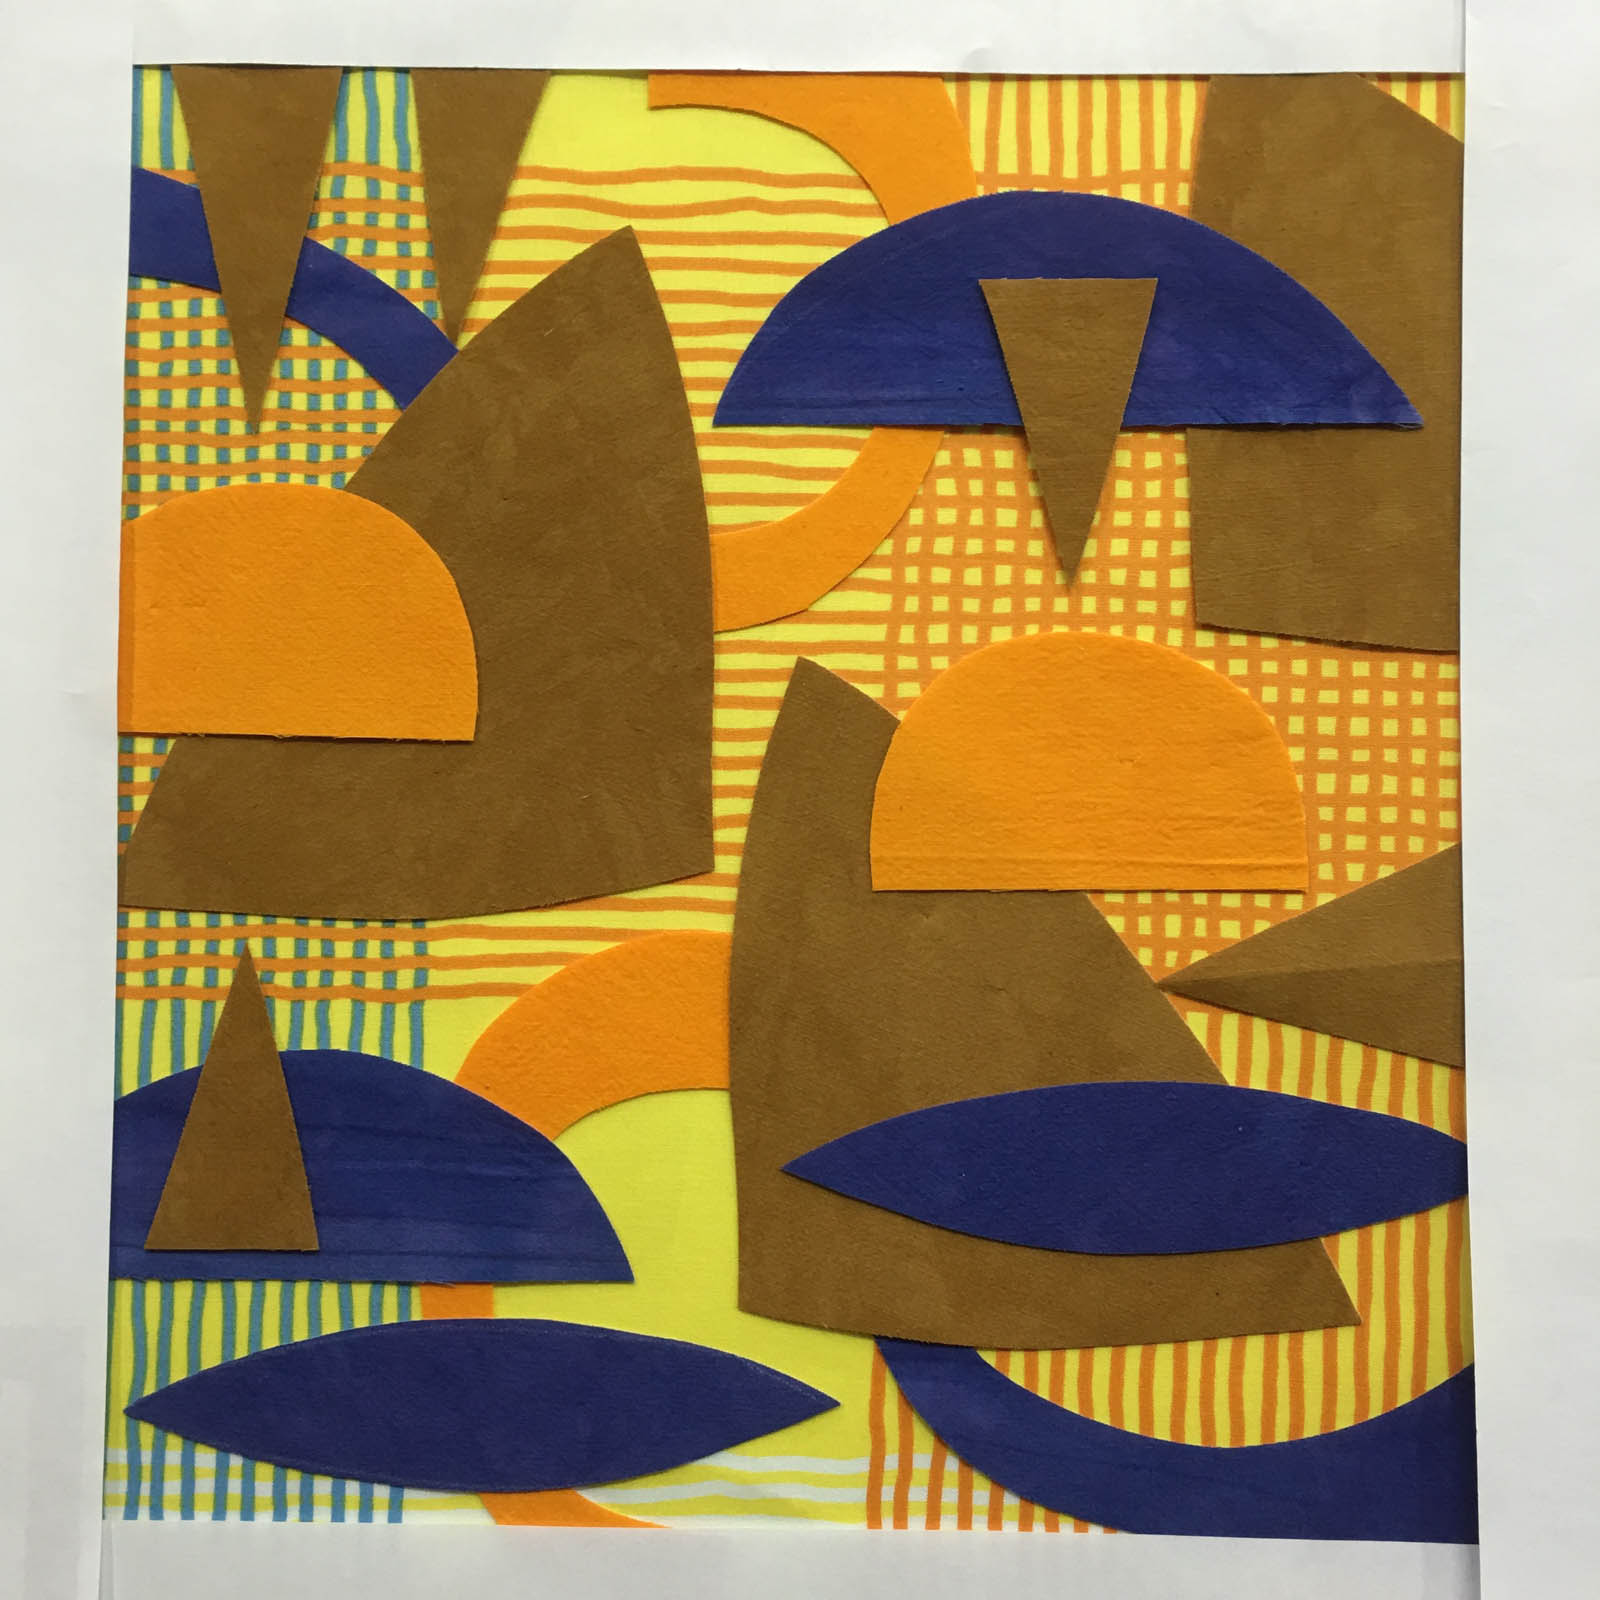
On my tracing, I also number my pieces from the bottom up, since this is the sequence for stitching. All the pieces that are only touching the background are number ones. The next layer on top are number two, etc. This blue print also makes it easy to audition different backgrounds. In this case, I found the perfect fabric for the background after my composition was already determined.
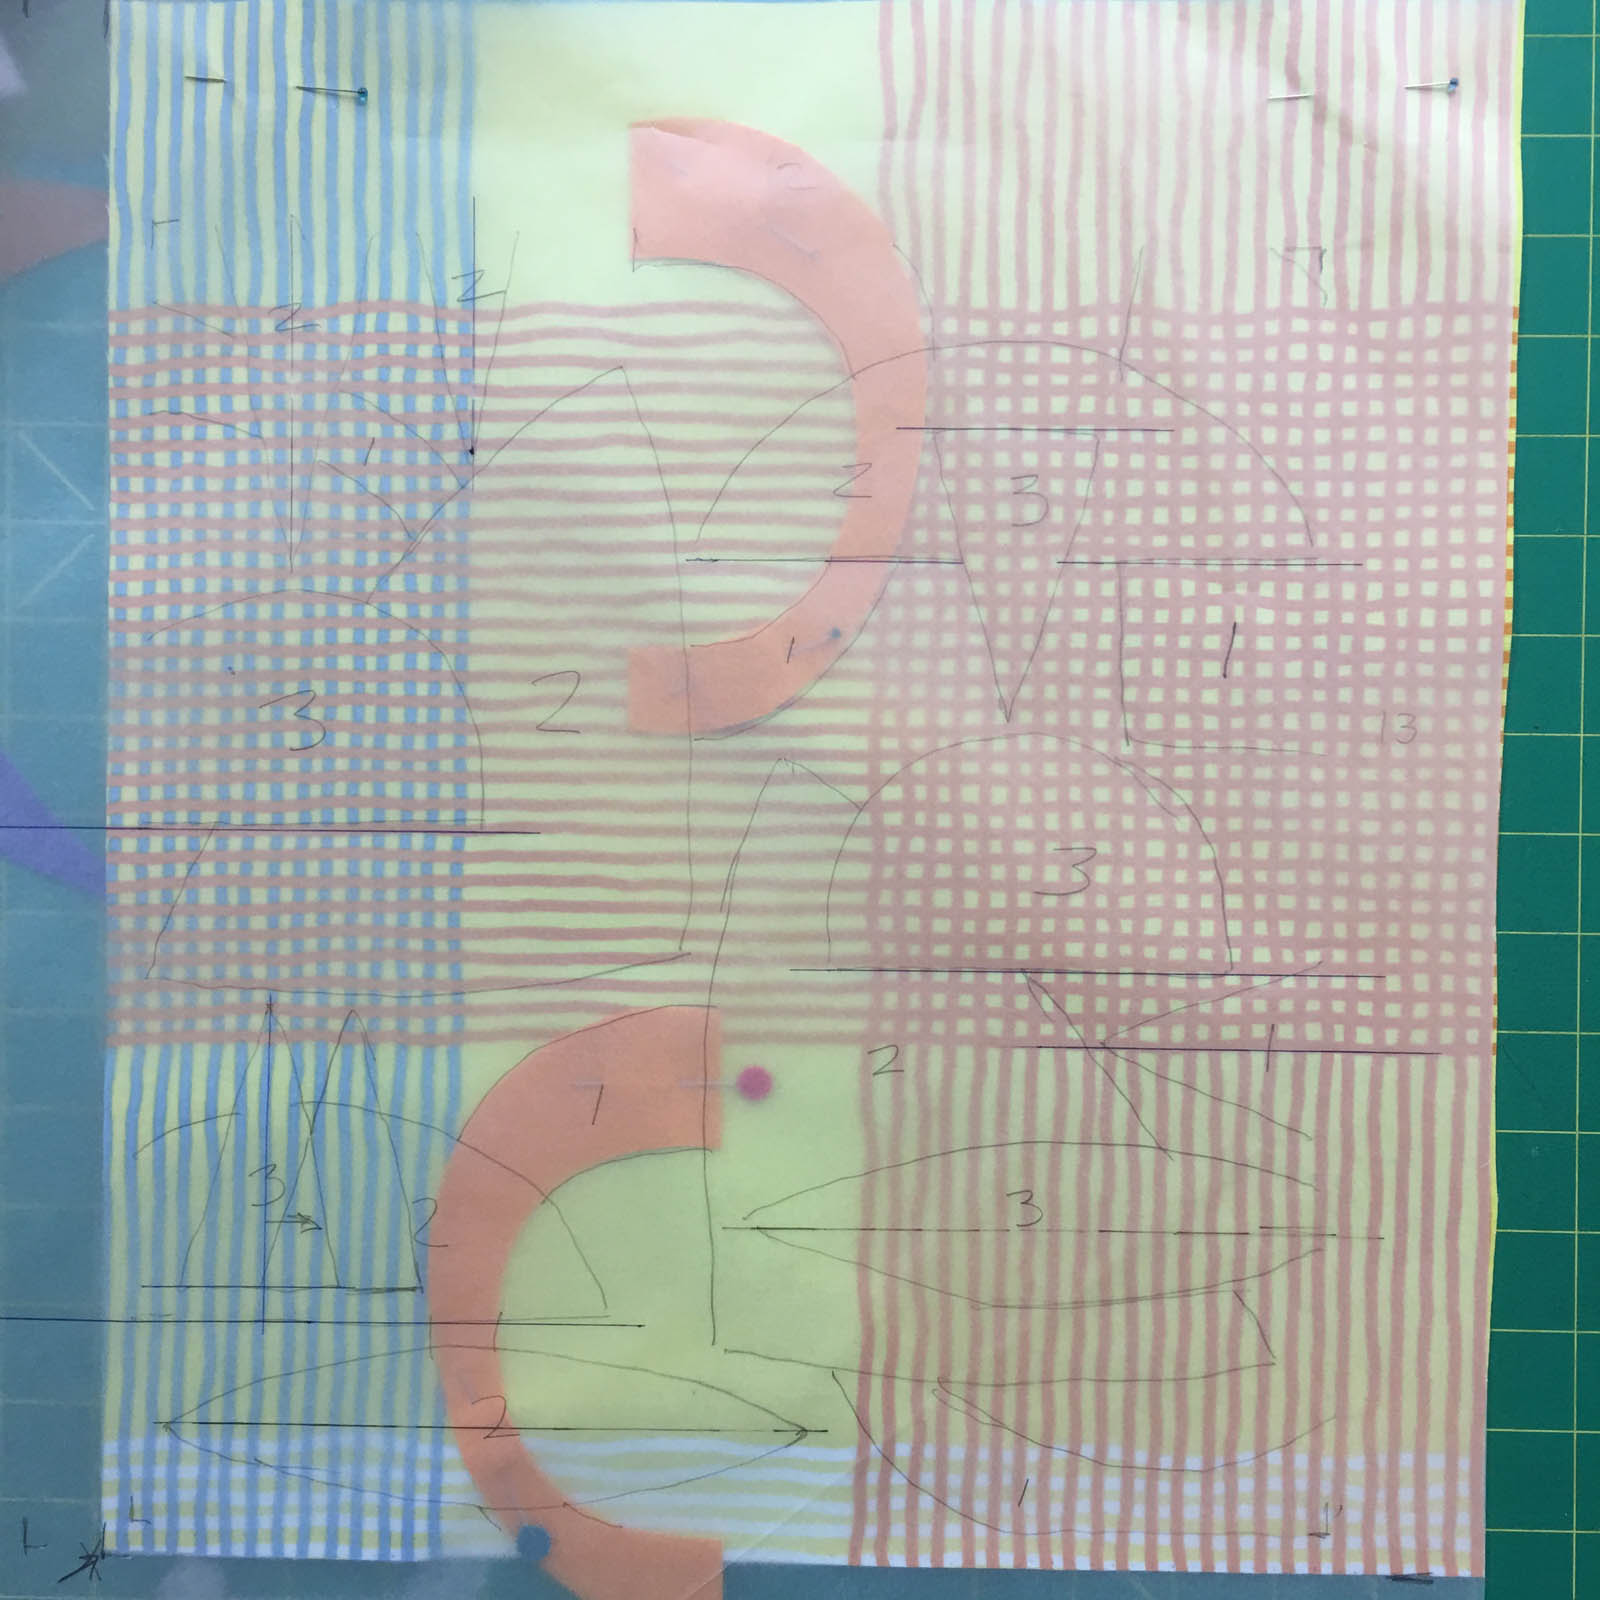
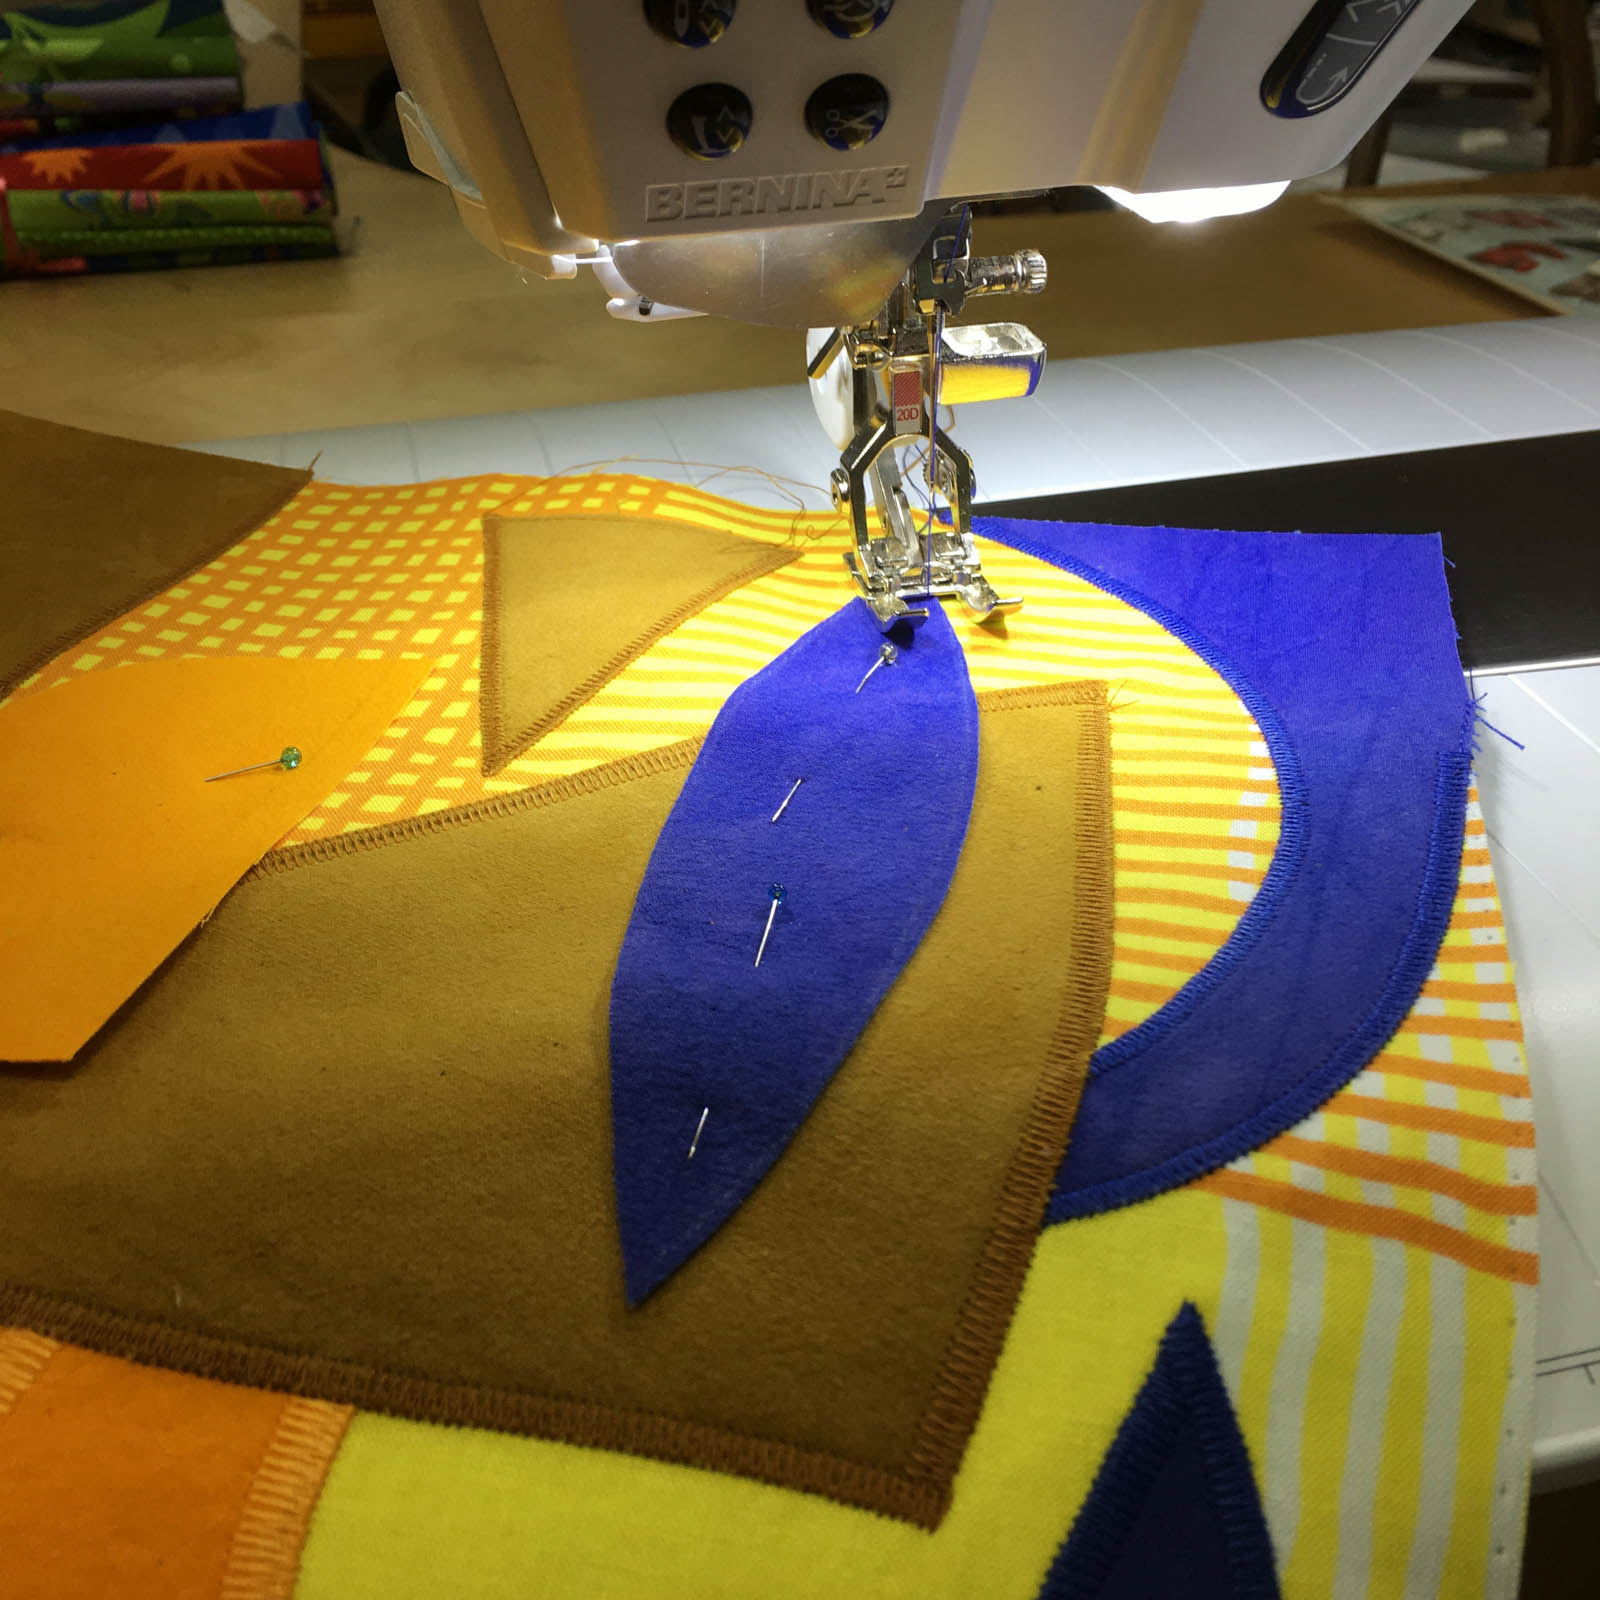
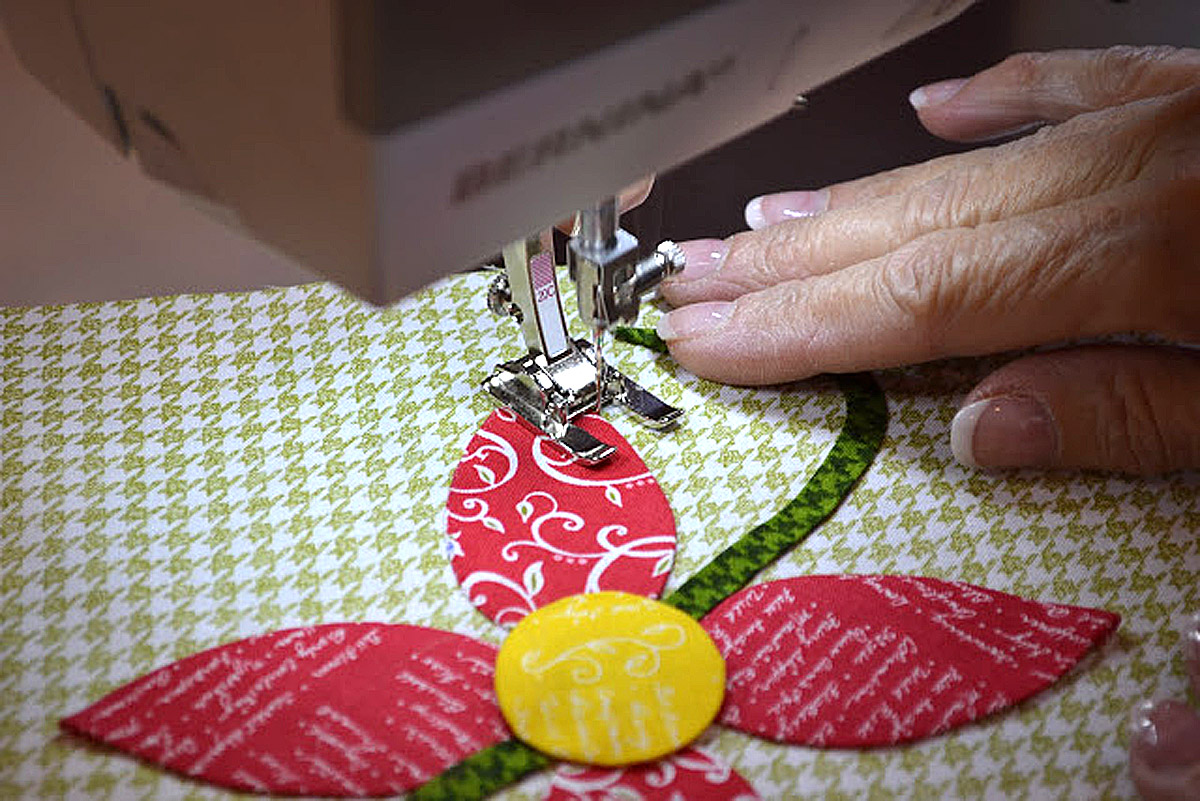
Construction begins by also backing my background fabric with iron-on interfacing. Then the tracing is pinned on top so I can lift the paper and slide in my first “number one” shapes. Pin or masking tape your shape into place and remove the tracing.
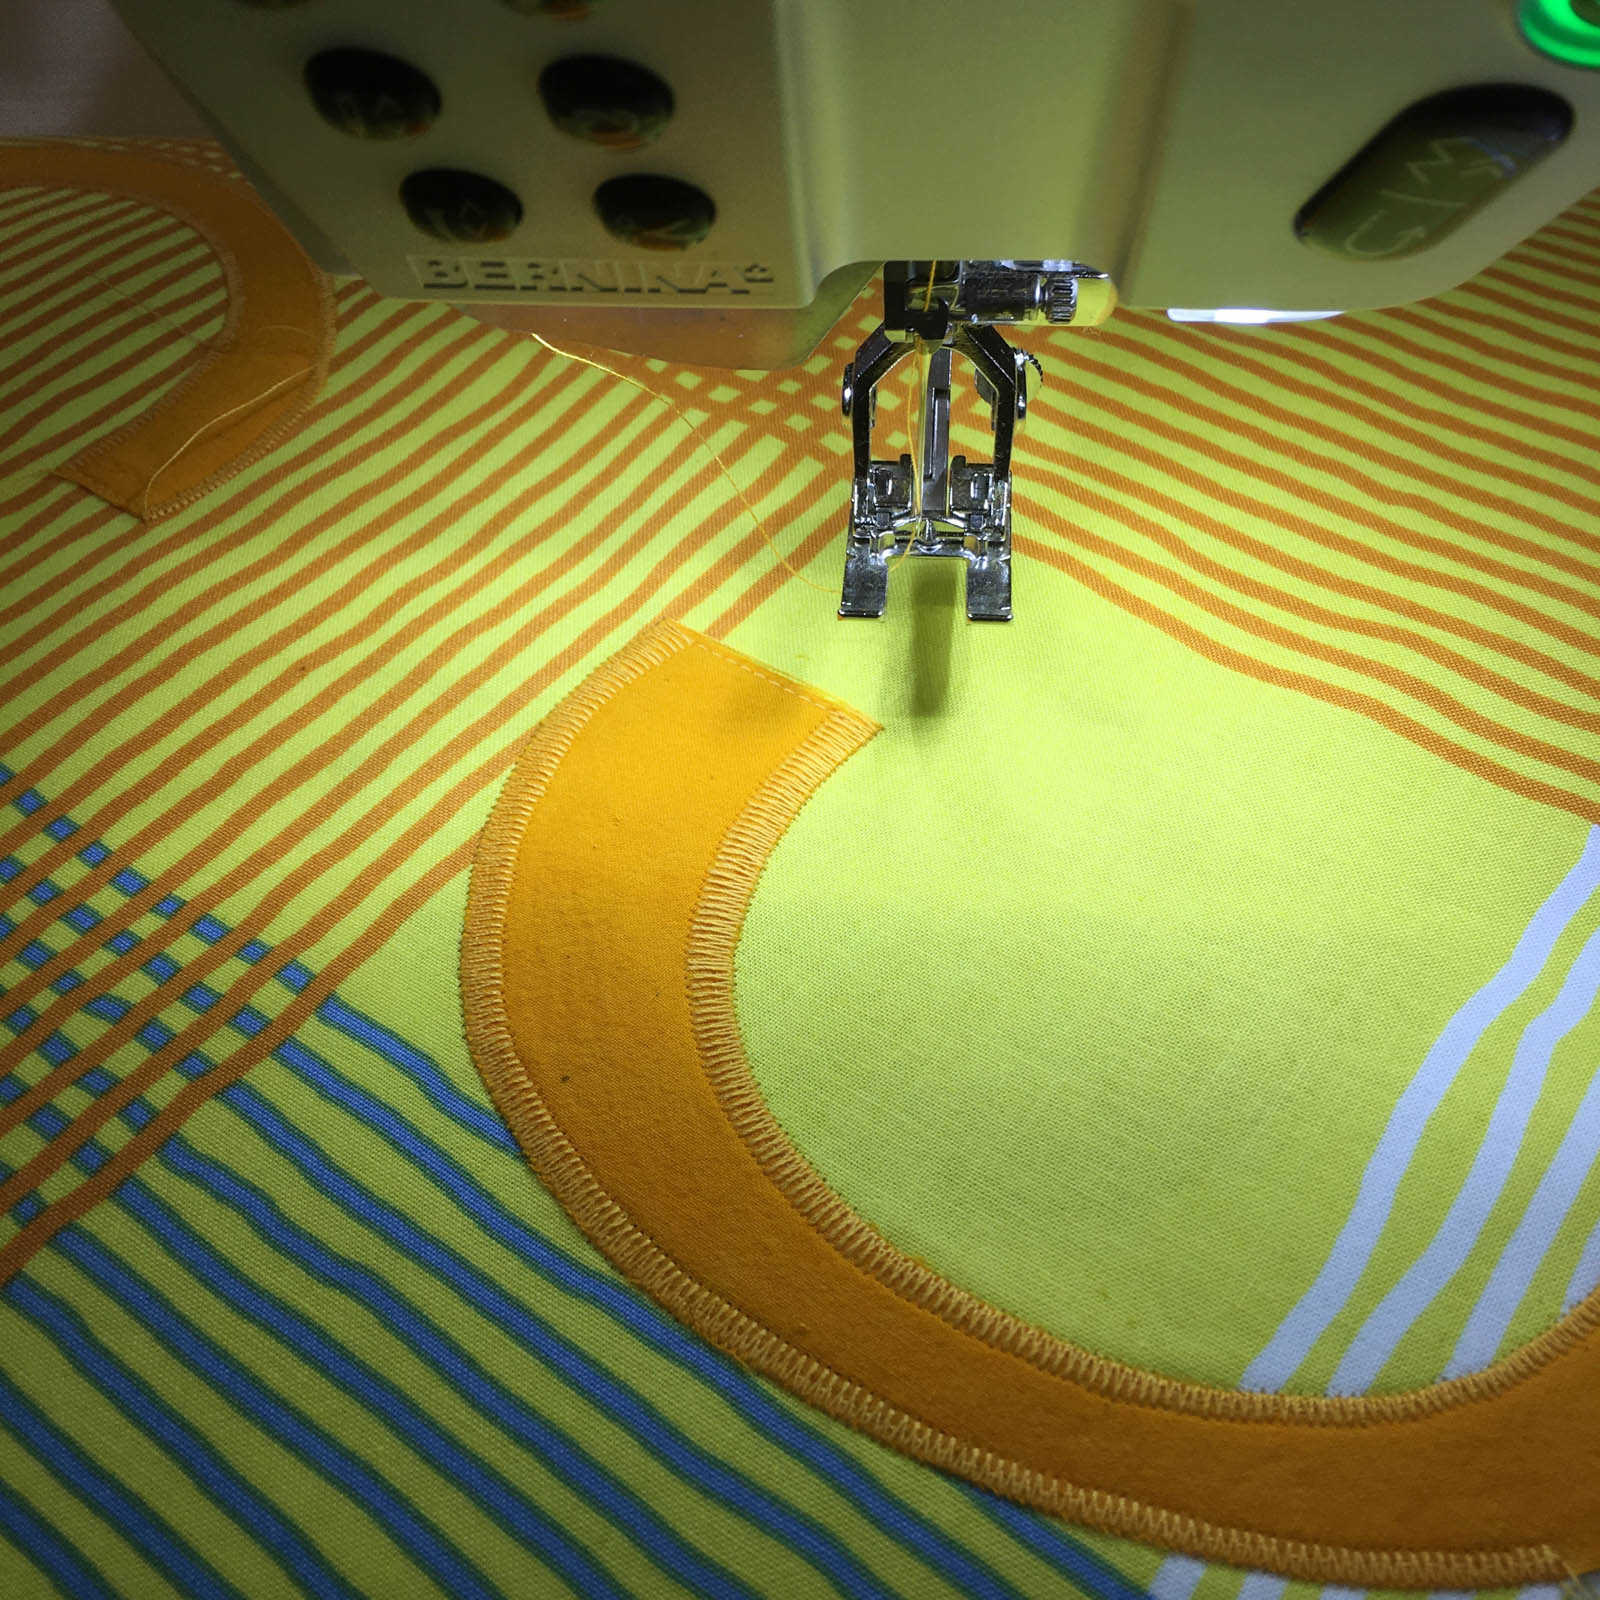
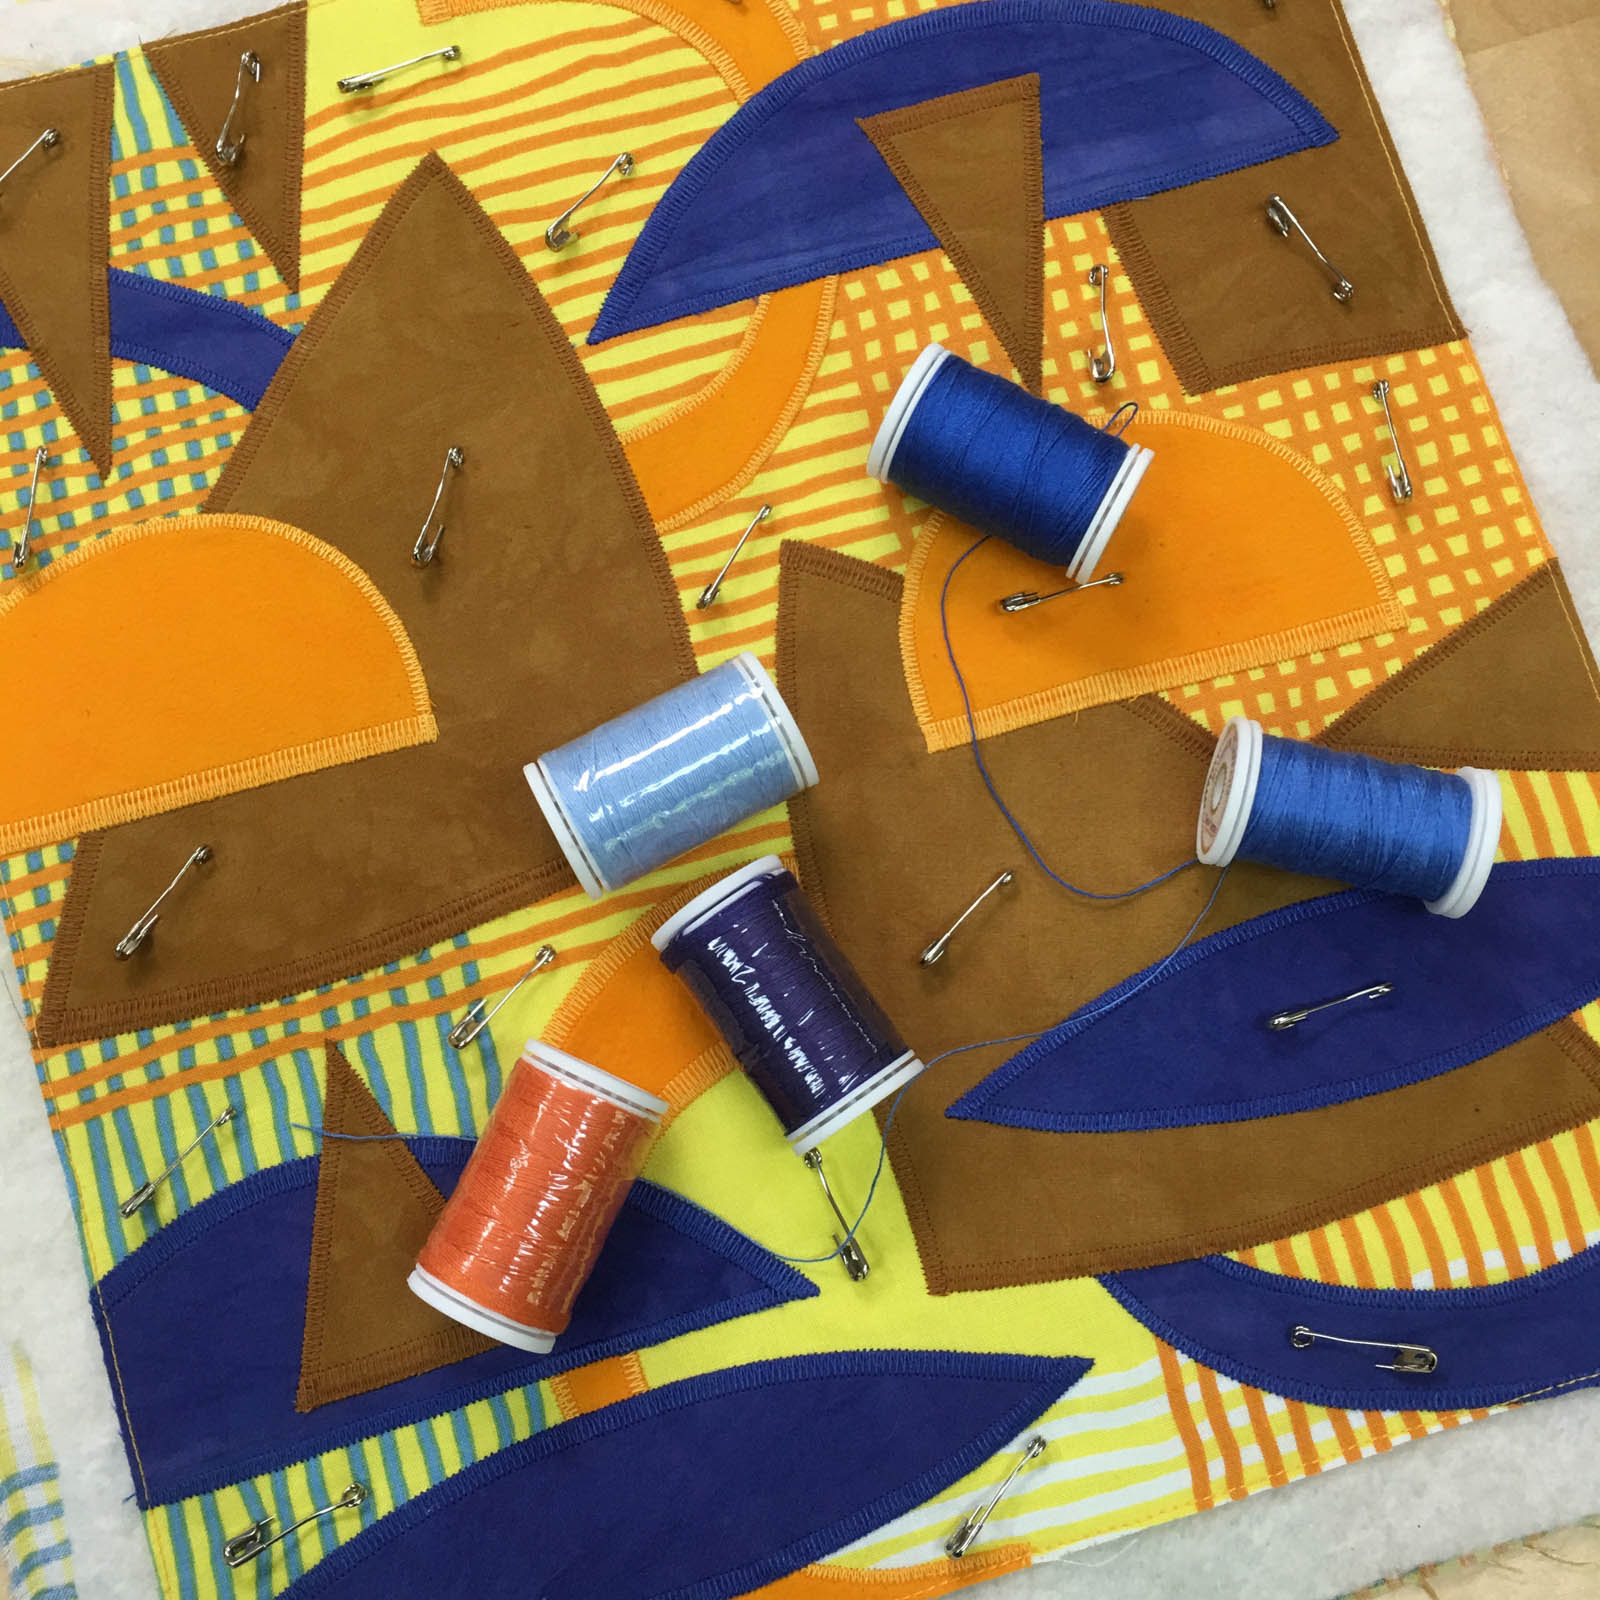
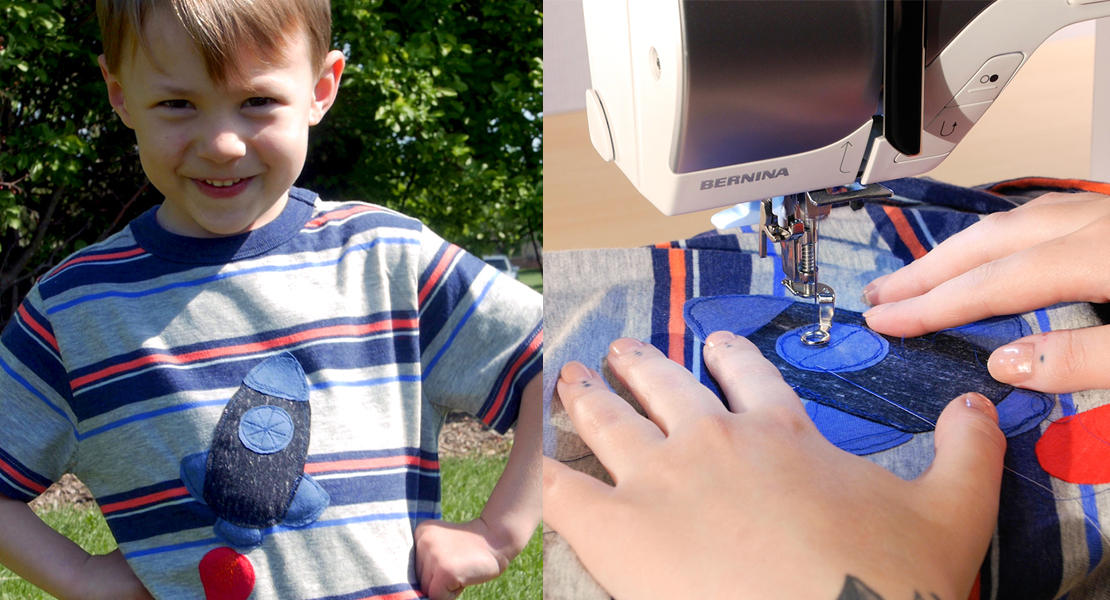
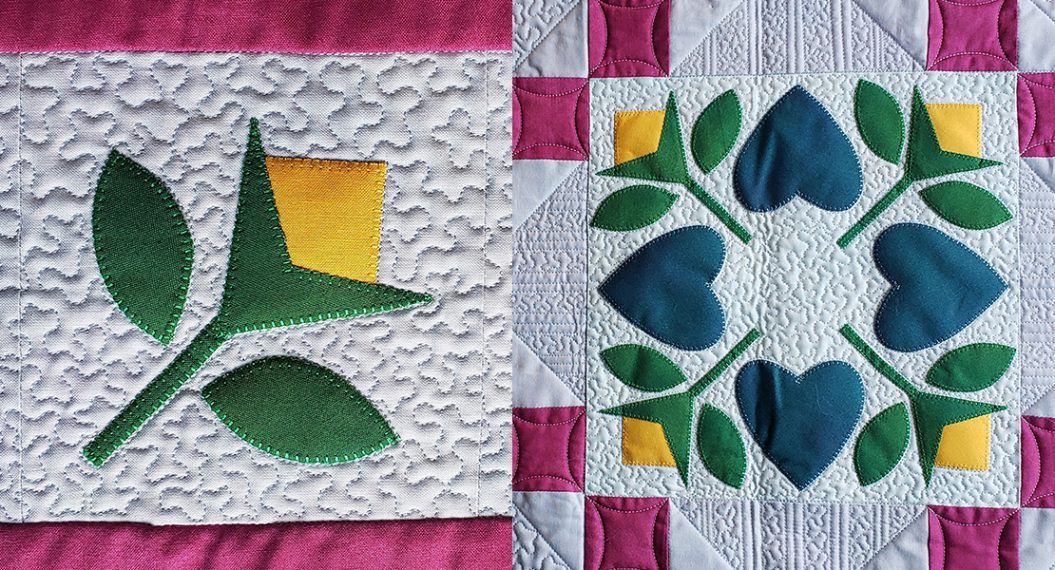
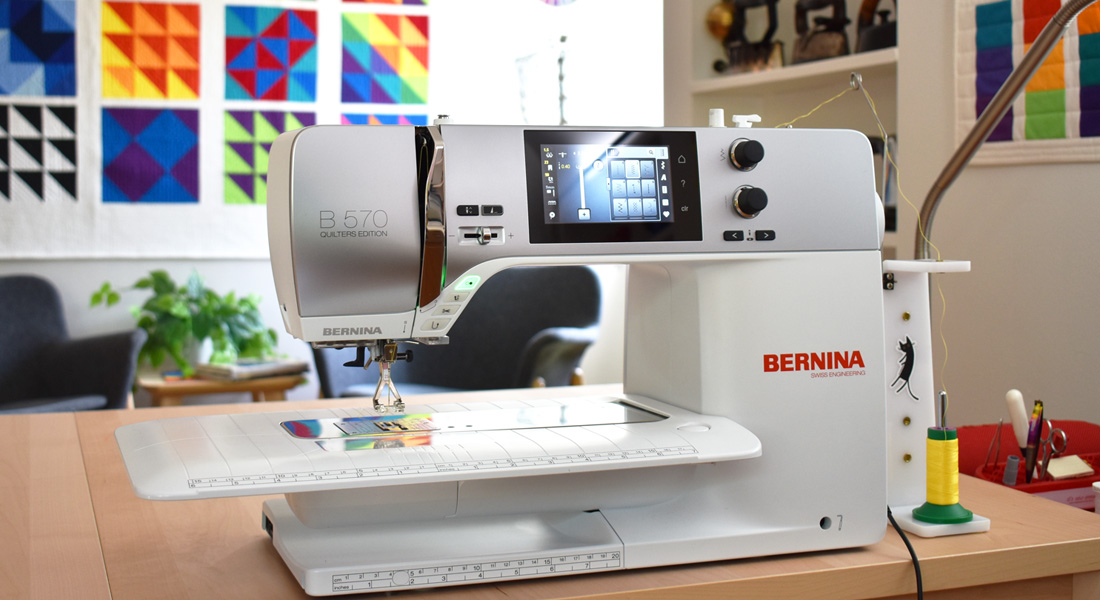
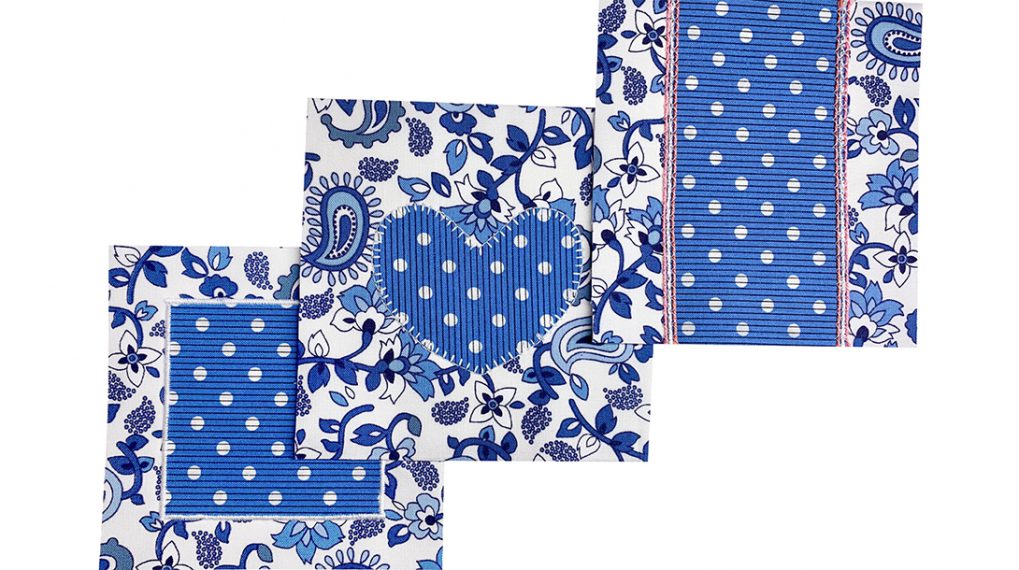
Using a matching color of thread, a regular straight stitch and a BERNINA open embroidery foot #20 or #20D open-toed embroidery foot, stitch around ( I sew on a BERNINA 880) the perimeter of the shape very close to the edge. When the circuit has been completed pull your threads to the back, tie and clip them. This initial stitch insures that all layers are secure. Then choose an embroidery design to stitch the finished edge. In this case, I am using a simple satin stitch to keep the crisp graphic look. I am also assigning each group of shapes a stitching “formula”. The half circles, for example, have a wider stitch at the bottom and the lop-sided triangles all have a wider stitch on one side. It is more interesting if there is at least a little variety, even though we are using the same stitch throughout.

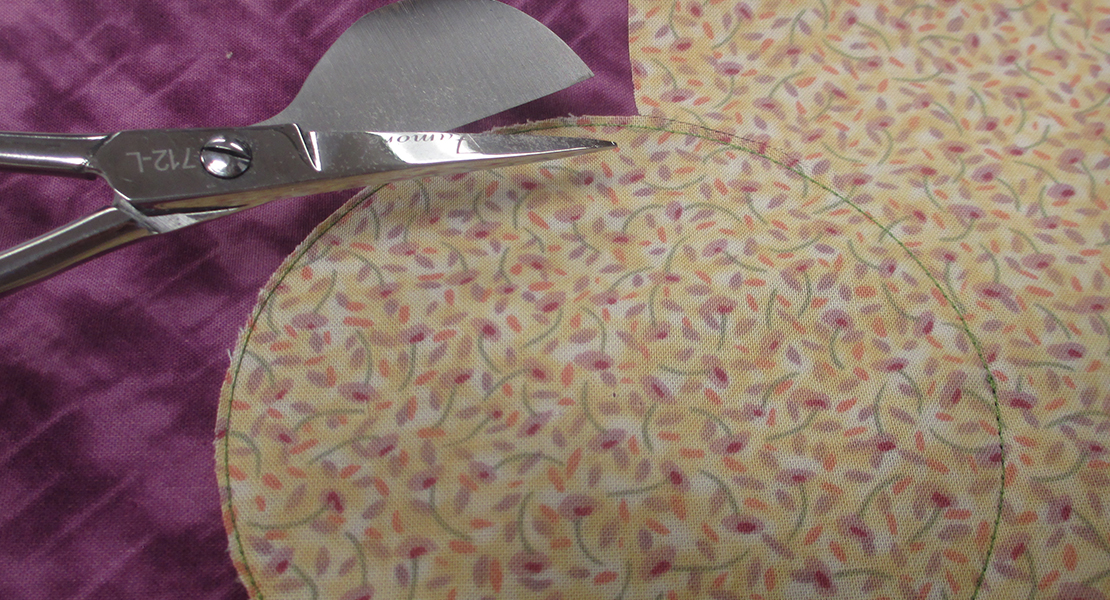
After the embroidery is finished on your first pieces, turn the quilt top over and cut out the extra layer of fabric behind each piece of appliqué. You can cut very close to the stitching. When all your “number ones” are finished with embroidery and cut away from behind, the next layer of “number twos” follow the same sequence. Again used your tracing for placement. Continue adding layers, finishing them with embroidery and cutting away from behind until all your shapes are attached.

When the top is finished it is time to pin baste the quilts sandwich (quilt top, batting and backing) in preparation for quilting. I like to use 12 weight topstitching thread for quilting, with a matching color of regular 50 weight sewing weight thread in the bobbin and a 14 or 16 topstitching needle and a 4 stitch length and #20D open- toed embroidery foot. This bold stitching adds a pleasing hand crafted look.
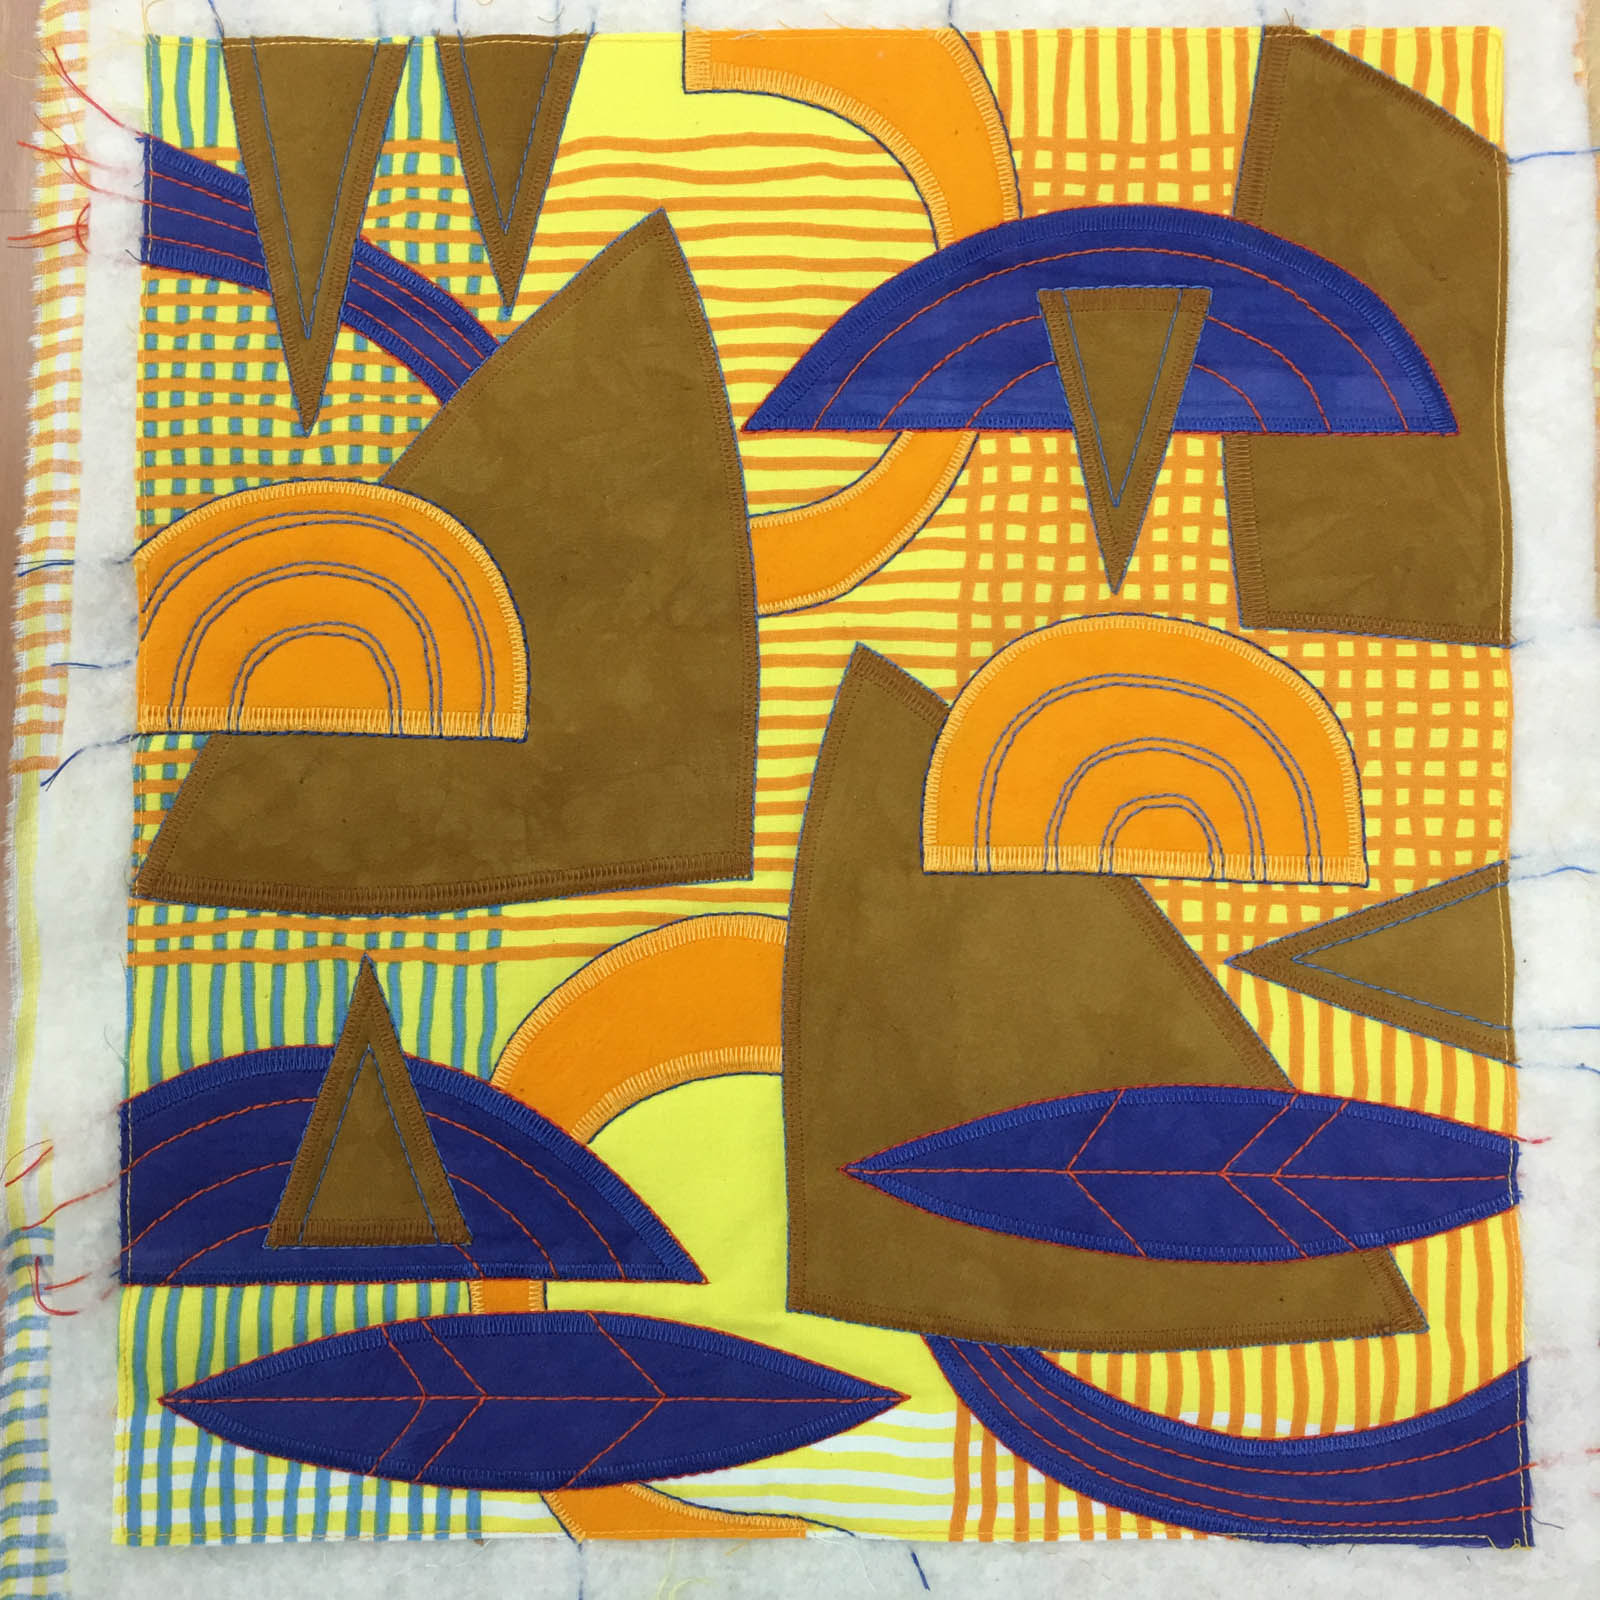
I always begin by quilting “in the ditch” along the edges of each shape. This secures the quilt layers right away and then I am free to plan the sequence of the next stitches. I always leave long thread tales at the beginning and end, and eventually pull them to the backside to tie and bury with an easy threading hand needle. And again, a stitching formula is assigned to each shape group.
I decided to use some little blocks of sating stitch as quilting, as well. These were made with basic sewing weight thread, instead of top stitching thread, and contribute some contrasting texture. Then the top is squared-up and bound.
So this is the basic sequence for all of my appliqué quilts. I hope you might like to make a little abstract quilt of your own to see if this technique may come in handy for your future projects. We’s love to see what you create. Share your quilt here on WeAllSew’s community section.
What you might also like


2 comments on “Abstract Appliqué Quilt”
-
-
Hi Scatty,
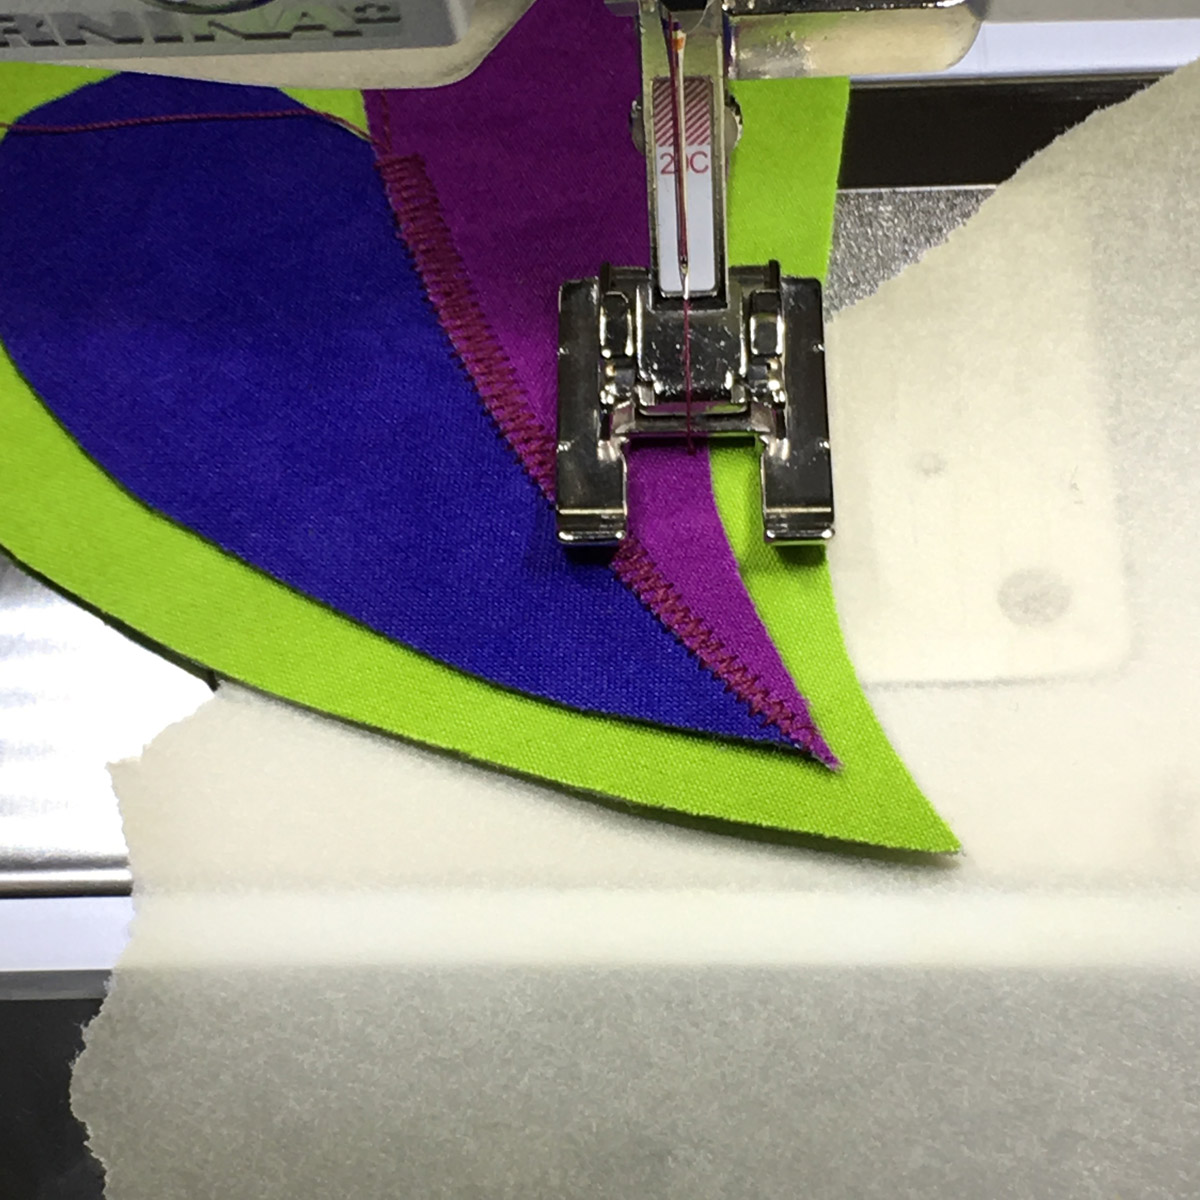
When I cut away from behind a shape I cut everything. In this case, I cut the brown fabric, the brown stitching and the bit of background fabric away. Whatever your shape is sitting on gets cut away. It can be scary to do this for the first time, but it works wonderfully. And there is no need to worry about cutting through your previous stitches because they are secured by the next layer of stitching.
-
Leave a Reply
You must be logged in to post a comment.

I have a question about the next layer of applique when you cut away the back. In the picture where the blue oval is on the brown triangle, after you have stitched the blue oval and are cutting away, do you cut the blue area in 2 pieces (small piece from the edge of blue up to the satin stitch of the brown, then the other side of the satin stitch to the edge of blue) or, are you cutting through the brown satin stitch. I guess I am wondering if there is bulk under the blue from the brown satin stitch. Does my question make sense?