Spanish Hemstitch Attachment #47
Isn’t it fun when you discover a sewing technique new to you that you love? That’s how I feel about Spanish Hemstitching – a beautiful technique that joins fabric or ribbon pieces with lacy threadwork. It’s easy to do using the BERNINA Spanish Hemstitch Attachment #47.
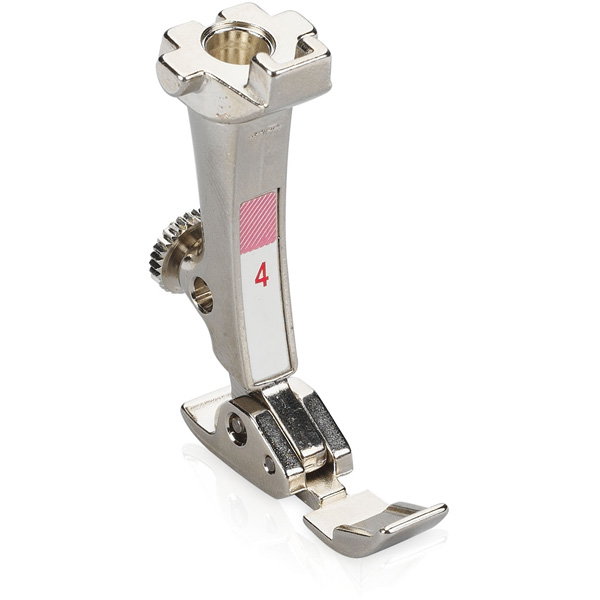
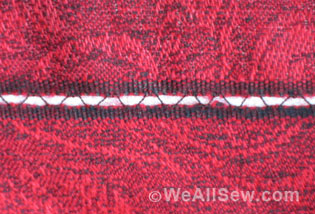
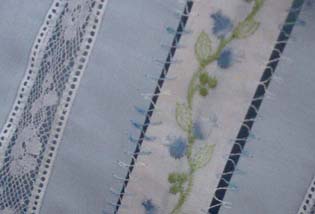
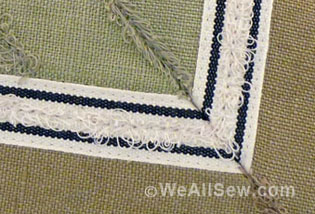
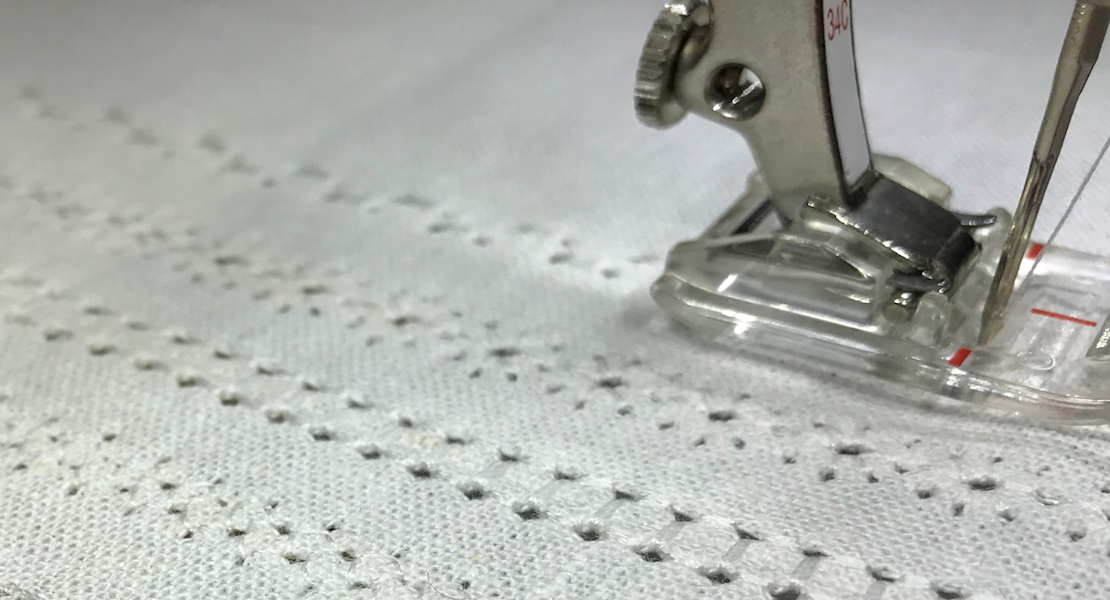
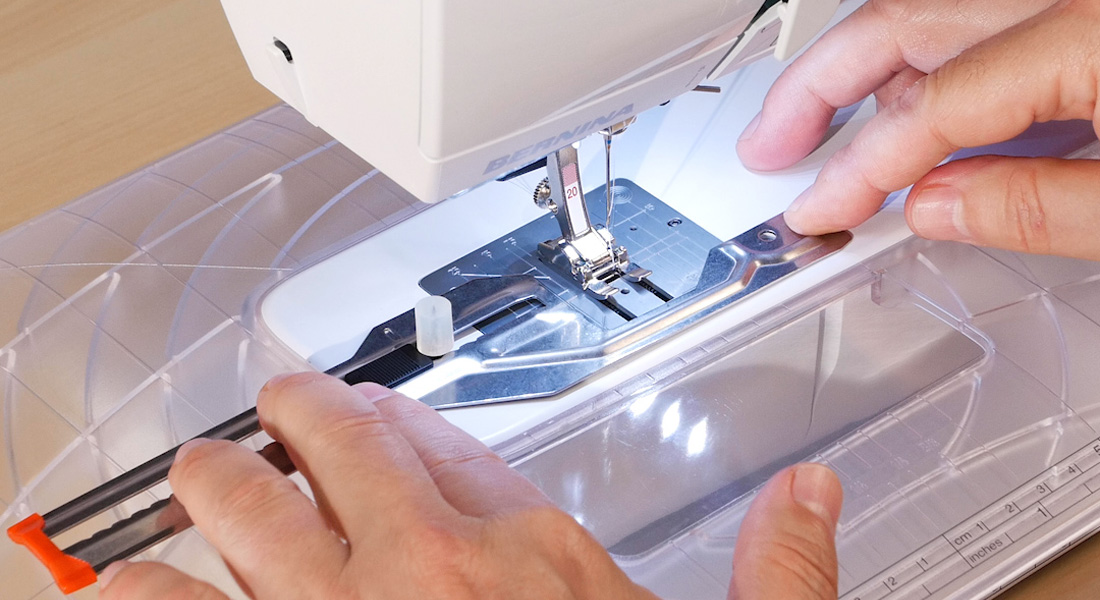
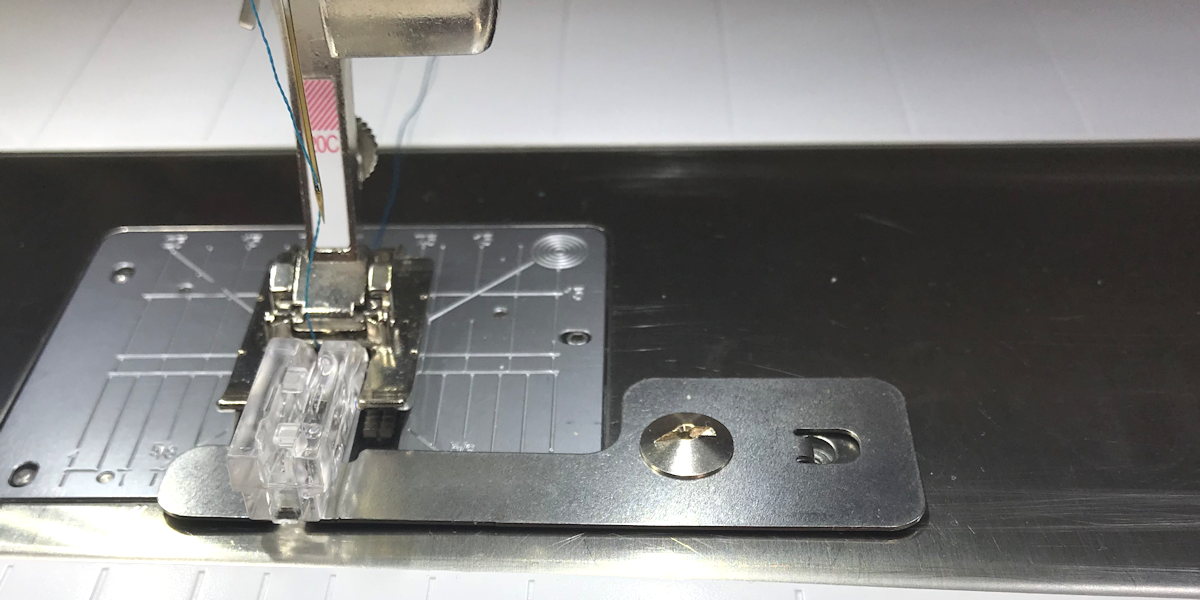
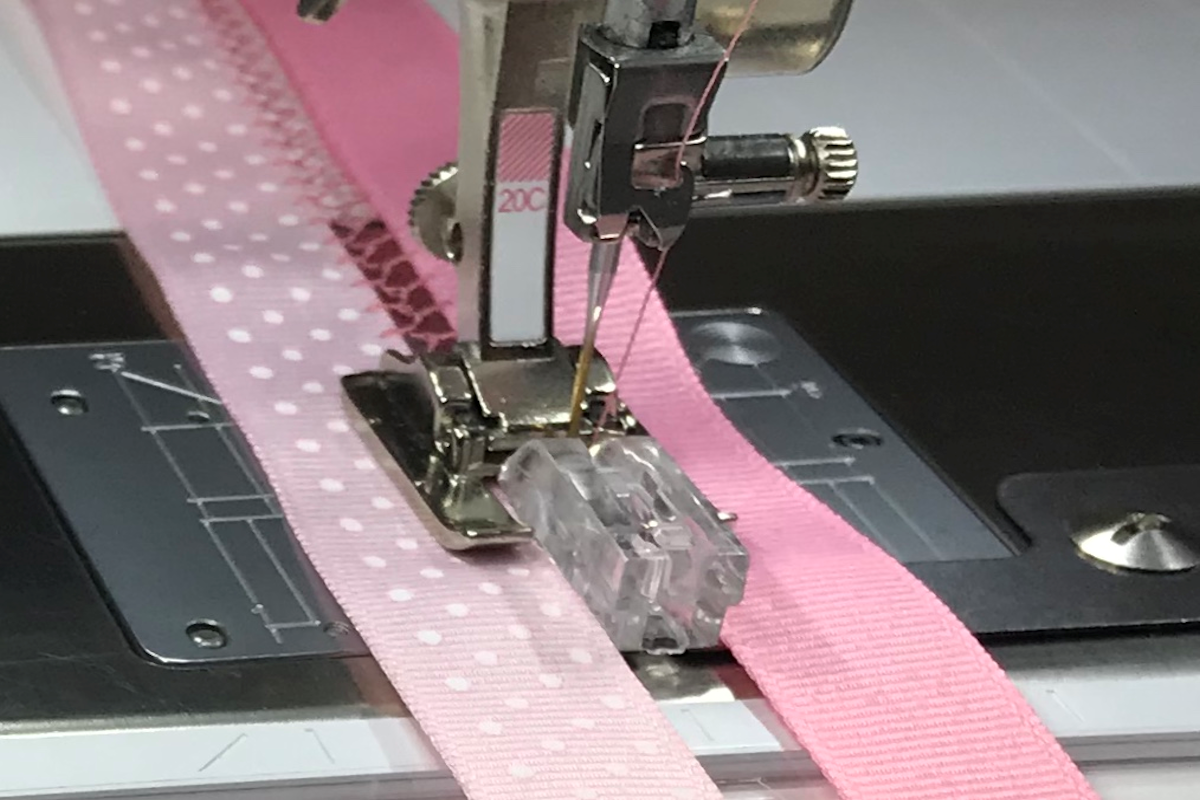
Before sewing machines, there were dainty fabric embellishments sewn by hand with needle and thread. A technique stitched by Spanish nuns in the 1700s joined delicate fabrics and trims with threadwork covering the space between them. Spanish hemstitching is now a machine technique that is almost impossible to sew without help. The trick to this embellishment is keeping the spacing between the two pieces of fabric exactly even and consistent for the entire seam. The needle goes from side to side to stitch on the edges of the fabric pieces. The Spanish Hemstitch Attachment #47 has spacers that are the key to sewing this technique. This attachment is designed to be used with Open Embroidery Foot #20/20C/20D; the spacer fits between the two toes of this foot.
Parts of the Spanish Hemstitch Attachment
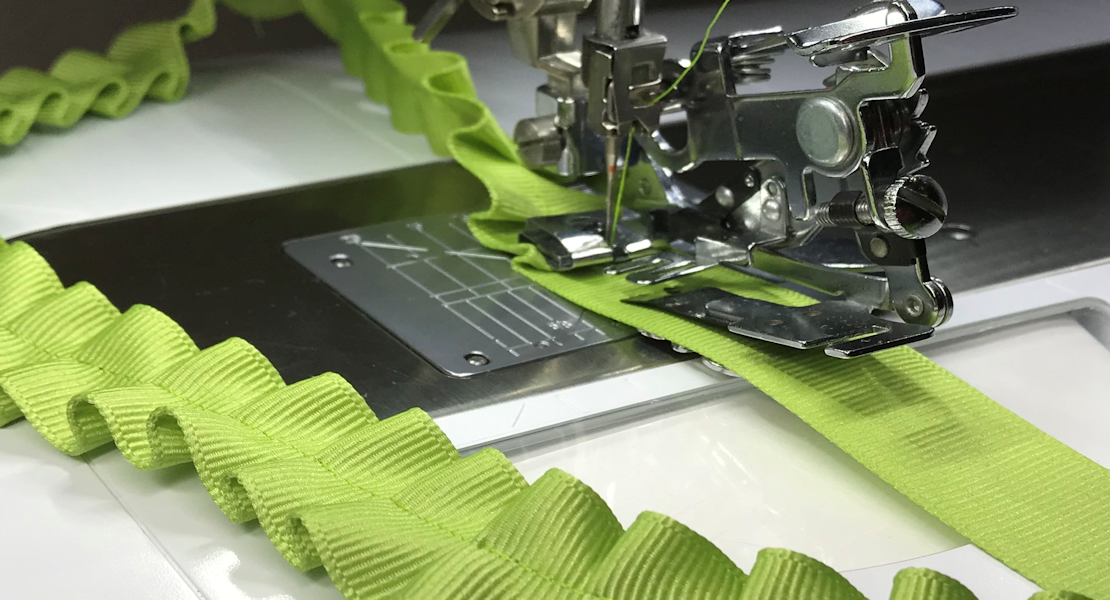
This accessory has several parts but is simple to use. The attachment comes with 4 spacers – 2 for 5 mm spacing and 2 for 9 mm spacing. The smaller spacers may also be used on the larger machines if a 5.5 mm space is desired, but the larger spacers will not work on the smaller machines. Each spacer has two versions, one for fine fabrics, and one for firm fabrics. In order to tell the difference, look at the side lower edge of the spacer, where you will see an indentation. The larger indentation is for thick fabrics and the smaller one is for thin fabrics. In order to tell the difference, look at the lower side edge of the spacer, where you will see an indentation. The larger indentation is for thick fabrics and the smaller one is for thin fabrics.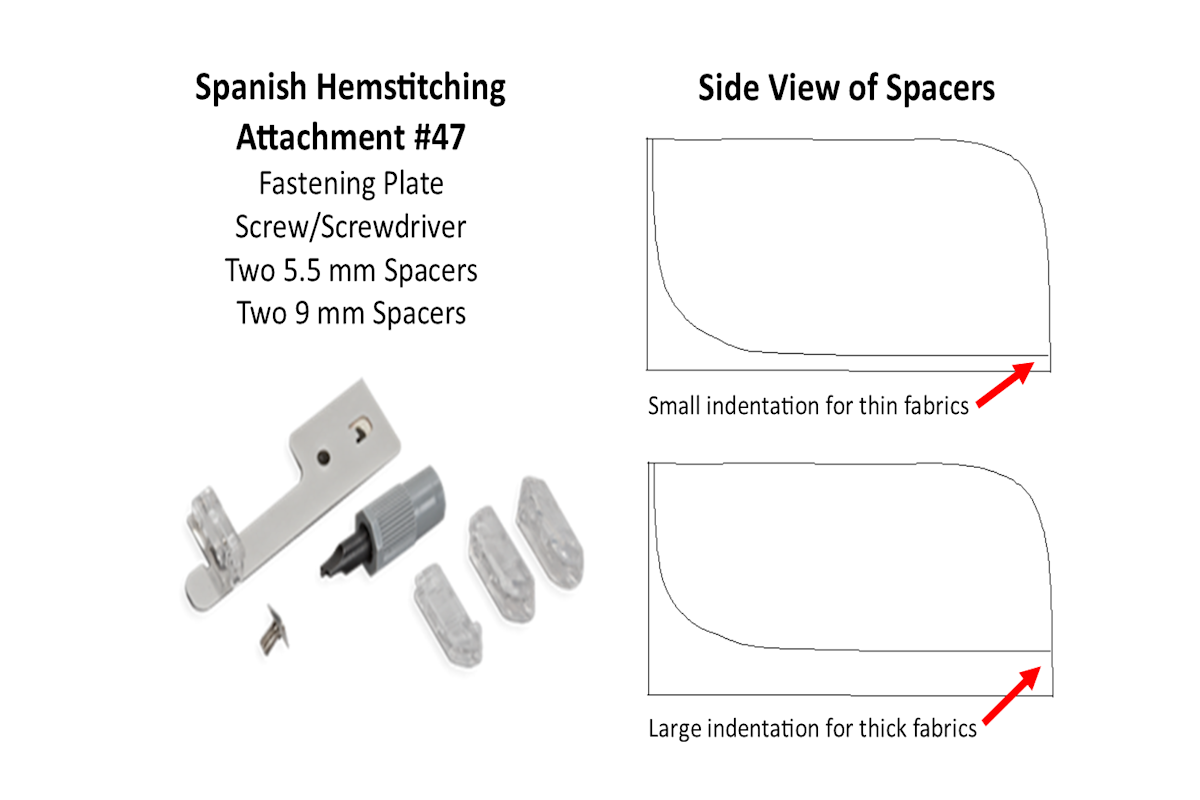
Machine Setup for Spanish Hemstitching
I use the BERNINA 790 PLUS for Spanish Hemstitching but any BERNINA sewing machine will work with this attachment To set up the machine for this technique, the first thing to do is to attach Open Embroidery Foot #20/20C/20D. Next, you will clip your selected spacer into place on the fastening plate and then the plate is attached to the bed of the machine with a single screw. Click here to see the BERNINA Spanish Hemstitch Attachment in action.
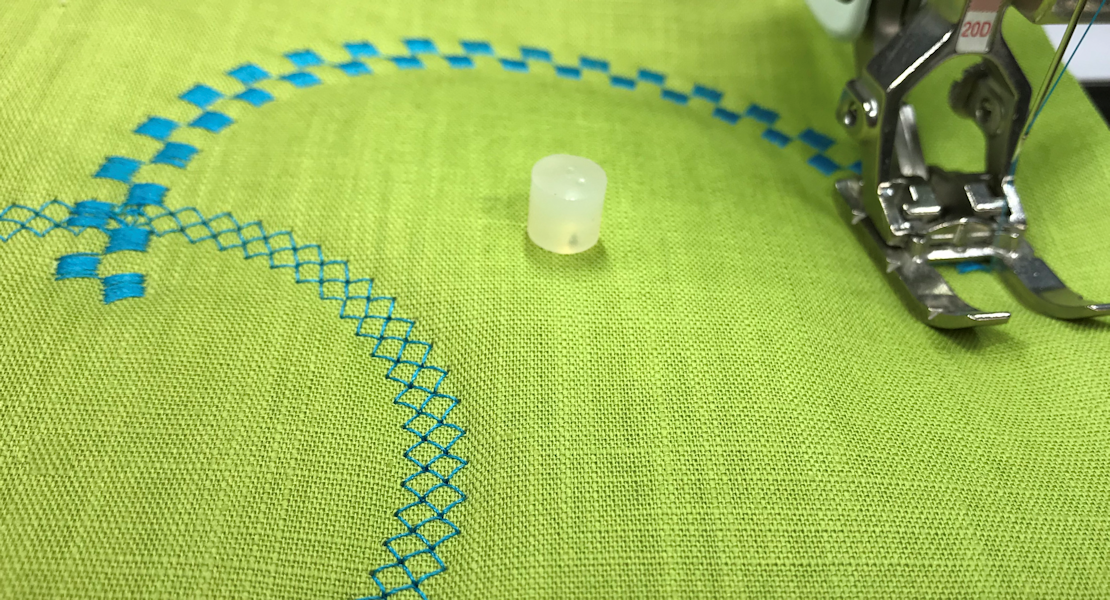
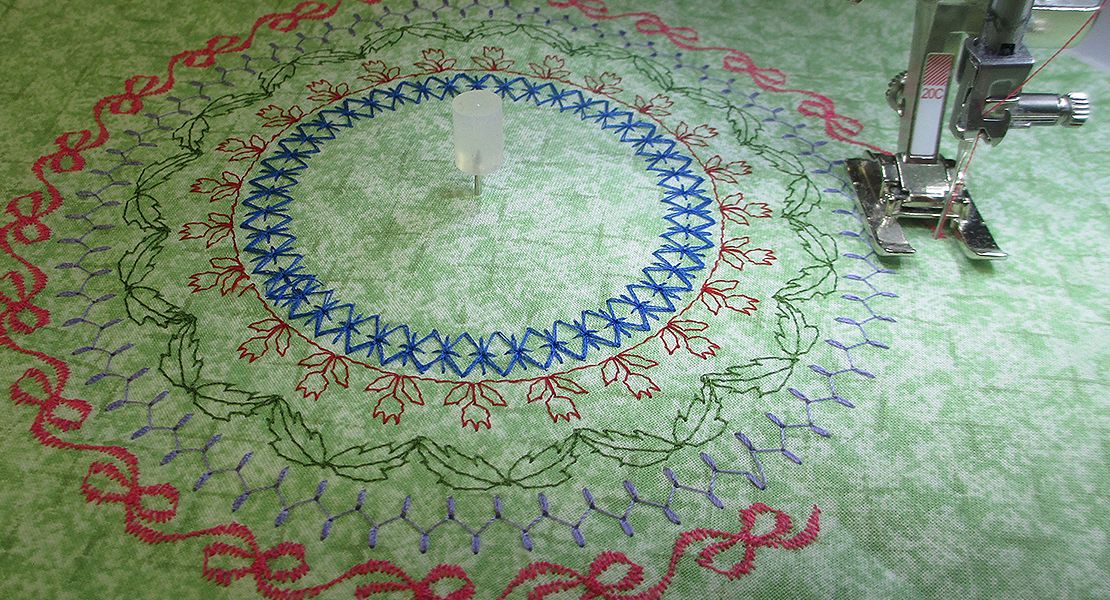
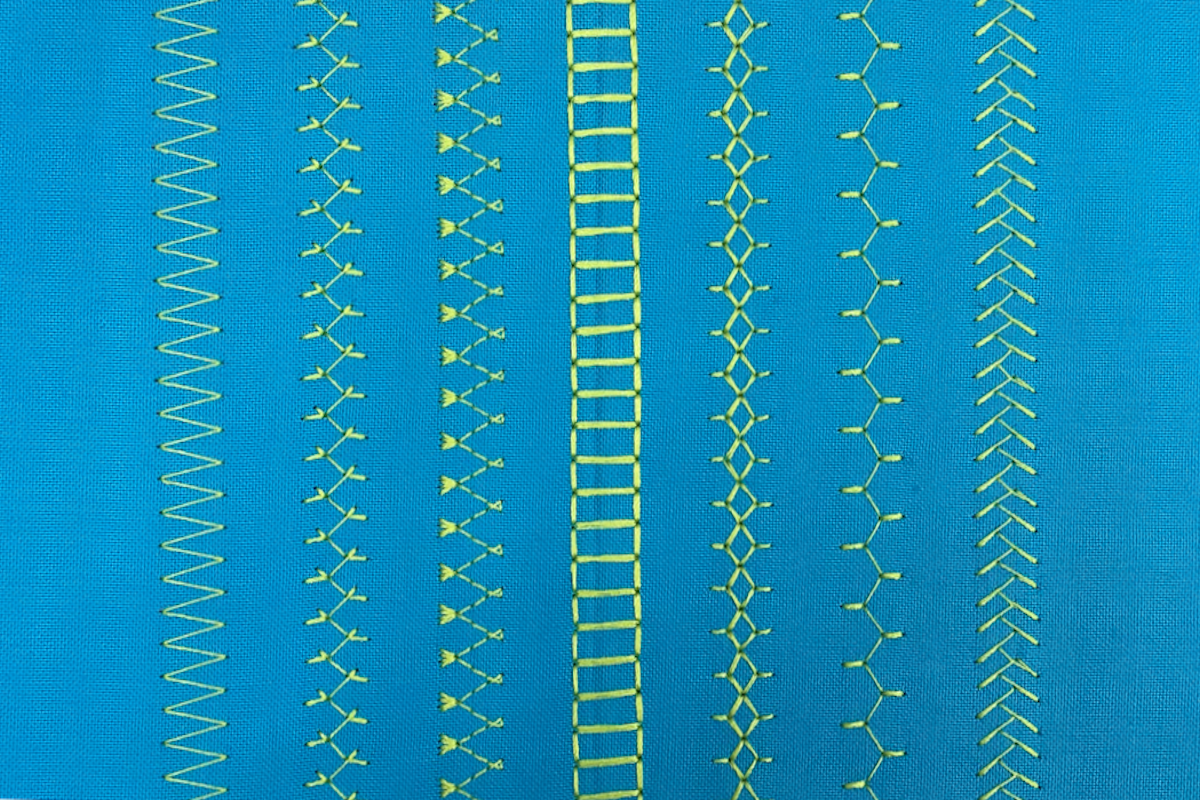
Stitch Selection for Spanish Hemstitching
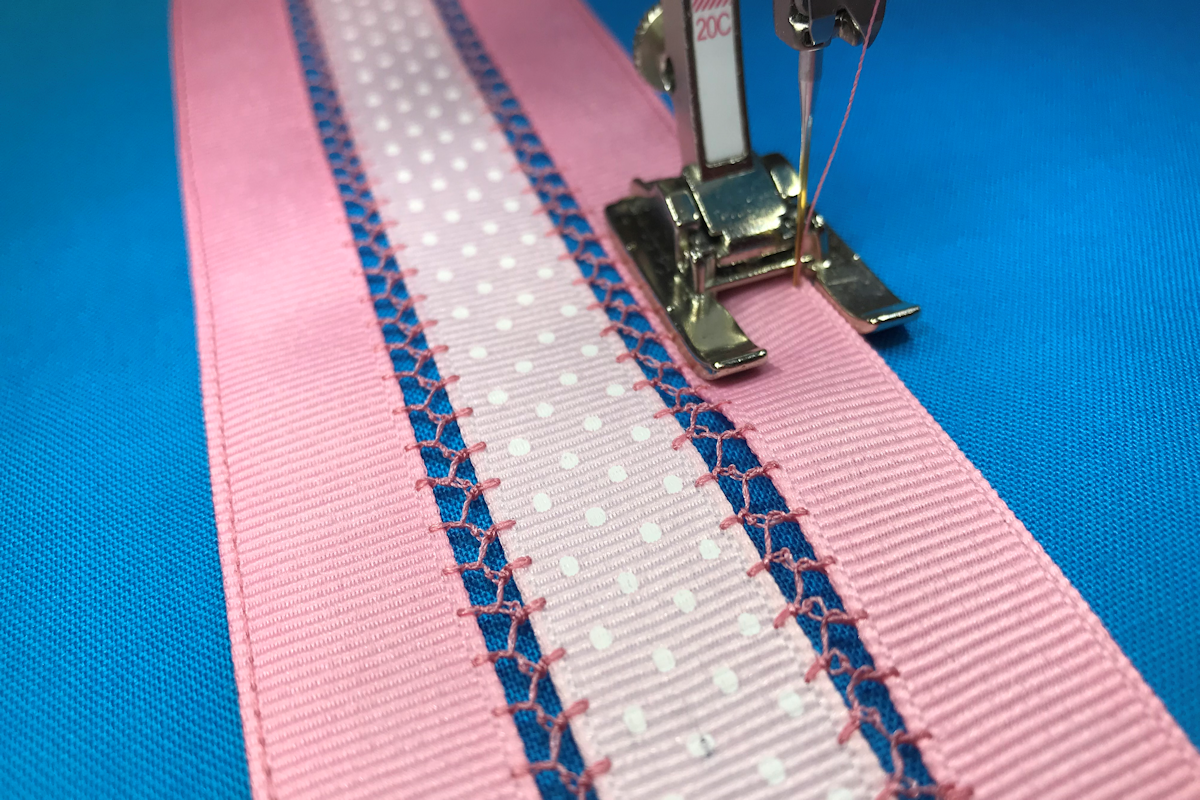
You will need a stitch that goes from side to side in the full width of your selected spacer (5.5 mm or 9 mm). Look for light, airy stitches such as the ones shown below. Not all stitches will work for this technique but don’t be afraid to try any that you think might give you a lacy bit of threadwork between your fabrics.
Creating Spanish Hemstitching
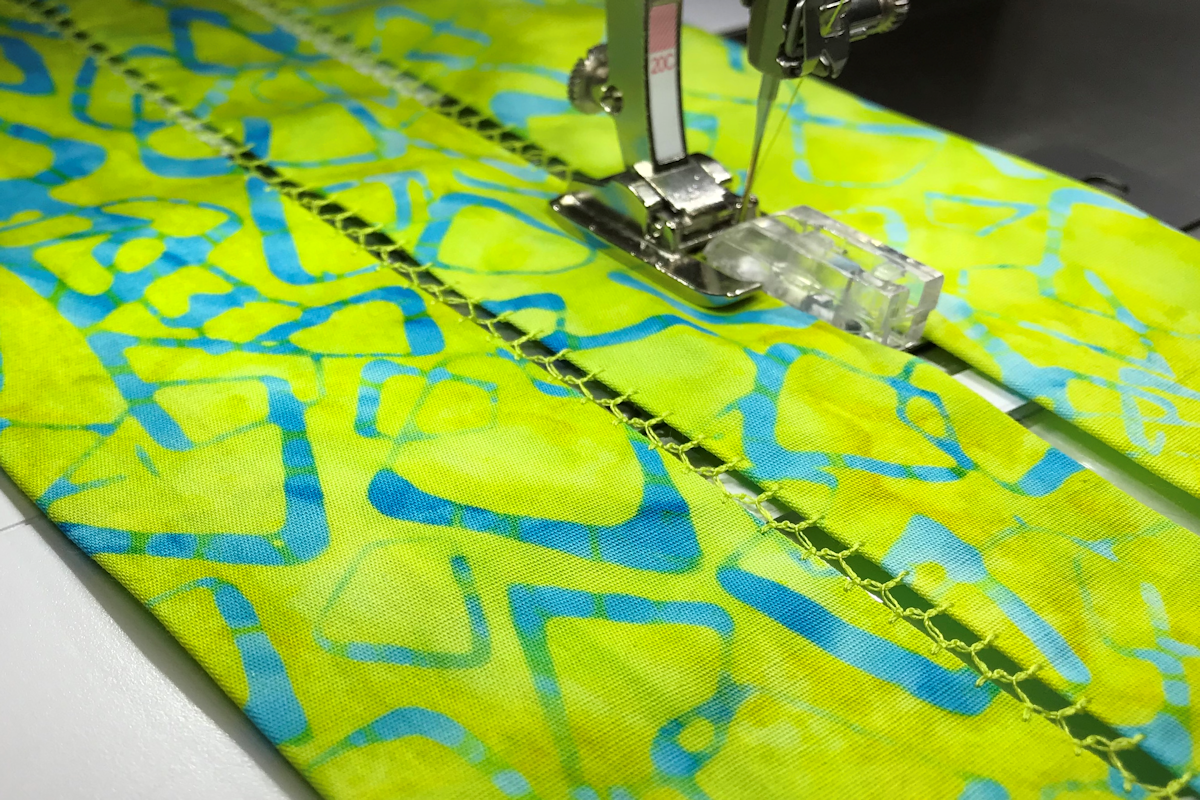
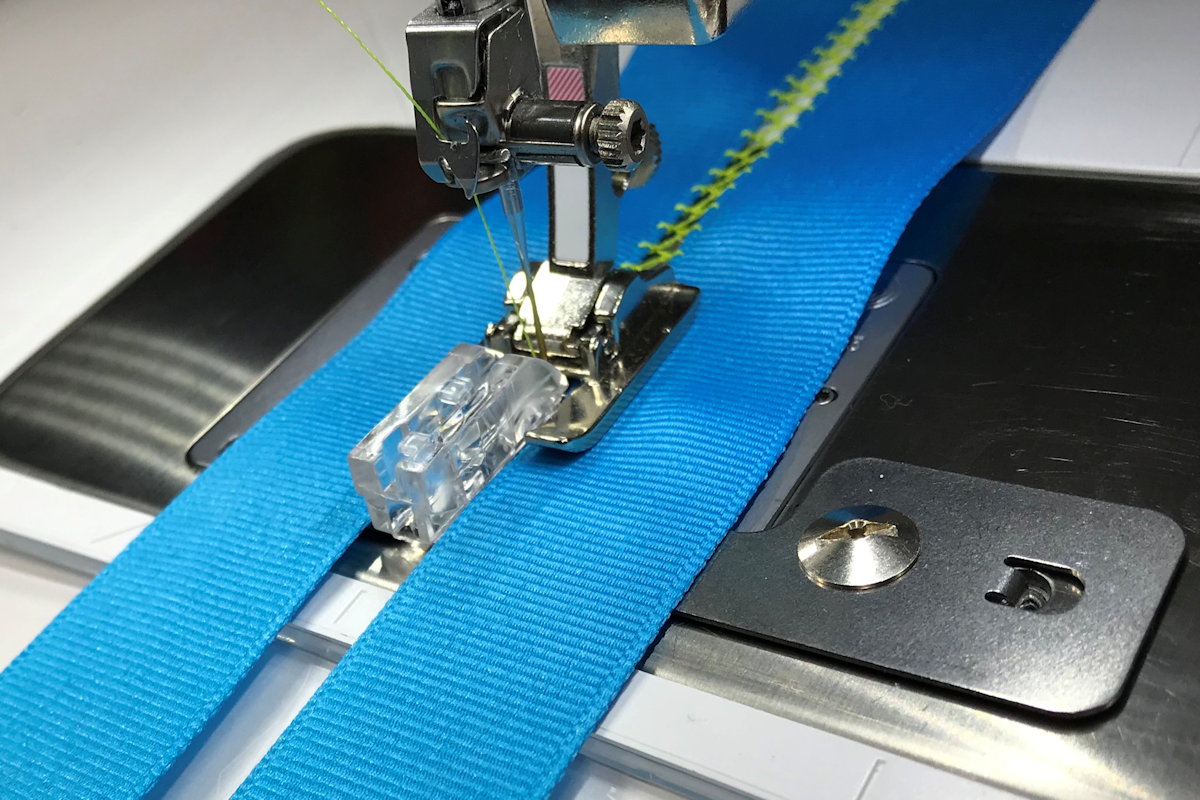
To start sewing, position one piece of ribbon or fabric on each side of the spacer; the fabric should have a finished edge, hemmed, folded, or faced. Stitch, making sure you keep the fabric next to the spacers. The stitch should stitch into the edge of each of the ribbon/fabric.
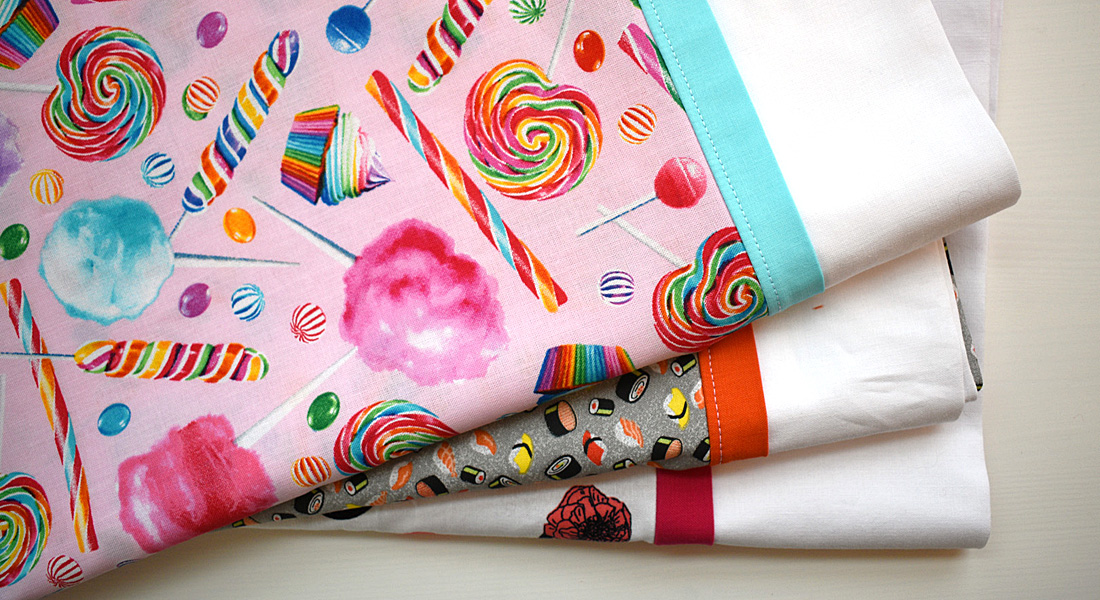
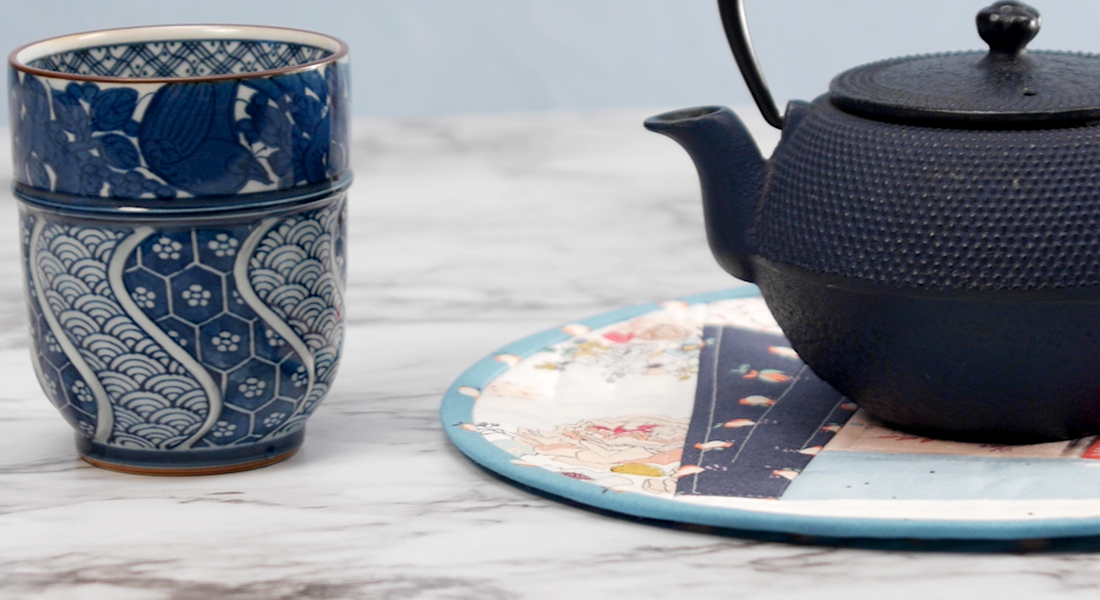
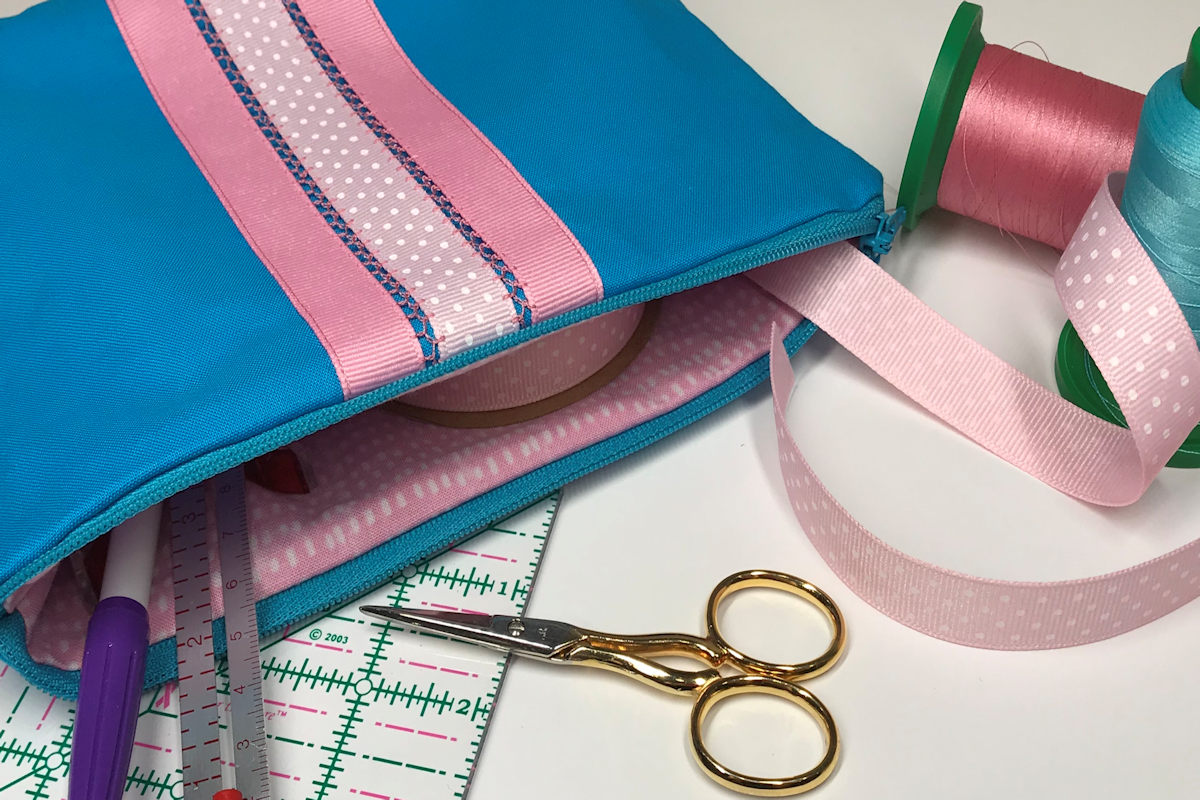
Zippered Hemstitch Pouch
Add some style to a simple zippered pouched with a unique decorative panel featuring Spanish Hemstitching. The pouch is lined for a clean look inside and out. The finished size is about 8″ x 6″ but can easily be changed by resizing the rectangles.
Materials for Making a Zippered Hemstitch Pouch
- Outer fabric, 2 pieces, 10” x 8”
- Lining fabric, 2 pieces, 10” x 8”
- Optional – OESD Fuse and Fleece: 2 pieces, 10” x 8” each (If desired, press the OESD Fuse and Fleece to the wrong side of the outer fabric pieces. This will add body to the bag.)
- Ribbon: 3 pieces of 5/8” ribbon, 18-20” each
- Embroidery thread in a coordinating color for both needle and bobbin
- 14”-16” Zipper
Preparation
Set up the machine for Spanish Hemstitching as described above.
Hemstitched Ribbon Panel
Place one ribbon on one side of the spacer and a second ribbon on the other side. Select a lacy decorative stitch (Stitch #311 was used on the sample). Stitch, making sure you keep the fabric next to the spacers. As the needle moves from side to side, it should sew into the edges of each ribbon. Repeat with the third piece of ribbon, stitching it to the original two ribbons. You now have three joined ribbons, creating the center panel of the pouch.
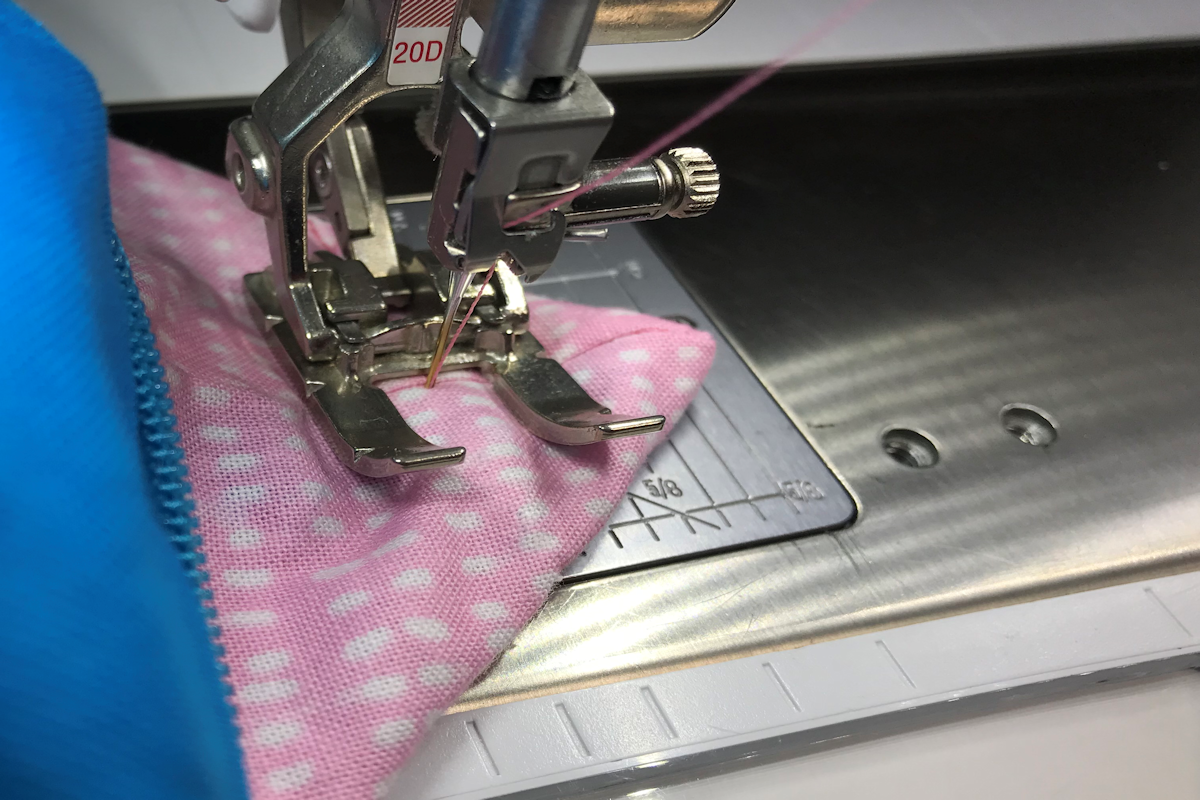
Cut the hemstitched ribbon panel into two pieces, each one 8” in length. Place each hemstitched panel on top of the outer fabric pieces, centered from side to side. Using Open Embroidery Foot #20/20C/20D, align one side edge with the inside right toe. Adjust the needle position 3-4 places to the right. Edgestitch the outer edge of the panel to secure it to the outer fabric; repeat with the opposite edge.
Zipper Application
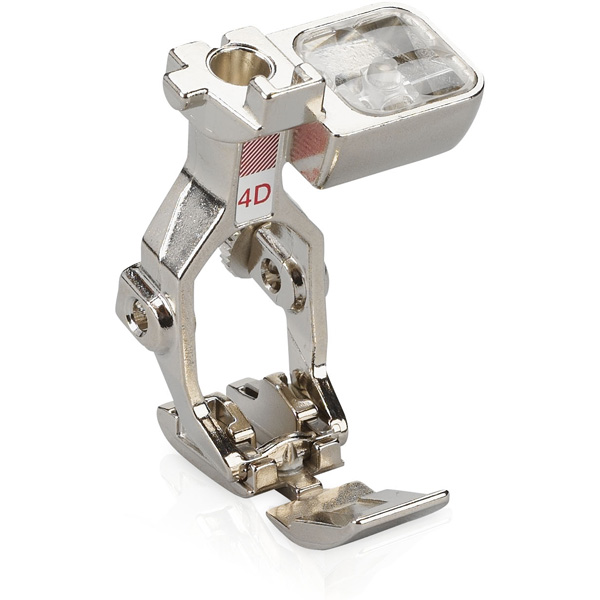
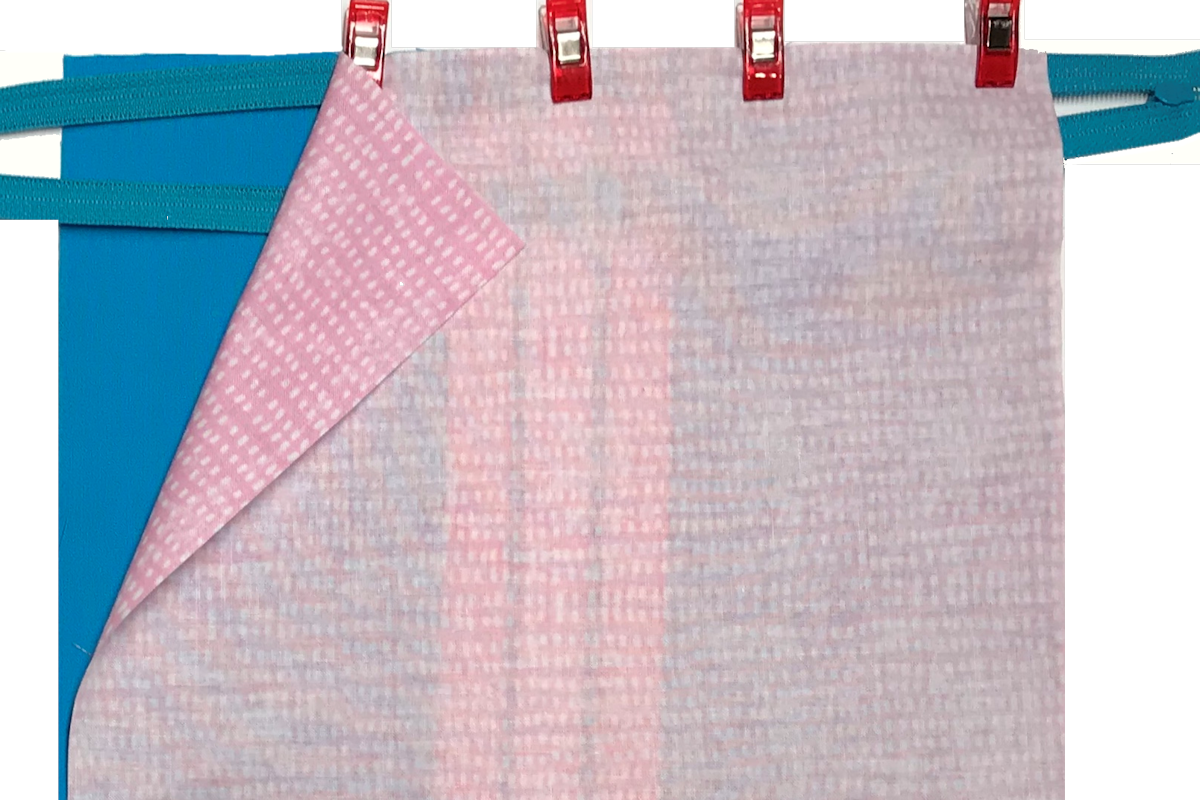
Unzip the zipper. Center one side of the zipper face down along one 10” edge of the base fabric with the coils facing down. The zipper will extend at each end. Position one piece of lining fabric right side down on top of it, sandwiching the zipper between the two fabrics. Using Zipper Foot #4D, stitch next to the coils. Repeat with the other zipper tape and the remaining pieces of fabric and lining. Optional: Topstitch along the zipper on the outer fabric. Press the seam allowances to the lining side.
Bag Assembly
With the zipper still unzipped, fold the bag in half, right sides together, with lining sides together and bag sides together. Starting on the lower edge, stitch all four sides using a quarter inch seam, leaving an opening in the lower edge for turning to the right side. The seam allowances along the upper edge of the bag should be stitched toward the lining. Trim the corners and turn the bag to the right side.
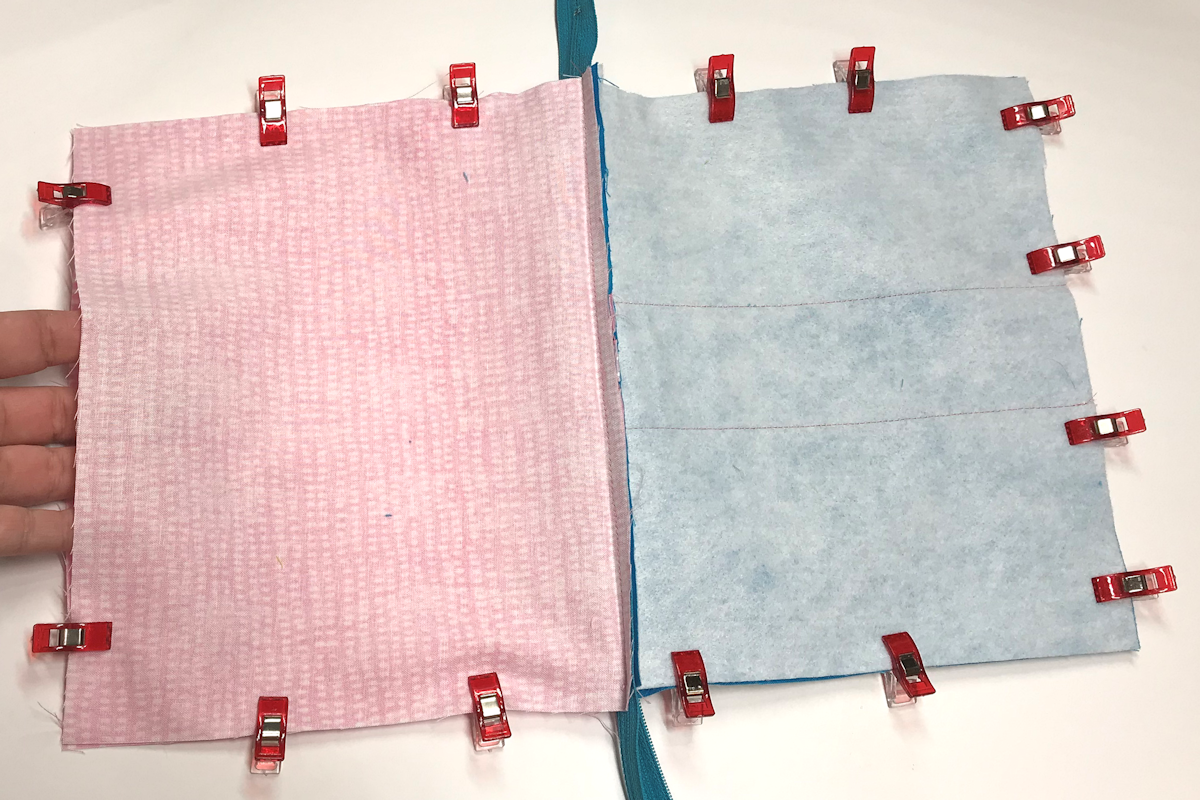
Finishing the Lining
On the lower edge of the lining, fold the seam allowances of the opening to the inside and press. Position the edge of the fabric along the inside right toe of Open Embroidery Foot #20/20C/20D. Adjust the needle position to the right so the stitching is along the edge of the fabric and sew the opening closed.

Boxing the Corners
Pull the corners of the bag and lining though the zipper opening. Working with the fabric and lining as one, fold the corner into a triangle. Measure about 1¼” from the point down, stitch across the base of the triangle. Repeat with the second corner. Push the lining down into the bag and press the bag if needed.
More We All Sew Spanish Hemstitching projects:
Spanish Hemstitch Pillowcase: https://weallsew.com/spanish-hemstitch-pillowcase/
Spanish Hemstitched Bottle Bag: https://weallsew.com/how-to-make-a-spanish-hemstitched-bottle-bag/
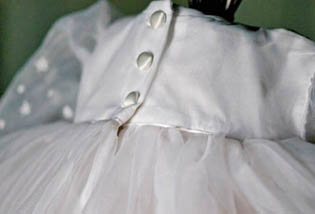
Modern Heirloom Dress: https://weallsew.com/modern-heirloom-dress/