Stitch Book

Description
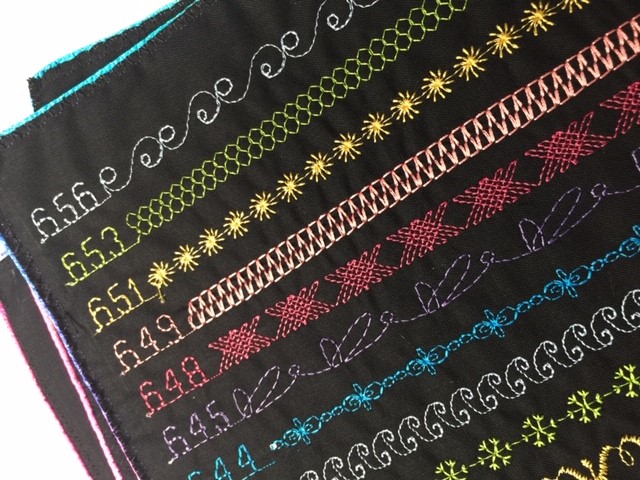
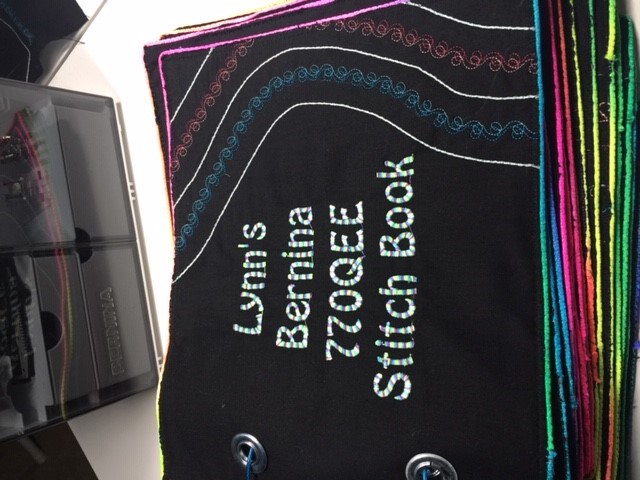
Four years after my instructor at my machine mastery class told me to do it, I stitched out all the stitches on my 770QE. I cut out “pages” from black cotton fabric and used a medium-weight stabilizer. After stitching out all the stitches, I joined the pages together back to back with my 2A foot and bound the edges with rattail cording and my 21 foot. Just looking at them has inspired so much more creativity!
16 comments on “Stitch Book”
-
-
I just finished doing a stitch book for my new QE570 but it’s positively “primitive” compared to yours! I used 8X10 pieces of muslin divided into 20 sections, numbered with pen and sewed with plain black thread. The muslin was backed by thin iron-on fusible batting for stability. I slipped two finished sheets back-to-back into plastic sheet protectors held by binder rings. Even this “simple” version was a time-consuming project but it will be well worth the effort — most of the stitches looked vastly different from the little icons once they were stitched out. And it will be fun to experiment with color and alterations to stitch length and width.
-
You are absolutely right about them looking vastly different than the little icons! So much prettier!
-
-
That is fantastic! What a handy way to have a “reference tool” at your hand. Love how you used grommets to hold them together
-
This is beautiful. I did one for my 570 but still need to do one for my 790 & 350. I love the black with the colored threads. Amazing!
-
I have to do that too!
-
cool idea!
-
Congratulations on your new book. I’ve owned my 780 for almost 3 years and just stitched all the stitches. I made business card samples and put them face to face with blank cards. I put notes on the blank cards. After seeing your book, though, I think I’m going to do this, as well.
We don’t realize how much benefit this exercise is until we, finally, do it.
?
-
I’ve seen various versions of this, but I think yours is my favorite! A couple of questions…
What stitch did you use as the lead in for each stitch (i.e. “656,” “653”)?
Could you share what size you cut the fabric/stabilizer for each page, and the spacing between lines (each stitch type)?
Thank you!
-
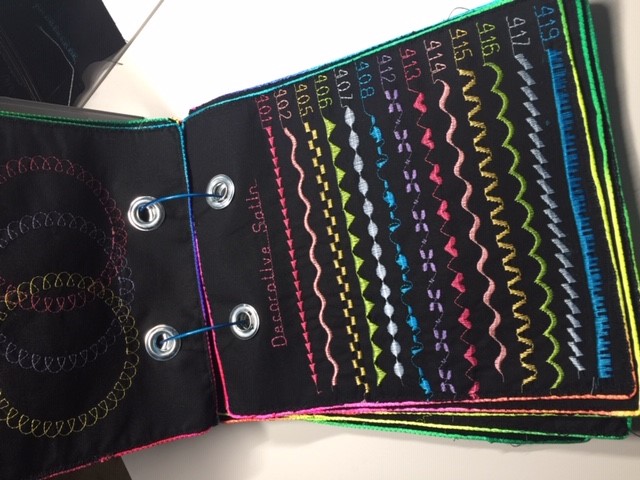
If you are interested in my process, I used 9 x 11” black Kona cotton and Isacord thread. I backed my “pages” with 931 Pellon. You could make the pages a little smaller, but a couple of times when my stitches were imperfect, I was just able to move down the page and stitch them out without picking them out. I prepared a page for each folder of stitches. Then I stitched the first stitch in every folder with one color before I would switch my thread. Then do the second stitch in each folder with the next color. I used one of the alphabets on my machine to stitch the number of the stitch. They are spaced about a foot’s width apart. After I finished all the pages, I joined them back to back with my number 2A foot. Then I attached a rat tail cord binding with my number 21 foot. I used grommets to put holes in the pages so I could run a cord through it to hold them together.
-
I am so proud of you for taking on this stitch book and finishing your assignment from your guide classes!!
-
Thank you for the process specifics,
-
-
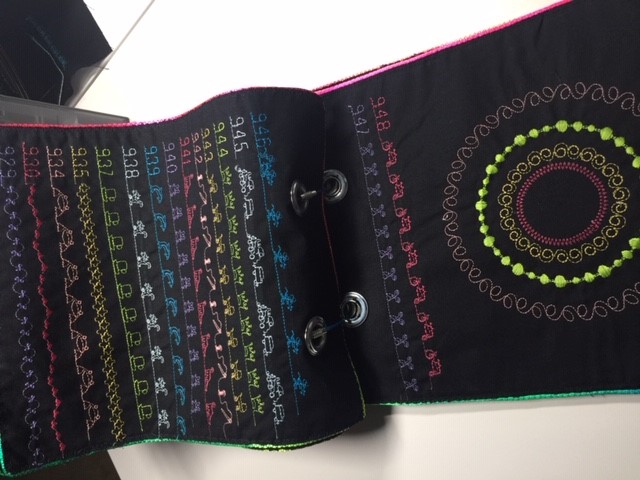
how did you do the circle stitches?
thanks,
donna-
I used the BERNINA circular embroidery attachment.
-
-
This is so wonderful! I just bought my second Bernina. I bought my first one in 1978, a 830 workhorse. I never thought I’d want another machine until my sister told me about her new 770QE. I just picked mine up a week ago. This will be the perfect first project for my new incredible Bernina. Thank you!
-
I just got a 770 QE Plus and had to try this. I did not have the feet needed to copy your technique so I just sewed my pages RST and after turning them right side out I topstitched with various stitches in color to make a border. They turned out great, though not as professional as yours!
Leave a Reply
You must be logged in to post a comment.


Thanks for your story of delayed action on the stitch book. I’m 5 years out from my mastery class, but you’ve inspired me to reconsider making one! Your is beautiful!