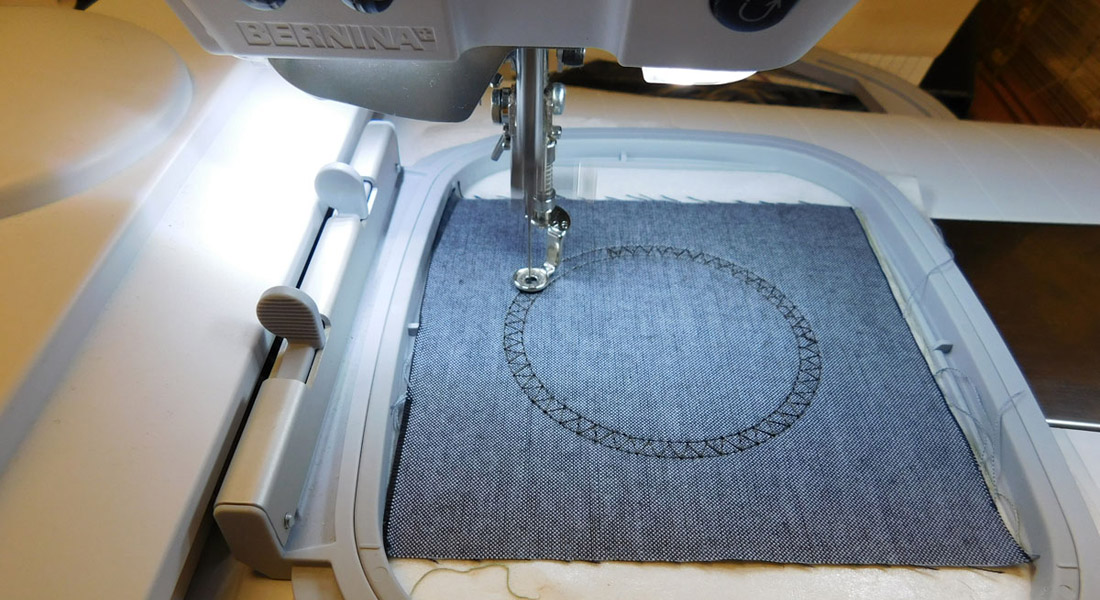
Design Positioning in Machine Embroidery
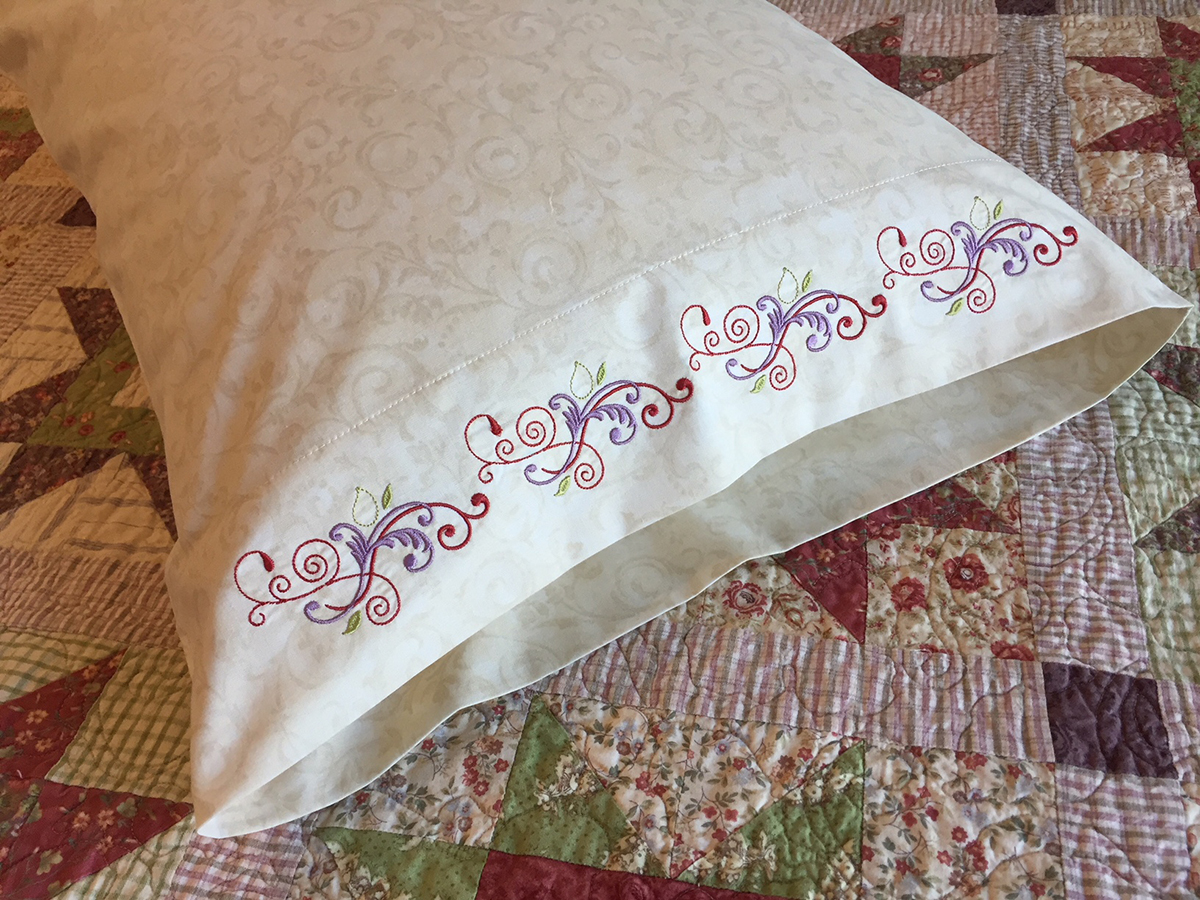
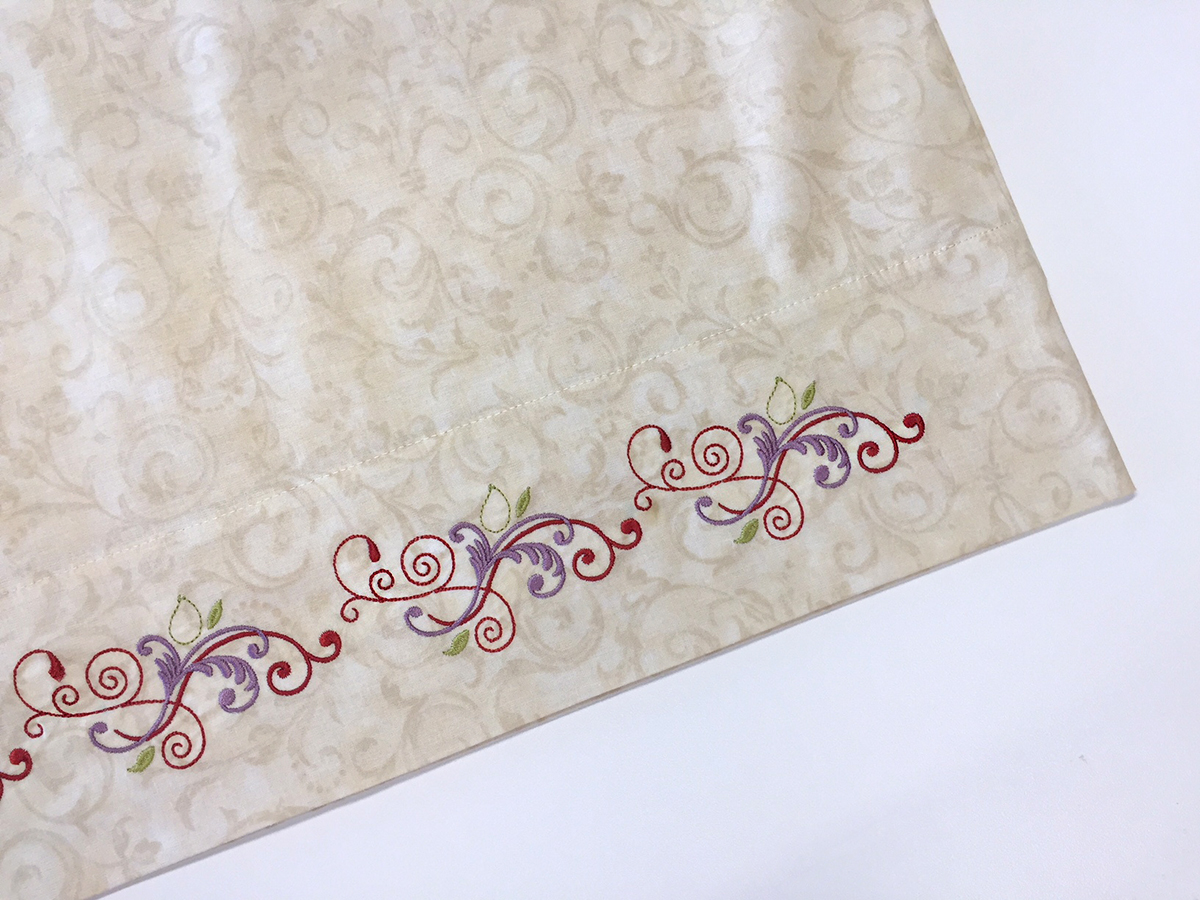
It’s time to freshen up the guest room and add a bit of a personal touch to the new linens. This project was creating new pillowcases for the guest room, and of course they needed a touch of embroidery. Using a traditional style with a bit of embroidery on the pillowcase cuff and a nice border would dress them up beautifully. Making pillowcases is such an easy and quick project, and they also make a nice gift.
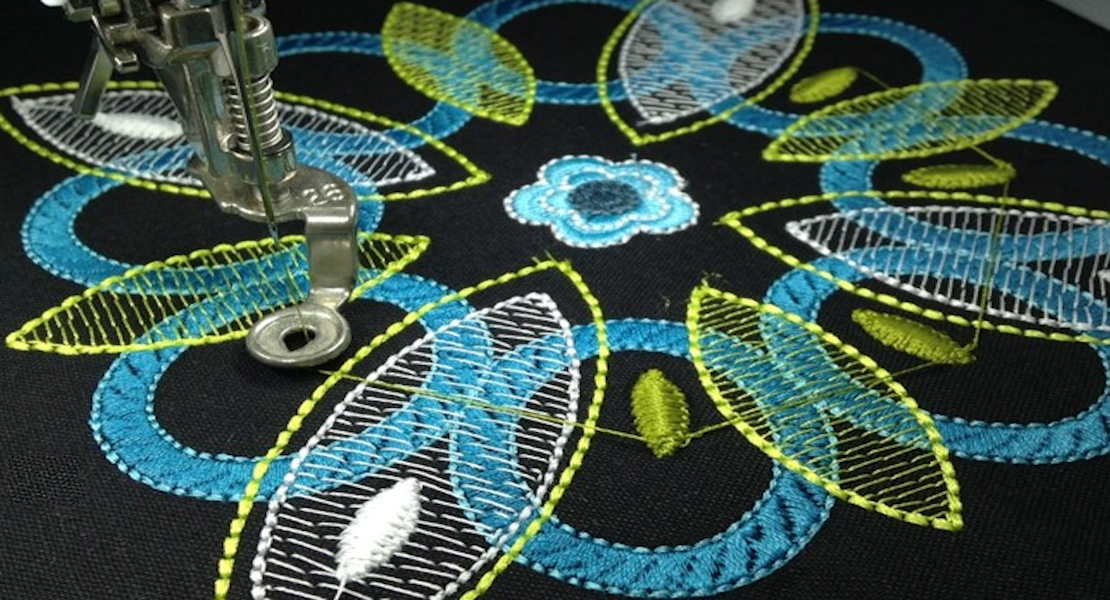
The success of any embroidery project is dependent upon the correct placement of the design and the completion of the project, wouldn’t you agree? Using the Pinpoint Placement feature on BERNINA embroidery machines made placement so easy, and I have a perfectly placed embroidered border.
Materials and Supplies to Embroider Pillowcases
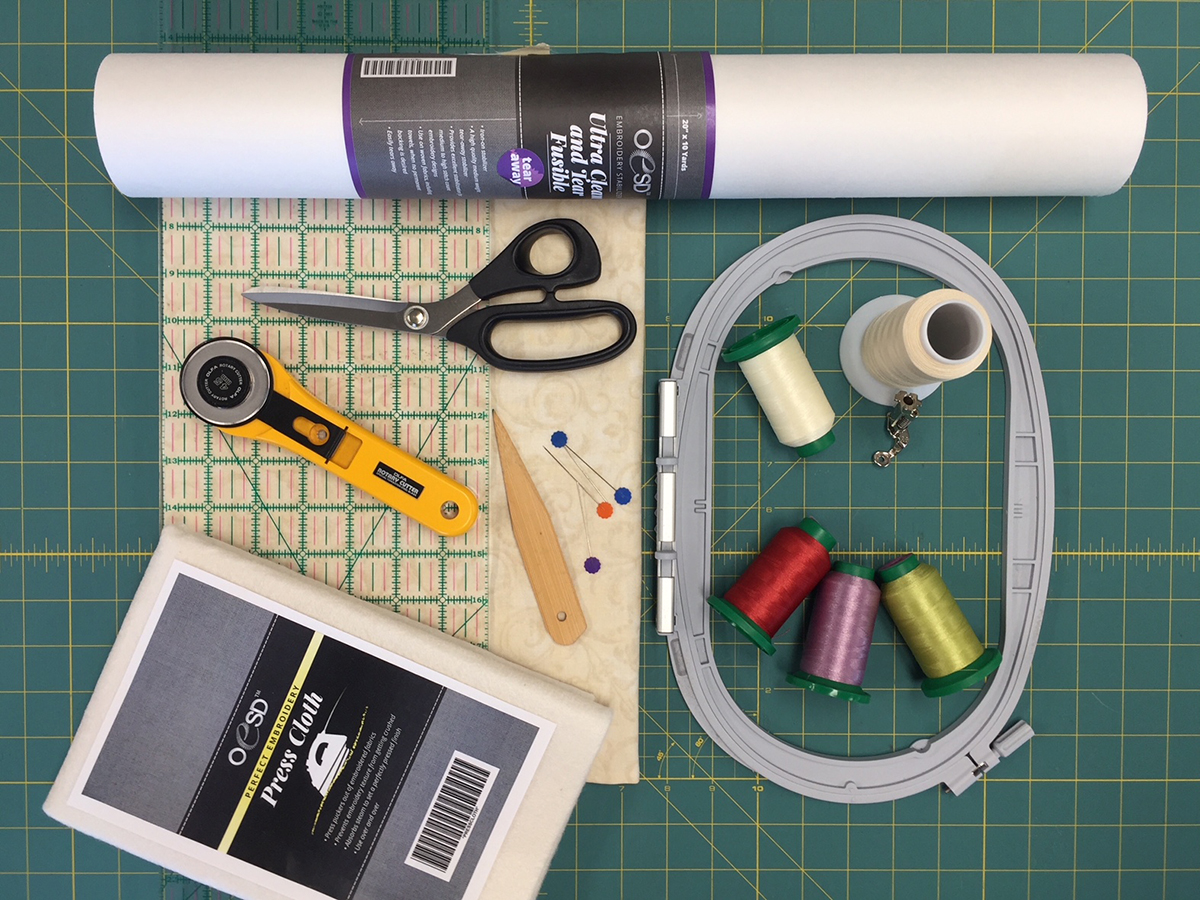
BERNINA 790 PLUS (B 880 PLUS, B 700, B 590 or B 500 machines also have Pinpoint Placement)
BERNINA Drop-Shaped Embroidery Foot # 26
Cotton Fabric for pillowcases: 2 1/8 yards
Border embroidery design: OESD-Flourishing Appliques #12205 (I used embroidery design FB335_48 Leaf Flourish 1)
OESD Ultra Clean & Tear Fusible Tear-Away Stabilizer
OESD Perfect Embroidery Press Cloth (optional)
80/12 Embroidery needle
Metrosene all-purpose thread
Rotary Cutter
Cutting Mat
Acrylic Rectangle Ruler
Iron
Straight pins
Water Soluble Marking Pen
Point Turner
Scissors
Making the Embroidered Pillowcase
Note: It is recommended to pre-wash cotton fabric prior to cutting.
Step 1: Cutting the Fabric
Cut 2 pieces 35’’ x width of cotton fabric for the pillowcase body. This will make a standard size pillowcase with a 4 inch hem. The finished size will be 30” x 21”. If you desire a larger pillowcase, purchase and cut fabric accordingly. (For a king size pillowcase, purchase 2 1/2 yards of fabric, and cut 41” x width of fabric.)
Prepare the pillowcase fabric for embroidery.
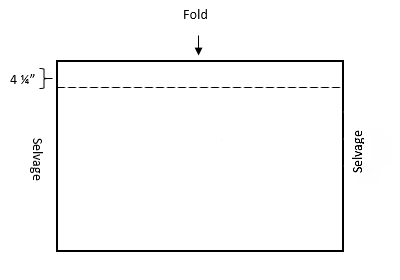
Step 2: Folding the Hem
Fold the pillowcase cuff edge with wrong sides together 4 1/4” along one long edge and press with iron. This will be the hem for the open end of the pillowcase.
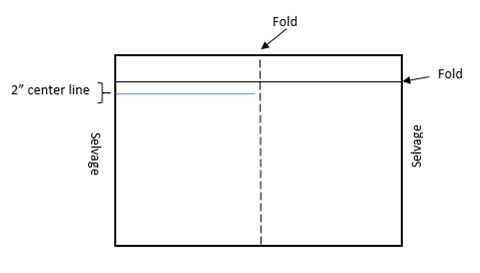
Step 3: Marking Design Position
Fold the fabric in half with wrong sides together and press the fold mark.
Unfold the fabric and open out the hem you just pressed. Using the pressed line as your guide, measure 2” from the pressed fold line and mark a line on the pillowcase (not the cuff hem) using a water soluble marking pen.
Step 4: Marking End Points of Design
Measure in 2 1/4” from the selvage edge and the vertical center fold, and place a mark on the previously drawn placement line. These marks are for the start and end of the embroidery border designs.

Step 5: Cutting Stabilizer
Cut the Ultra Clean & Tear Fusible Stabilizer 10” x 23”.
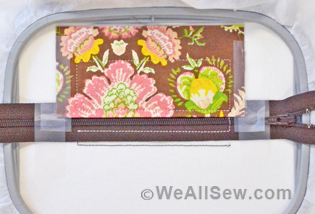
Step 6: Preparing and Hooping Fabric
Lay the pillowcase wrong side up on the ironing board. Place the piece of stabilizer shiny side down on the wrong side of the pillowcase fabric, centering it over the marked placement lines. Follow the instructions on the package of Ultra Clean and Tear Fusible stabilizer to adhere it to the fabric. Press with a medium warm iron.
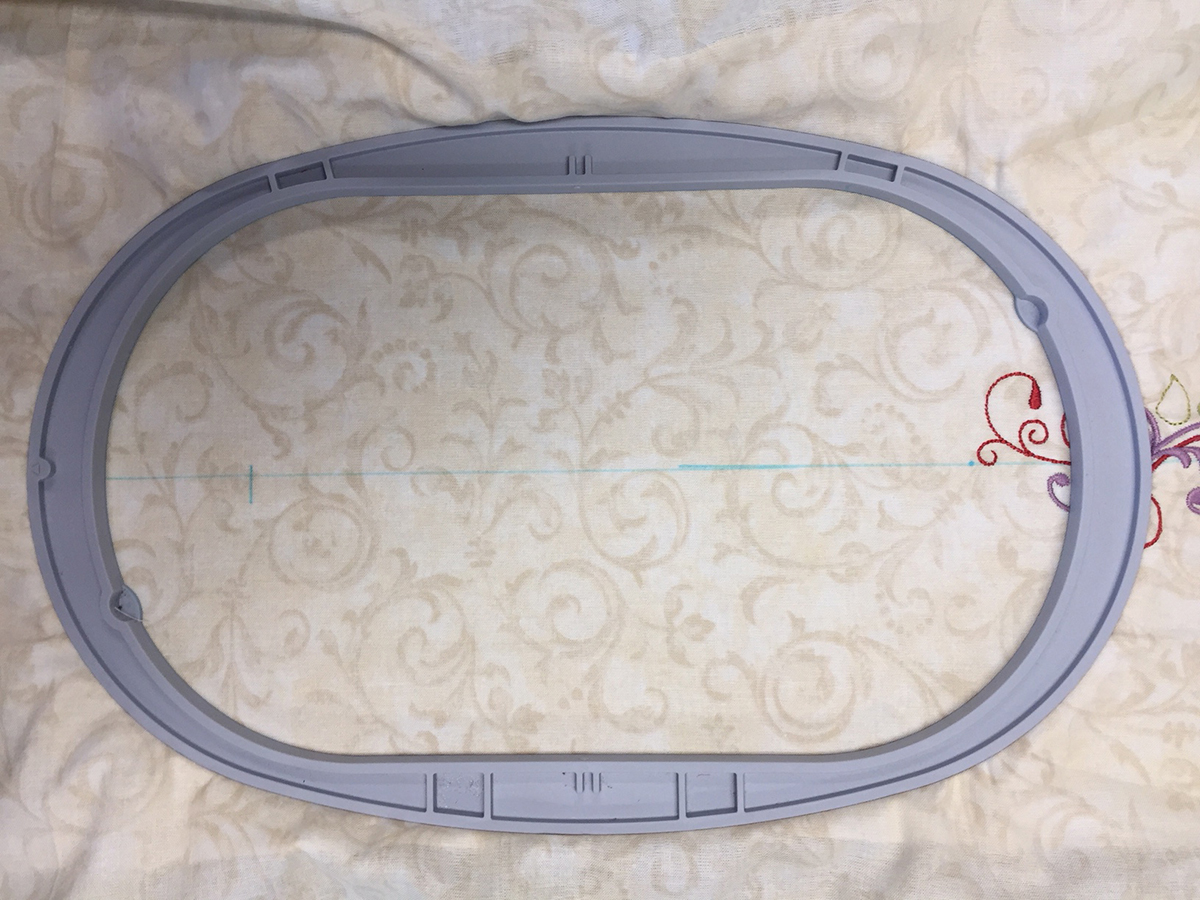
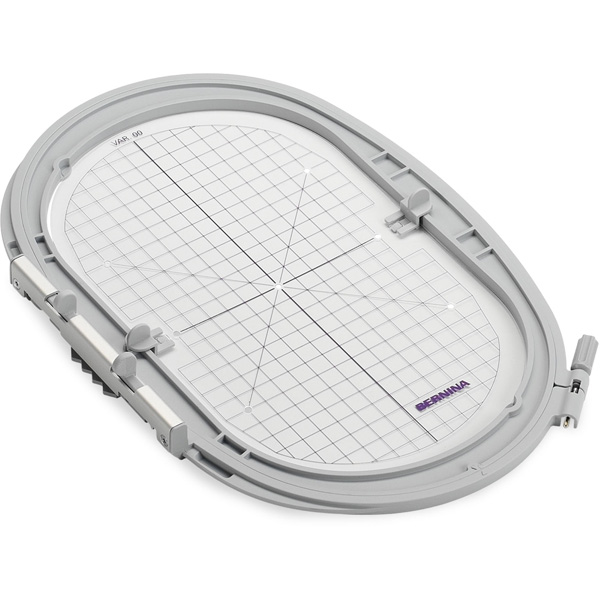
Hoop the fabric/stabilizer unit referring to the marked placement lines.
For more information about stabilizers and hooping refer to these eBooks on bernina.com:
https://www.bernina.com/en-US/Experience-en-US/Embroidery/Embroidery-ebooks/JEIAllAboutStabilizers
https://www.bernina.com/en-US/Experience-en-US/Embroidery/Embroidery-ebooks/JSIeBookArtHooping
Step 7: Setting up the embroidery design
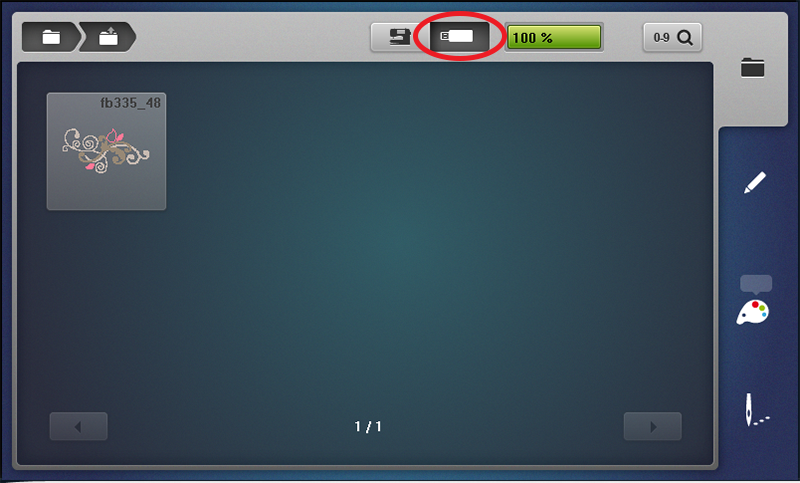
Save the embroidery designs to a USB drive in the BERNINA EXP format and insert the stick into the machine. Select the USB icon on the screen, and touch design # FB335_48 Leaf Flourish 1.
The design opens in the hoop size closest to the design’s size. Touch the Hoop Indicator/Select Hoop icon to open the Hoop display.
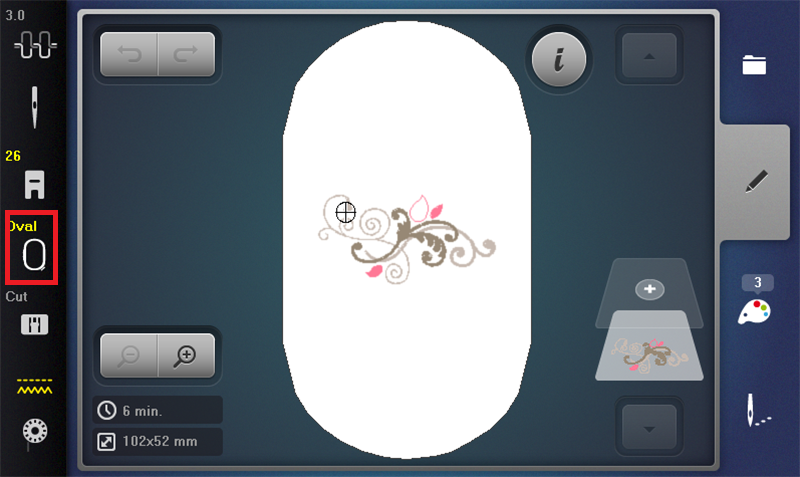
Touch the Grid icon until only the crosshairs of the design center are visible. Close the display.

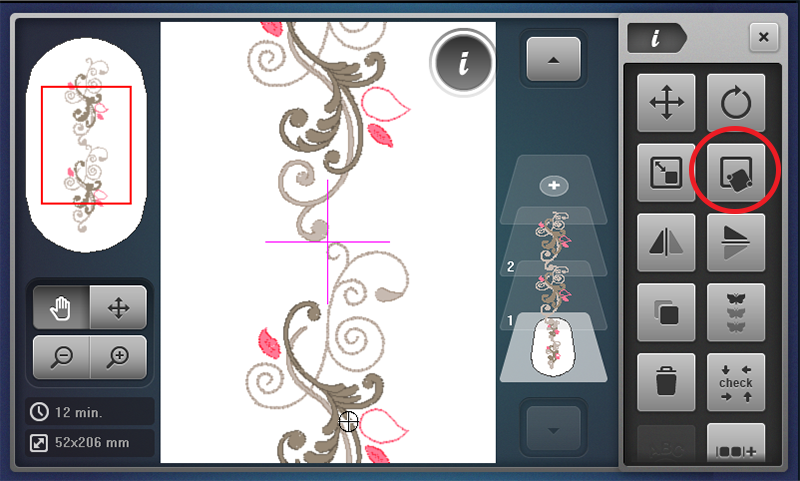
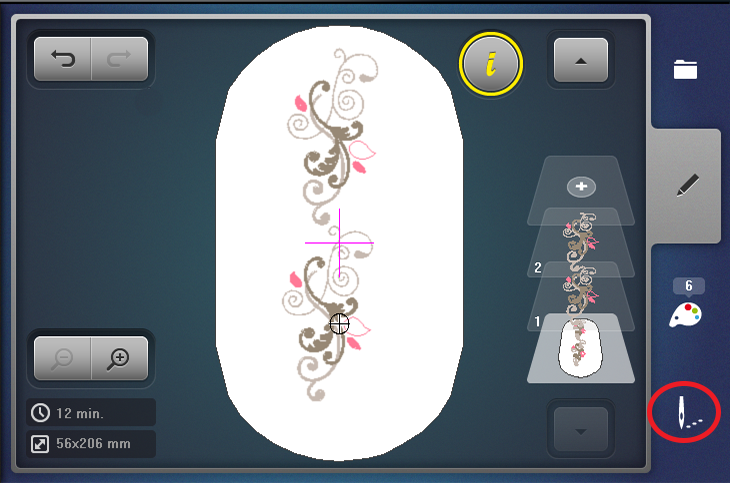
Touch the Information icon; touch the Rotate Motif and touch Quick Rotate 90°.

Touch the yellow “i” in History Navigation (breadcrumb trail at top of Information display) to return to the Editing display. Touch Duplicate.
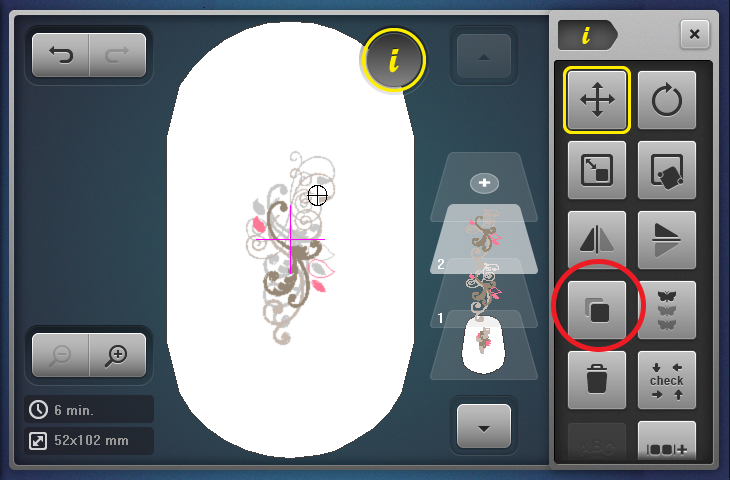
Using the Lower Multifunction knob, turn it to the left and move the duplicate design below the original. Position so that the designs are close, but not touching.
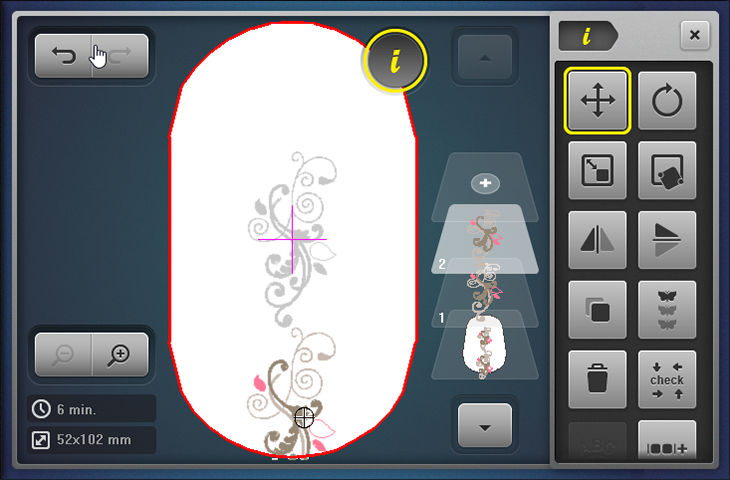
Touch the bottom layer in the Layer Panel that displays both designs. Then touch Move Motif.
Touch Motif Center.

The designs are now centered in the hoop.
Touch Zoom Plus (magnifying glass to left of hoop) to enlarge the view of the design and check the position of the designs in relation the center of the hoop. The designs should be positioned on either side of the center mark of the hoop.
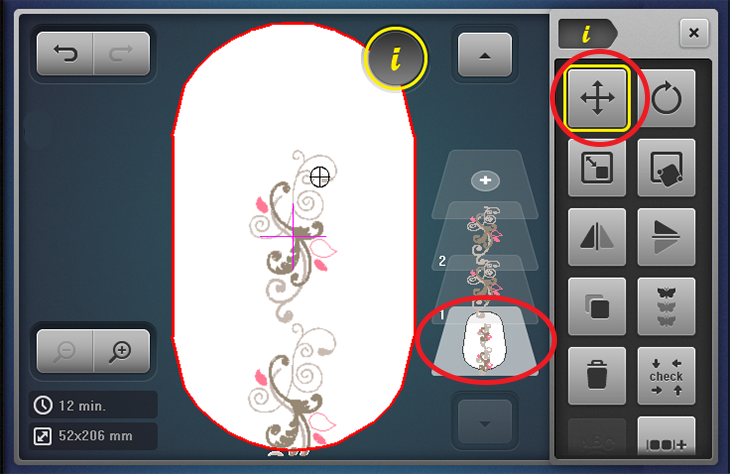
Touch the yellow “i” in History Navigation (breadcrumb trail) to return to the Editing display.
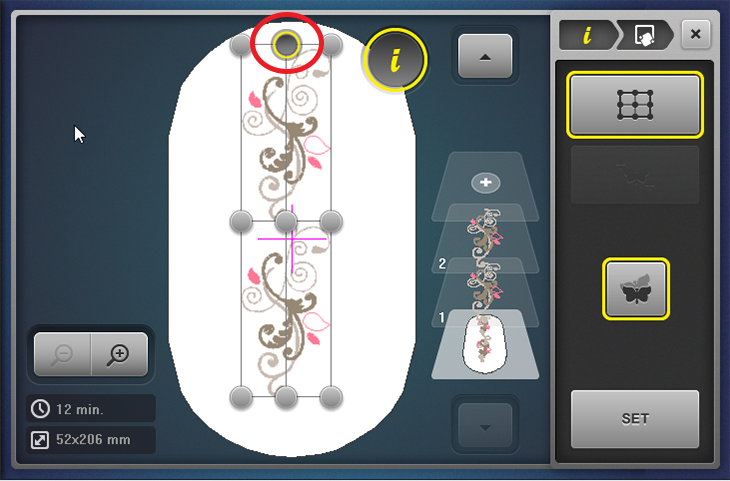
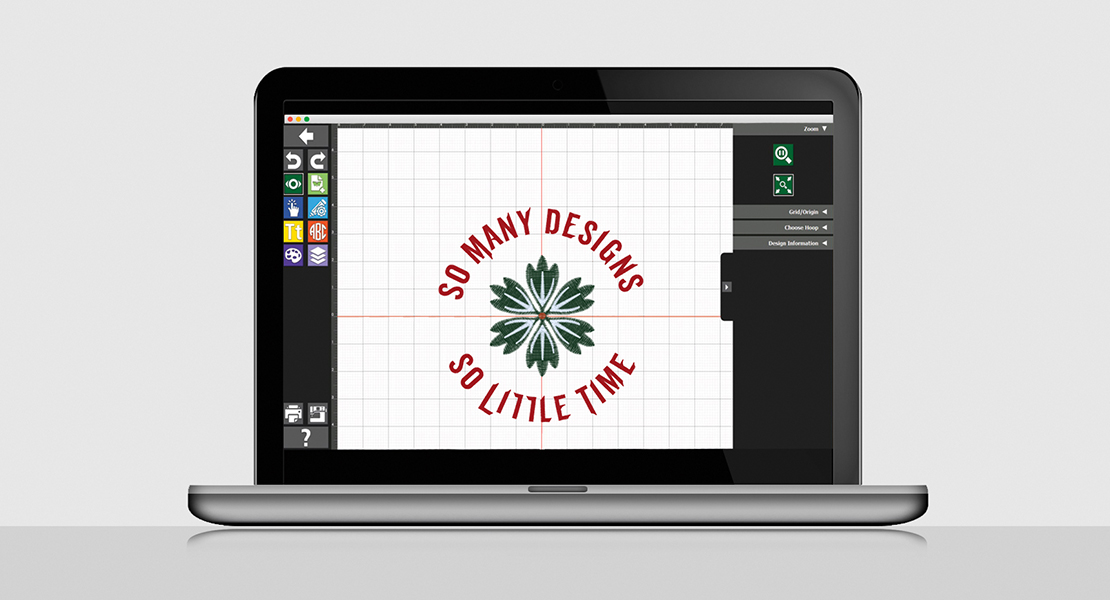
Touch Pinpoint Placement.
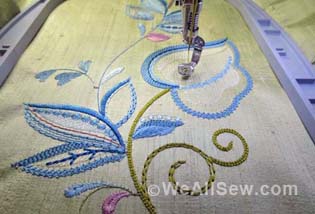
Step 8: Positioning and stitching the embroidery
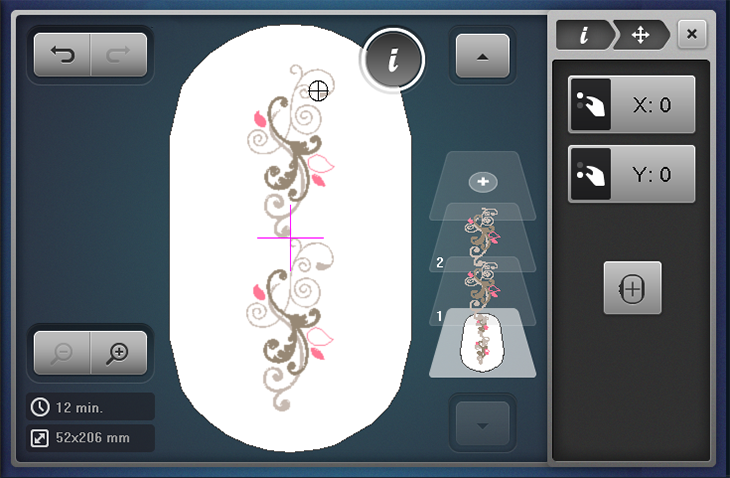
Touch Grid.
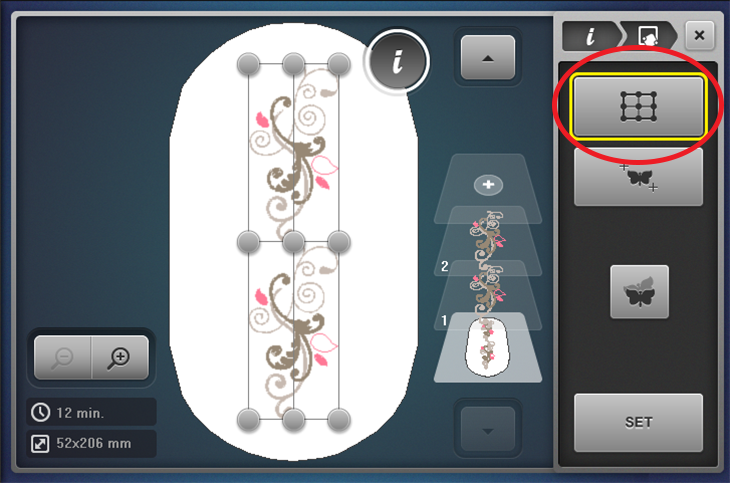
There is now a grid over the design on the screen with nine points for positioning the design. We will be using two points to position the design.
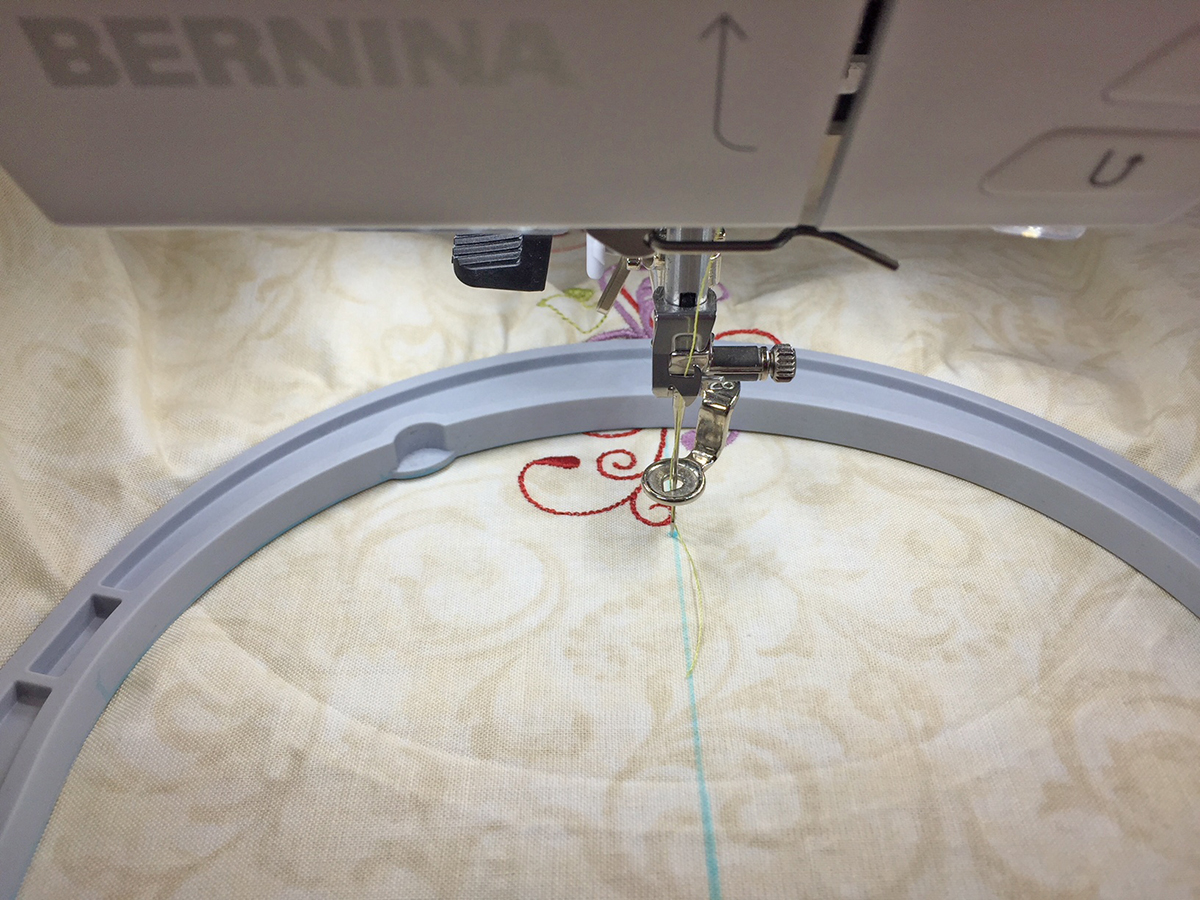
Touch the top center positioning dot. The point will change color and is now active. The machine will move so the needle is positioned over that spot that is displayed on the screen of the machine.
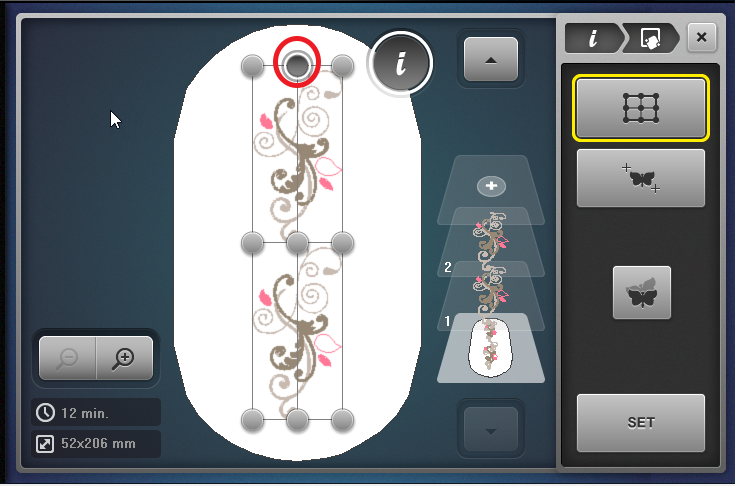
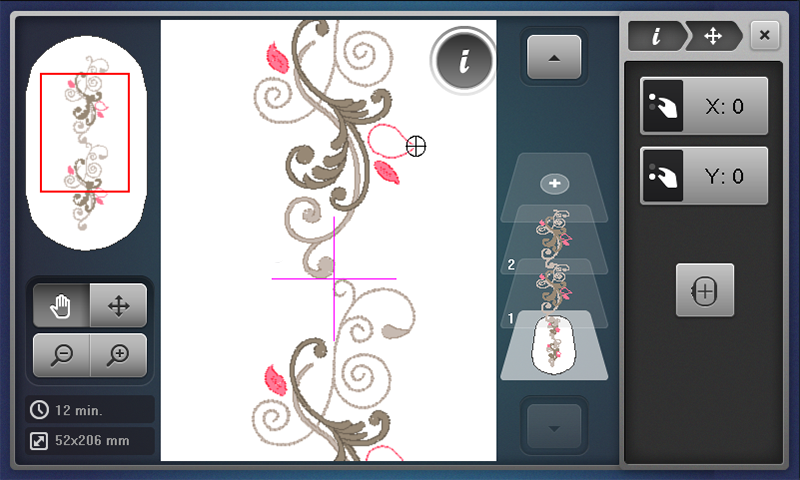
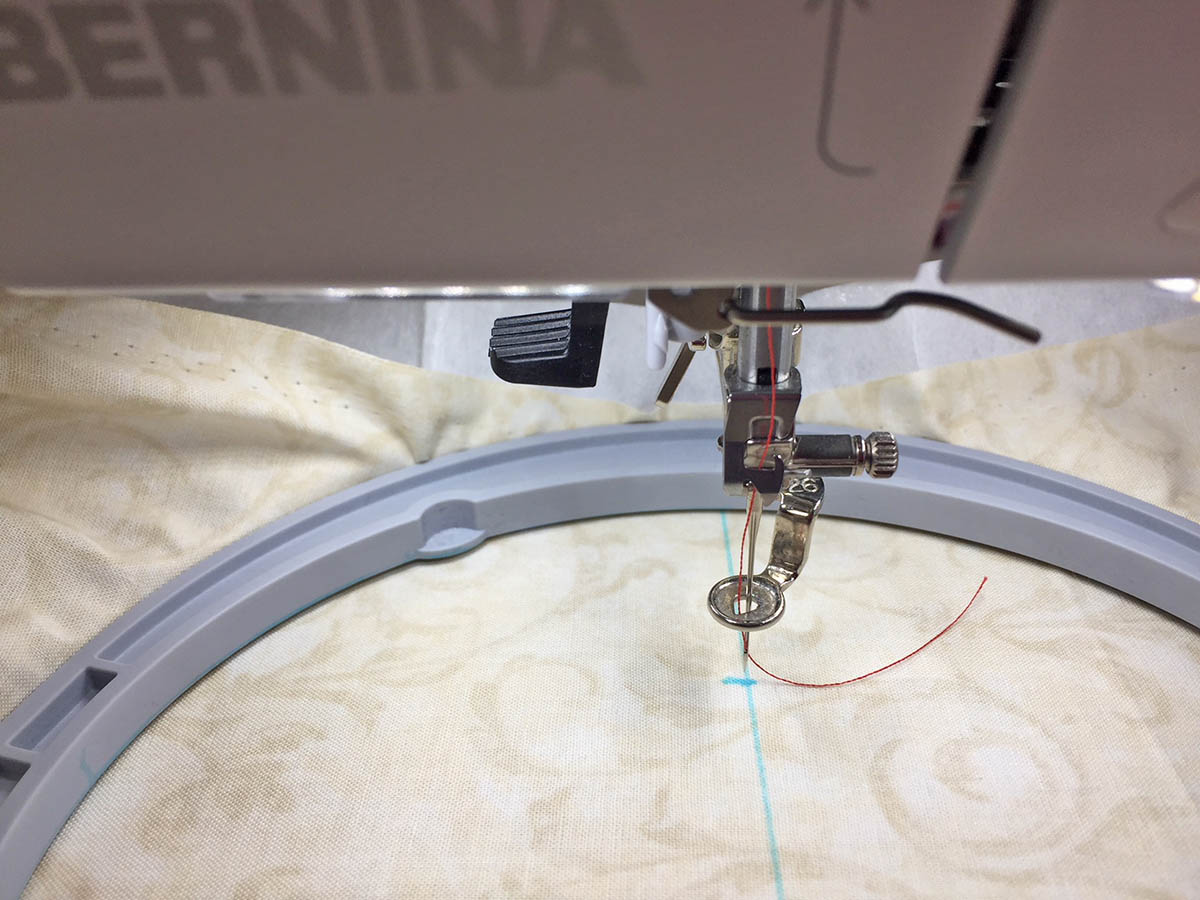
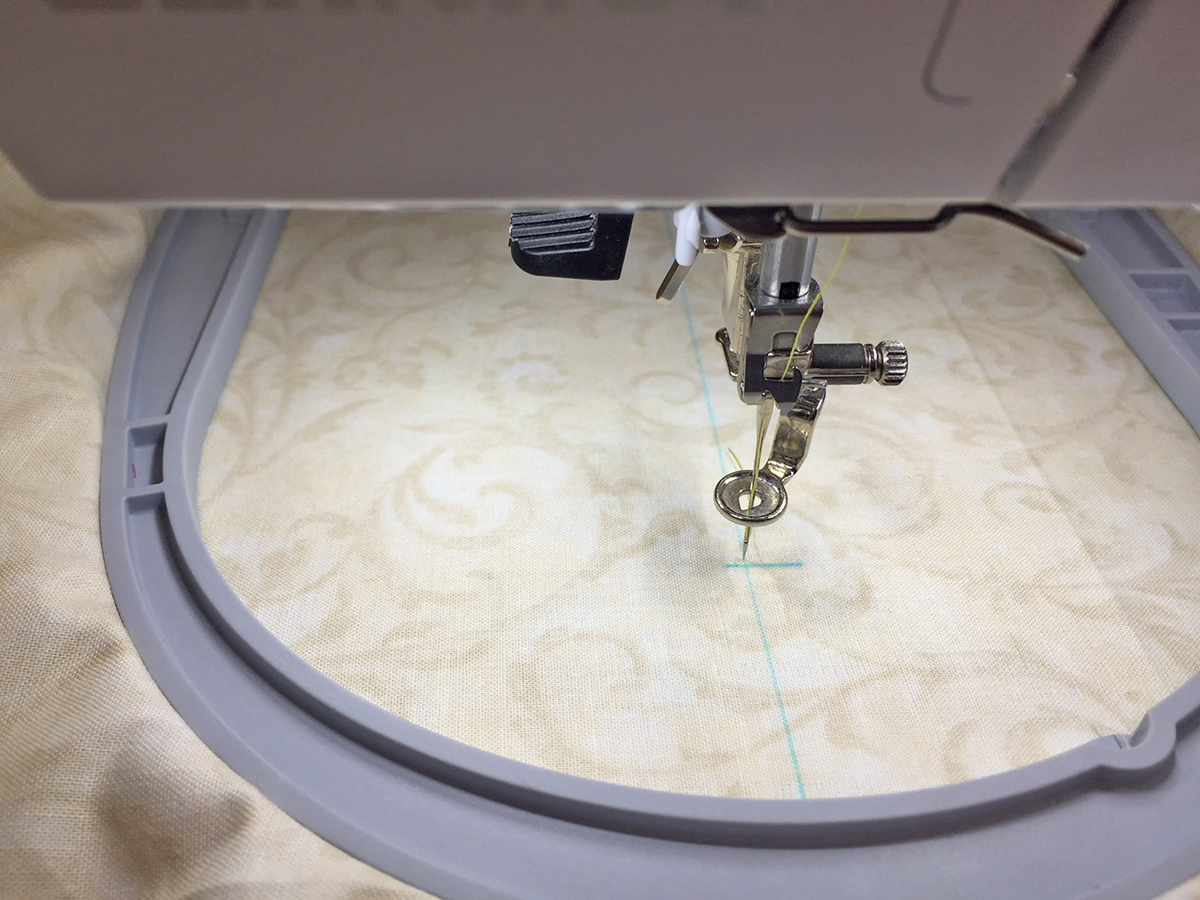
Using the marks you placed on the pillowcase cuff as reference, locate the mark of the fabric for the top placement. Use the Multifunction knobs on the machine to move the needle of the machine so that it is directly above the mark on the fabric.
Use the handwheel to lower the needle to check the placement. Raise the needle back to the highest point after you check.
On the screen of the machine, touch Set to confirm the position; you will see that the dot now has a yellow highlight around it.
Touch the bottom center positioning dot. The point will change color and is now active, and the machine will move so the needle is now over that area of the hooped fabric that is displayed on the screen of the machine.
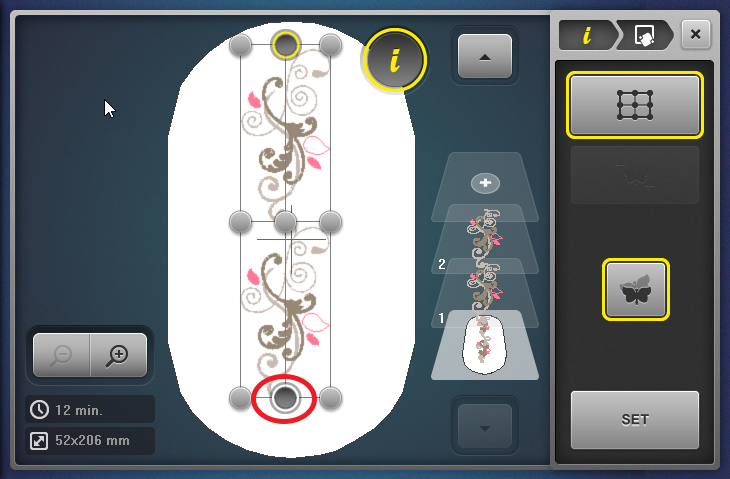
Use the center line mark you made on the pillowcase cuff as reference. Use the top Multifunction knob only (this is the side to side movement on the machine). This will move the needle of the machine so that it is directly above the center line mark on the fabric.
Use the handwheel to lower the needle to check the placement. Raise the needle back to the highest point after you check.
On the screen of the machine, touch Set to confirm the position. You will see that the dot now has a yellow highlight around it.
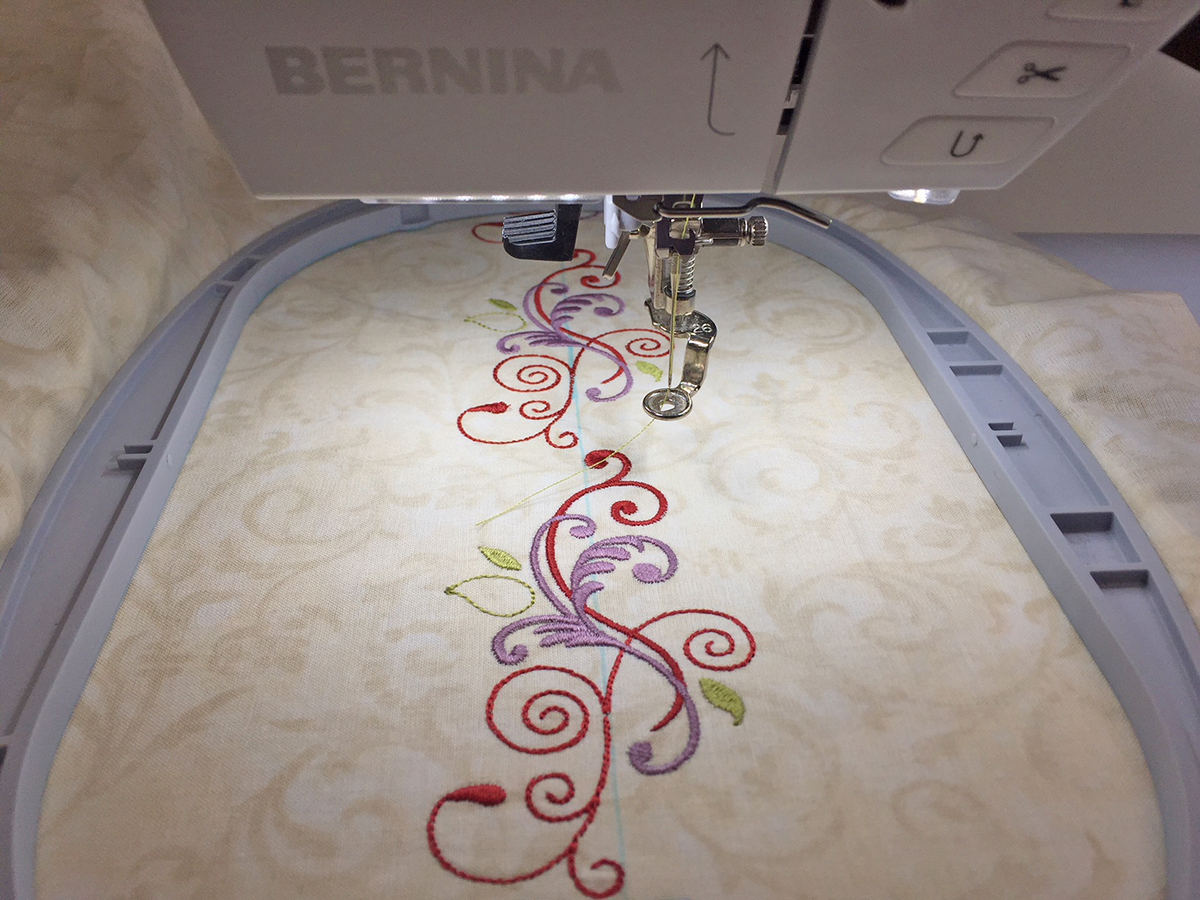
Your design is now perfectly positioned!
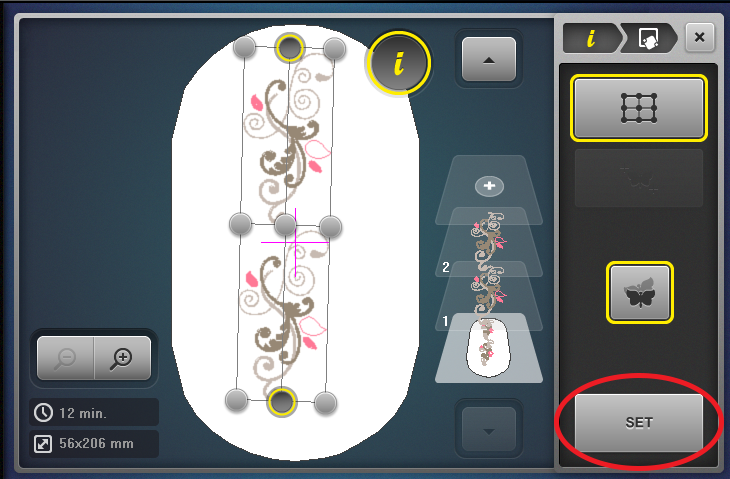
Touch Close (the x at upper right) to close the Editing display.
Okay, the design for the first hooping of the pillowcase cuff is now ready for stitching. Touch the OK icon to enter the Embroidery display.
Touch Color Resequence; the identical colors of the embroidery design will be combined to reduce the number of thread color changes.
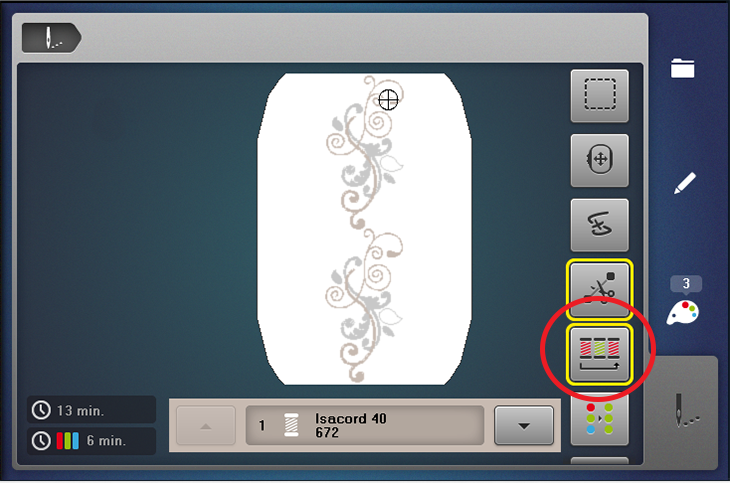
Stitch out the design. When the design is complete touch Finish (the flag), and you will return to the editing screen.
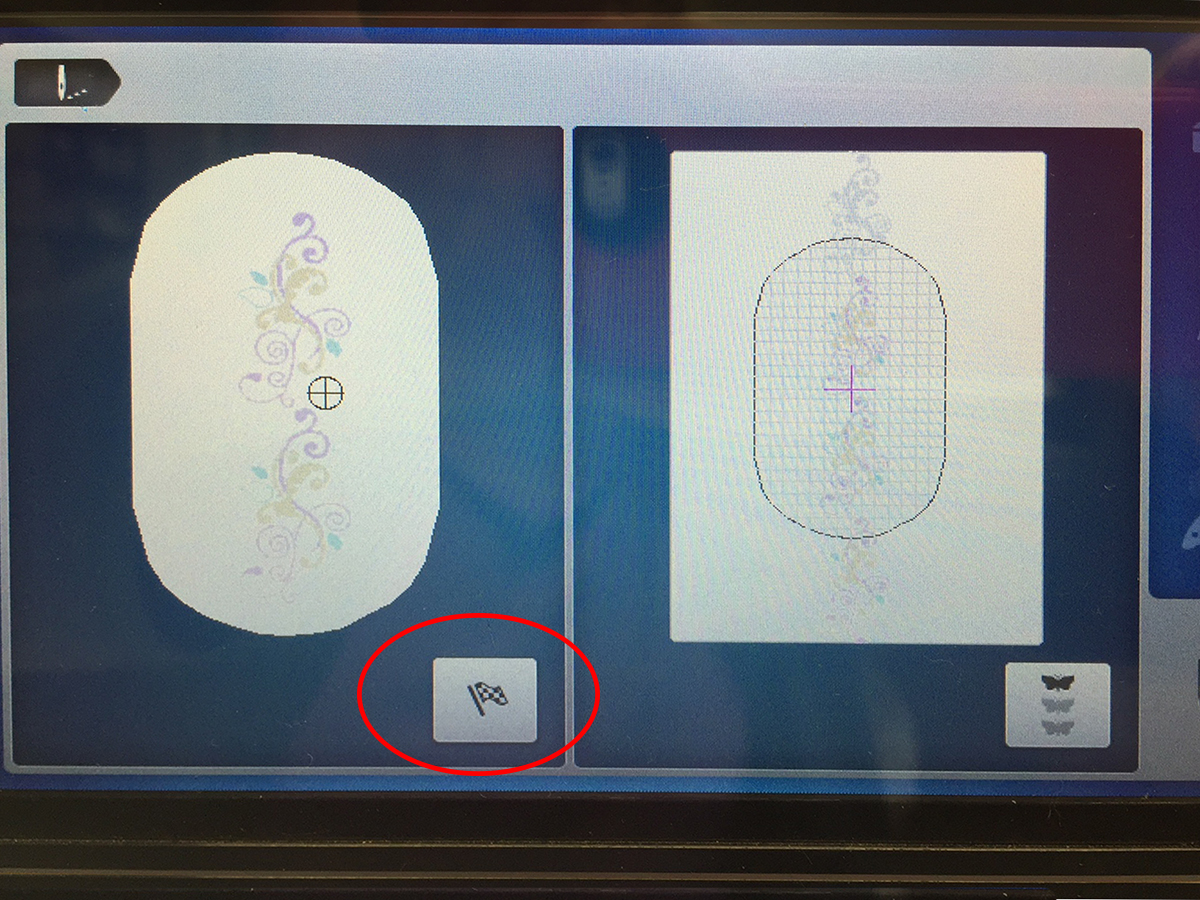
Remove the hoop from the machine. Remove the completed embroidery from the hoop. Re-hoop the fabric/stabilizer unit referring to the marked placement lines.
Attach the hoop to the machine.
Repeat the above steps for positioning the second embroidery.
Stitch the second embroidery.
When the stitching is complete, remove the hoop from the machine. Remove the completed embroidery from the hoop.
It is so easy to get things positioned, and there are multiple options when using Pinpoint Placement.
Remove the tear away stabilizer, carefully tearing it away from the stitches. Remove as much as possible; a bit of heat and steam will make it easier to remove in the tight areas.

Step 9: Sewing the pillowcase
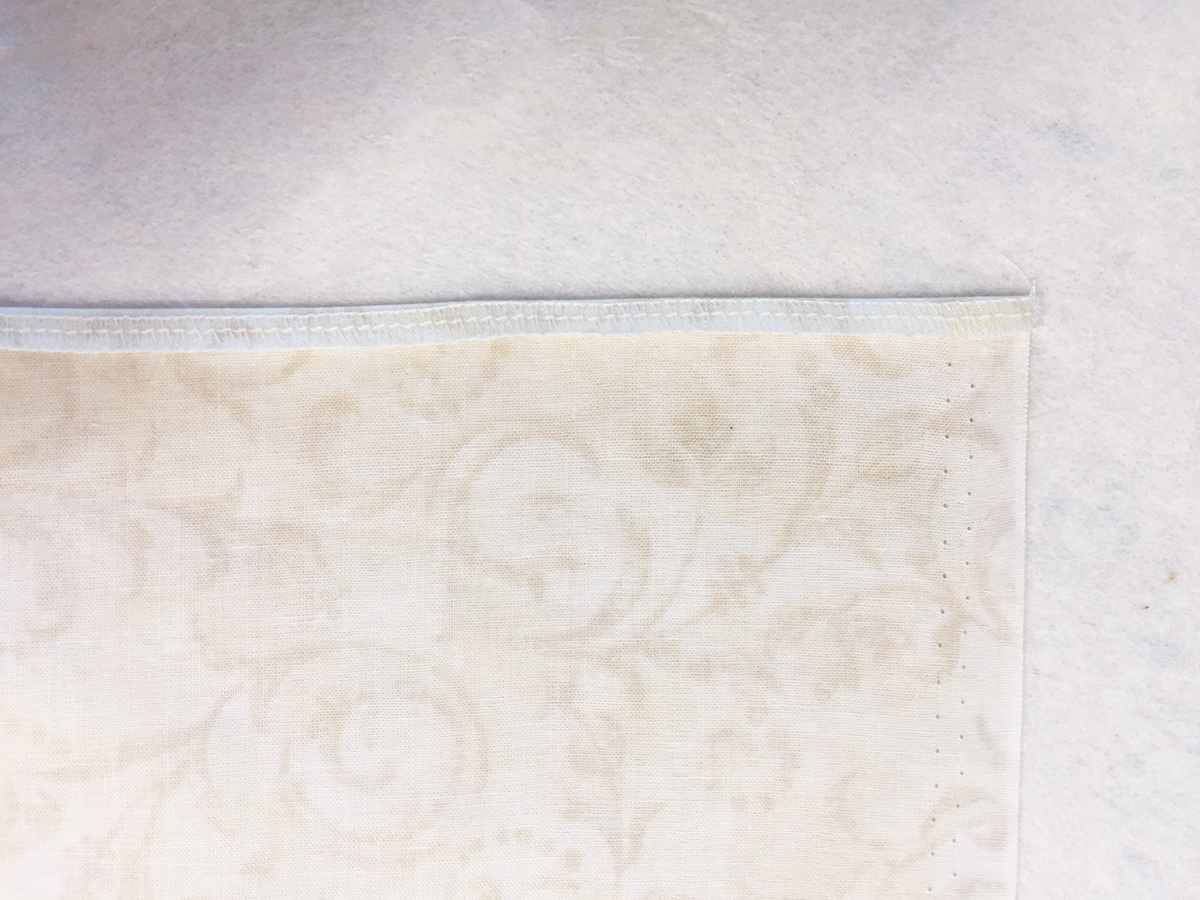
On the top edge of the pillowcase, press 1/4″ to the wrong side.
Fold the pillowcase rectangle in half lengthwise with right sides together, and match up the sides and bottom of the pillowcase. Pin down the side and bottom.
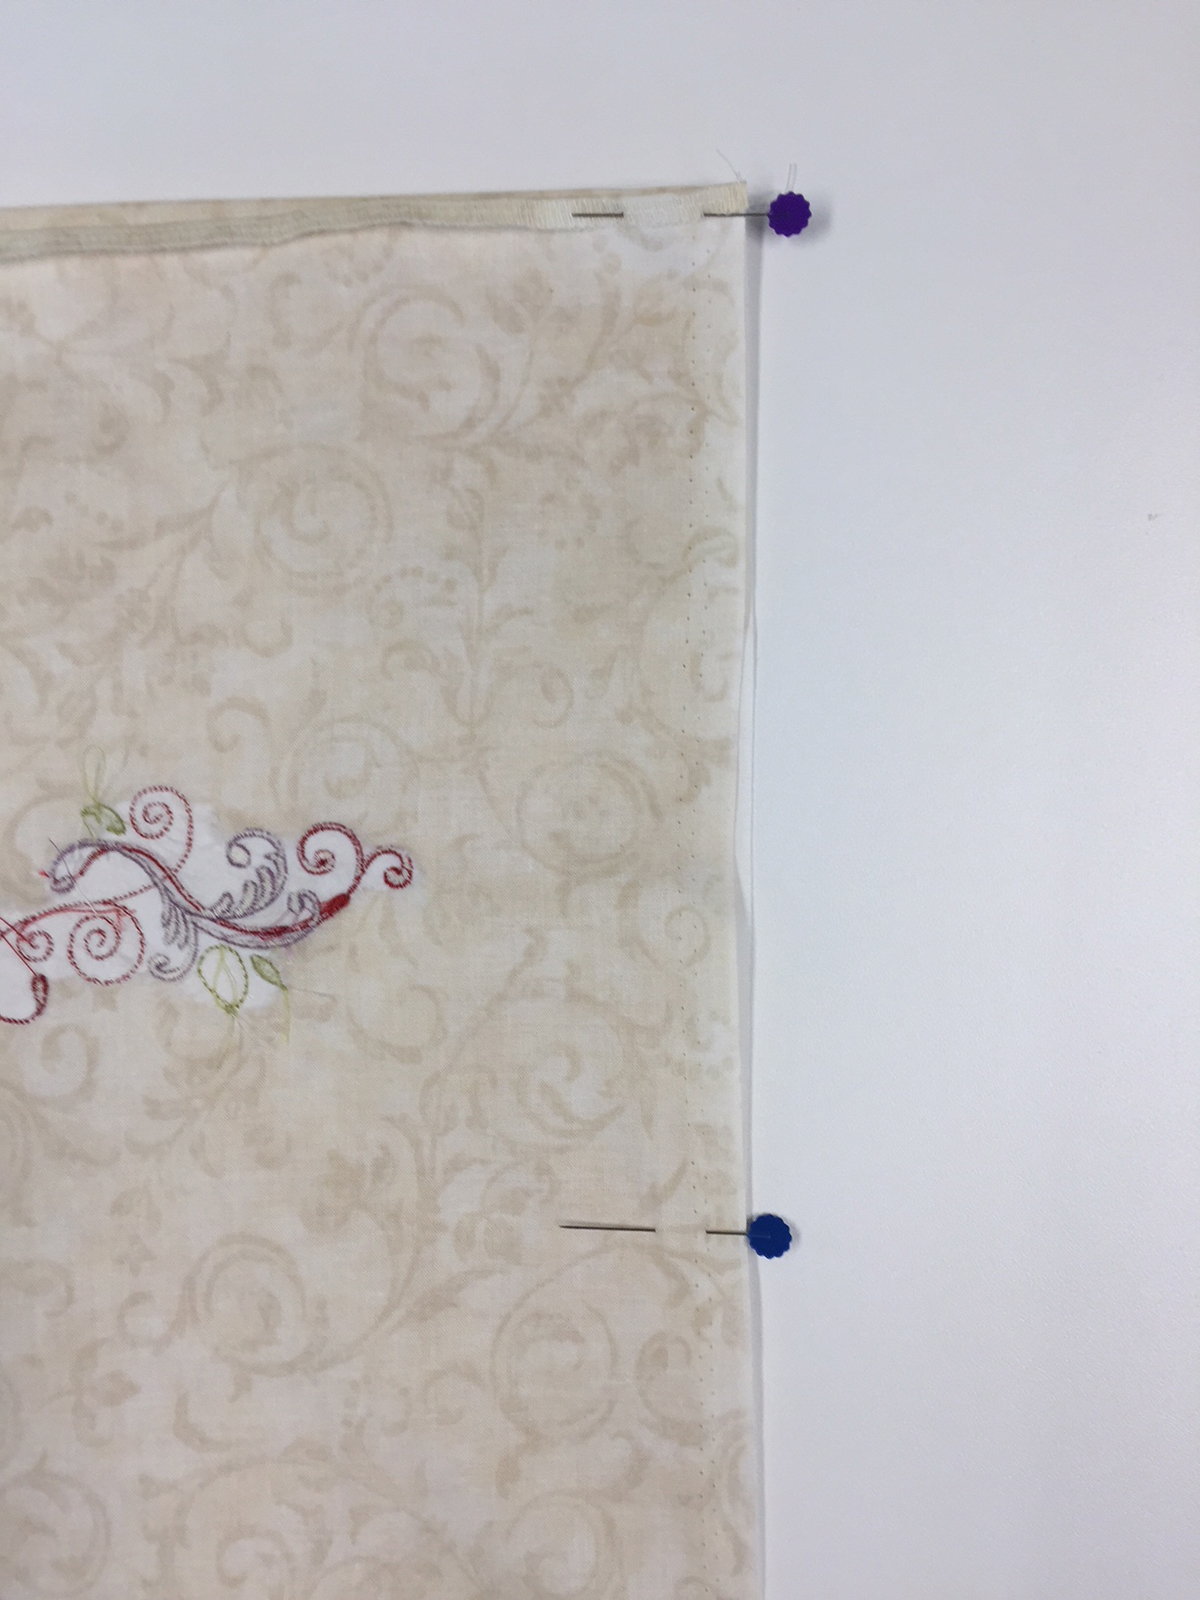
Sew or serge using a 1/2″ seam allowance down the side and bottom. (The 1/2″ seam allowance will trim off the selvage edge on the sides.) At the corner, you will need to pivot and continue stitching.
Finish the seam edge with a zigzag stitch, overcast stitch or use an overlocker and serge the edge.
Fold the cuff hem to the wrong side on the fold line. The hem should measure 4 inches deep.
Sew the hem, placing the stitching about 1/8” from hem edge.

Turn the pillowcase right side out, and use a point turner to push the corners out. Press the seams flat. Now get ready to make the matching pillowcase for yourself, or for some quick gifts!


What you might also like

2 comments on “Design Positioning in Machine Embroidery”
-
-
Your detailed tutorial can bring professionalism to my amateur embroidery skills. Thanks for the helpful insights.
Leave a Reply
You must be logged in to post a comment.

Thank you for this super helpful tutorial. This will take my embroidery to the next level.