Diamonds 2 Quilt Along, Part 2: Quilting Row One
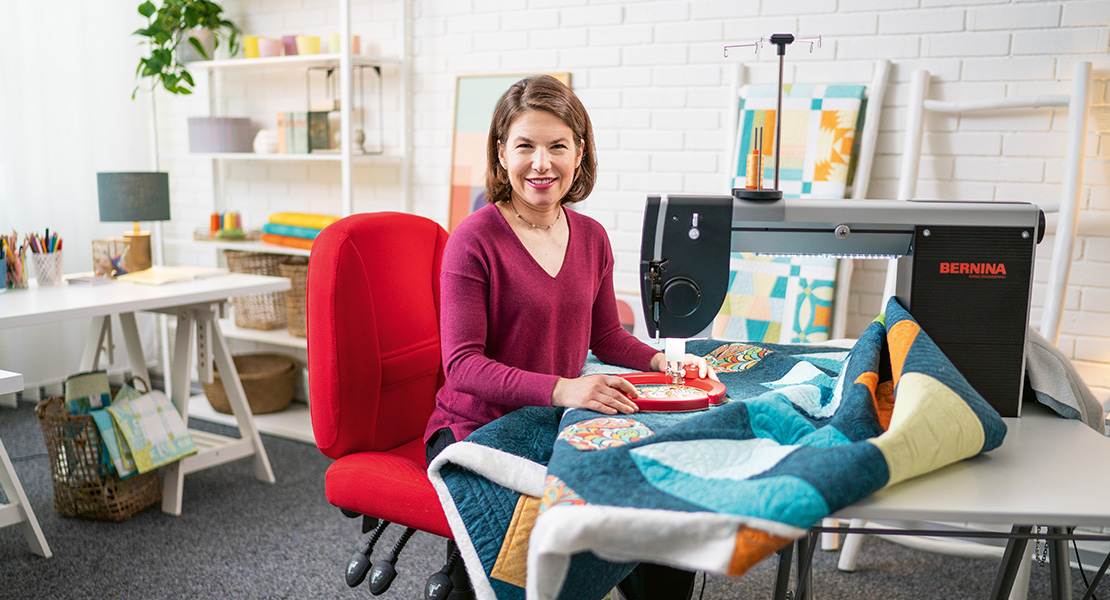
Welcome back to the Diamonds 2 Quilt-Along! I’m BERNINA Expert Amanda Murphy and this month I’ll show you how I quilted the first row of the Diamonds Sampler. If you missed last month’s post that has piecing directions, you can find it here.
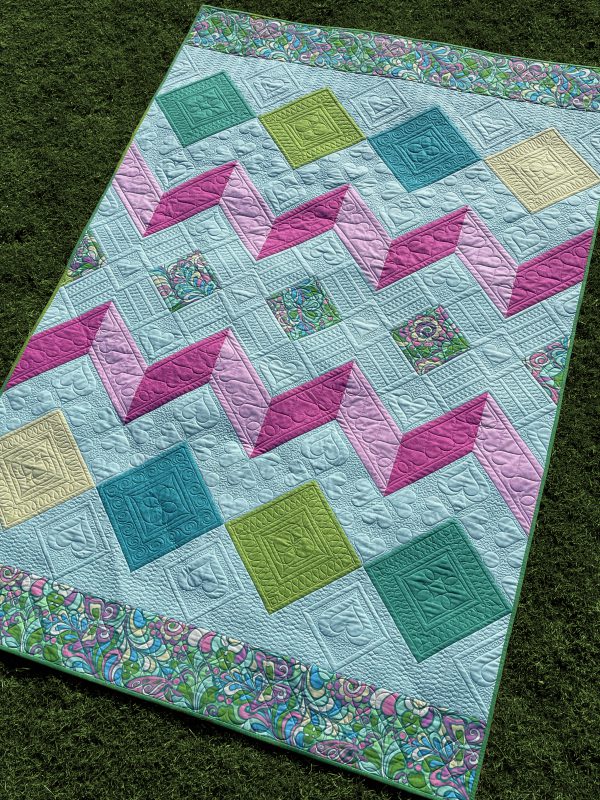
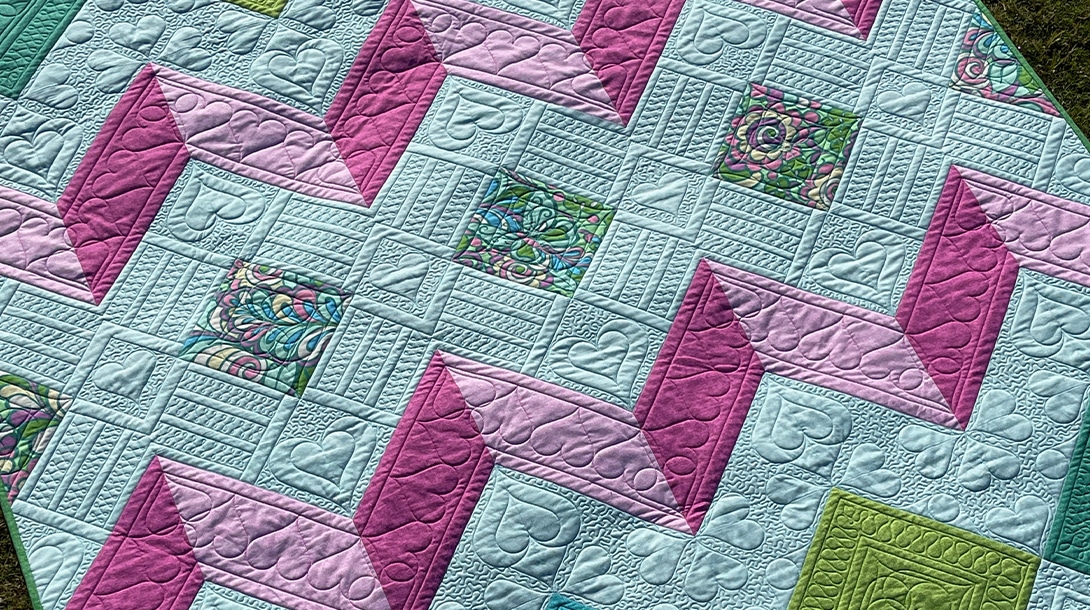
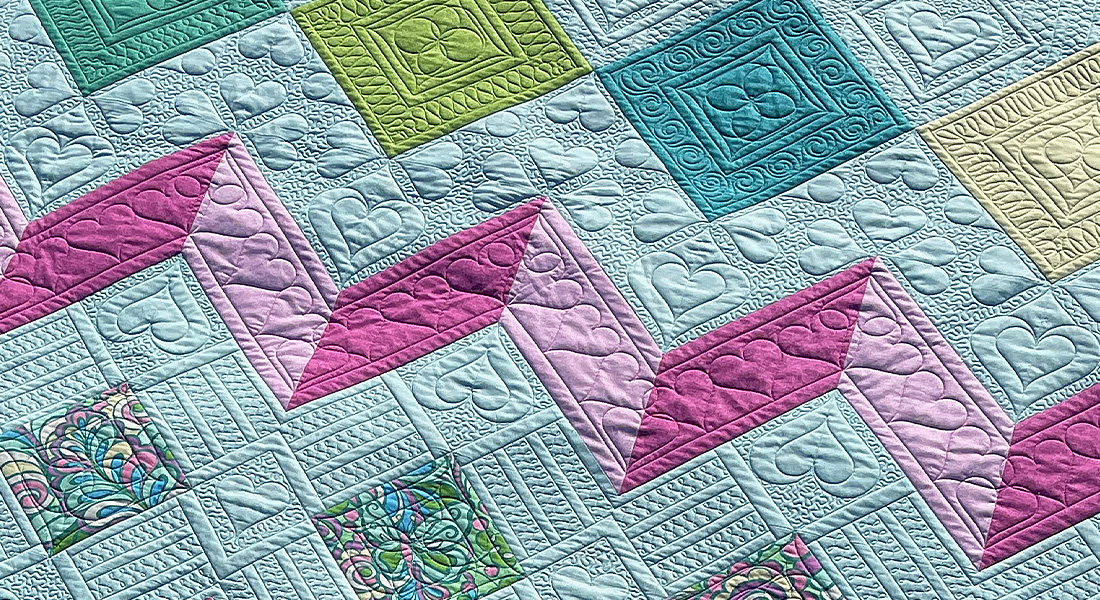
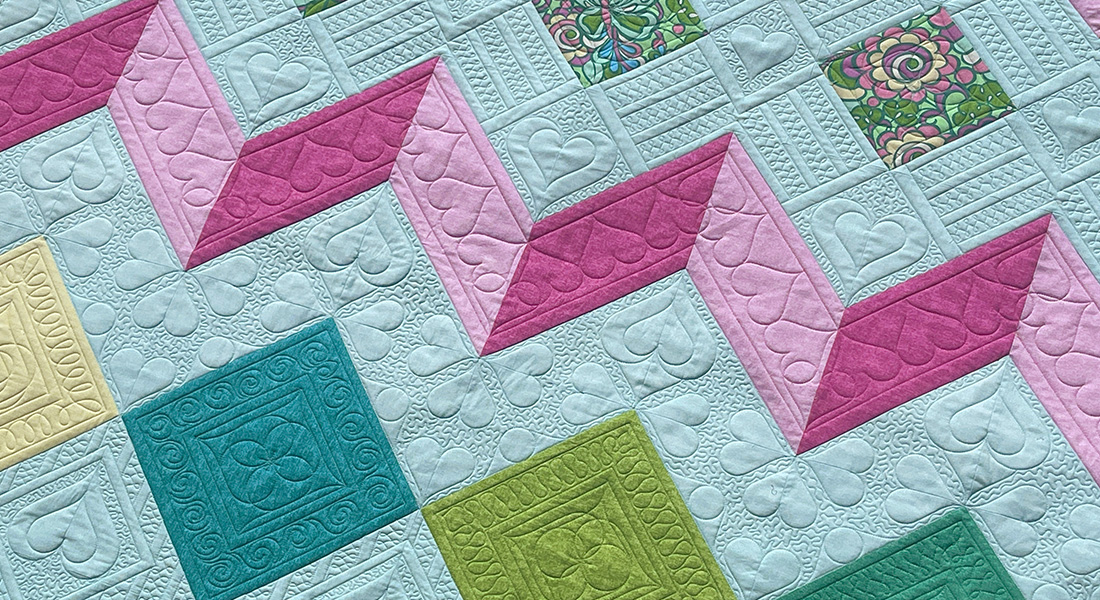
Diamonds 2
Because Diamonds 2 was created to celebrate the introduction of the BERNINA Q 16 PLUS on the Studio Frame, the videos will show the piece being quilted on that model, but I thought I’d take a moment in this first quilting post to tell you about the process of quilting on both a frame and a sit-down machine.
Quilting on a Frame
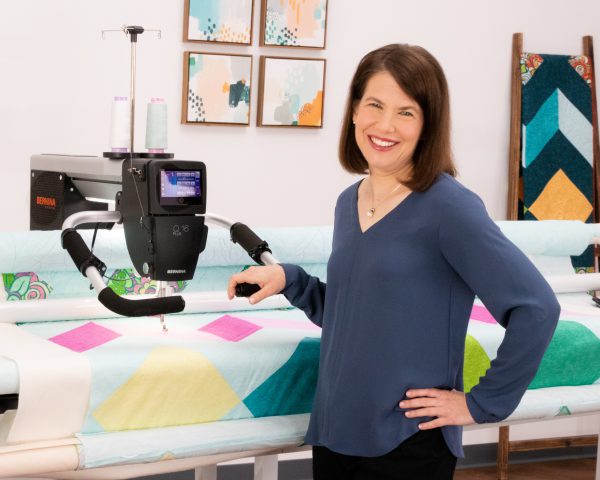
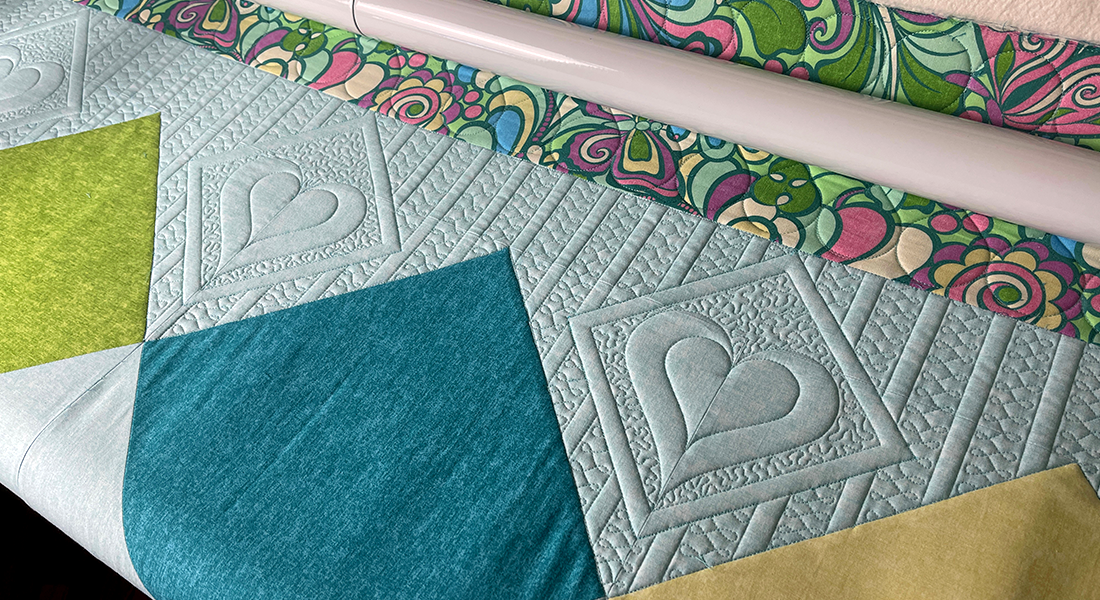
Ready to quilt on the BERNINA Q 16 PLUS on the Studio Frame!
On a frame, you always start at the top of the quilt and quilt down. To do this, mount your backing and batting to the bars. (You can see a video of how to do this here. Run a line of basting stitches at the top of the batting and backing either by moving the machine across the frame against the take-up bar or by using channel locks. Mount the quilt top along this basted line to ensure it is square to the frame. Then pin to quilt top leader on the front of the machine, if desired. (If you leave the bottom of the quilt top unpinned it is called “floating your top”. Lots of quilters do this, but it requires more practice to ensure that the quilt remains square than if you pin the bottom of the quilt top to a leader.) Baste down the side edges of the quilt top, as far as you can go. Then put on the clamps. Complete the quilting in that section.
As you work down the quilt, when you come to a section, you’ll baste the quilt topsides and THEN put on the clamps. Do all of your stitch-in-the-ditch work and large rulerwork and then do your smaller fills. Then roll the quilt and proceed to the next section.
TIP: If you are planning on quilting a piece really heavily like I did for the Jubilee quilt celebrating BERNINA’s 125th anniversary, it is possible to quilt in multiple passes to help keep it square, but you have to get enough quilting in the initial pass so the fabric doesn’t fold on the bars. When I do multiple passes I like to repin my backing fabric to the “quilt top leader” after the first pass; this stabilizes the distance between the machine bed and the quilt as I work back and forth.
The bottom half of Diamonds 2 is a mirror image of the top half, so we will use this month’s design on both the top and bottom borders of the quilt. But on a frame, you can’t get to the bottom border until you have quilted all the rows above it. You have a few choices:
- Hold off on quilting the bottom rows of the sampler until you quilt the top rows. This is what I’d probably choose to do. BERNINA keeps all these posts up in perpetuity so you can come back to any post at any time.
- If you just can’t wait you can baste all the way down the quilt and quilt the bottom row. BUT you’ll have to put in a really significant amount of basting so the fabric won’t fold on the bars. Maybe even a line every couple of inches. I’d use BSR3 with a setting of 1 or 2 stitches per inch for this. (You can also do your stitch in the ditch during this process, but it won’t be enough stitching to skip the basting.)
Quilting on a Sit-Down Machine
On a sit-down machine, you’ll have to pin-baste or spray-baste your quilt sandwich together. You do have to deal with the bulk of the quilt, but the good news is you can quilt anywhere on your piece at any time. I recommend quilting all of the stitch-in-the-ditch-type of work first and then add in detail to each row every month as the instructions are posted.
For more details of basting and quilting on a sit-down, reference my Diamonds Quilt Along from last year.
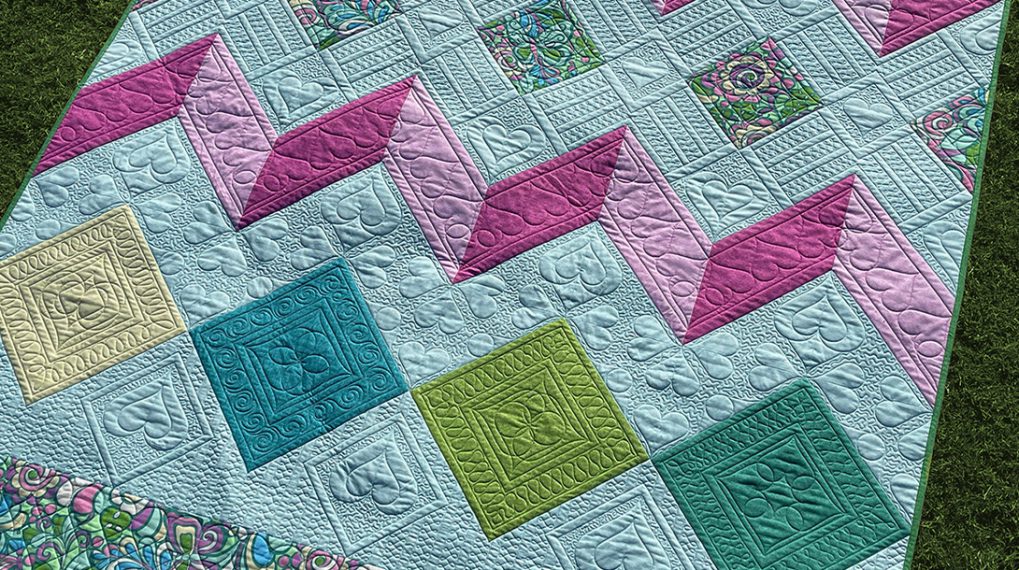
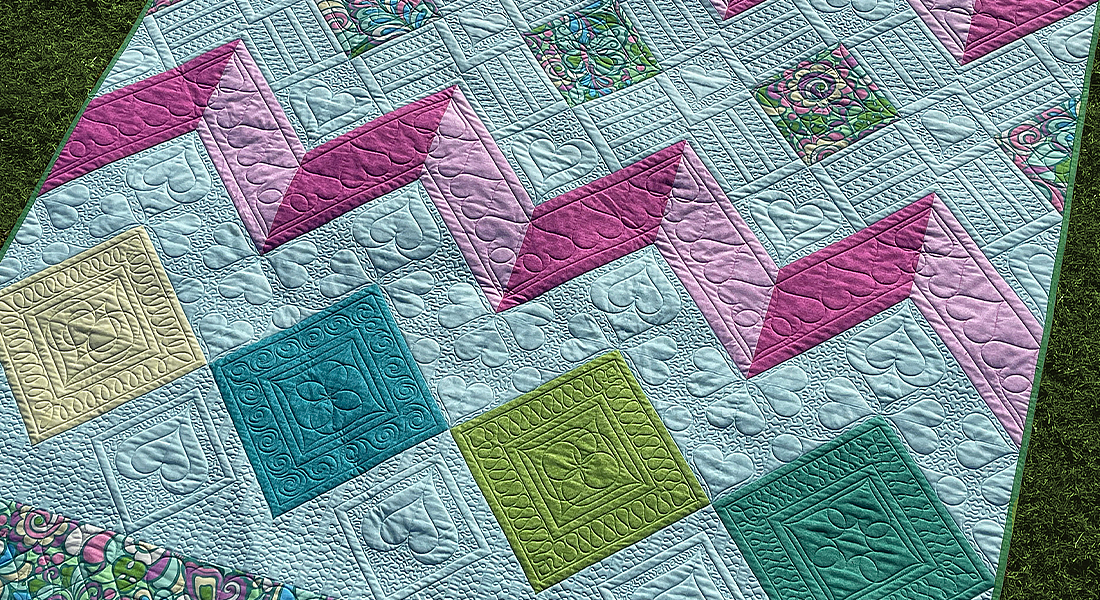
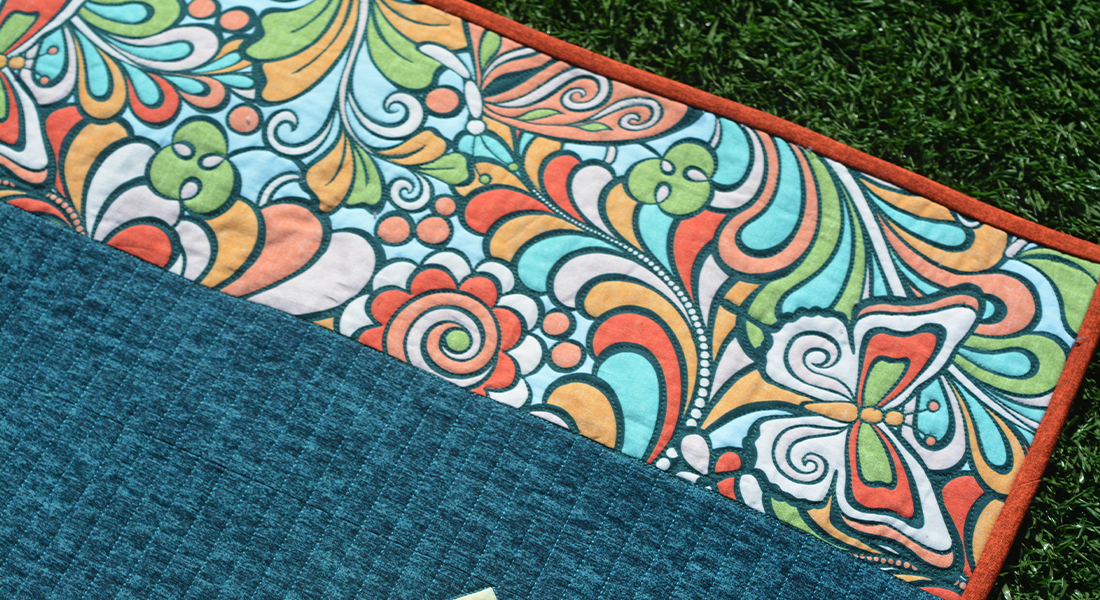
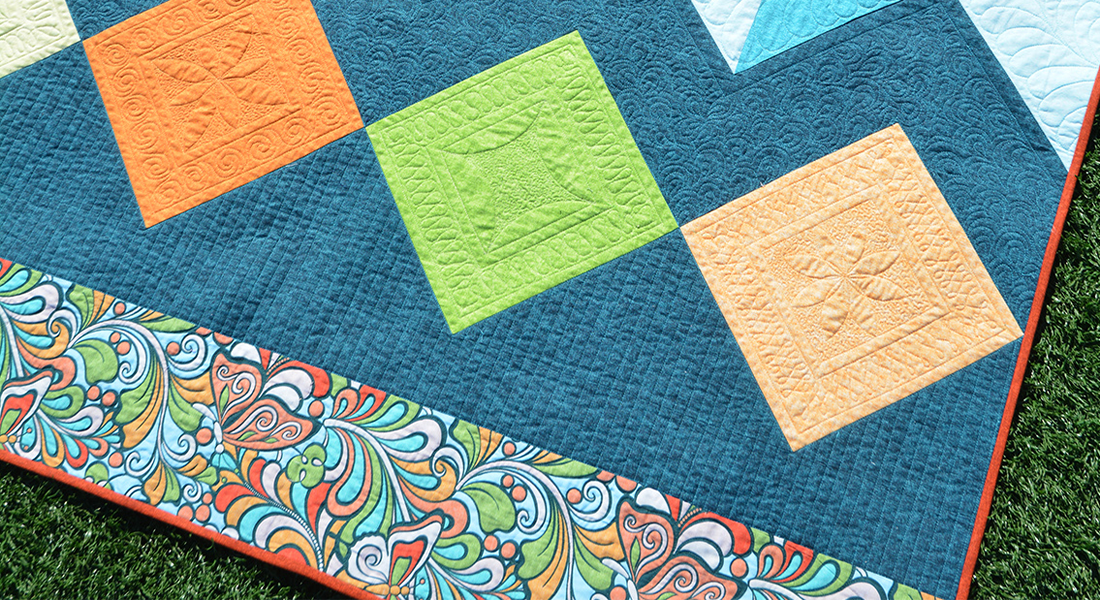
The Diamonds 2 Area A Design
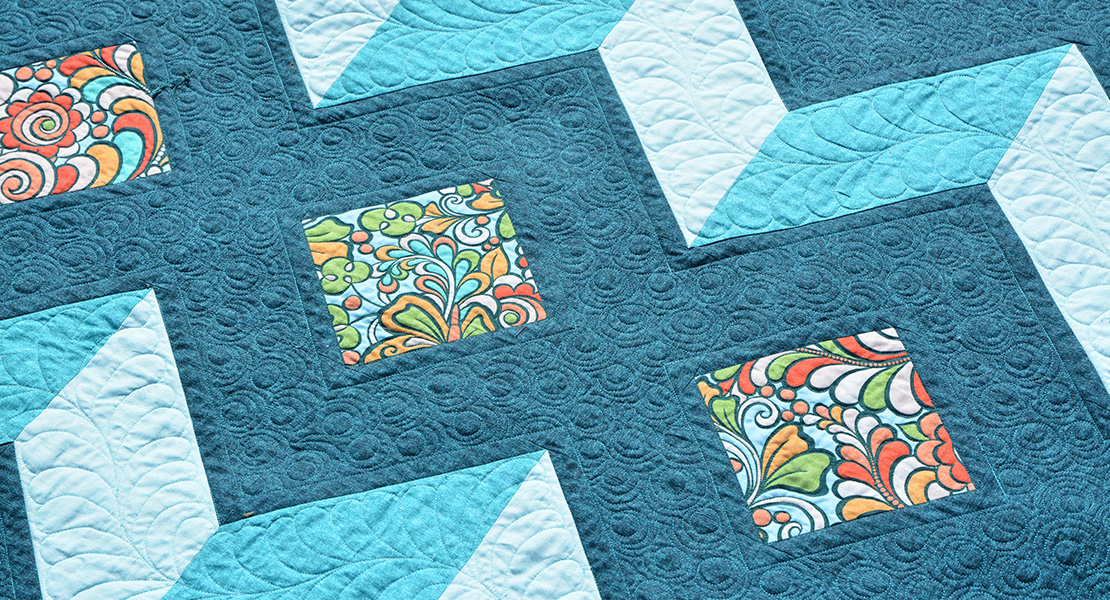
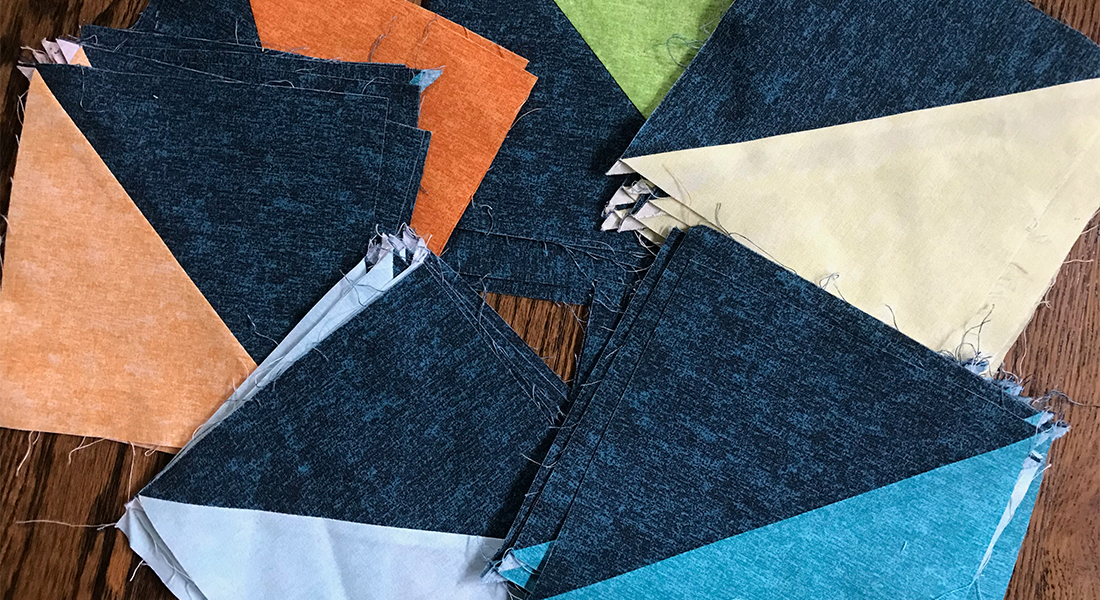
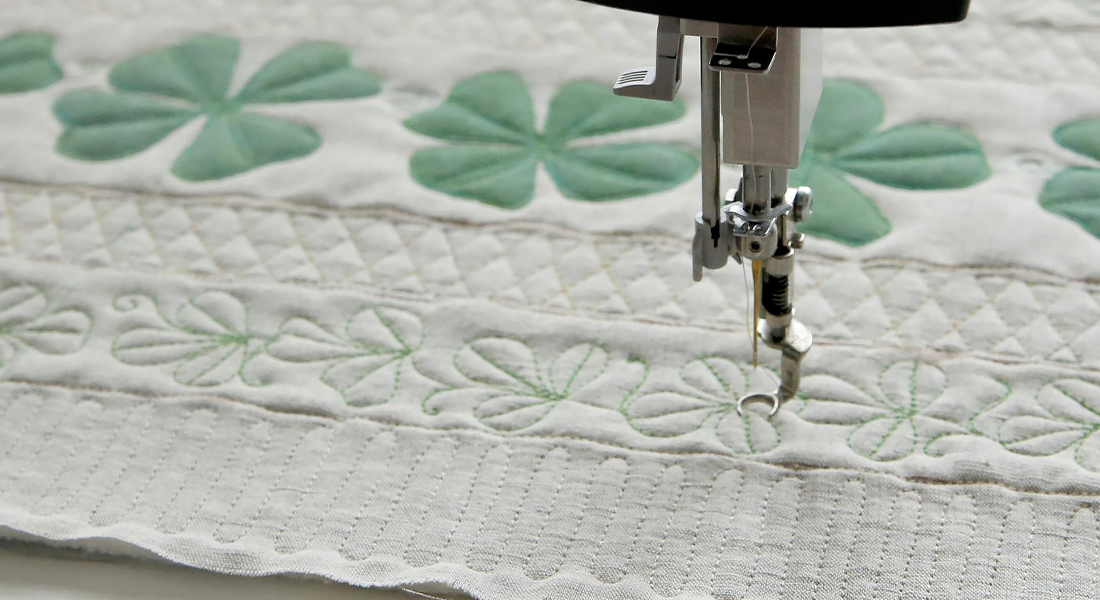
I chose to quilt a double-heart design in the border. This design has an intricate feel and fills up the border fast. The fabric is pretty busy so I refilled much of this section on my plum Cotton Shot blender fabric so you can see what I was doing better. You’ll need my Good Measure Every Heart Set 2 Quilting Templates to execute this design.
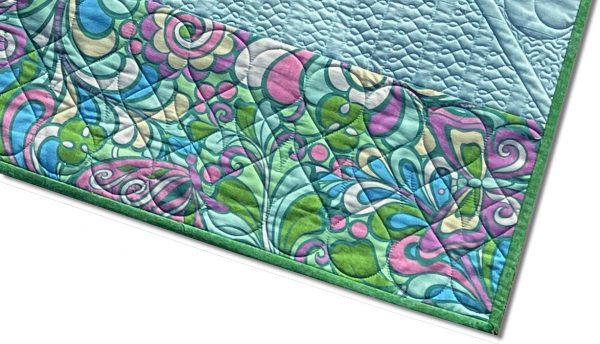
The border from the front of the quilt.

The border from the back of the quilt.
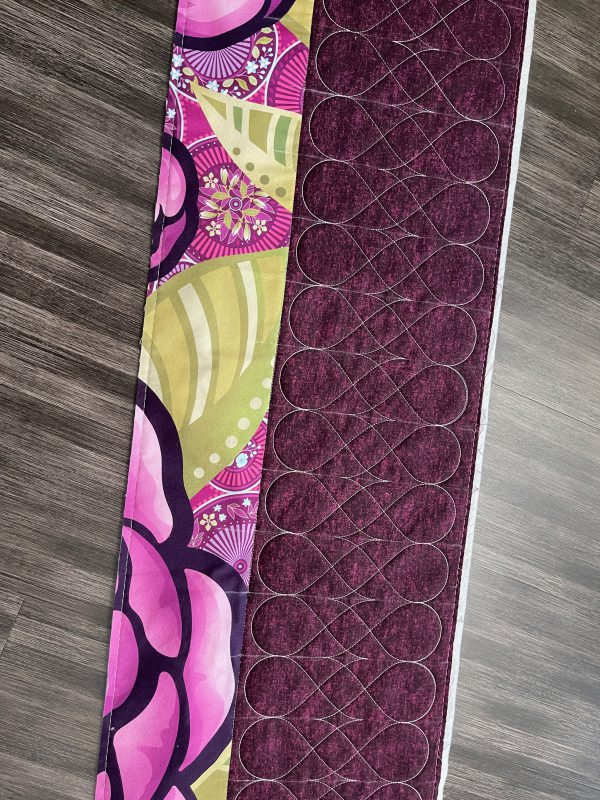
The same design, quilted on a plum cotton shot for easy viewing!
To learn how I quilted the first row of Diamonds 2, download the PDF instructions here and watch this video:
Happy quilting and I hope you have a lovely holiday season!
Amanda
Used Products


What you might also like


104 comments on “Diamonds 2 Quilt Along, Part 2: Quilting Row One”
-
The Bernina Gripper Ring Set
-
A new wool pressing mat
-
-
The Snowman panel quilt machine embroidery design collection. He just looks so happy I want to make him and display every Christmas.
-
On my Christmas wish list is a sewing-related coffee mug and a quilting calendar to display in my sewing room! Finger crossed!
-
Wishing for Santa’s elves to deliver a new embroidery module!
-
-
I would like to find a high thread tension Bo in case under the tree.
-
I asked for a gift certificate to my favorite quilt shop.
-
I’d like to get the ribbon candy ruler.
-
I asked Santa for a felt pressing mat and a mini iron.
-
I asked Santa for a larger embroidery hoop for Christmas! I am crossing my fingers.
-
I asked for — and received already! — the new SDT embroidery module.
-
The quilt planner from A Quilting Life.
-
Congratulations on your win!!
-
-
I asked for several Bernina feet, including #88!
-
The new Bernina SDT embroidery module
-
the lazer pointer and thread spool holder, just got the Q16
-
I asked Santa for 4 new feet for my B880+ and Isacord thread to add to my collection. Also asked for a large gift certificate from my favorite Bernina Dealer. I am holding my breath!
-
A laser light for my new Q20 would be amazing!
-
I LOVE Amanda Murphy’s ‘style’! Quilts, quilting, everything is so perfect! Thank you for all the inspiration you provide!!!
-
I love this use of the heart template! Who knew it could be used that way! I asked Santa for several Bernina feet to make free motion quilting easier.
-
I asked Santa for beginners embroidery classes, feet, and threads, to help me learn how to make beautiful gifts with my Bernina 770QEE Tula Pink Edition machine.
-
I would like Amanda’s every heart rulers.
-
A new Bernina 770QEPLUS because I believe in Santa!
-
My first set of Amanda Murphy’s rulers
-
More ruler sets for my Q24!
-
Ask for and ordered an AccuQuilt Go!
-
For Christmas I would love to have my lazer light installed on my Q20
-
I would like the front extension tables for my Horn lift table
-
I would love a laser light for my Q20 and time to quilt!
-
Thank you so much for the video. It really helped me to understand how to move the template from area to area. I’m doing my quilt in the midnight color story.
I’m going to ask Santa for a laser light for my Q16 sit down, but he might have to wait until midyear to deliver it. lol
-
I have asked for a new rotary cutter. I’ve worn mine out!
-
Amanda and Bernina. A perfect match. Thanks for all the creative ideas you share ?
-
I would like a new seam ripper with an custom handle for gripping ease.
-
I asked for the Q16 sit down or frame I’m not picky!!
-
Dear Santa, Please send me Amanda’s ribbon candy and heart rulers set. Merry Christmas and Happy Holidays everyone!
-
Please Santa, I’ve been good! For all the small fine work I have been doing since I got my 770 Tula Pink, I would love a lamp with a magnifier!
-
I’ve asked Santa for a Bernina red chair.
-
I asked Santa for a rivet press and a lighted seam ripper.
-
I asked for ruler templates.
-
I asked for a gift certificate from my Bernina Store
-
I love Amanda’s videos! She uses her language so precisely and consistently. This year I asked Santa for some tear away stabilizer so I can play on my new 590 embroidery module.
-
zipper leaders and/or paddles for free motion micro quilting
-
I would ask Santa for the software update, but I know Santa will probably just save the money for the grandkids.?
-
I would love to have The new BERNINA Smart Drive Technology (SDT) module
-
Needles, thread and a turner tool.
-
I asked Santa for V9 upgrade for my embroidery ideas
I also considered a small sewing machine to take to class we will see what Santa brings -
I want Santa to bring me a new design wall. Hope he is listening!
-
The bernina foot #70 and #71.
-
I asked for a gift certificate to my favorite quilt shop.
-
A new sewing machine I can take to my classes!
-
I’m going for the gusto !!! I asked Santa for a Bernina 790. We’ll see ?
-
I asked Santa for more fabric and thread!
-
The Embroidery Book is something I have wanted for a long time.
-
I asked Santa for a longarm, but I doubt that one will fit in his sleigh! ?
-
I asked for a Bernette for traveling to class or when my Bernina is in the shop!
-
I asked for someone to help me get my sewing room organized!
-
This is a very exciting Christmas ……I have my diamonds quilt pieced and Santa brought me a Q16! Very excited, have been drooling, but thought it was only a pipe dream. I cannot wait to start on this quilt. I have my templates ready to go and I’ll say goodby now and go and get started!
Thank you Santa and Amanda!
-
I am hoping for some shiny red bobbins for my Q machine. ?
-
I would love the new 790plus, please Santa!
-
I just received my 770QE Plus and embroidery module. I’m so new that I need everything. I absolutely love Amanda Murphy’s rulers. Fingers & toes crossed!
-
Santa brought me a 790 crystal edition! What fun it will be!
-
I want the Bernina Plus upgrade for my 770 QE.
-
A yellow high tension bobbin.
-
I asked Santa for more quilting thread. I always seem to be running out…..
-
Machine Quilting rulers, you never have enough rulers
-
I love the heart ruler
-
I asked Santa for a day off so that I could do some sewing. Have been under a lot of stress recently due to family health problems.
-
To upgrade my Bernina 1630
-
Dear Santa, Can you give me more time to sew?
-
Santa could bring me gift card(s) to my favorite sewing/quilt store so I can find some special new fabric, patterns or notions.
-
I’ve asked for an embroidery machine
-
On my wish list is a collection of embroidery threads.
-
Dear Santa and Bobbin the Elf,
Someday, I would love to play on the 770 QE Plus! Merry Christmas everyone at Bernina! ??? -
I asked Santa for a sit down quilting machine…pretty please Santa, I’ve been good!
-
I asked for a blade saver thread cutter. ??
-
Gift cards to my favorite quilt shop or the local Bernina dealer!
-
I asked “Santa” for a midi hoop and some feet. 🙂
-
I have asked for the 730 QE. How exciting would that be to have that under the tree.
-
A Gift Certificate to The Sewing House!
-
I asked Santa for v9 software upgrade, and a couple of extra hours a day to work on Amanda;s beautiful quilting designs.
-
I’d like Santa to bring more Amanda Murphy Ruler Sets or a new Bernina 790 crystal edition 🙂
-
The Bernina Gripper Ring set
-
I’ve asked for some quilt books?
-
My V 9 software has arrived. One of my daughters will pick it up from the shop and bring it to Christmas dinner. So excited as new computer is ready to go as well.
-
a Giant box of time…Just feeling a little overwhelmed this year
Hugs and love yall
Megen -
I asked Santa for a Larger Embroidery Hoop. Fingers crossed…
-
I asked Santa to upgrade my sewing machine!!
-
My Santa request for 2021 is for a large sewing/quilting/embroidery room. Right now I have two rooms filled with things needed for doing all the listed. I just know Santa has received my request!
-
I asked for a Bernina sewing machine in the 800 series. I want to learn embroidery.
-
I asked Santa for a larger embroidery hoop.
-
On my Christmas wish list is a new cutting mat ???❤️??
-
I asked for Amanda’s design ideas book.
-
I asked Santa for a Q24 and of course lots of fabric and batting.
-
When asked, I responded that beautiful fabric is always appropriate!!!
-
I hope Santa will bring me a larger hoop,
-
I asked for the newest BERNINA embroidery software.
-
I asked Santa for a gift card from Bobbin and Bolt Quilt shop
-
I have purchased the Diamonds 2 Mint Color Story fabric kit. I really like the print and would like to know where I could purchase additional fabric. My local Bernina store as well as the other fabric stores around here do not carry it. Thank you.
Susan Meathe
-
For Row 1 quilting, do we use the 5” heart ruler? – Thanks in advance!
-
I used the 4” as you can see in the video, but the 5” would work too – it would simply generate a different design.
-
Leave a Reply
You must be logged in to post a comment.

Surprise Gift Package WeAllSew Giveaway
This giveaway is now closed. Thank you to all of our WeAllSew fans who entered!
Congratulations to our winner(s):
Keep an eye out for the next WeAllSew giveaway!