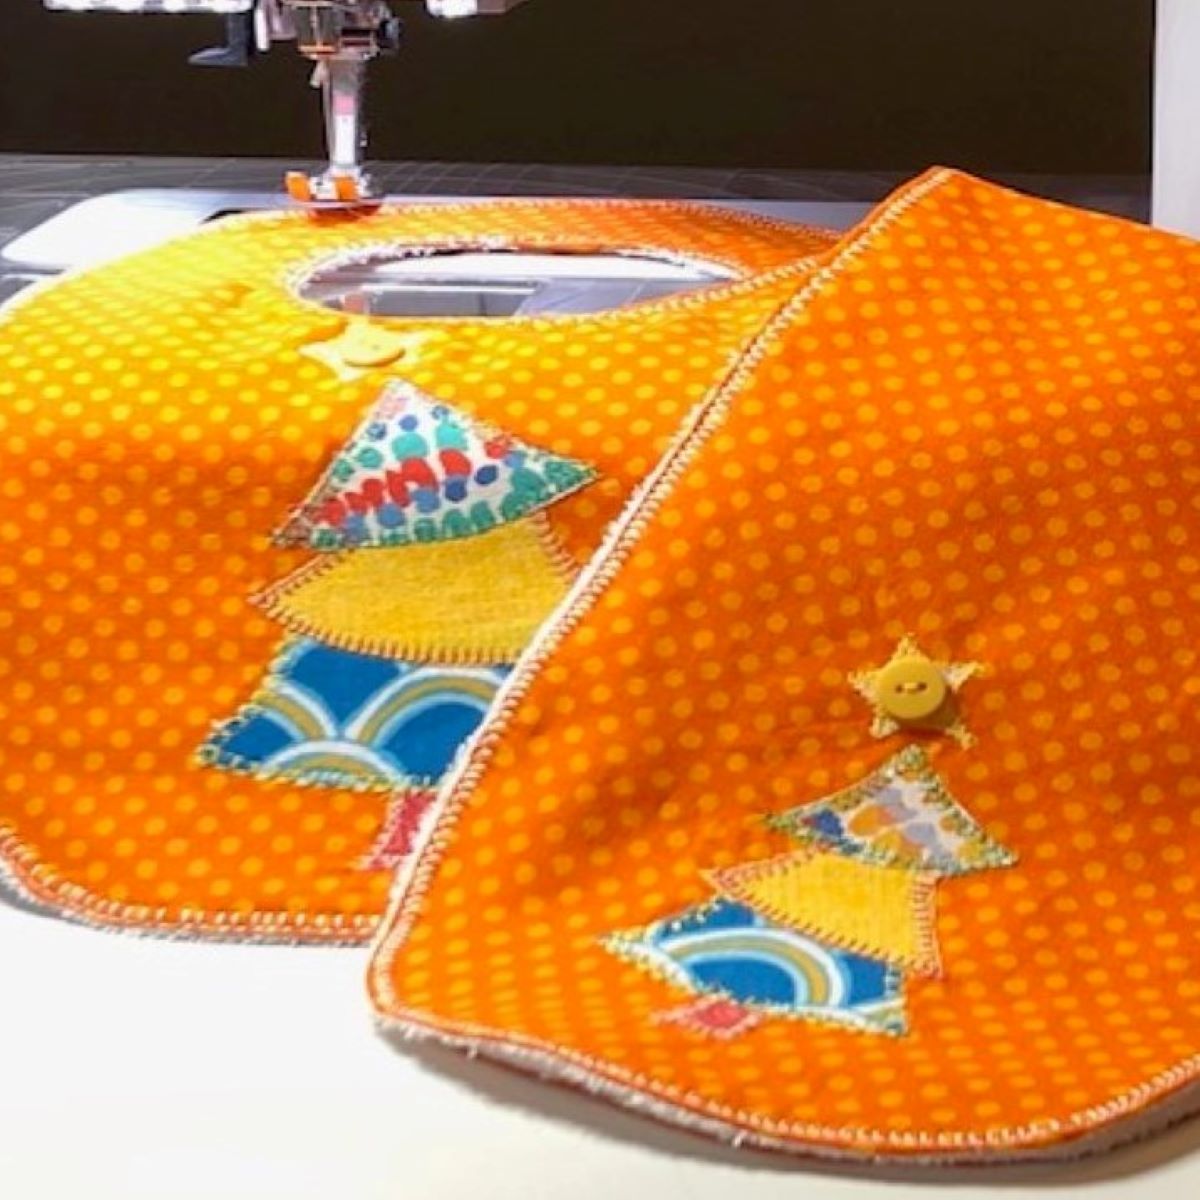
DIY Baby Burp Cloths and Teether
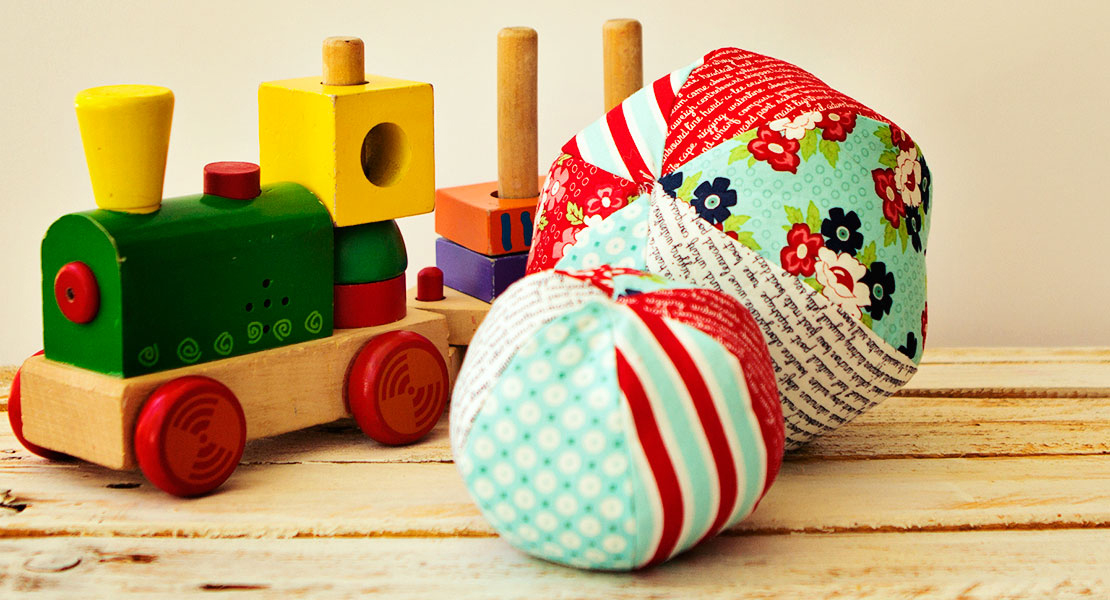
Hello everyone! Kymona here with a super cute set of baby burp cloths and teether that any new mom would love. New babies spit up all the time, and having the right accessory to catch that spit up is very important. Today I’m going to show you how to make a personalized set of three burp cloths with a matching teether for any newborn or toddler in your life.
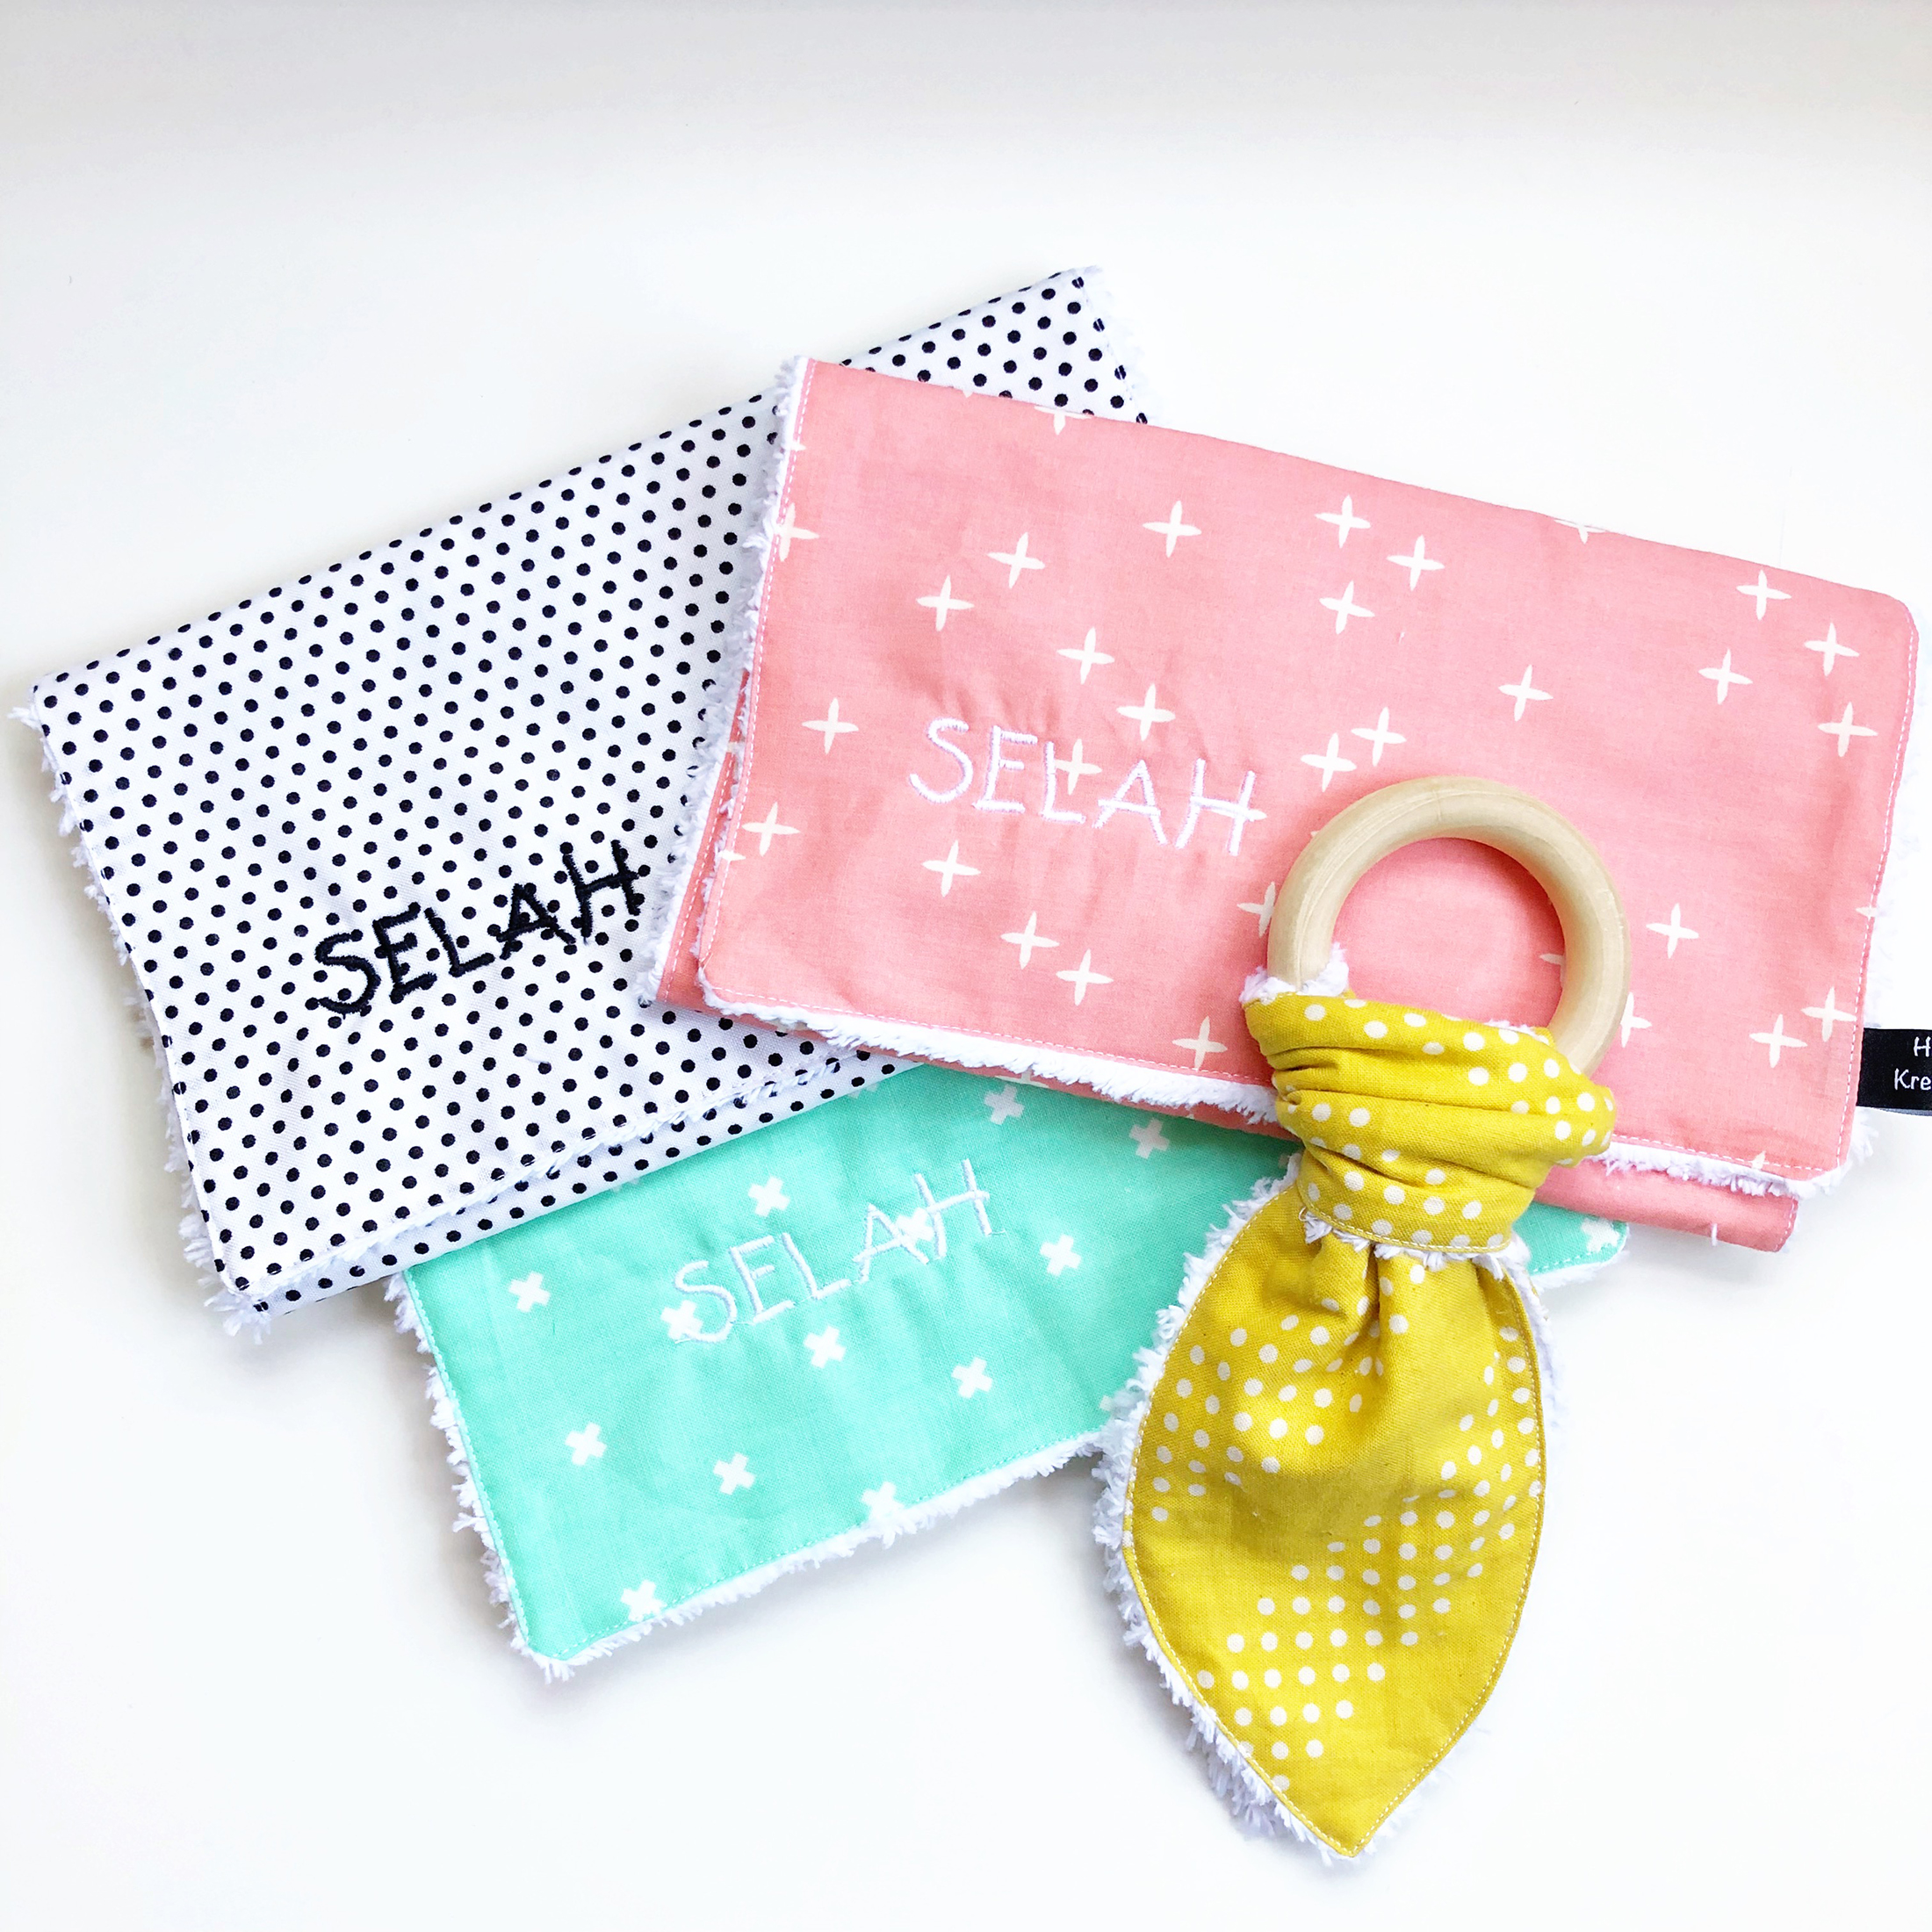
Finished burp cloth size: 9.5 inches x 16.5 inches
Finished teether size: 4.5 inches x 19 inches
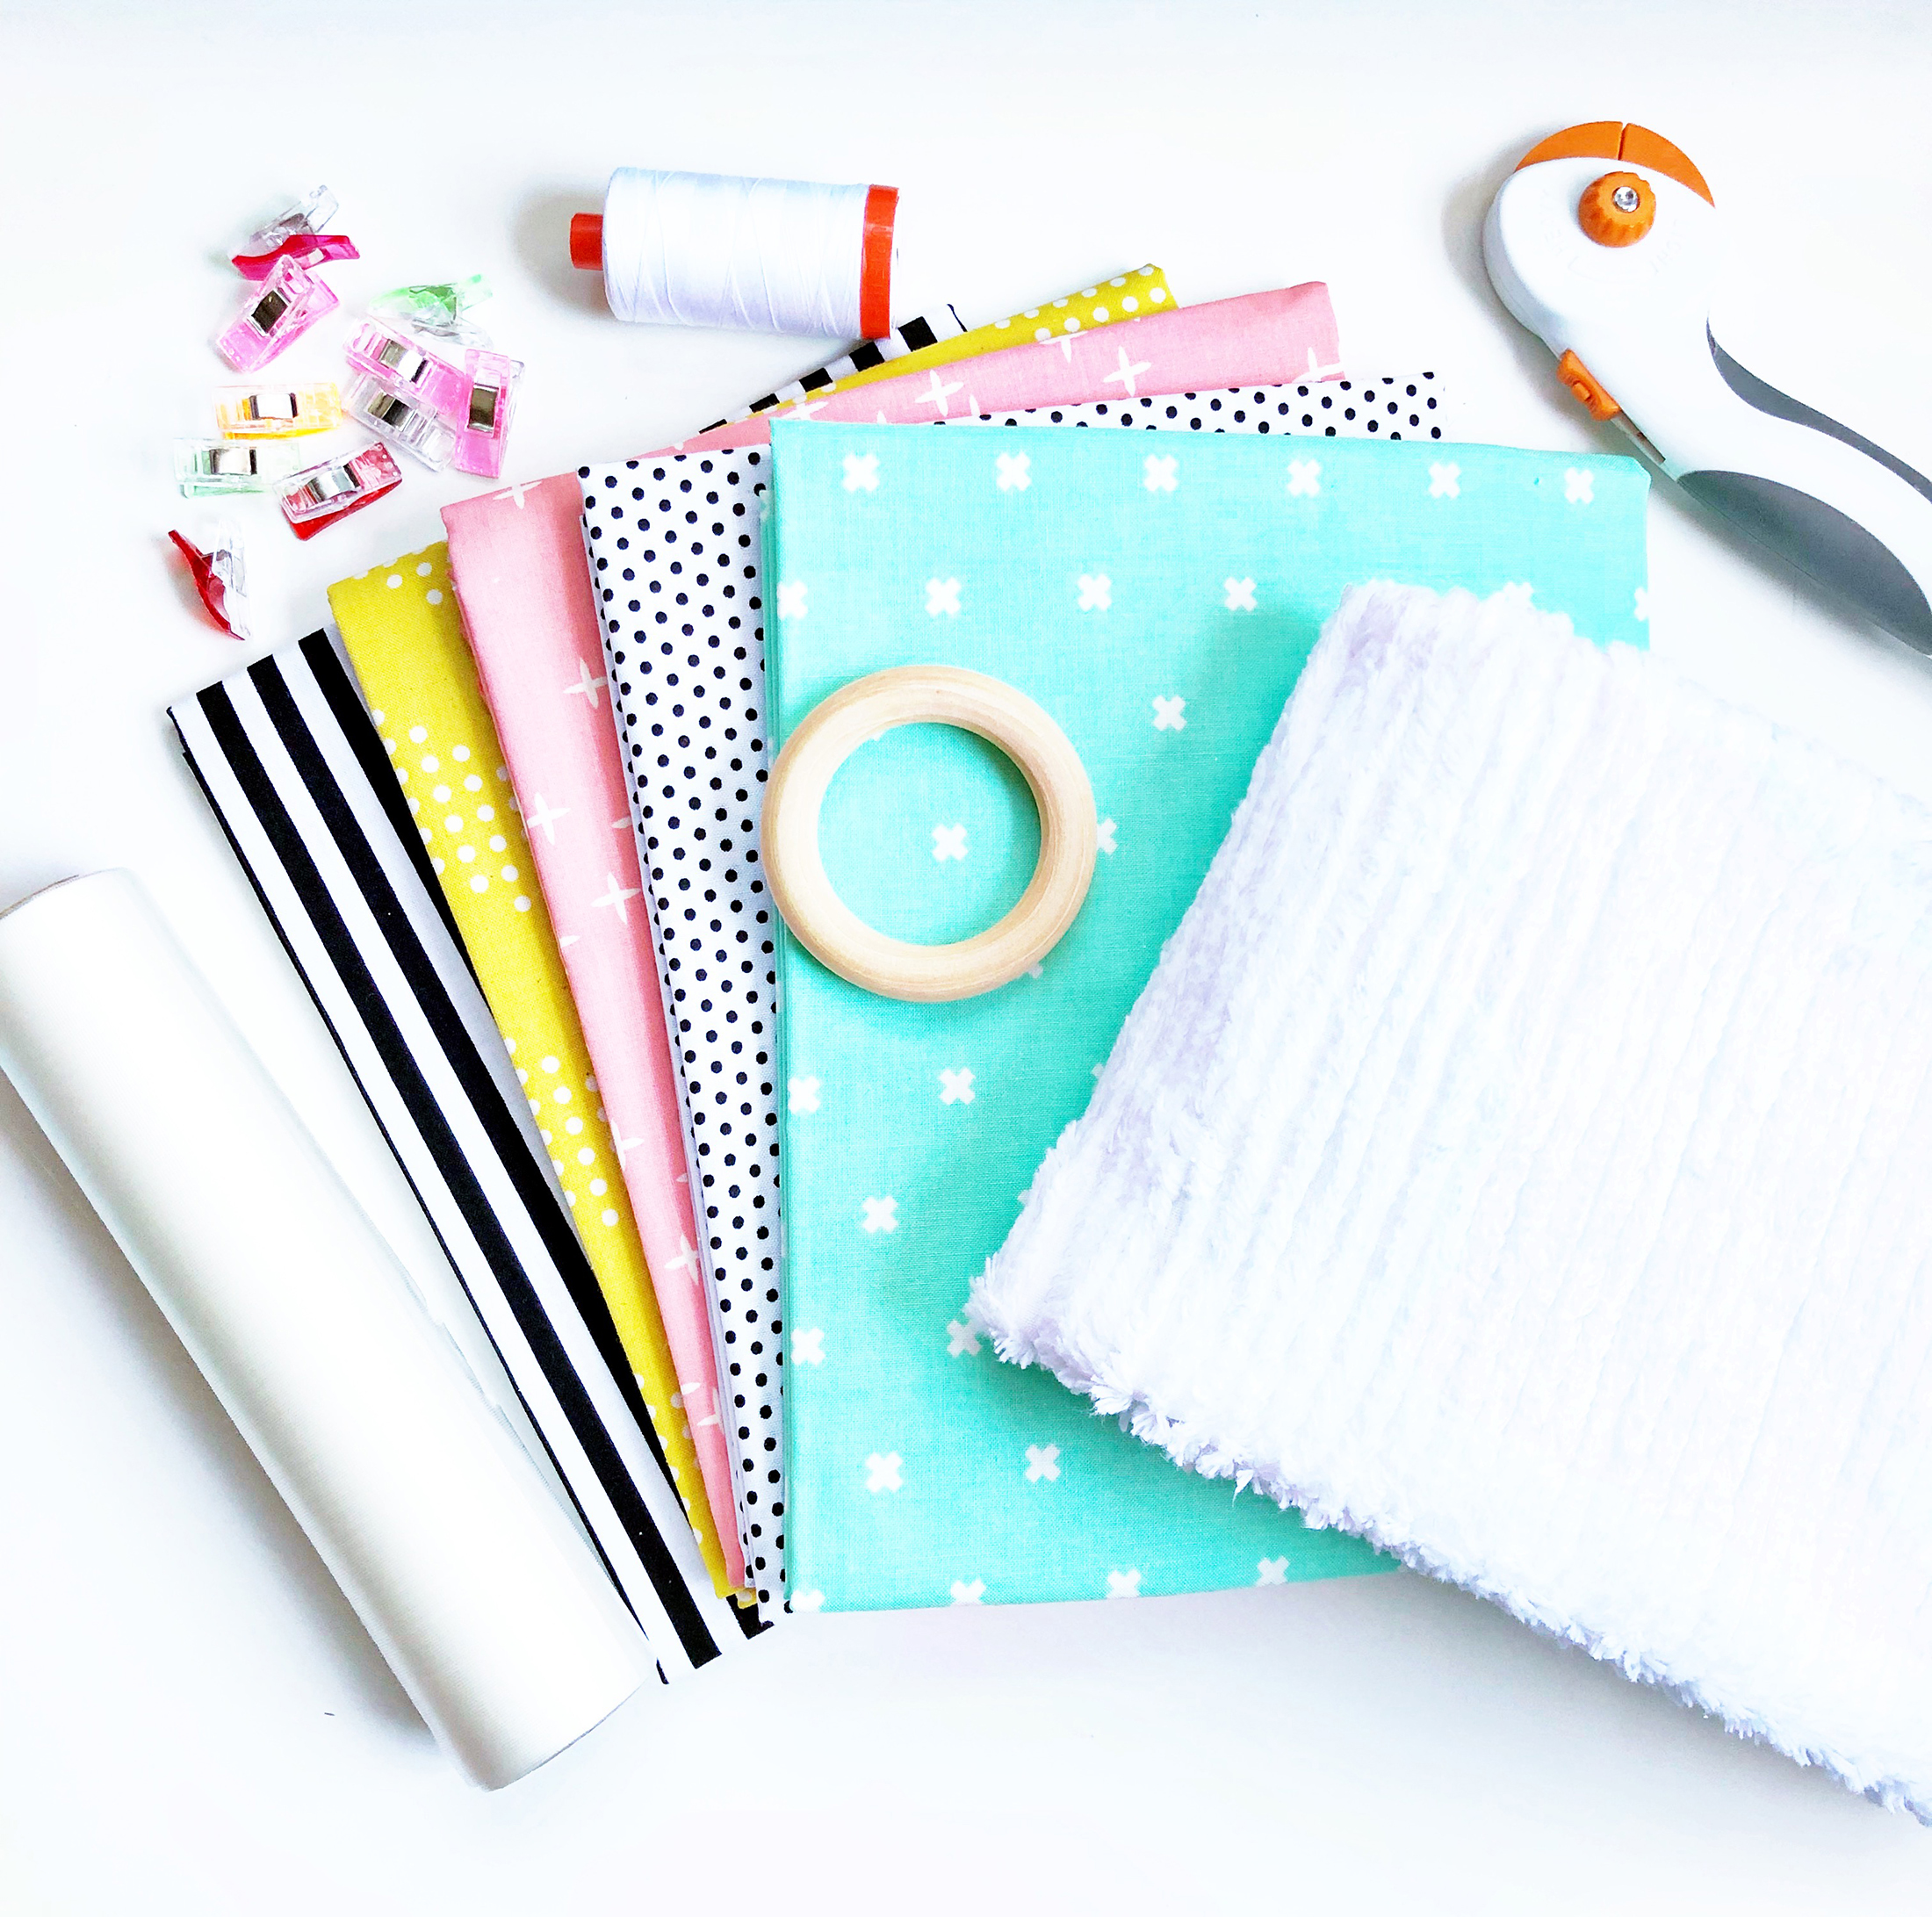
Materials to Create a Burp Cloth and Teether
- Download the Baby Teether Template here
- 4 Fat Quarters (I used a Pool Party Bundle)
- White Chenille
- Fabric pen
- Ruler
- Embroidery Scissors
- Pins/Clips
- Rotary cutter and mat
- White thread
- White and Black embroidery thread
- Point turner
- Wooden teether
- Tearaway Stabilizer
Other
- Electronic Cutter (optional)
Instructions to Sew a Burp Cloth and Teether
Step 1 – Cut the fabric
Baby Burp Cloths:
Cut (3) different fat quarters to 9.5 inches x 16.5 inches.
Cut (3) pieces of the white chenille to 9.5 inches x 16.5 inches.
Teether:
Cut (1) fat quarter to 21 inches x 5 inches.
Cut (1) piece of white chenille to 21 inches x 5 inches.
Note: All seam allowances are 1/4 inch unless otherwise noted.
Step 2 – Prepare the fabric for sewing
Burp Cloth:
Clip or pin one fat quarter and one chenille right sides together.

Leave about 3 inches on a long side for turning.
Teether:
Use the pattern to cut the pattern from the fat quarter and chenille. Or, use an electronic cutter to cut out the shape of the teether from both the fat quarter and the white chenille.
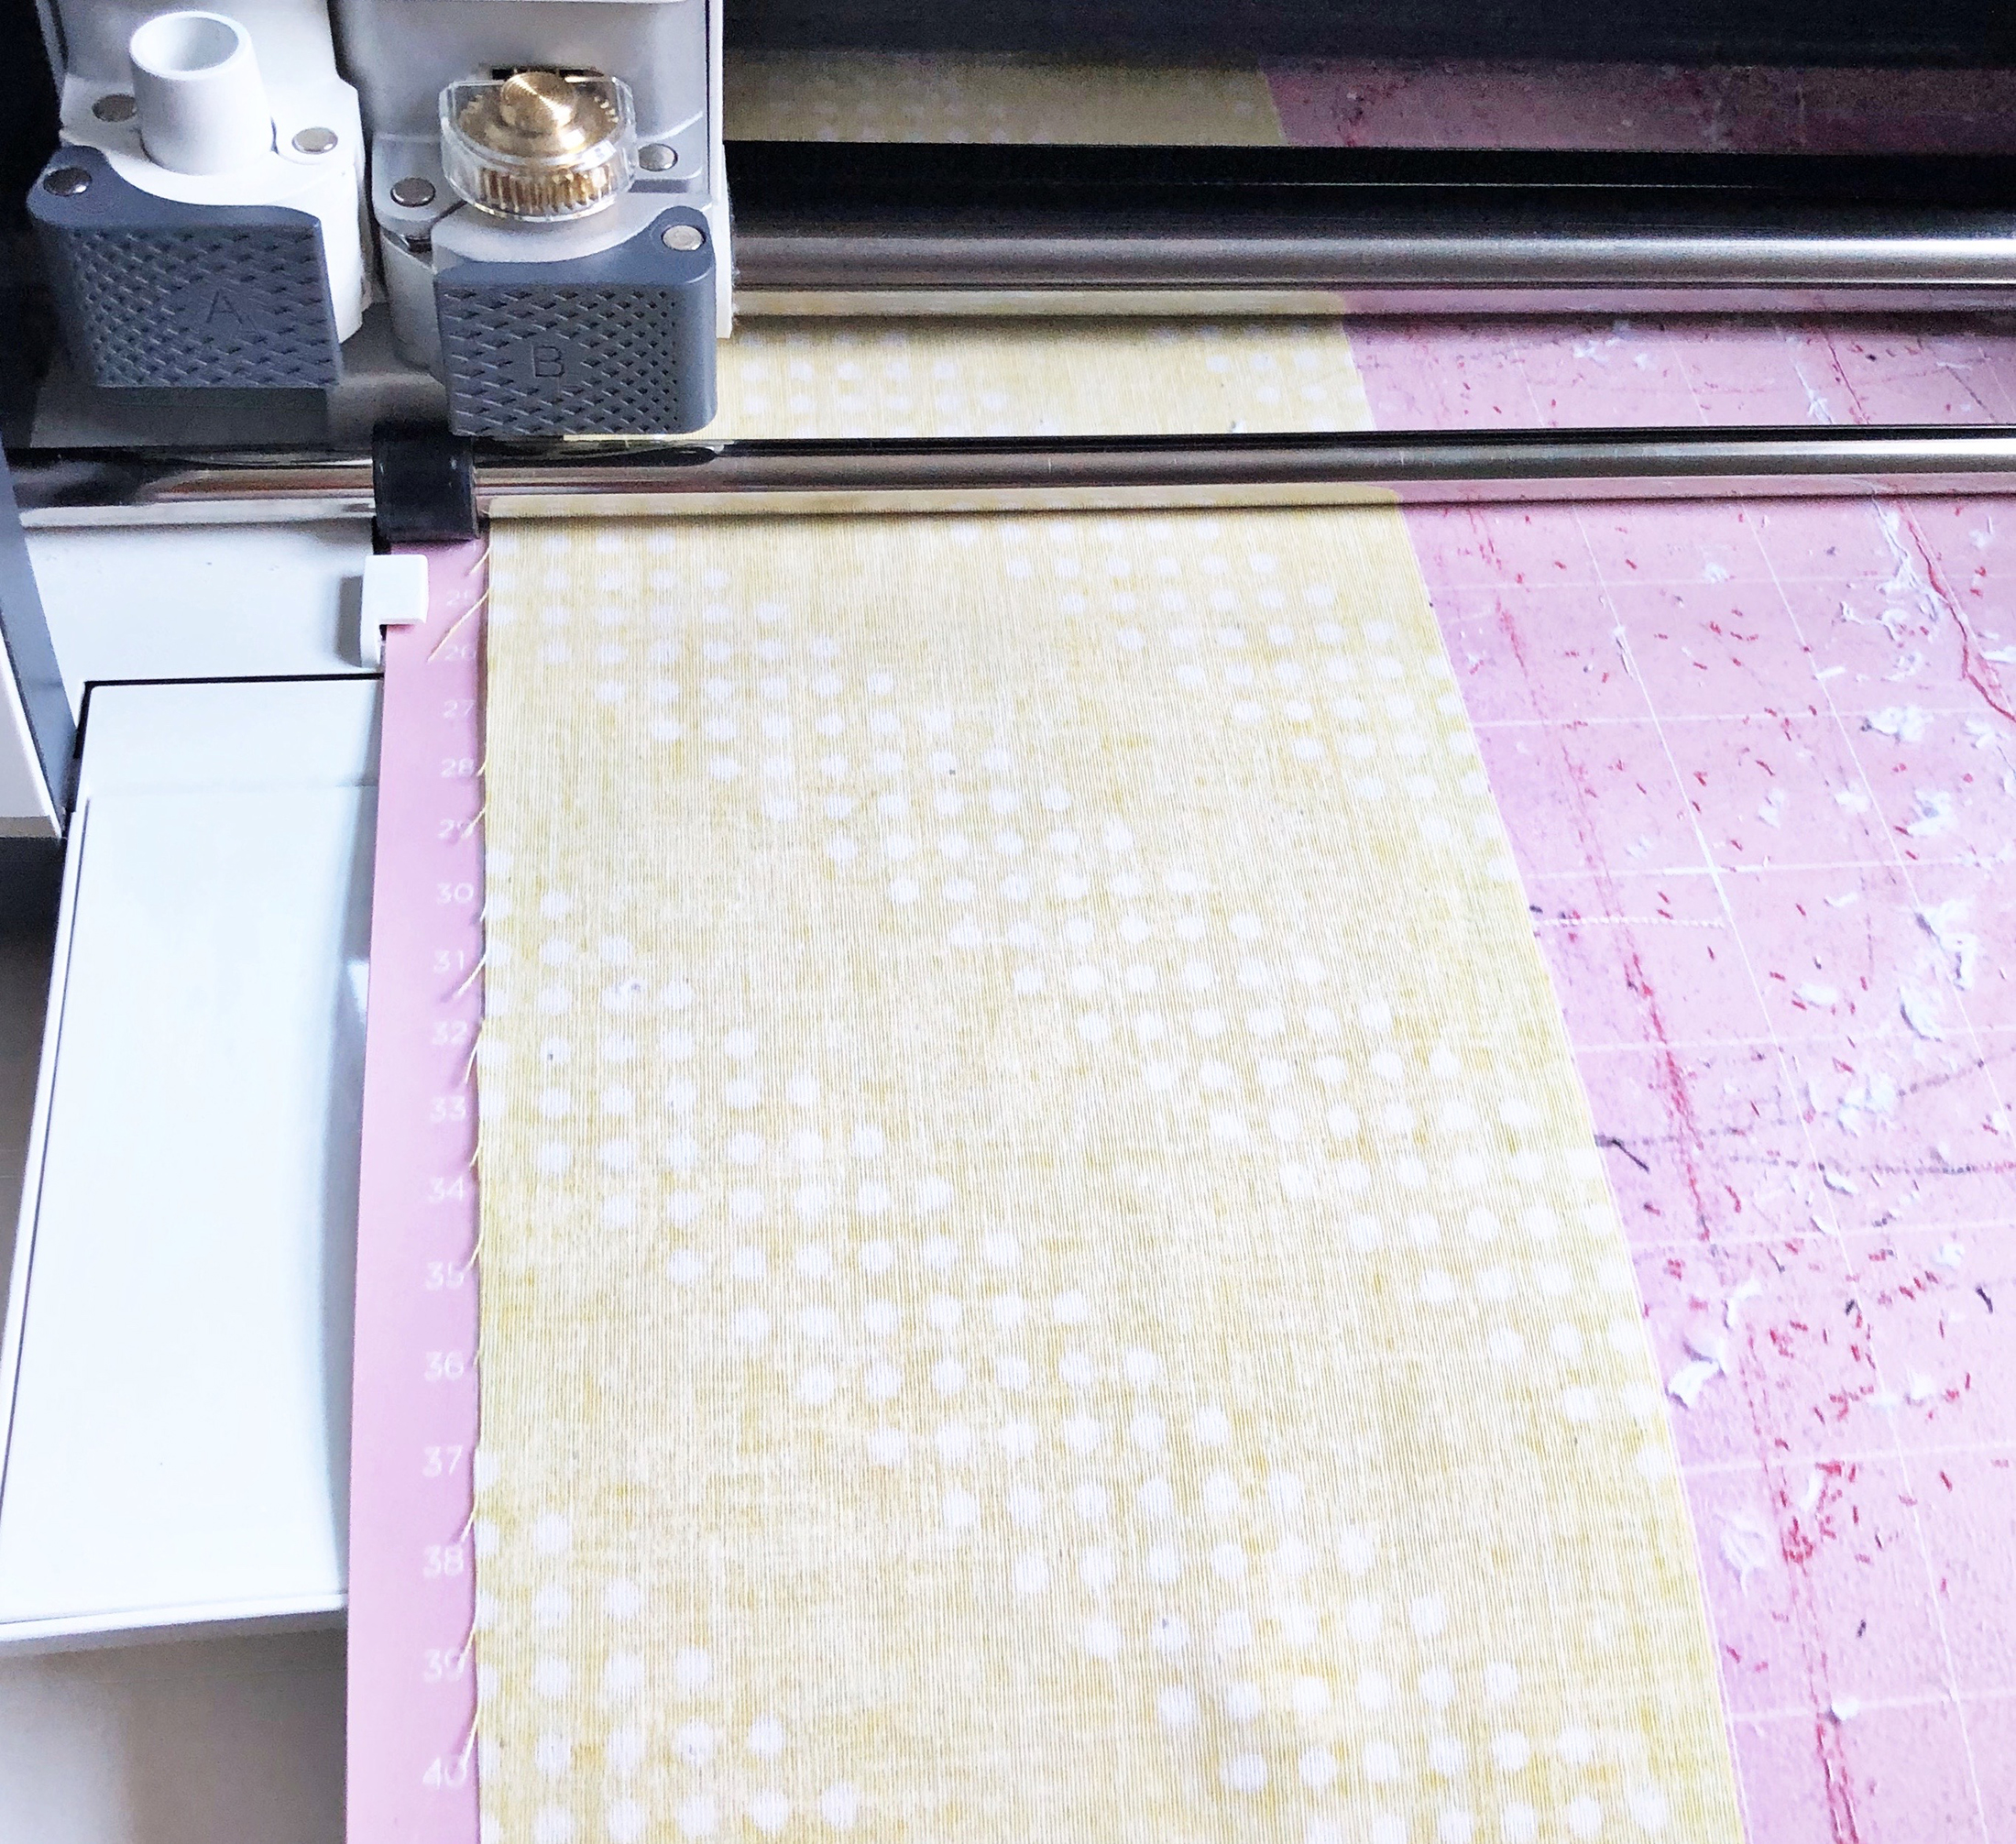
Clip or pin the fat quarter and chenille right sides together.
Leave about 3 inches on a long side for turning.
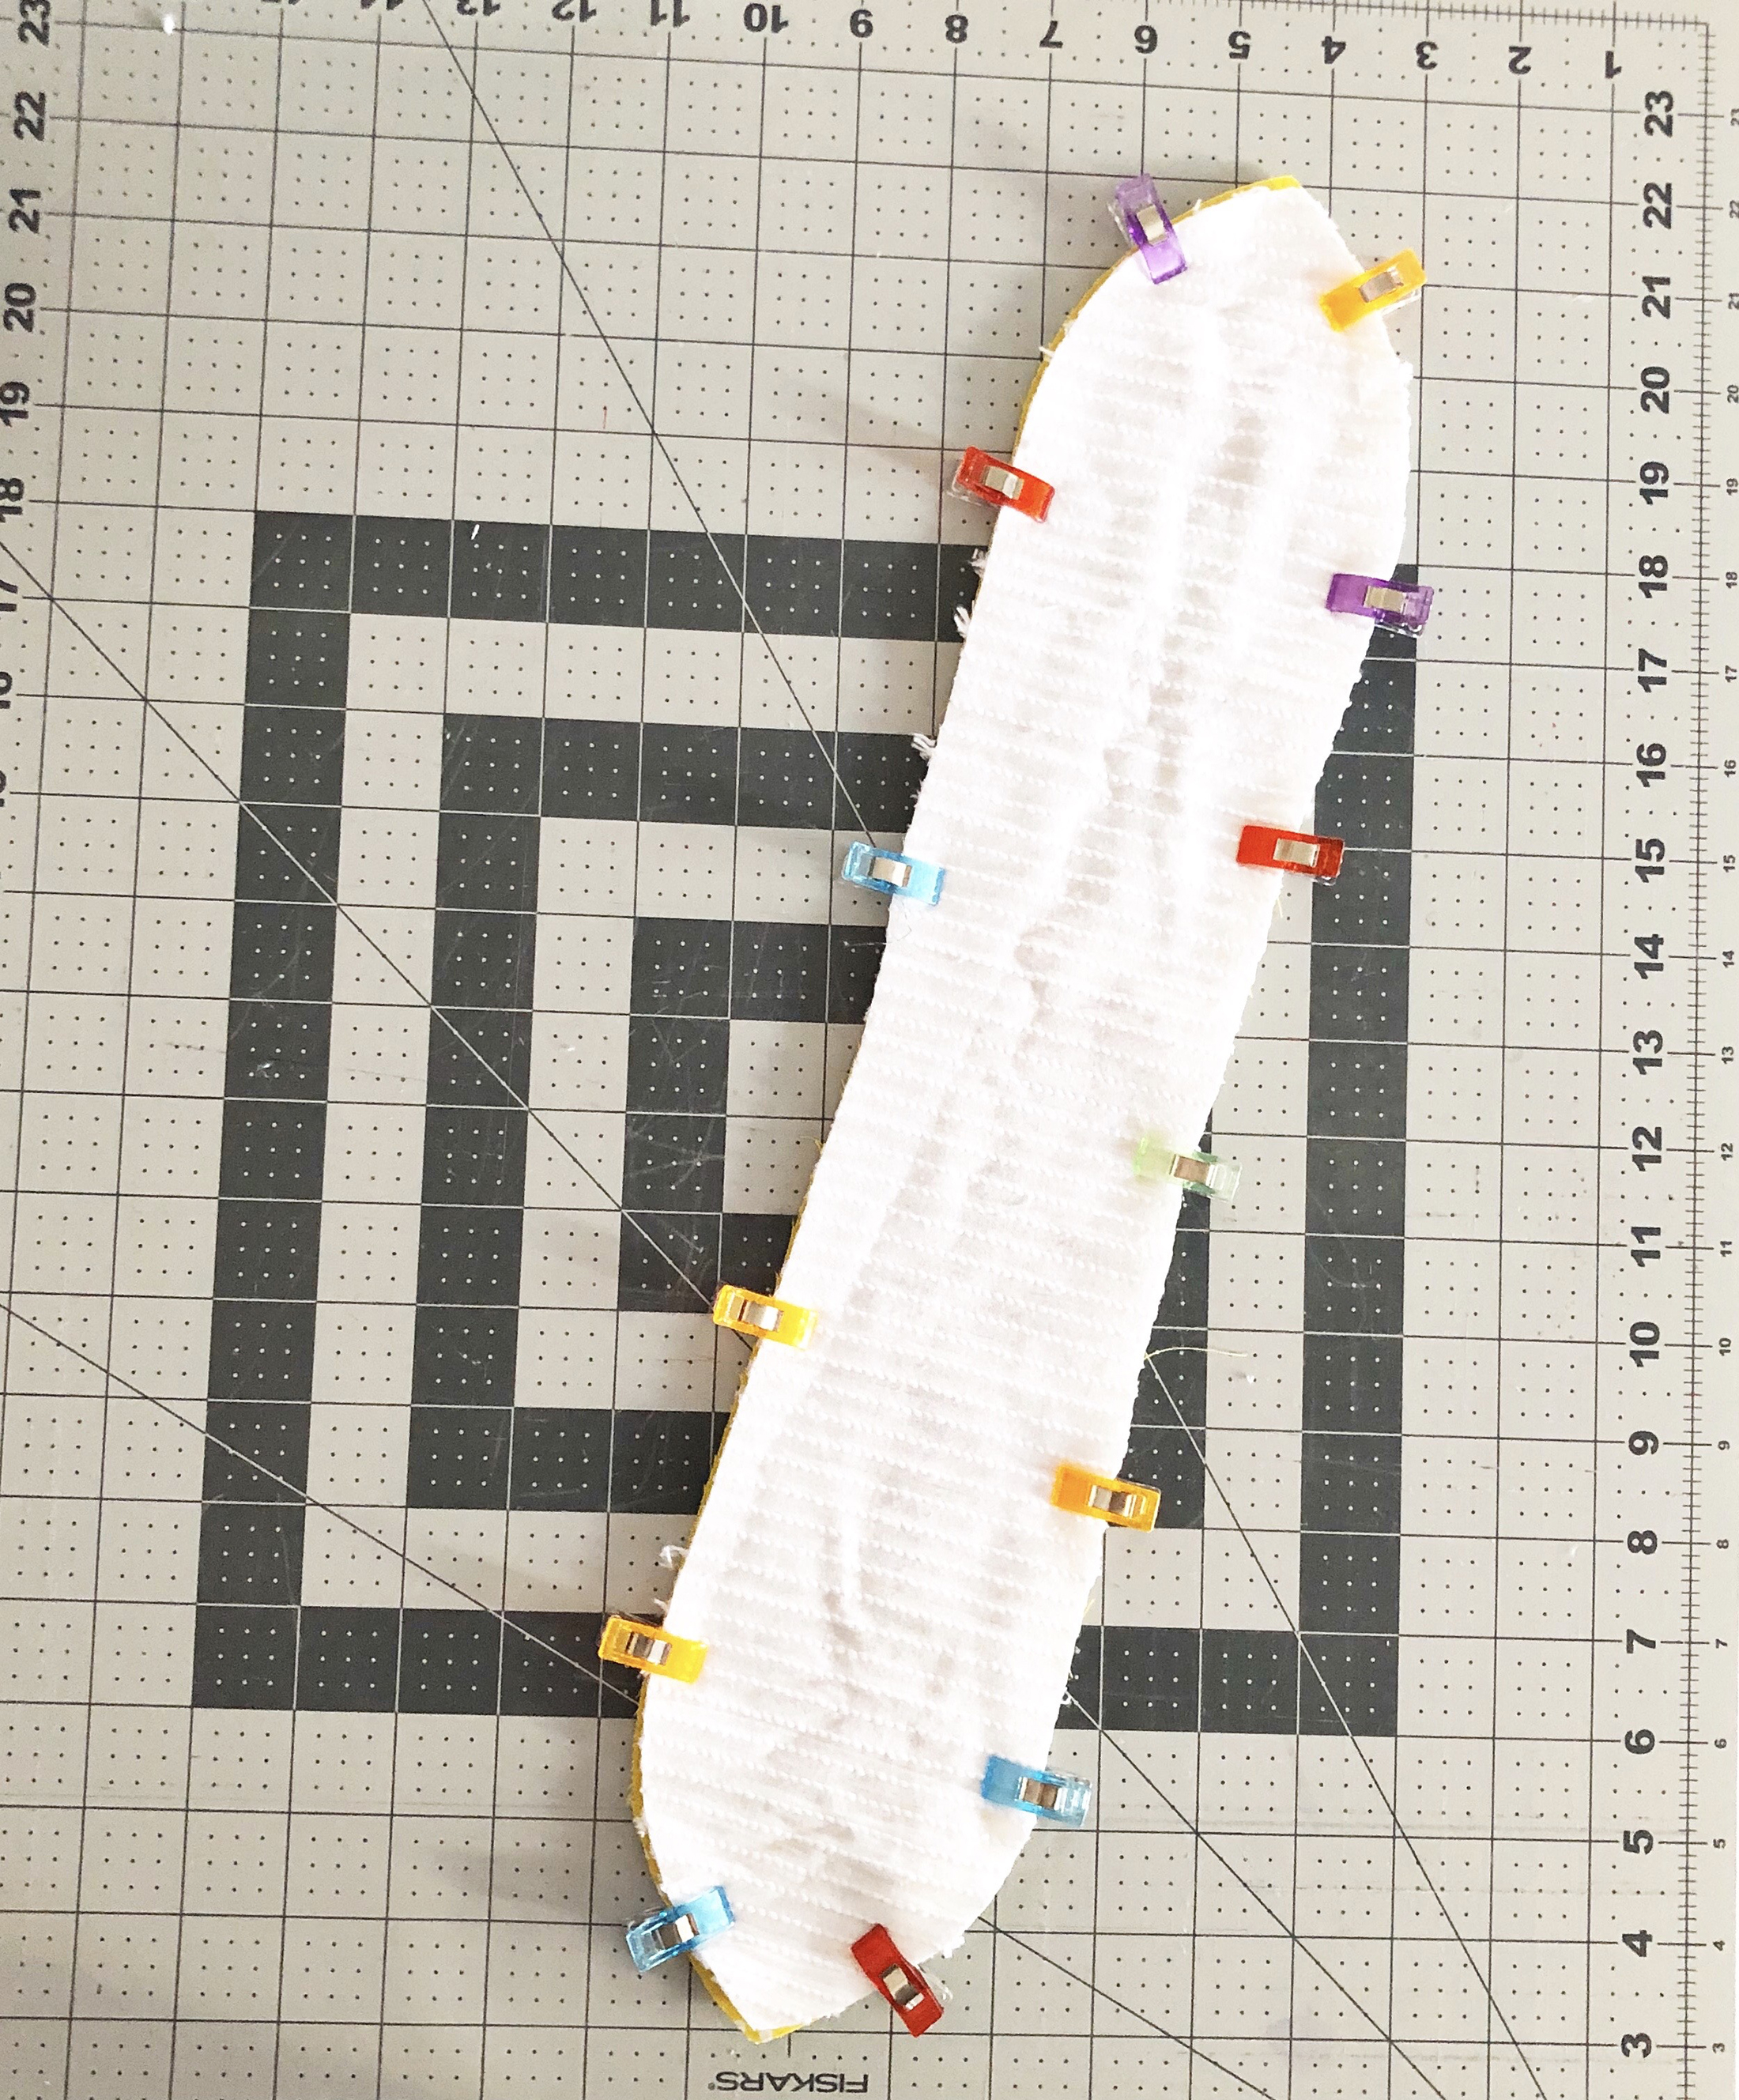
Step 3 – Sew the front and back together
Burp Cloth and Teether:
Attach Patchwork foot #97D and the Patchwork seam guide to your machine.
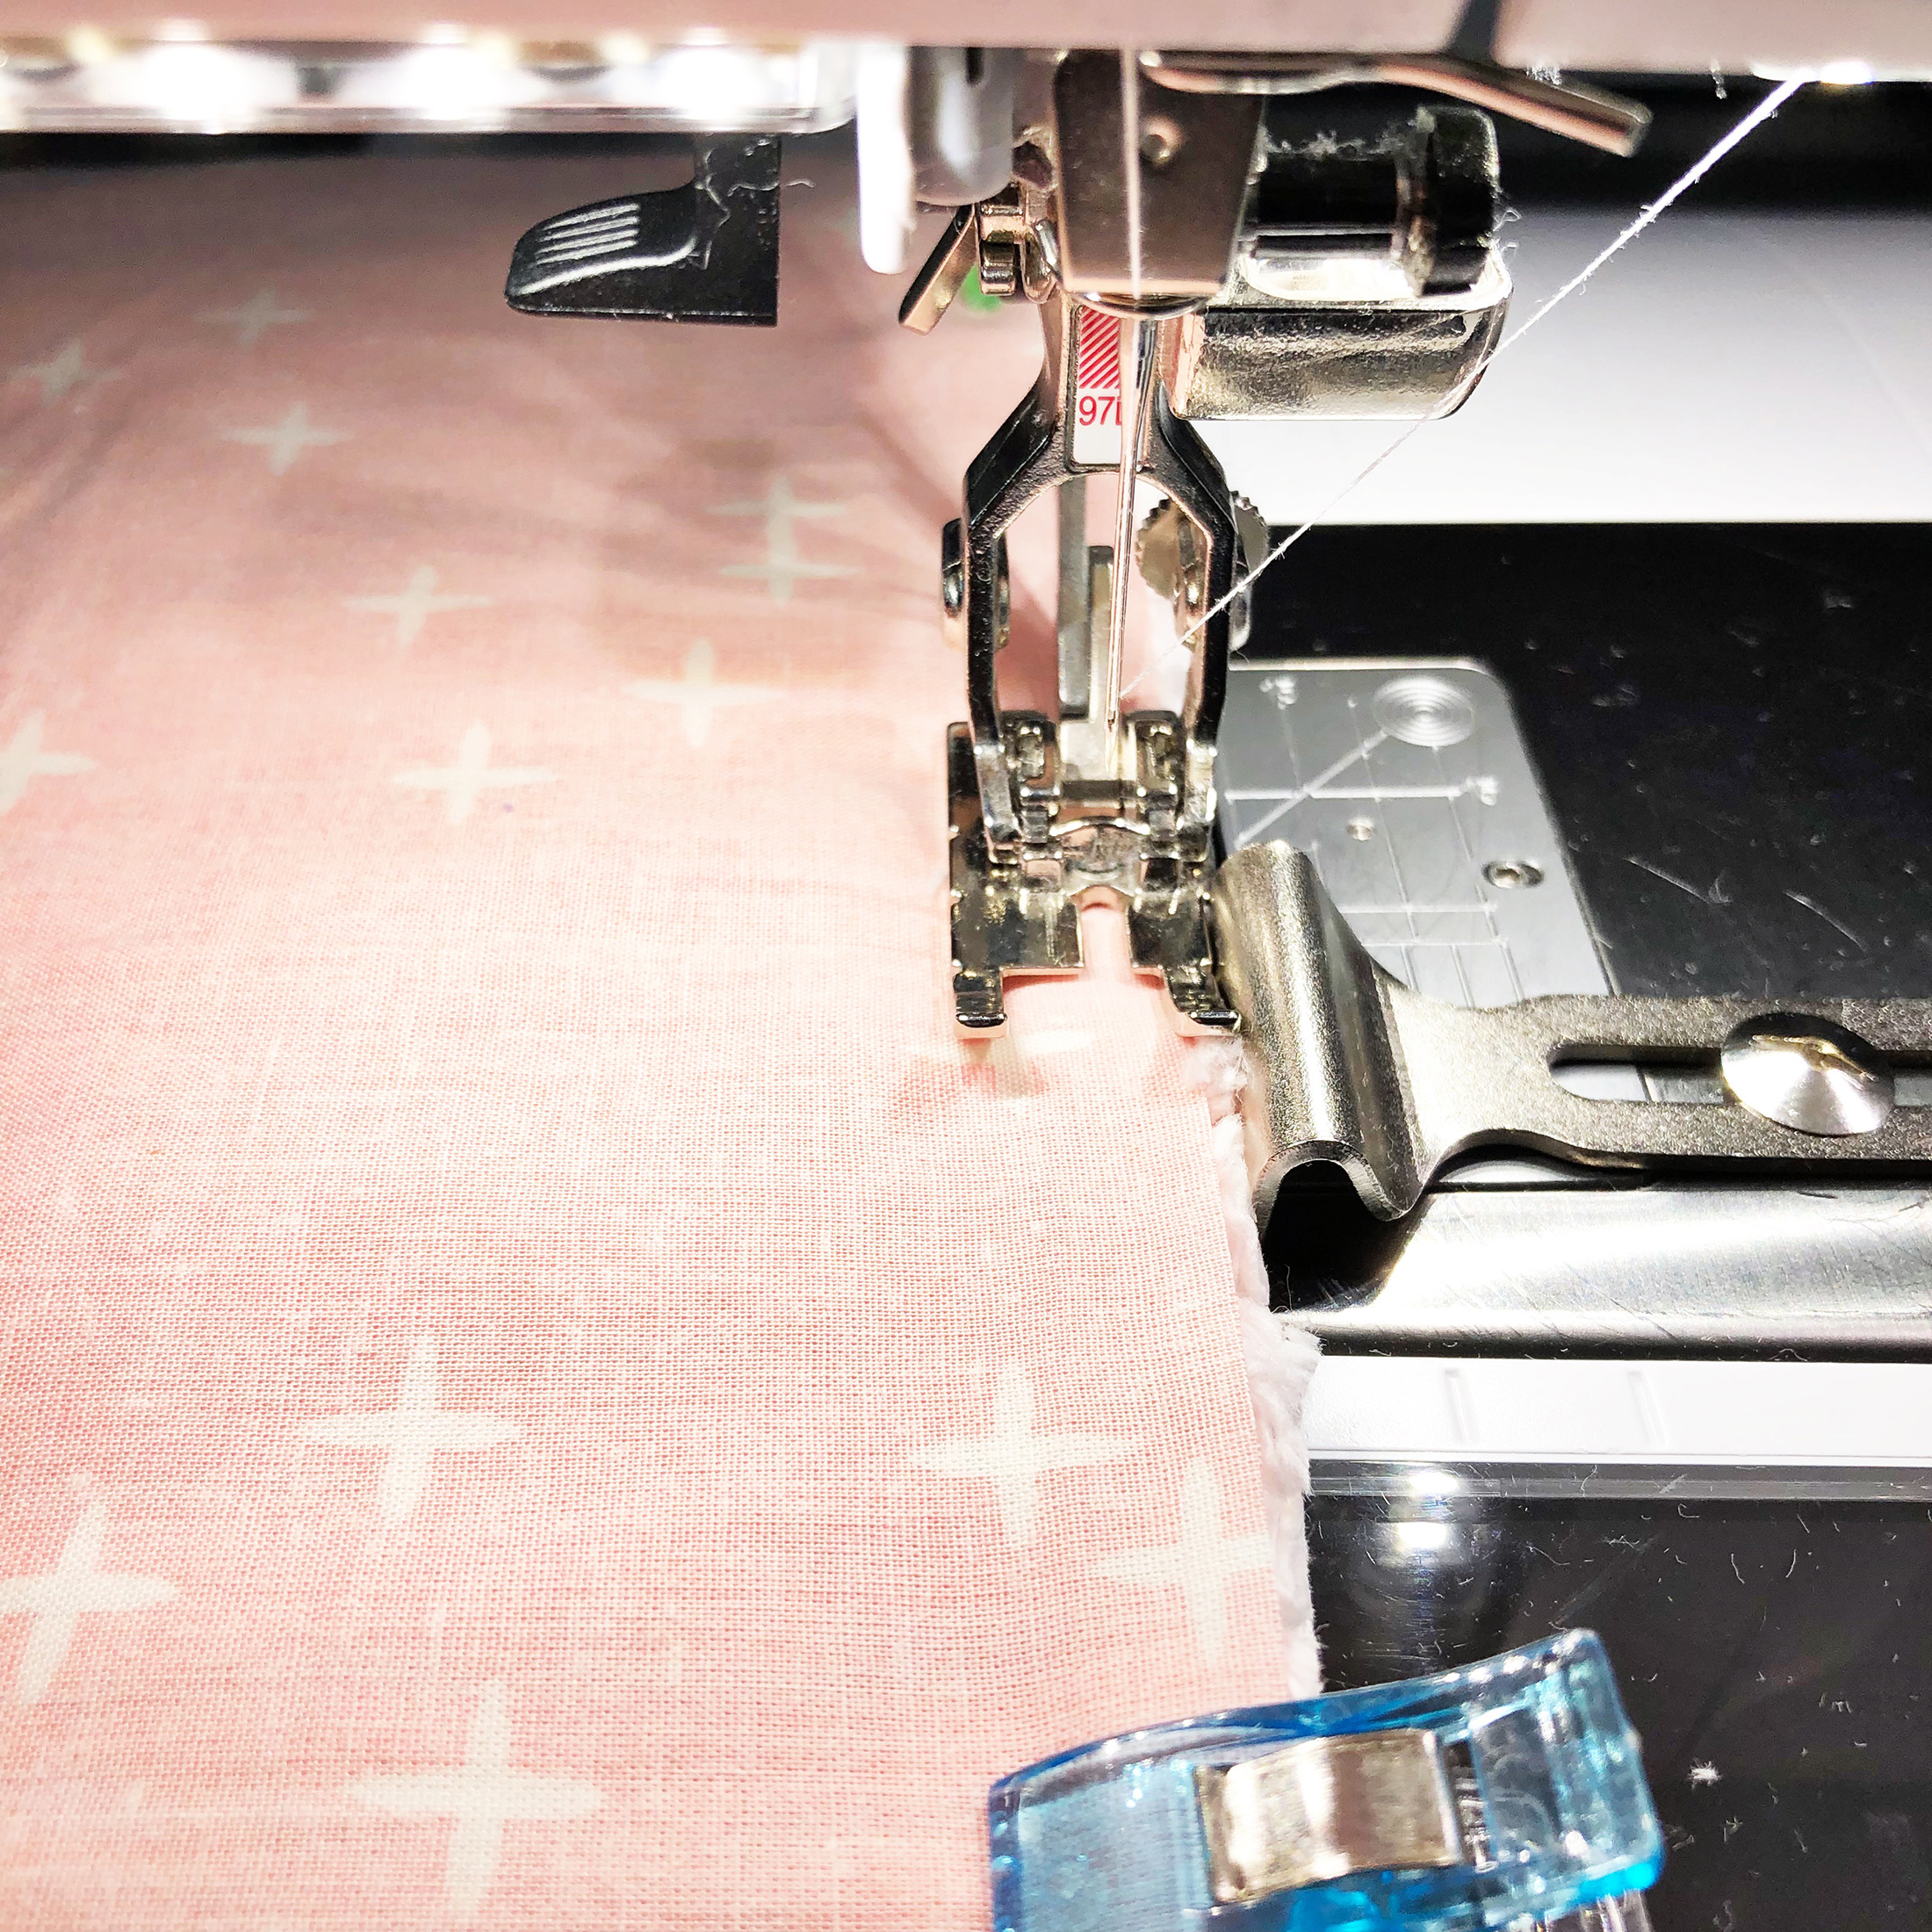
Begin sewing on the long side where the 3-inch opening will be. Backstitch and sew around the entire piece stopping to leave the 3-inch opening. Repeat for each piece.
Step 4 – Ironing and Cutting
Burp Cloth and Teether:
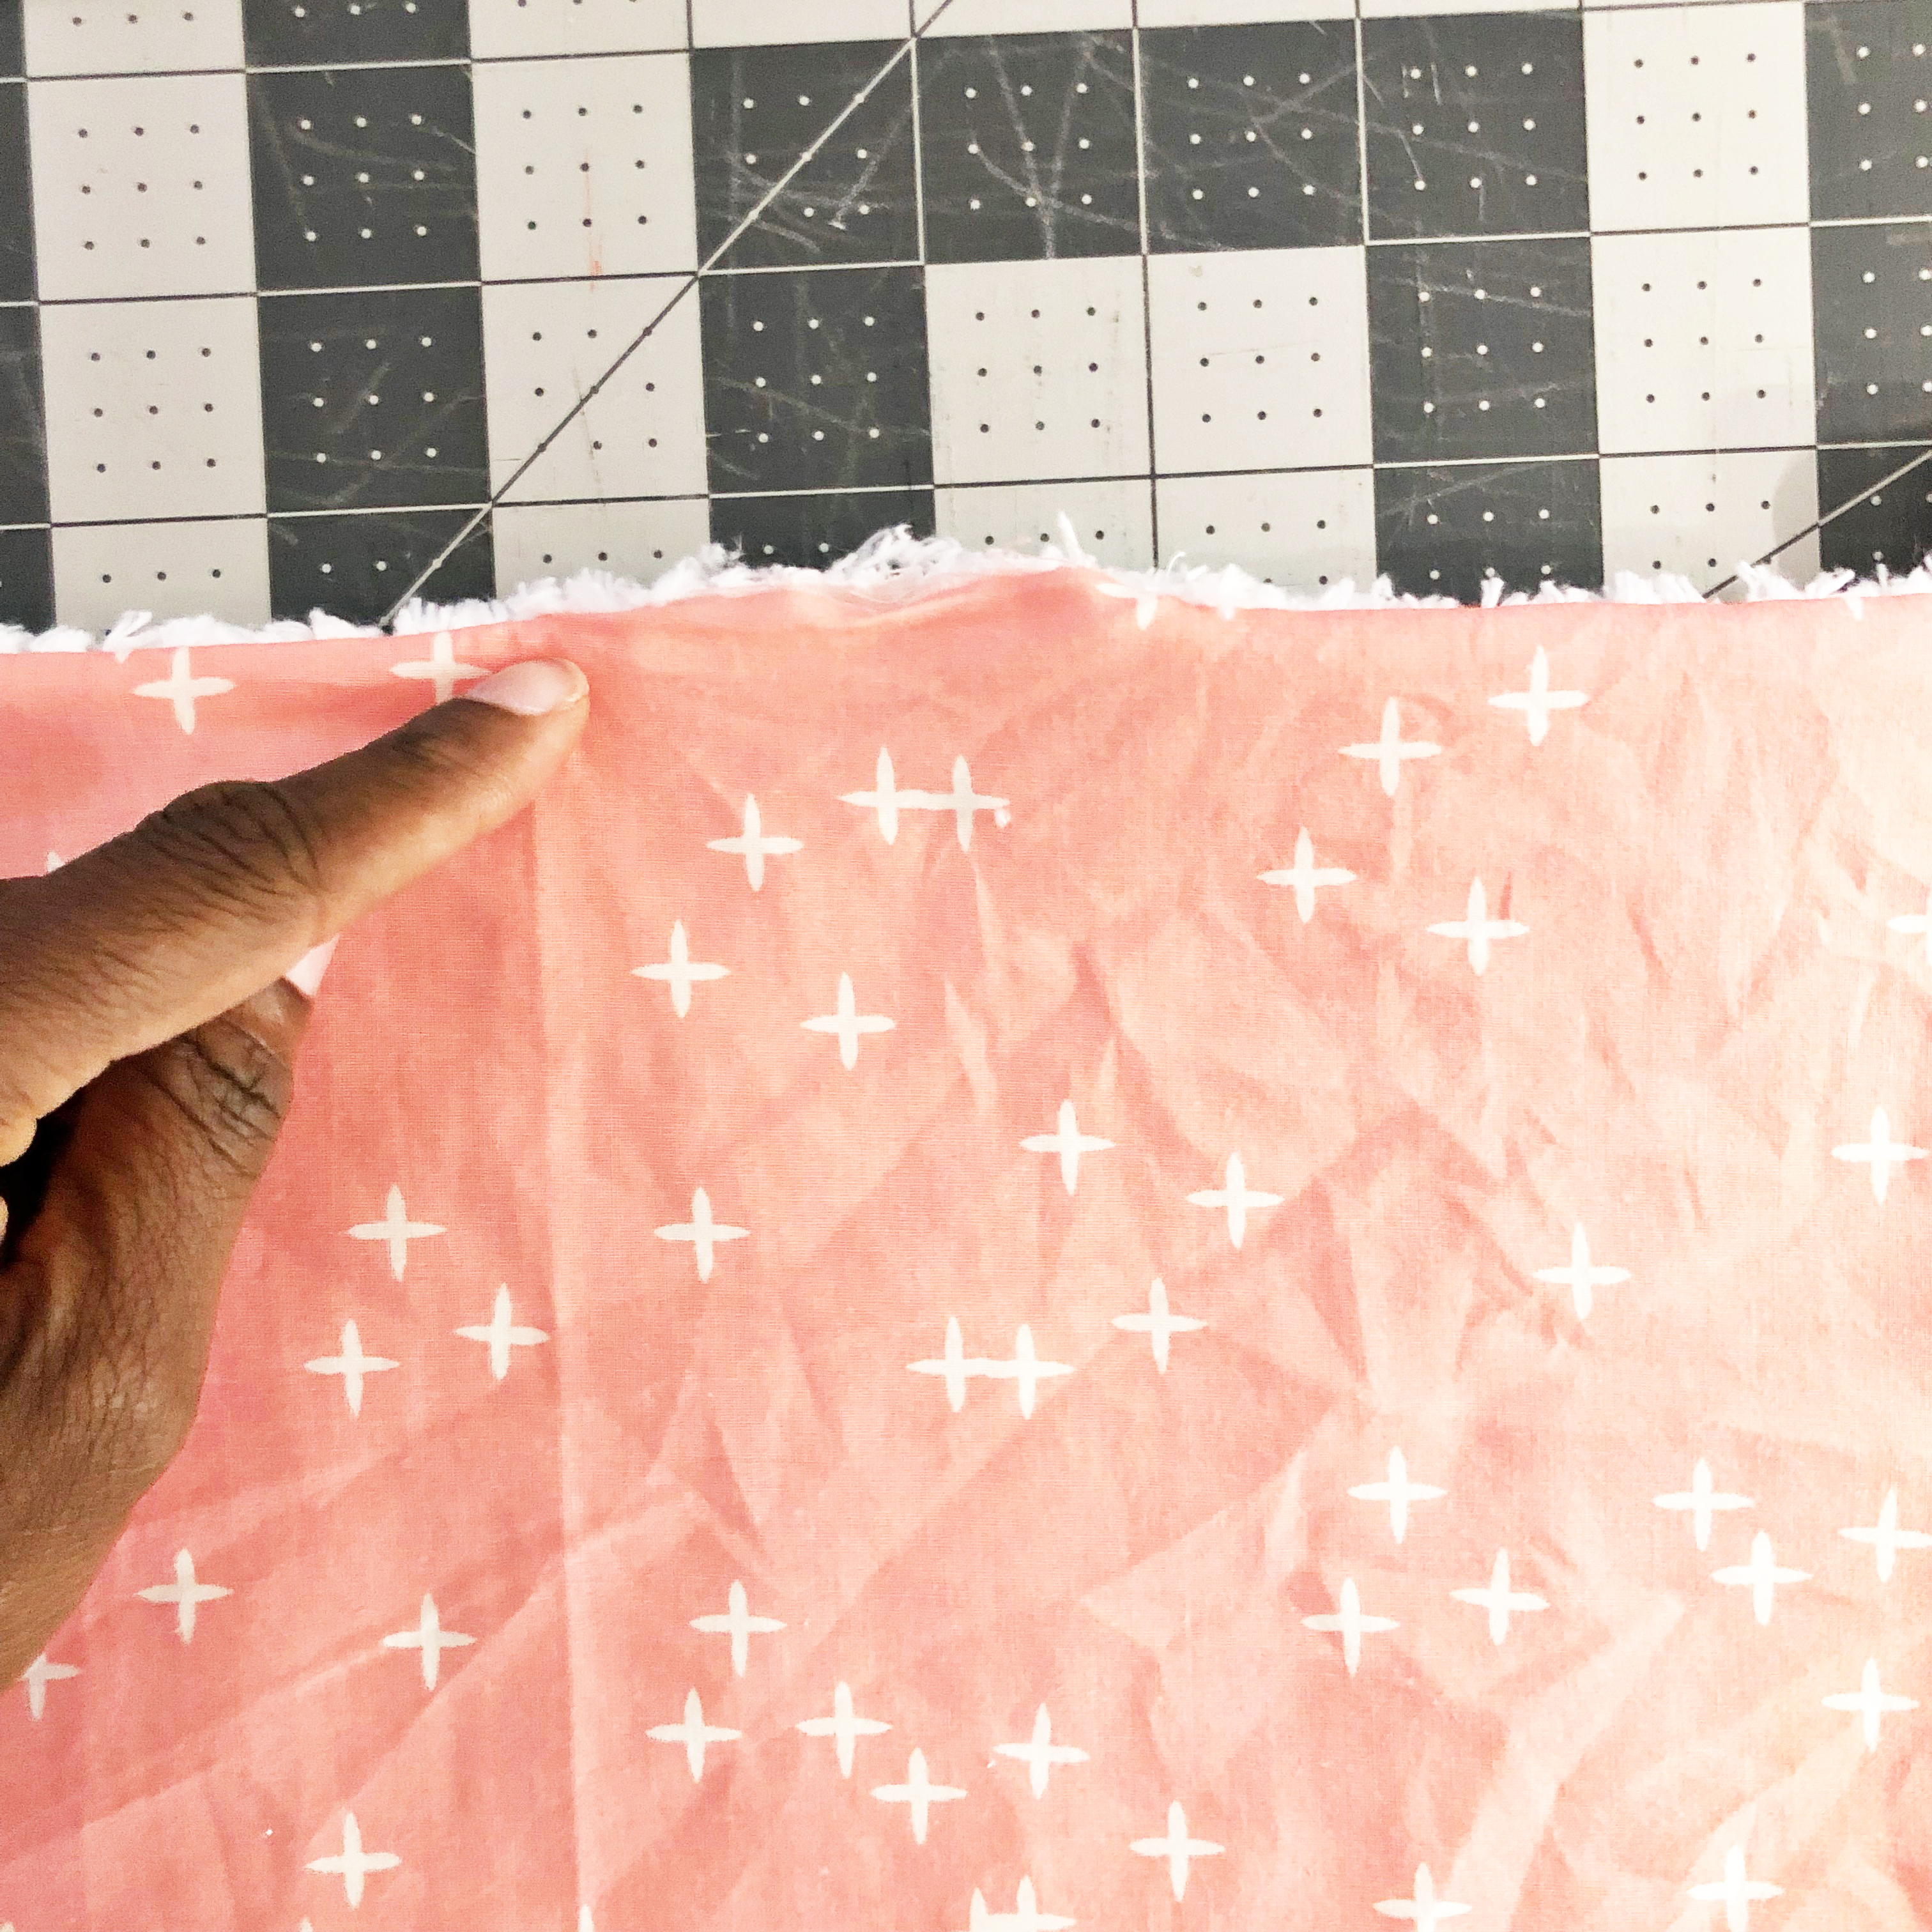
Iron all of the stitches to set them in place. Use the embroidery scissors and round all of the corners. Repeat for each piece.
Step 5 – Turning the project
Burp Cloth and Teether:
Turn the fabric inside out. Use a point turner to poke out the corners. Repeat for each piece.
At the 3-inch hole, fold the fabric in and iron to set the shape.
Repeat for each piece.
Step 6 – Edgestitching
Burp Cloth and Teether:
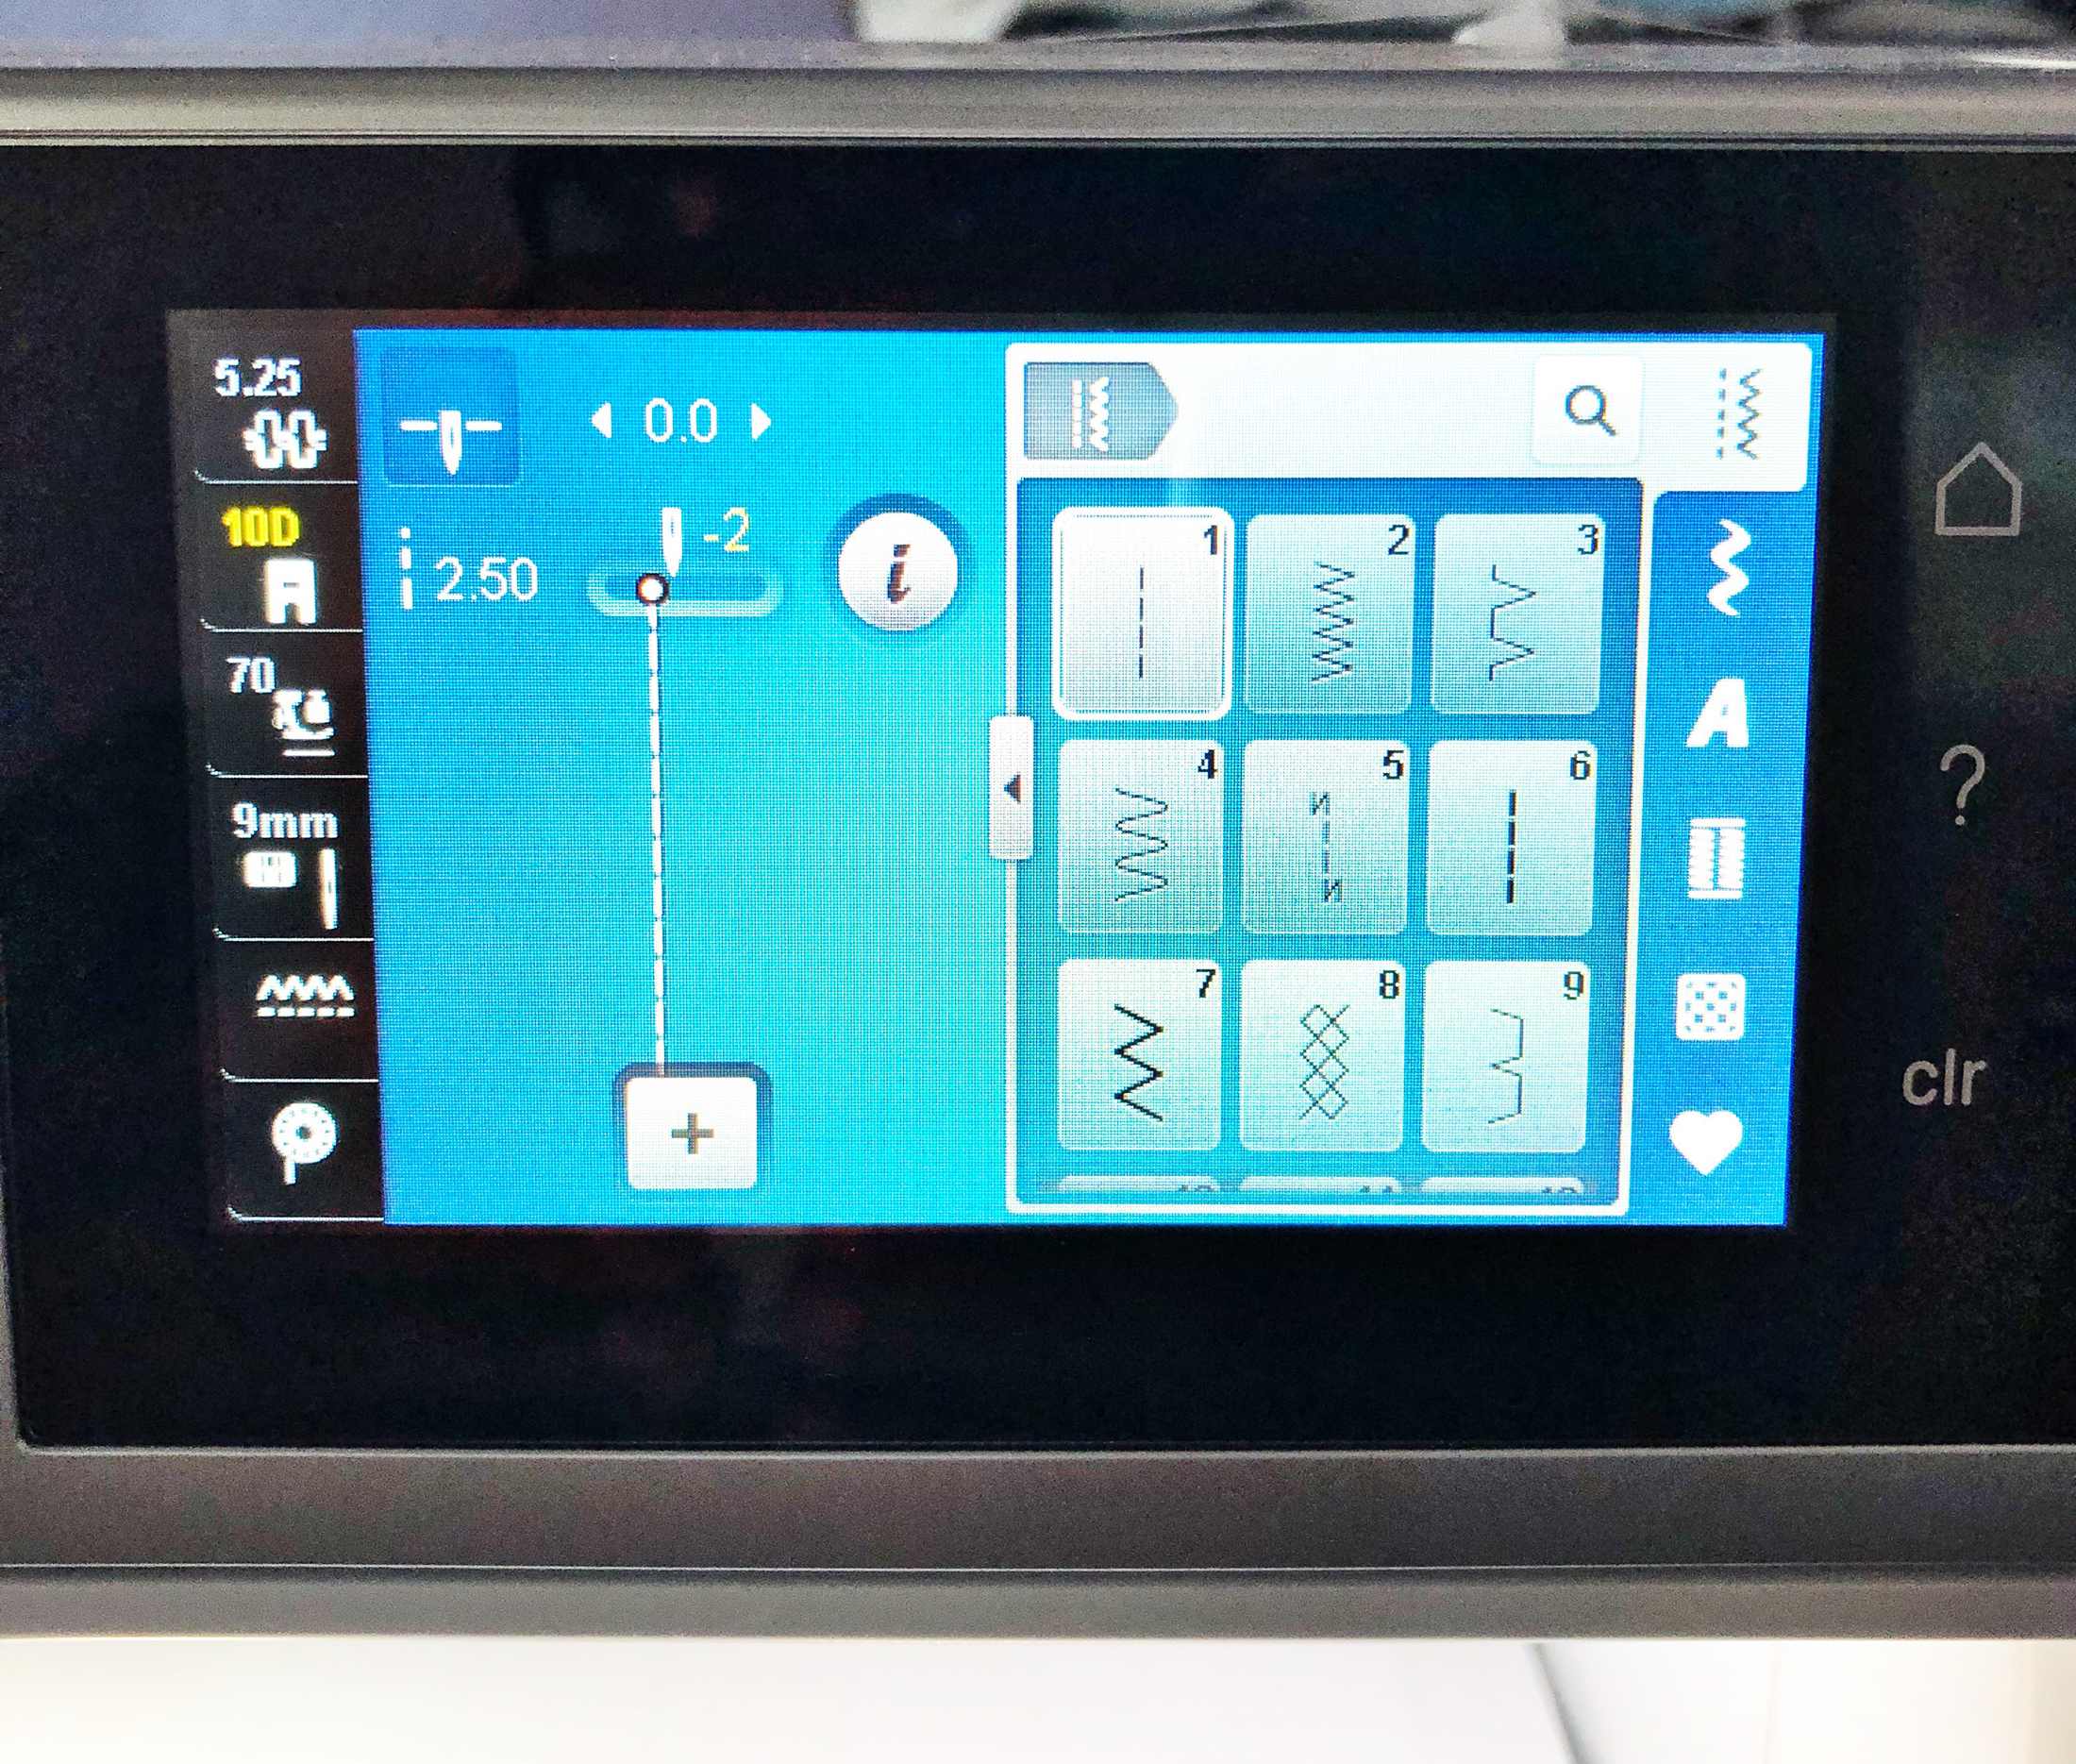
Attach Edgestitch foot #10D to your machine.
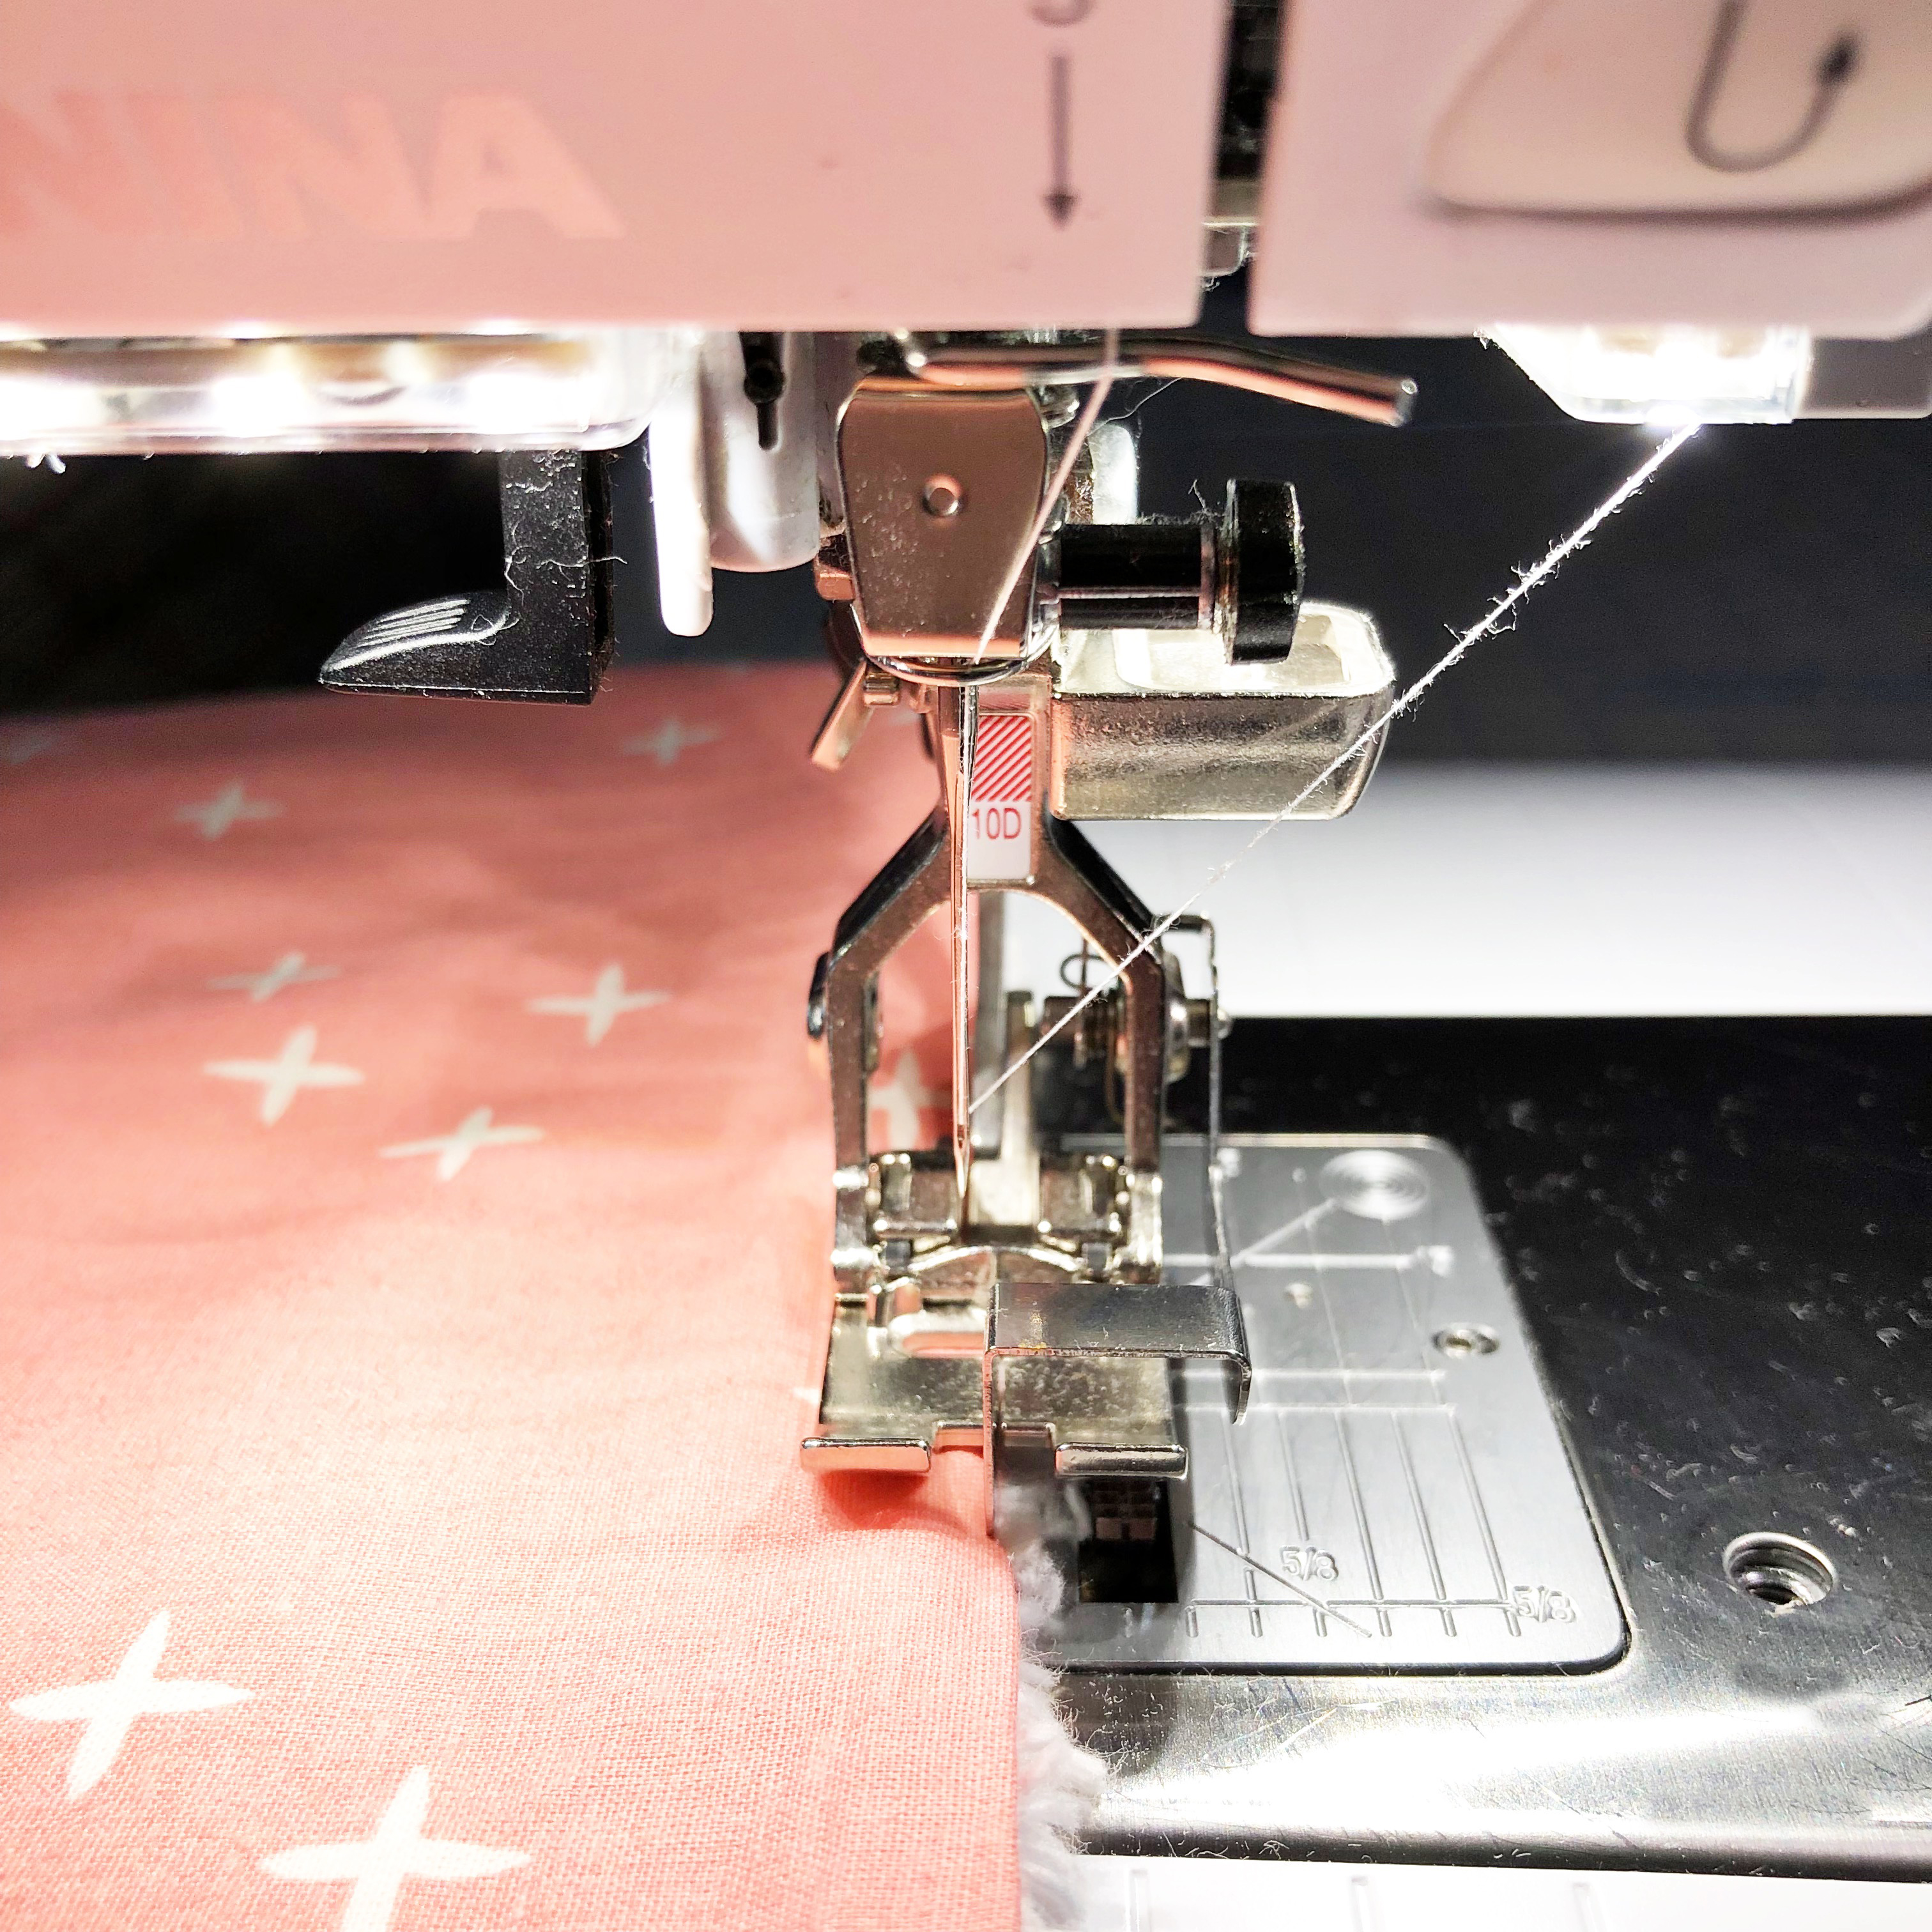
Place the burp cloth/teether under the presser foot where the 3-inch hole is. Line the edge of the fabric up against the guide and change the needle position to -2.
Stitch all the way around remembering to backstitch. Repeat for each piece.
Step 7 – Topstitching
Burp Cloth:
Attach the Reverse-pattern foot #34D to your machine.
Using a ruler, divide the burp cloths into three and draw two lines using a fabric marker.
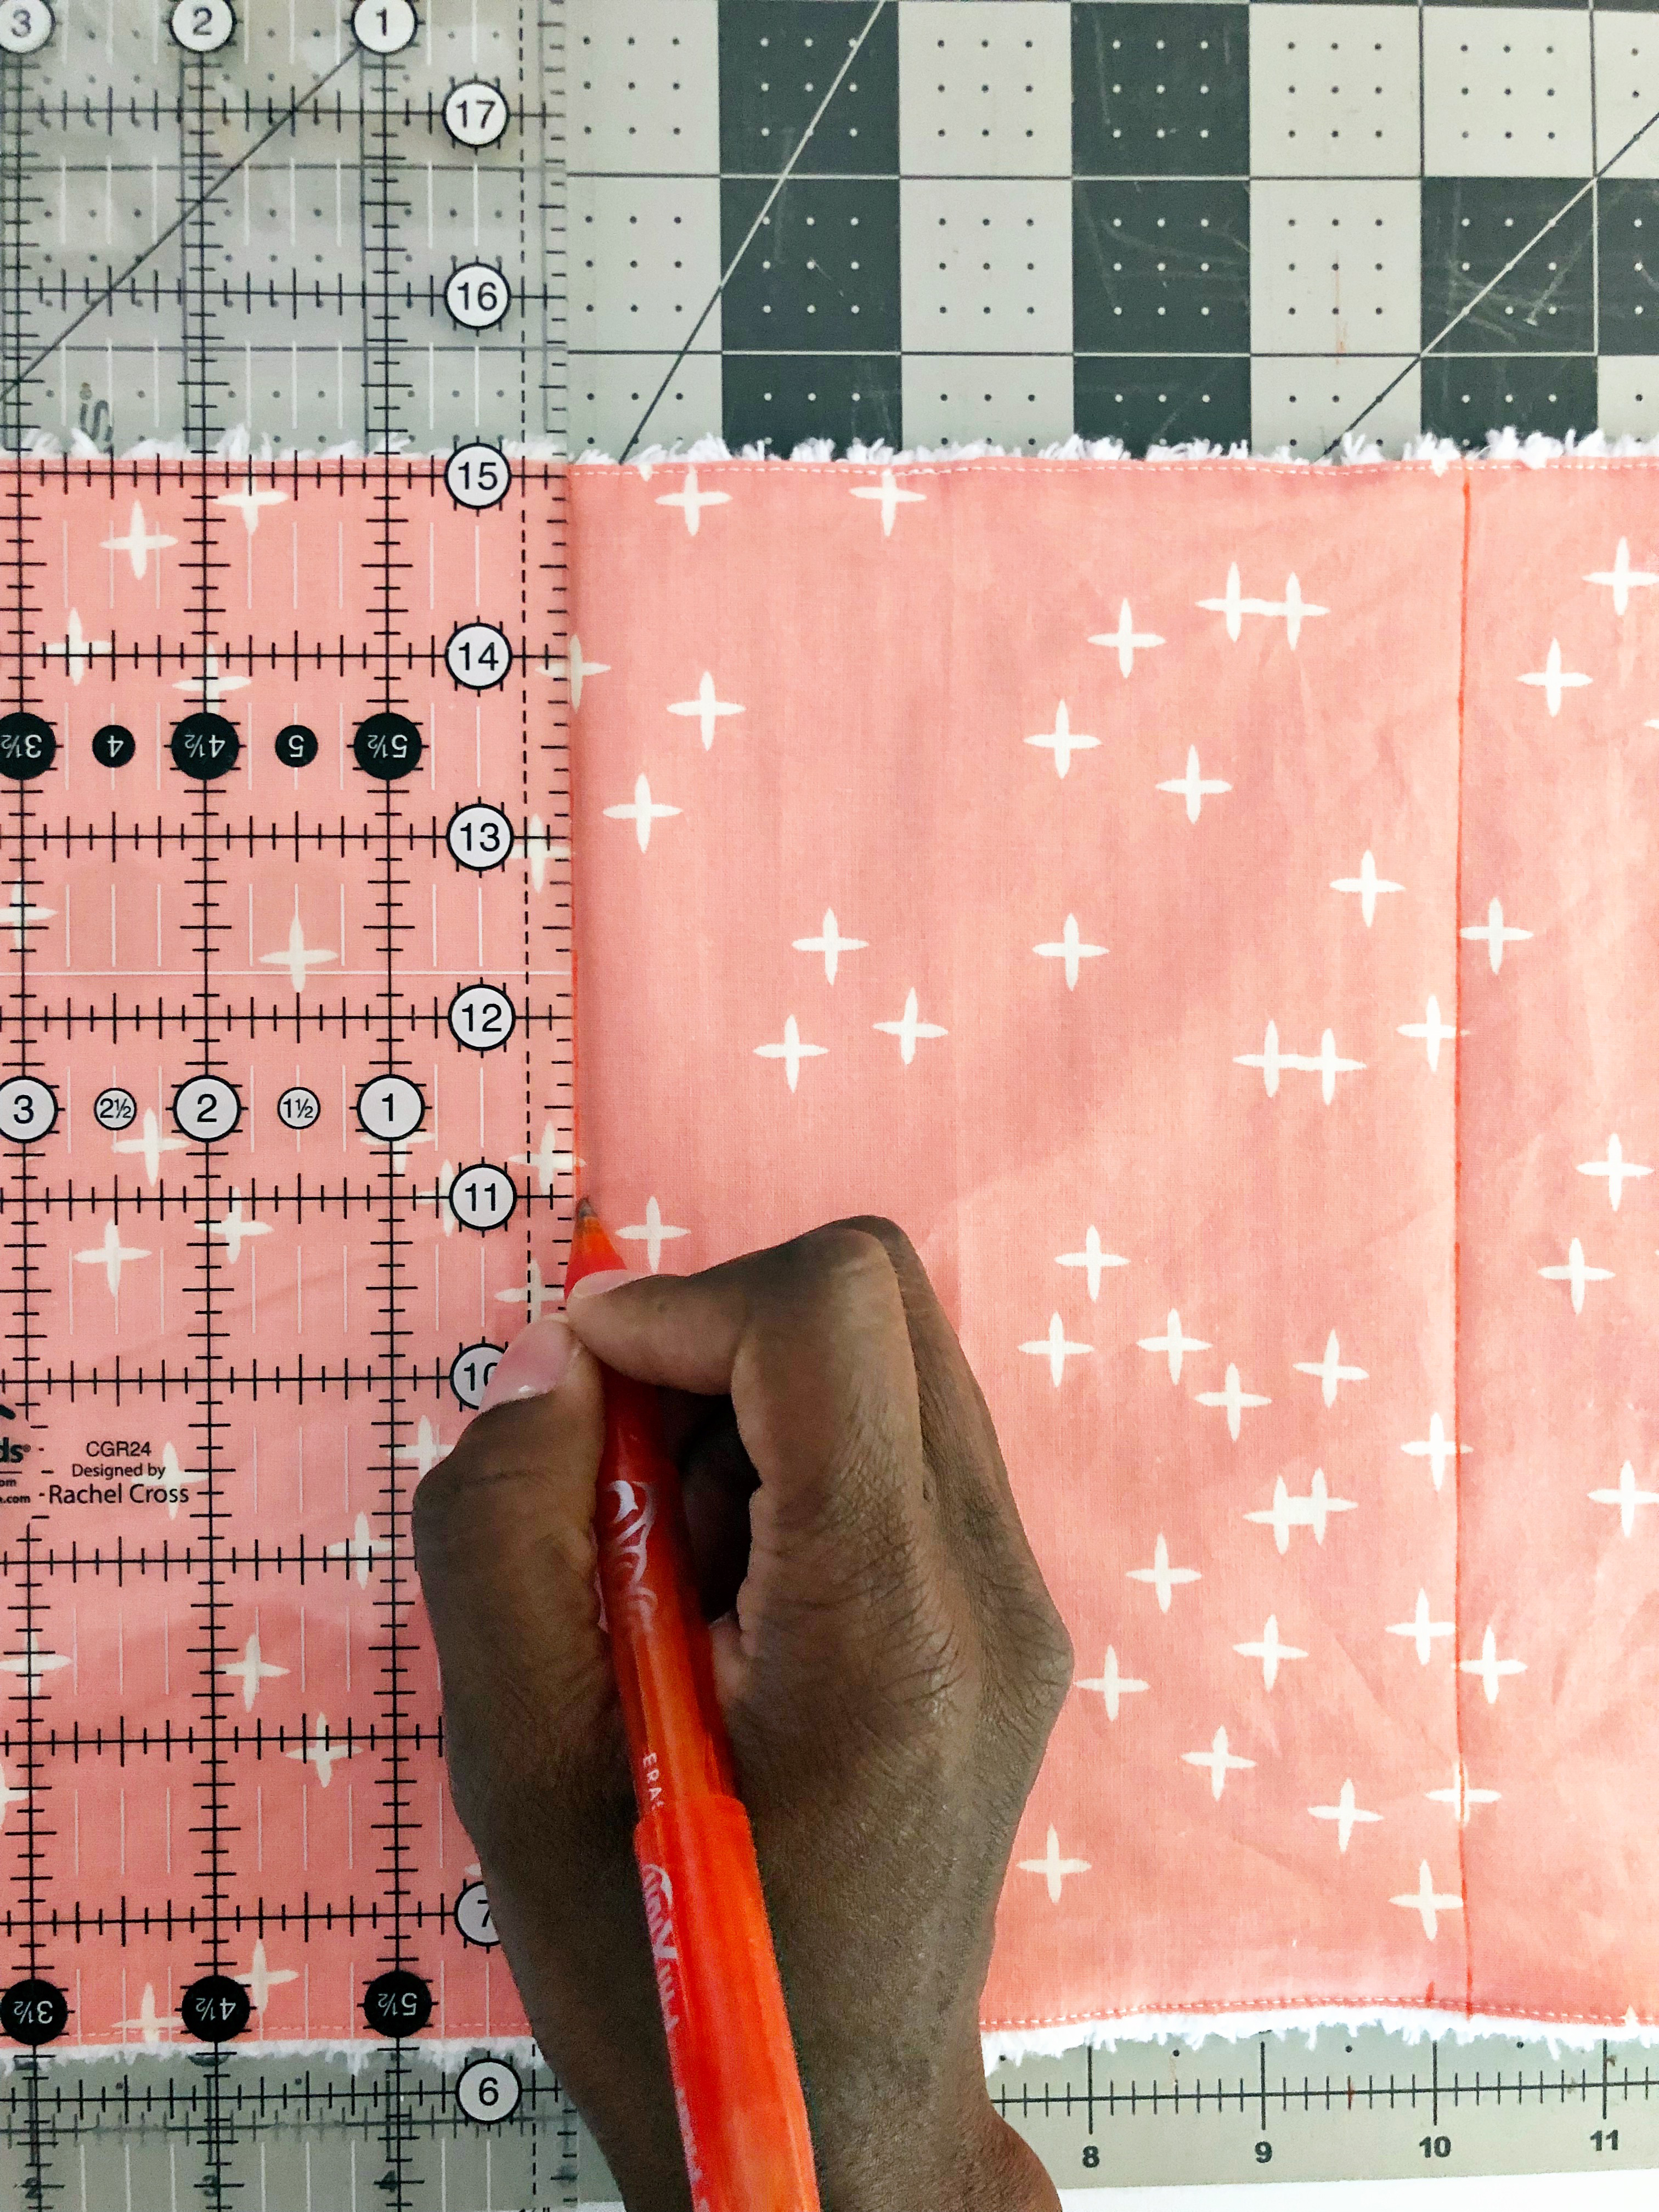
Stitch straight down the line.
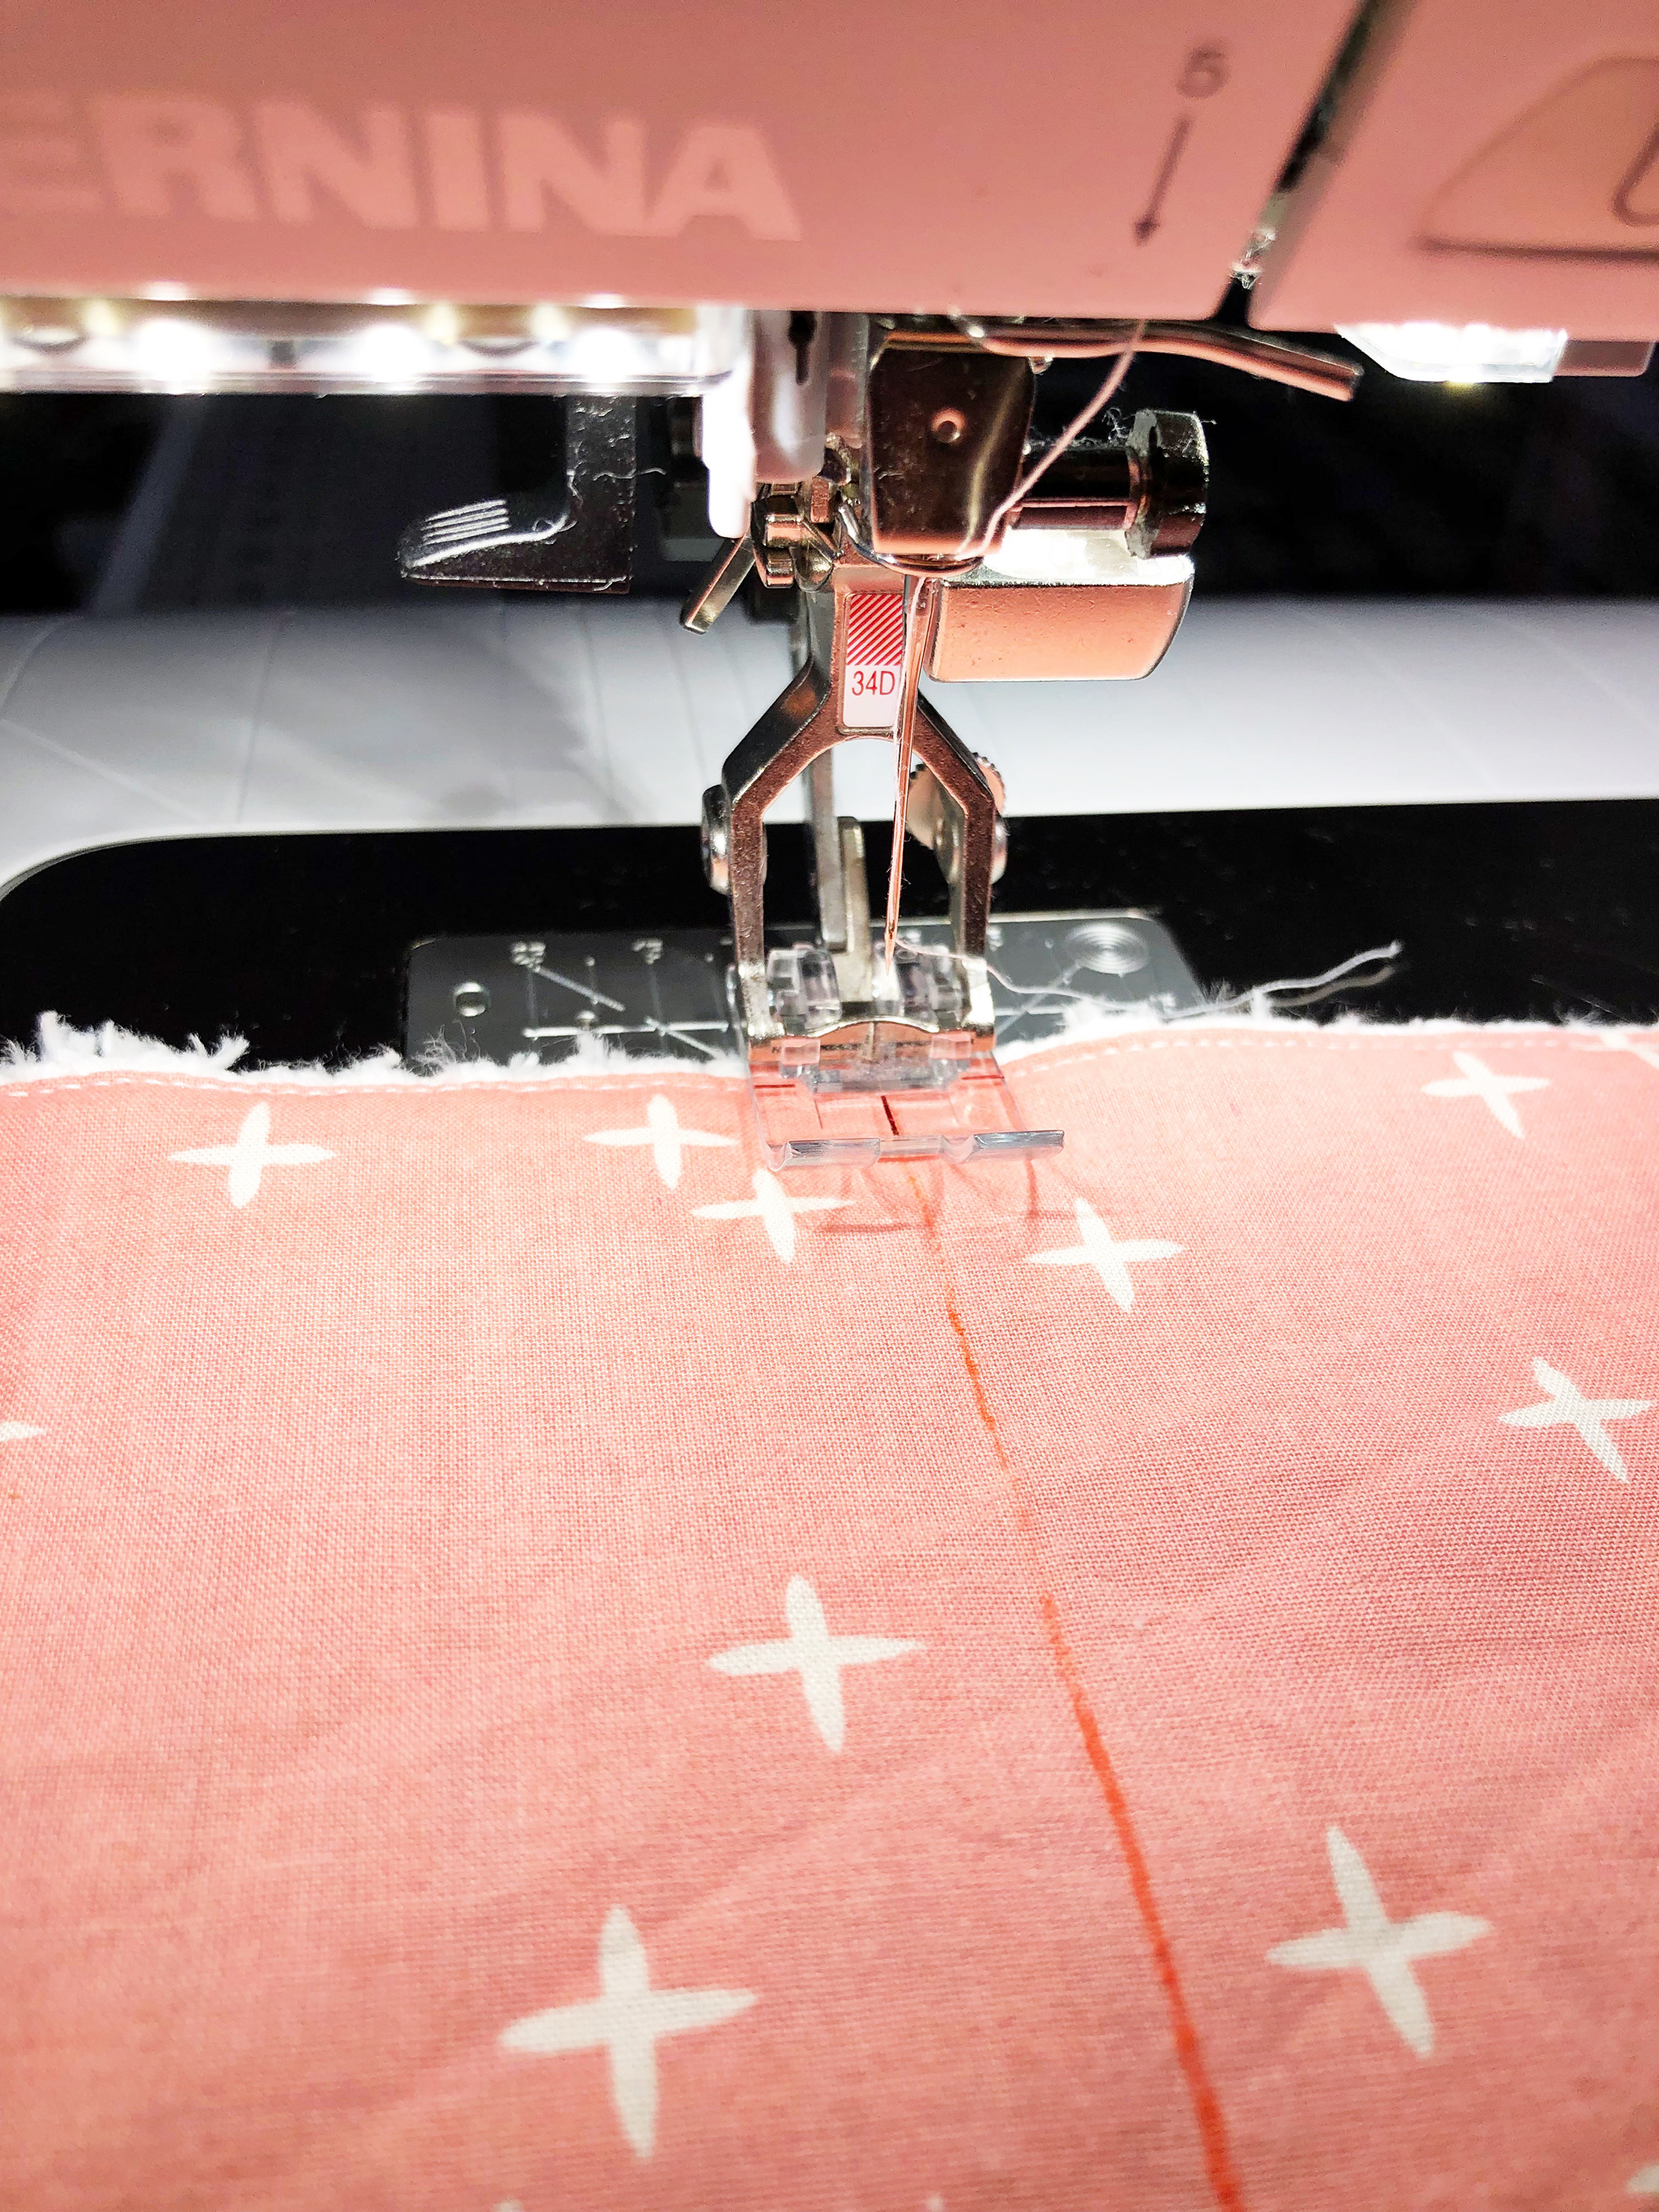
This stitch will allow the burp cloth to fold neatly.
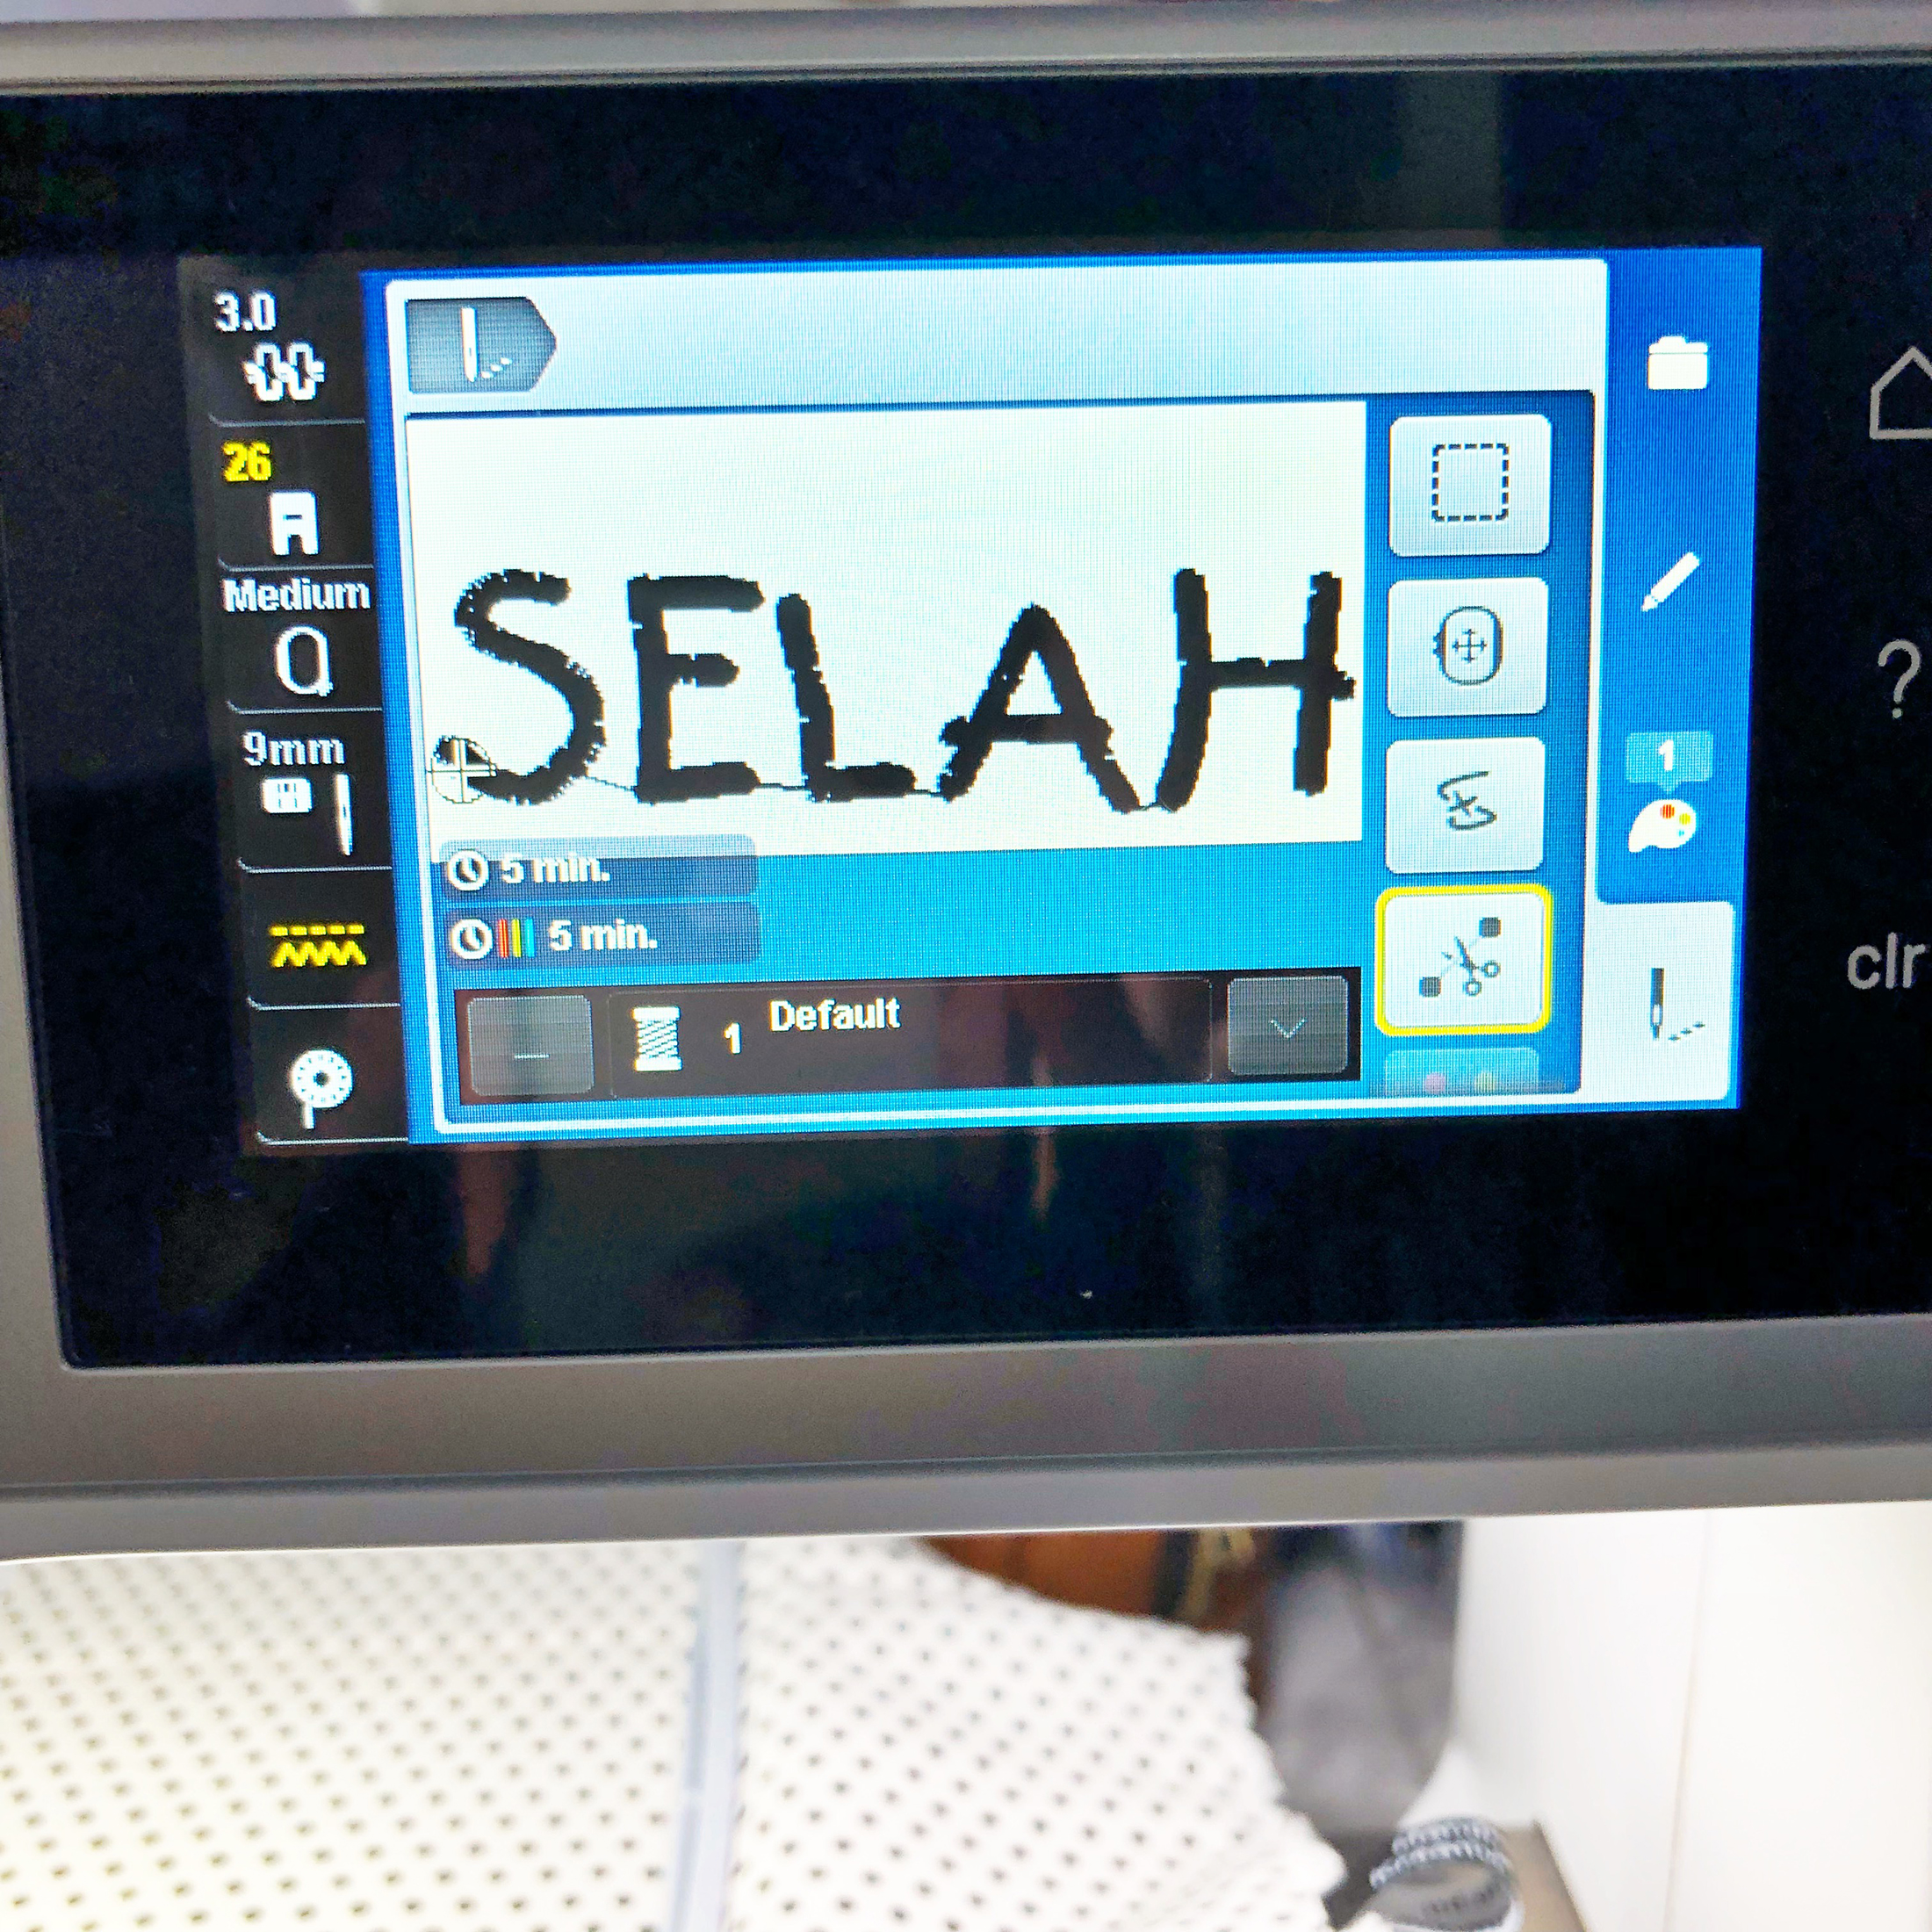
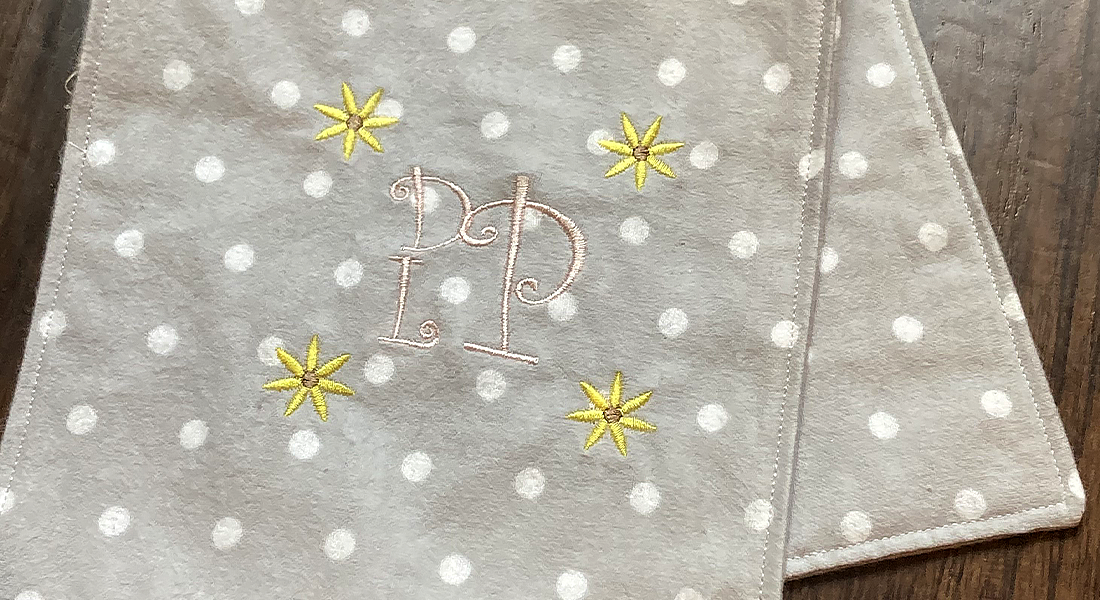
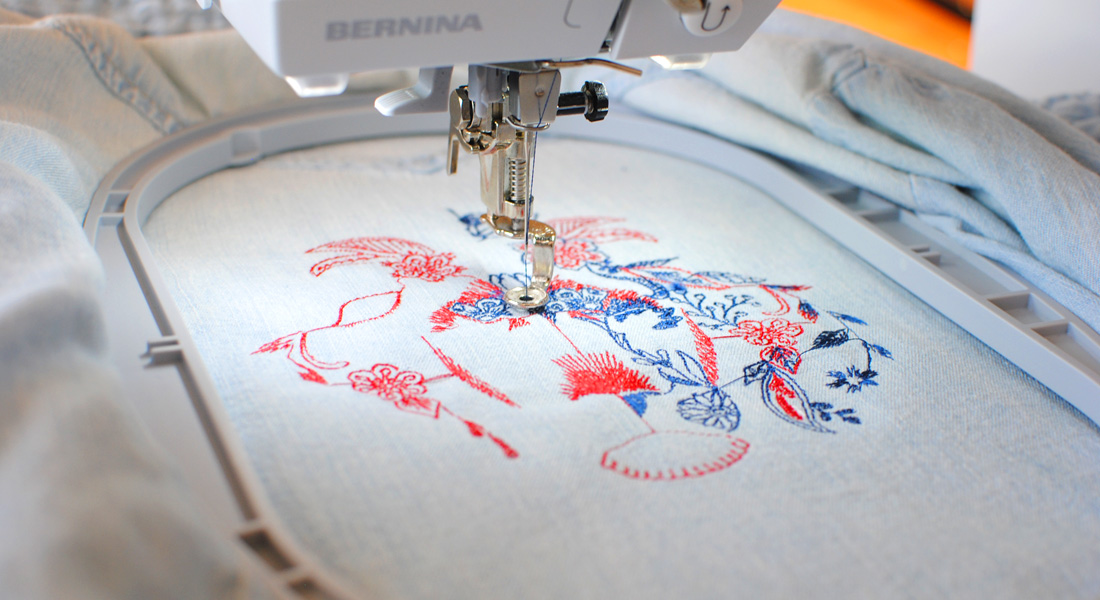
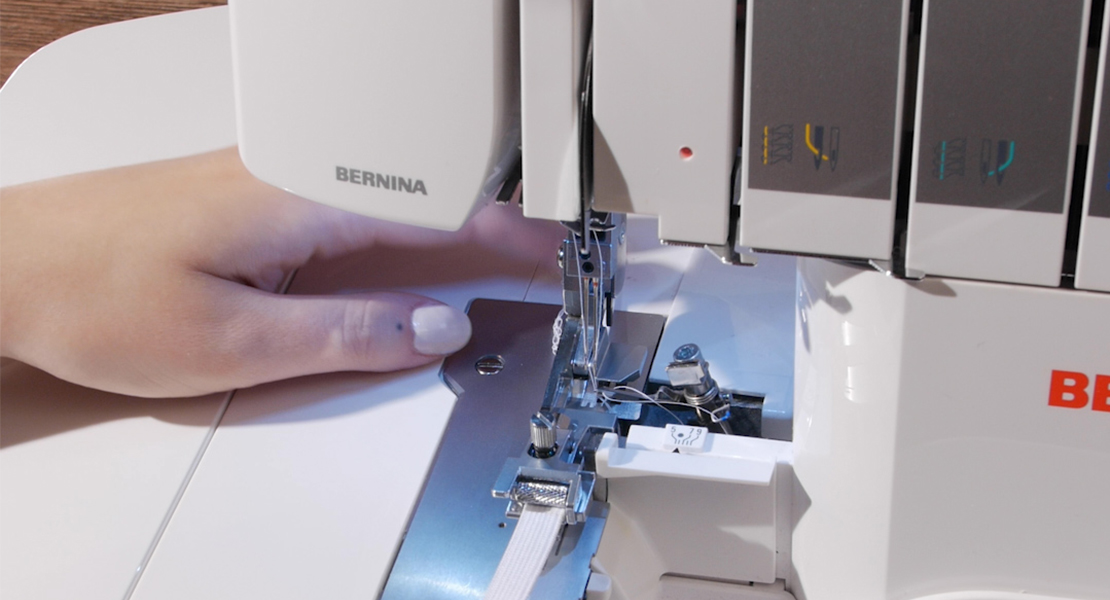
Step 8 – Embroidery Setup
Make sure the machine is turned off. Attach the embroidery module M, embroidery foot #26 to your machine and change the needle to an embroidery needle. Turn the machine back on and hit the home button on your sewing machine and switch from sewing to embroidery.
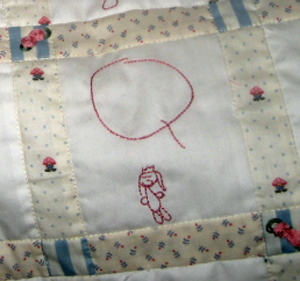
Design the look on the machine. Choose the alphabet style, spell out the name and set. Choose one color and move the design where you want it to appear on the fabric.
Step 9 – Prepare the fabric to be hooped
Place down the base of the Medium Embroidery Hoop, then a piece of the tearaway stabilizer, then the material and seal it with the inside part of the hoop. Make sure the stabilizer and the fabric are pretty taut.
Step 9 – Embroider
Hit the stitch-out mode. Follow the animation and attach the hoop to the module.
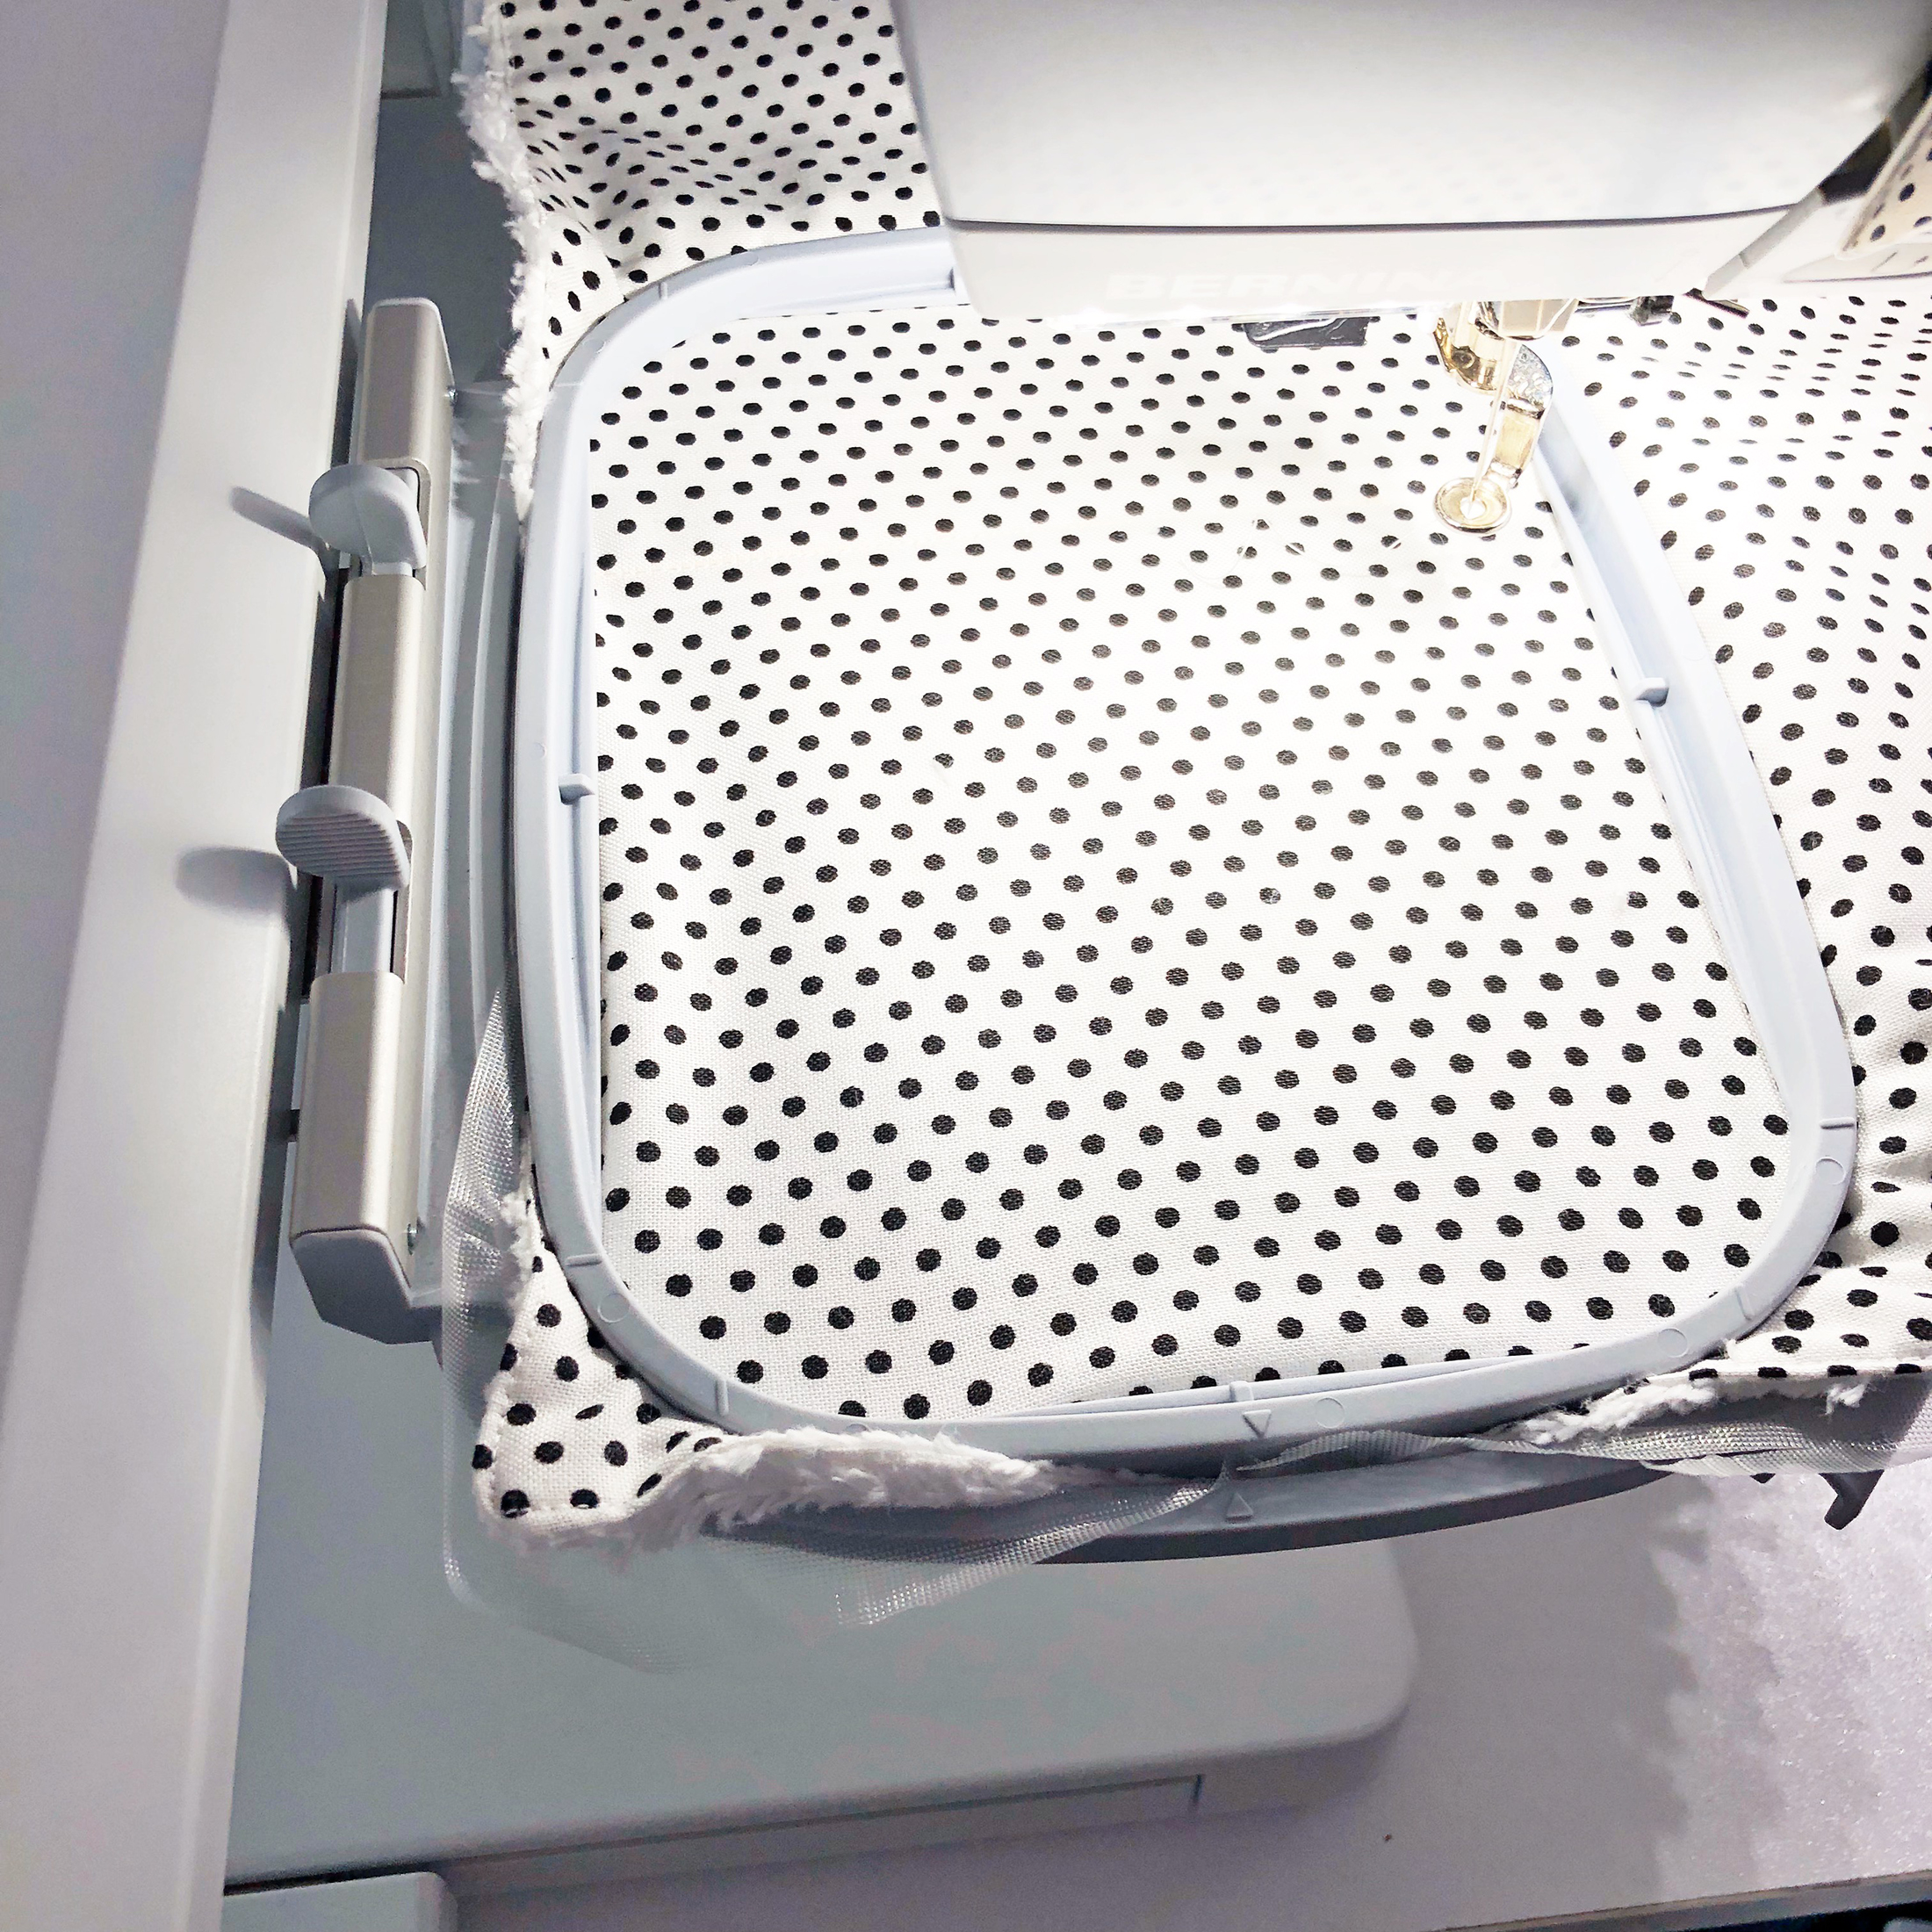
Press the start/stop button to start the embroidery.
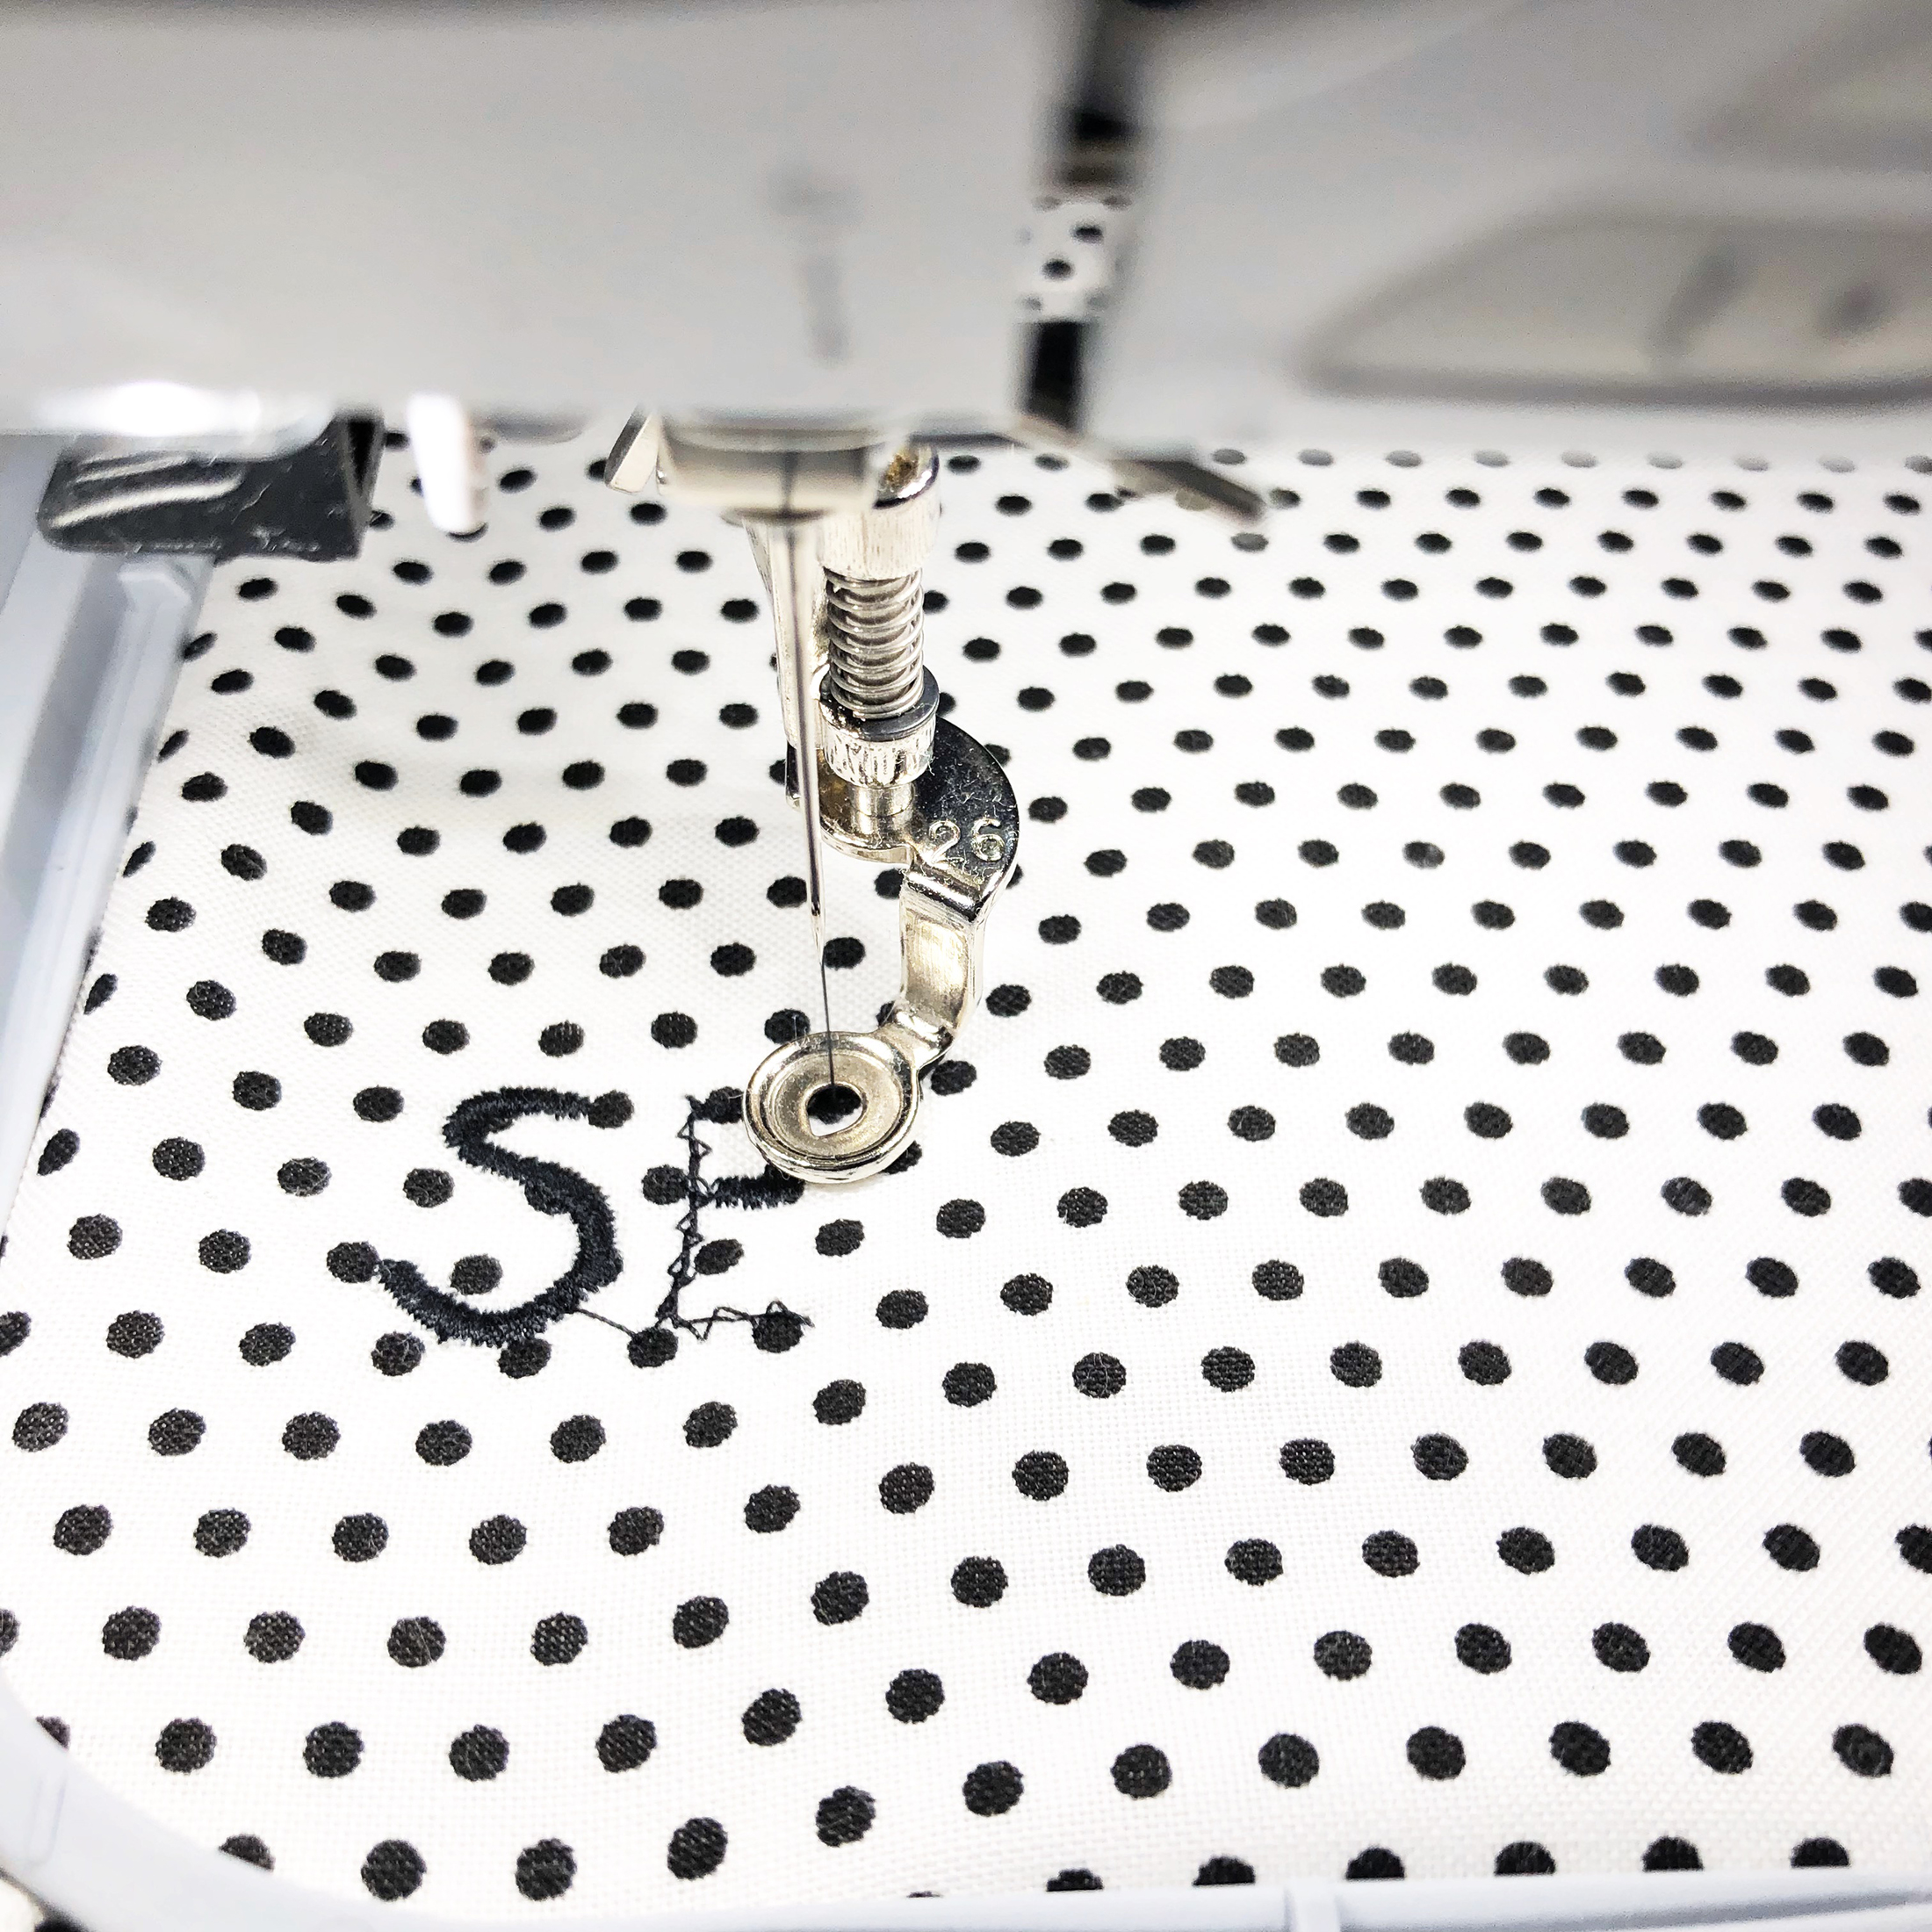
Repeat for each piece.
Step 10 – Attaching the teether to the fabric
Fold the fabric in half. Push the fold through the wooden teether, then pull the ends through the fold and pull.
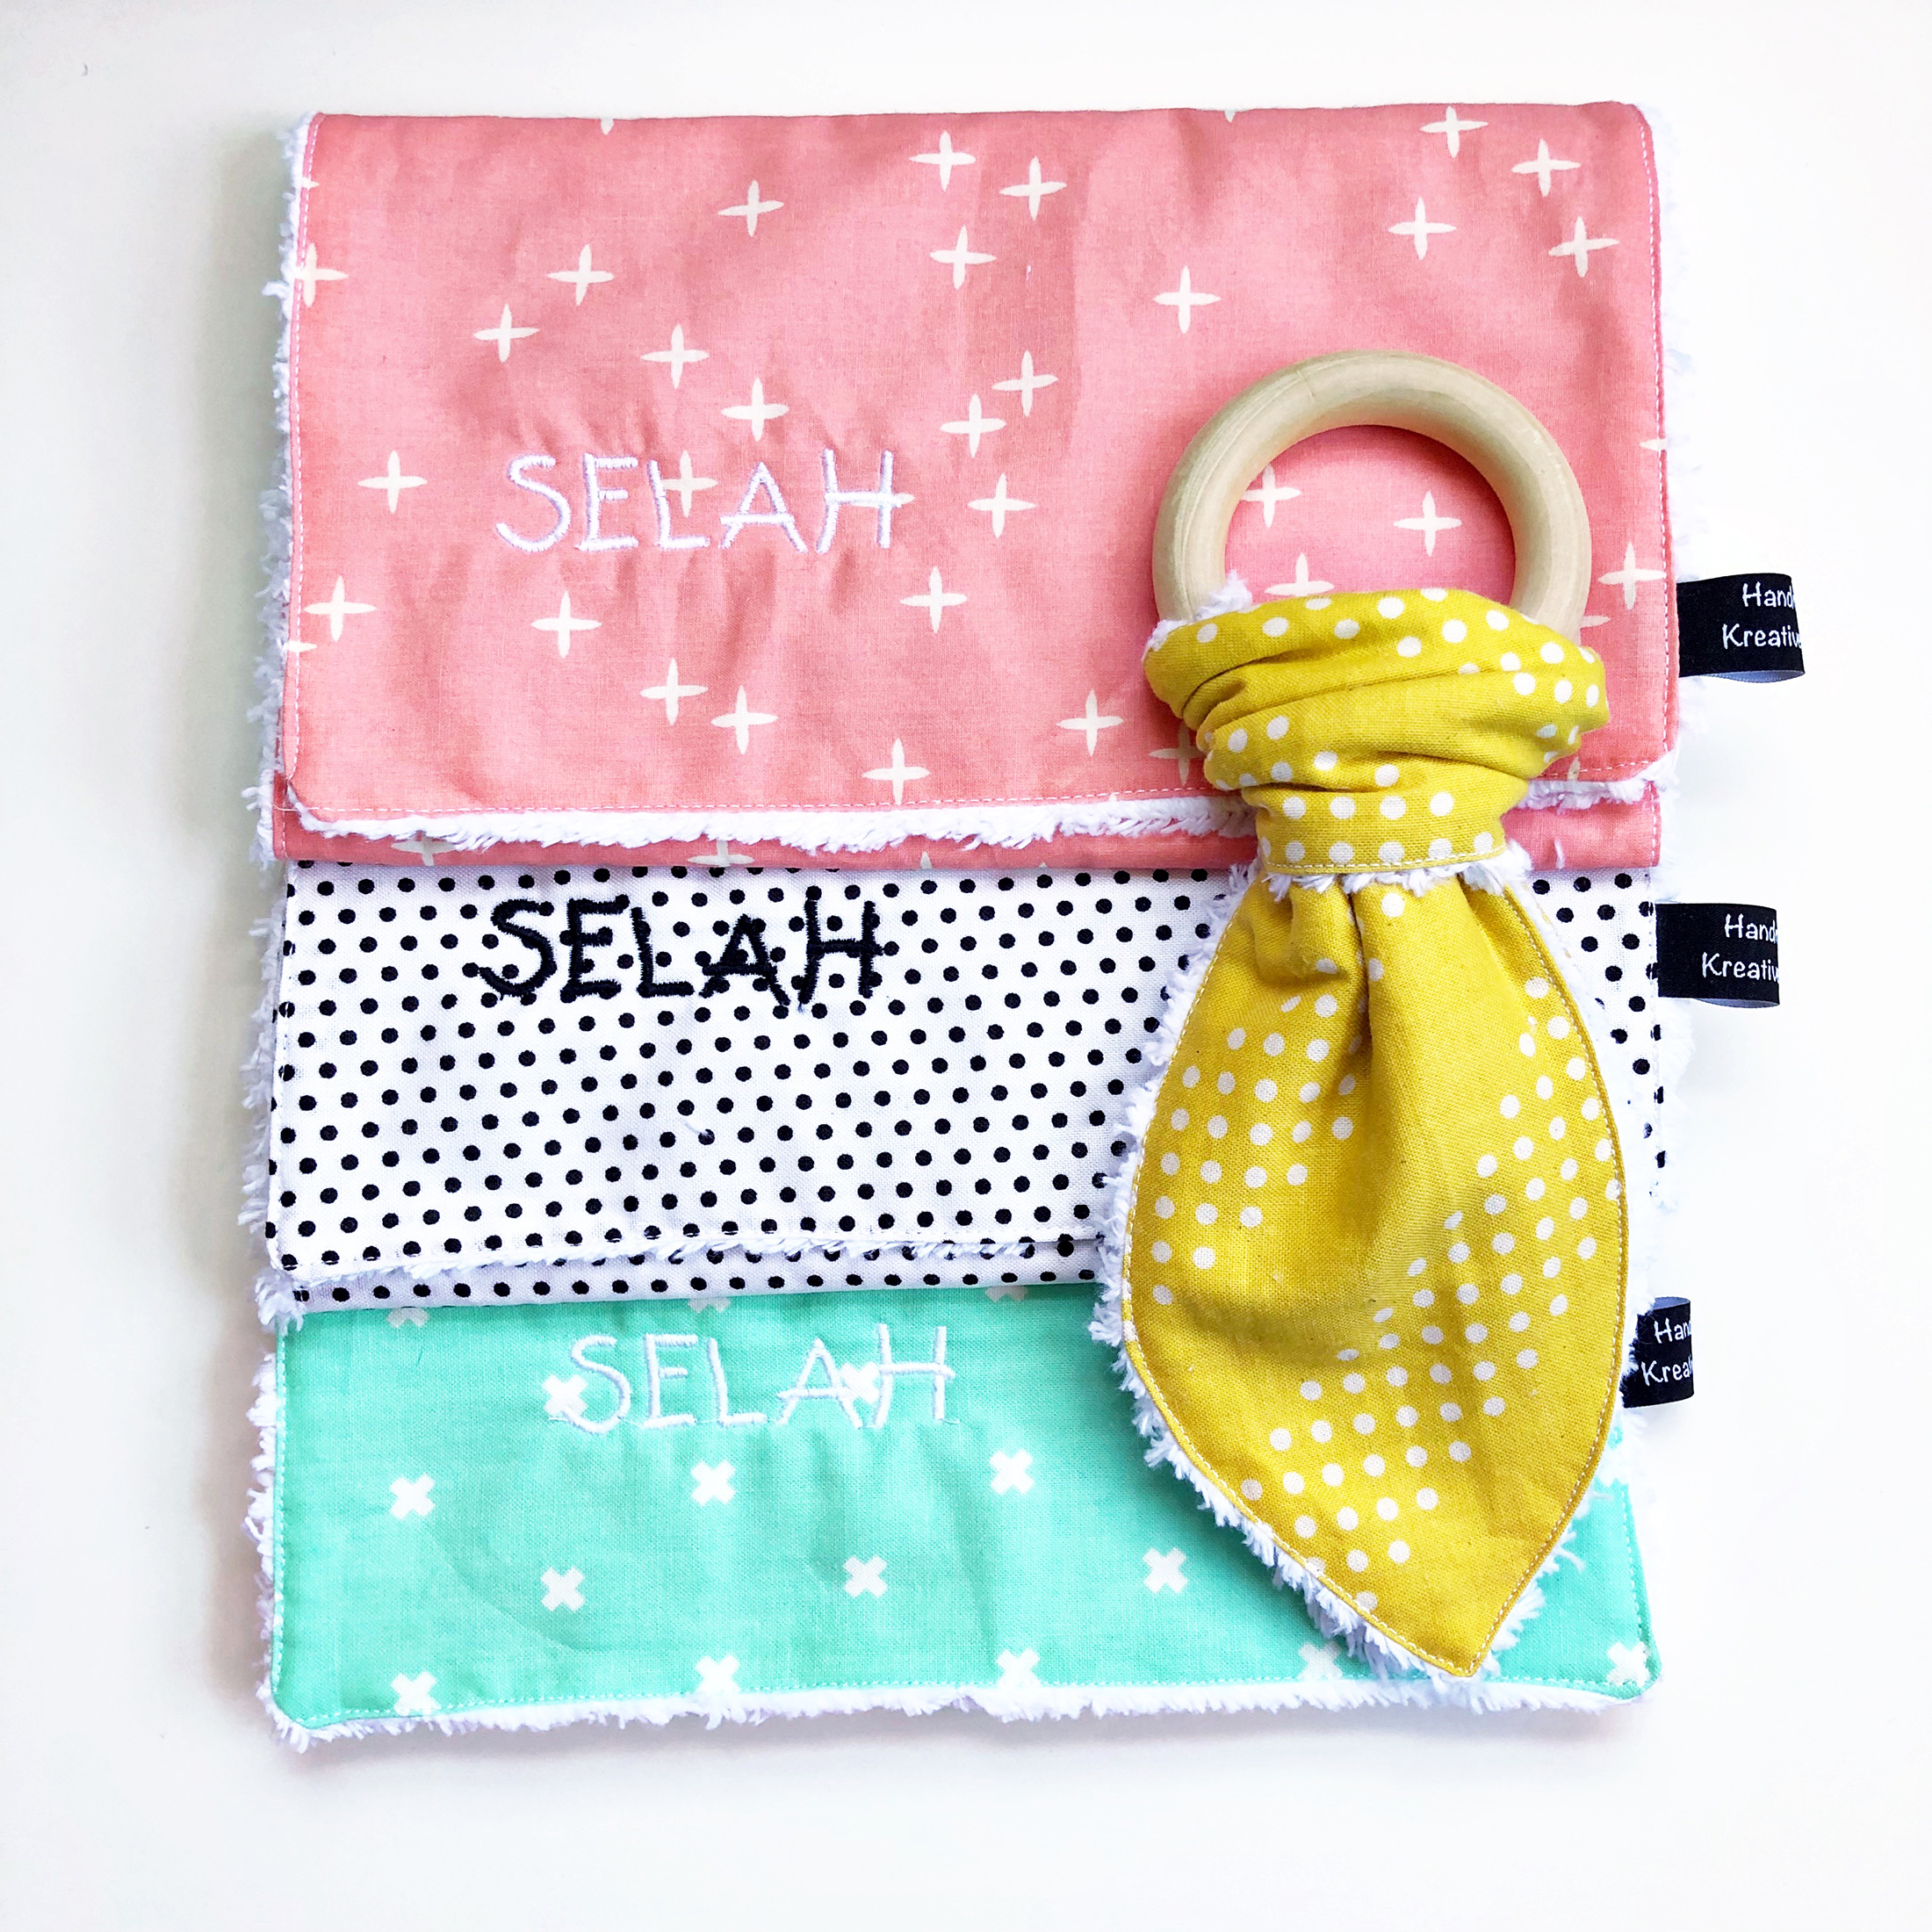
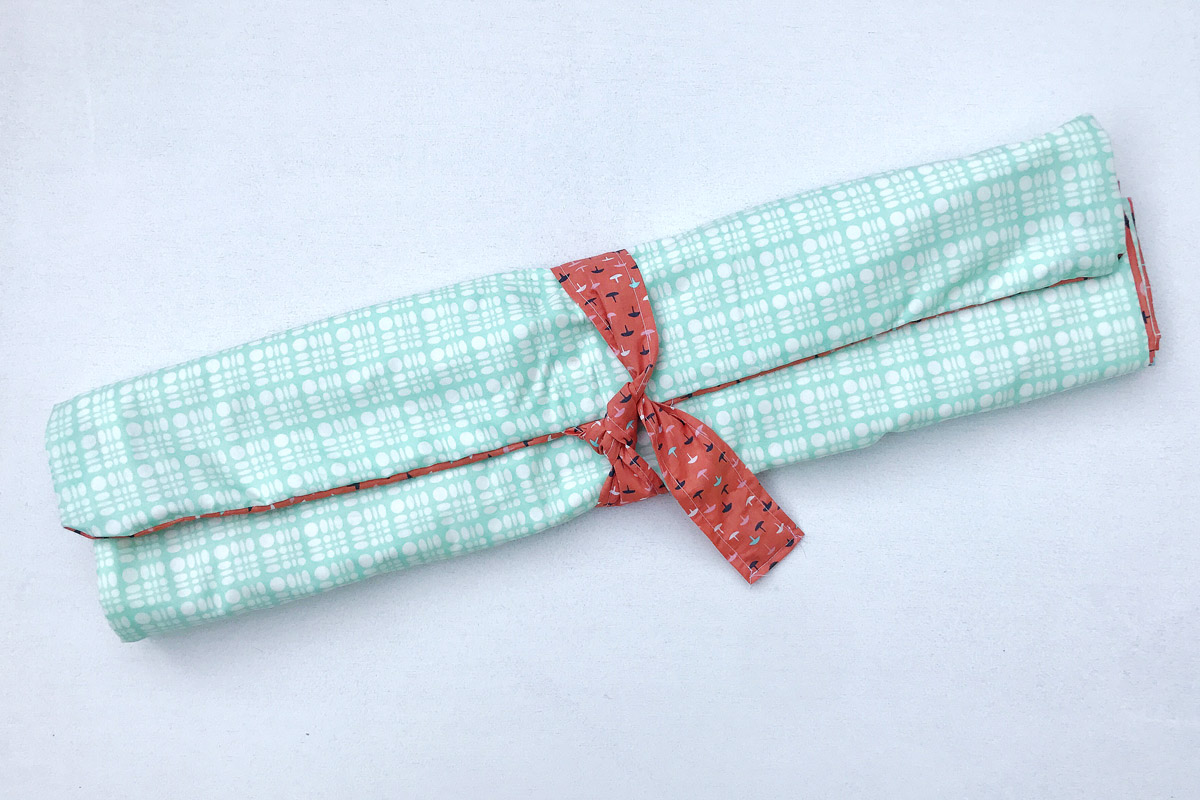
Step 11 – Packaging
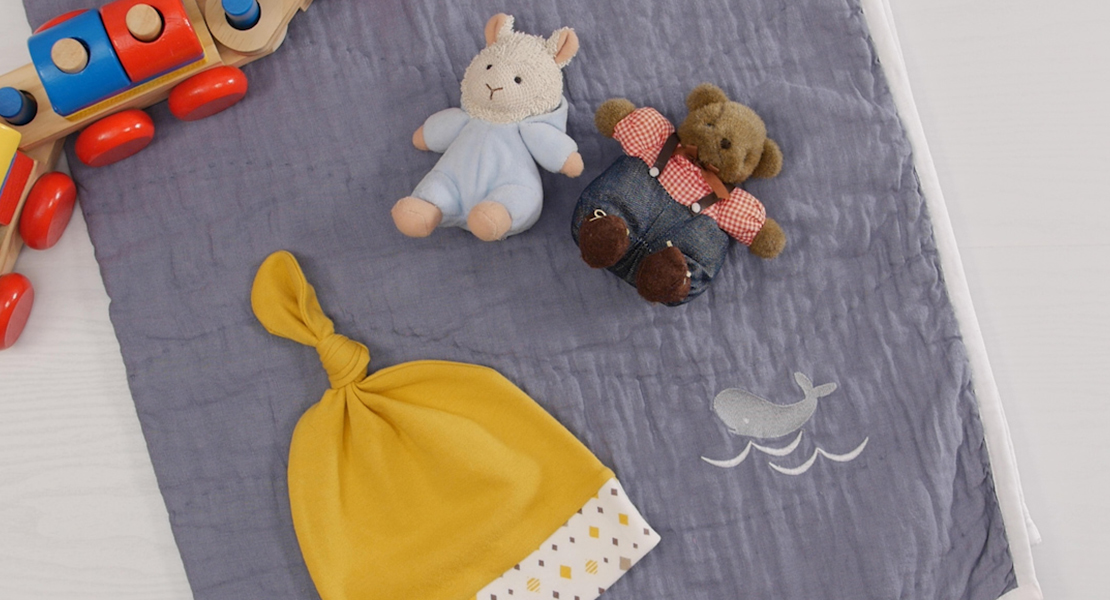
Fold/roll the burp cloth and place them in the mini suitcase. Place the teether on top. Gift or mail your package off to a new mom!
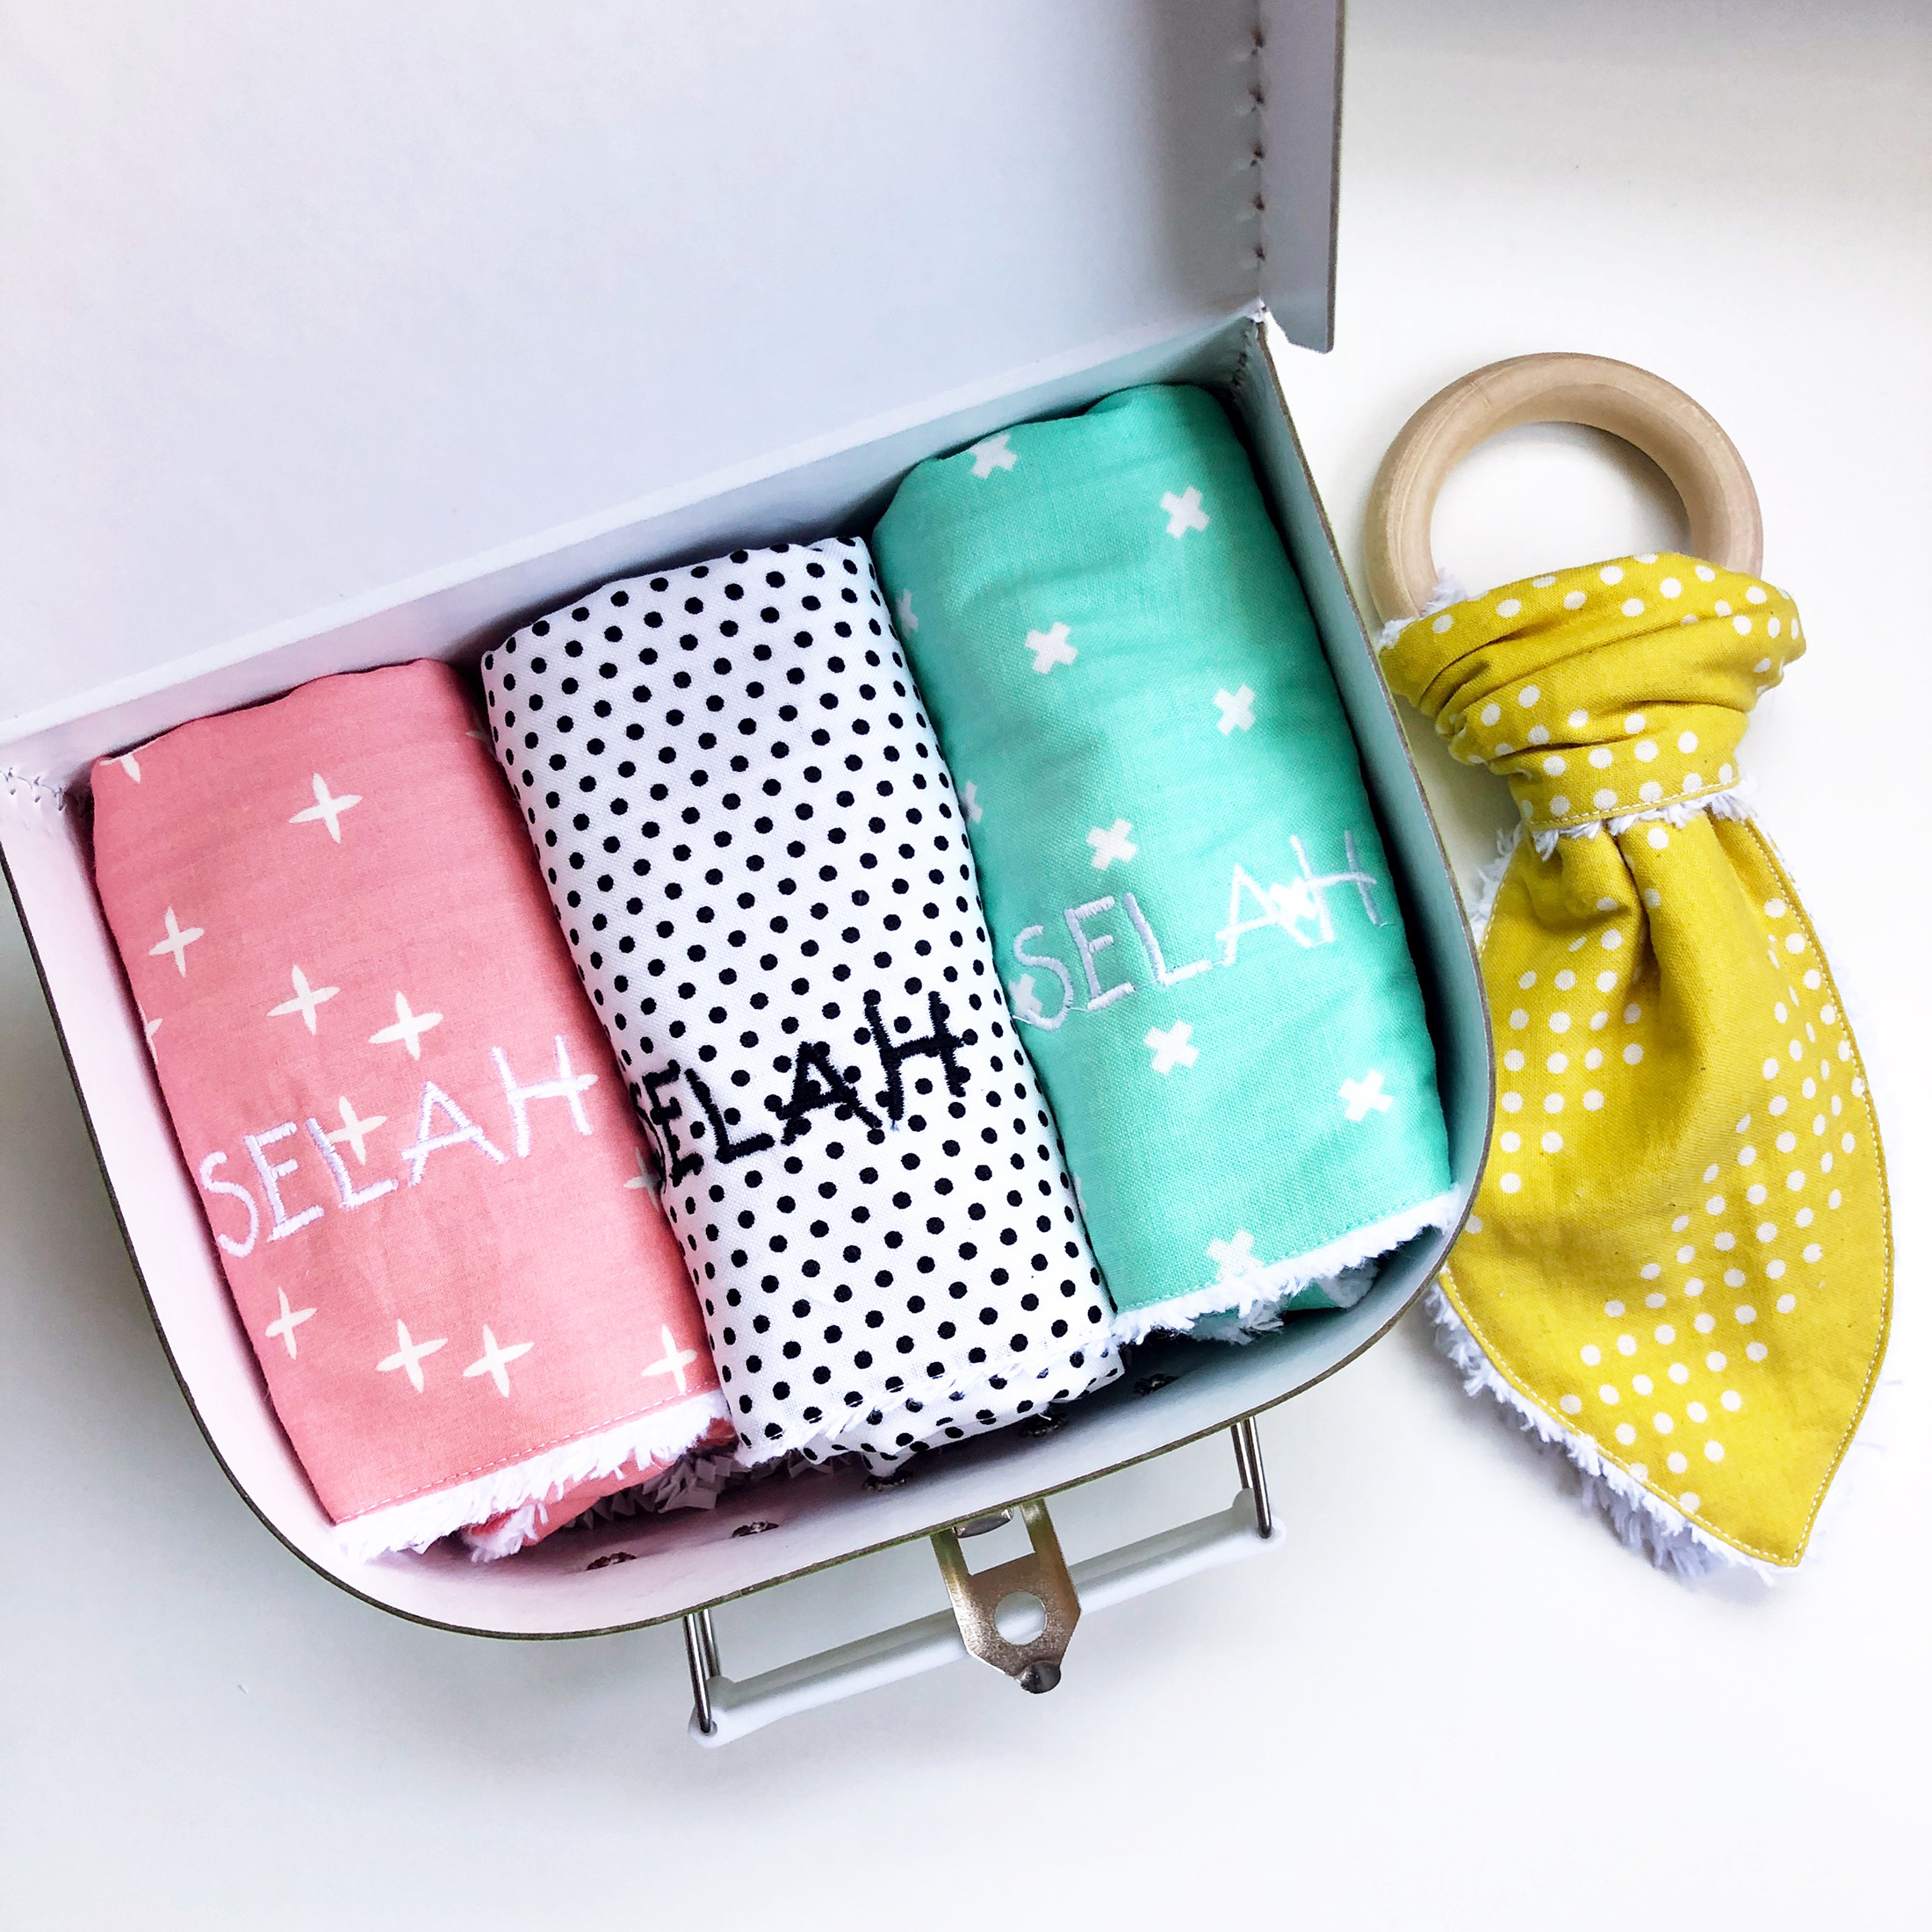
These baby burp cloth and teether are a perfect gift for new moms, dads, and babies!
Used Products


What you might also like


10 comments on “DIY Baby Burp Cloths and Teether”
-
-
Hello Pamisf!! You are more than welcome. I used the Cricut Maker for this project. It cuts fabric.
-
-
Love the word “selah” on these.
-
Hello Raquel! Thank you! That’s my friend daughter’s name!
-
-
Thank you for the tutorial. These would be nice baby gifts to have on hand.
-
Hello Tootsie1! Yes, you can make a couple and keep them on hand instead of purchasing baby gifts. It’s more meaning behind it!! You are more than welcome.
-
-
Would it not be better to do the embroidery before sewing it to the back? That way you would not have the reverse letters showing up on the back. I know that side will be down on the shoulder but I think it might look a little more professional done the other way.
-
Hello Sharon,
You can embroider these burp cloths before sewing them. Since I used chenille, you hardly see the embroidery on the back.
-
-
I see these teethers all over in stores and now I can make my own with cute fabric. What size of teether did you use?
-
Hello Linda,
I used Natural Wood Teethers that was 70mm in size. Here’s the link: https://amzn.to/3m485Sh
-
Leave a Reply
You must be logged in to post a comment.

Thanks for a lovely and inspirational tutorial. What type of electronic cutter did you use?