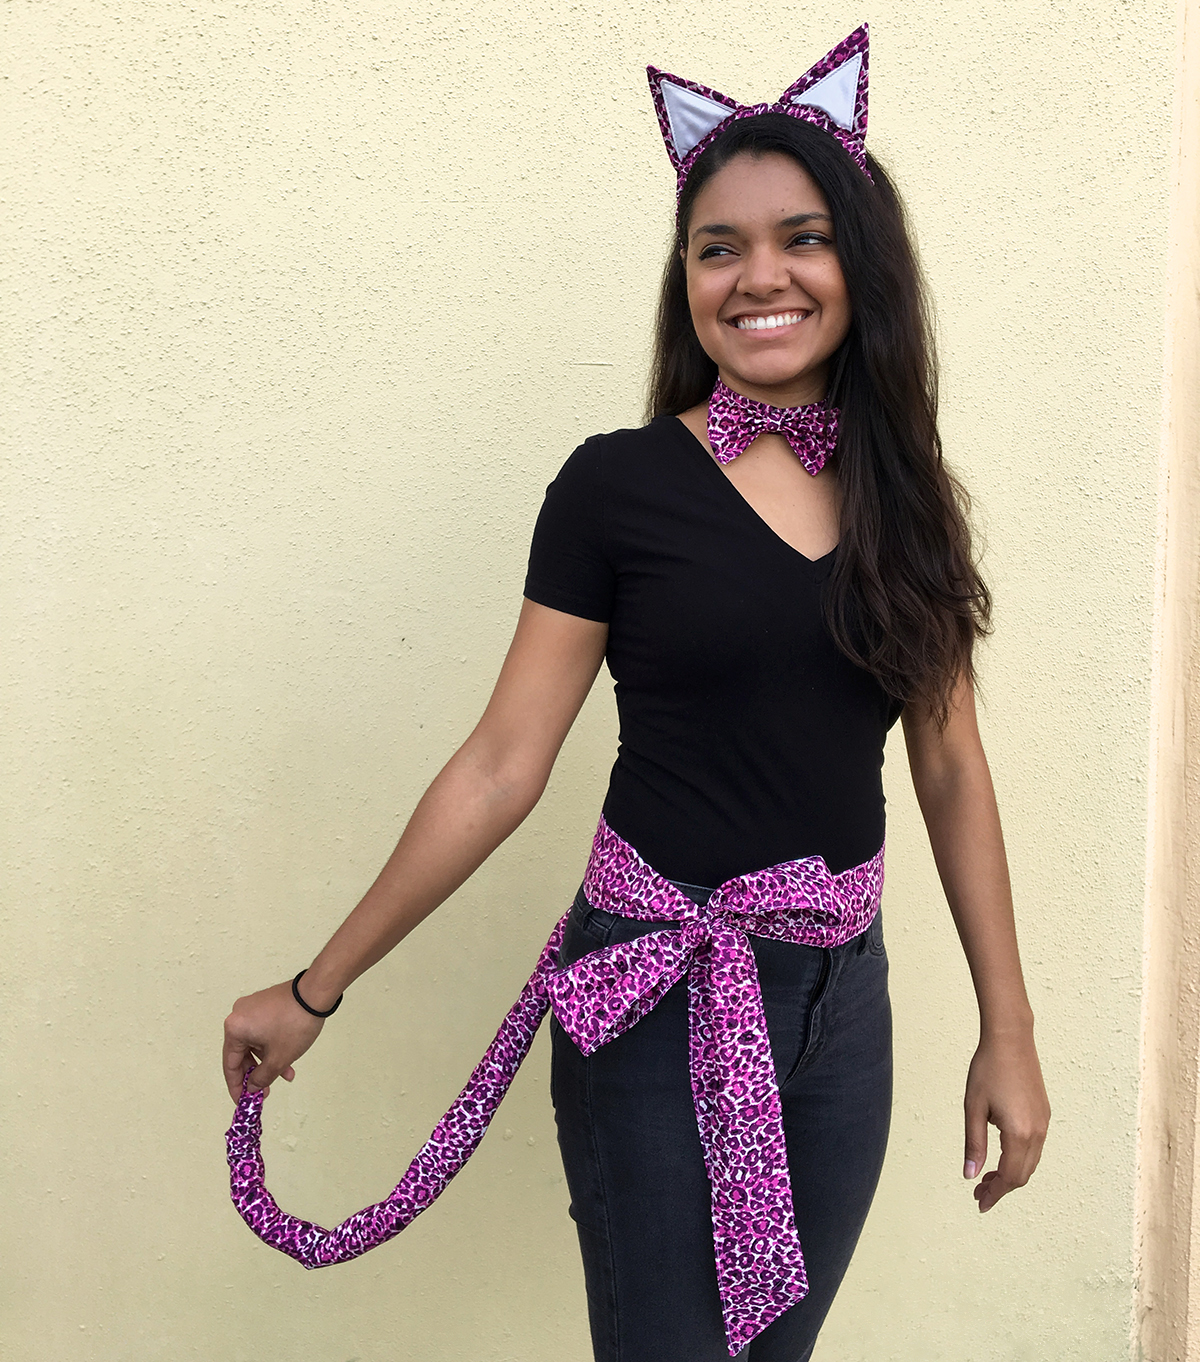
Kitty Cat Costume Tutorial
Hi Everyone,
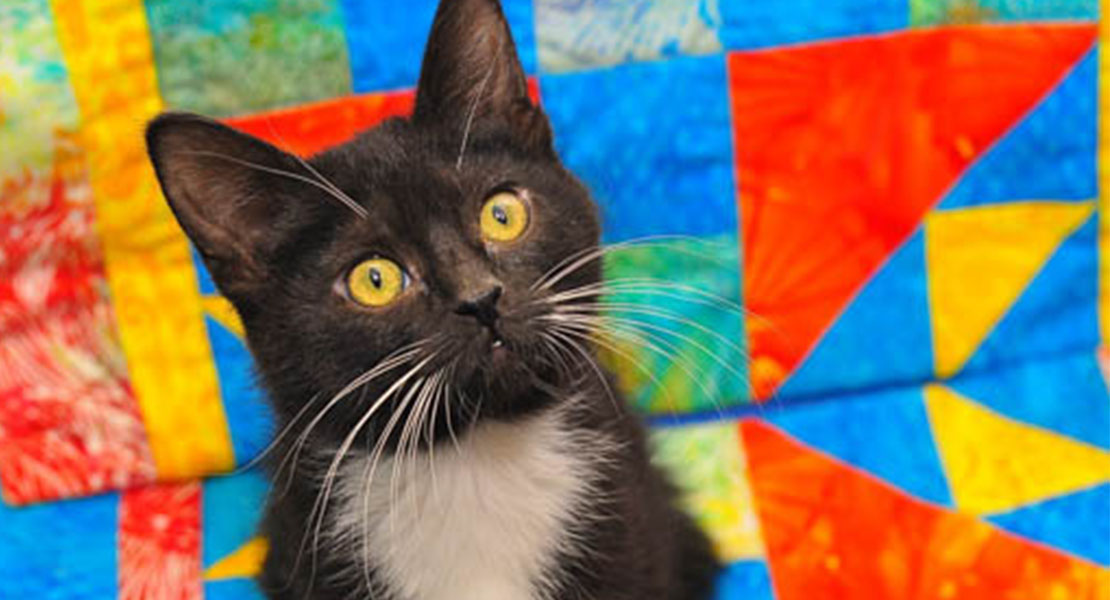
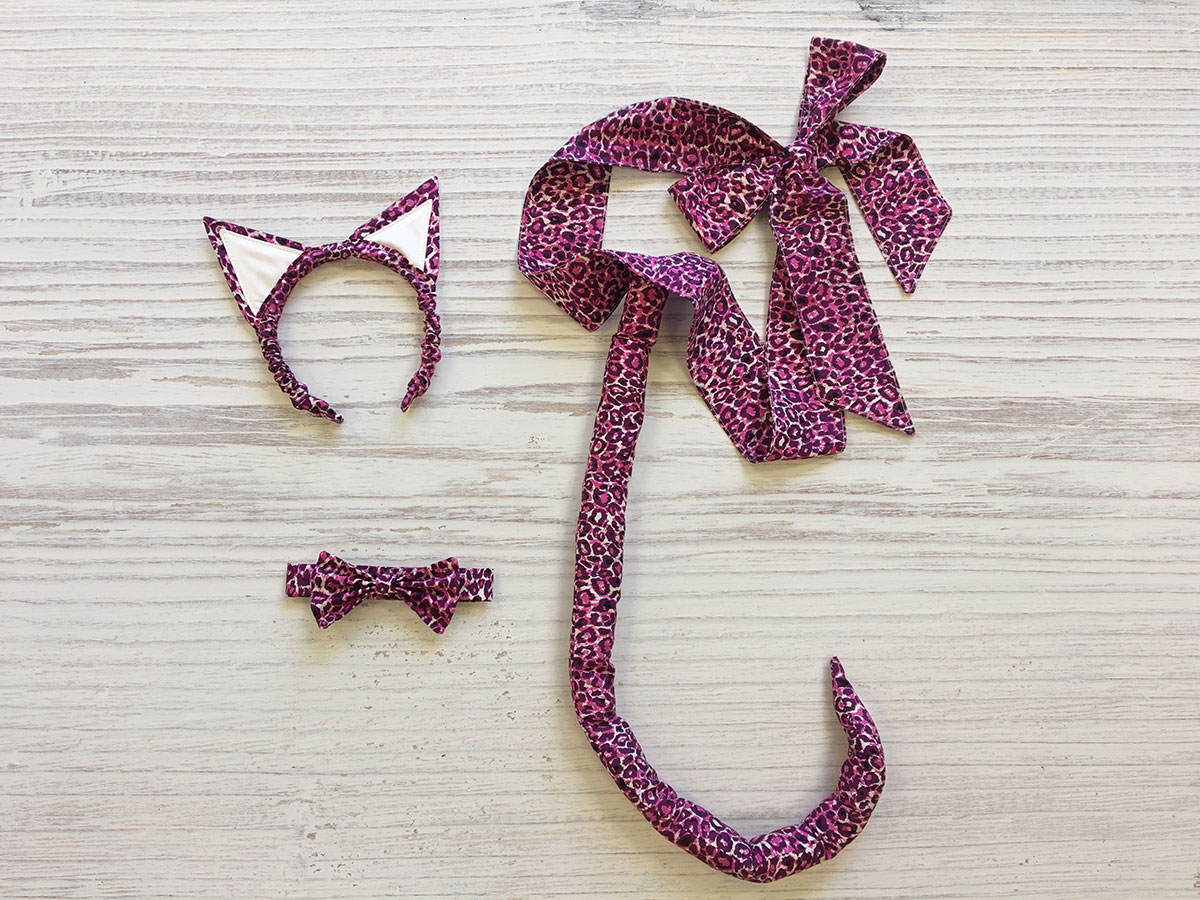
October is here and AGF loves any excuse to decorate the office with Fall/Halloween inspired crafty projects! It’s also time to start thinking about what we will be dressing up as for Halloween. Which inspired us to create the Kitty Costume Tutorial! Why go to the store and spend money on a costume that probably won’t make it til next year when you can make one yourself with no time at all. Gather your sewing friends and have a Pre-Halloween sewing party to create your costumes together! We made our Kitty Cat Costume with the “Leopardess” print from the Esoterra Fabric Collection. This three piece costume is sure to have your friends begging you to make their costume for next Halloween.
Materials to Make a Kitty Cat Costume
Fabrics Used:
Fabric A- EST-76505- Leopardess
Fabric B- PE-433- Snow
Cut the fabric as follows:
Cat Ear Headband
One (1) 2 1/2″ x 23 1/2″ strip from Fabric A
Four (4) 4 1/2″ squares from Fabric A
Four (4) 3 1/2″ squares from Fabric B
Two (2) 3″ square from Ultra Firm Fusible Stabilizer
Two (2) 2 1/2″ squares from Ultra Firm Fusible Stabilizer
One (1) 3/4″ wide headband (we bought ours at the Dollar Store)
Neck Tie
One (1) 2 1/2″ x 17″ strip from Fabric A
Two (2) 3 1/2″ x 5″ rectangle from Fabric A
One (1) 1 1/2″x 2 1/2″ strip from Fabric A
One (1) 2 1/2″ x 3/4″ wide strip of Black Velcro
Tail
Two (2) 6″ x WOF strips from Fabric A (Sash)
Two (2) 2 1/2″x WOF strips from Fabric A (Tail)
Other Materials:
- Sewing machine (we use a BERNINA 350 PE)
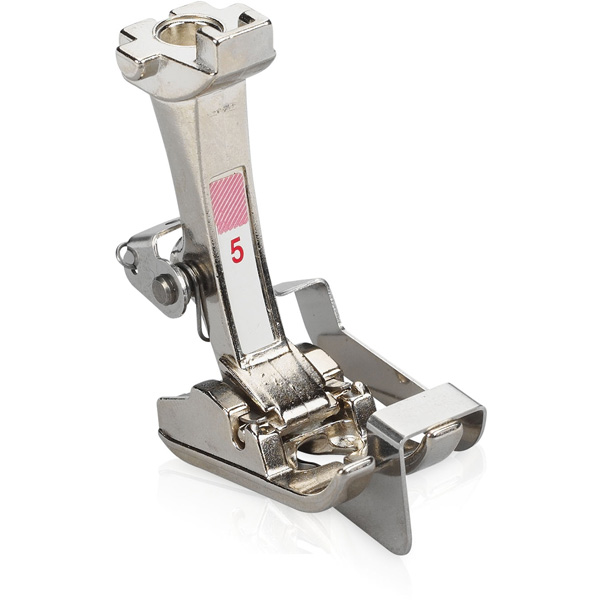
- Blindstitch foot #5
- Reverse pattern foot #1/#1C/#1D
- Polyfill
- 70″ bendable wire
Instructions to Make a Kitty Cat Costume
Step 1: Making the Cat Ear Headband
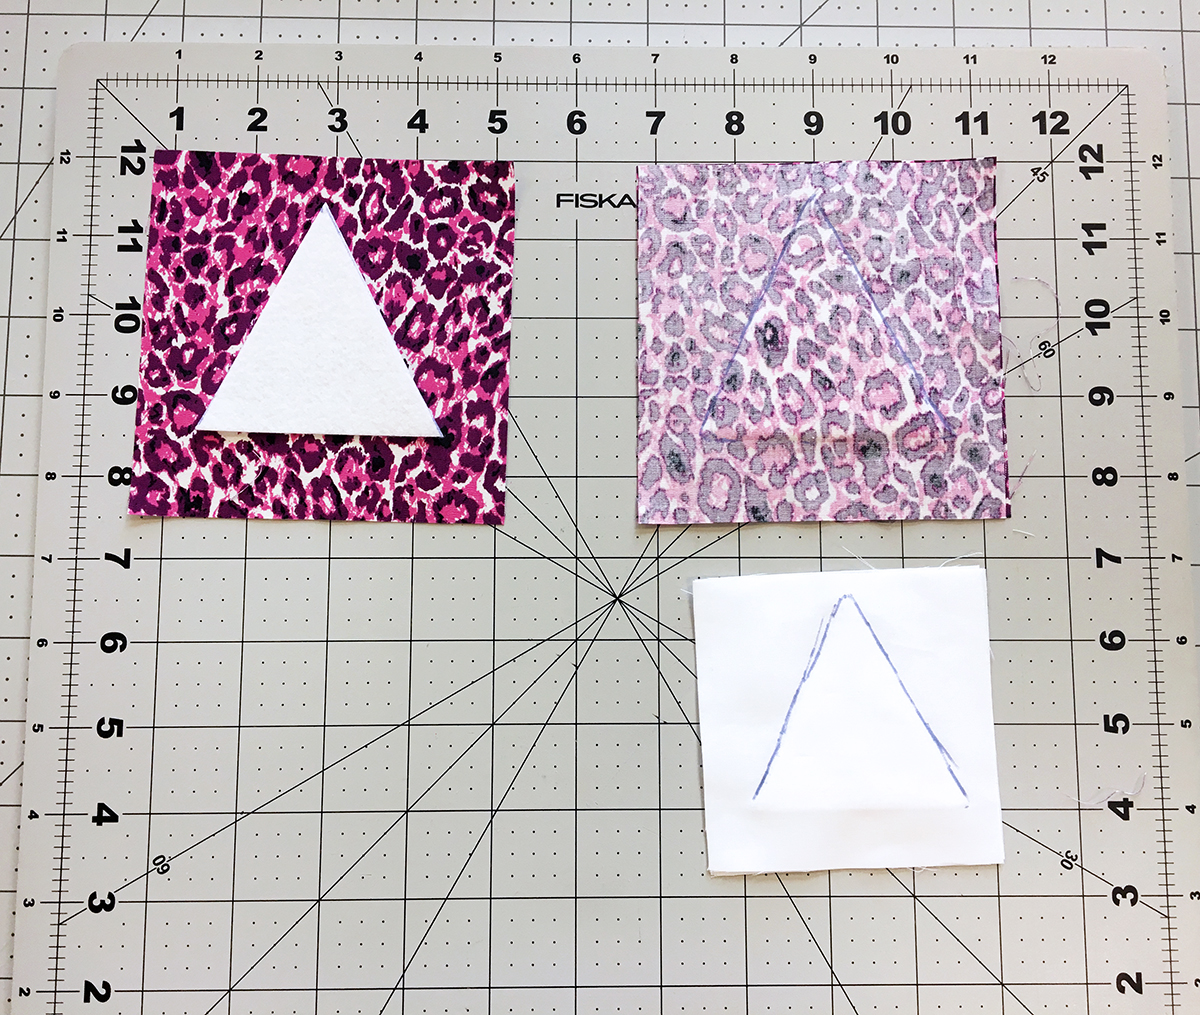
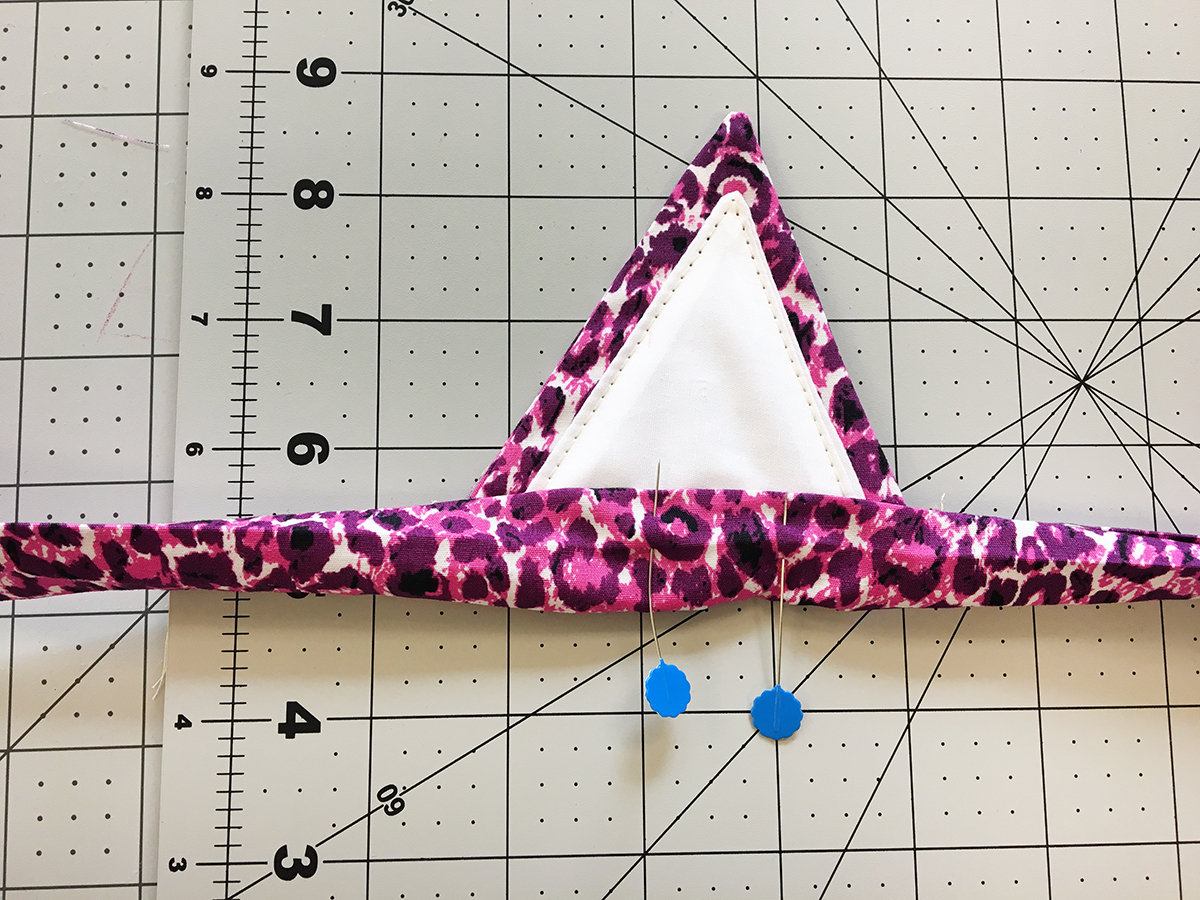
Mark the middle of your 3″ and 2 1/2″ squares of Ultra Firm Fusible. Draw two diagonal lines from this mark to the corners of your piece to create a triangle. Cut out the triangles and place your smaller triangle between two 3 1/2″ squares from Fabric B and place your larger triangle between two 4 1/2″ square from Fabric A. Pin layers together and with a fabric marking pen trace the edges of your triangle.
With the needle position all the way to the left or right use metal guide on your Blindstitch foot and follow along the lines you drew. Pull Ultra Firm ear templates out and trim your side seam allowance to 1/4″ and leave a little extra seam allowance for the bottom of your ear.
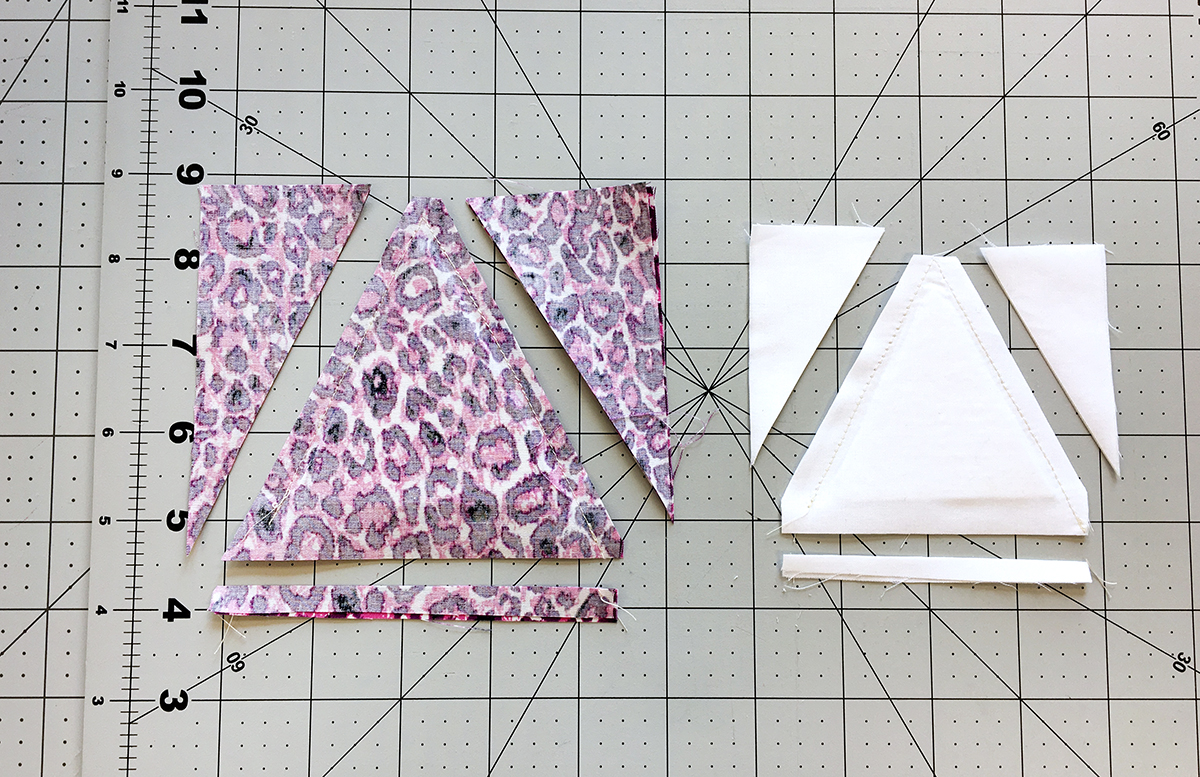
Flip ears right side out and give them a good press.
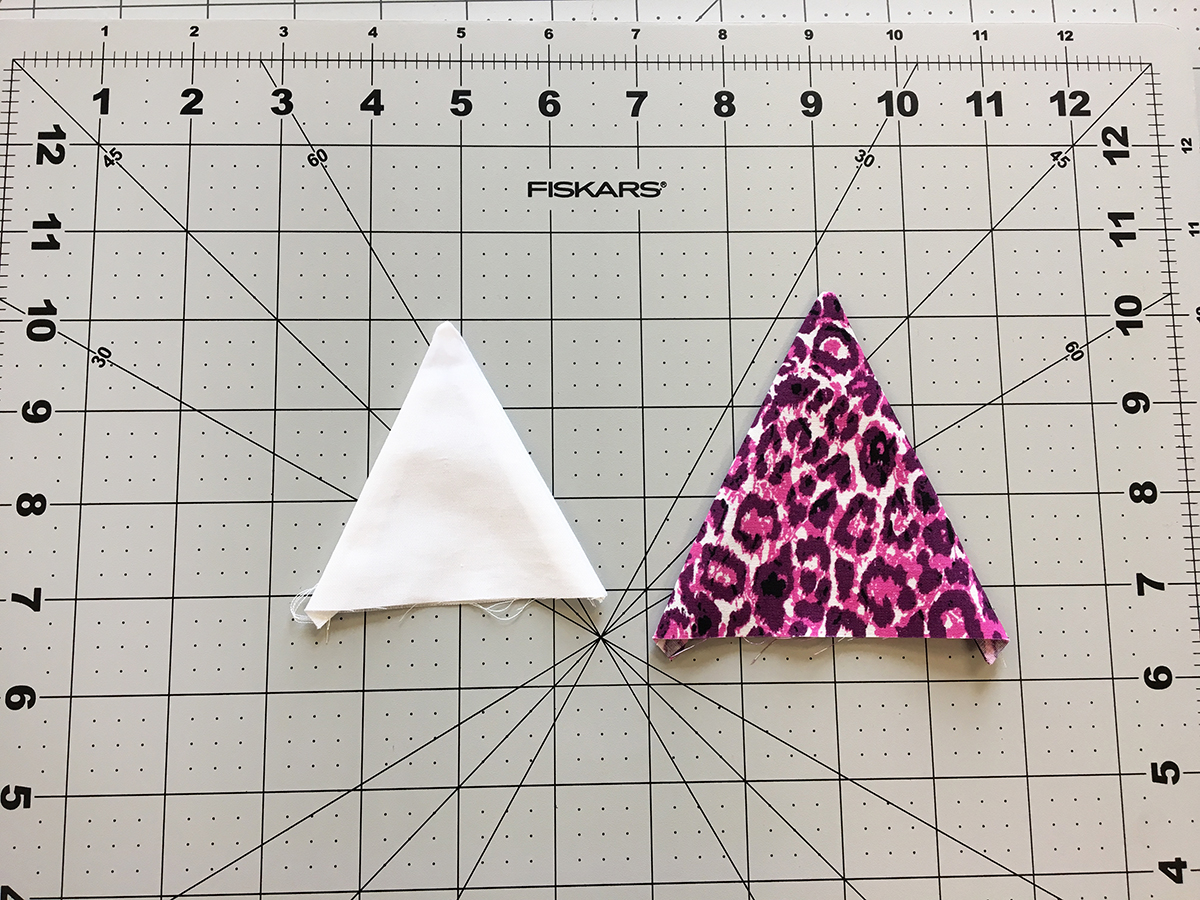
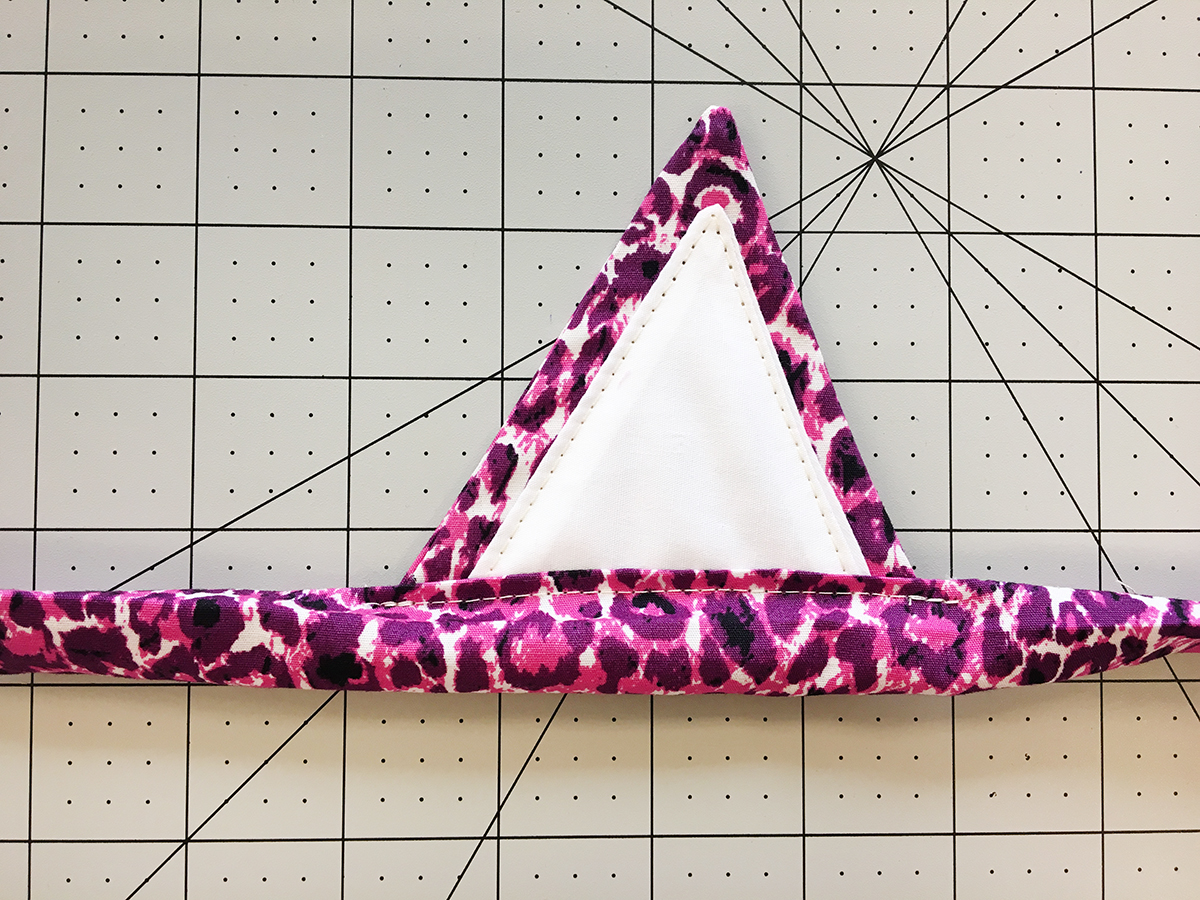
Tuck the Ultra Firm Fusible triangles back into your outer ear. Place your inner ear on top of your outer ear and topstitch into place.
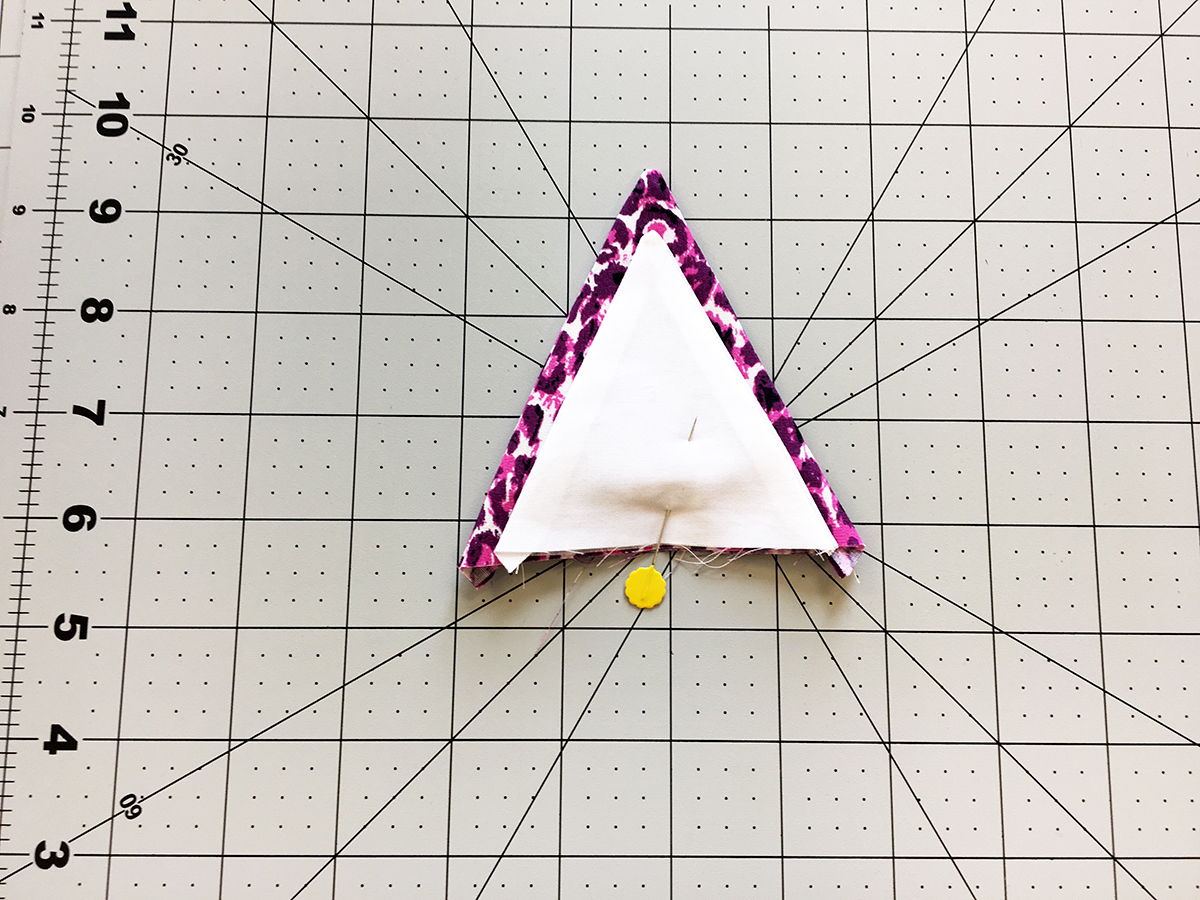
Trim excess fabric at the bottom, still leaving enough seam allowance to attach your ears to your headband.

Step 2: Creating the Headband Strip
Take your 2 1/2″ x 23 1/2″ strip from Fabric A and fold the ends in about 1/4″. Place your ears equal distance apart about a 1/2″ or more apart. Mark where your ears will be inserted. Stitch your tube at 1/4″ back stitching when you get to the ear opening and starting again until you get to the other ear opening and continuing to the end of your strip.

Flip your tube to the right side of the fabric with a safety pin and place your ears in the unsewn portions and pin into place.
Top stitch to secure ear into the headband strip.
Feed your strip through the headband and hot glue the ends into place.

Neck Tie:
Step 1: Creating the Bow
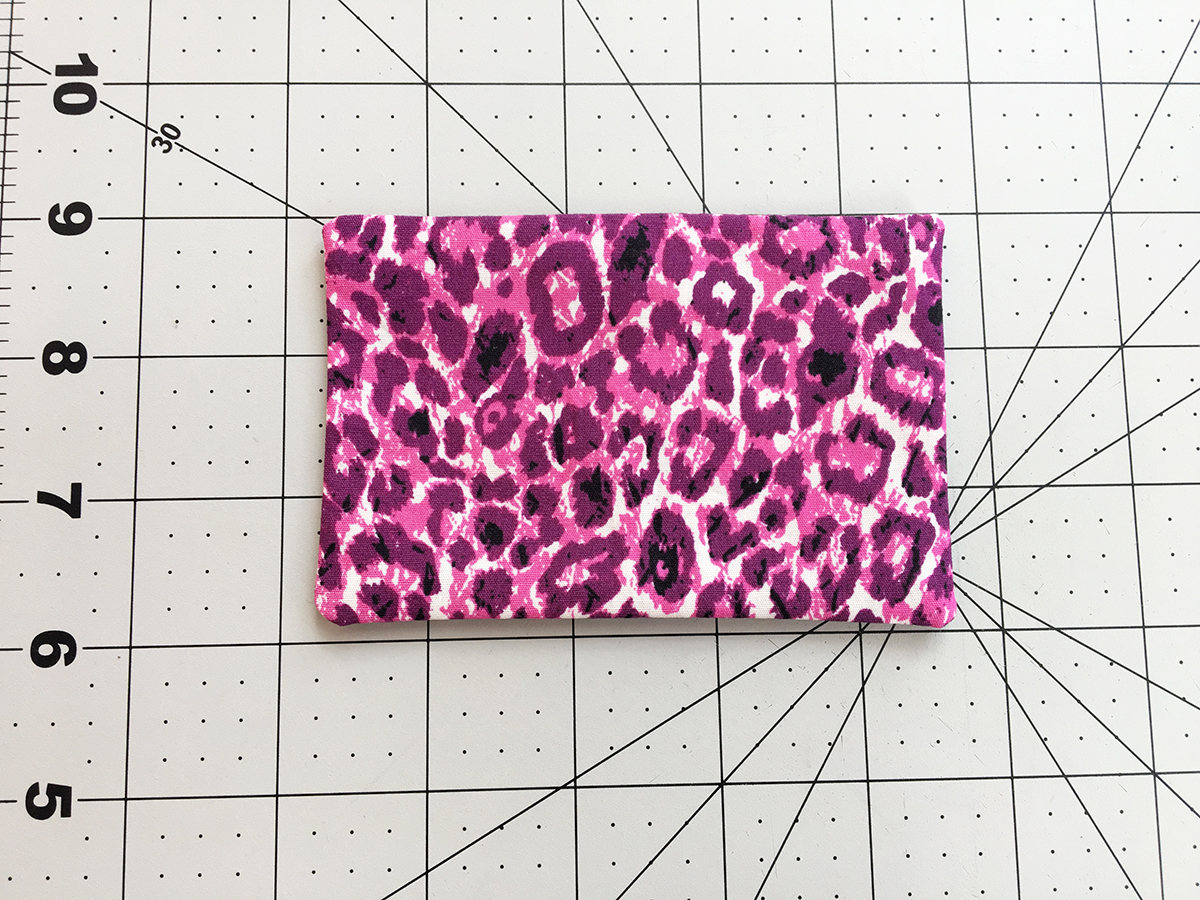
Sew two 3 1/2″ x 5″ rectangles right sides together. Snip a small whole on one layer of the fabric to pull right side of the fabric through.
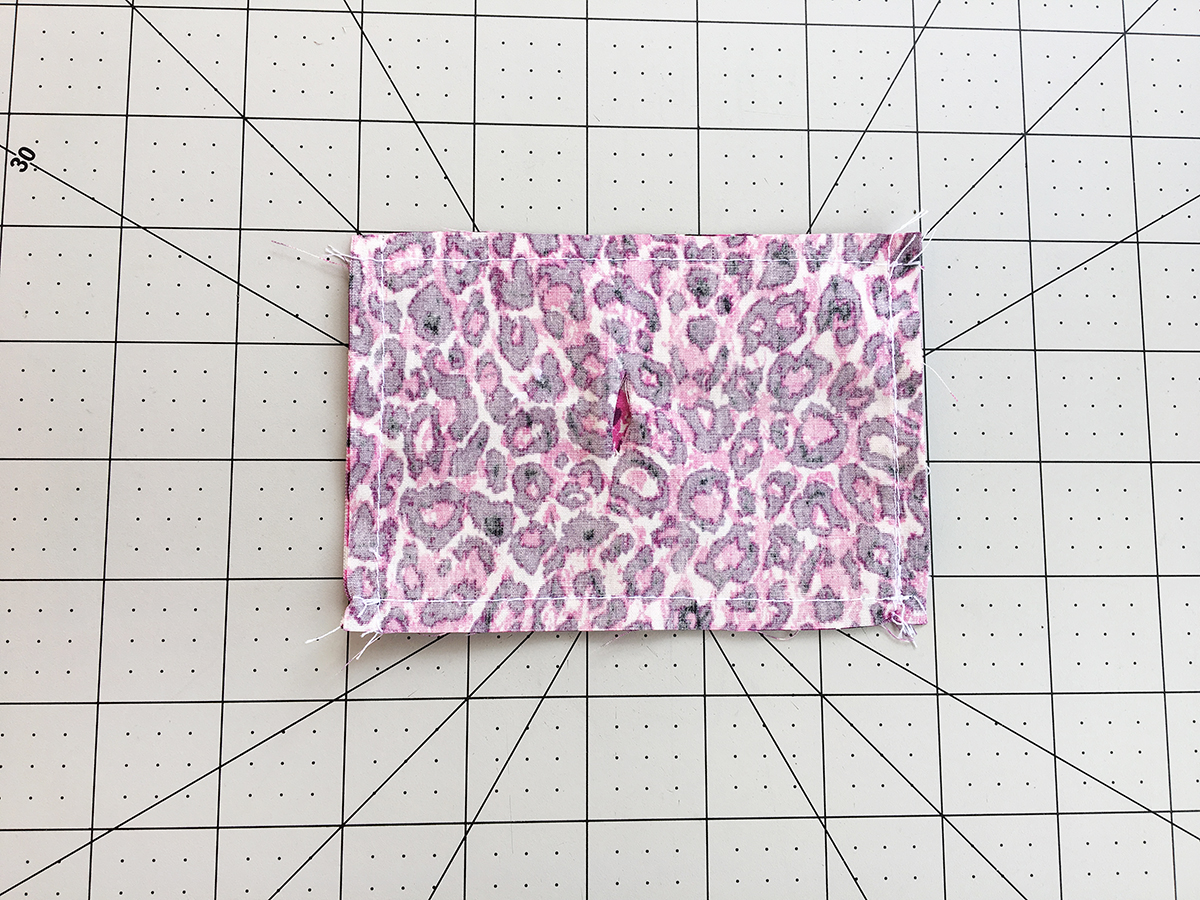
Give it a good press and make sure all your points all fully flipped though.
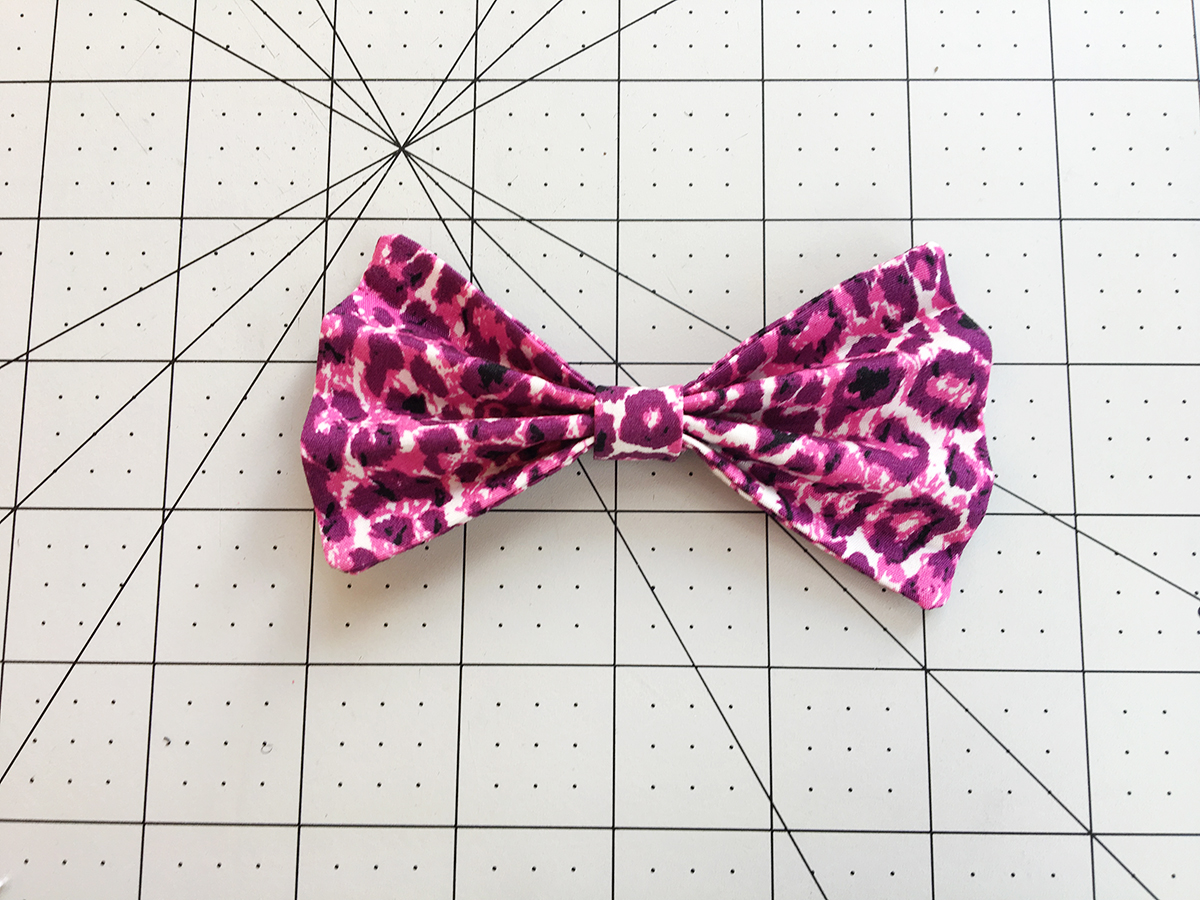
Fold your rectangle into four sections making a accordion or fan and press to make four crease marks. Take your 1 1/2″x 2 1/2″ strip from Fabric A and fold in half length wise and sew right sides together to create a tube. Flip piece though to create your tube of fabric that is going to wrap around the center of your bow tie.
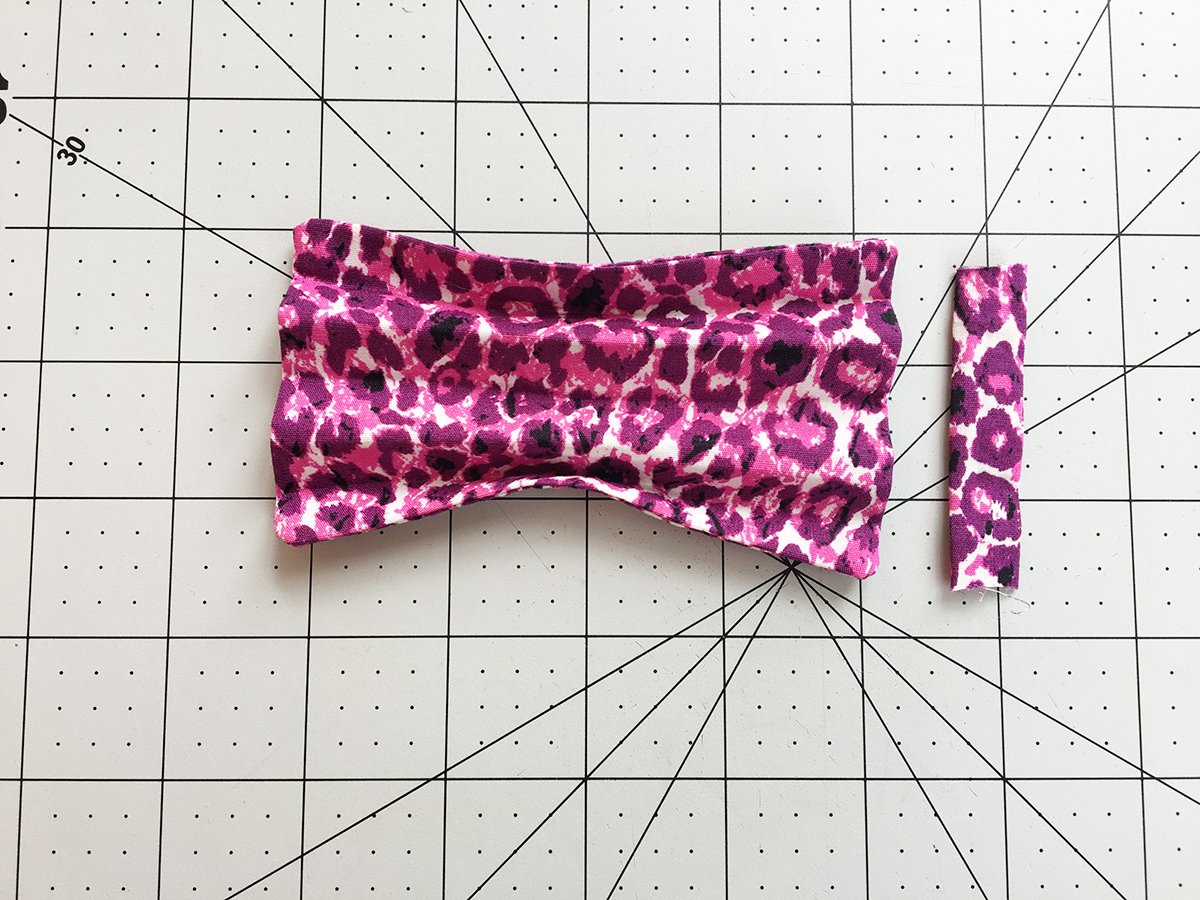
Pinch the center of your bow tie and wrap your center tube around the center and hot glue or handstitch into place.
Step 2: Creating the Strap
Take your 2 1/2″ x 17″ strip from Fabric A and fold in edges at 1/4″ and sew together creating a tube. Flip fabric to the right side of the fabric using a safety pin.

Press tube so the center seam is in the center of your strip. Place your 2 1/2″ long pieces of Velcro to the ends of your strap. Stitch with black thread each end of your Velcro to your strap.
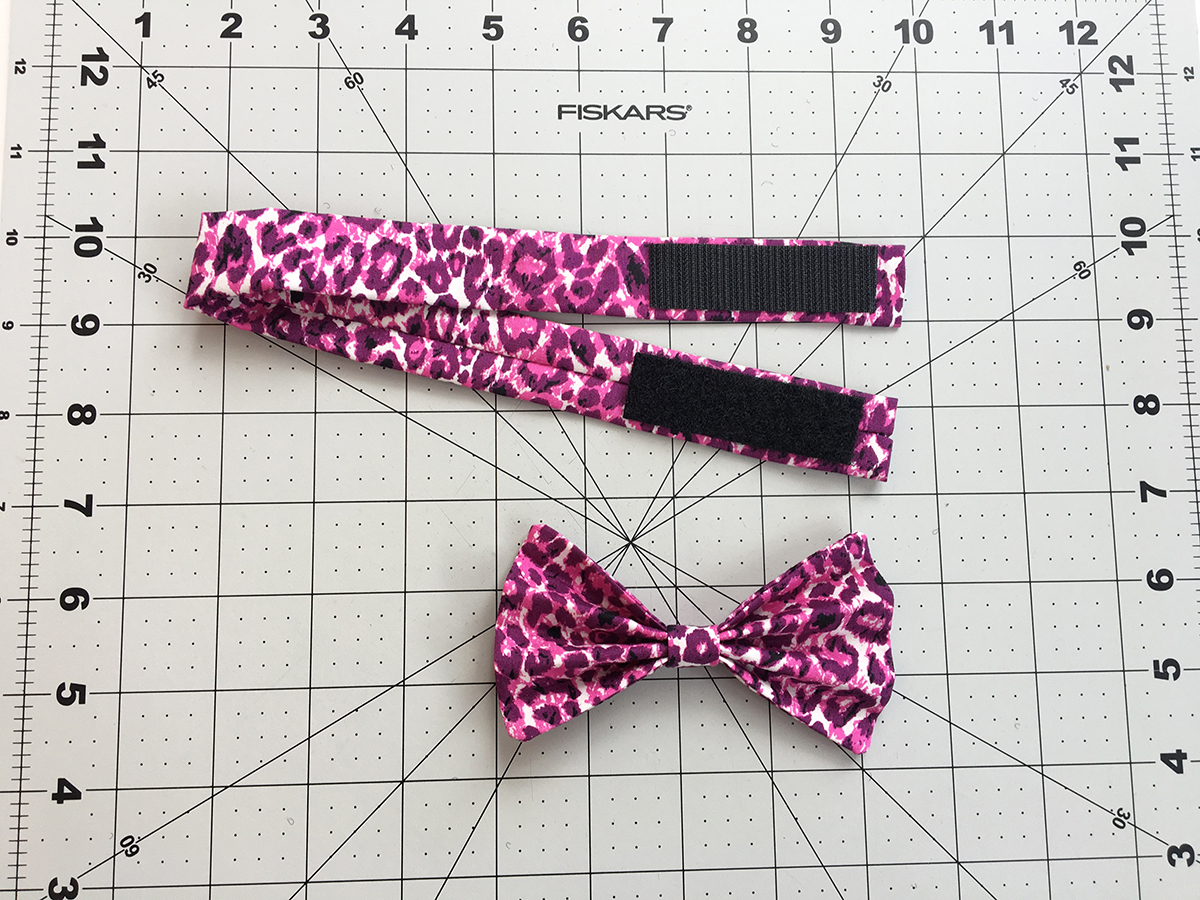
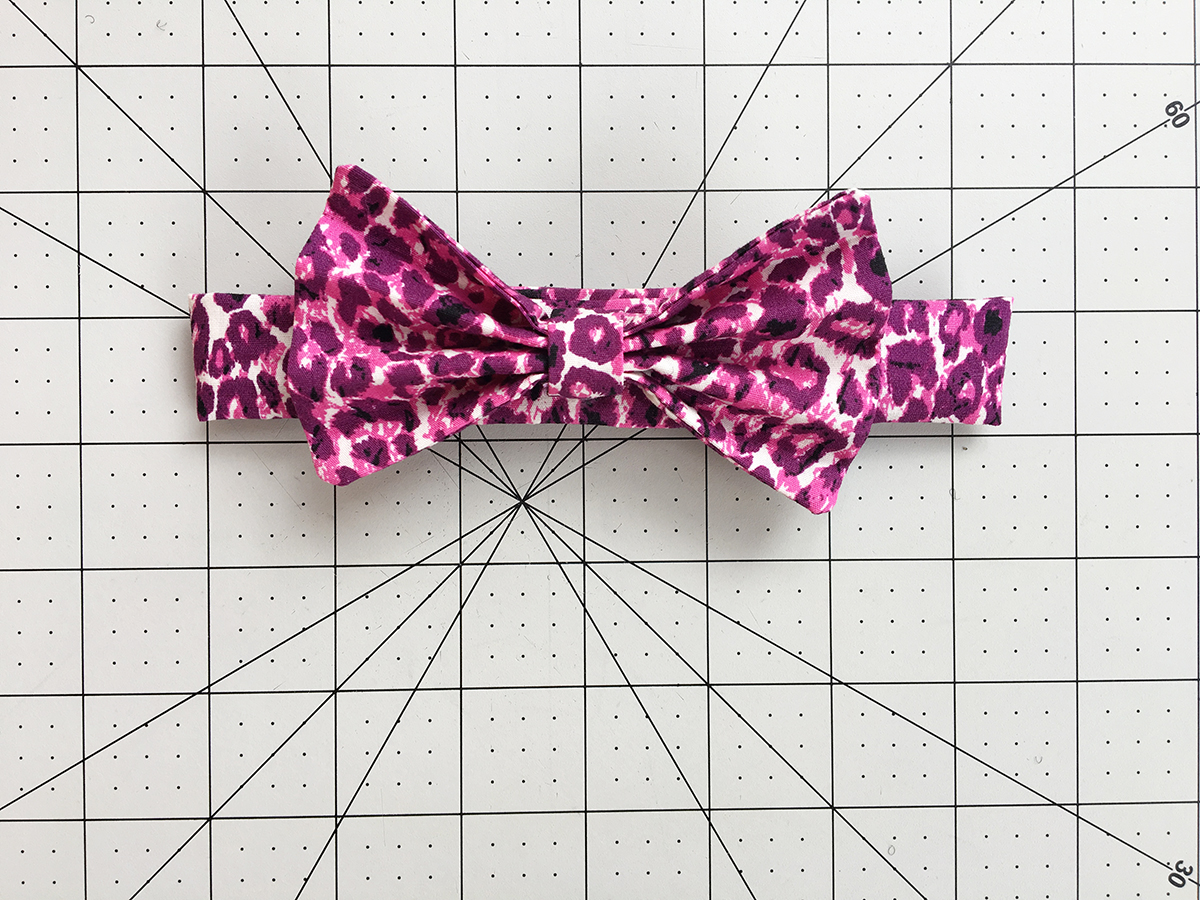
Last step is to place the bow in the center of your strap and hand stitch or hot glue into place.
Tail:
Step 1: Creating the Sash
Take two 6″ x WOF strips from Fabric A and sew ends of strips together.
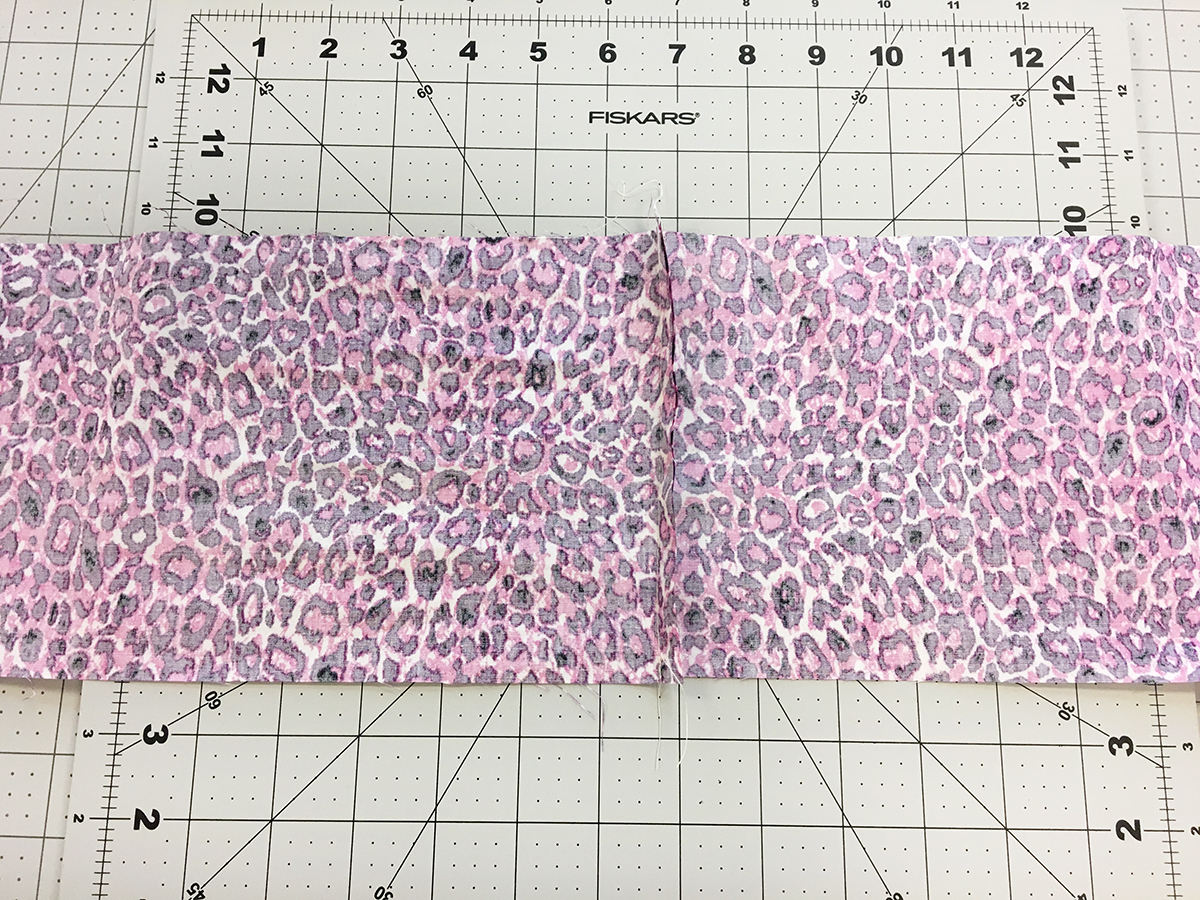
Figure out how long you will need your sash depending on your waist size and how much extra sash you will need to tie a bow. Trim to your liking.
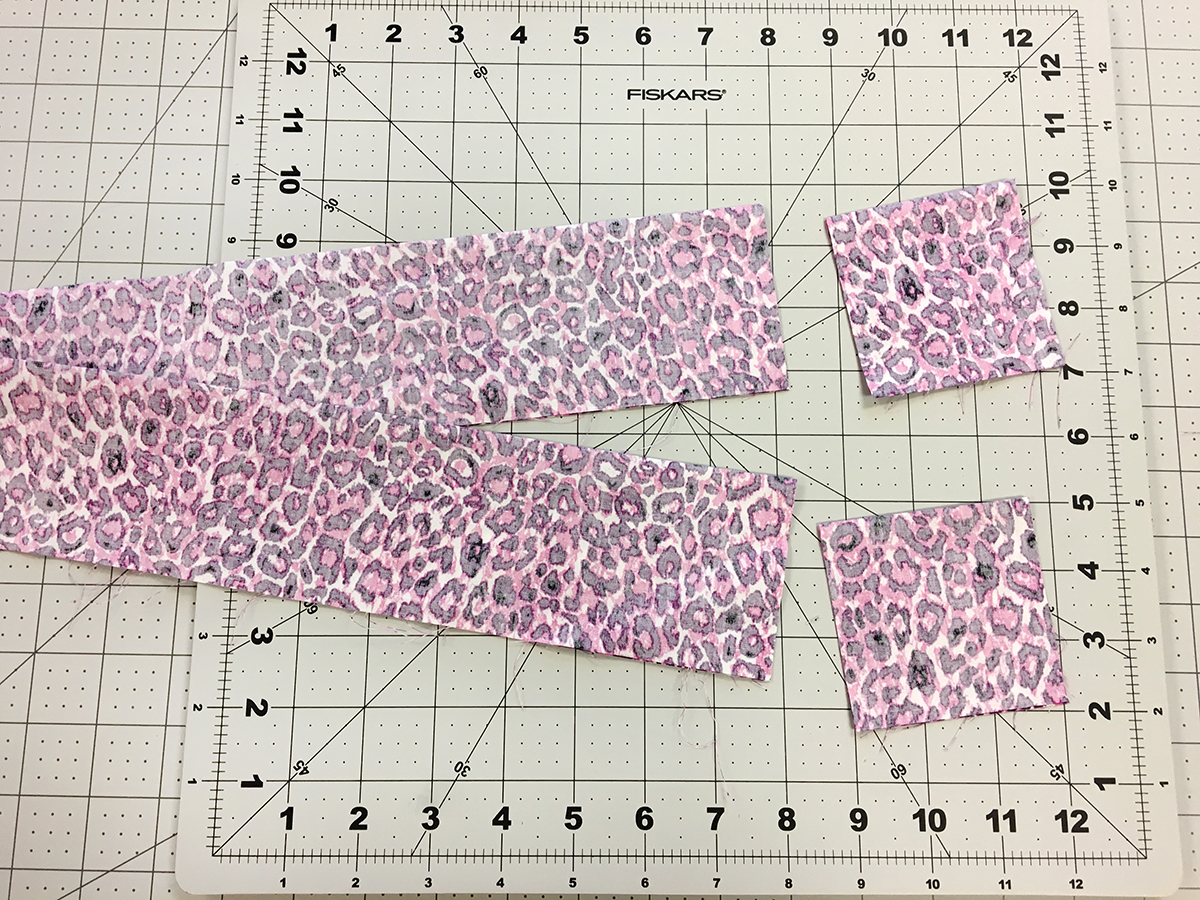
Fold long strip in half and measure about 2″ in and draw a diagonal long and cut along the line to create the ends of your sash.
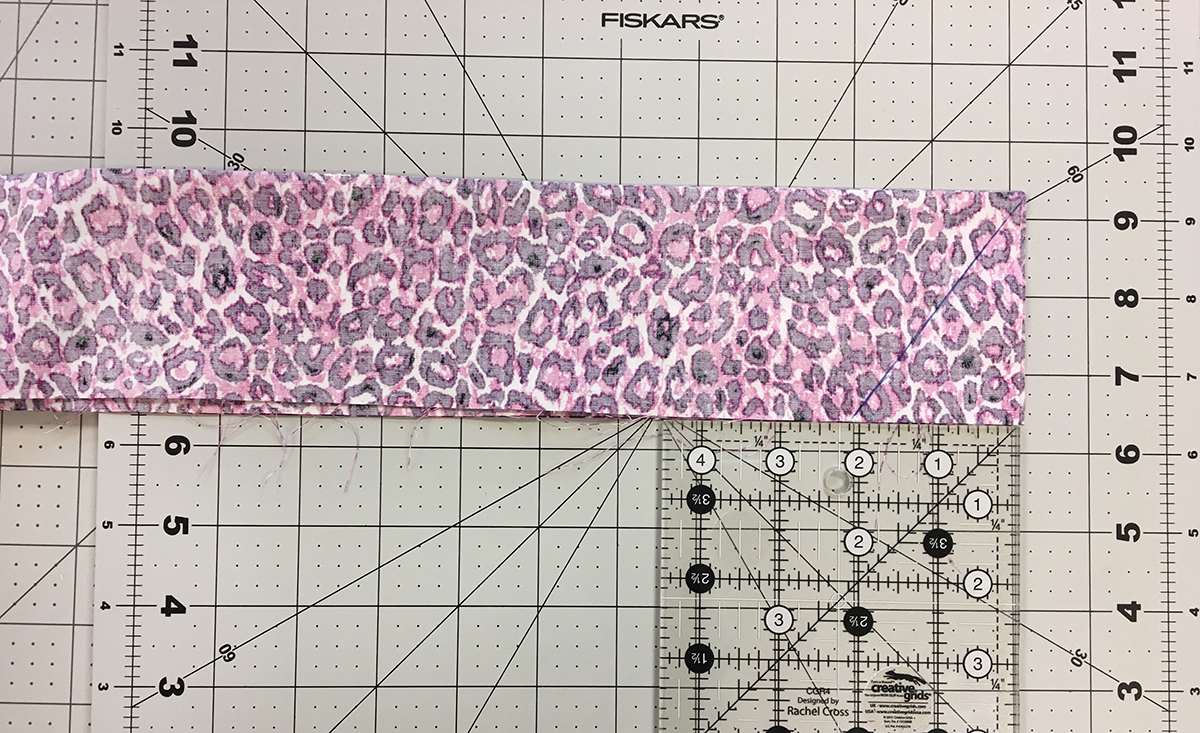
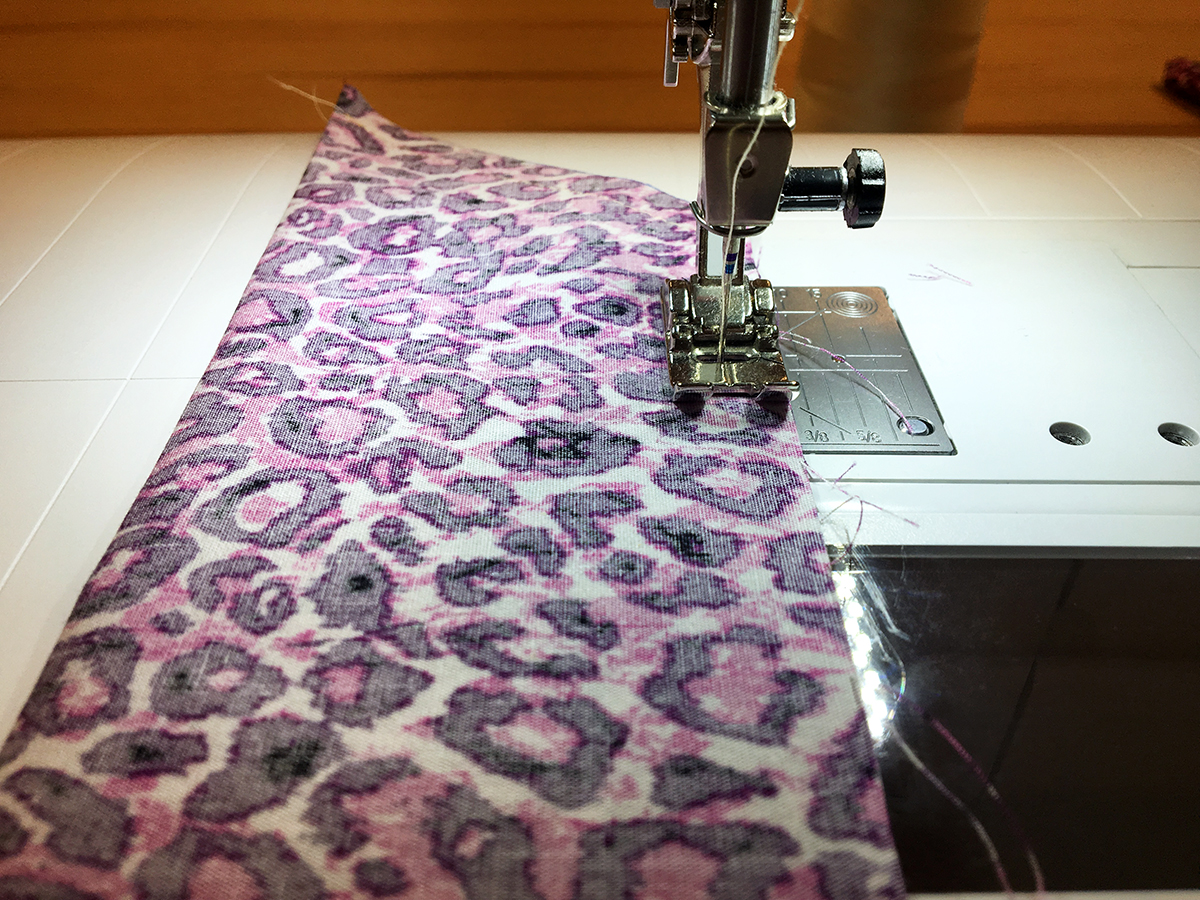
Sew your sash right sides together leaving a small whole to flip your sash through. Topstitch all the way around your sash.
Step 2: Creating the Tail
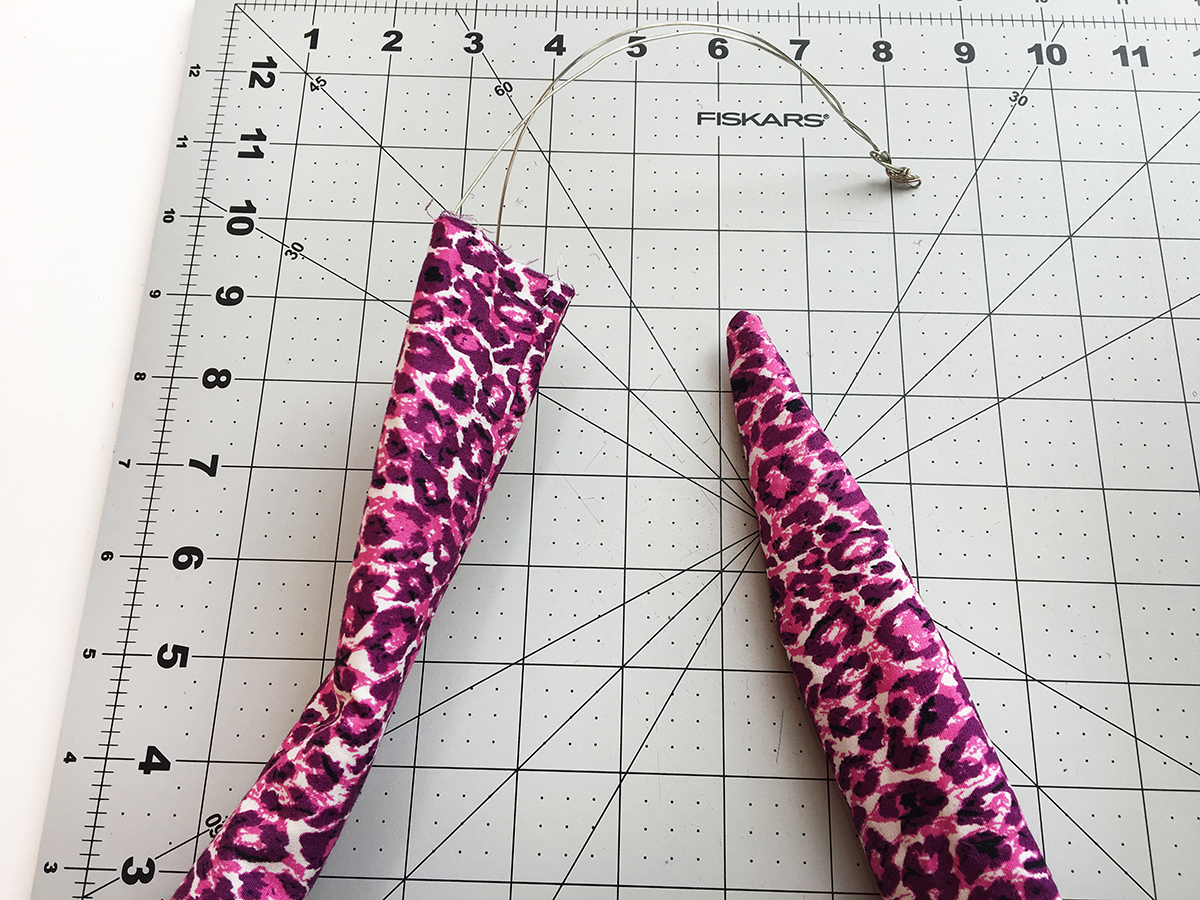
Place two 2 1/2″ x WOF strips from Fabric A right sides together and on one end of the strip create the end of your tail. We made our tail about 28″ long. Trim the length of your tail to your liking.
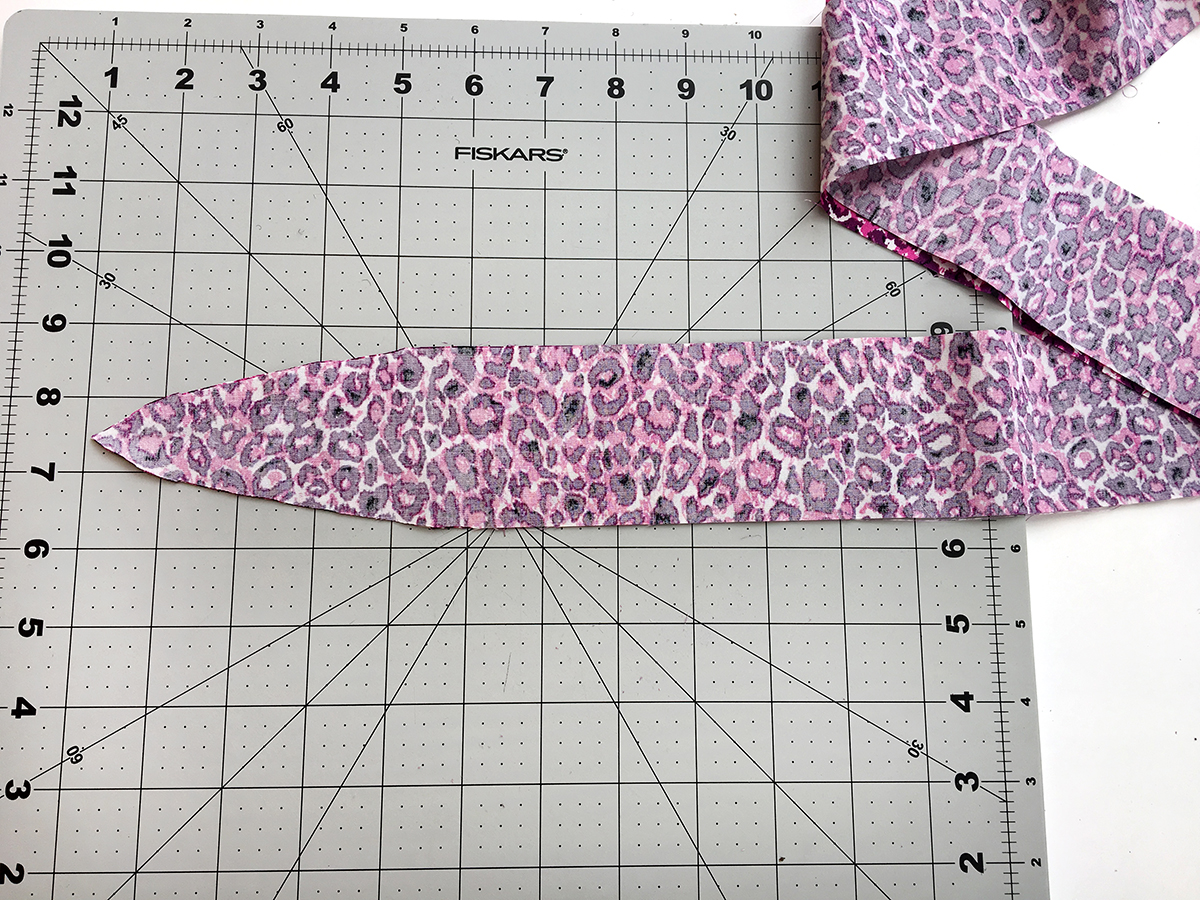
Sew your tail pieces right side together and flip right side of fabric through. Fold your 70″ wire in half and insert into tail. Tie off ends of wire and trim to the desired length. Stuff tail lightly with polyfil.
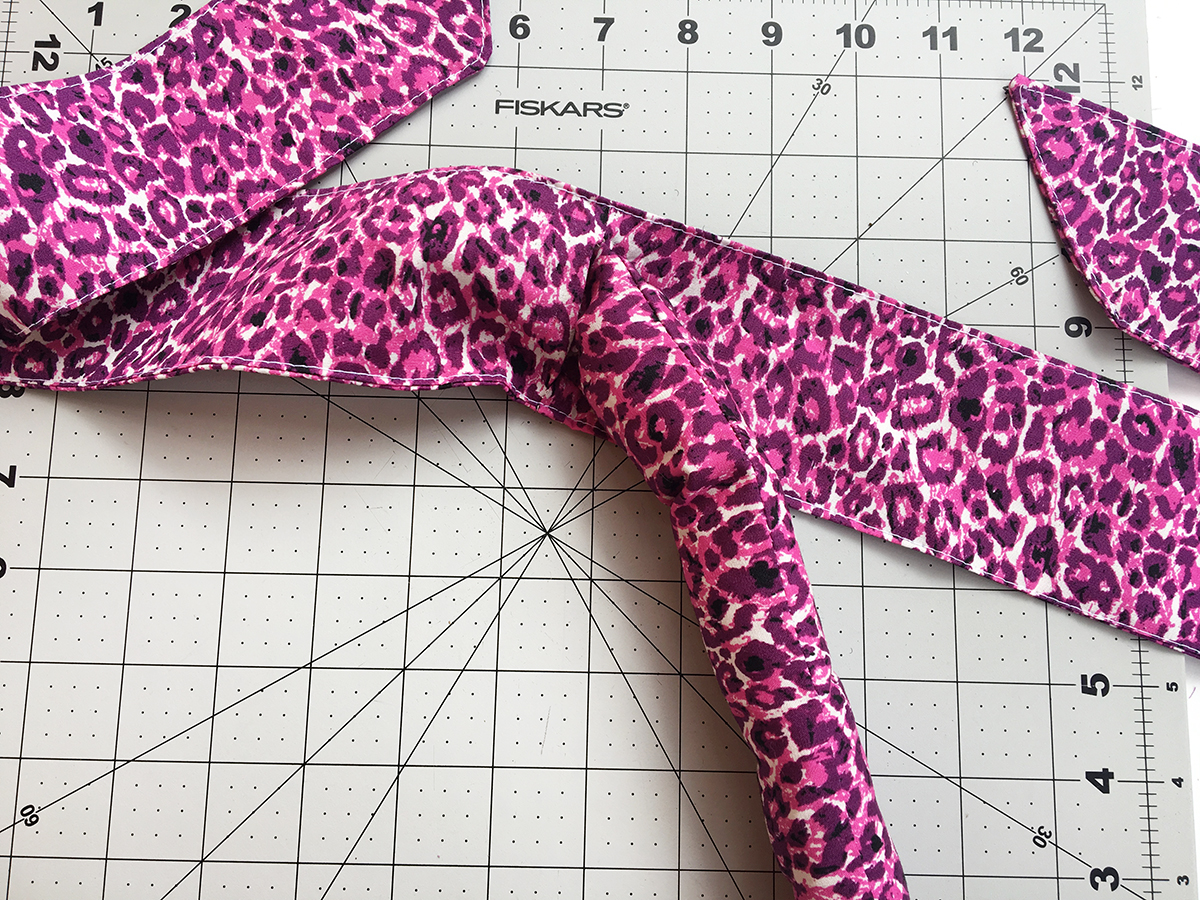
The last step is to seam rip a small section where your two sashing pieces came together. Insert the end of your tail and stitch into place.
All three pieces are complete and you are ready for the Halloween parties to begin!
Happy Sewing,
AGF