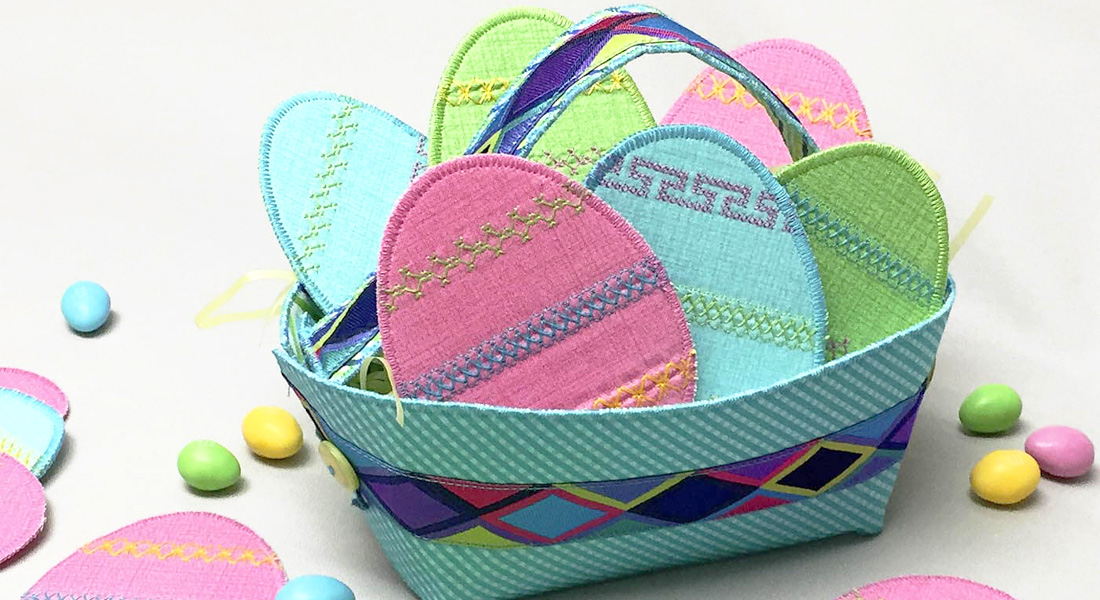
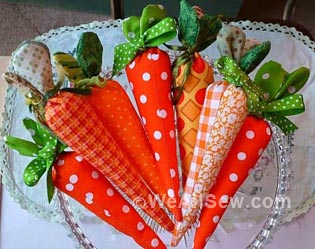
Easter Treat Tags from Art Gallery Fabrics
Hello Everyone,
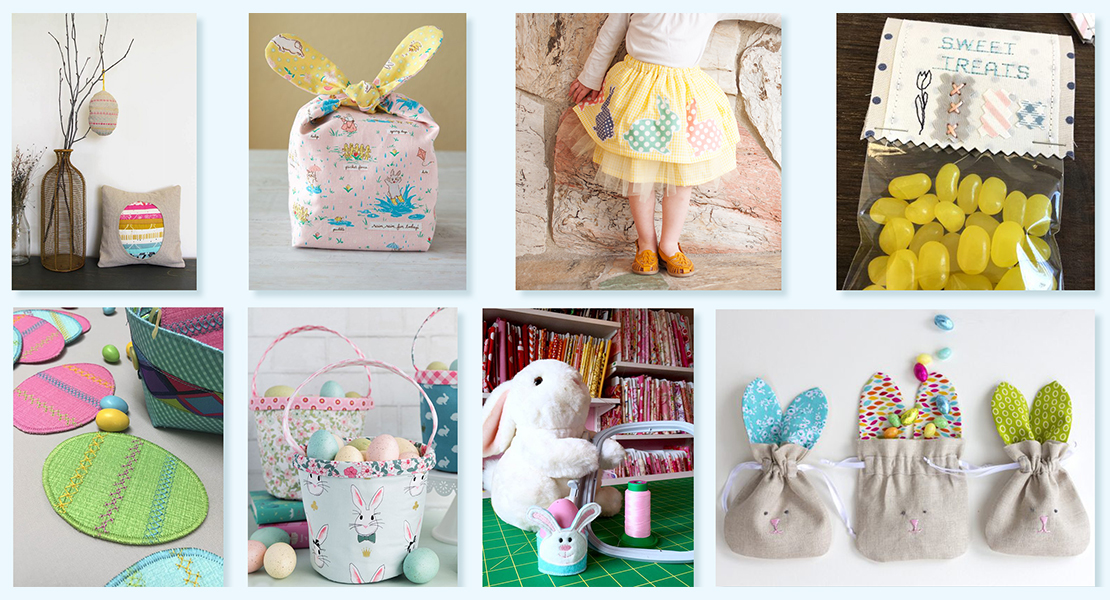
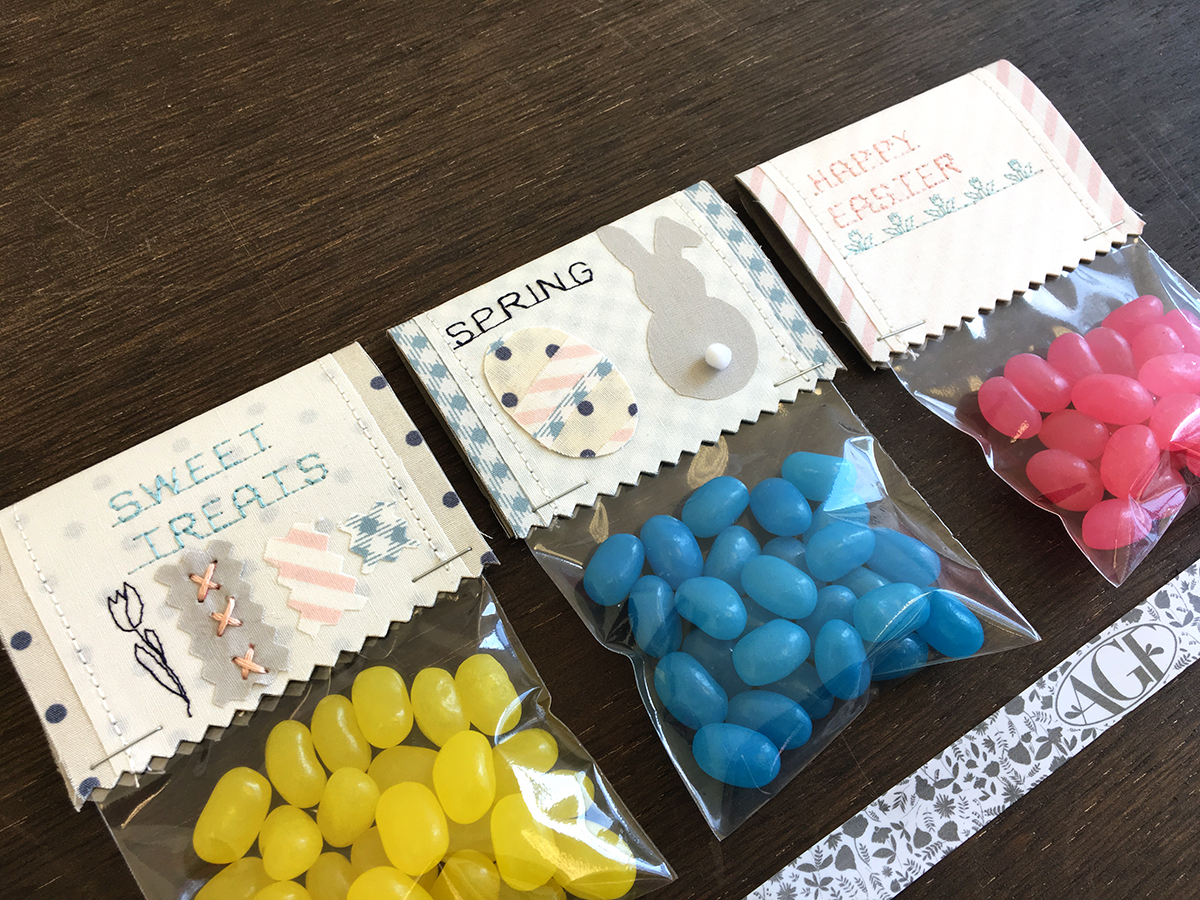
I don’t know about you but I am ready for April, the beautiful weather and new life it brings! Easter is around the corner and it is a great holiday to spend with family and friends and an excuse to eat candy. We have a super sweet and cute project to share with you today, Easter themed treat tags! I loved how this project turned out and it will for sure bring a smile to the person’s face you give it to. What better way to hand out sweets then with a personal touch? My tags are made with Les Petits fabric by Amy Sinibali. I love this collection because it is full of cute dot, stripe, and check prints that is perfect basics to have in your fabric stash. Mixing these fabrics with Bernina’s decorative and alphabets stitches turned my tags into such a fun make!
Materials to Make Easter Treat Tags
Fabrics Used:
- Fabric A – LEP-812-Petits Strokes Rose
- Fabric B – LEP-Petits Checks Sky
- Fabric C – LEP-711-Petits Dots Creme
- Fabric D – PE-408- White Linen
- Fabric E – PE-431-Mystic Grey
Other Materials:
- Download the Easter Treat Tag Templates
- Sewing machine (We use a BERNINA 570 QE)
- Kraft-tex (mine is grey but you can get it in so many different colors)
- Steam-A-Seam
- Pinking Shears
- Stapler
- Hot Glue
- Mini Treat Bags 3″x 4″ (I bought mine at Party City)
- Mini Pom-Poms .20in (5mm) (I bought mine at Micheals)
- Aurifil Threads: Blush – #2415, Light Grey Turquoise – #2805, Very Dark Navy – #2785
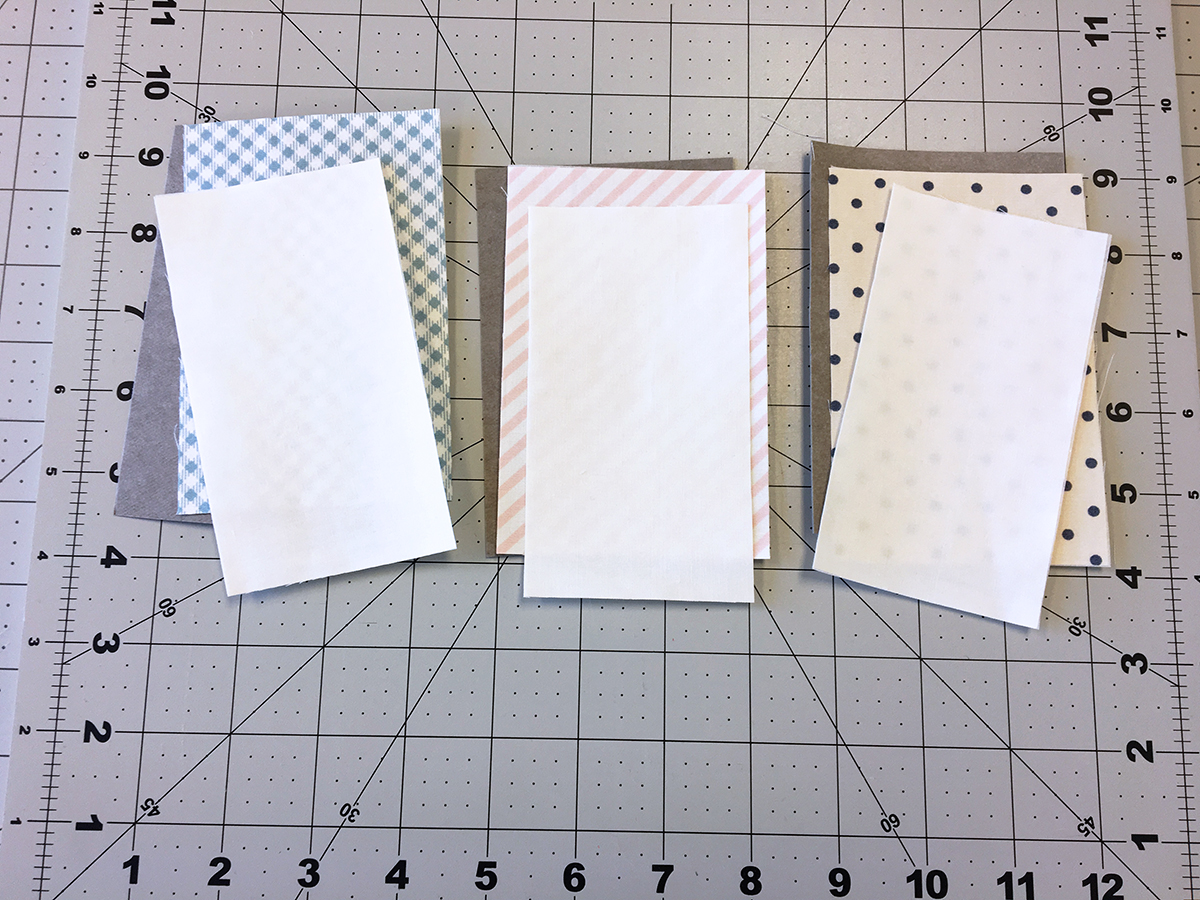
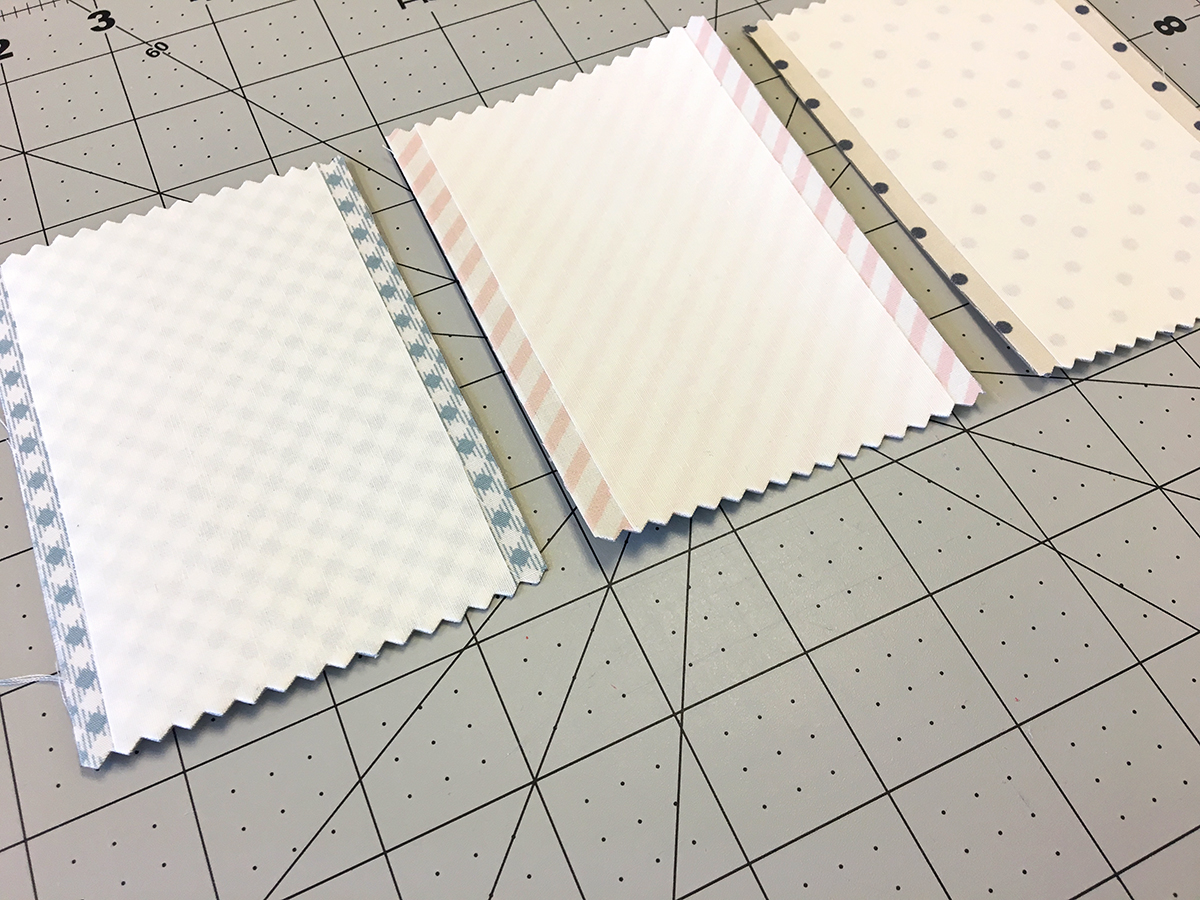
Cutting Directions (to make three Treat Tags)
Iron Steam a seam to every fabric piece.
One (1) 3 1/4″ x 5″ rectangle from Fabric A, B, C, Kraftex and Steam-A-Seam
One (1) 3″ square from Fabric A, B, C and Steam -A-Seam (for egg)
One (1) 4″ square from Fabric D and Steam-A-Steam
Three (3) 2 3/4″ x 5″ rectangles from Fabric D and Steam- A-Seam
One (1)2 1/2″ x 4 1/2″rectangle from Fabric E and Steam -A- Seam (for bunny)

Step 1: Creating Candy Tag
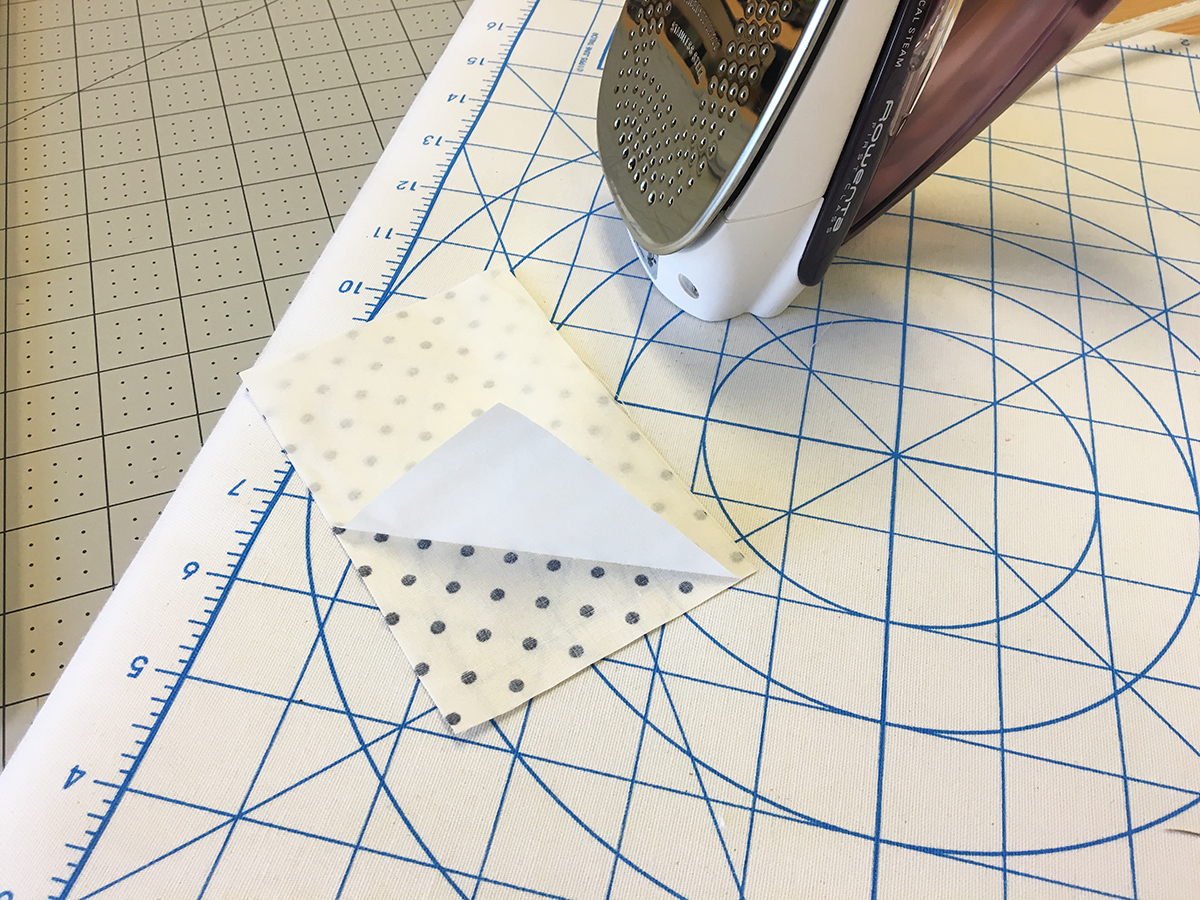
Iron Steam-A- Seam to the wrong side of all your fabric pieces.
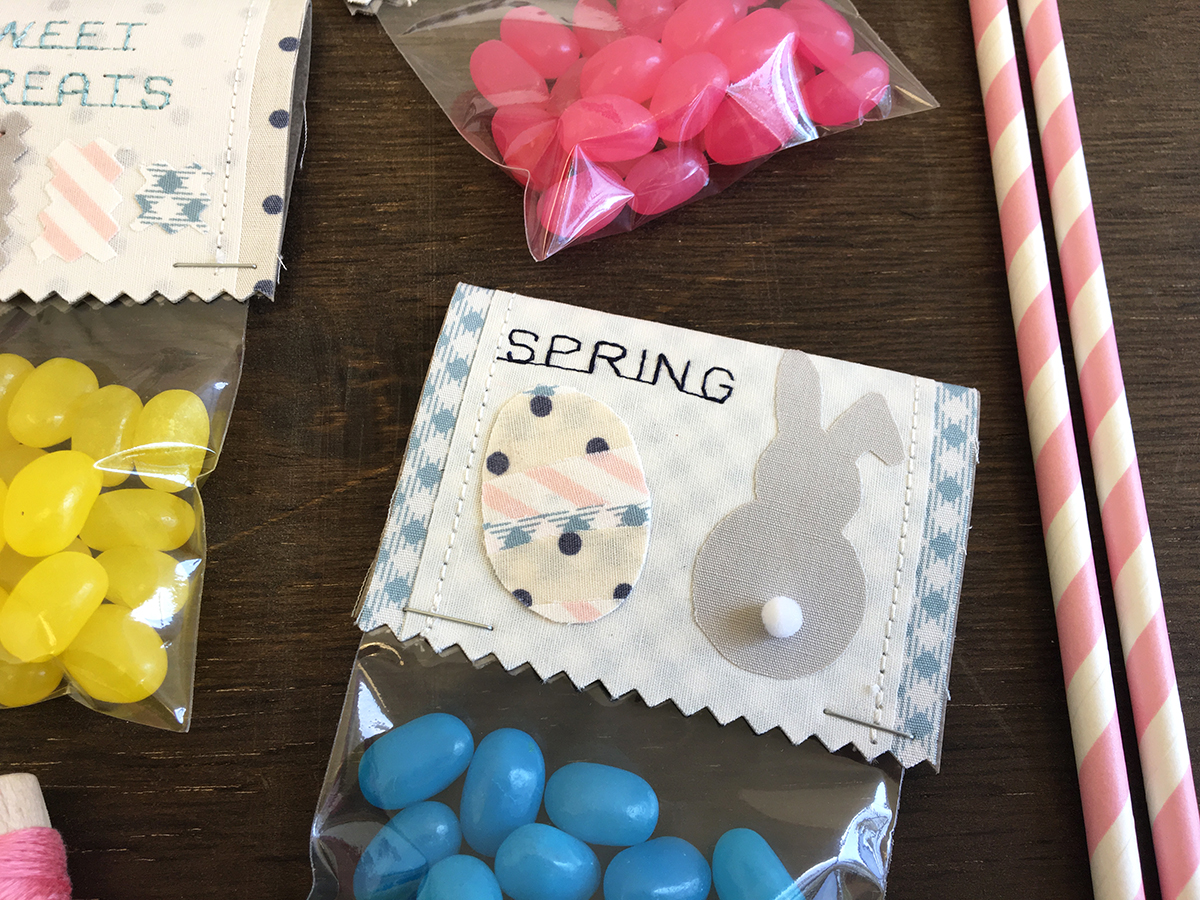
Stick 3 1/4″ x 5″ rectangles to your Kraft-tex pieces and press in place. Then stick your 2 3/4″ x 5″ white rectangle to the center of your tag and press in place. Cut ends of your tags with pinking shears to create zig zag ends.
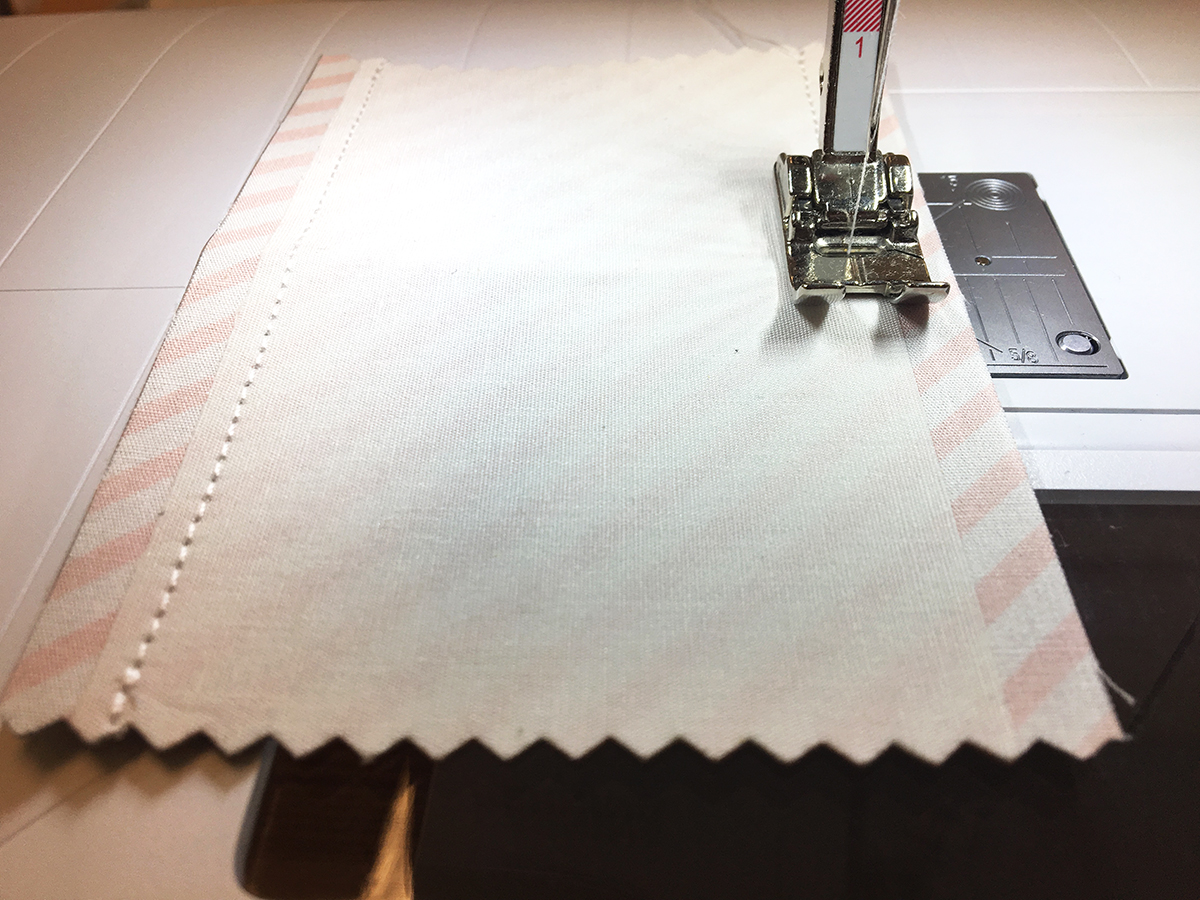
Topstitch 1/8″ in on all your white fabric pieces.
Step 2: Applique Bunny and and Egg
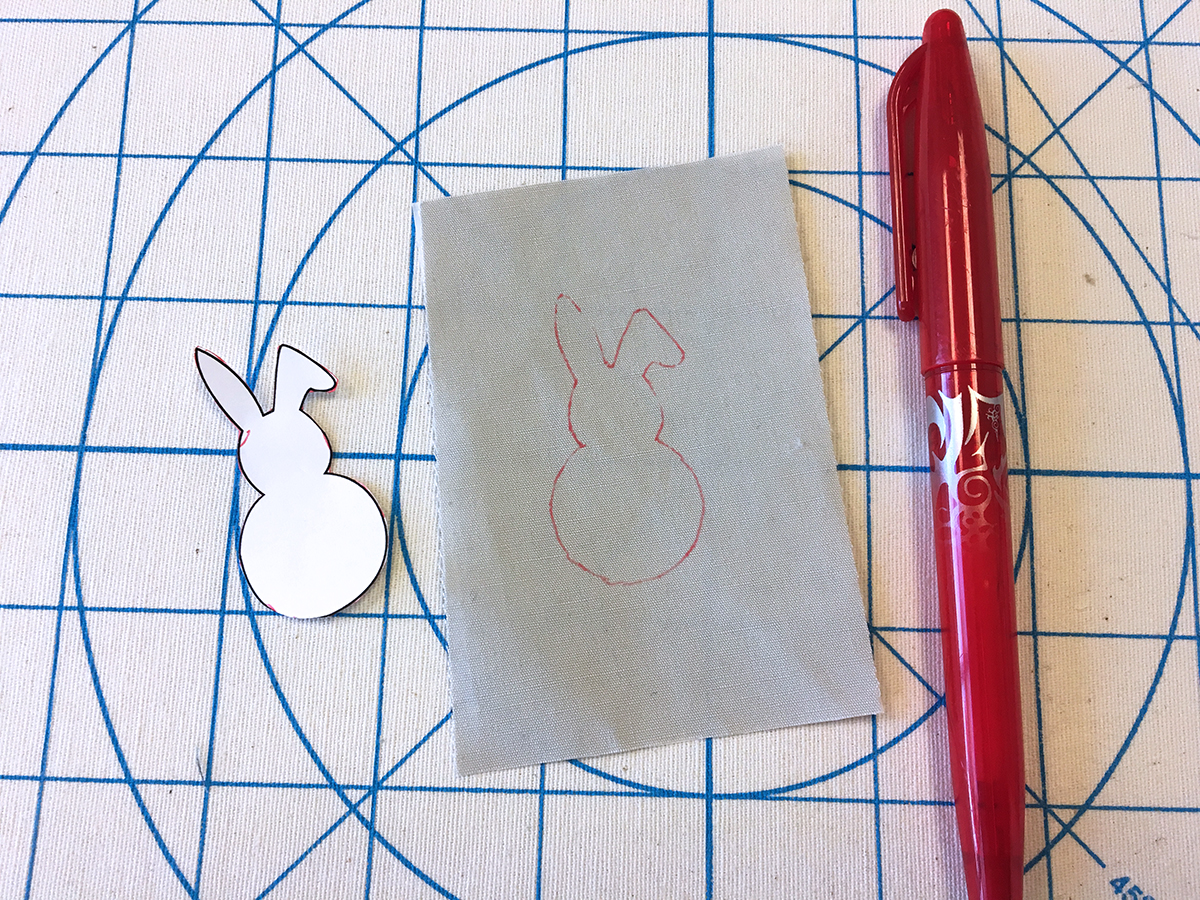
Take your 2 1/2″ x 4″ rectangle from Fabric E and trace your bunny template with a fabric marking pen. Cut out bunny.
To create your egg, cut your 3″ squares from Fabric A, B, and C into wonky strips that vary in width.

Trace your egg template on your 4″ square from Fabric D.

Stick strips on egg overlapping strips until you fill the whole egg. Press pieces into place. Trace egg template again and cut out egg.

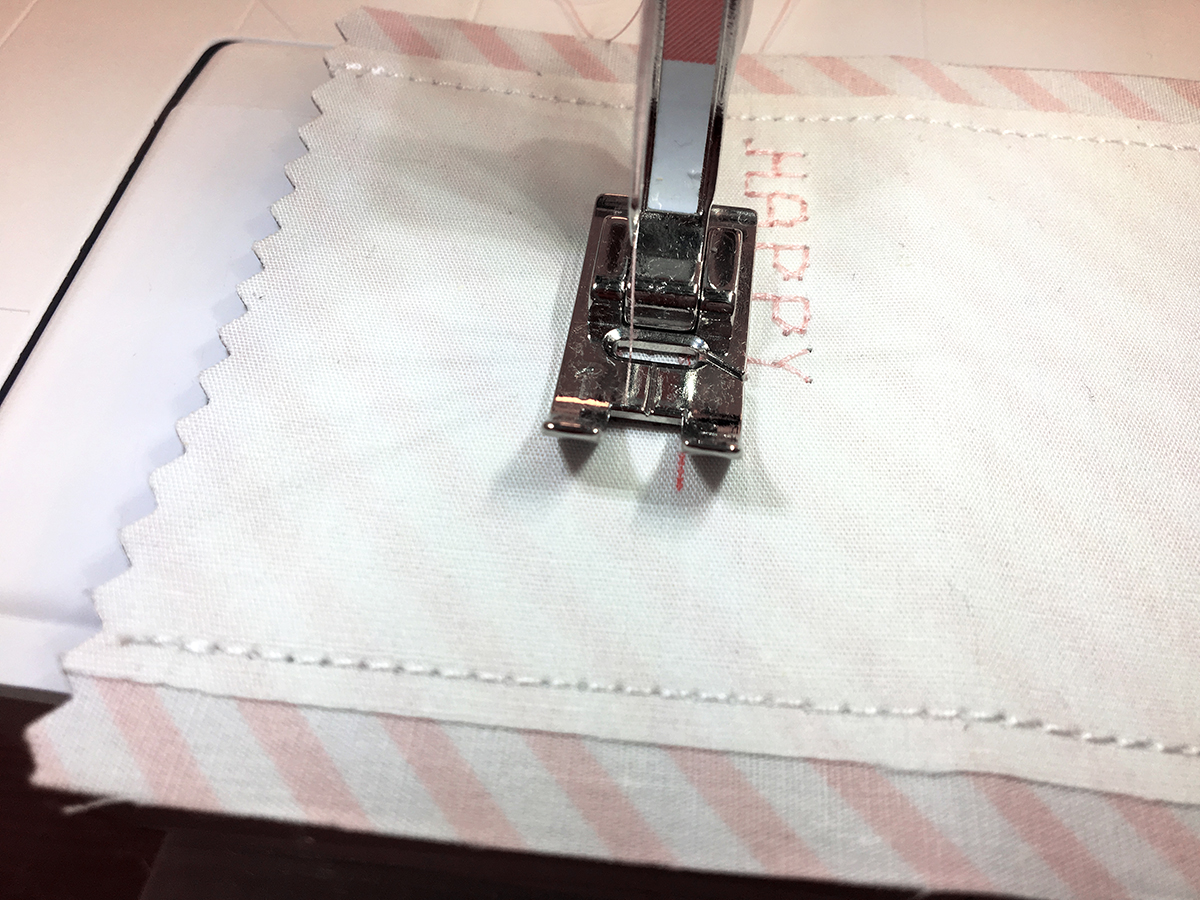
Step 3: Creating your words and decorative stitches
Touch the Alphabet button and select the type of font and words you would like to stitch. (If you have a different BERNINA model, check your manual to find out how to program lettering.)


Then touch the “i” icon. If you want your word to be stitched only once make sure the pattern repeat is set at 1.

With a fabric marking pen mark where you would like to stitch your word and make sure to test the word on some scrap fabric so you will know how much room it will take up on your tag. (Very important!)
Play around with the decorative stitches to add some extra cuteness to your tags! I used decorative stitch #103 and #101.

Step 4: Adding the Final Touches
Stick egg and bunny to one of your tags and iron into place. With a bit of hot glue attach the bunny’s tail. Fold tags in half . Fill your mini treat bags with your favorite treat and place the tags over the opening of the bag and staple into place on each side of your tag!
If you enjoyed making this project click here for another fun project to make fabric gift tags to attach to your gifts for upcoming holidays. Have fun making them your own and personalizing them the way you like!
Enjoy,
AGF