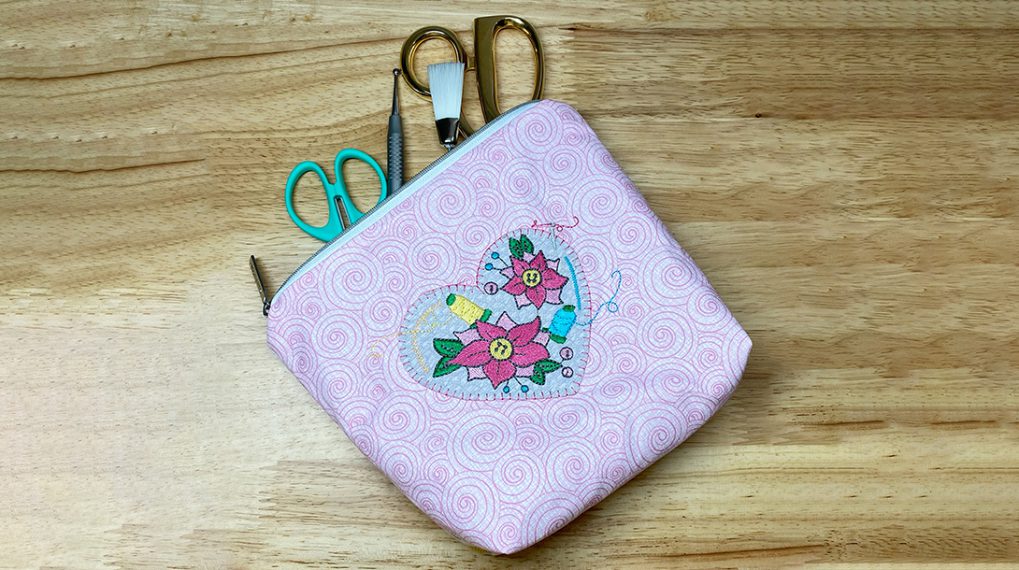
Embroidered Felt Pouch
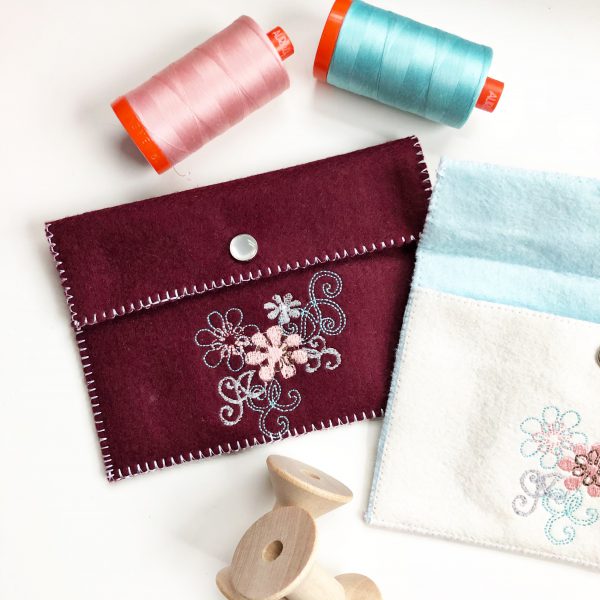
Hello everyone, Kymona here with a fun embroidered felt pouch for everyone to recreate. Felt is such a cool fabric to work with. I love working with blended felt, merino wool, and rayon together. It’s soft, comfortable to cut, and is resistant to pilling and pulling. These felt pouches are great for gift-giving or to have as your own.
Let’s dive right in!
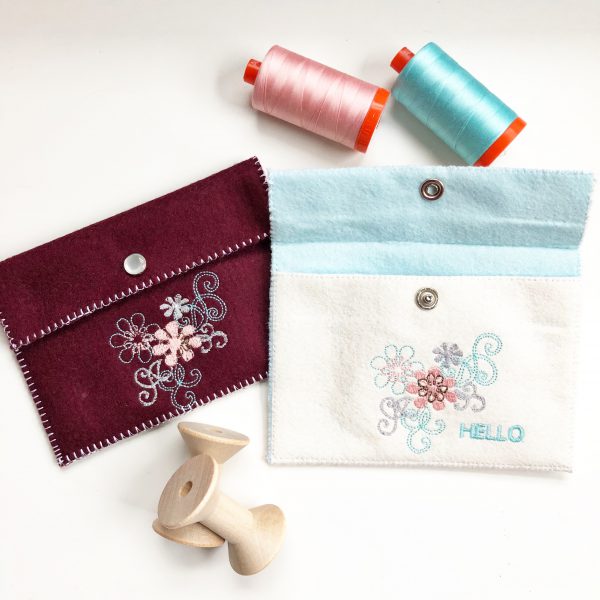
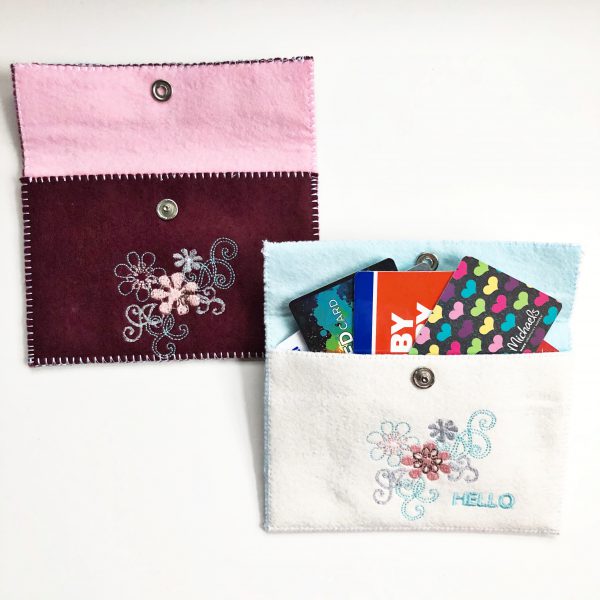
Finished felt pouch size closed: 6″ wide x 4.25″ high
Finished felt pouch size open: 6″ wide x 9.75″ high
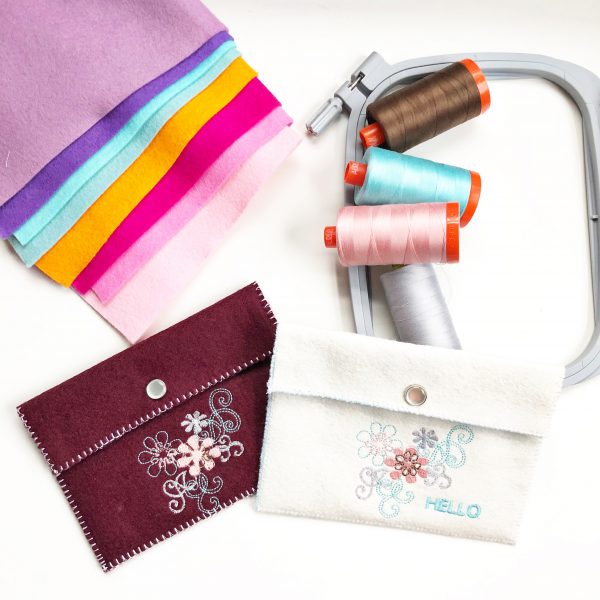
Materials to Create an Embroidered Felt Pouch
- Two pieces of felt in different colors
- Ruler
- Pins/Clips
- Rotary cutter and mat
- White thread
- Four different embroidery thread colors
- Monofilament thread
- Tearaway stabilizer
- Pearl snaps
- Snaps pliers
Instructions to Sew an Embroidered Felt Pouch
Step 1 – Cut the fabric
Cut two pieces of different color felt to 6 inches x 9.75 inches
Cut a piece of the tearaway stabilizer to 4.50 inches x 4.50 inches
Step 2 – Prepare the fabric for embroidery
Decide which color is the outer fabric.
Fold the bottom of the outer felt up to 3.75 inches. Use a fabric pen to mark where that 3.75 inch ends and mark the bottom of the fold to show the bottom of the pouch.
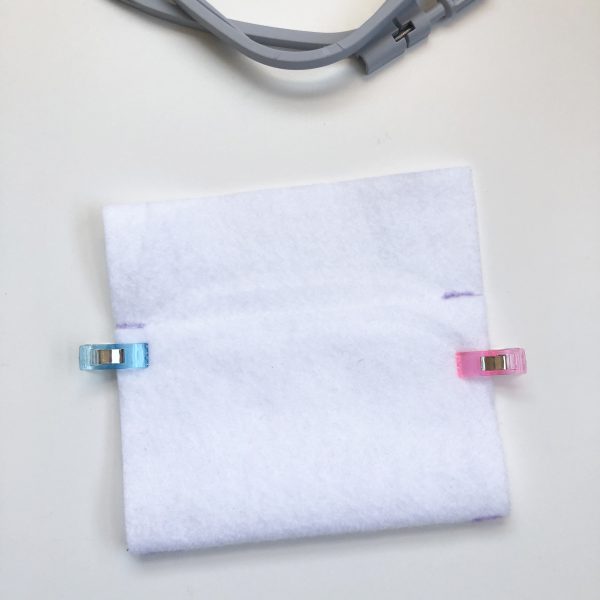
Finger iron the fold. Unfold and fuse the stabilizer under that 3.75 fold of the fabric.
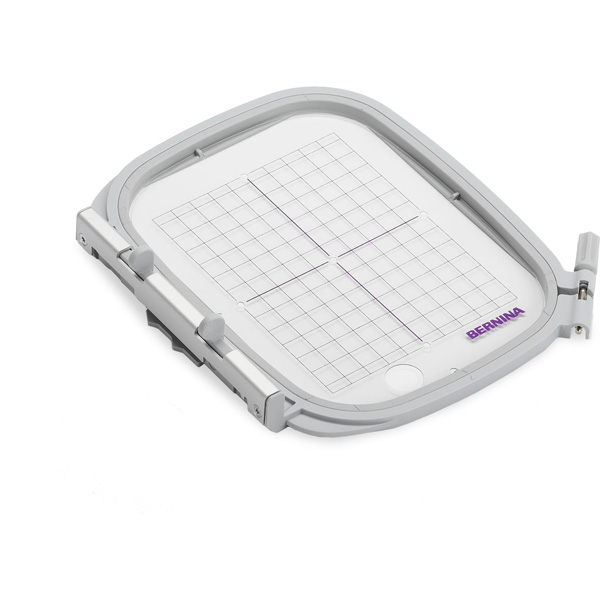
Hoop the fused stabilized felt fabric into the medium embroidery hoop.
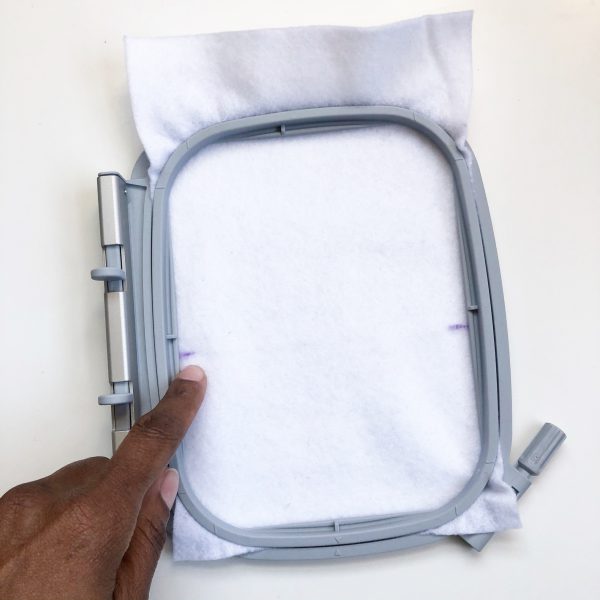
Notice the purple ink markers. They tell you that’s the bottom of the pouch where the fold happens so you don’t want your pattern to go above those lines.
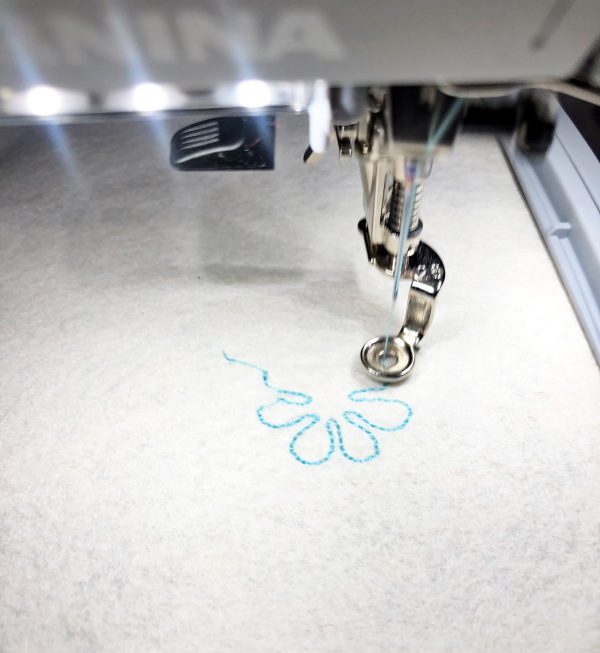
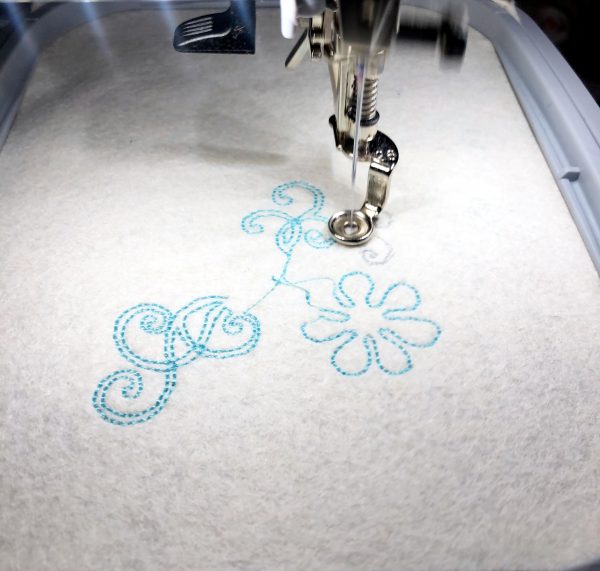
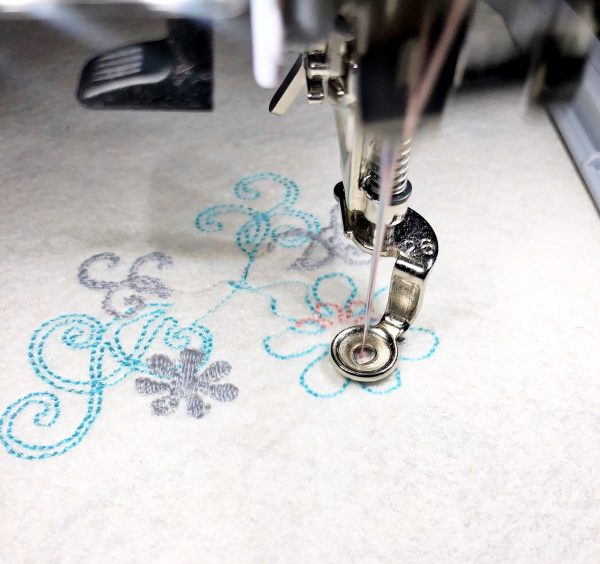
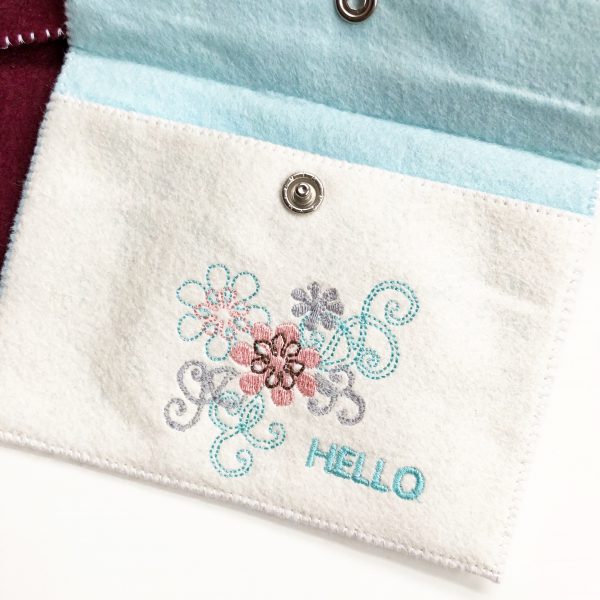
Step 3 – Embroider the front of the pouch
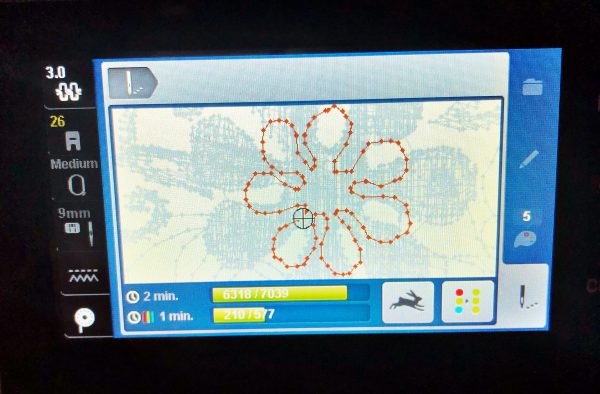
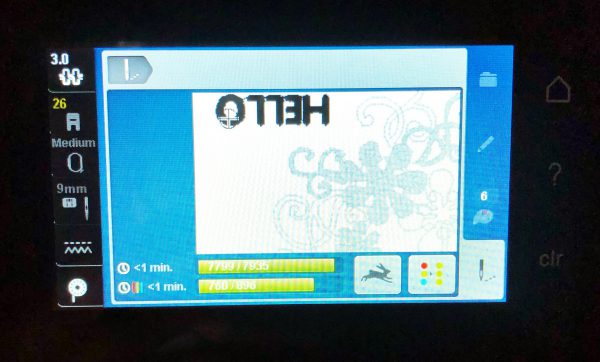
Choose a floral design and set the machine to start embroidery. The design I used came with my machine and can be found under the butterfly folder, choose file folder 3 then design number 22.
Scale the floral design down to 49 x 49 mm. Move it to the bottom of the hoop.
This design called for five different colors of thread but I only used four.
When the machine stops, change the color of thread to the color displayed on the machine screen.
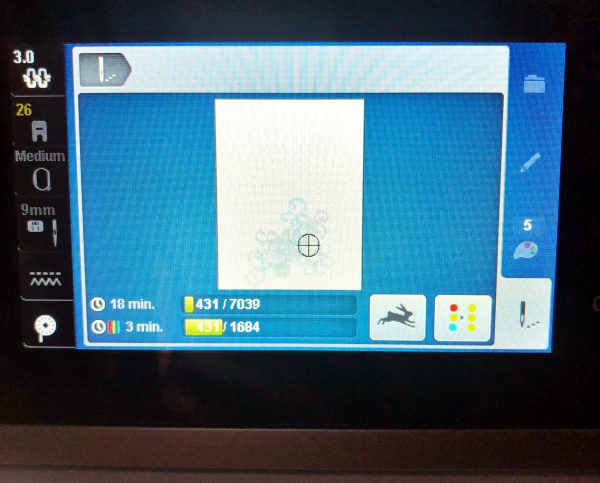
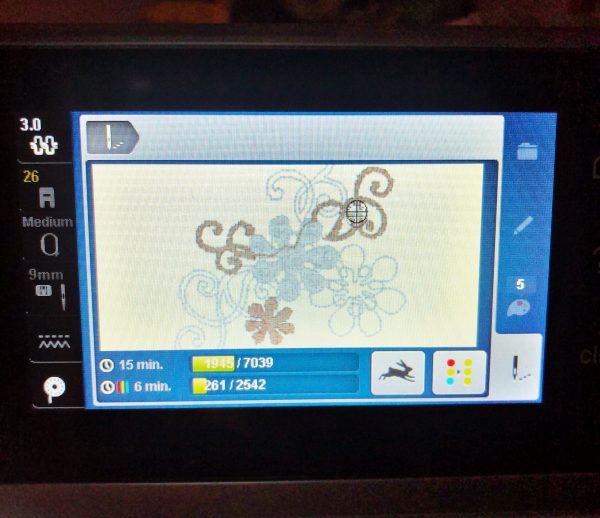
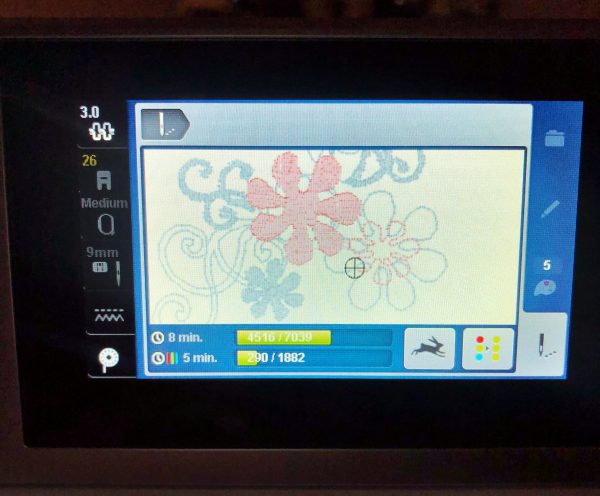
When the machine stops, change the color of thread to the color displayed on the machine screen.
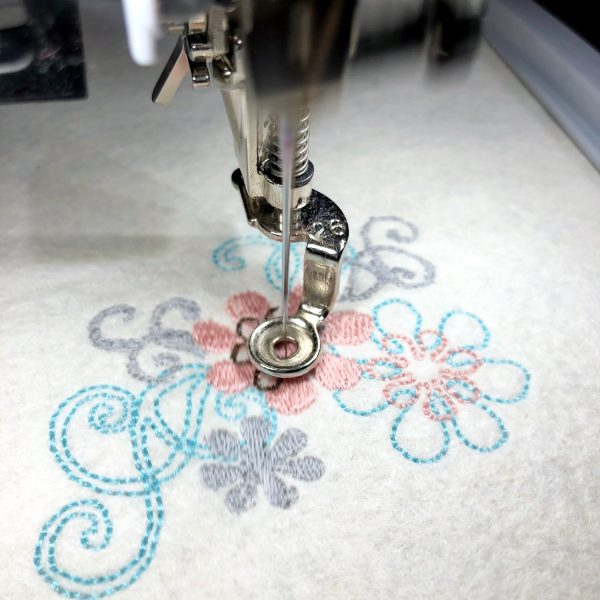
To add a little bit of personalization, add a layer to the embroidery design and type a message using the available text fonts.
Scale down the font to 27 x 7 mm. Position the font right next in between the two floral stems on the left side of the hoop.
Remember to turn the text around so that it reads correctly when you sew the felt pouch closed.
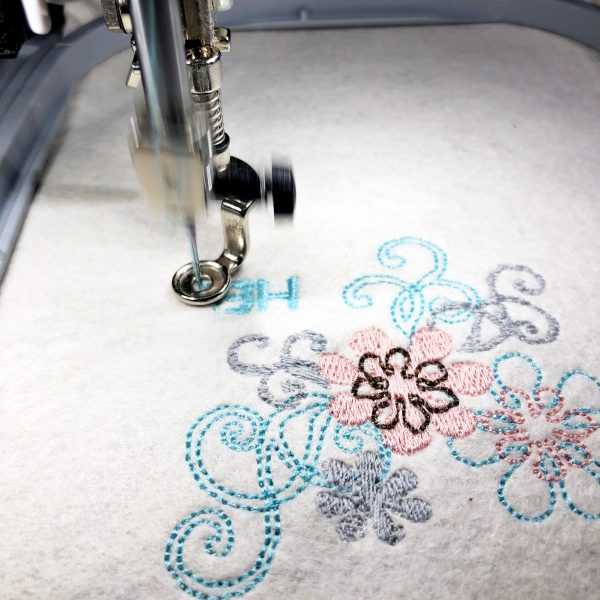
Once the design is finish, remove the fabric from the hoop.
Tearaway the stabilizer and cut any loose threads.
Step 4- Prepare the fabric for sewing
Clip or pin the 2 felt pieces together.
Remember, the embroidered design should be on the outside.
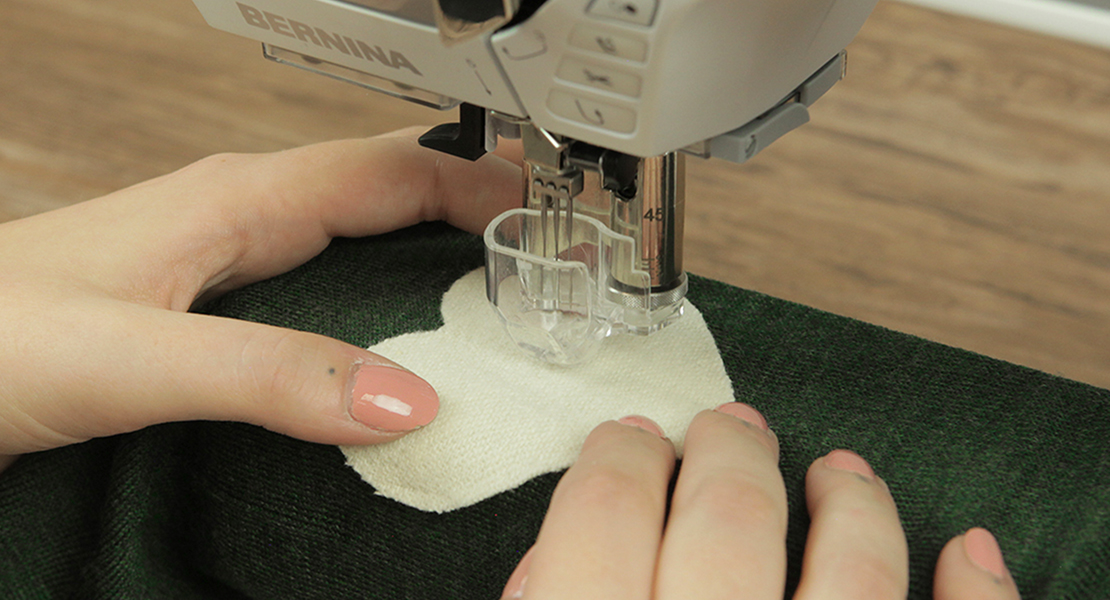
Step 5 – Sew the two-piece together
Attach BERNINA #20C foot to the machine.
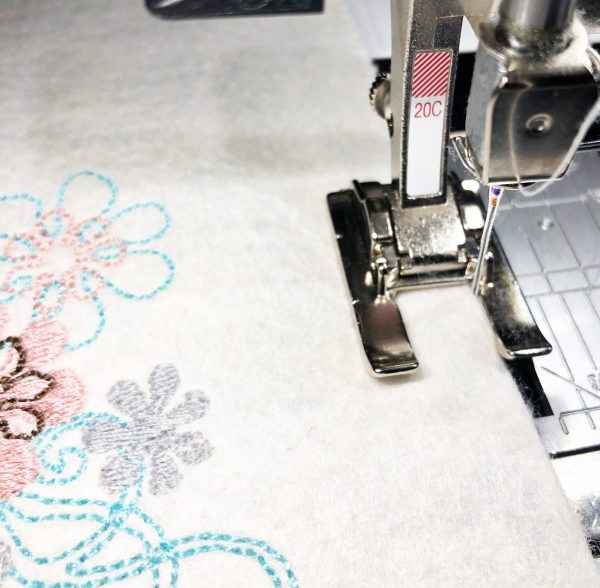
Select a blanket stitch (stitch number 1309 on my machine) and move the needle to the right position 5.

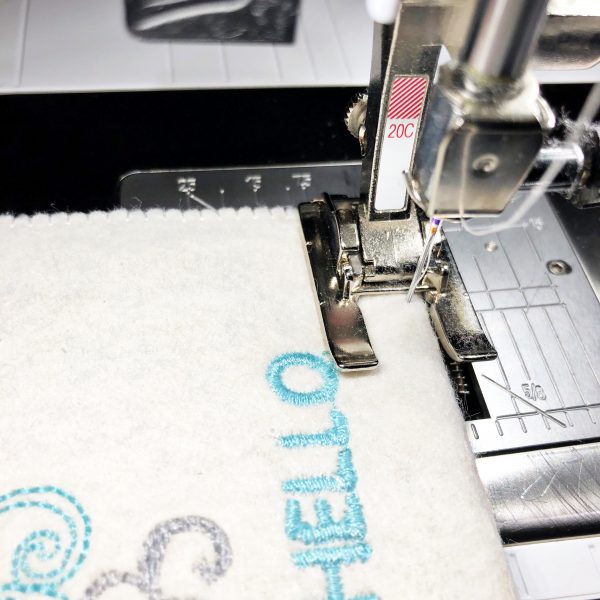
Blanket stitch the top and bottom (shorter side) with the white thread.
Fold the bottom up to the 3.75 inch mark showing the embroidery design.
Pin or clip the fold.
Place the top of the fabric under the presser foot and blanket stitch around the entire felt pouch.
Step 6 – Add snap closure
Fold the top of the felt pouch down to 4.25 inches.
Mark the center with a pencil.
Use the snap tool to adhere the snap to the flap and the pouch base.
Close the pouch to make sure the snap is stable in place.
Perfect little felt pouches to hold small items in a big bag or a stand-alone pouch to walk with.
Used Products


What you might also like


6 comments on “Embroidered Felt Pouch”
-
-
Yes you could use wool for this but remember that wool tends to frey on open edges so you might want to create a little fringe and secure with a straight edge stitch right up to the fringe line, you would skip the blanket stitch with this method if you want to use the blanket stitch I would use a fusible woven interfacing on the back side of the wool (a sew in interfacing would not work with this pattern) but you would need to trim a scant amount from the edge so your blanket stitch catches the interfacing say make your interfacing 1/16 of an inch all around smaller than your wool pieces to assure the interfacing does not show.
-
Thank you Arhuland for responding. Well said!!
-
-
-
Thank you! ?
-
Is it possible to show the underside of the embroidered area? I am looking for a reference to how my first 5-10 stitches should look when I start an embroidery design with my 770.
-
Hello Calhoun38! The underside of this embroidered pouch is covered by the inside felt. I would have to create another one to show you the backside. The backside usually isn’t the pretty side, and since its cover-up, it ok that it doesn’t look pretty. If this was a towel, then, of course, the backside needs to look great as well.
Is this your first time embroidering? I can create an example piece but would need to email it to you for you to see since I can’t add a picture to this reply.
-
Leave a Reply
You must be logged in to post a comment.

Very cute! Can you use wool?