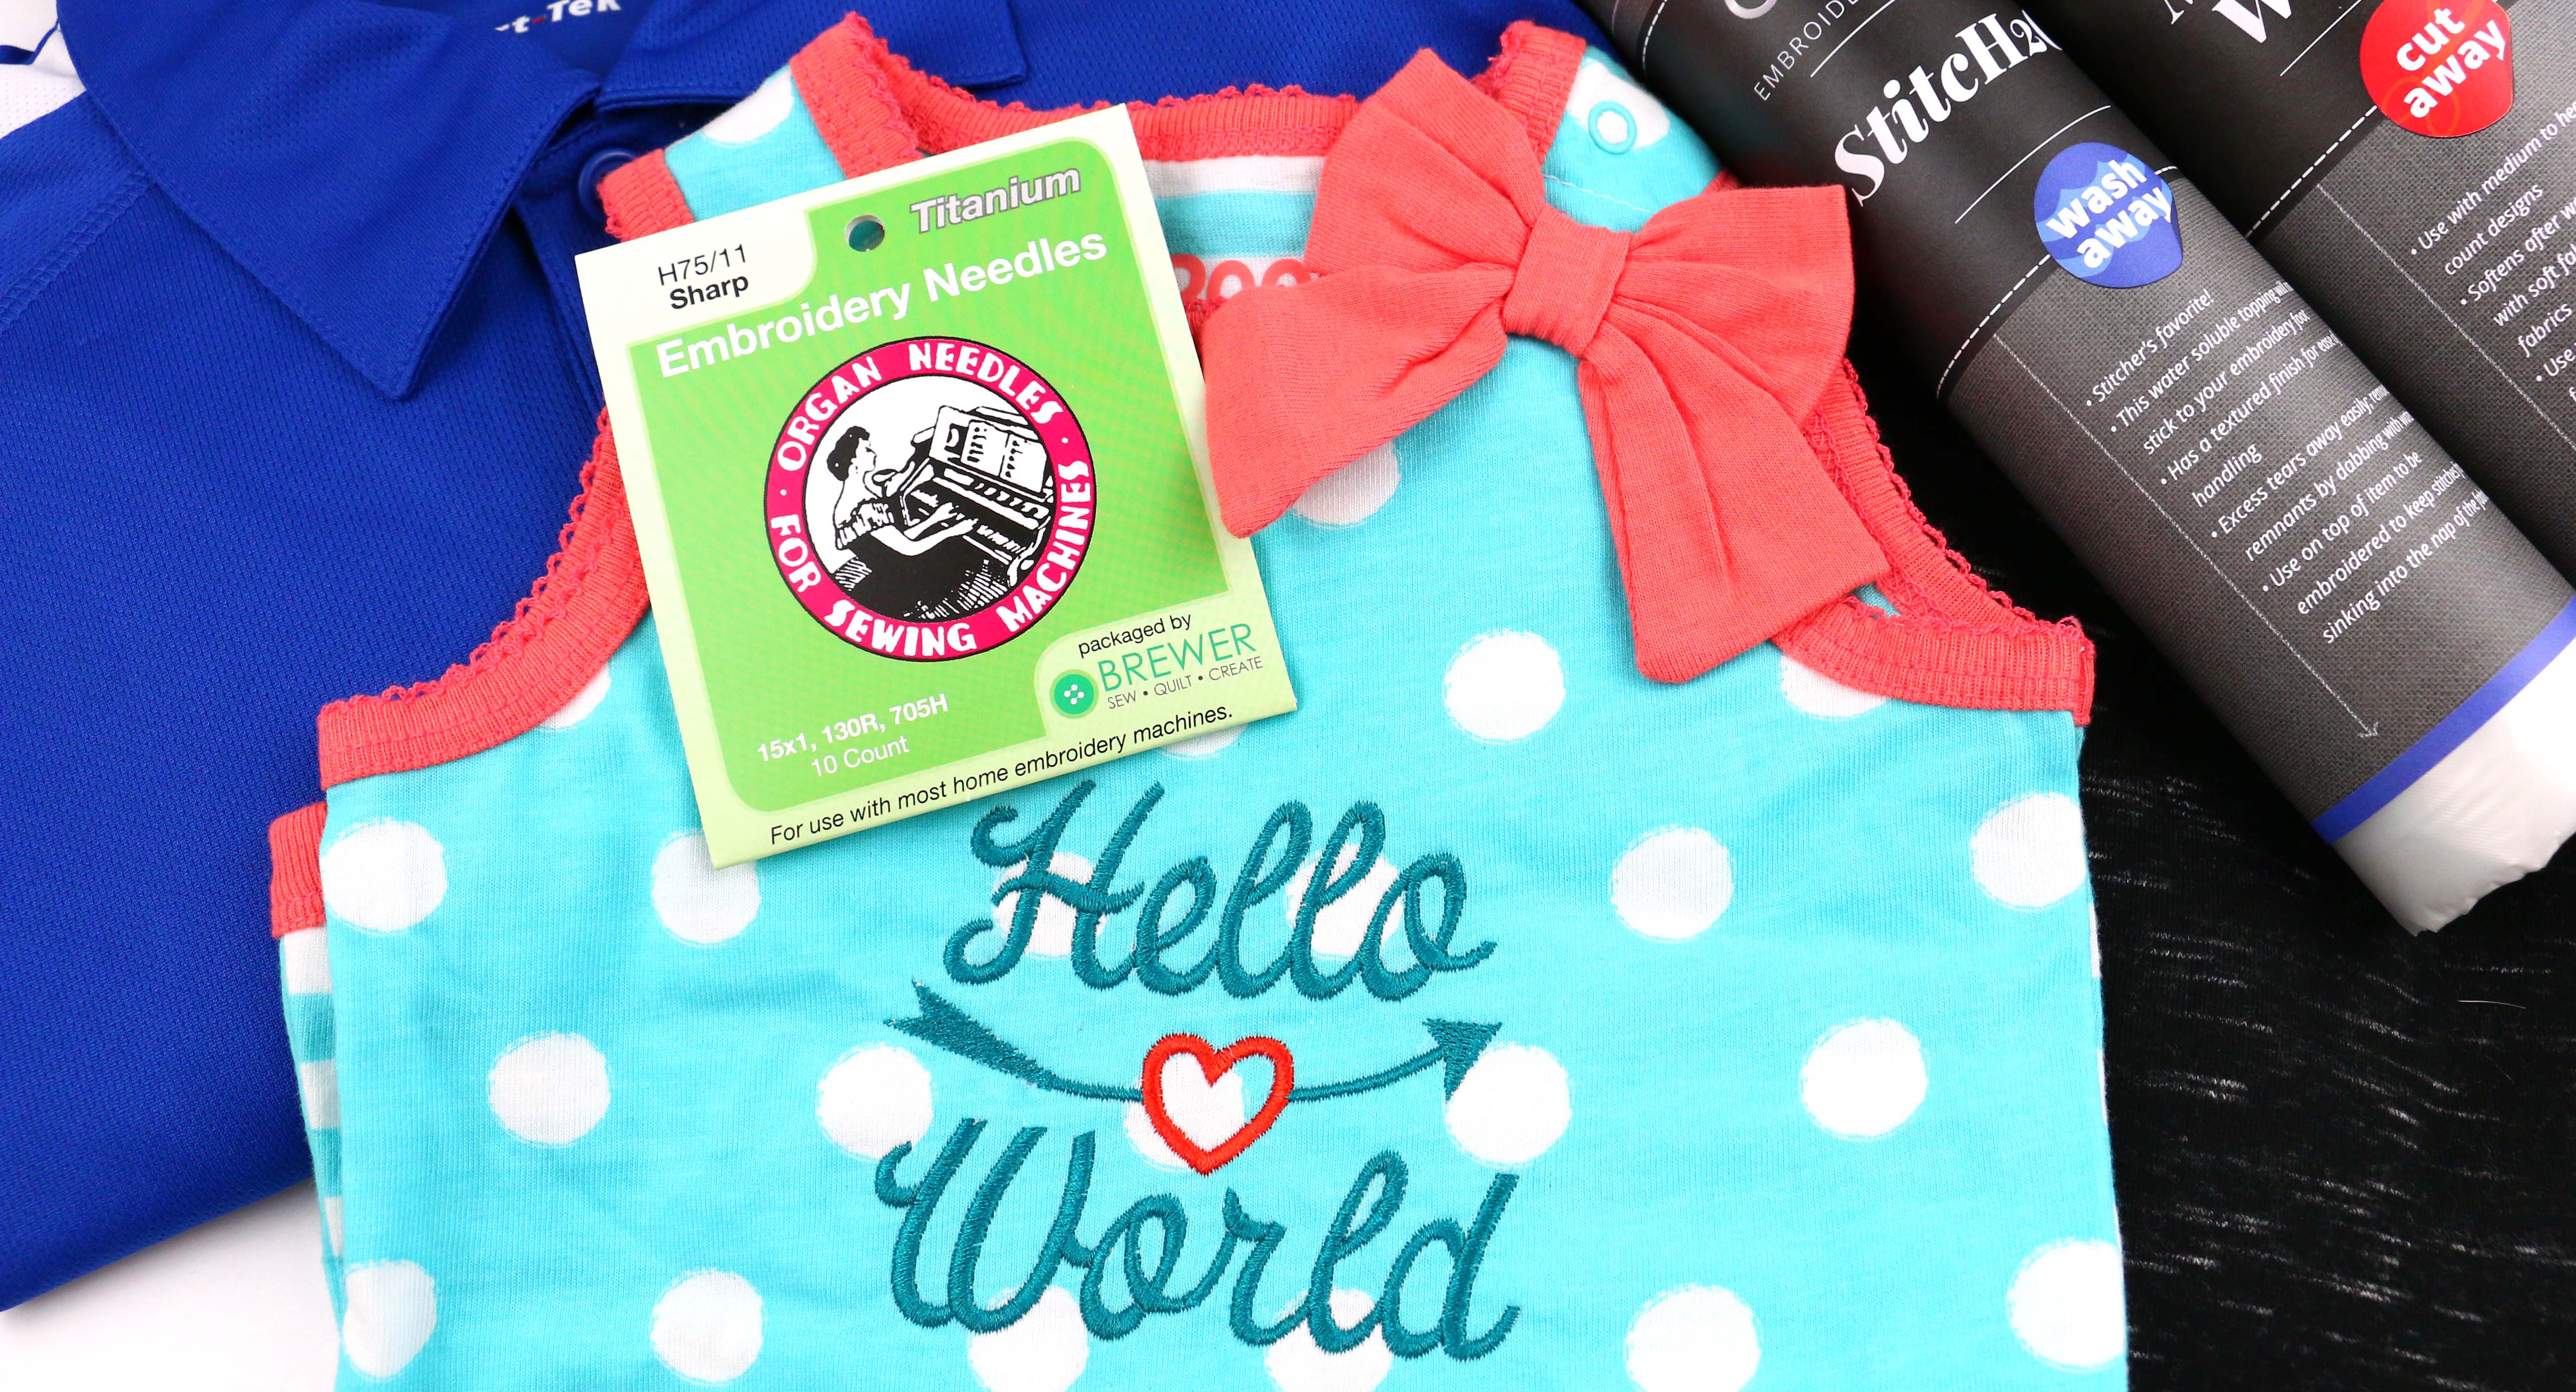
Embroidered Onesie on the Freearm
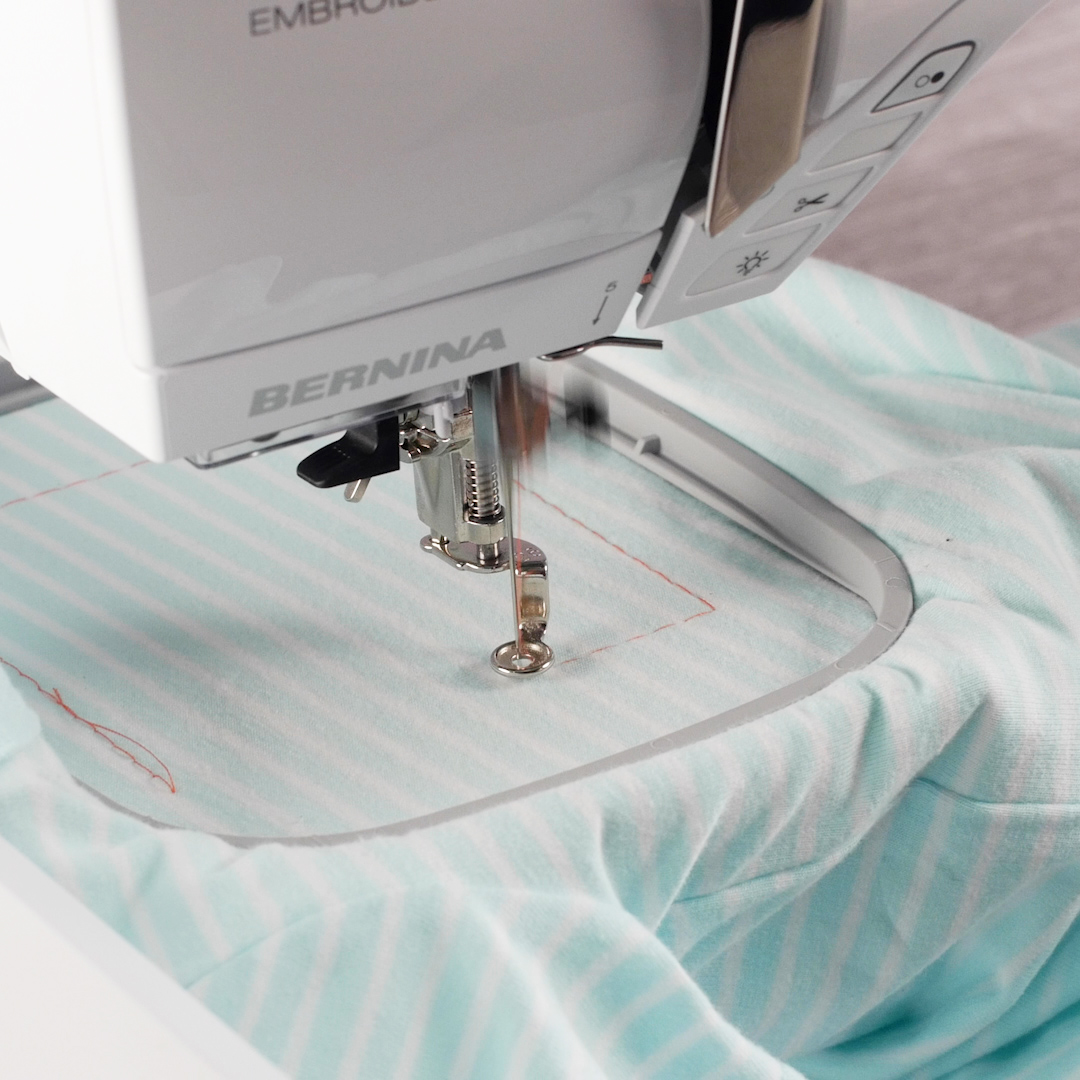
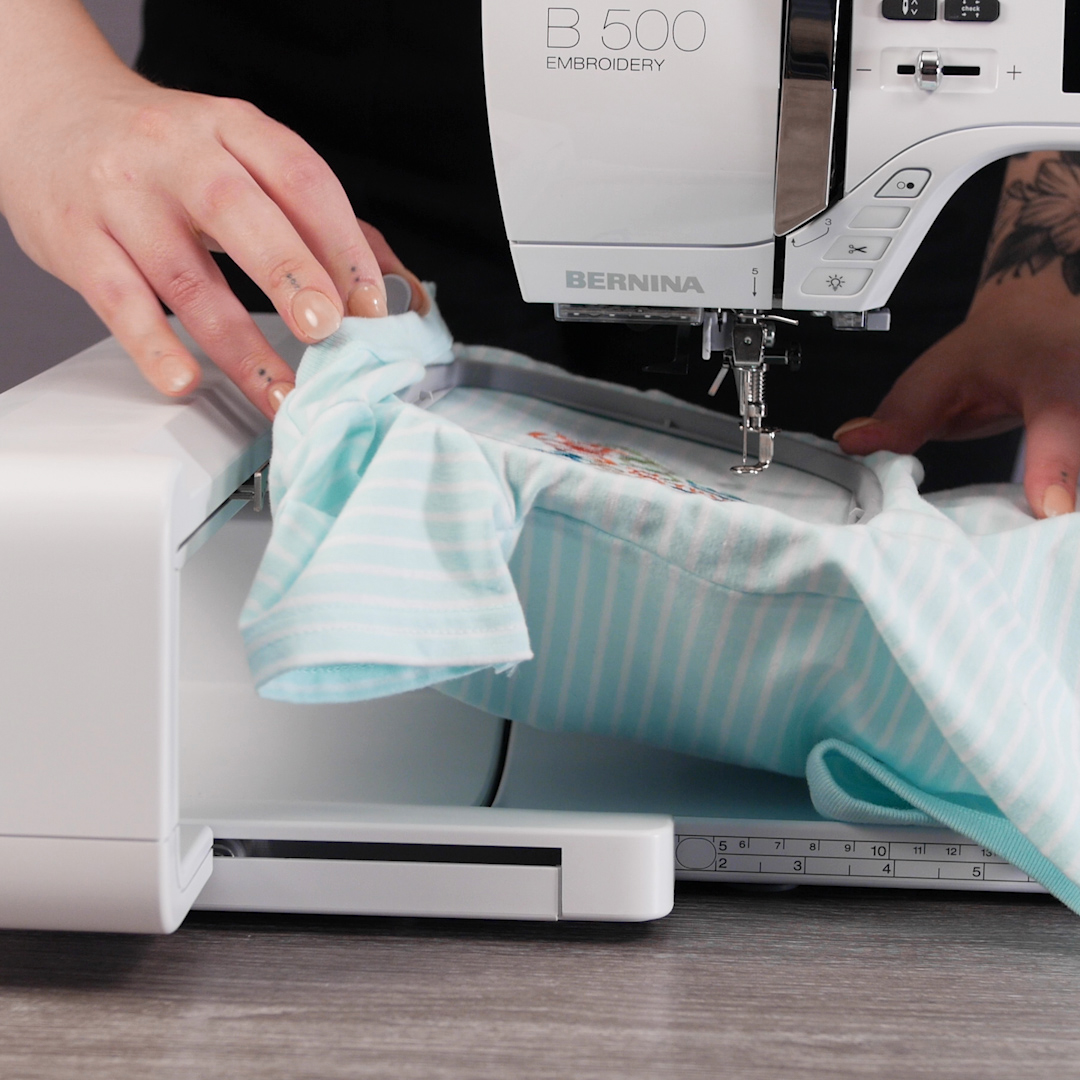
There are so many accessories, clothing items, and goodies you can embroider that require some extra flexibility around your machine’s freearm. Did you know BERNINA machines are the only domestic machines that have the ability to embroider while utilizing the freearm? The ability to maneuver your project around and underneath that needle area is highly undervalued real estate!
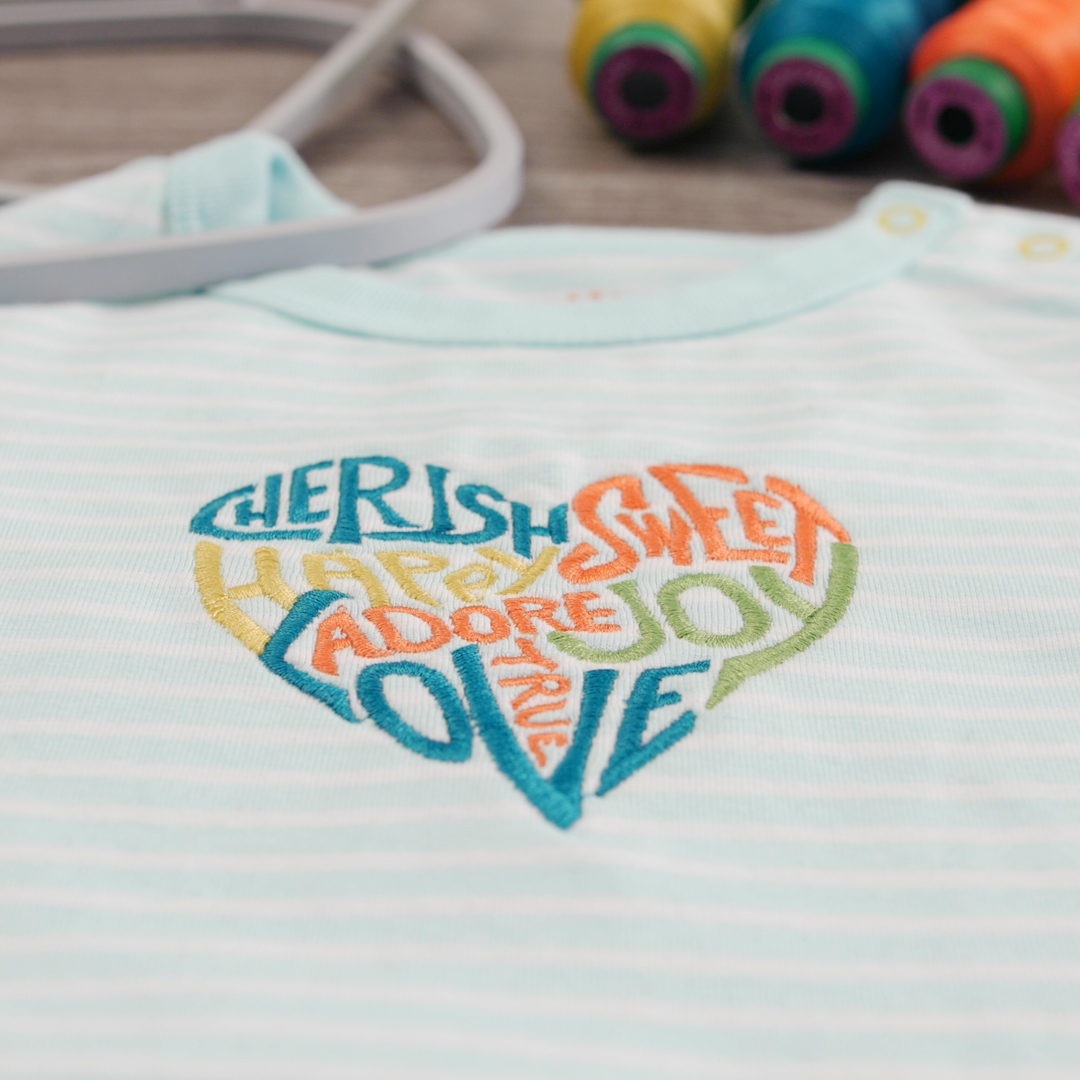
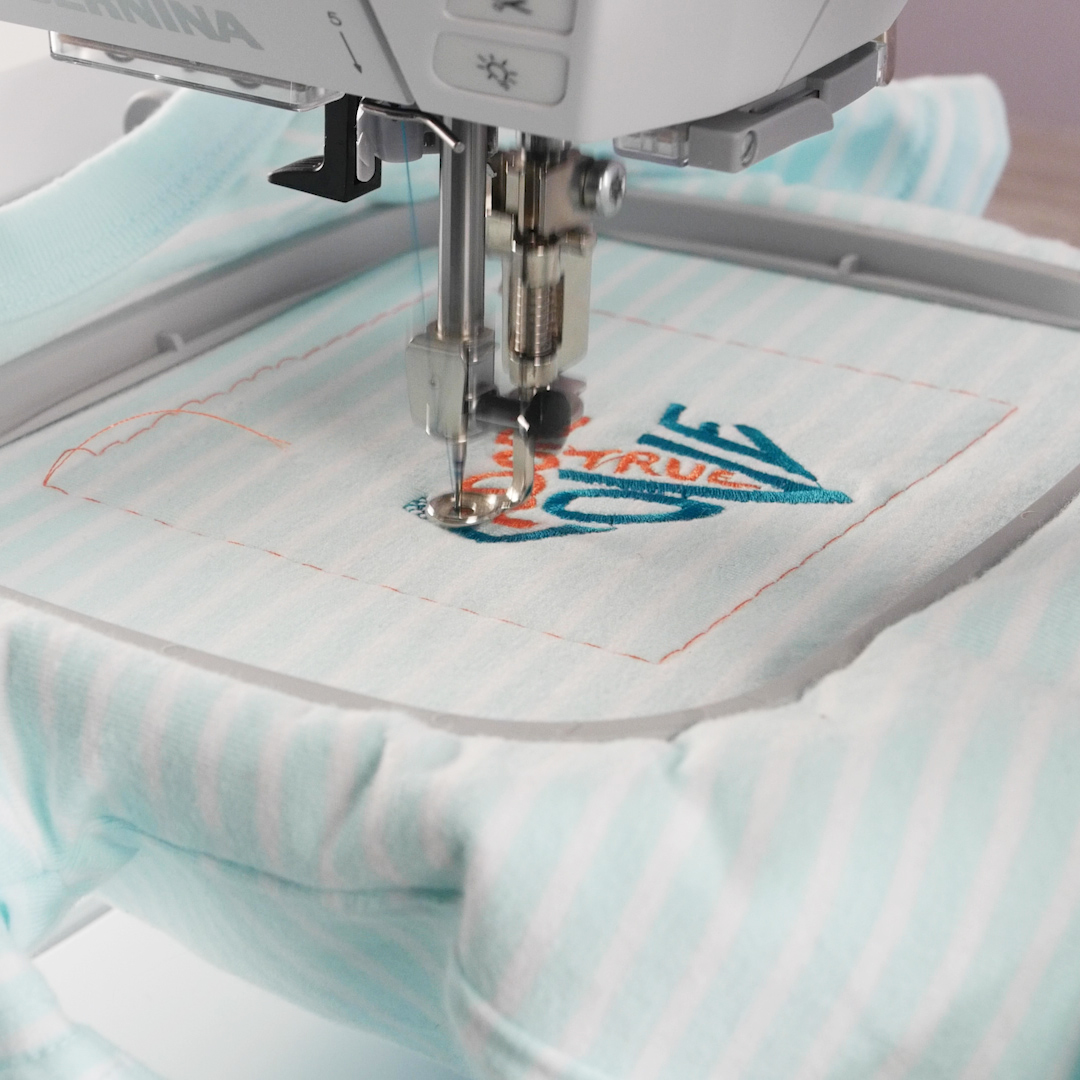
One of the best projects to show off this feature is stitching on a baby onesie. Their size and shape can make them tricky to hoop and would typically require some extra work to make sure the excess fabric is secured away from the needle area.
Supplies:
- Cotton jersey baby onesie
- OESD Word Art Heart embroidery design
- OESD Polymesh CutAway stabilizer
- 505 Spray Adhesive
- Isacord embroidery thread
- BERNINA Medium Embroidery Hoop
- Drop-Shaped Embroidery Foot #26
- BERNINA 500
- Stabilize
Proper stabilization is the hero of well-stitched embroidery. BERNINA Ambassador Sue O’Very has written an incredible series on embroidery techniques and their stabilizers—you can find tips for stitching on any kind of fabric over here.
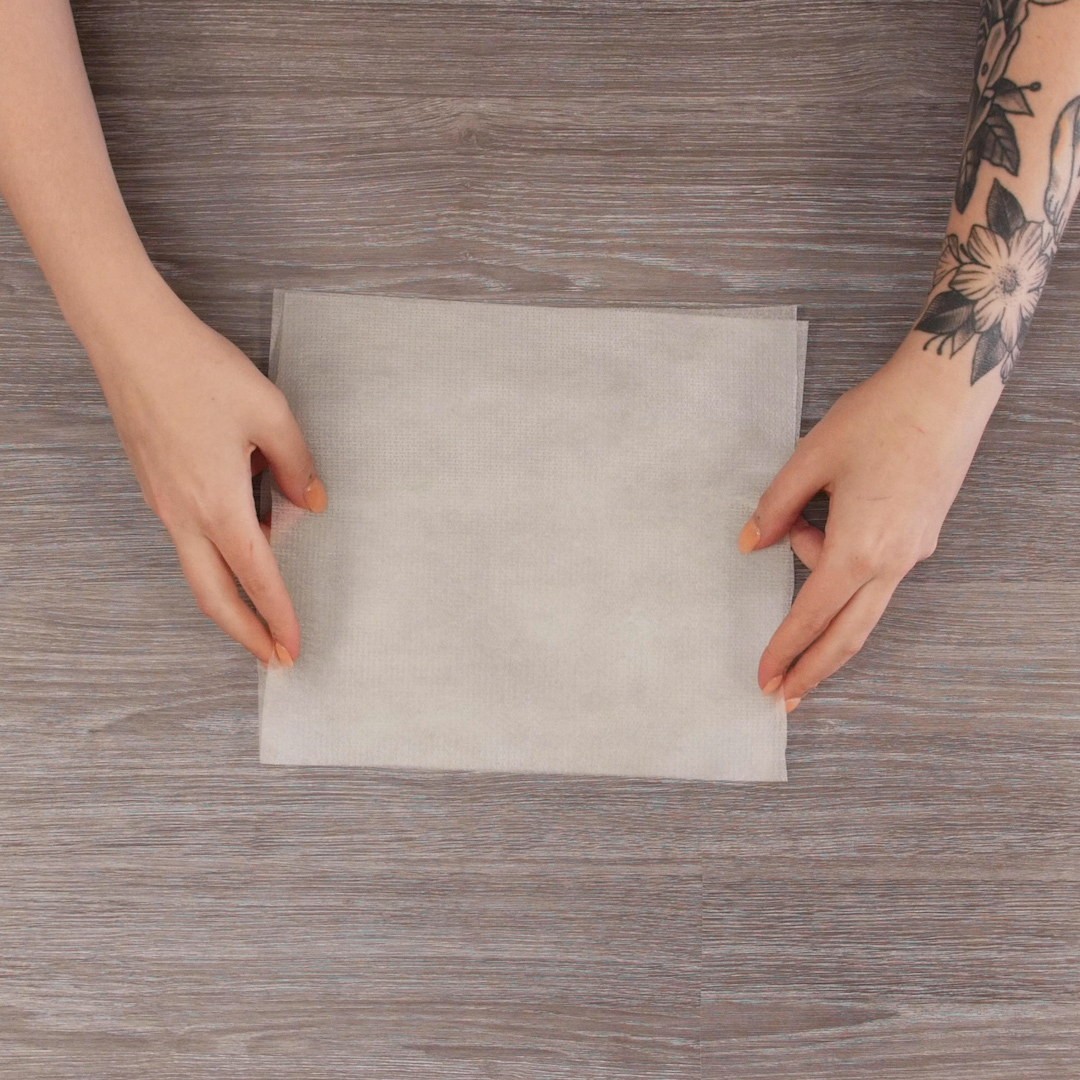
For our medium-weight knit baby onesie, I’m going to use two layers of OESD Polymesh CutAway stabilizer. This will give strength to the embroidery but also be nice and soft on the back side. If you or your little loved one is especially sensitive, you can cover up the bobbin stitches and stabilizer edges after the embroidery is finished using OESD Gentle Touch Embroidery Backing.
Stick the two layers of Polymesh together with a light spray of 505 Spray Adhesive.
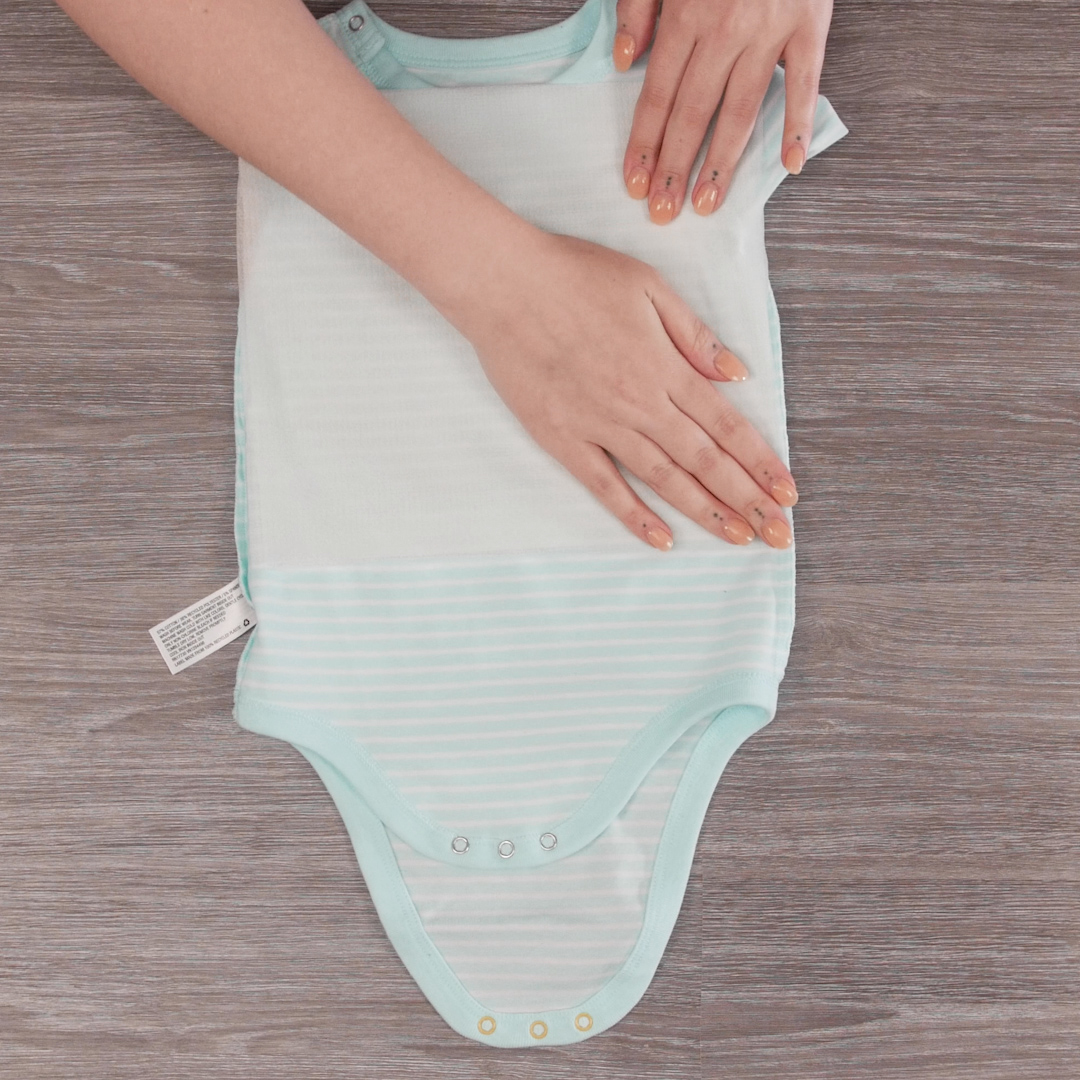
Then, again with the 505, stick the stabilizer to the inside of the onesie.
- Hoop it up
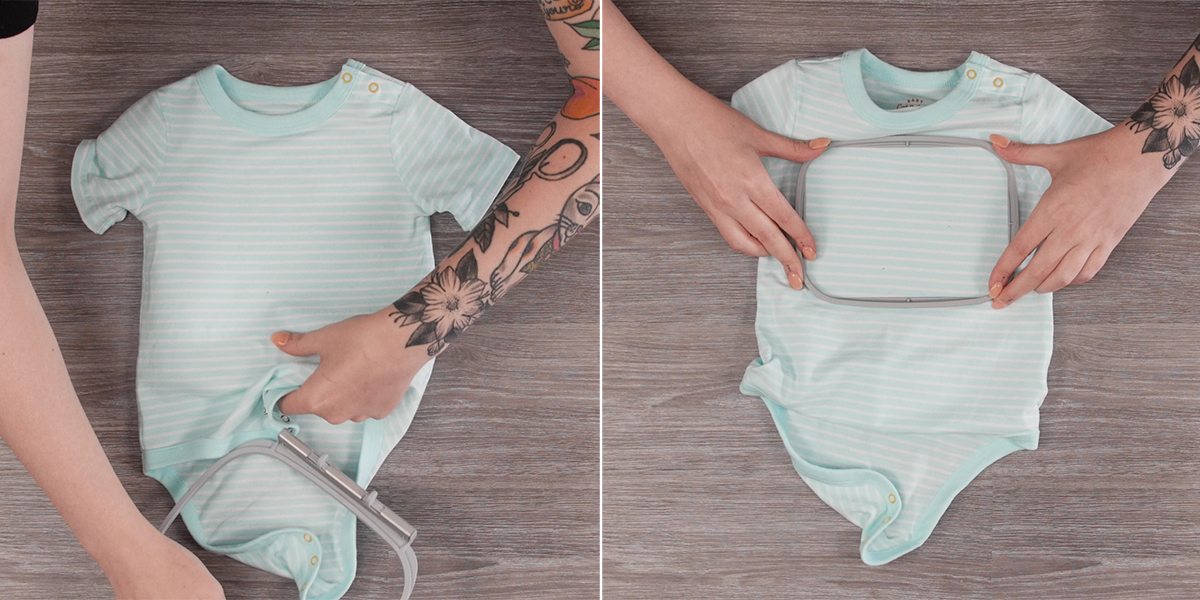
With the onesie turned right side out, so our stabilizer is inside, measure and mark the center of the onesie (or wherever you’d like to place the embroidery design) with a fabric marker or chalk pencil.
Hoop your project so the outer ring of the embroidery hoop is inside the onesie and the inner ring is on the outside, making sure your placement marking is roughly in the center. The widest part of the medium hoop will go shoulder to shoulder across the onesie.
- Setup Design
Get your embroidery design loaded on to the machine. Take a look at your Status Bar and double check your hardware settings. You should have the #26 presser foot and the Medium embroidery hoop selected. I also suggest using a straight stitch needle plate for your embroidery projects.
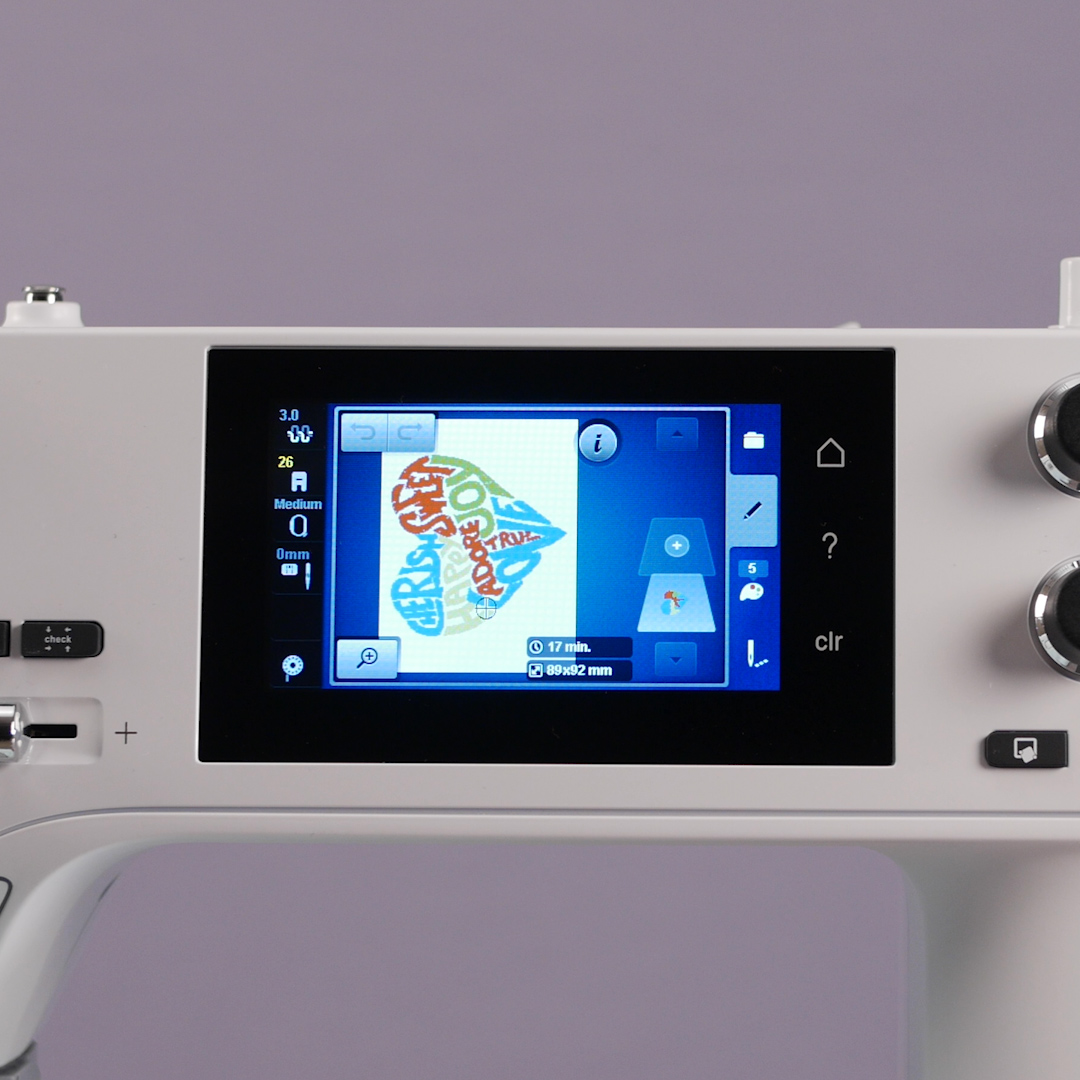
Next, select the Information icon; then select Pinpoint Placement. At this point, your machine will ask you to attach the hoop to the embroidery module. Open up all the snaps and slide the onesie around the freearm and secure the hoop to the module.

To use Pinpoint Placement to align your design, begin by selecting one of the nodes around your design on screen. The module will then move the hoop to this point on the design. Use the Multifunction Knobs to adjust this point and select Set to save. Then, select a second node on the design and repeat the process.
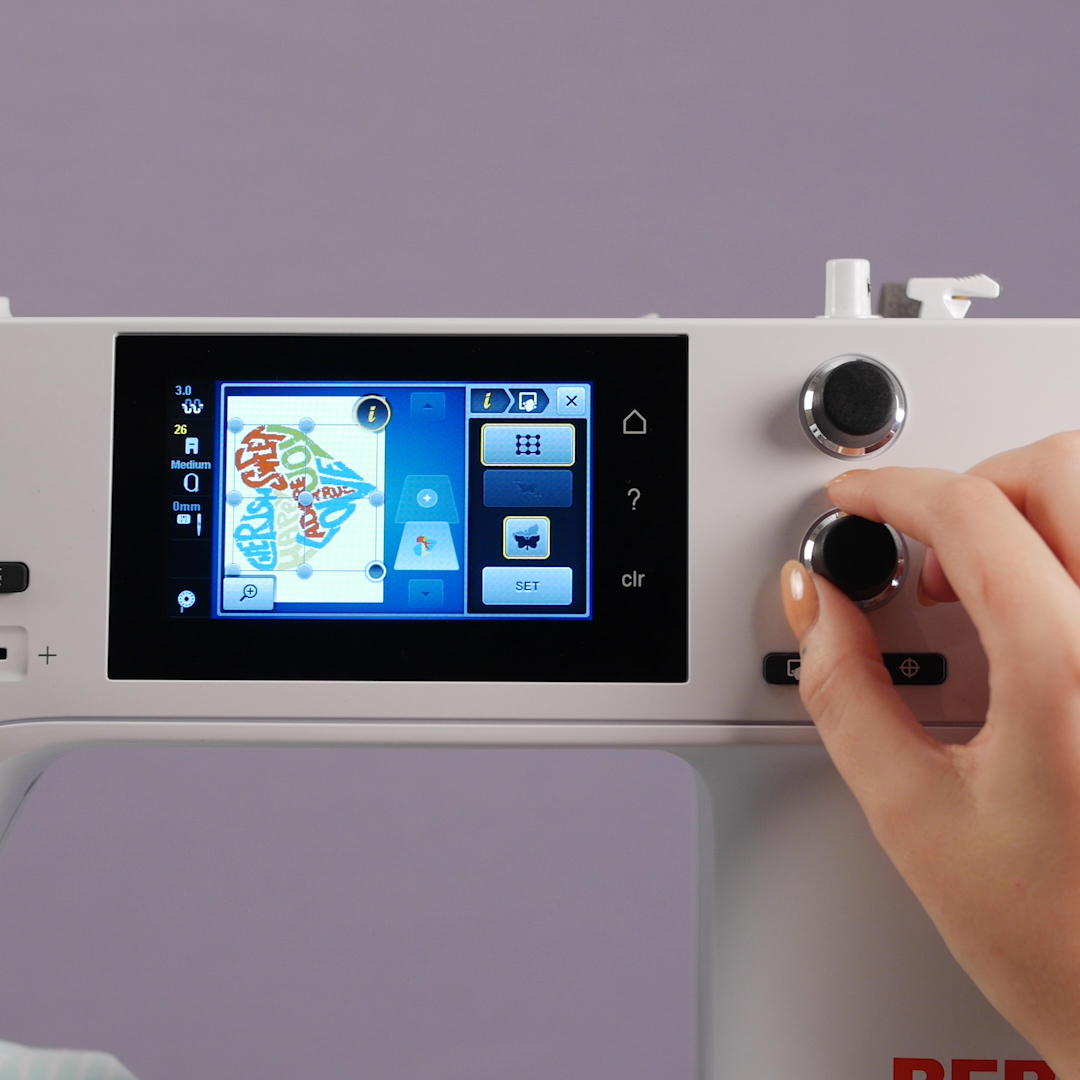
The onesie I’m using is striped which makes things very easy for me to align my points and ensure the design is lined up straight across my fabric.
- Stitch out
When we move on to the stitchout screen, there’s one last setting to check before we actually start the sewing. Select the Basting icon.
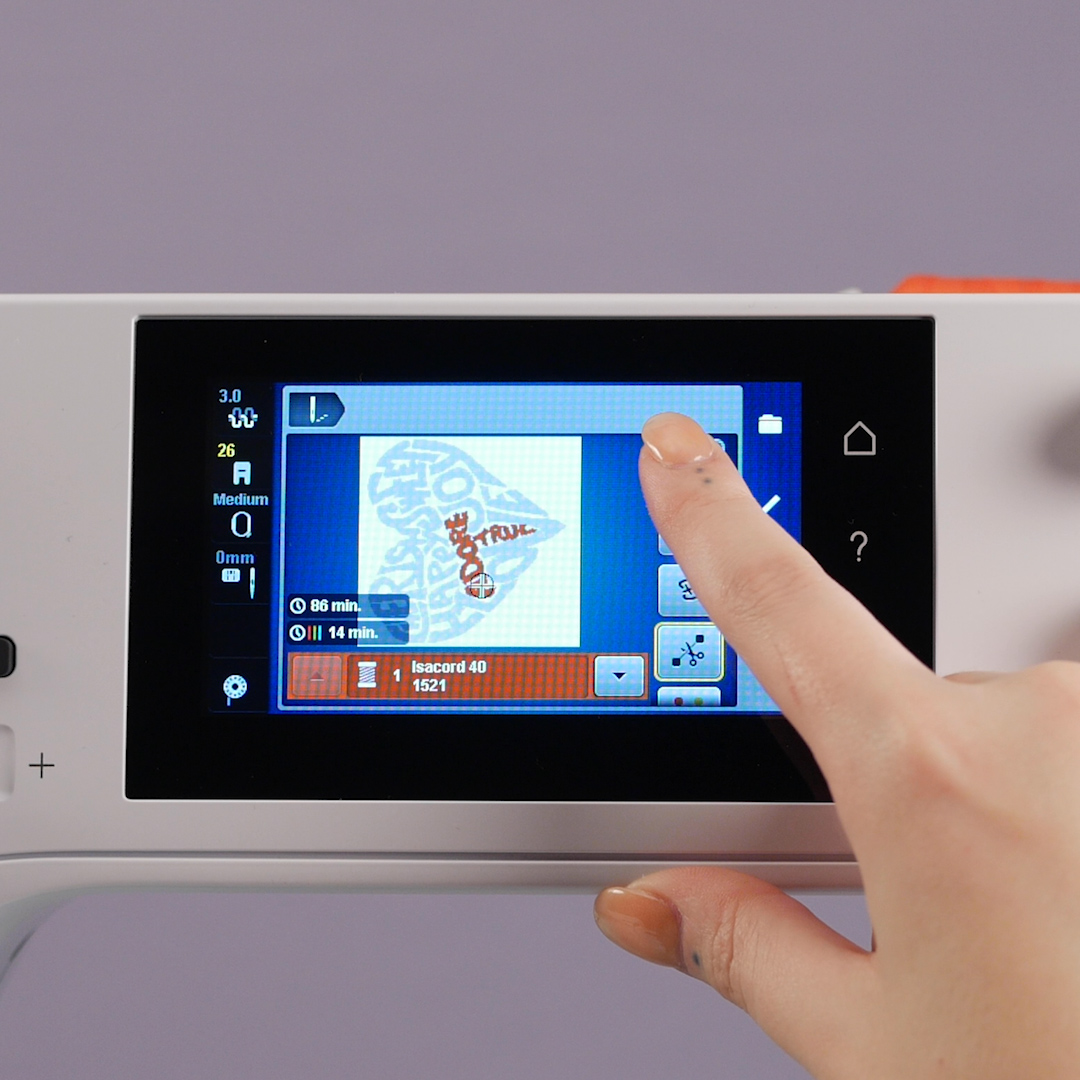
The machine will now sew a basting box around the design for an extra level of stabilization before the design itself stitches out.
With your basting box sewn, go ahead and let the design stitch out, changing thread colors as needed.
- Trim stabilizer
When the design is finished, remove the hoop from the machine and unhoop the onesie. Pull out the basting box threads, using a seam ripper or small snips if necessary.
Trim away the excess stabilizer around your design, wash with some hypoallergenic detergent, and it’s ready for your little loved one to wear!
What you might also like


24 comments on “Embroidered Onesie on the Freearm”
-
-
You are welcome, Jojo! Be sure to share what you make 🙂
-
-
I used this technique on my 590 and it was so easy! No more trying to wad up the onesie and hope it doesn’t get caught in the stitchout!
-
Isn’t it a life saver?! It’s so handy to be able to make a quick, headache-free custom gift 🙂
-
What does the pinpoint icon look like and basting icon on B780
-
The basting box icon is in the same location noted here, after you select the needle icon to move to the stitchout screen. Unfortunately, Pinpoint Placement is not a feature available on the B 780.
-
-
-
-
AMAZING. Ingenius!! Love this tip.
Thinking about all the years I wrestled with grandkids’ onesies.
I’ll do this with any child’s t-shirt in the future.
Thank you!!-
Absolutely! Kid’s shirts are another great application for this– anything smaller than 5T can put up a fight when you try to embroider on it. The freearm makes it a breeze 🙂
-
-
What a great way to personalize a much-used baby item. I’m sure I’ll create many. I imagine making one to match a handmade baby quilt.
-
What a great idea! Best of luck 🙂
-
-
Wish I had seen this a few months back. One of my first embroidery project as a size 9 months onesie with long sleeves….and it was coming along beautifully until I realized one of the sleeves was caught in the design! And that was after I thought I had pinned the sleeves out of the way. Your approach would eliminate all that.
-
It really is a great way to stitch! Another technique that would avoid the “stuck sleeve” issue would be to use PaintWork– no need to worry about sewing through something if you’re just drawing on the surface! PaintWork is extra baby/kid-friendly too because there’s no stabilizer or threads on the inside.
-
-
Can I do this on my 560e?
-
I had an adapter set to do free arm embroidery on my 2016 570 (same gen as your 560). It creates the space next to the free arm to do this. All the machines that use the S module would need this adapter, as the S module sits right up next to the arm. This snug fit creates a nice, stable worktop, but closes up the free arm area. So get the adapter set for the med/large hoops, from your dealer, and you will be good to go.
-
-
I have an older Bernina machine, the Artista 730 and may have to check this out for my machine.
-
Read about adapter set for med/large hoop on S module just above this comment.
-
-
On my 830?
-
Yes! Your L module leaves that space open for free arm hooping.
-
-
After all the times I struggled with a small hoop to embroider a onesie, I am thrilled to see this method. Can’t wait to try it out.
Thanks…Lorraine -
What a great thing to be able to do. Glad I saw this tip now as I’ve git a couple of onesies in my pile to make right now!
-
Can this be done on my Artista 200/730? that would be so much easier if I can!
-
Yes, please see the comment above about the adapter set for med/large hoops on your S module.
-
Leave a Reply
You must be logged in to post a comment.

Genius!!! Thank you for this tip! Cannot wait to try it!