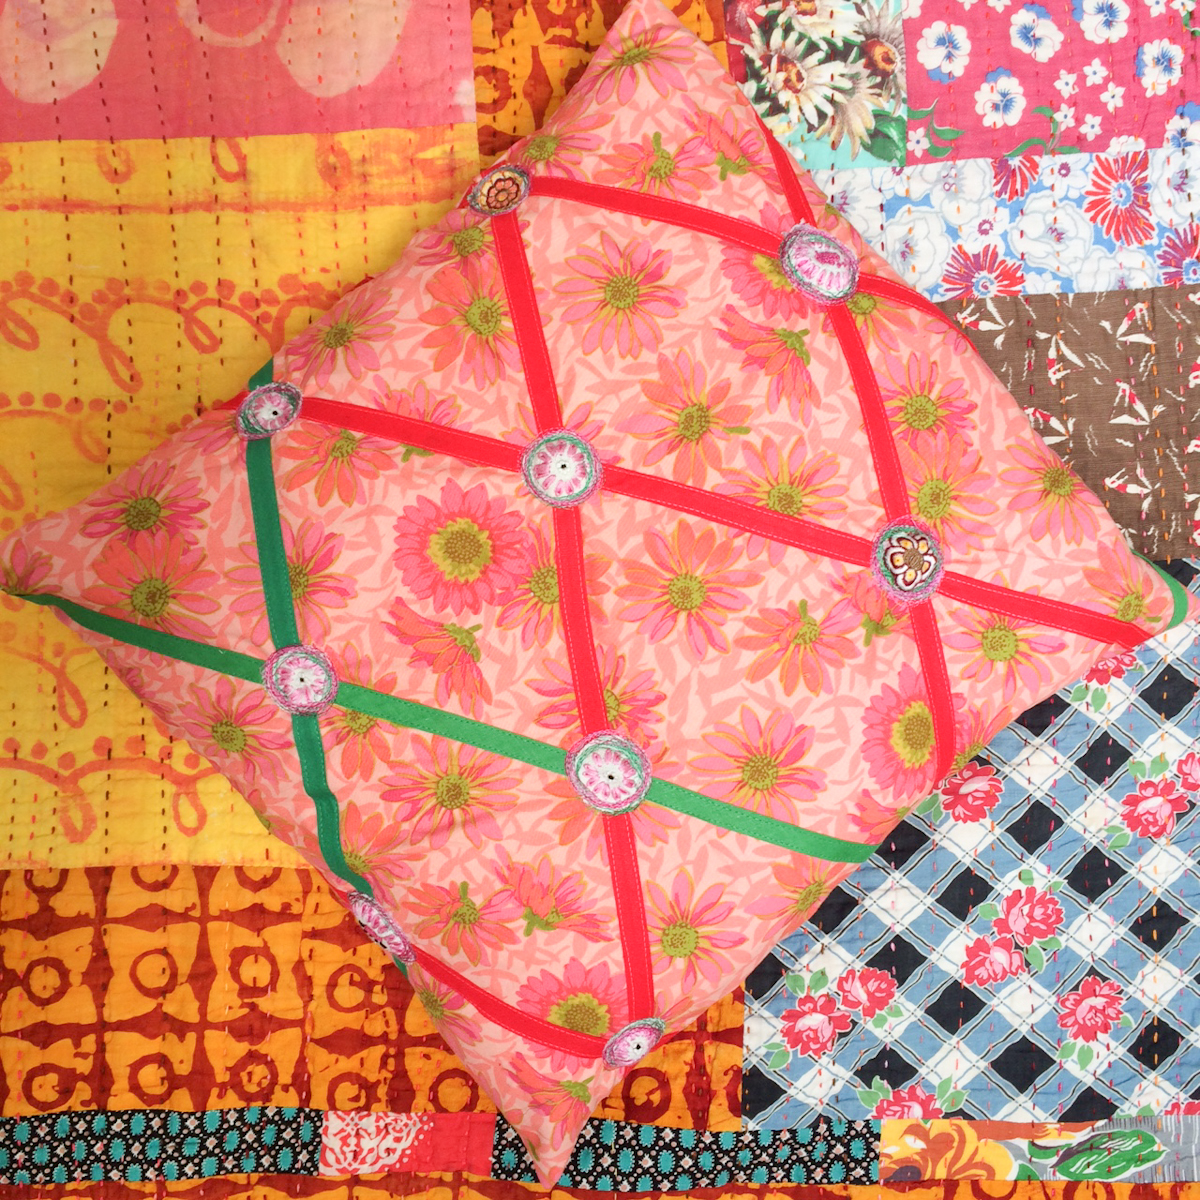
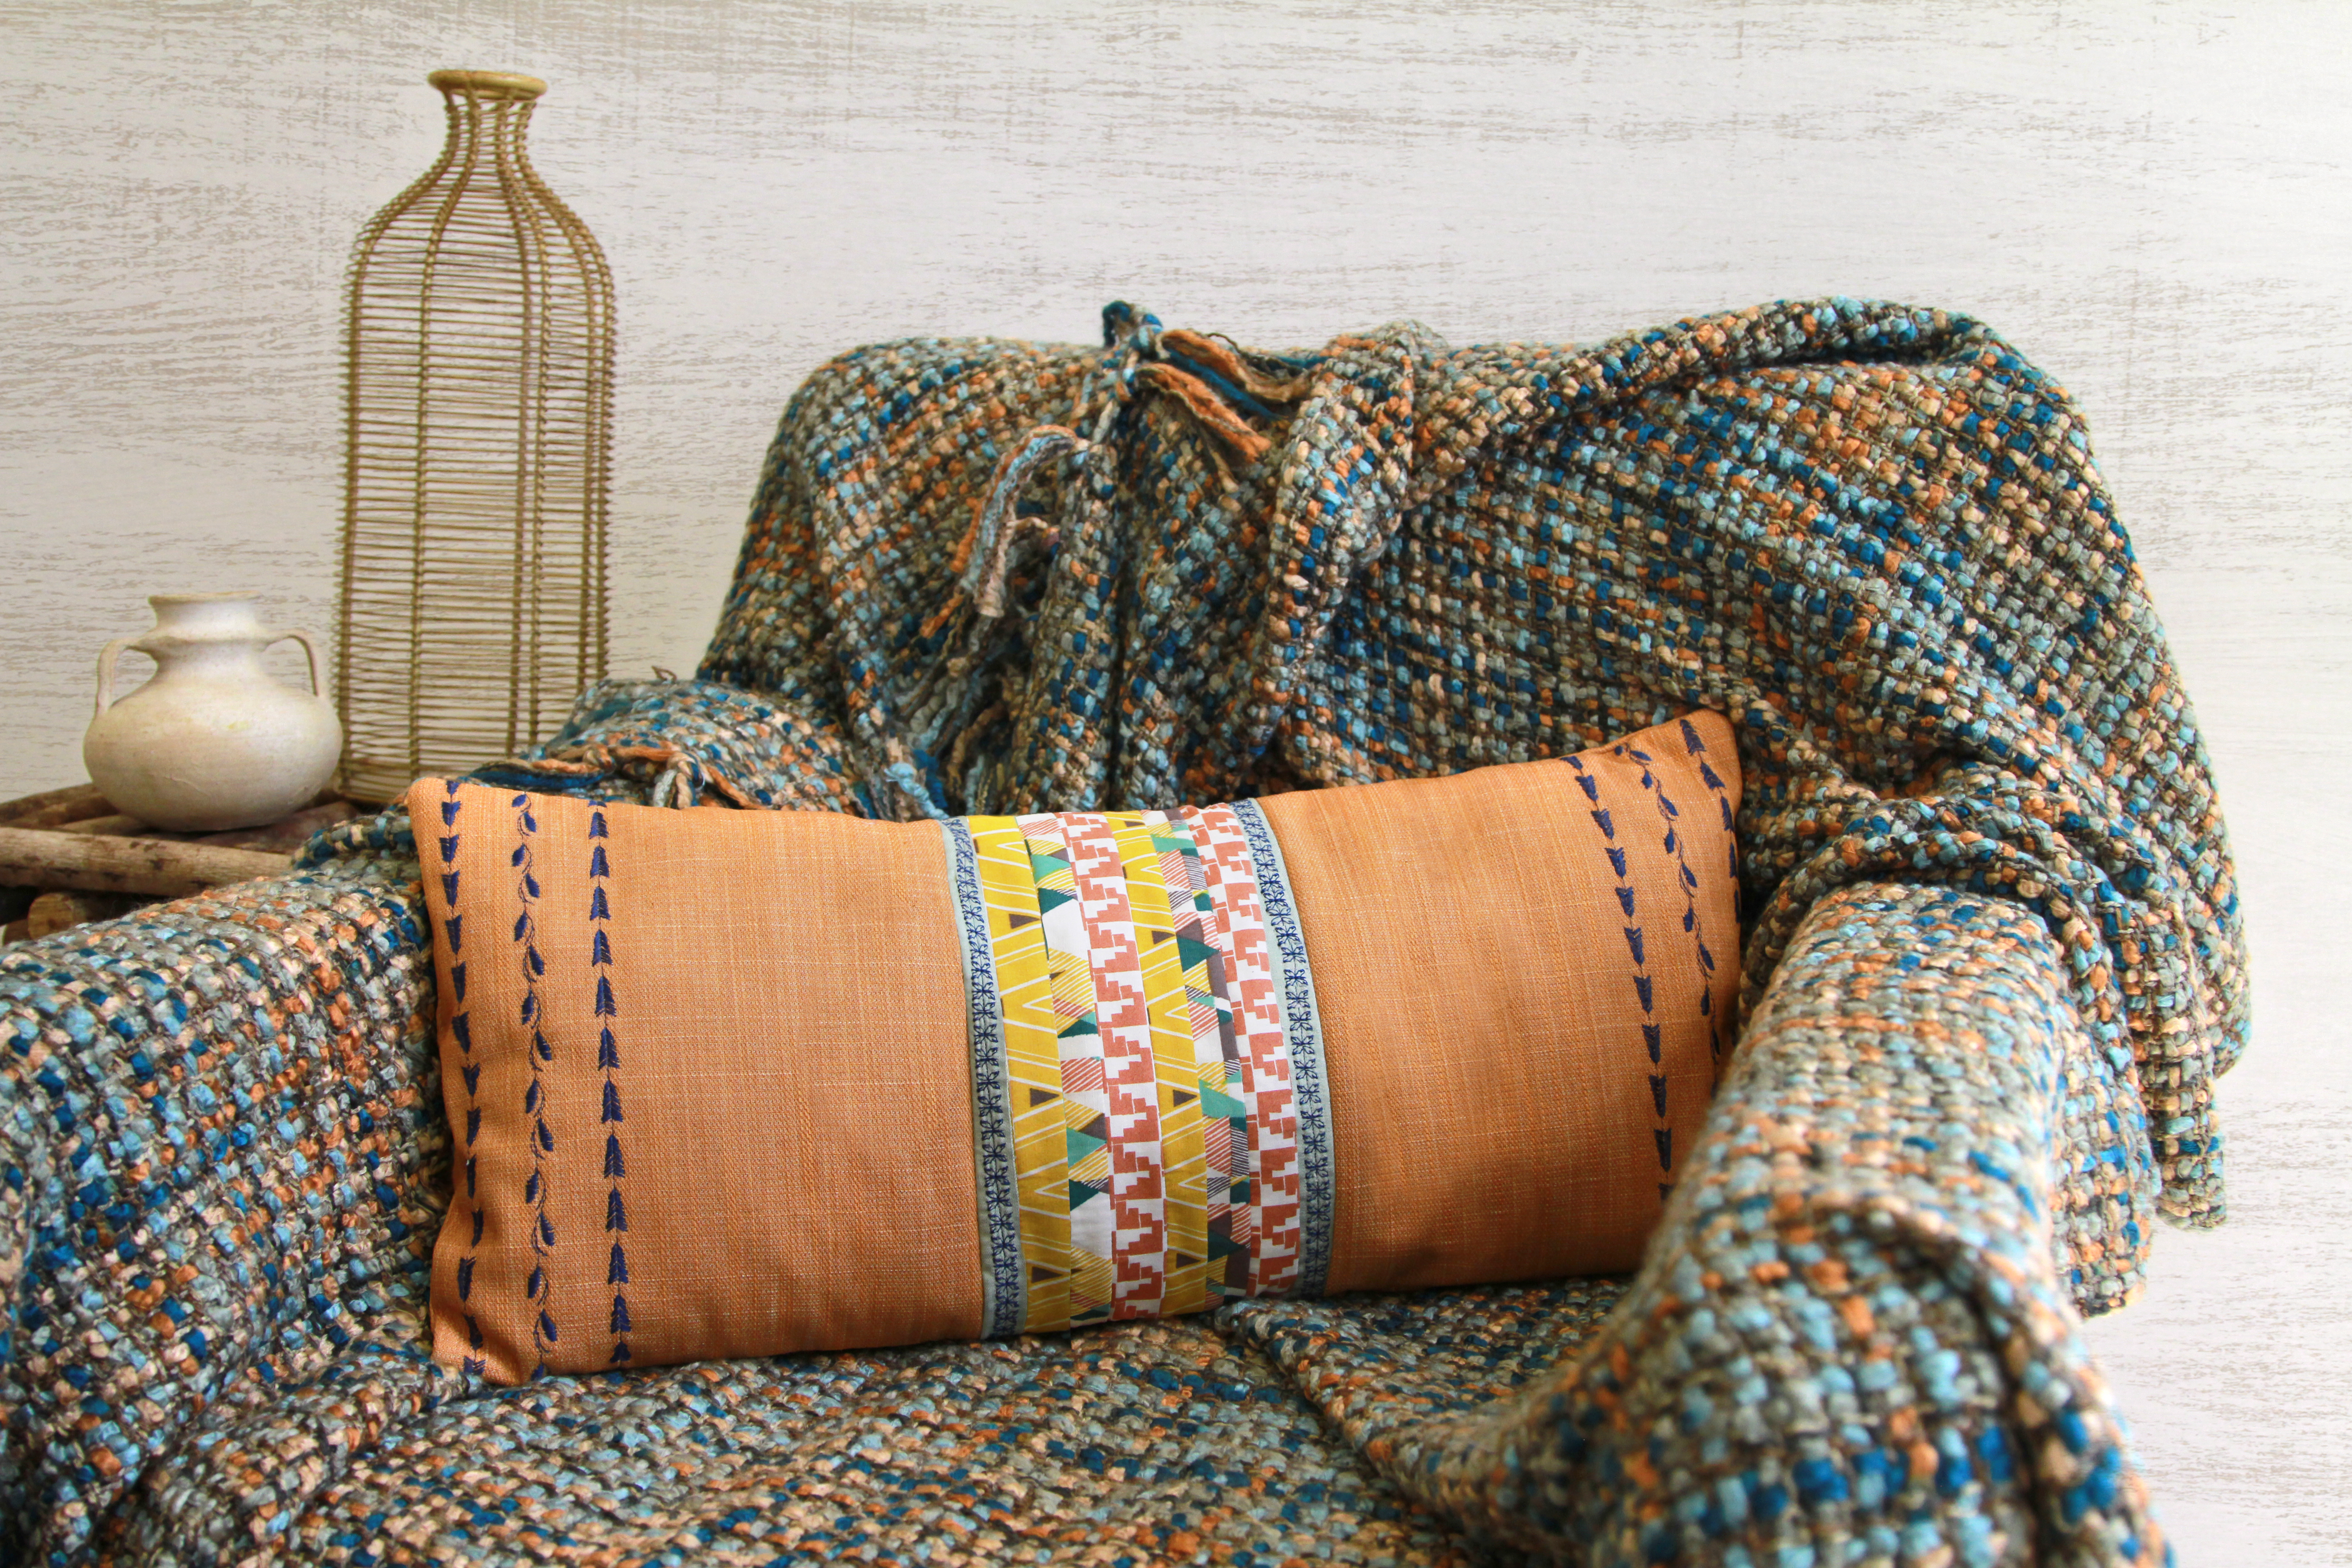
The Essence Pillow Case

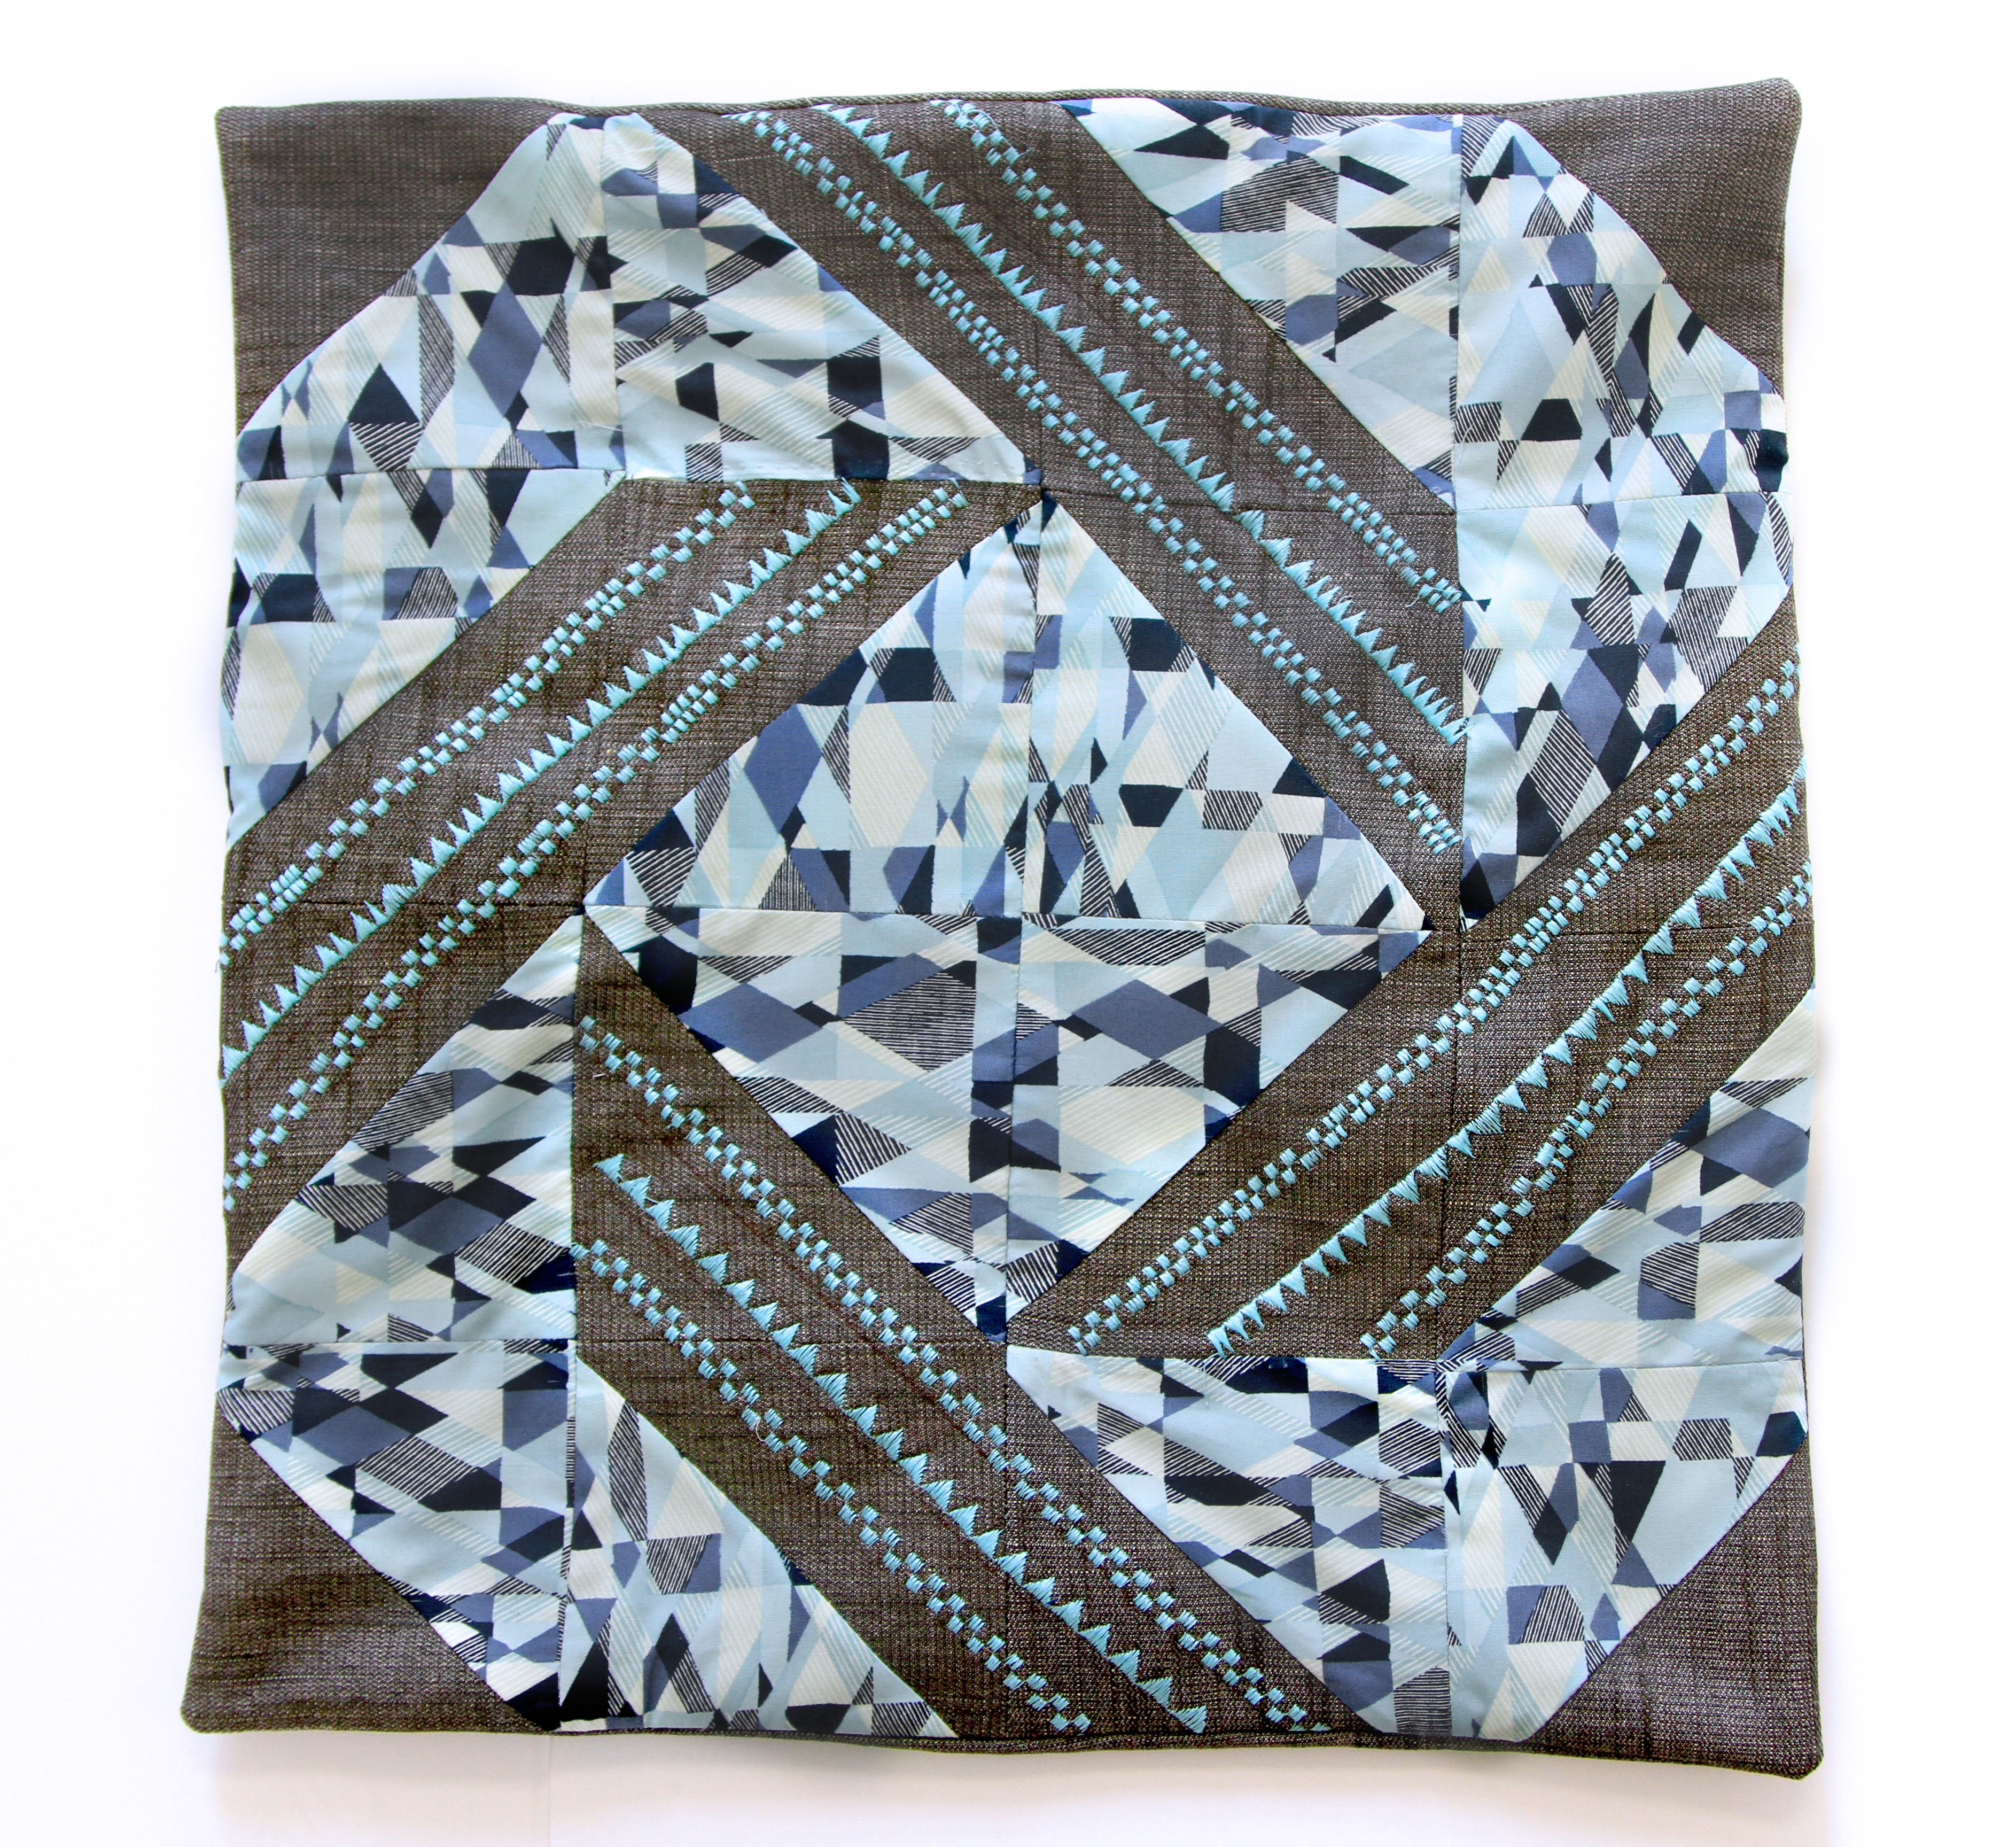
I got so excited with the arrival of my Essentials II collection that I started a project as soon as I could say QUILTING! Also, Art Gallery Fabrics just recently released The Denim Studio and naturally, I had to get my hands on some of their premium substrates. I was absolutely thrilled to see how good Bluebottle Field (The Denim Studio) look along side Interwill Azur (Essentials II) So The Essence Pillow Case was born, featuring two satin decorative stitches! Follow the instructions below so you can also have this unique pillow decorated with BERNINA’s finest features.
Materials to Sew The Essence Pillow Case
- 1 Fat Quarter of Essentials II ESS-II-151
- 1 yard of The Denim Studio DEN-T-3000
- 1/2 yard of batting
- Aurifil Thread 5006
- Universal needles, size 80/12
- Your sewing machine: I sew on a BERNINA 790
- Open embroidery foot (BERNINA Open embroidery foot #20/20C/20D) and all-purpose presser foot (BERNINA Reverse Pattern Foot #1/1C/1D)
Cutting Instructions
- Cut 8 (eight) 5” by 5” squares of ESS-II-151 and sub-cut diagonally giving you a grand total of 16 (sixteen) triangles
- Cut 8 (eight) 5” by 5” squares of DEN-T-3000 and sub-cut diagonally giving you a grand total of 16 (sixteen) triangles
- Cut a 20” by 20” square of batting
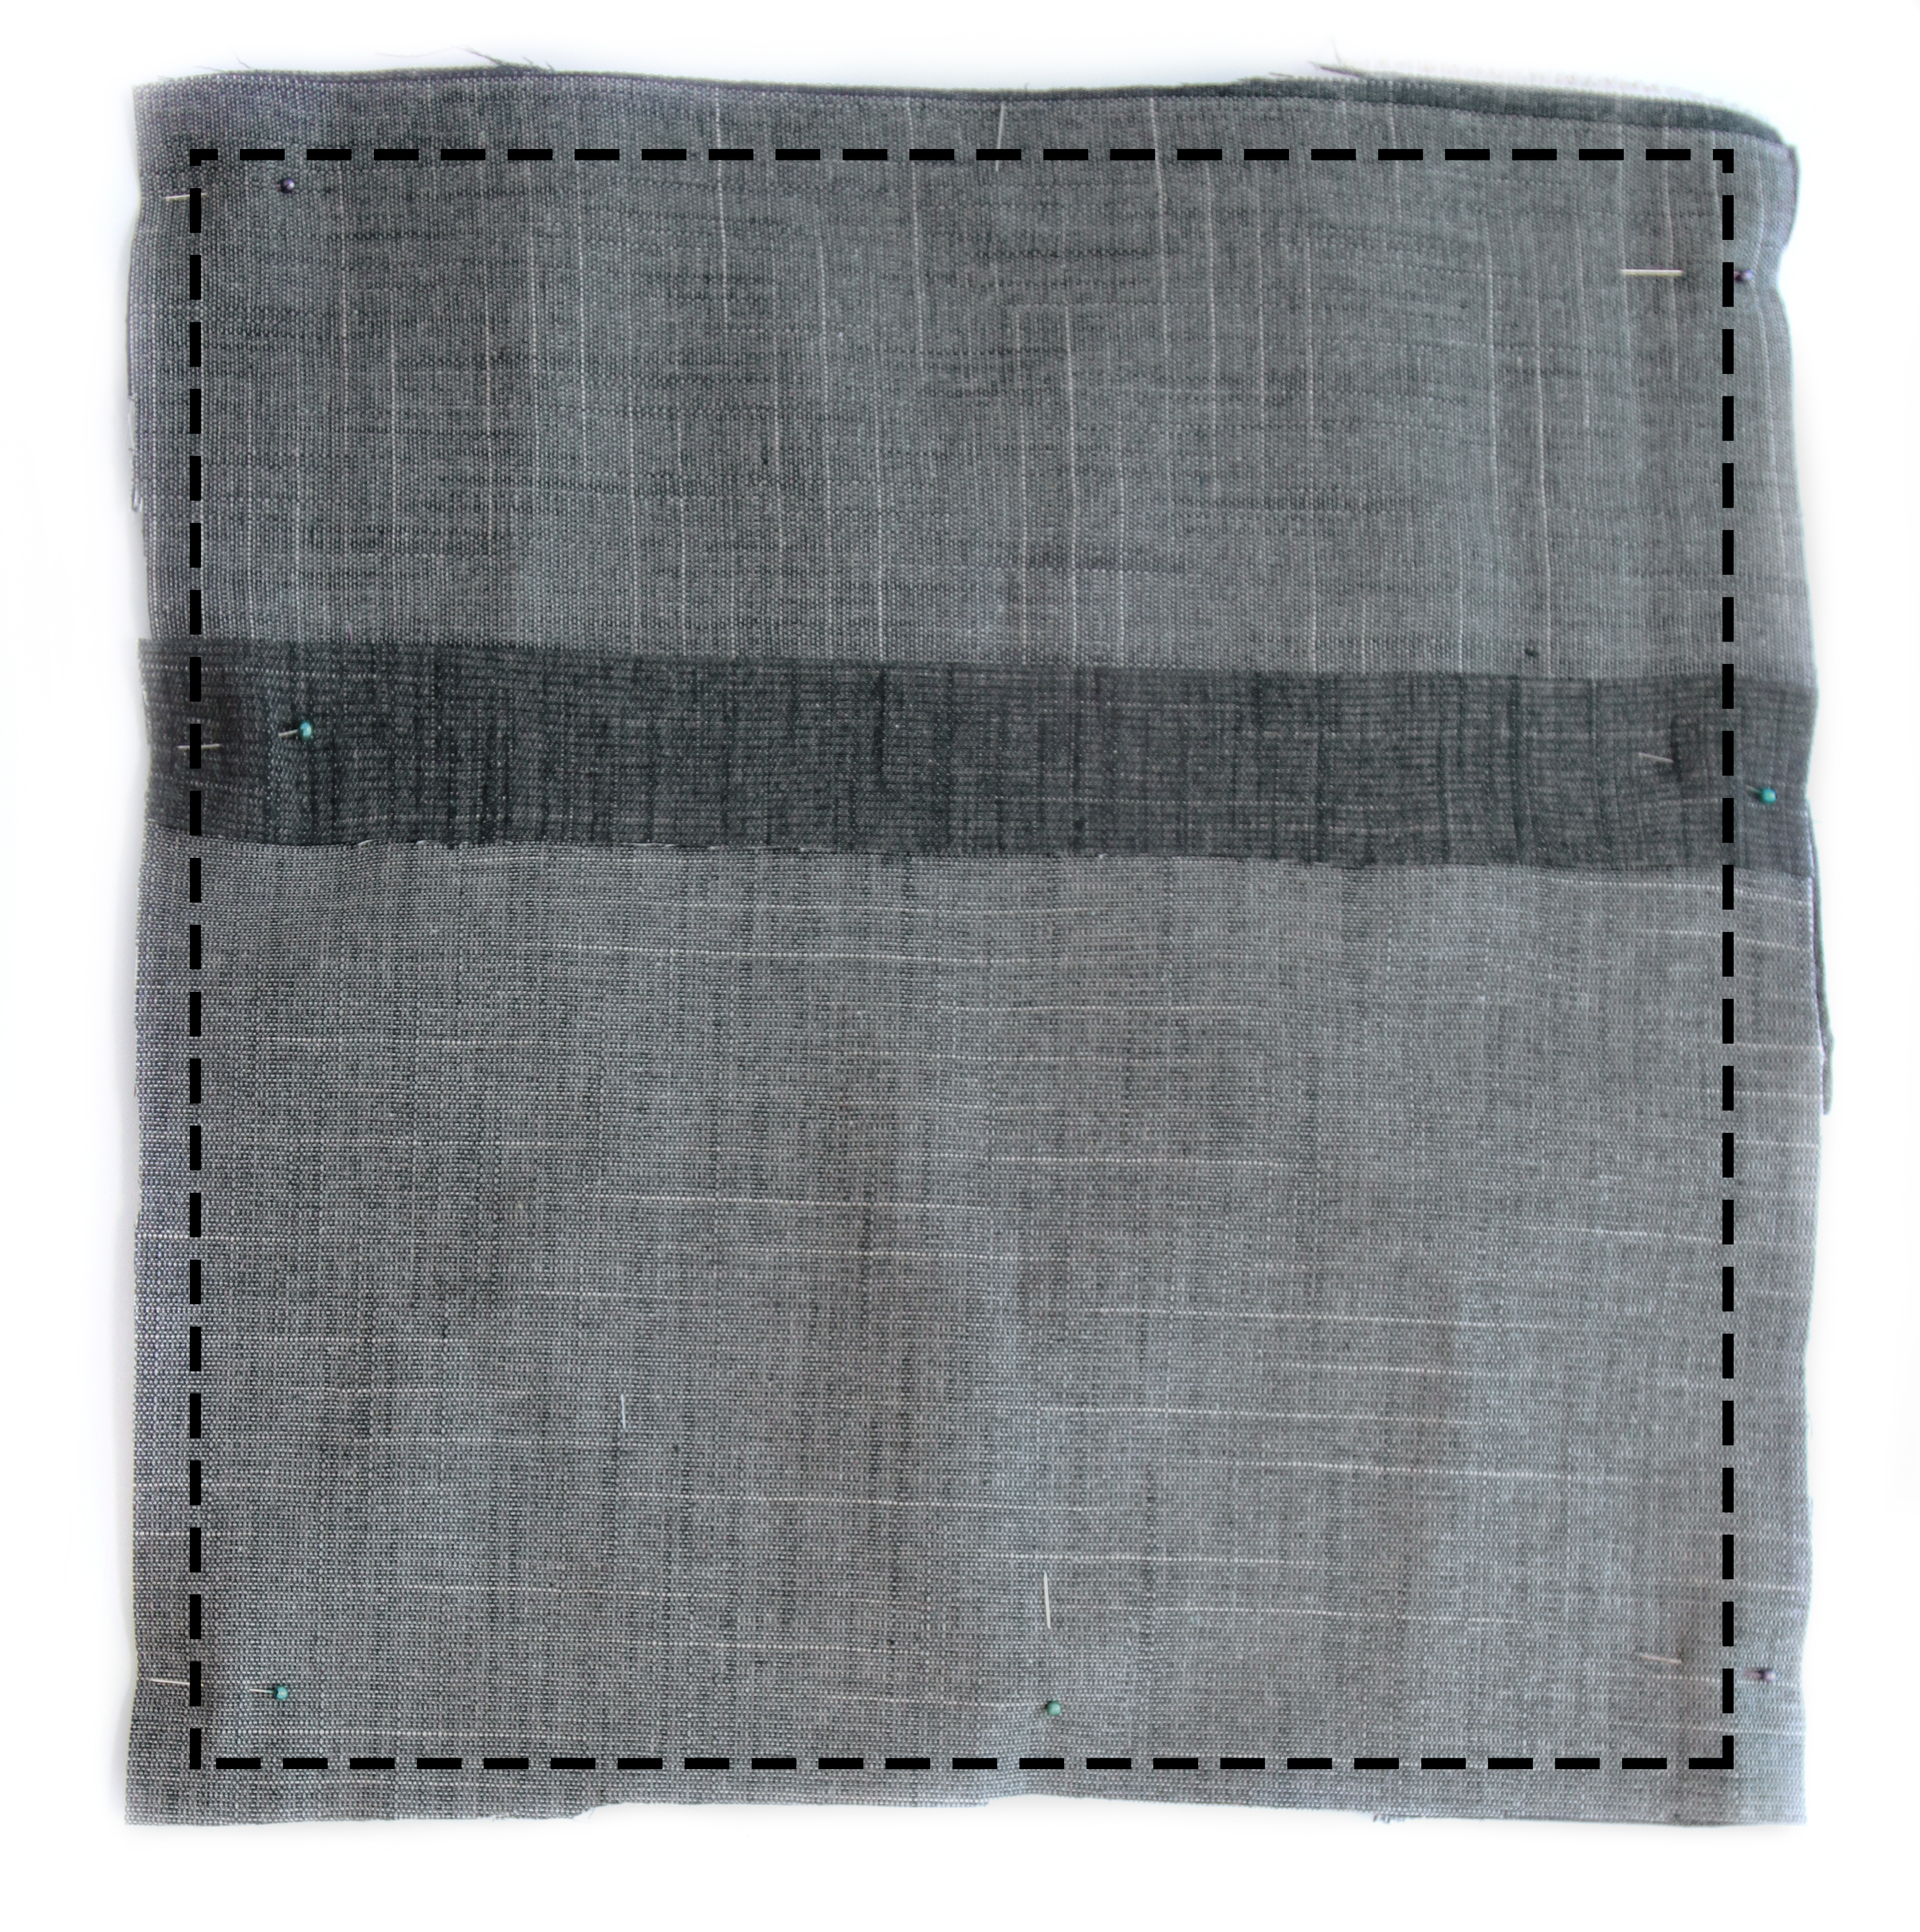
- Cut 2 (two) 20” by 15” DEN-T-3000
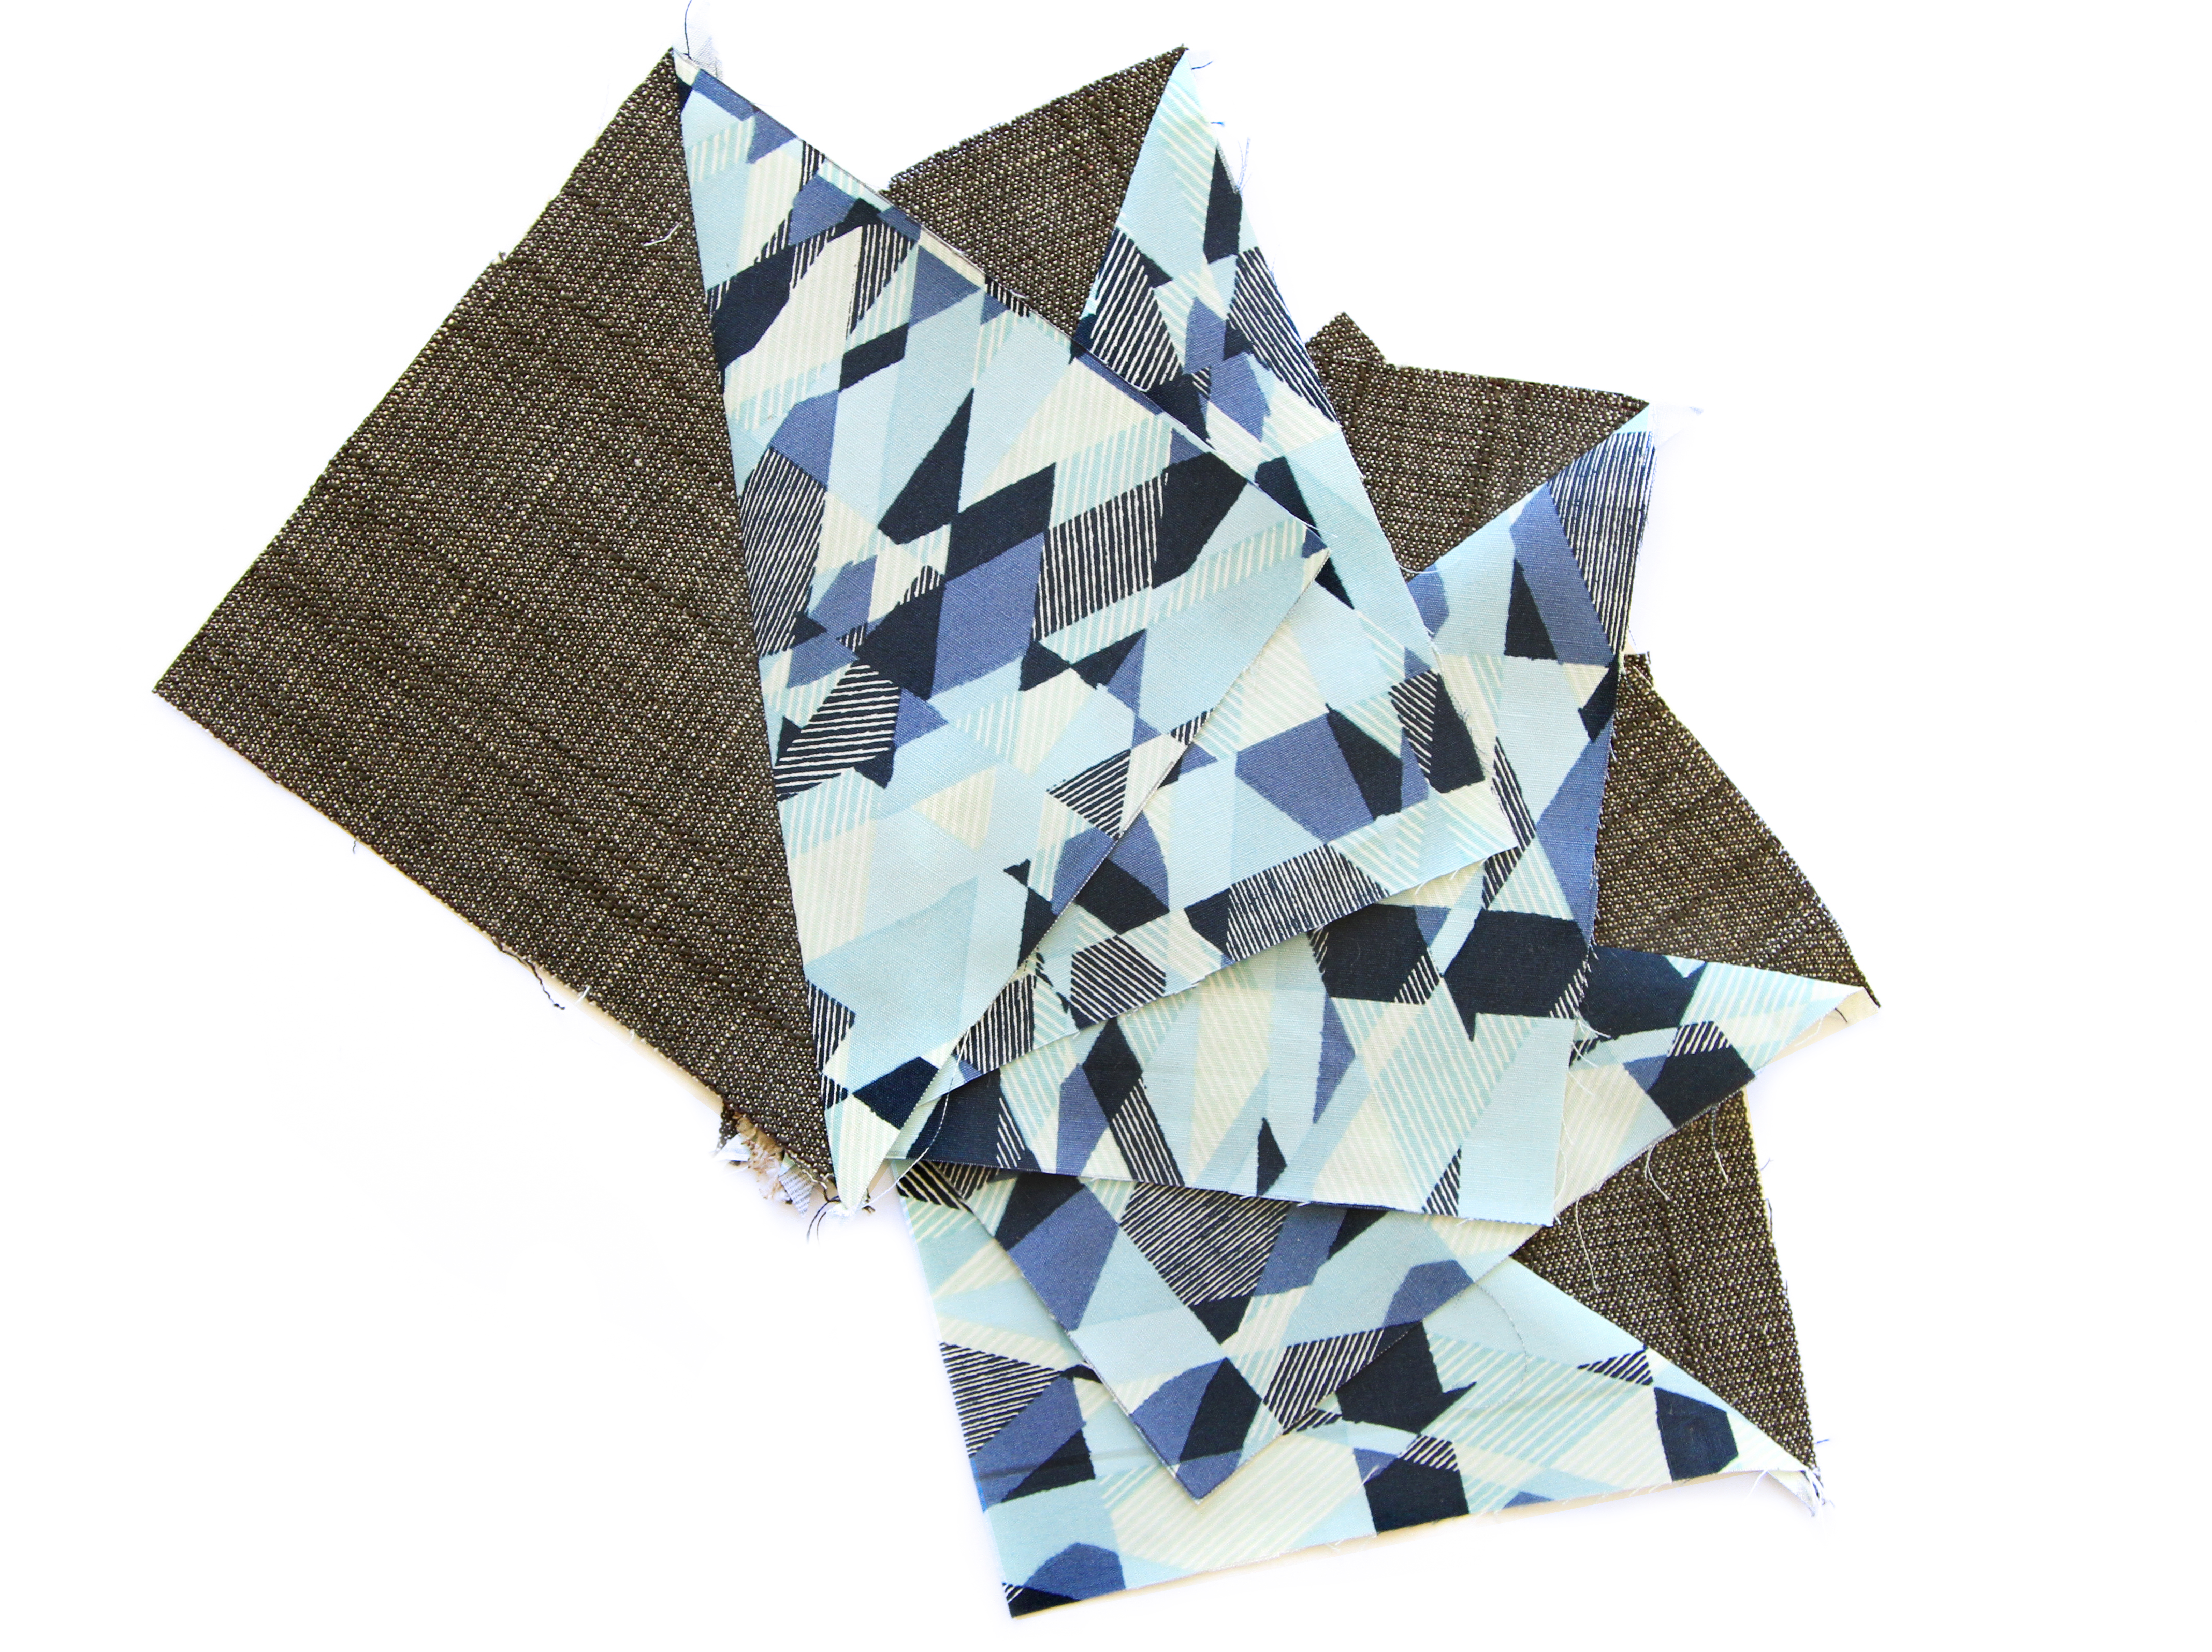
Step 1- Making the Half Square Triangles (HST)

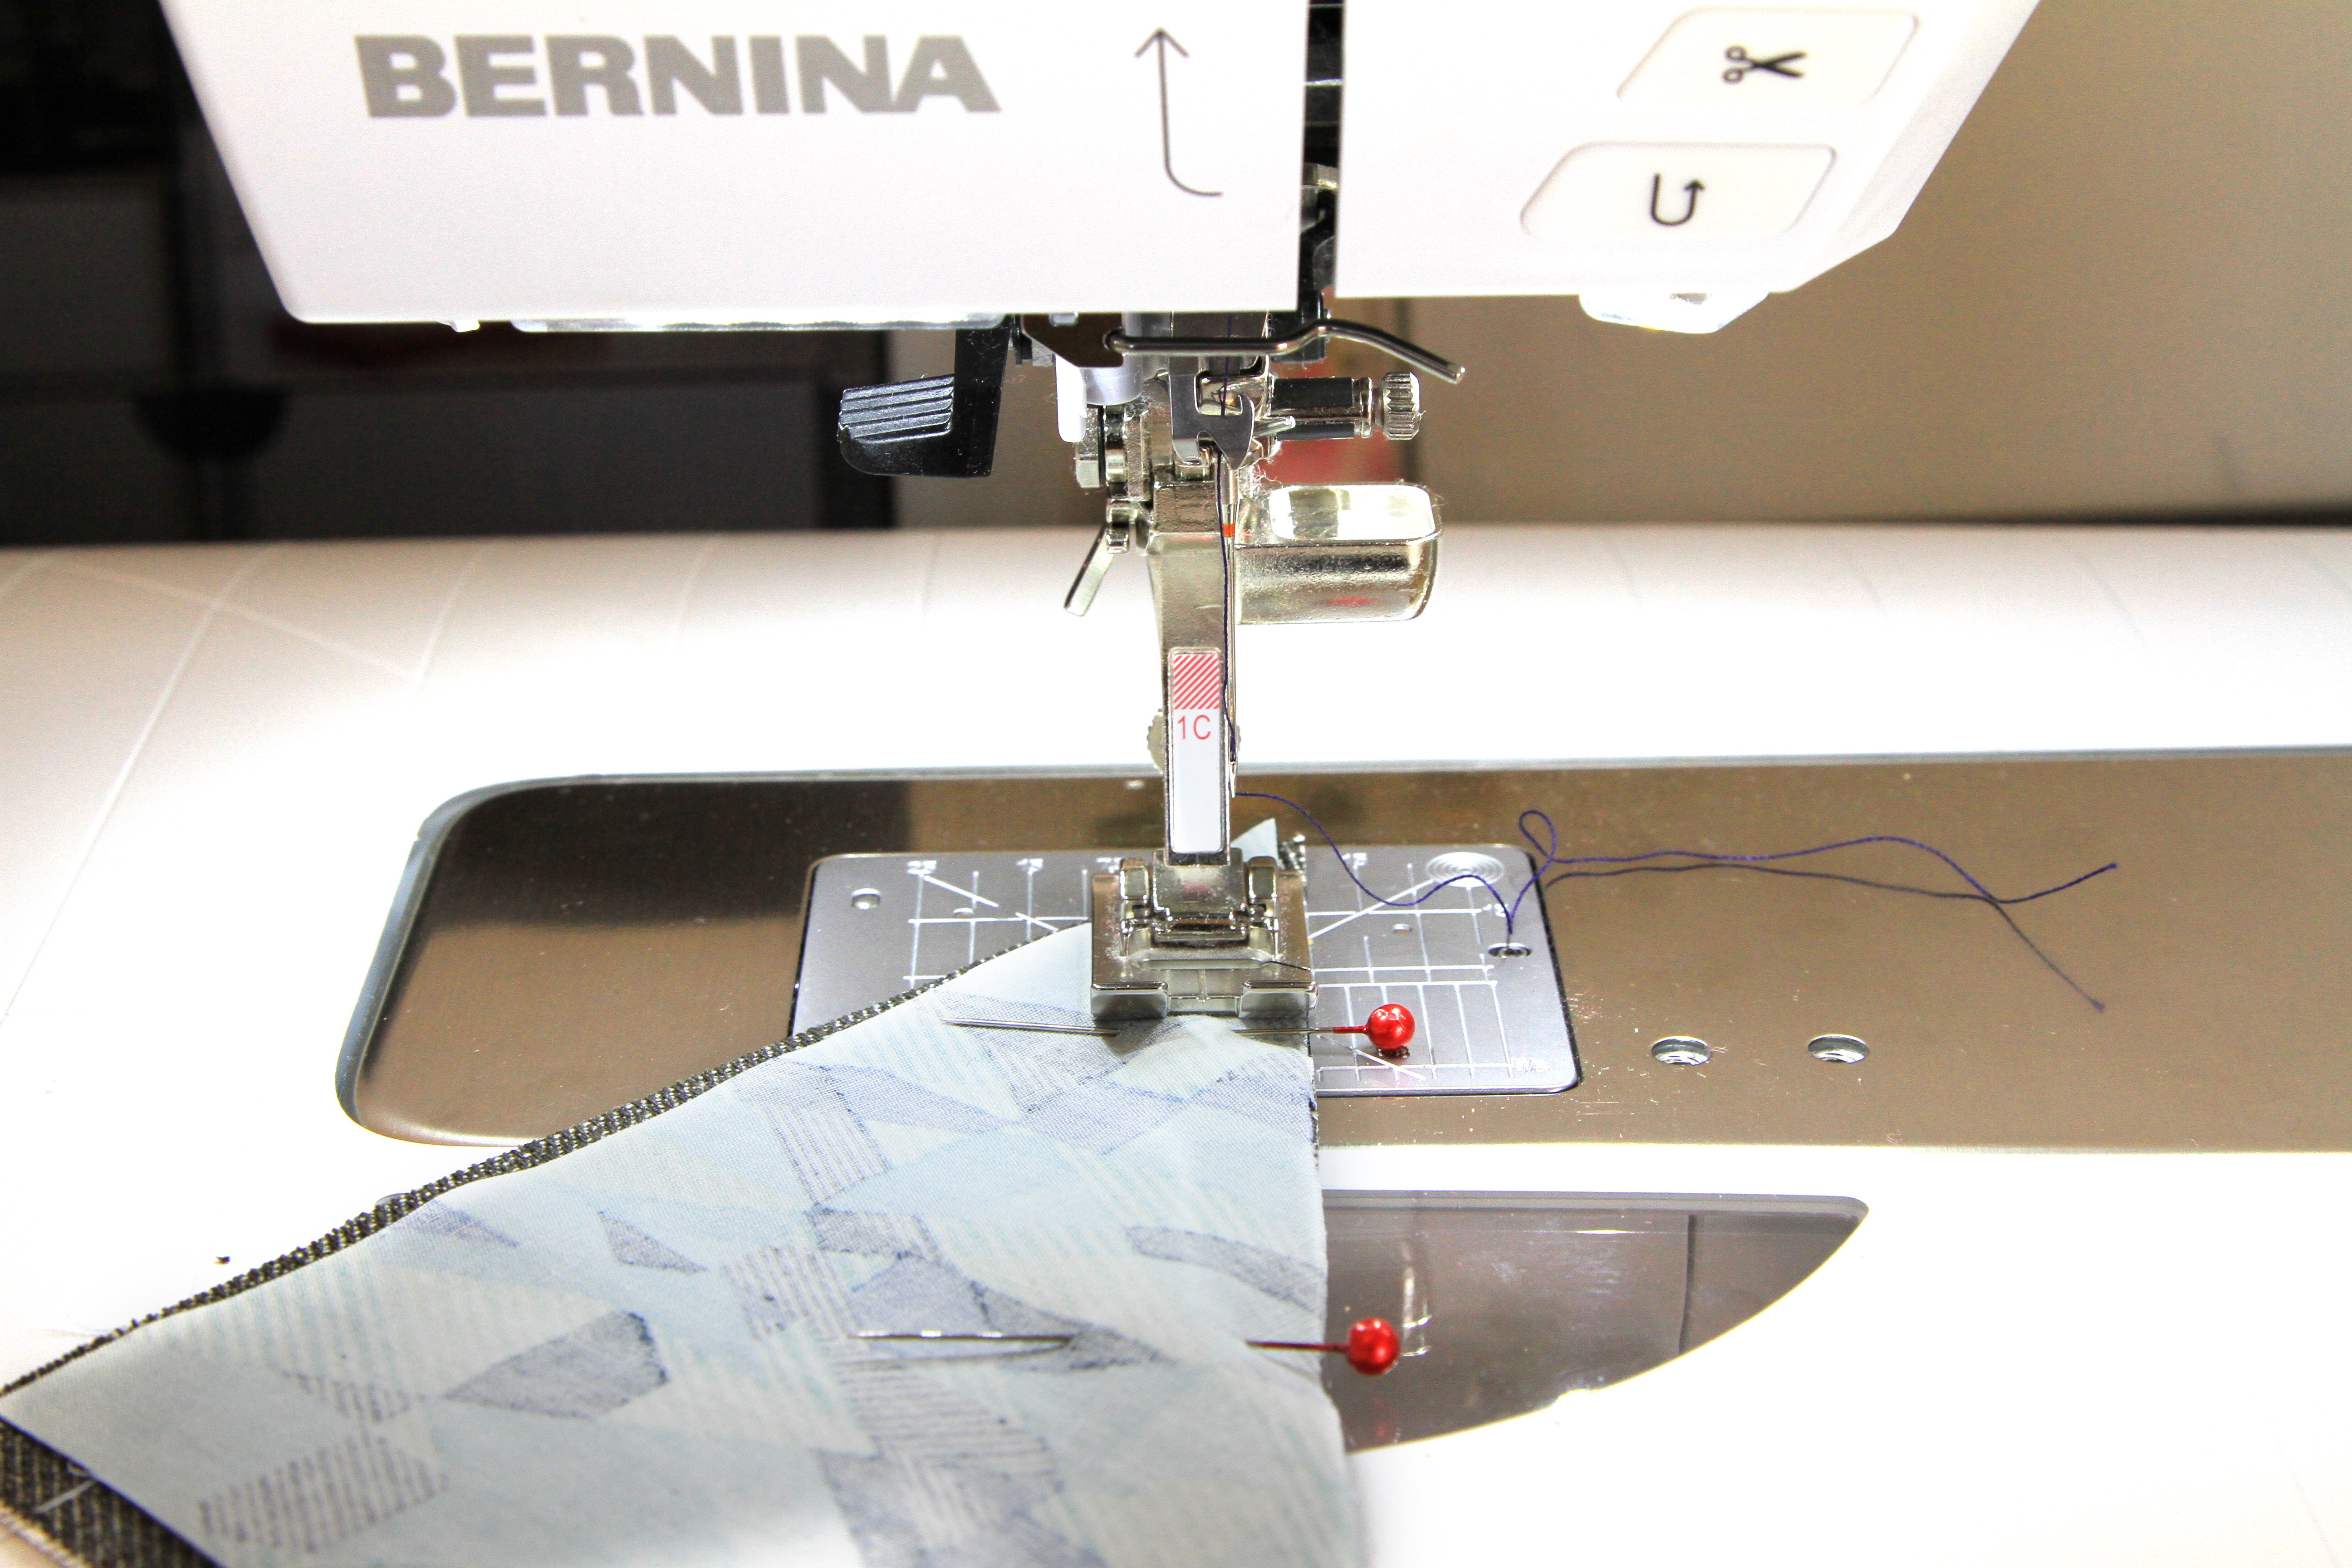
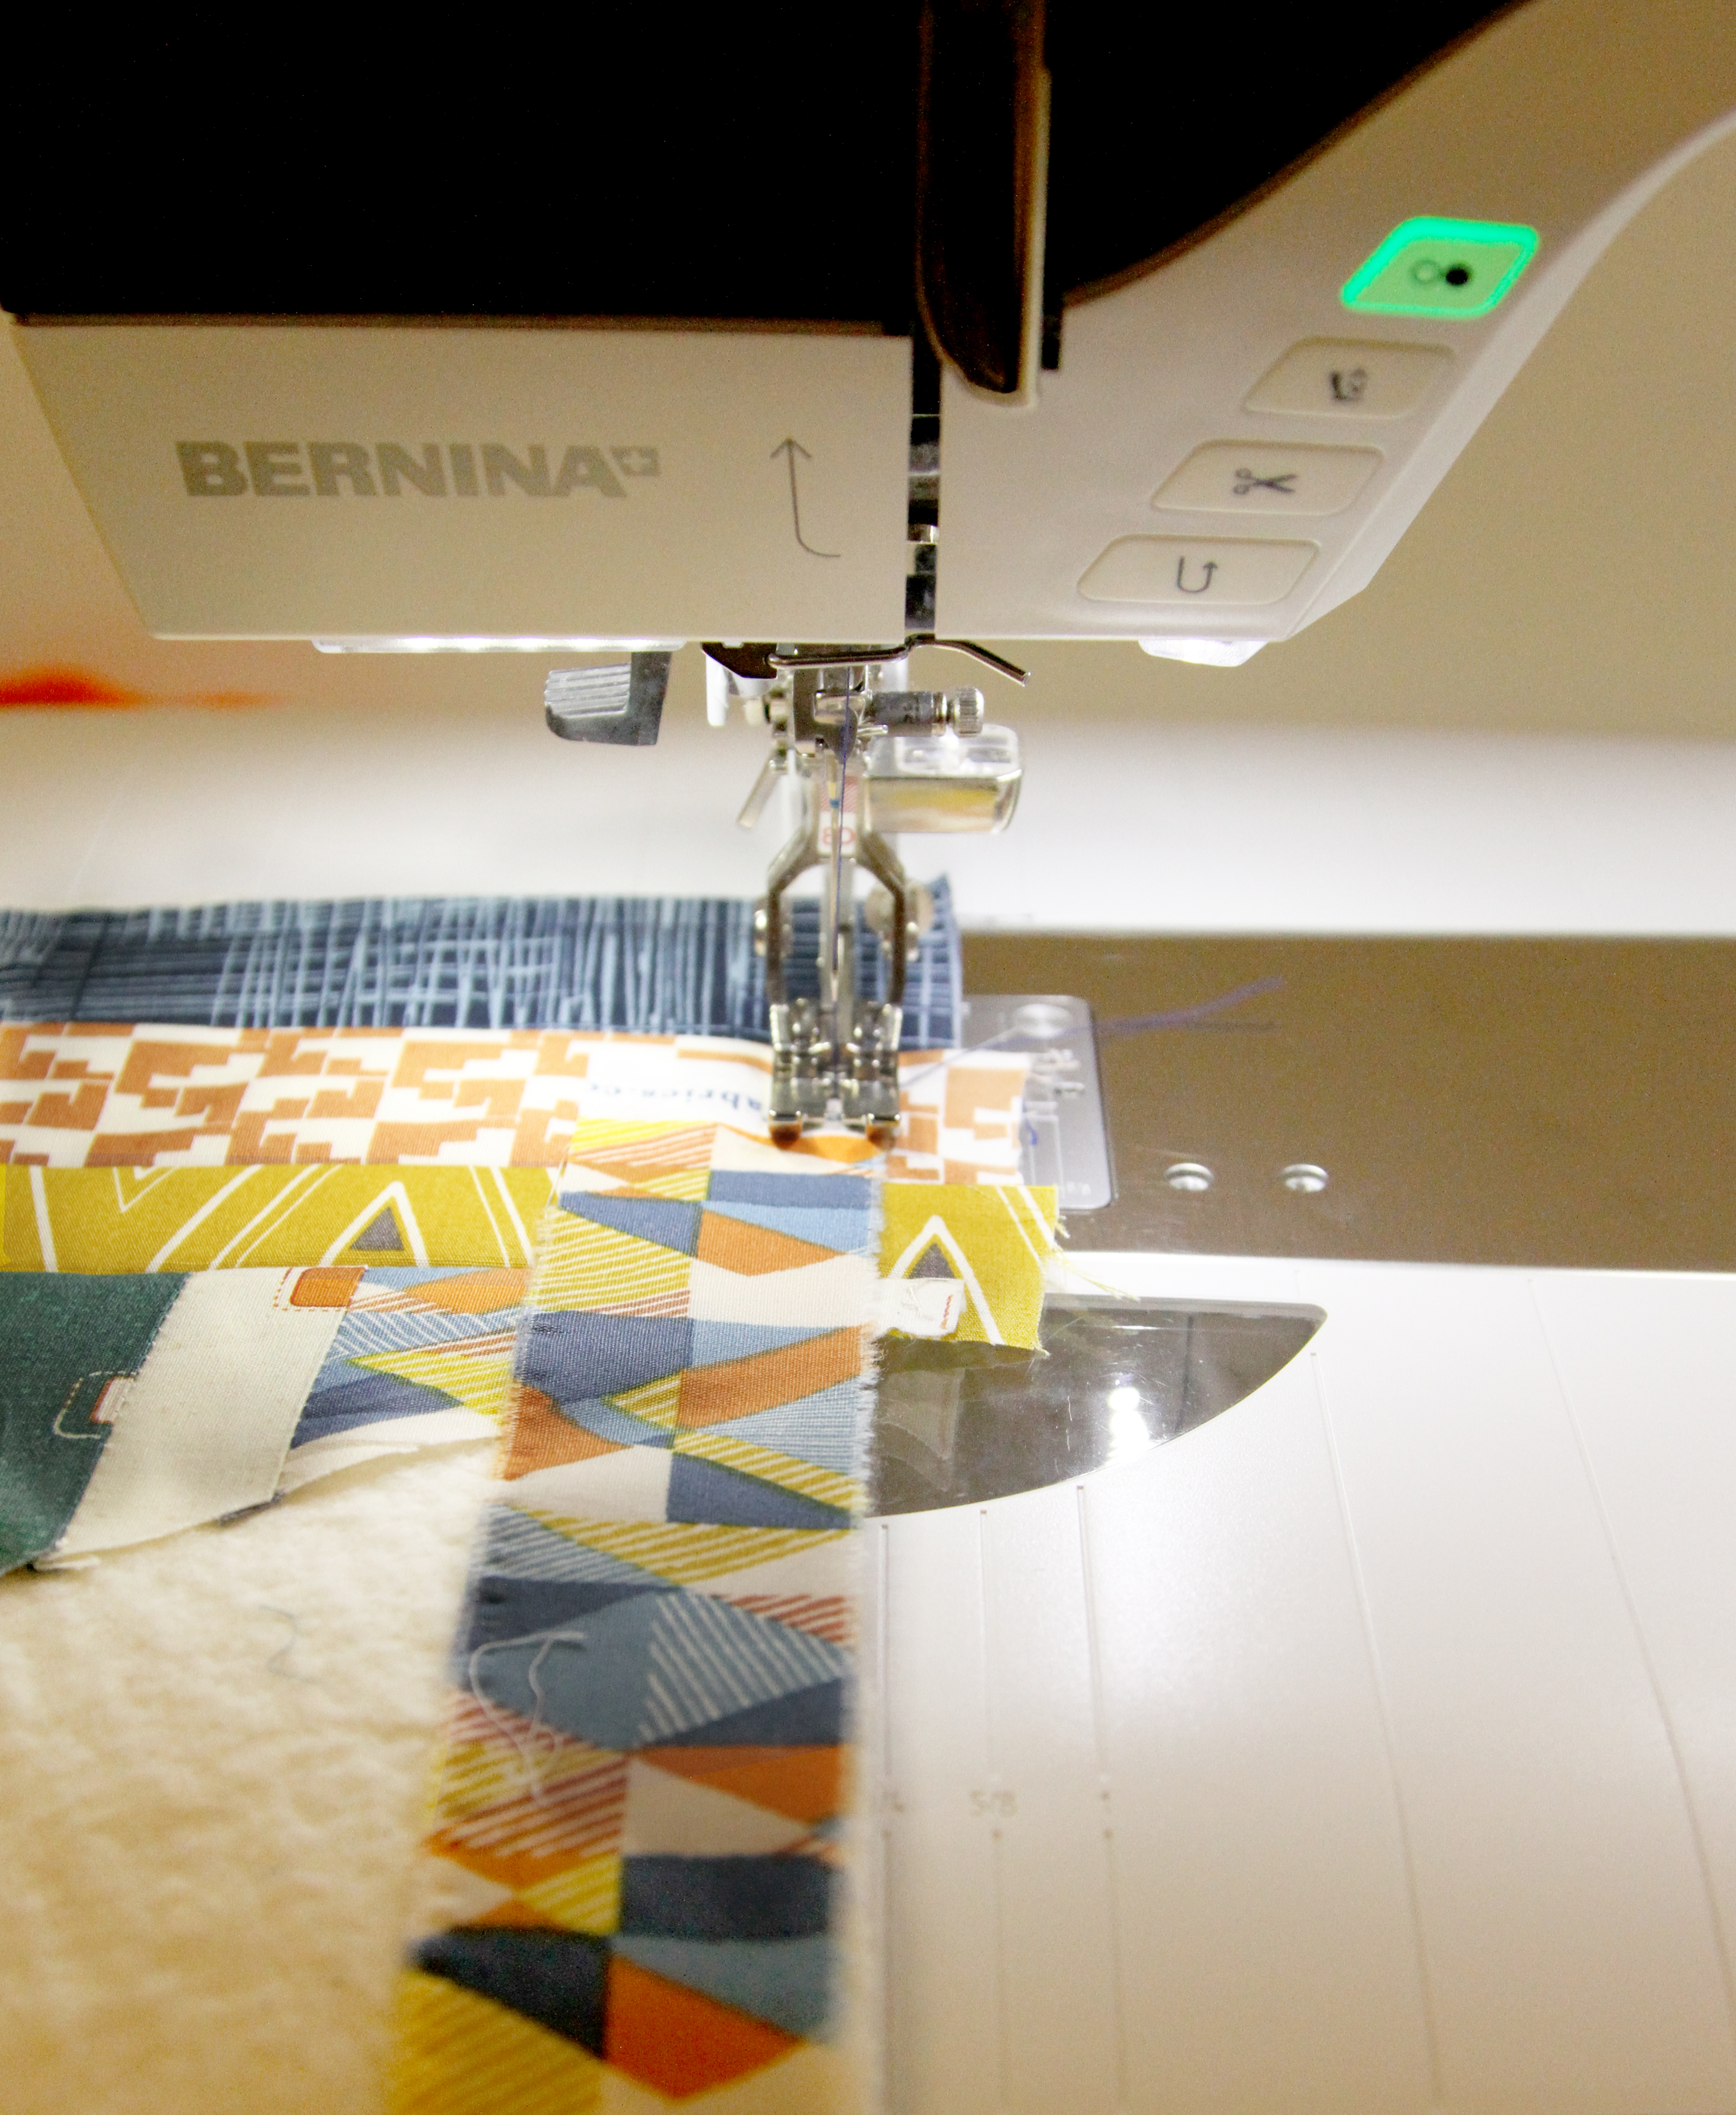
Start by placing right side of ESS-II-151 with right side of DEN-T-3000, pin in place and straight stitch from top to bottom along the longest edge. Prep your machine with all-purpose presser foot (BERNINA Reverse Pattern Foot #1D.
Begin stitching, repeat this step with the rest of the fabrics.
The completion of this step will leave you with a grand total of 16 HST.
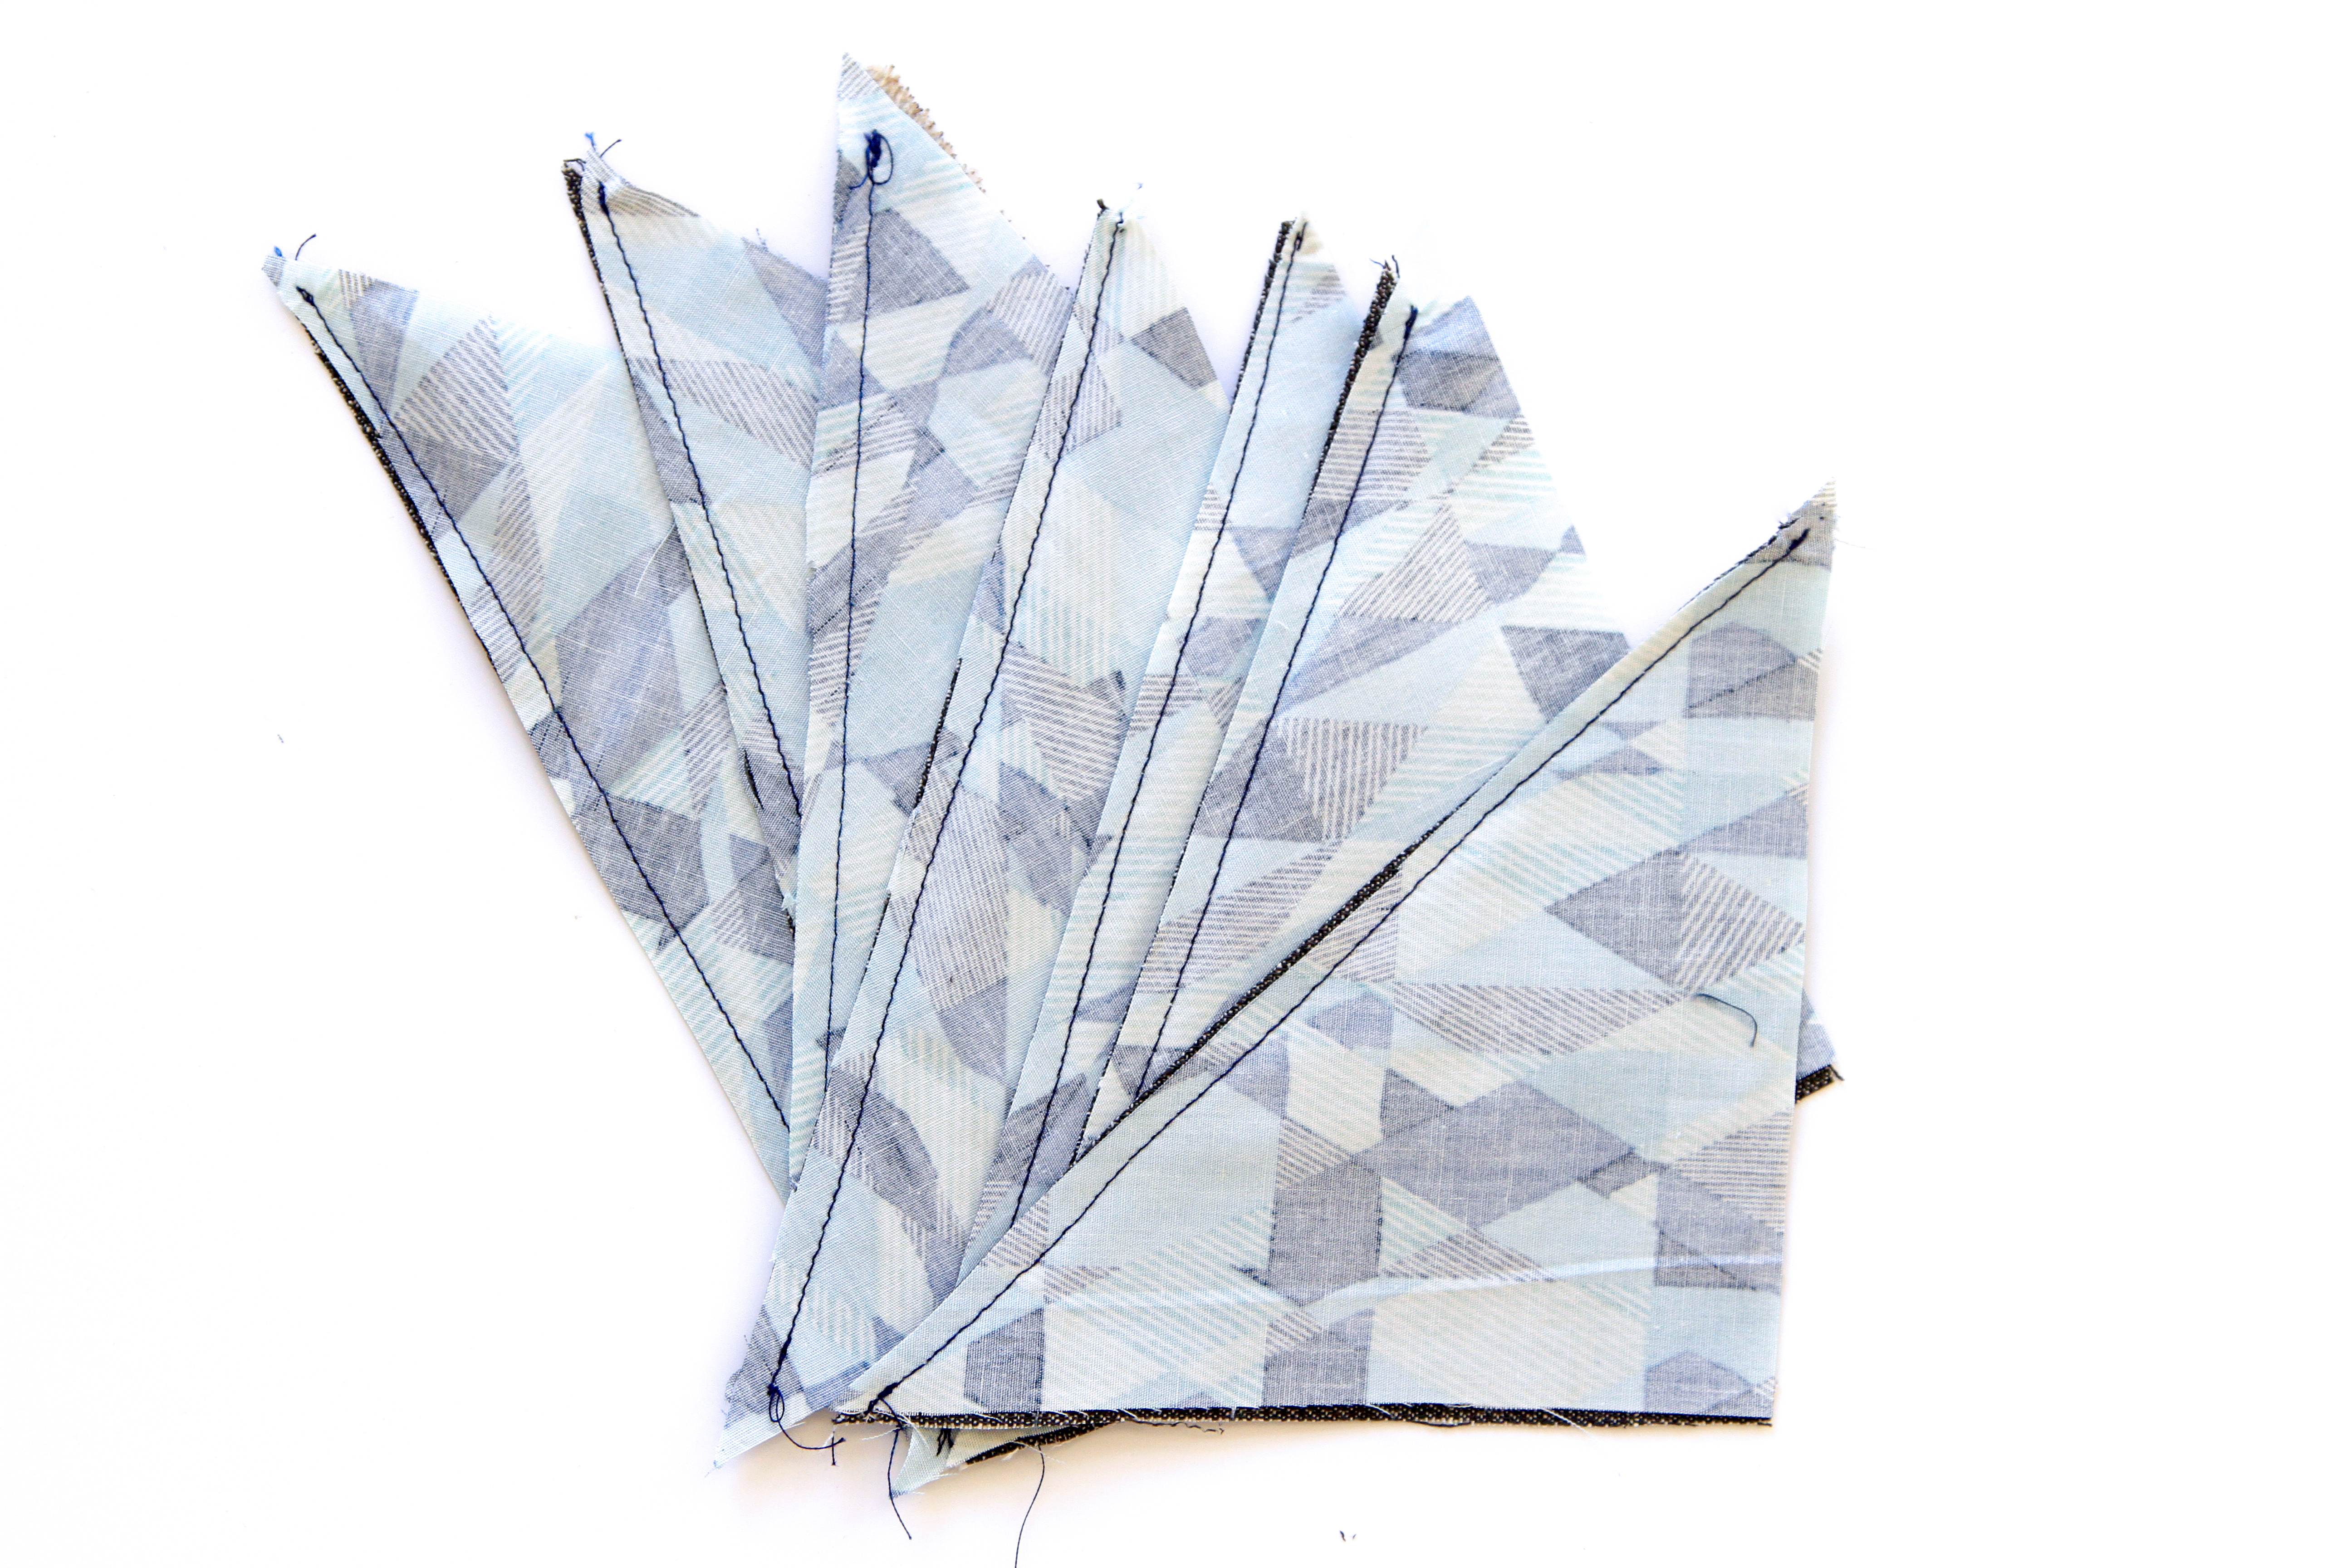
Press the squares open and set aside.
Step 2- Attach HST
Once you have all the HST sewn in, lay out your design for reference and start sewing each HST by row. I will call each row by a letter, A B C D.
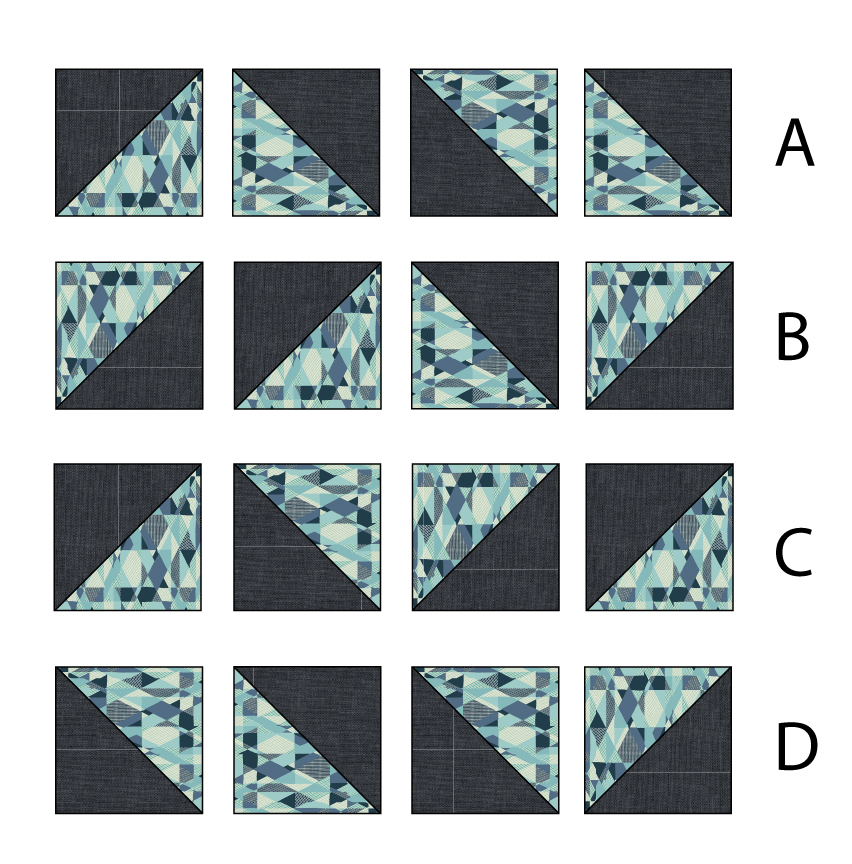
Begin stitching.

Place the finished stitched rows as shown below and now begin sewing each row together.

Now you will have your pillow top complete!
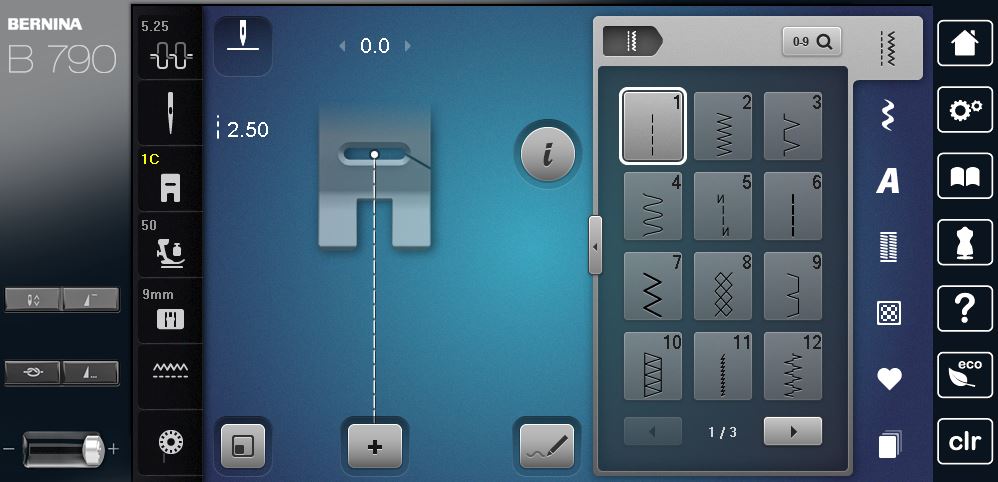
Step 3- Satin Stitches
To make this pillow even prettier, I decided to add some decorative stitches in each DEN-T-3000 (except the corners) For this tutorial I used two satin stitches #405 and #422. Prep the front of the pillow case with the 20″ by 20″ square of batting, pin in place and start stitching in this order:
- #405
- #422
- #405
Prep your machine with the right stitch, in this case #405, and change your presser foot to open embroidery foot (BERNINA Open embroidery foot #20C).
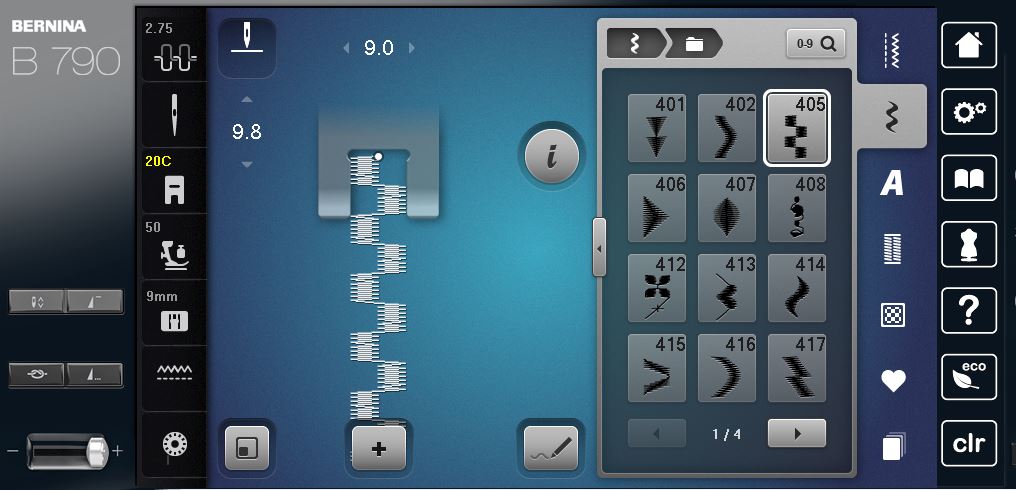
Begin Stitching 1/2” apart from edge, once the first line is complete, change the stitching number to #422 and begin stitching 1/2” apart from previous decorative stitch.
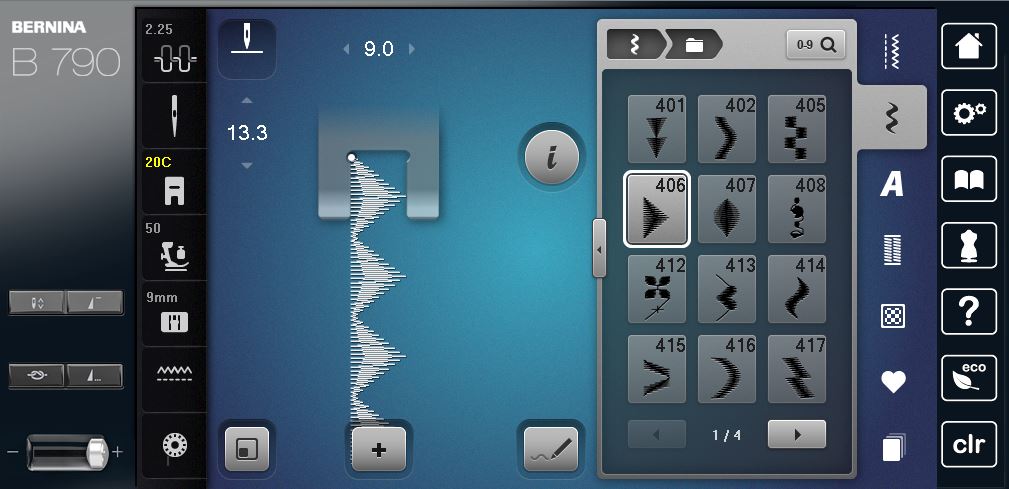
Now, we go back to stitch #405, stitching 1/2” apart from previous decorative stitch.
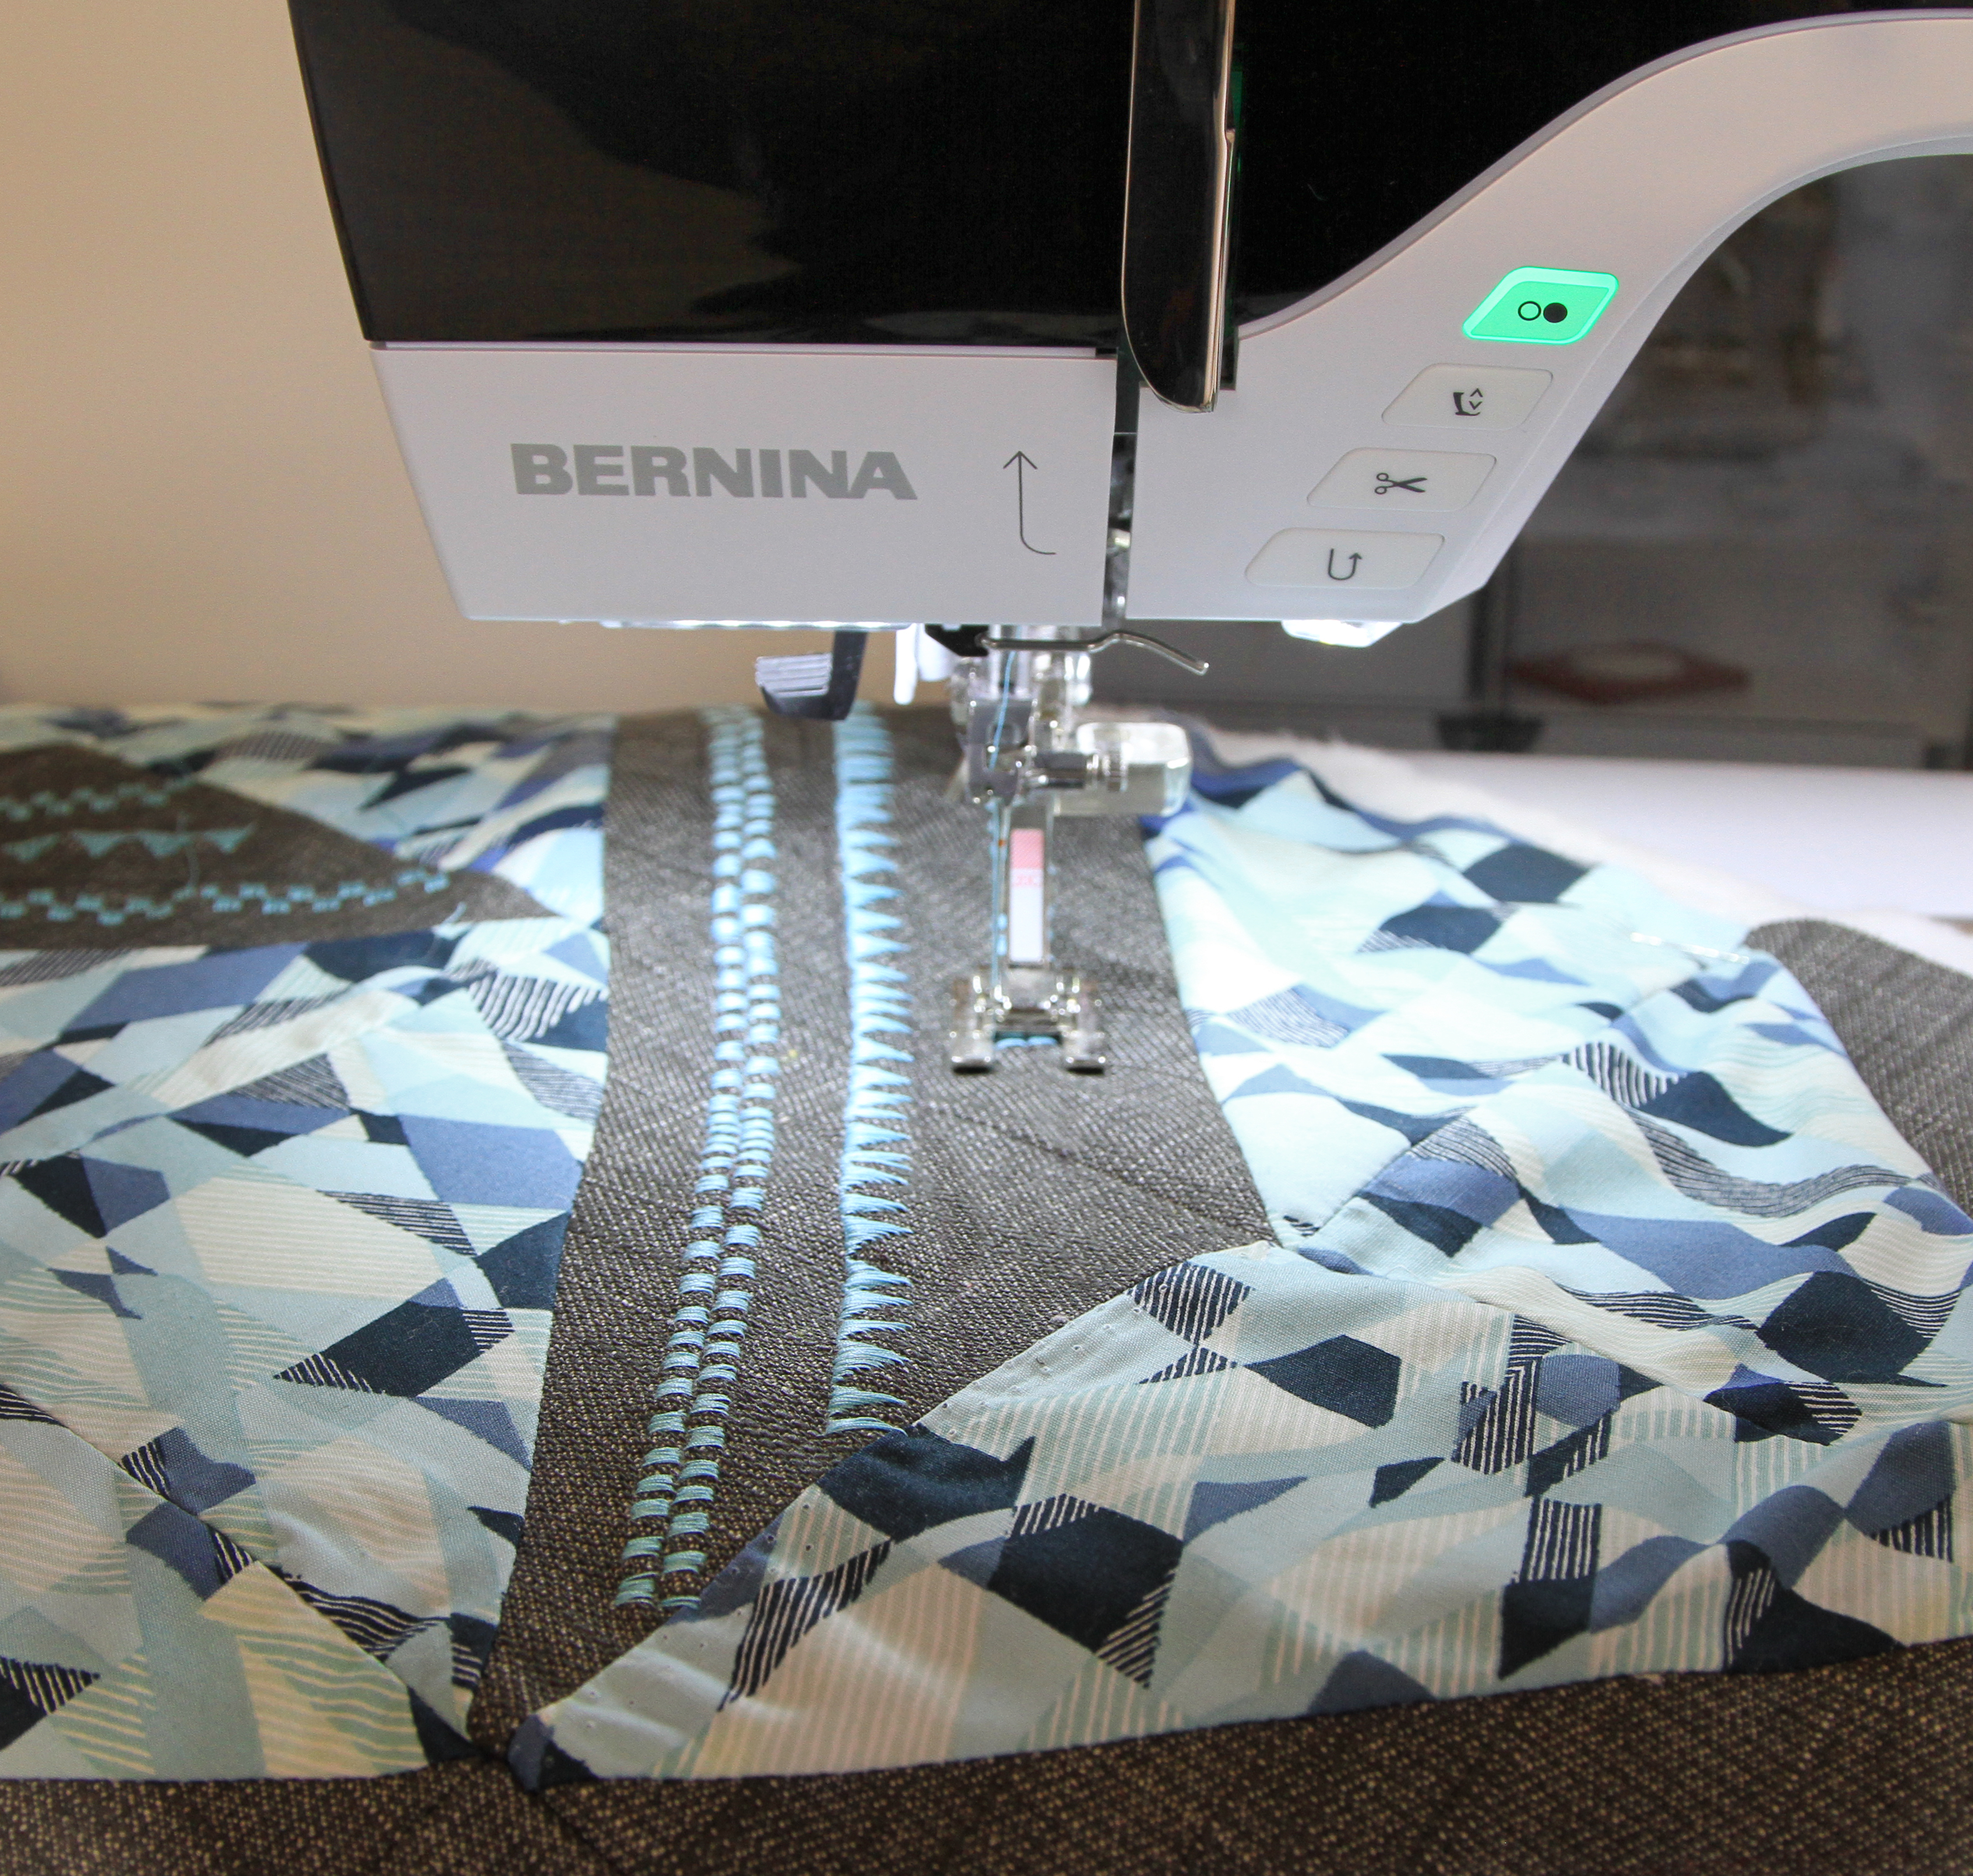
Repeat this step using the image below as reference for the decorative stitches.
Step 3- Pillow Backing

Start by placing the front panel (with decorative stitches) right side facing up and then place the two back panels of the pillow with the right side facing down. Pin all the pieces together and sew around with an 1/2″ inch seam allowance. Fold it over and you will have your Essence Pillow case with a secret overlapping opening on the back where you insert your pillow body!
I hope you all enjoy making the Essence Pillow case as much as I enjoyed making it!
Happy Sewing!

What you might also like


5 comments on “The Essence Pillow Case”
-
-
Thank you lizjk66, it is going to look amazing!
-
-
Where do you use the batting?
-
Hi jrediske, I use the batting on the front of the pillow for assistance when creating the decorative stitches.
-
-
Just got an idea for a christmas gift
Leave a Reply
You must be logged in to post a comment.

I love it and plan to make a few for my couch