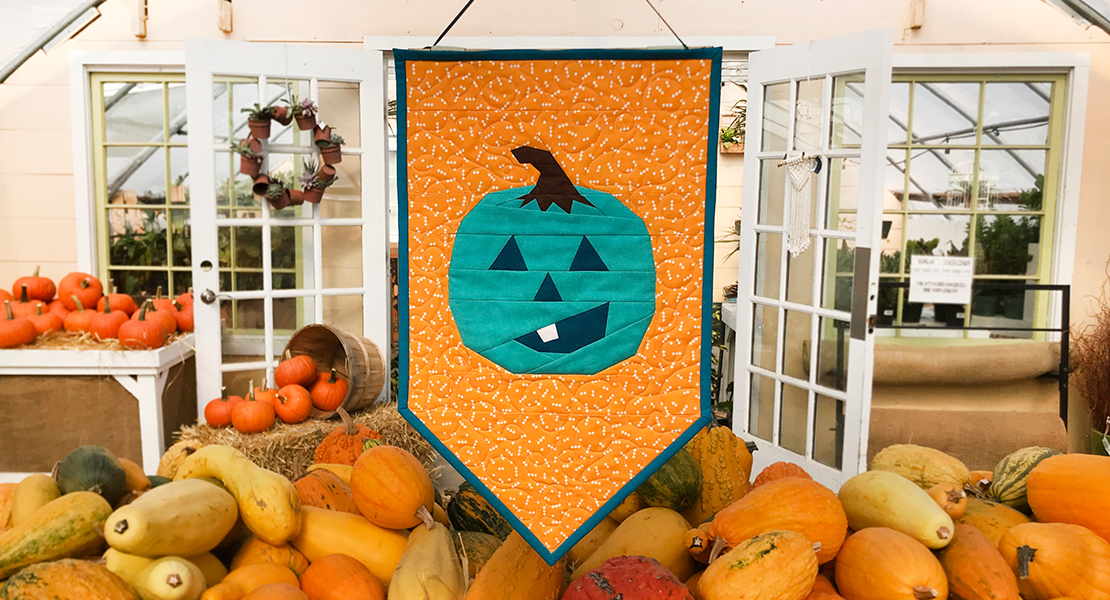
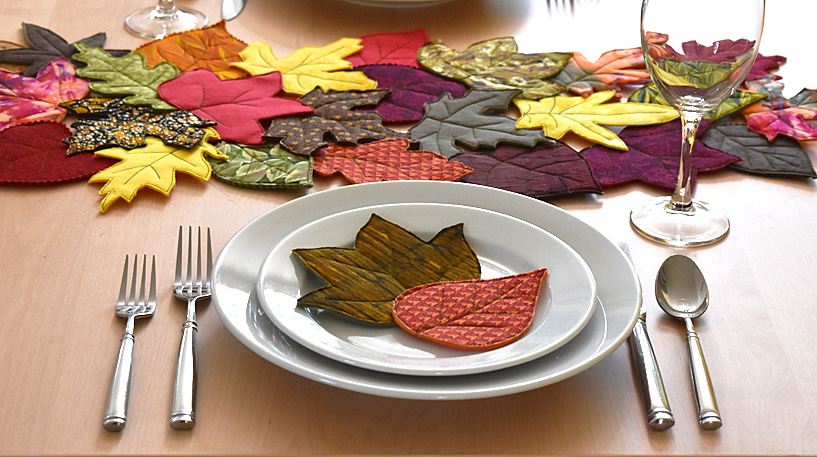
Fall Foliage Paper Pieced Placemat Tutorial
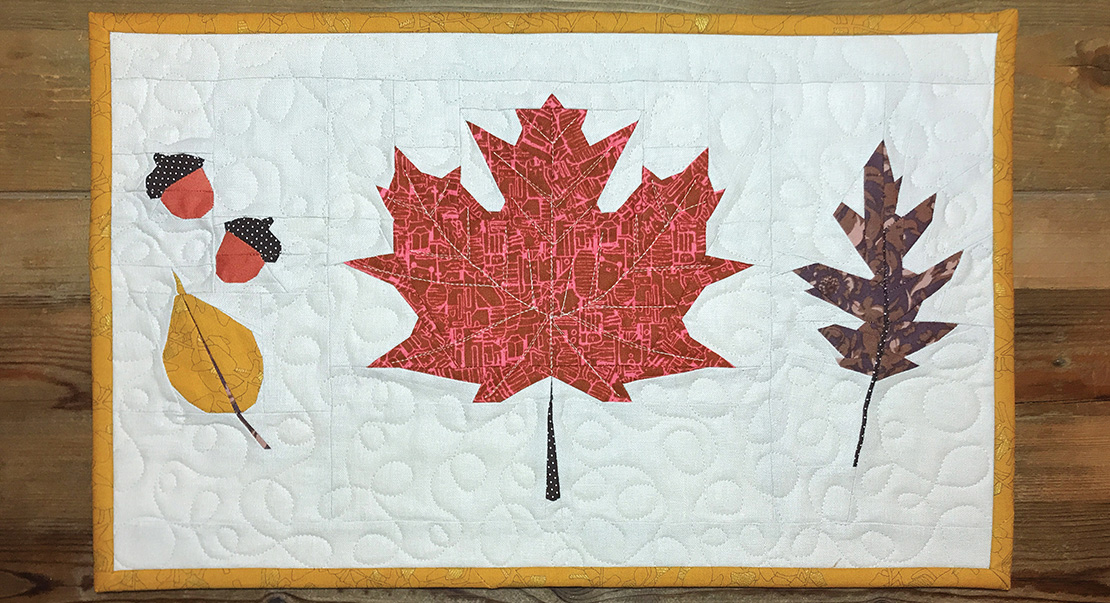
As soon as summer comes to an end, the leaves begin falling from every nearby tree signaling a season of gratitude. This is a time when we gather together around the table or walk together enjoying the crisp air, finding leaves of every color during the peak foliage season. This foundation paper pieced placemat celebrates the beauty of those falling leaves and the gathering to come of family, friends, neighbors and even strangers. Make just one for the turkey or pumpkin pie, or one for every place setting. Get cozy with your machine and make a table runner to match too.
Hi everyone, I’m Kerry Goulder of Kid Giddy and I’m so excited to share my love of foundation paper piecing (FPP) with you all in my very first tutorial here on We All Sew. As soon as summer comes to an end here in Maine, the leaves quickly begin falling from every nearby tree signaling a season of gratitude. This season of gratitude is a time when we gather together around the table or walk together enjoying the crisp air, finding leaves of every color during the peak foliage season.
This Fall Foliage paper pieced placemat tutorial celebrates the beauty of those falling leaves and the gathering to come of family, friends, neighbors and even strangers. We will start with sewing just one placemat using all three blocks, but know that you can make multiple variations and even a table runner to match as well if you’d like. Foundation paper piecing simply put, is sewing your fabric with paper. Simply follow the design on the paper while placing the fabrics underneath. If you get confused with the paper, remember how you would sew it without the paper. You will still sew two fabrics with right sides together, sew a seam, trim the seam and then open those two fabrics to add the next piece.
Materials to create a Fall Foliage Placemat
- Download and print the Fall Foliage Paper Pieced Pattern here
- Background 1 print = 2 Fat Quarter or 1/3 Yard
- Sugar Maple Leaf block 1 print = 1 Fat Quarter
- Oak Leaf 1 print = 1 Fat Eighth
- Acorn Tops & Stems 1 print = 5″ x 10″
- Beech Leaf & Crossgrain Binding 1 print = 1 Fat Quarter
- Acorns & Backing 1 Fat Quarter
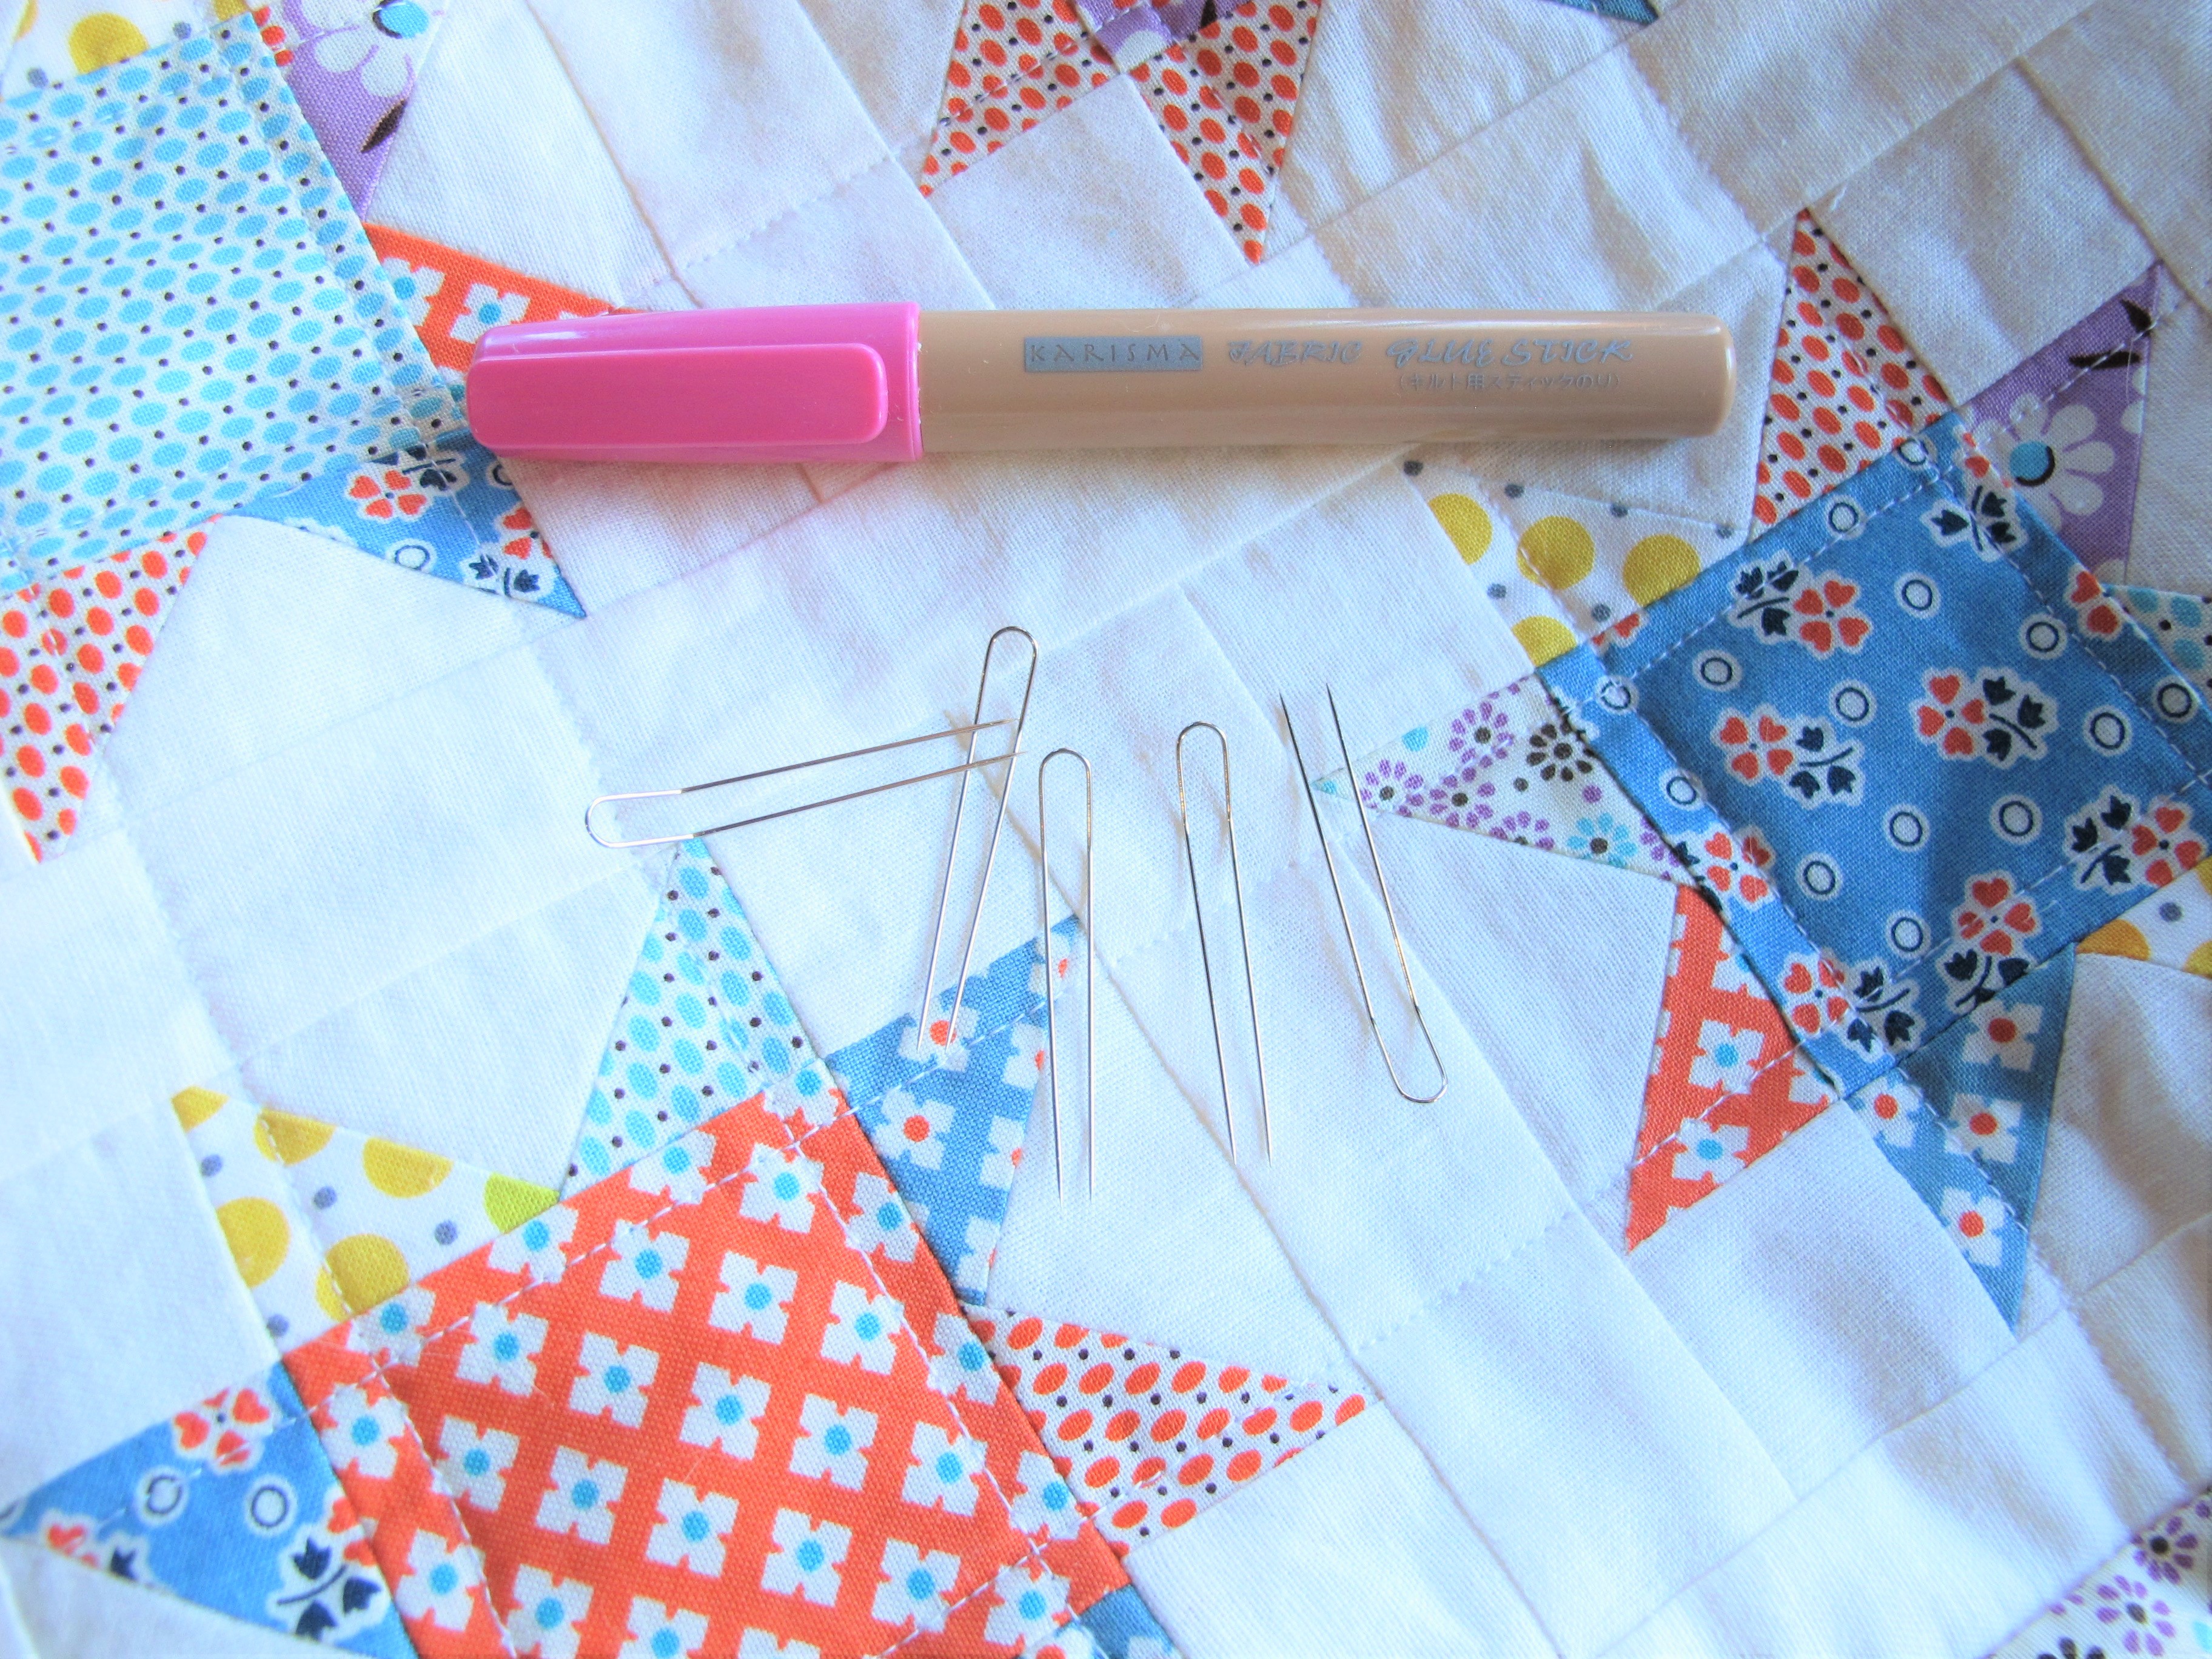
- 50 Wt Thread to match
- 24″ quilting ruler, mat and rotary cutter
- Mini iron
- Washable glue for basting, (starch as desired)
- Straight pins or clips
- Sharp angled tweezers
- Sewing machine
- Thread snips
Cutting Instructions
- Cutting instructions are noted in the pattern file to assist you with making your own placemat.
- While some sewists precut fabrics for each patch in a foundation paper piecing pattern, I do not as I prefer to use scraps when possible.
Presser Feet and Accessories
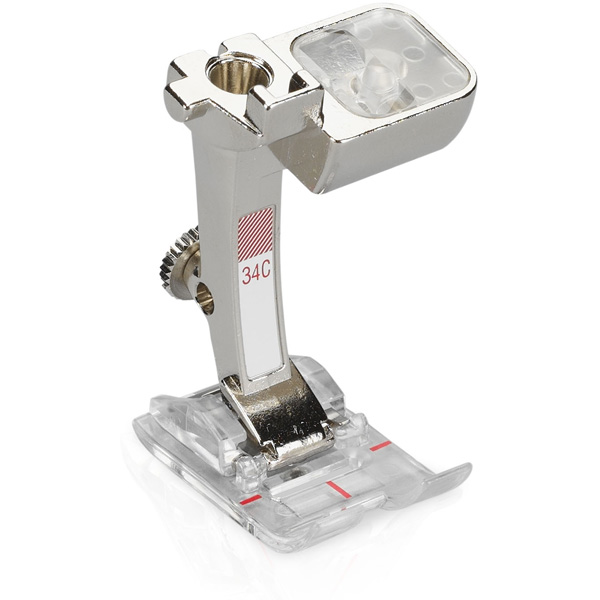
- Reverse pattern foot with clear sole #34C (this is the foot that I use most often as it allows me to see where my patch lines and fabric at all times)
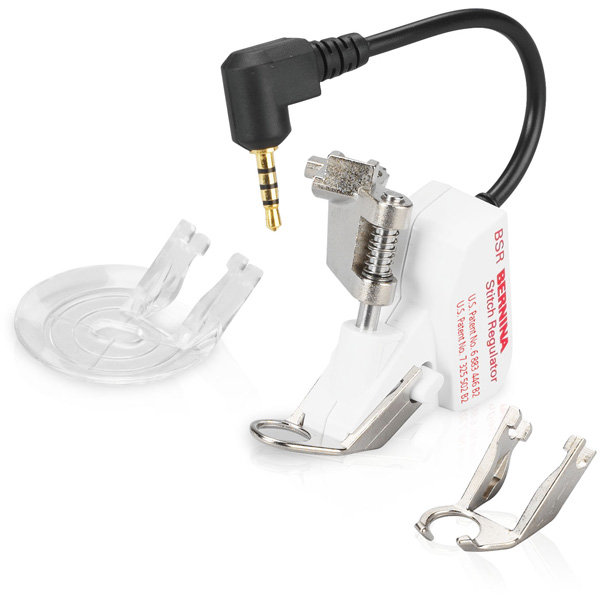
- BERNINA Stitch Regulator #42 (for quilting your placemat)
- Three-sole walking foot #50 (for attaching binding)
Ready to get started?
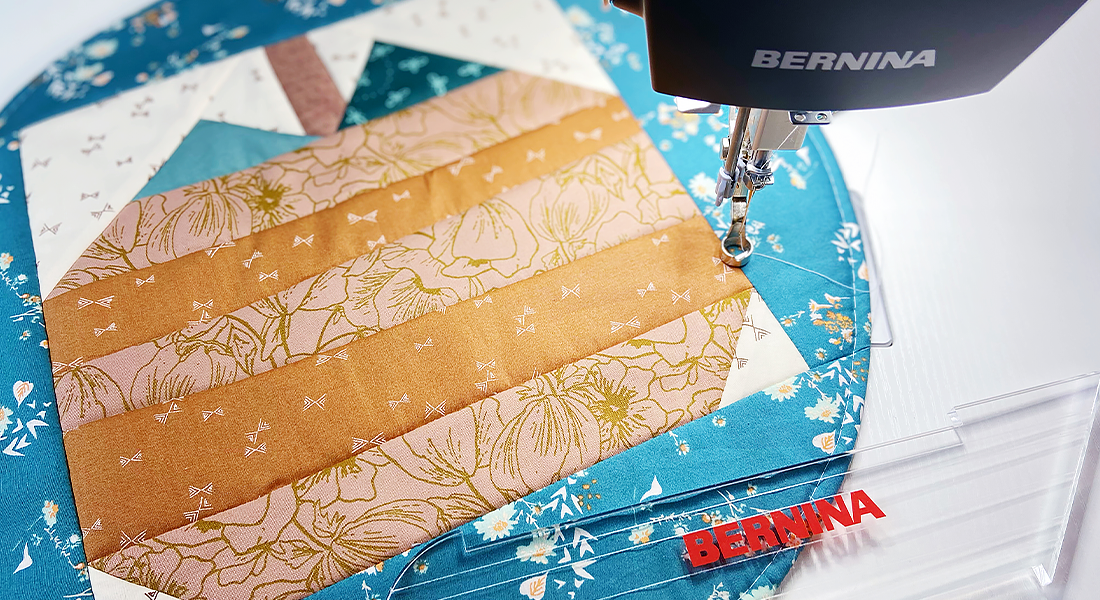
Print out the Fall Foliage Placemat PDF and read through all of my instructions, tips and tricks. Begin by cutting out all of the section pieces for the Sugar Maple Leaf. Ok beginners, don’t worry. Yes it looks complicated, but when you break down a pattern to just one piece, it really is the same as doing one simple block. We will start with Section A because that is the simplest section in this leaf block. This block contains multiple sections A – P, and each section contains multiple patches.
Step 1: Set the stitch length
When paper piecing, set your stitch length to 1.80. Sewing with a shorter stitch length allows you to carefully rip out the paper without ripping out the stitches. If you paper piece a lot, set this stitch as a favorite.

Set your stitch length to 1.80.
Step 2: Sew with your pattern right side up
When paper piecing, always sew with the pattern paper right side up. The fabrics will be underneath with right sides facing. The larger red fabric below is large enough to cover the full size of the pattern patch (and seam allowance), while the tan fabric is big enough to cover the small “A2” patch (and seam allowance).
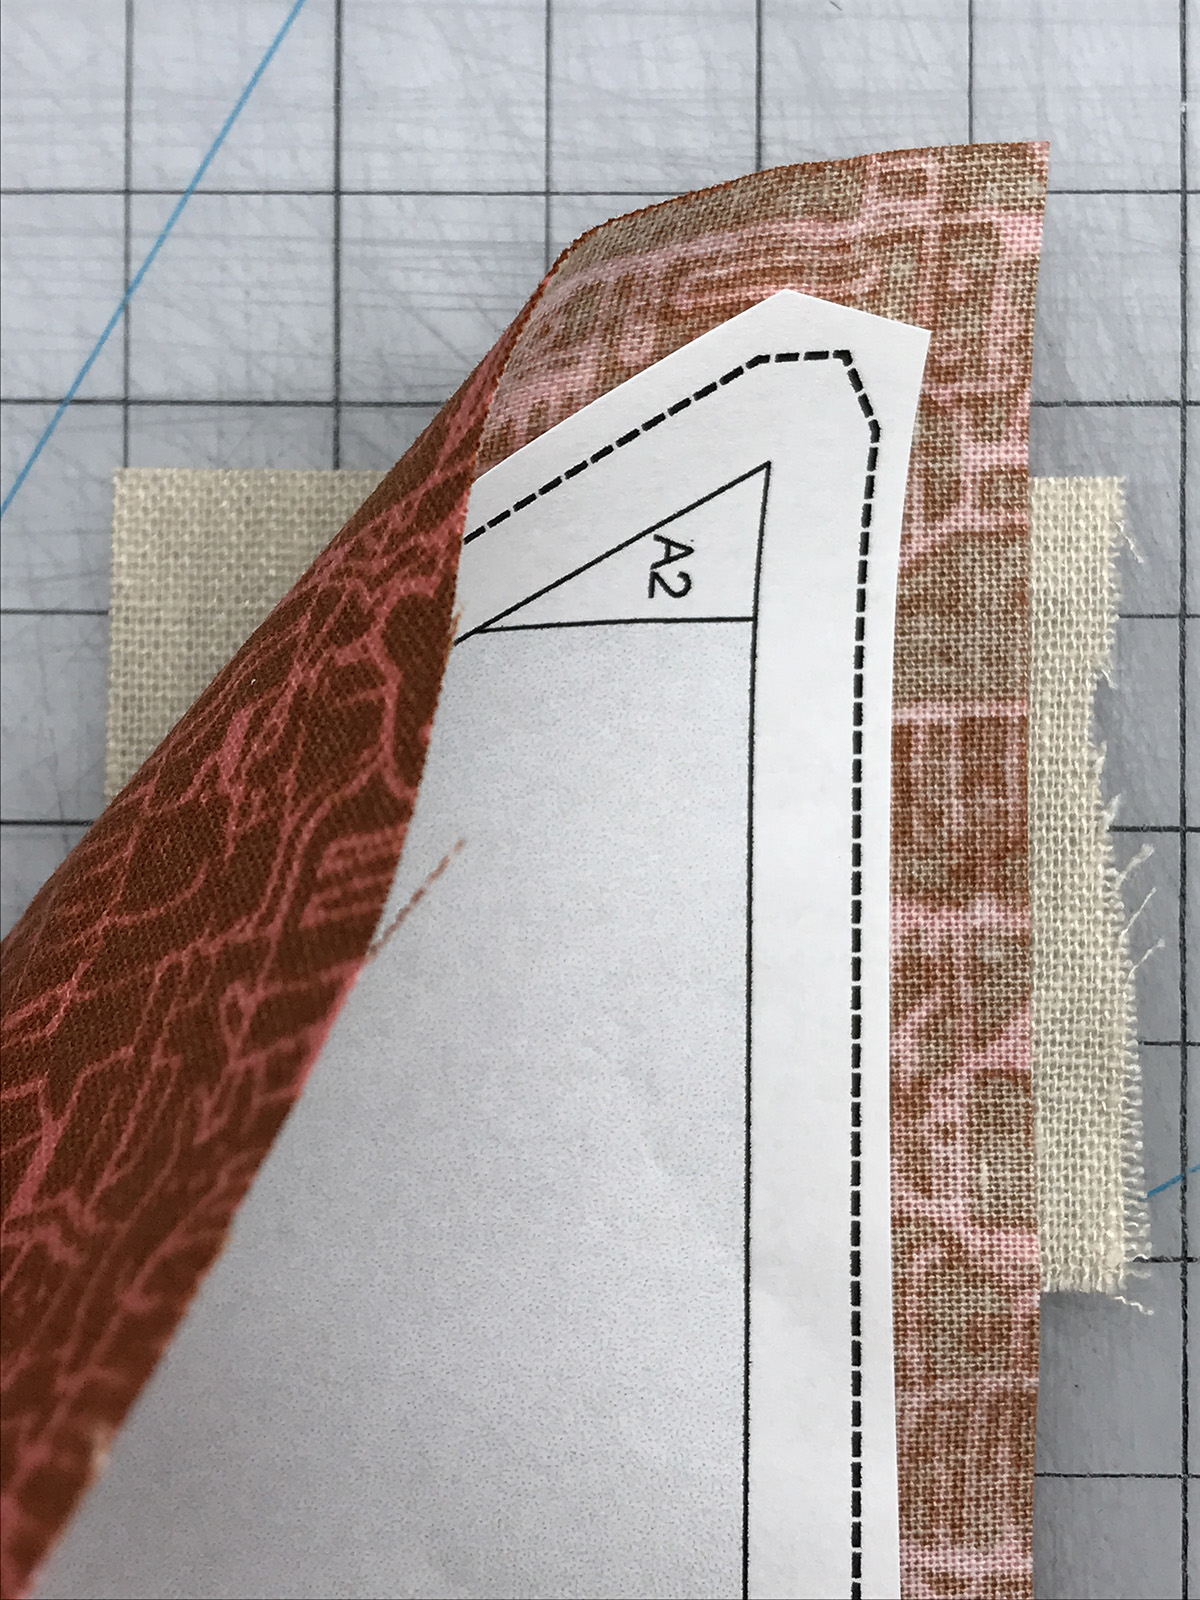
With the pattern piece right side up, place two fabric pieces underneath, right sides together.
Step 3: Reverse pattern foot with clear sole #34C
Why use the Reverse pattern foot with clear sole #34C for foundation paper piecing? Precision is key when paper piecing. To get points to line up properly it’s important to sew directly on the line. I prefer using this foot as it helps me to see everything. Literally.
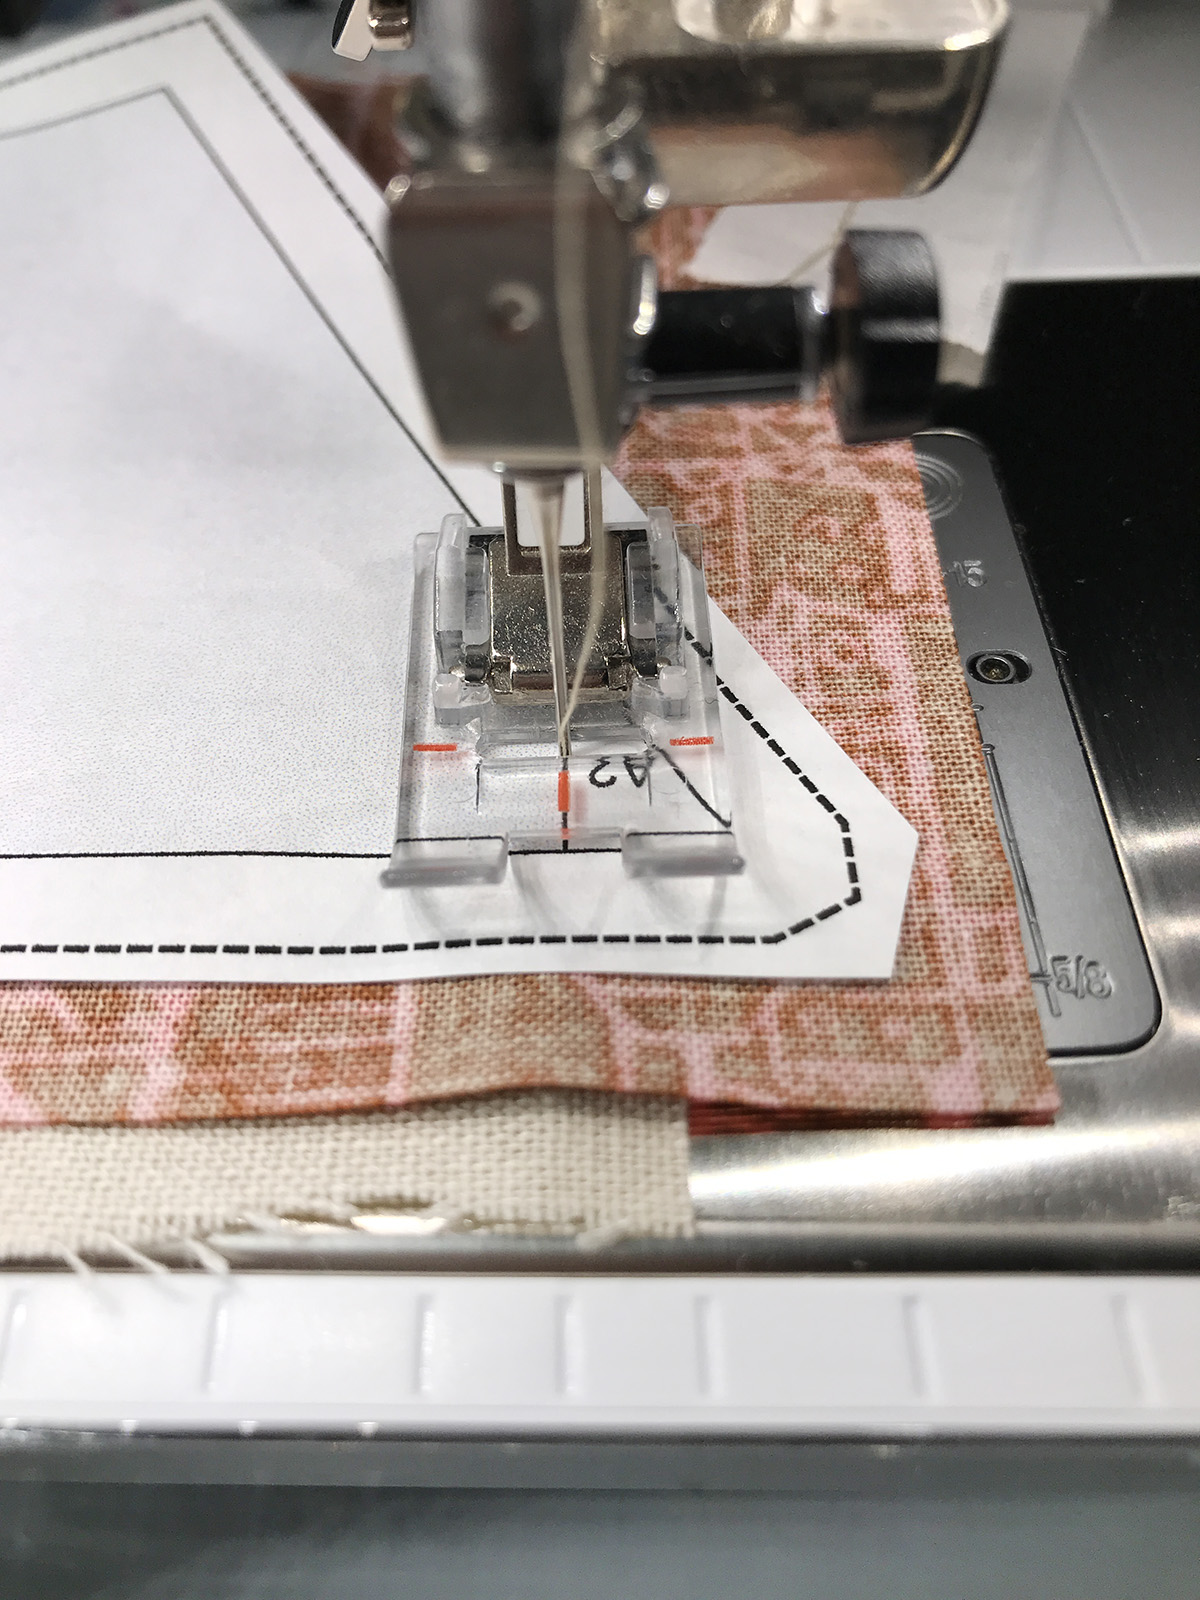
The Reverse pattern foot with clear sole #34C allows you to see the lines all of the time.
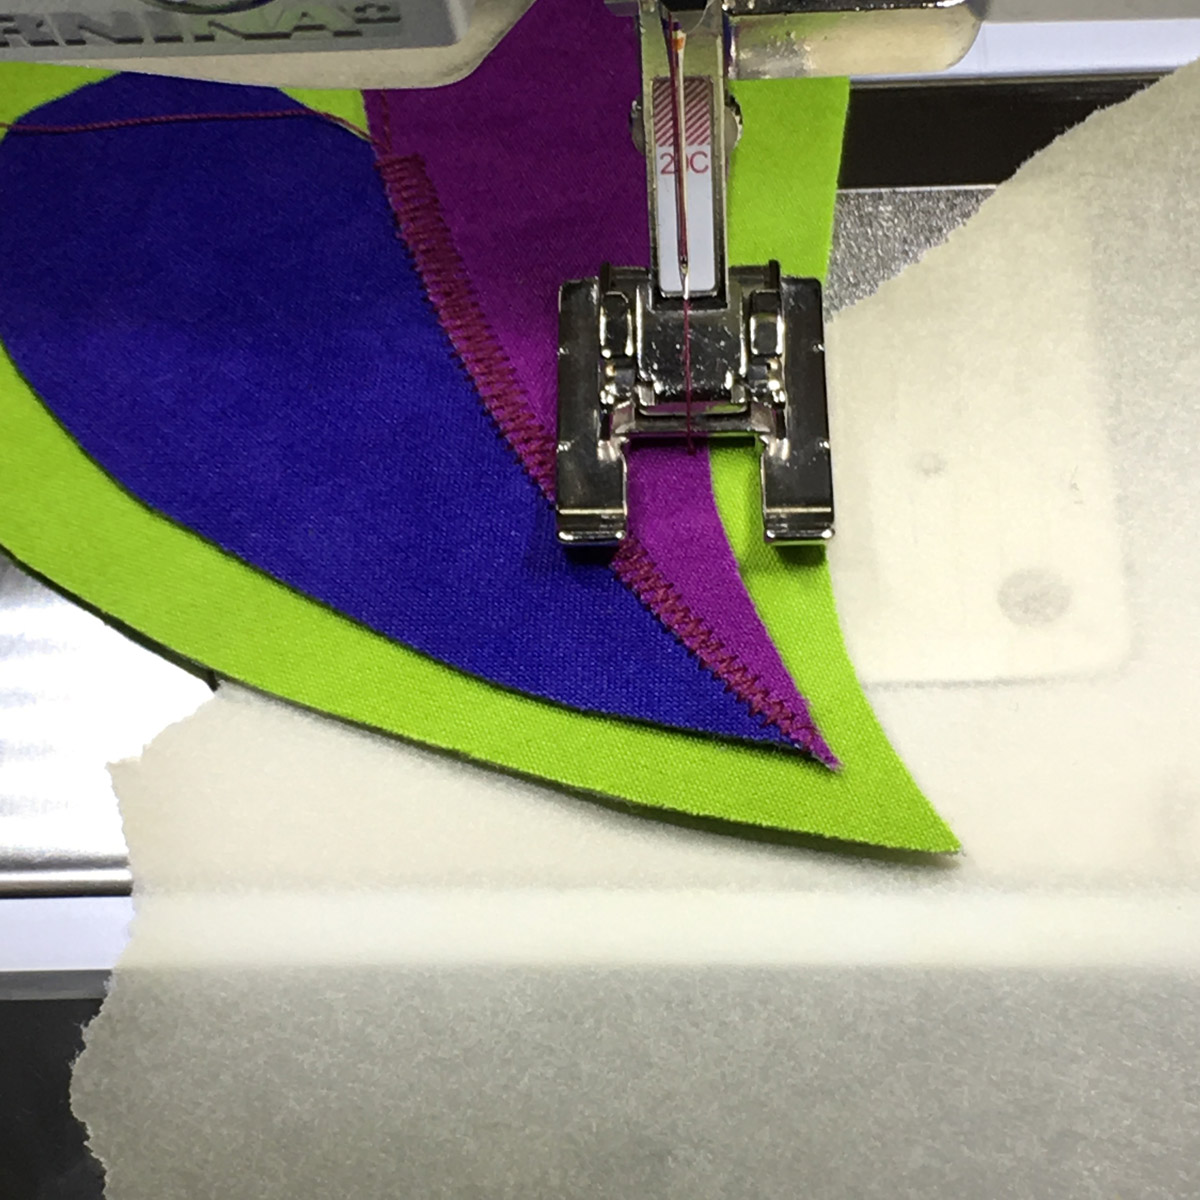
Step 4: Sewing the first seam
It’s important to sew the first seam (as well as all the others) all the way across from one edge of the other including the seam allowance. Later on when seams are crossed perpendicular, it will lock in the stitches and prevent the seams from unraveling.
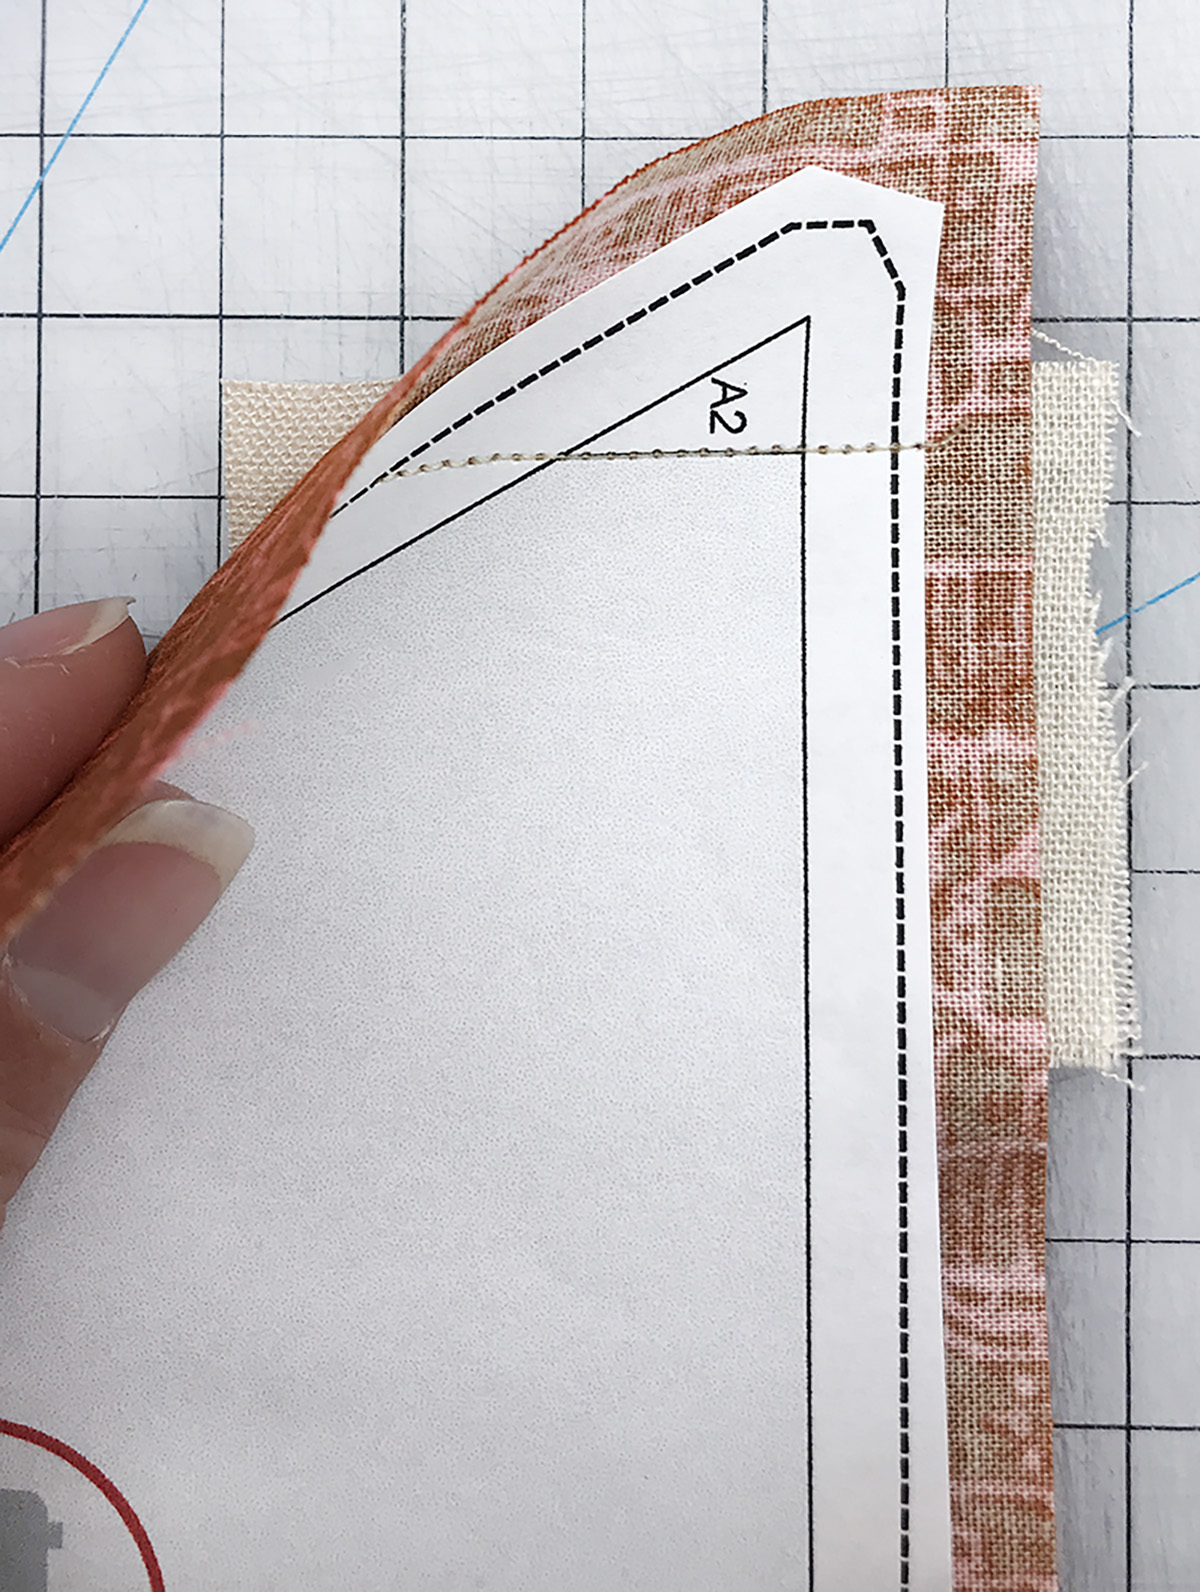
Sewing the first foundation paper pieced seam from edge to edge.
Step 5: Press every seam
Use a seam pressing tool to press open the smaller seams, and a mini iron to press open the larger or bulkier seams. If you don’t regularly press open the fabrics, it can result in excess fabric in the block.

Use a seam pressing tool to press open smaller seams.
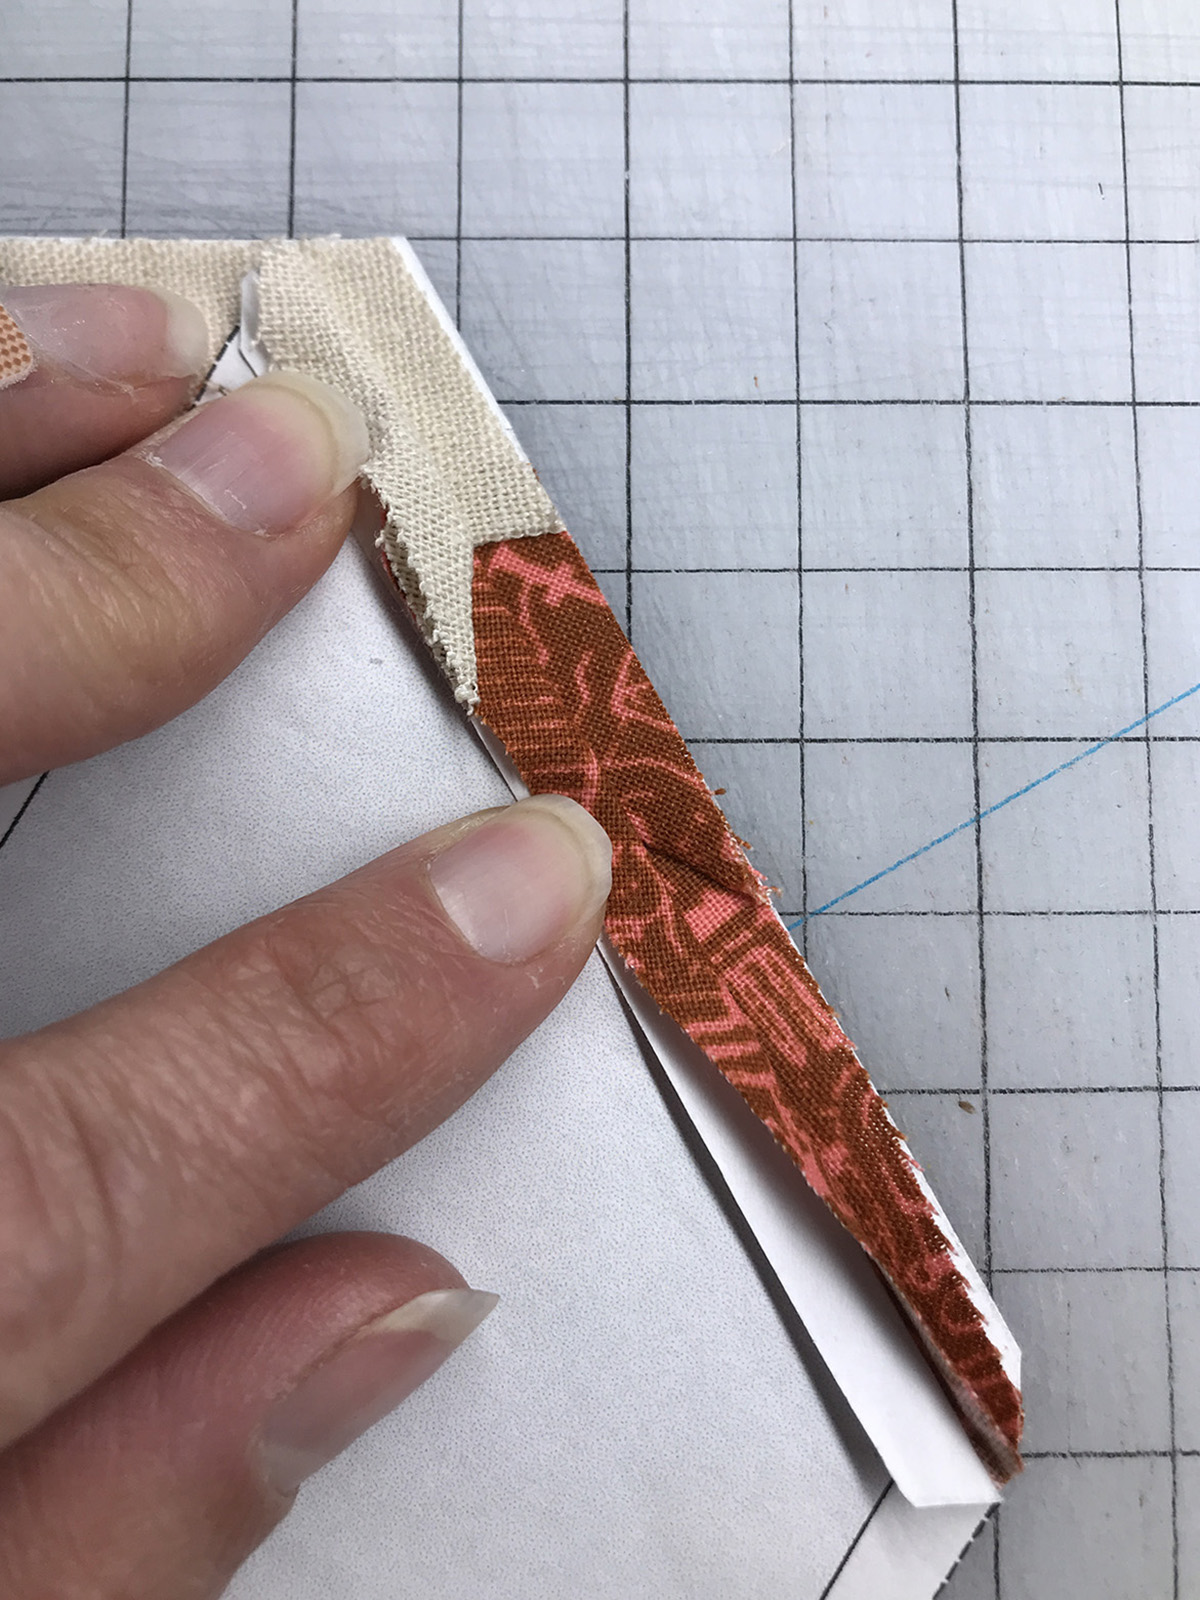
Step 6: Trim every seam
After every seam, you must trim the excess fabric away from the seam allowance. Be sure to fold back the pattern paper piece to prevent cutting it off. Using a clear ruler will allow you to see where the seam edge is and where to cut.

Trim off excess fabric from seam allowance.
Step 7: Trim Section
When you have sewn all of the patches for any given section and pressed it, carefully trim the entire section on the dashed (seam allowance) lines using a rotary cutter, ruler and mat. The solid line is where you sew the sections together to form your block. Do not cut on the solid line. Please do not cut off your seam allowance at two in the morning before a deadline like I have done! With this first section done, you can now move onto section B, and continue until all of the sections are sewn.
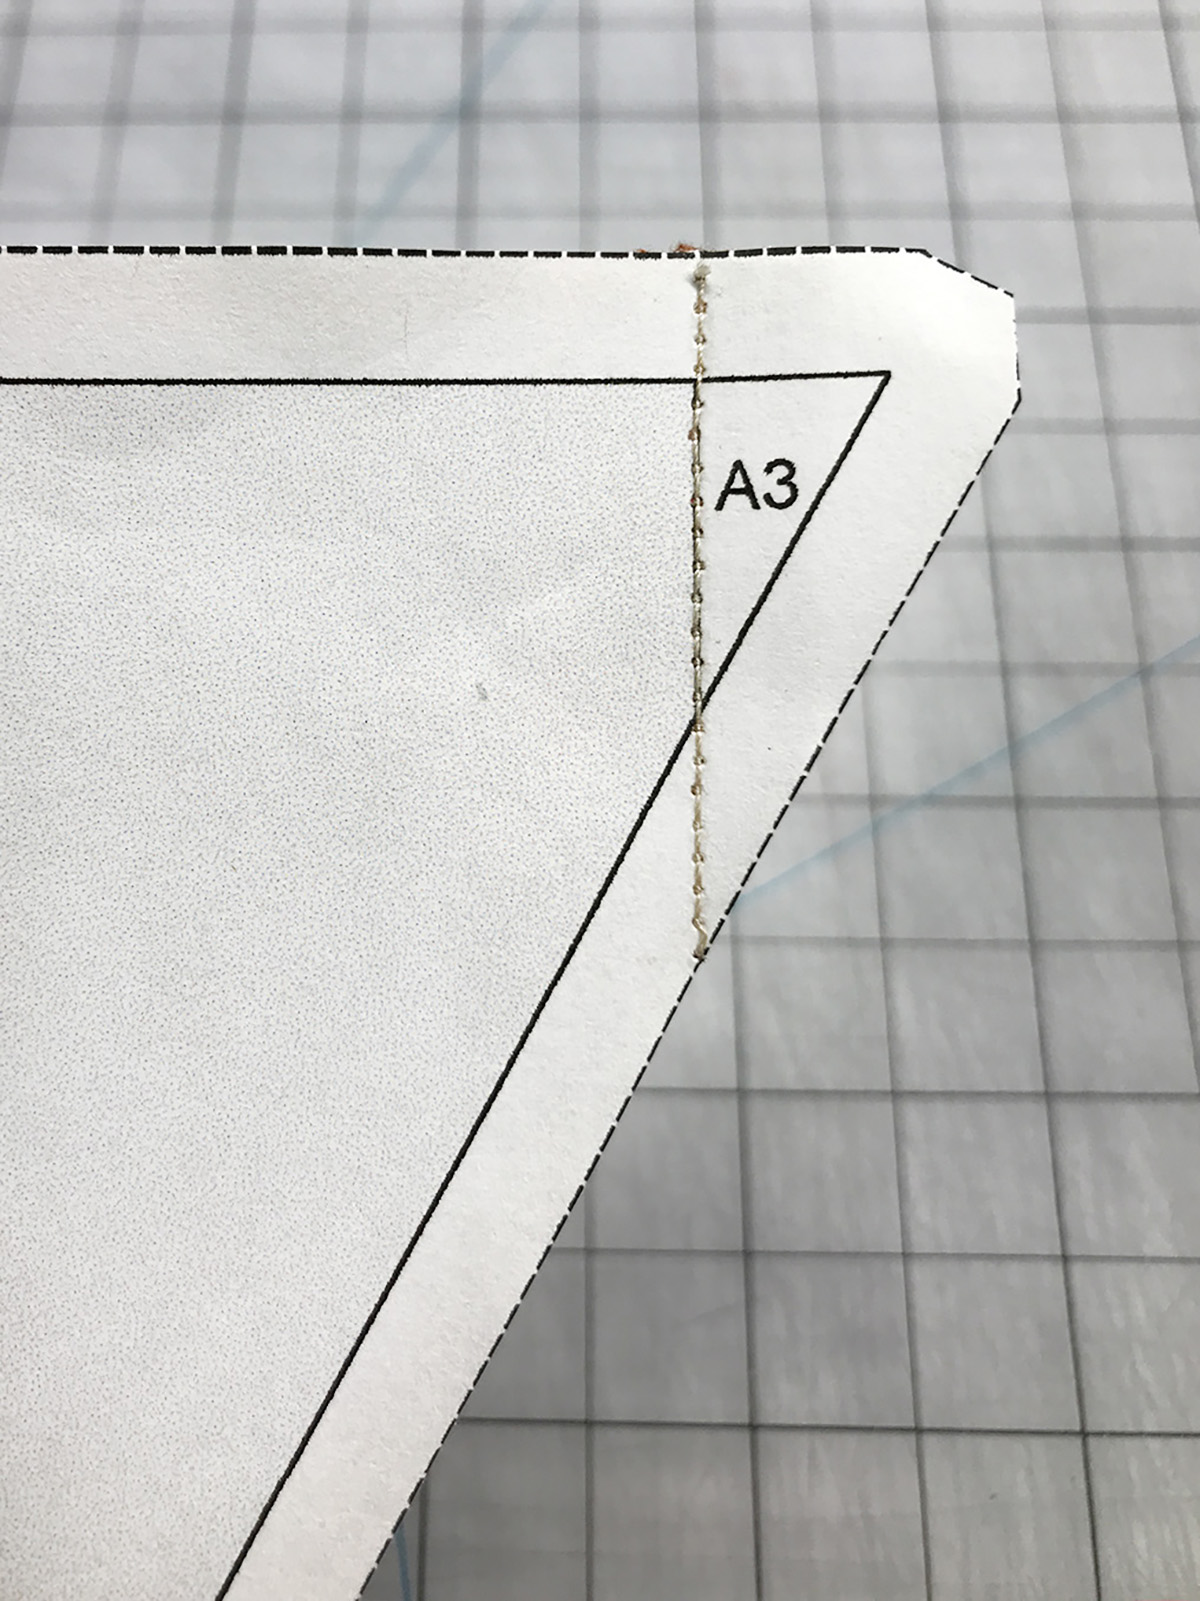
Trim sections along outer (dotted) edge.
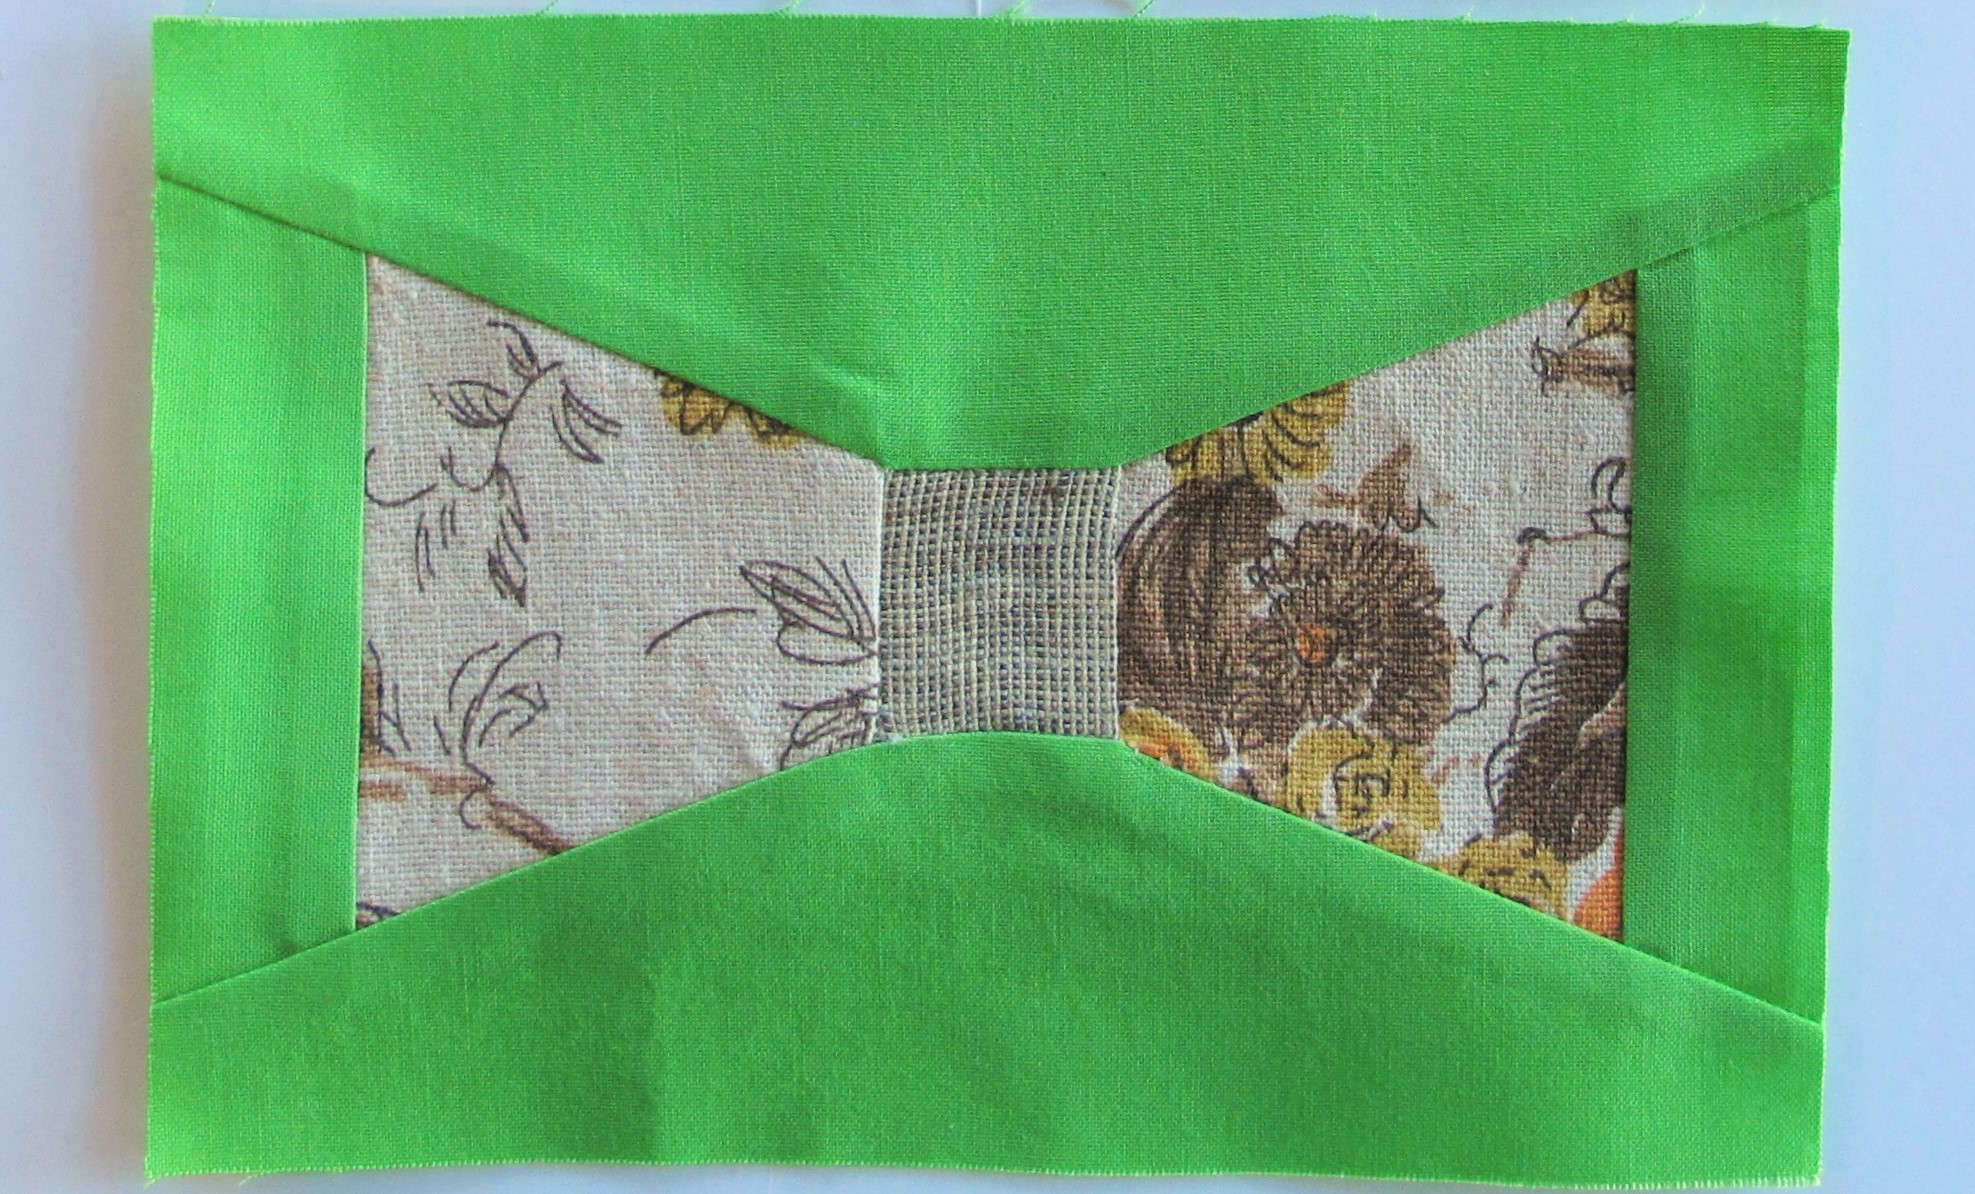
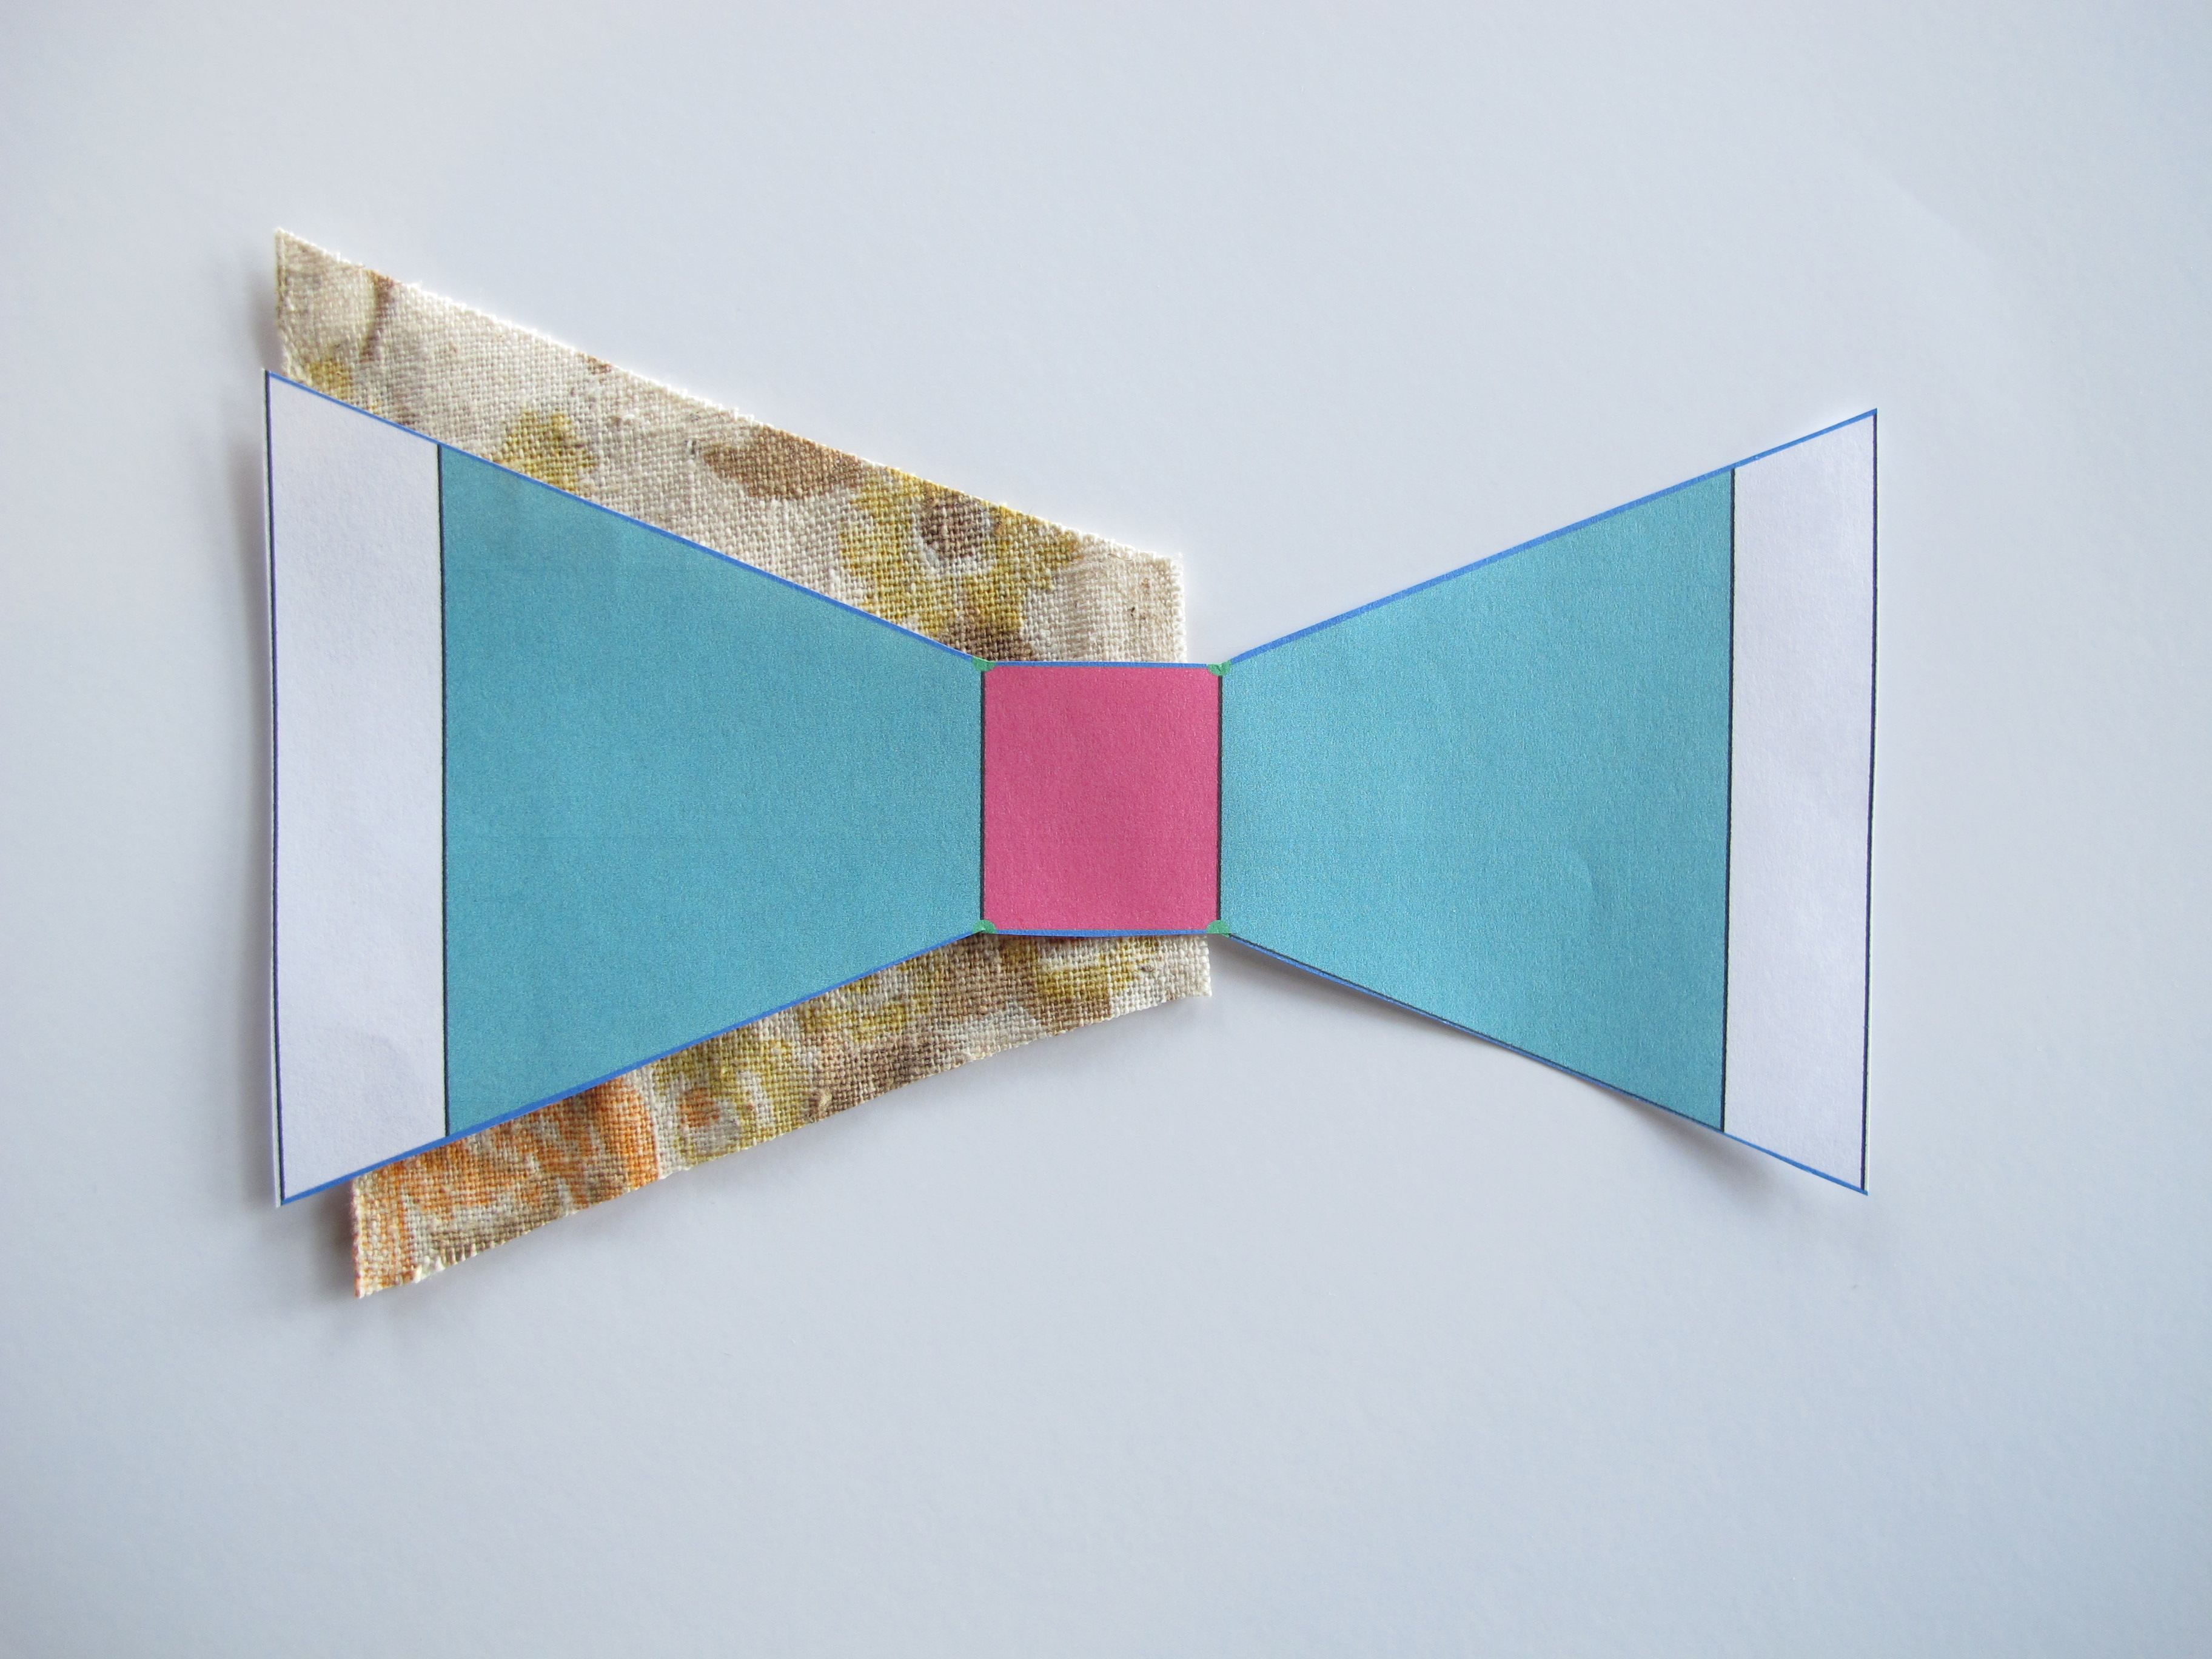
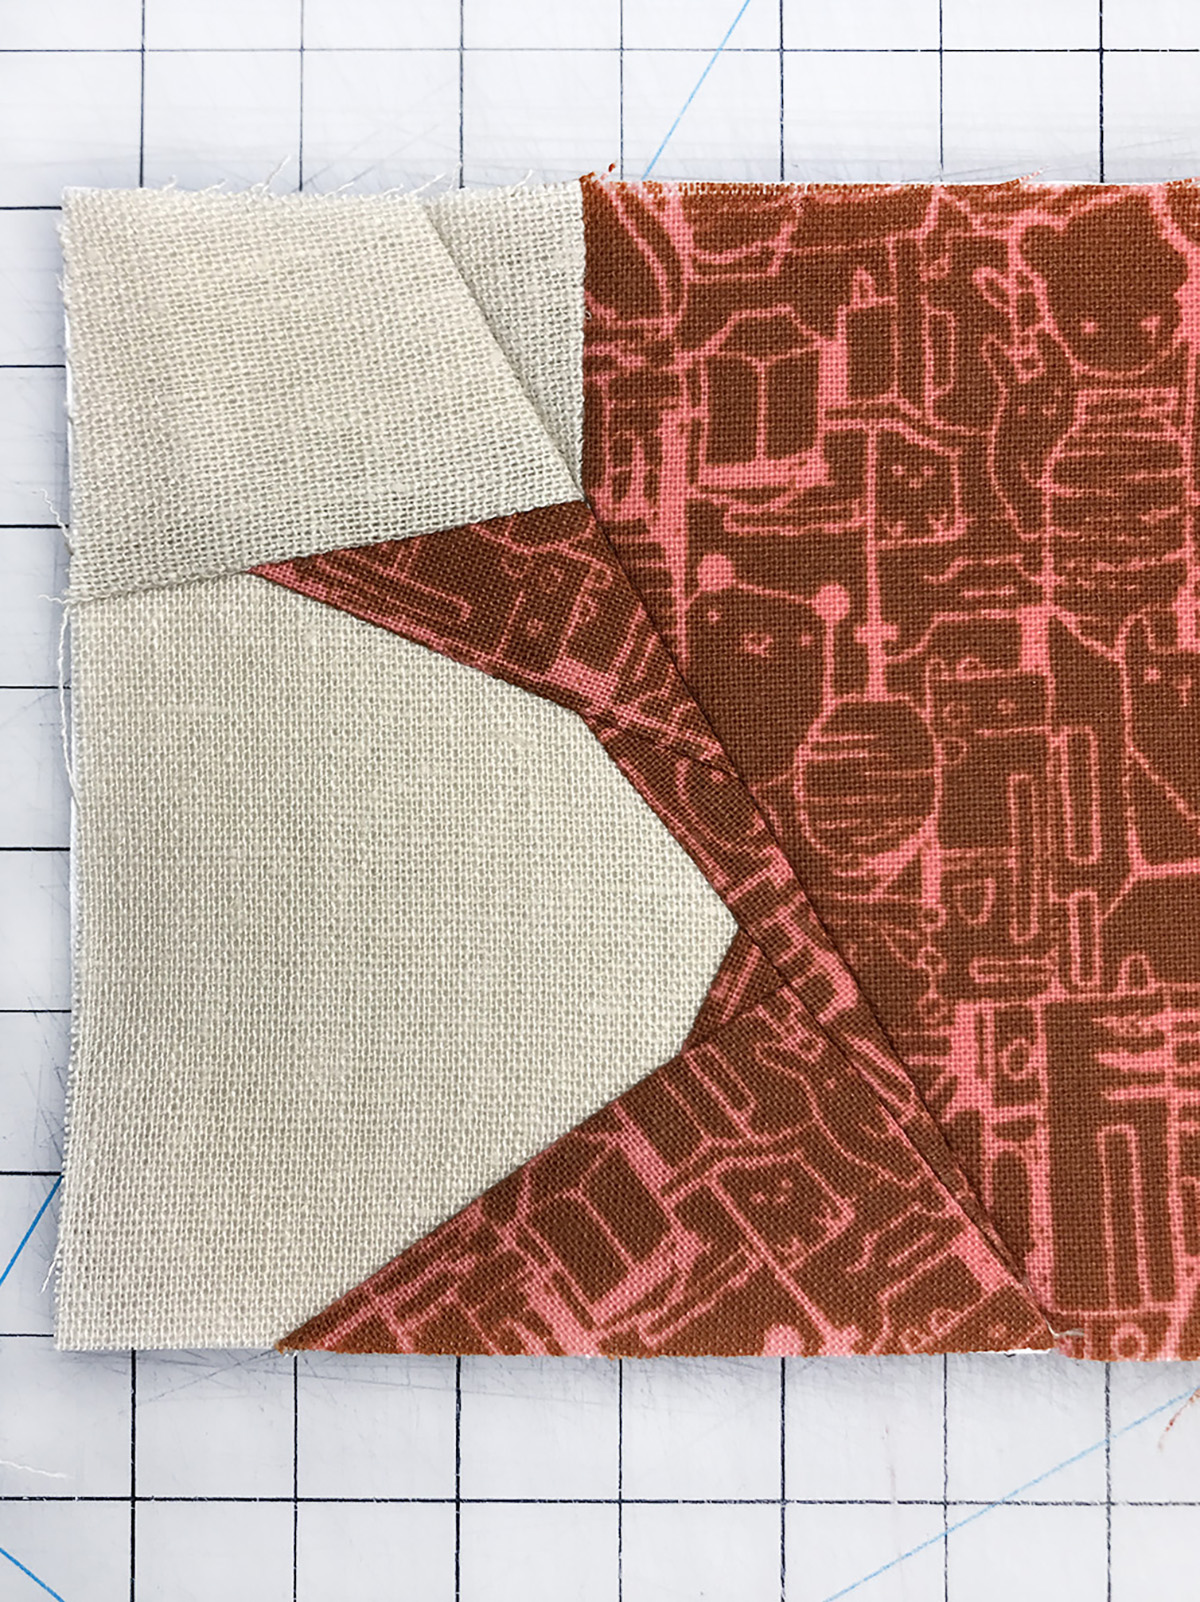
Step 8: Getting seams and points to line up
Not every seam will have specific points to line up. But some will and when you can accurately line them up, it makes the block look crisp and clean. To line up a seam or point, lay the two sections right sides together. Fold over the seam of the top section and adjust the position as needed. Once in place, pin the two sections together before and after the point.
Line up sections to sew together.
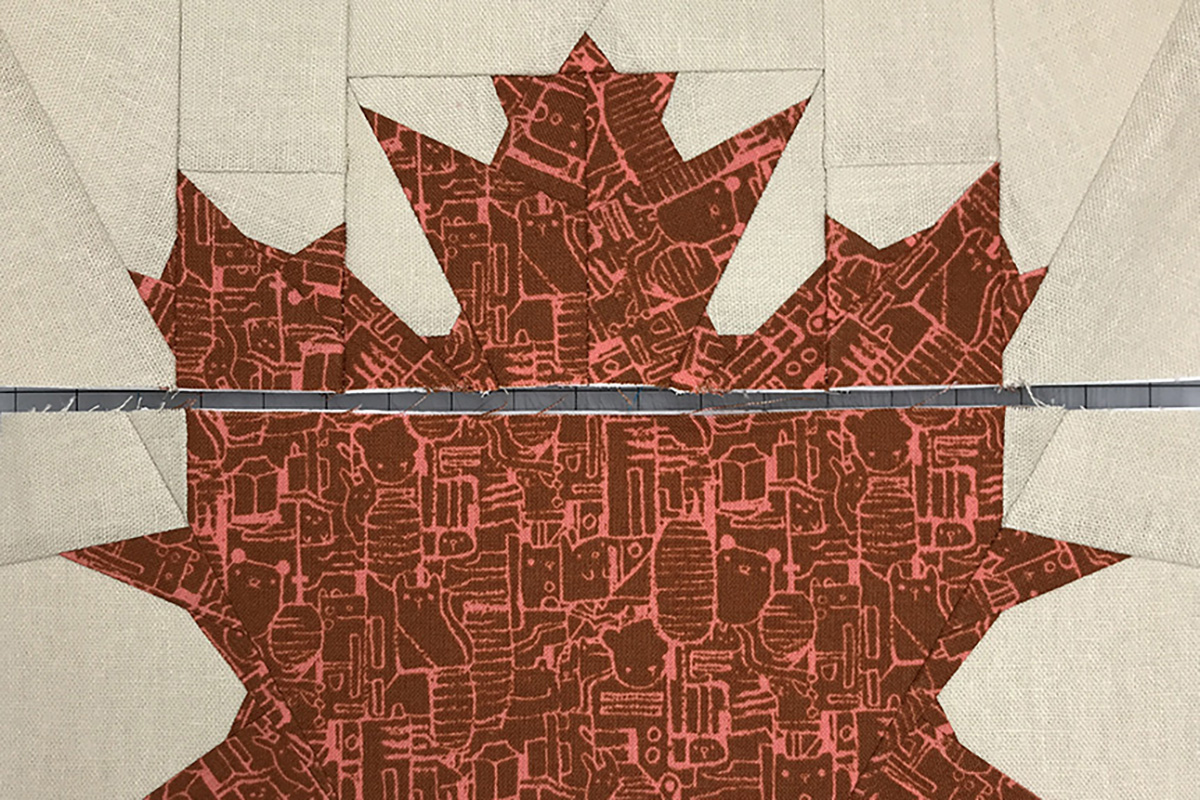
Step 9: Lined up points
These two sections have a point that comes together and were lined up just right before being sewn.
Lined up points make the block look crisp and clean.
Step 10: Attaching Top half to Bottom half
When you finish sewing all of the top sections together, and have also finished all of the bottom sections, line up the two halves and practice lining up any matching points. In the photo below, I can see one side looks like it will line up, while the other may not. However, if you line them both up and pin them in place, sew half of the seam from one end, and sew the other half of the seam from the other end. This will allow you to ensure both points are lined up. Change the stitch length back to 2.40 or 2.50 in order to be sure of placement.
Carefully line up the top half to the bottom half.
Step 11: Perfect points
Not every point is going to be perfect. If you want your points to line up better, you can carefully unstitch any seam and resew it to get it just right. The more you rip out a mistake, the less reliable the pattern paper becomes.
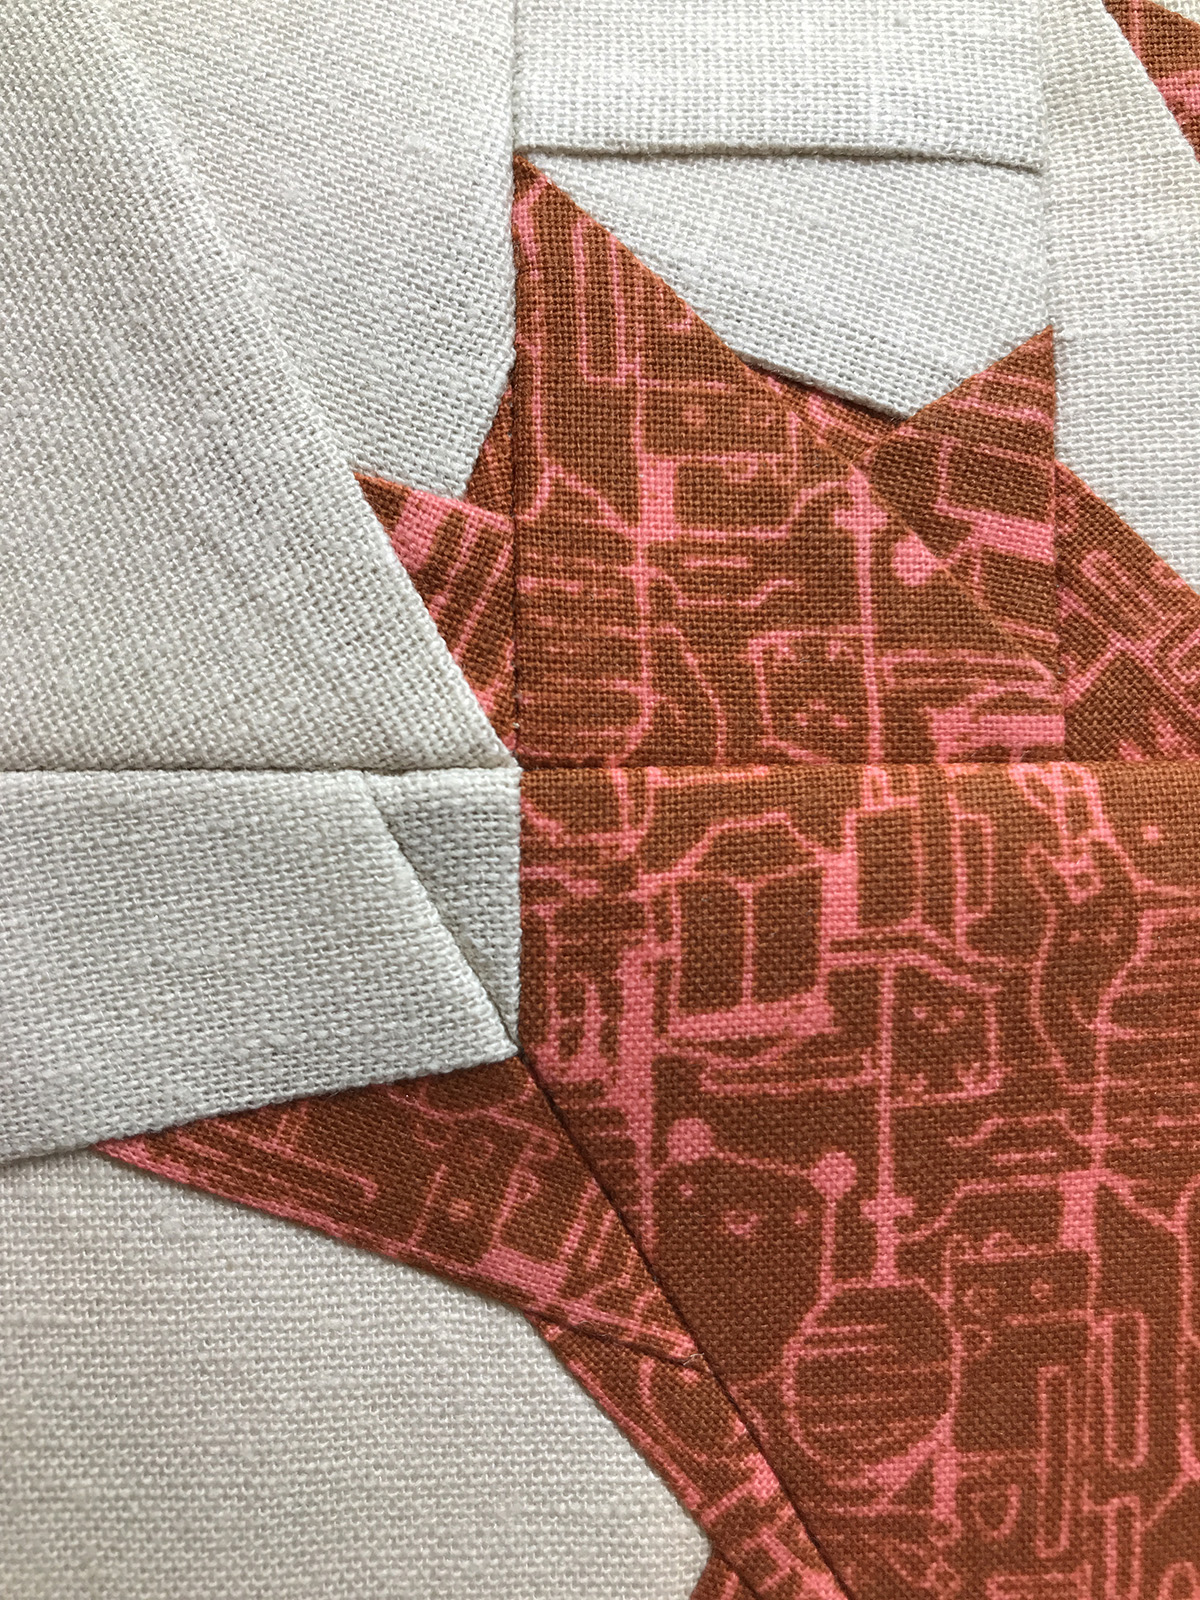
Two perfectly lined up points. You can do it too.
Step 12: Press the seams
This seam allowance photo looks like a hot mess. It’s clear here to see why it’s important to press the seams. Some will naturally press open, others will not. The goal is to reduce the bulk to make quilting easier. A mini iron really helps to getting into those tiny seam allowances, after you have carefully torn off all paper pieces.

Using a mini iron, press the block on the seam side first.
Step 13: Prep for quilting
Glue or spray basting layers helps prevent shifting. Although these layers are glue basted, it’s important to use a larger piece of batting and an even larger piece of backing fabric to protect the edge on the front of the placemat. I decided to use the BERNINA Stitch Regulator #42 in order to quilt the placemat with a little loop design (mimicking how leaves fall and swirl all around).
Glue Baste a larger piece of batting and an even larger piece of backing fabric before quilting.
Step 14: Gather binding strips and tool
Prep and press your binding fabric and get it ready for quick and easy binding. Sew your binding on with the Three-sole walking foot #50 to prevent any one fabric layer from puckering.

Having the right feet and tools make quilting and binding easier.
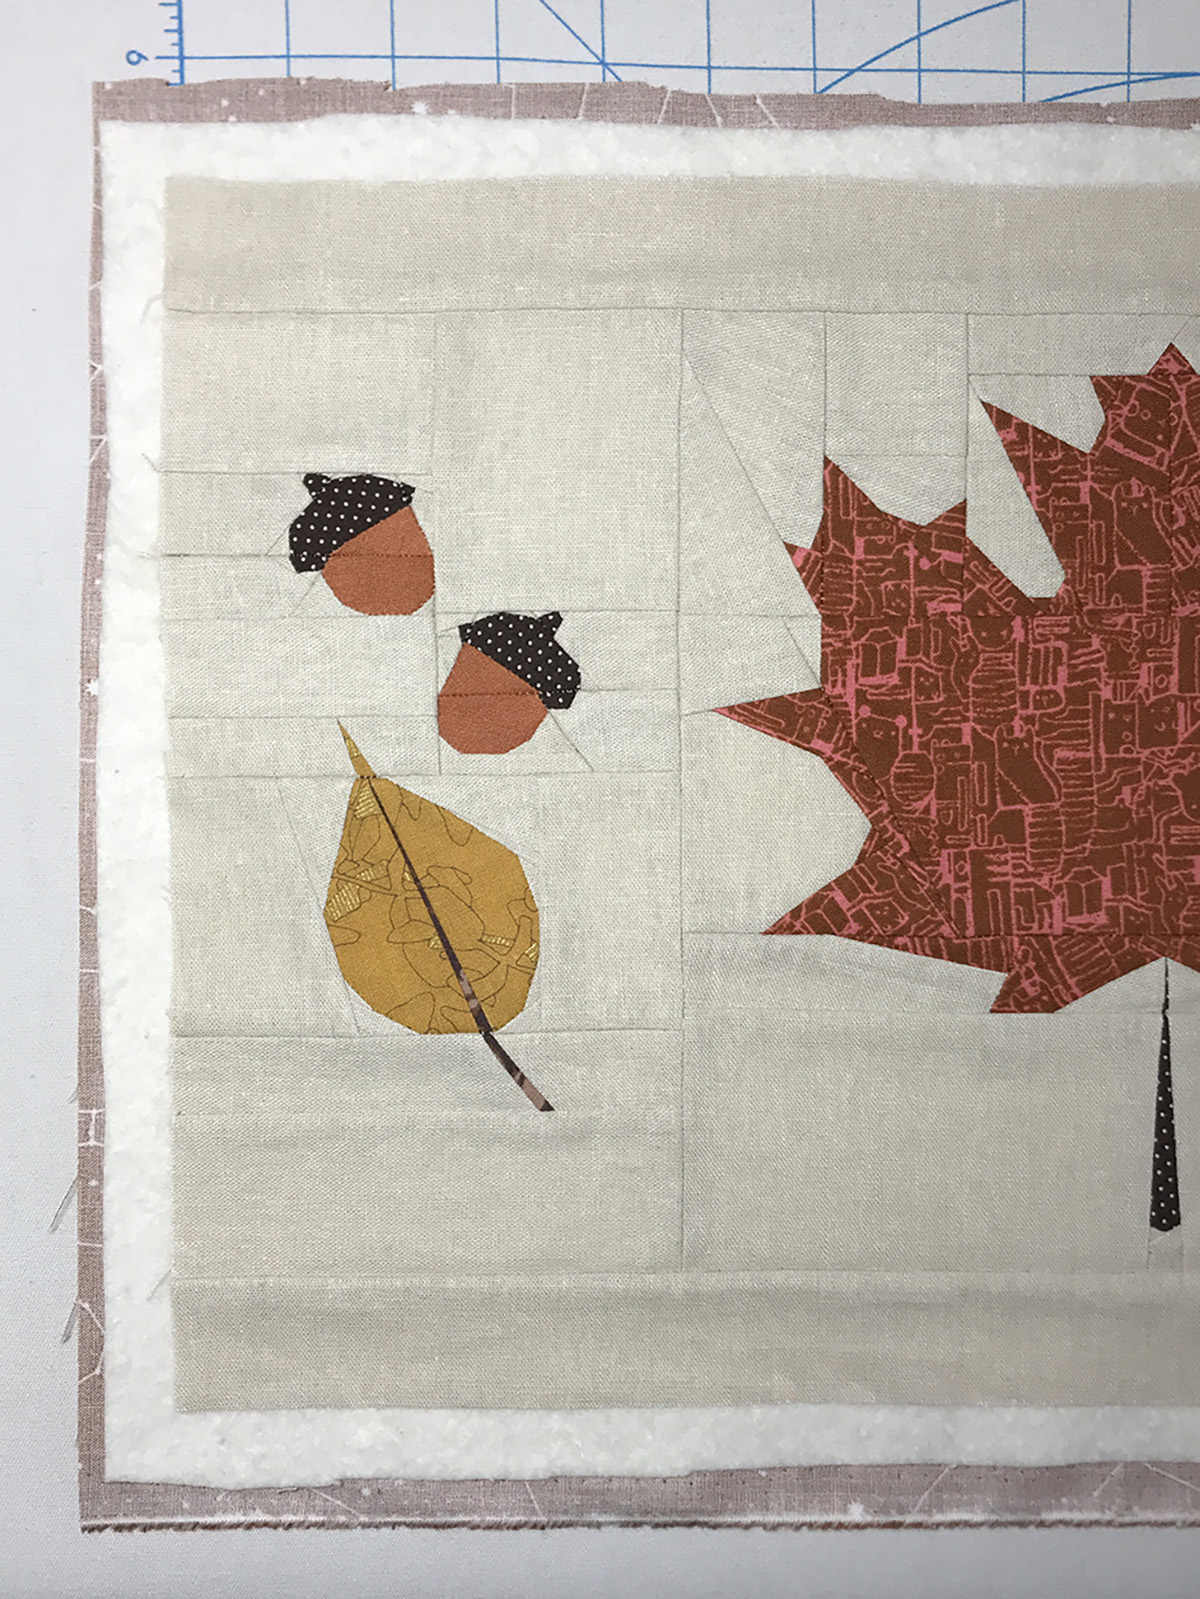
Step 15: Using different colors
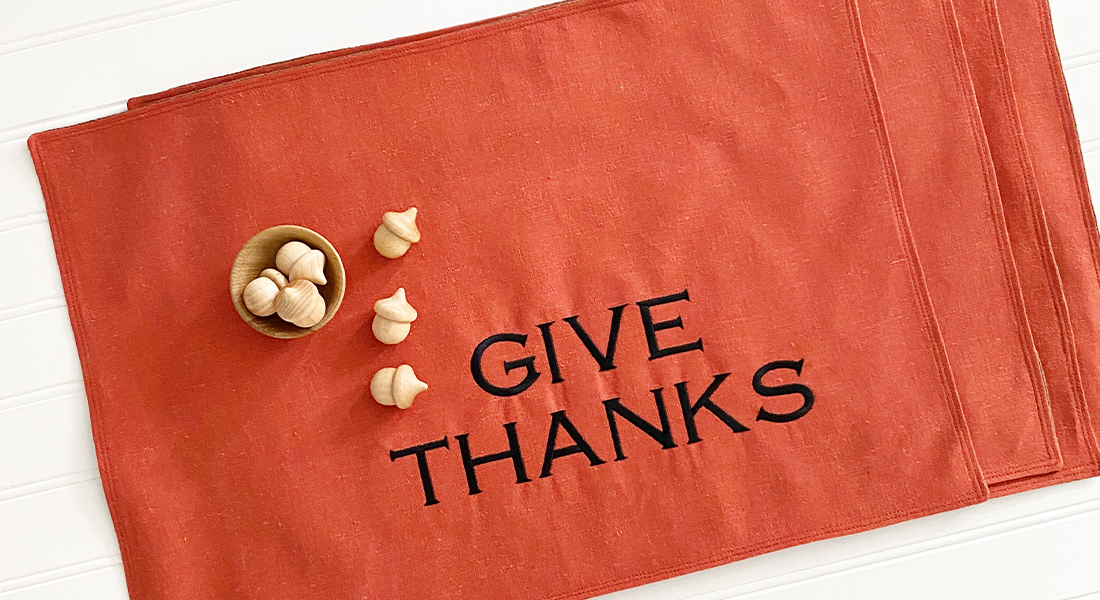
With each new placemat, experiment with different colors for the leaves and even acorns. Throughout the seasons, the leaves change all kinds of colors. Mixing them up will allow each placemat to pop and add your own bit of “fall foliage” to your holiday and thanksgiving table.
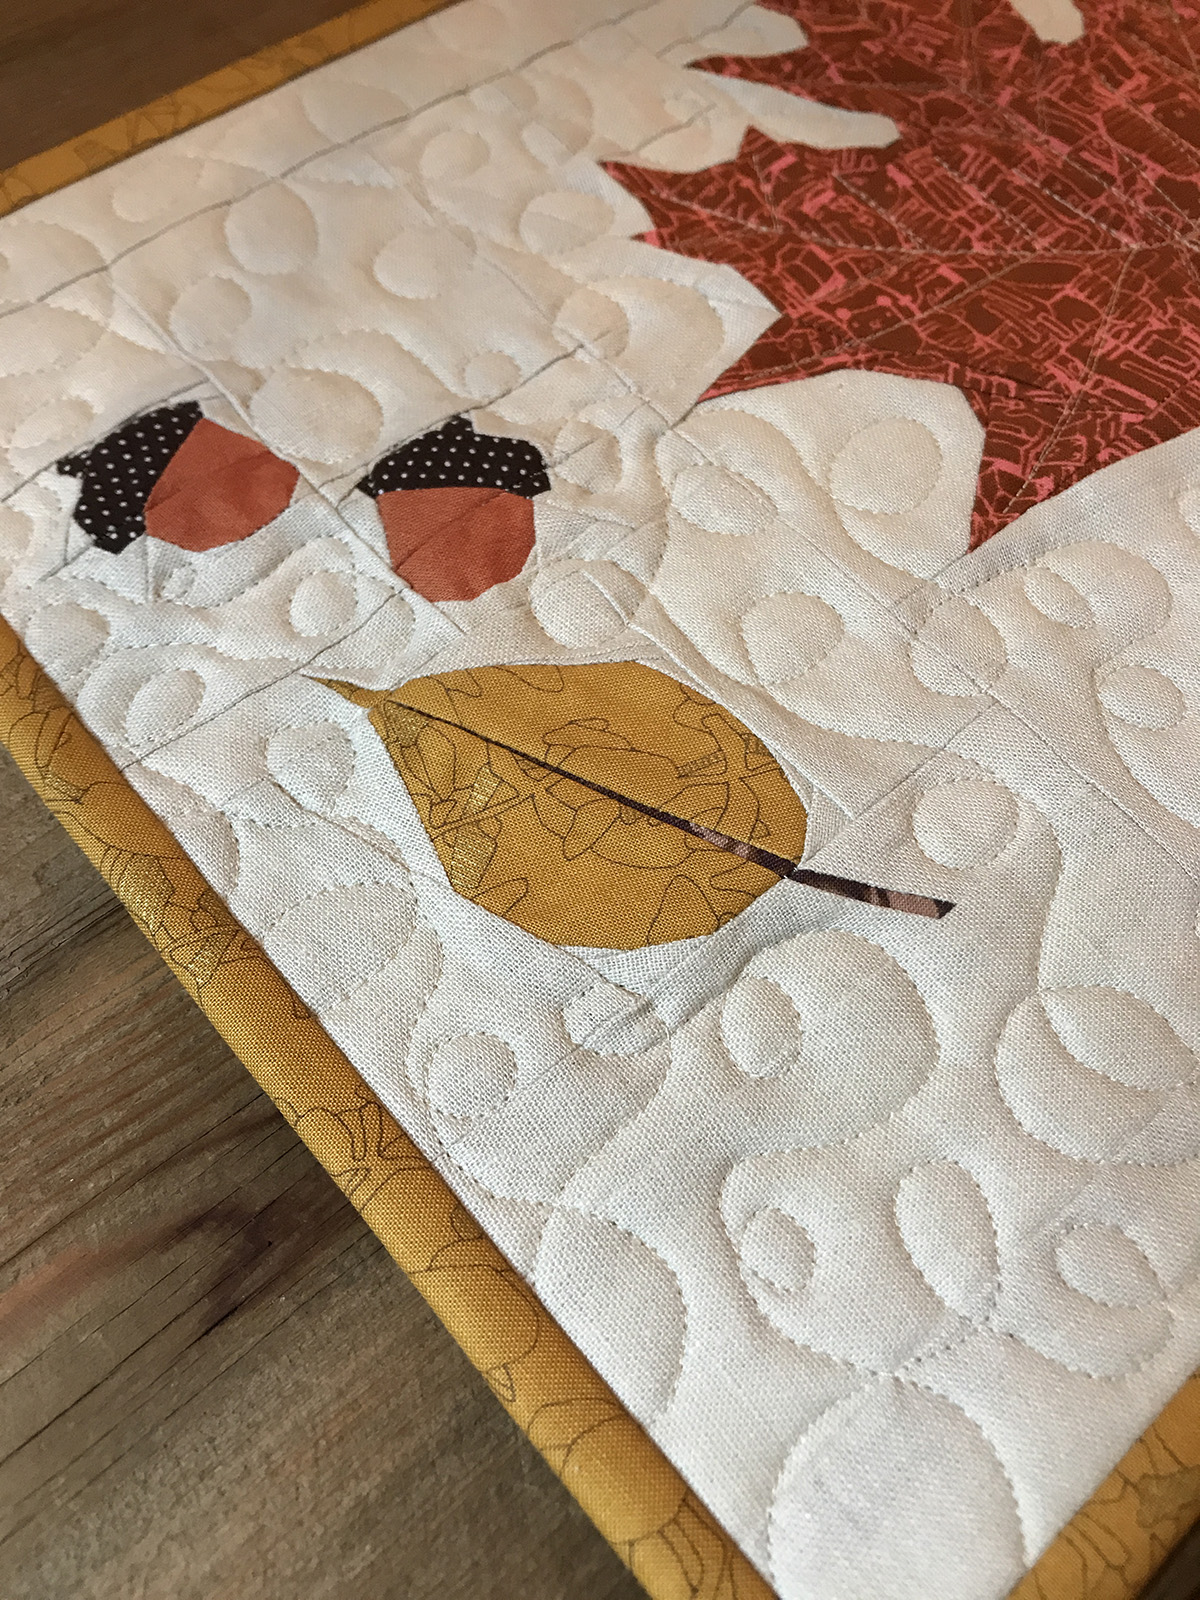
Using color variations give the leaves and acorns a little pop.
I hope you have enjoyed this tutorial and have picked up a few of my tried and true tips and tricks for successful foundation paper piecing. Although I’ve been paper piecing now for a while, I still find myself spending time with a seam ripper, so don’t stress if you are too. Please feel free to ask me any questions below and tag me on IG with #fallfoliageplacemat with your finished placemat.
If you want to learn more about designing and sewing foundation paper piecing patterns, download a copy of my Learn to Design and Sew Foundation Paper Piecing ebook and join me on social media IG @kidgiddy, FB @kidgiddy and on my website kidgiddy.com. Happy Thanksgiving! – Kerry