Four+ Ways to Finish Seams
If you want your projects, especially garments, to look as good on the inside as they do on the outside, finishing the seams is the way to go. Not only will they look good, but the seams will also be stronger, and the fabric edges will wear better and fray less. This post covers four ways (plus a few extras!) to finish seams on a variety of fabrics and projects.
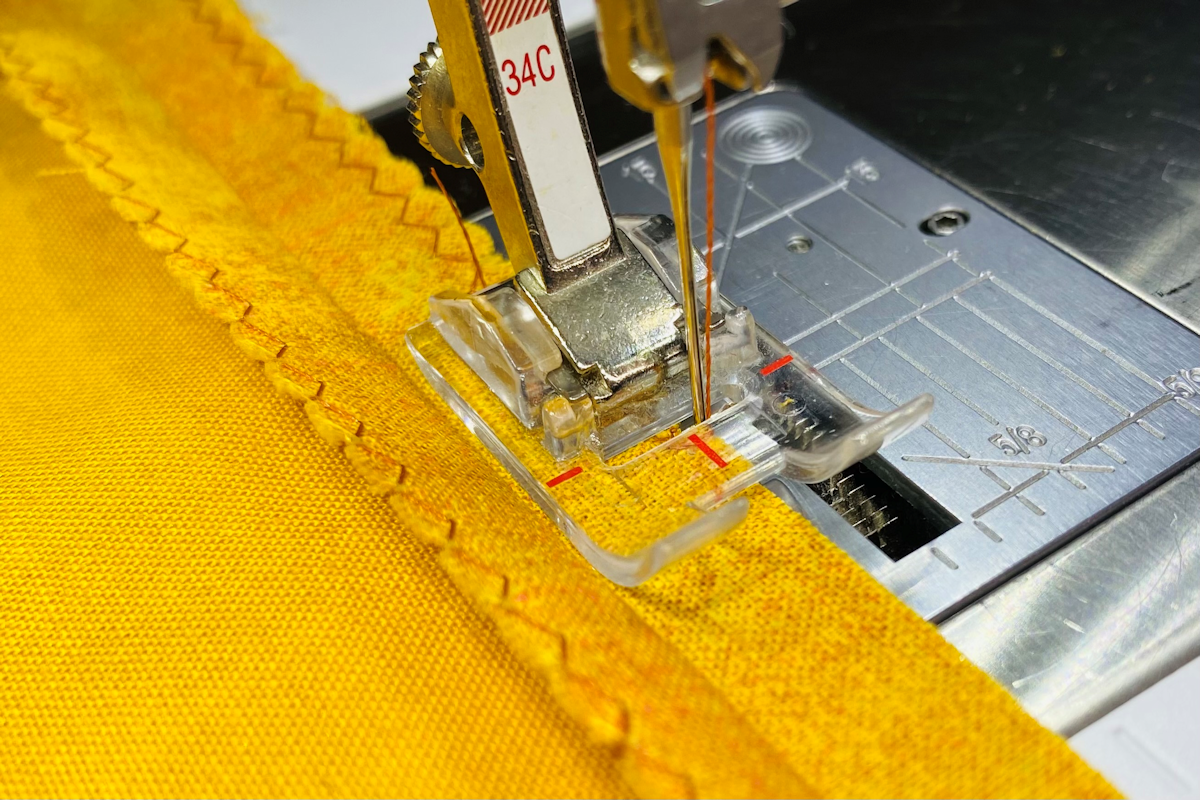
Oversew Edges with Reverse Pattern Foot with Clear Sole #34/34C
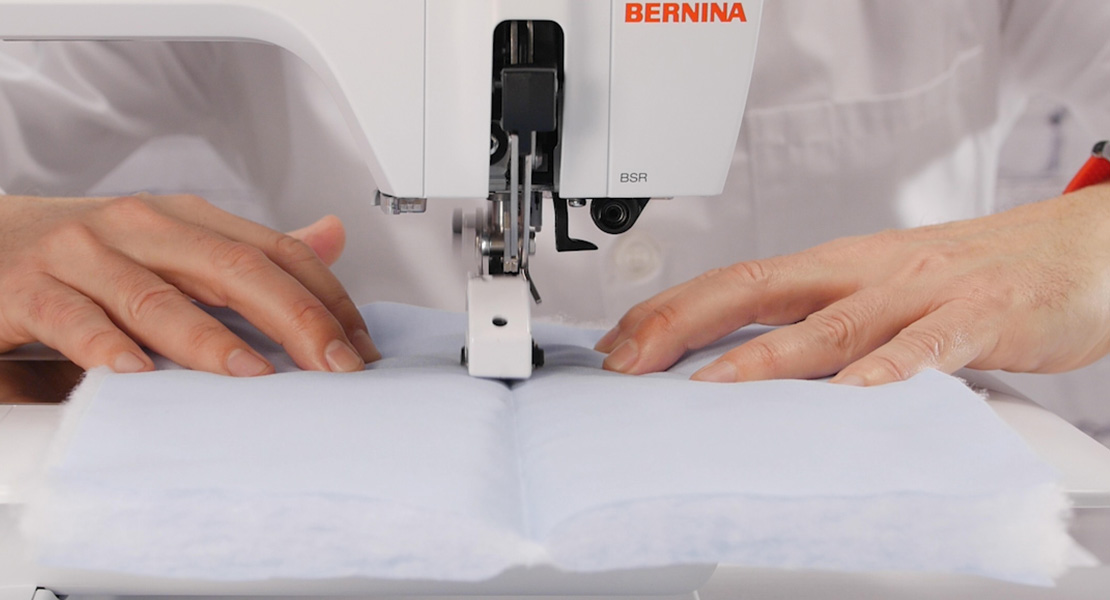
The simplest way to finish fabric edges, this method works best for firmly woven, medium weight fabrics such as quilting cotton. Stitch the seam using a straight stitch and press it open. Fold the garment away from one seam allowance so you can stitch on the raw edge. Select the zigzag stitch and adjust the width to 3-5 mm and the length to 2-4 mm. Align the fabric edge with the red line in the center of the foot and sew the length of the seam. Repeat for the opposite seam allowance. Note: Because you are stitching on only one layer of fabric, Foot #34D is not useful here.
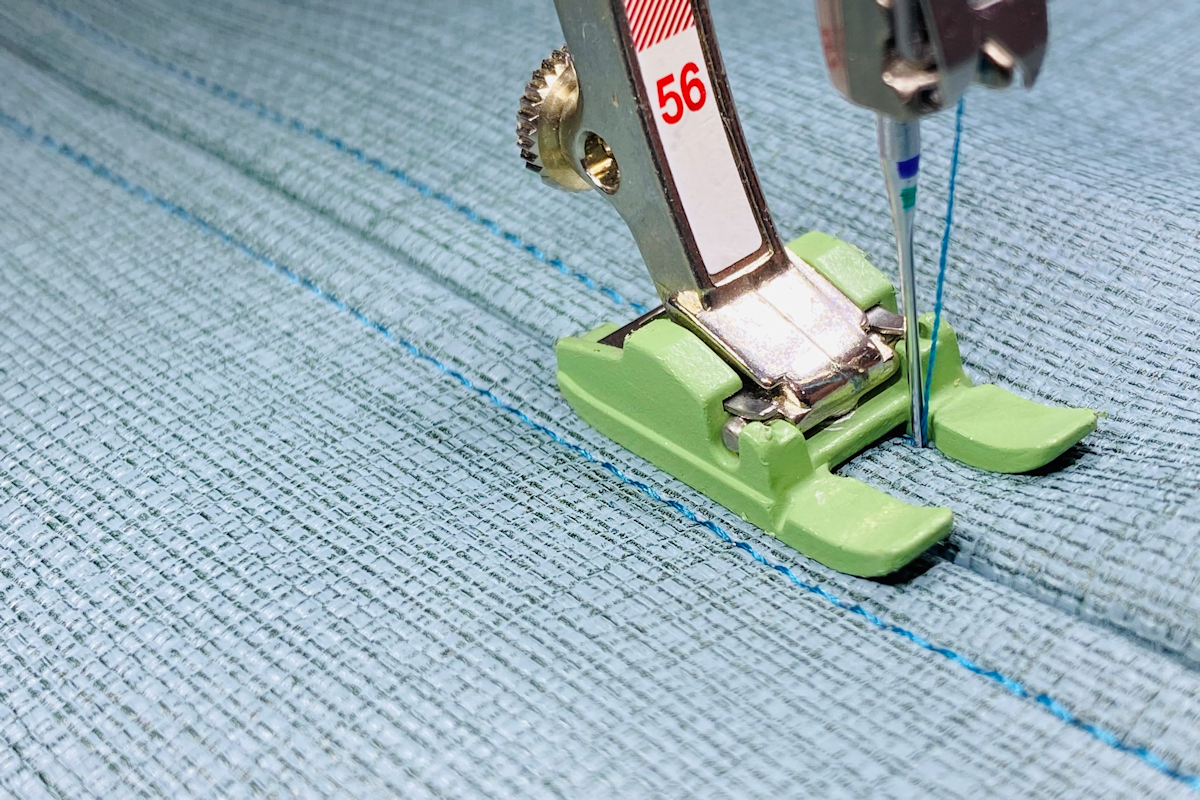
Topstitched Seam with Non-Stick Open Embroidery Foot #56
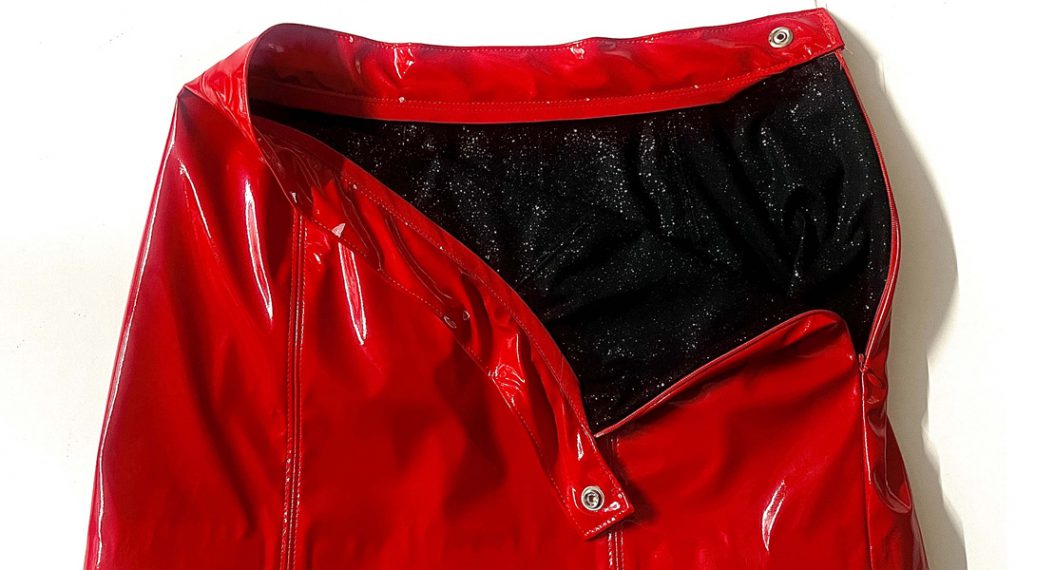
When working with leather or vinyl, these materials do not ravel or fray, but the seam allowances tend to curl, adding bulk to the seam area. A great way to flatten the seam allowances and keep them from curling is to topstitch them from the right side. Non-Stick Open Embroidery Foot #56 works well for this as it glides over the material. The open area between the toes makes it easy to see exactly where the needle is stitching. Stitch the seam and open it. Place the material right side up, under Foot #56, aligning the inside toe of the foot with the seam line. Adjust the needle to the far right or left position as needed. Stitch the length of the seam. Repeat the stitching on the opposite side, placing the needle to the opposite far position.
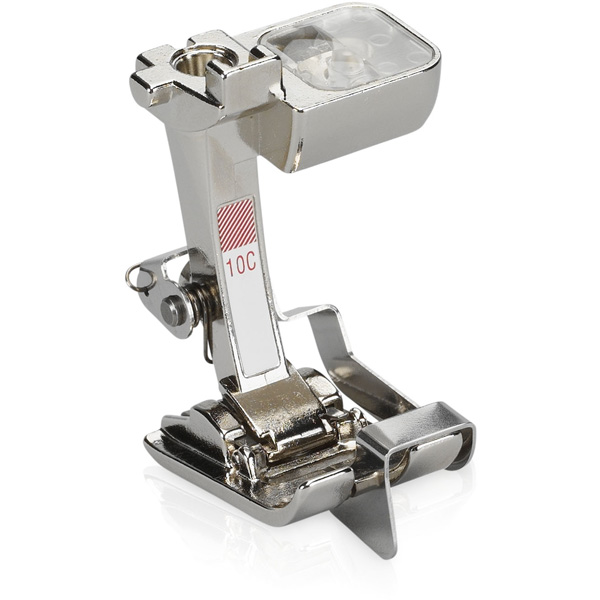
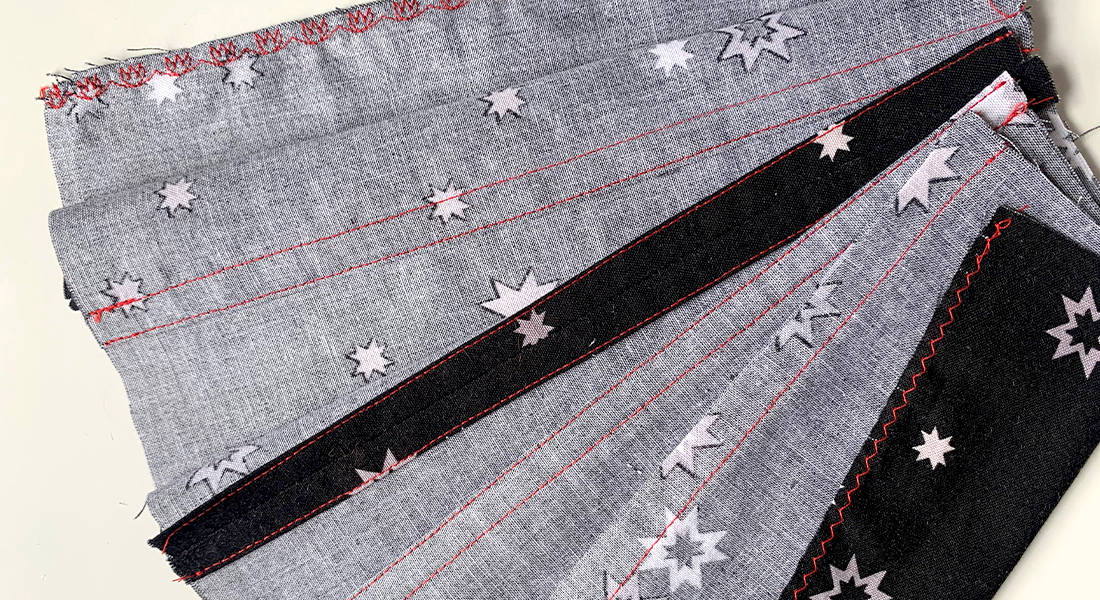
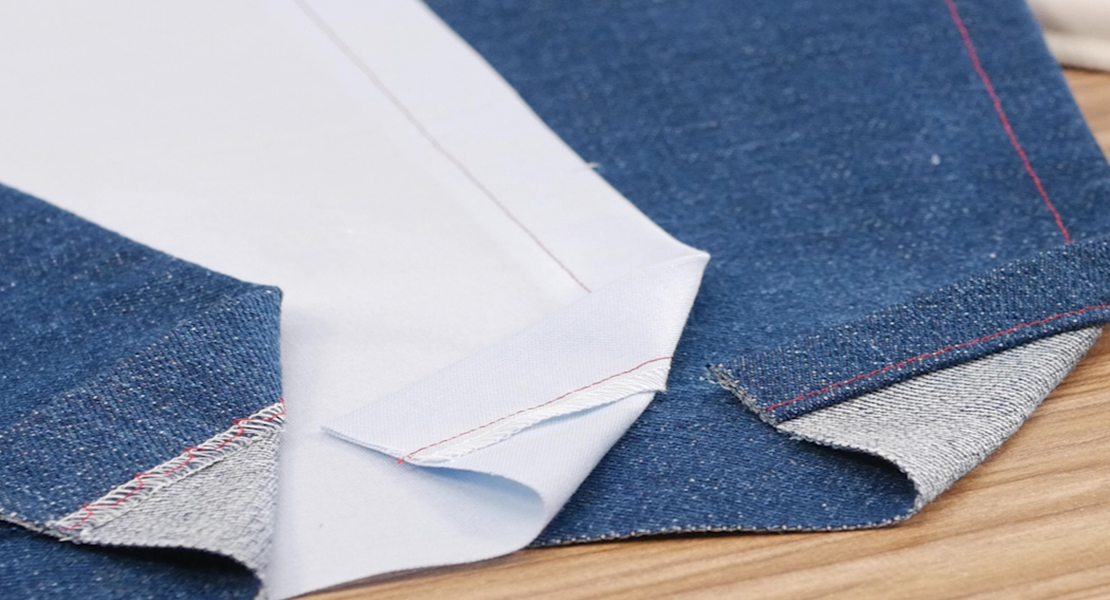
Hong Kong Finish with Edgestitch Foot #10/10C/10D
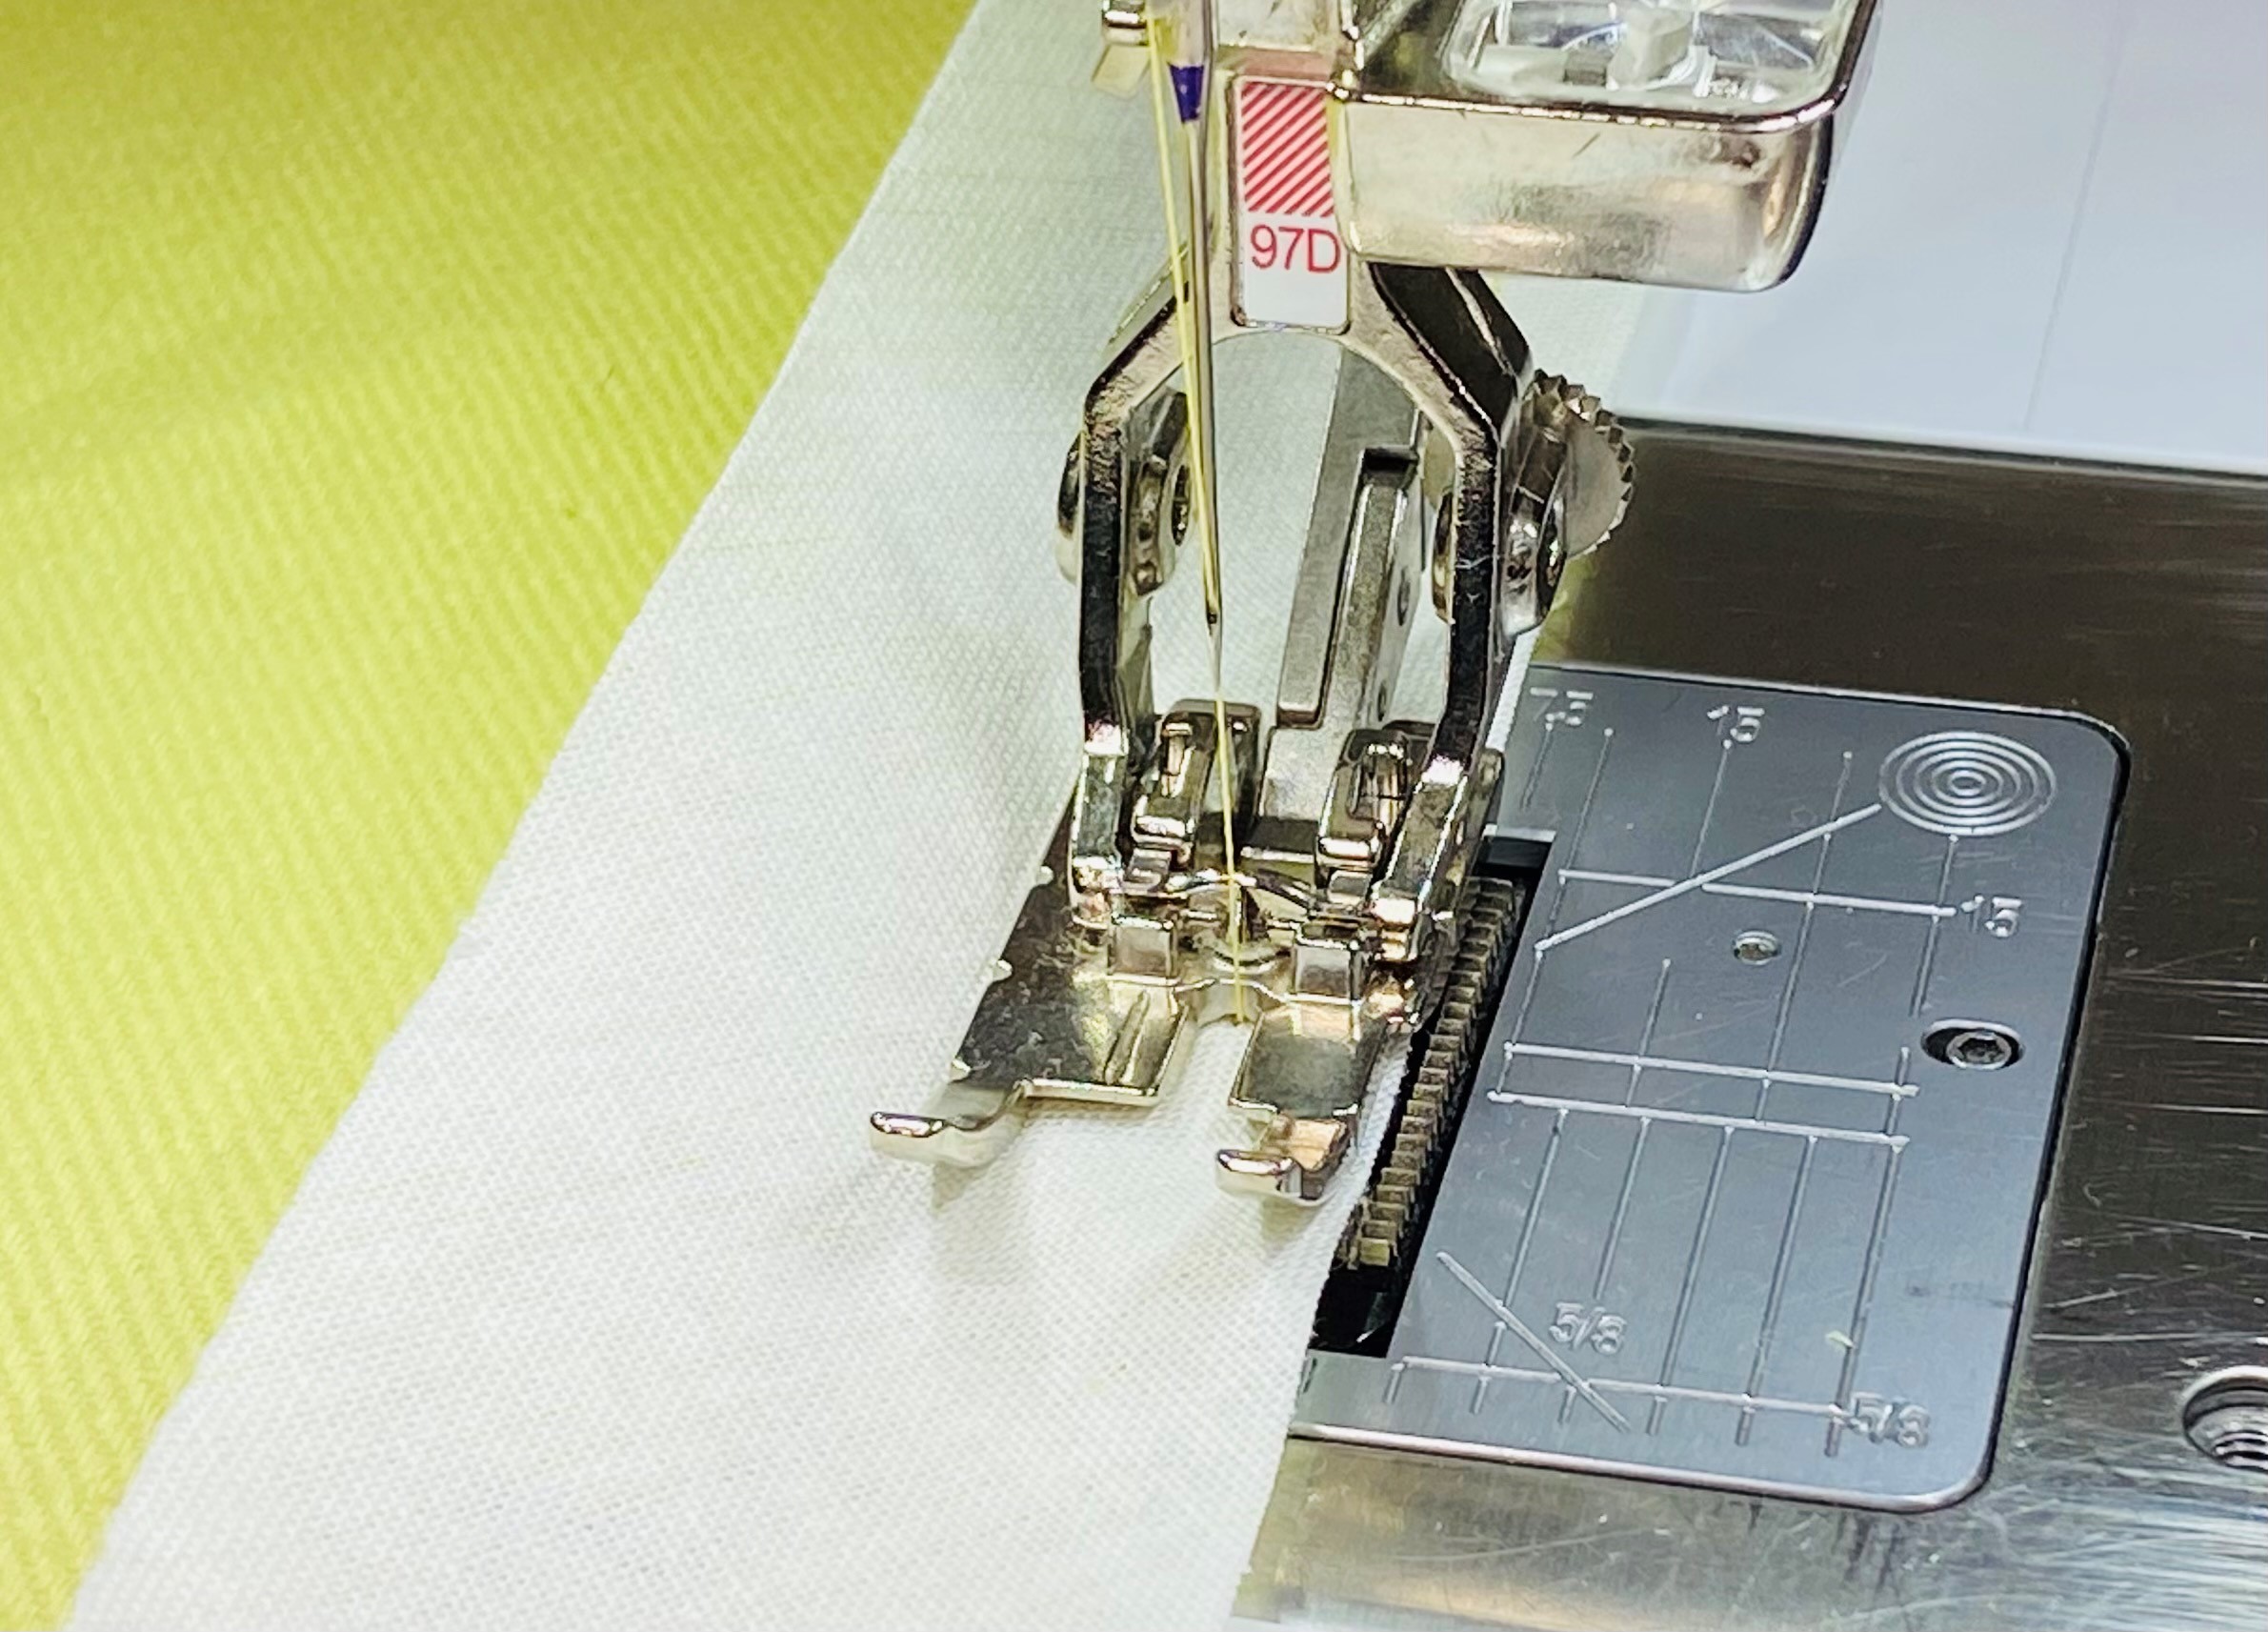
Give your garment a designer look on the inside as well as the outside. The Hong Kong method works for medium to heavy-weight fabrics such as linen and wool. It’s great for unlined jackets and coats, covering all raw edges for a completely finished garment. Cut a binding strip, 1 ½” wide from a light to medium weight fabric such as quilting cotton. Fold the garment away from one seam allowance and place the binding strip face down along the raw edge. Stitch a quarter-inch seam using Patchwork Foot #37, #57, or #97. Click here and here to see two previous posts on the BERNINA Patchwork Presser Feet.
Trim the seam allowances to 1/8″. Wrap the binding around the edge of the seam allowance and pin or clip in place. From the right side, place the center guide of Edgestitch Foot #10 along the seam, and stitch-in-the-ditch to secure the binding. From the back, trim the excess binding, about 1/8″ from the stitching.
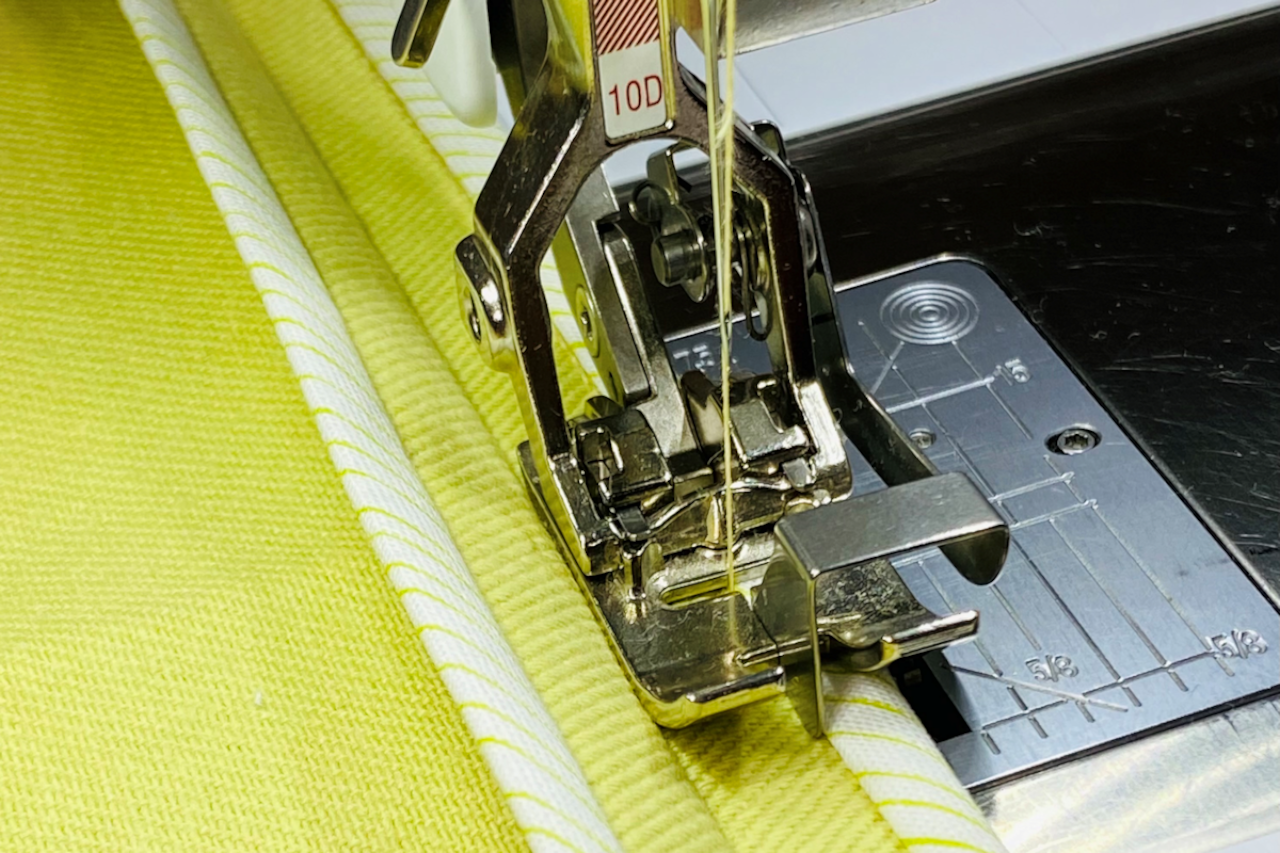
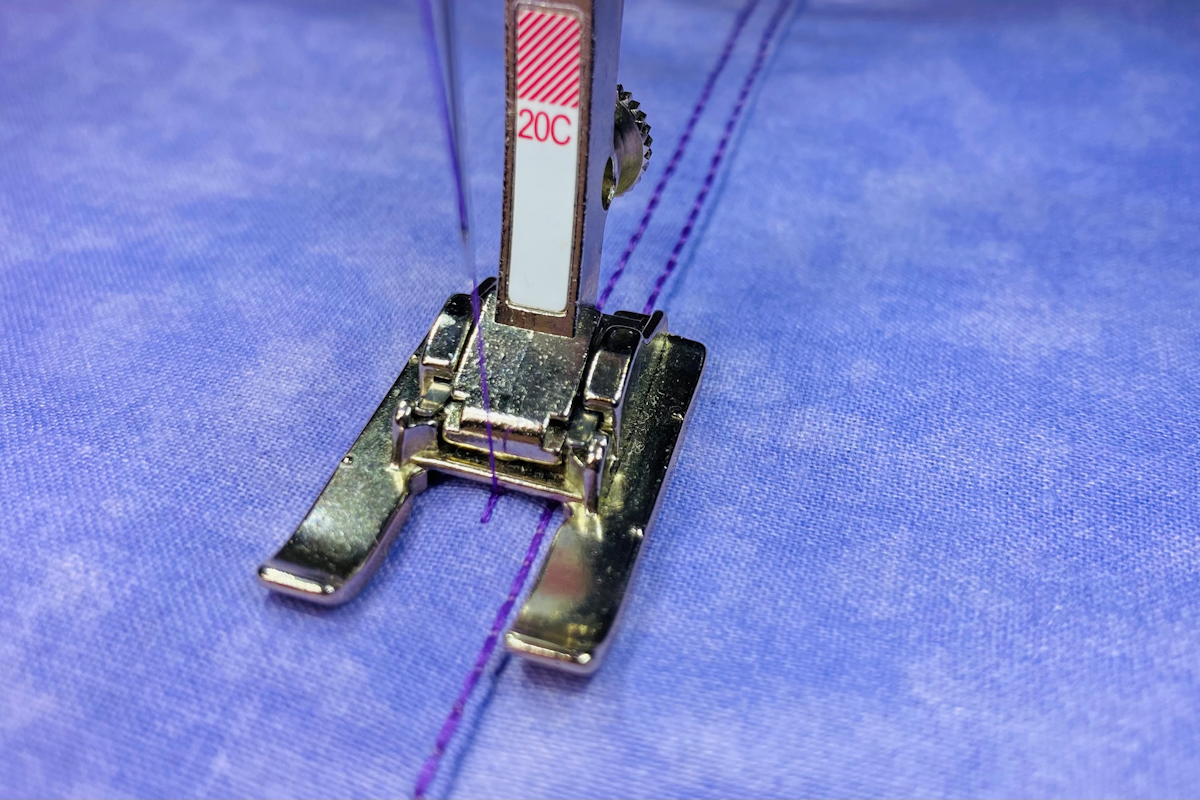
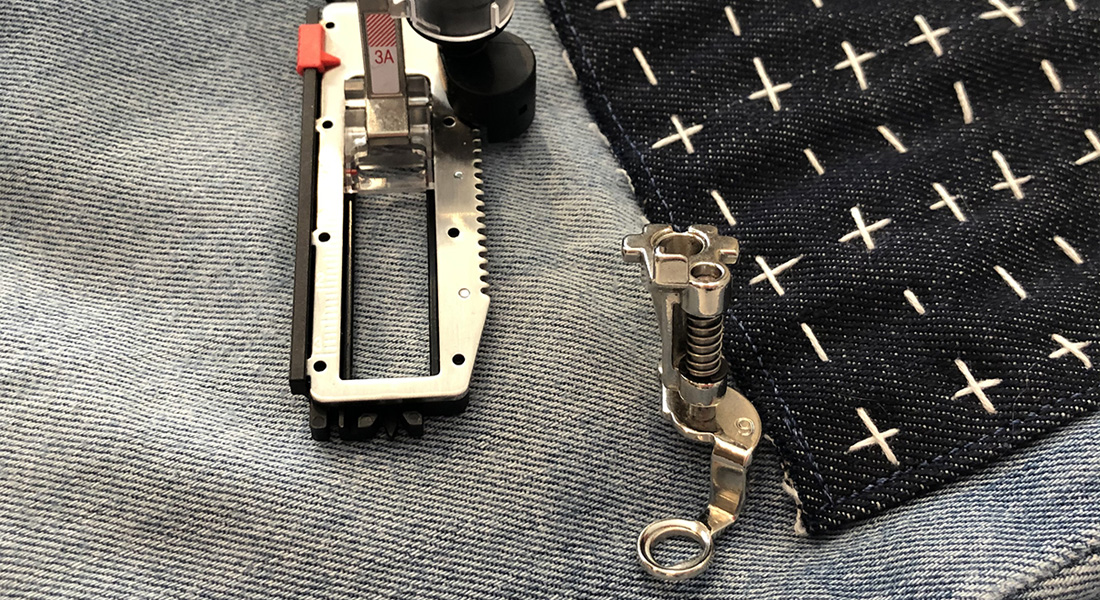
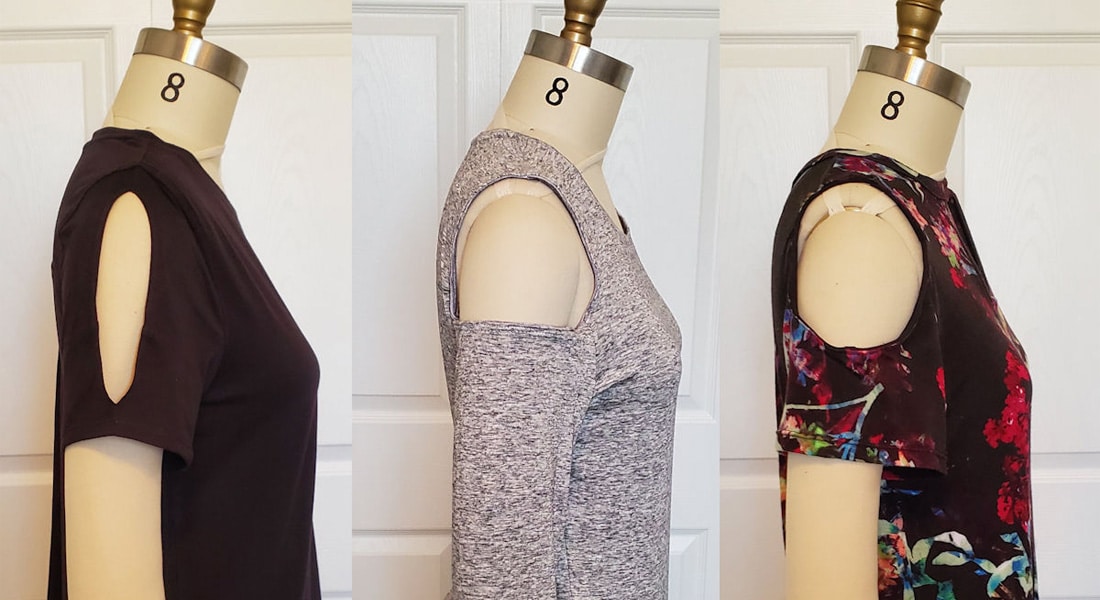
Mock Flat Felled Seam with Open Embroidery Foot #20/20C/20D
A mock flat-felled seam starts with a simple seam sewn with a straight stitch. Instead of pressing it open, you press both seam allowances to one side. From the right side, place the fabric under the foot so the seam line is next to the inside toe. Adjust the needle position to sew next to the seam line and stitch the length of the seam. Go back to the beginning of the seam and position Foot #20 exactly as you did for the first line of stitching. Next, adjust the needle position to the far left and sew the length of the seam. The parallel lines of stitching give you the look of a flat felled seam, and the seam allowances are secured and safe from fraying.
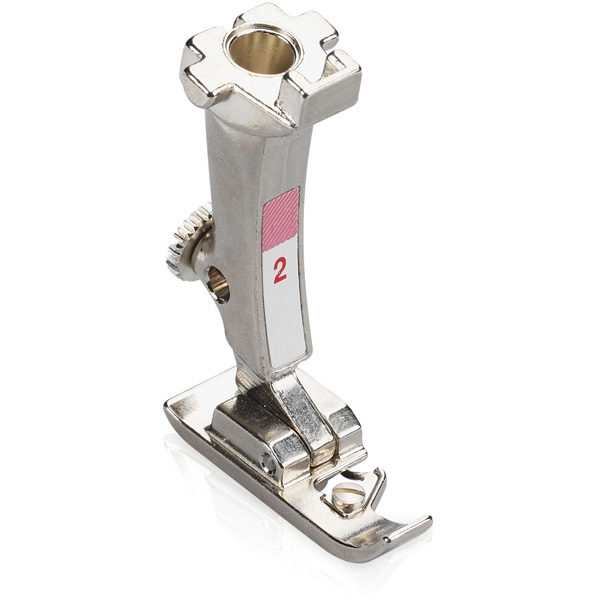
Click here to see previous posts with additional ways to finish seams. My favorite is using the Vari-Overlock Stitch (#3) with Overlock Foot #2/2A.

For more sewing techniques using BERNINA presser feet, see The Big Book of Feet at your local BERNINA Dealer.
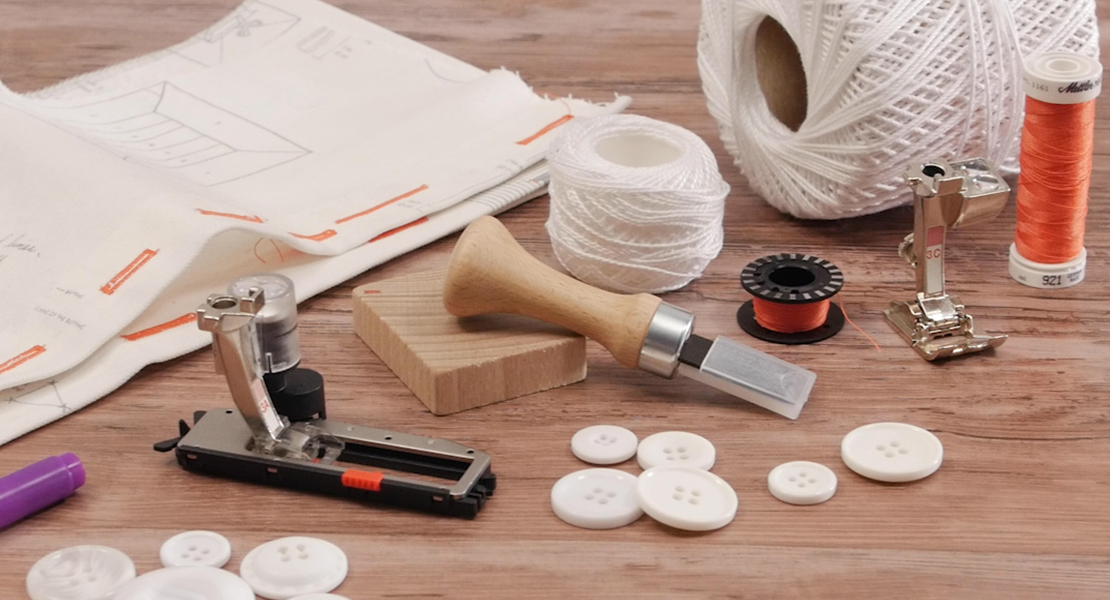
Used Products


What you might also like


2 comments on “Four+ Ways to Finish Seams”
-
-
Not sure if instructions are clear….. totally lost midway through the Hong Kong seam.
Leave a Reply
You must be logged in to post a comment.

I gathered single layer silk chiffon and attached to next flat layer. What is the best way to finish this egde? Thank you.