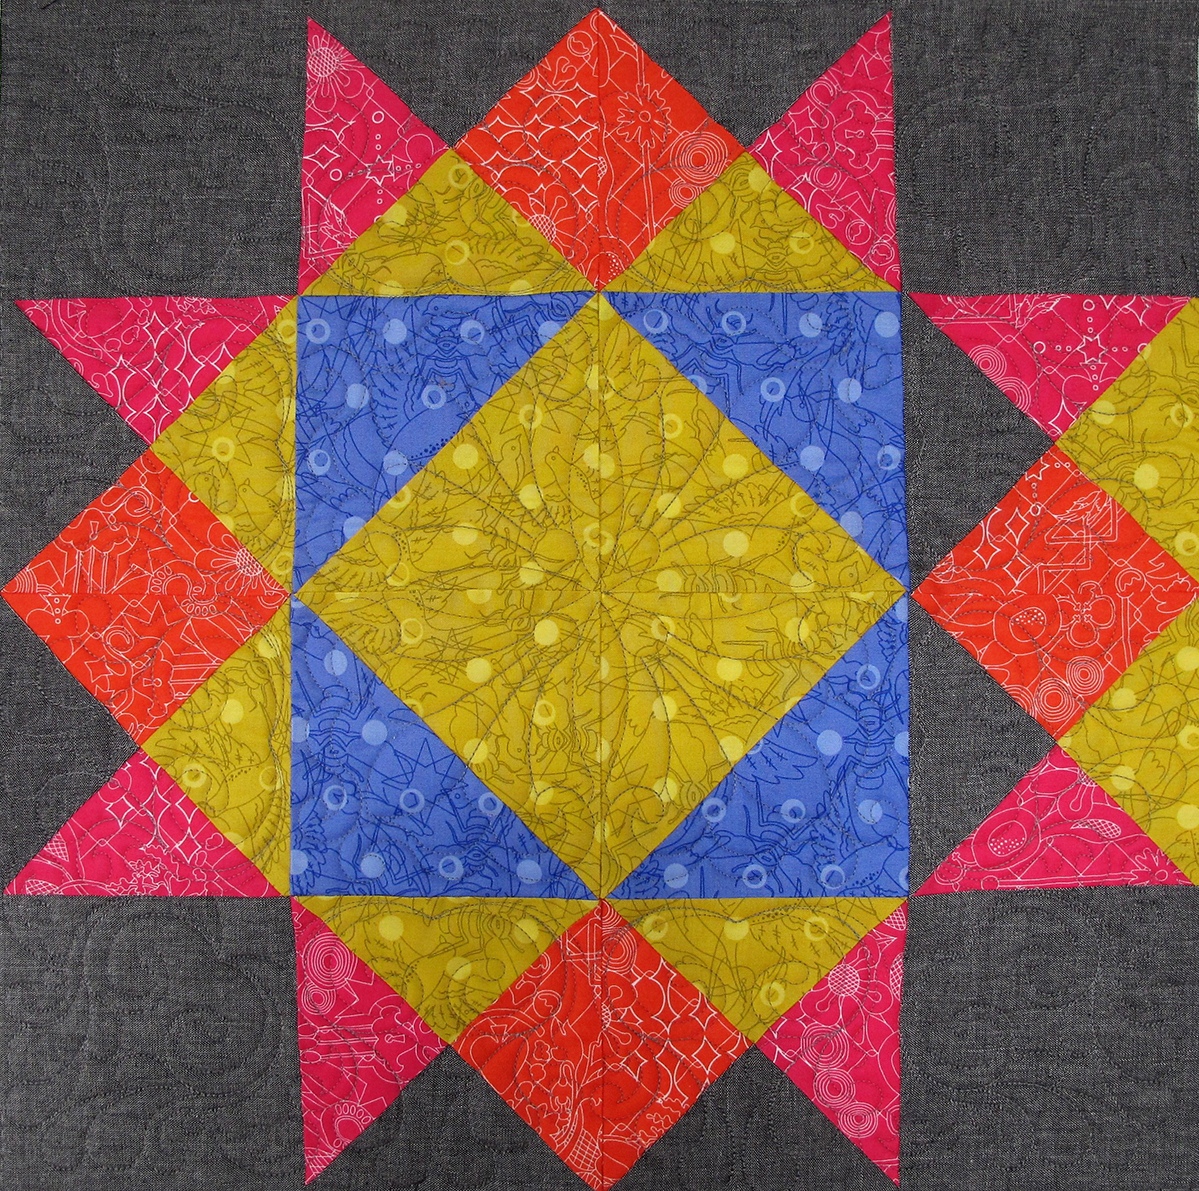
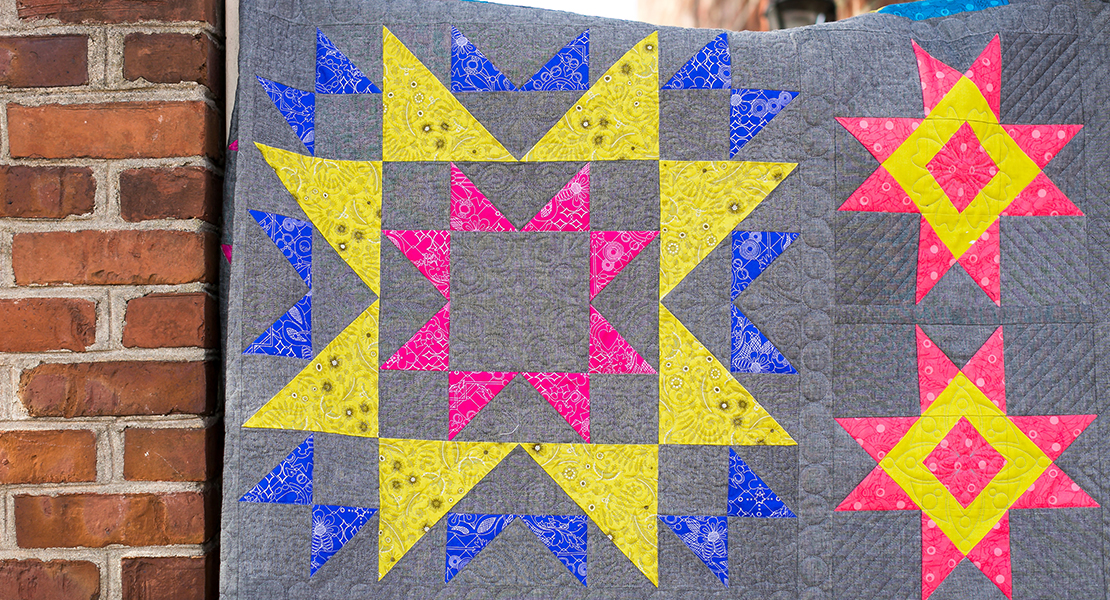
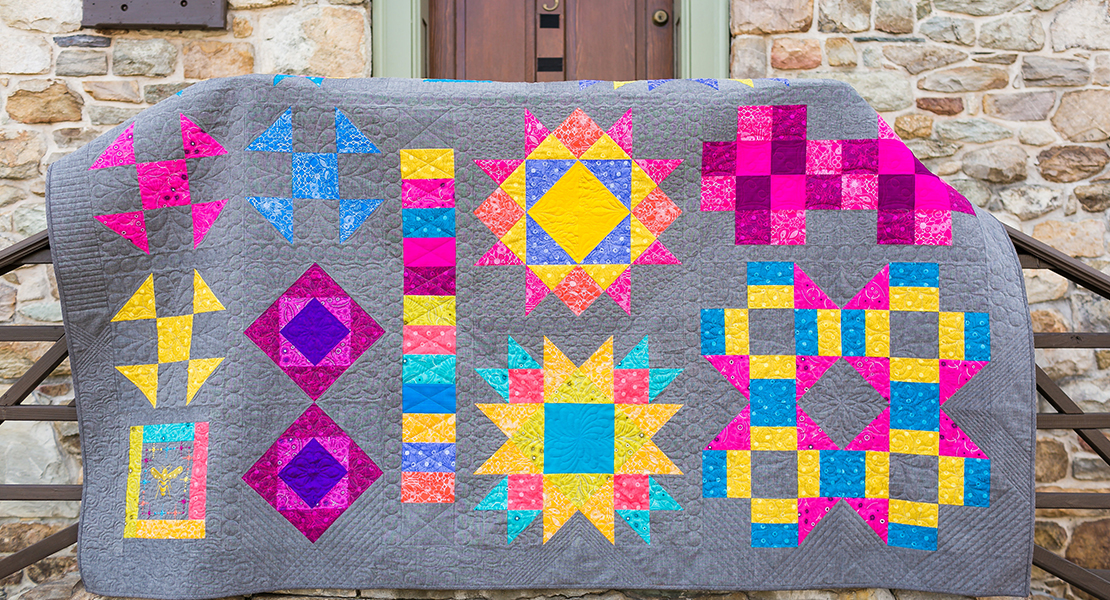
Girl’s Favorite Quilt Block
We hope you are enjoying BERNINA’s Block of the Month Party! This month’s block (Block 10) is Girl’s Favorite, and the name of this block really does say it all! This 18” block is one of my favorites, and is so easy to make! (Except when you are not paying attention-more on that later!)

If you are buying fabric for each block on a monthly basis, you will need four fabrics for this block; a teal, a yellow, a pink and the gray background fabric.
Please see more details about fabric requirements here. You will follow the Alternate Cutting Instructions below if you are cutting from a kit.
Please also download the BERNINA Block Party Fabric Chart.
If you are using the Sun Print 2017 Andover fabric line by Alison Glass, the specific colors are listed in bold:
Fabrics
Fabric A Pink A-8482-E Fat Quarter (Insert Fabric A Pink)
Fabric B Orange A-8482-O Fat Quarter (Insert Fabric B Orange)
Fabric C Yellow A-8484-Y Fat Quarter (Insert Fabric C Yellow)
Fabric D Purple A 8484-B Fat Quarter (Insert Fabric D Purple)
Fabric E Center Your choice of fabric! Fat Quarter
If you do not want to add another fabric, the Fabric C fat quarter would also work here.
Fabric F Gray A-C-Black Fat Quarter (Insert Fabric F Gray)
Supplies
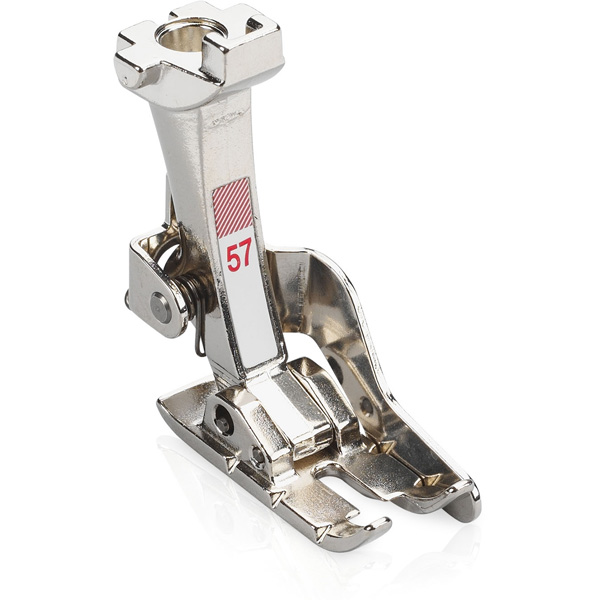
Patchwork Foot #37/37D or #57/57D or #97/97D for piecing
Straight Stitch Needle Plate for piecing on domestic machines
BERNINA Q Series Longarm on Frame with BERNINA Q-matic Longarm Quilting Automation System
or
Machine with Embroidery Capability and Embroidery Foot #26 (if quilting with embroidery machine)
Cutting
Fabric A Pink
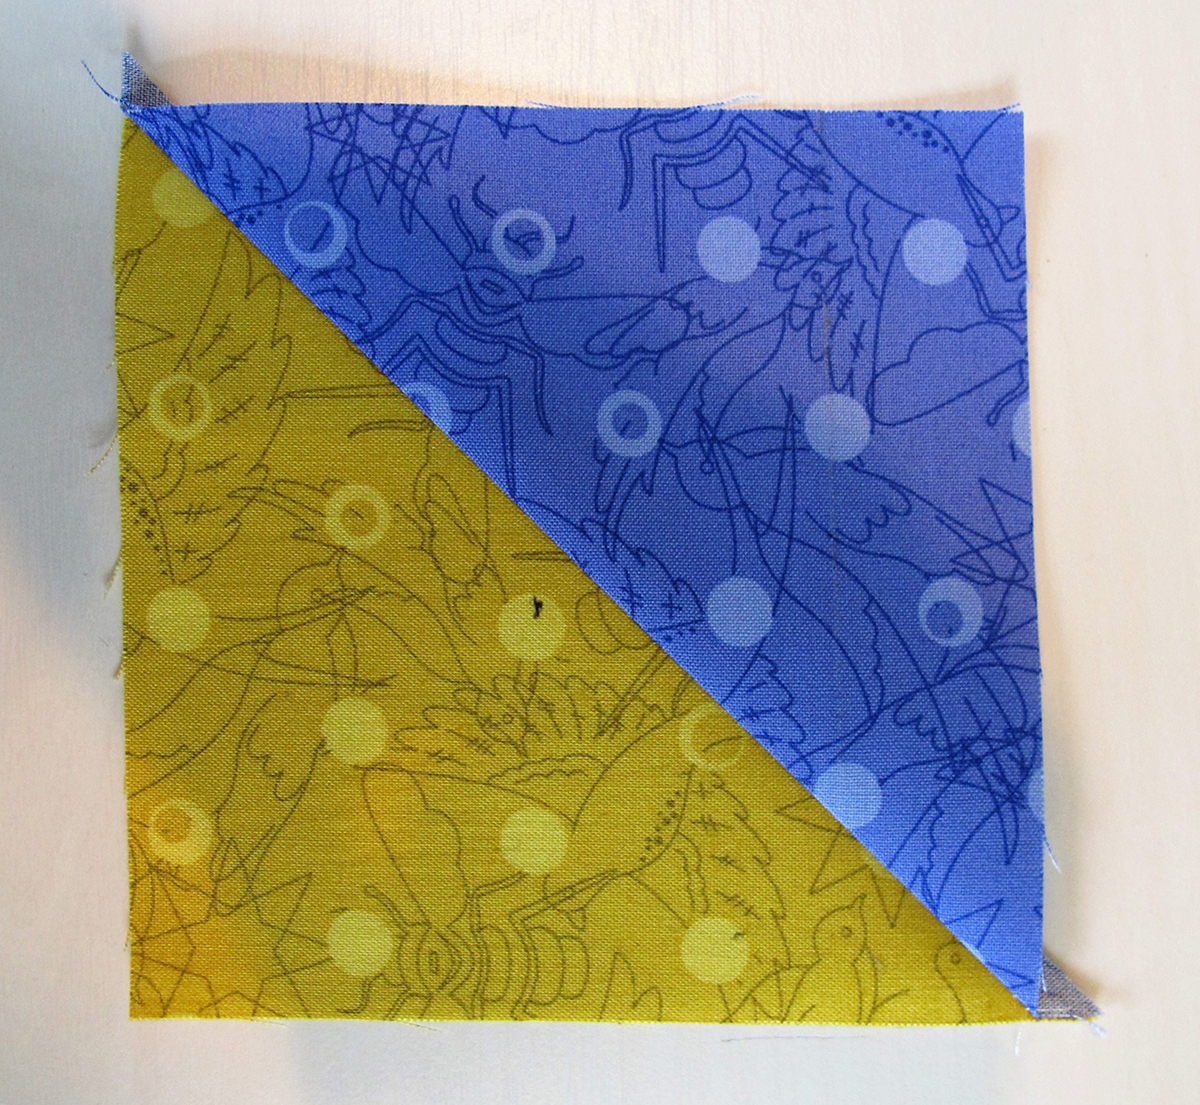
2 Squares 5 3/4”; cut in quarters diagonally making 8 triangles
Fabric B Orange
2 Squares 5 3/4”; cut in quarters diagonally making 8 triangles
Fabric C Yellow
2 Squares 5 3/4”; cut in quarters diagonally making 8 triangles
Fabric D Purple 2 Squares 5 3/8”; cut in half diagonally making 4 triangles
Fabric E Your Choice
2 Squares 5 3/8”; cut in half diagonally making 4 triangles
Fabric F Gray
4 Squares 5”
2 Squares 5 3/4”; cut in quarters diagonally making 8 triangles
Alternate Cutting Instructions
Fabric A:
Cut 2 squares from the previously cut 5 3/4” strip from Block 6. 20” will remain.
Fabric B:
Cut a 5 3/4” strip; cut 2 squares. 31” will remain.
Fabric C:
Cut a 5 3/4” strip; then cut 2 squares. 31” will remain.
Fabric D:
Cut a 5 3/8” strip; then cut 2 squares.
Fabric F:
Cut a 5 3/4” strip; then cut 2 squares. Cut strip down to 5” width and cut 4 squares.
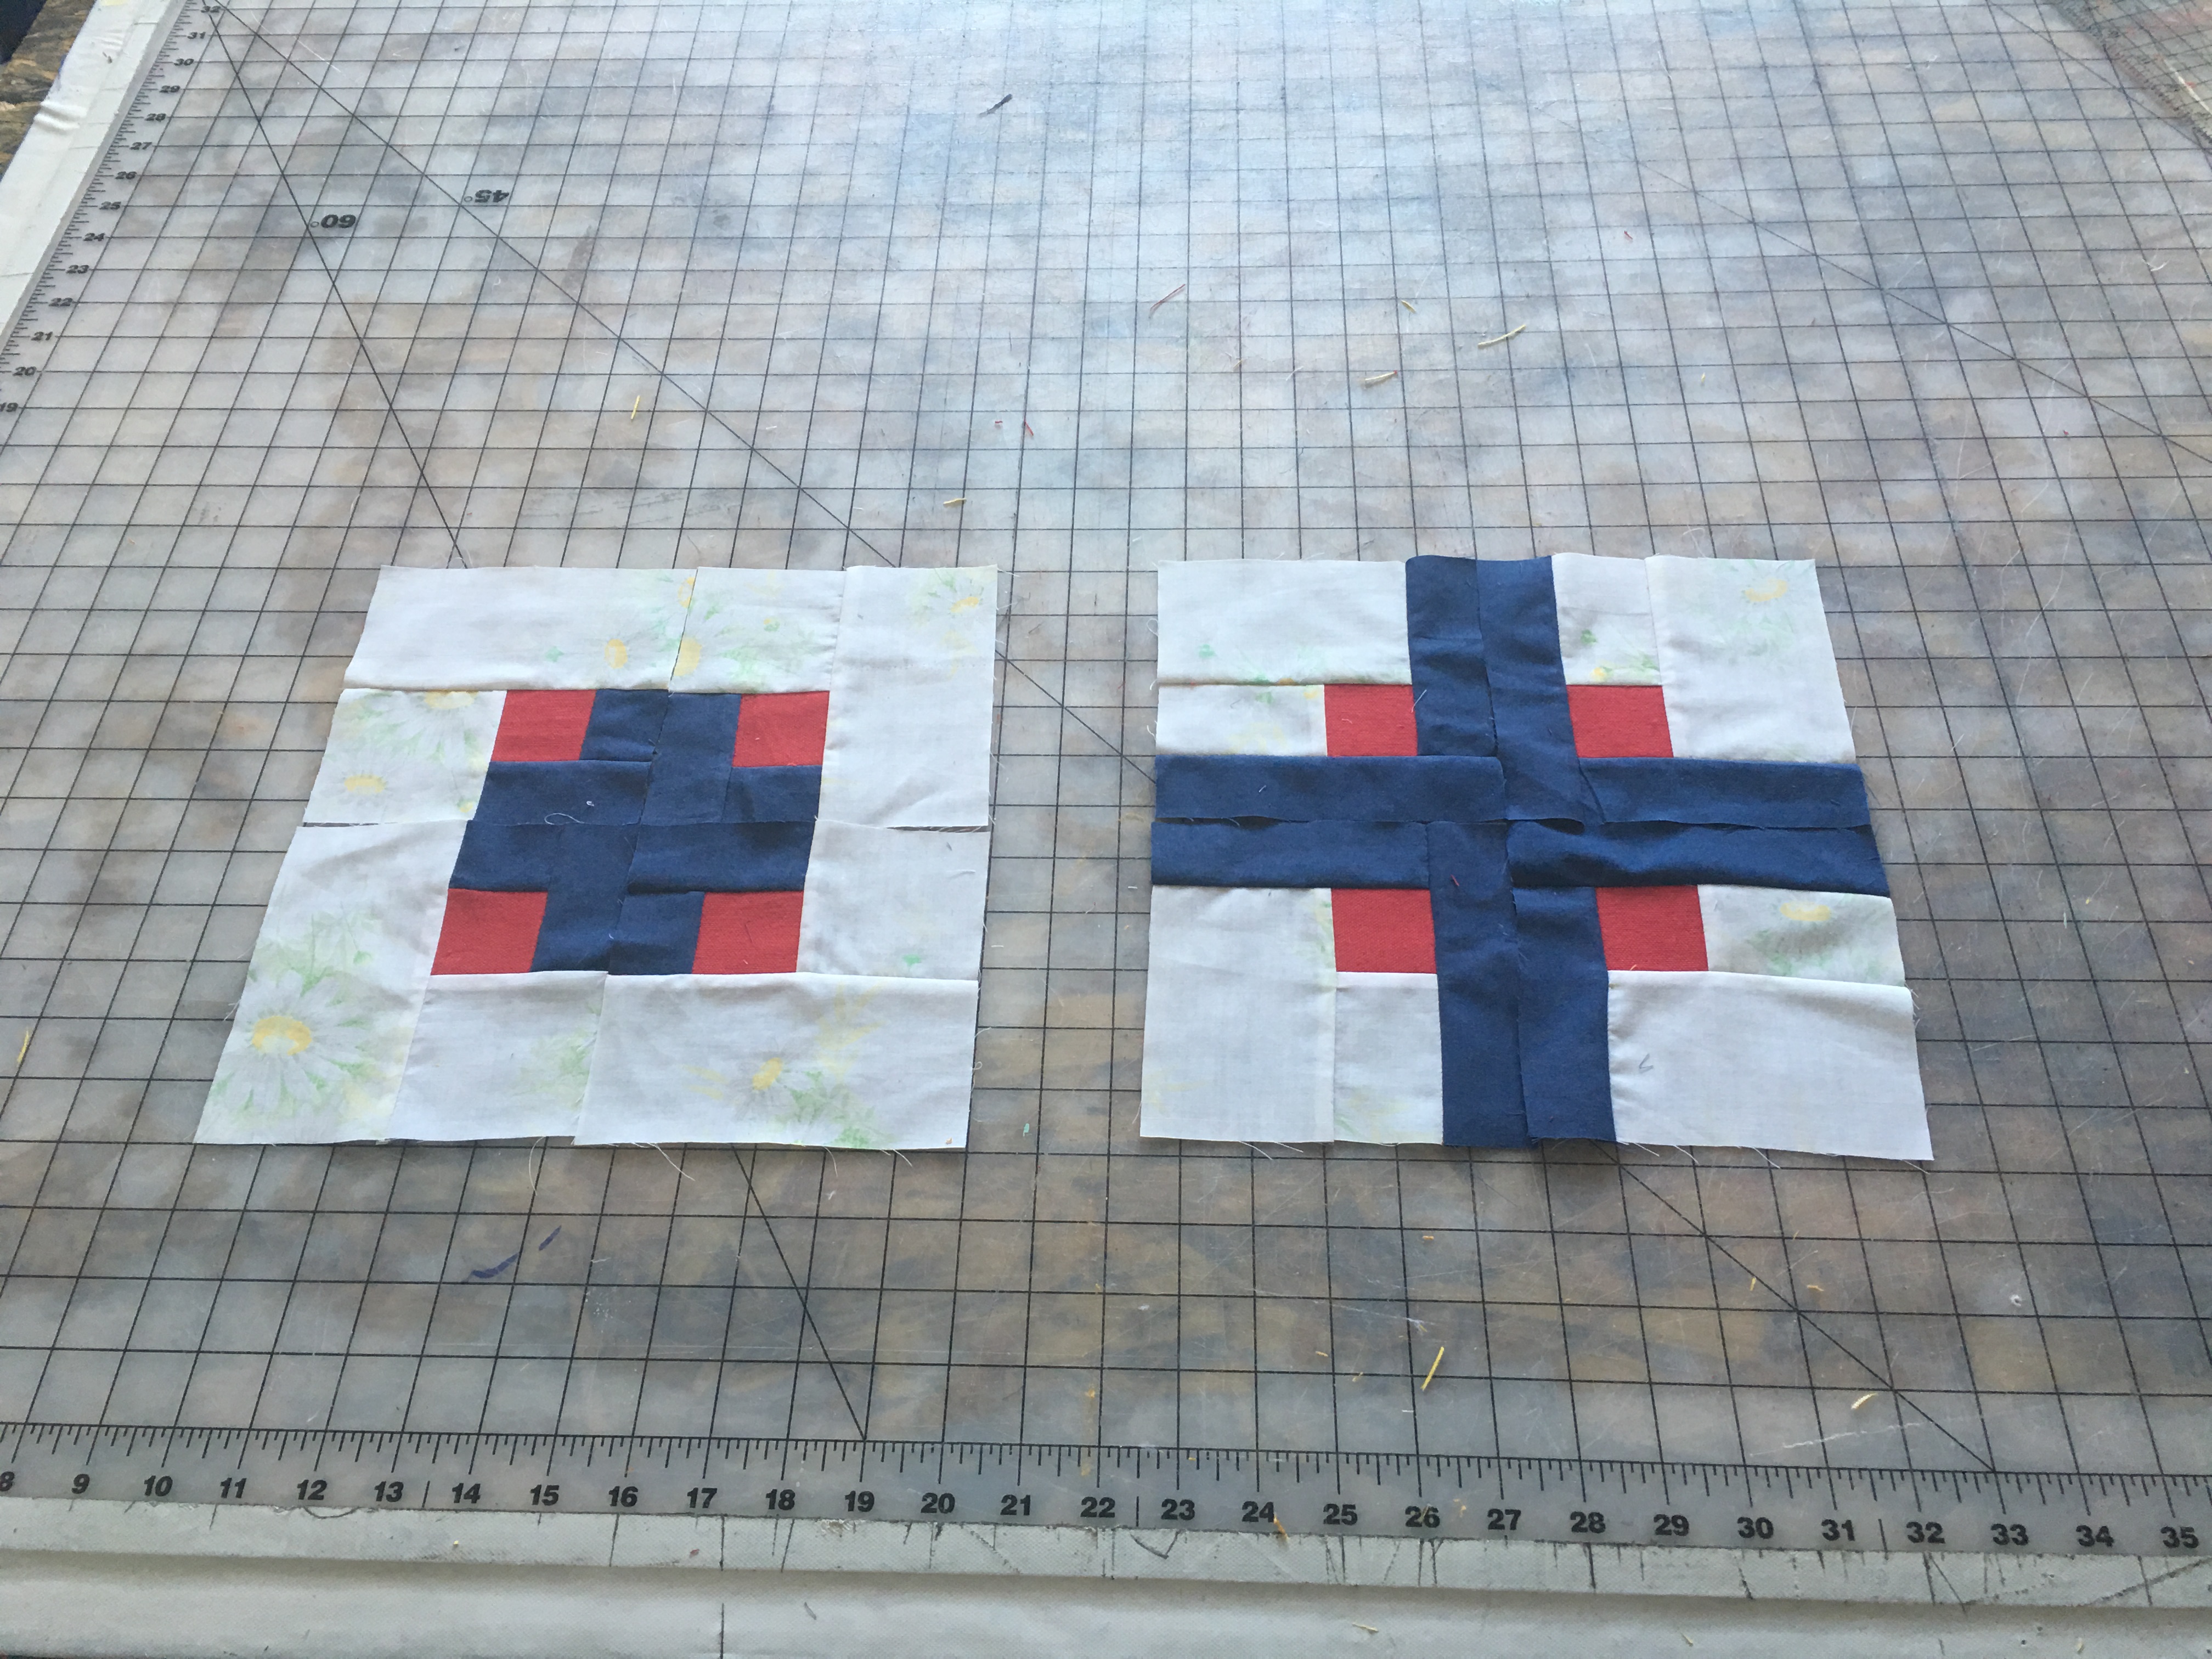
Piecing
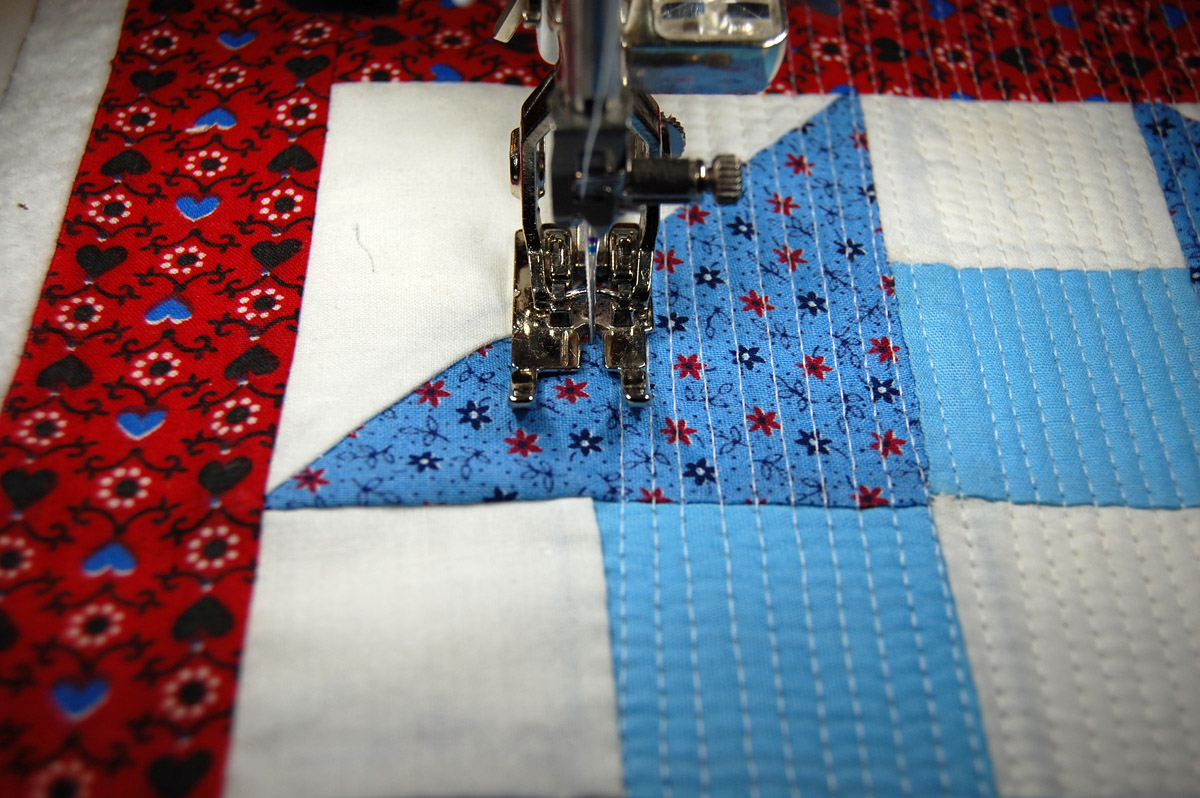
There will be 8 squares made up of 4 triangles each. When piecing these blocks together, it is important that the points all meet in the middle. When seaming the two halves together, it will help to lock the seams in the middle by making sure that the seams go in opposite directions. I get a more perfect match when the seam on top faces away from me and the seam on the bottom faces towards me.

Using 4 smaller triangles from Fabrics A, B, C and F, piece together the block as shown. Make 4 units.
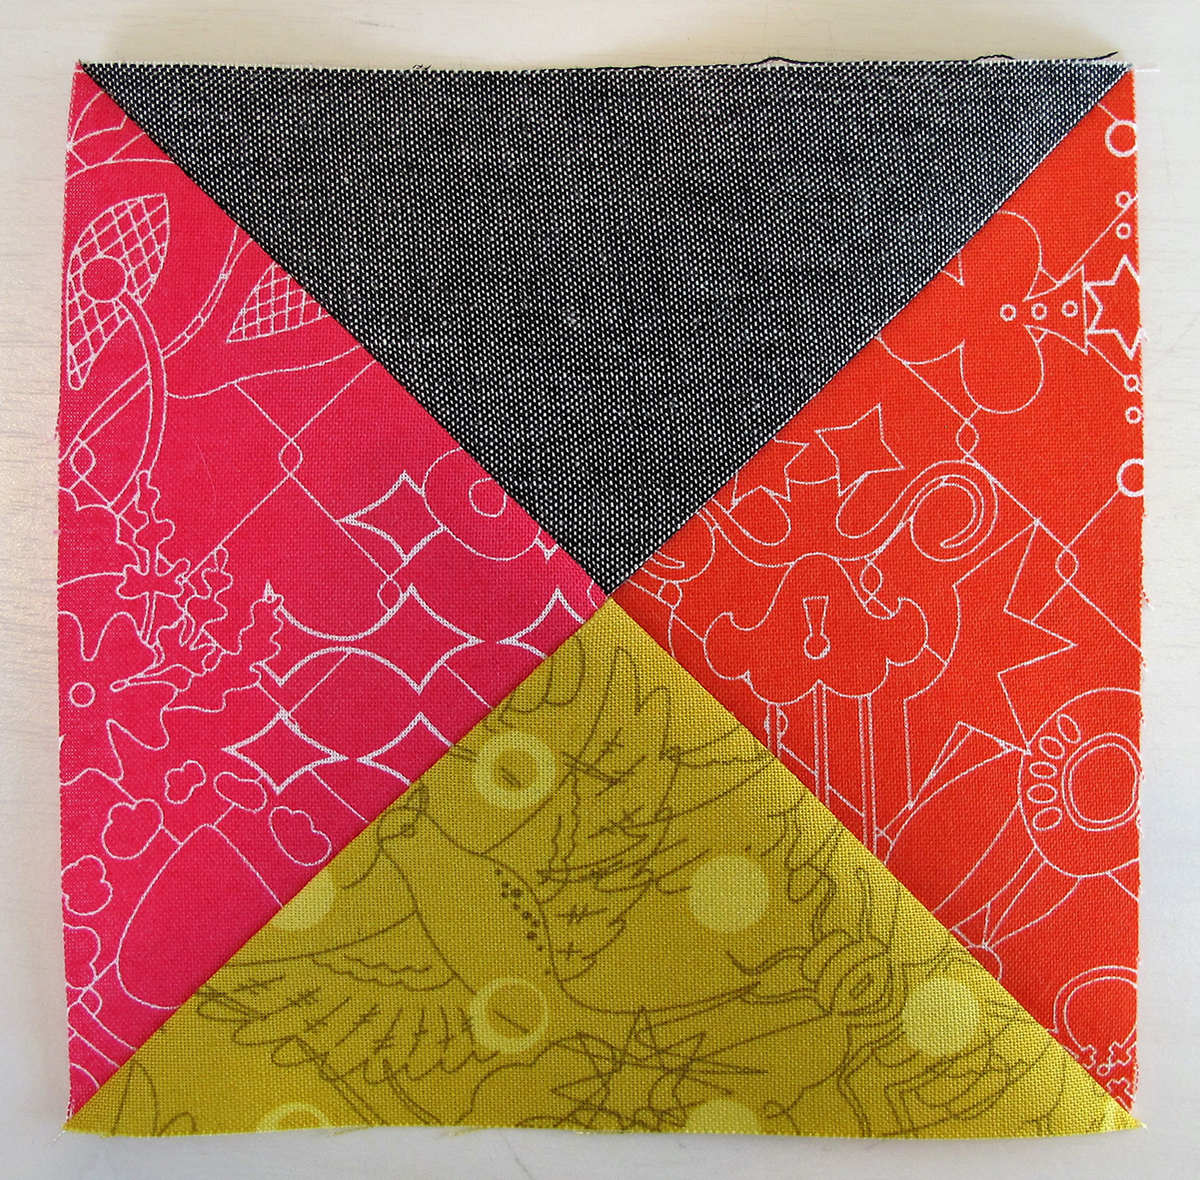
Using the remaining 4 triangles from Fabrics A, B, C and F, piece together the block as shown. Pay close attention to color placement. Make 4 units.

Piece together a Fabric D triangle with a Fabric E triangle along the long side making a half square triangle unit. Make 4 units.
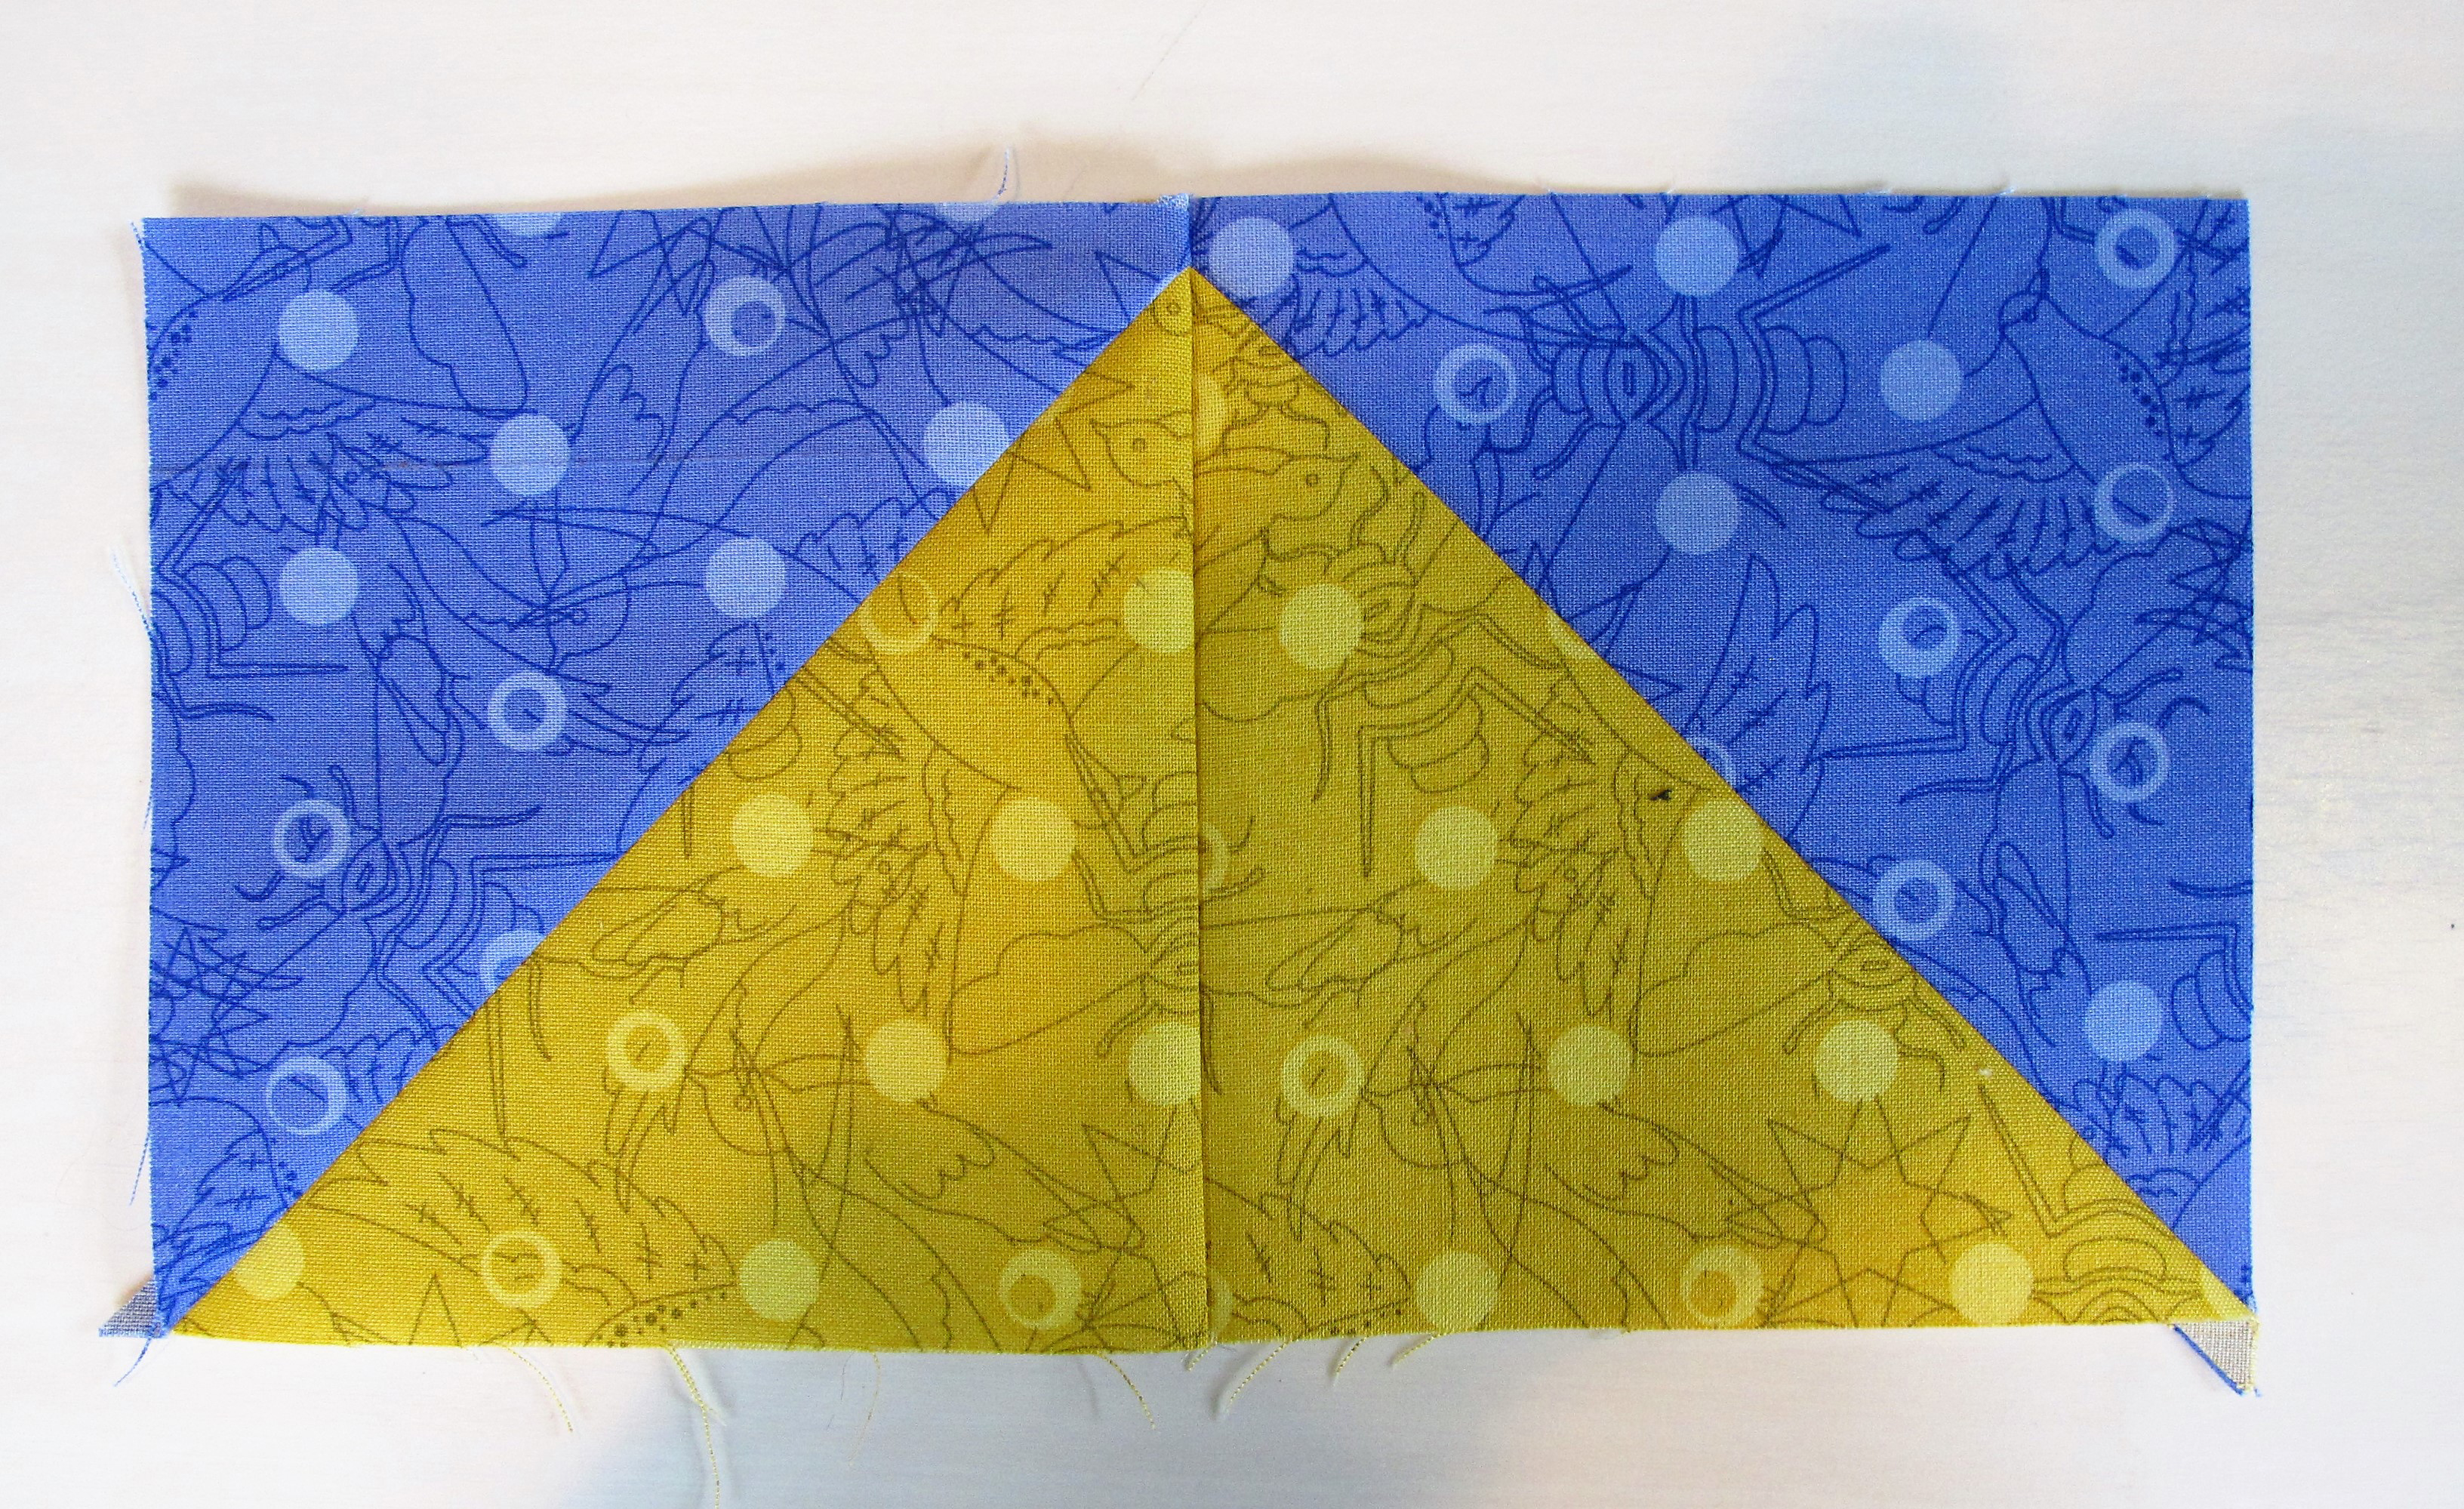
Sew two yellow edges of the half square triangle units together as show below. Make 2 units.
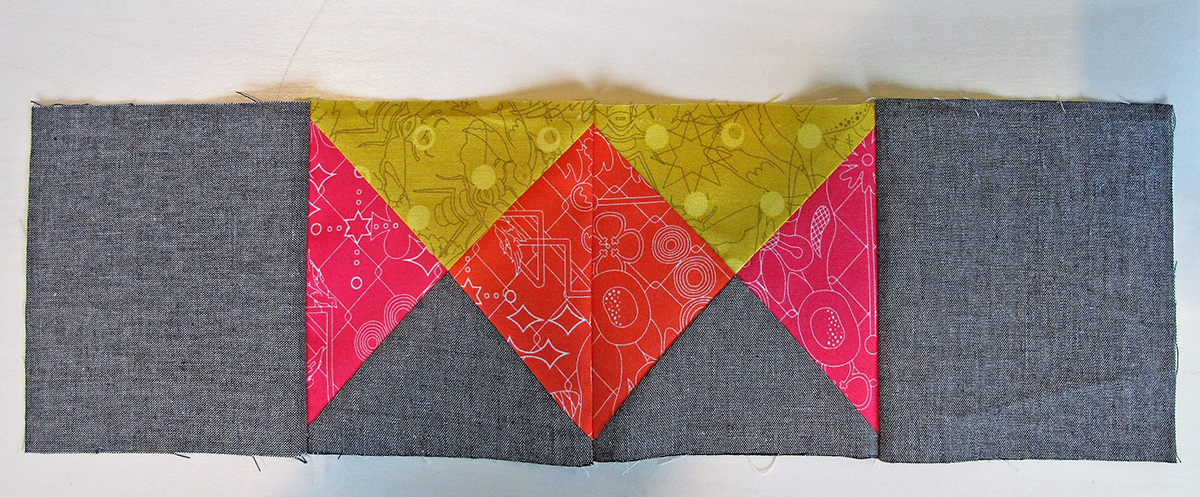
Stitch together a Fabric E square, two of the four triangle blocks (1 each of the previous arrangements-pay attention to the color placement), and another Fabric E square as shown below. Make 2 units.
Stitch together a four triangle block and two half square triangles and a four triangle block. Make 2 units.
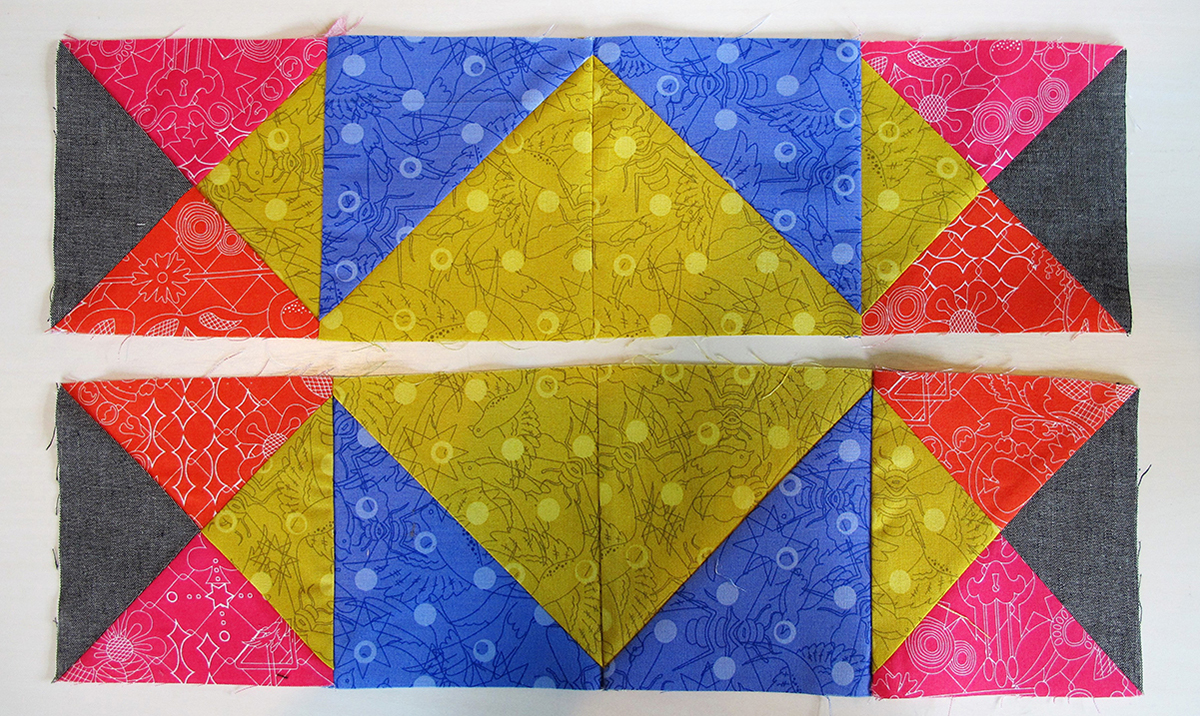
Seam the 4 strips together creating the 18 ½” block.
Pay attention to the orientation of strips to avoid the mistake I first made! I constructed and quilted this block before I noticed my mistake!
If you are going to make the entire quilt from the Block of the Month Series, set this block aside for now. The instructions for the piecing together all the blocks will come at the end of the series.
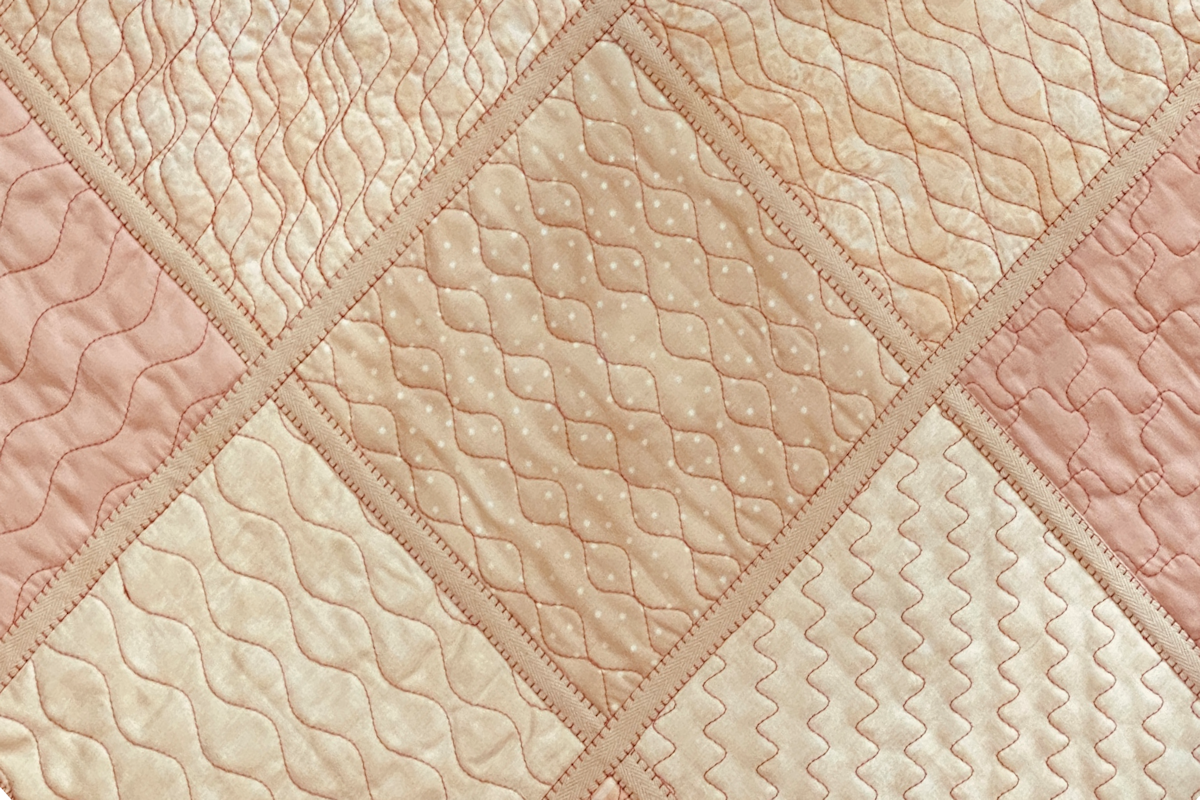
Each month, I also give you instructions for a different quilting technique so that you can experiment with different techniques. When it comes time for the final quilting, you will be ready to decide which quilting techniques you like best.
Remember to join Denise Jones later this month. She has a creative project using the Girls Favorite block. That project will post on January 22nd.
A Quilting Lesson: BERNINA Q-matic Longarm Quilting Automation System
This month’s block is quilted entirely with BERNINA’s Q-matic, the automation for the
BERNINA quilt frame. However, realizing that not everyone has a Q Series machine and frame, similar results can be achieved by quilting the block “in-the-hoop” using an embroidery machine. Many BERNINA embroidery machines have built in quilting designs, and OESD also has a large number of quilting designs available.
To use the BERNINA Q-matic Longarm Quilting Automation System, load the backing and batting in the center of the frame. Stitch a straight row of basting across the top edge, just below the backing leader. Align the top of the block along this line. Baste the top along the top and sides. If using the Q 24, you can reach the bottom edge of the block at this time, so baste across the bottom of the block. If using the Q 20 you will baste across the bottom edge when you advance the block.
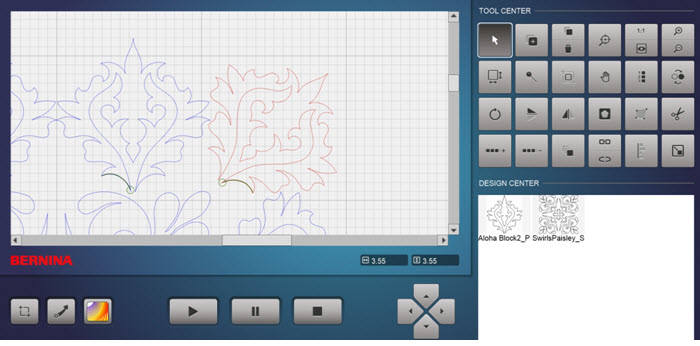
Open the Q-matic program. Load designs “Aloha Block 2” and “Swirls Paisley Square” into the Design Center. You will quilt parts of the blocks at different times, but I prefer to lay everything out on the screen at the same time, and then choose what is to be quilted.
Select the Swirls Paisley Square and enlarge the design to fit the center of the pieced blocked. I sized mine to 8.5” X 8.5”. Center the block over the grid lines.
![]()
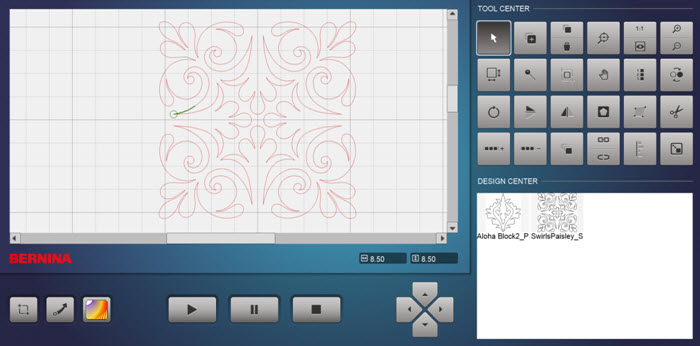
Place the “Aloha Block-2” on the screen. We want this block to be square, and we want it to be as wide as half the Center Block side. In this case you will resize the block to 4.25” X 4.25”.
Place the resized Aloha Block above the left half of the Center Block. Duplicate the Aloha Block and place the copy next to the original so they just touch, making sure they are in alignment.
![]()
Group the two Aloha Blocks. Their width should be 8.5”.
![]()
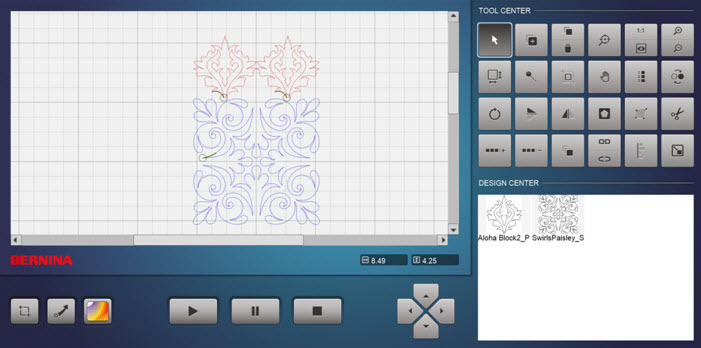
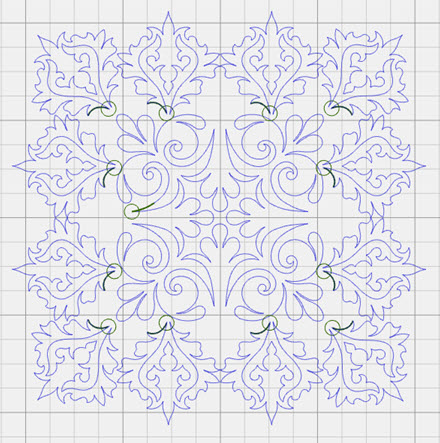
Duplicate the grouped design and place a pair of Aloha Blocks on each side and at the bottom of the Center Design. Use the Mirror Image tools and the Alignment tools to position and align all four sides with the center.
![]()
![]()
![]()
![]()
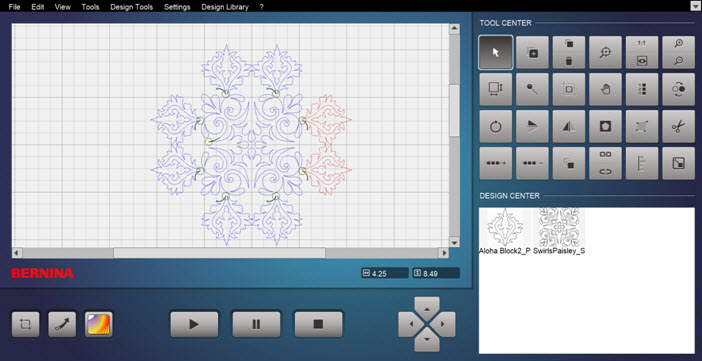
Disconnect one of the side designs. Select one of the Aloha Blocks and duplicate it. Move the copy of the block into one of the corners. Rotate the design 45 degrees.
![]()
Center the corner between the two sides. Repeat for each corner. Disconnect any designs you have grouped. You now have all individual designs.
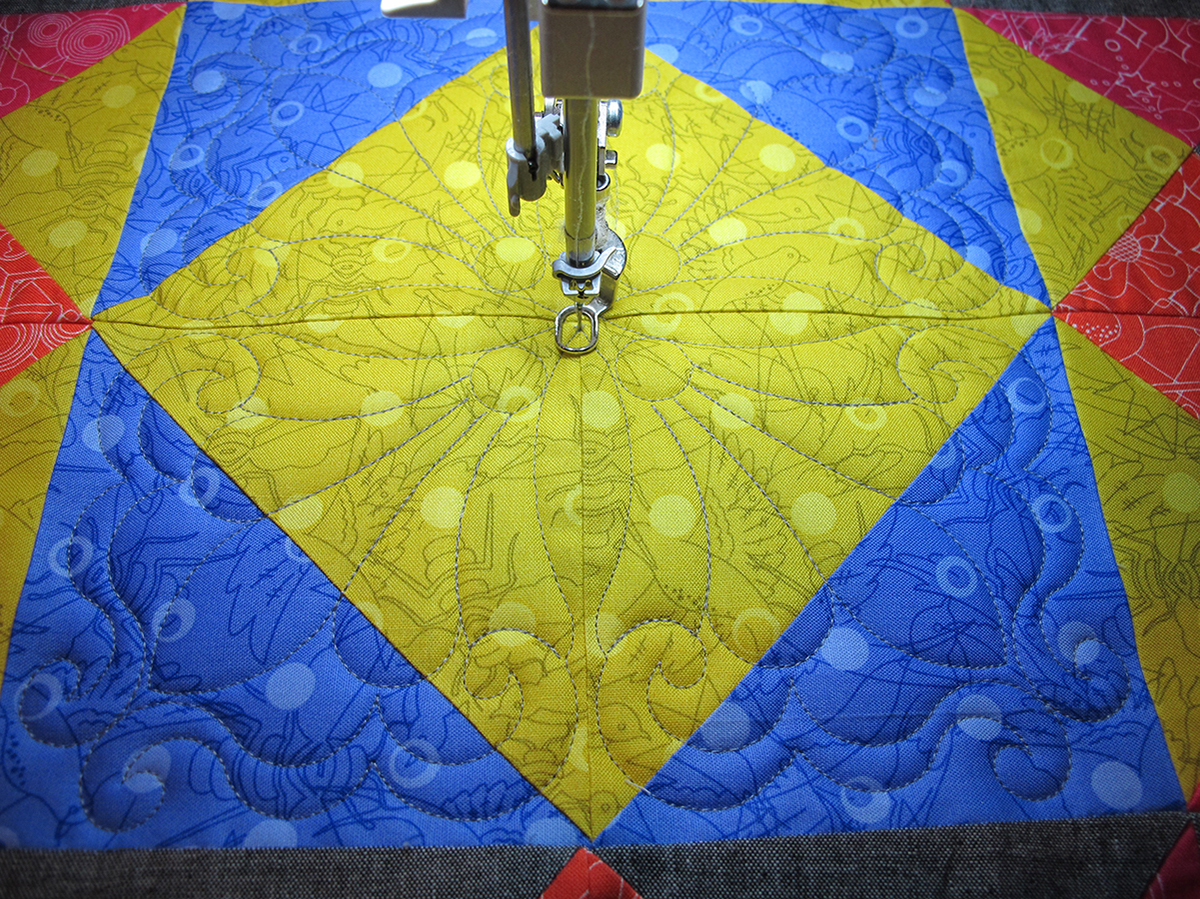
Use the Sewing Sequence to choose which designs to quilt. Begin with the center design. This will be quilted in the square in a square, which includes the purple triangles.
![]()
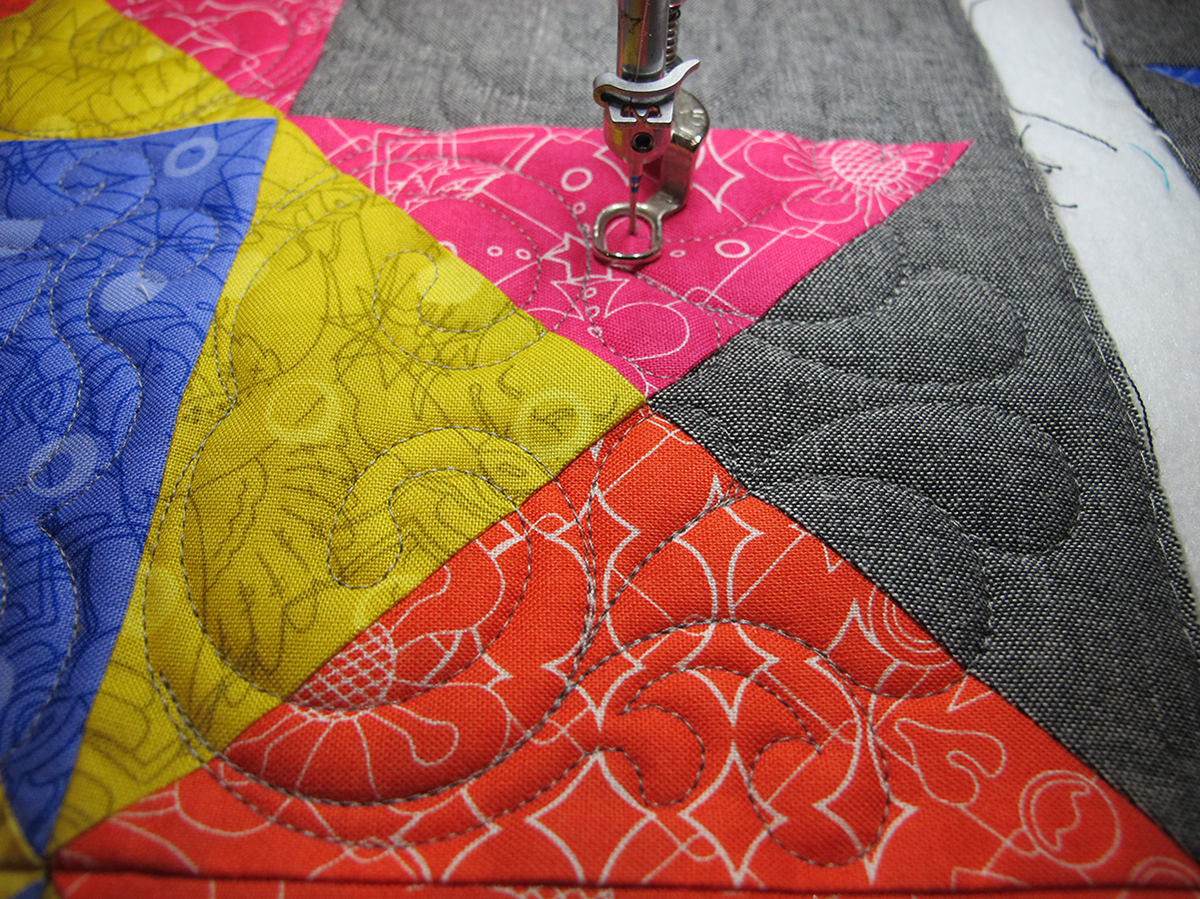
Then stitch the designs in the border around the center. You can quilt them individually or choose several to quilt together. I like to choose a corner and 2 side designs in one quilting.
Use whatever placement method you prefer.
If using the embroidery machine, hoop your block without any stabilizer. Choose designs that will fit the different parts of your block. For more information on quilting with the embroidery machine, refer back to the Block 7 Maple Star blog post.
Tutorial List of the BERNINA Block of the Month Series
Block 3, Square in a Square Block
Block 5, Card Basket Variation Block
Used Products


What you might also like


15 comments on “Girl’s Favorite Quilt Block”
-
-
Yes absolutely! That will be the 13th post after all the blocks are done.
-
Hi!
I can’t find the finishing instructions.
Thank you,
Mary
[email protected]-
The finishing instructions have not been posted yet. They will be available April 2nd.
-
-
-
-
I love what you’re doing but is there going to be any classes with the designer 8 in them? I see you’re using the tool box and the long arm. It would be nice to have the alternative to design a quilt motif. Thank you. Nile Remsing.
-
Actually what you see in this post is the longarm automated software called Q-matic. There are no plans in this blog for BERNINA Software V8 but that is something your BERNINA Dealer should be able to show you.
-
-
My newest machine is a 1981 Bernina 830 Record. It’s a marvelous machine…a real workhorse, without all the bells and whistles of the newer ones. I do ruler quilting on it and will adapt so I can sew along with this project. Thank you for continuing to motivate all types of people who love to sew.
-
Is it too late to start this quilt? Even tho I’m a year late? 😉
I see all the block patterns but I don’t see the final piecing or the “13th post.”Thanks!
-
No is not too late to start!!!
The 12th block will not be posted until February and the “Putting it all Together” post will not be available until March.-
I cannot find block instructions for 11, 12, and 13.
Thanks
Mary-
Go to the search at the top of the page and type “Bernina Block Party” in the search box. All the Block of the month posts will come up.
-
-
-
I’m a late joiner. But will luv the catchup process. ??
-
Welcome!! This is a fun project and being a late joiner means you don’t have to wait a month between blocks!!!
-
-
Hi Nina,
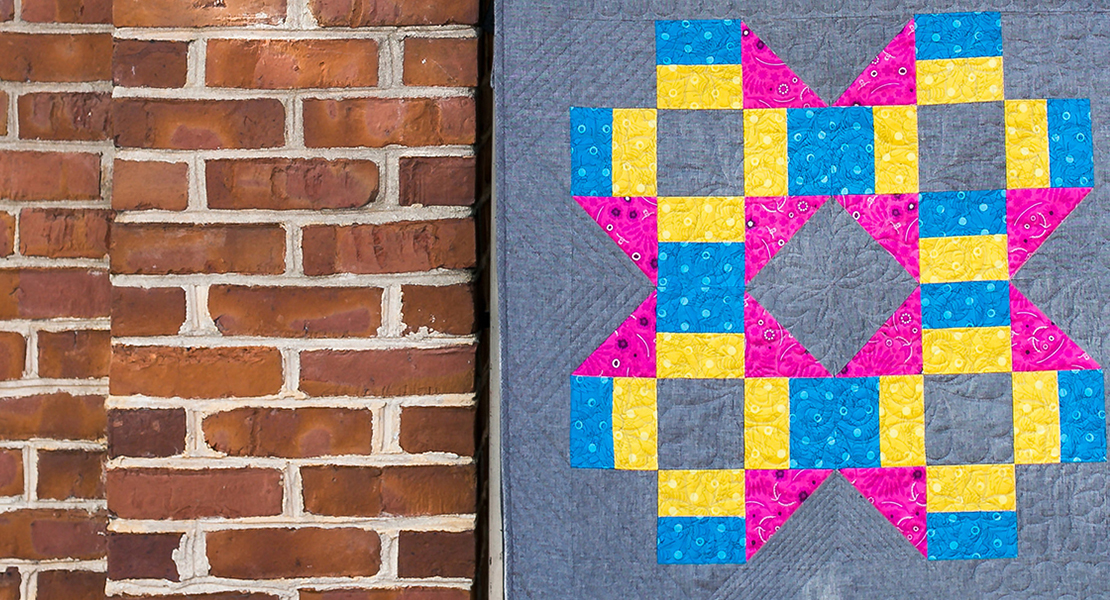
Love this quilt pattern and the fabric choice. I am a few months behind on completing the blocks. I was looking ahead and don’t see the block instructions for the long row of rectangles pictured in the lower left quadrant of the quilt photo. Am I missing the instructions somewhere?Thank you!
-
I am so happy you like the quilt. The instructions for the row of triangles will come in the last instructions when we put it all together!
Leave a Reply
You must be logged in to post a comment.

Love the series. Will you give us directions in how to put blocks together? Thanks so much.