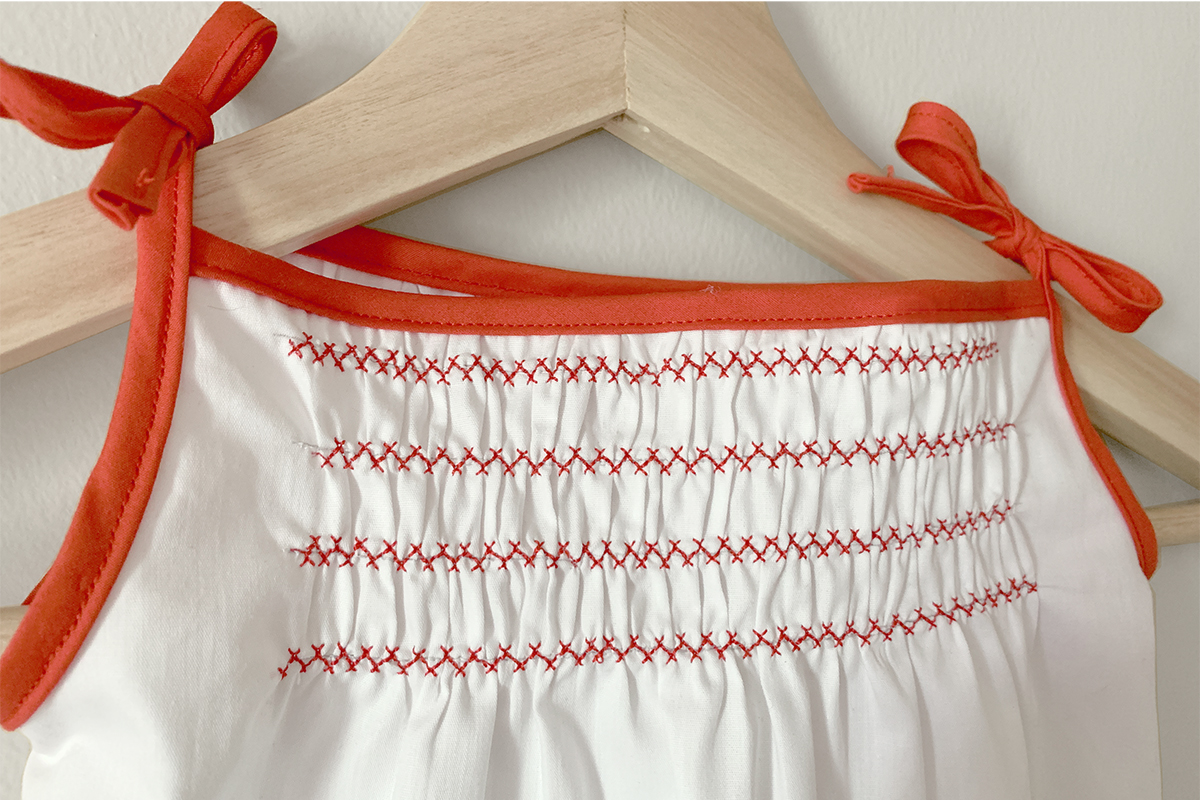
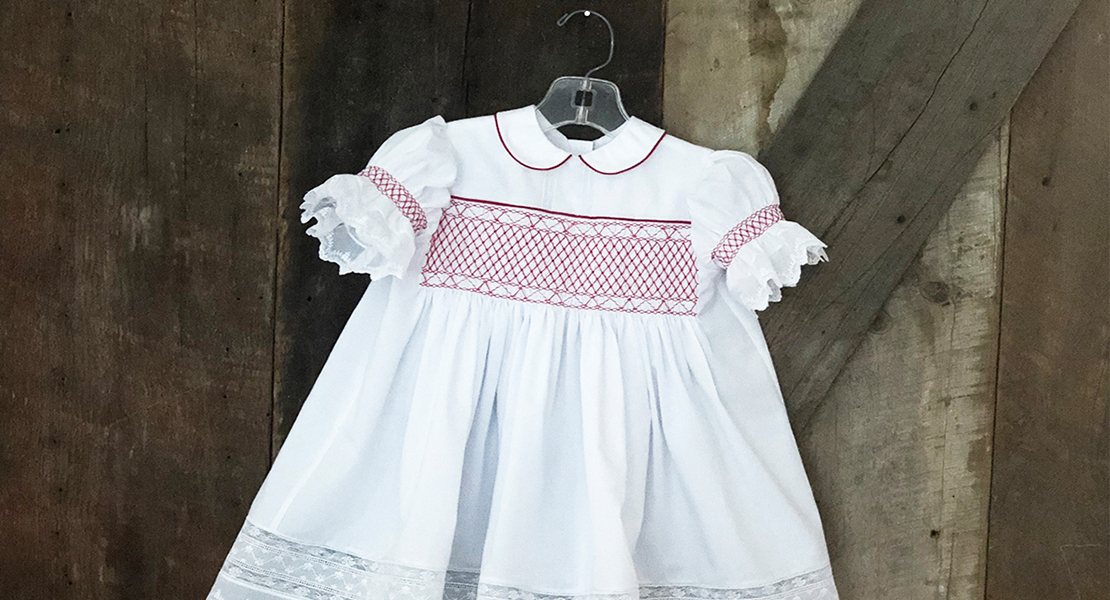
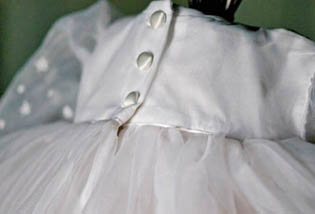
Hand-Look Smocking
Traditional smocking is a beautiful but tedious art—it requires precise pleating and hand embroidery but results in incredible heirloom pieces. If you’ve ever admired this art but lack the time to complete it by hand, I welcome you to try it on your sewing machine!
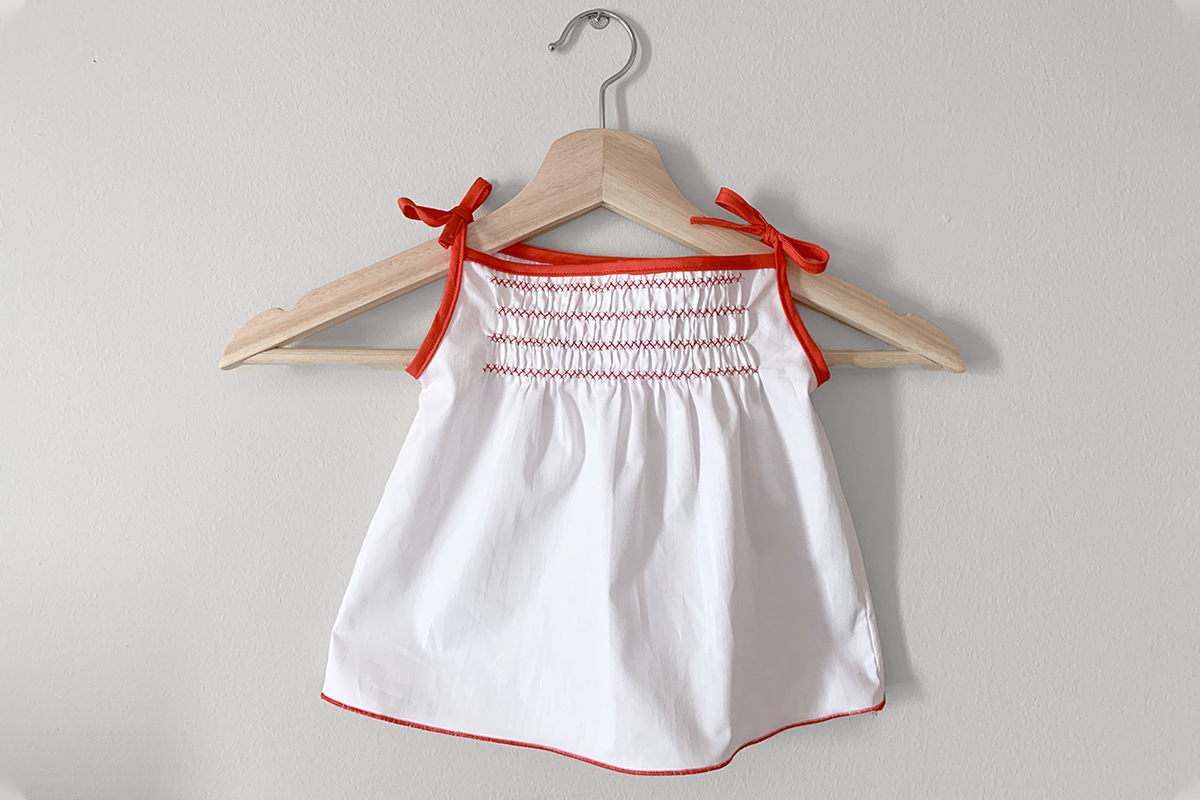
With some simple gathering and decorative stitching, we can easily take simple poplin fabric and turn it into an heirloom-inspired pinafore. We’ll learn a few finishing techniques on both the standard sewing machine as well as the overlocker along the way.
Materials for Hand-Look Smocking
- Main Fabric – 1/2 yard poplin
- Contrast binding fabric – 1/4 yard
- Alternatively, you can purchase premade bias tape (at least 2 yards).
- Thread
- Mettler Metrosene (all-purpose polyester); color matching the main fabric
- Isacord (40wt polyester); color matching the contrasting/binding fabric
- 3 spools of Mettler Seracor (overlocker/serger thread); color matching main fabric
- Ruler
- Rotary cutter
- Cutting mat
- Pattern weights
- Bias tape maker
- Wonder Clips by Clover
- Fray Check
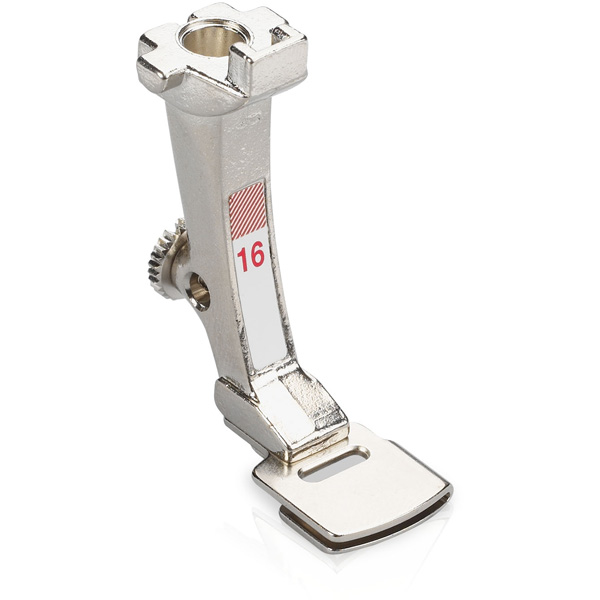
- Gathering Foot #16
- There are two different widths available for this presser foot, for machines with a 5.5 mm wide feed dog or 9 mm wide feed dog. Be sure to use the appropriate foot for your machine.
- Open Toe Embroidery foot #20C
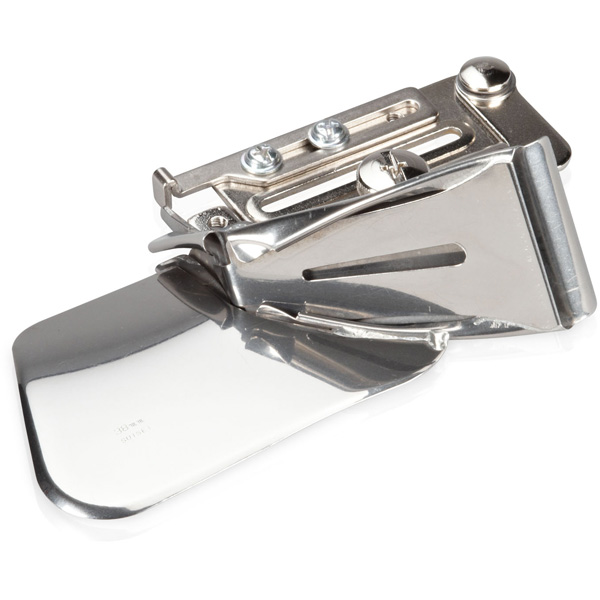
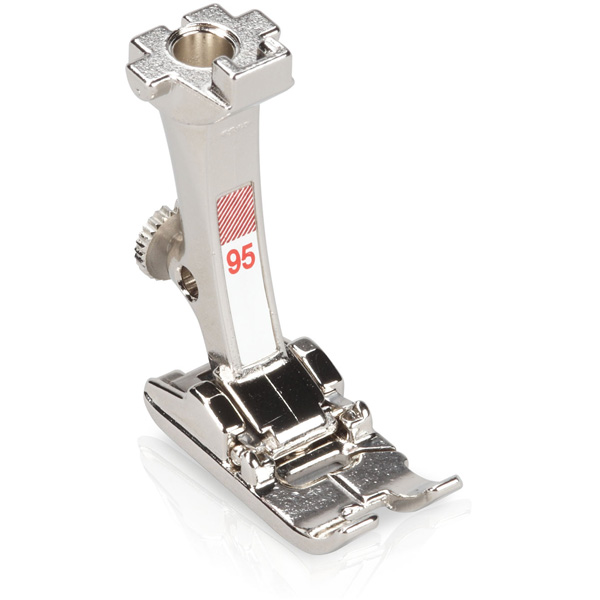
- Binder Attachment #88 with Binder foot #95/95C
- If you use premade (double fold) bias tape, you will want Binder Attachment #87.
- BERNINA 790 PLUS
- BERNINA L 460 Overlocker
1. Cut out fabric
For our little smock/pinafore, I have drafted a pattern myself. The joy of sewing for babies and toddlers is that there’s almost no fitting required. The pattern piece I created will finish at a nice length and width for my very small friend and has a curve cut out for an arm-hole.
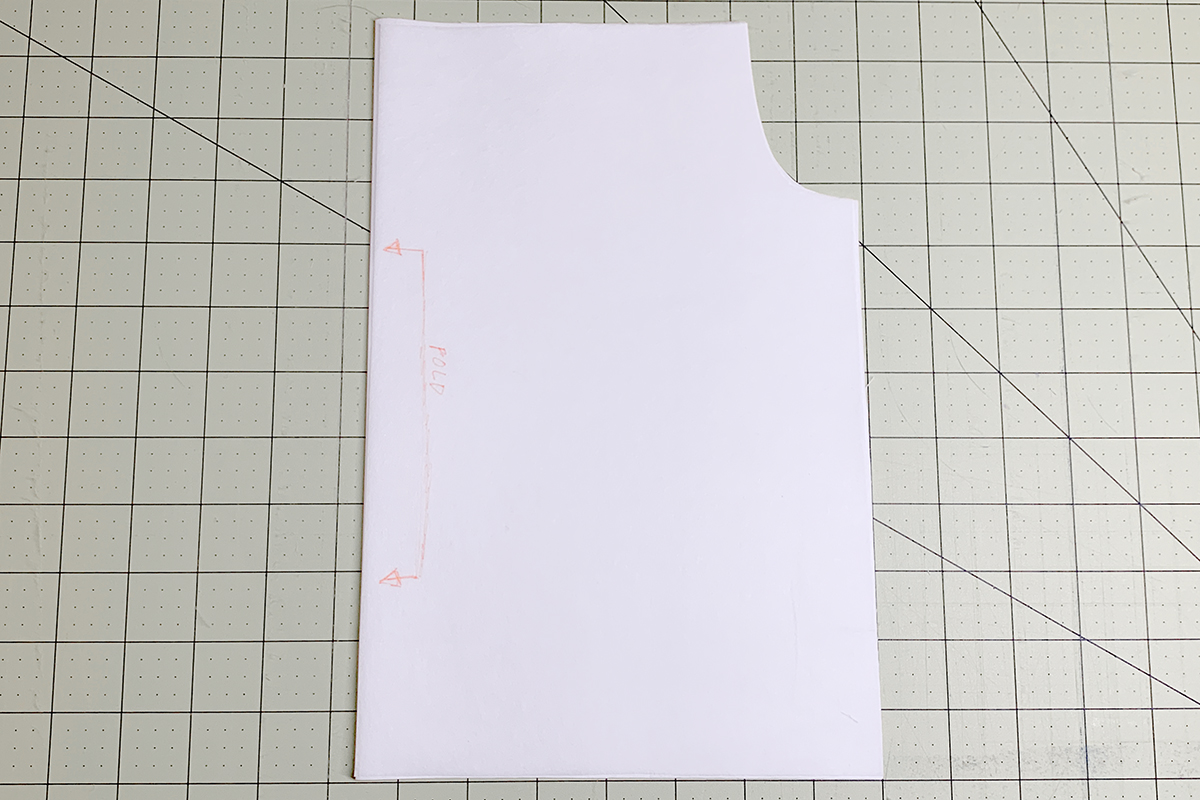
Place the pattern piece on the fold of your fabric and cut two pieces, one for the front and one for the back. For garment sewing, I like using pattern weights and a rotary cutter. A small diameter rotary cutter may help you navigate curves a bit easier as well.
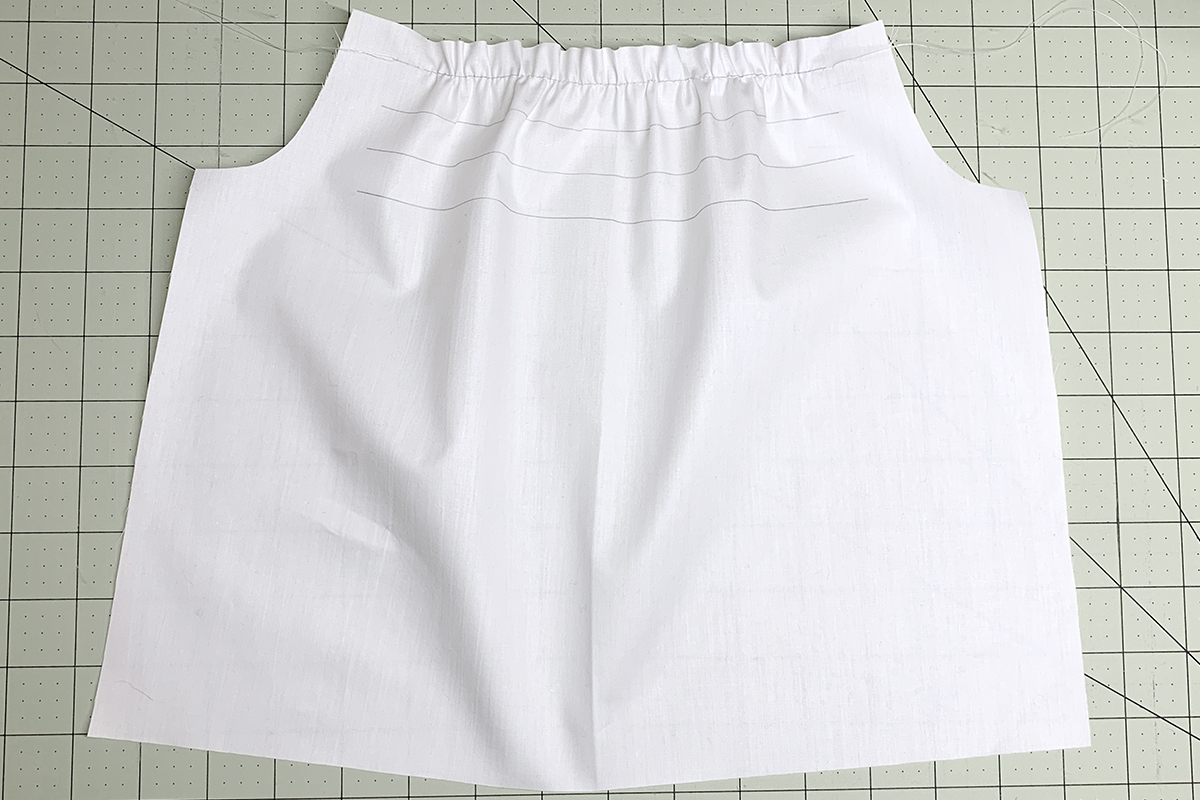
2. Mark lines for smocking
Parallel to the top edge of each of our fabric pieces, use a ruler and fabric marking tool to mark three to four lines for smocking 3/4” apart. You may want more or less, depending on the finished size of your garment. I’m making this to fit a 3-month size so I will mark four lines. My lines start and stop about ¾” away from either side.
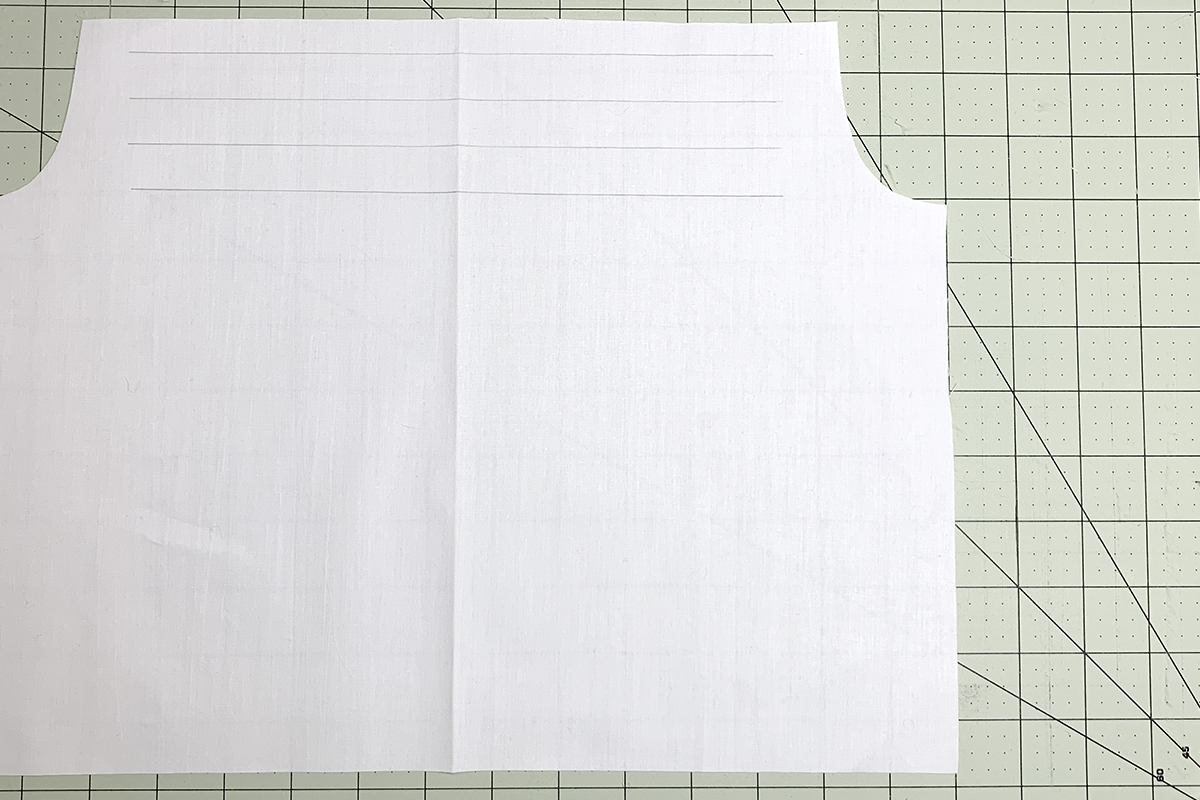
Repeat for the second fabric piece for the back.
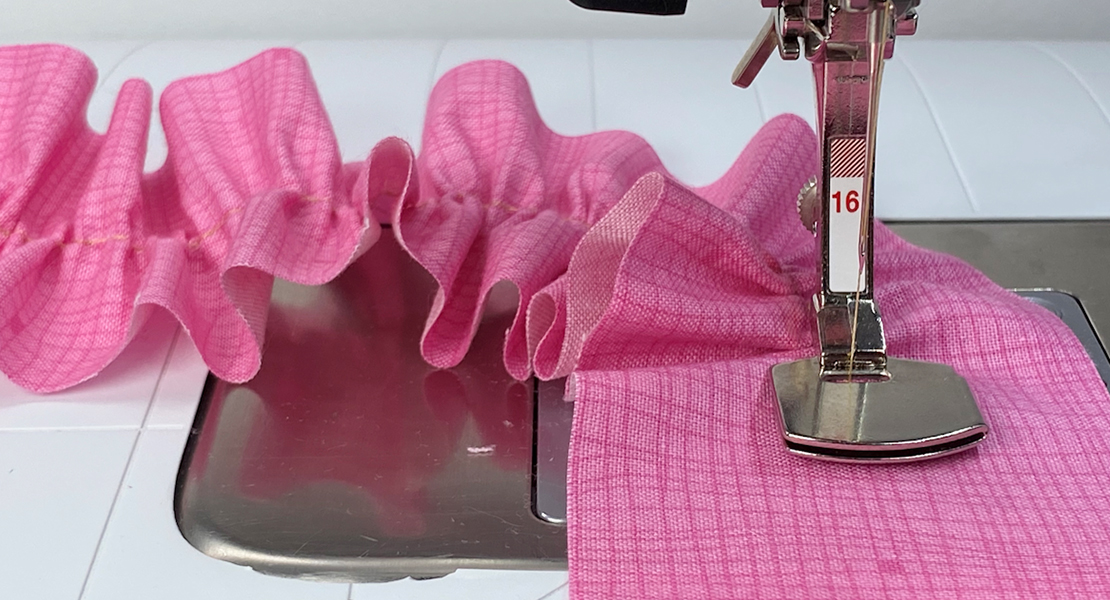
3. Gathering
Before we gather our actual pattern pieces, test your gathering on a scrap piece of fabric. I know that I want my garment to finish about 7” across the top edge after it has been gathered. I need to test my stitch length to figure out what settings will give me that result using Gathering foot #16.
Now with your fabric cut to the pattern piece shape, place the first line (closest to the top edge of the fabric) under the presser foot. Make sure your upper thread and bobbin are both threaded with a color that matches your fabric. This gathering stitch should be essentially invisible when we’re done.
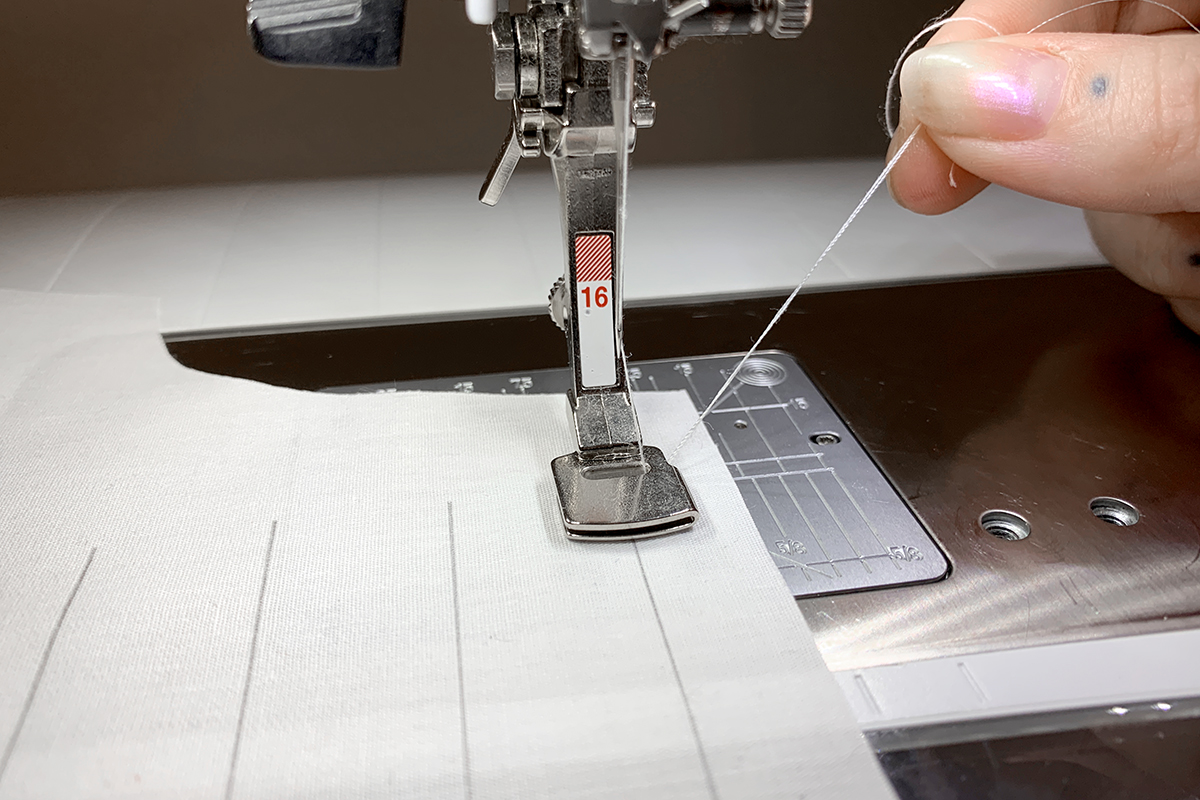
Use the Needle Up/Down button to draw up the bobbin thread. Pull a few inches of thread up. When we’re finishing up the garment, we will hand tie-off our threads on the inside of the garment for clean finish and this will make that much easier.
Sew along your marked line. When you reach the end, leave a nice long thread tail before cutting your threads (like we did in the beginning).
Repeat for the remaining lines. Don’t worry about tucks from the previous lines getting gathered in as you sew—this is part of the smocked look!
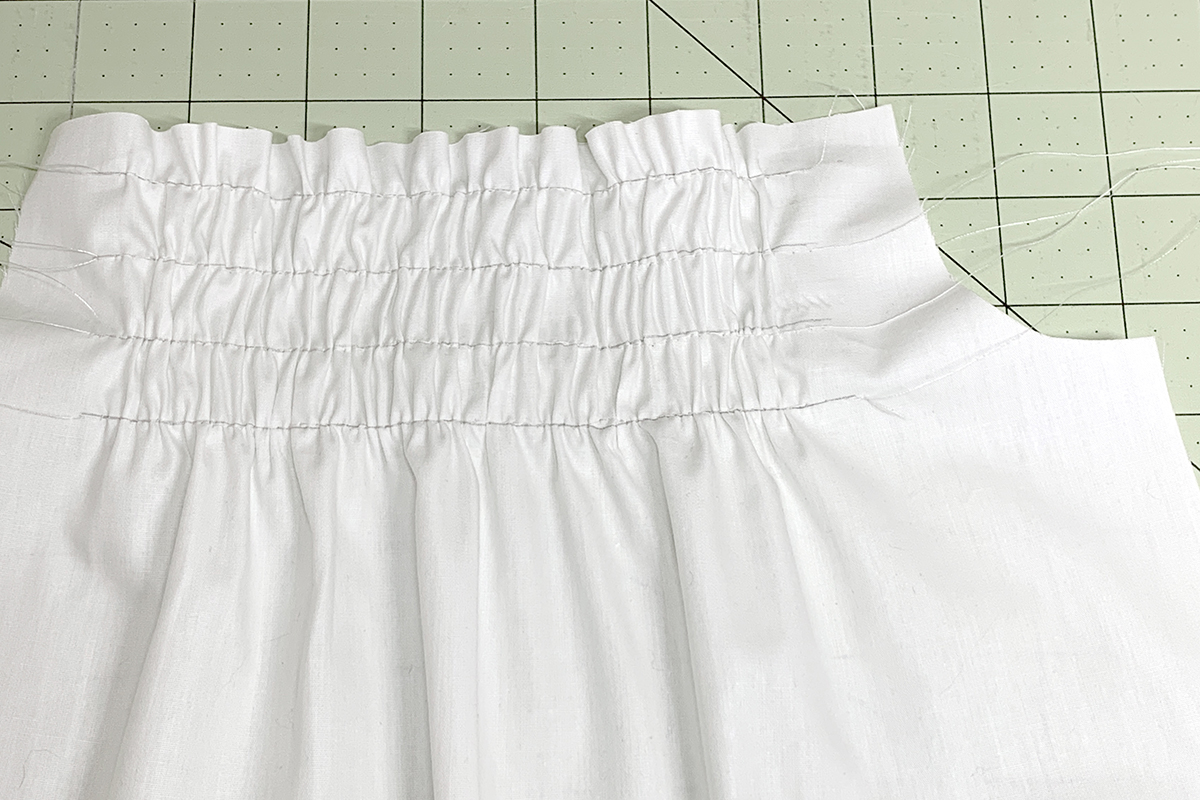
When you have all your lines stitched, pull those thread tails to the back side, tie them off, and trim close to your knot. Repeat all of this on your second pattern piece.
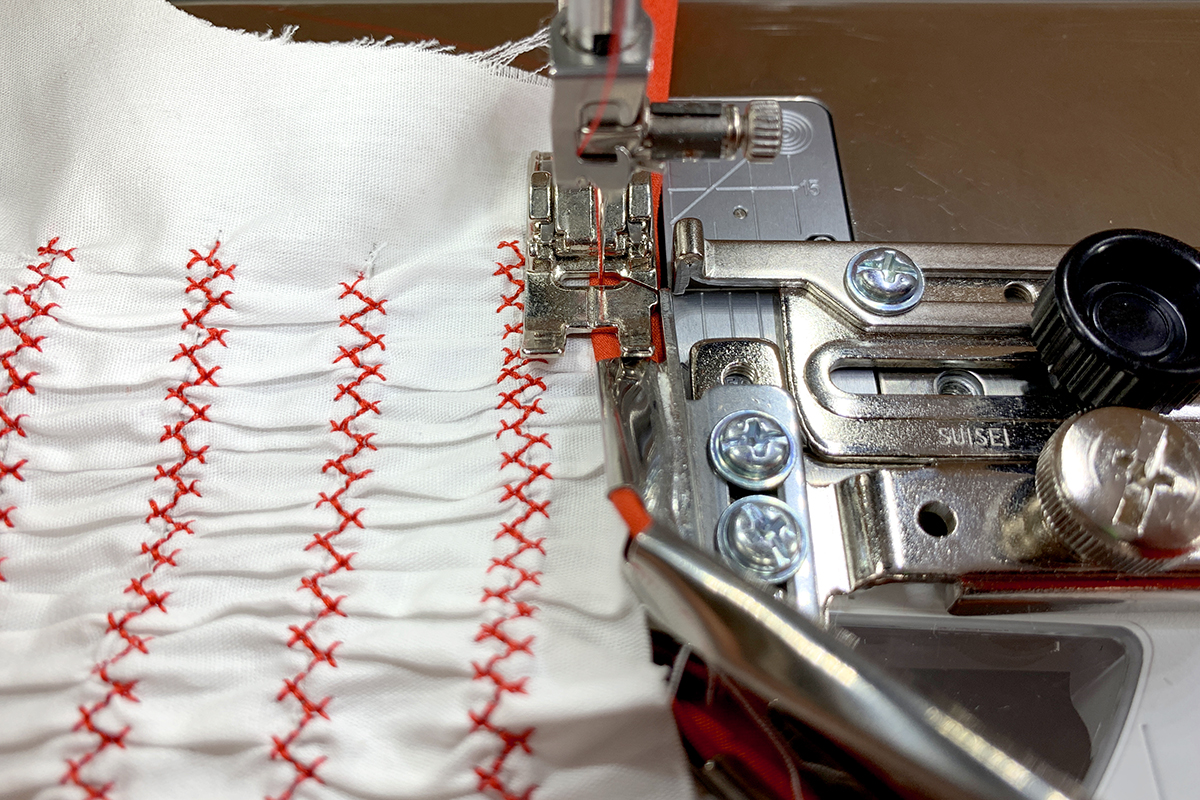
4. Add decorative smocking stitch
Now we’ll add the stitching that really adds the detailed look of traditional smocking. Thread your machine (both the needle and bobbin) with a contrasting color.
Navigate to the Decorative Stitch Menu and open folder 301 for cross stitches. I’m using stitch #327 on my BERNINA 790 PLUS.

Attach Open Toe Embroidery Foot #20C. Place your fabric under the presser foot, aligning the first gathering stitching line centered under the foot. There is a small groove near the shank of the foot to guide your center.
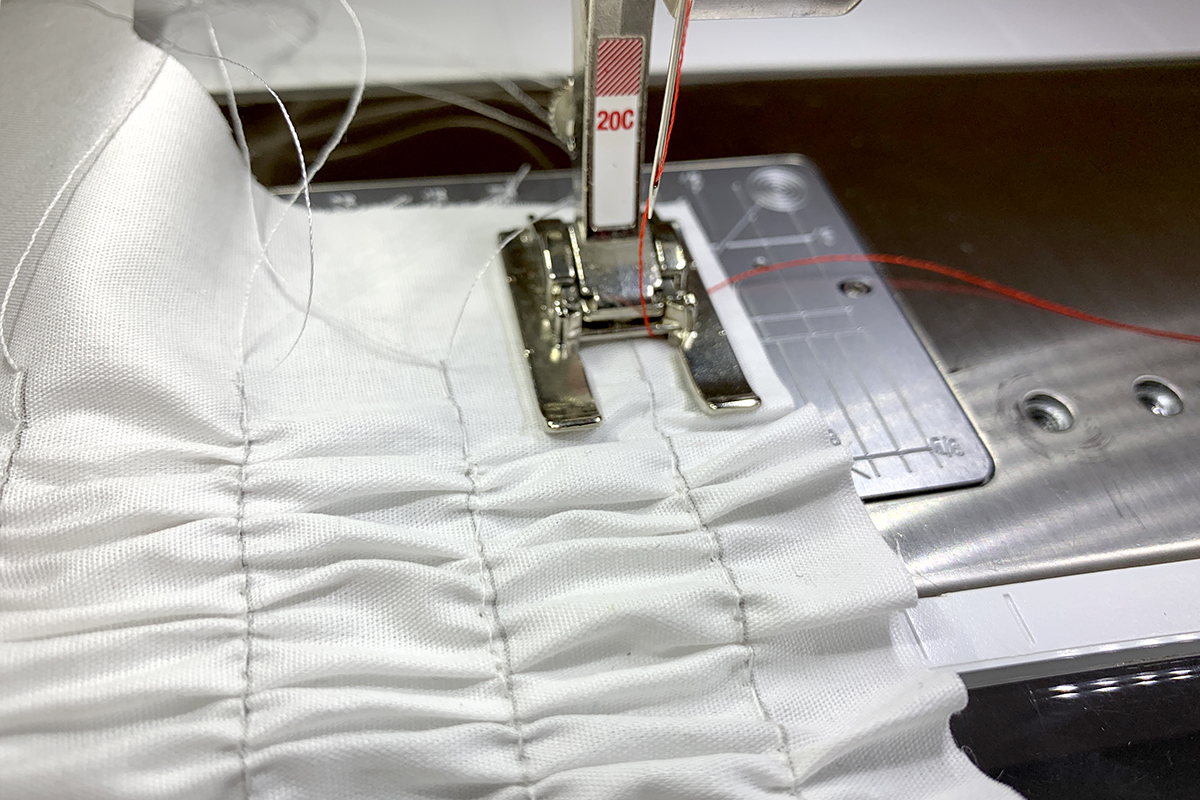
Pull up your bobbin thread again at the beginning of your seam and stitch over the gathering down the length of the gathering stitching line. Take your time with this—you want to make sure this decorative stitch is pretty and precise as it sews over all those pleats and puckers. I suggest using the Slide Speed Control to bring your speed down significantly.
As you approach the end of your row, press the Pattern End button and the machine will automatically stop stitching when it completes the repeat of the decorative stitch pattern. Then, just as we did before, leave a nice long thread tail for tying off on the wrong side of the fabric.
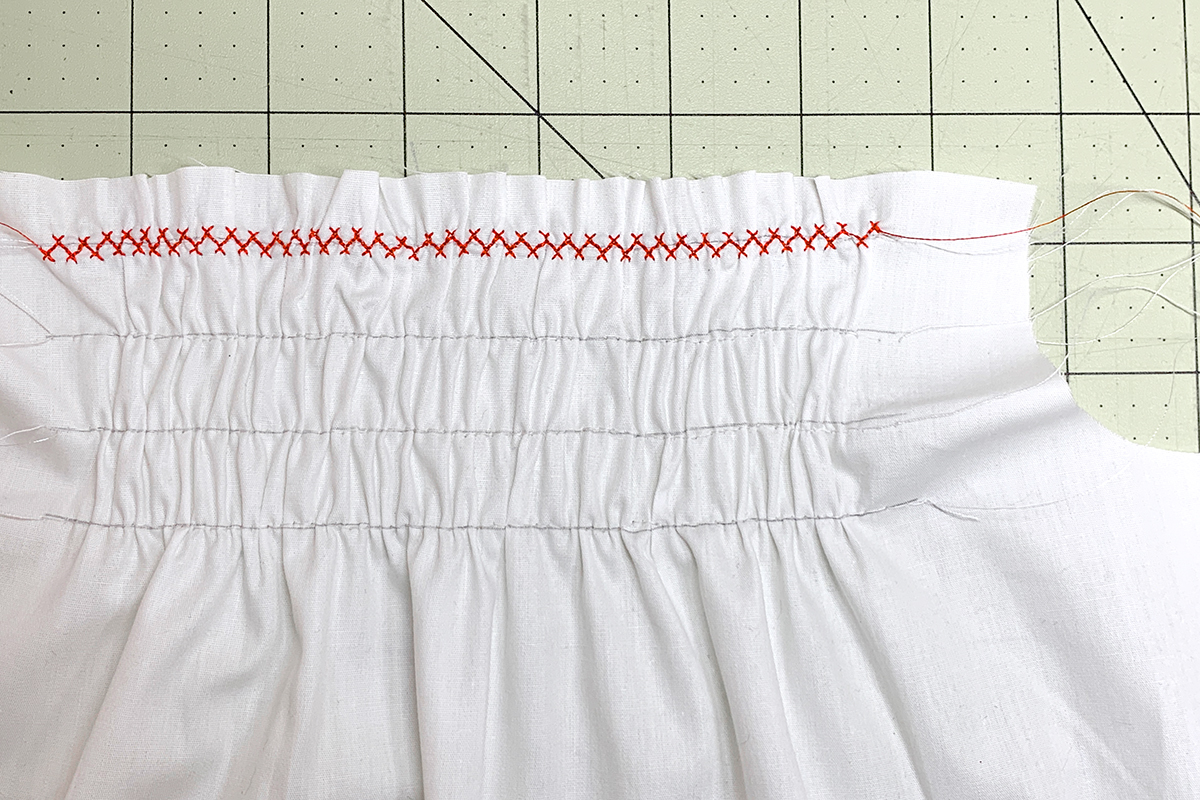
Repeat this decorative stitching over top the remaining rows of gathering stitches.

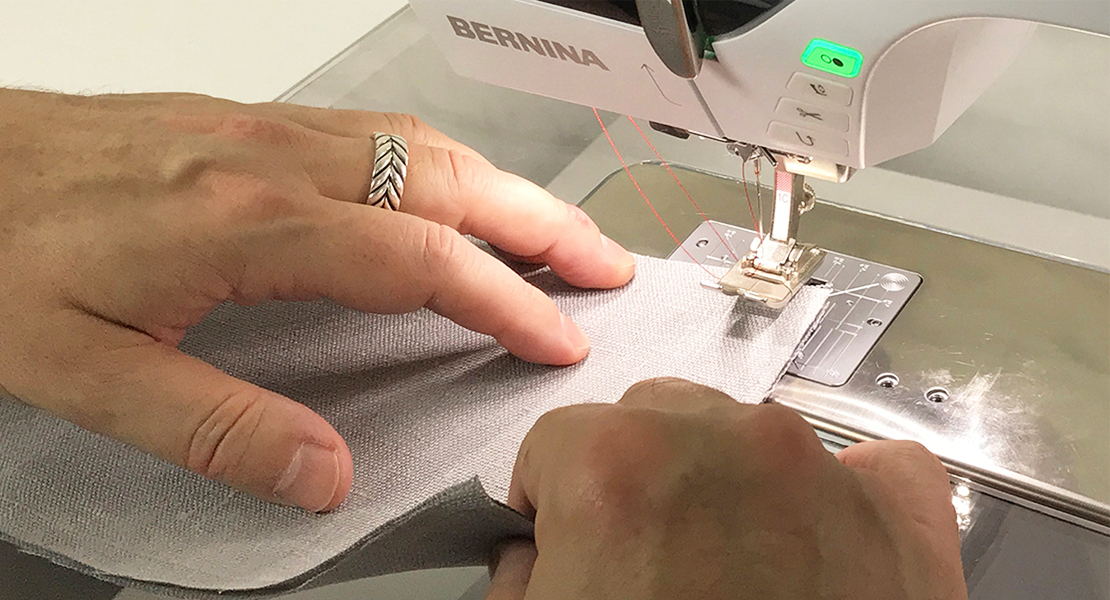
5. Seam sides
Now we can assemble our little baby gown, which is as simple as stitching up the side seams! Place the pieces right sides together and align the raw edges of the side seams and use Wonder Clips to hold the two pieces together.
Sew down each side with a 3-thread overlock stitch. I’ve set my cutting width at about 7 mm. This will leave me with approximately ¼” as the seam allowance.
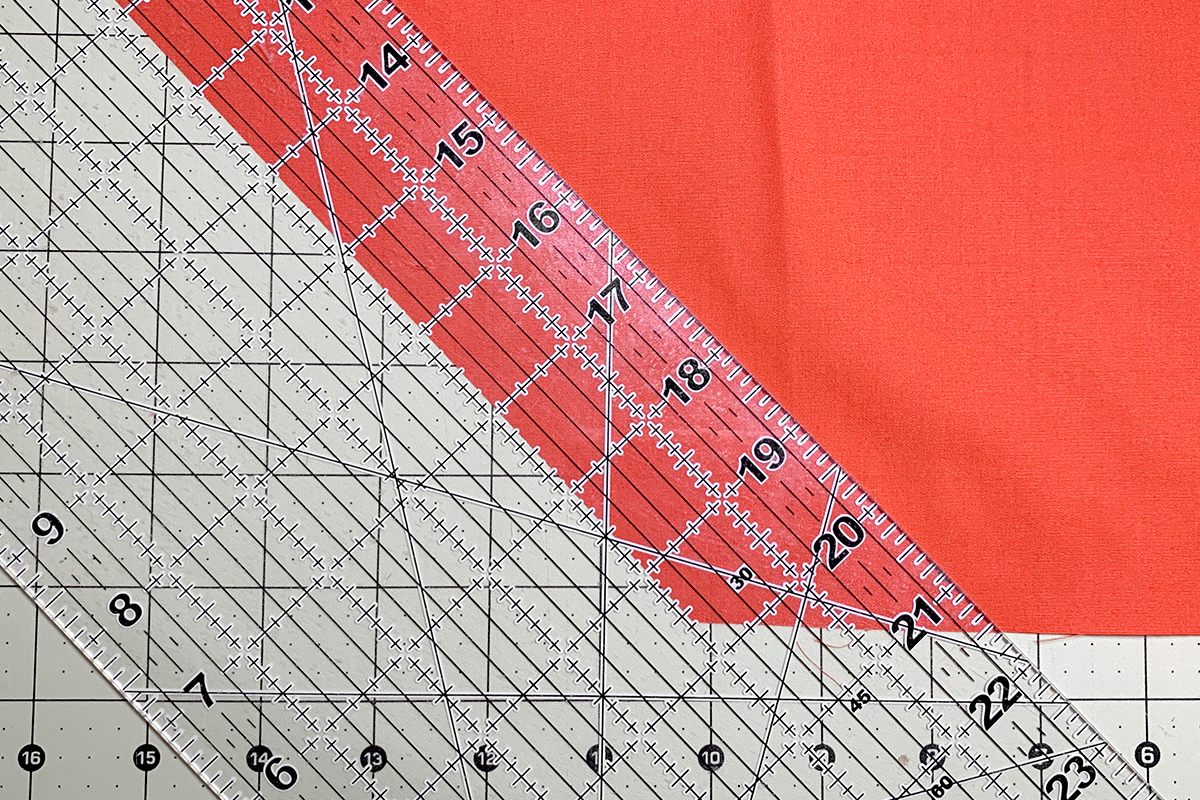
6. Create bias tape
You can always purchase pre-made bias tape but personally, I don’t mind making my own! You will need at least two yards of bias tape for this project.
To make your own bias tape, cut your contrasting fabric into bias strips. For my 25 mm bias tape maker, I will cut my strips at 1-7/8”. For our arm holes/straps, you will need two strips, each at least 24” long. For our front and back top binding, you will need two strips, each about 10” long. Piece bias strips together end-to-end if necessary to achieve the appropriate length.
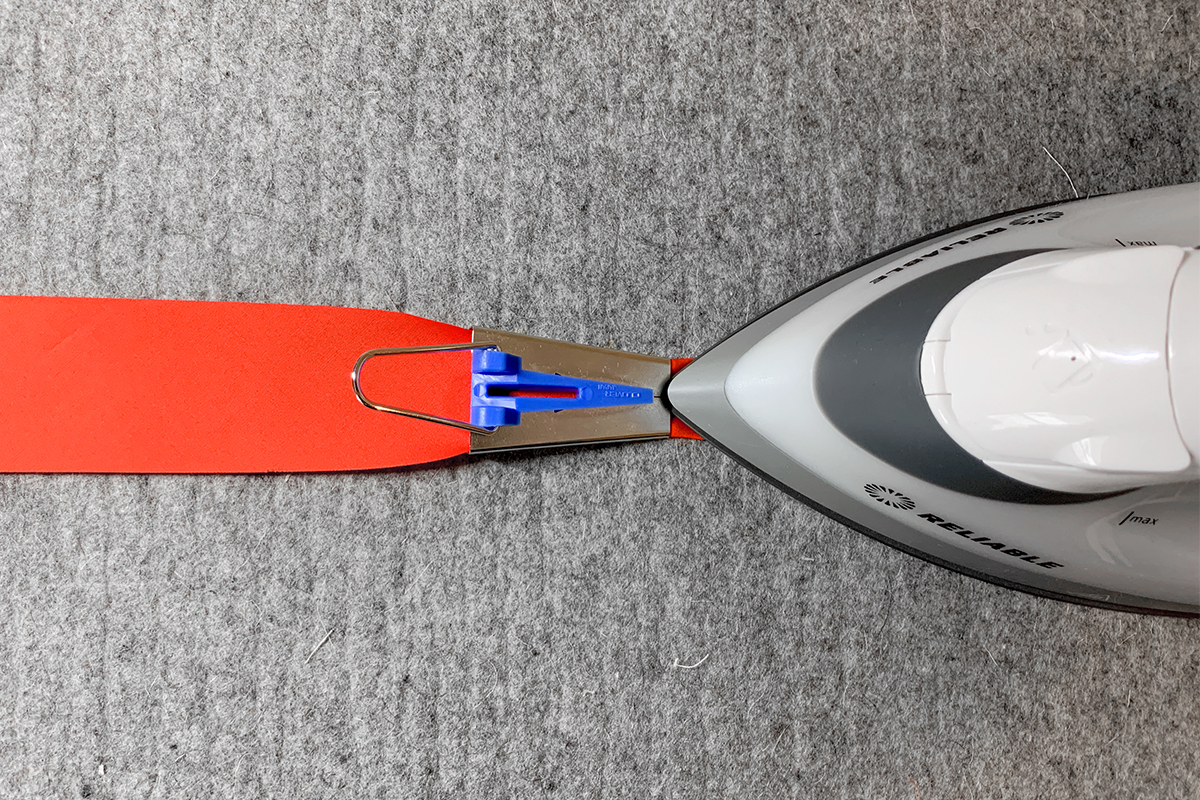
Press your bias strips for binding by feeding the strips through the bias tape maker and following along with an iron.
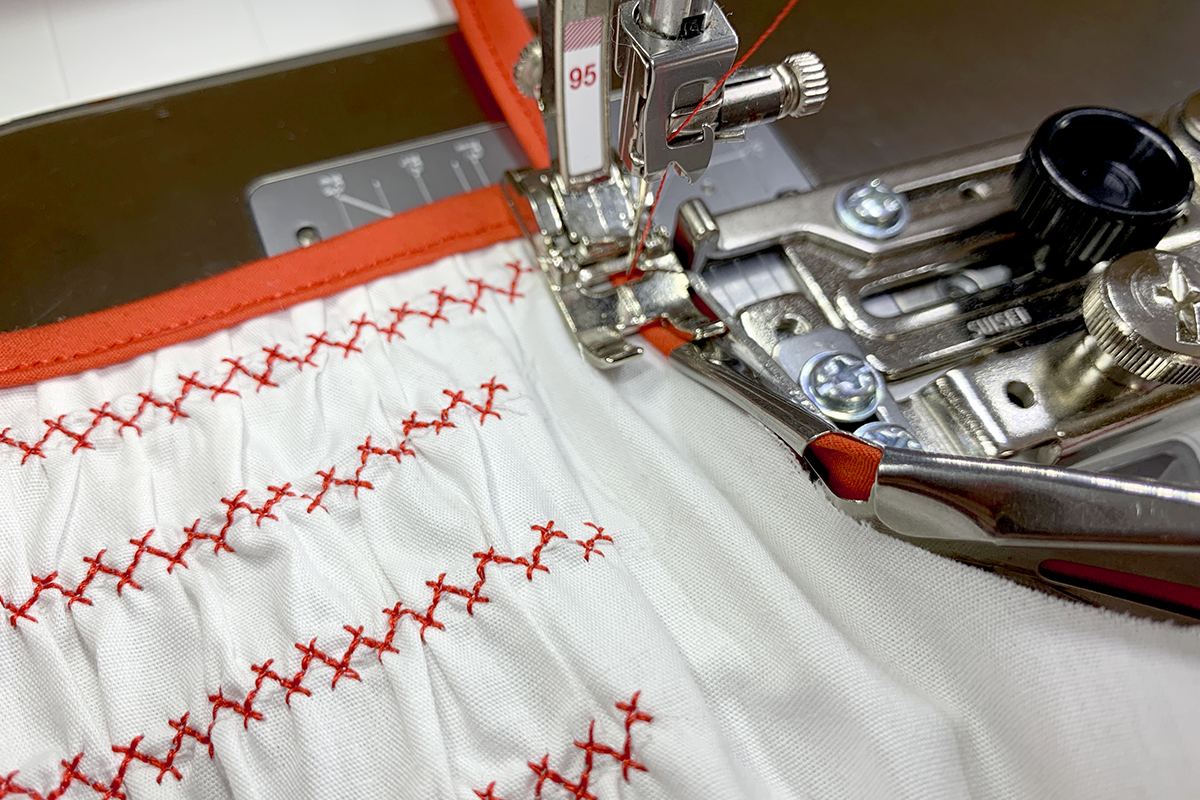
7. Bind raw edges and create straps
Attach the Binder Attachment #88 and Binder foot #95 to your machine. Swing the Binder Attachment out and begin feeding your bias tape through the slit. An awl or stiletto may help you feed this through.
Place the end of the bias tape, folded together, under the presser foot. Select a straight stitch and adjust your needle position to stitch about 1/16” away from the edge of the bias tape. For me, the best spot was needle position 3.
Start by binding the top edges of the bodice. Place the bias tape under the presser foot and take a couple stitches to secure. Then, place the edge of the bodice in, aligning the raw edge to the right, and fitting inside the fold of the bias tape.
Sew from one end to the next, easing the gathers in with your awl/stiletto.
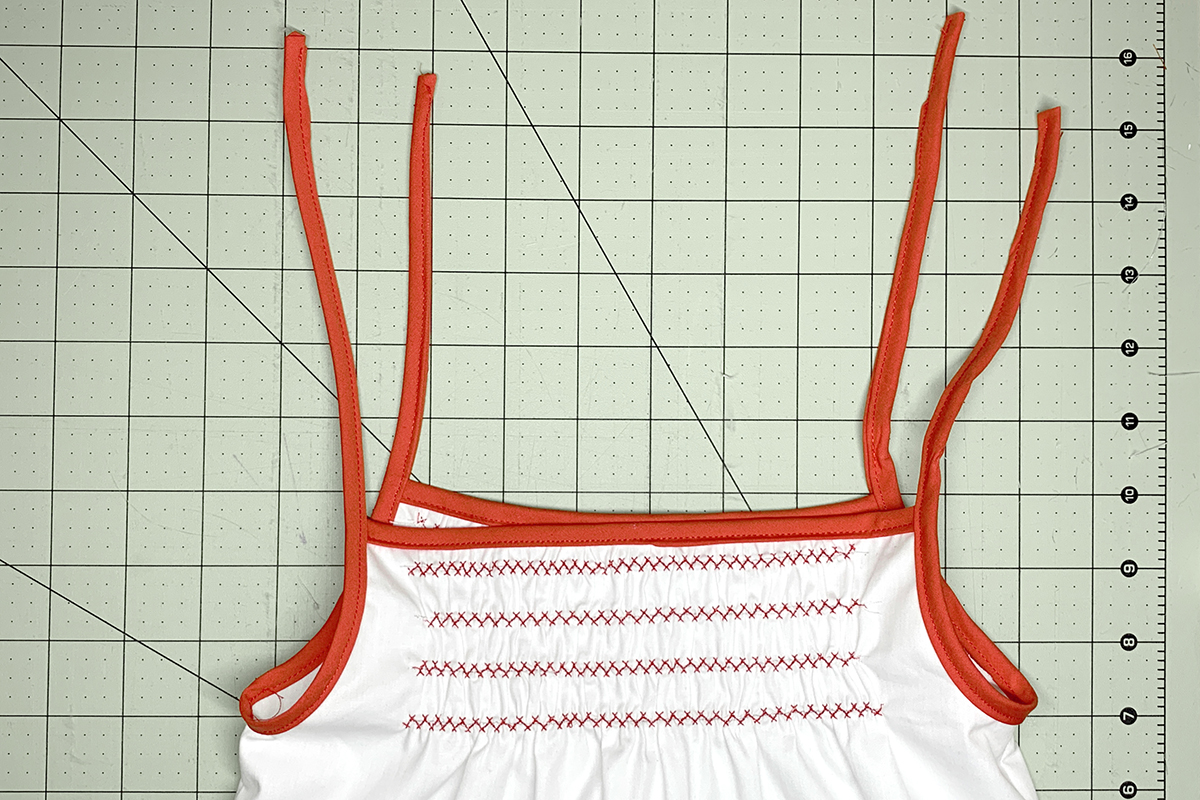
Next, we’ll bind the arm holes and create straps with the bias tape. To start our straps, pull several inches of bias tape through the attachment. At the end, fold the raw ends in, about 1” with wrong sides together. Then fold the bias tape in half lengthwise. Pin in place.
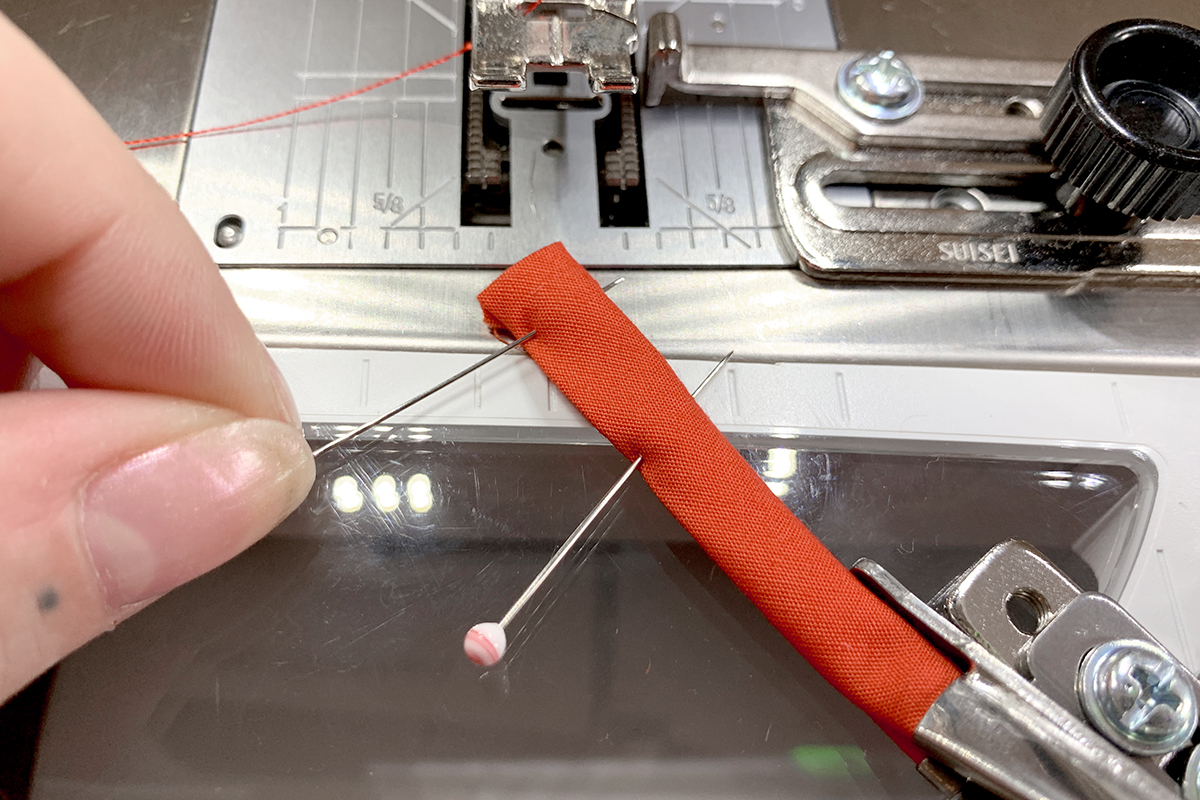
Begin stitching just the bias tape together, for about 8” of length. This will create ties at the shoulders of our pinafore.

Stop with the needle down in the fabric. Bring your bodice in, again aligning the raw edge to the right, to fit inside the fold of the bias tape.
Sew around the arm hole of the bodice, binding as you slowly work around the curve. When you reach the other end of the arm hole, continue stitching the bias tape together for another 8” or so to match the length of the beginning piece. Trim the bias tape and fold the raw edge inward, just as you did at the beginning, and secure the end.
Repeat for the other side.
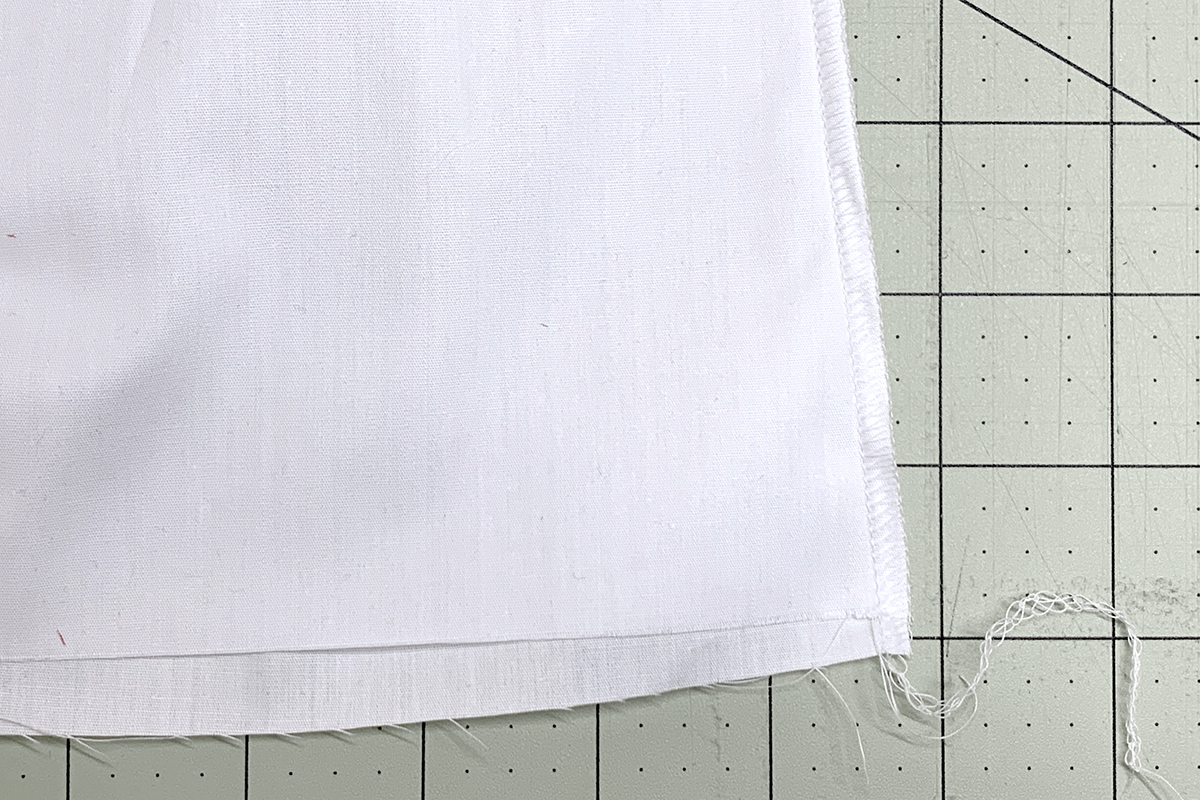
8. Hem
The final step is to hem the bottom edge of our smocked dress. For a clean and easy finish, I’m going to sew a 3-thread rolled hem using my overlocker.
Remove the left needle from the machine. Thread the right needle and the loopers with the desired thread (I’m using bright red to match my decorative stitching and binding). Adjust the tensions as per your manual for a 3-thread rolled hem. Reduce the stitch length to 0.8, reduce the cutting width to 5, and engage the Rolled Hem Lever by pulling it toward yourself.
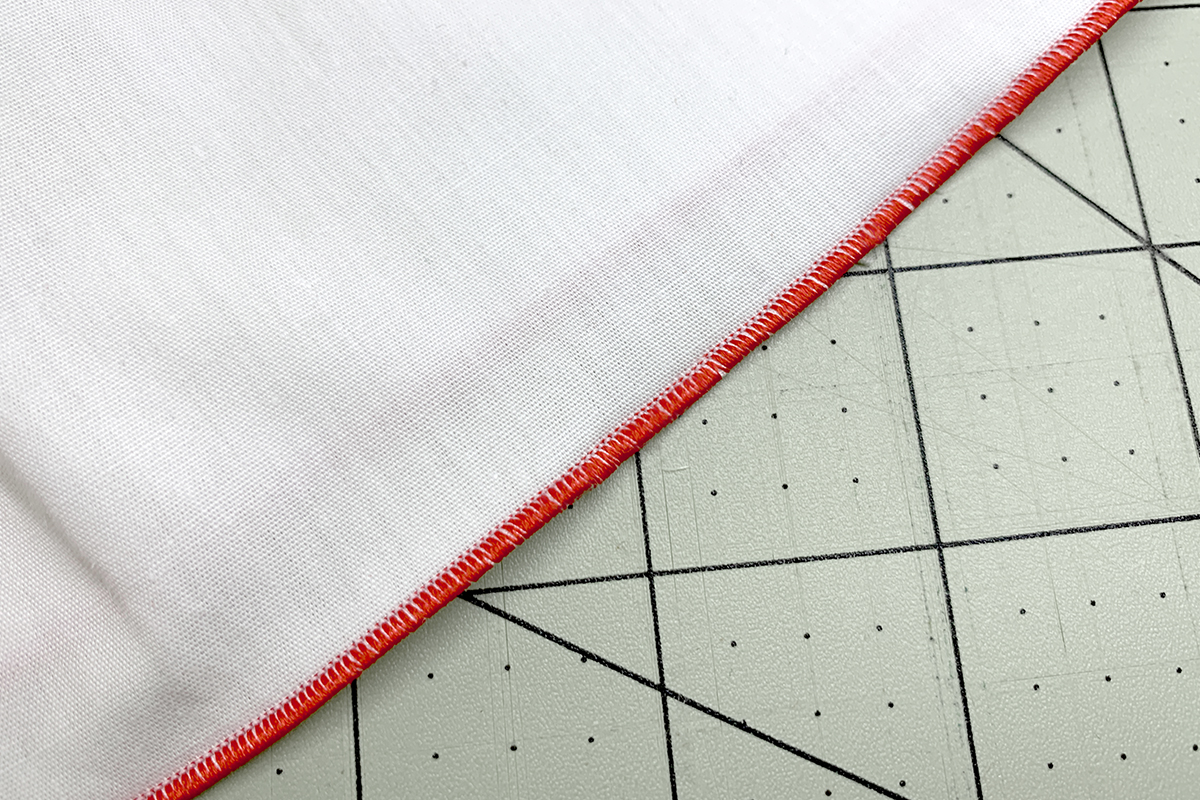
Sew all the way around the hem of the pinafore with this rolled hem. When you reach the starting point, chain off several inches before cutting the threads. Use a darning needle to tuck this thread tail and finish with Fray Check.
All that’s left is to tie up the shoulders into little bows and your pinafore is ready to wear!
Used Products


What you might also like


3 comments on “Hand-Look Smocking”
-
-
Generally speaking, I am very unfamiliar with infant sizing as well and I’ve found the sizing can be pretty inconsistent across brands. This one was made with a particular little girl in mind so I worked based on a measurement of her chest which is what I’d recommend doing if you’re trying it at home!
-
-
Thanks for the simple clear cut instructions. Love the outcome.
Leave a Reply
You must be logged in to post a comment.

This is great, but I wish there were some measurement ideas! I’d live to try it, bit don’t have foggiest on size for a 9 month old.