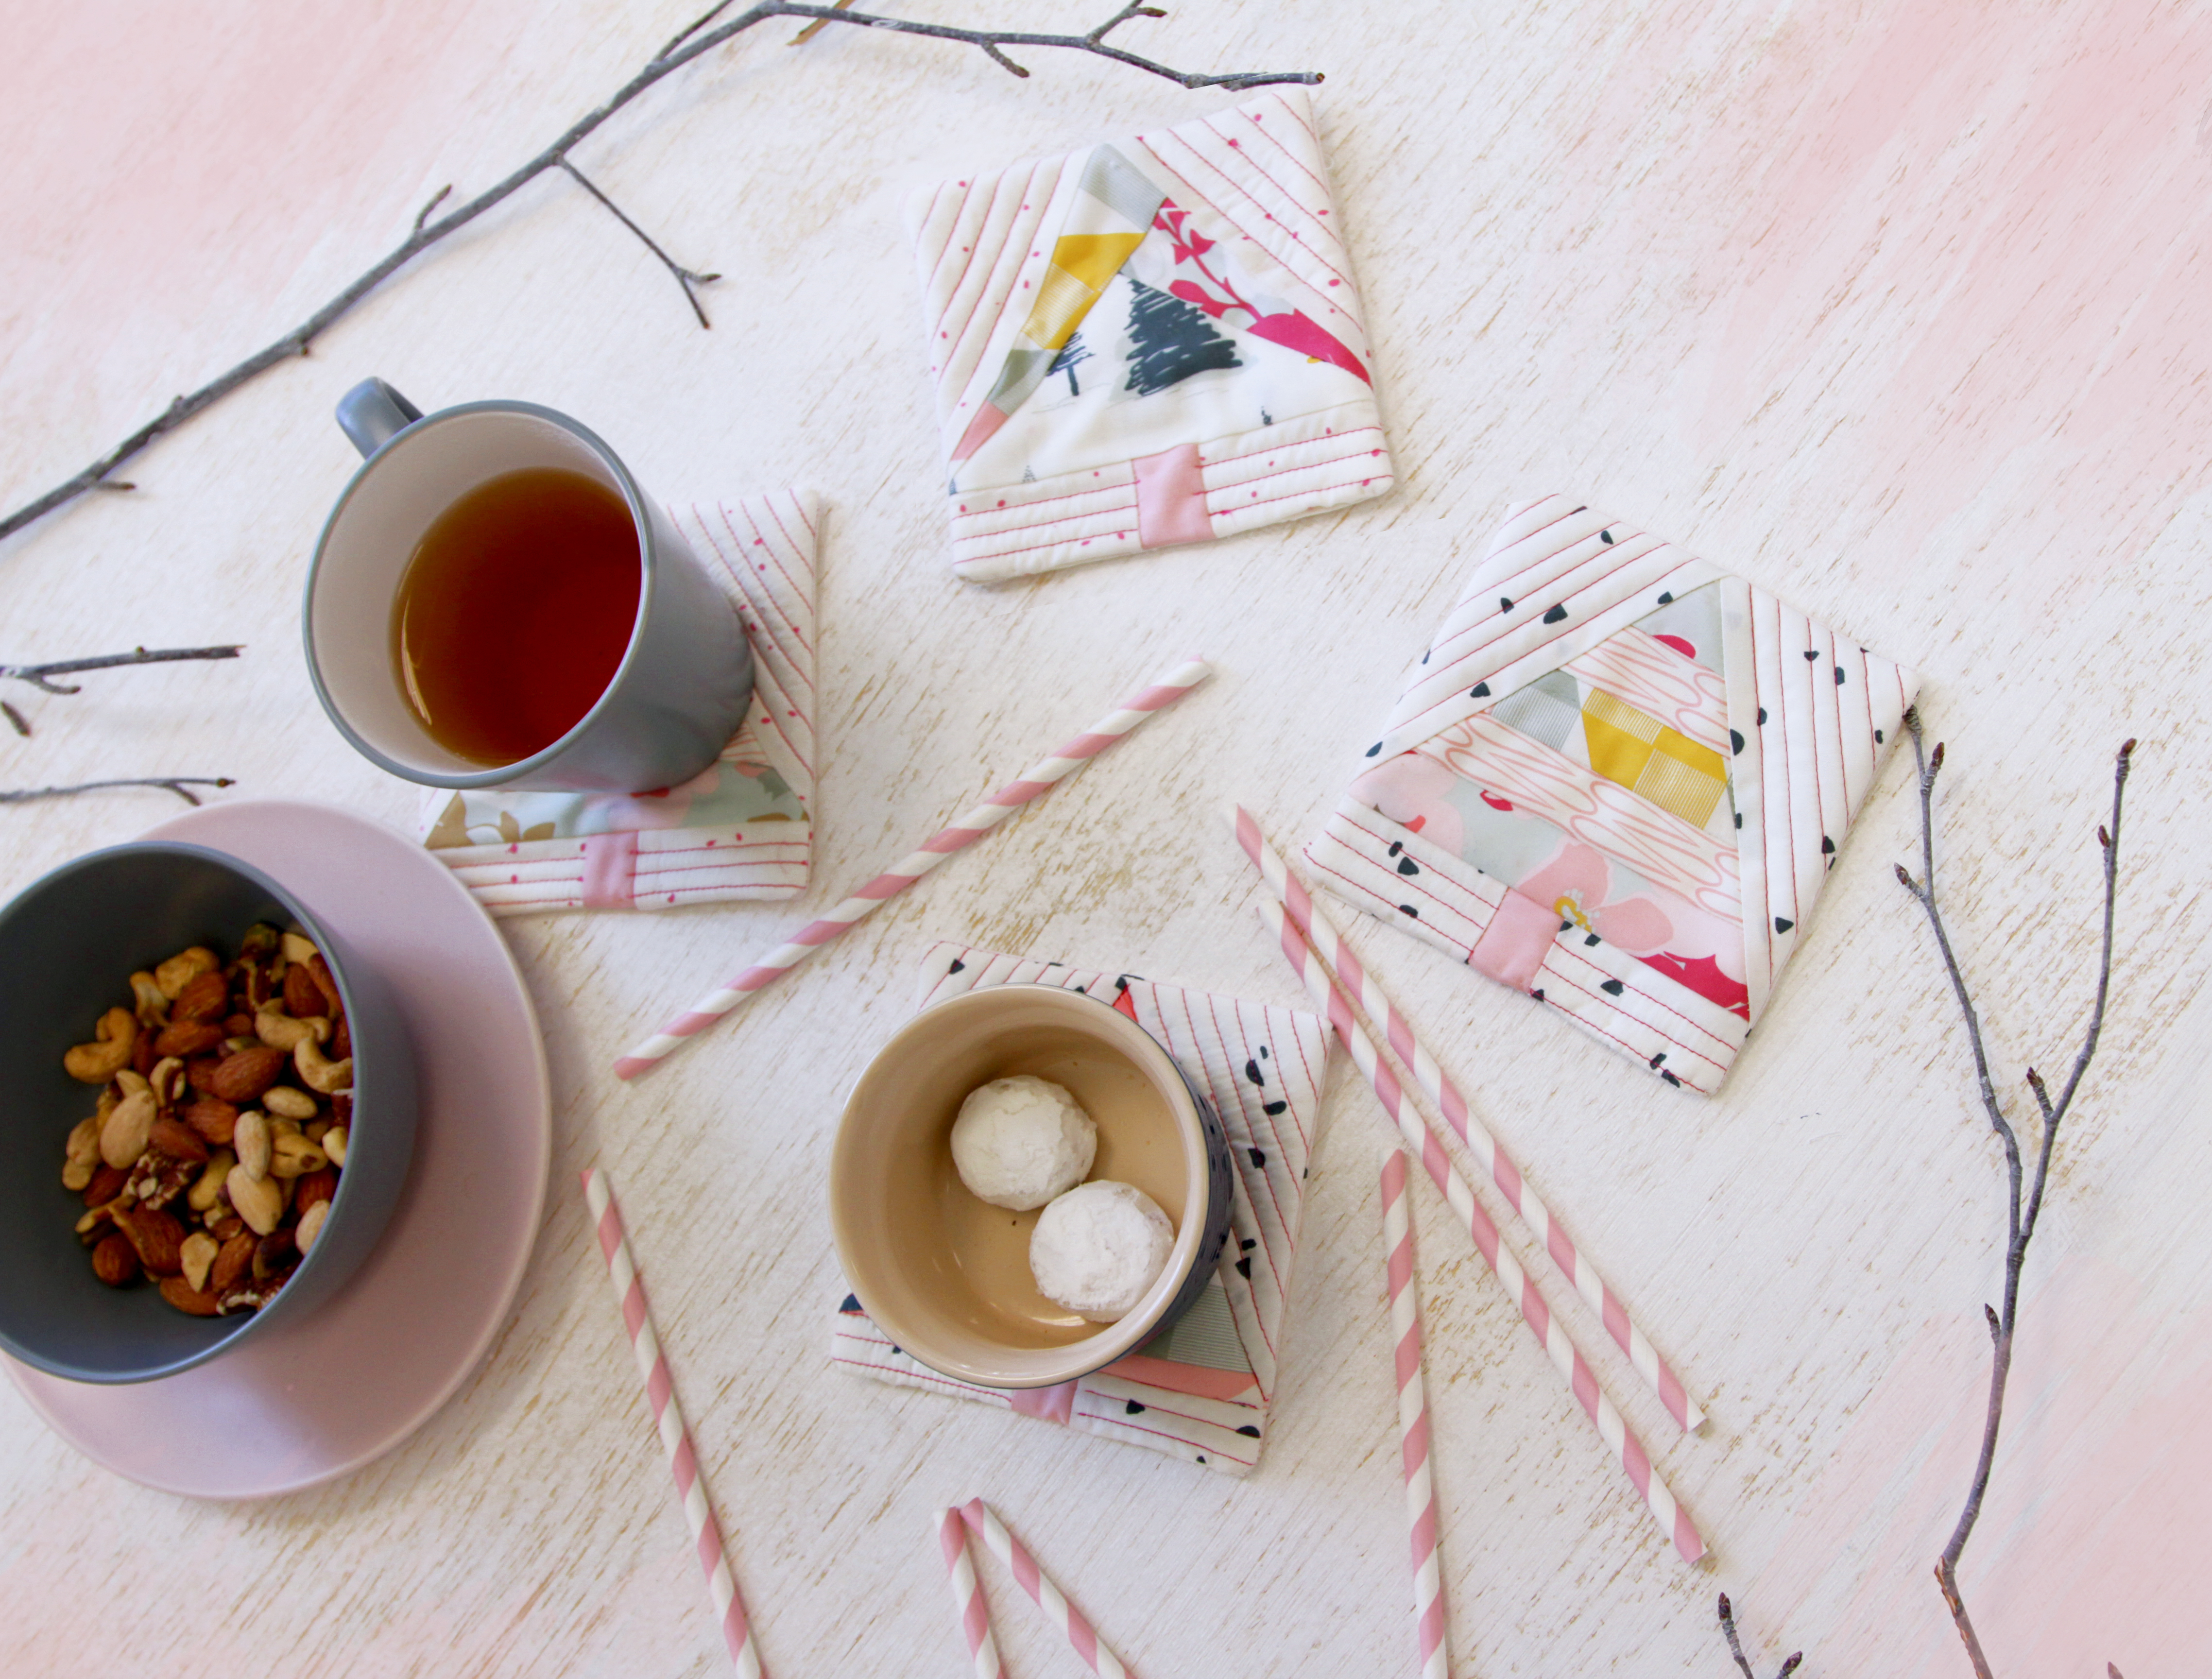
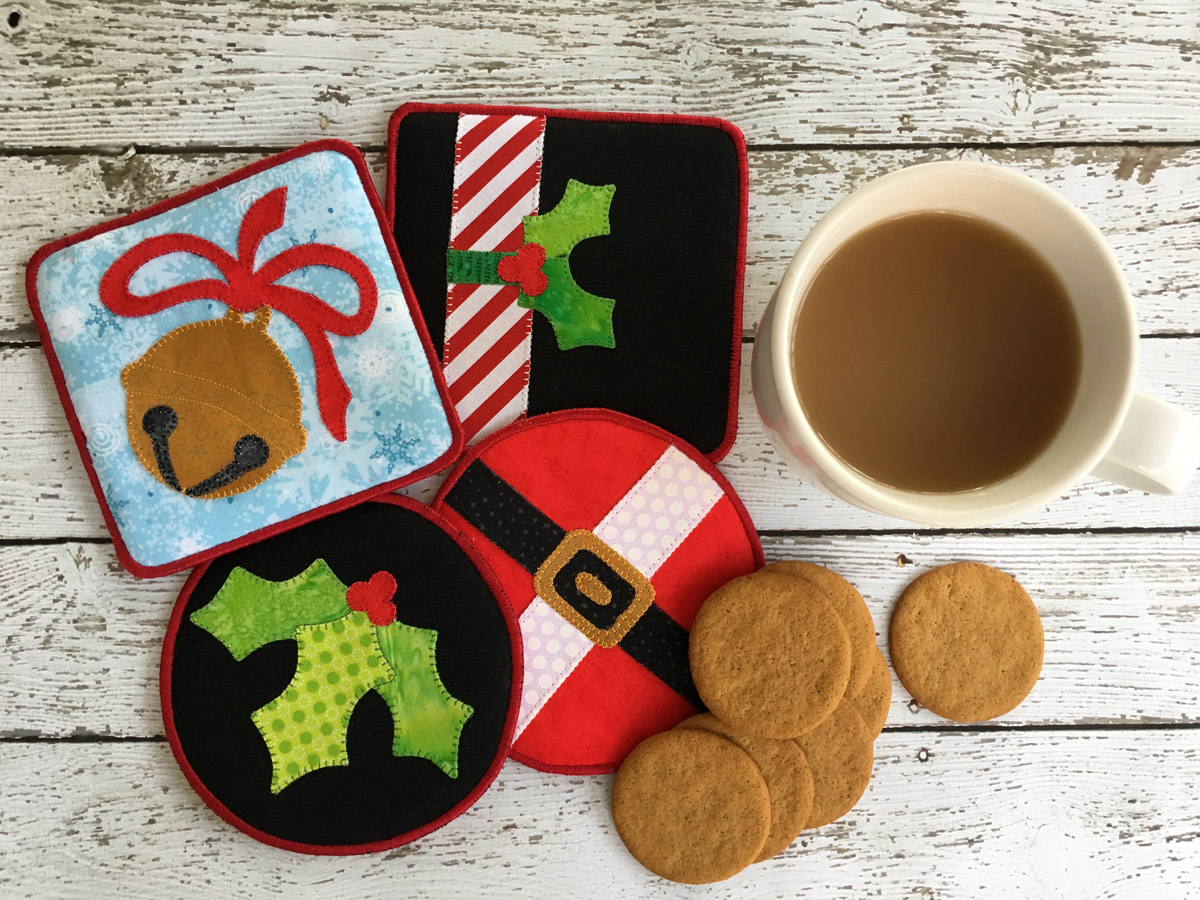
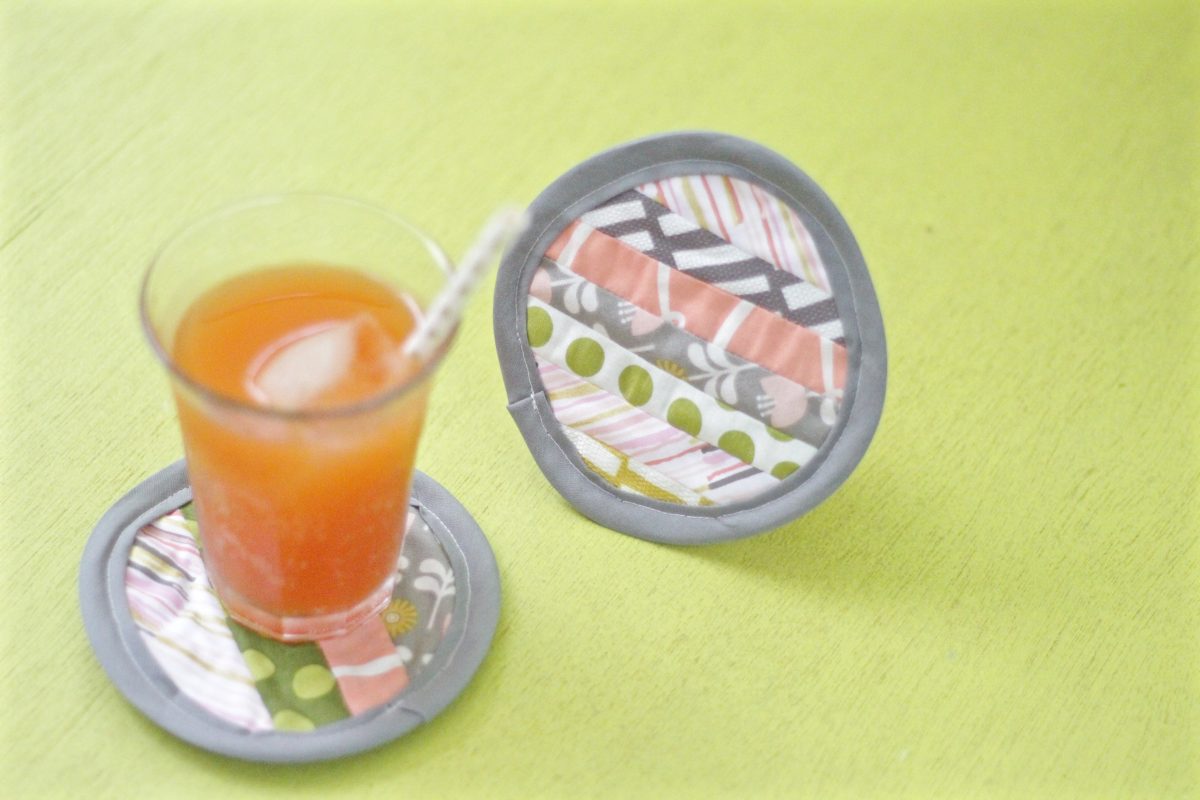
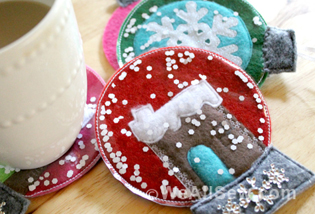
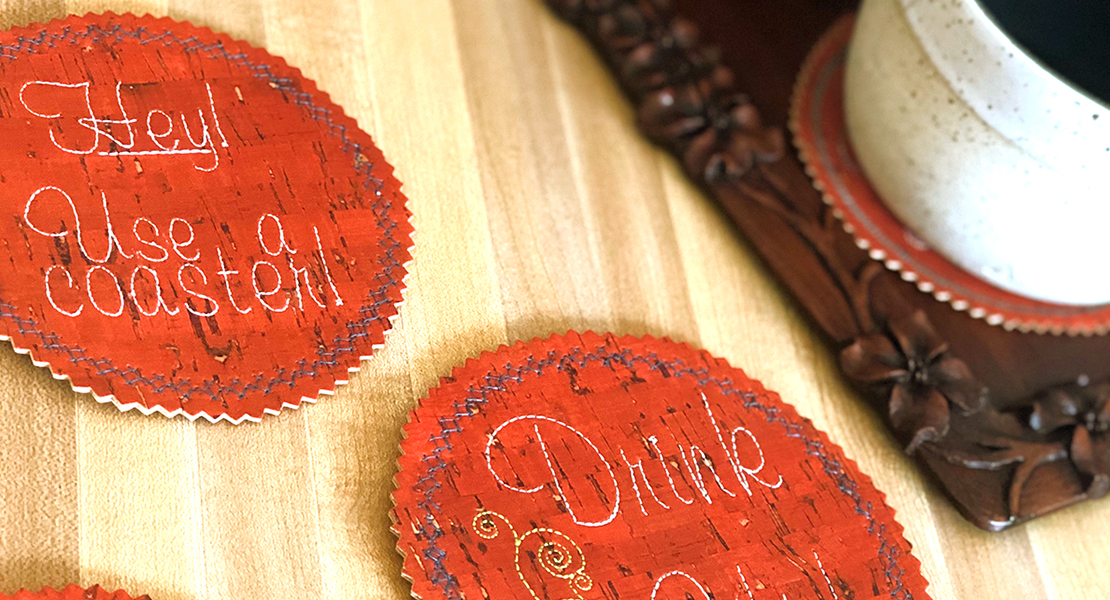
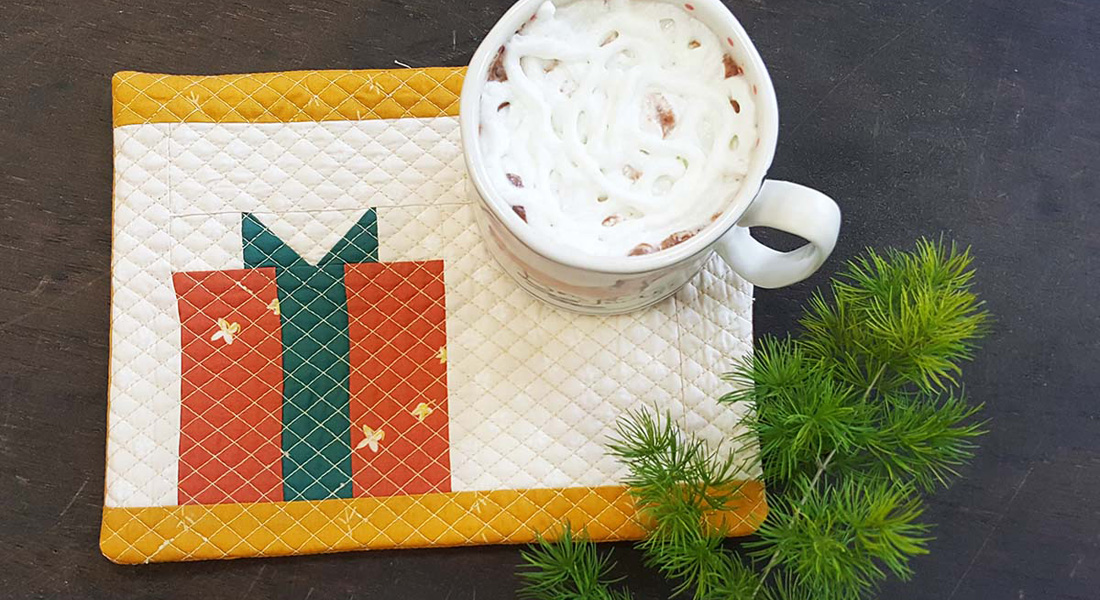
Holiday Coasters
Christmas is around the corner and I have a little cute project for all of you. If you want to transform your Christmas dinner table in the cutest way possible, get the instructions below to create these adorable holiday coasters. I know that the majority of you have countless of fabric scraps and don’t know what to do with them. Well, this adorable project will teach you how to get the best use out of them so that they don’t go to waste!
Materials to sew the Holiday Coasters
We are going to use fabric scraps; in my case I used scraps from projects using Heartland Fabrics.
- Pat Bravo HRT-85300 Fabric A
- Pat Bravo HRT-85303 Fabric B
- Pat Bravo HRT-85308 Fabric C
- Pat Bravo HRT-85307 Fabric D
- Pat Bravo HRT-85301 Fabric E
- Pure Elements PE-420 Fabric F
- Pat Bravo ESS-II-154 Fabric G
- Pat Bravo ESS-II-254 Fabric H
- Par Bravo HRT-95309 Fabric I
- 1/2 yard of batting
- Universal needles, size 80/12
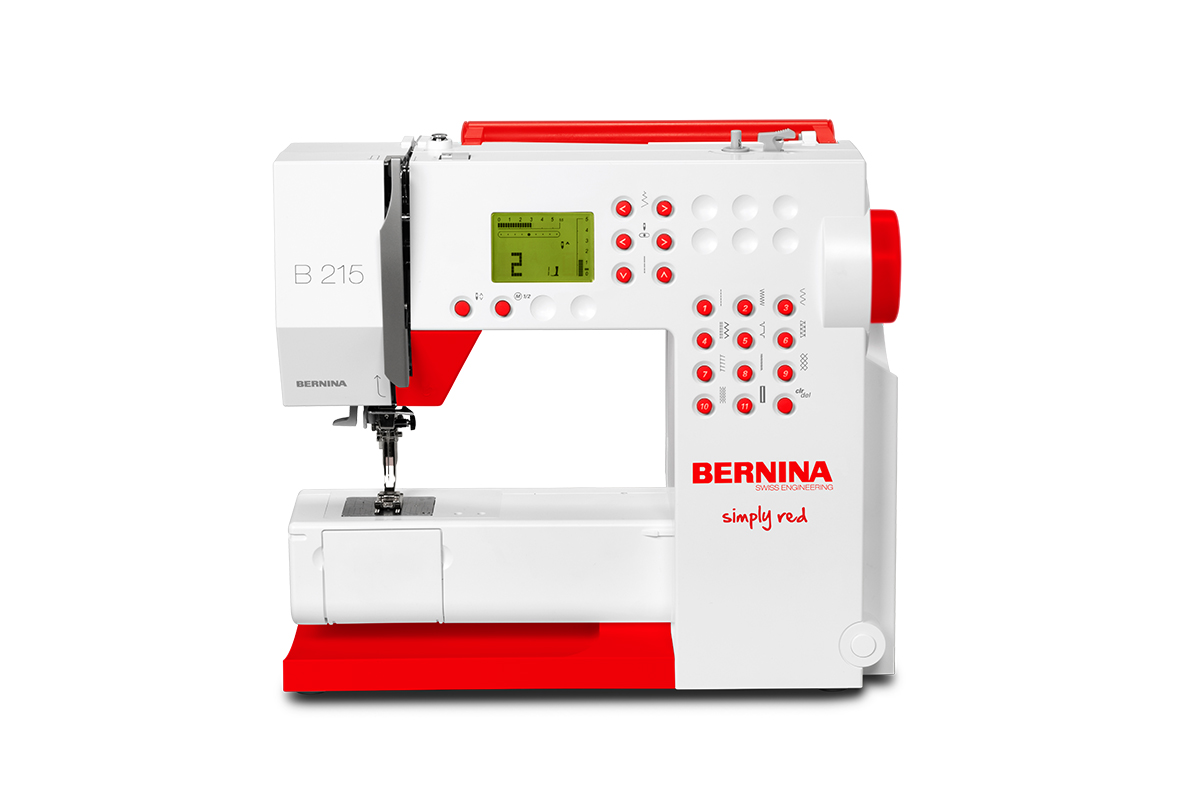
- Your sewing machine and embroidery machine: I sew on a BERNINA 790
- All-purpose presser foot (BERNINA Reverse Pattern Foot #1/1C/1D)
- AURIFIL cotton thread #2311 and #4020
- Erasable pen
- Download the printable template for the Holiay Coasters Paper Pieced Pattern
Cutting Instructions
- For the paper piecing, you will be using whatever fabric scraps that you have!
- Cut 1 (one) 5 1/4” by 5 1/4” of Fabric D
- Cut 1 (one) 5 1/4” by 5 1/4” of Fabric G
- Cut 1 (one) 5 1/4” by 5 1/4” of Fabric H
- Cut 10 (10) 6 1/4” by 6 1/4” of batting
Step 1- Paper Piecing
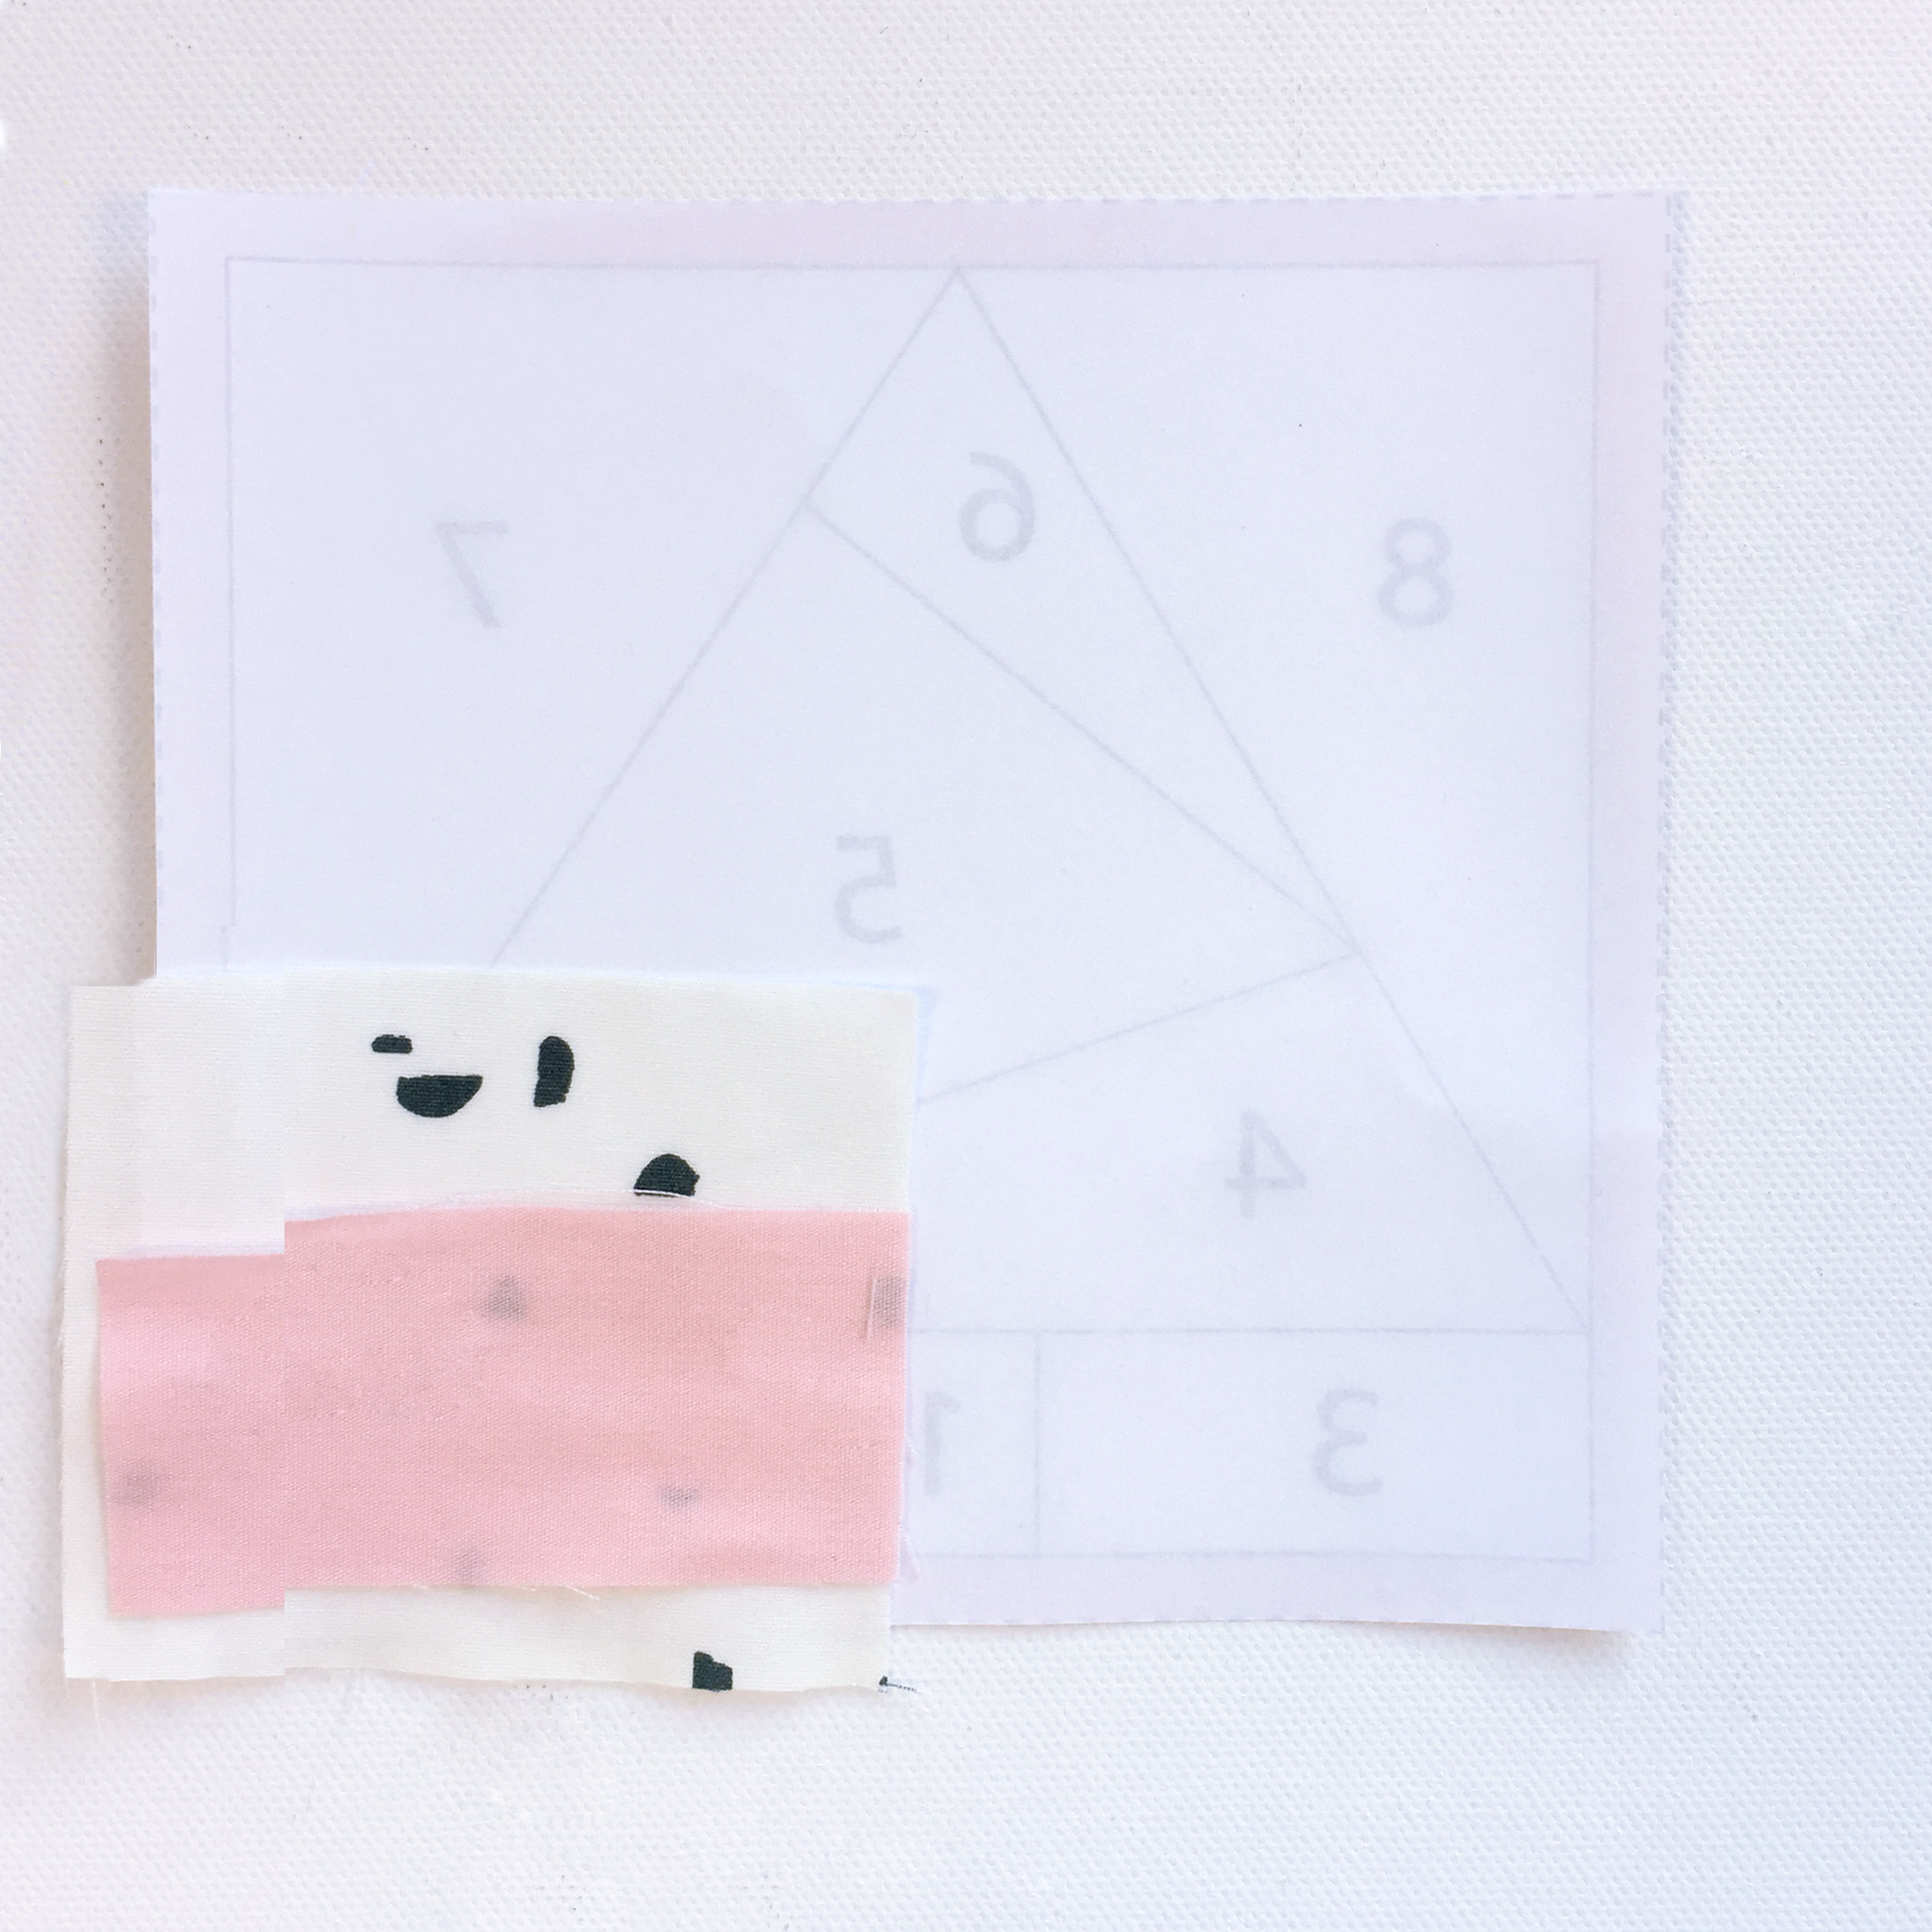
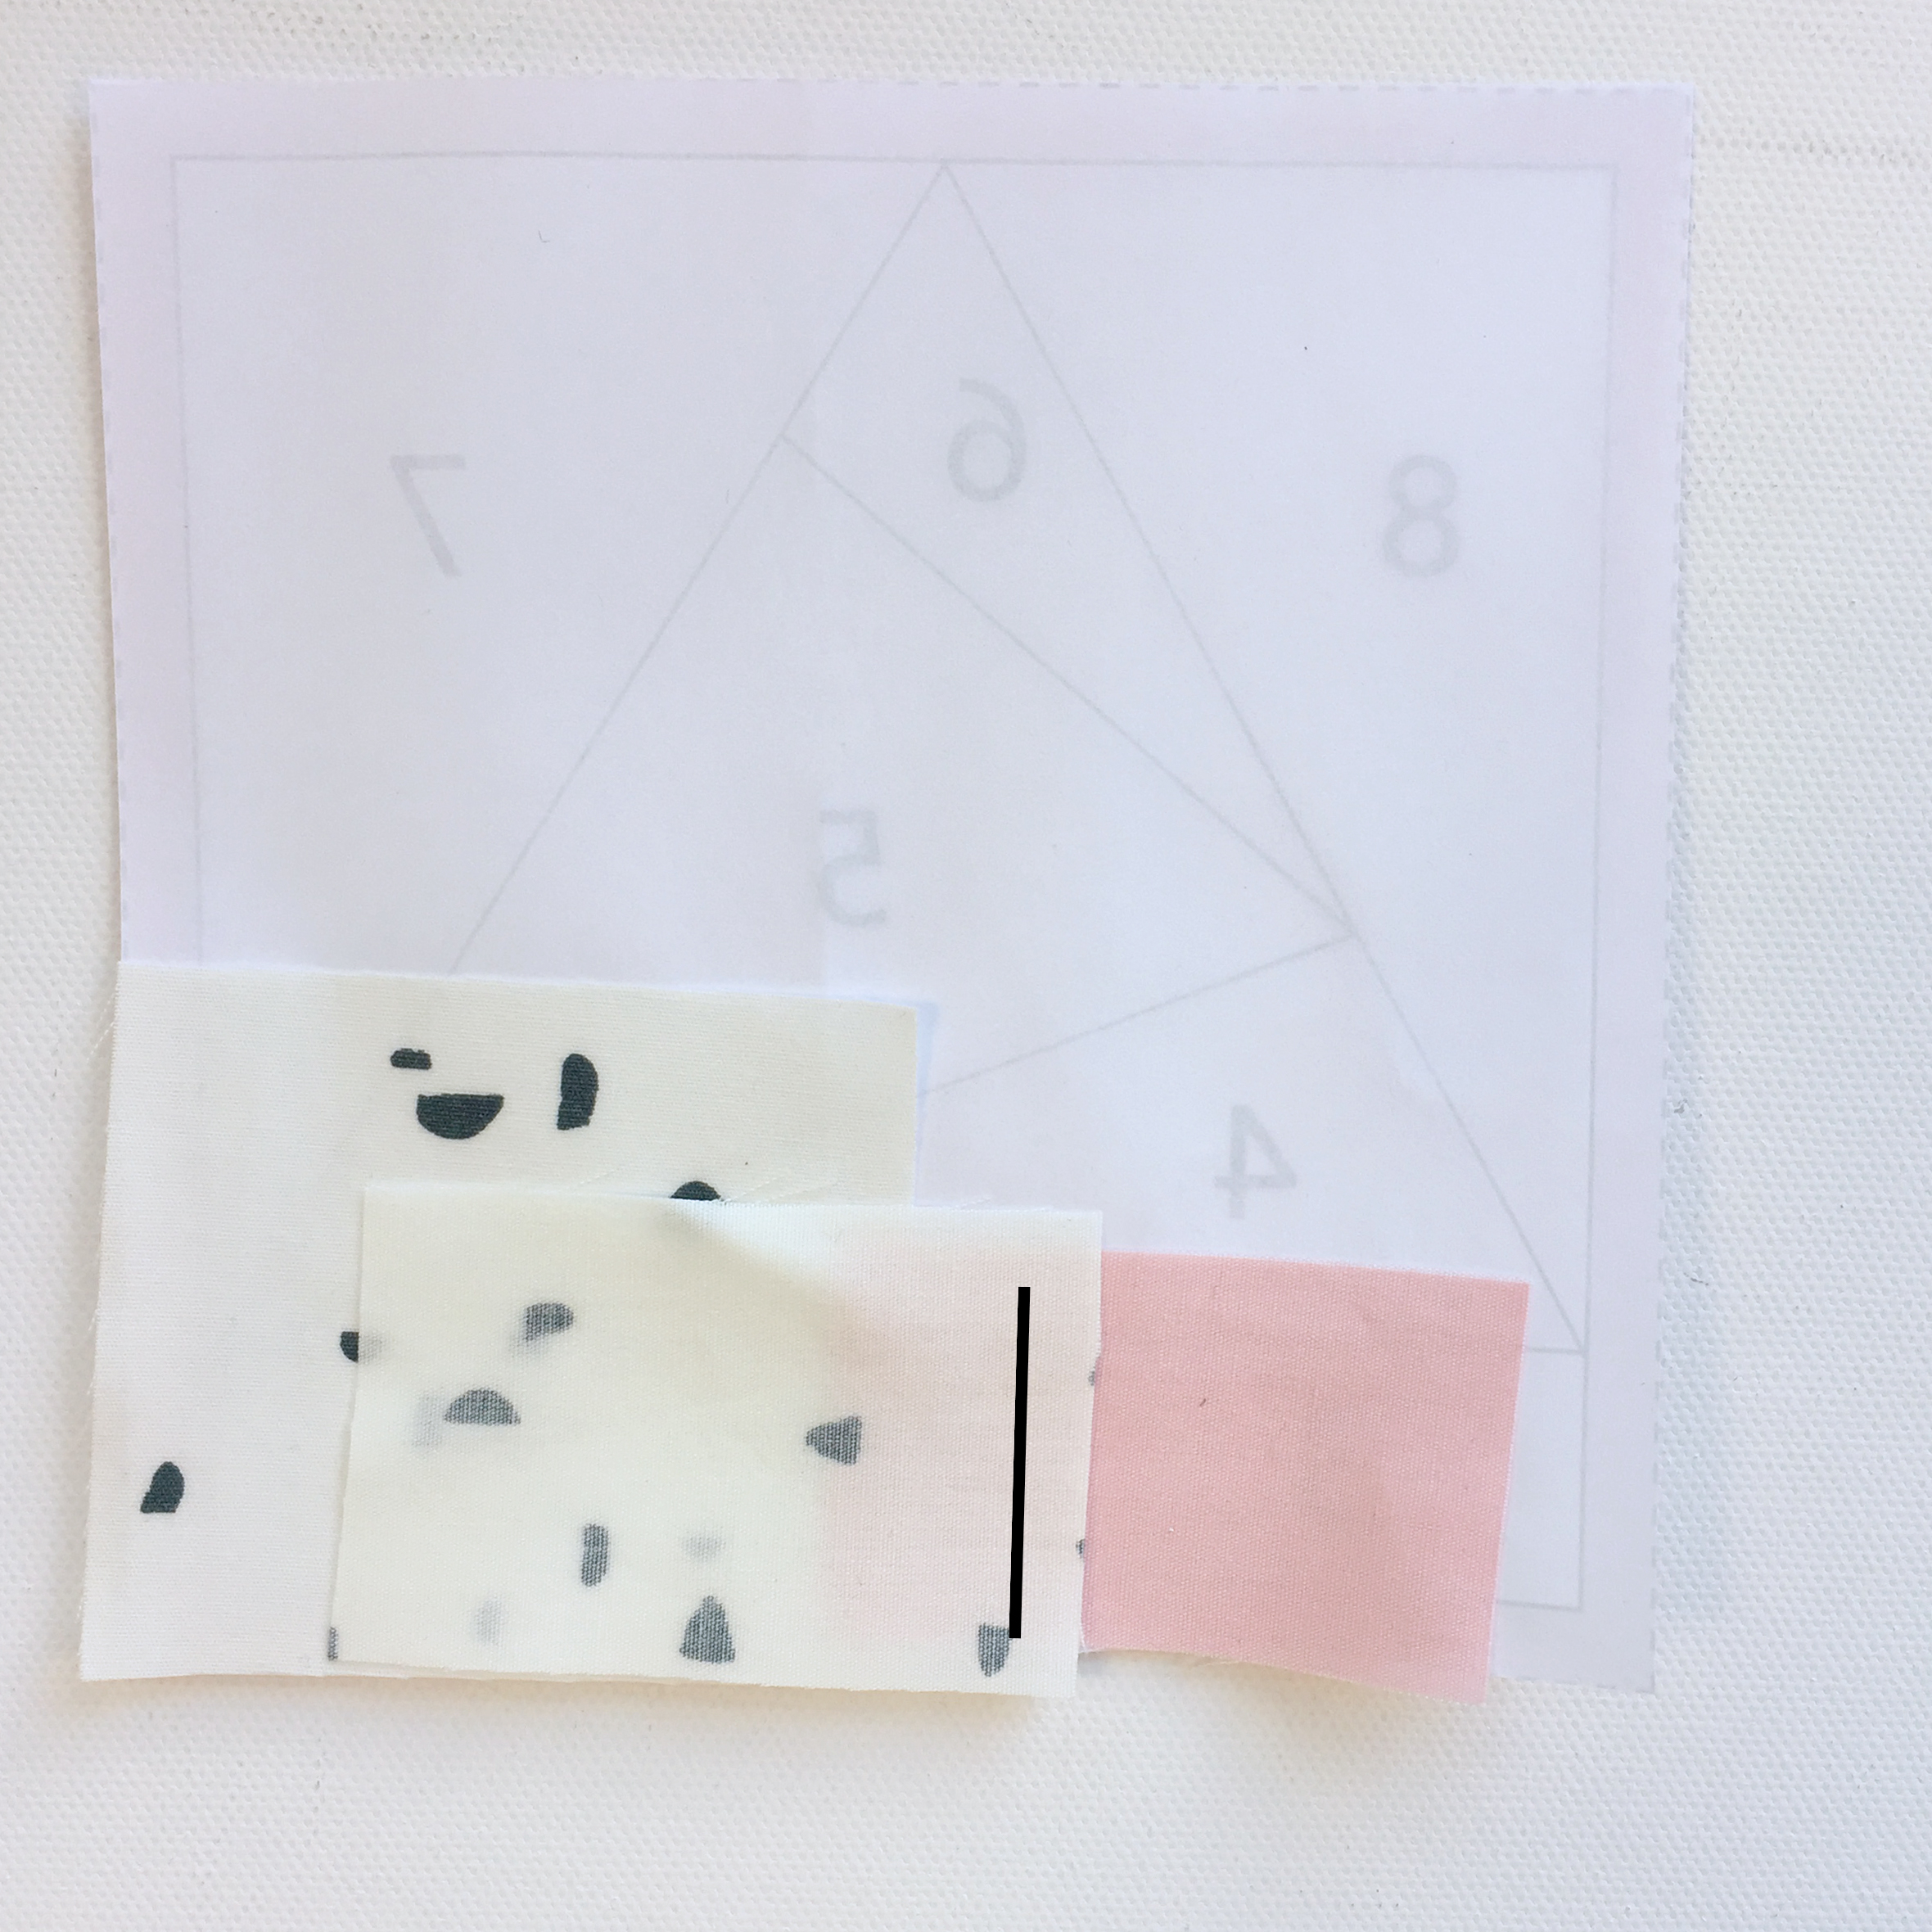
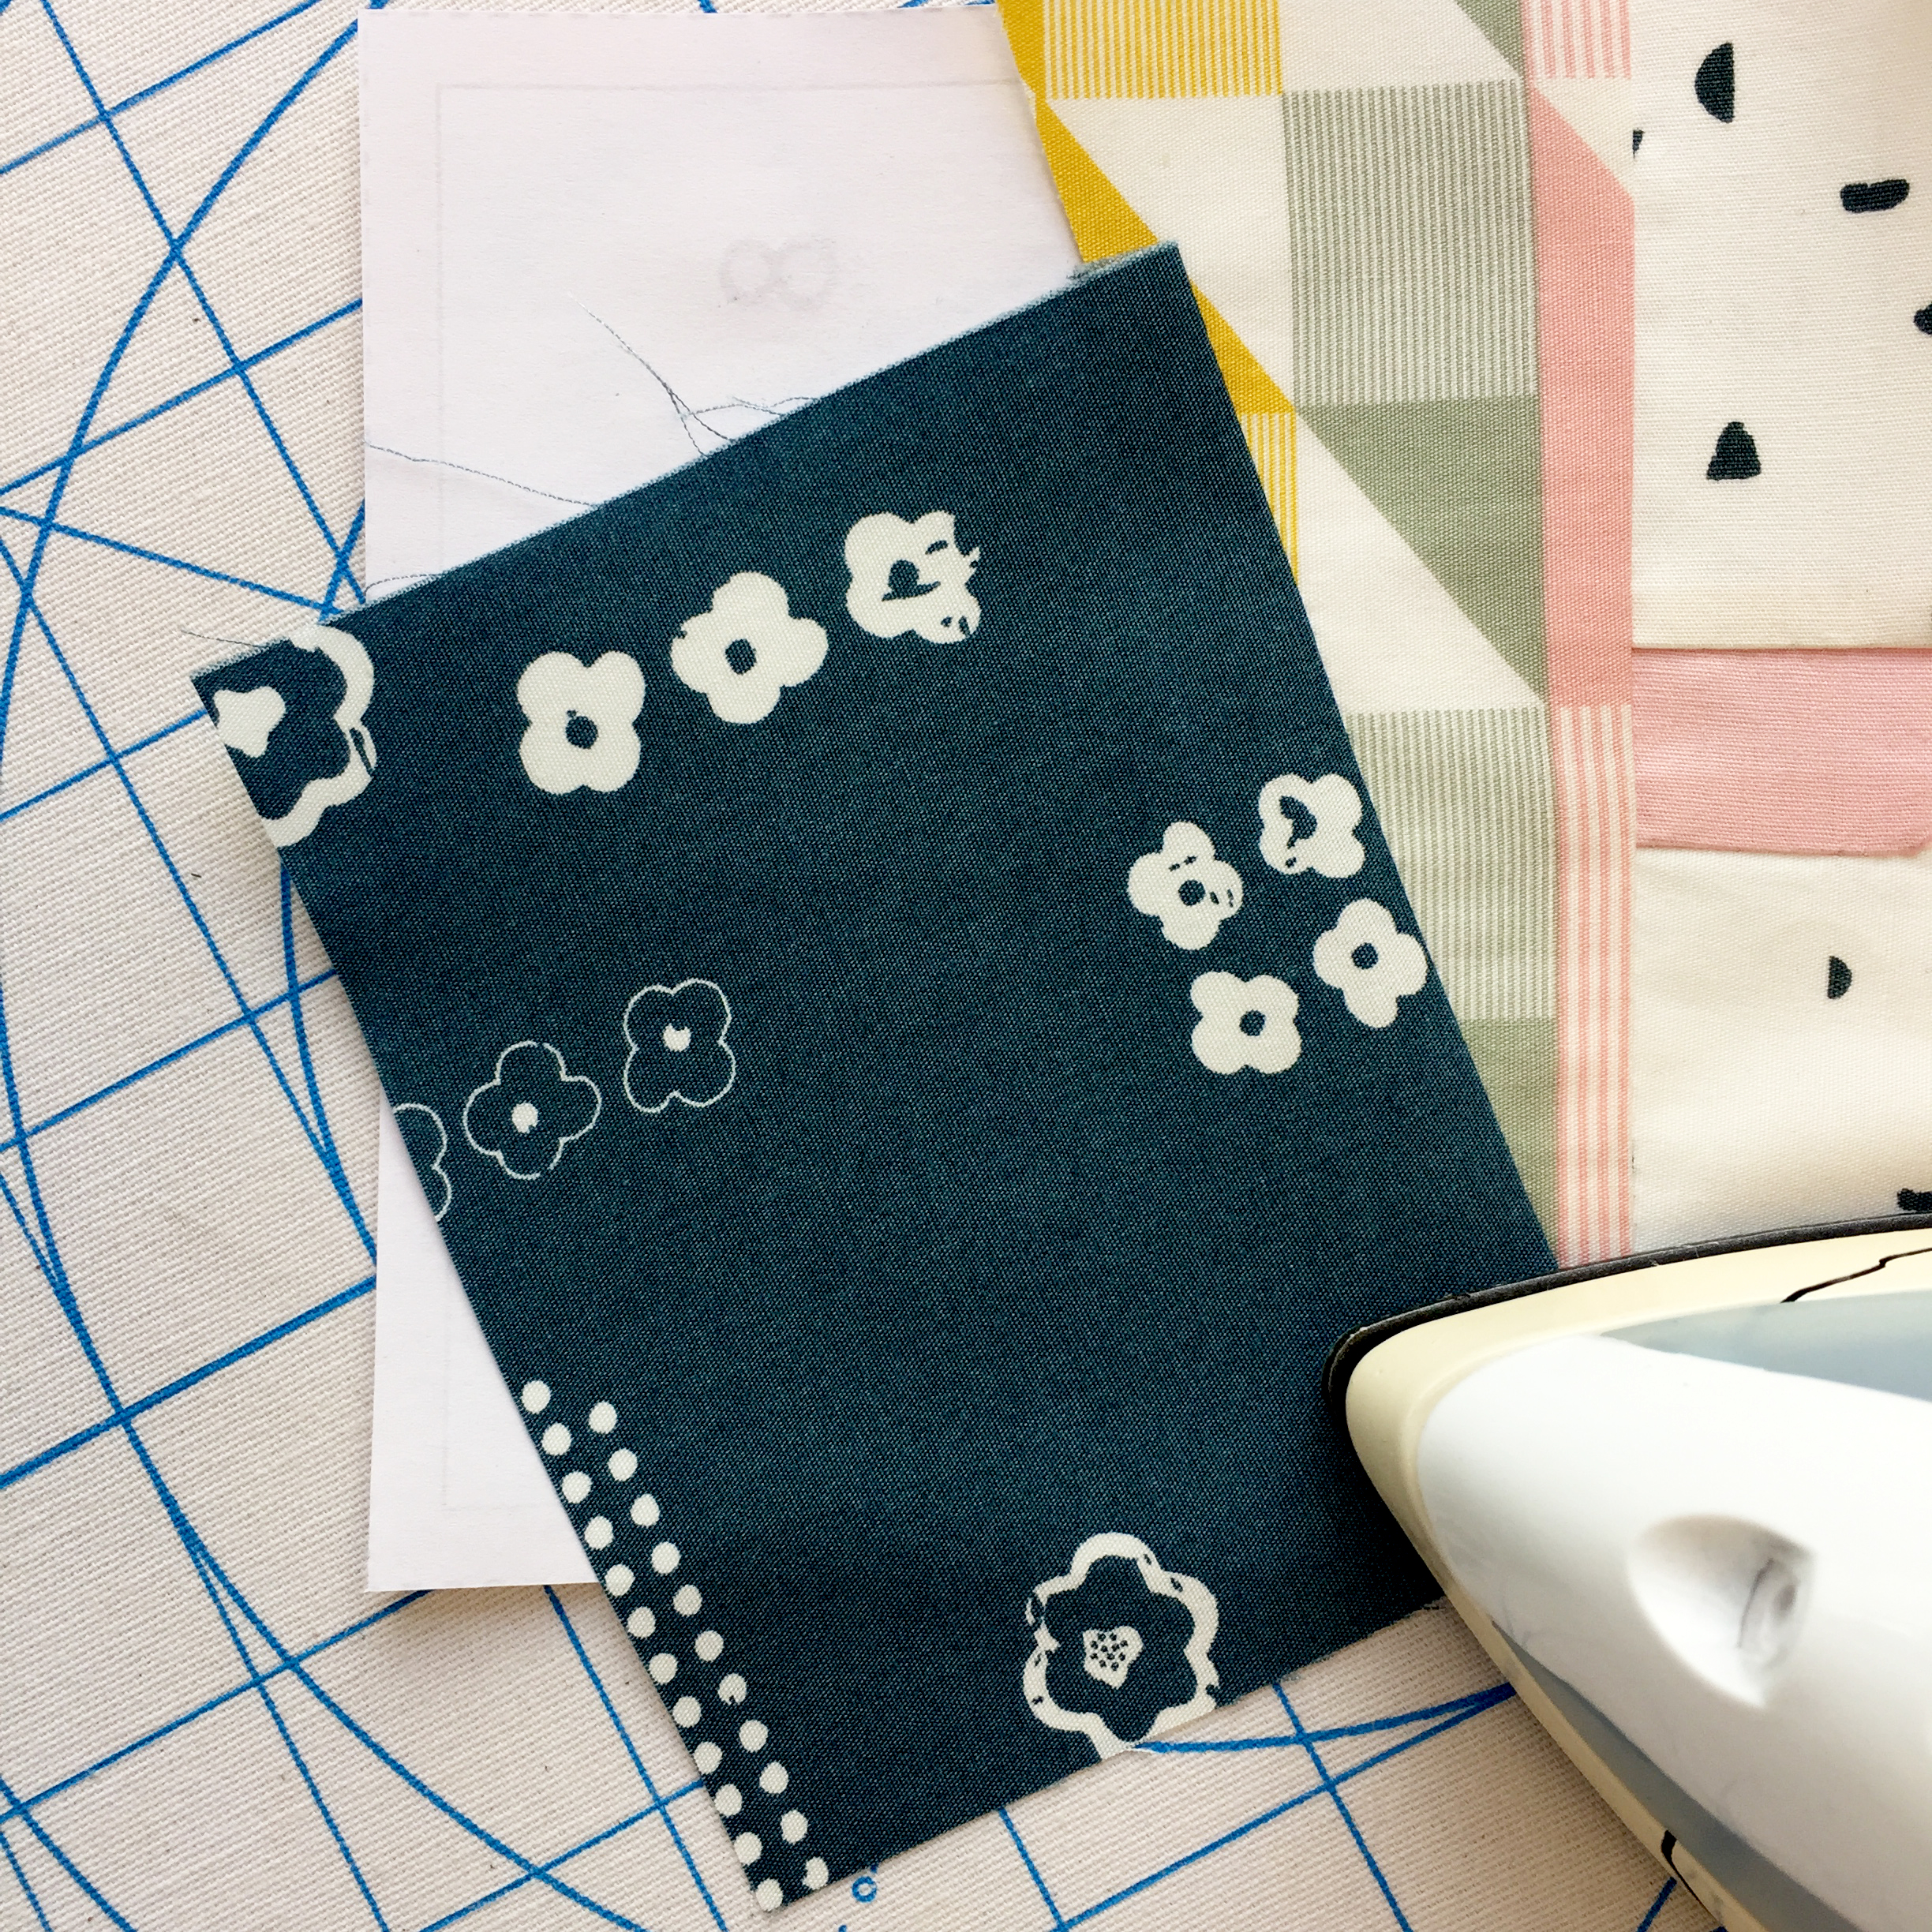
Paper piecing is going to be a bit easier due to my last project How To Make A Paper Pieced Mini where I explained the basics of the technique which is beyond fun! Print out one of the Christmas coasters templates and place Fabric D (right side facing up) on top of Section 2 of the paper piecing pattern. Always make sure that the pieces you are taking from your scraps are bigger than the square that you are going to be sewing. Next, place Fabric F on top of Fabric D. Then grab the template along with the fabrics and place it next to a light, (this is a simple little trick; that way you can see the transparency of the fabric and you can make sure to have a desire seam allowance (1/4”) or more), later on we can cut the extra.
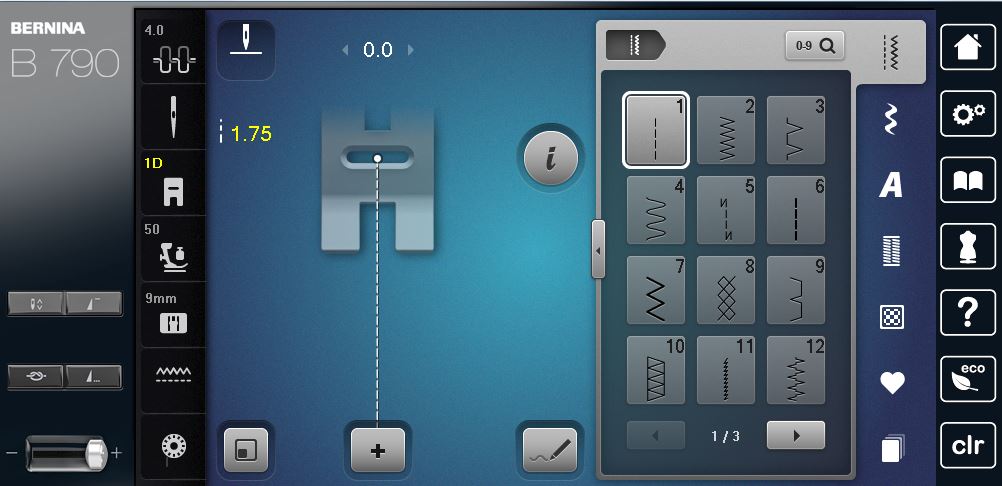
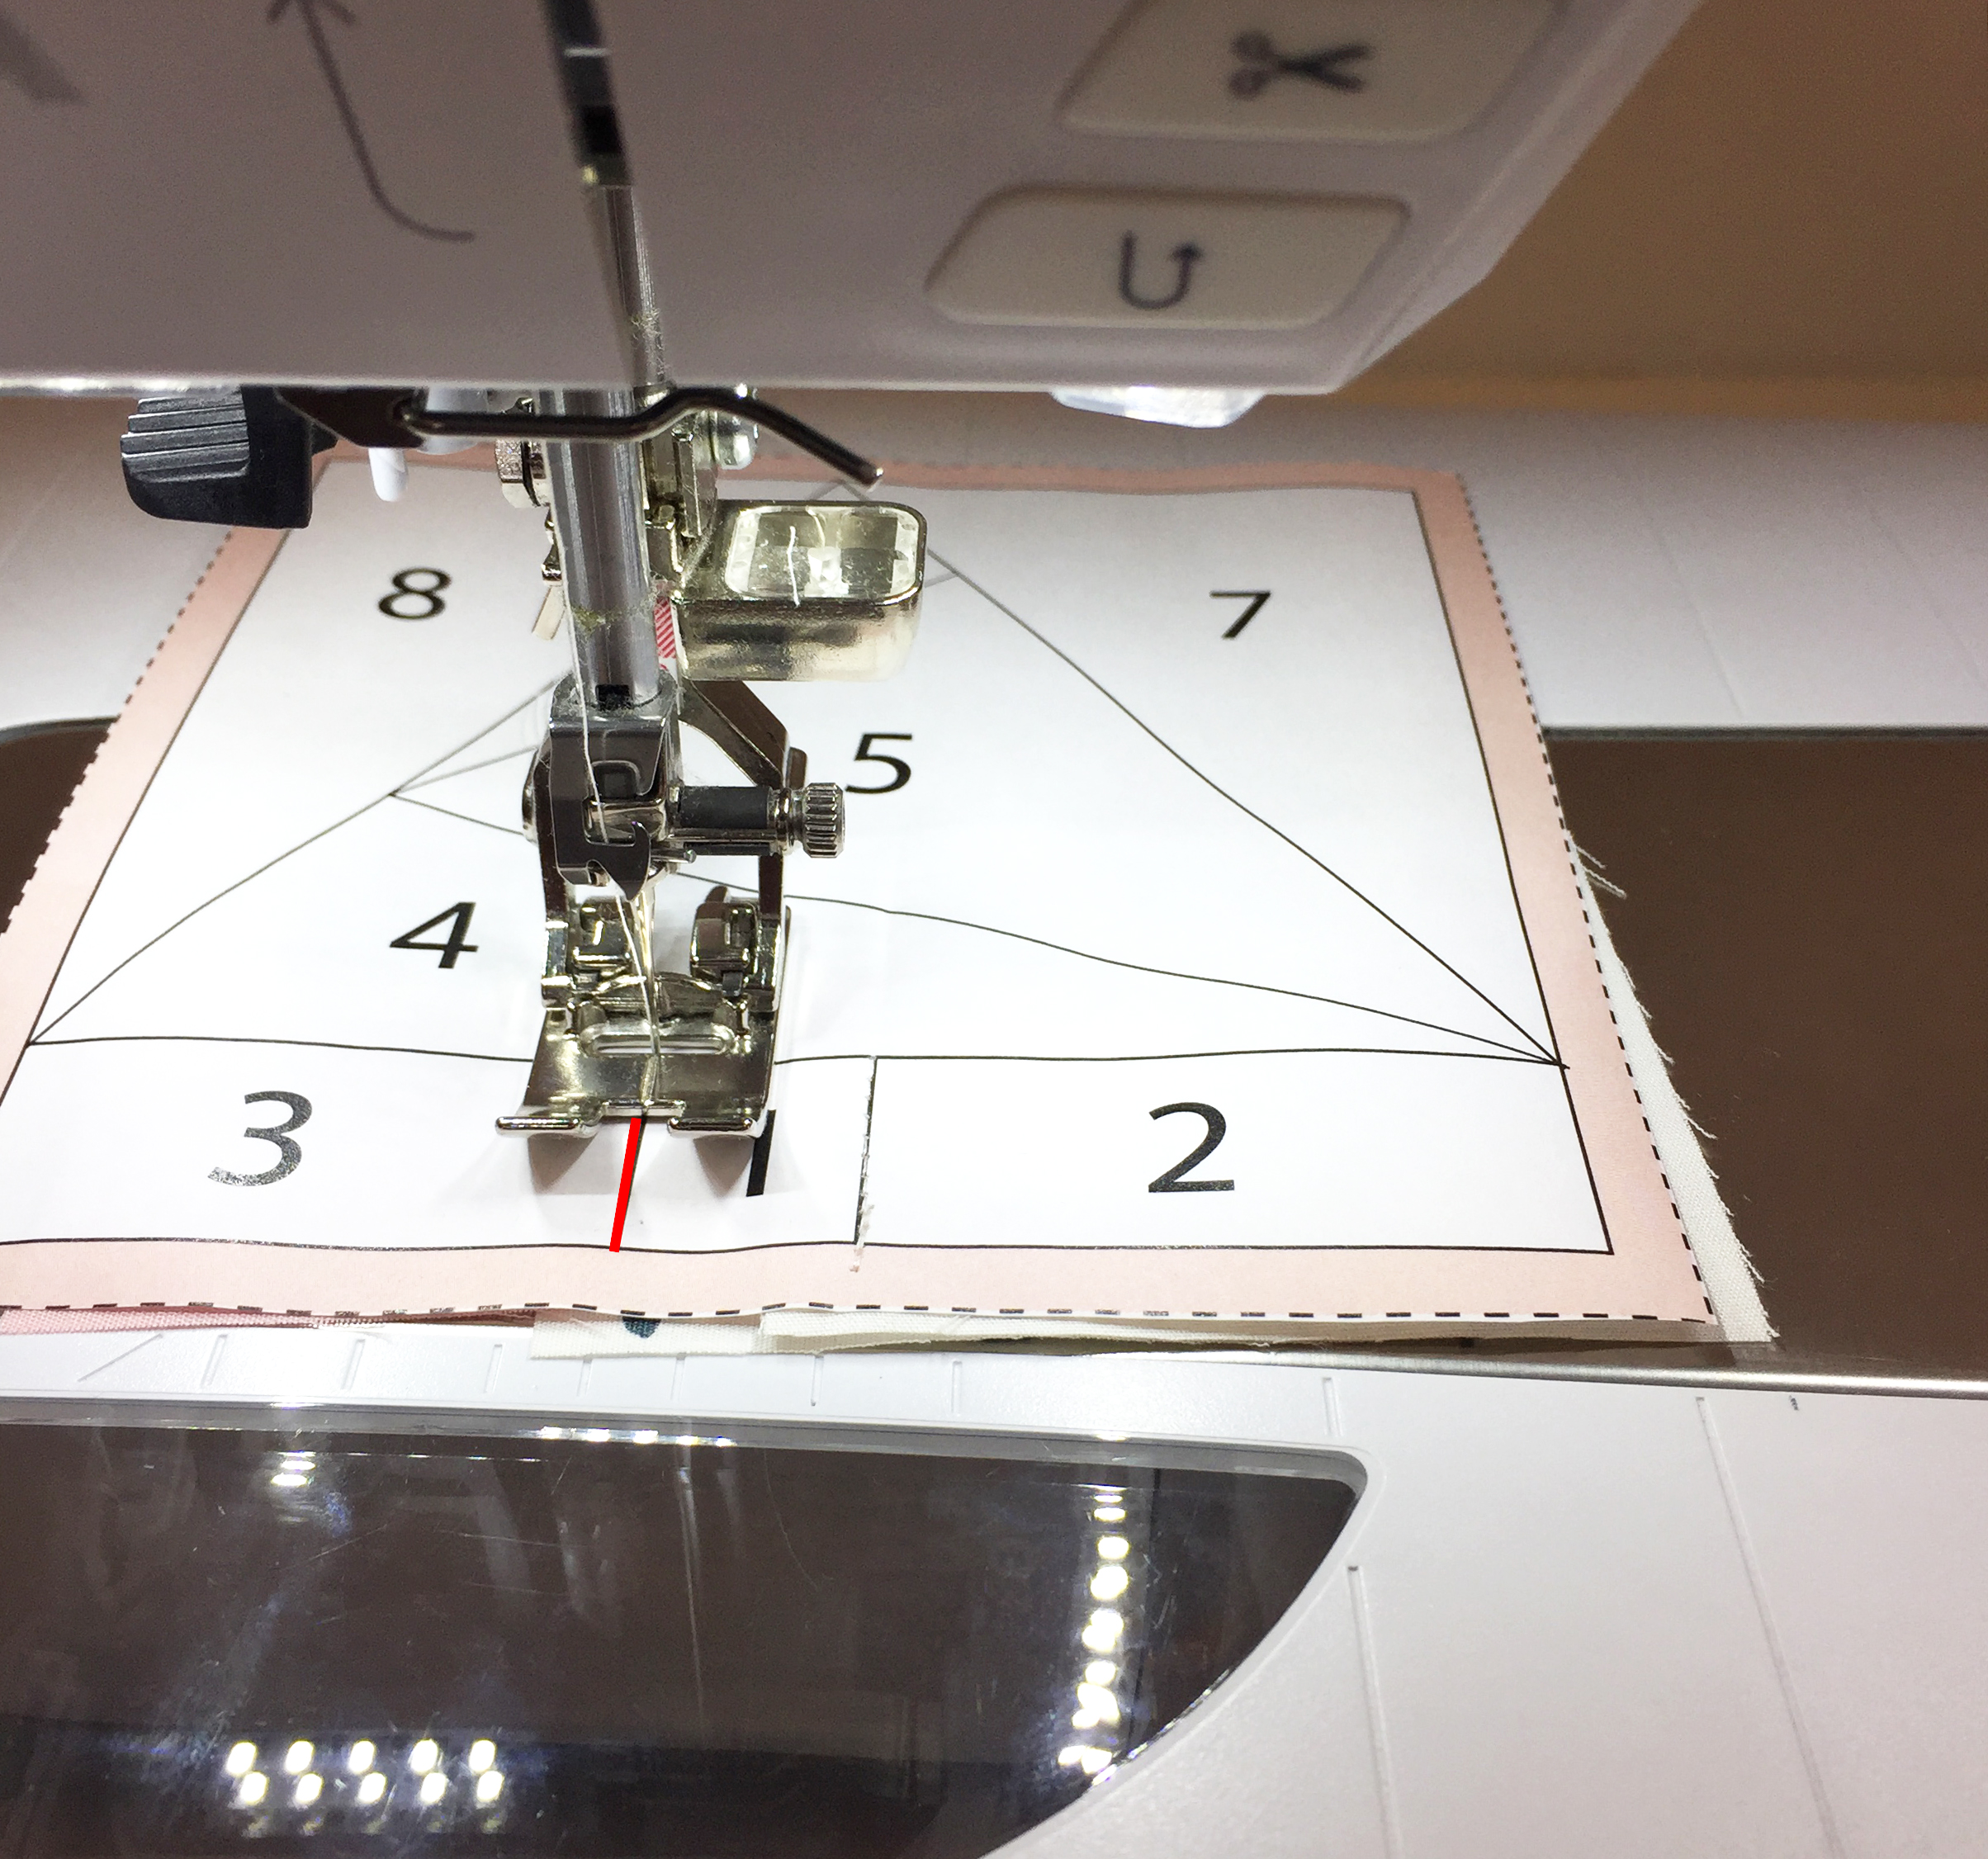
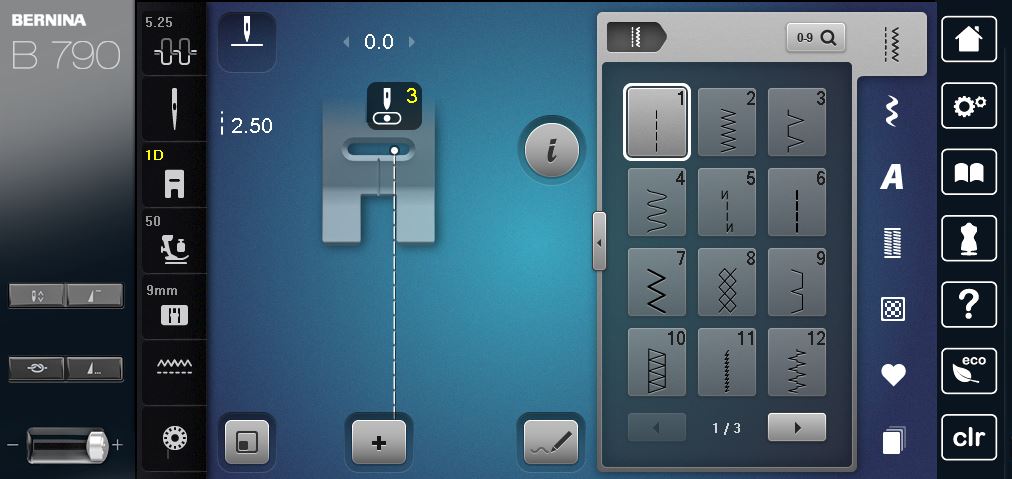
Prep your sewing machine, in my case the BERNINA 790. Use the all-purpose presser foot (BERNINA Reverse Pattern Foot #1/1C/1D) and stitch #1. Make sure to use the Lower Multi-functional Knob and lower the stitch length to 1.75 because this will help us later on to tear off the paper piecing template of the fabric. Use AURIFIL cotton thread #2311.
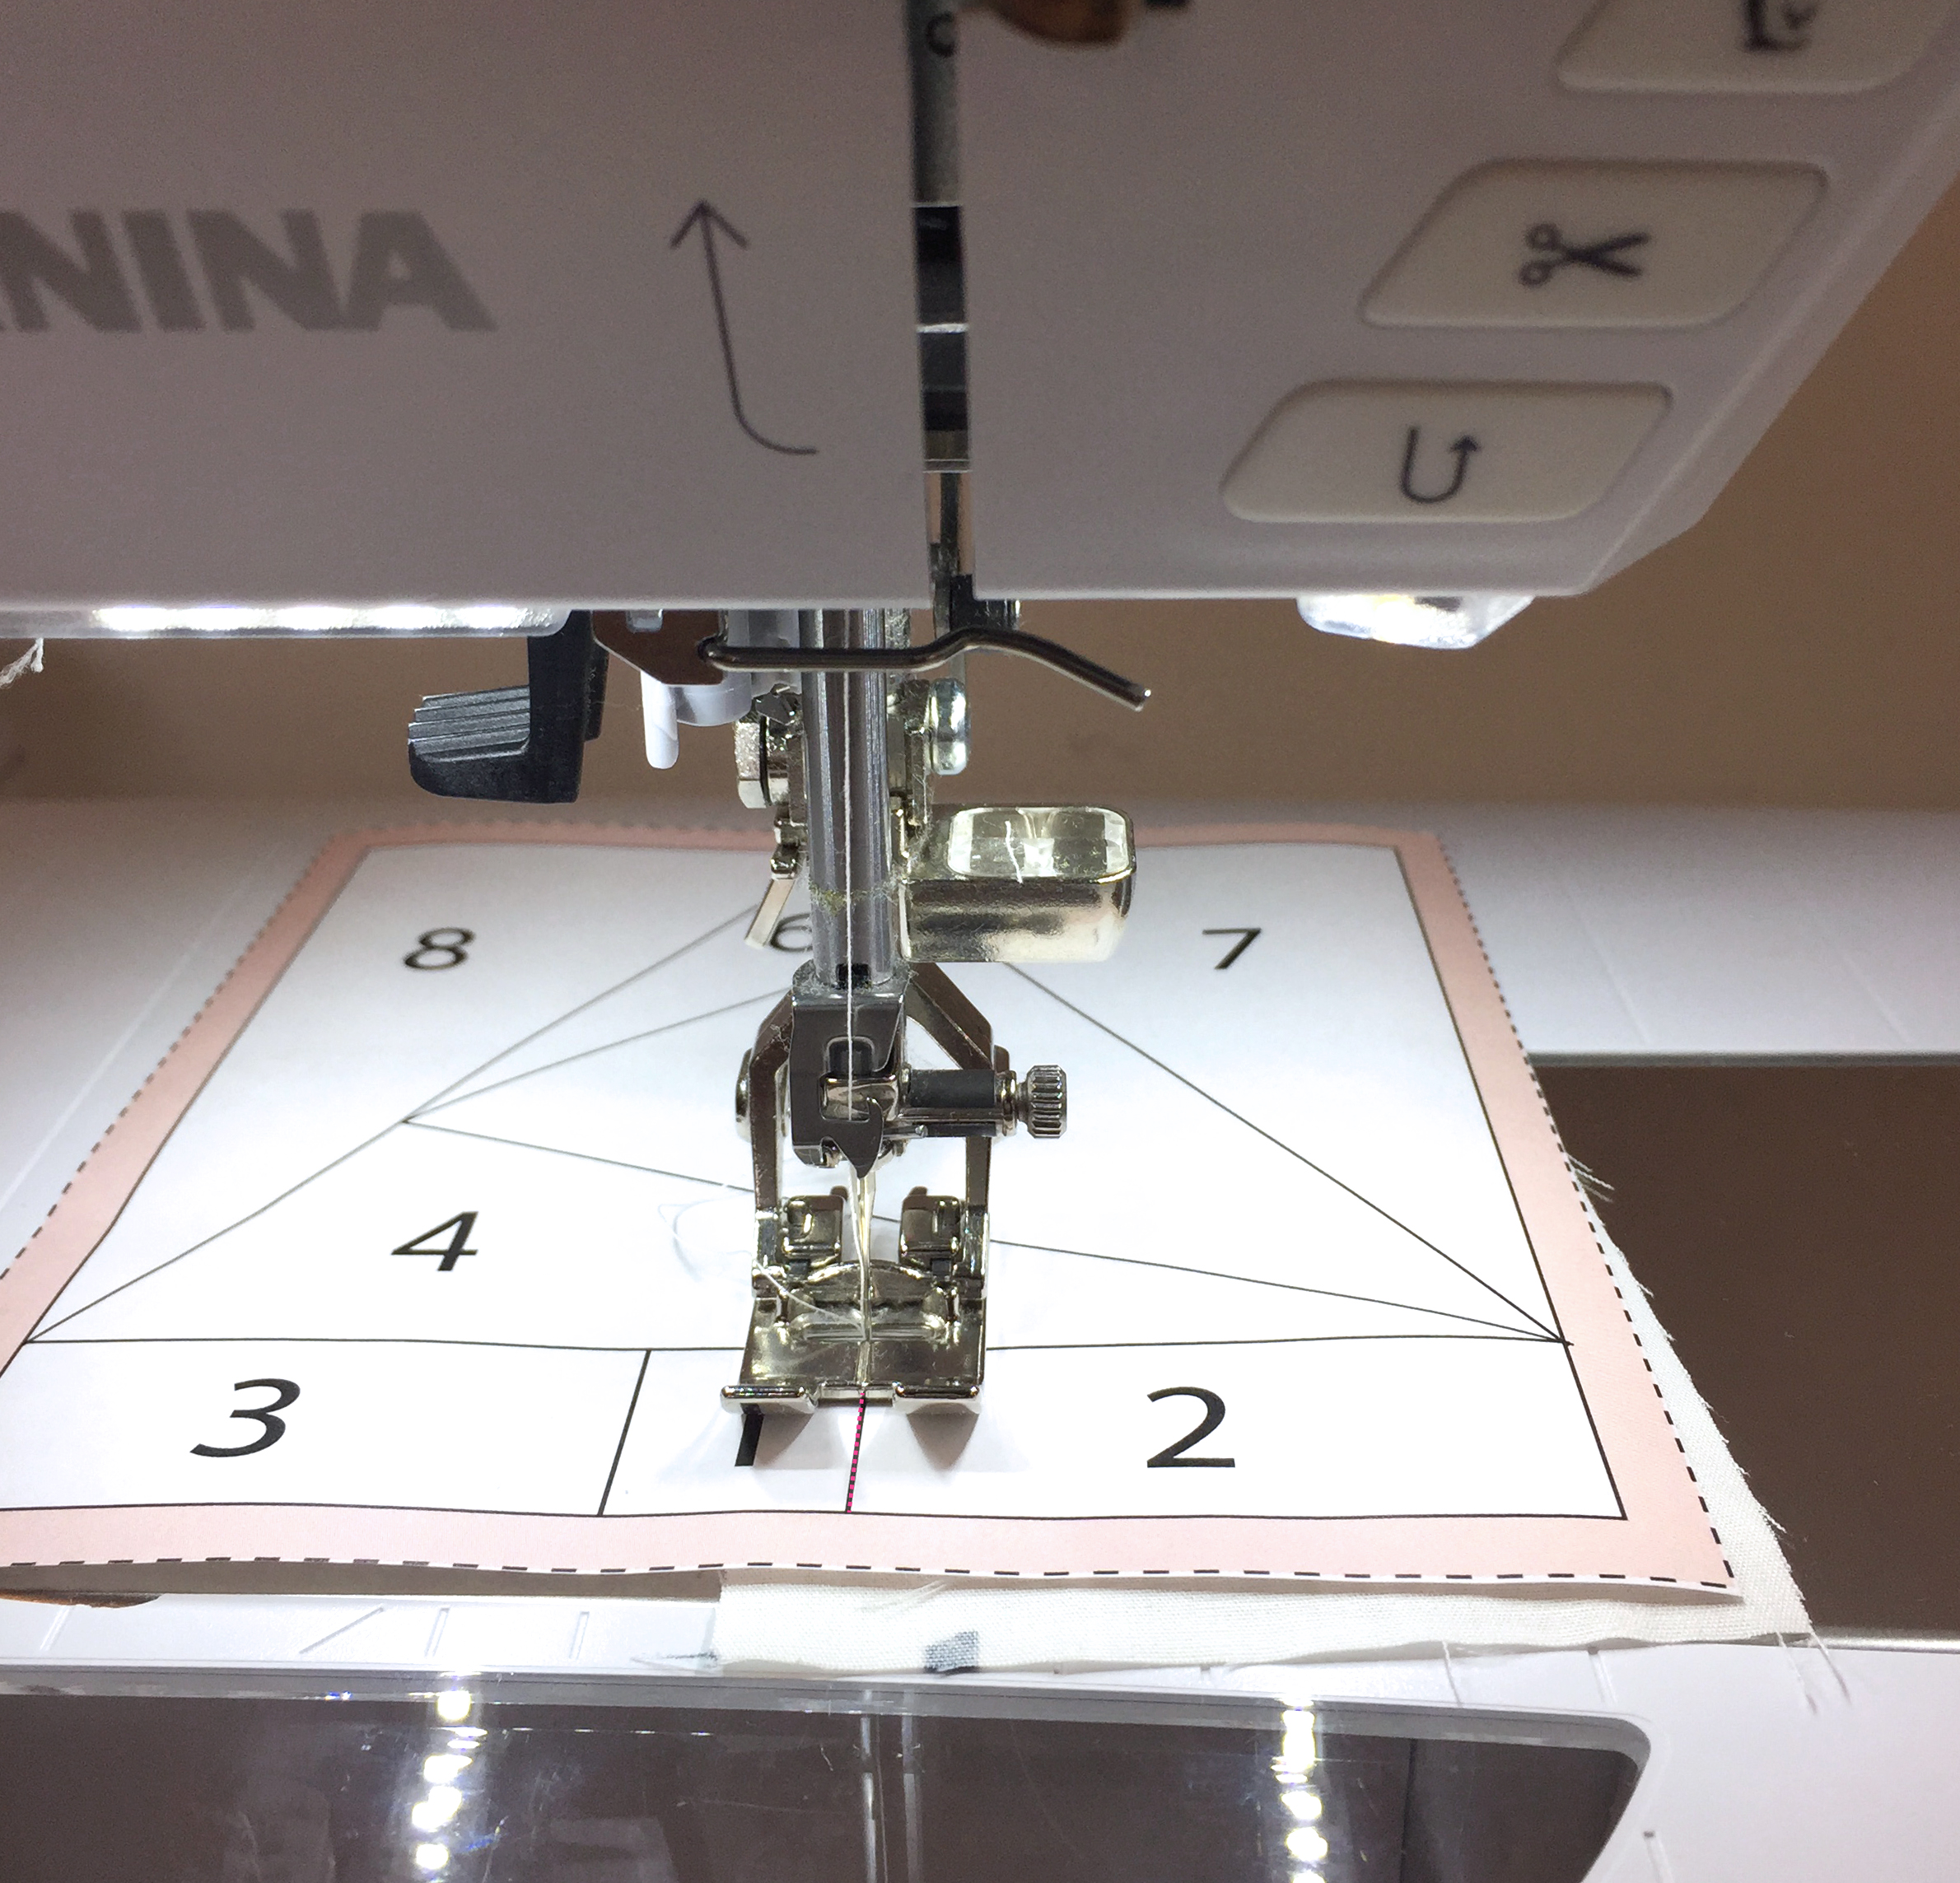
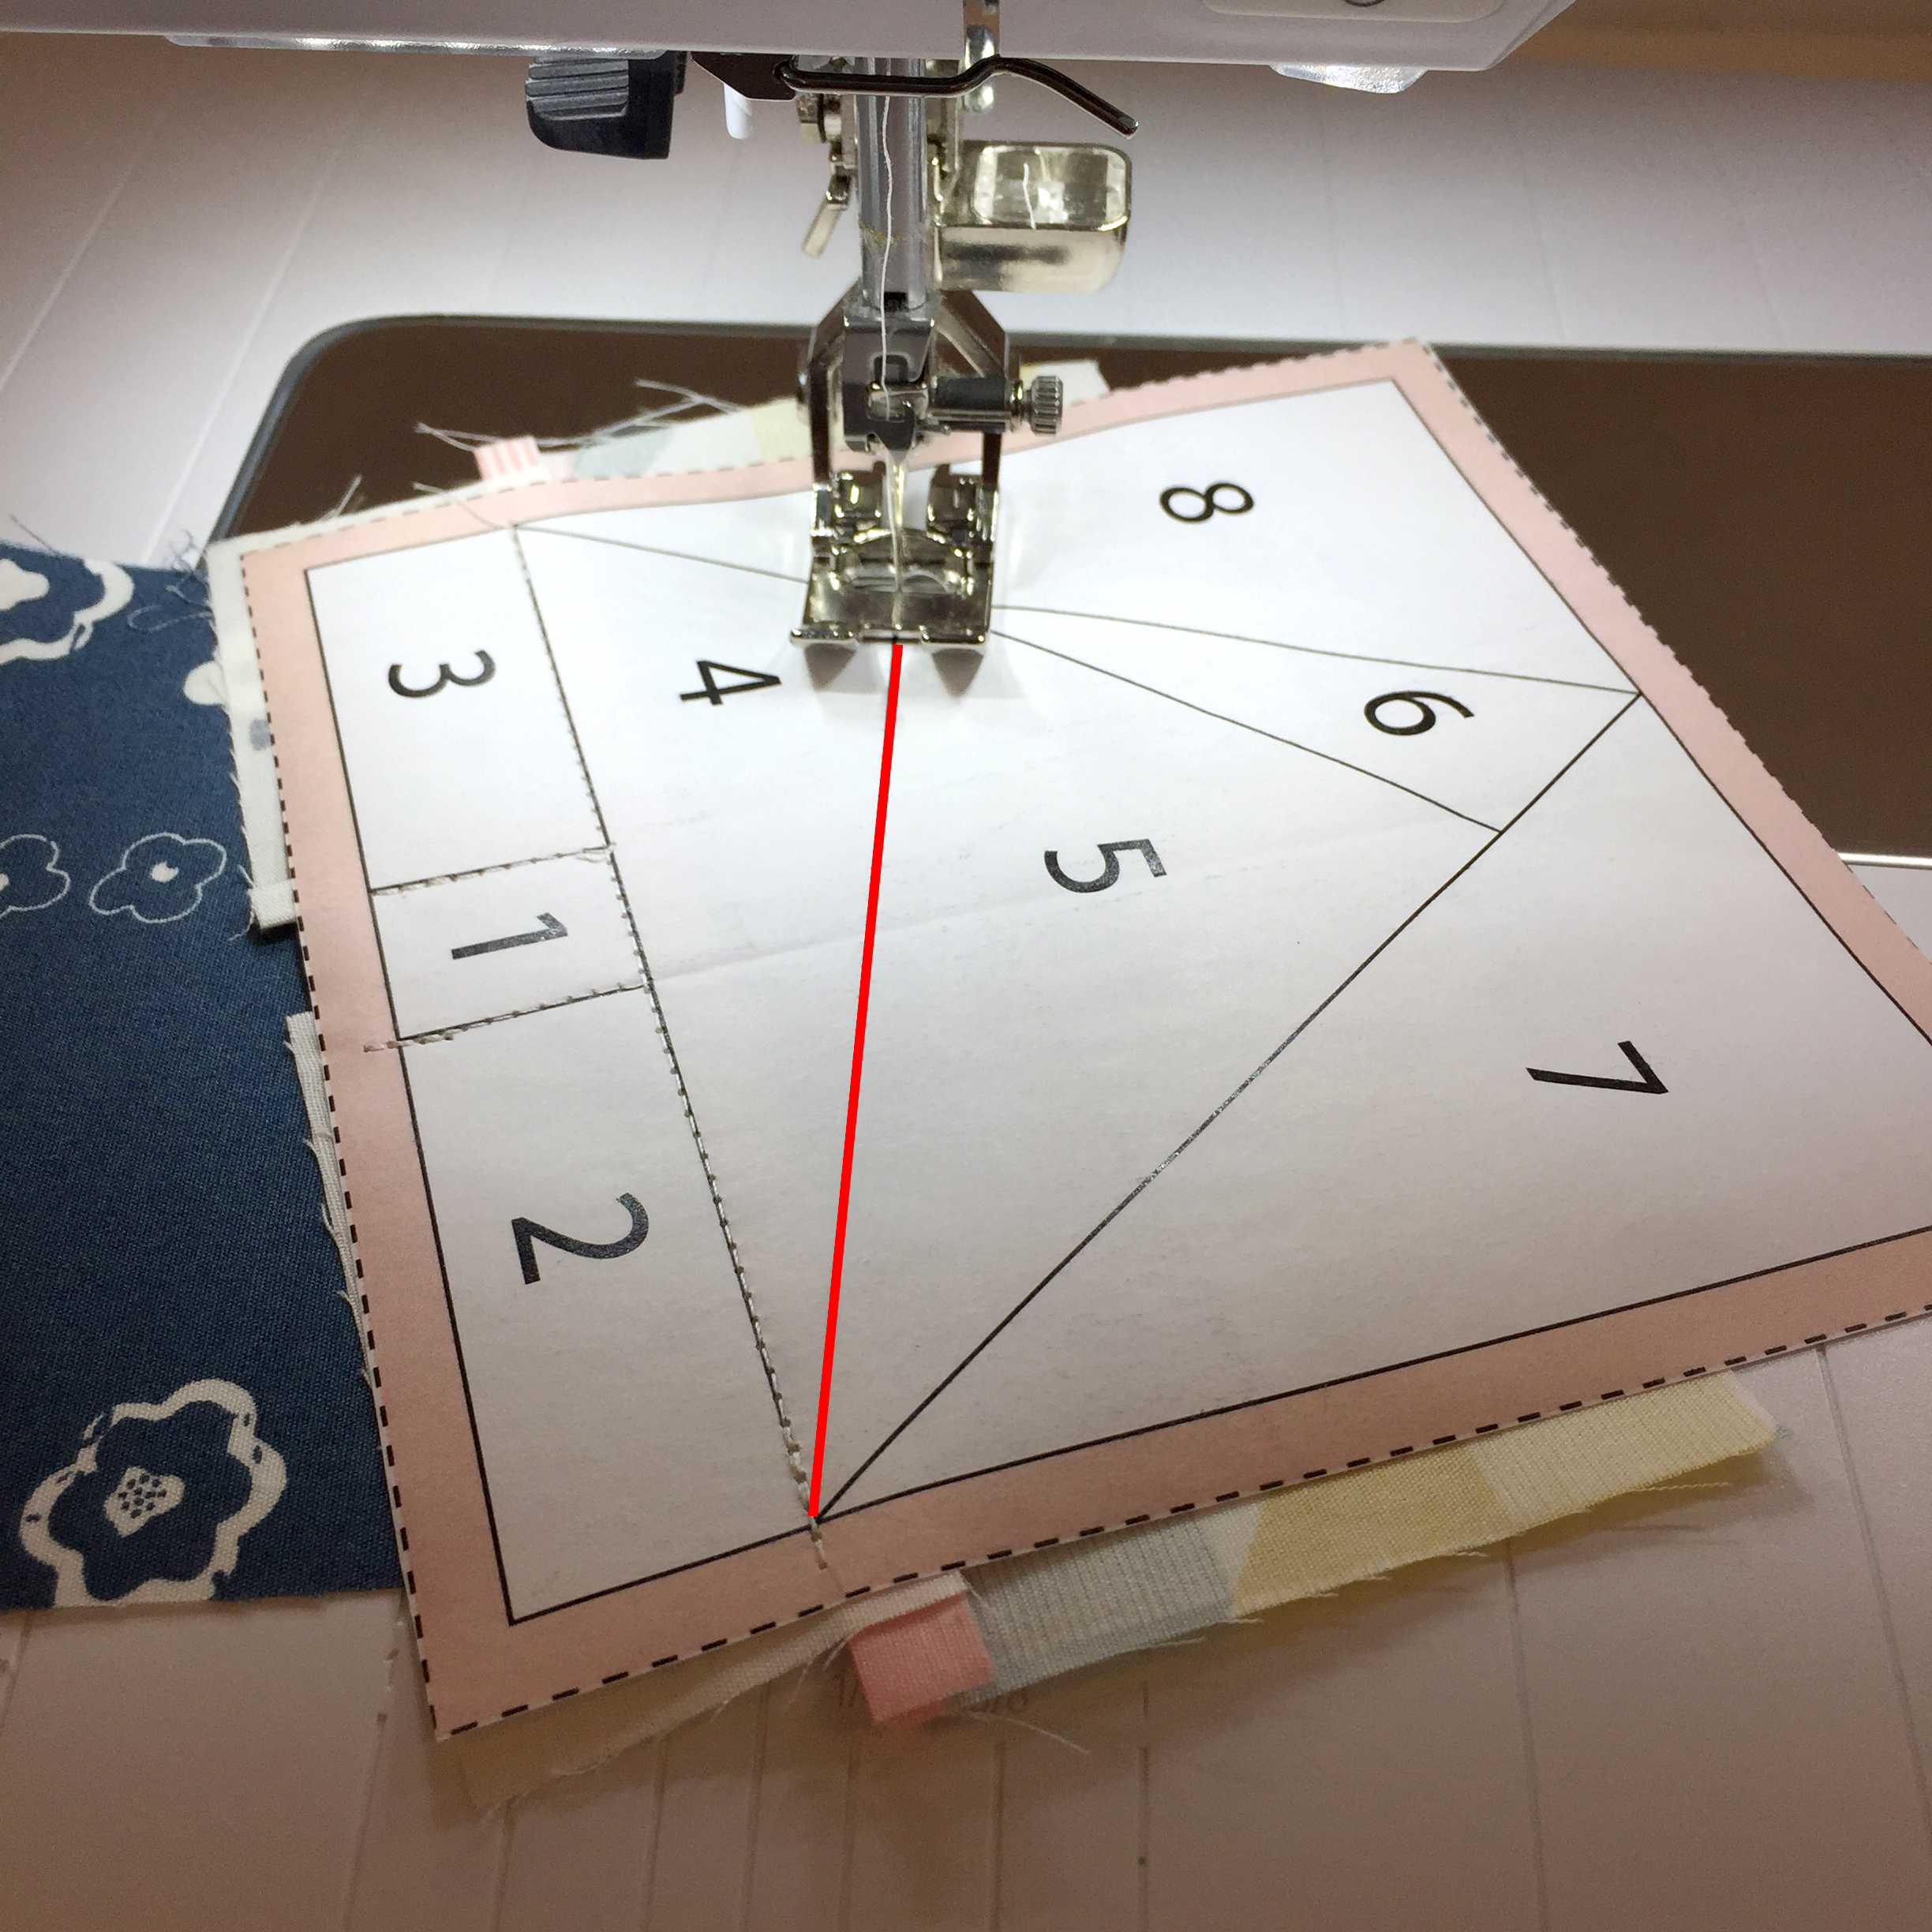
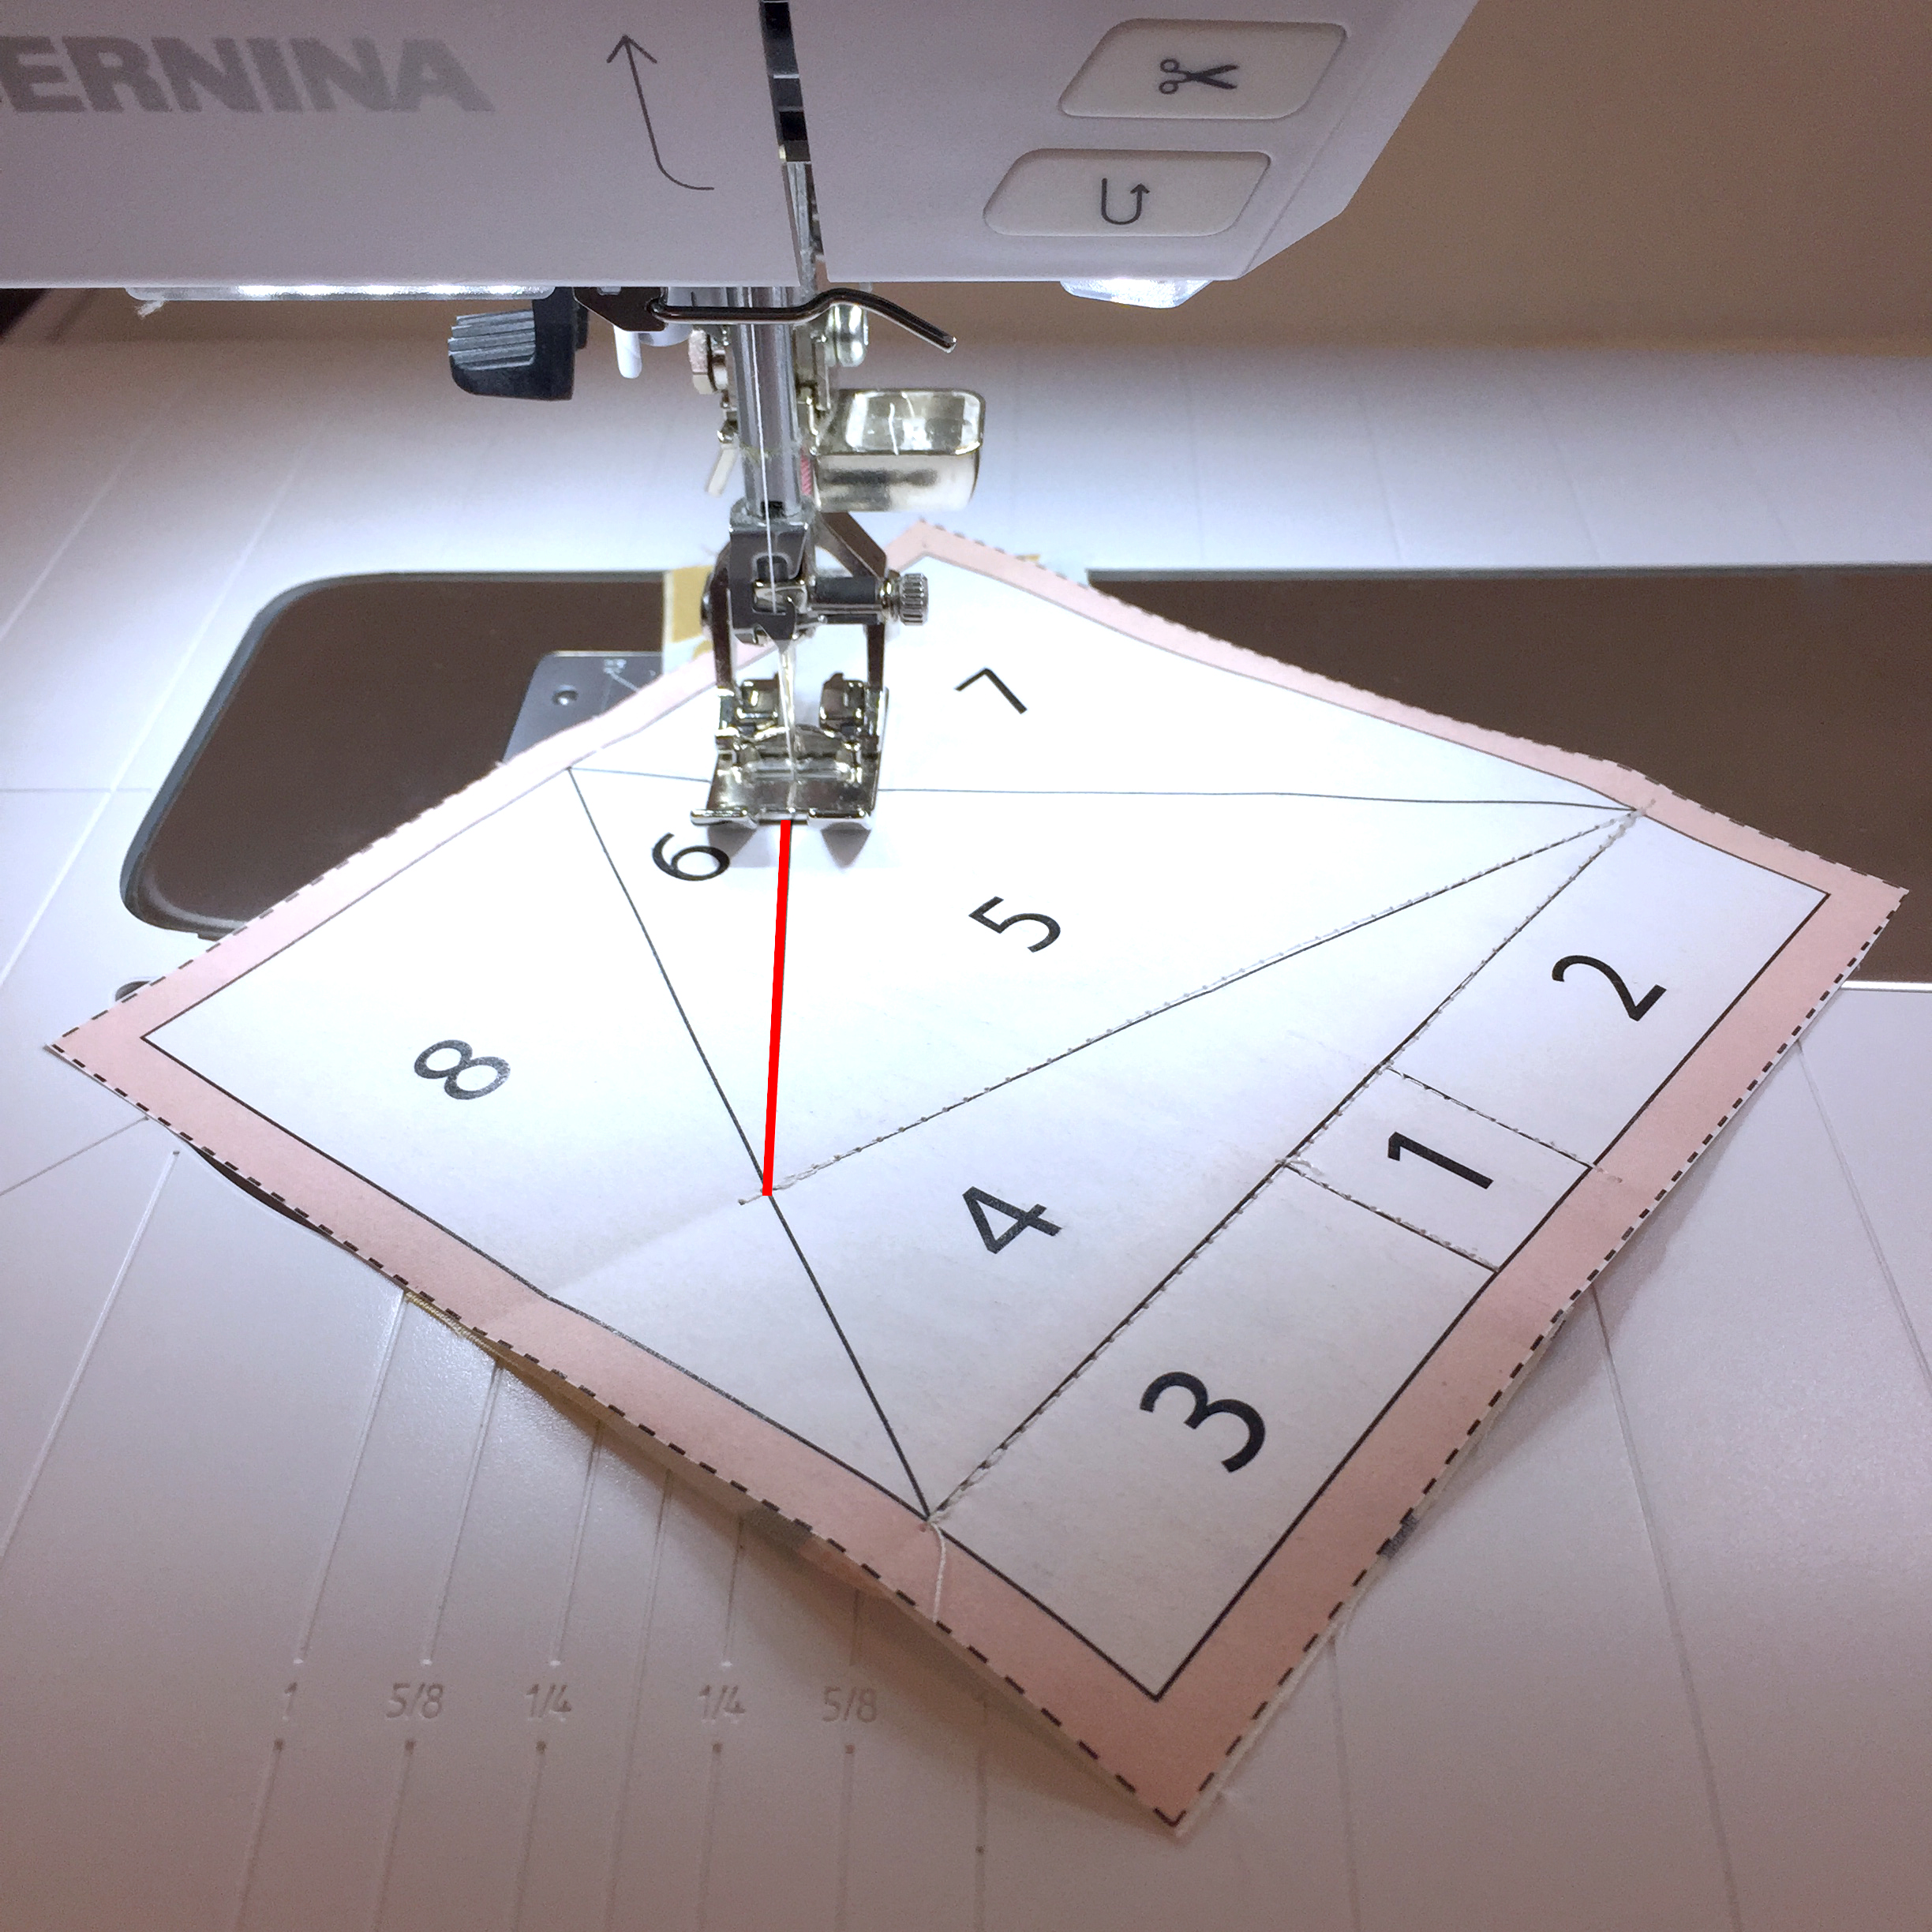
If desired, pin the fabric in place and straight stitch on the line between number 1 and 2 pictured below.
Press seams open as pictured below.

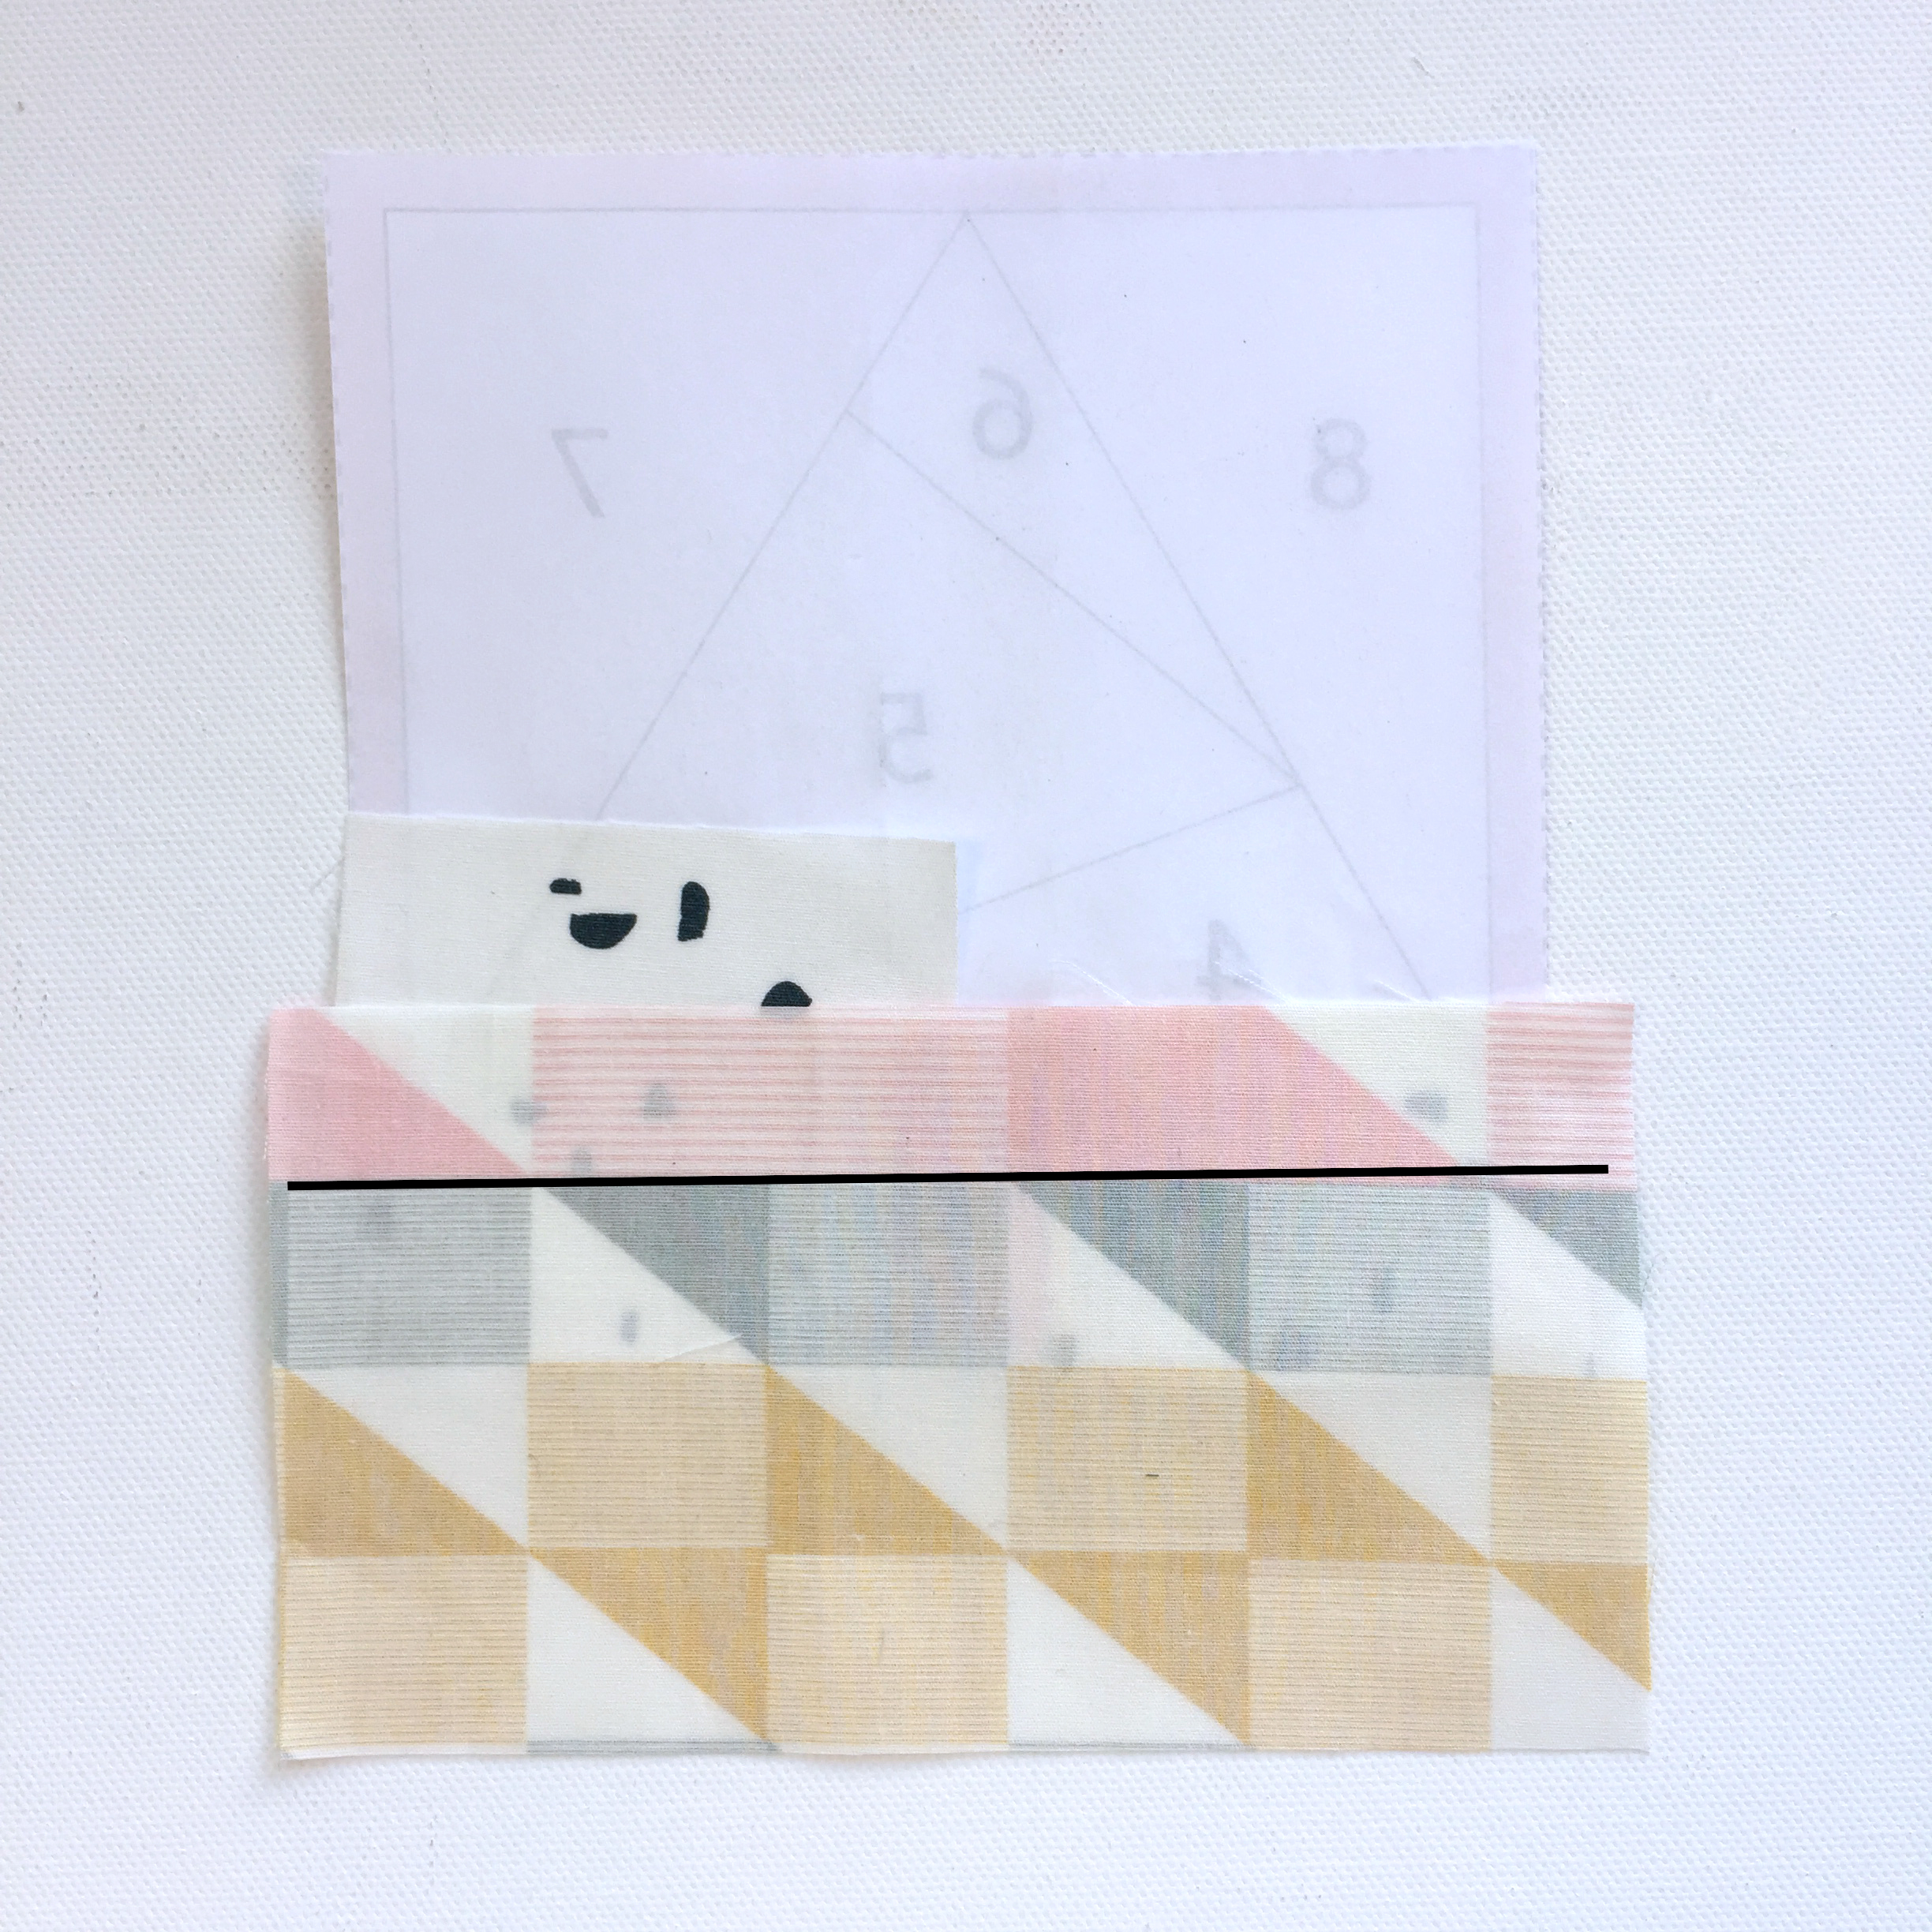
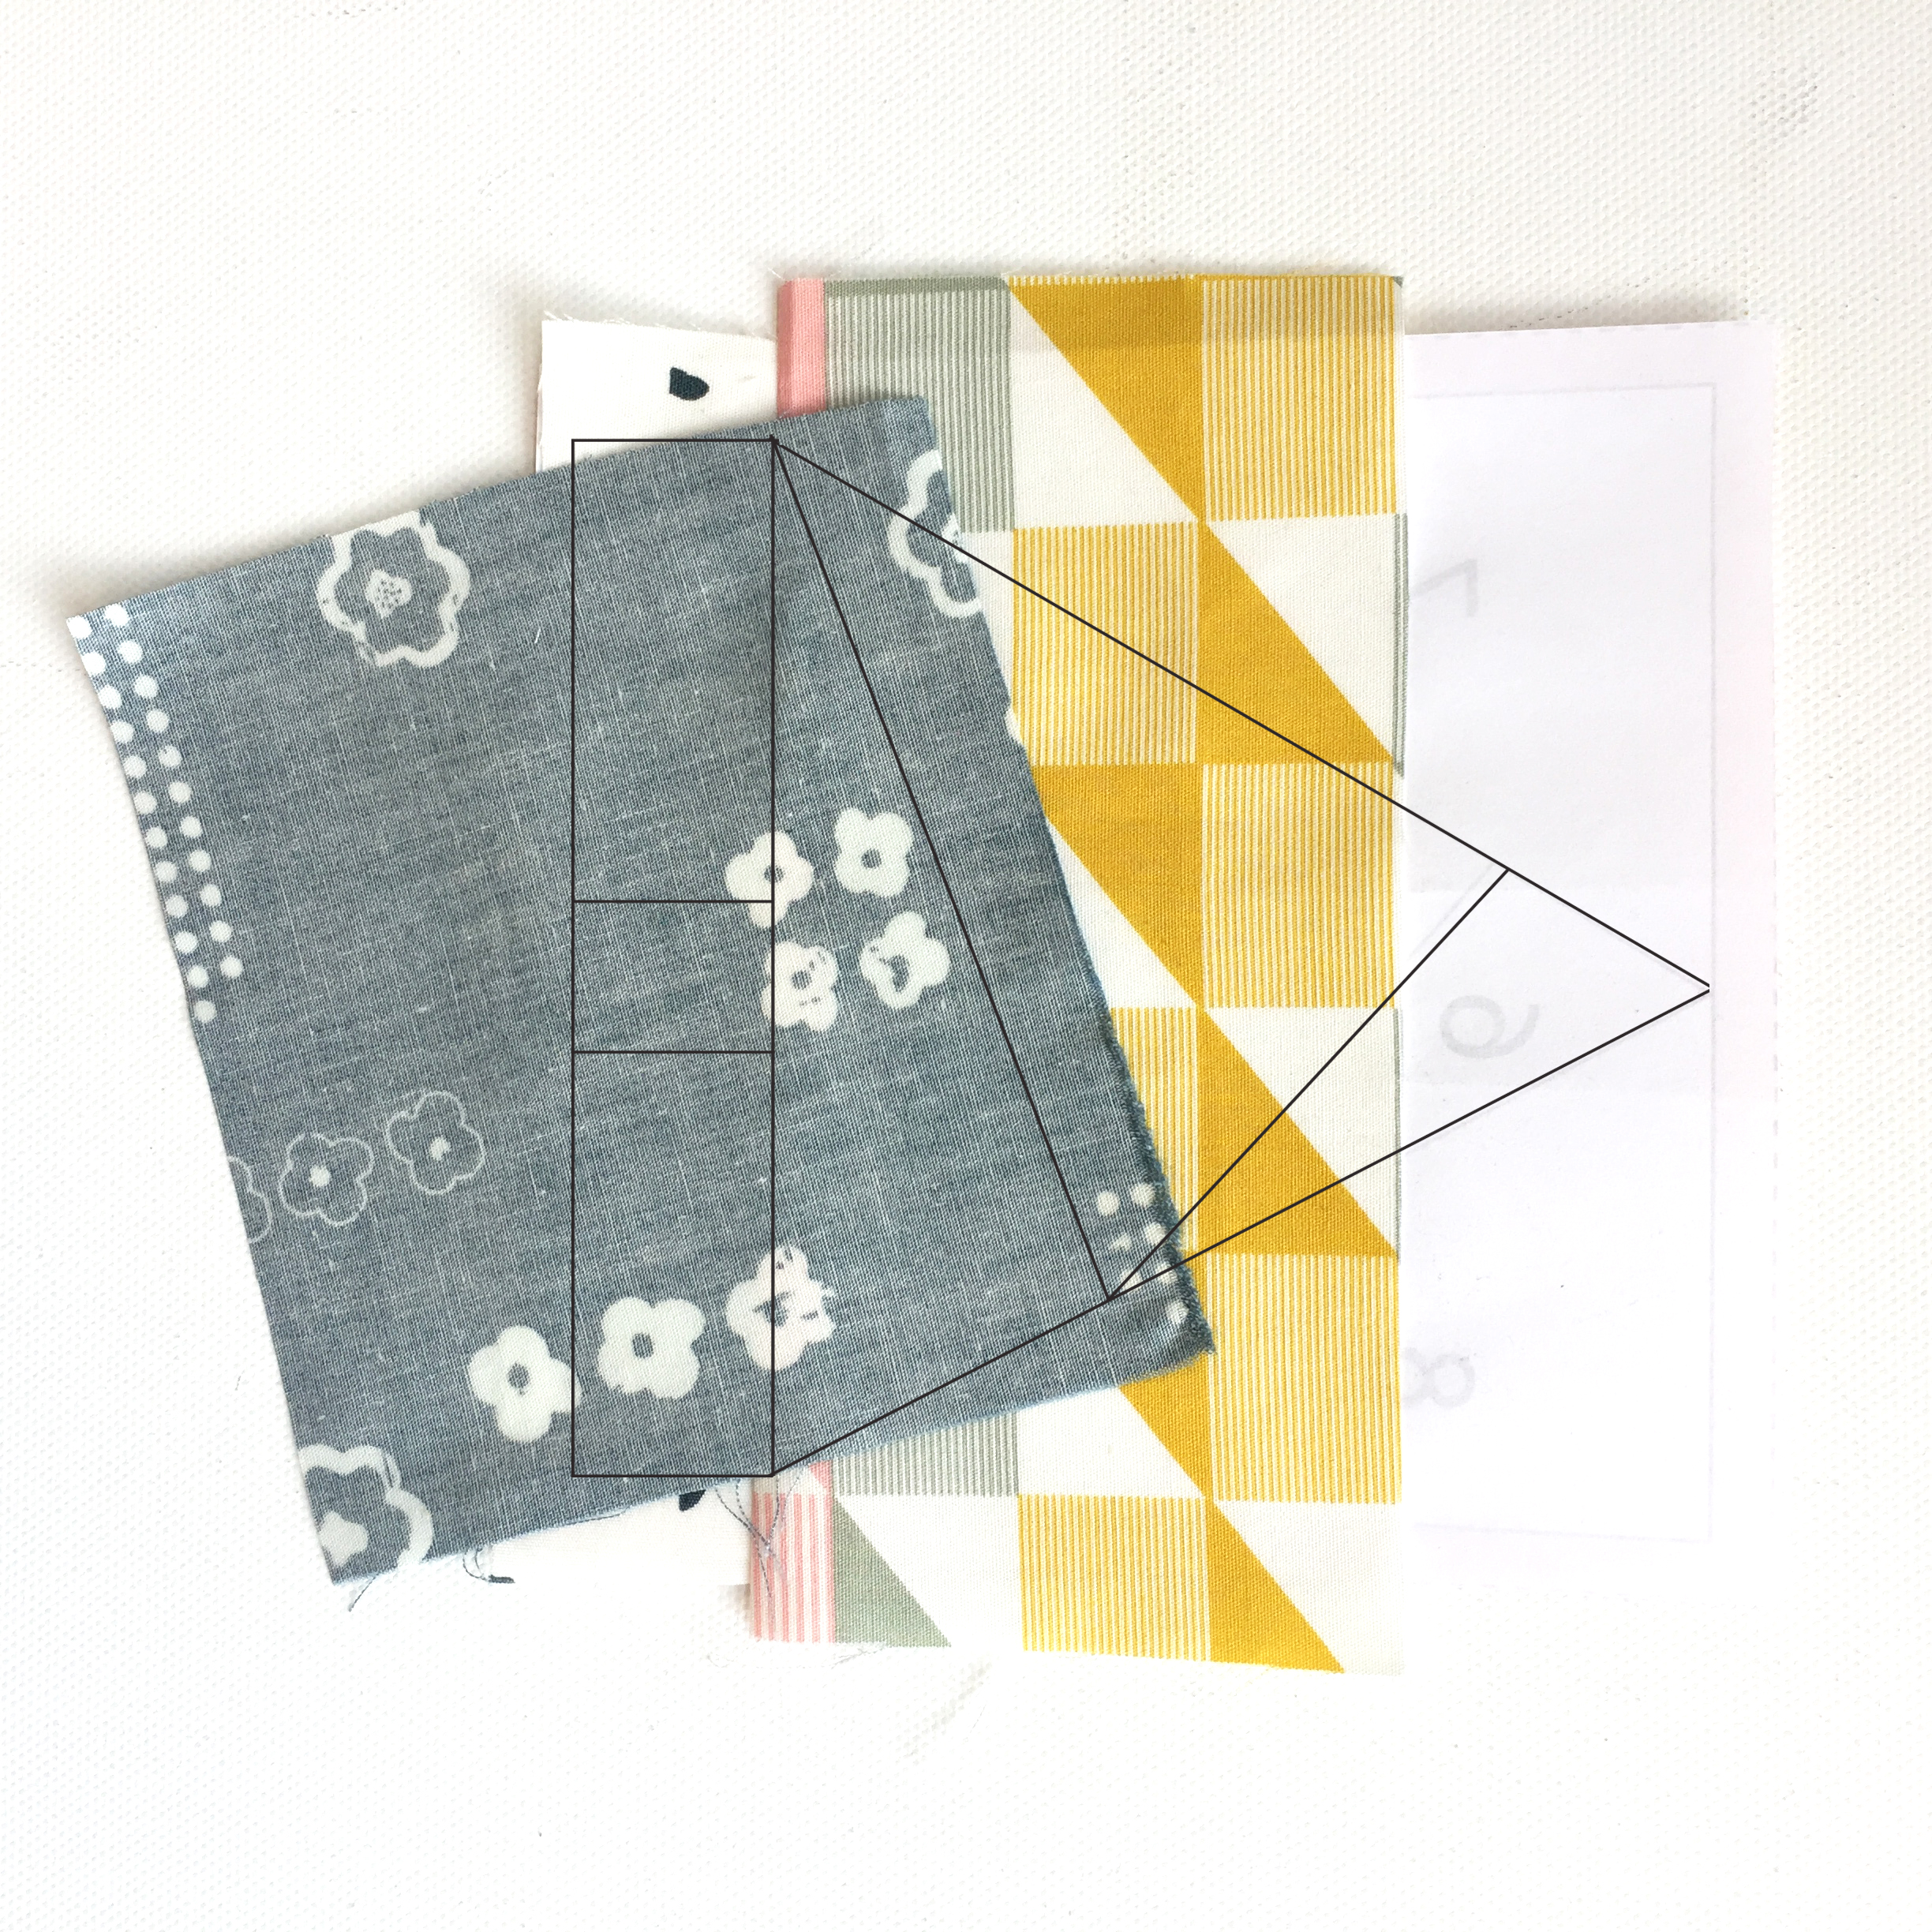
Take another piece of Fabric F and place (wrong side up) it on top of Fabric D as pictured below. You can use the little light trick that I taught you before to make sure you are having the right or more seam allowance. I have indicated in the photo below with the solid line where we will be stitching—make sure you have enough fabric on the other side of the line to create a 1/4″ seam allowance.
Now we take it to the machine and straight stitch on the line between number 1 and 3 pictured below.
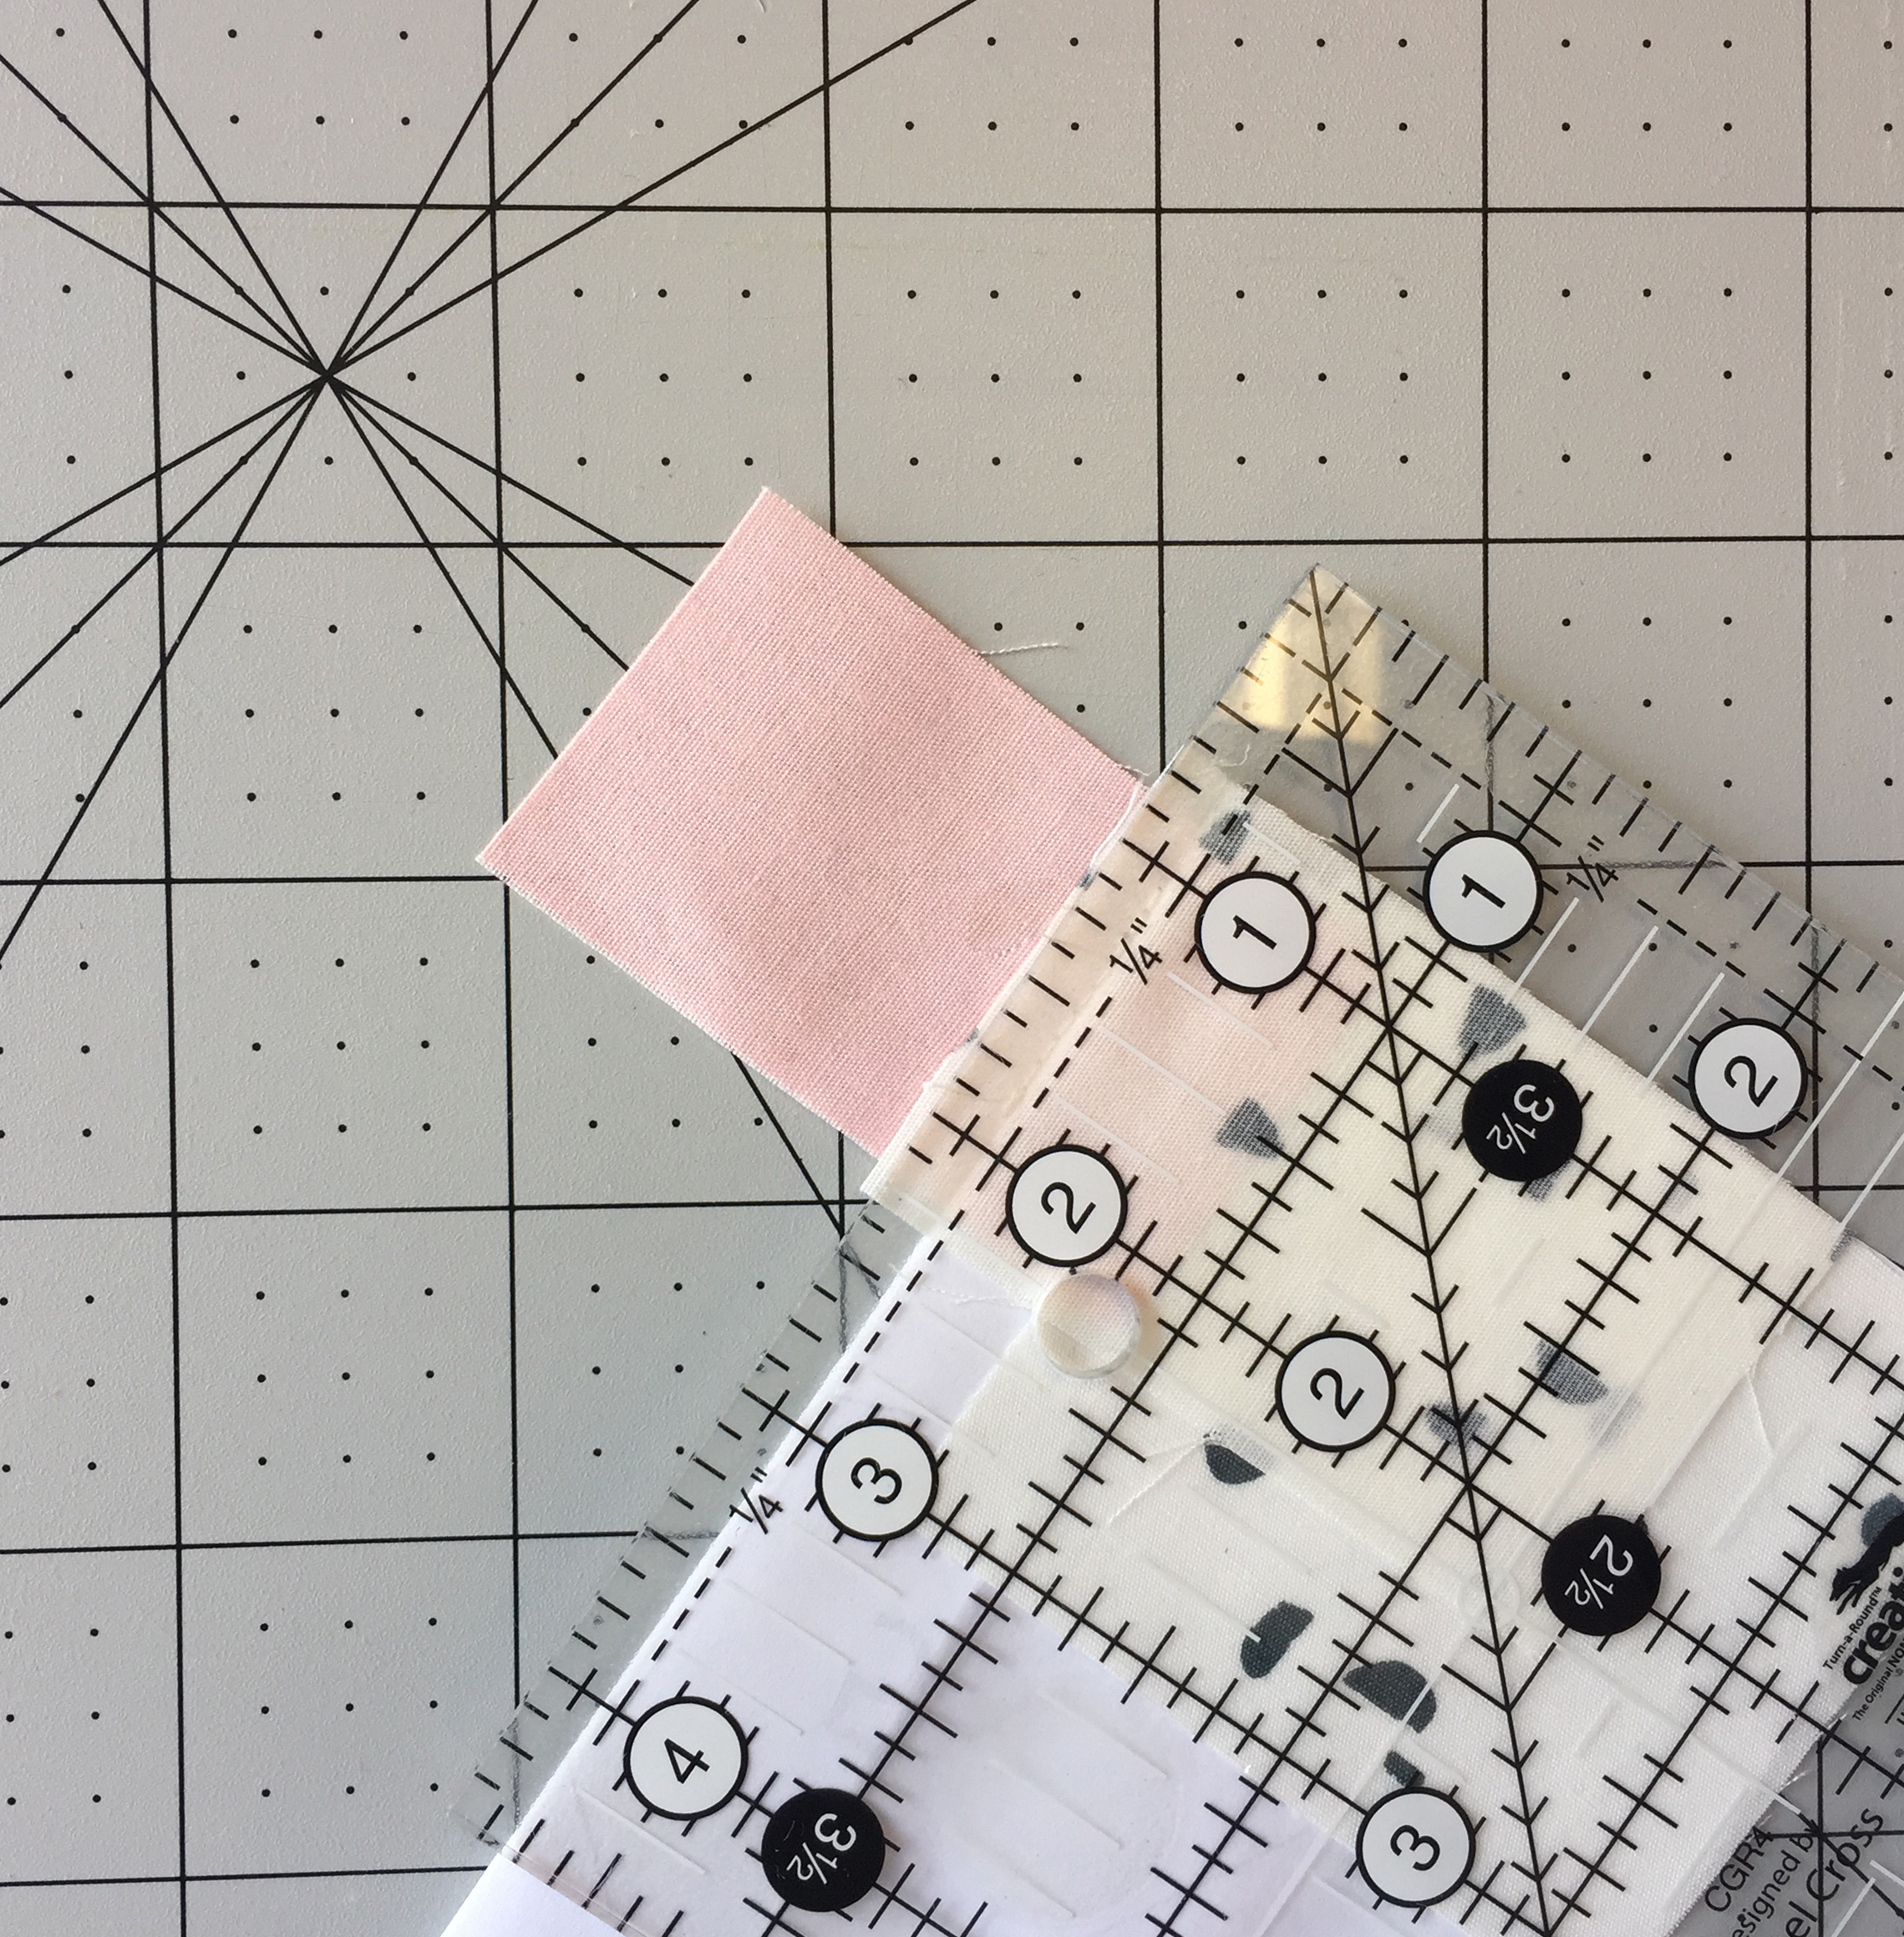
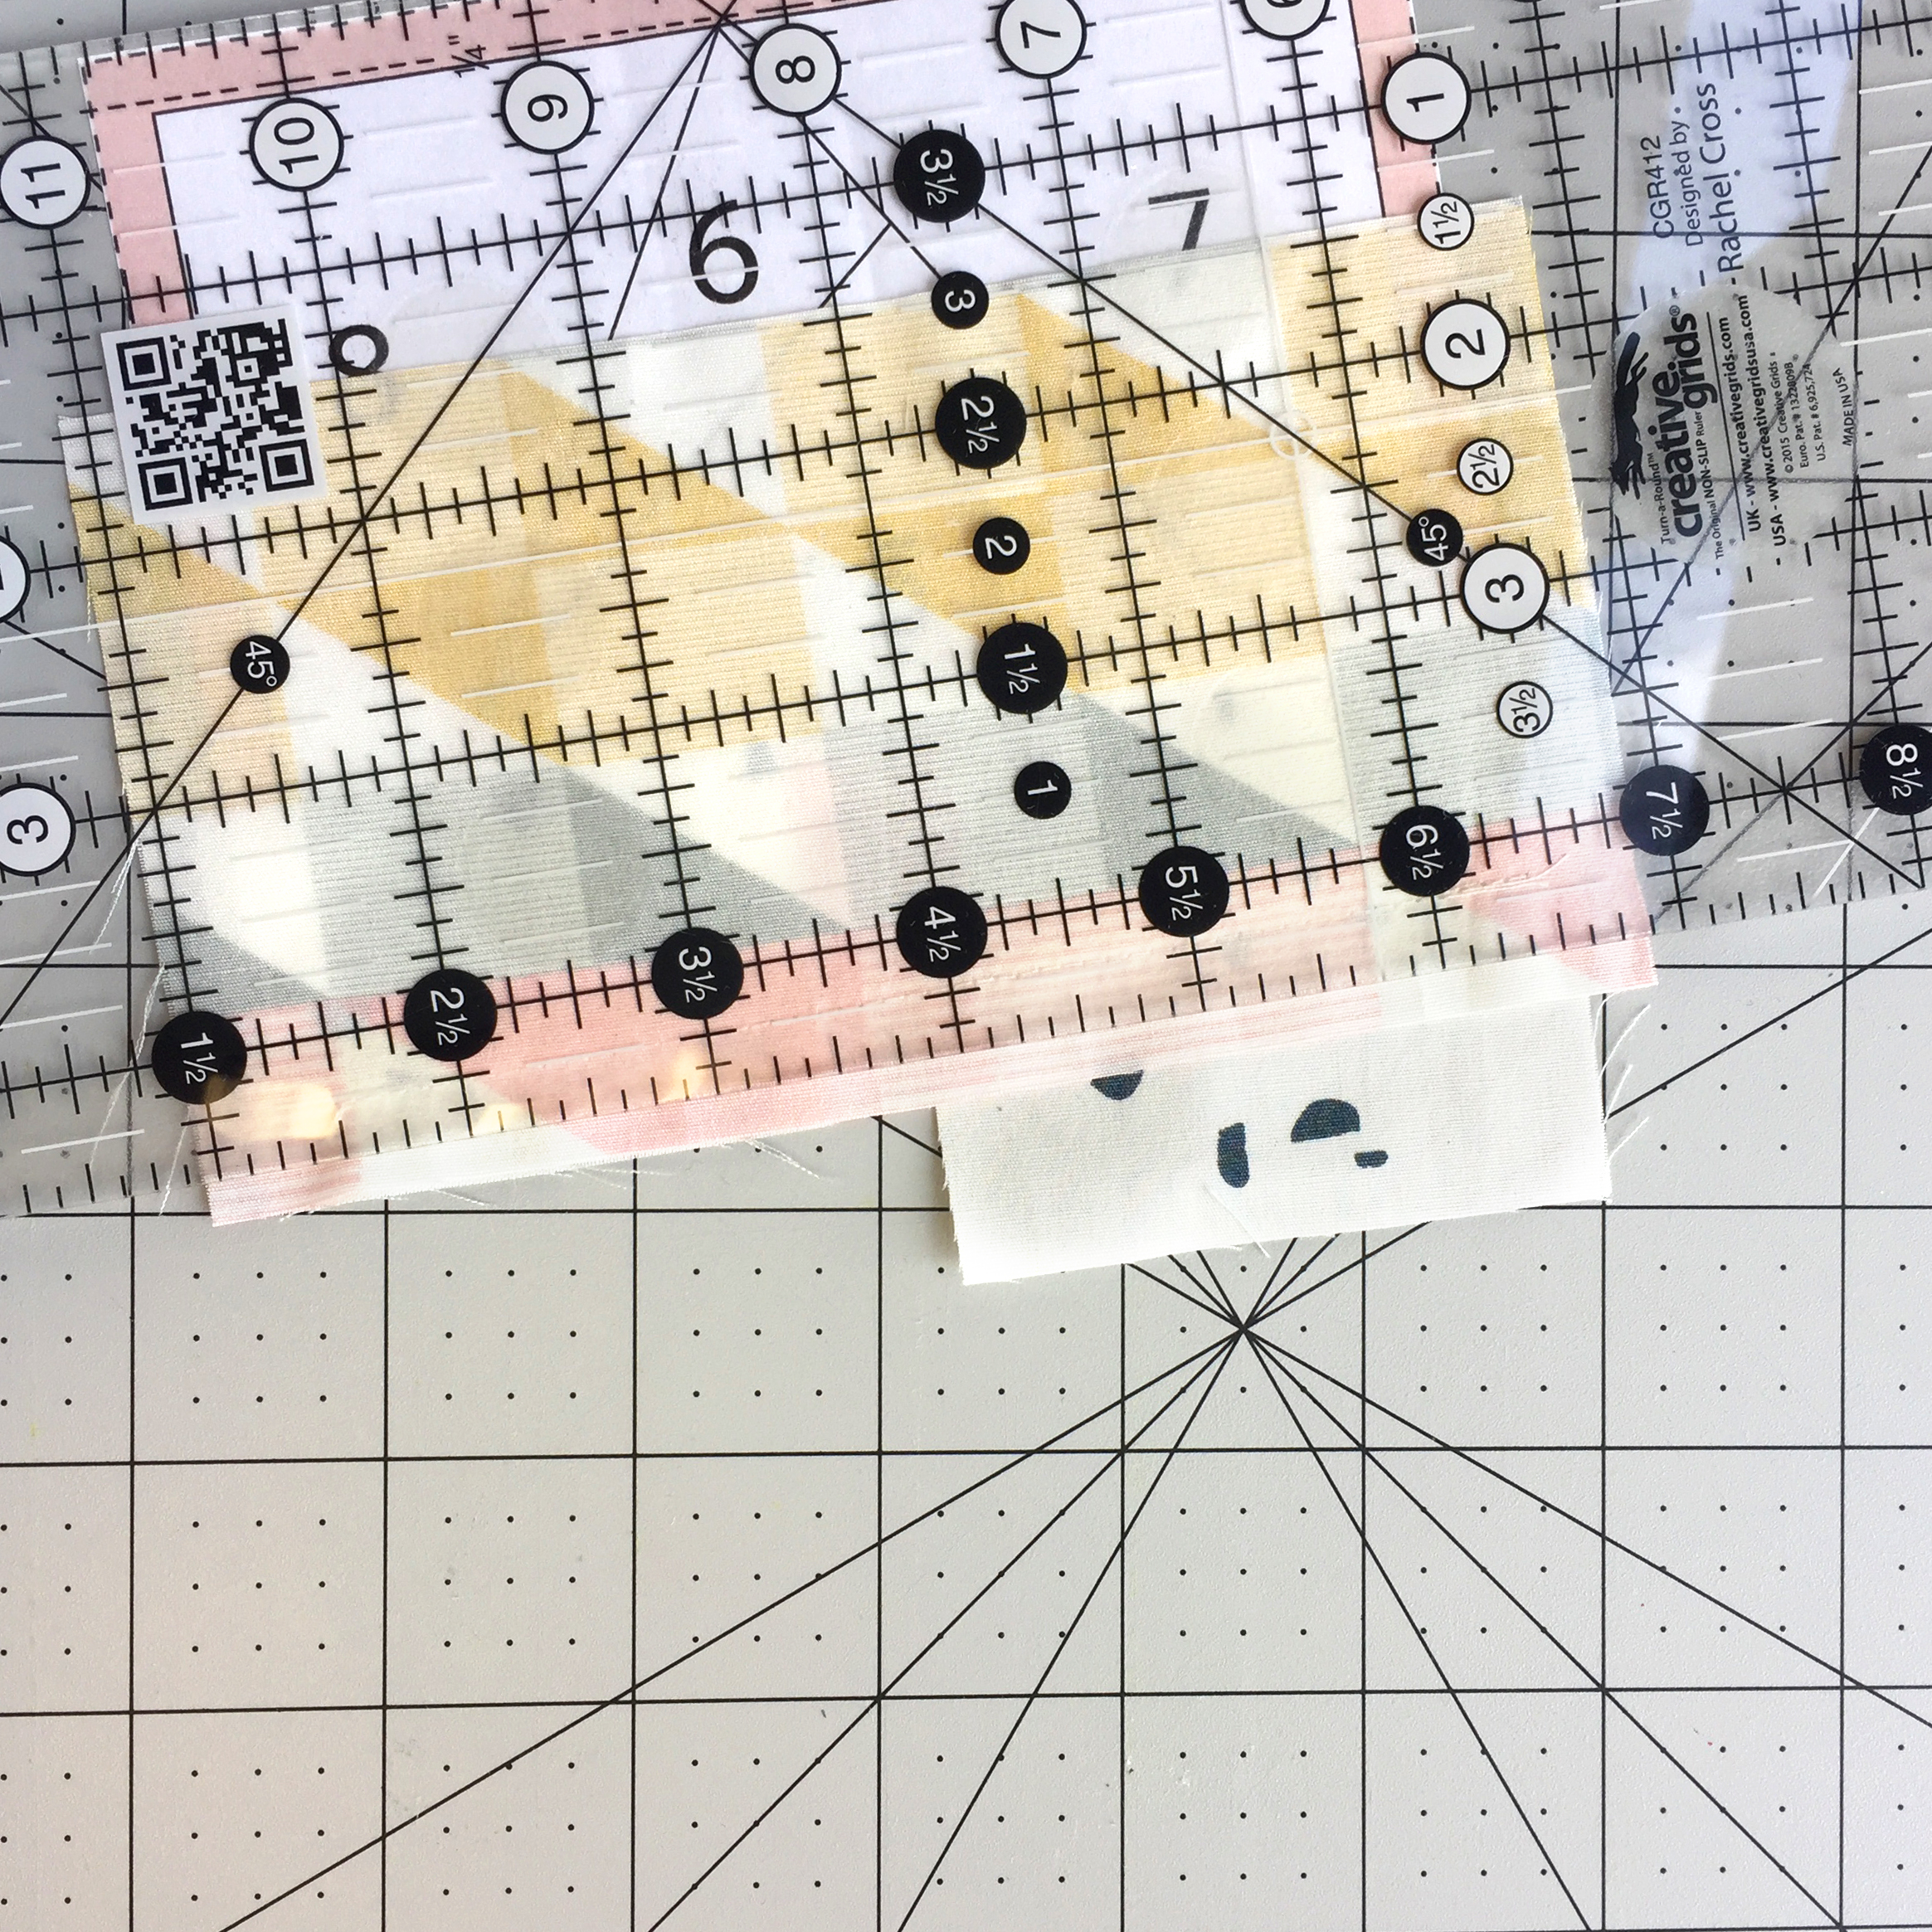
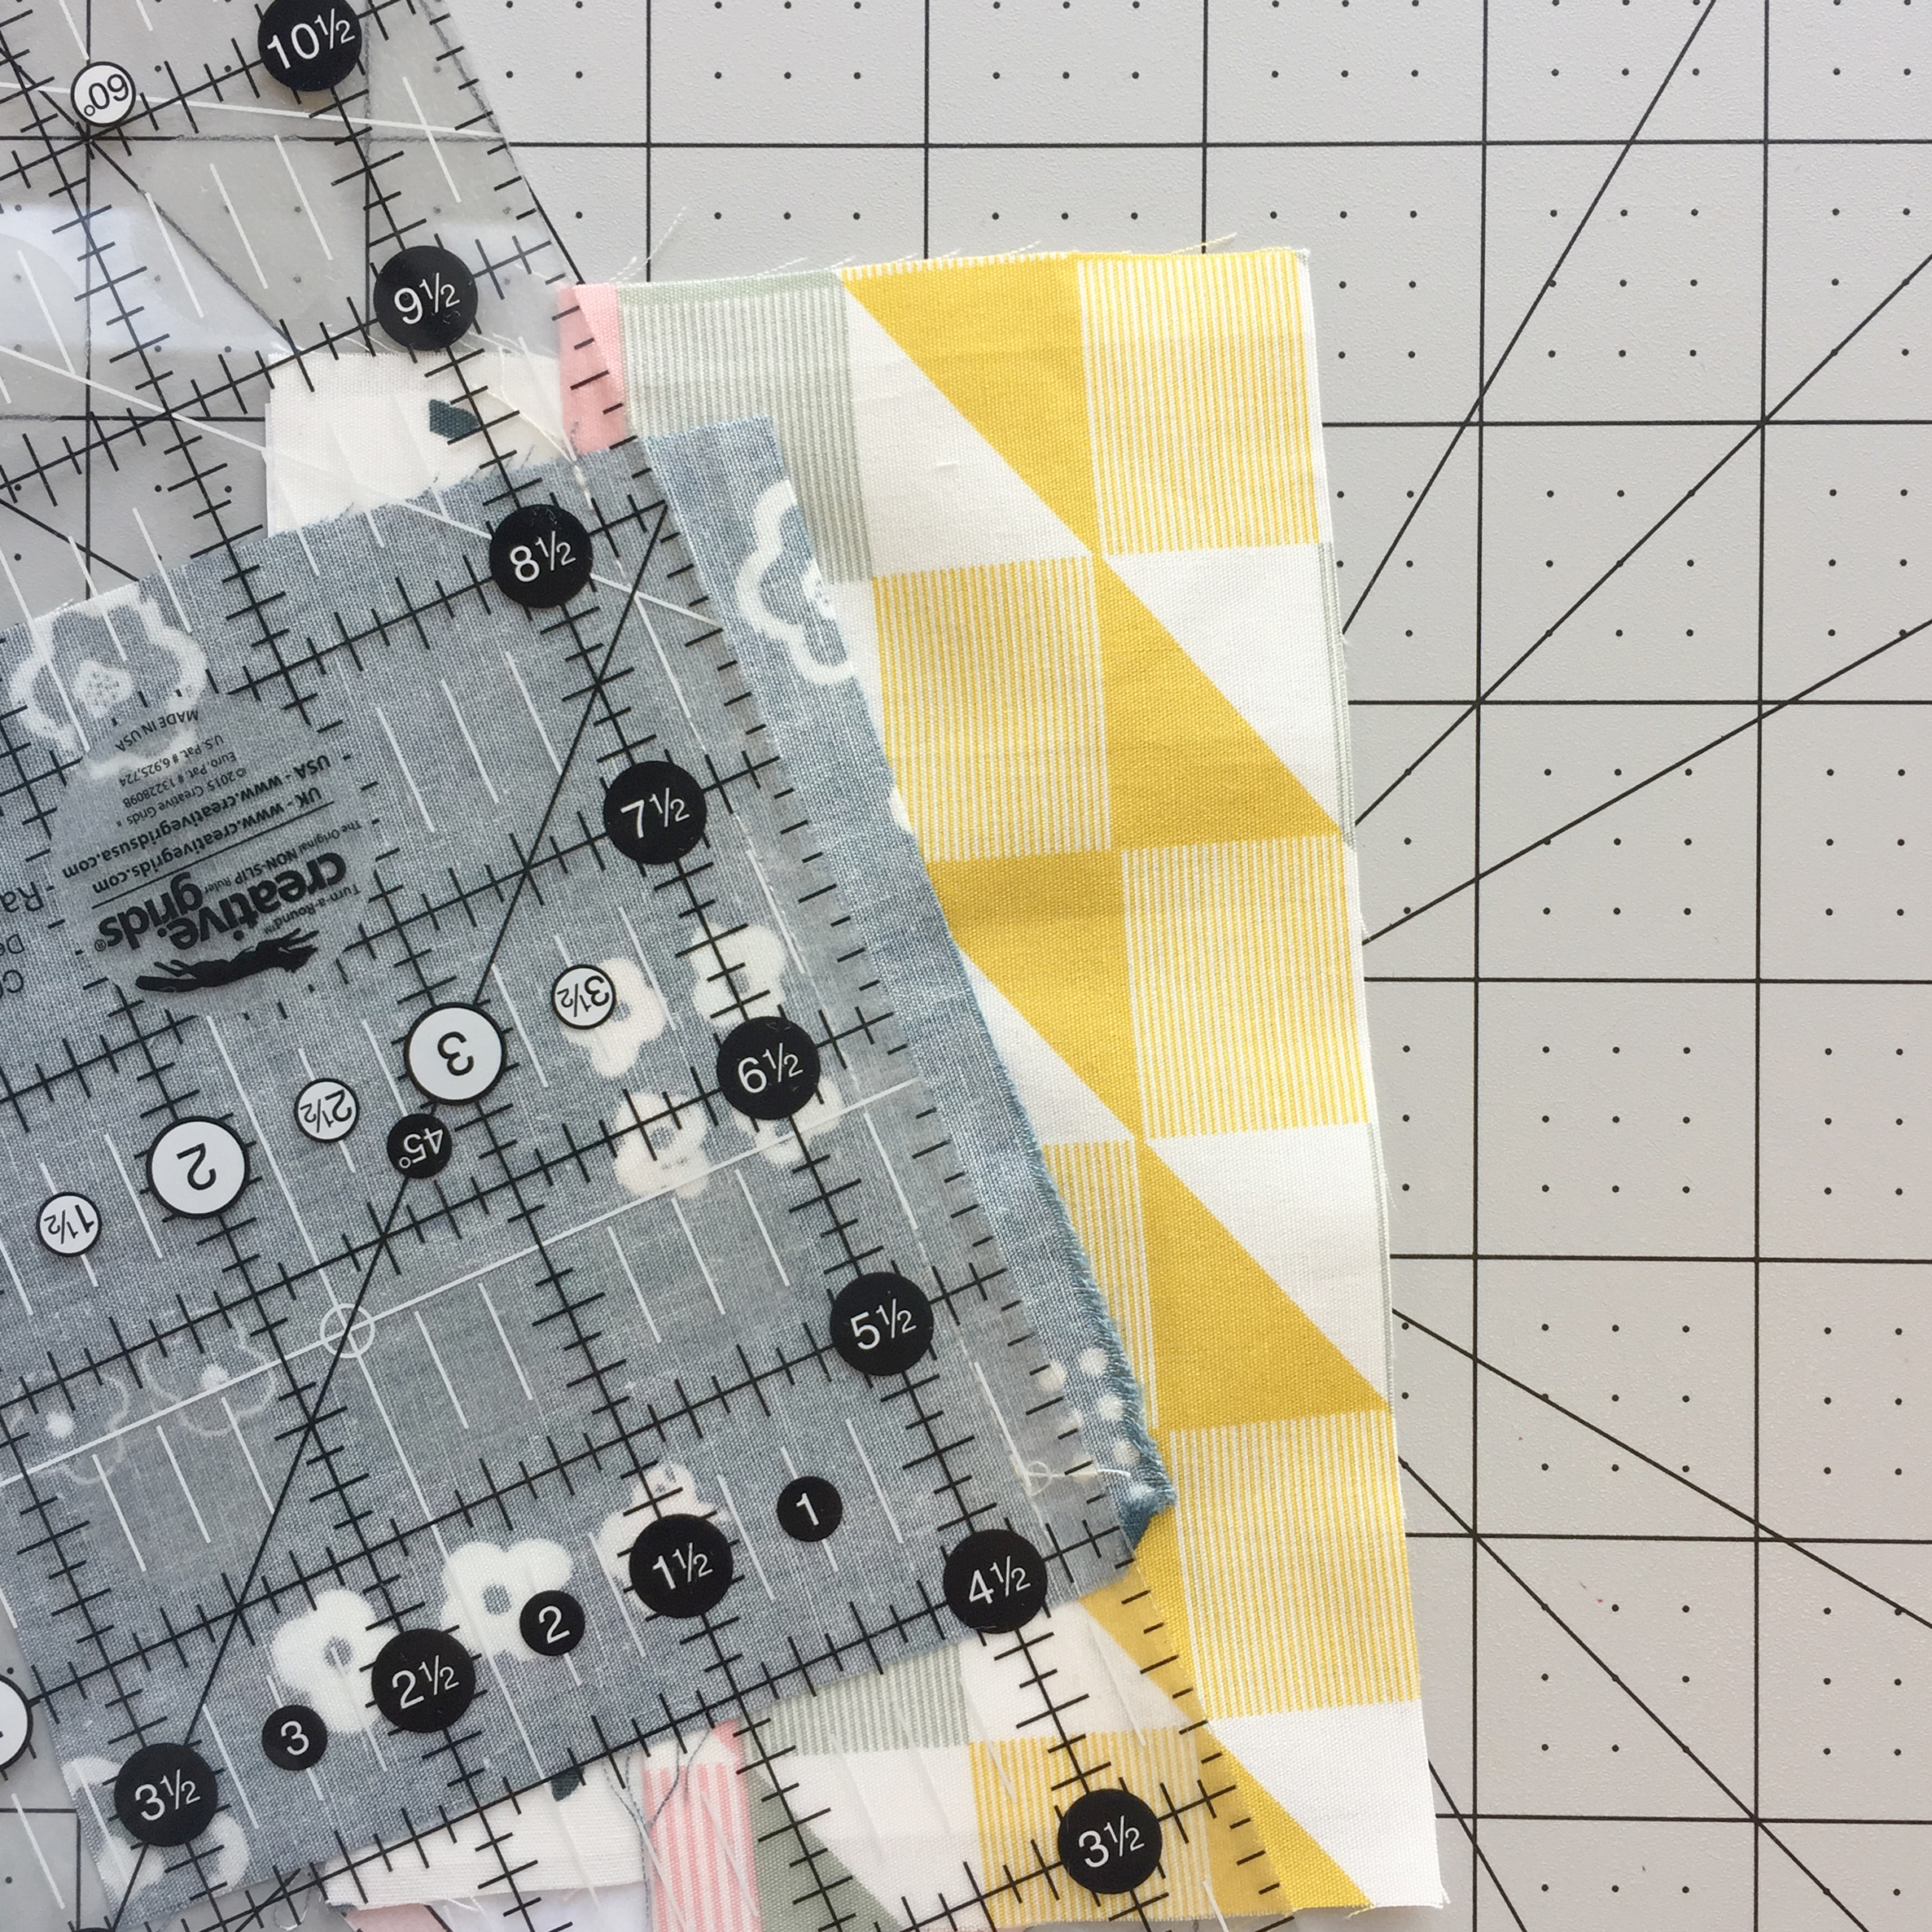
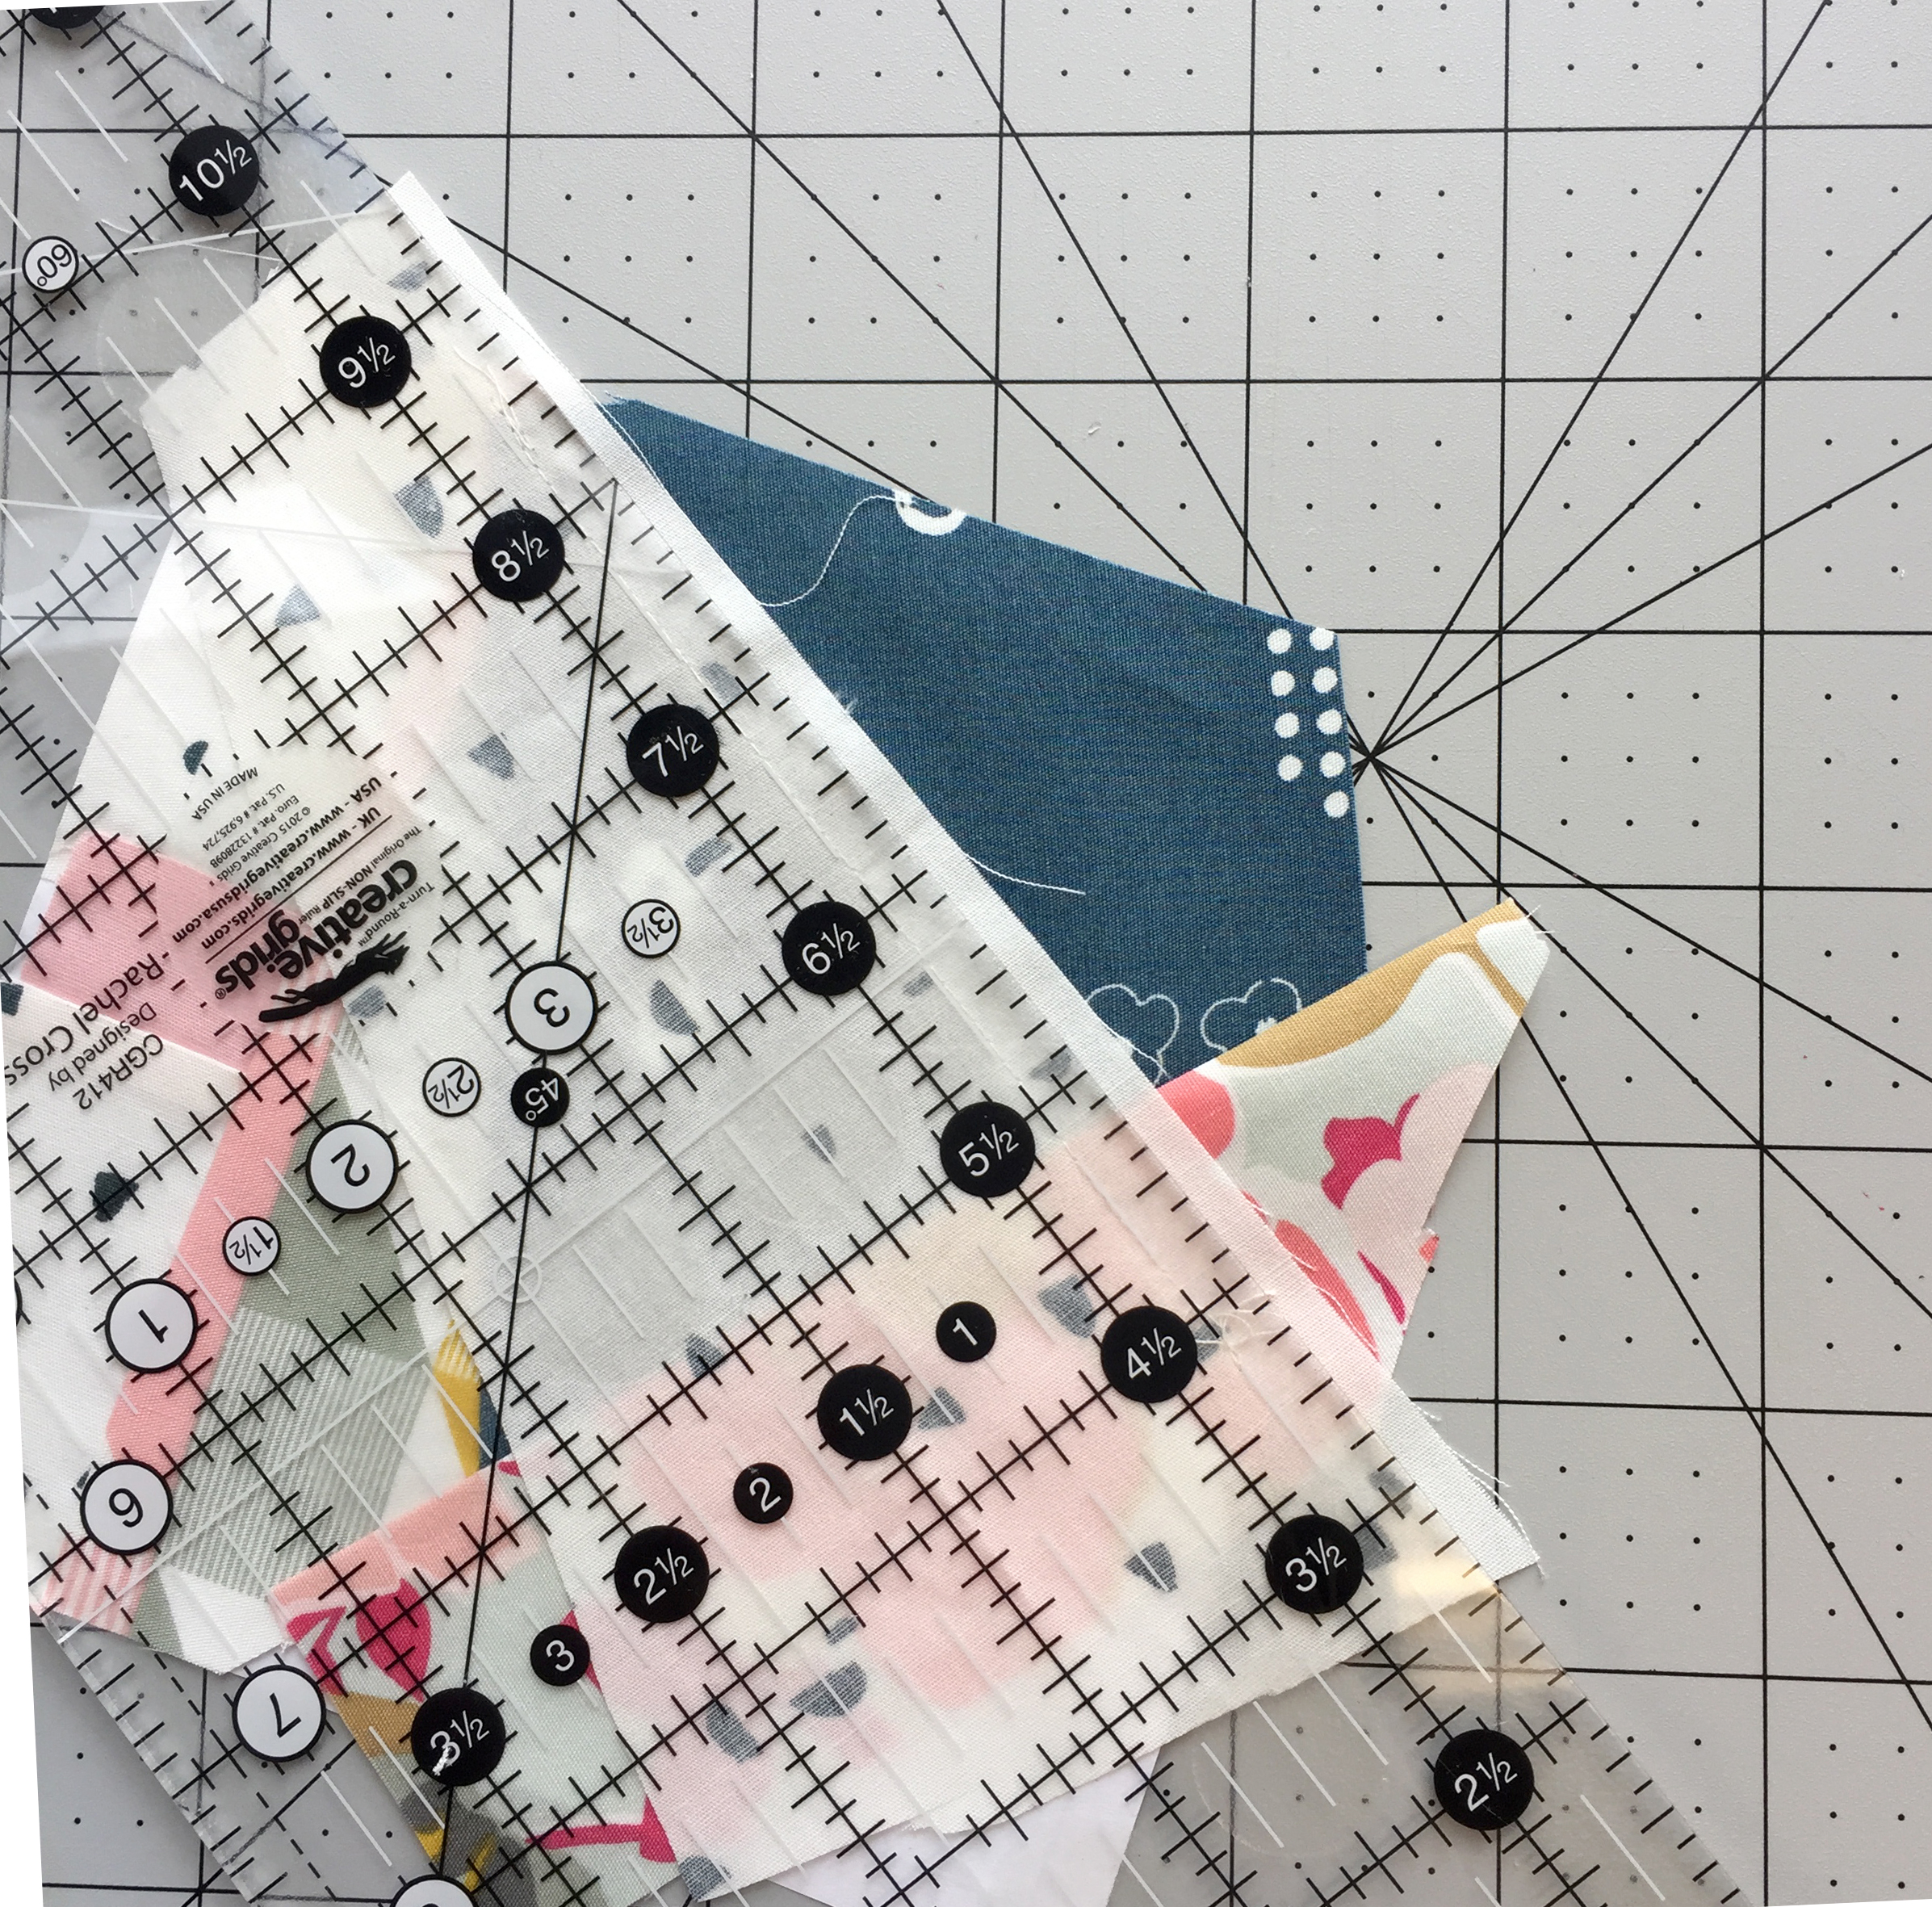
Once the last step is completed, we take our piece to our cutting table and fold back the template (that way we don’t cut it), and with a clear ruler we measure the desired seam allowance (1/4”) and the cut off the extra fabric.
Following the same procedure as before, now we take a piece of Fabric C, always making sure it covers the part of the paper piece that we want to cover, in this case part 4. Place it as shown below, wrong side facing up.
Straight stitch on the line between 4 and the section already sewn as pictured below.

Again, repeat the same technique of cutting the seam allowance. Always remember to fold your paper pieced template to prevent from cutting into it.
Press seams.

It may get a little tricky now, but do not fear, I will explain you each further steps. Place Fabric I (wrong side up) a little bit diagonally to Fabric C as shown below. Do the light trick to make sure you are in the right track regarding seam allowance. Fabric I will cover Part 5 of your template, so make sure than when you fold the fabric to the right side, Part 5 is fully covered.
Take it to your machine and straight stitch the diagonal line between number 4 and 5 as pictured below.
Cut seam allowance.
And press seams.
Place Fabric A, wrong side facing up, and making sure your fabric scrap is going to cover Part 6

Straight stitch between on the line between number 5 and 6 as pictured below.
Cut seam allowance, don’t forget to fold your template! Next, press with your iron as I instructed before.
Now that you are all refreshed in Paper Piecing, you just need to add Parts 7 and 8 with Fabric D. Don’t forget to the little light trick I taught you, and straight stitch
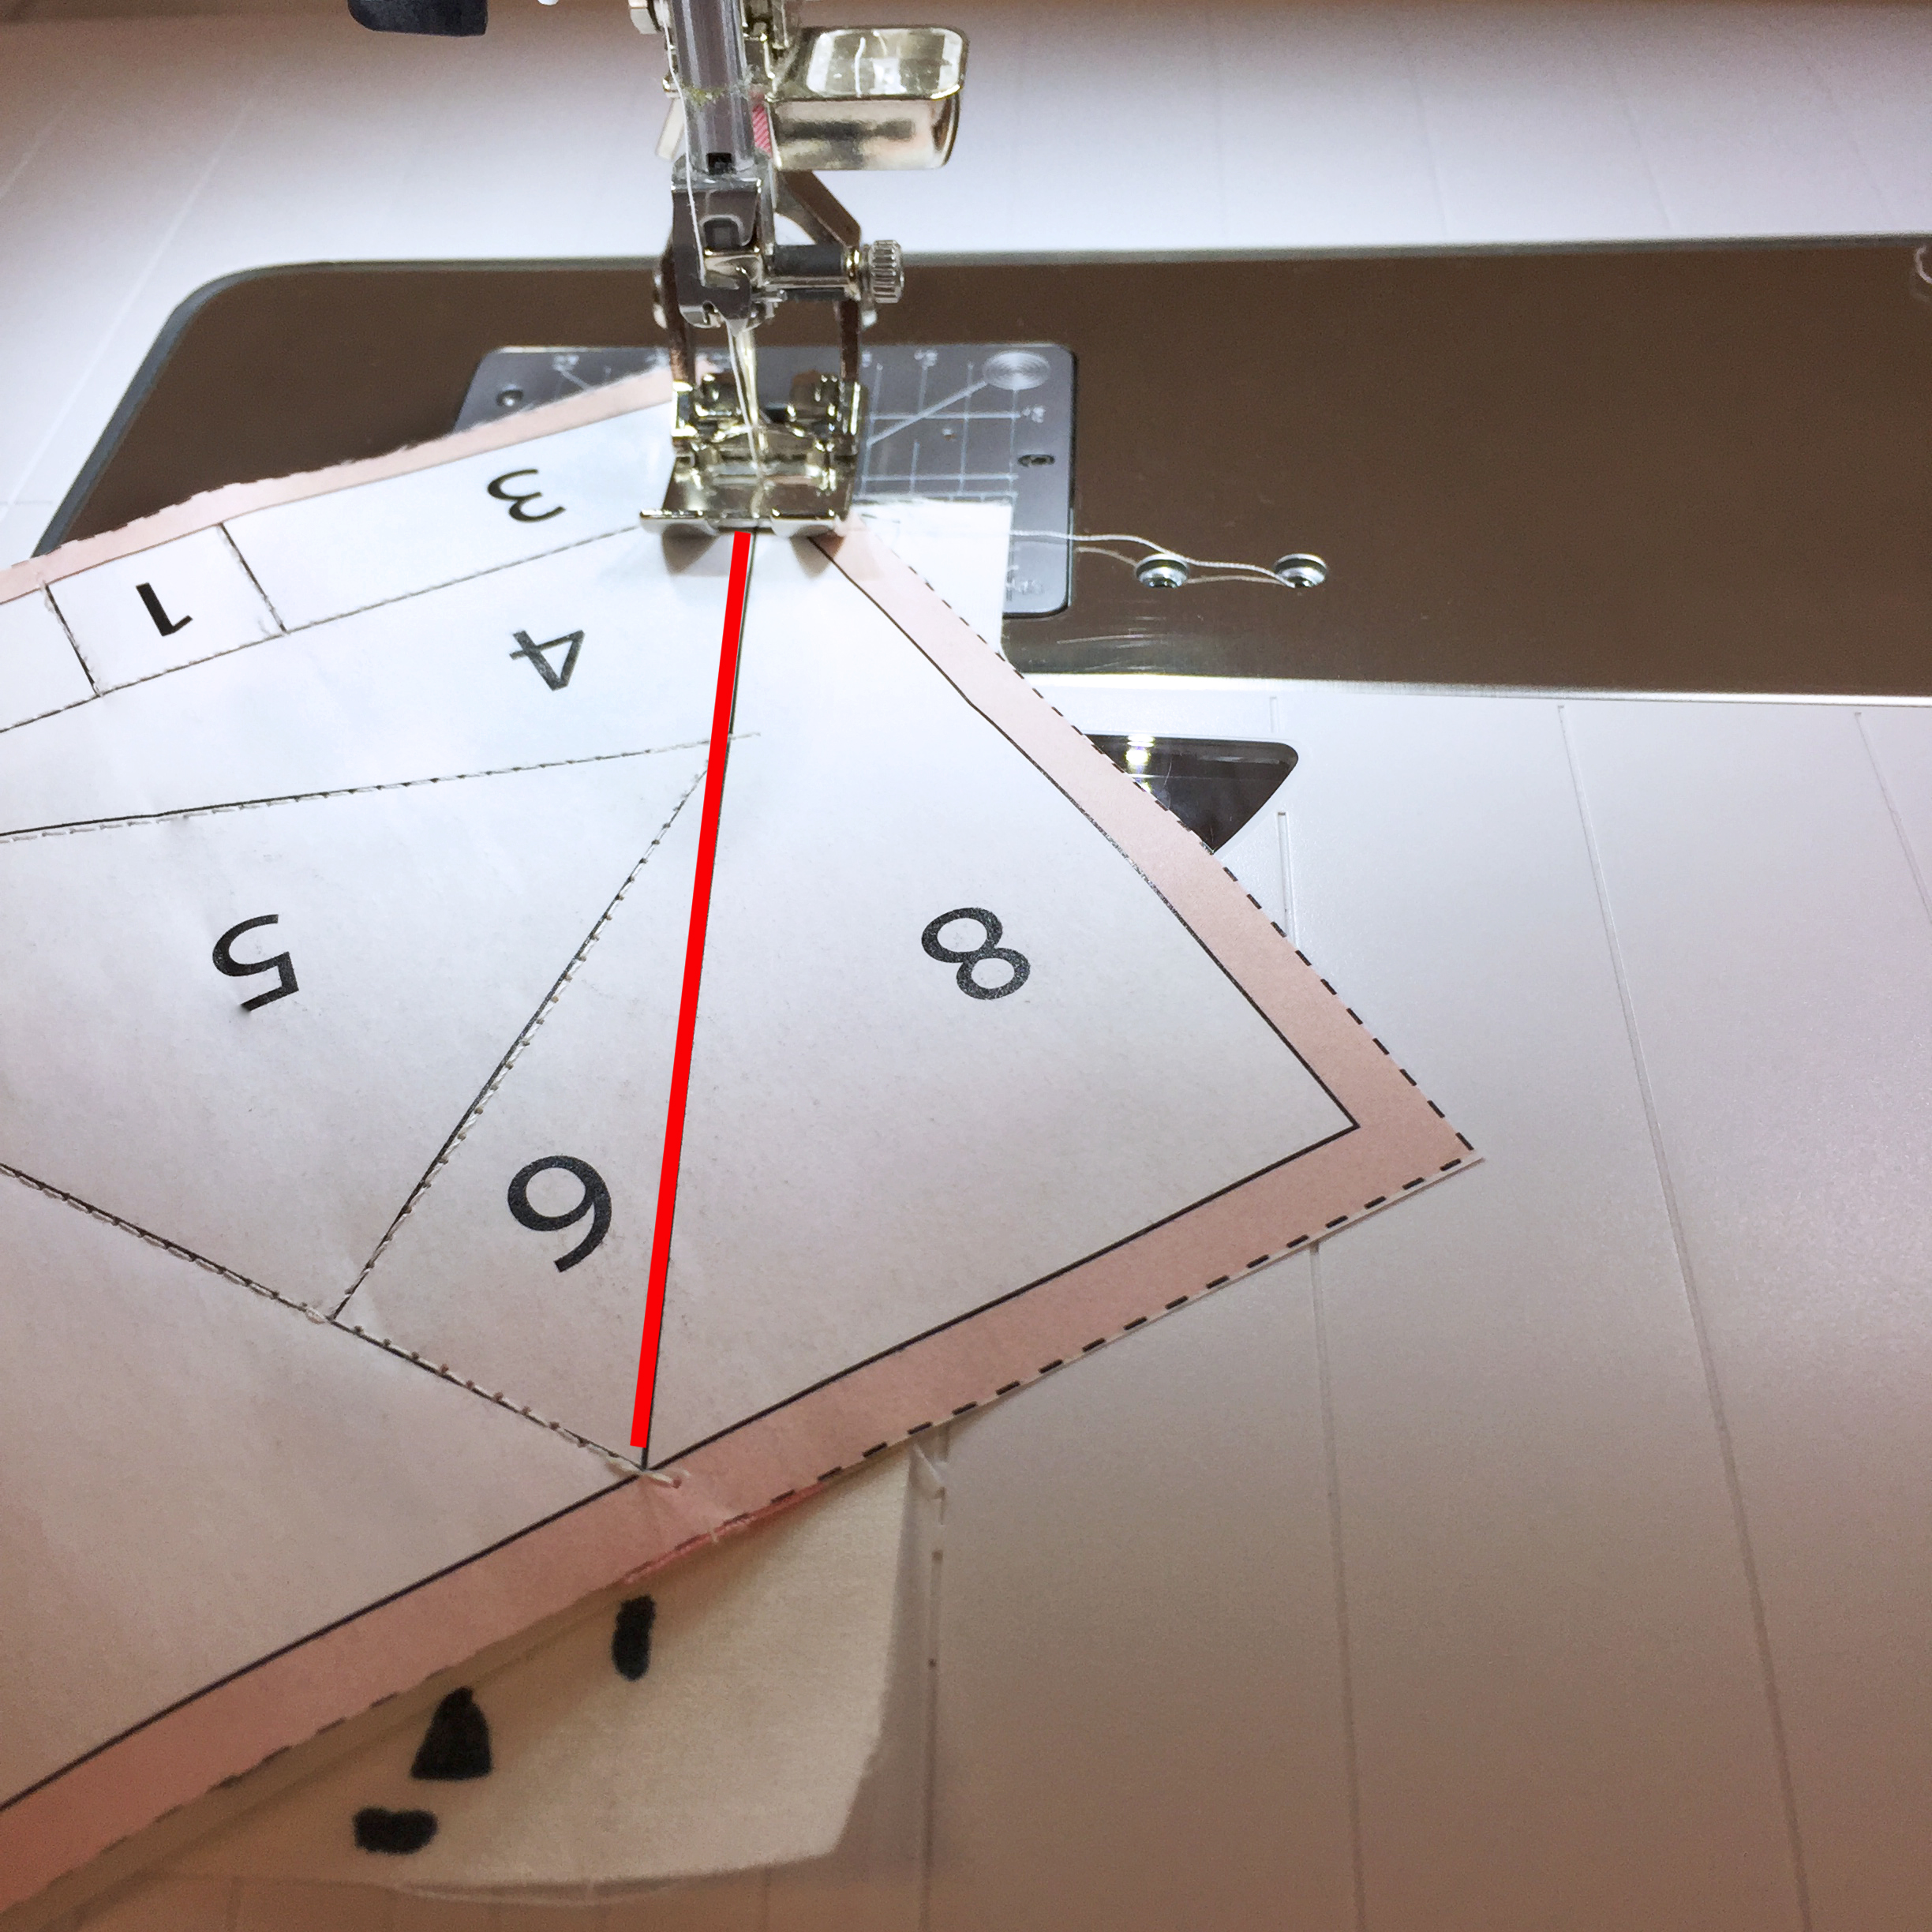
When cutting the seam allowance, don’t forget to fold your template, and press seams open. Repeat this same step with Part 8.

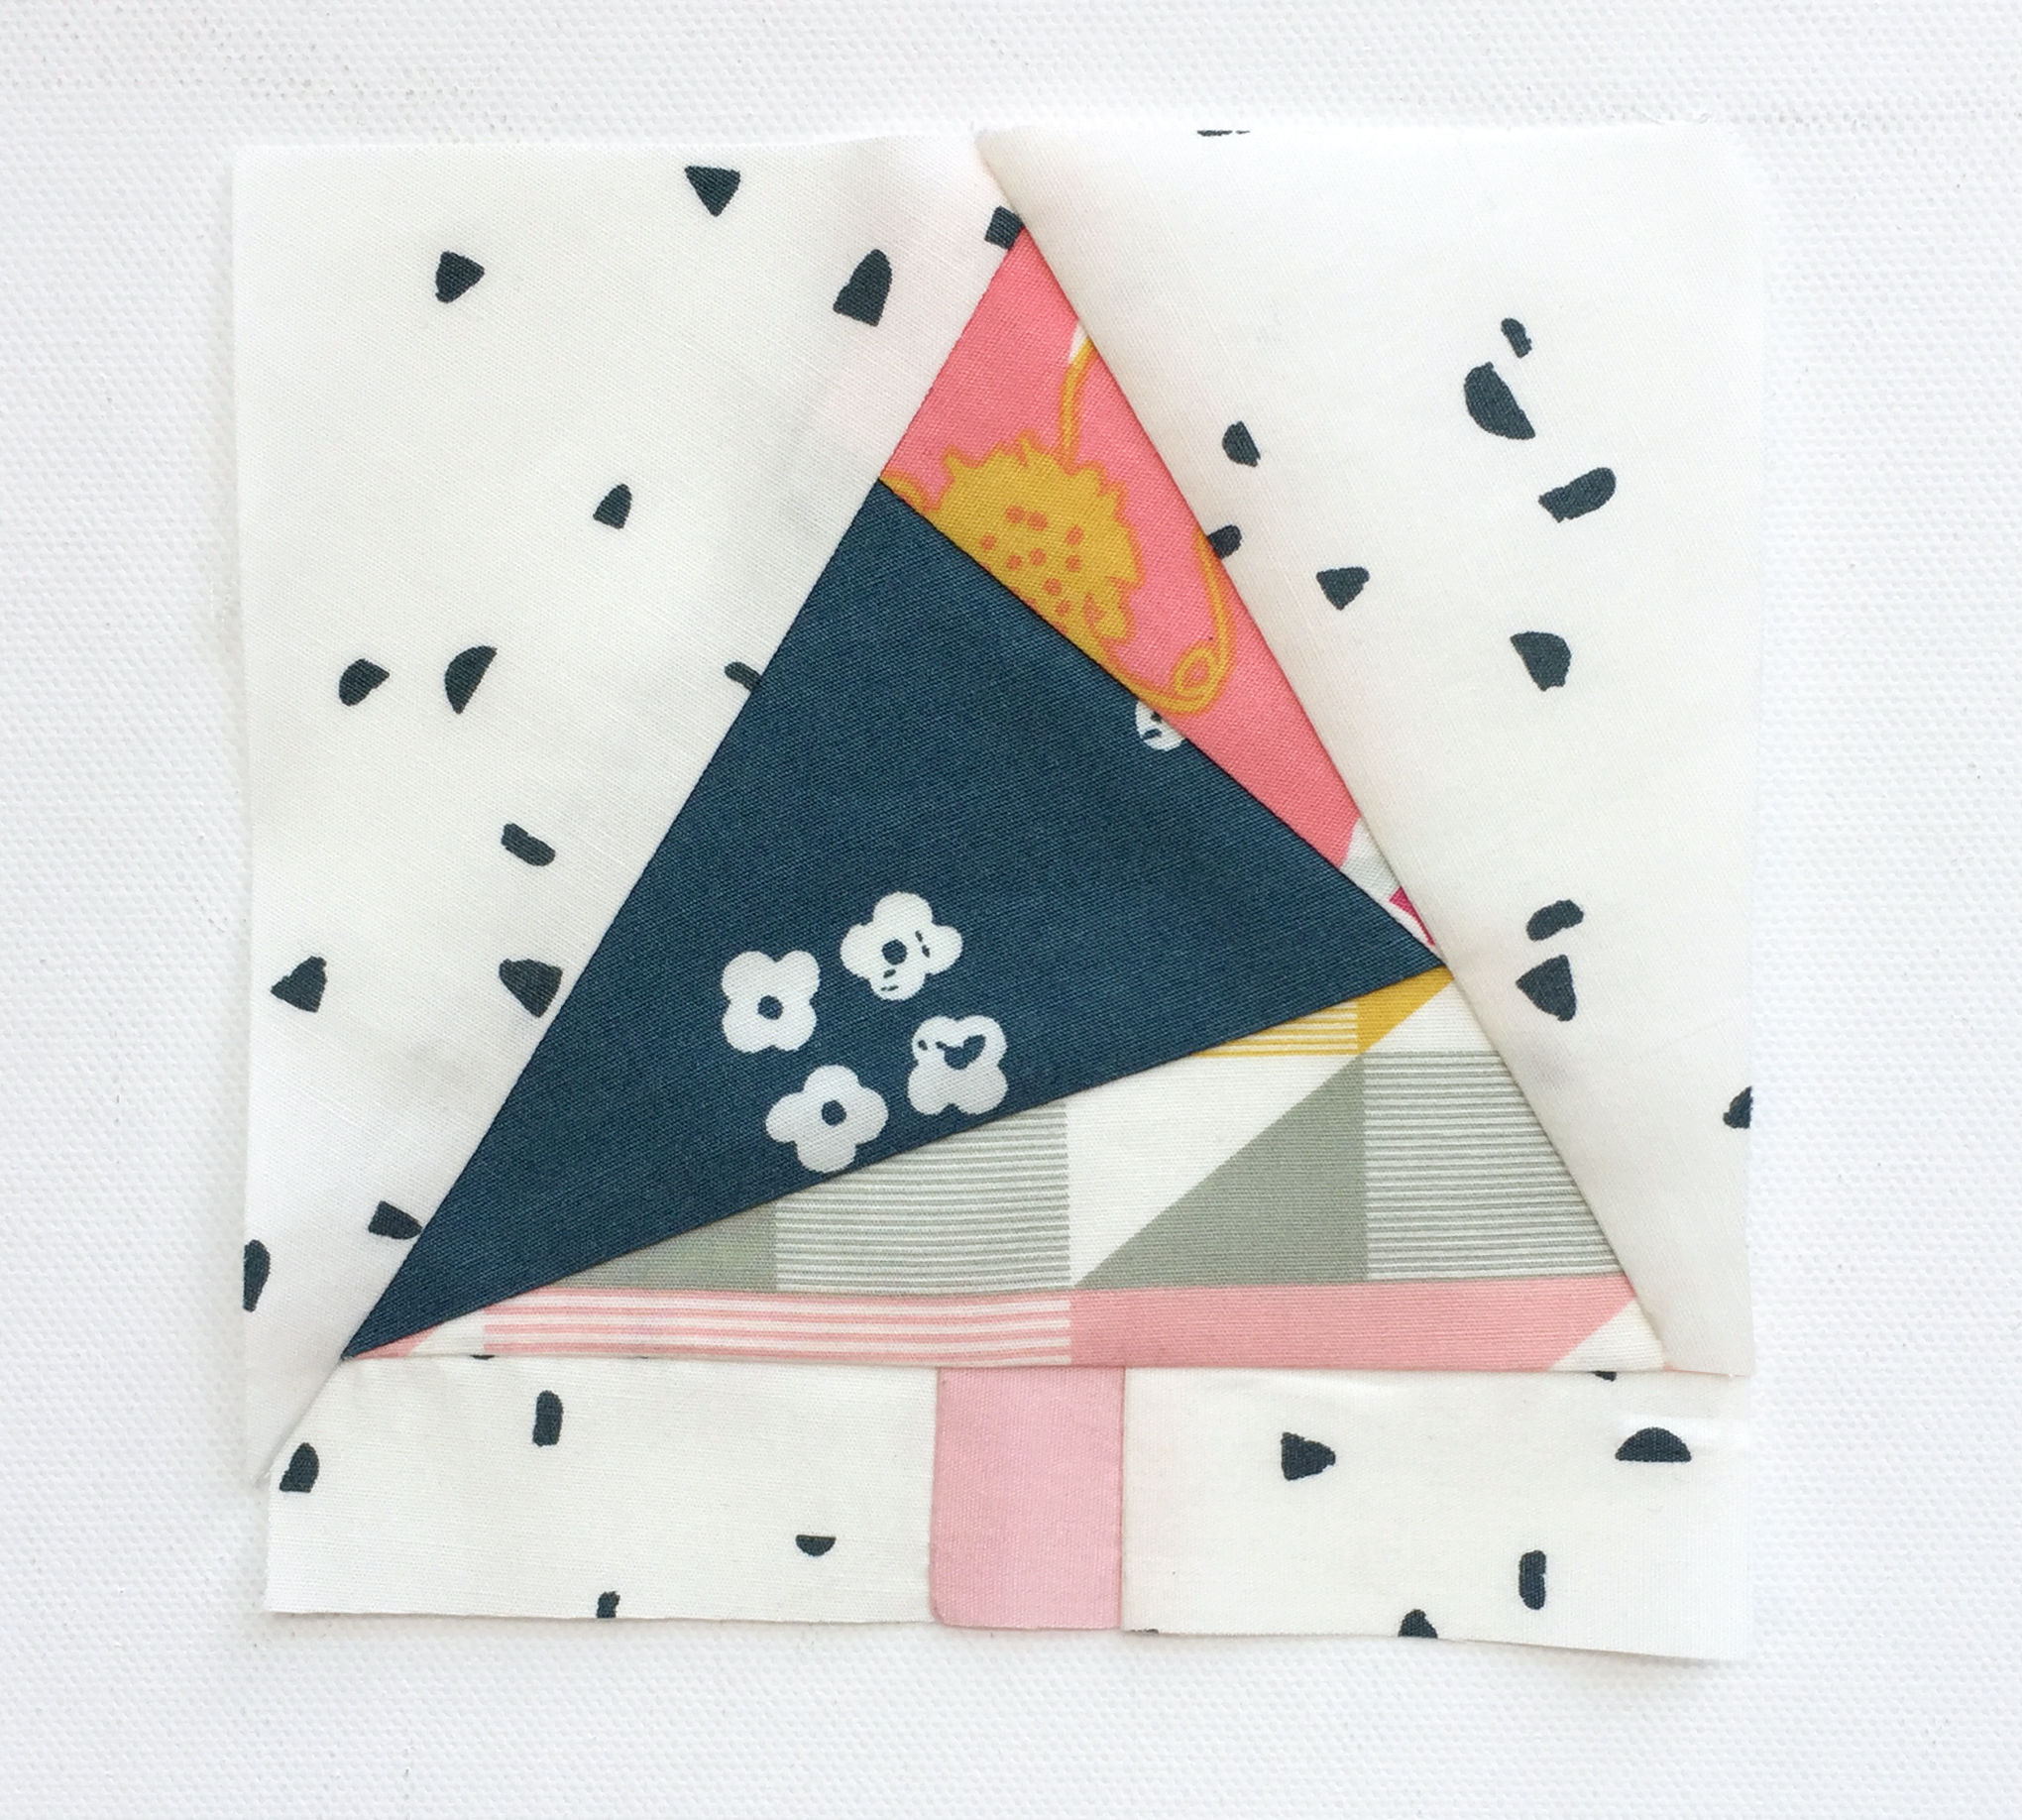
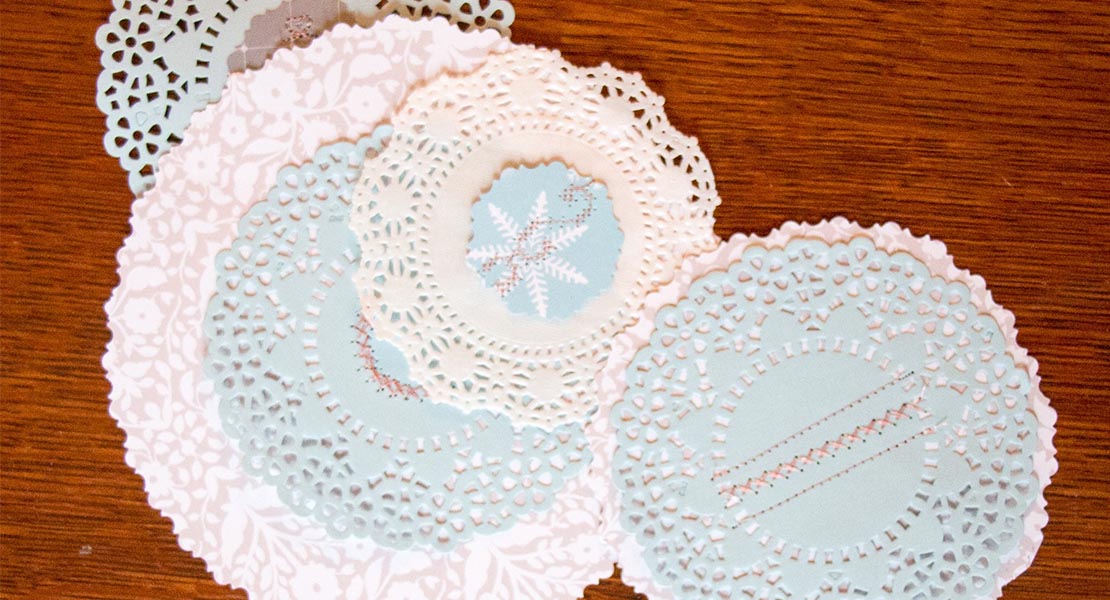
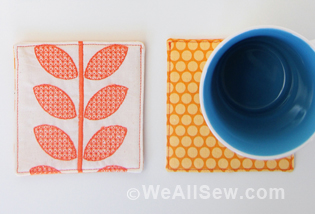
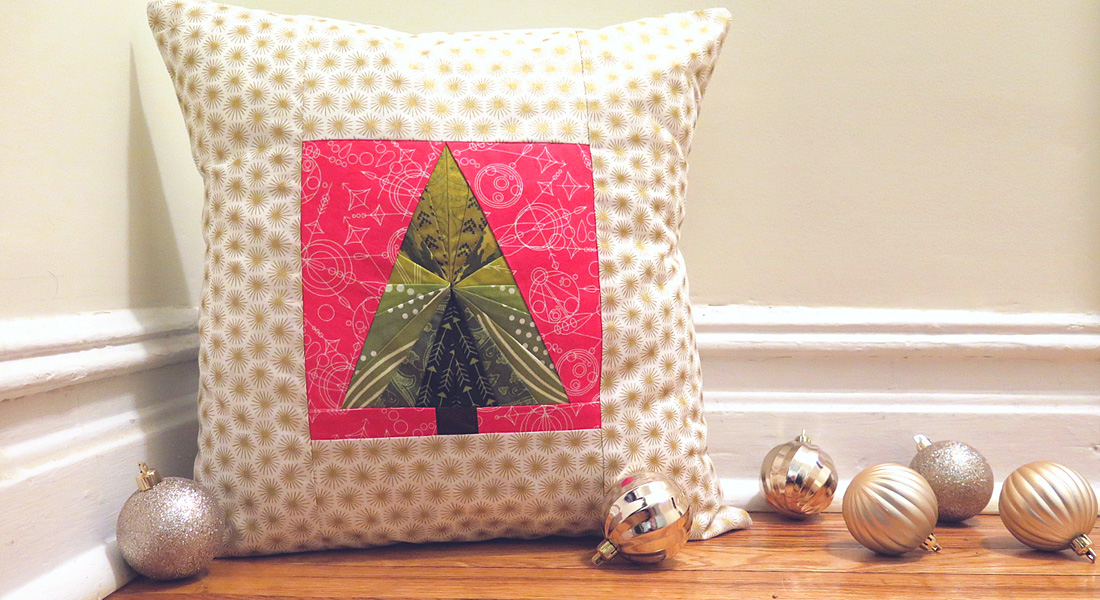
You will have a top piece looking as cute as this one!
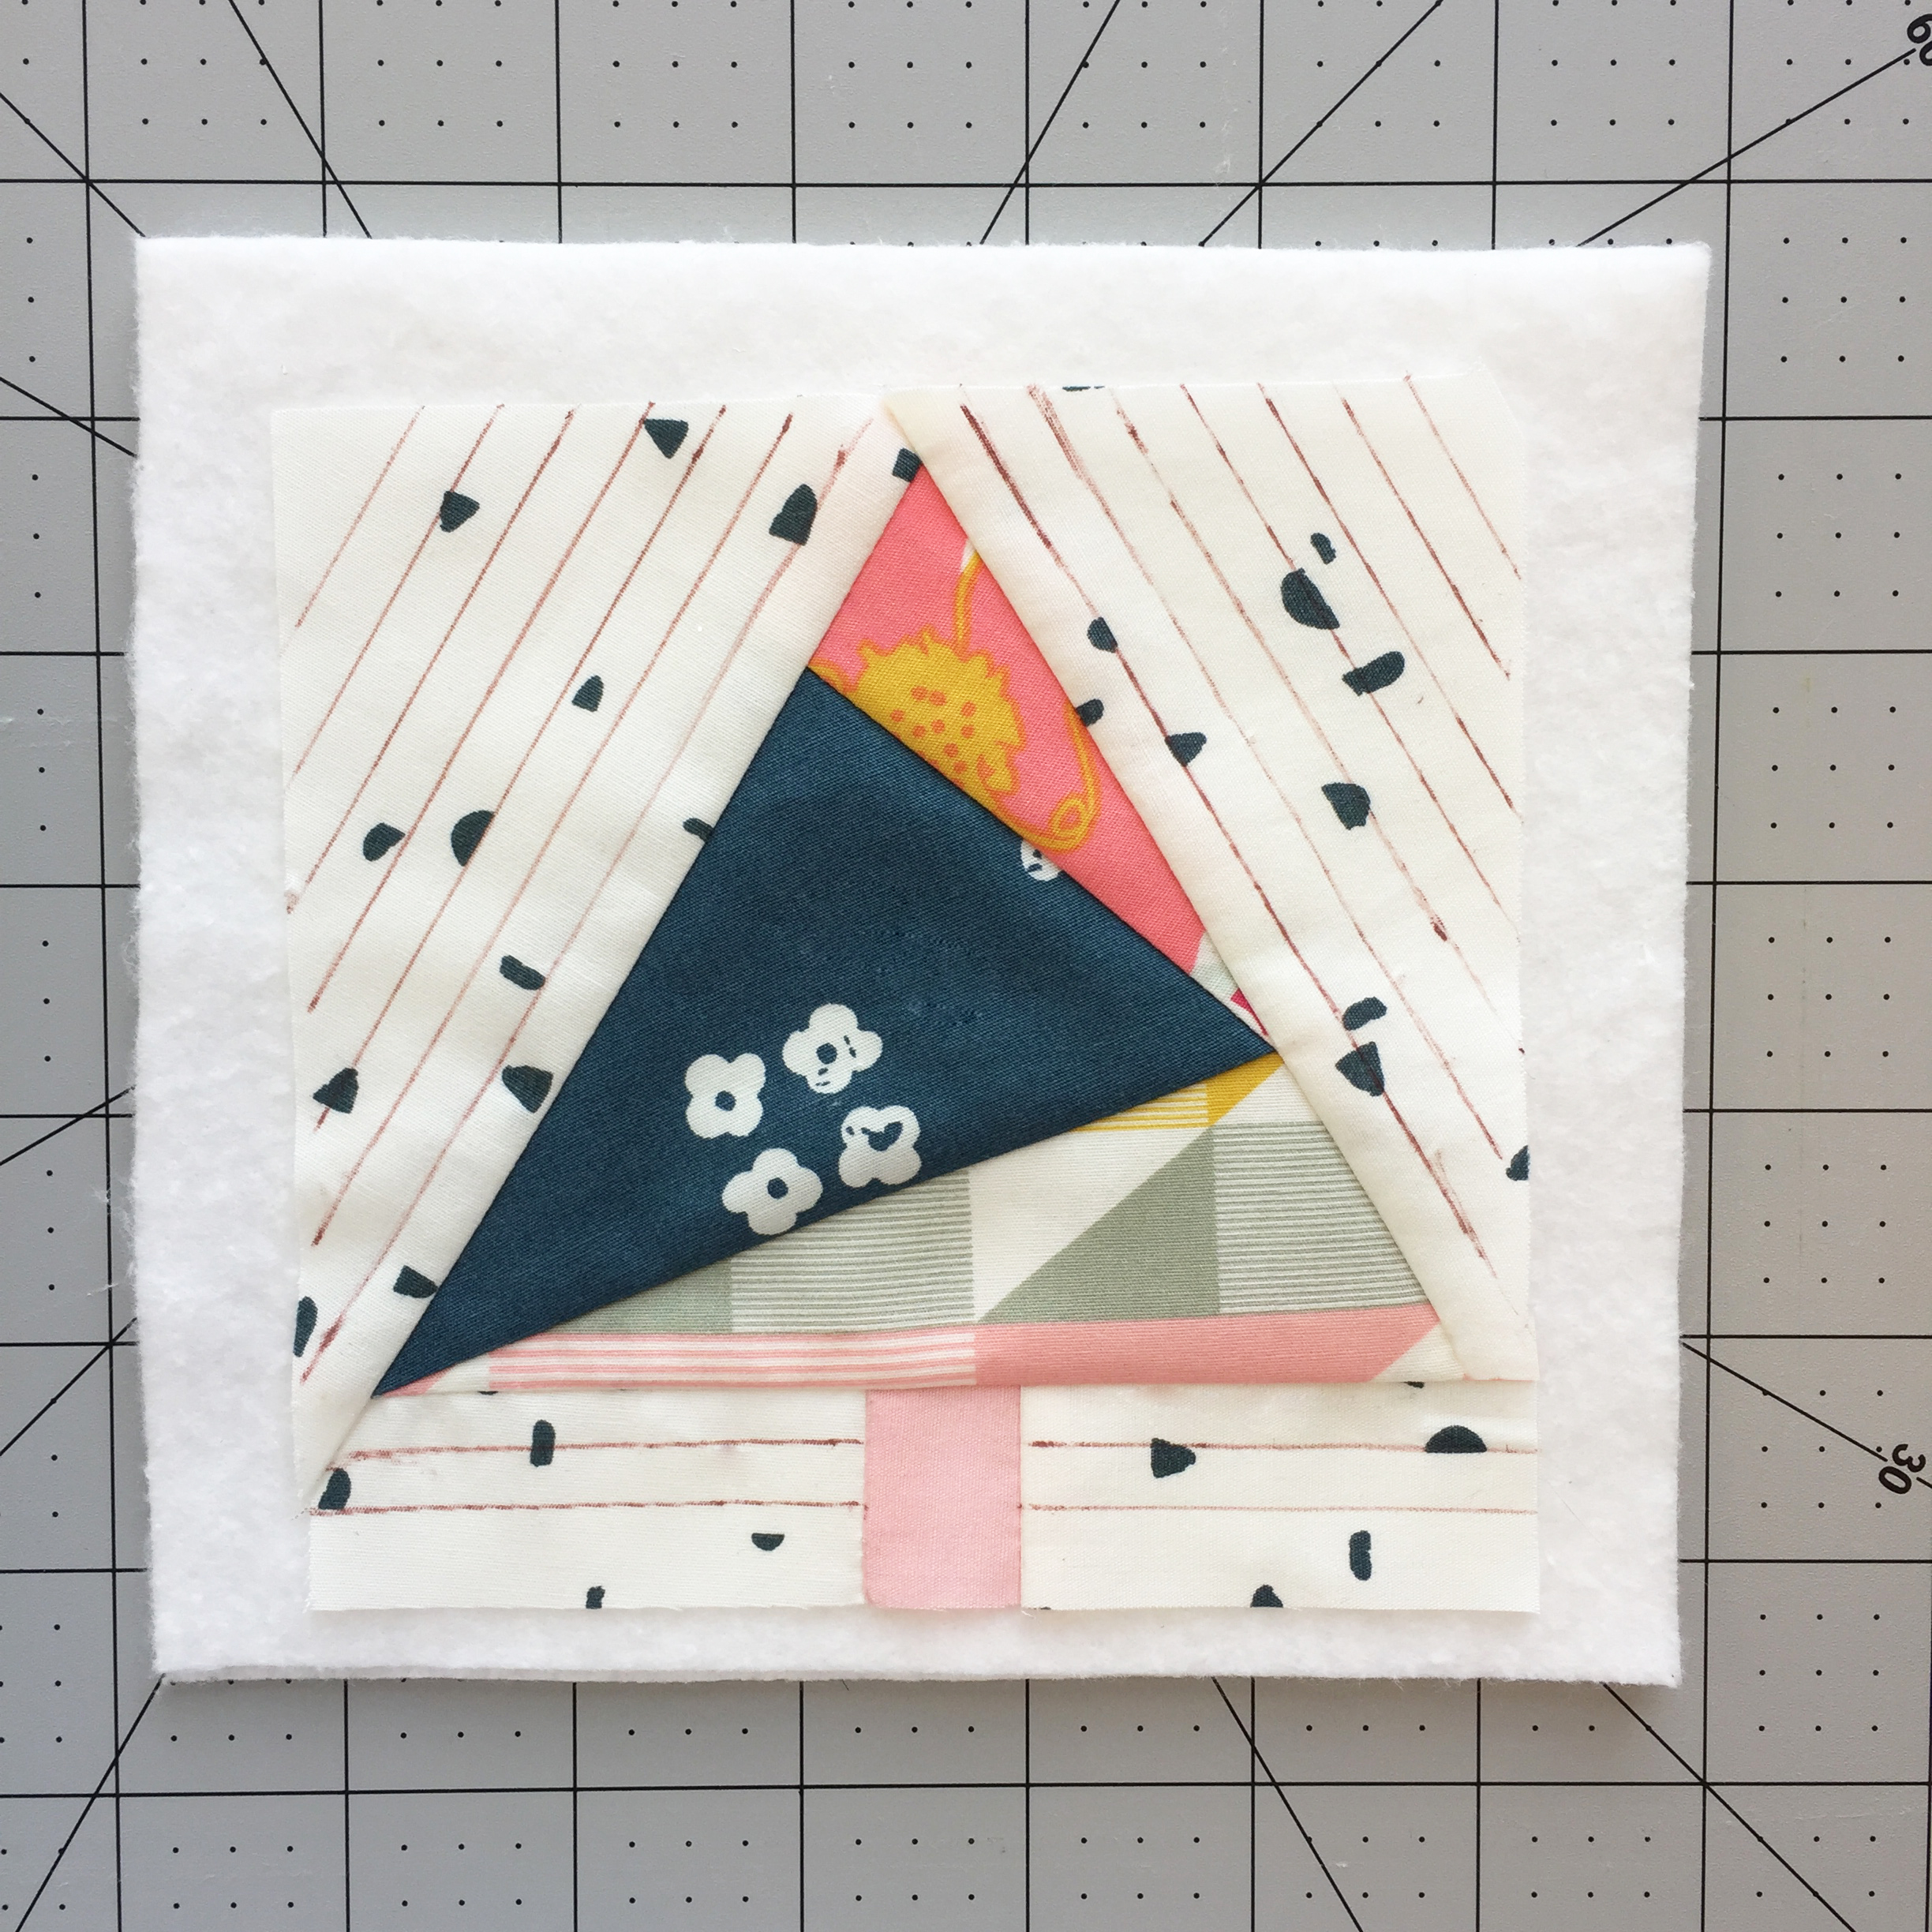
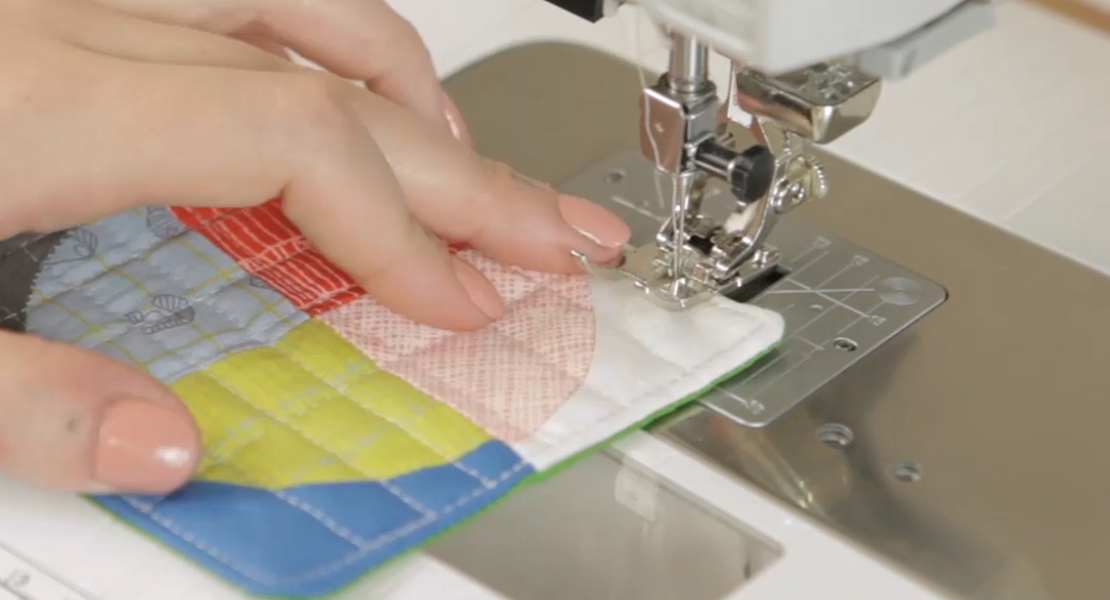
Step 2- Quilting
With an erasable pen, draw diagonal lines at 1/4” separating between each line, just as pictured below. I used two layers of batting for extra quilting richness, so grab 2 (two) 6 1/4” by 61/4” pieces of batting.
Prep your machine by changing your thread to AURIFIL cotton thread #4020. Also change the Lower Multi-functional Knob back to 2.5.

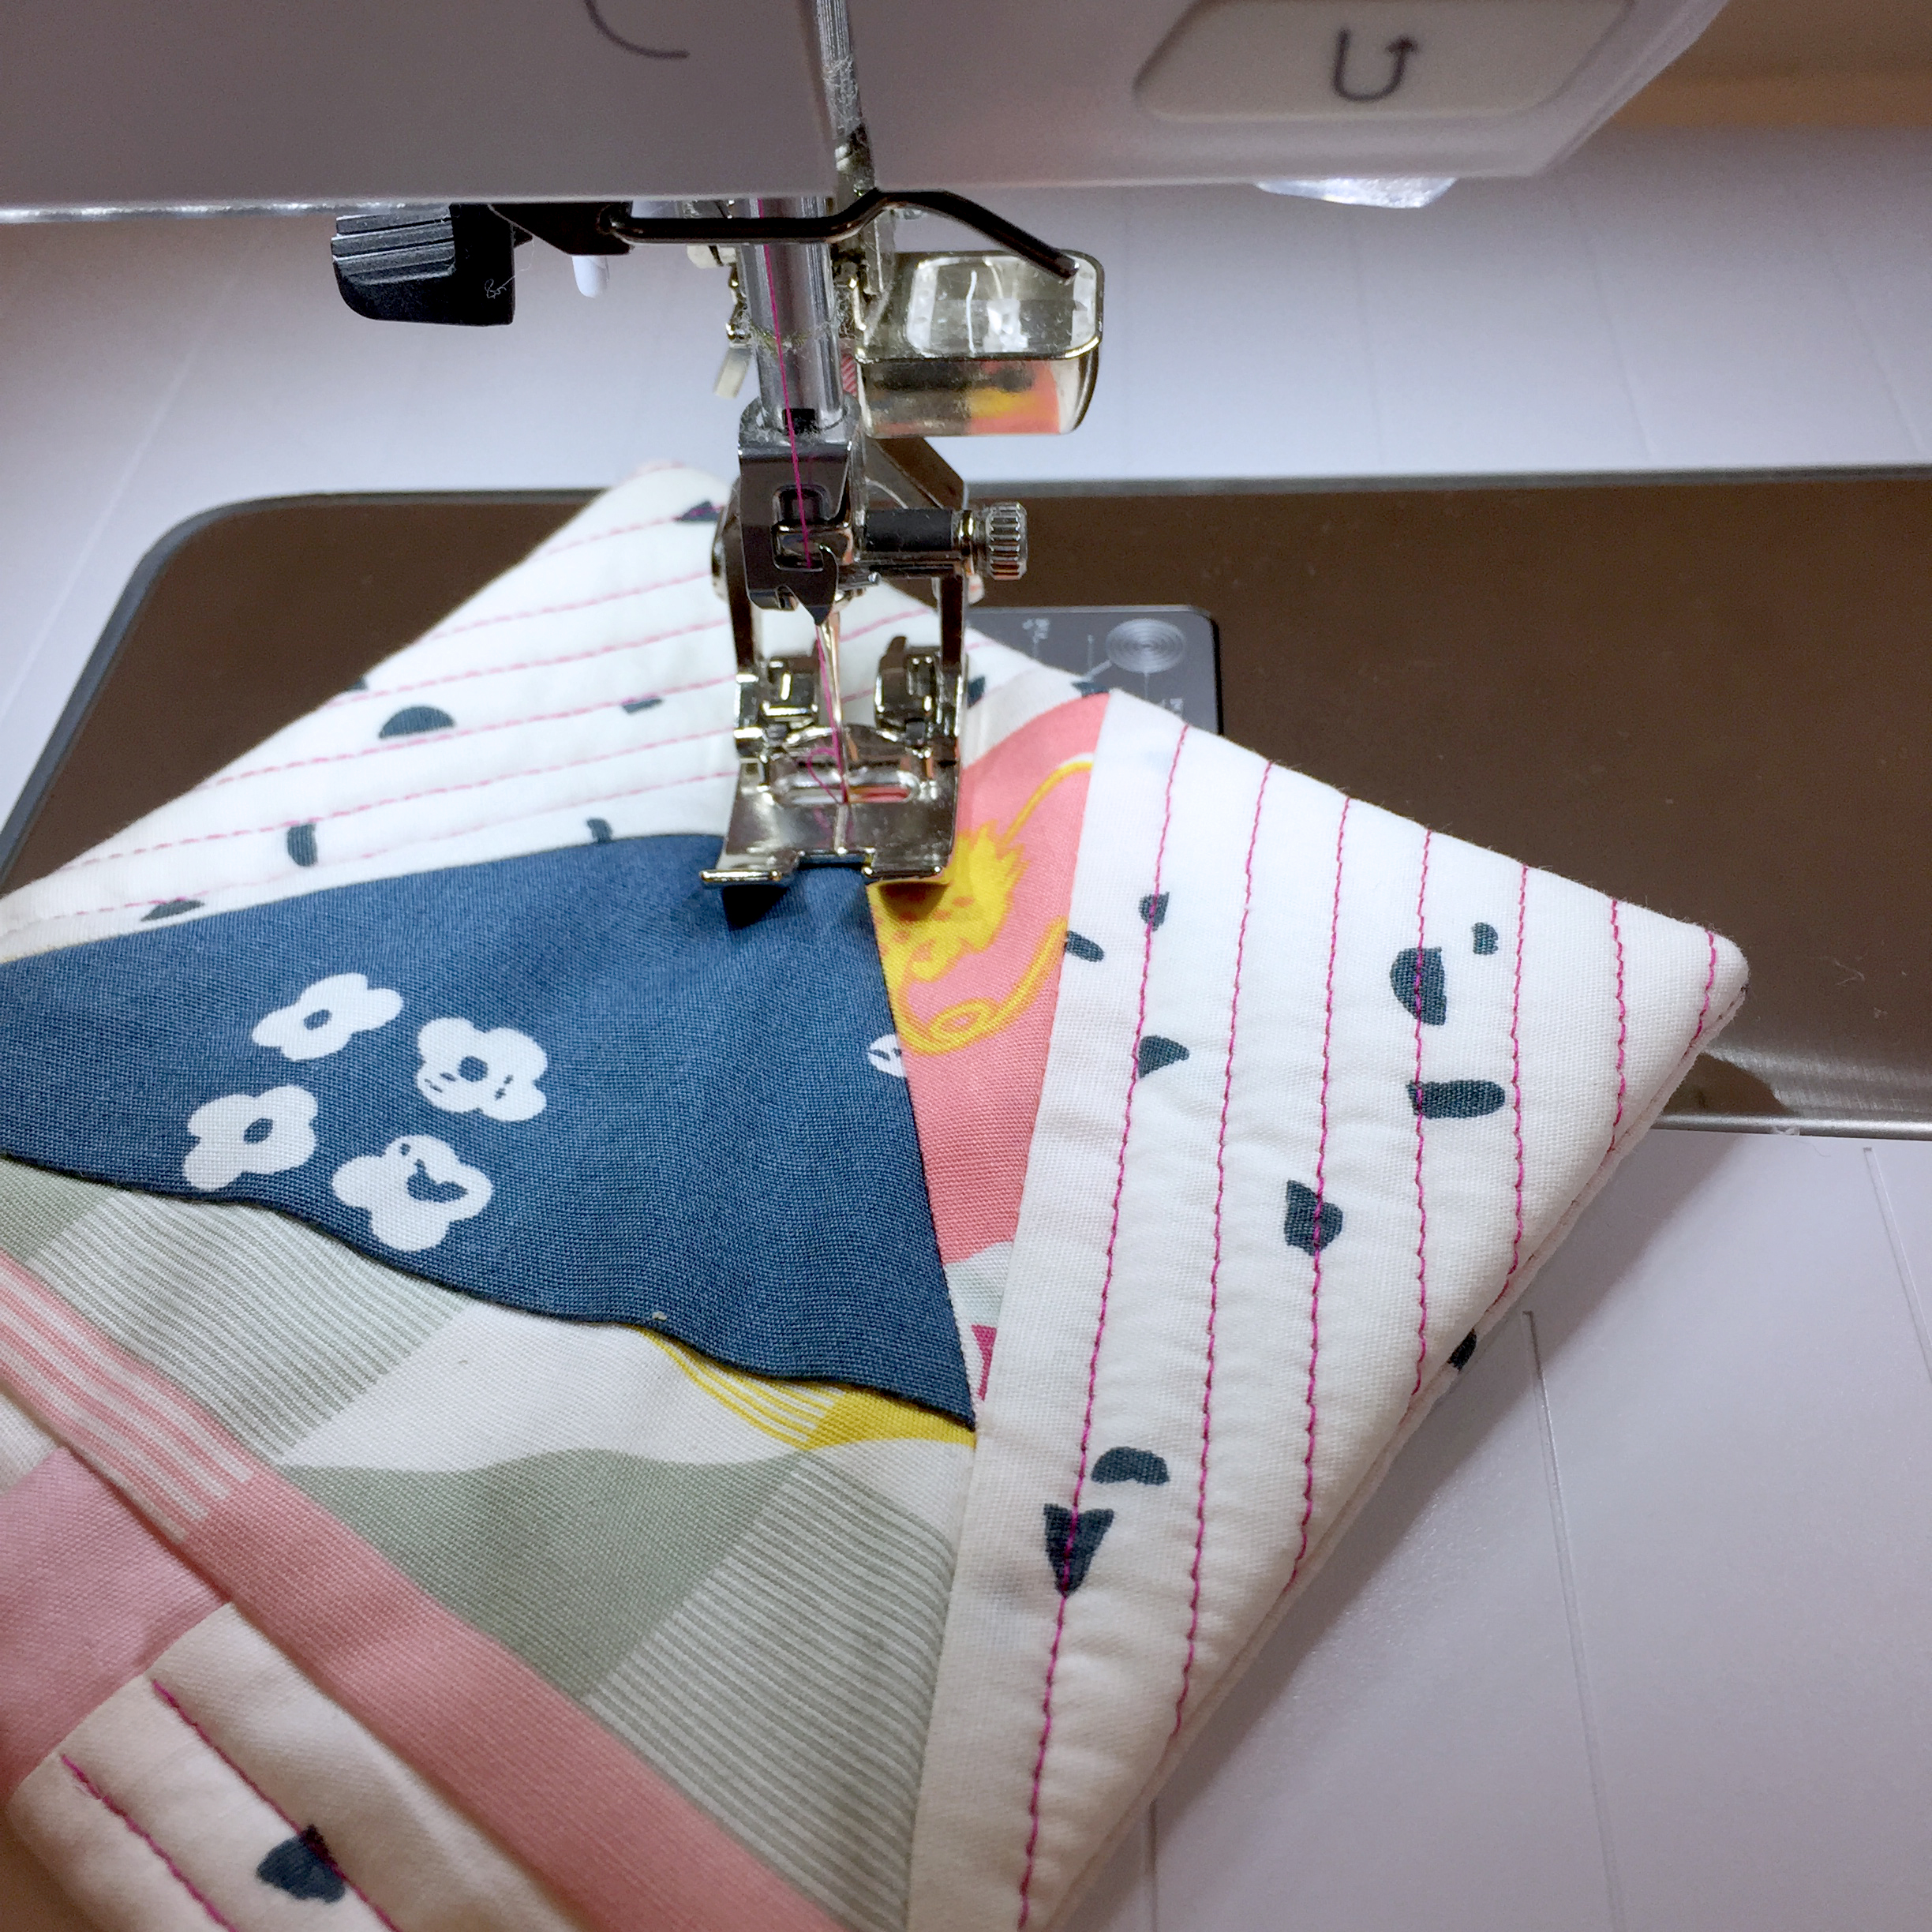
Take your piece to your sewing machine and start quilting!

Step 3- Backing
Now take your 5 1/4” by 5 1/4” piece of Fabric D and place it, wrong side up, on top of your already quilted piece. You will sew around the coaster at 1/4″ seam allowance leaving only the bottom part open.

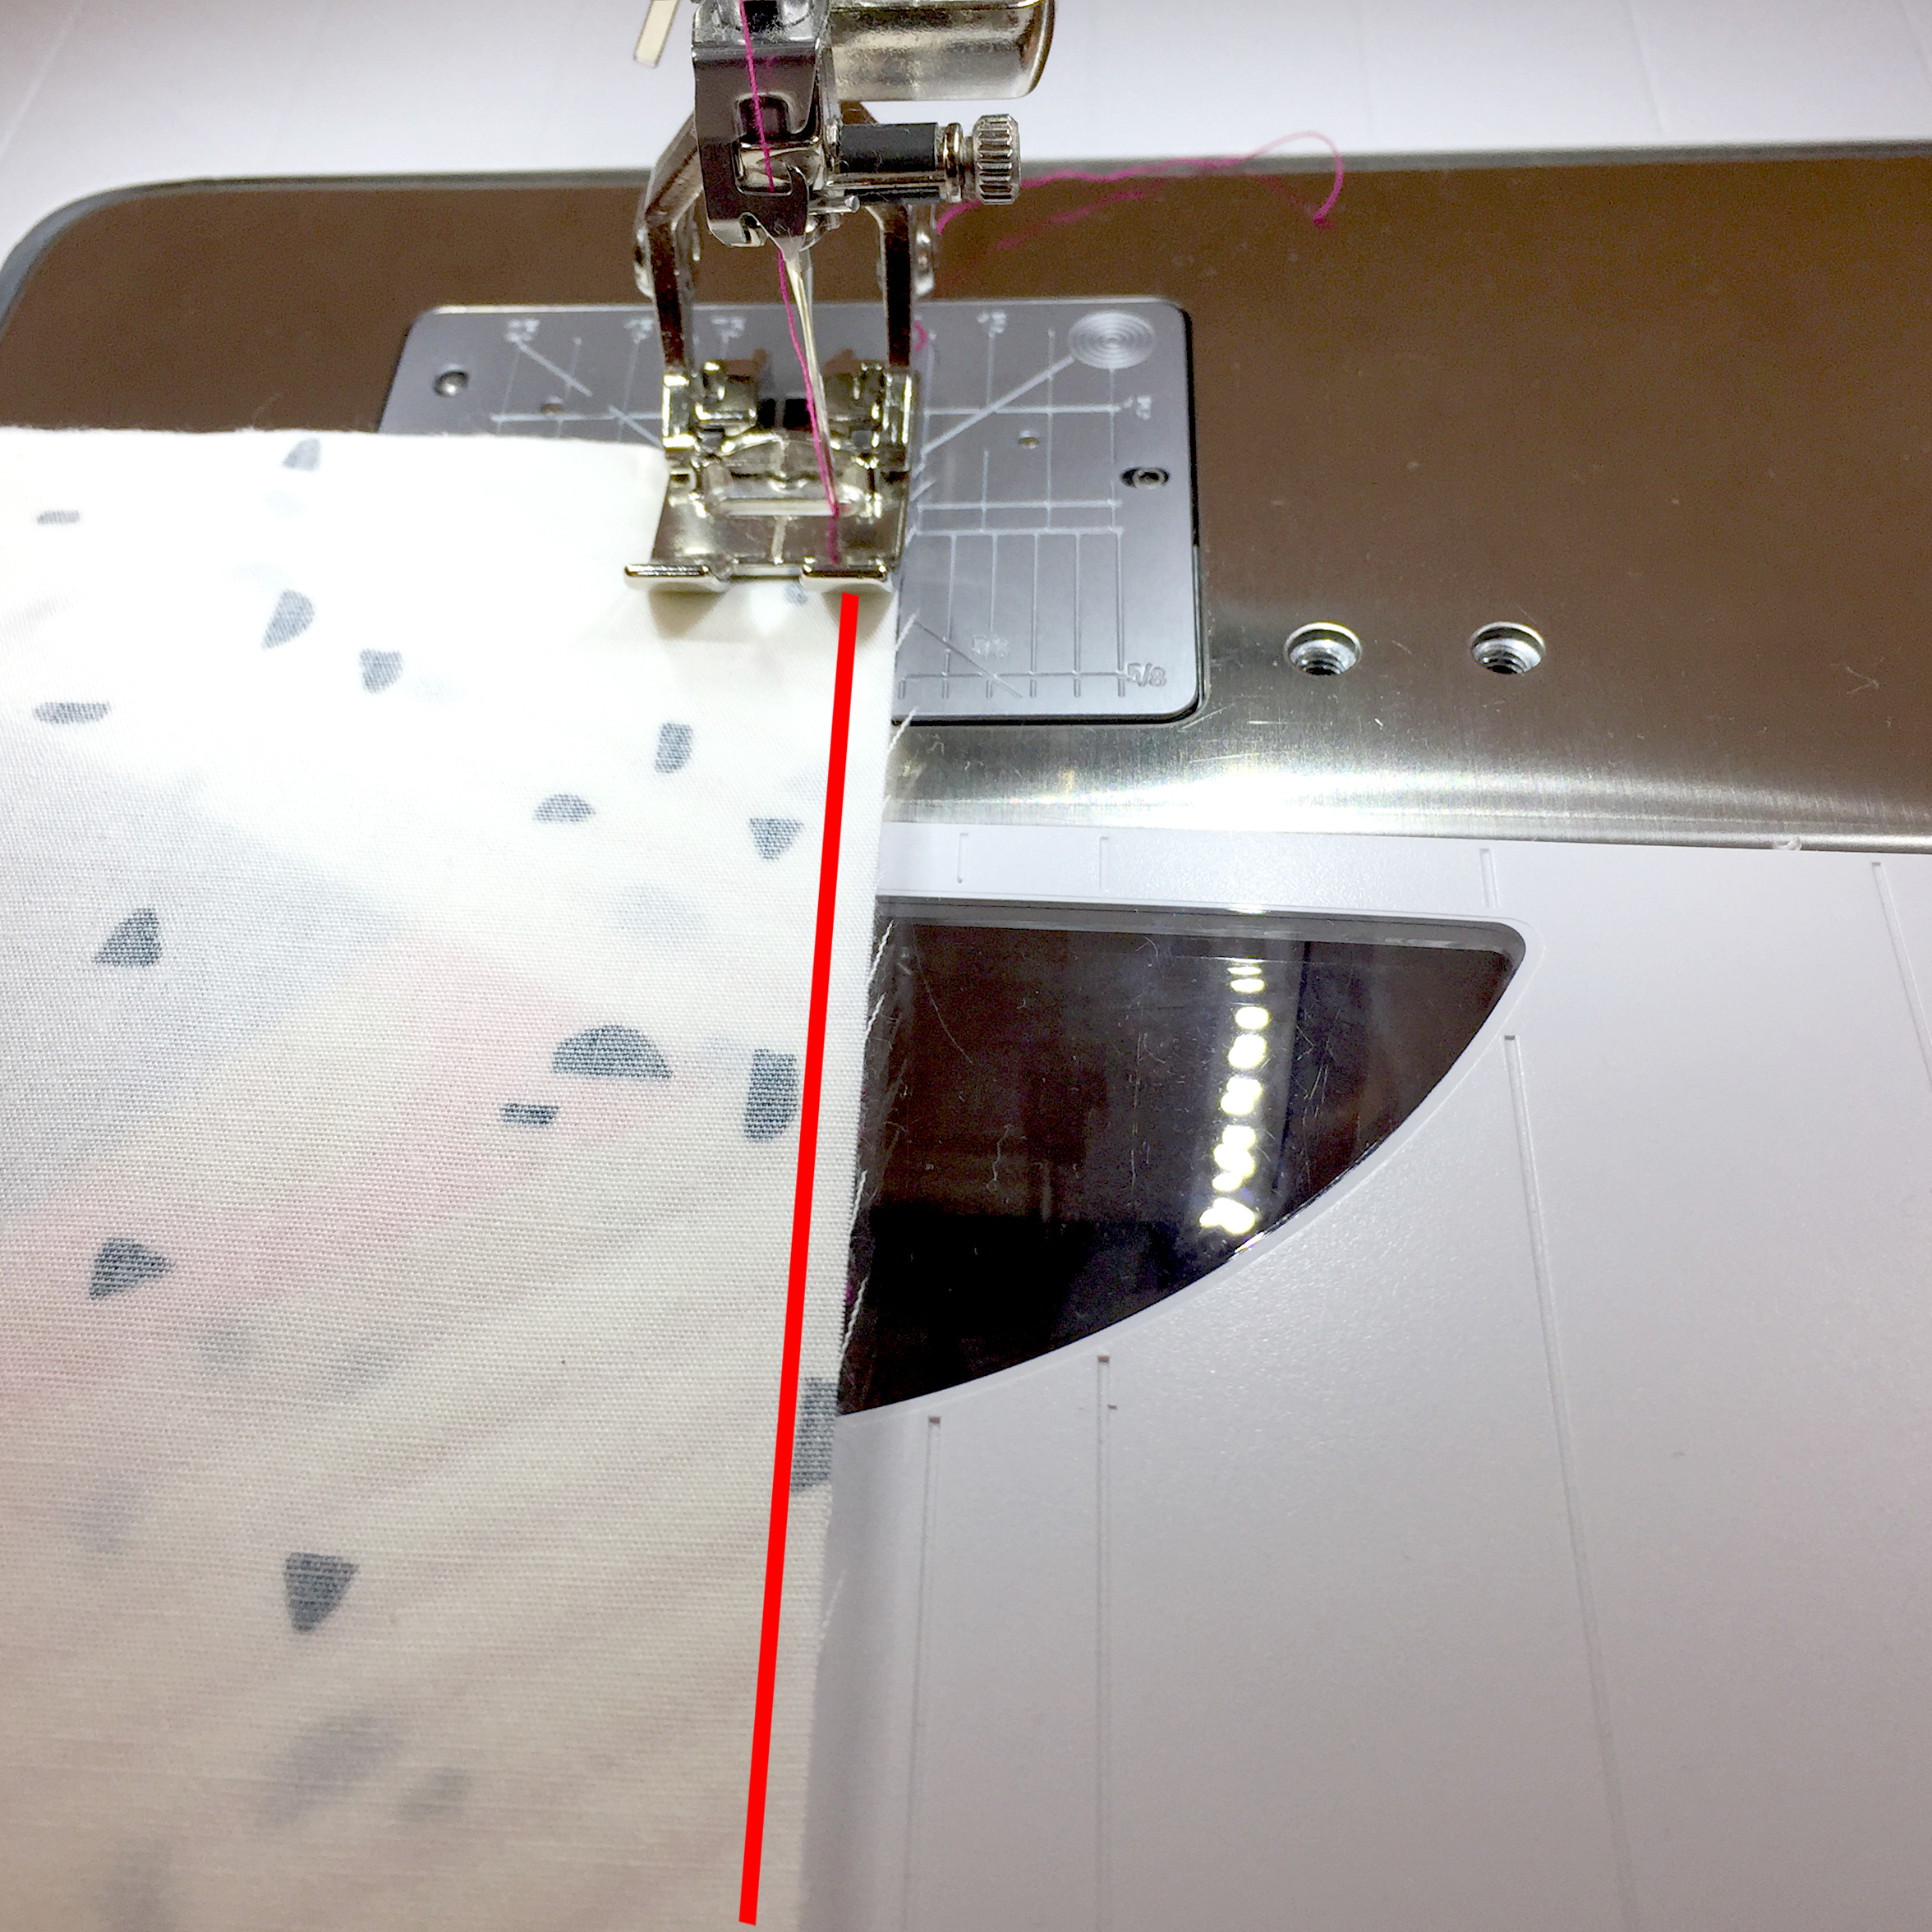
In your sewing machine, you will move the needle to the right to #3 using the Needle left/right button.
Place the coaster to the edge of your presser feet and start sewing.
Once that’s complete you will have a piece looking like the one below. Cut the corners and fold the piece over. Now it is time to close the coaster by folding 1/4” of fabric under the piece and blind stitch. If it is easier for you, you can top stitch.
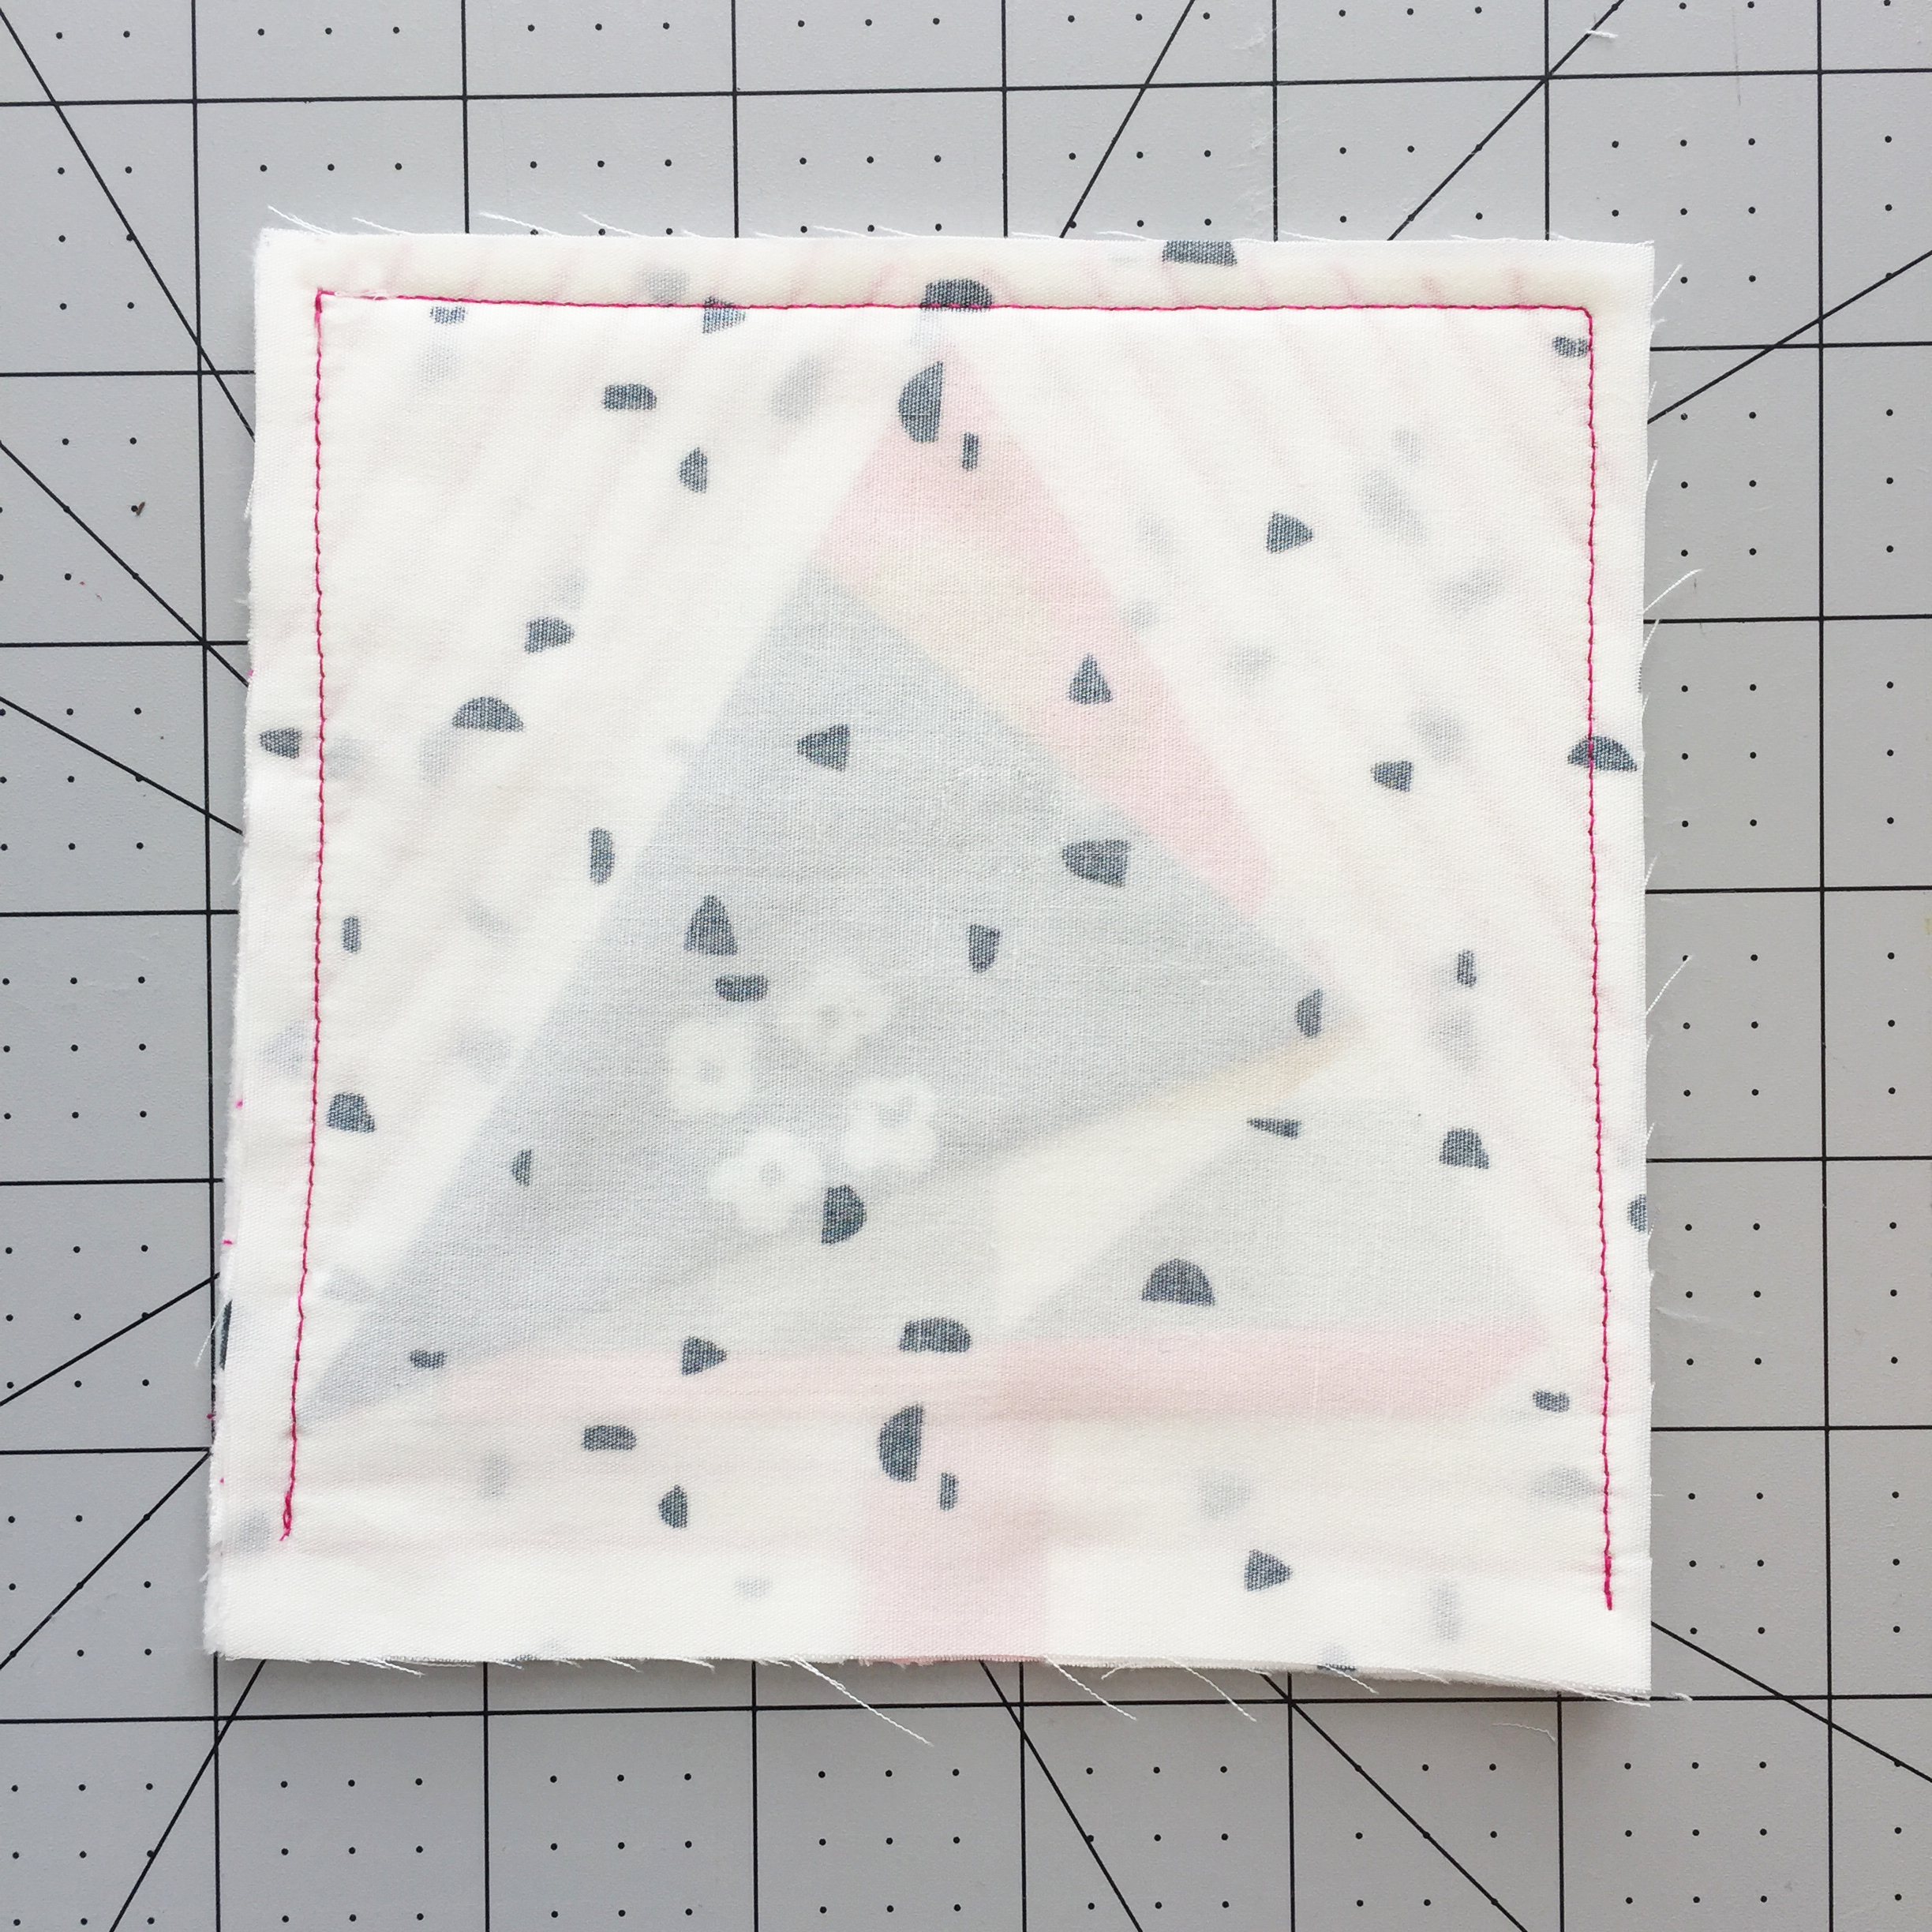
Stitch around the triangle of the paper pieced Christmas tree to add stability with the backing fabric.
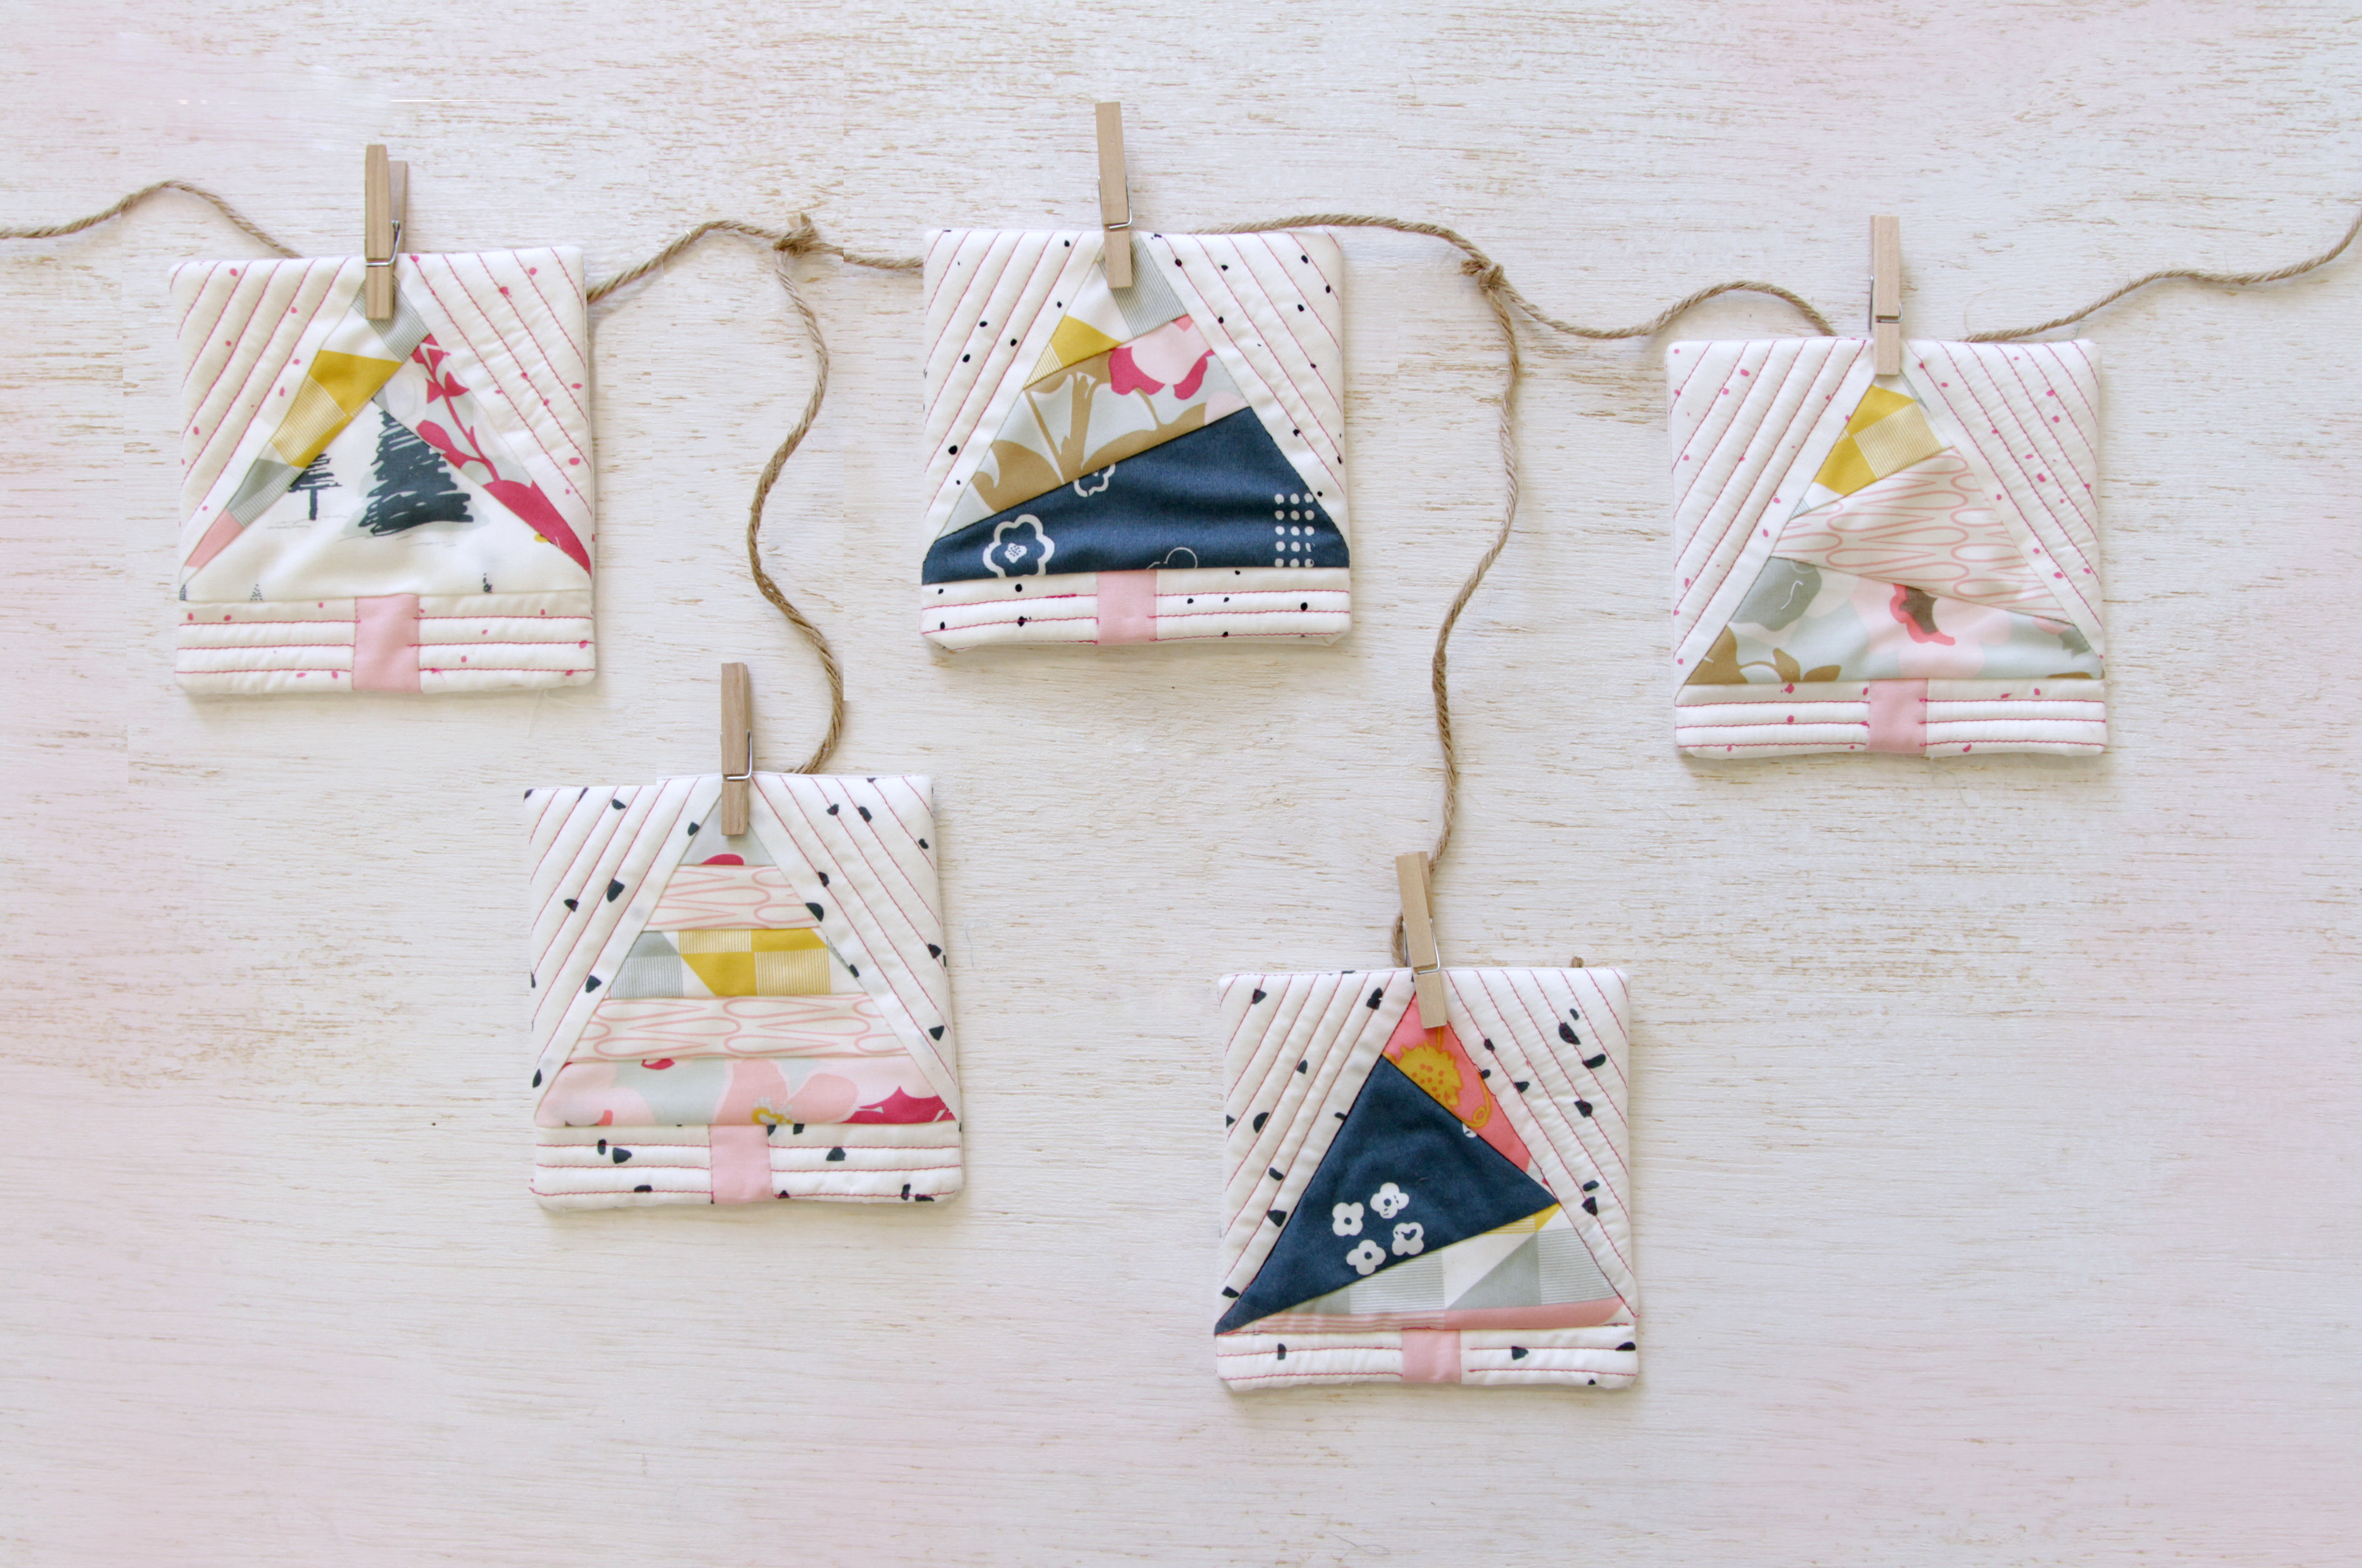
And voilà! You have completed this adorable Paper Piece Holiday Coaster! There are 4 more templates for you to use and create a wonderful and beautifully decorated Christmas dinner table!
Our December 22 Gift for You
Today is the day of the big giveaway! One WeAllSew reader will have the chance to win the BERNINA Simply Red sewing machine.
Pat Bravo’s December 22 Gift for You
Today’s gift is an adorable fat quarter bundle of Heartland Fabrics.

All you have to do is post a comment below answering the following question for a chance to win the BERNINA Simply Red sewing machine AND the Heartlands fabrics fat quarter bundle:
Do you have a favorite fabric designer?
A winner will be chosen at random on December 23, 2016 and announced the following week!
Good luck!
The contest is open for comments until December 22 at 12:00 midnight Central Time. Click here for contest rules.
What you might also like


429 comments on “Holiday Coasters”
-
-
To be honest I can’t afford to have rich taste in most things , I choose to find comfort and joy in whatever is available to.
But on the other hand we all are free to dream ( and to drool ? ) so right now whatever I have in my stash would feel great if I won this machine…-
I’ve been a Bernina owner since 1976! Would live the Red b215 to give my b560 a little sister! Perfect for classes and workshops. Or when the older sister is embroidering I coukdr keep busy sewing on the little one.
-
-
I love the Blithe line by Art Gallery and Michael
Miller serafina-
So many talented designers but I too would pickKaffe Fasset
-
-
I think Edita Sitar is my favorite fabric designer. I would love to win the Simply Red machine for my grandson’s wife who is just learning to sew. She love to design clothes & is interested in learning to quilt. She has a gift for design. Thank you for the opportunity to win. Merry Christmas.
-
Kaffe Fassett is my newest favorite. Easy to appliqué, just overall fun.
-
Love moda 3 Sisters line, Hoffman Holiday fabric, especially precuts
-
I really like paper piecing-Pat Bravo
-
-
Gosh there are so many! Kaufman maybe but I like so many others including Pat Sloan’s bundle from today.
-
I meant Pat Bravo? although I do like Pat Sloan too ?
-
-
I love fabric and have many favorites. But if I were on a desert island and could only choose one, I would pick Kaffe Fassett.
-
I enjoy flannels and several designers of beautiful flannel patterns
-
-
Not yet…
-
I guess I don’t follow specific fabric designer, but follow specific lines of fabric. I love Moda, Timeless Treasures. I have always loved Debbie Mumm, though! She’s a classic and designs fun prints. But in terms of fabric lines, I choose a fabric I like, look at the end of the bolt, and usually see it’s made by one of my faves. Amazing how that works! They have a look that suits me perfectly.
-
KAFFE FASSETT, beautiful fabric.
-
I love Riley Blake. Always a wide range of fun but modern prints!
-
I have been making some things from Sweetwater…love this line of fabric!
-
I don’t have a favorite! I’m working on a project with cotton + steel Sarah Watts fabric currently though.
-
Hard to pick just one, I like Michael Miller designs.
-
No, I don’t have a favorite.
-
I don’t have a favorite designer right now. It’s been a while since I’ve just done purely for fun projects.
-
Recently, I discovered Heather Givens. Her fabric ‘sings’ to me.
-
Yes, my favorite is Northcott.
-
I love Alexander Henry!
-
Anna Maria Horner Is my favorite. I have a little Granddaughter that would love the machine!
-
I like Robert Kaufman…and I am not sure I spelled his name correctly….:)
-
Bonnie & Camille would have to be my favorite. Thanks for all the amazing giveaways!
-
I enjoy many different fabric designers, but my favorite right now is Jane Sassman
-
I love the creativity of Tula Pink!
-
I admire Edyta Sitar’s fabrics and designs. Riley Blake has some fun designs also. Kim Schaefer fabrics also catch my eye.
-
There are too many fantastic designers out there! How can you have one favorite? Pat Bravo, Maureen Cracknell, Amy Sinibaldi, Cory Yoder to name a few are my favs.
-
Love Paula Nadelstern for Benartex. Makes the best Christmas ornaments.
-
I think Anna Maria Horner counts as my favorite designer. But in reality, I LOVE all fabric!!
-
I don’t have a favorite fabric designer for the purpose of fabric. I do love Tula Pink’s personality.
-
I love fabric!! My choice usually depends on the project, but RJR has long been one of my top favorites.
-
I have not a favorite designer, but love the feel and drape of Moda fabrics.
-
I really enjoy Micheal Miller’s horse fabric designs! Horse themed fabric is really difficult to find!
-
I don’t have a favorite designer. If I see a collection I particularly like, I will buy a FQ pack of the entire collection, else I might buy selective yard cuts of fabric that appeals to me. I might add that I am old and my stash is fairly extensive so that might influence what and how much I will buy.
-
Amanda Murphy’s Sewing Room is my current fave.
-
Riley Blake and Fassett always appeal to me as many others. I like fabrics to wash well and haven’t figured out how to tell that before purchasing.
-
I just have an overall love of all batiks. Anthology, Hoffman, etc. Not particularly one specific designer.
-
I saw a fresh new collection by Katie Doucette recently called “On the Road Again”. I like her style and love BERNINA!
-
Thank you for the project! My favorite is Leanne Anderson especially her “Kitty Kay Kapers”.
-
Tula Pink is my favorite right now! There are so many layers to her designs.
-
What a wonderful prize! I would love to win this one!!
I follow these designers: Kaffe Fassett for color richness, Amanda Herring (who designs for Riley Blake) for sweet patterns with many eye-catching coordinates, and Liberty of London for delicate and vintage voile/lawn designs. -
I love the eccentric prints Cotton + Steel makes!
-
Kaffe Fassett, definately!!
-
I love the different styles that Timeless Treasures comes out with.
It would be SO COOL to WIN this! Today is my BIRTHDAY!
Hope your day will be as special as mine. 😉-
Fabric Designer? For SURE: Gail Cadden
-
-
Naomi Ito is a favorite.
-
Don’t have a favorite designer, but I do have a favorite sewing machine. My Bernina 780 can do anything I ask it to do.
-
Riley Blake, Lori Holt, Sweetwater…those are a few of my faves! But I’m a fabricoholic…I could definitely pick more!
-
It is impossible to pick just one — as soon as I do, I will find a new favorite.
-
I just love April Rhodes. She uses a gorgeous color palette and has a gread design sensibility.
-
I love Tula Pink! I have many others, Sarah Watts, Alexander Henry..there are so many awesome fabric designers it is really hard to choose!
-
It’s too hard to pick a favorite designer so i’ll chose a favorite manufacturer…Art Gallery Fabrics. It adore the hand of their quilting cottons and the knits are lovely.
-
I like so many designers but my favorite is Bonnie and Camille.
-
I don’t have a favorite designer, I have several I love. Depends on recipient of the project or my mood. LOVE Daiwabo taupes, kona solids – so many colors, lots of the “modern” prints and for childrens projects I love a lot in Michael Miller.
-
My all time favorite designer is Amy Butler! Such beautiful designs!
-
I do not have a favorite designer. I use a variety of fabrics.
-
Moda and Robert Kaufman are among my favorites.
-
I can’t pick a favorite. Love so many.
-
I am loving Moda right now!
-
I love Riley Blake, especially the western designed fabrics…making a little girls cowgirl quilt now!
-
I like Riley Blake, but my favorite changes all the time!
-
My favorite fabric designer is Amy Butler. I decorated our 2 guest bedrooms using her Soul Blossoms Home Dec fabrics and my grandchildren LOVE it!
After using high quality fabrics, I can’t go back to the cheep stuff. Now, if I could just afford a Bernina. Would love to win this little red one.
-
I love Kaffe Fassett! We have long winters and the fabric makes me think of summer!
-
Not really a favorite designer, but I love batiks!!
-
This is so hard, I love so many! If I had to pick any at the moment t I like designers Gingiber and Sarah Watts
-
Love Riley Blake, working on Bloom quilt kit!
-
Lately, I have been loving the saturated colors of Alison Glass. But Art Gallery Fabrics are the highest quality in all the land. Thank you for the chance!
-
Narrowing down to one favorite is difficult, but I love Bonnie and Camille.
-
I seem to end up with quite a lot of Robert Kaufman each year. This year it is Pat Sloan’s Home Town Girl line. It is hard to pick just one though, isn’t it?
-
Oh gosh! So many talented designers…Kaffe Fassett is probably my favorite!
-
I love Alison Glass with such classy design and awesome colors
-
I love the paper piecing trees. My favorite fabric designer is Tanya Whelan
-
I have too many favorite designers!! ? I love to sew with Moda cottons in modern prints and colors.
-
Kaffe Fassett
-
I really like Hoffman fabrics and have entered several of his annual quilting contests. It’s a great way to challenge myself by using his fabric in a completed quilt & getting it finished in just a few months!
-
One of my favorite designers is Tula Pink! She is truly an artist and I am always excited to see what she creates next! I have many other favorites as well…good stuff being created by so many talented people and I’m so thankful I get to be inspired by them!
-
Robert Kaufman
-
Tough one. I like so many. I guess Moda.
-
I like Michael Miller and love Penny Rose’s flannel designs.
-
I do not have a favorite designer. My tastes are pretty varied, depending on the project and my mood at any given time.
-
Love this tutorial!!! Oh my a new Bernina would be AMAZING!
My favorite designer is Bonnie & Camille….but Pat Bravo is a very close second!
-
Kafffe all the way. Love his large colorful prints & the newest line, Free Spirit, is amazing.
-
I’ve always loved Lizzy House’s designs.
-
I have two; Edyta Sitar and Kim Diehl.
-
There so many that I like but my go to designers are Robert Kaufman and SewCaroline.
-
My favorite designer is Helen Stubbings of Hugs ‘n Kisses in Australia. Love her designs and everything that she puts her pen to! She is awesome!
-
I have too many favorites to choose just one. Merry Christmas.
-
I don’t have a particular favorite fabric designer. I do like Kaffe Fassett, Amanda Murphy, Pat Sloan, Jenny Beyer, Edyta Sitar, and others. There are so many incredible designers. They make shopping for and sewing fabric more fun.
-
I do not really have a favorite fabric designer. I do love anything batiks so maybe Hoffman.
I loved this tutorial. Lots of great instruction and photos. Thank you so much. -
I really like Riley Blake
-
1 don’t have a favorite. I pick fabrics that I like-not a particular designer.
-
My ‘designer’ fabrics come from my mom’s extensive scrap collection! I travel down memory lane, opening up boxes and boxes of material from projects of times gone by!
-
Boxes and boxes of fabric from my mom’s scraps. No need for a designer at the moment.
-
Kate Spain is one of my faves. And anything the gals at Cotton and Steel do is awesome.
-
I like Valorie Wells. Thanks!
-
I love all fabrics but I think Sweetwater is really cute.
-
I don’t have a favorite but enjoy the designs of so many!
-
Robert Kaufman!
-
My favorite designer changes depending on what I’m looking for, and the colors in their latest collection. I do consistently love Anna Maria Horner and Amy Butler, although I don’t often use their fabrics. They’re hard to see in person where I live. I also like Cotton+Steel.
-
I really do not have one favorite designer. I like a designer/fabric when it “speaks” to me.
-
Yesssssss!!!! Riley Blake and Cotton + Steel are my jam 🙂
-
I like Allison Glass fabrics
-
If I can only pick one, it is Kaffe Fassett. But there are so many great ones with so many different looks!!!
-
I love batiks, but I also enjoy using Red Rooster, Keepsake Quilting, and Heartland! Have a wonderful Christmas!
-
Kaufman Radiance Fabric is my favorite for elegant garments, quilts, and home dec creations.
-
I love so many designers-but Tula Pink is one of my favorites!
-
I don’t have a favorite designer but I’ve been enjoying the cotton + steel, Riley Blake and art gallery fabrics lines.
-
There are so many beautiful fabrics! It is hard to choose but one of my favorite is Tula Pink.
-
I love kimberbell designs. She is local and I love to see what is new from her at her sisters shop!
-
Miriam Bos and a new collection called “Wildland.” It features a Native American girl, Bipi, interacting with wild ponies and woodland creatures in gorgeous colors. Great for sparking young imaginations!
-
I love Pat Bravo and her contemporary designs.
-
I love all fabric. It would be hard to pick a favorite designer since there are many wonderful ones. But no matter which fabric I am sewing my favorite machine is a Bernina.
Love the coasters and also the fabric!
-
I do not have a specific favorite fabric designer but I always seem to be drawn to bright colors and happy designs with lots of coordinating fabrics.
-
Liberty of London is so beautiful but so expensive.
-
I find that I am often drawn to Nancy Halvorsen fabrics, but there are so many great designers in Fabric Land! Good luck to everyone!
-
Favorite fabric designer is Patrick Lose.
-
There are too many of my favorites to list, but my latest go-to designer that I love is Carolyn Friedlander. I love her universal designs (good for male, female, young and old) as well as her fabulous choice of color. She’s got neutrals as well as fabrics that offer a pop of color. I can also embroider on her prints which add a unique touch to using her fabric. AND, her designs are on Essex linen. What more could you ask for?! Maybe a new Bernina to sew her fabrics into fabulous creations?
-
No I will not be traveling during the holidays this year, but our family will be getting together in March and will celebrate all birthdays and holidays at that time. When family is together it is a holiday
-
Do many to choose from but I cannot resist anything by Kaffe Fassett and Tula Pink!
-
I am a beginner and very patriotic since coming from a military family – so I like the patriotic fabrics from RJR Fabrics!!
-
Riley Blake is one of my favorite fabric designers. Her fabric has always given me inspiration for new sewing projects.
-
I’d love to win a Bernina sewing machine to enjoy in my retirement!
-
I don’t have a fav designer as of now
-
-
I don’t really have a favorite designer. There are so many gorgeous fabric collections that comes out often that it’s hard to narrow down to just a certain designer.
-
Amy Hindman from Peekaboo patterns and fabric is one of my favorites, but there are so many to choose from.
-
Live Tula Pink designs
-
I love kaffe fassett!
-
Lori Holt is my favorite designer! I would just adore having this machine!! Thank you for the chance to win.
-
I think my current favorite designer is Kaffe Fassett. I love his use of vivid colors in so many colorways.
-
I do not have a favorite fabric designer, I am open to let all fabric speak to me…some whisper others scream from across the shop !
-
I would so like to win the little Bernina and/or the fabric bundle. Merry Christmas
-
I have no favorite. I just love FABRIC!!!!
-
My little niece loves Michael Miller prints, especially the the fairy folk and wee folk designs and co-ordinates. Because she loves them, I love them because I like to make clothes and accessories that make her happy.
-
I love Ann Kelle’s fabric. It makes me happy!
-
I love all fabrics. I have a room full of boxes, shelves, and cabinets stacked with fabric. I like bright colors so that is why Amanda Murphy is one of my favorite fabric designers.
-
I love Deb Strain’s designs for Moda. I had the opportunity to meet her once and found her to have a fun, bubbly personality.
-
Currently, Kaffe Fasset is my favorite. Just love his use of color and design.
-
Love Kaffe Fasset!!
-
I don’t have a favorite- there are too many that I love.
-
Alexander Henry! or whoever is in my stash!
-
Alexander Henry
-
I like Tula Pink and Alexander Henry.
-
It would be easier to tell you who I don’t like.
-
I love fabric and there are so many designers that I really like that I don’t think I can narrow it down to just one favorite.
-
We don’t have a lot of choices around here. I kind of like the Premium & Artist Brands Quilting Fabrics that Joanns has. If I can find them I like Moda.
-
i work mostly in solids, but find a lot of cute prints out of japan that are fun.
-
Picking just one designer or fabric line would be like choosing just one type of cookie, not possible. But I can pick just one sewing machine for life, Bernina! Now I am teaching my grandchildren to be Bernina lovers too!
-
I have been drawn to the Robert Kaufman collection. I have completed a couple quilts using his wildlife panels.
-
not really, just enjoy what they have designed and if I like the item (regardless of designer) I make it (or something similar)
-
My current favorite is Riley Blake
-
I’d have to say Tula Pink and Heather Bailey.
-
I love cotton + steel fabric!
-
I do not have a favorite designer, since I choose fabric by whatever strikes my fancy when I’m looking at the store.
-
I think Lynette Jensen would probably be among one of my favorites.
-
I think my favoirte would be Alison Glass. All of her fabrics tie in with each other and aren’t print heavy. 🙂
-
No secret that I am Denyse Schmidt’s biggest fan girl!
-
Love them all!
-
i have favorites for different types of quilting projects.. i love Jacobs & Fassett for bold and feminine colors for a block pattern where there is plenty of space to appreciate the print. Zen Chic, Kona solids, Allison Glass, Kate Spain for more modern patterns. So many great designers is what i love about shopping for fabric. Right now i am loving the look of Amanda Murphys Nordic Holiday fabric, so beautiful i cant wait for the new year!
-
I love Kim Diehl’s fabrics from Henry Glass!
-
Amanda Murphy
-
Right now I’m enjoying Judie Rothermel’s 25th anniversary collection for Marcus Fabrics.
-
I really like batiks. But when making items for my niece, Sara Jane’s fabrics are so adorable. Her mermaid fabrics are a big hit!
-
Hands down Kate Spain… I also adore Tula Pink but can’t bring myself to cut into the fabric!
-
I love Lori HOlt’s designs and Debbie Mumm has always been a favorite of mine! thanks.
-
My favorite fabrics are Batiks by Timeless Treasures. I don’t have the name of specific designers for their designs but all the Batiks are beautiful.
-
I’ve always loved Riley Blake but have recently been introduced to Kaffe Fassett and love that line. But really, my absolute favorite is whoever is the designer of different 30s repros. I go by color and design more than just the designer.
Beth
[email protected] -
Hard to pick just one designer since there are many great designers. Bonnie and Camille would be my first choice as favorite designer. Blessings to all.
-
There is so much fabulous fabric out there, such a wonderful time to be a sewer/quilter. My absolute favorite fabrics are Moda and my favorite designers would be Laundry Basket Quilts, Fig Tree and Bonnie and Camille.
-
I like so many, but Tula Pink is a favorite.
-
Definitely Bonnie and Camille. But Stacy Iest Hsu has a big place in my heart 🙂
-
not yet depends on project
-
I love so many. How about Kaffe.
-
I don’t currently have a favorite fabric designer. I just started sewing again about a month ago after not sewing for nearly 16 years. I am so excited to get going again and am just starting to build a stash.
-
I never remember to pay attention and remember designers. But I always think I should pay more attention.
-
Kaffe Fasset is my favorite.
-
I would have to say Lila Tueller is a favorite.
-
I like kaufman,and especially Ann Kelle.
-
Beautiful! I don’t have a favorite designer. Love the ones I’ve seen online and in stores.
-
I don’t have someone favorite.
-
I think KAFFE FASSETT is timeless. There are so many to choose from. Love them all.
-
I don’t have any one particular designer, but I do love batiks!
-
Riley Blake
-
So many to pick from, but Robert Kaufman and Moda would be my two favorites.
-
I don’t have a favorite yet, but I’m sure I’ll have many favorites when I win!
-
Holiday Coasters are adorable.
Favorite fabric designers are Kaffe Fassett and Brian Mably…great team!
-
So many to love, but if I have to pick Kaffe Fassett. Thanks,
-
I love many many fabrics, especially batiks. Not necessarily any one designer.
-
My favorite designer is Anna Maria Horner!
-
Favorite designer? I would have to write several down. Love of fabric and color. Hoffman, Michael Miller,Kaffe.I think one of my favorite fabrics is Grundge by Moda. It is so veratile. Good luck everyone and Merry Chirstmas. Thanks to WeAllSew
-
What a sweet project! I don’t know if I have been sewing longing enough to have a favorite fabric designer but I do enjoy Jennifer Jangles fabric when I need something bright and bold : ) Thanks for the chance to play!
-
I have always loved French General and Minnick and Simpson. So hard to choose just one.
-
Hard to choose just one. I like many different designers.
-
Kaufman and Moda are two of my favorite fabric lines, but I really buy based on color.
-
I like Tula Pink!
-
No favorite. All fabric is beautiful.
-
Favorite at the moment is Vanessa Vargas Wilson, the Crafty Gemini, her Dominicana collection for Timeless Treasures fabrics. To be fair I must mention Janet Wecker Frisch, as I’ve made up quite a few projects with her delightful fabric designs. So, the fabric I am using at the moment is my
favorite. So many talented designers, it’s the best time to be sewing! -
Just one?! When I’m looking for a good cotton, I almost always find myself gravitating toward Robert Kaufman.
-
There are so many great fabric designers out there. With the lack of sunshine right now, I find myself loving Kaffe Fasset and Tula Pink fabrics!
-
For years, I’ve used mostly batiks. I just love them and the way they blend together.
-
I love Joel Dewberry’s designs!
-
Tula Pink designed the fabric for the quilt I recently completed…I really enjoyed working with her fabrics; but, to say she is my favorite designer would be an injustice since each project I work on changes what I am looking for from the fabric design.
-
I don’t have one favorite designer, but right now I am in love with Katarina Roccella and BariJ
-
I don’t really have a favorite but I love Jinny Beyer’s rich colors. I just wander looking for color and pattern.
-
I do not have a favorite fabric designer, I let the fabric call me over 🙂 However more than once I’ve been called over by the fabric by Kaffe Fassett!
-
Tula Pink & kaffe
-
My favorite fabric is Robert Kaufman.
-
I would have to pick any of designers for Cotton and Lawn.
-
I love Riley Blake, Moda and Kauffman fabrics. Cotton and Steel makes absolutely beautiful fabrics also. I guess if I had to just pick one I would choose Cotton and Steel. I love fabric! ??
-
It’s been Peggy Toole for Robert Kaufman, but I’m always open to new designers. Some of the things that Tula Pink has been doing lately are very fun!!
-
Tula Pink.
-
I love Bonnie and Camille, but there are many on my list….
-
I love all the fabrics from Moda
-
Moda and Timeless Treasures
-
I am really enjoying the style of Amanda Murphy designs, the colors and motifs are fresh and inviting.
-
There are so many great designers, how can I choose?
-
Don’t have a favorite designer. When I see a fabric I want to use, then I pick a project.
-
Pat Sloan is my favorite. Would love to win the Bernina, struggling with my old machine.
-
Amy Butler. Thanks for asking, and please pick me! ; )
-
Not sure I have a favorite fabric designer. I really enjoy so many but Riley Blake and Tula Pink are two that always seem to please.
-
Darling ornaments! There are so many wonderful designers how can anyone pick just one. My favorite is a tie between Lori Holt and Jo Morton.
Thanks for a chance to win,
-
Very cute idea. Right now I am enjoying Pat Sloan fabrics.
-
It’s hard to narrow down to just one but Robert Kaufman is usually my go to designer
-
Riley Blake is one of my favorites along with Tula Pink
-
Maureen Cracknell is one of my favorite quilt/fabric designers, but I really love Pat Bravo too!
-
I love Moda, but I use many different designers. This is a great giveaway!
-
I simply love fabric – could never choose one designer??
-
So hard to choose! Maureen Cracknell, Bari J., Sarah Jane, Pat Bravo, Katarina Roccella…
-
My favorite fabric designer is Tula Pink. I love her bright fun modern patterns.
-
Such wonderful prizes, thanks for the opportunity. Red is my favorite color! No, I do not currently have a favorite fabric designer.
-
Don’t have a favorite designer..love to mix up it up with all styles and designs.
-
Currently my favorite fabric designer is Kaffe Fassett due to the instantaneous reaction of joy I experience when veiwing his color combinations.
-
I don’t really have a favorite designer but I have purchased a lot of Robert Kaufman fabric this year.
-
I don’t have a specific designer in mind – there are so many talented people out there! It usually depends on my mood and the specific project I’m working on
-
I like the things Pat Sloan produces. Fun project…thanks for sharing!
-
I love the brights of Patrick Lose.
-
Jinny Beyer is my favorite fabric designer.
-
Well…I like a few… Don’t know which to say would be my favorite… Depends on what I’m crafting… 🙂
-
So many favorite designers but one of my top designers is Sweetwater.
-
Yikes, it’s so hard to choose, but I think I’d have to say Edyta Sitar! I’ve never met a Laundry Basket design I didn’t love!
-
I like several designers, since I sew A LOT. But I seem to come back to Kaufman a lot.
-
I’m partial to Rashida Coleman Hahn at the moment.
-
I don’t have a specific designer, but I love Moda fabrics and Timeless Treasurers. Happy Holidays!
-
I have many favorites. Today I like Edyta Sitar. Tomorrow I might prefer someone else! I just love fabric!!!
-
Robert Kaufman and Riley Blake are the two favorites I cannot chose between!
-
Oh I have many fave designers like Tula pink Kate Spain Joel d Anna Marie h just a few ?
-
I have two favorites! I love the Patrick Lose collections. They are bright and beautiful and I’ve used them in anything from table runners to quilts. I also love the Kaffe Fassett collections. Just beautiful colors and blends. Since learning to sew on an old treadle machine with “feed sacks” my bubba(grandma) used to repurpose, I have learned to appreciate the beauty, and sometimes simplicity of all fabric designers!!! Merry Christmas. Happy Hannukah.
-
Lonni Rossi is my favorite designer…red is my favorite color and my two machines have finally called it a day.
-
I think my favorite is Bari J! Her lines just speak to me as a mother of 2 daughters.
-
Art Gallery ☺
-
I like the unique colors and designs by Chong-a Hwang for Timeless Treasures. Her designs never disappoint.
-
I don’t have a favorite fabric designer. I’m an equal opportunity shopper; it really depends on my mood and the project I have in mind.
-
Sweet little paper piecing project! I love Cotton & Steel and Tula Pink.
-
I do not follow a particular designer but I am especially interested in the American Made fabrics. It is exciting to know we have textiles being made in the States.
-
I love Steele and cotton. Such cute modern prints. I also love pat Sloan’s lines they make me smile!
-
Moda. I love there line.
-
I love looking at the colors and patterns. I don’t remember Designer names well but the more I look names are becoming familiar.
-
My favorite favorite designers are Me & My Sister by Moda their color palette and playful designs just make me smile and happy no matter what the project is. Bright and bold is always in style in my book!
-
I love many designers including Michael Miller, Moda, RJR, Kuafman, and many others. There are so many great lines.
-
My favorite Fabric Designer is Lori Holt. I have many other Fabric Designers that I follow and love the work that they all are able to do.
-
Favorite? Not really. There are SOOOO many fabrics to love. But I do like Tula Pink a lot.
-
I am always attracted to fabrics by Kaffe Fassett, but I have not made anything with them yet. Maybe I need a new Bernina to help me get started.
-
I”m really drawn to the fabric collections by Edyta Sitar. The tones and designs of the fabrics work so well with the patterns she creates.
-
I am still pretty new to the cotton lines and do not yet have a favorite desginer, but my eyes are opening up to all the wonderful fabrics available.
-
I have a lot of favorite designs; Joel Dewberry, Heather Ross, Sarah Jane, Tanya Whelan, kaffee Fassett oh lord too many to name. Thank you for the opportunity to win a Bernina if I win tomorrow on my birthday I will be the happiest woman on the planet!
-
Favorite fabric designer is Cloud 9 fabric
Love the unique colors and designs. -
I would have to say my absolute favorite designer is Alison Glass. The colors she chooses make my heart sing! I would so love to win this machine! My special stitch machine doesn’t work well. This red beauty would get used daily!
-
I like so many designers. Tula Pink is one of my favorites.
-
What’s not to love about most fabric designers? Some of my favorites are Henry Glass, Benartex, Heartlands and Cotton & Steel. This would be a wonderful prize to win today. I have just the person in mind that wants to start sewing. What better way to help them get started than to share the Bernina machine from today! Merry Christmas to all!
-
I have only been quilting for 21/2 years, whatever I am working on seems to be my new favorite collection!
-
Can not pick just one designer! Just love fabrics, especially batiks and my Mother’s stash which is slowly being lovingly used for family projects. Thanks so much for these amazing giveaways!
-
I have so many I enjoy it would be hard to narrow it dow to one! I mostly purchase reproduction lines though.
-
Lovely giveaway!!
There are so many top notch designers out there. Tasha Noel, Lori Holt, Jennifer Chiaverini and Tula Pink are some of my favorites. -
I like so many, but Kaufman, Pat Sloan’s and pat bravo are my favorites.
-
At this time, Me & My Sister Designs for Moda?
-
Art gallery
-
I don’t have a favorite fabric designer, but I love bright colors and florals!
-
I love this, looking forward to learning to paper piece using this tutorial.
-
I sew a wide variety of projects, so my favorite fabric designer is the one I am working with whose fabric best matches the project I am making. Each designer brings such wonderful variety of pattern and colors to my sewing room I simply love them all !
-
Angela Walters, I love her material that looks like it was already free motion quilted.
-
I love Moda and I love any batiks. Your coasters are so cute. Thanks for the pattern.
-
My favorite fabric designer it the one who designed the fabric I am holding at each moment as I sew. I find so many that I love! Now to go hold some of those favorites as I make some coasters…
-
Right now my favorite designer is Elizabeth Hartman for Robert Kaufman. Waiting for her to release her line of Essex Yarn Dyed Linen. Thank you for another paper pieced project. I am saving all of them for next year teacher’s gifts. We have long winters here in NH and maybe I can get a head start on next year. I love my Bernina so much that I purchased one for my daughter. When I teach sewing to the little 4-Hs they all head for the Bernina’s. Thank you for the opportunity to comment and enter your drawing. Merry Christmas and a Very Happy and Peaceful New Year to all of the staff.
-
Mine changes from season to season – right now I’m loving Pat Sloan’s lines for Moda.
-
Wow, there are so many great fabrics it is hard to pick one. However, I was just online checking out some beautiful colorful fabrics by Amy Butler that I loved.
-
I love all kinds of fabric. My current favorite designers are Alison Glass, Anna Maria Horner, and Tula Pink. Thanks for chance to win!
-
I really don’t have a favorite but I do like Riley Blake. Thank you for the contest and great projects.
-
I love batiks, and I love Kaffe Fassett!
-
So many favorites, Fig Tree, Bonnie and Camille, Sweetwater
-
I prefer to use Hoffman fabrics for many projects.
-
I love vibrant colors and I seem to be drawn to designers like K. Fasett, Chong Hwang, Michelle D’Amore, (forgive my spelling) etc. I also like the whimsical drawings of Michael Miller and the like. Thank you for the great coaster idea.
-
Love Kaffe Fassett fabrics…color,color,color!
-
I love Jennifer Sampou’s fabrics. I’ve been working in solids recently though and I use Moda. 🙂
Merry Christmas!
-
Love Tula Pink!
-
I am drawn to Cotten and Steel. And I love almost any Moda fabric and all their designers. I have just finished sewing my Christmas projects. Whew!
-
Too much fabric?? That is impossible. I’m always missing a critical color or an inch or two of the fabric I have used for my background. Besides, it is fun to pet fabric and each has its own unique feel. We are so blessed to have so many beautiful choices.
-
Tula Pink is one of my favorite designers. I love her use of color and hiding animals in the prints!
-
I love Hoffman fabrics
-
The daughters and mom who make up Sweetwater are my favorite.
-
My favorite fabric designer is Nicole Miller because they’re pretty, affordable and available at Joanns.
-
I have quite a few favorite designers, but Pat Bravo is definitely one of them. Thank you for all of the great giveaways.
-
I’m just always drawn back to Cotton & Steel! Love to sew all things with it… home decor, quilts, and clothes!
-
I love fabric, all kinds. Just love too sew.
-
-
I have loved Michael Miller fabrics for years. Lately I like Ridley Blake designs. There is so many wonderful designers. I keep buying the fabric.
-
While I I don’t have one designer I always use. I tend to buy bulk plain fabric but when I need a pattern I just discovered Wildflowers by Josi Severson; I really enjoy her fabric because it’s all produced in the USA and has some great prints for fashion.
-
I don’t have a favorite designer- I simply like what I like when I see it.
-
Jinny Beyer rocks!
-
I enjoy many different fabrics and lines…however..I lean towards batiks and kaffe fassett…I weave as well as sew and love color..patterns…and any fabric that screams…USE ME!
-
I like Tula Pink and Bari J, and Alison Glass, and the wattsalot cotton and steel designer.
-
I love Alison Glass’s modern prints.
-
Love Tula Pink.
-
I choose fabric based on what I like, not by the designer. I Like Kaufman, Kaffe Fassett, Tula Pink, Ridley Blake, et al. I am trying to use up my stash, but always seems to be missing the border , the binding, or the sashing, so I buy more!
-
No favorite designer, but I do love Moda fabrics.
-
I like all ombres, especially Moda. Thank you for all the inspiring projects and prizes.
-
I love the Kaffe Fassett Collections!!! Love all of the bright colors and patterns for appliqué!!
-
Love Edyta Sitar’s designs and soft subtle colors
-
I love the ladies at Cotton + Steel, and their modern take on fabric designs.
-
Benartex, Quilting Treasures, Tula……. Its hard to pick just one.
-
I’m very fond of iconic William Morris patterns and love the fabric interpretations being done, such as those being from Barbara Brackman/Moda and designer Sarah Walden of Peacoquette Designs. Thanks!
-
I don’t have a favorite designer. I just buy what I like.
-
So hard to pick just one! so I won’t
-
My favorite fabric designer is Joanna Figueroa of Fig Tree Quilts. Love her fabrics.
-
I am still pretty new to quilting so I am still learning about the different fabric designers.
-
I love Kate Spain’s designs.
-
No, there are too many to choose just one!
-
My preference is not to a specific designer but rather color, prints and quality of the fabric. I love a houndstooth or check that is n a straight grain.
-
I have been quilting lots since about 1984. I love the feel of Moda. I like Hoffmann, Amy Butler…mostly more modern look fabrics. I would love a new Bernina. Mine is about 25 years old.
-
Can’t decide on one ? Love Moda, Kaffe, Amy Butler, Cotton+Steel and Robert Kaufman
-
I love Bonnie and Camille, Tula pink, Robert Kauffman. I just LOVE fabric!!
-
I don’t think I could ever choose one favorite designer, though I count Tula Pink, Alison Glass, and the ladies of Cotton & Steel among the many that I love! It is such a rich time for those who sew!
-
I mainly quilt with a specific person in mind, so the style and design often varies. For me, I love Cotton + Steel designers!
-
My favorite designer is Aneela Hoey. But….by looking at my fabric stash, I clearly like many other designers too.
-
I love Michael Miller designs.
-
I love KaffeFassett, however more recently I’m also learning of other designers cannot choose a favorite
-
Kaufman is my favorite fabric designer. Such beautiful colors and designs!
-
I like Cotton and Steel but mostly I just get what designs I like and what feels like nice fabric. I would love to win this machine for my daughter.
-
I have a few designers I love, but if I have to pick one it’s Kate Spain
-
I don’t have a favorite. I buy fabrics that have colors and designs for whatever project I’m working on.
-
I am completely new to all of this, so I do not have a favorite fabric designer…yet!
-
I usually do not select fabric by any one particular designer, however, before her death, I always chose Laurel Burch’s designs they have such personality.
-
I just love fabric. Batiks are awesome.
-
I am a sucker for Bonnie & Camille!
-
I love Kauffman fabrics and many others. Lately I’ve been enjoying using Kona solids.
-
I recognized Pat Bravo’s name and fabric immediately! I also love the designers at Cotton and Steel. IG is my favorite place to browse new collections.
-
I admire all the designers for their ability to produce so many beautiful fabrics. I am not blessed wth that talent and they make my fabric shopping a real pleasure as I “pet” the fabrics while making my choices.
-
I like all the designers with Henry Glass and Northcott, although I do love all fabric.
-
My favorite fabric designers are Kaffe Fassett and Kate Spain. They are so different, but I admire everything they design!
-
I prefer the look of “country” style prints/colors. Don’t really have a faborite designer but rather choose what looks
good with what I am doing at the time. -
Spoonflower is a great way to design your own fabric.
-
I love Moda’s Bonnie and Camille fabric collect! The combination of bright colors and fun, pretty prints are so adorable! But then again I love all quilting fabric! Love your site too! I am so glad I found you tonight! FYI my favorit color is Bernina Red!
-
I choose fabric based on what I am making. But I seem to find what I need with Kona, Robert Kaufman, Time Treasures, Hoffman.
-
I am a Jennifer Paganelli (aka Sis Boom) addict!
-
I like the bright and cheerful fabrics from Me and My Sister designs.
-
Must have a red machine. My favorite designer (s) are Bonnie and Camille. Thanks for the chance to win!
-
Yes, I love Jenny Beyer’s fabric designs.
-
I love Bonnie and Camille fabrics! And I love this red Bernina!
-
These coasters are great!!!! Love the Heartland fabrics.
-
I love MODA, second would be Robert Kaufman.
-
I don’t have a favorite designer. What Indo love is the feel if a great quality piece of fabric.
-
I don’t have a favorite designer but my favorite line is Moda.
-
Natalie Barnes is my favorite fabric designer. I love her HandMaker line. The color palette is beautiful.
-
Jinny Beyer is my current favorite.
-
I have several, but I think, Katarina Rocella!
Thank you. -
I love Alexander Henry’s wild prints! I also love my own designs in Batik, and pen and ink on fabric.
-
I love Lizzy House and Heather Ross. Such fun character in all their prints!
-
I love Kaffe Fassett. Color…design…all beautiful.
-
I love all fabric so it’s really hard to pick a favorite!! But if I had to, it would be Moda! Merry Christmas to all!!
-
I happen to love Art Gallery, Cotton & Steel and Alexander Henry. Thanks for the chance to win!
-
I love Michael Miller’s fabrics when I make things for my grandchildren.
-
I love so many designers…but one of my favorites is Lynne Hagmeier of Kansas Troubles! I can’t resist so many of her fabrics. LOL!
-
I like Jinny Beyer, Hoffman, and Loralie
-
I love Sweetwater’s prints!
-
I am in love with French General by Moda! I can’t buy enough of it, so gorgeous and timeless! I need a new sewing machine. I have the Bernina 830 electronic sewing machine that I bought in 1980! Still runs great!
-
I love Michael Miller Fabric!
-
Cherry Guidry has certainly caught my attention as a fairly new fabric designer. Love her whimsical designs. Her fabric lines are with Contempo Studio. She is also a wonderful Bernina Ambassador too!
QuiltShopGal
http://www.quiltshopgal.com -
I have no preference on designers.
-
I love lots of designers, but I’m currently in love with French General!
-
Kaufman
-
I have too many to choose . Pat Bravo, Pat Sloan, Kauffman is a definate must, Riley Blake, Art Gallery Fabrics, Sweetwater, just to name a few.
-
I don’t have one favorite designer. I like designers who use bright colors and geometric patterns. I also like to mix and match.
-
I can’t help wondering who would be the lucky person to win this beauty..
For me any fabric would feel heavenly if I were sewing on this machine. -
Yes and no. I actually have two favorites. One is McKenna Ryan and the other is Sherri Noel. Love them both!
-
Nancy Halvorsen has been my favorite. Never get tired of her fabrics.
-
I have many favorites but right now I love Michael Miller and of course my favorite go to designer is Moda.
-
Depends on the project.
-
Moda
-
Robert Kaufman is my favorite for the fine Japanese prints. I do Japanese art quilts and never disappointed in the array of fabrics. I’m also partial to the Stonehenge fabrics from Northcott for my Native American art quilts.
I came to quilting later in life than most probably did, so have much lost time to make up for…LOL…. -
I like a variety of types of fabric, but right now I am partial to Jo Morton’s reproduction prints.
-
Jackie Robinson, love her lush colors.
-
My favorite designer is Kaffe Fassett. He has an eye for color and pattern.
-
I like different designers depending upon my projects. I like Pat Sloan for a bright colors, Jen Kingwell for her fun fabrics and Kaffe Fassett for his wild patterns and colors.
-
That’s a hard question because I admire so many designers of quality fabrics, but I think Minick & Simpson is my overall favorite.
-
Right now Robert Kaufman fabrics have been catching my eye most often. However, I like to check out Hoffman also.
-
Jinny Beyer is the designer that I like best – I sometimes find her designs a bit complex to work with.
-
I like several fabric designers, but my most recent discovery is Michael Searle. Terrific use of color, humor, and design.
-
My favorite designer is Tone Finnanger.
-
I like Rose Ann Cook’s Glass House by Benartex
-
I have many many designers I love but I think that Kaffee Fasset is probably my favorite.
-
Robert Kaufman and Susan Winget are two of my favorite fabric designers. However, it is hard to choose just one or two since there are so many talented designers at the different vendors. As each season passes, they wow me with their creativity with fabric that says, take me home with you! Merry Christmas to all!
-
I don’t have a favorite designer. I just pick fabric I like based on color, design and feel
-
I don’t know which is cuter….that fabric bundle or that super cute Simply Red Bernina.
It would be fabulous to win either one. Thank you for the chance to win both!! 🙂
I love these Heartland Fabrics by Pat Bravo!
My current fave designer is Cori Dantini. And, for AGF I love the fabrics by Mathew Boudreaux.
🙂 -
Thanks for the great tutorial. My favorite fabric designer is Kaffe Fassett.
-
Moda, Me and My Sisters and Robert Kaufman have been my main stays for fabric.
-
So hard to choose. When I think of “designer” I do think of many of Art Gallery Fabric’s artists and their watercolor or sketchy floral designs. So I will pick Pat Bravo.
-
Tula Pink!
-
I love Robert Kaufman fabrics, they are always beautiful and top quality materials.
-
I generally choose by color and size of pattern on the fabric. I like all the many designer fabrics out there
-
I like a number of different designers, but Pat Sloan is one of my favorites. Thanks for the chance to win an awesome Bernina machine.
-
Karen Gibbs is my favorite with Banyan Batiks for Northcott fabrics.
-
I really like all of Joel Dewberry’s fabric collections but my favorite is an older collection called “Bungalow”.
-
3 Sisters has become a great favorite, although I enjoy so many others, too. Tula Pink always has such fun fabrics. I had a chance to meet her in Walla Walla, WA. a few years ago when she put on a class during the day and then a presentation about designing in the evening.
-
No I do not have a favorite fabric designer. I love fabric of all kinds.
-
What a fun way to empty out the scrap bag.
-
I would have to say that Jinny Beyer is my favorite. I am always looking forward to her next line.
-
Tula Pink is one of my favorite fabric designer.
-
Cute project!
-
I love Moda and everything Kansas Troubles!
-
I don’t really have a favorite designer. I look for colors and prints that work with my projects.
-
I think Paula Nadelstern’s design’s are fantastic! I love the red Bernina machine. Such a nice travel size!
-
Thank you for the cute tutorial. As for fabrics, I have had a wonderful opportunity to see so many different styles of fabrics, therefore, as much as I love Kauffman and others, I have also enjoyed designers from other countries. My true joy is to see the vivid colour and motif play that so many talented designers bring to the table. To marry quilt designs with colour and motif, has brought me much joy in my quilting. Thank you.
-
I like Jennifer Sampou
-
Everything Jason Yenter does is my favorite.
-
Right now my favorite is Tilda. I really love ALL fabrics!
Leave a Reply
You must be logged in to post a comment.

While I really like a lot of different fabric designers, my favorite is probably Joel Dewberry. Thanks for a chance at this great giveaway!