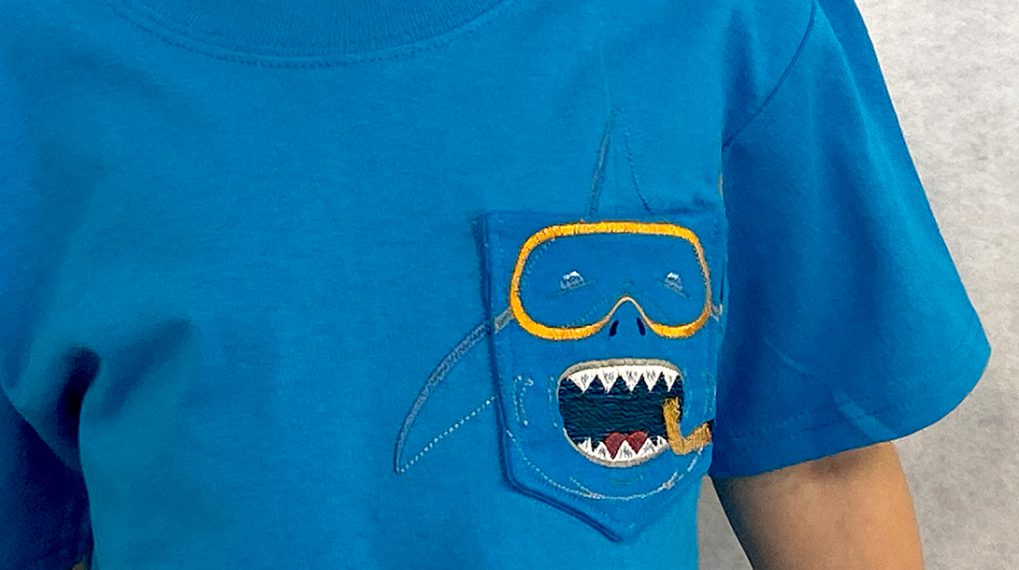
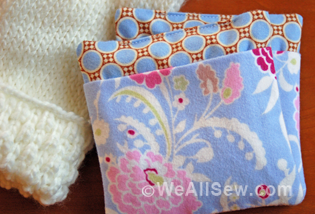
How to Add a Hemstitched Pocket to a T-Shirt
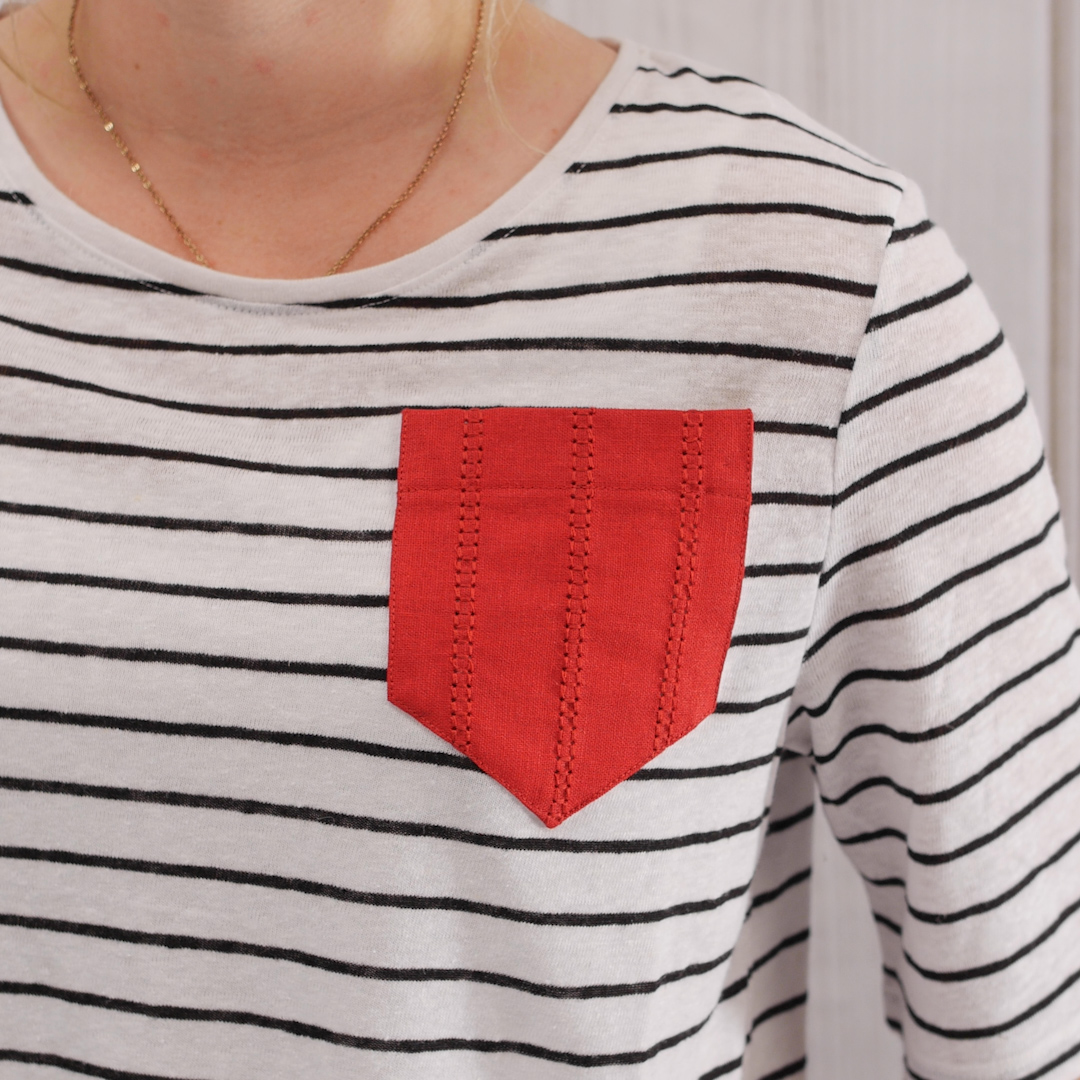
Do you have plain tee shirts that need some new life? Why keep them tucked away in your closet when you can give them the pop of color and detail they need! With this tutorial, personalize those shirts by adding a custom linen pocket stitched with a hemstitch needle and heirloom stitches. Go from plain to eye-catching with some of the built-in stitches and features of the B 475 QE.
Materials to Add a Hemstitched Pocket to a T-shirt
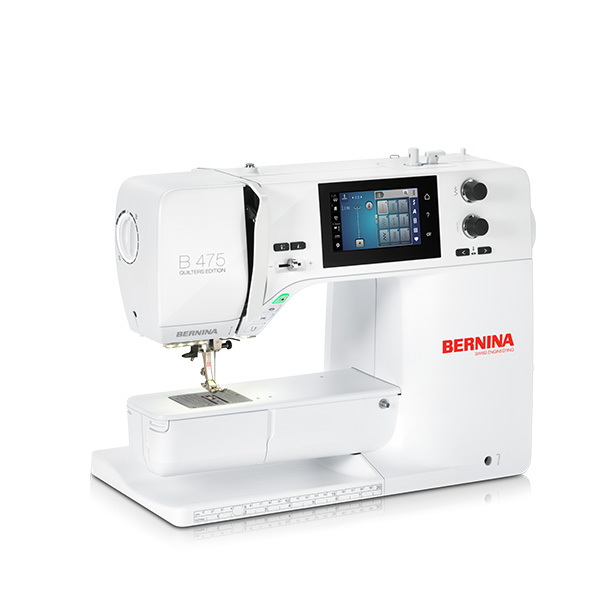
- BERNINA 475 QE
- Edgestitch Foot #10/10C
- Open Embroidery Foot #20/20C
- 5.5 mm Stitch Plate
- Schmetz Hemstitch Needle, Size 100/16
- BERNINA Universal Needle, Size 80/12
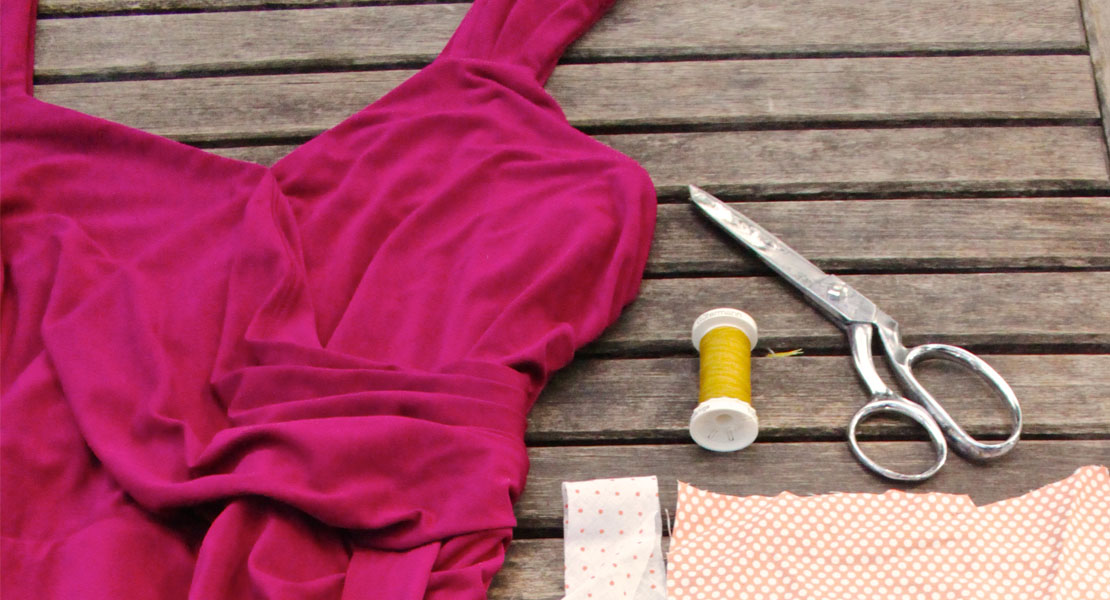
- T-shirt
- Lightweight linen or linen-like fabric
- Thread to match linen fabric (I used a polyester thread for the shine)
- Odif Fabric Booster Spray
- Hot Ruler Press Perfect
- Iron
- Wool pressing mat
- Parchment paper
- Clear ruler
- Chalk pencil or fabric marker
- Pins
Here’s the How-To:
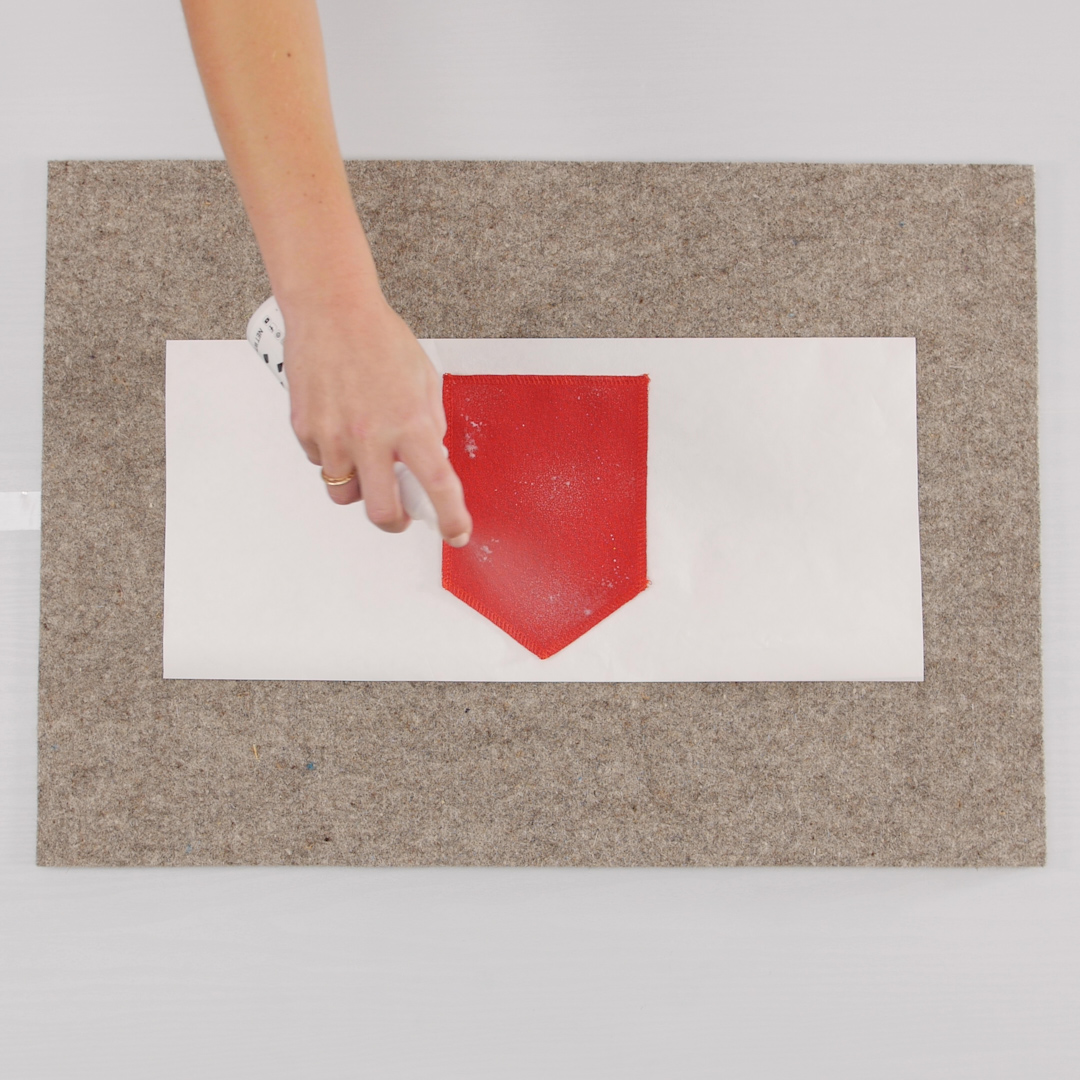
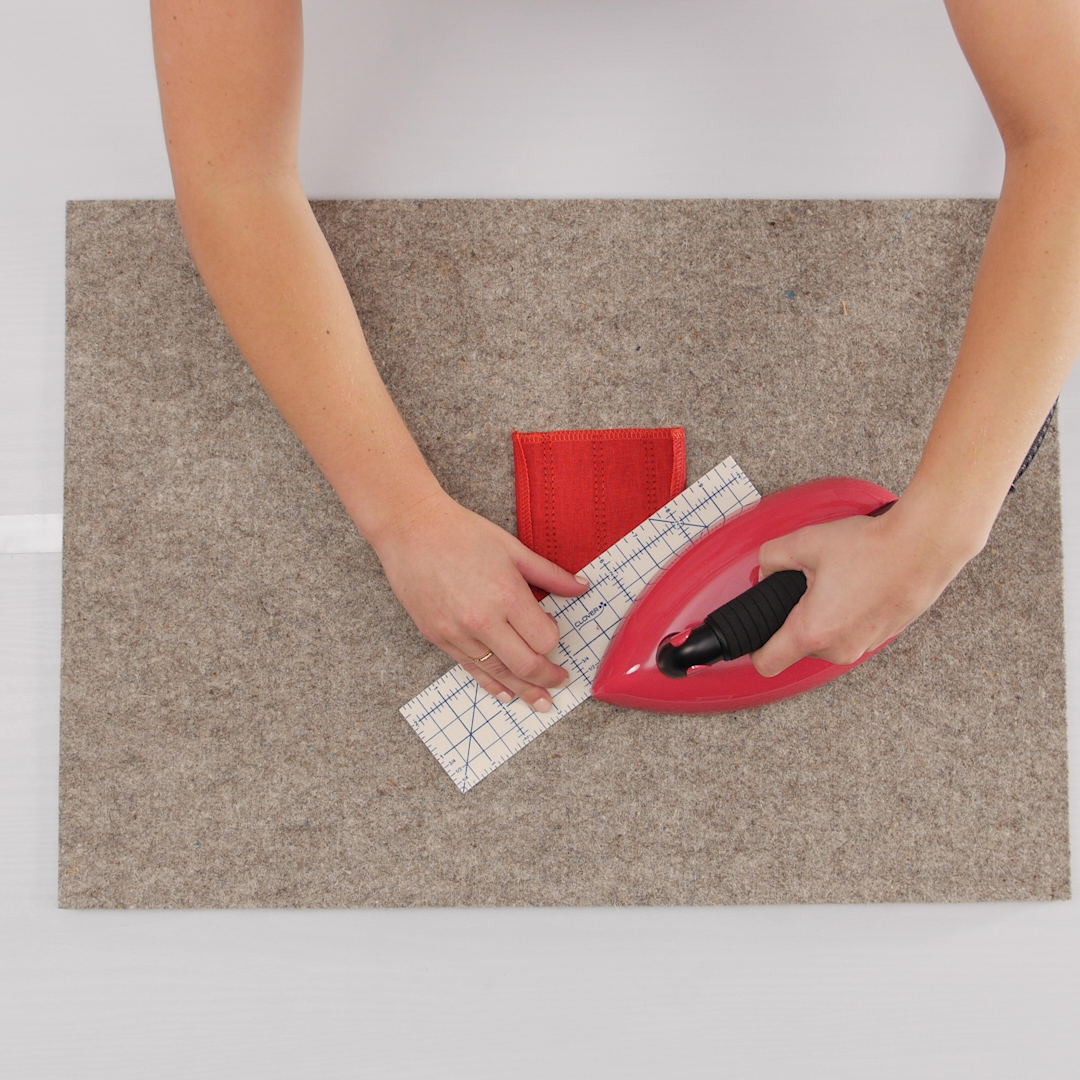
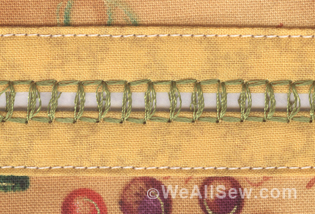
The first step is to make the linen fabric stiff using a starch, such as the Odif Fabric Booster Spray. I like this spray because it can be applied easily, makes the fabric very stiff, and washes out cleanly. Heirloom stitches work best when the material being sewn is stiff, but not backed with stabilizer. The hemstitch needle is winged, so when it penetrates the fabric, it leaves holes without cutting the fibers of the fabric. The needle pushes through the weave and the thread reinforces the hole. The added stiffness from the starch helps the needle make a clean penetration through the woven material. The lighter your linen is, the more defined the needle penetrations will be, but the more starch you will need. If you want even more definition, try using a bigger winged needle.
On top of the wool pressing mat, lay out a piece of parchment paper. Place the pocket piece on the parchment paper and coat it evenly with the starch spray.
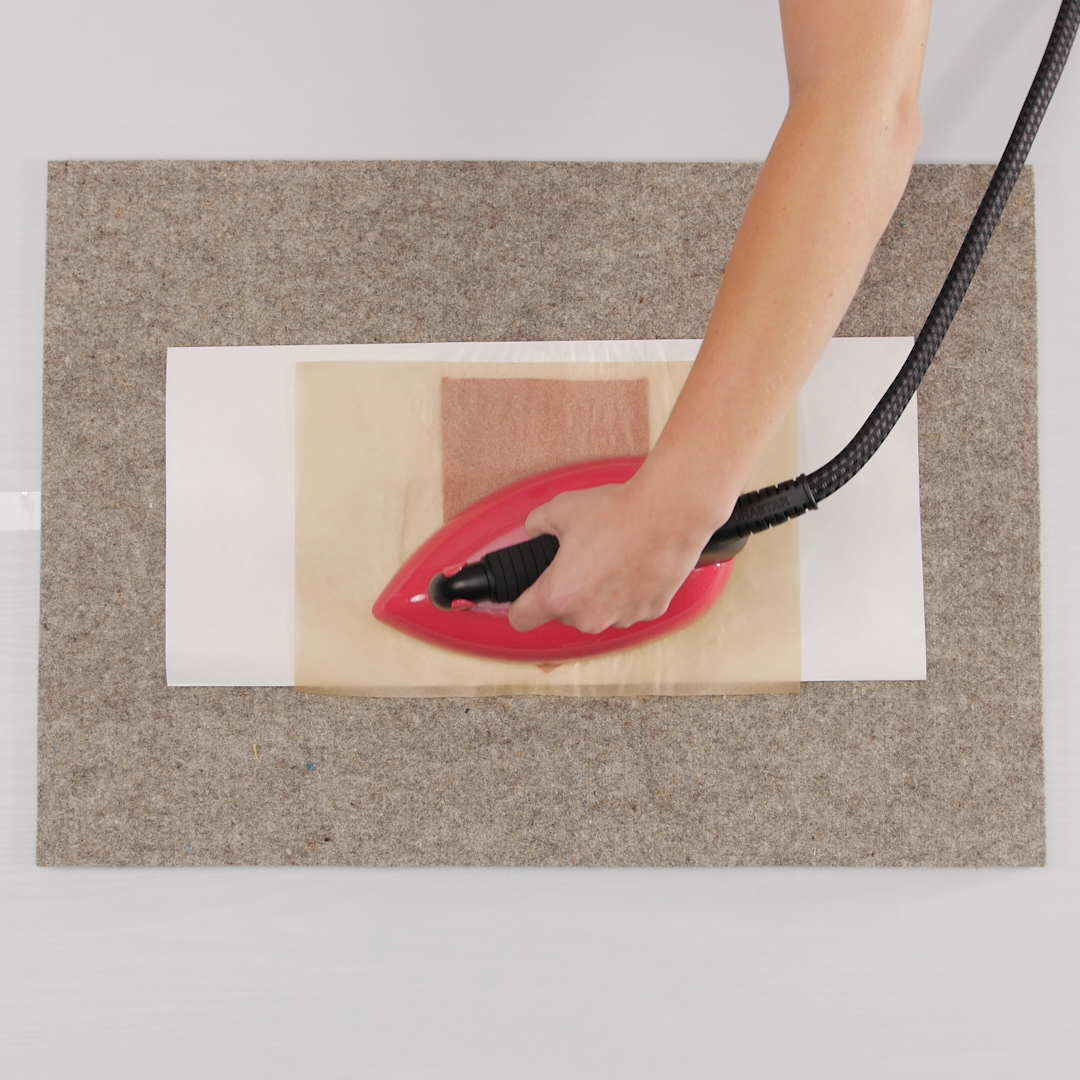
To protect your iron, cover the pocket with another piece of parchment paper and press with medium heat. After most of the moisture has dried, remove both pieces of parchment paper and iron the pocket normally. I decided to repeat this process a second time before proceeding with the marking and sewing.
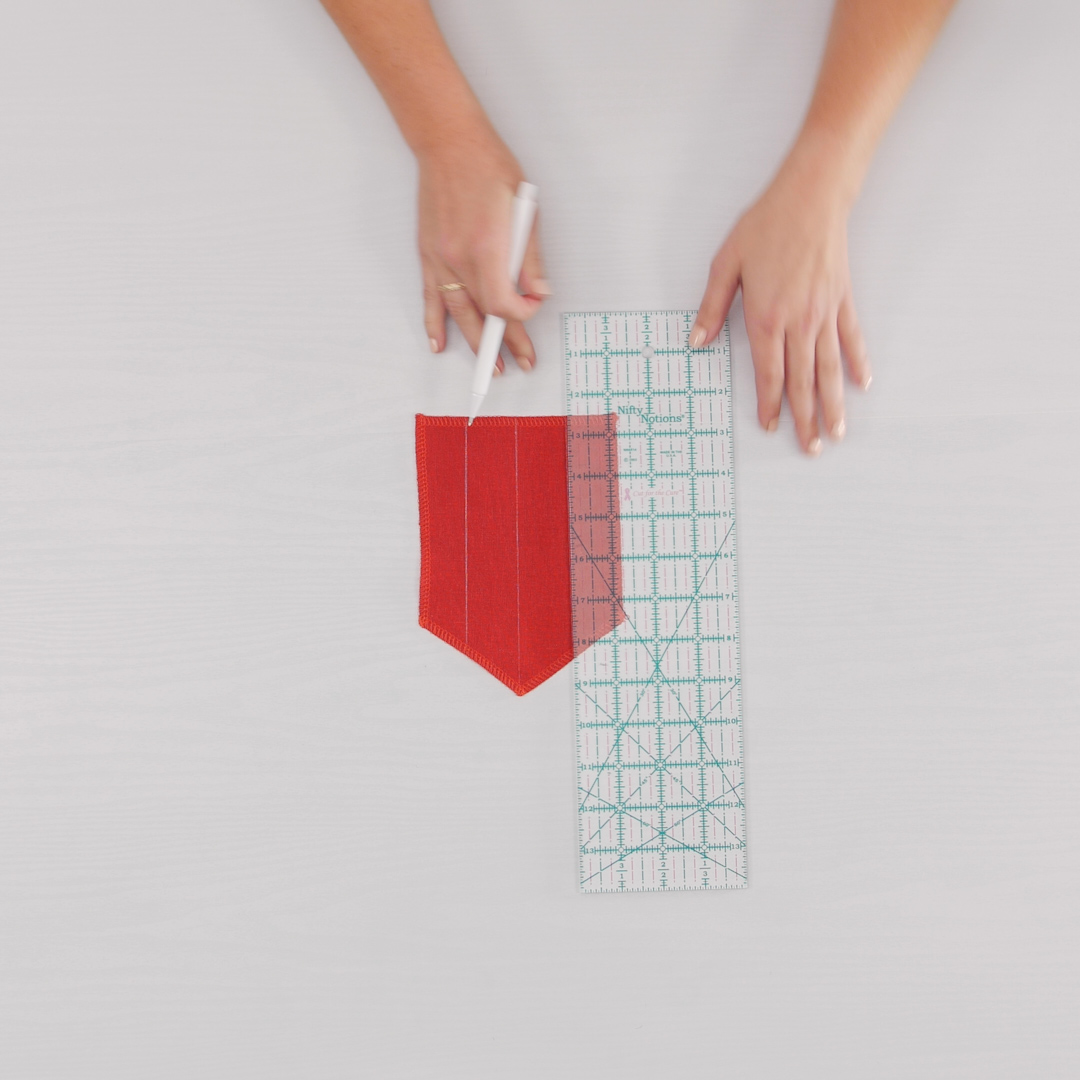
After starching the pocket, the next step is to mark out the lines where the stitching will go. This can be done with a chalk pencil or fabric marker of your choice, along with a clear ruler to ensure even spacing.
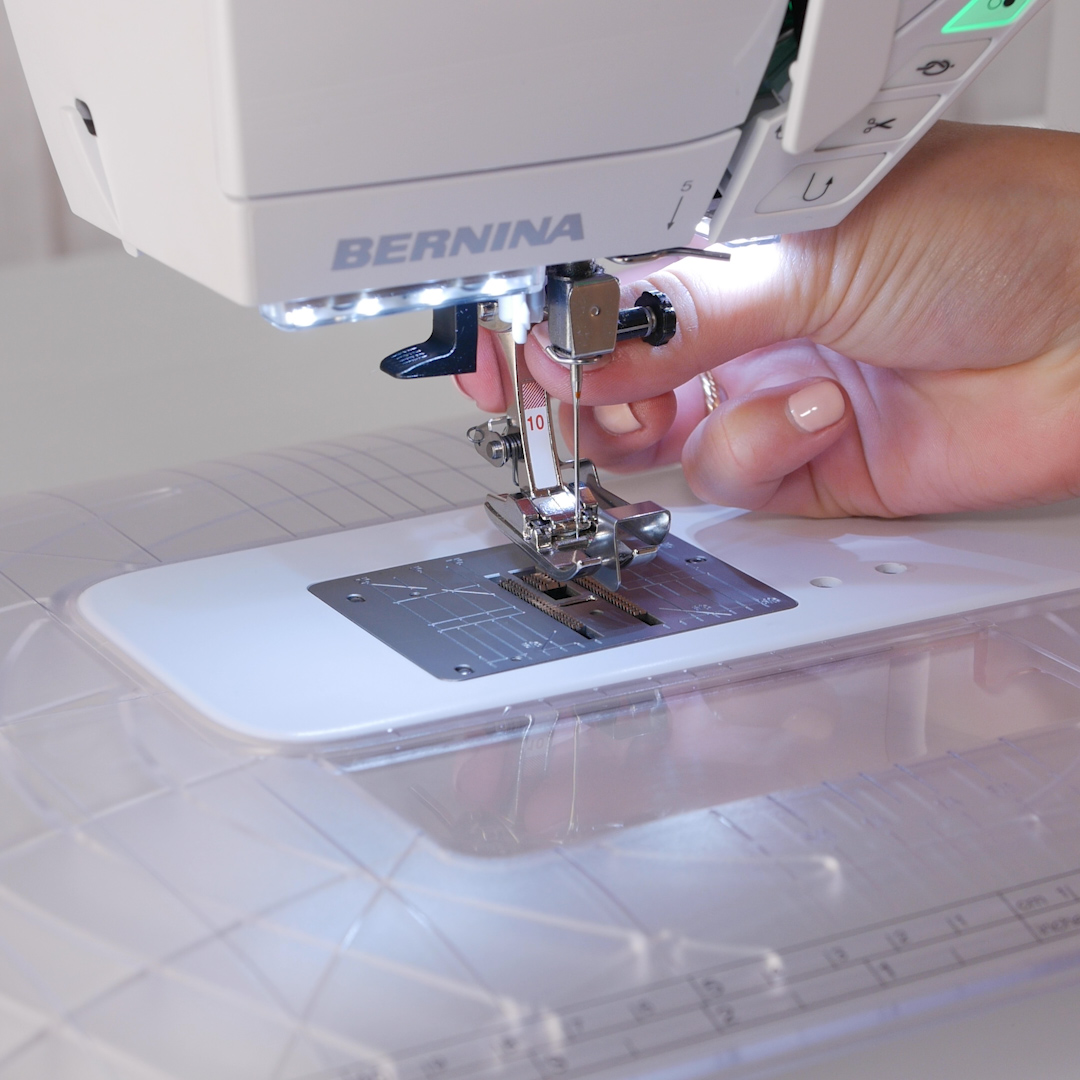
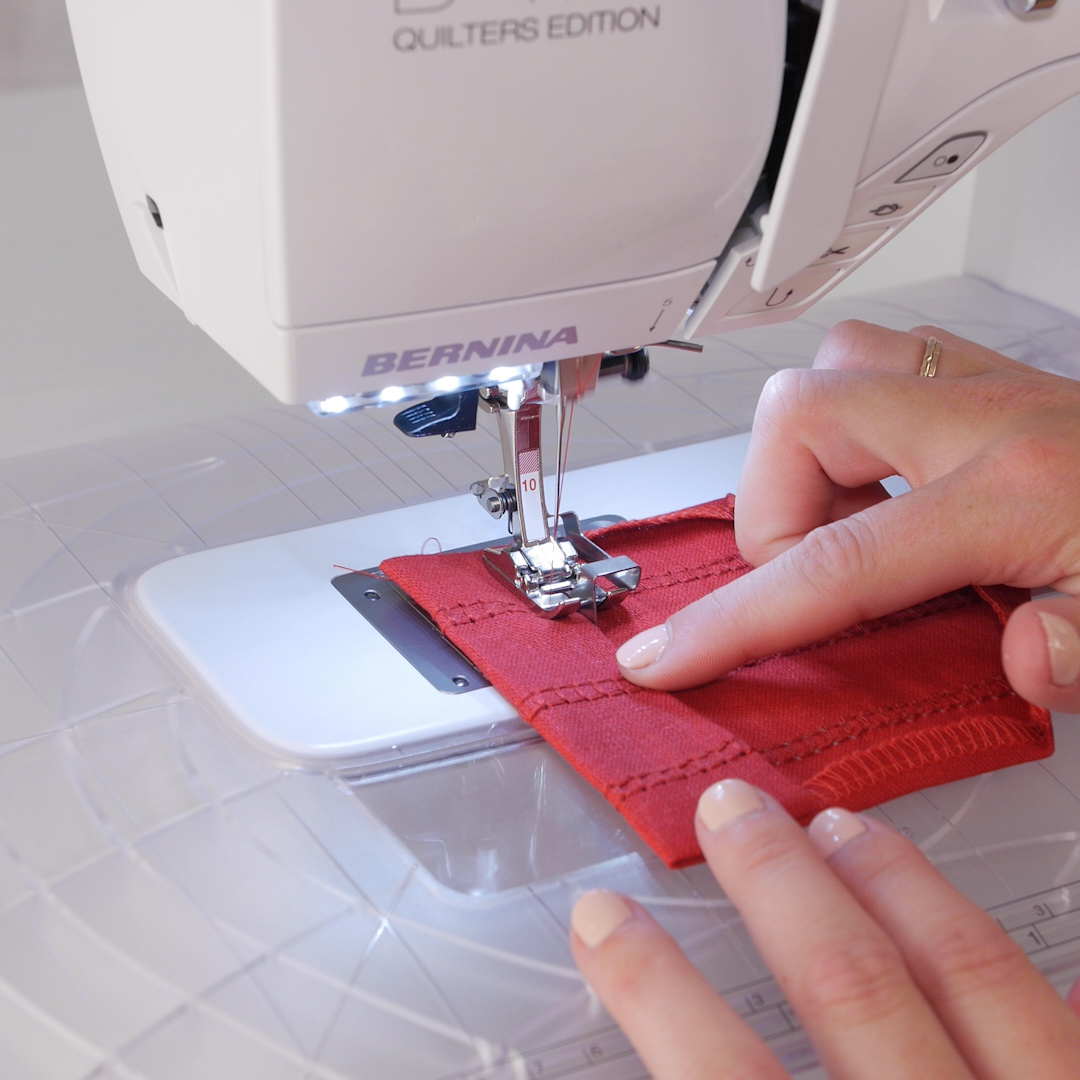
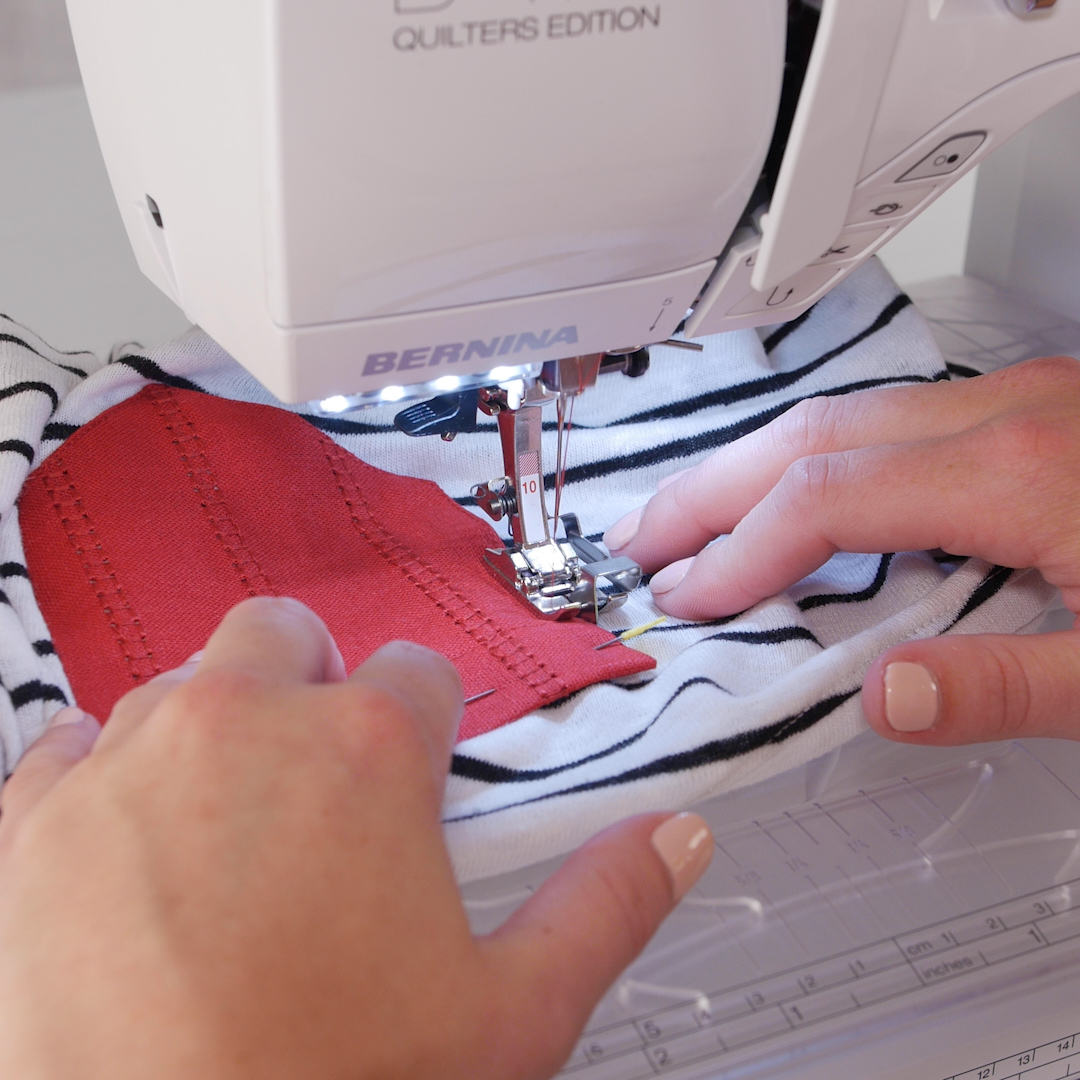
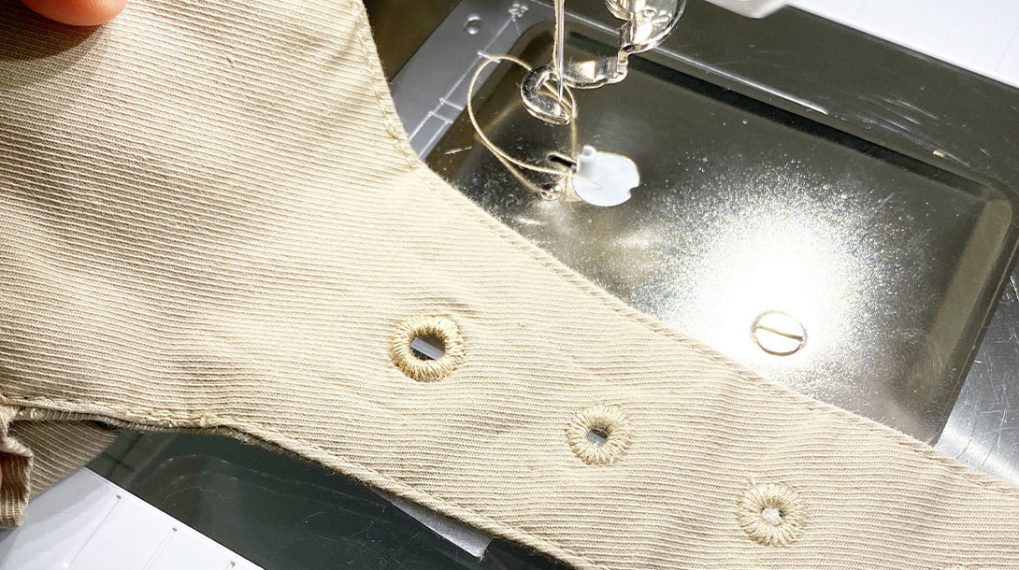
Let’s now prepare the machine for sewing. Attach a Schmetz Hemstitch Needle, Size 100/16, to the machine, along with Open Embroidery Foot #20. Also be sure to have the 5.5 mm stitch plate on the machine. Thread the machine with a thread color that matches the fabric being used for the pocket. With heirloom stitches, it is traditional for the thread color to match because the emphasis is actually on the holes created by the winged needle.
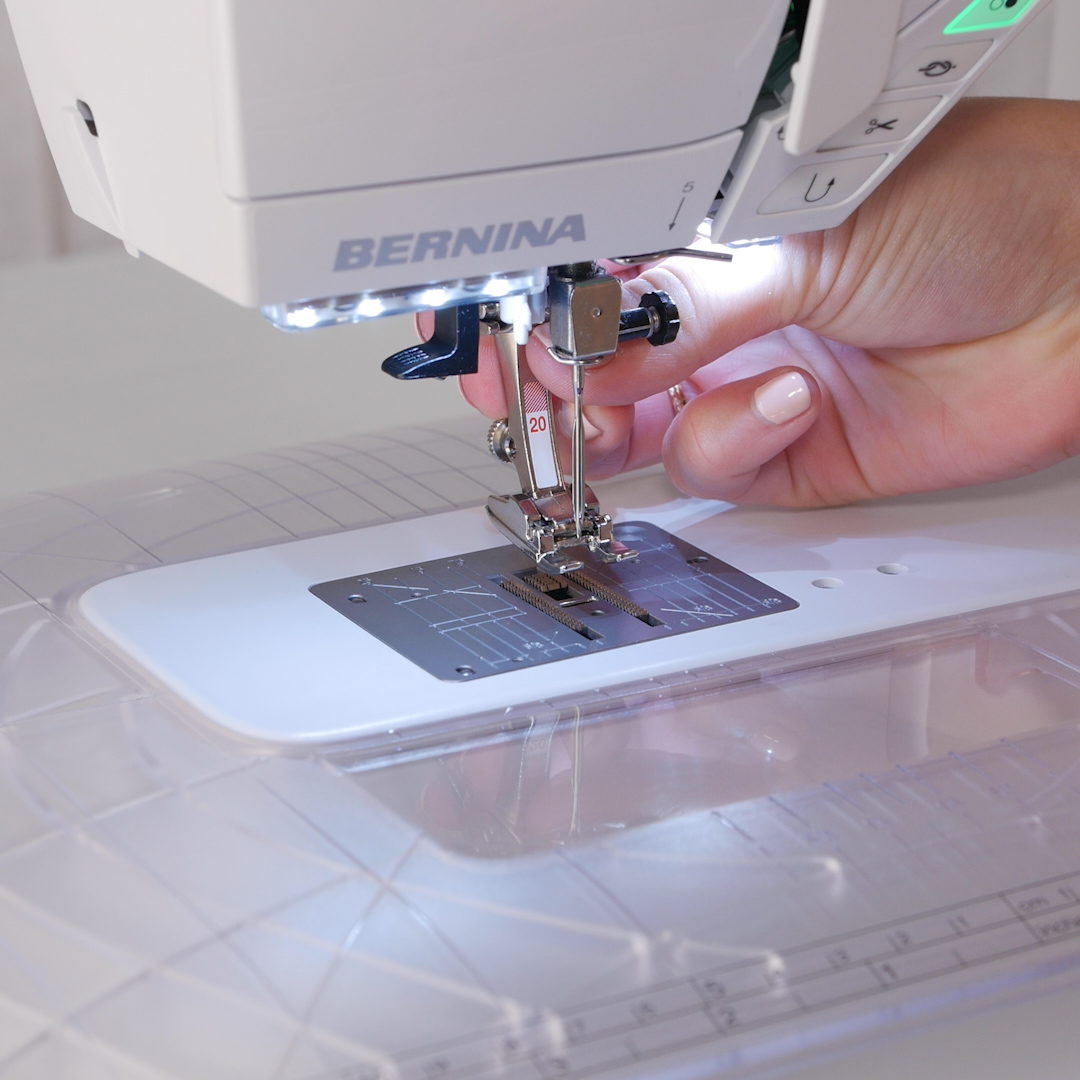
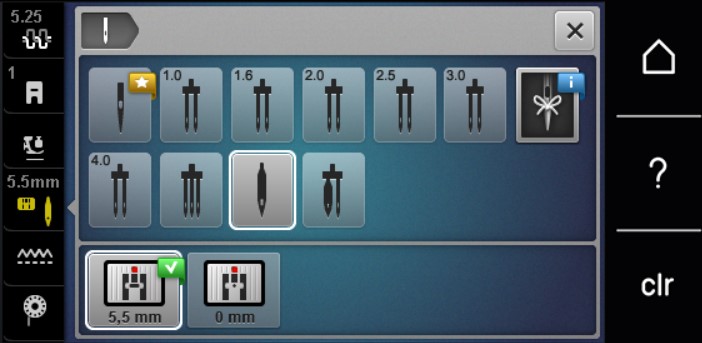
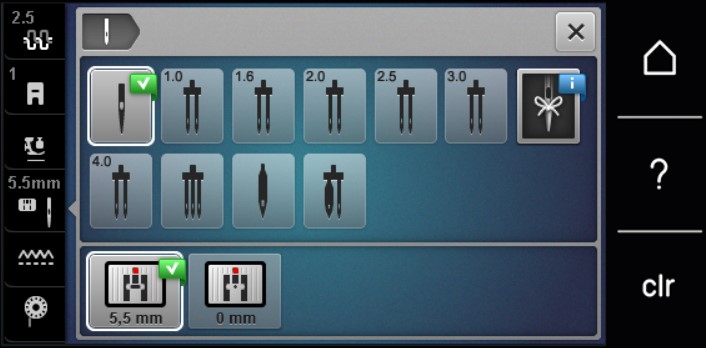
There are two security features that can be set on the machine to ensure safe stitching. In the status bar on the left side of the machine screen, select the Stitch Plate/Needle Selection icon. Within this menu, select the wing needle, as well as the 5.5 mm stitch plate.
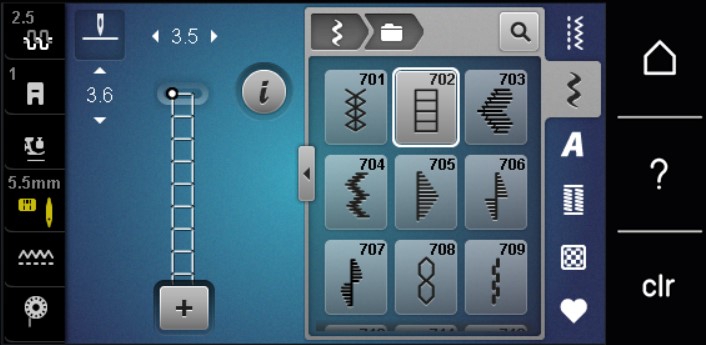
For this hemstitch pocket, we need an heirloom stitch. These are built-in stitches that can be found in Folder #700 in the decorative stitches folder on the B 475 QE. I chose Stitch #702. Any stitch that is chosen can be altered to fit the needs of your project by adjusting the stitch length and width using the Multi-function knobs.
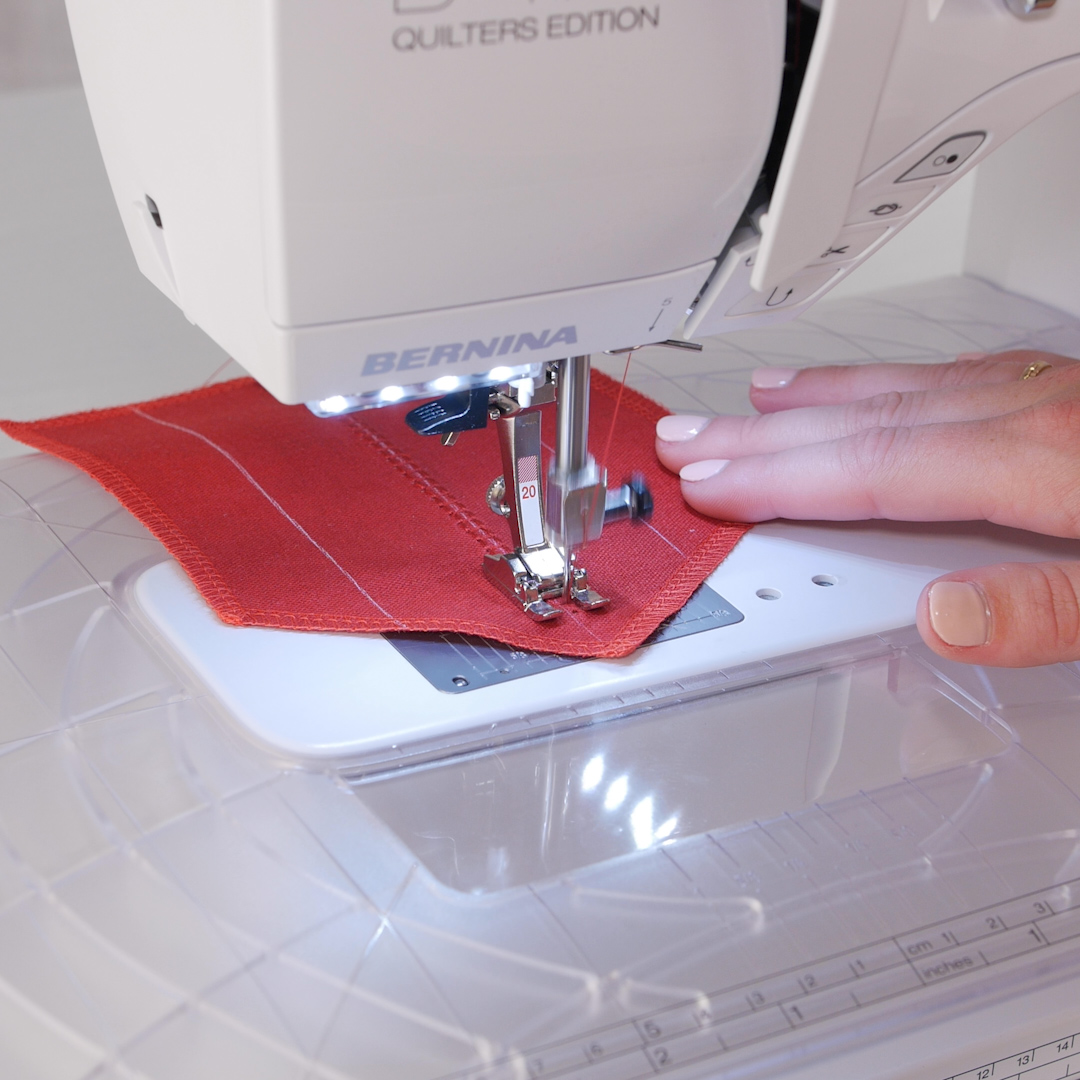
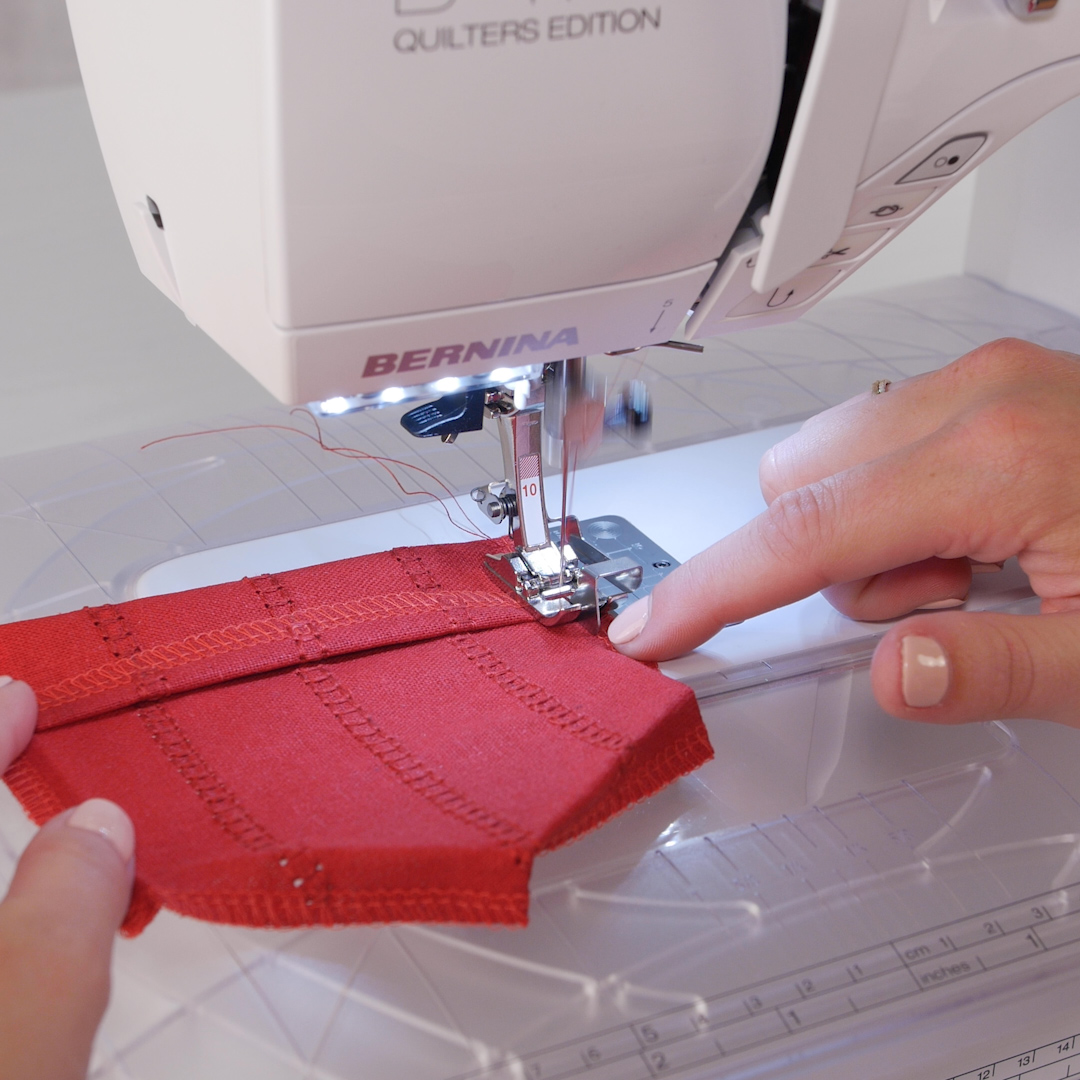
After selecting the stitch and adjusting as desired, stitch it out on the marked lines on the pocket.
Once the stitching is completed, the raw edges, or serged edges, must be ironed under. This can be done very easily using a Hot Ruler Press Perfect. Start by ironing under the long, parallel sides, then the angled bottom edges, and finally the top edge. Iron them all under 3/8” to the wrong side of the pocket. The top edge will then need to be ironed under another 1”.
Back at the sewing machine, attach a BERNINA Universal Needle, Size 80/12, and Edgestitch Foot #10.
Again, select the Stitch Plate/Needle Selection icon in the status bar, and select the standard needle. Close the menu, and select Straight Stitch #1.
To ensure a finished look at the top edge of the pocket, fold back the edge along the 1” fold that was just pressed, as well as the side folds, and match the right sides of the pocket together. Leave the 3/8” fold at the top of the pocket as it is. With the metal guide of the foot in the 3/8” crease from the pressed-under sides, stitch from the 3/8” fold of the top to the edge where the top was folded back. Repeat on the other side. Flip the top edge so it is right side out again. Notice how the raw edge is now encased.
Move the needle three positions to the left of center. Align the pressed-under top edge of the pocket with the metal guide of the foot. Stitch across the edge to create a finished hem.
Almost there! Pin the pocket to the shirt wherever you see fit.
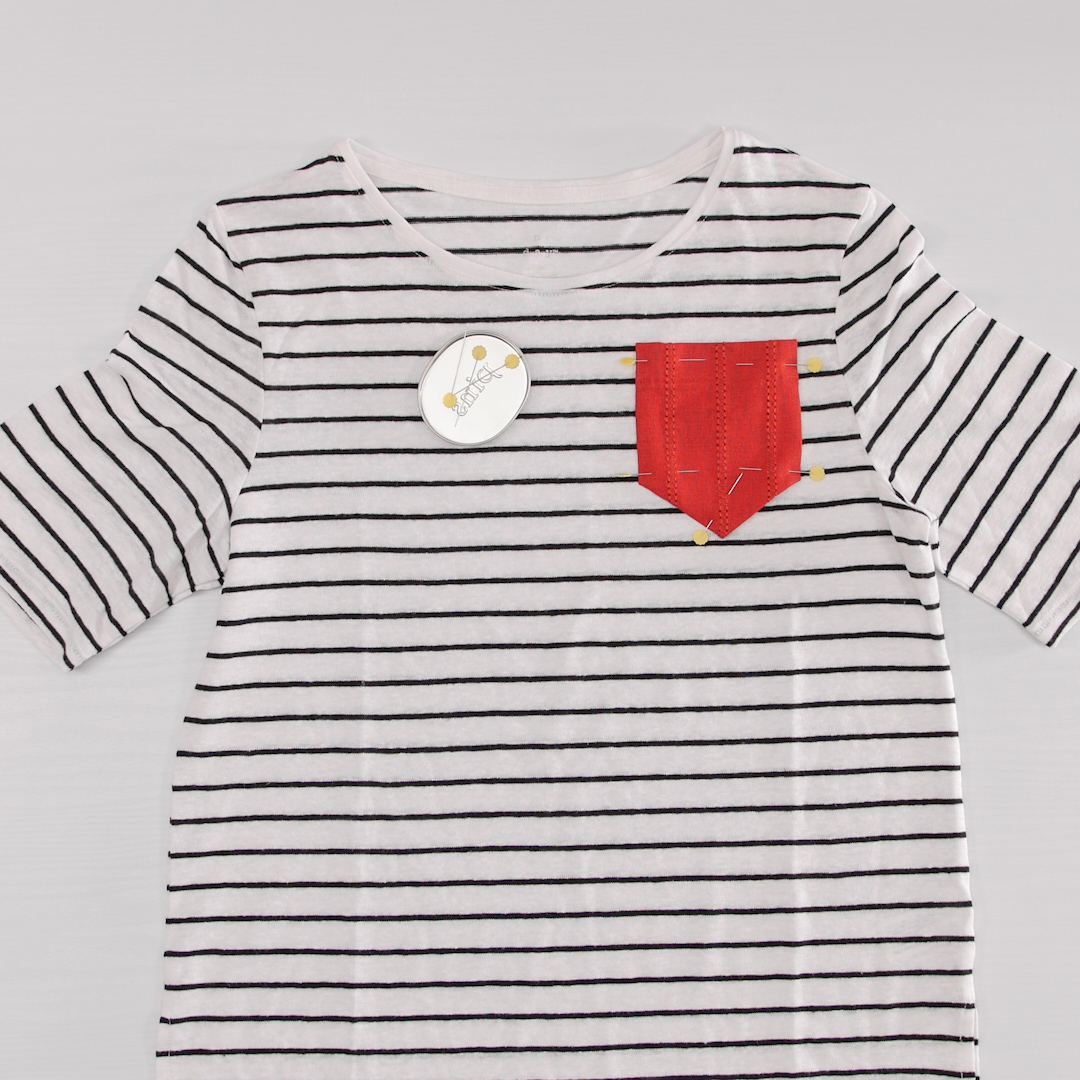
On the machine screen, program the needle to stop down. With the needle still to the left of center, line the right side of the pocket to the guide. Begin sewing the pocket to the shirt. Be sure to reinforce the top edge of the pocket. You may choose to sew a rectangle shape by pivoting, a triangle, or just back stitch 3 to 4 stitches at both the beginning and end.
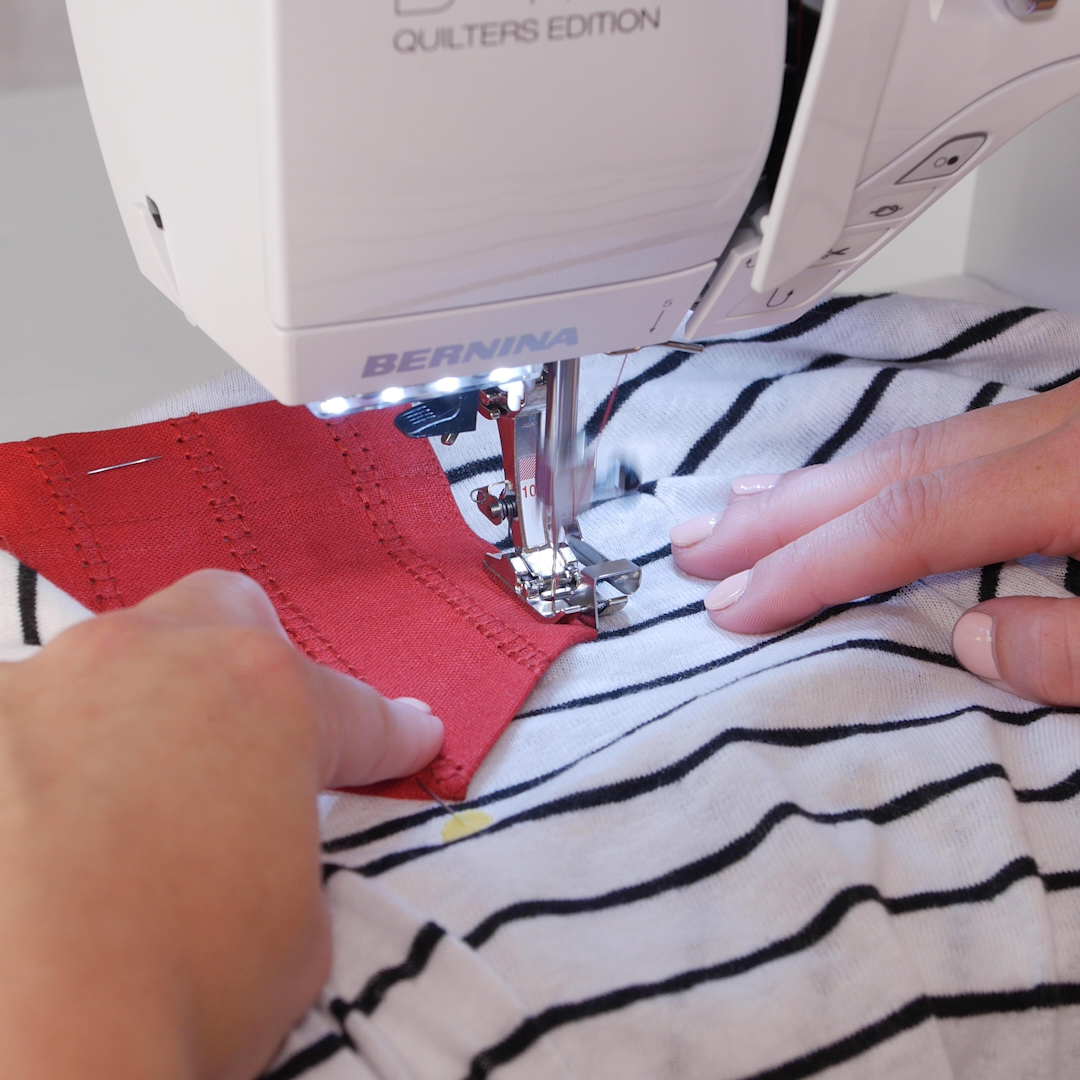
Pivot around each of the corners by lifting the presser foot while the needle is down in the fabric (it may be helpful to use the BERNINA Free-Hand System for this). Check that the shirt is not caught underneath the needle as you pivot around the corners.
You now have a “new” piece to put back in your wardrobe!
Used Products


What you might also like


4 comments on “How to Add a Hemstitched Pocket to a T-Shirt”
-
-
“It is speedy! Hopefully the video gives you a quick taste of the project – it’s not really meant to be a tutorial. Instead we suggest you follow the steps in the post. Happy Stitching!
-
-
Thank you for the article
Can the pocket be stitched on a ready made t-shirt or would I need to open the side seam first?
-
I stitched it on a ready-made shirt without opening any seams. My machine has a freearm, so I can tuck the rest of the shirt underneath without anything catching in the stitching.
-
Leave a Reply
You must be logged in to post a comment.

While I enjoyed the presentation, the video went too fast for me. The illustrations were great, but the video would have helped me a little better. Cute idea though