How to Free-motion Quilt a Love Letter
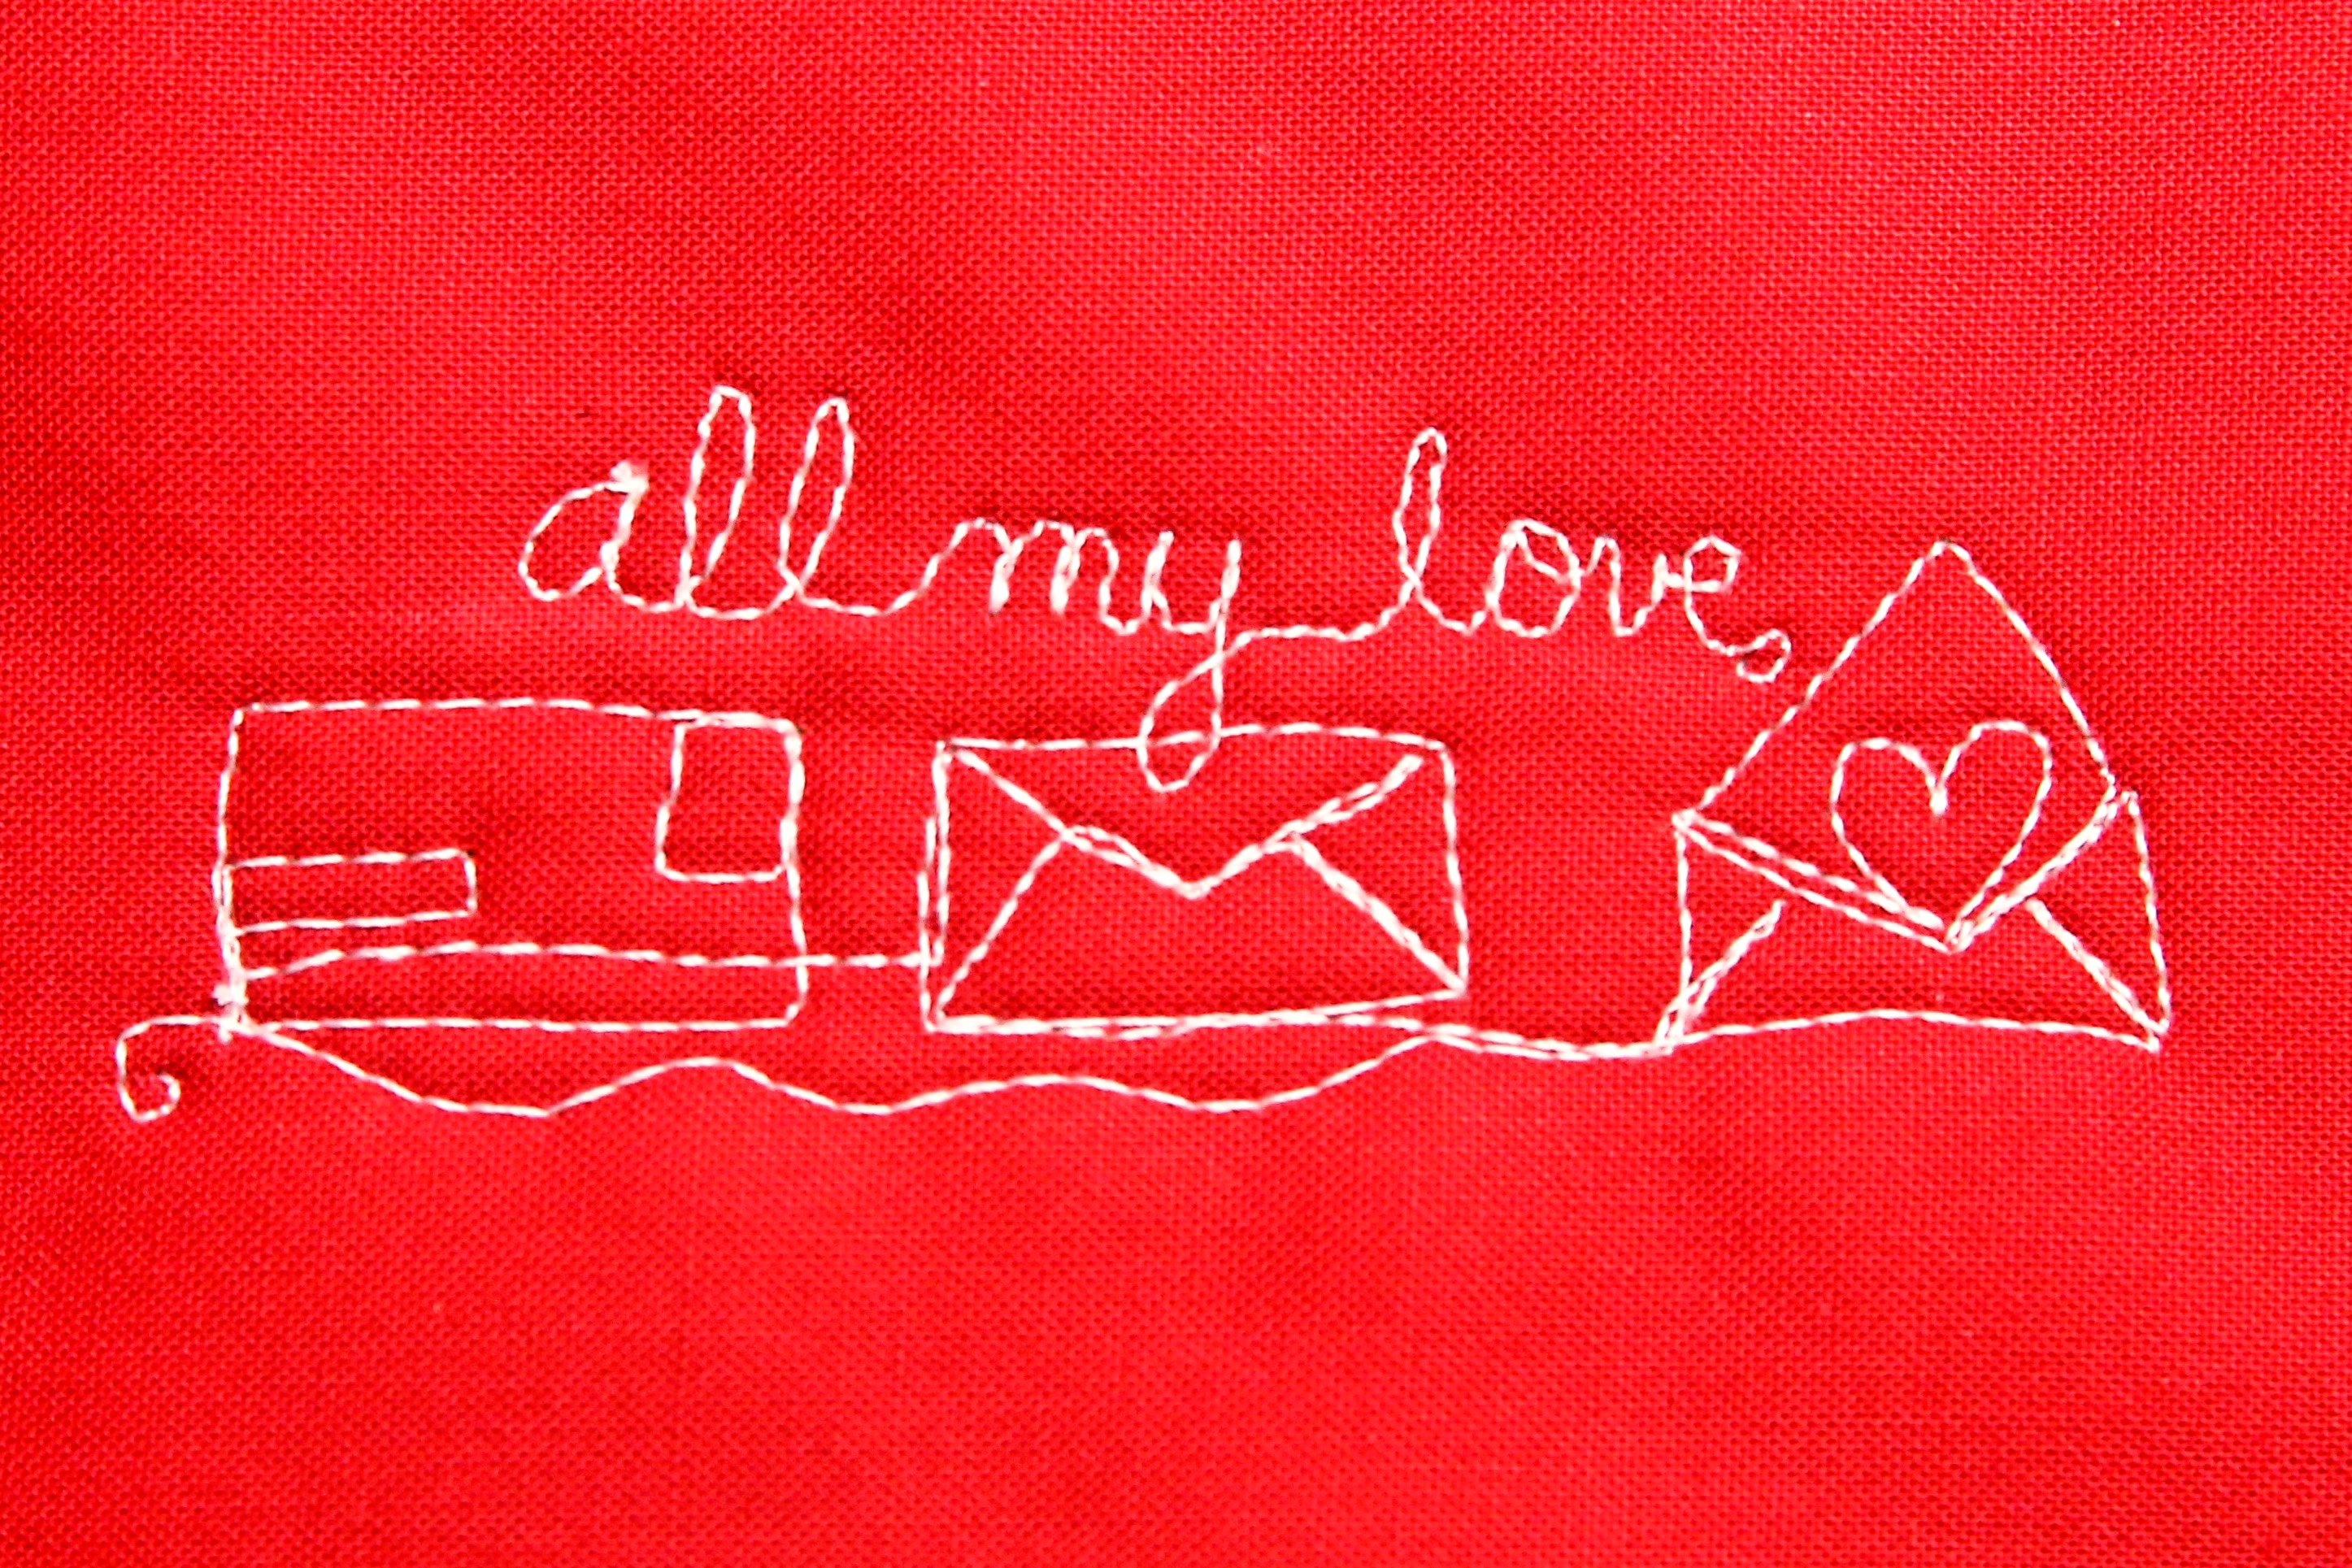
Email? Snail Mail? Why not send YOUR sweetheart a quilted letter this Valentine’s Day?
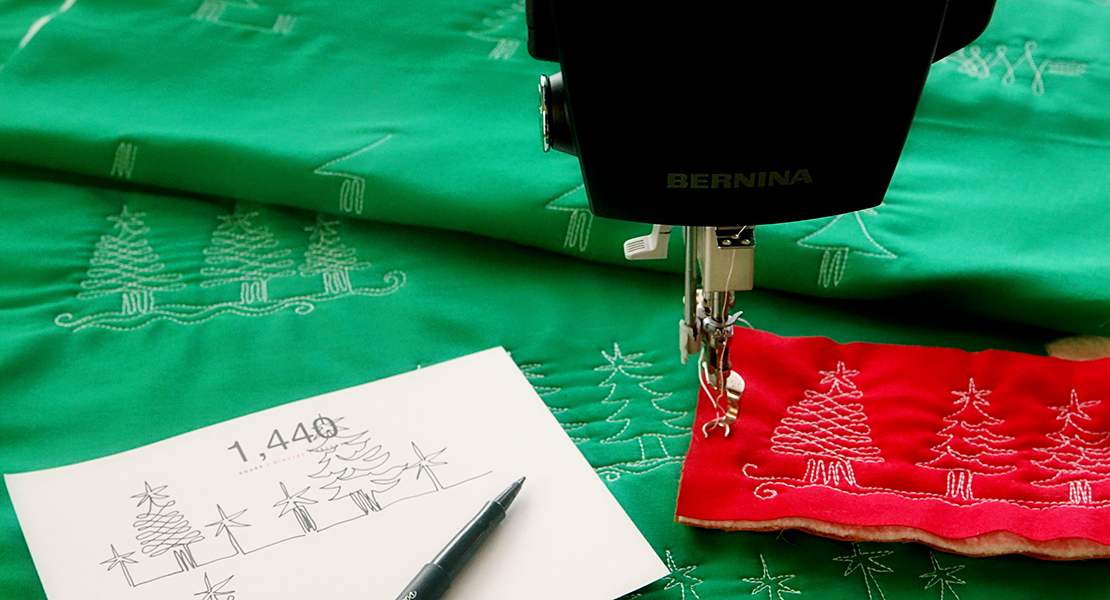
Dear Quilters, I’m Lori Kennedy of Lori Kennedy Quilts and I LOVE machine quilting—especially quilting on my BERNINA Q20 quilting machine! This Valentine’s Day, let’s send a special message to YOUR beloved!
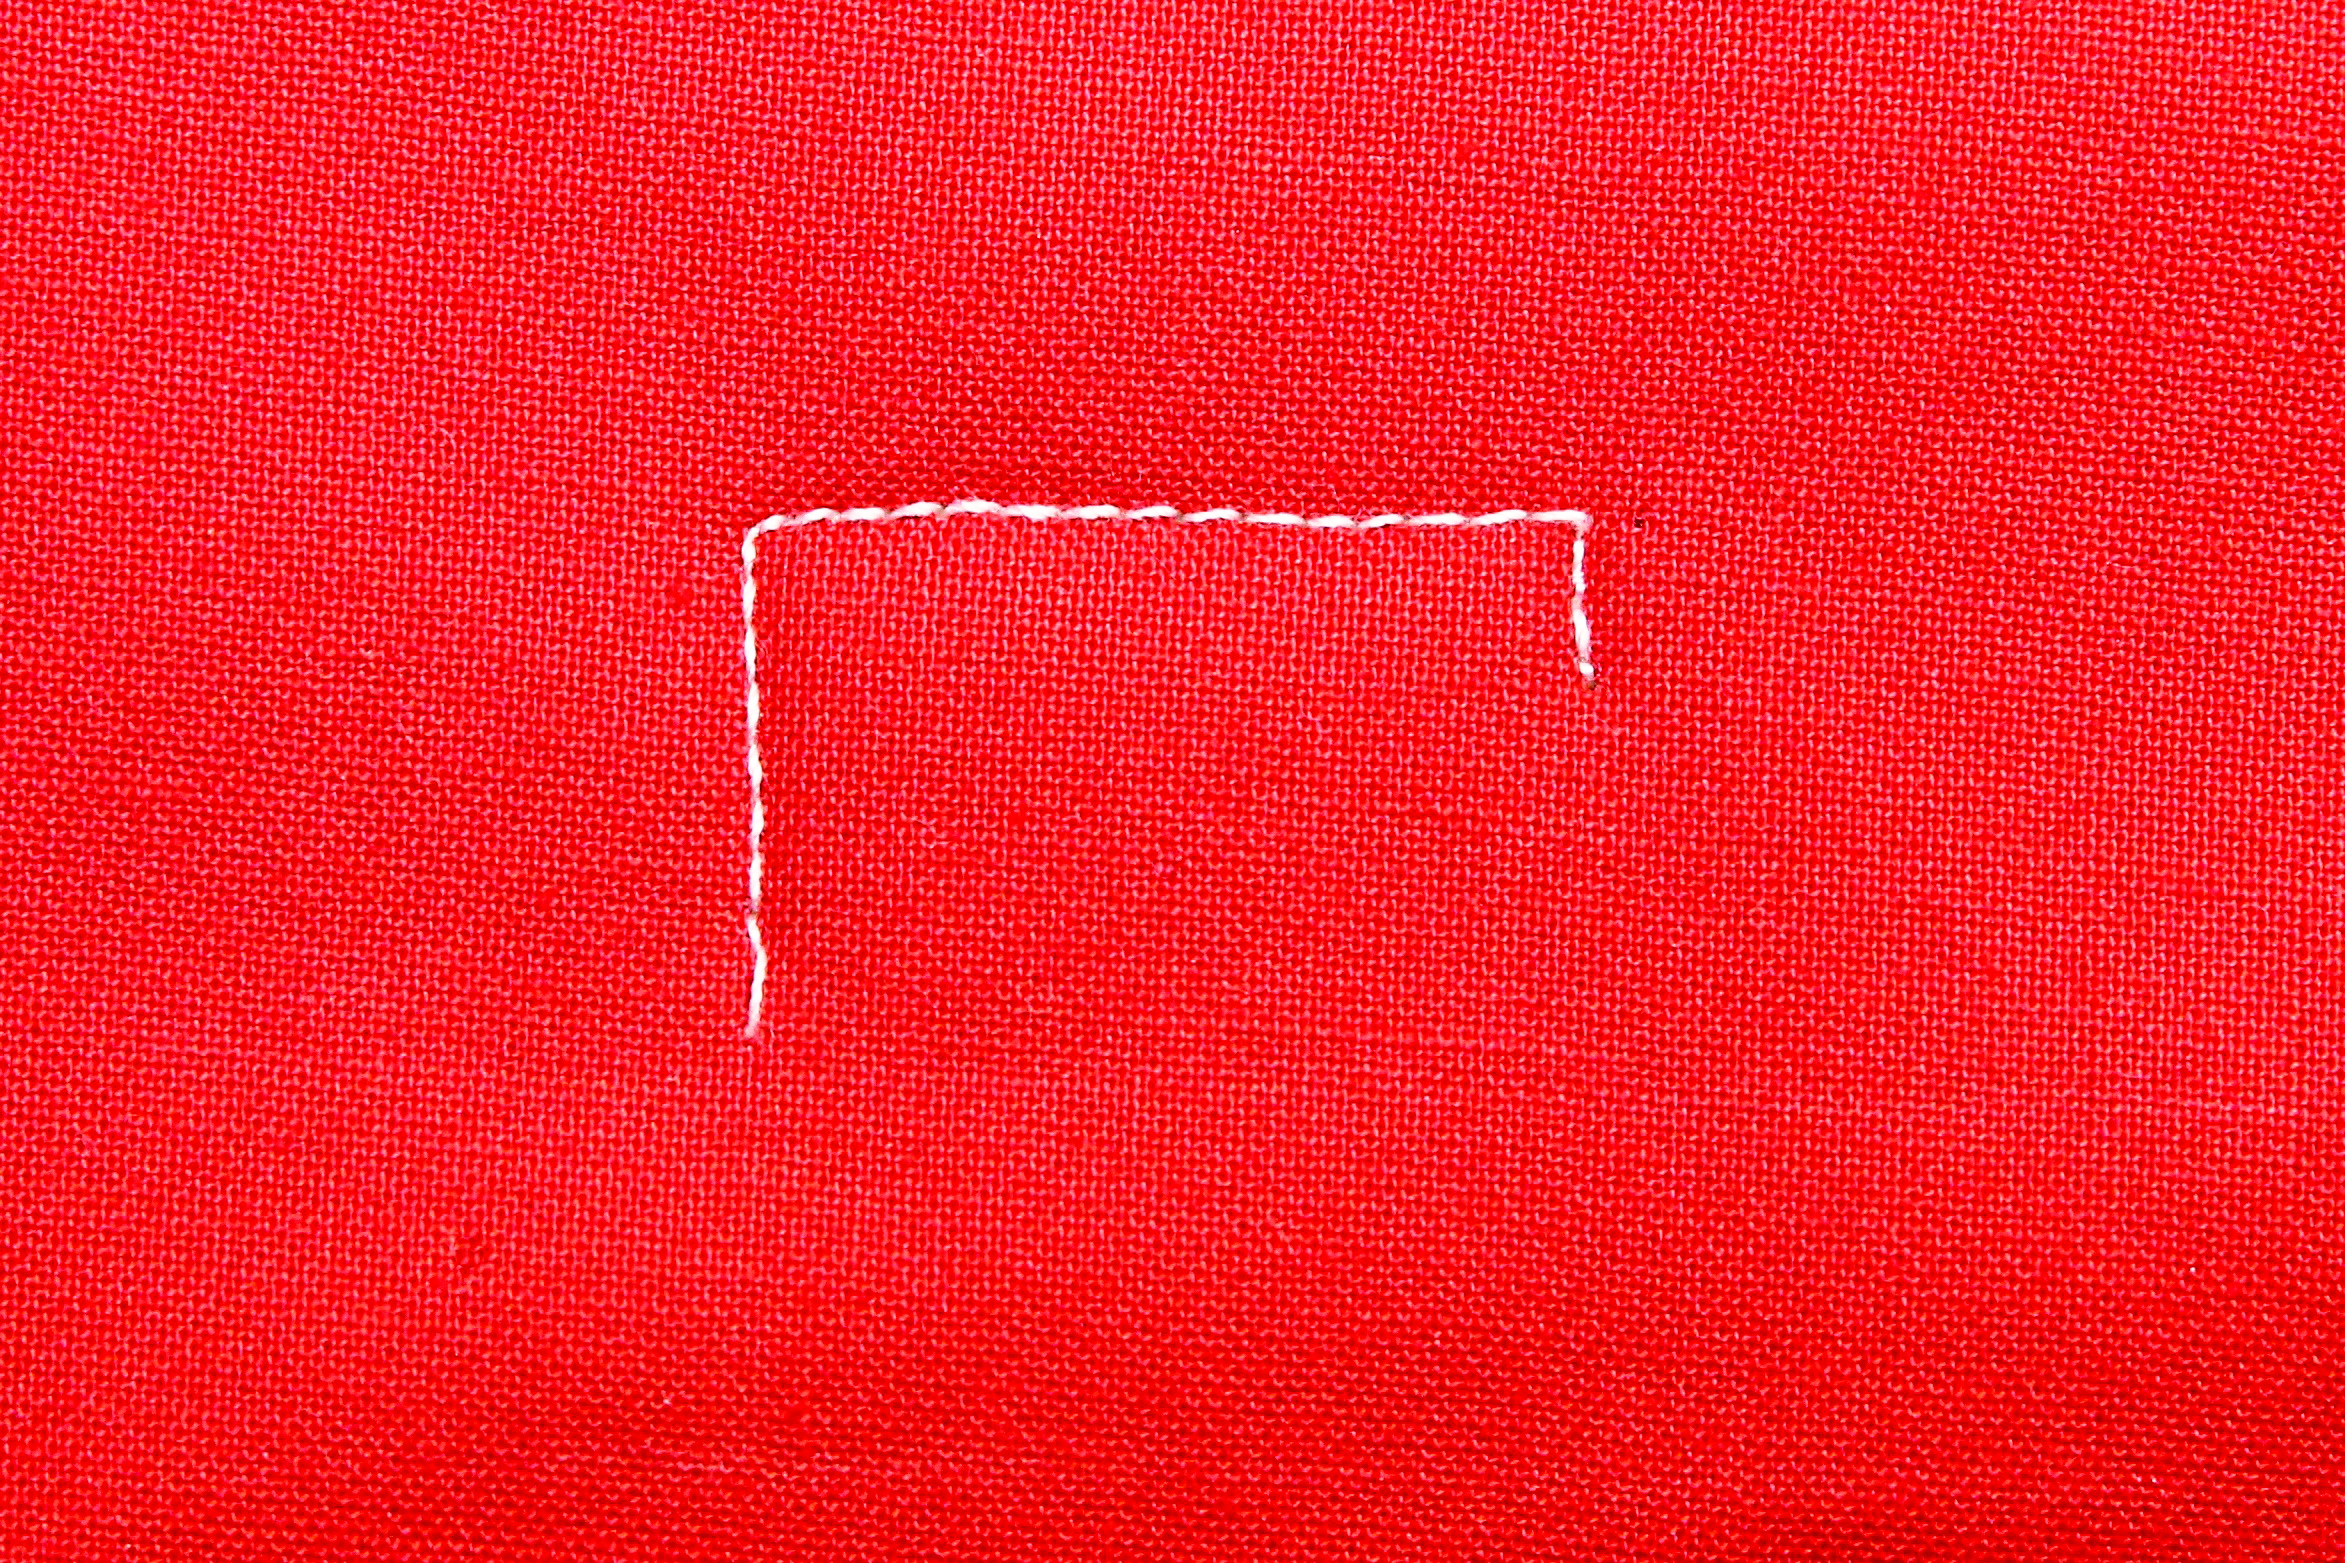
Begin by stitching a short vertical line and a slightly longer horizontal line. Stitch down a few stitches to begin the postage stamp.
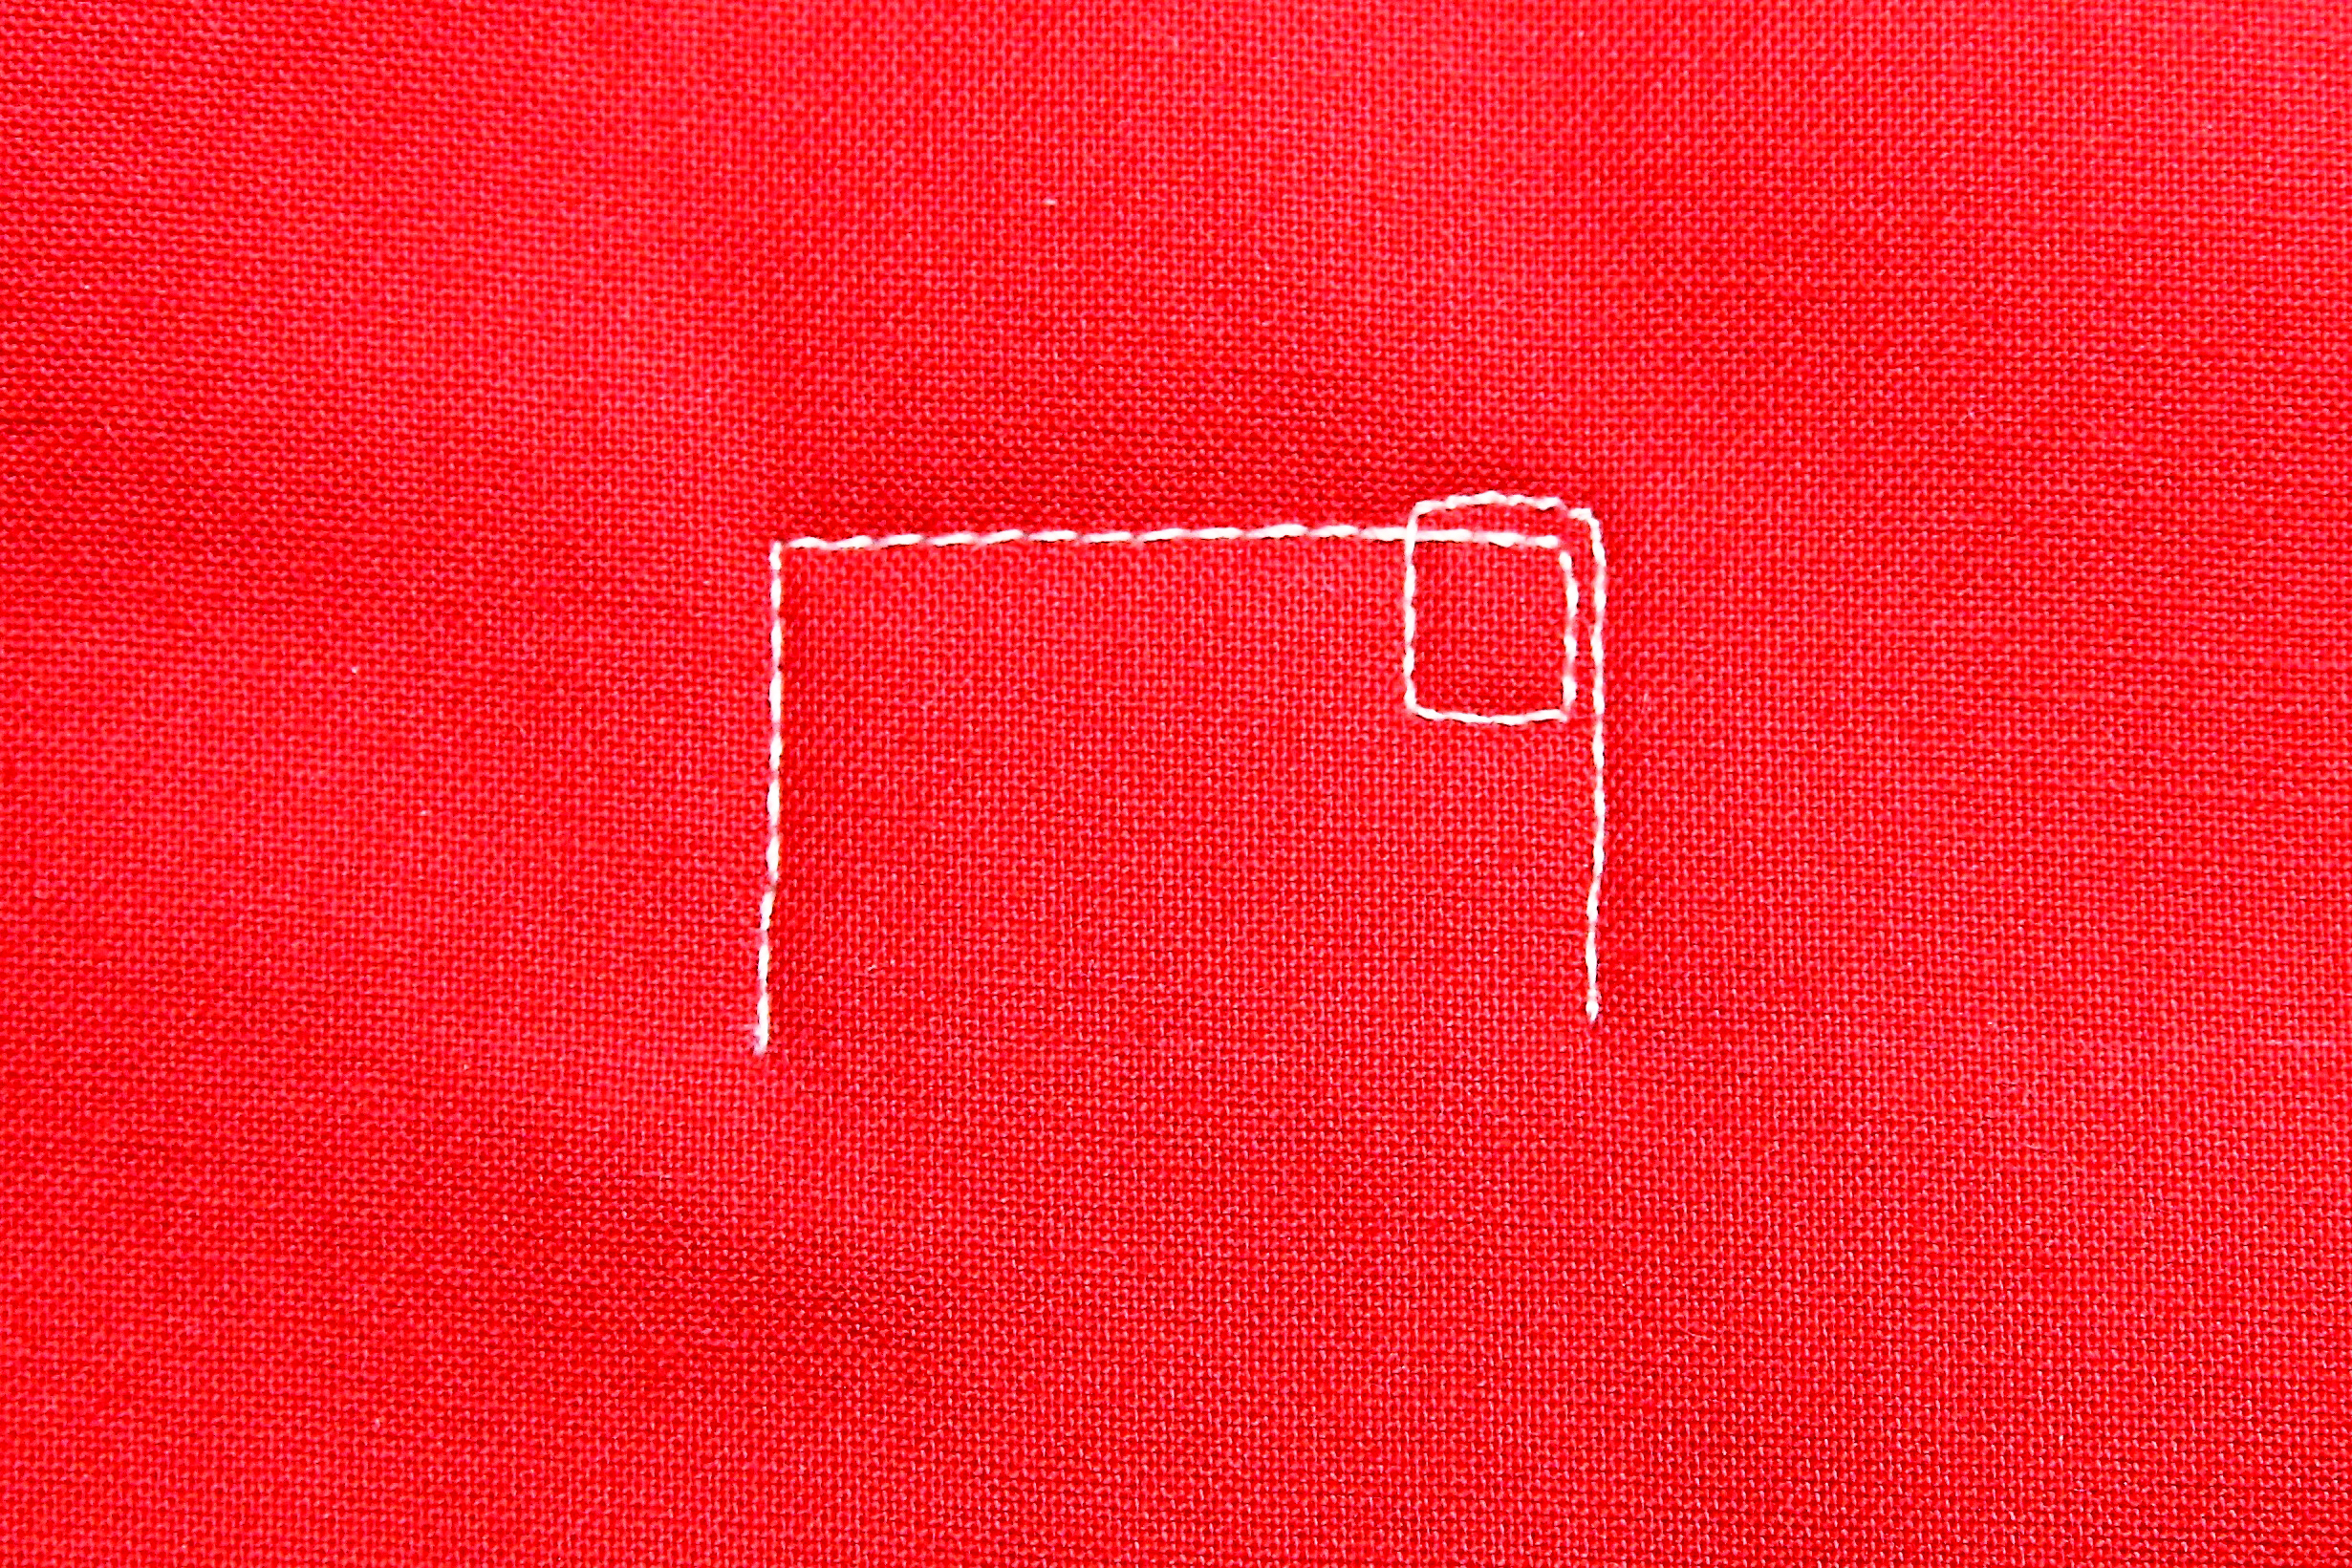
Stitch a small stamp by stitching a short horizontal line from right to left. Add a short vertical line. Continue by echo stitching the top of the letter and stitch a vertical line downward.
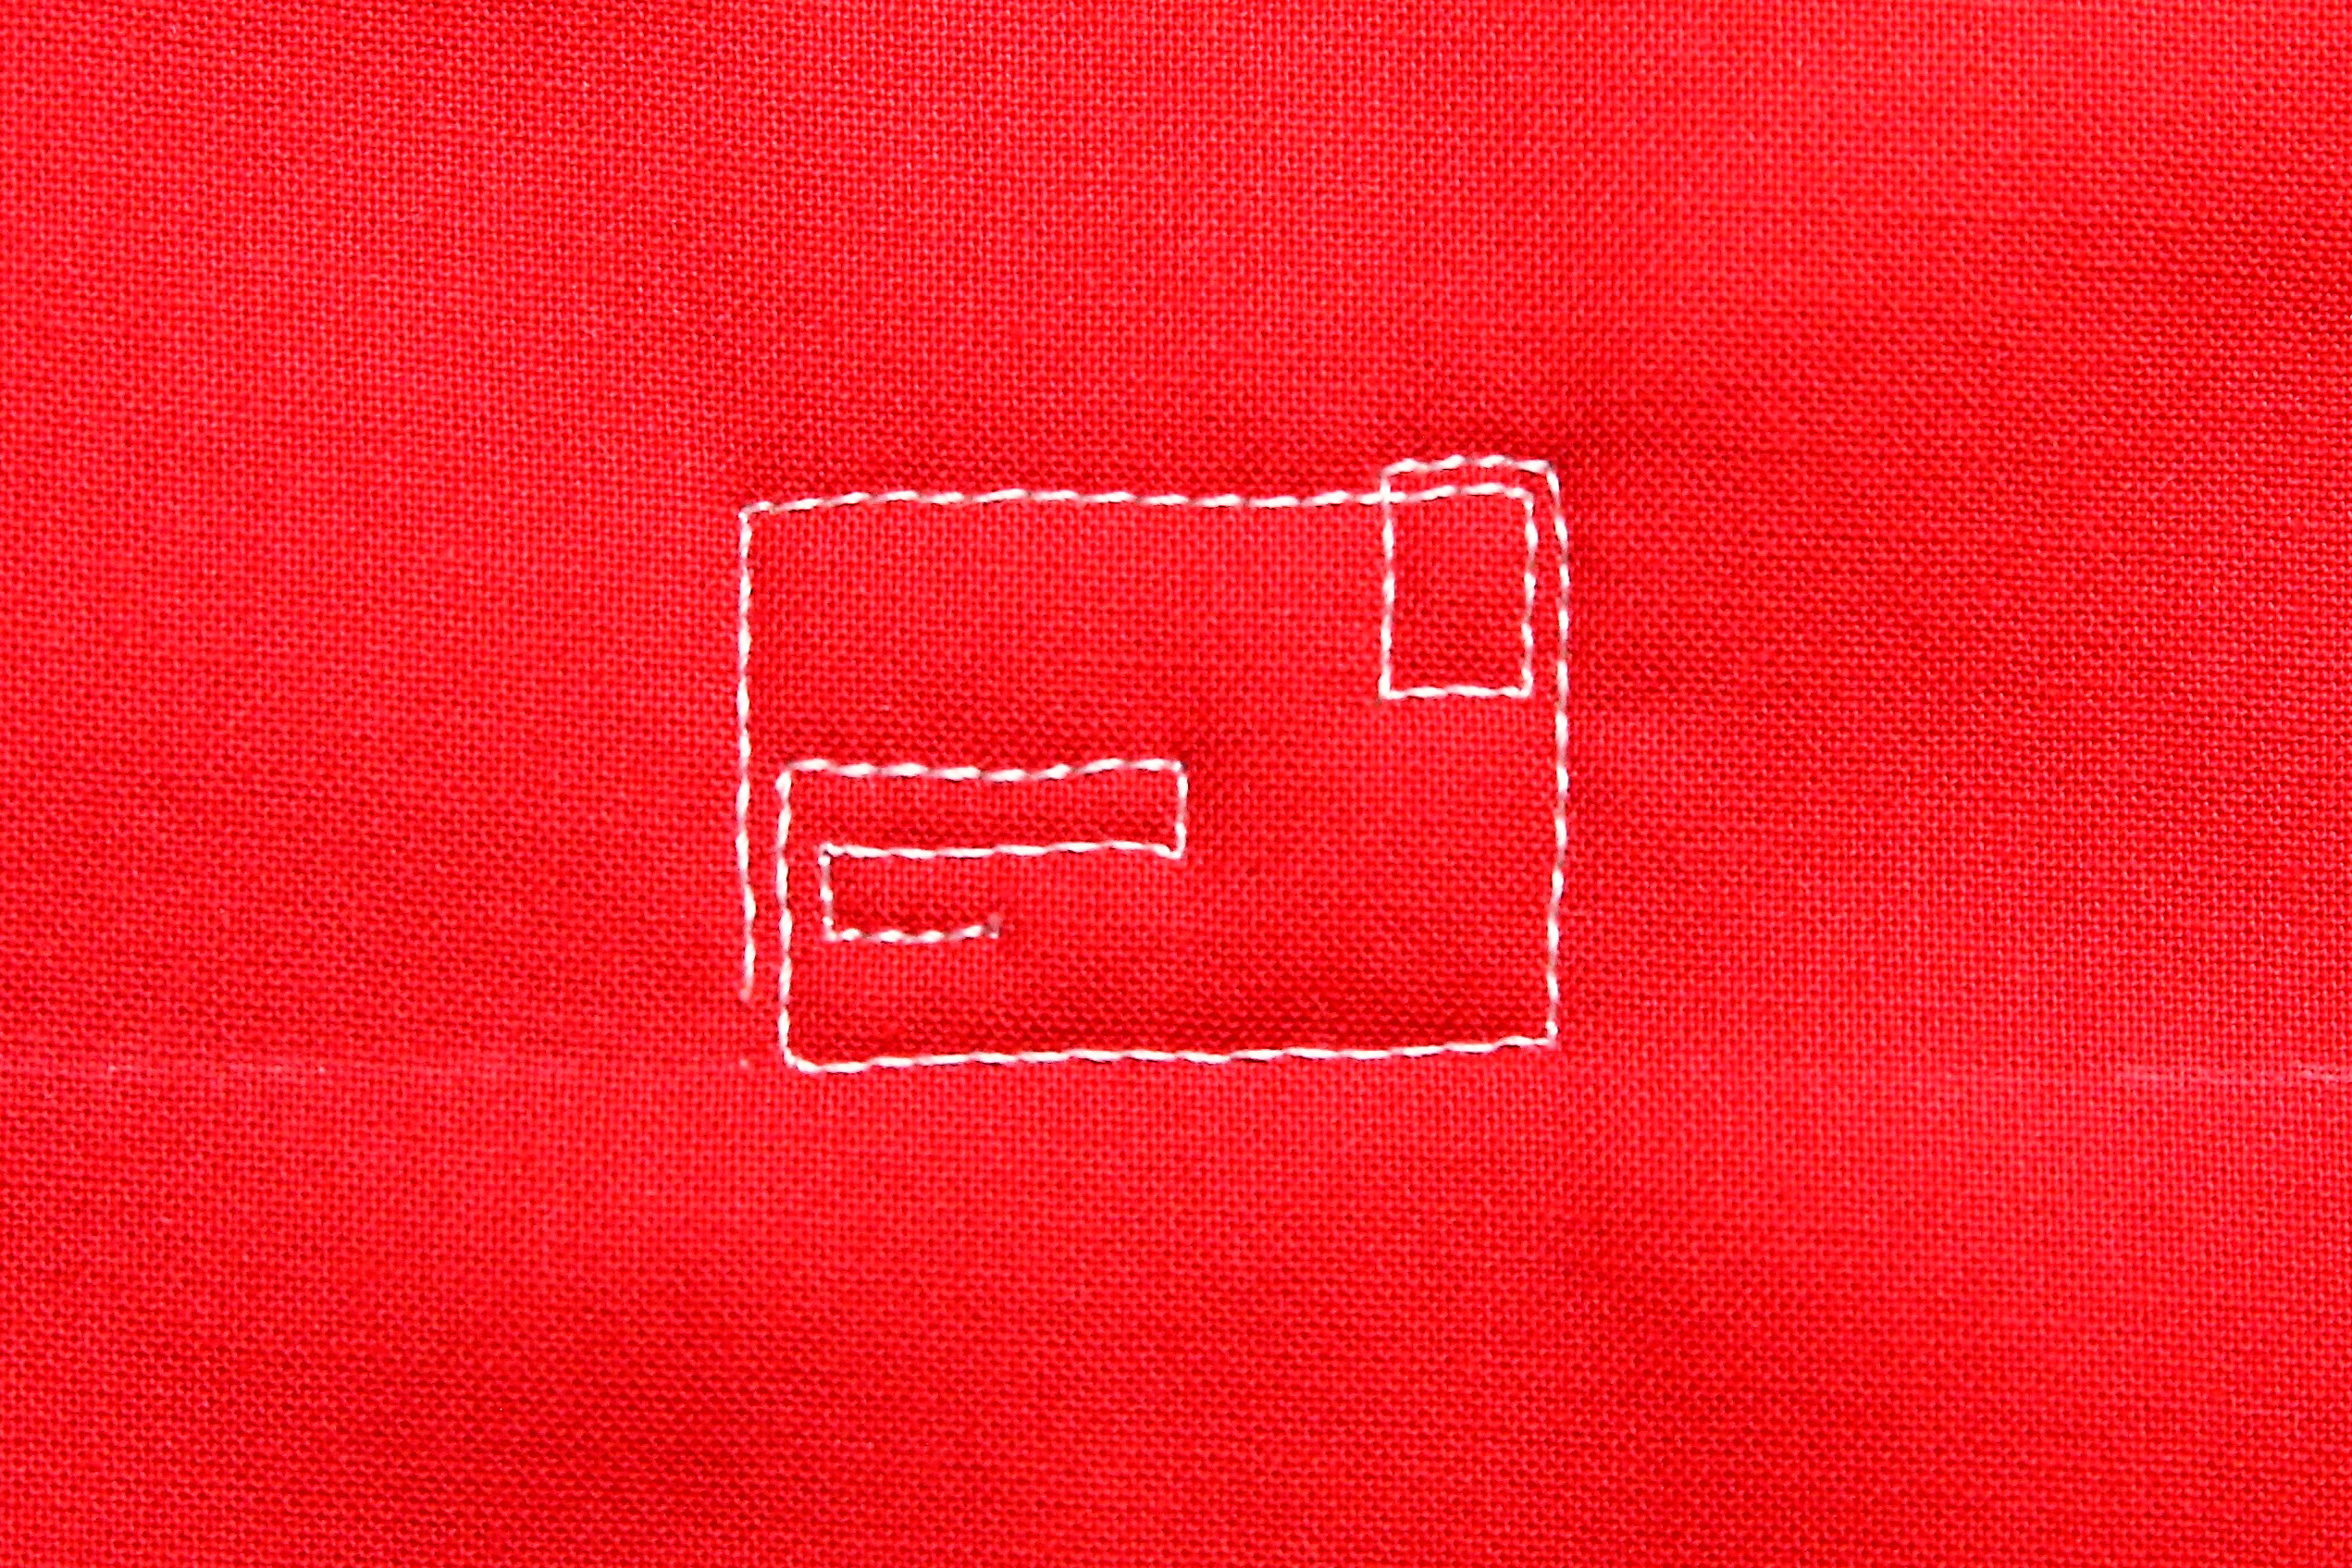
Stitch along the bottom line, then stitch vertically a few stitches. Add a few horizontal lines-to create the “address”.
Continue stitching from left to right to exit the right side of the first letter.
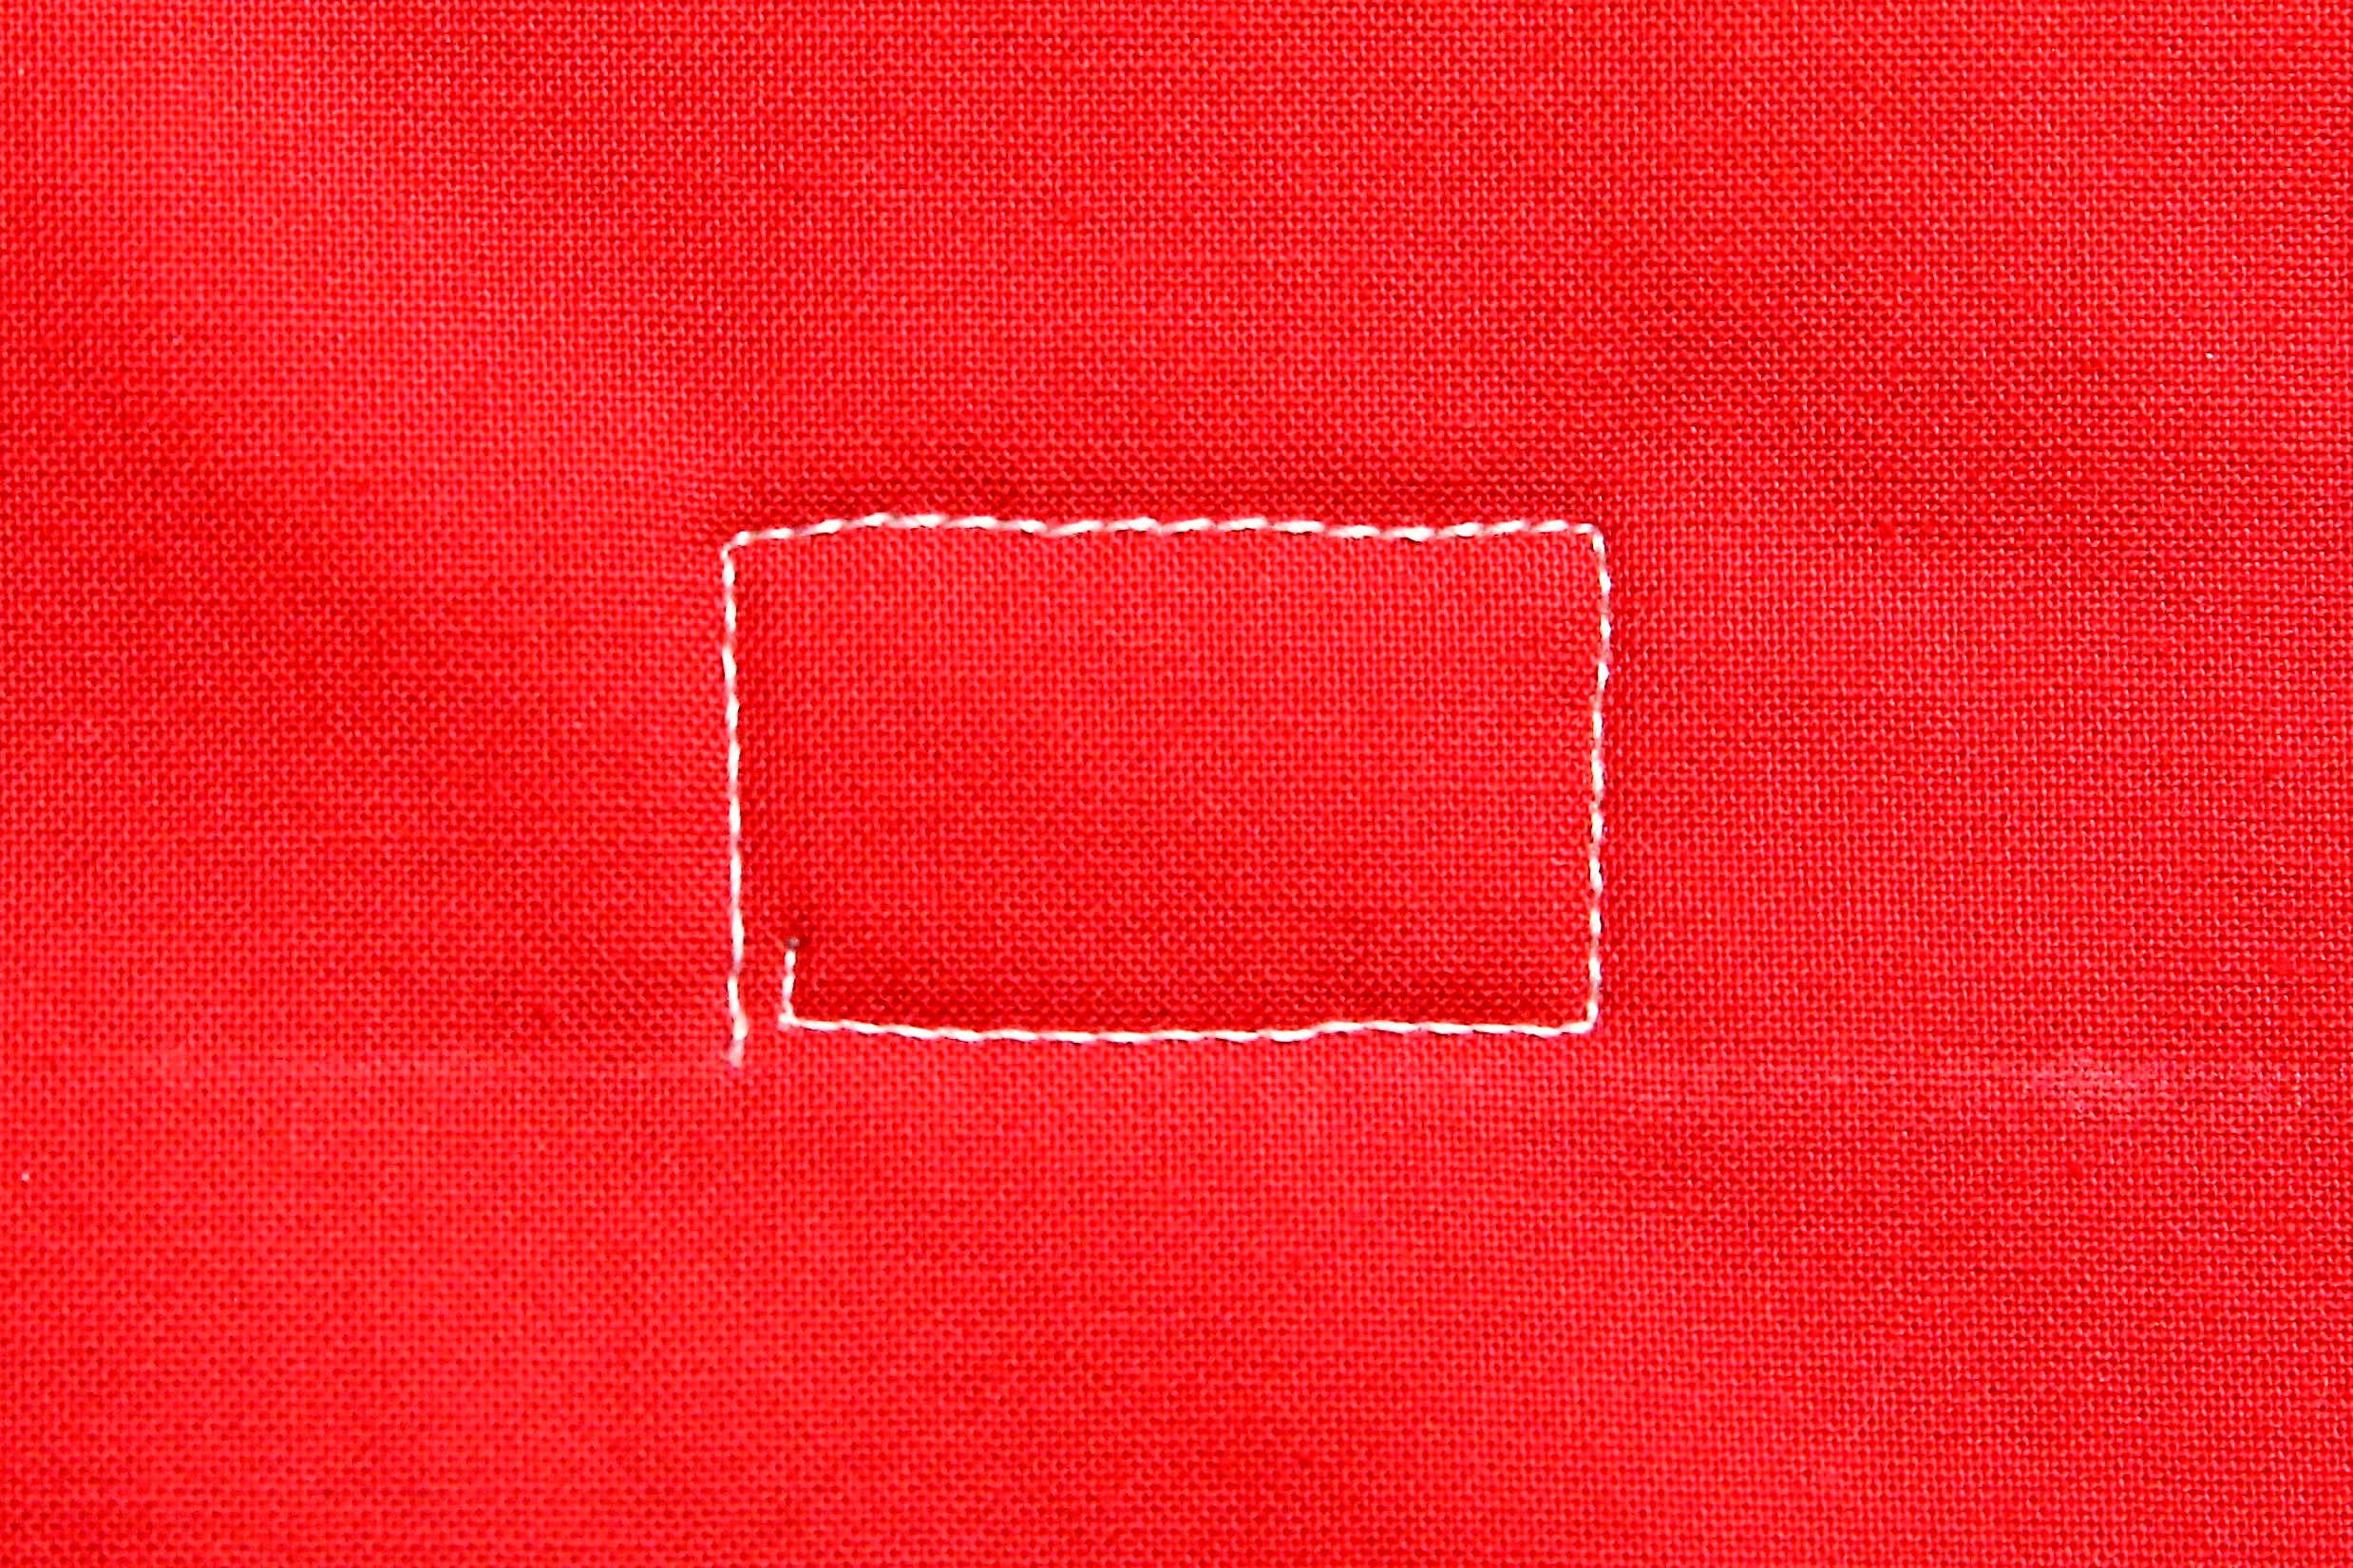
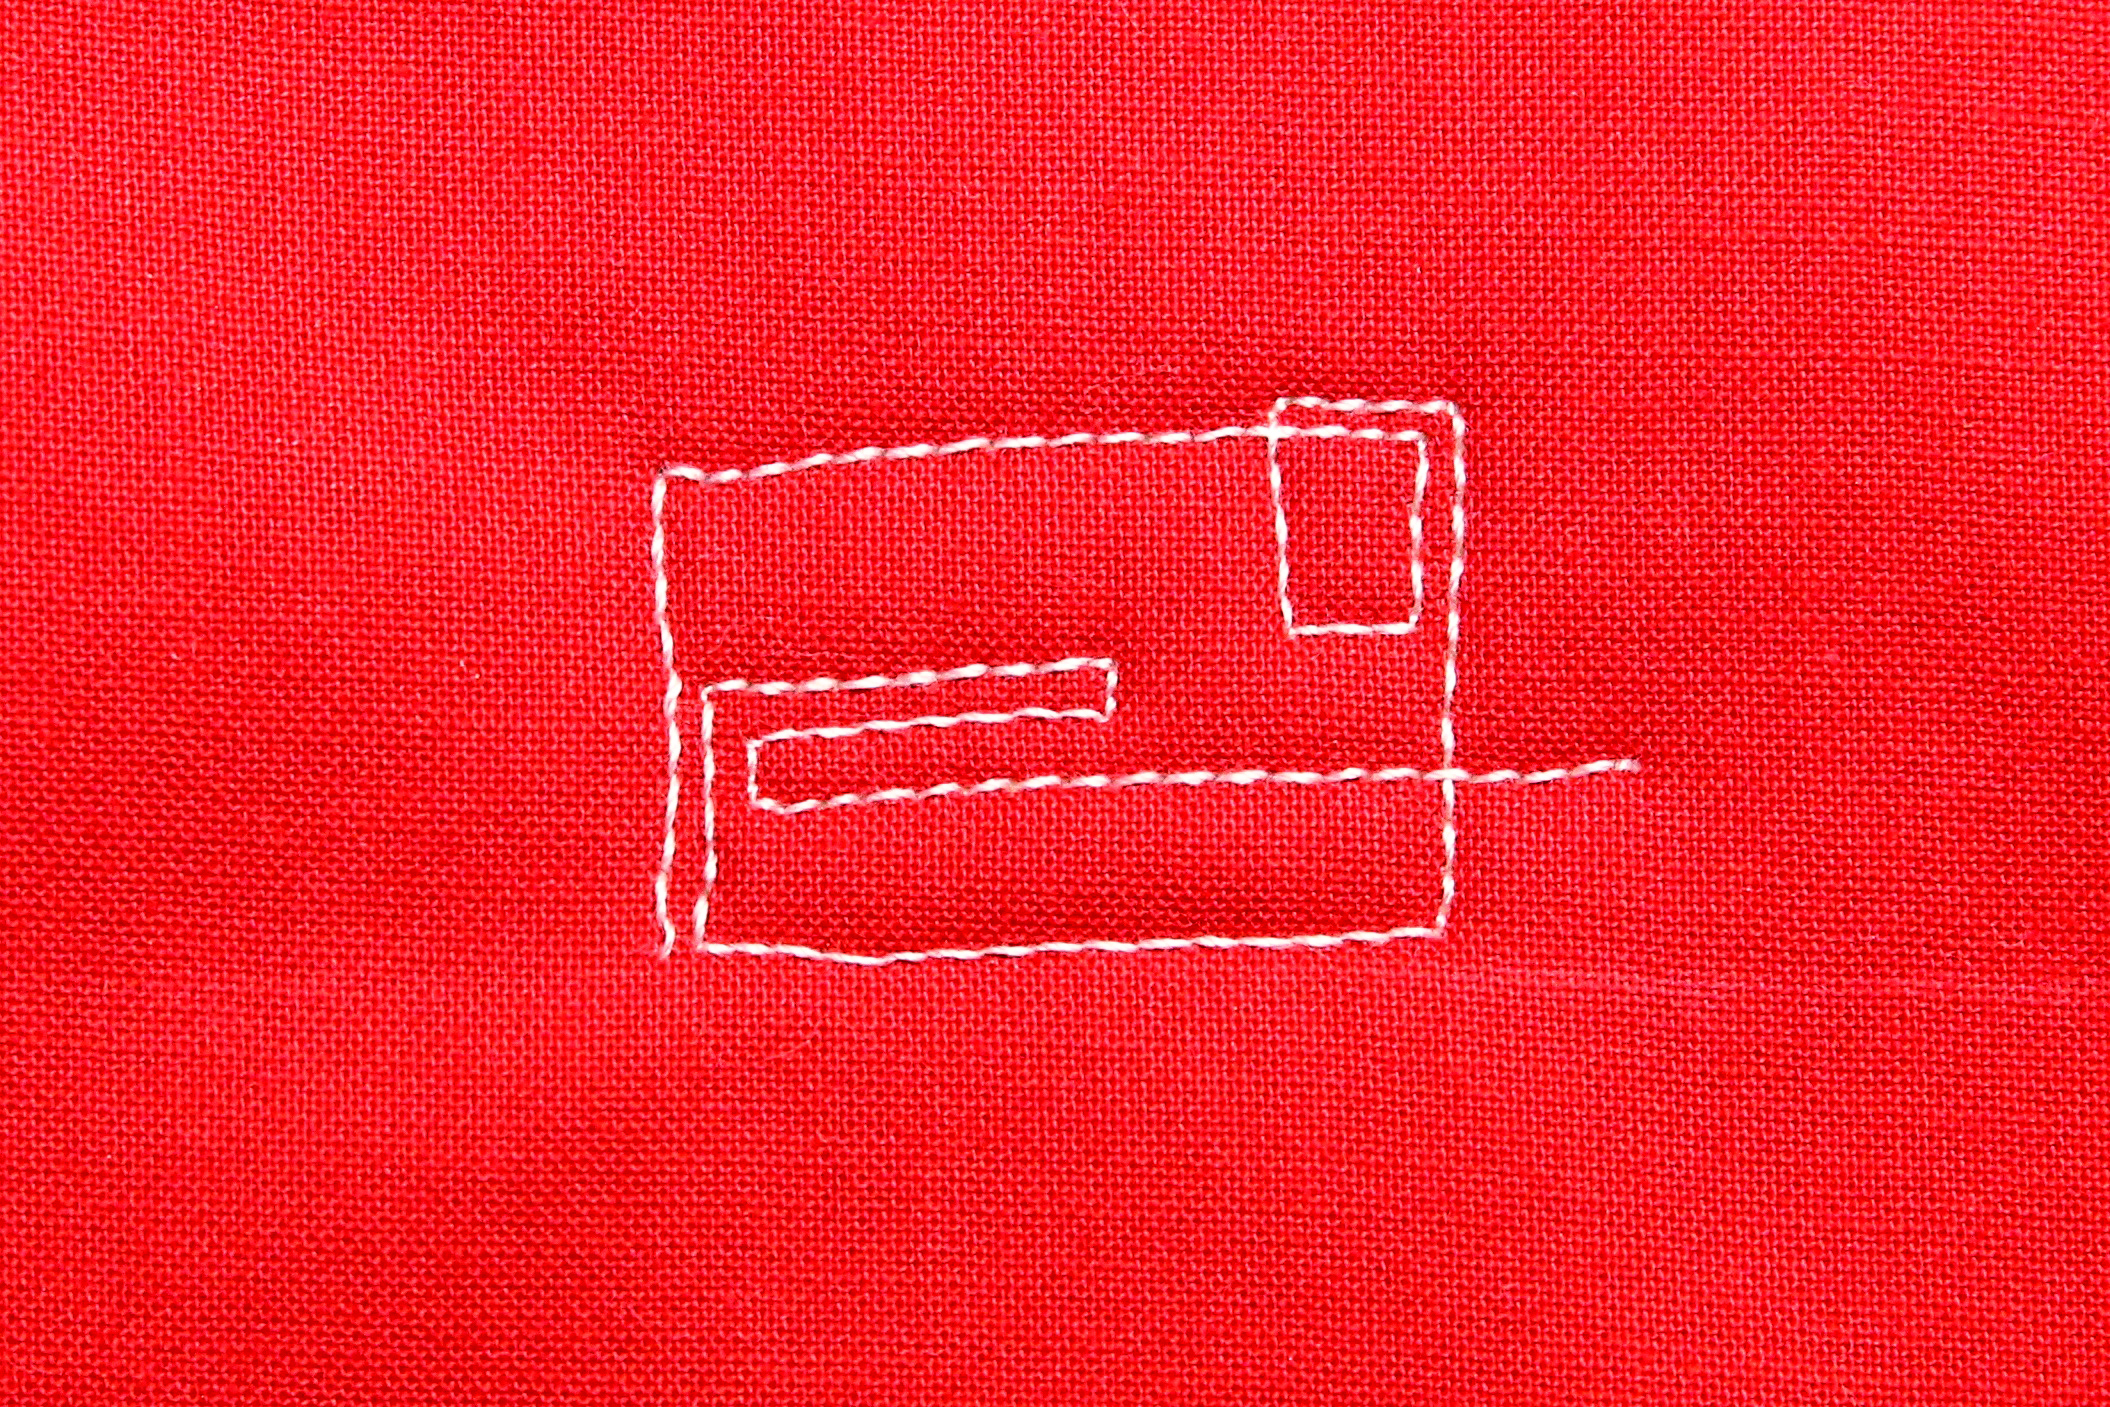
To create the back of the envelope, begin by stitching a small rectangle, stopping just to the right of the first vertical line.
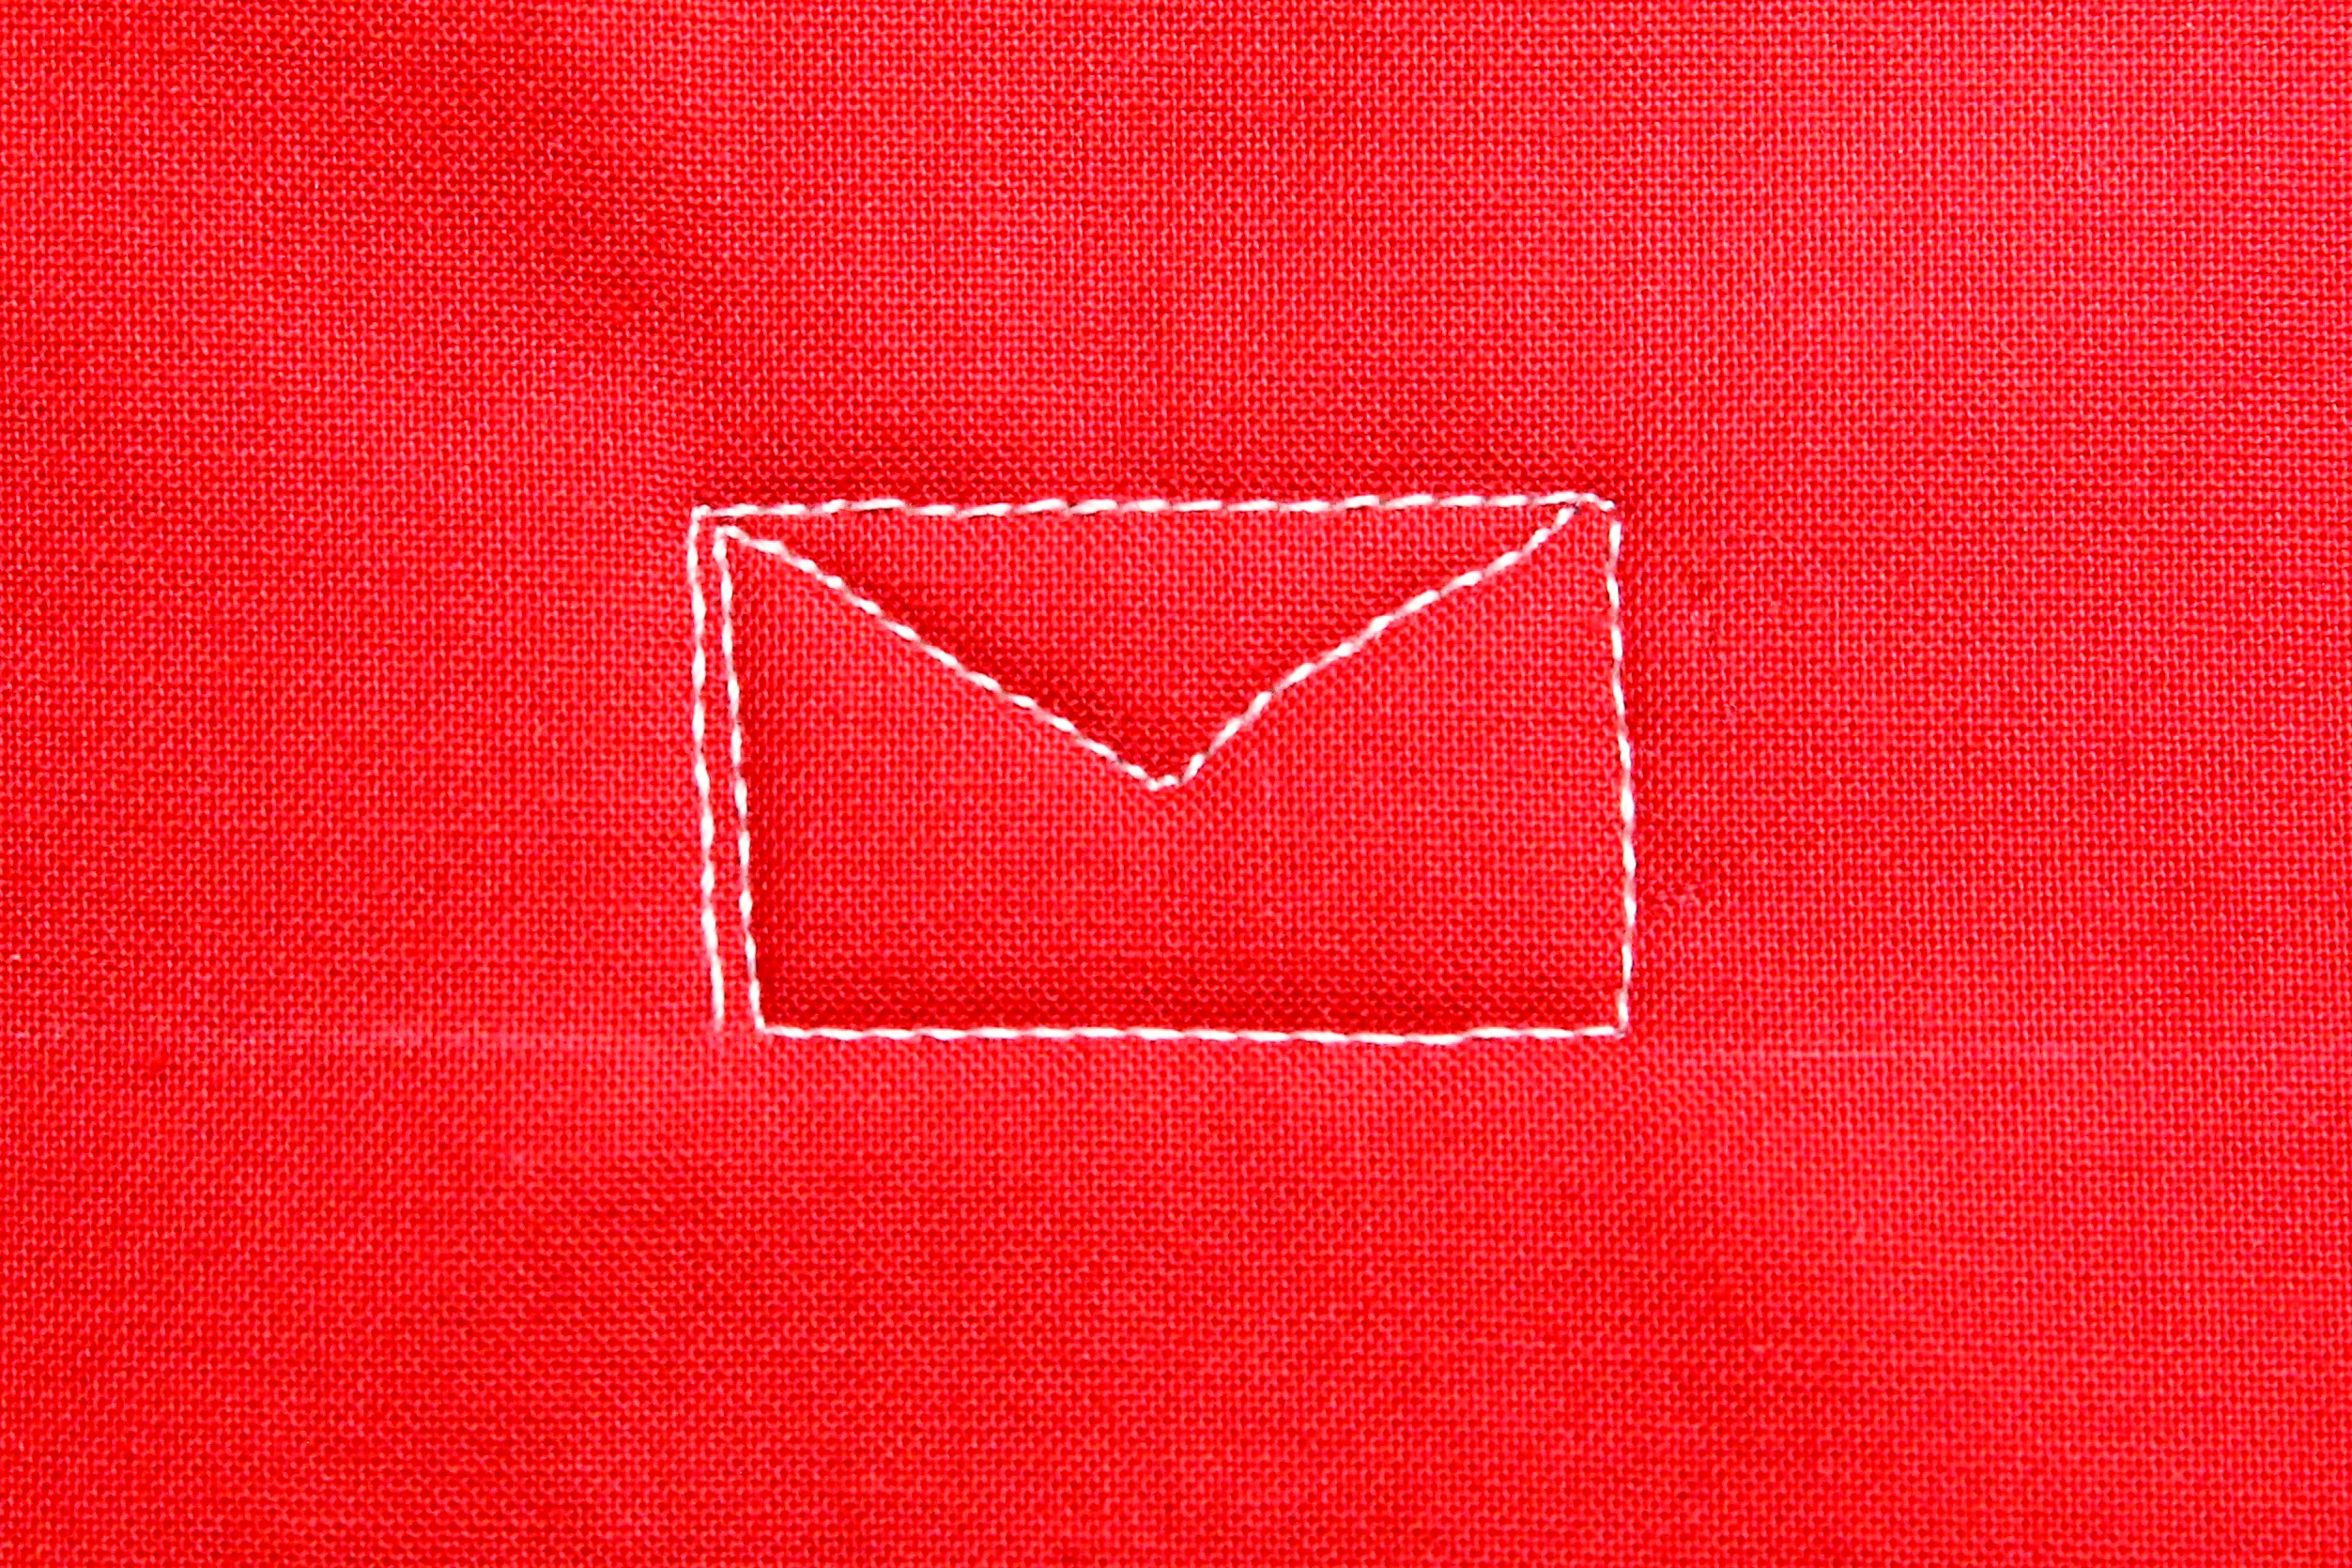
Closely echo stitch the left vertical line, then stitch a triangle, ending on the right side of the envelope.
Stitch along the right angled line, stopping half way to the point.
Stitch into the corner and back again, then closely echo stitch along the angled line.
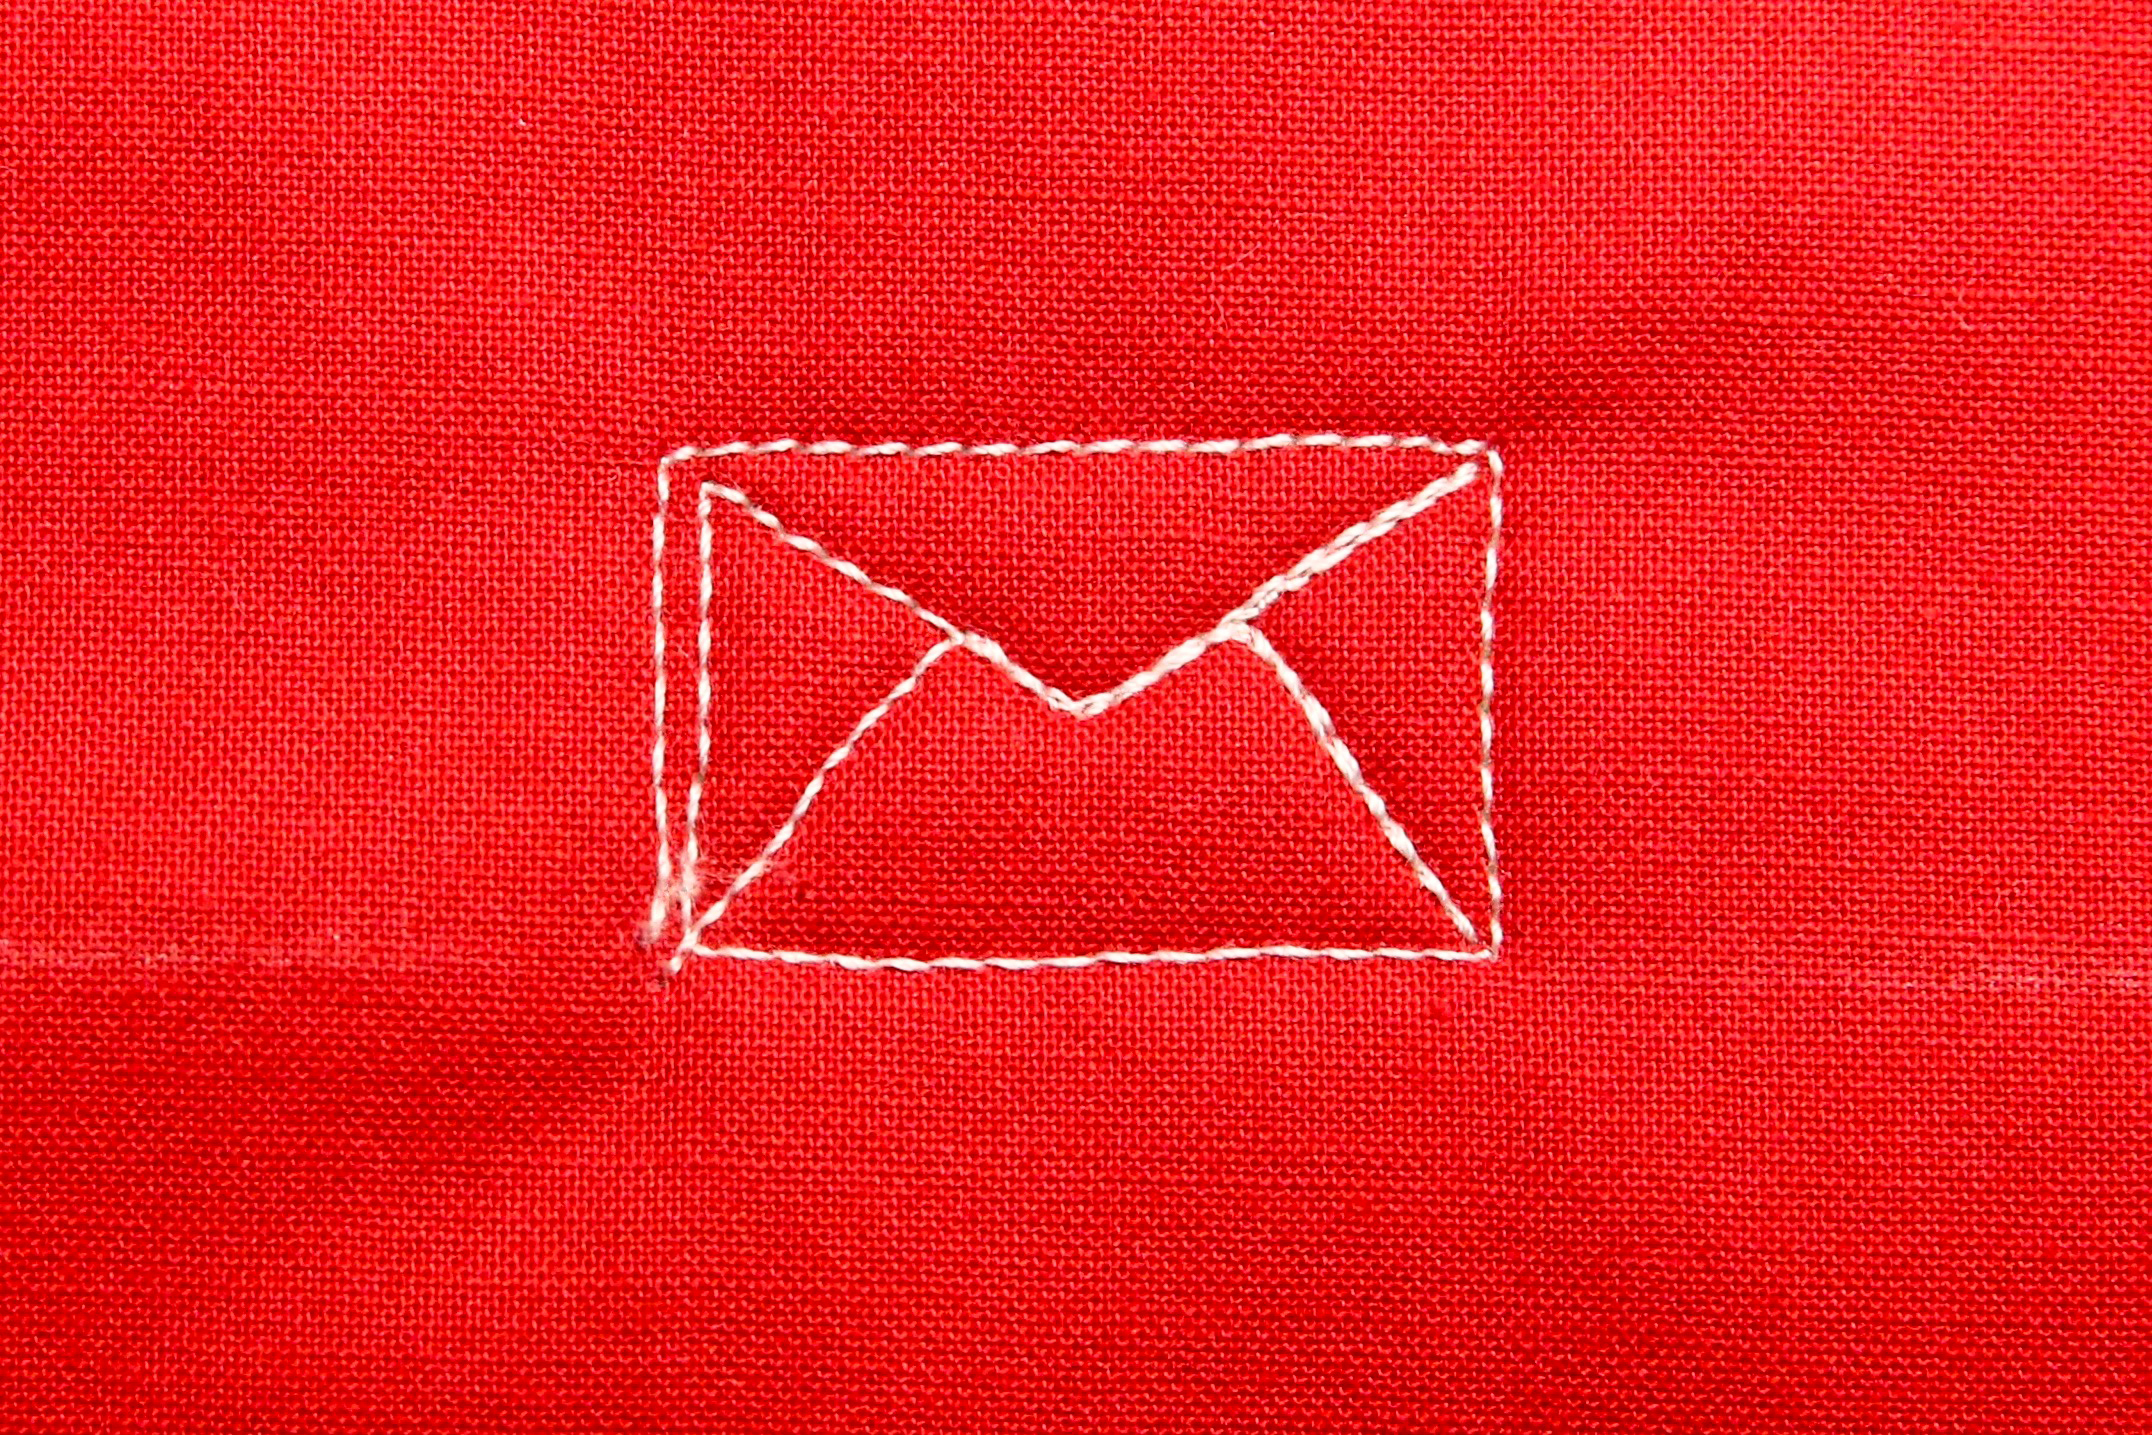
Stitch into the left corner to complete the envelope. To travel to the next motif, closely echo stitch under the completed envelope.
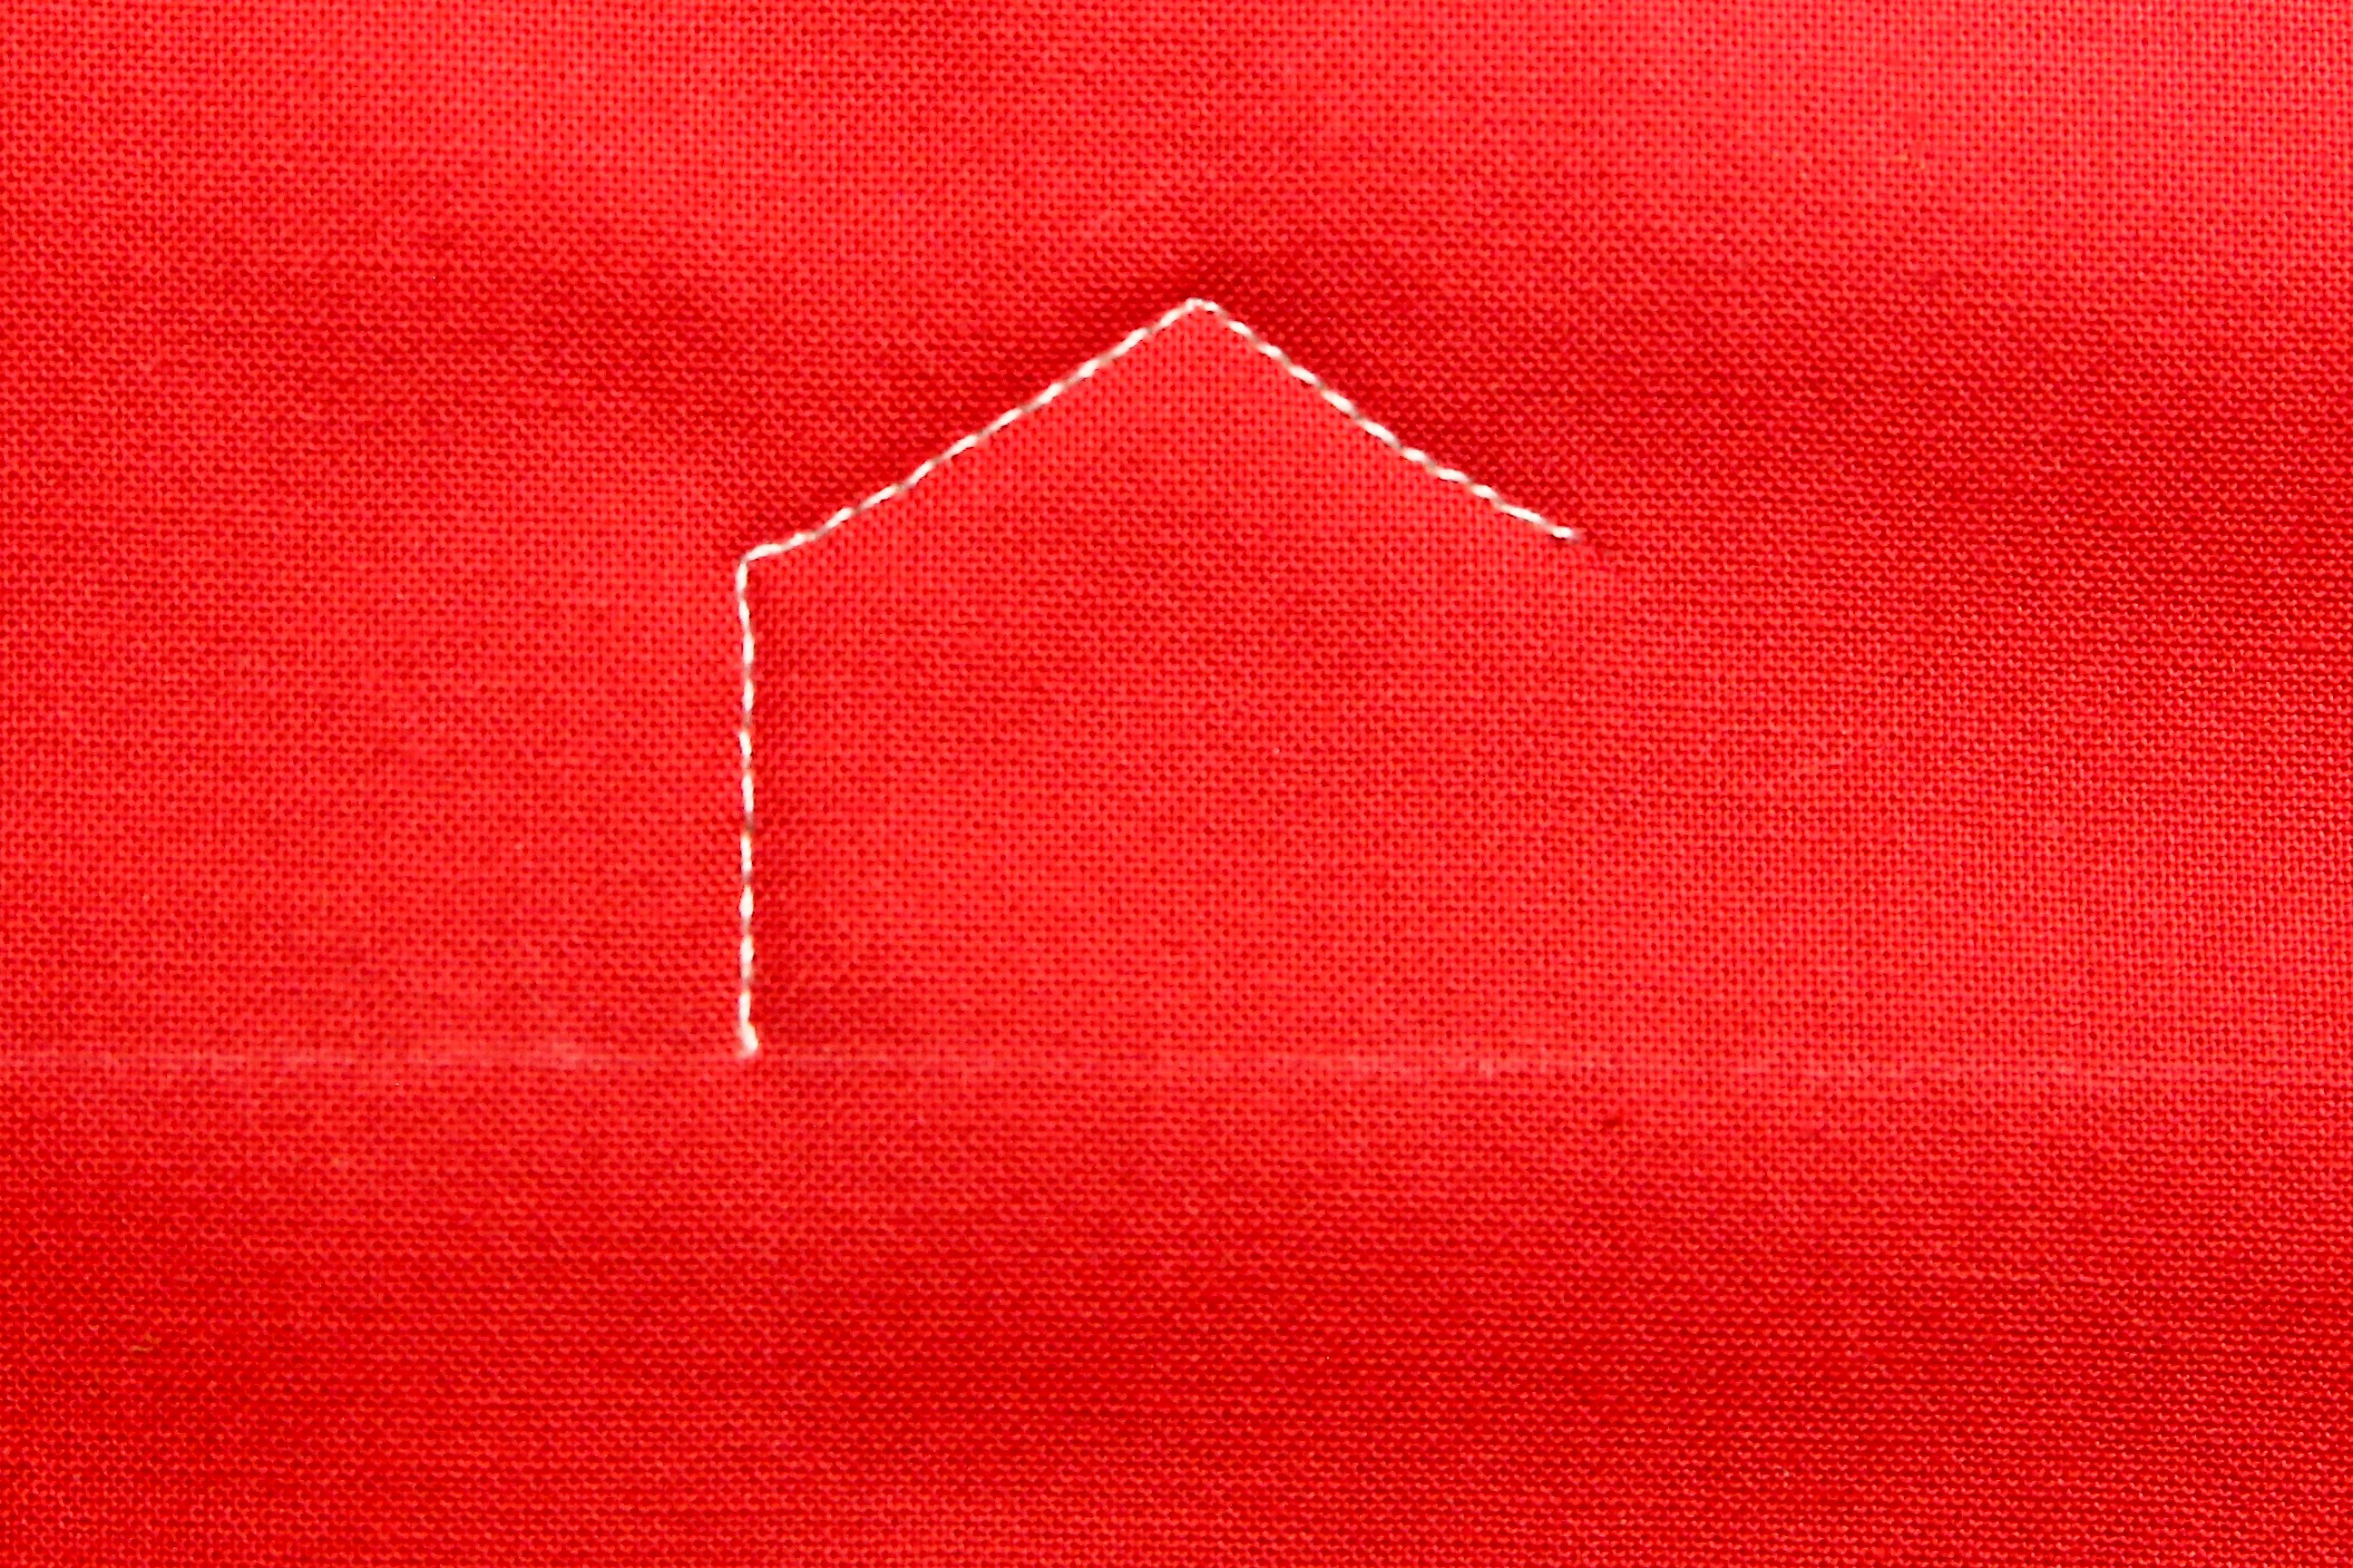
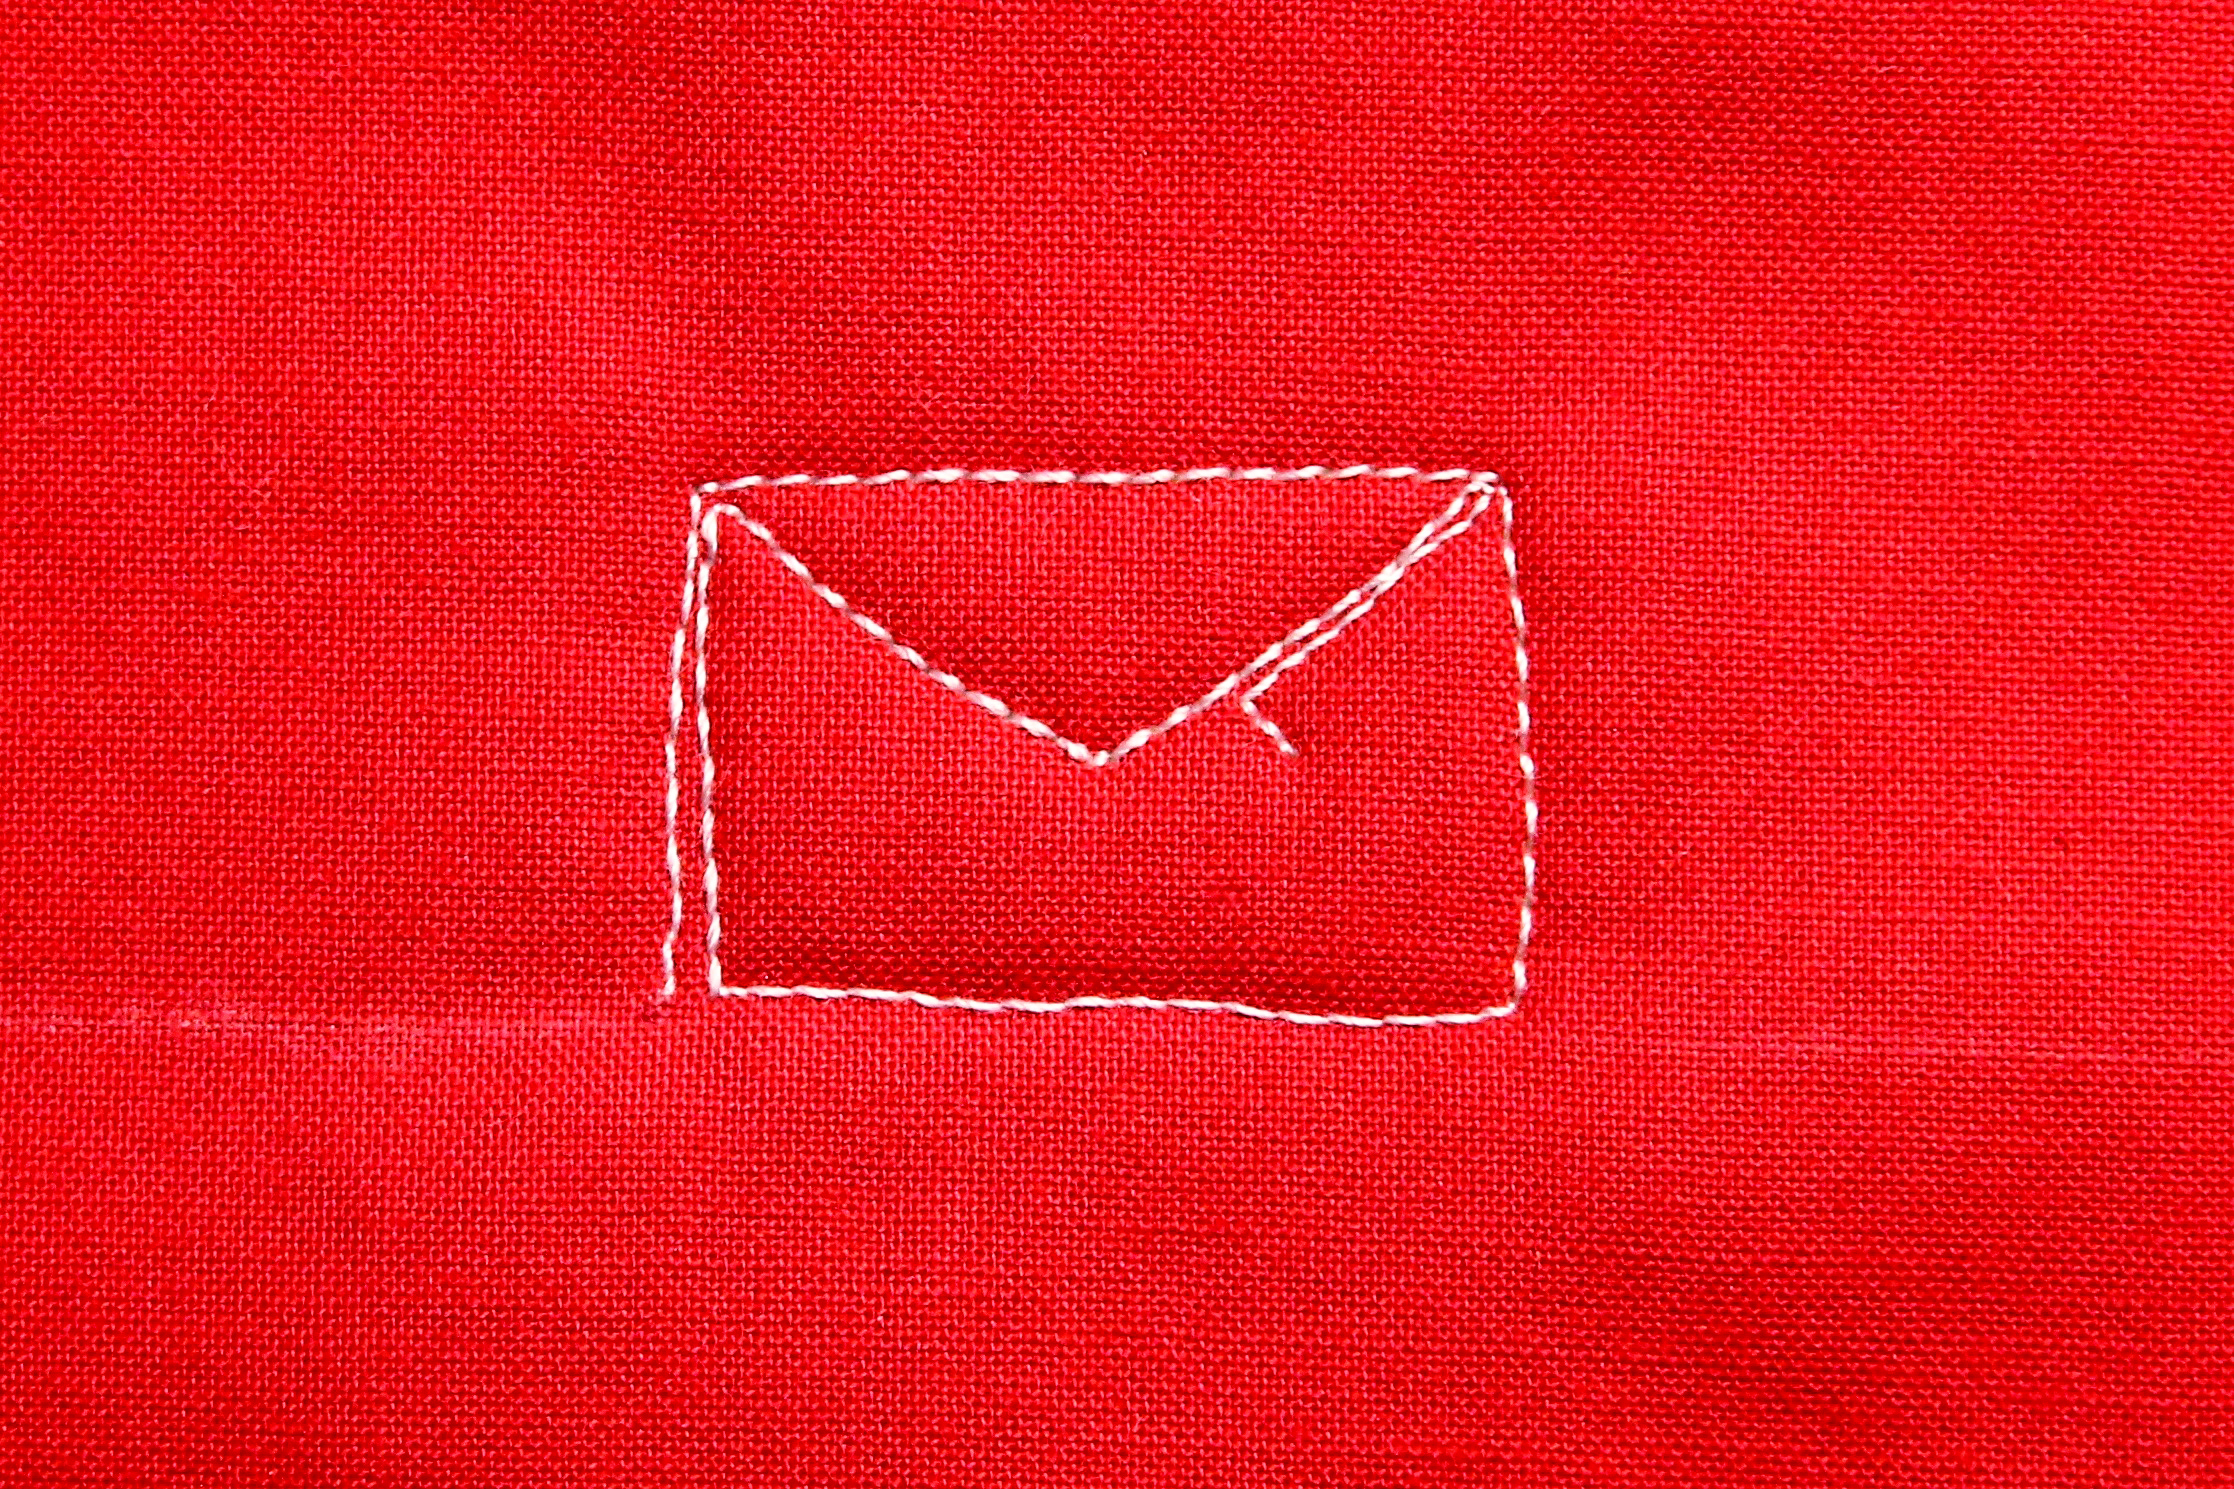
To create the open envelope, begin by stitching a vertical line and an upward angle.
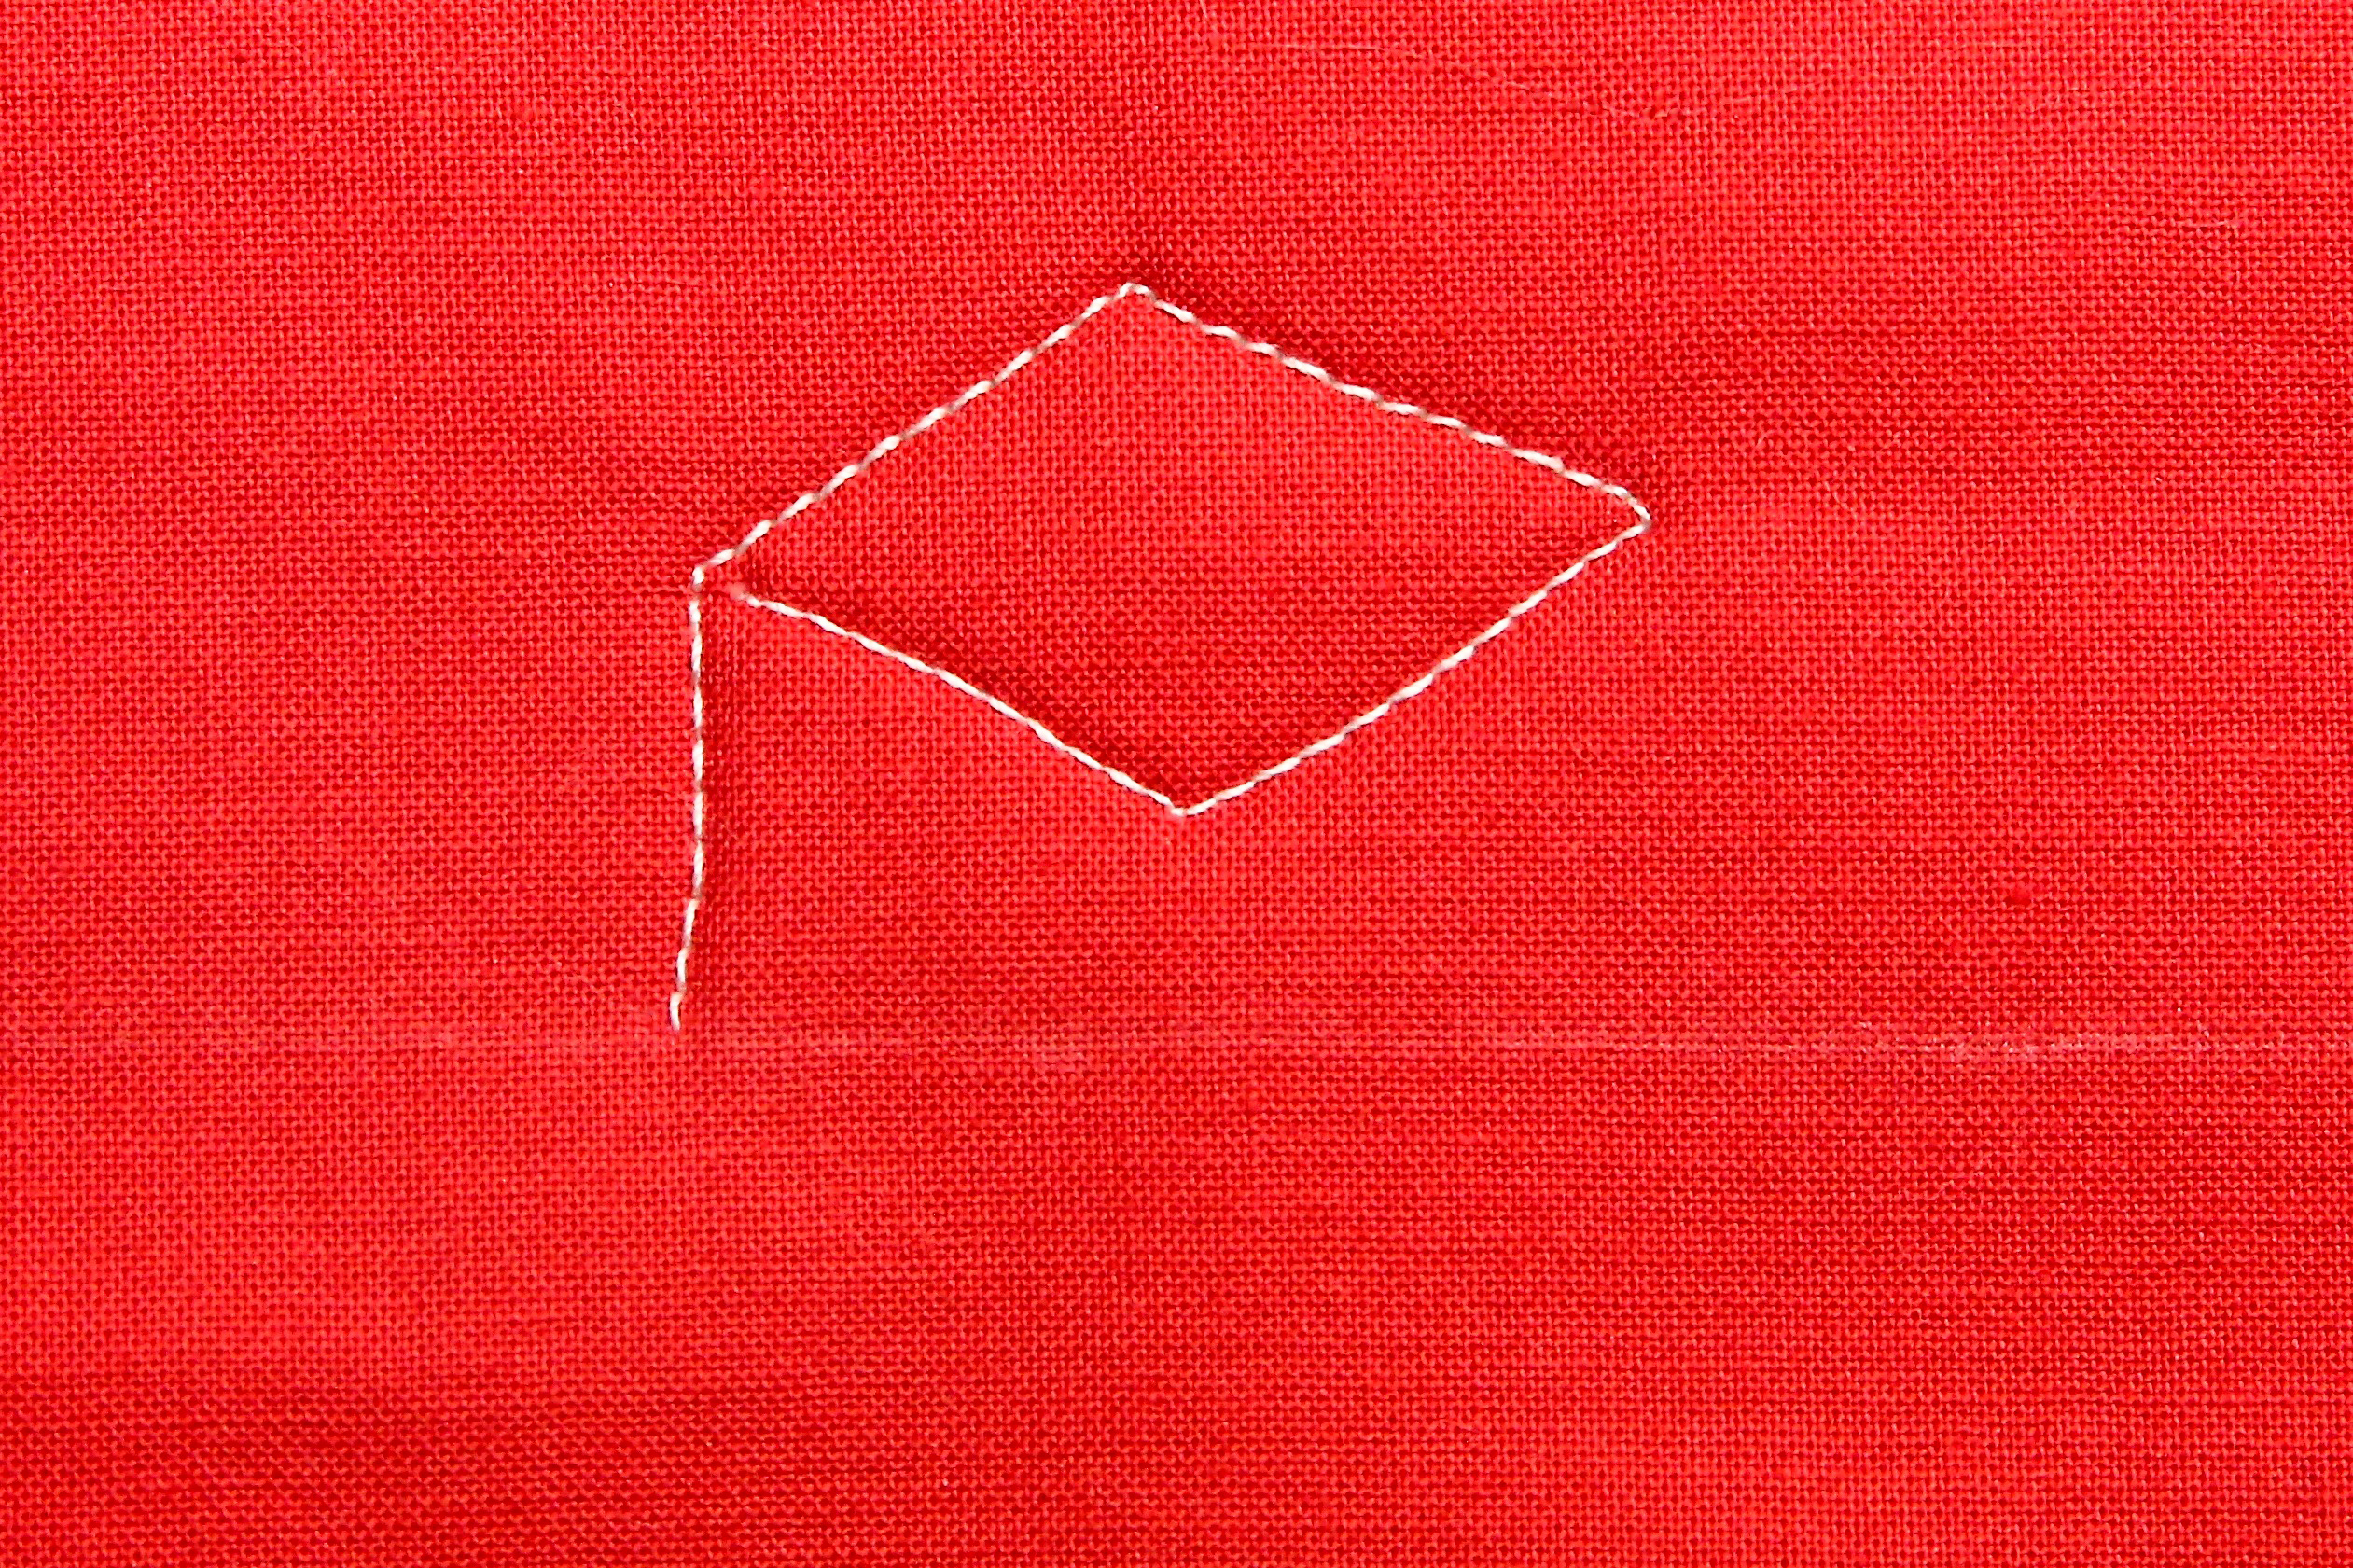
Stitch a mirror image line, ending on the left side of the envelope.
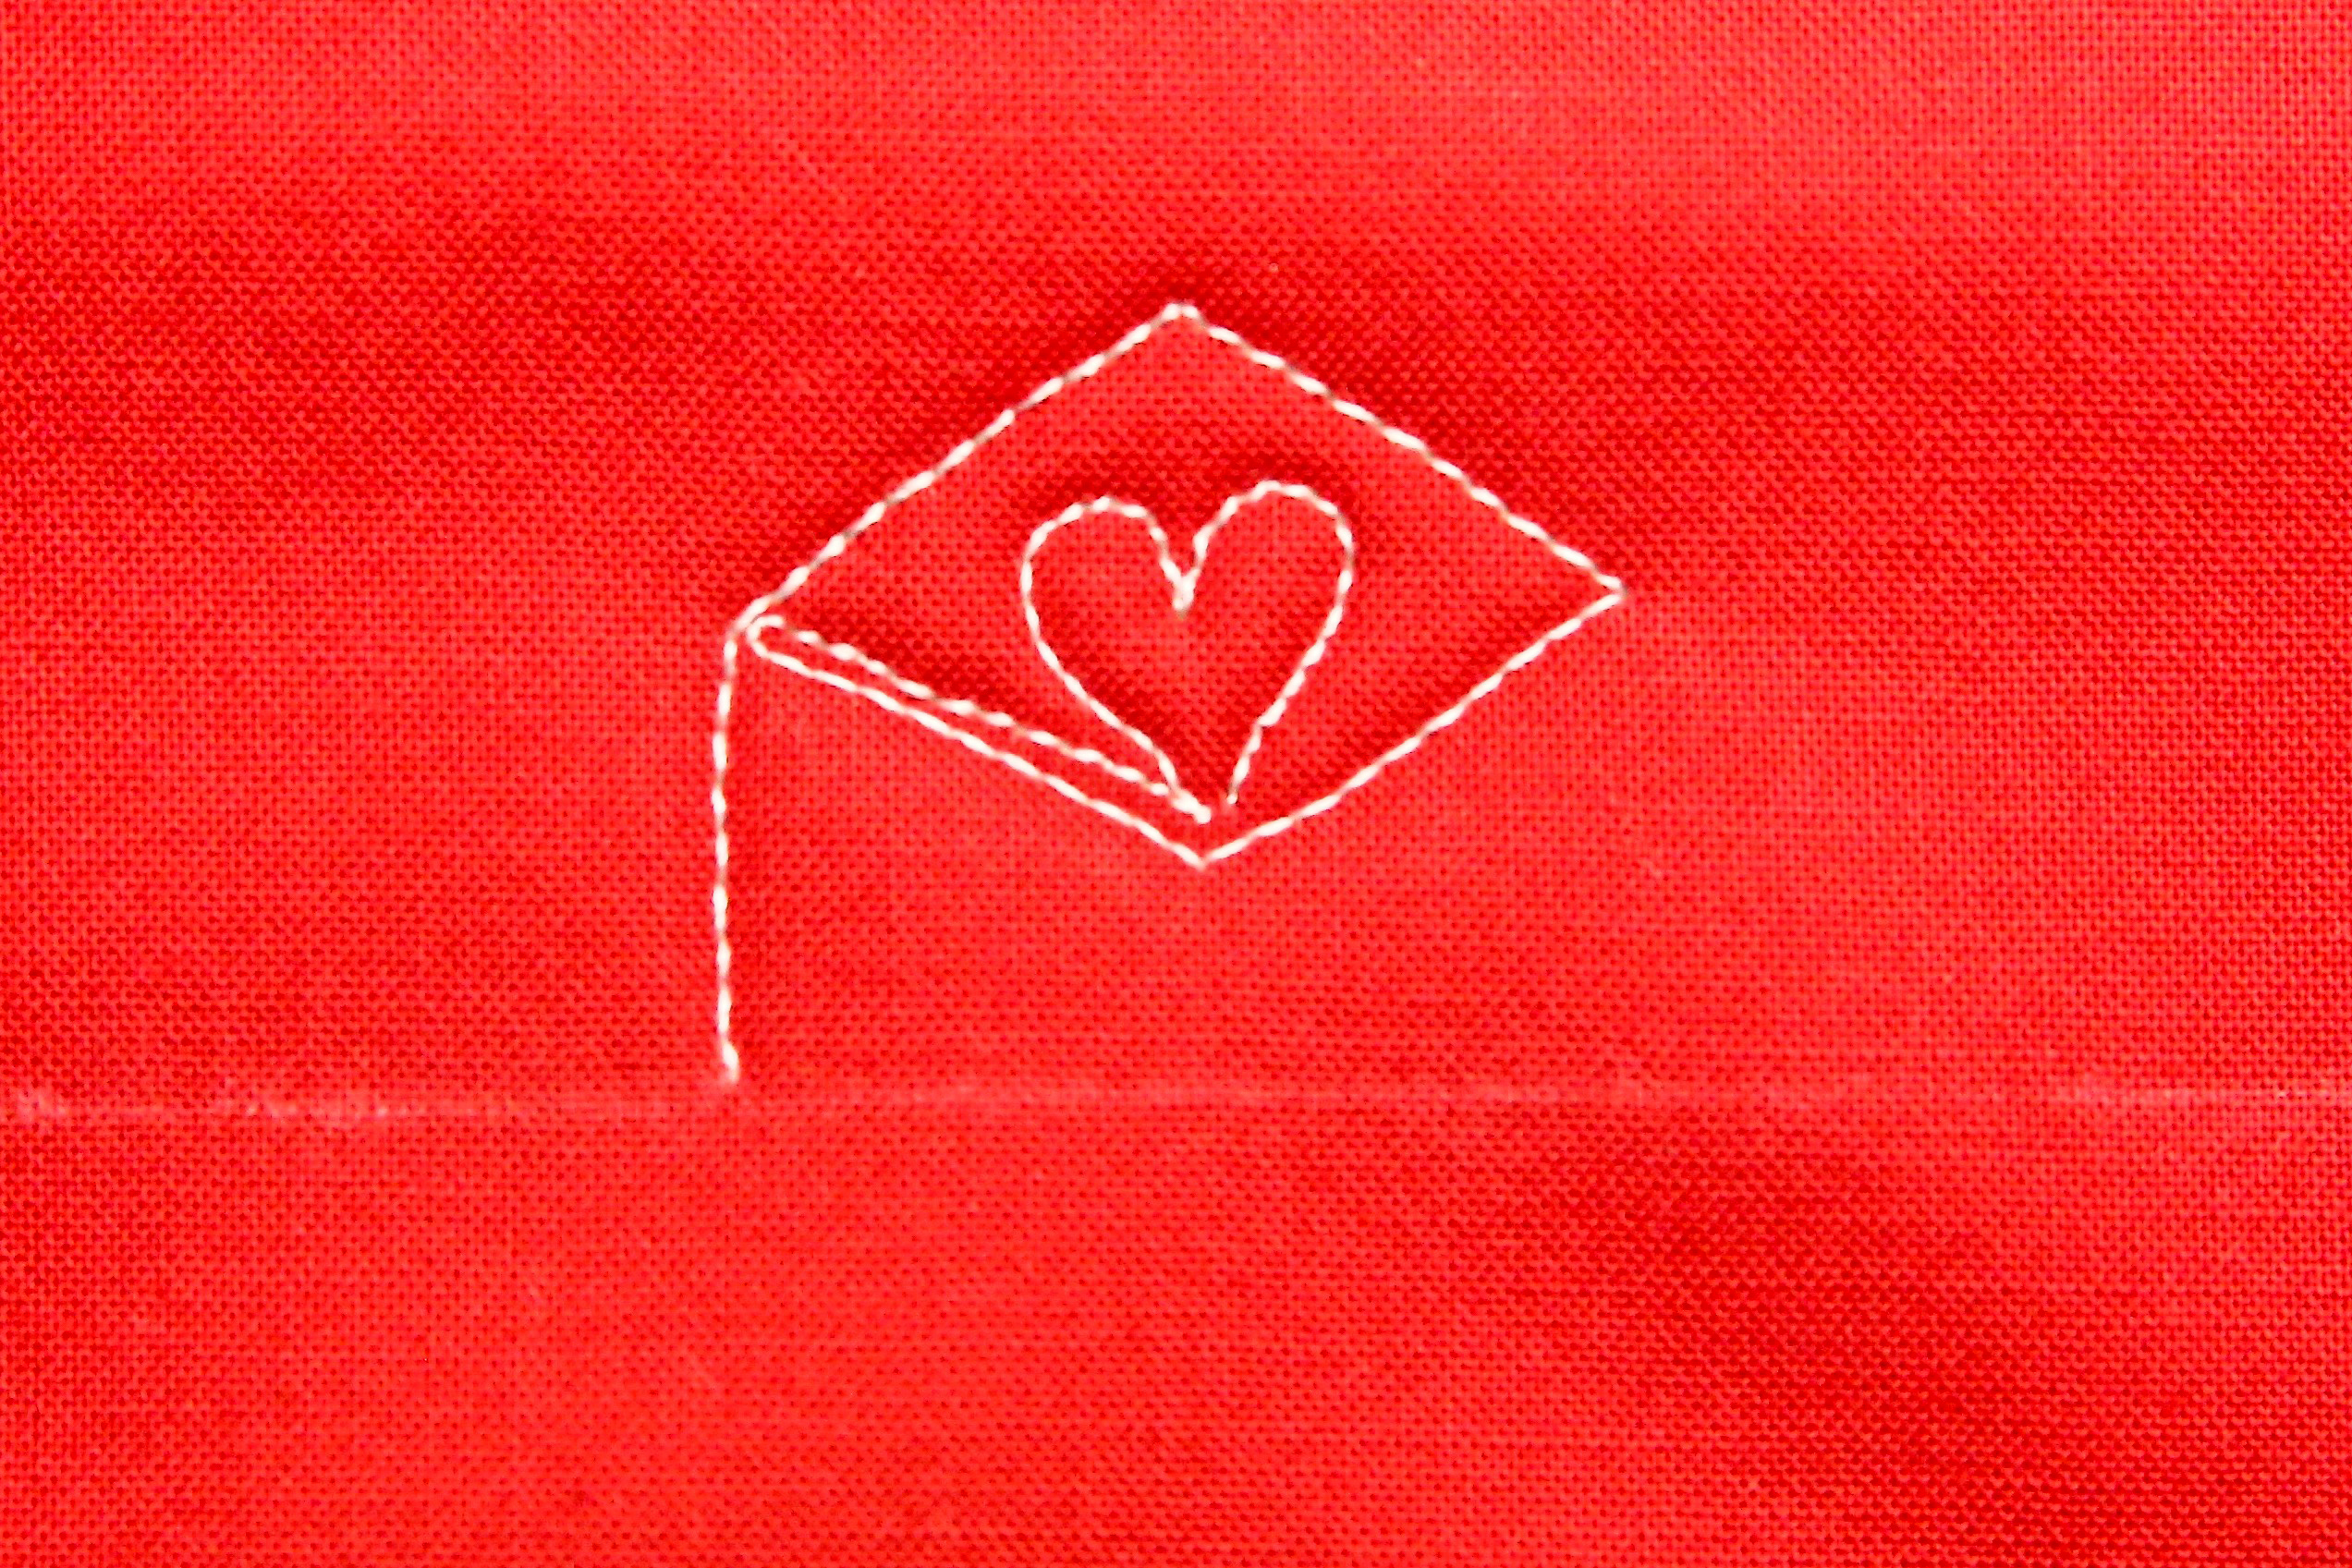
Closely echo stitch the angled line and add a small heart.
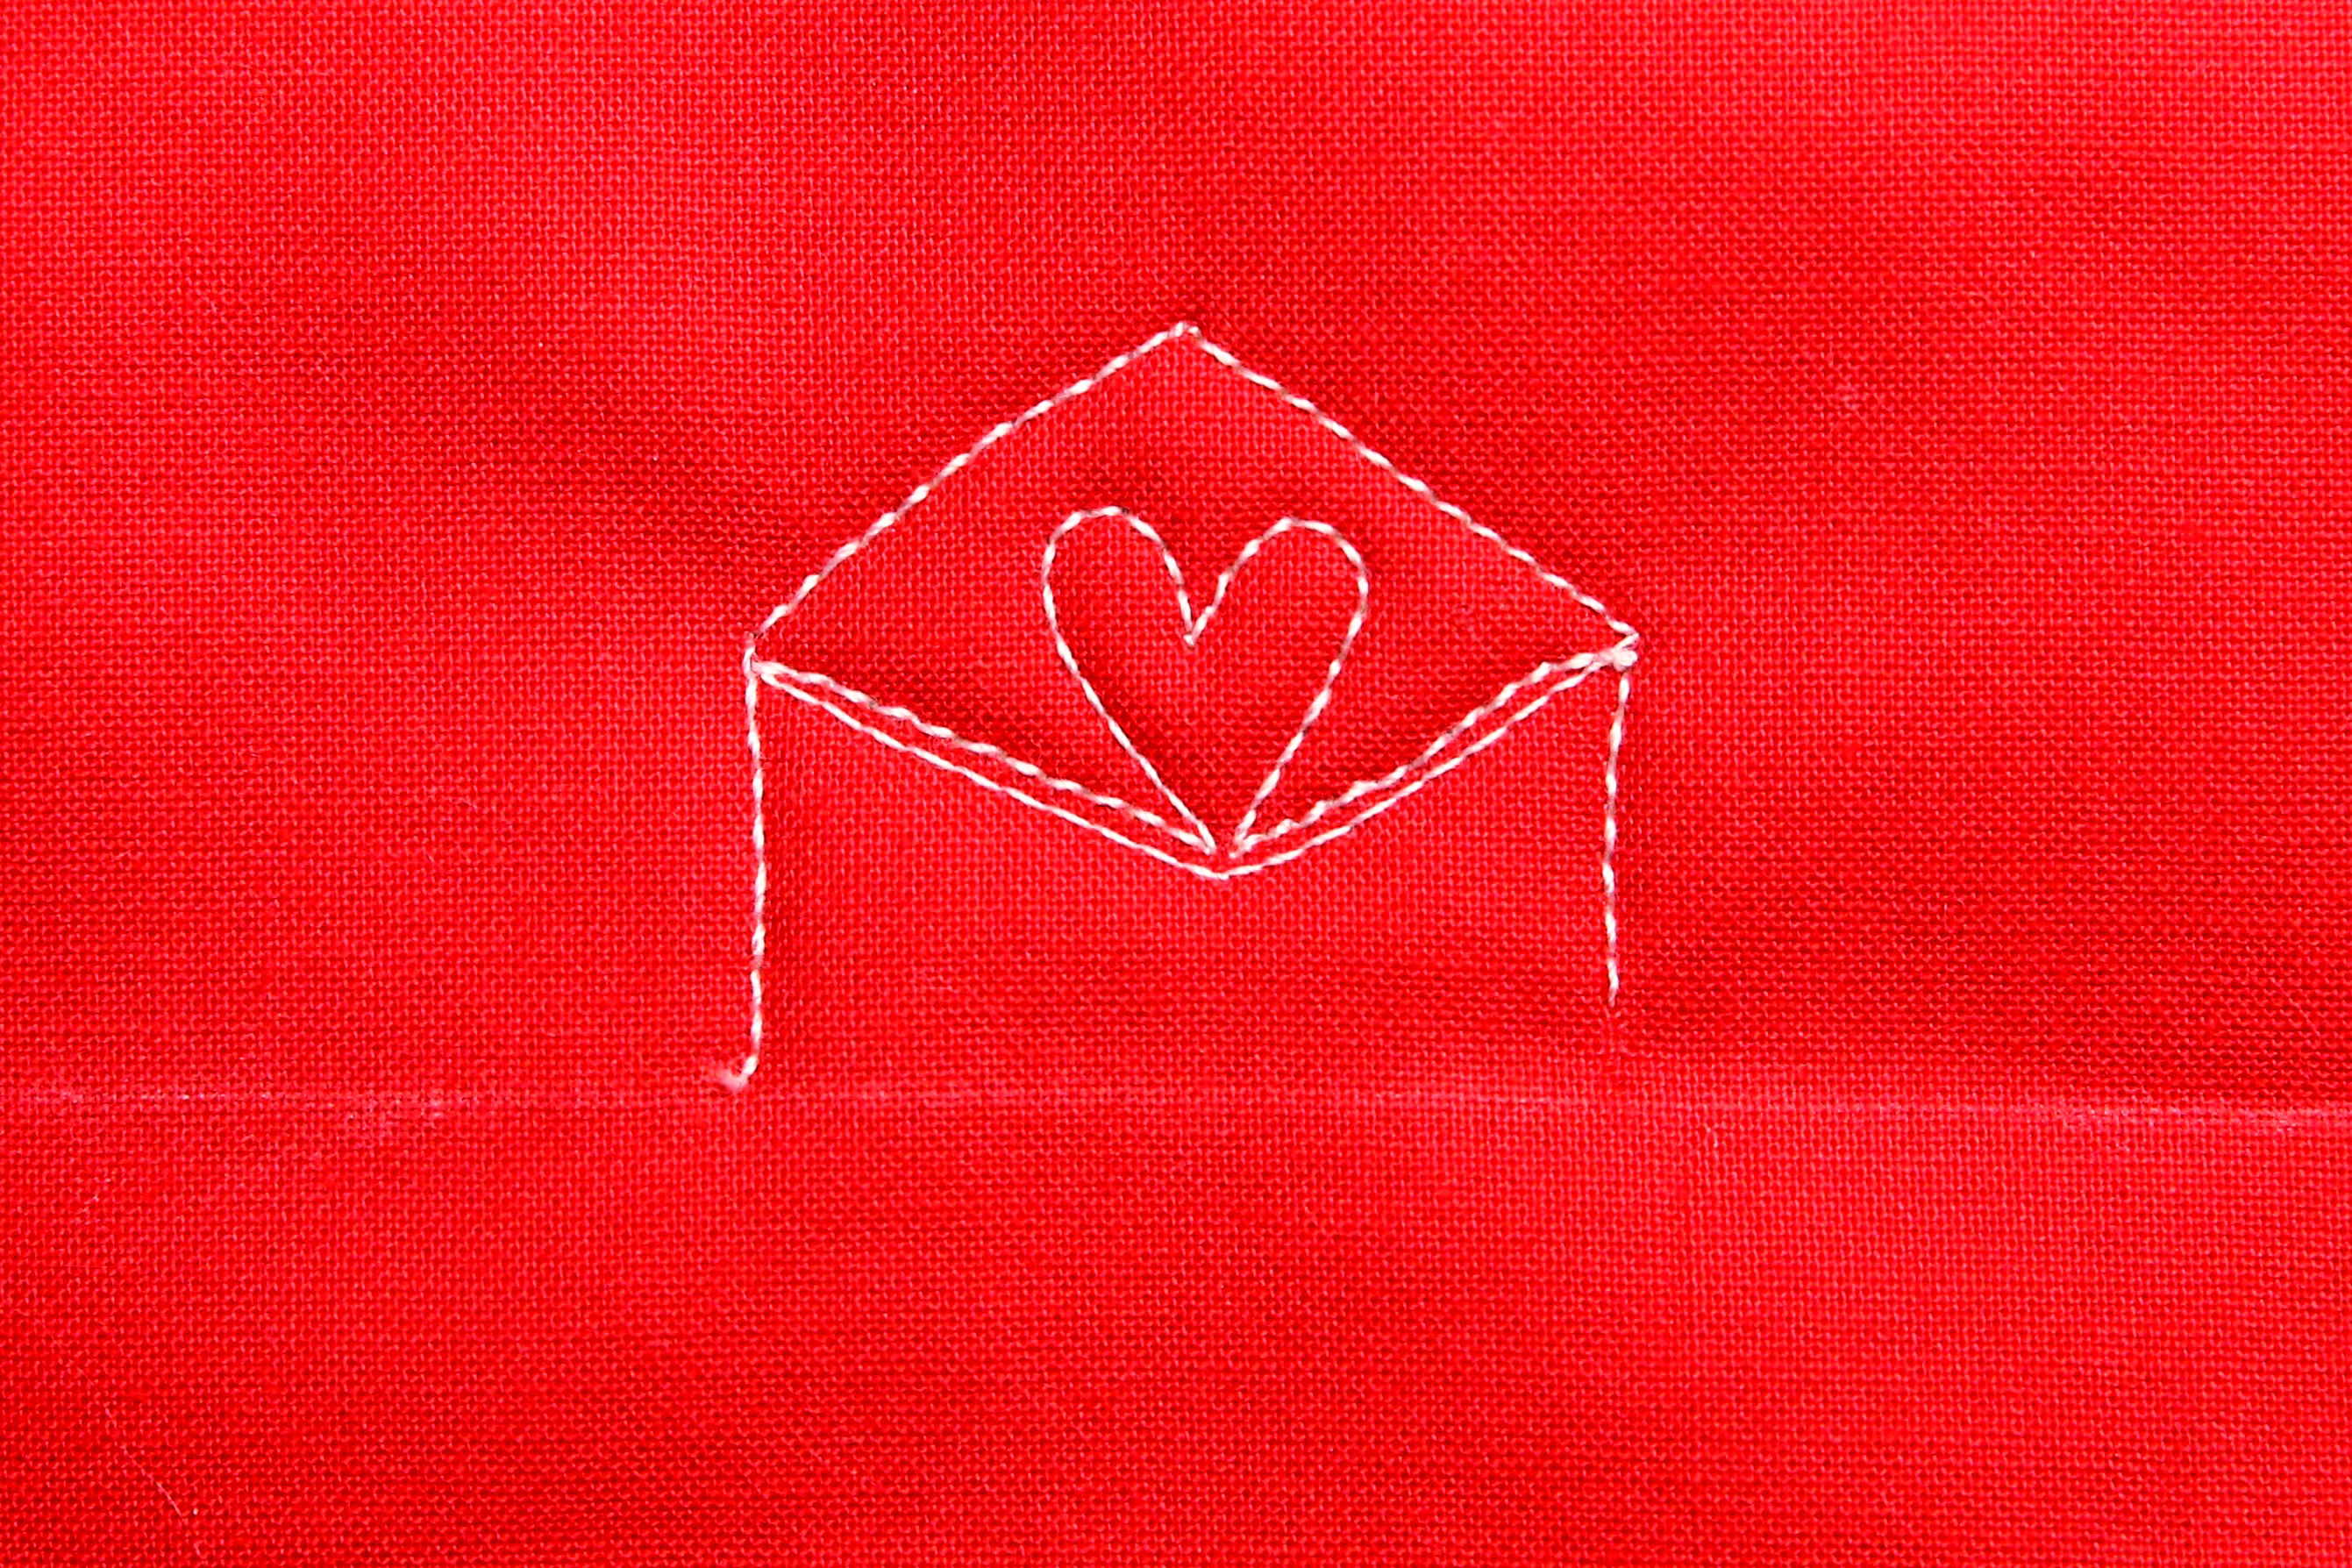
Echo stitch the right-angled line, then add a vertical line downward.
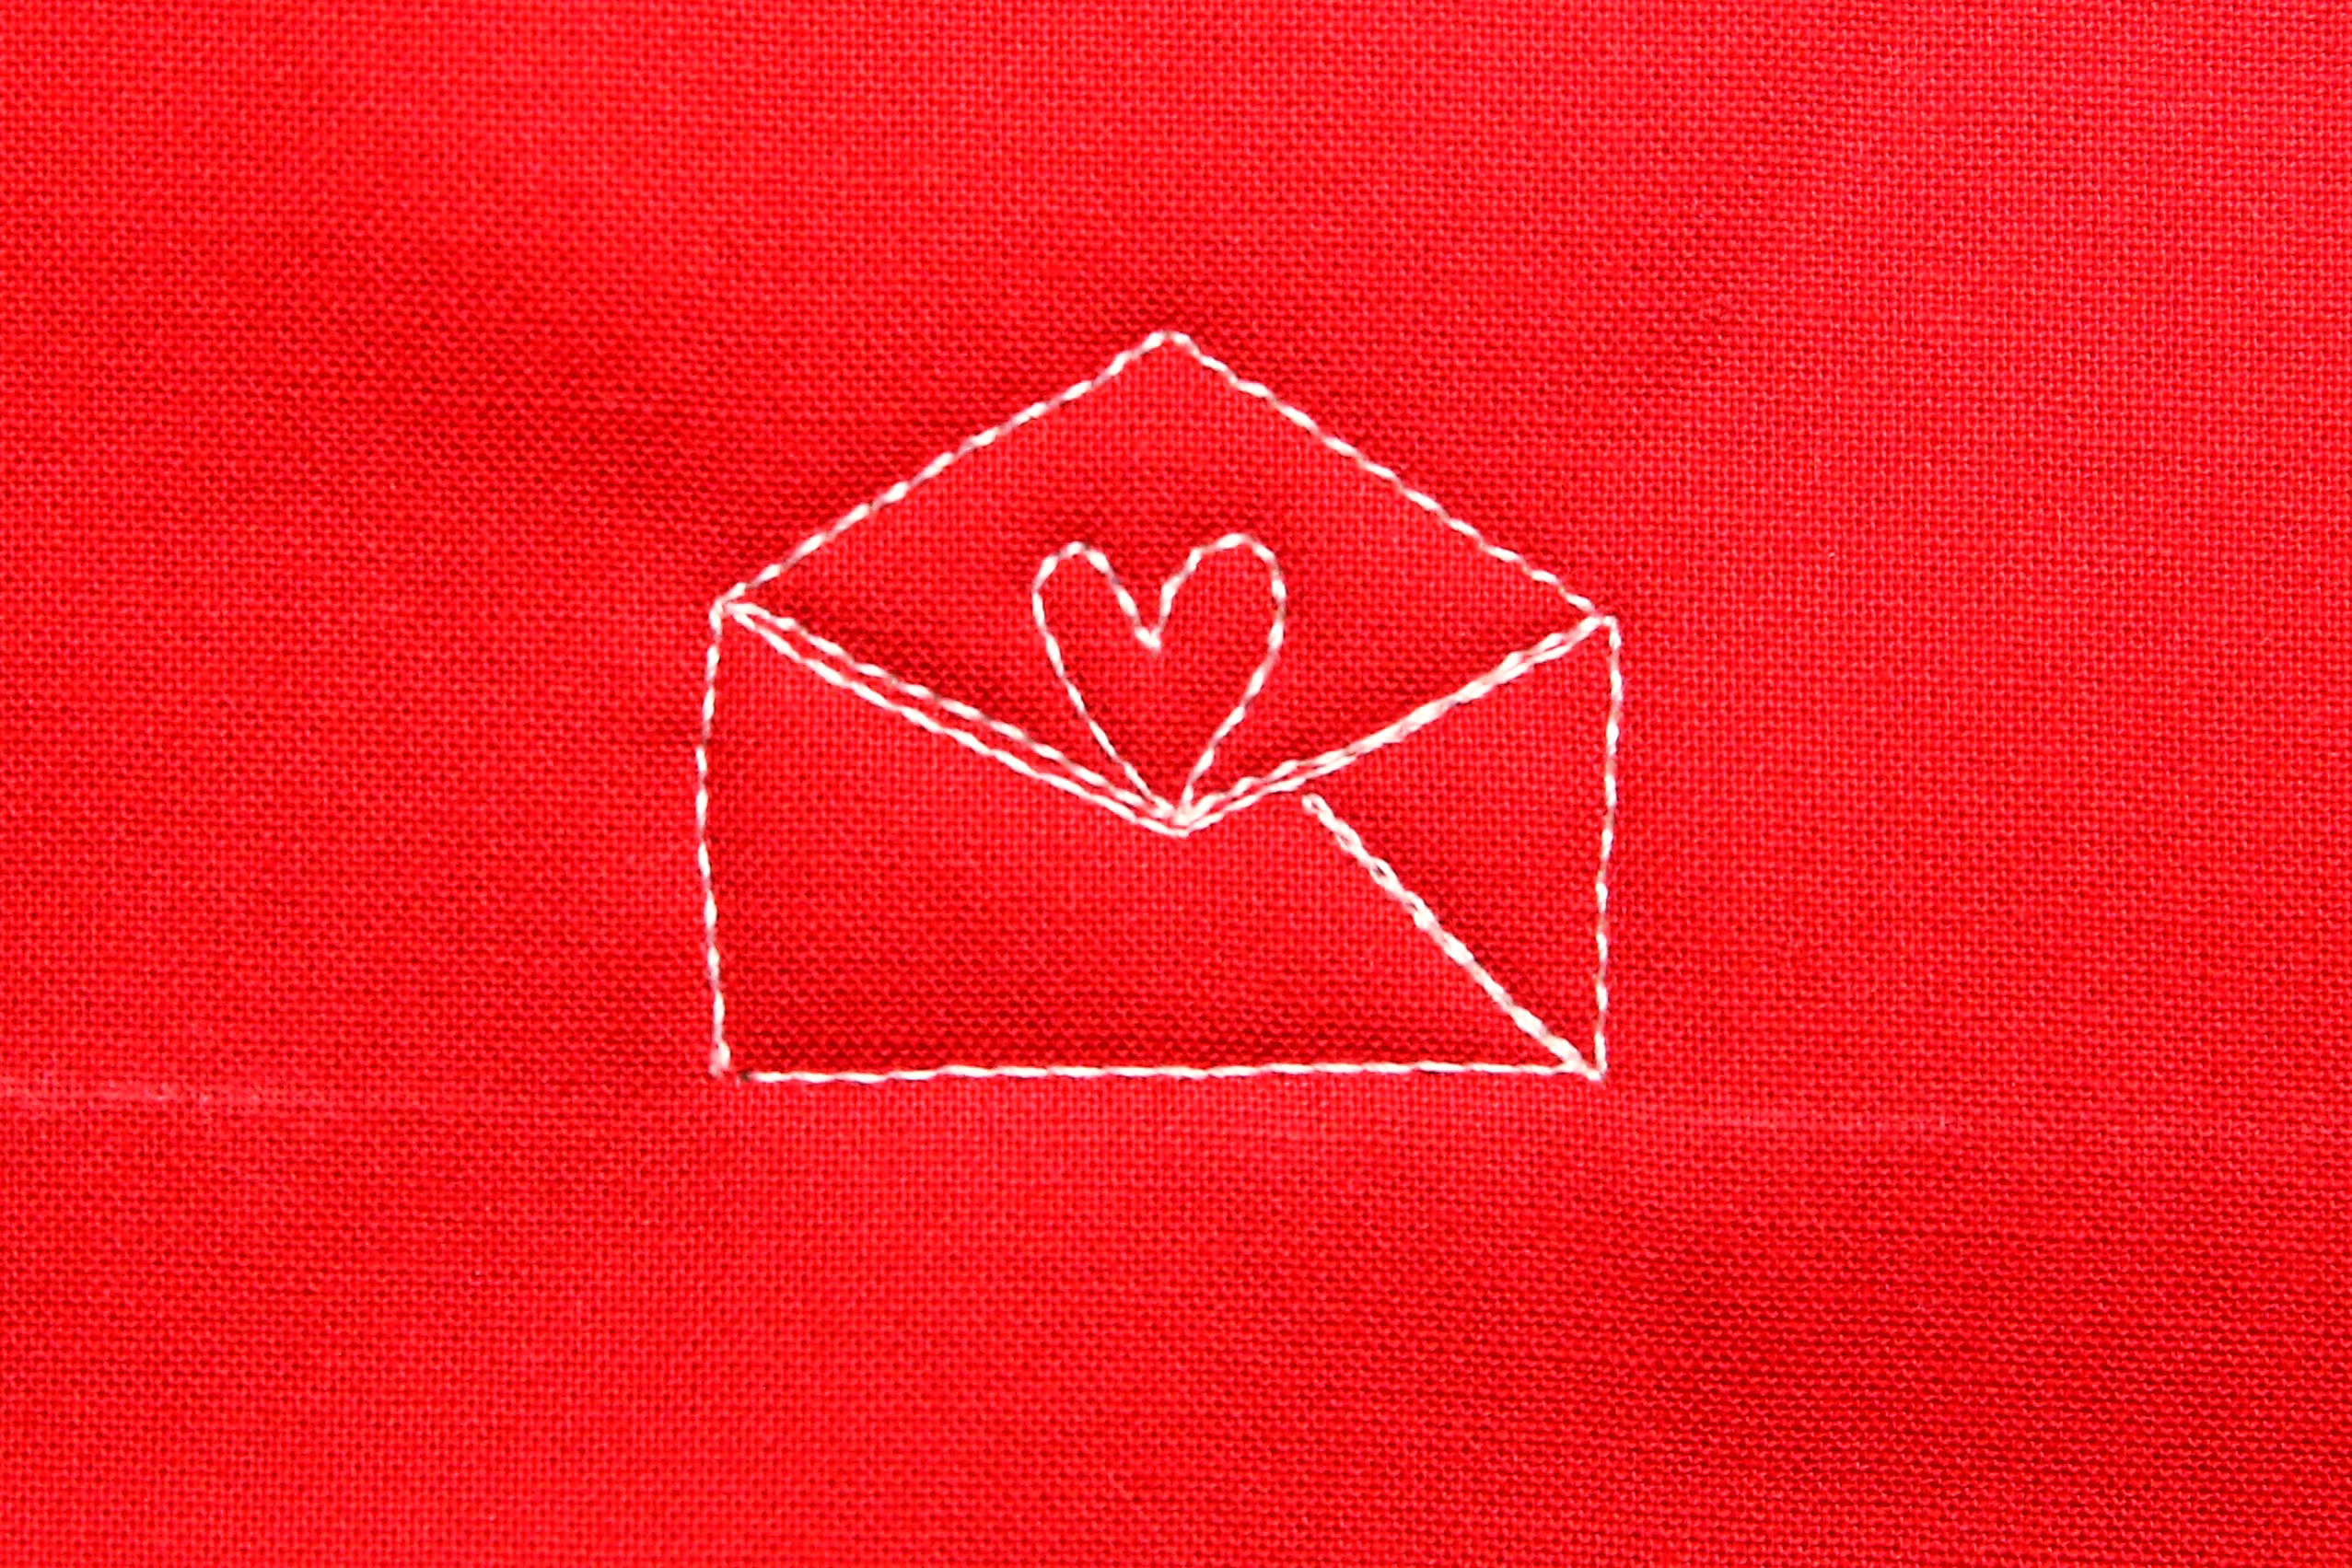
Stitch an angled lined toward the heart, then stitch back to the bottom line. Stitch a horizontal line from right to left.
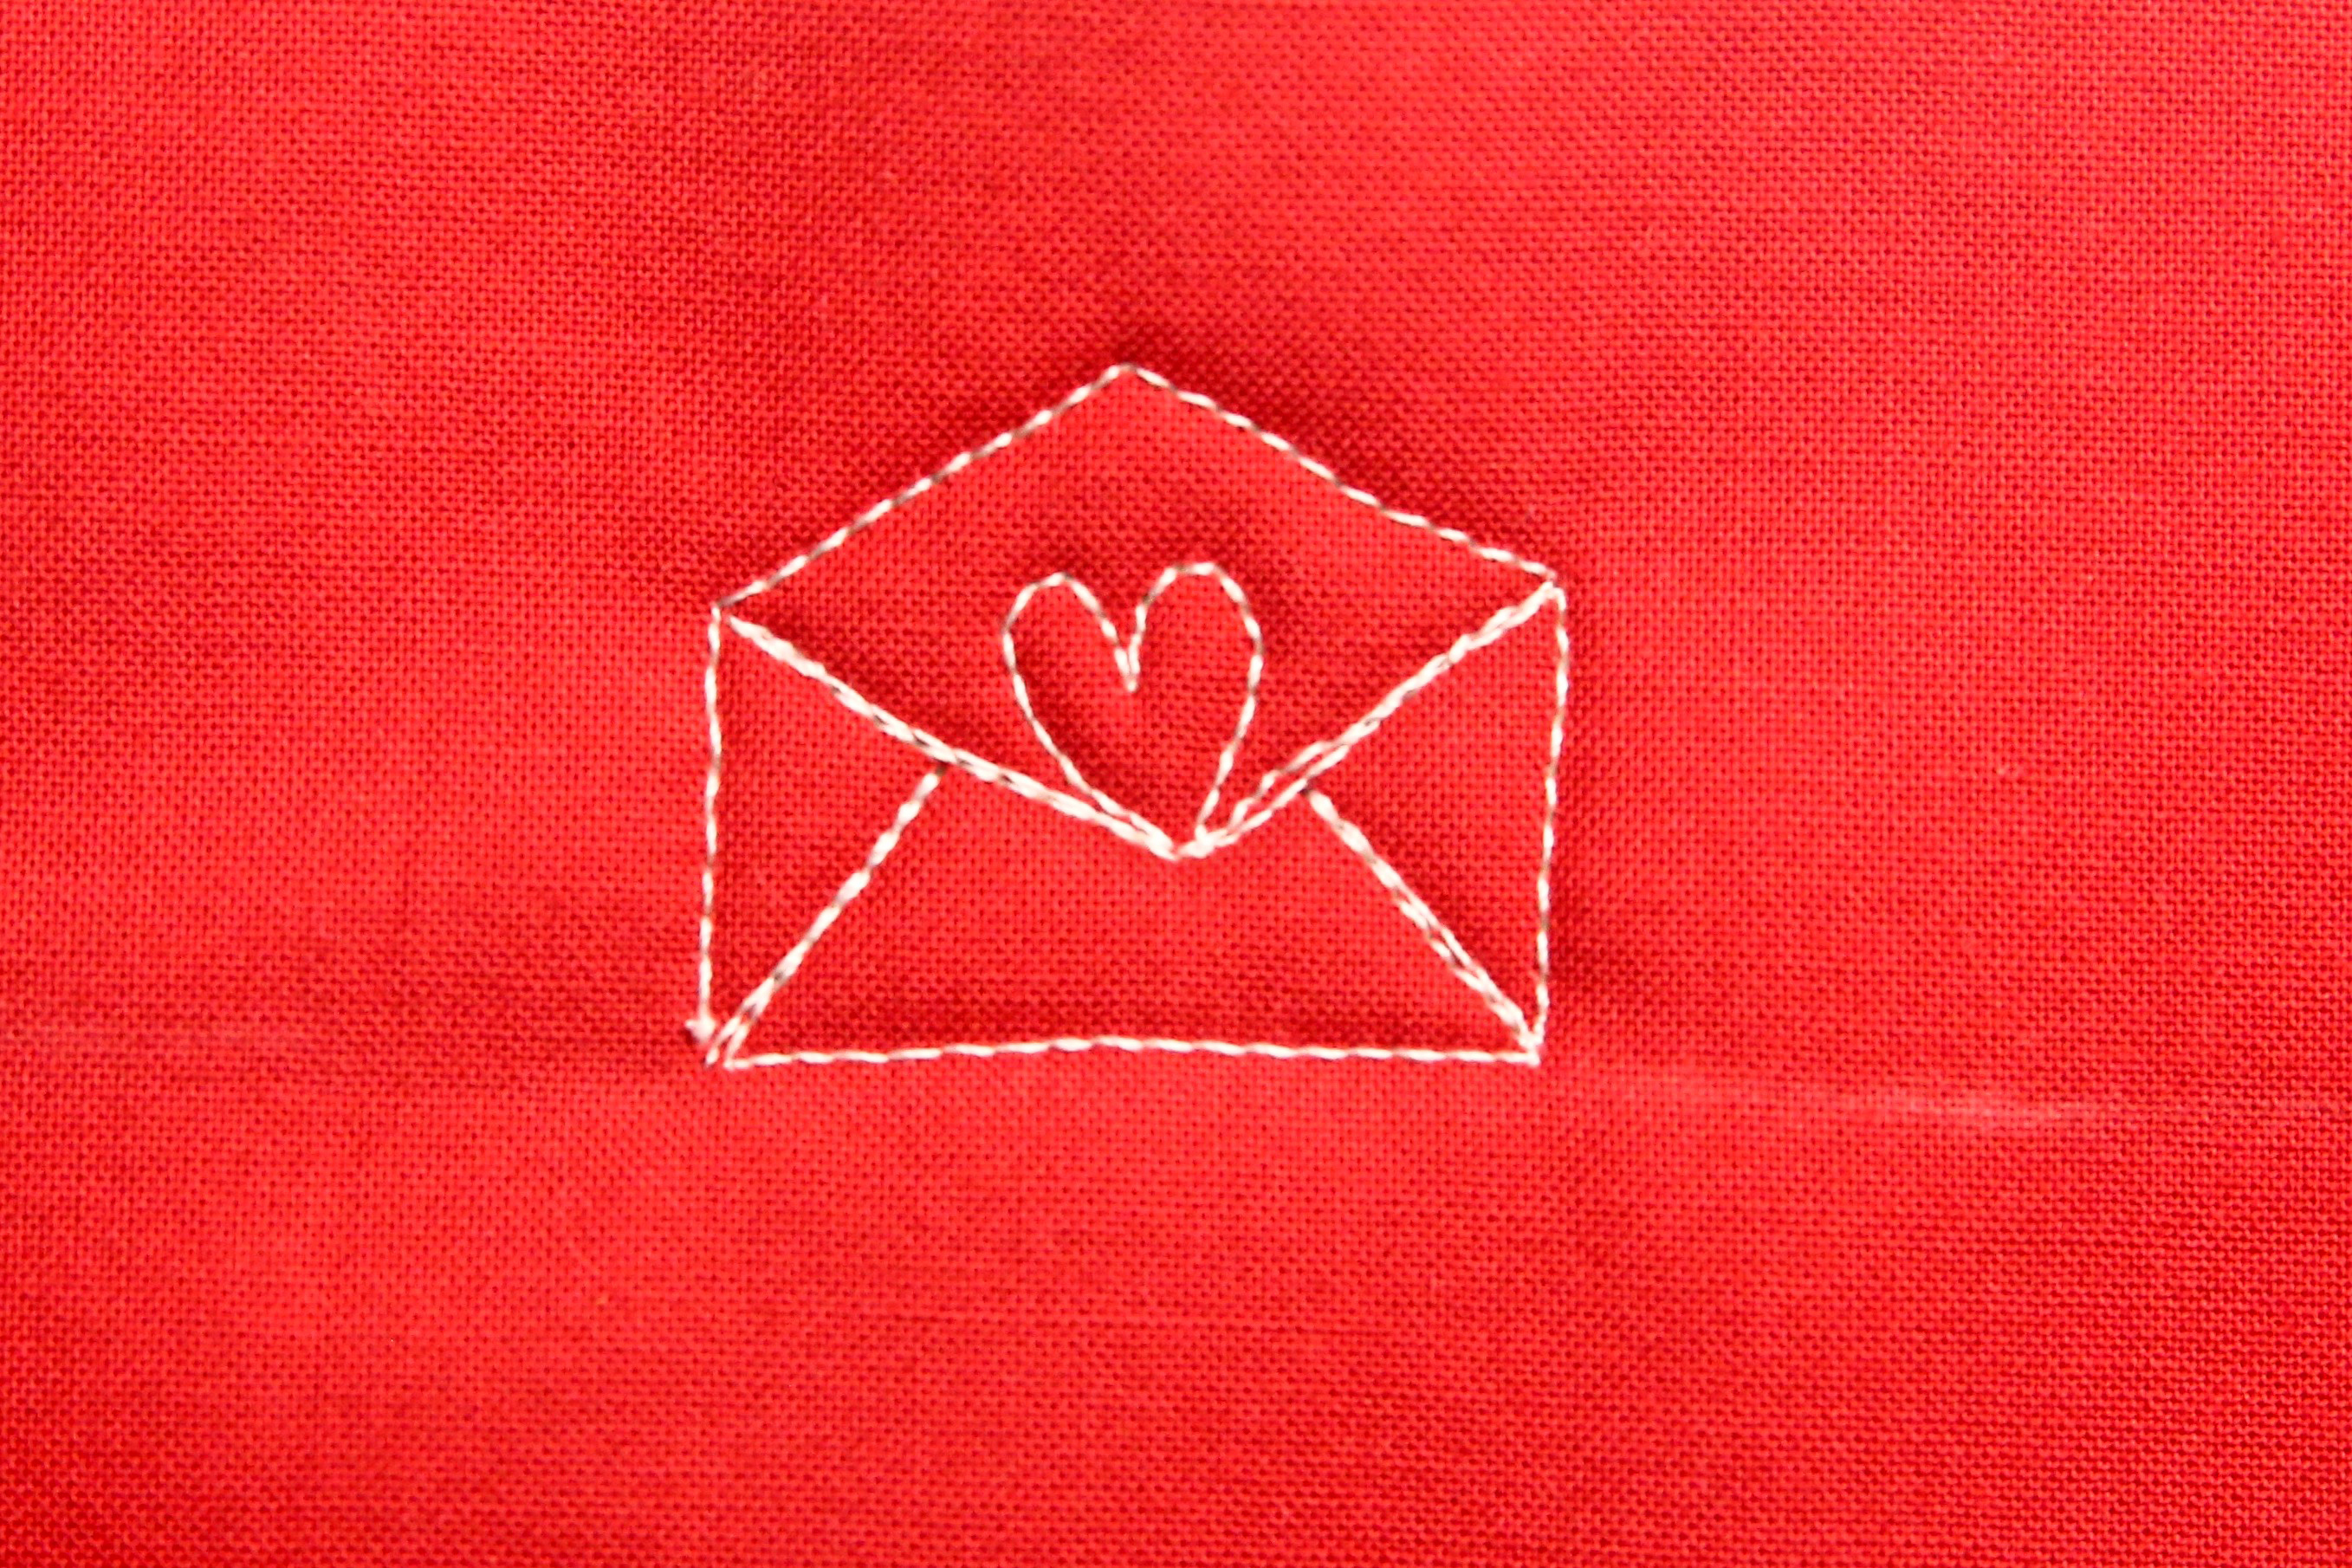
Stitch into the envelope and back again to complete the open letter motif.
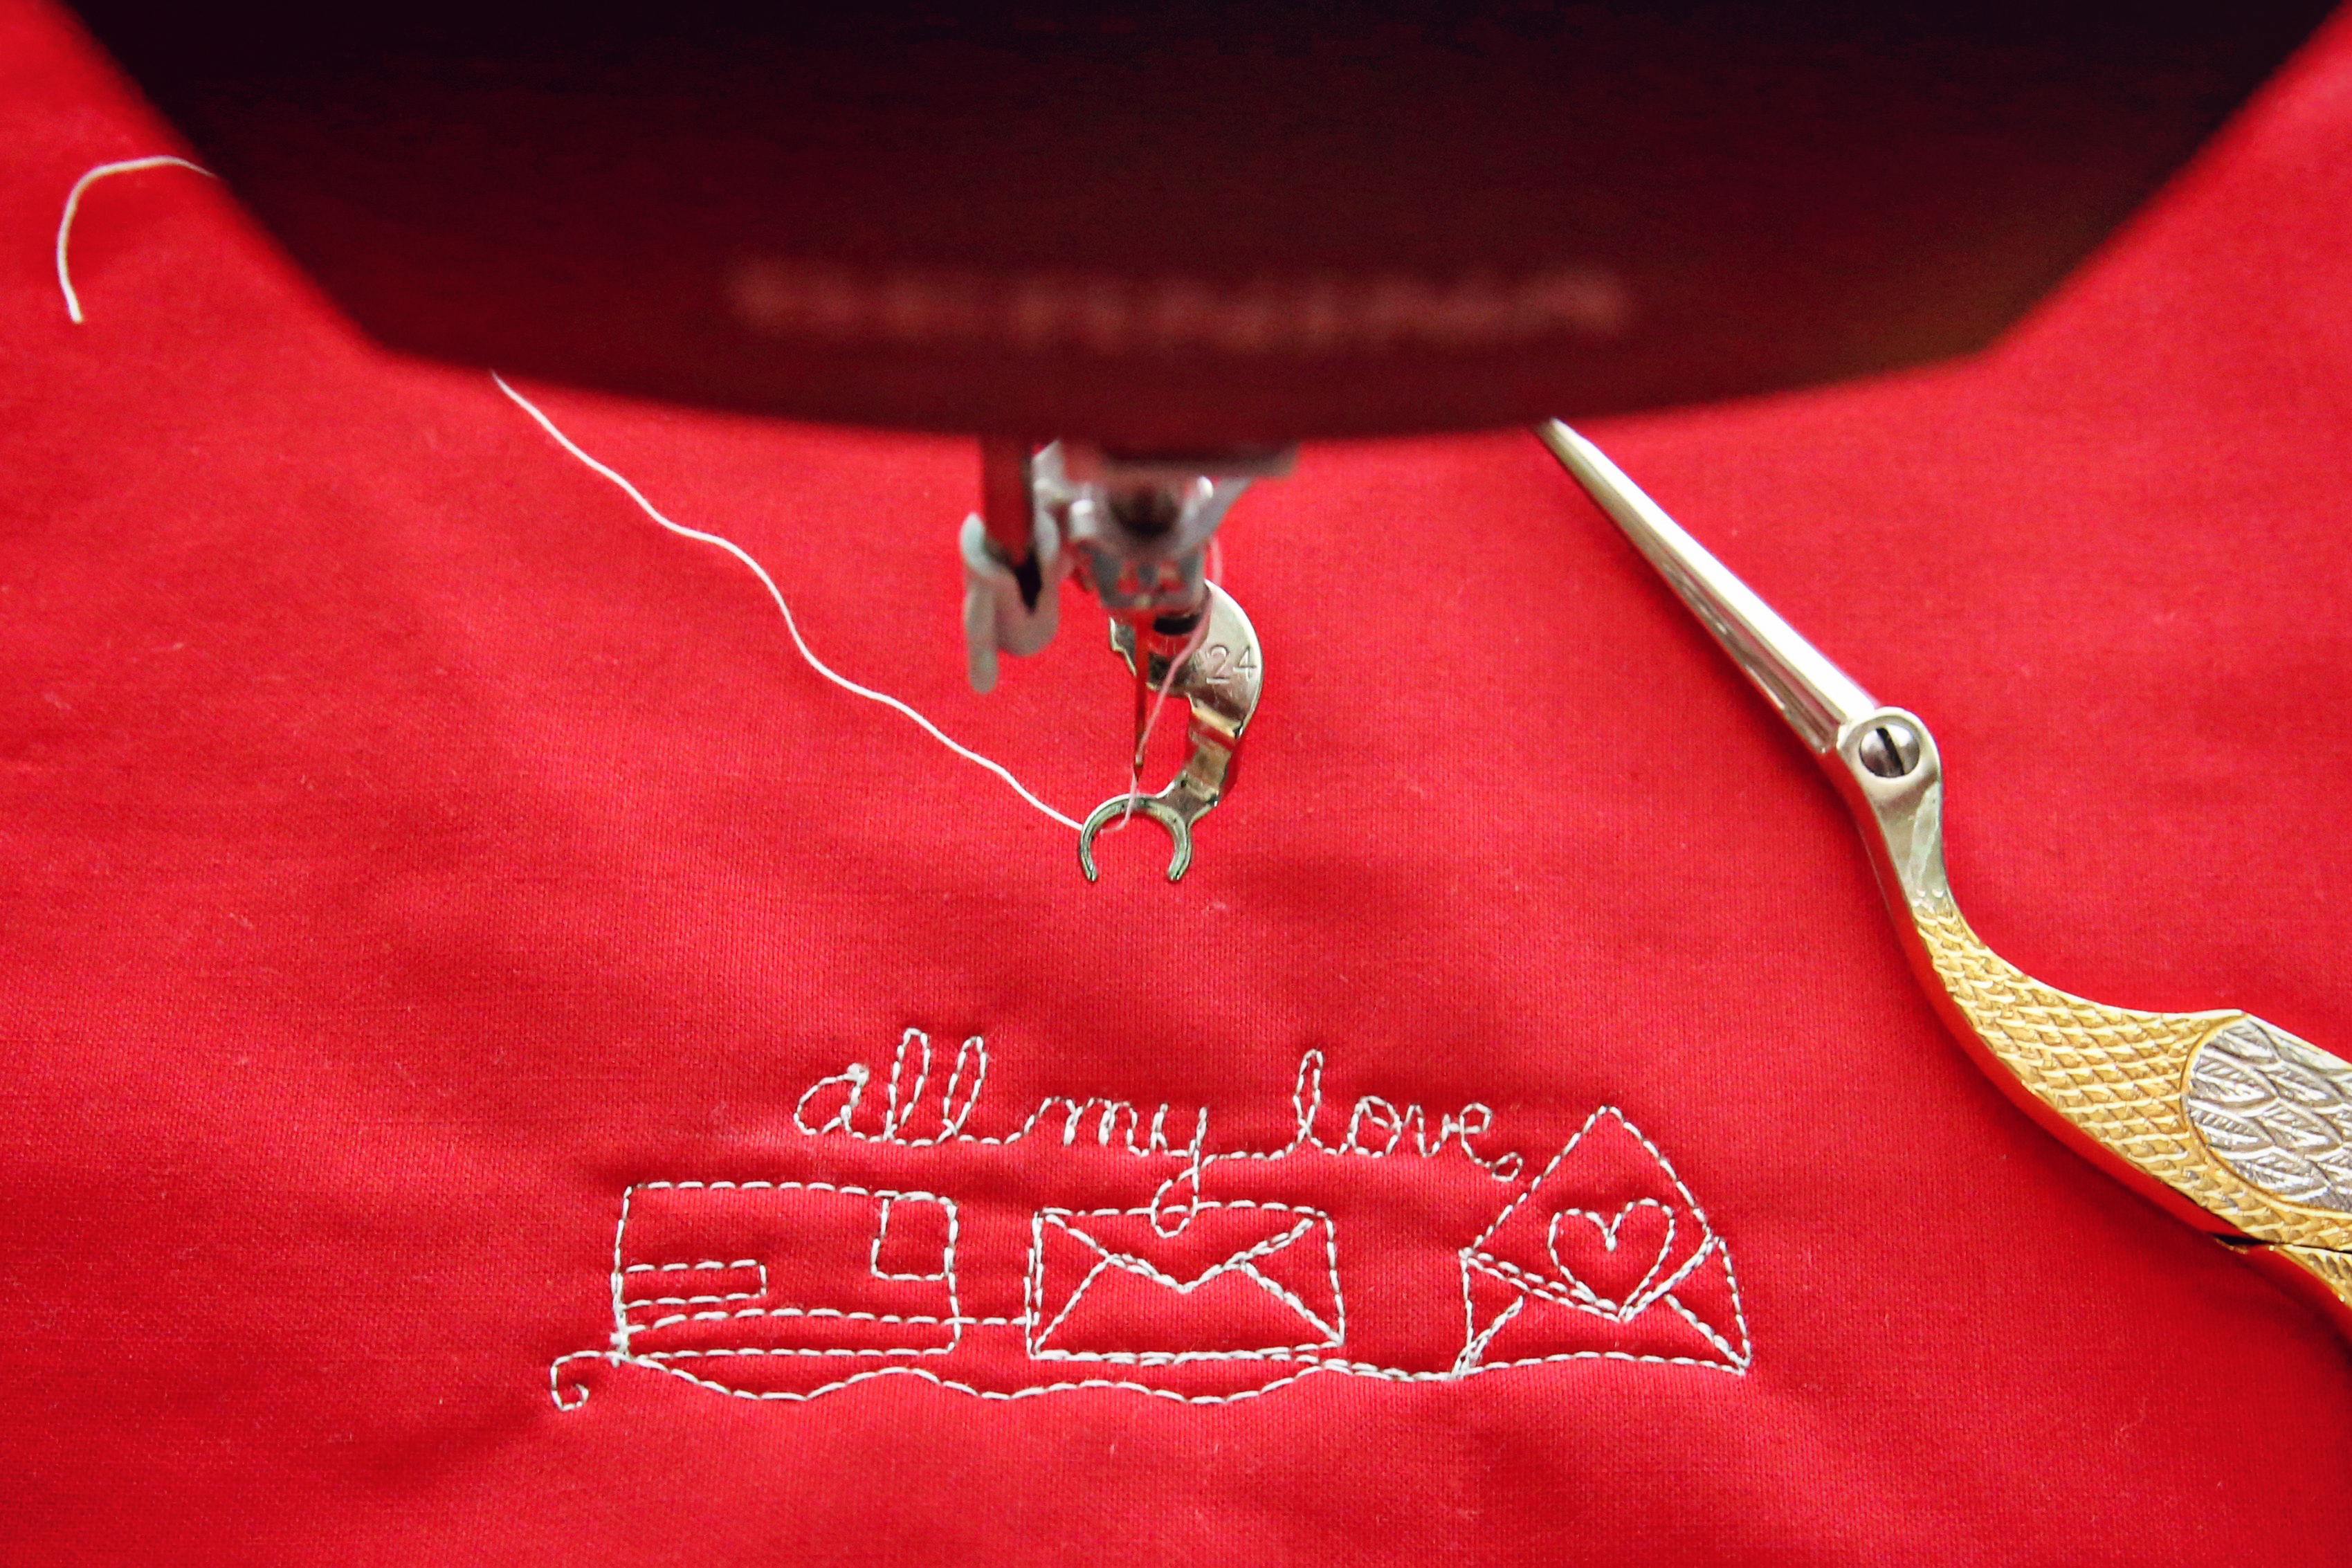
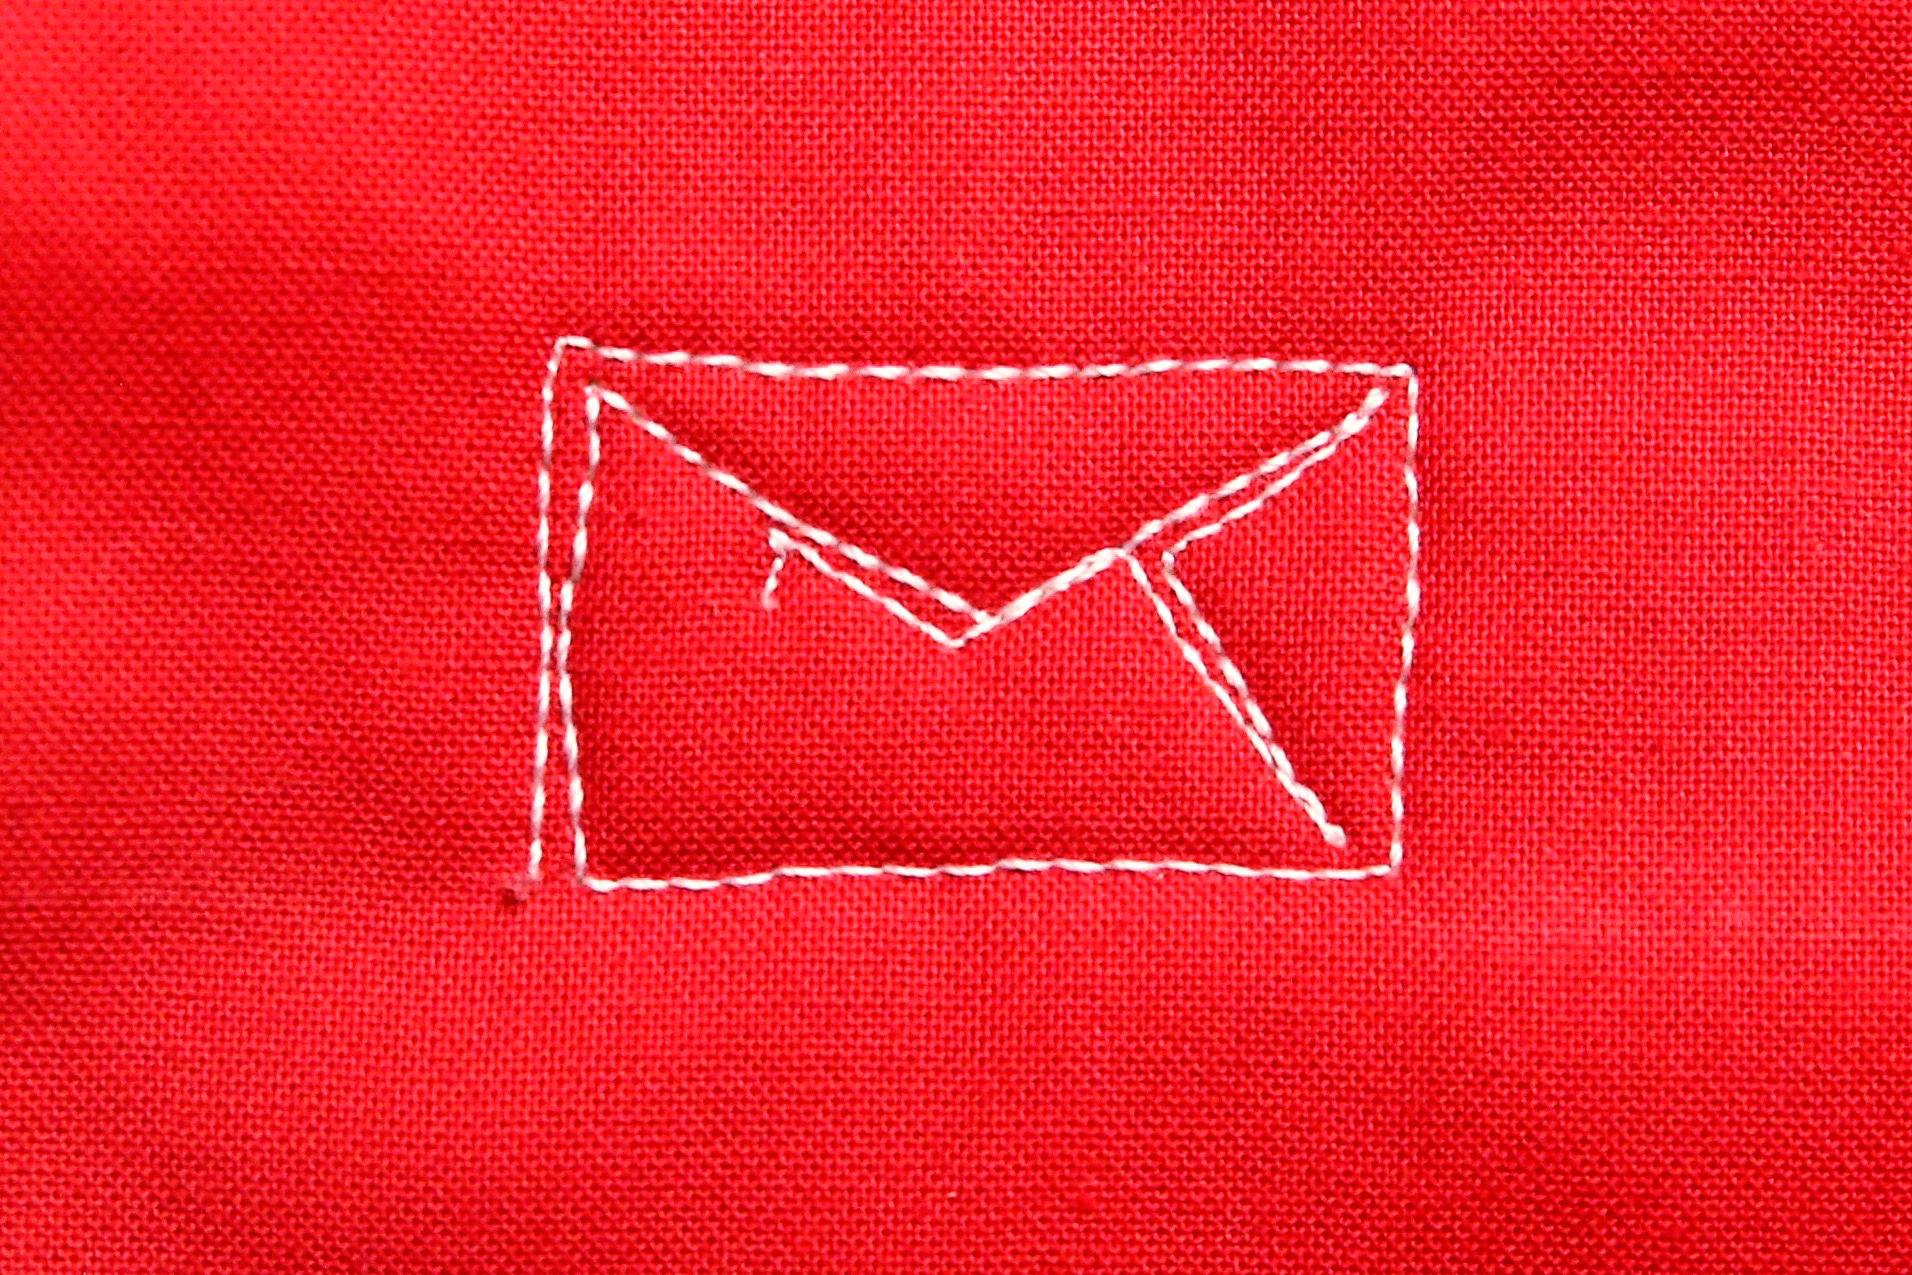
Combine the envelopes to send YOUR love! Stitch a variety of envelope sizes and shapes and add “handwritten” love notes to your special sweethearts. They will cherish this letter 4-EVER!
Happy Valentine’s Day!
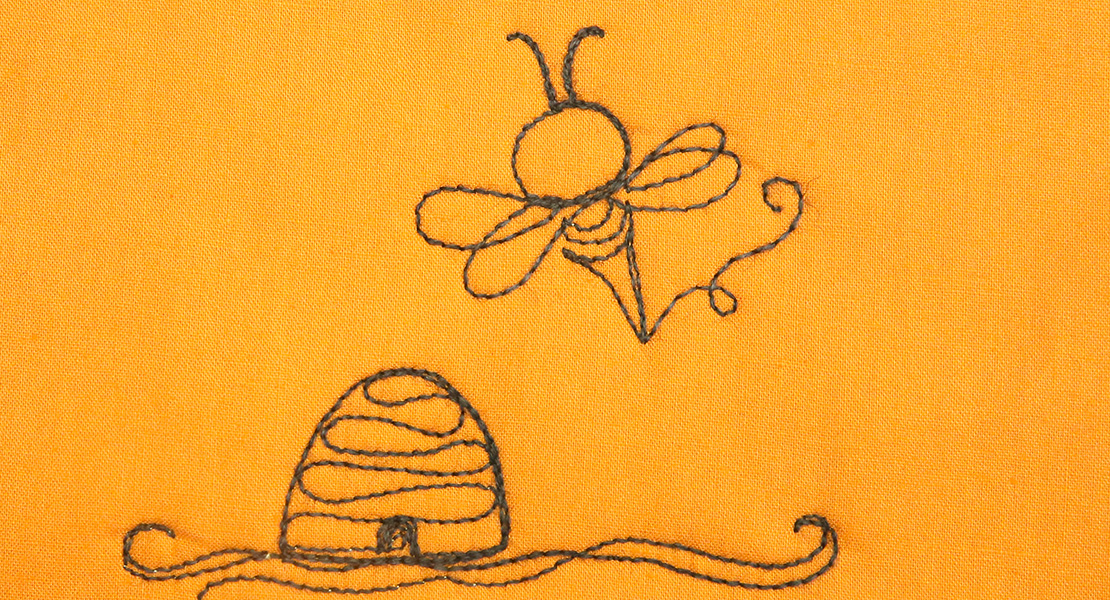
You might also like: How to Free Motion Quilt Scalloped Hearts
For creative machine quilting every day, please visit me at LoriKennedyQuilts.com.