How to Free-motion Quilt Ice Cream Cones
What better way to celebrate summer than with an ice cream cone! I’m Lori Kennedy of Lori Kennedy Quilts back with another free-motion quilting tutorial and video.
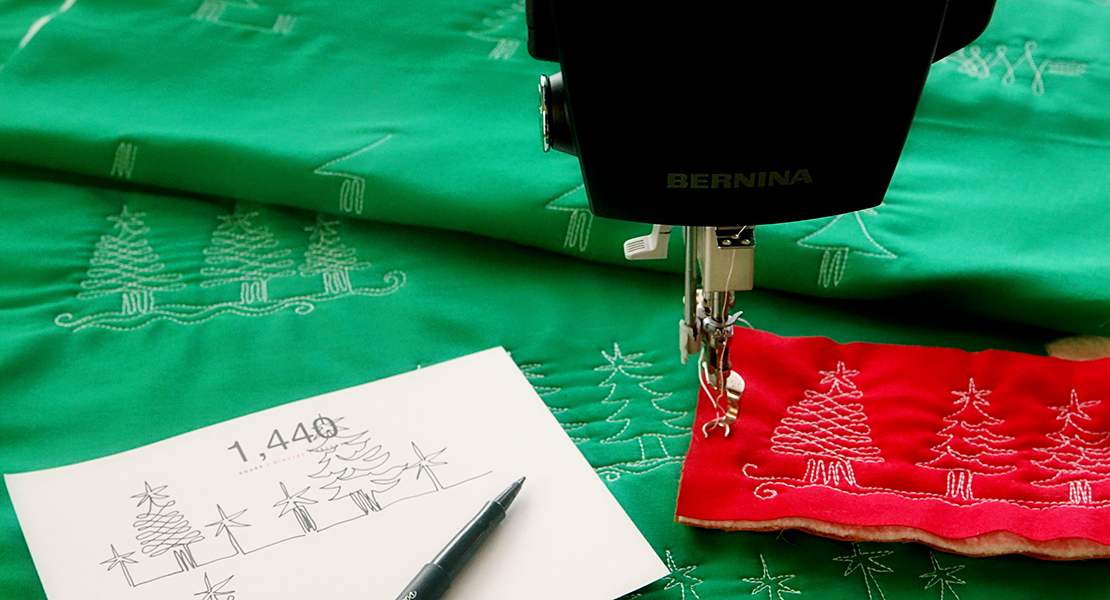
I have two BERNINAs set up in my sewing room right now, a BERNINA 770 QE and a BERNINA Q 20 Sit-down Longarm Machine. Both machines create gorgeous BERNINA stitches and I use both for free-motion quilting. Today’s motif, The Ice Cream Cone Border, was stitched on the BERNINA Q 20.
Once you learn the basic motif, add your own decorative elements to the cone for more design interest. A single ice cream cone would look great in the center of a block, or stitch a loopy line between ice cream cones to create a sweet background connection!
How to Free-motion Quilt Ice Cream Cones
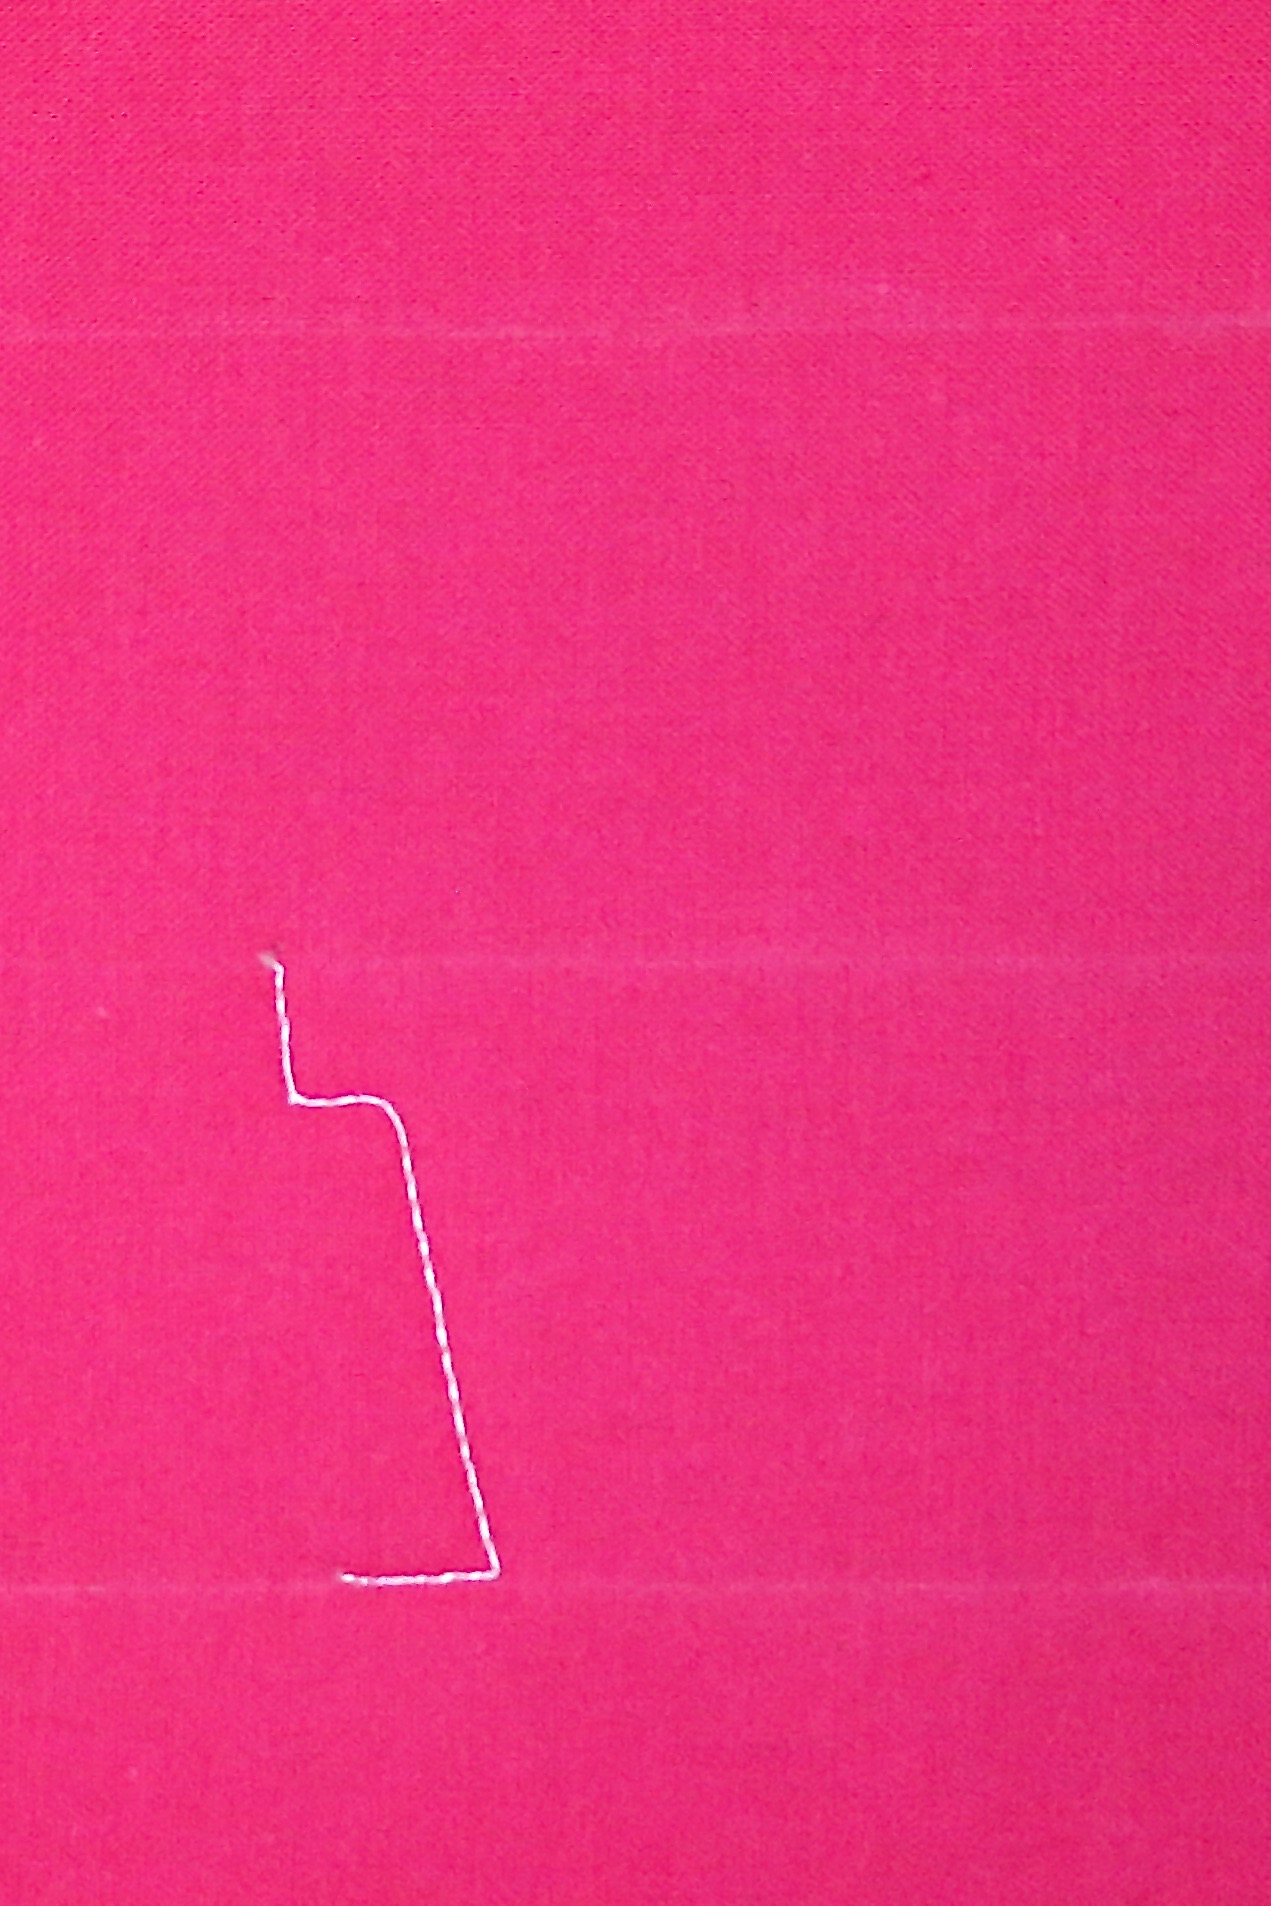
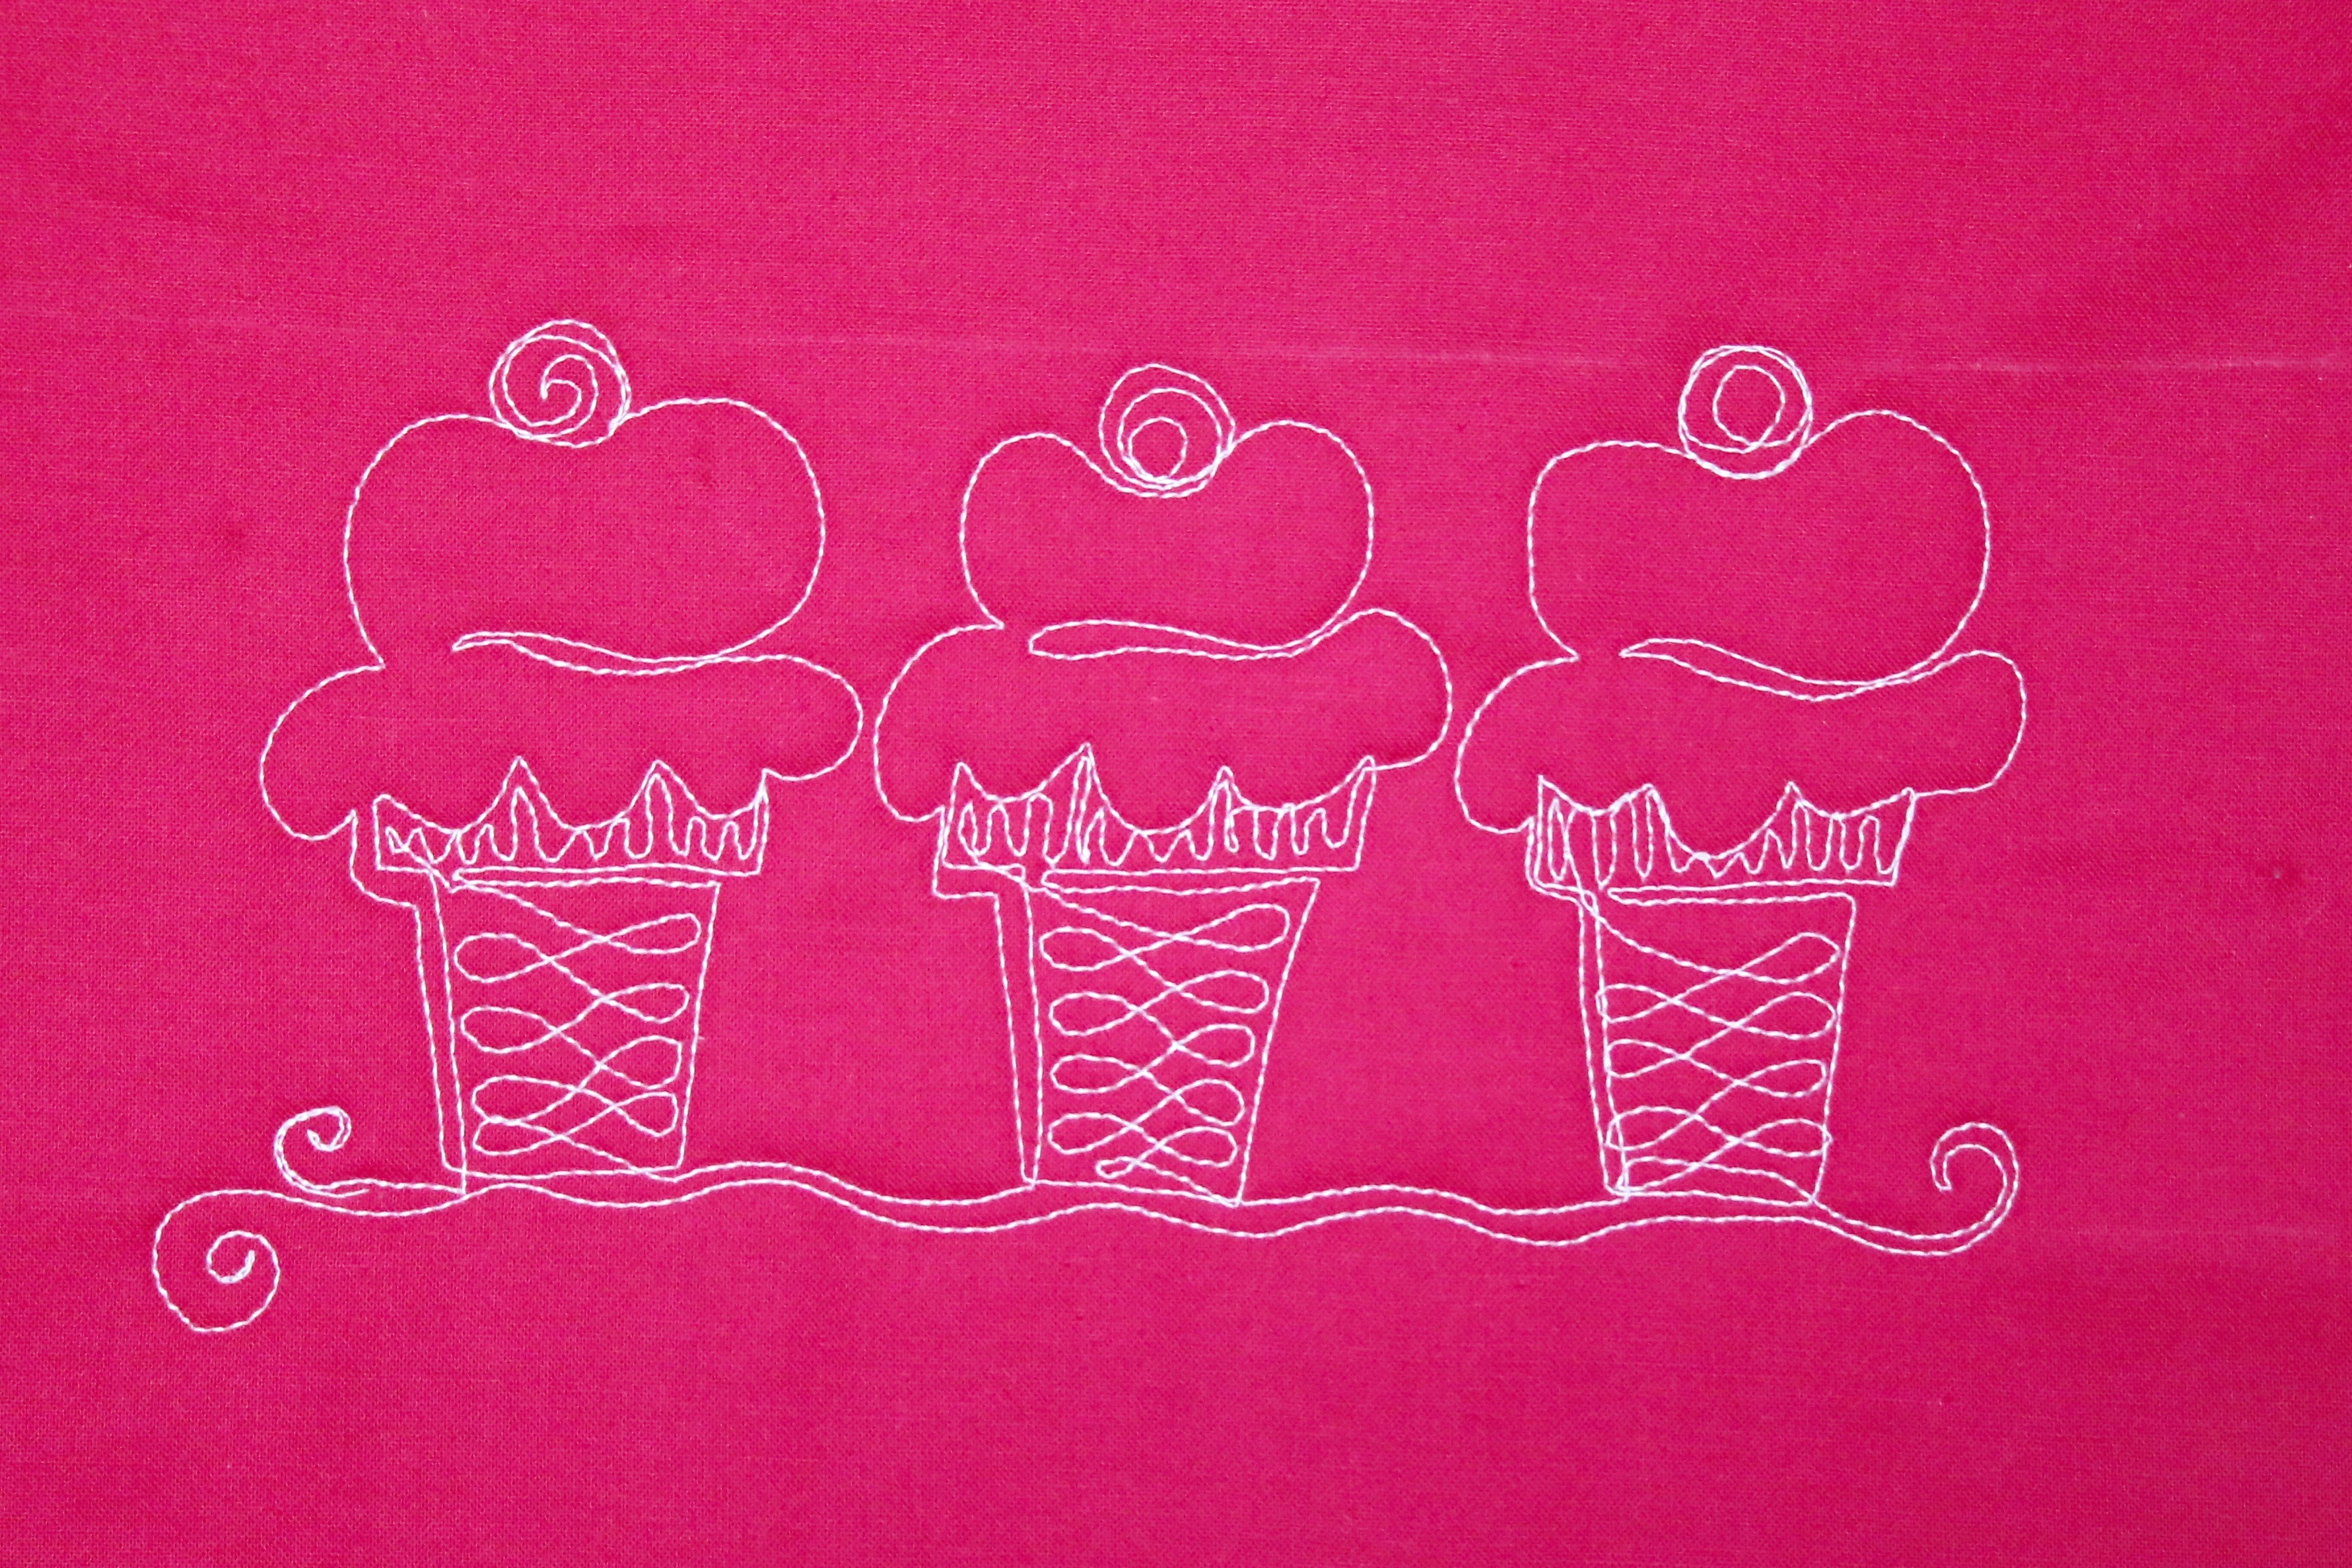
Begin by drawing three parallel lines, equidistant apart to serve as guidelines. Start stitching on the bottom line. Stitch a line slightly angled to the left, then stitch a short horizontal line and a short vertical line, stopping near the middle guideline.
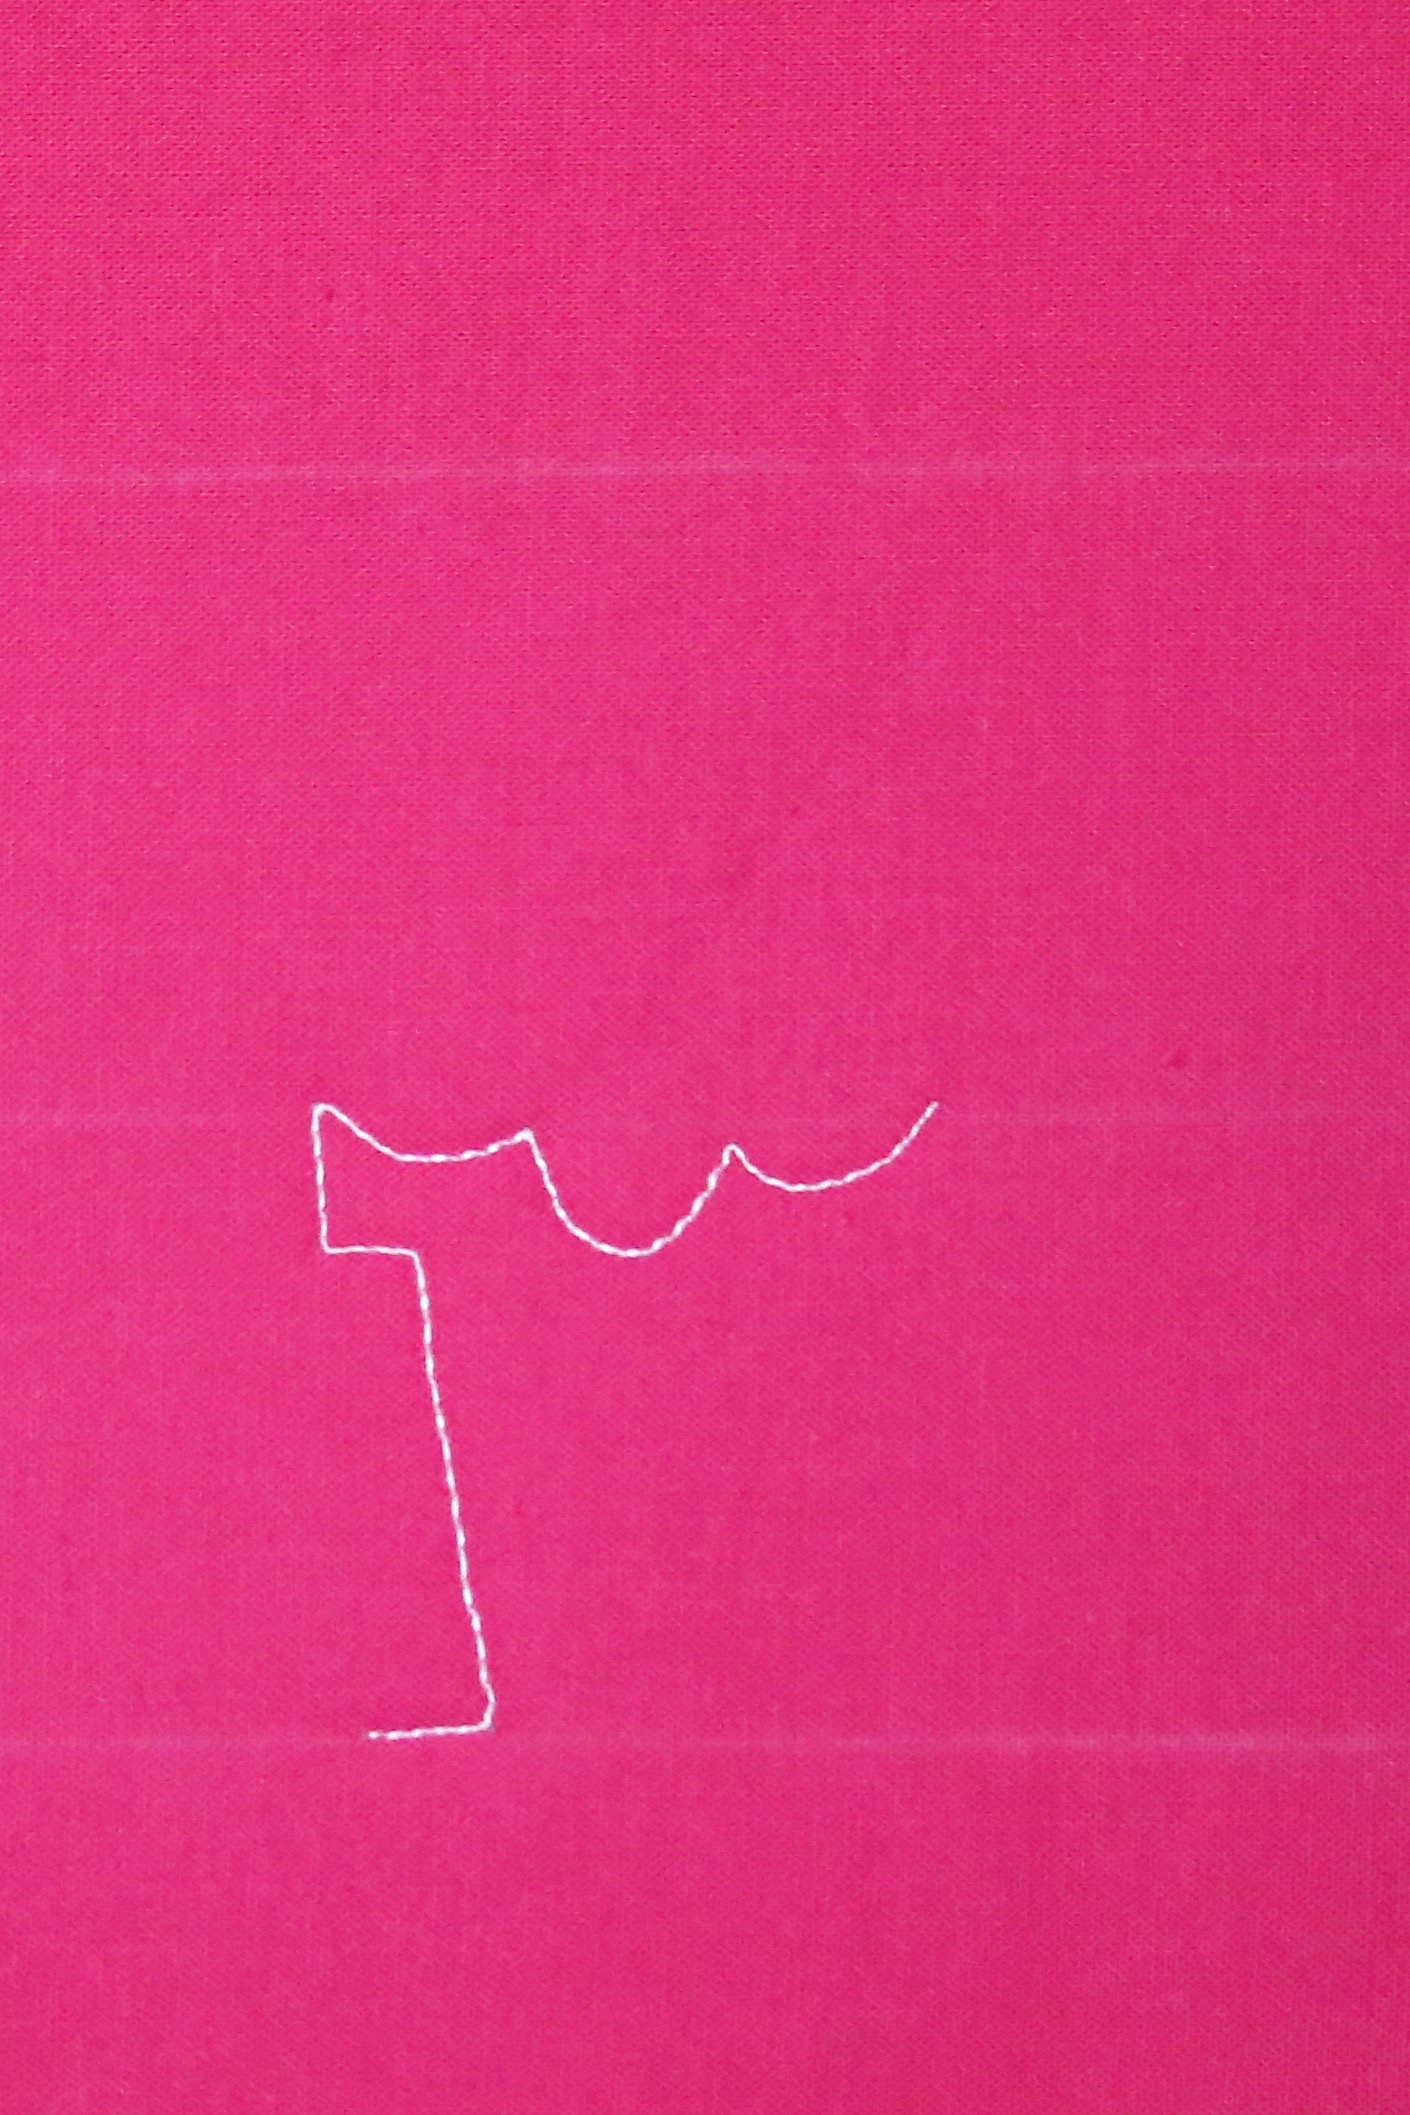
Stitching from left to right, add three scallops along the middle guideline.

Stitch down a few stitches, then add a horizontal line from right to left. Closely echo stitch the line stopping a little short of the right edge.
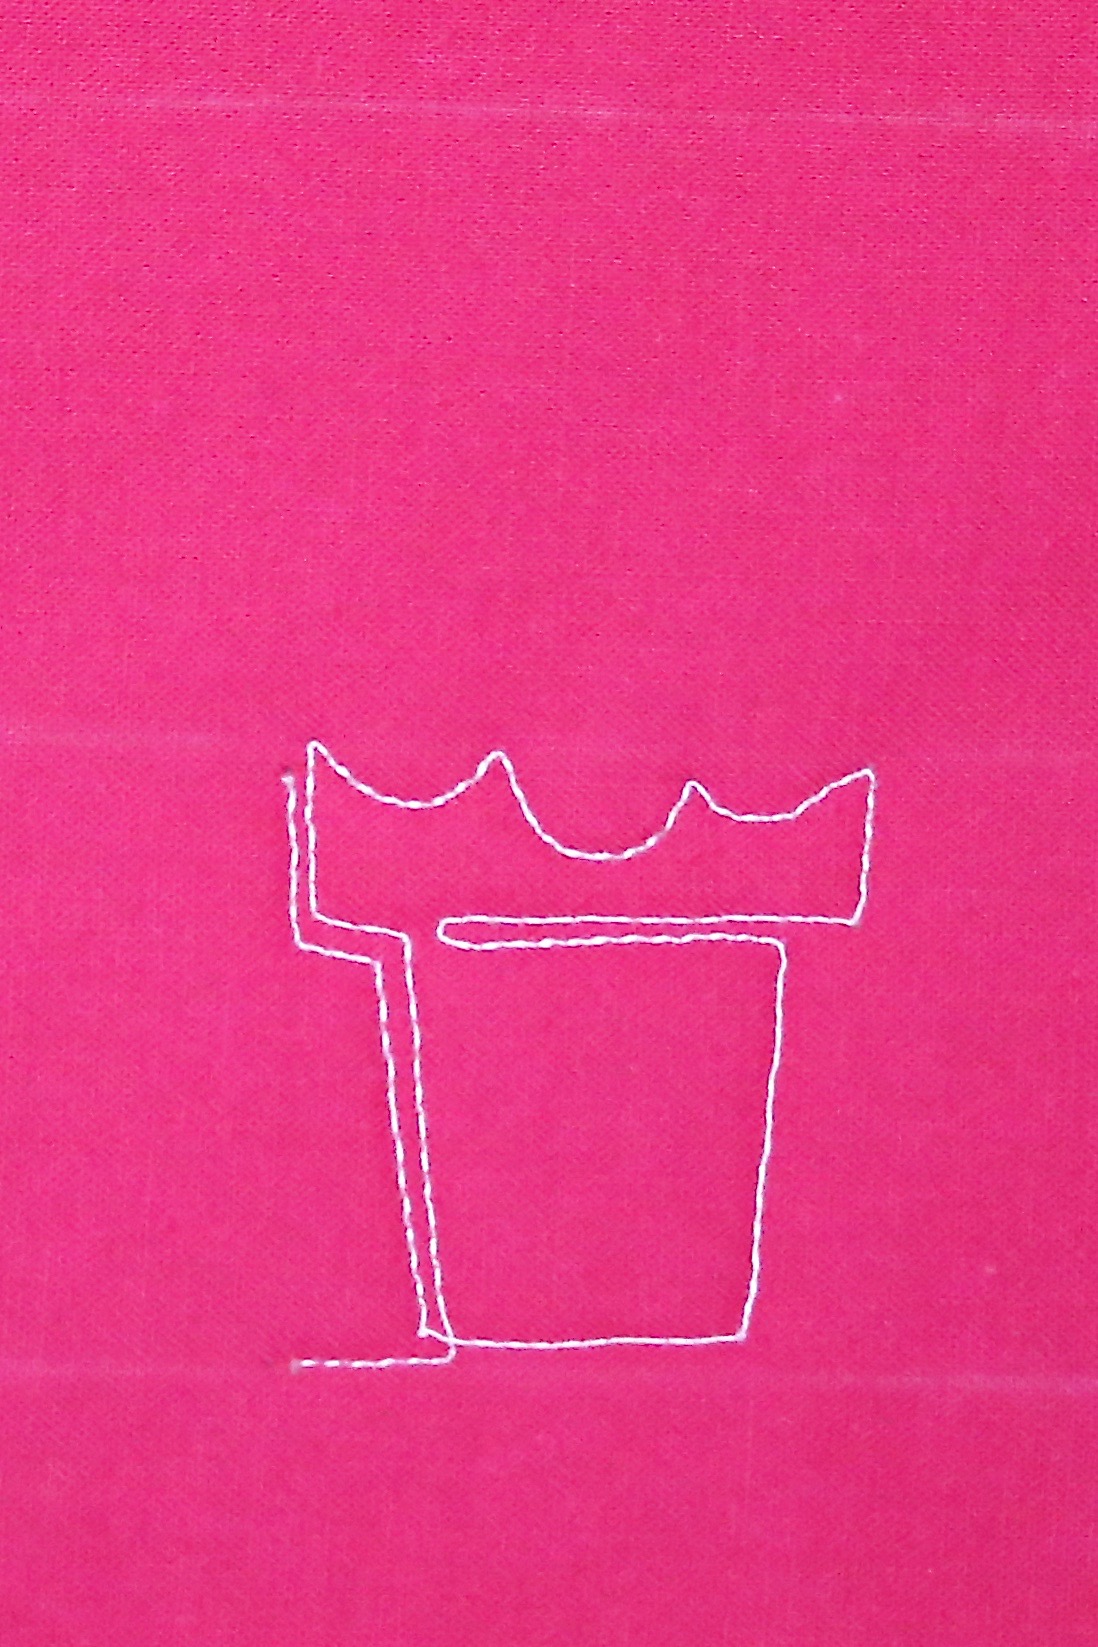
Stitch a slightly angled line to the baseline, then stitch along the bottom guideline to create the bottom of the cone. Continue by echo stitching the left side of the cone.
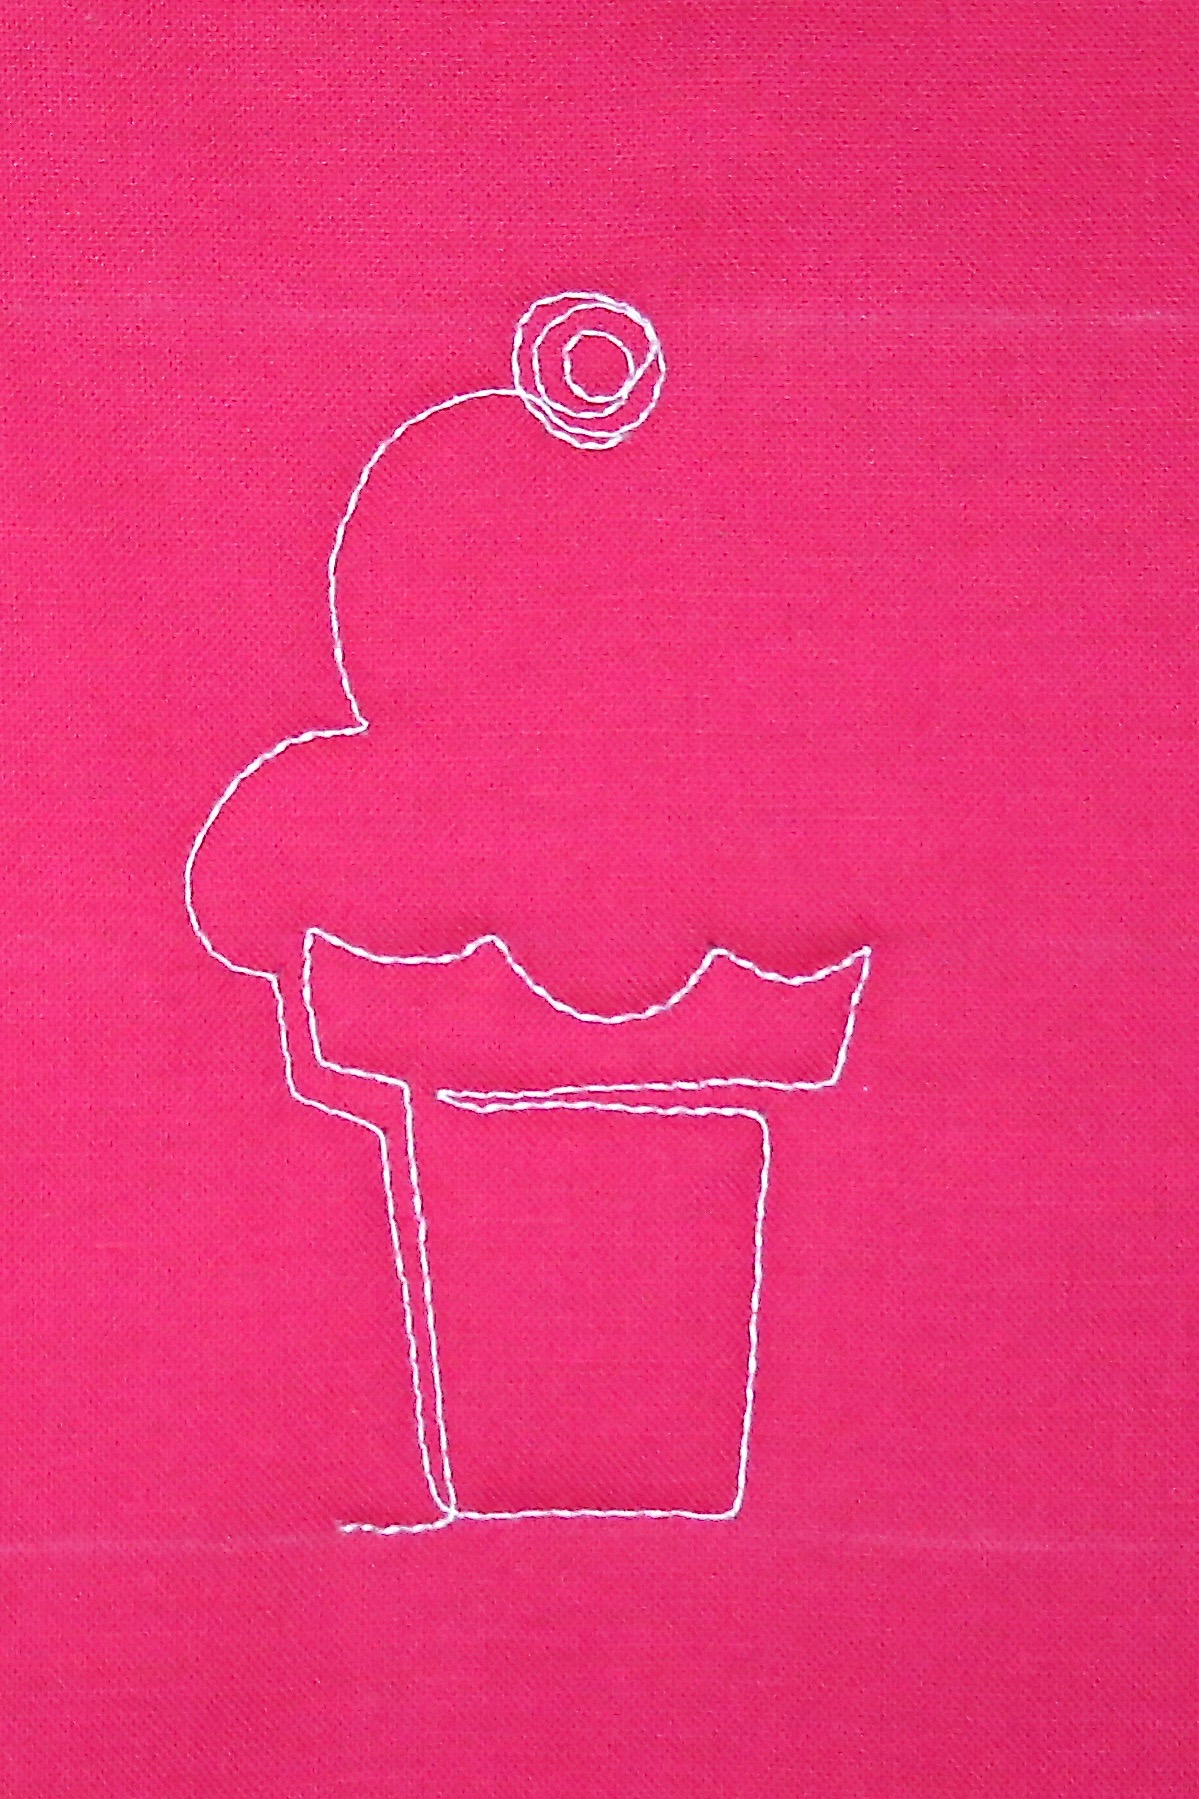
Add a small scallop and a large scallop, then stitch a small messy spiral “cherry” on top.

In one smooth motion, stitch a large scallop and a slightly curvy line across the center of the “ice cream”.
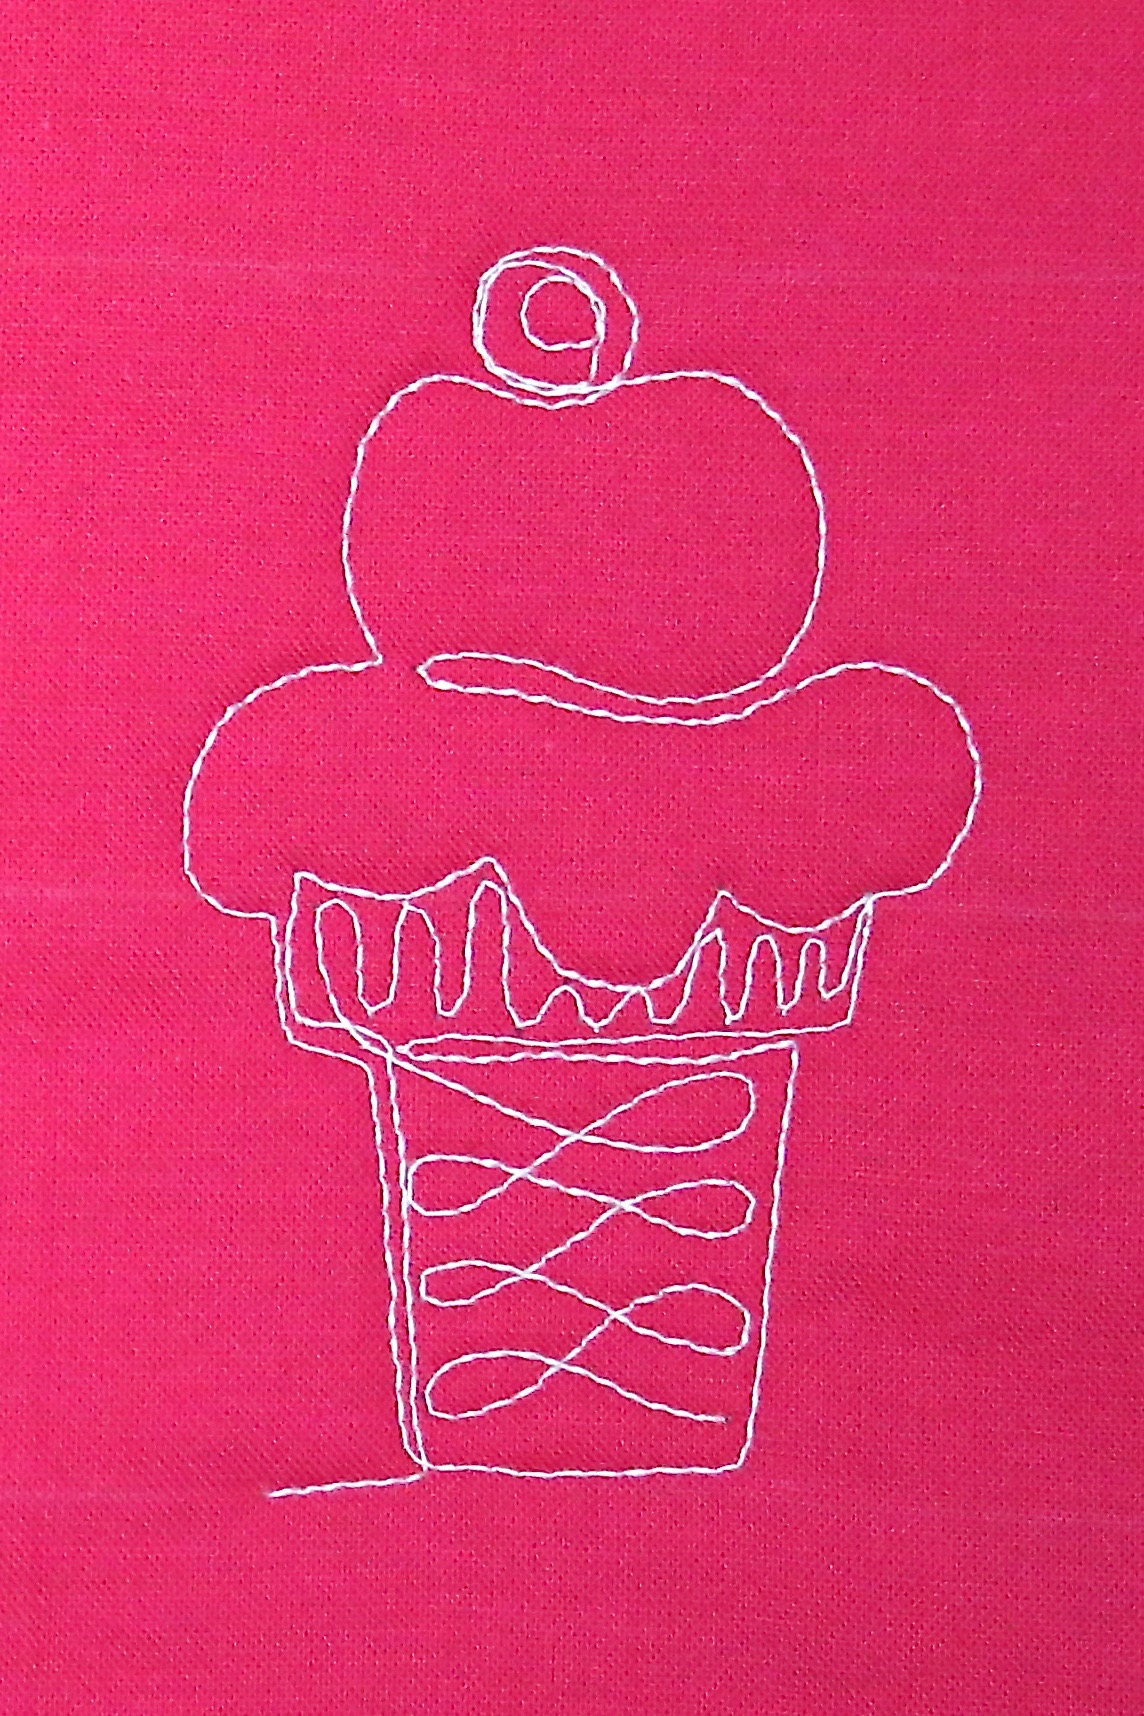
Echo stitch the line then add another small scallop to complete the ice cream. Stitch through the top of the cone and add a decorative motif in the bottom of the cone if desired.

Add a stem as you stitch the cherry and choose different motifs to decorate the cone to add more interest to you quilt!
FUN FACT: In 1802, Thomas Jefferson hosted the first ice cream party in the White House and we’ve been hosting ice cream socials ever since!
Vanilla and chocolate swirl, please and thank you!
For more free motion quilting motifs and tips, be sure to join me at www.LoriKennedyQuilts.com!