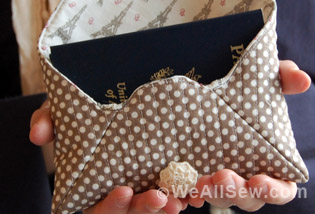
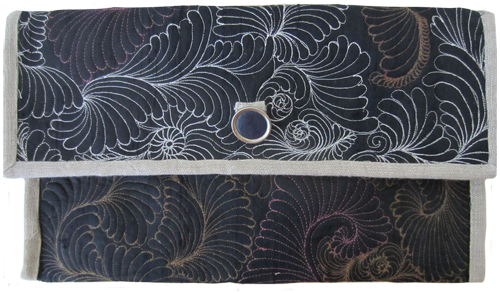
How to Make a Bobbin Work-Quilted Silk Clutch
Remember last month’s post on free-motion bobbin work by Teri Lucas? Practice your skills as you create quilted fabric for this lovely silk clutch.
Supplies
- 2/3 yard linen for back and binding
- Fat quarter of dupioni silk for front
- Low-loft cotton or silk batting
- Thread for quilting: Magnifico (polyester(, Aurifil Lino (linen), Aurifil Lana (wool), or any thread that will stand out
- 6″ x 24″ acrylic ruler
- 45 mm rotary cutter
- Small scissors for snipping thread
- Size 80/12 and 90/14 Topstitching needles
- Hand sewing needle and needle threader (for burying thread)
- 3 vintage buttons
- Magnetic closure
- Freemotion presser foot (BERNINA Stitch Regulator or Freehand Embroidery Foot #24)
- Quarter-inch foot (BERNINA Patchwork Foot #37)
- Zipper foot (BERNINA Zipper Foot #4)
- Bobbin Work Bobbin Case (BERNINA Black Latch Bobbin Case or 7 Series Red Bobbin Case)
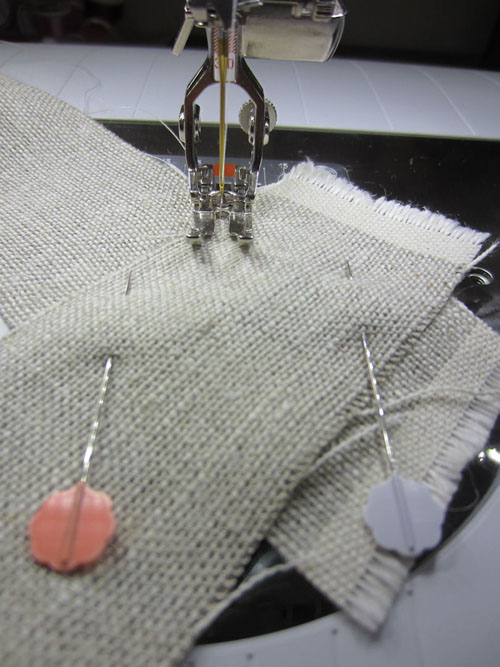
Step 1) Prepare the “quilt sandwich.”
Cut linen into two (2) 18″ x 24″ rectangles – one for quilting and one for binding.
Layer the linen, batting and silk together. Baste using your favorite method.
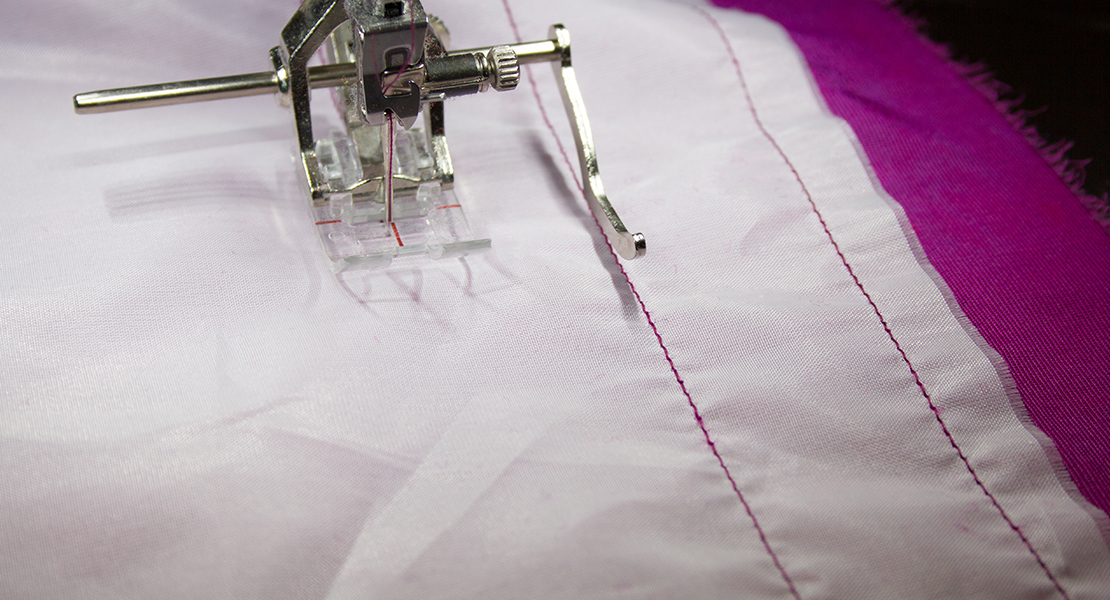
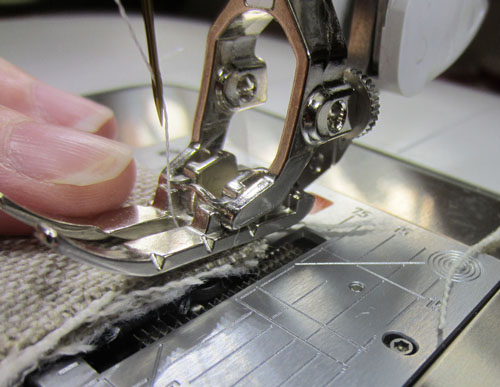
Step 2) Quilt the layers with bobbin work.
Set up your machine for bobbin work. (See Tips for Free-Motion Bobbin Work post, April 23, 2014.)
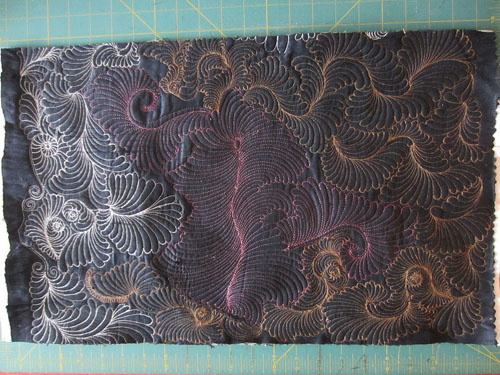
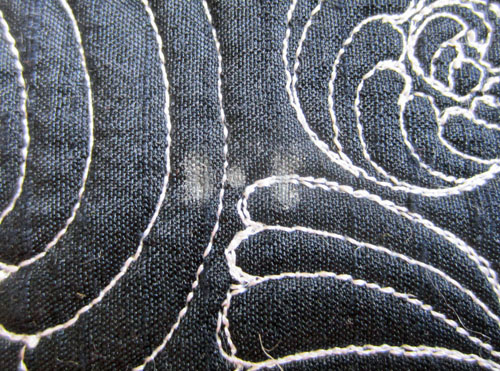
Using either the freehand embroidery foot, quilt your favorite motifs. I stitched curved feathers and nautilus shells. Stop to bury thread as you go so the tails don’t get caught in the stitches.

Once the quilting is complete give the quilt a press from the linen side. This will help it lay flat.
Square the piece if necessary.
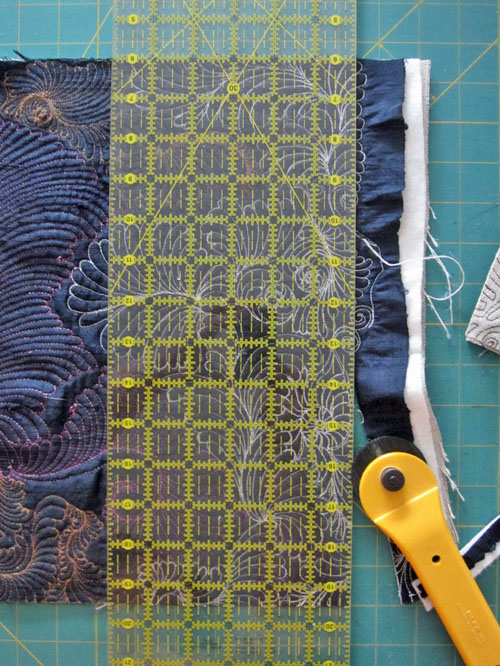
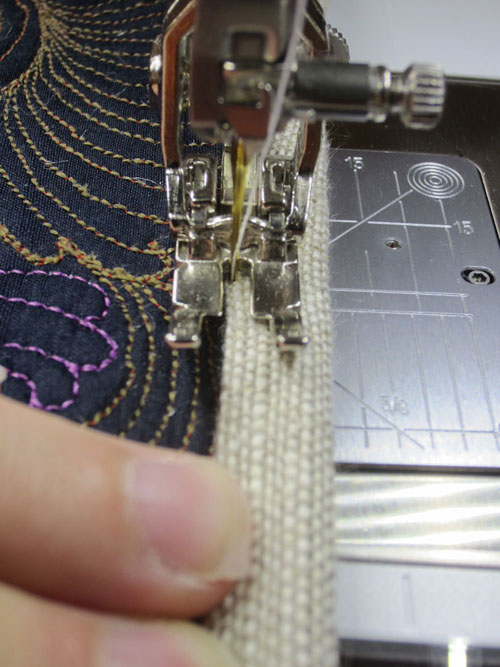
Step 3) Bind the edges.
Make 85″ of binding by cutting five (5) 2″ strips of linen “cross-grain.” There is enough stretch cross-grain to miter the corners of this project.
Cut the rectangle to 14″ x 20″.
Using your quarter inch foot, apply the binding to the linen side of the quilted piece just as you would on a large quilt.
Once the binding is attached, clip the corners to reduce the bulk. Then fold over and stitch the binding to the silk side.
Step 4) Assemble the clutch.
With the quilt back facing you, fold the bottom approximately a third (1/3) of the way up.
Fold the top down until the look of the clutch is pleasing to you.
Mark the fold points with pins or the chalk pencil. Do not sew the clutch closed just yet.
Apply the magnetic clasp:
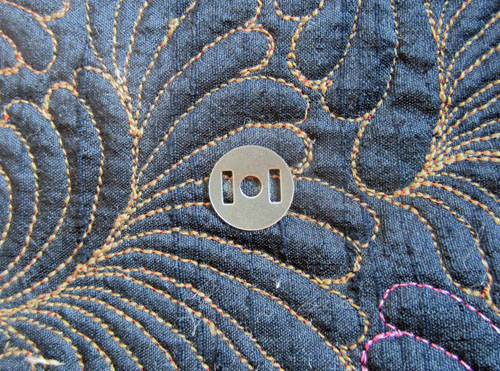
- Find the mid point of the clutch. Using a chalk pencil, mark the center 2″ from the edge of the clutch. Use the small metal anchor disc and the chalk pencil to mark the snip lines.
- Be careful to go all the way through. Make sure the clasp on the top is facing in and the lower portion is facing out.
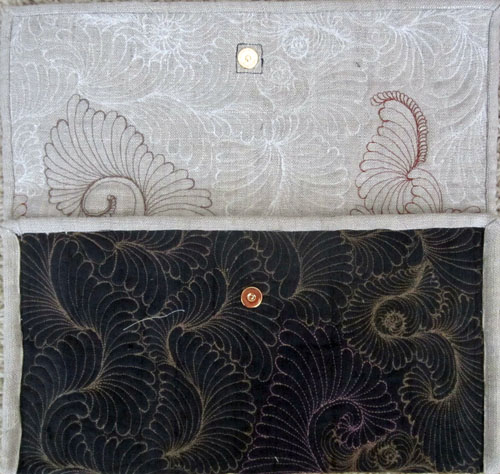
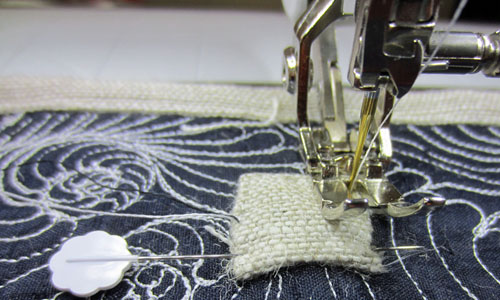
- Cover the clasp pieces with a small piece of fabric. Using either your quarter inch foot or the zipper foot stitch all the way around the fabric to secure.
Fold the lower portion of the clutch up. Using the zipper foot and thread that will blend with the fabric, stitch along each sides of the clutch.

Step 5) Add button embellishments.
Hand stitch a few beautiful buttons on the front of the clutch to cover the fabric that covers the clasp and add decoration.
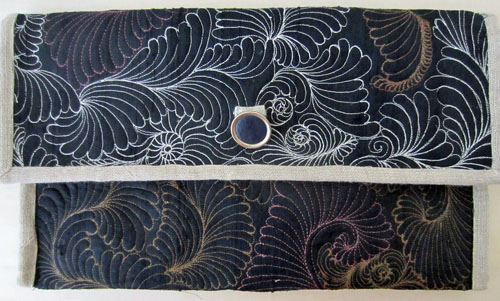
Enjoy your beautifully-quilted clutch!