How to Use Three Threads Three Ways with the BERNINA Overlocker
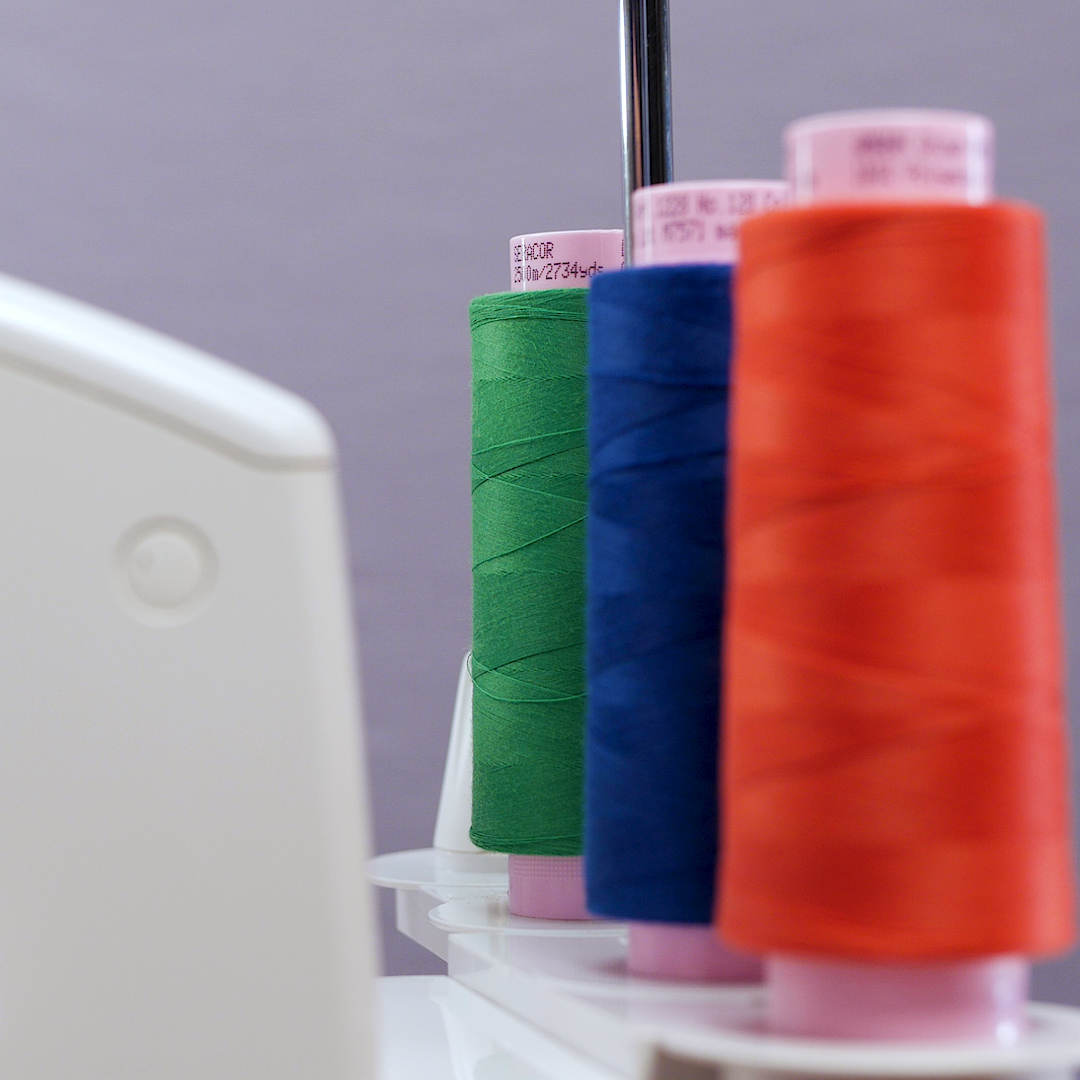
As the old School House Rock song teaches us, 3 is a Magic Number. I’ve always loved the number three, and it is a great way to think about the basic stitches on an overlocker machine. The three basic stitches are: overlock, flatlock and rolled edge. Using three threads, we can easily adjust settings to achieve these three different stitches. Then you can get creative with a whole bunch of different ways you can use them. This makes the overlocker a versatile machine indeed.
Overlocker Stitch Basics
Machine Featured: BERNINA L 460
Stitch 1. Overlock
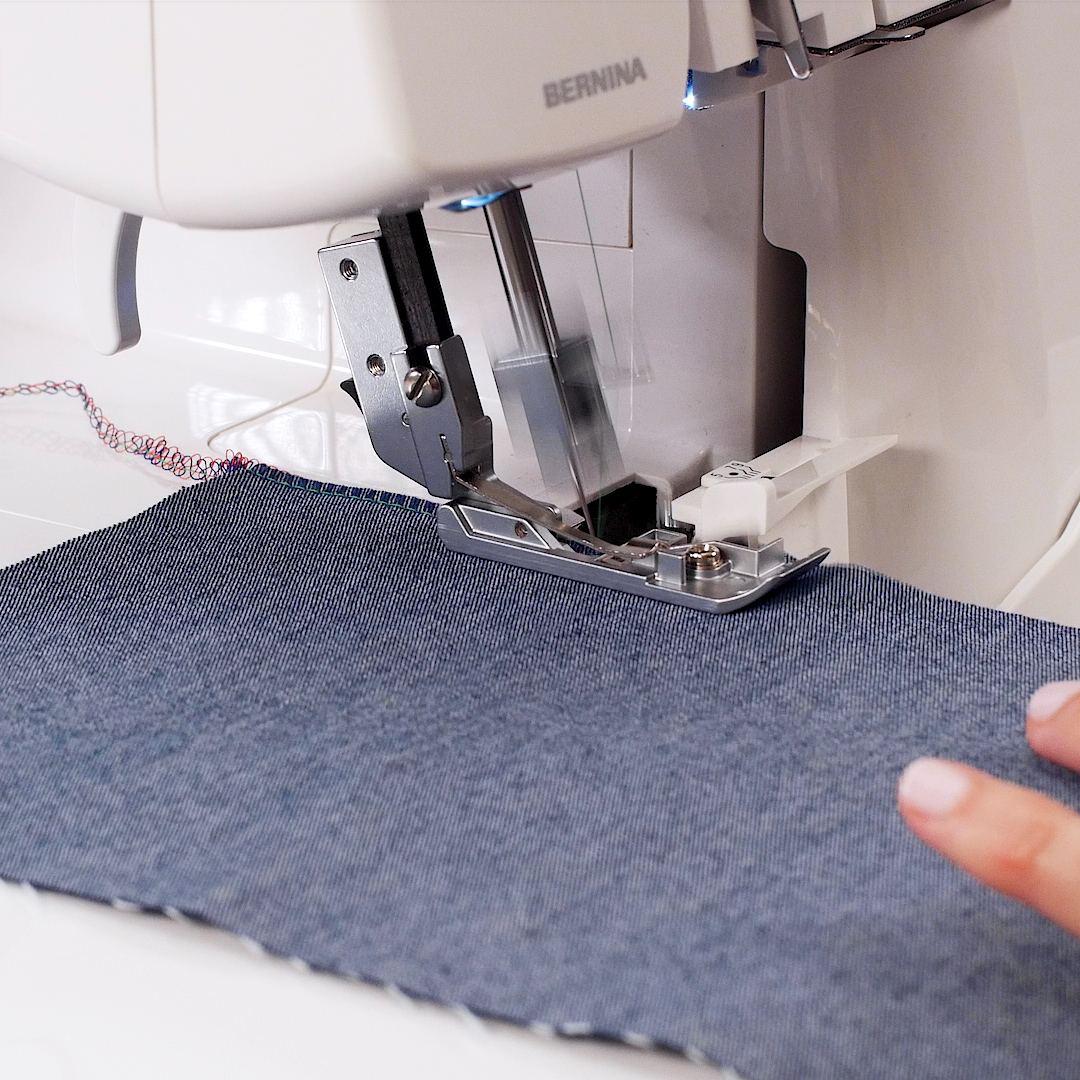
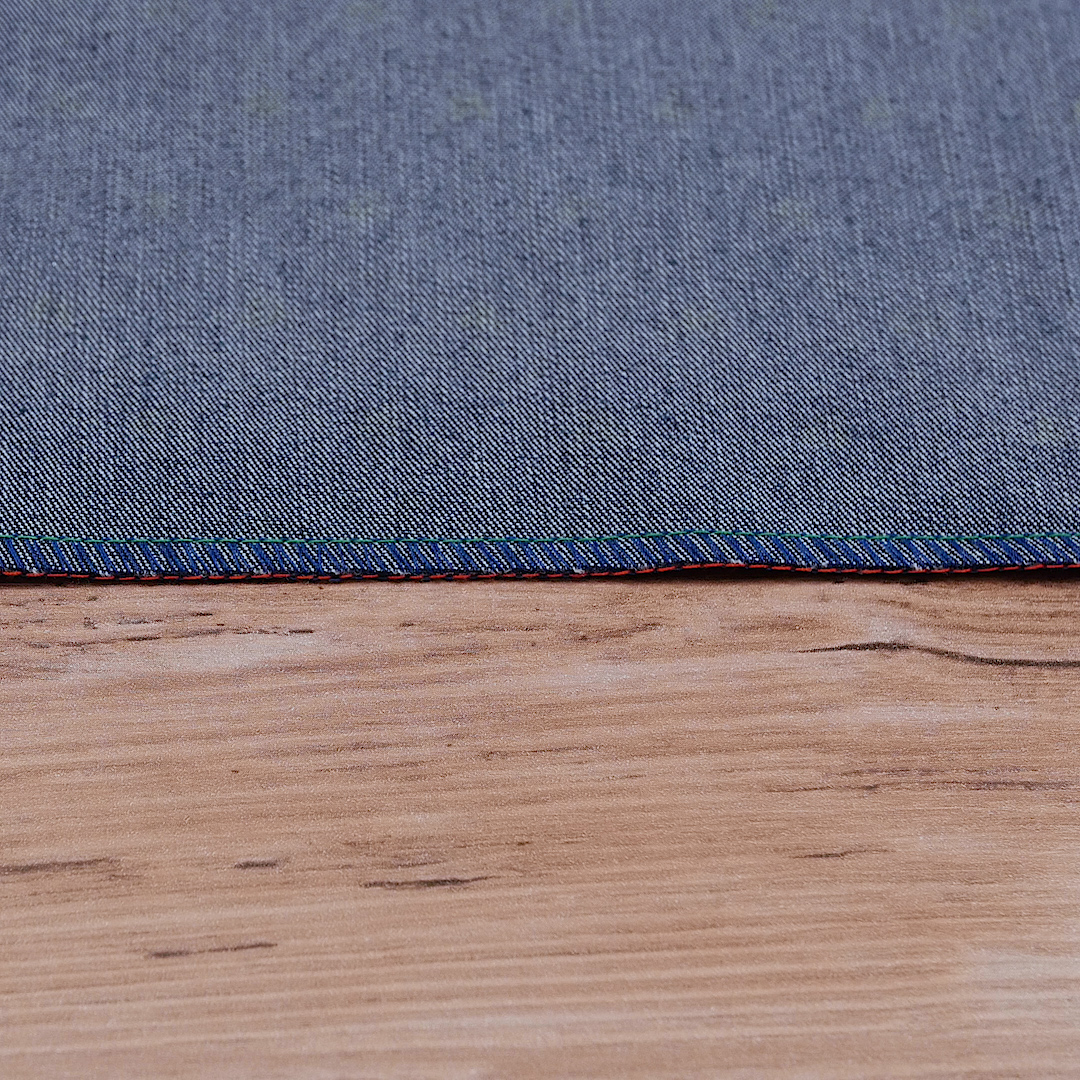
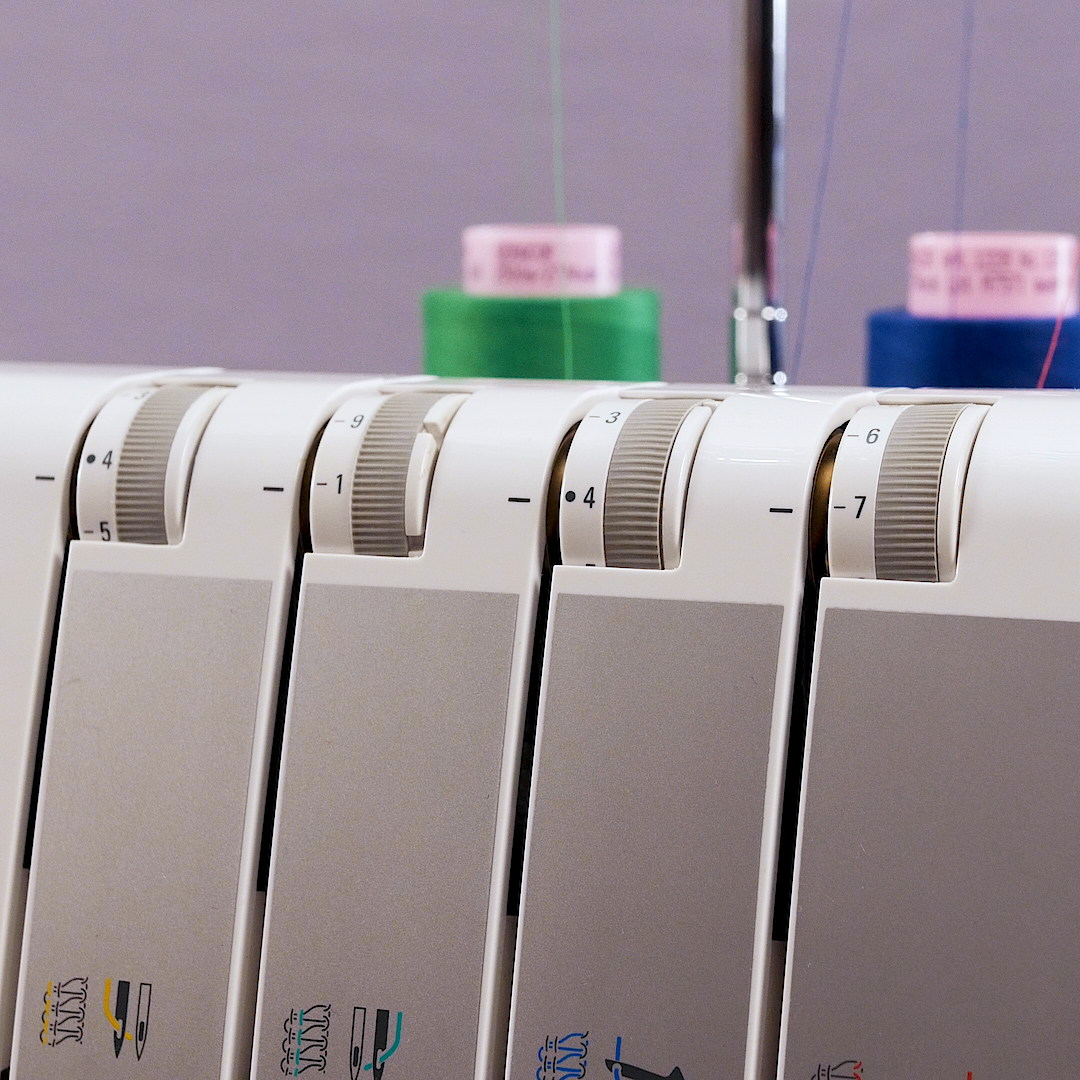
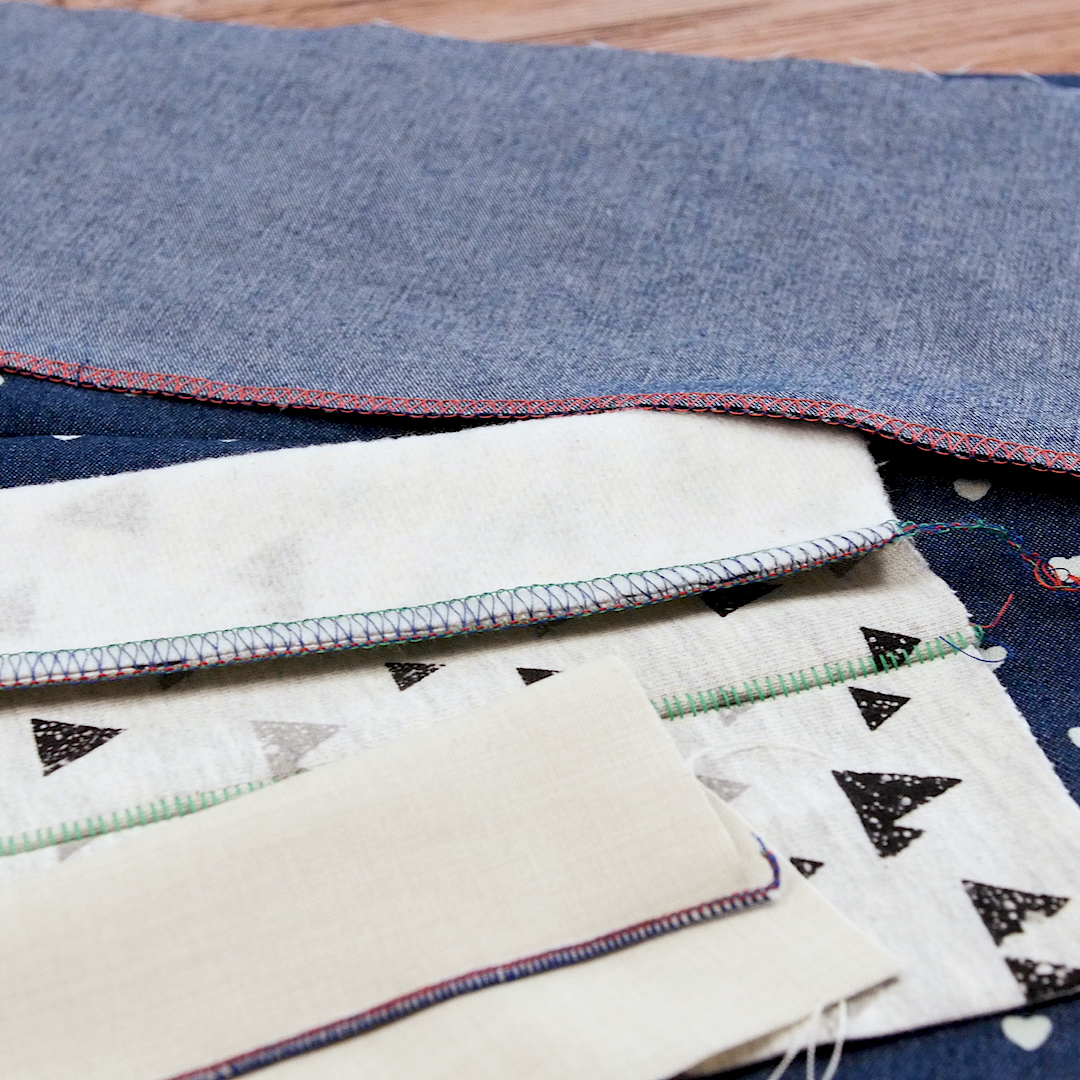
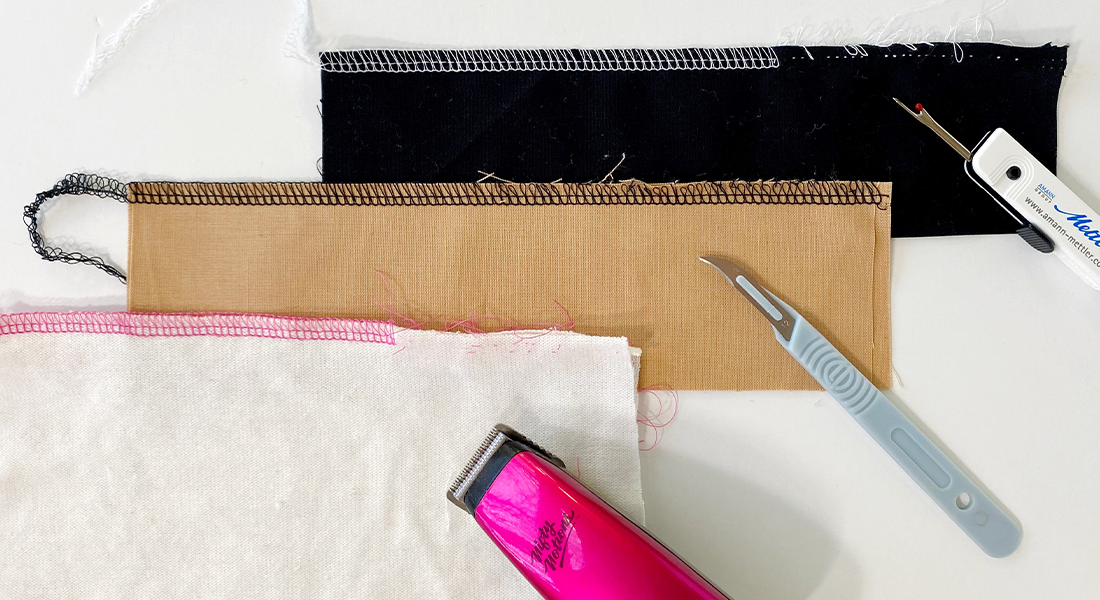
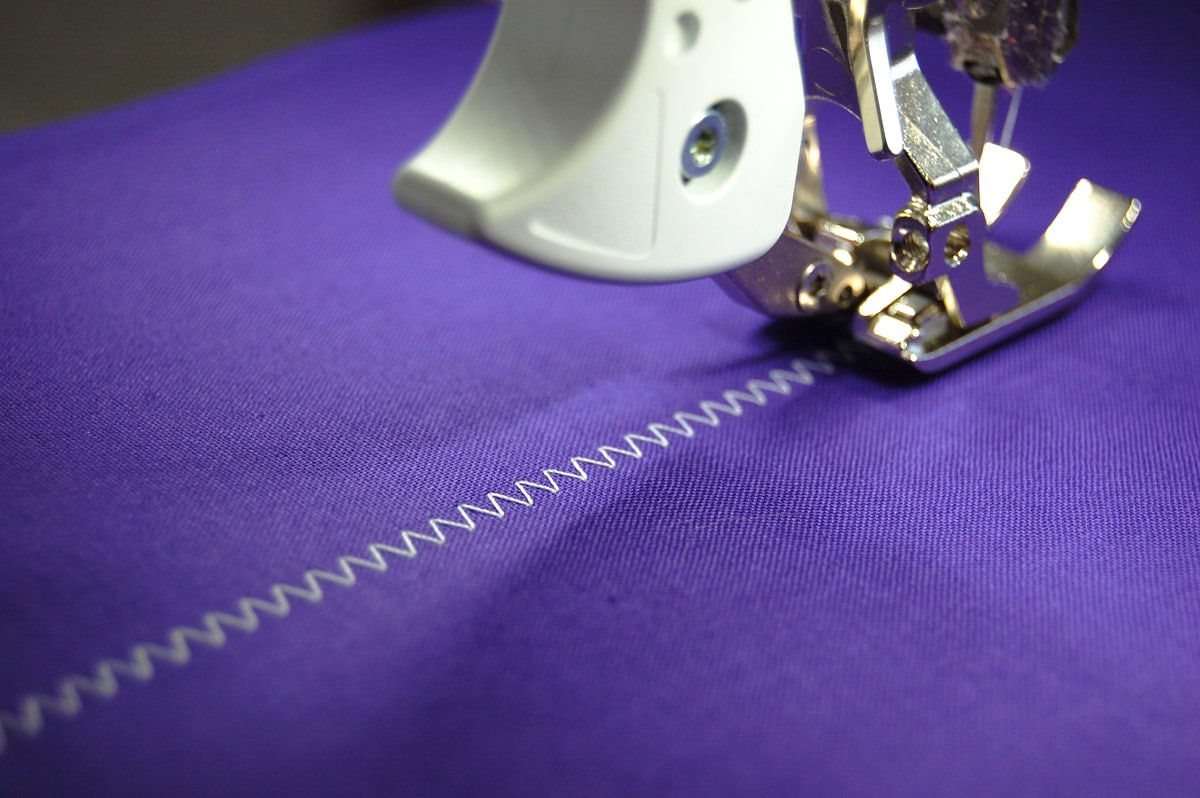
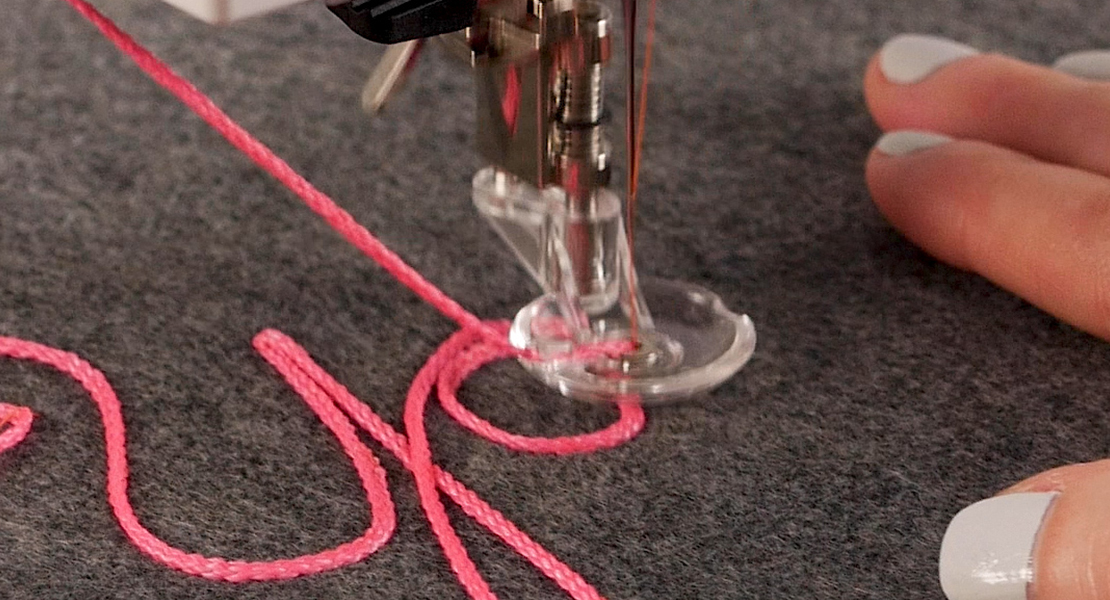
The overlock stitch is probably the most basic stitch, and the one you think of first when considering a serger. In fact, this stitch is why the machine is called an overlocker. In the United States the term “overlocker” has largely been replaced by the term “serger”, but either refers to a machine that cuts the edge and finishes the seam in one operation. An overlock stitch can be made with 4, 3, or even 2 threads. In this stitch formation, the thread tensions are balanced creating a strong seam that is ideal for construction and edge neatening.
NOTE: Although I am using the BERNINA L 460, the information in the charts below will be similar to most overlockers. Refer to your owner’s manual for the specific settings for your overlocker.
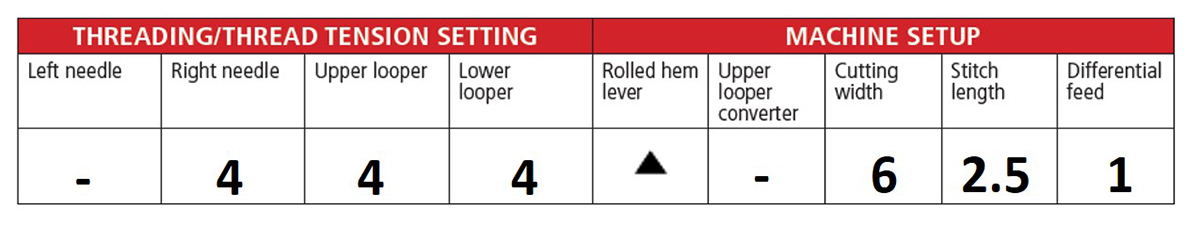
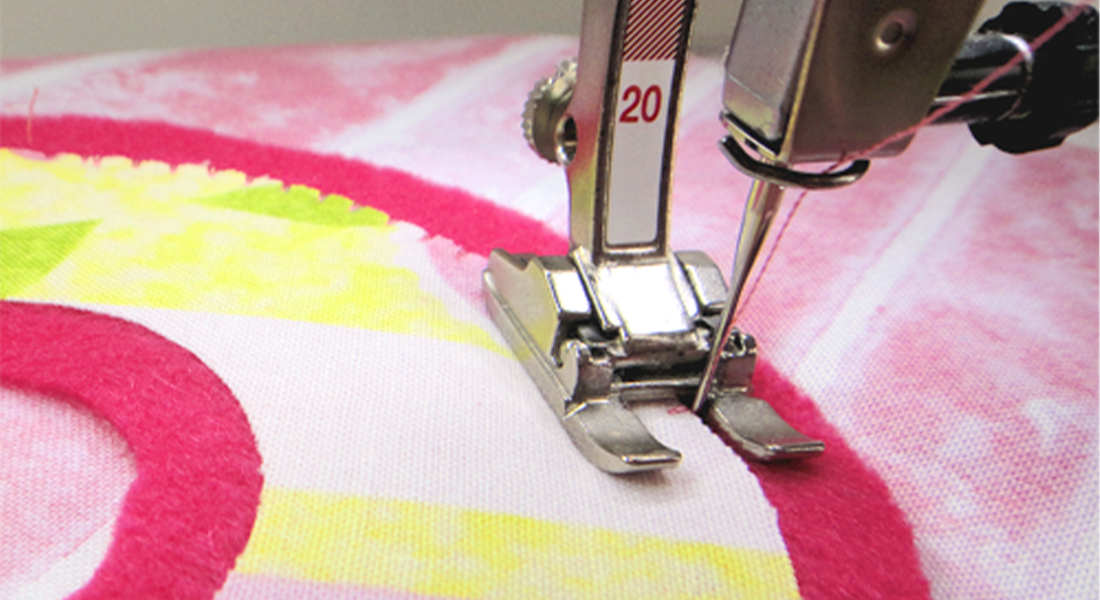
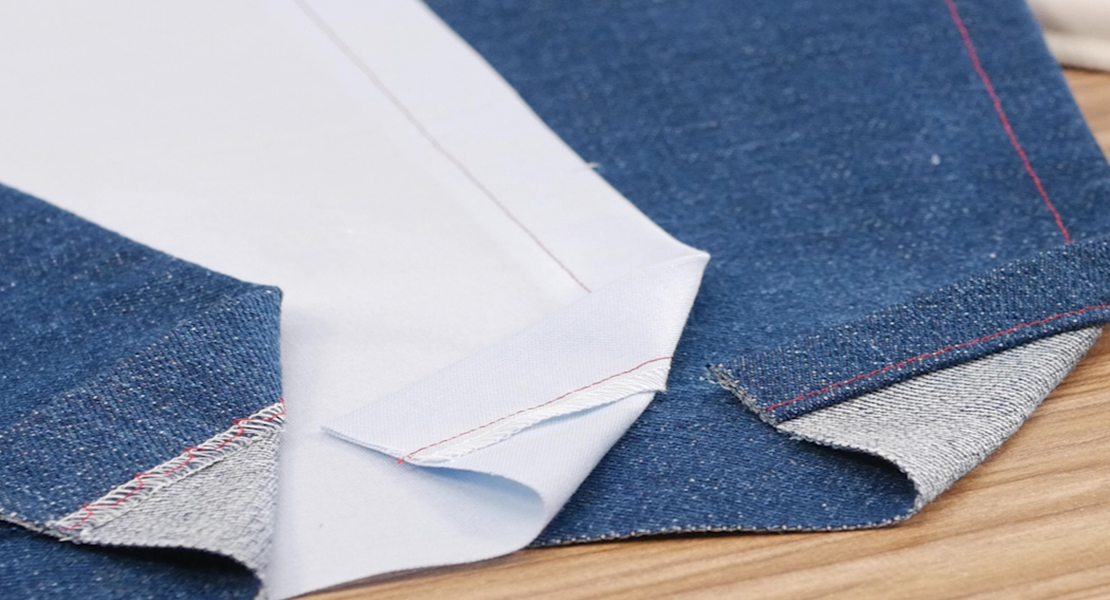
3-Thread Overlock Narrow (right needle)
Tip: Always test sew or chain off the stitches on an overlocker before starting on the final project to ensure proper stitch formation.
Stitch 2. Flatlock
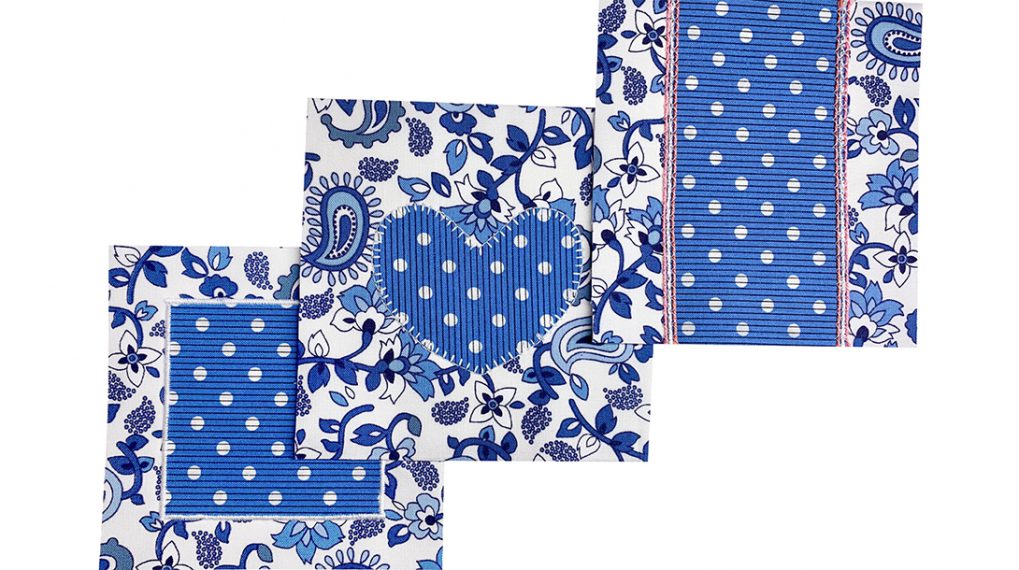
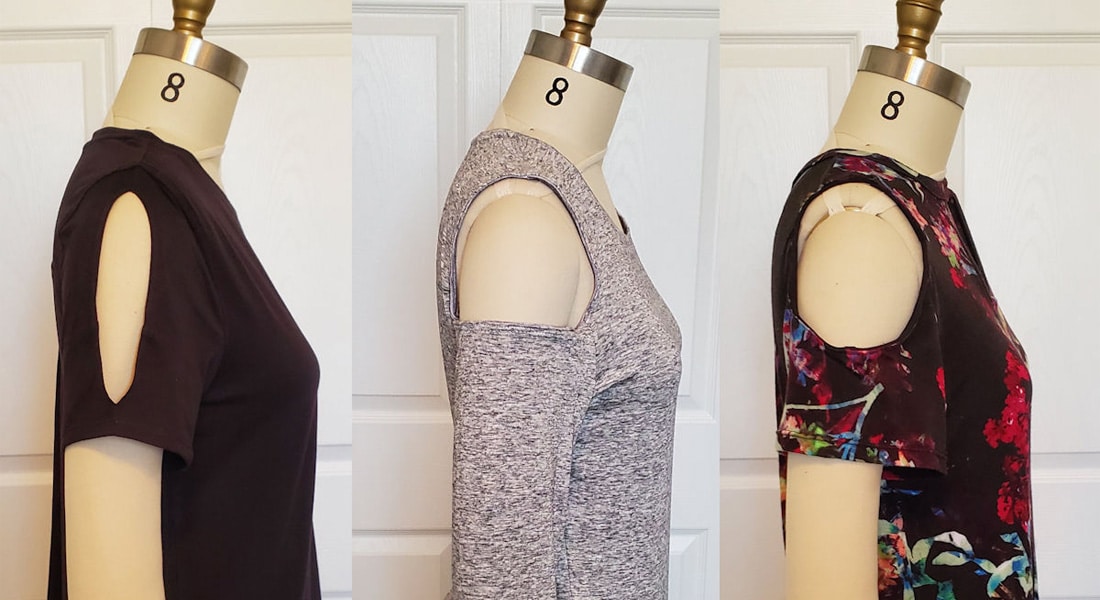
By simply adjusting the tension settings for the needle and the lower looper (thereby creating an unbalanced stitch, you have a new stitch called a flatlock. Because the needle thread is loose and the lower looper is tight, this stitch allows the two layers of fabric to pull away from one another and lay on top of each other. There are two distinct sides to this stitch. The “right” side is the side with the loops showing and the “wrong” side is the side that shows the needle thread—which looks like a ladder. The truth is, there is no right or wrong side, you can choose which side you like for your project. If you want the loops to be on the right side, stitch with the fabric wrong sides together. If you want the ladders to show on the right side of the project, place the fabric with right sides together and stitch. The flatlock stitch is great for seaming bulky fabrics like fleece and sweatshirt knit because it is stretchy and flat. The flatlock can also allow for a lot of fun decorative applications as well, like weaving narrow ribbon into the ladder side of the seam for heirloom sewing techniques.
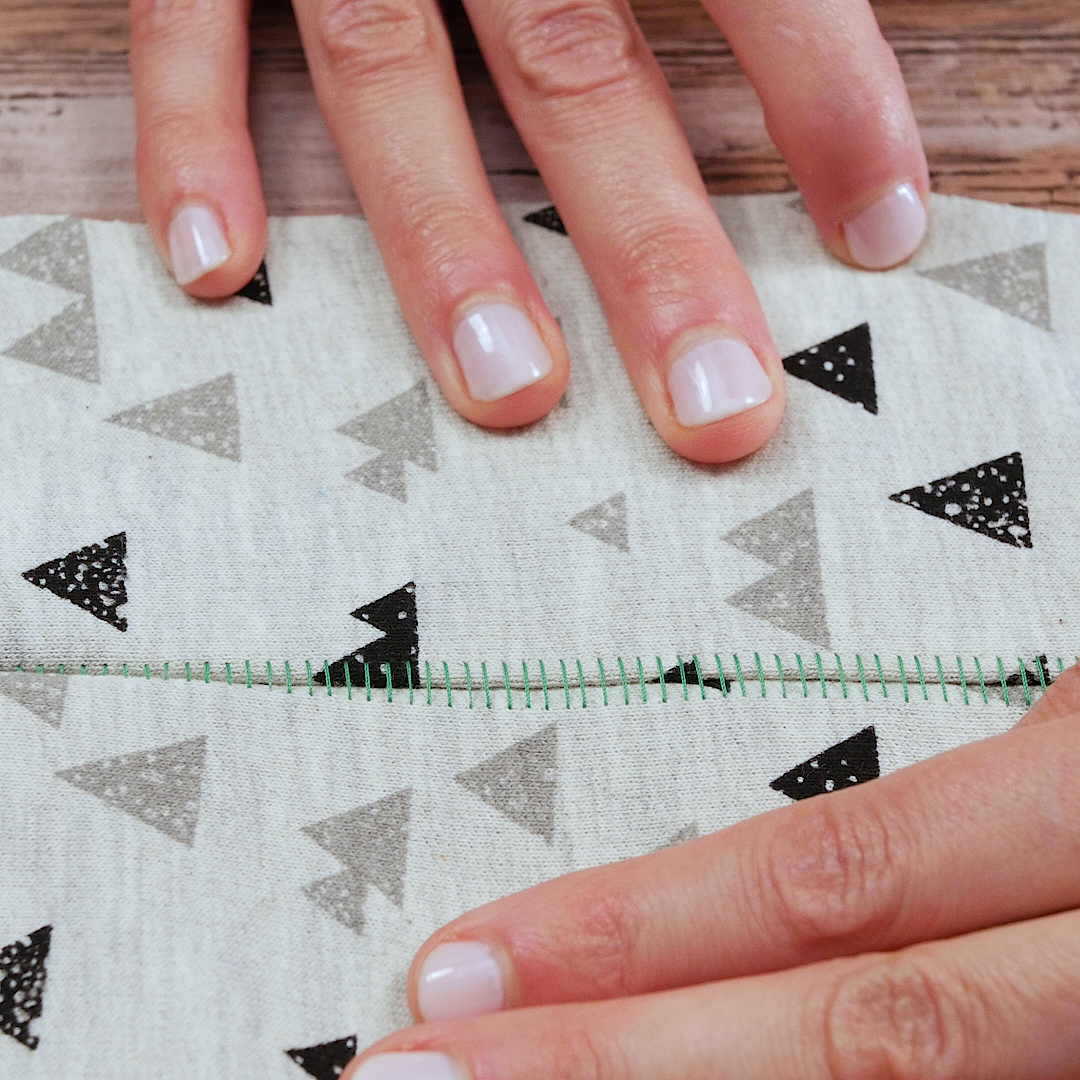
3-Thread Flatlock Narrow (right needle)

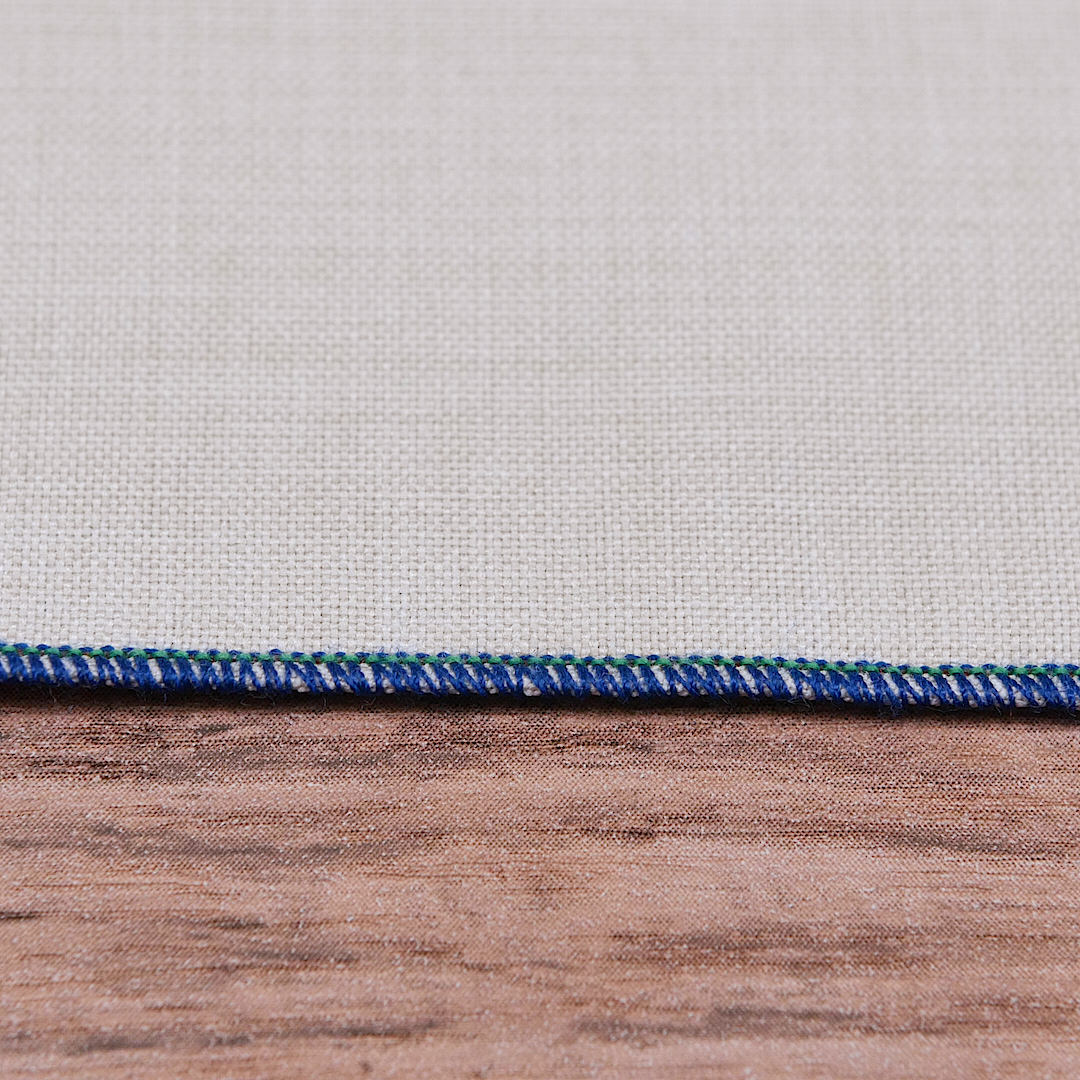
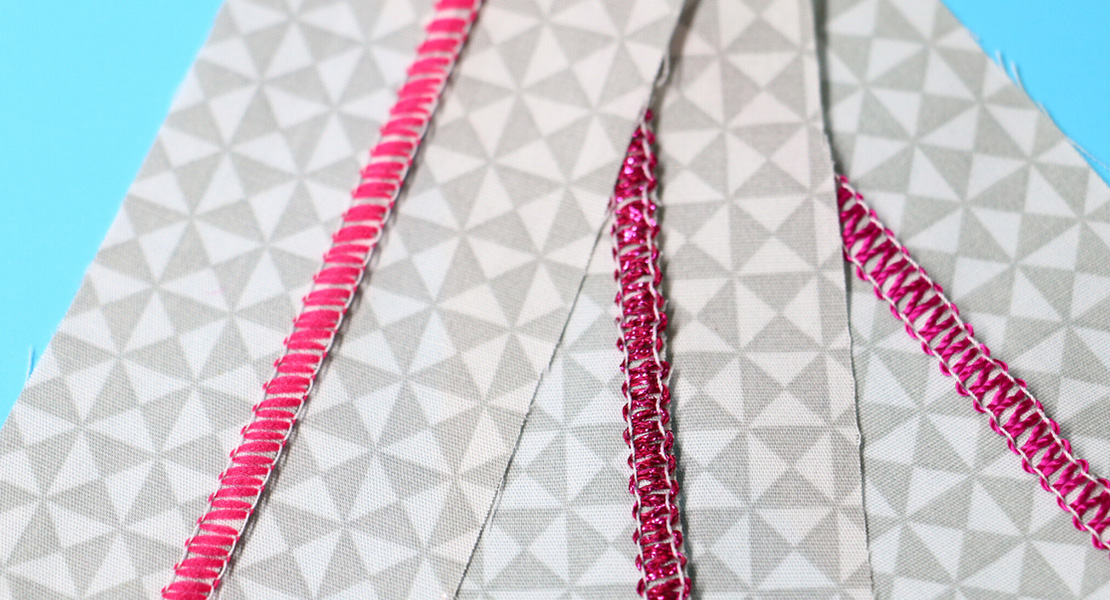
Stitch 3. Rolled Edge
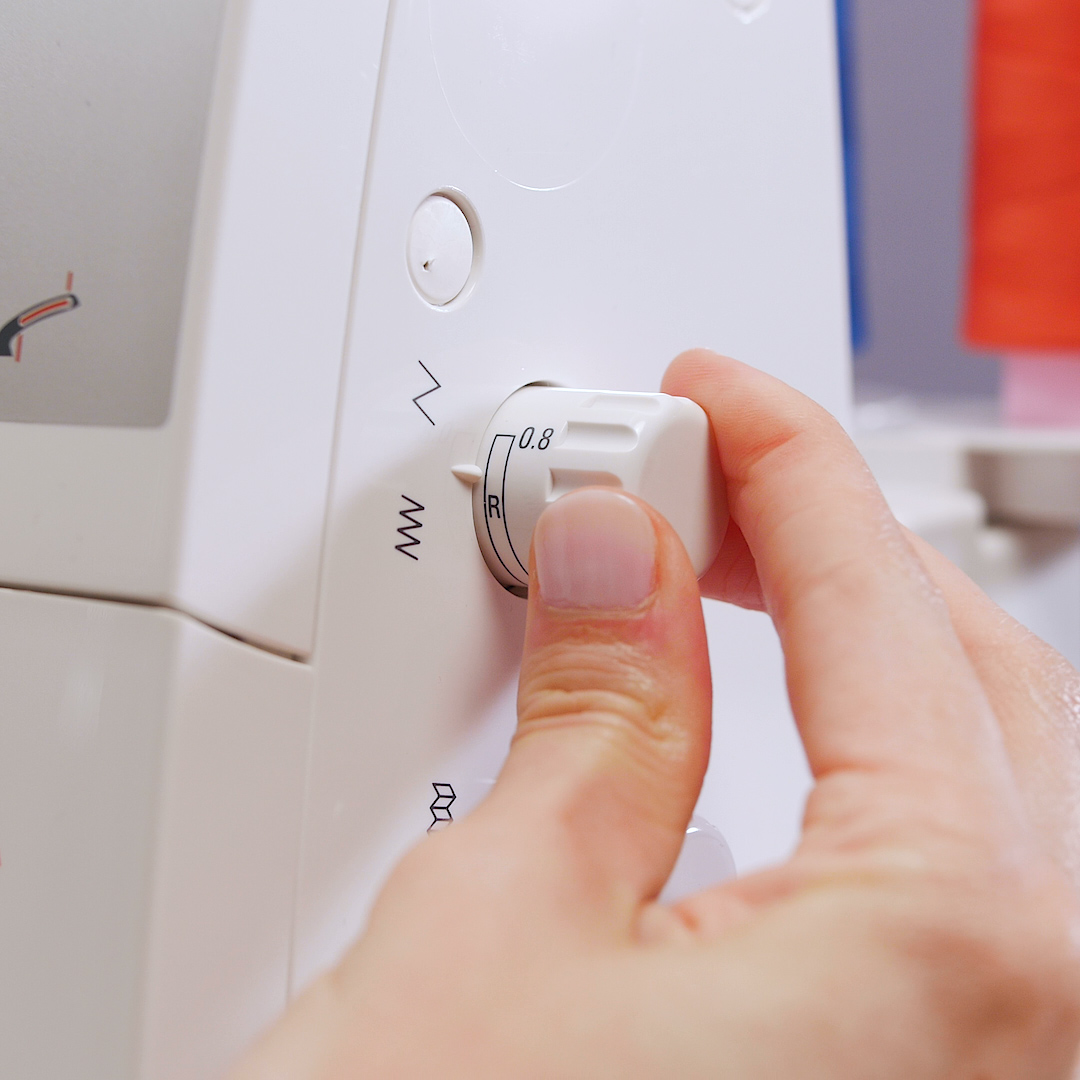
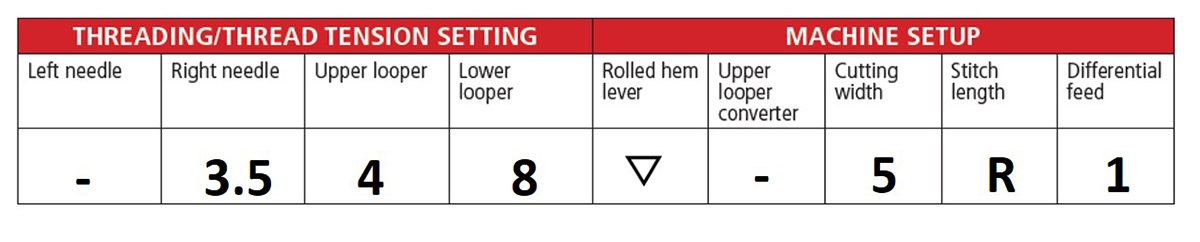
With just a few more setting changes, we can make the most impressive rolled hem stitch. The tension setting on the needle will go back to a middle range between 3 and 5, and the lower looper tension setting will be tightened to 8. The upper looper has remained at 4 for all the stitches shown. Depending on your machine, remember that your basic settings may be slightly different, and just know that thread and fabric selection always plays a part and you may need to adjust these settings to achieve the best looking stitch for your situation.
Most overlockers today will have an easy way to switch to a rolled edge. On the L 450 and L 460 machines, this is a lever on the stitch plate. When it is moved to the rolled hem position shown, the stitch finger—the metal piece that holds the loops to the fabric edge, will move underneath the stitch plate. Now the fabric edge will roll instead of lying flat. Since the fabric needs to roll to create this stitch, it is best suited for delicate fabrics such as; silk, cotton or rayon and not heavy fabrics like canvas or denim.
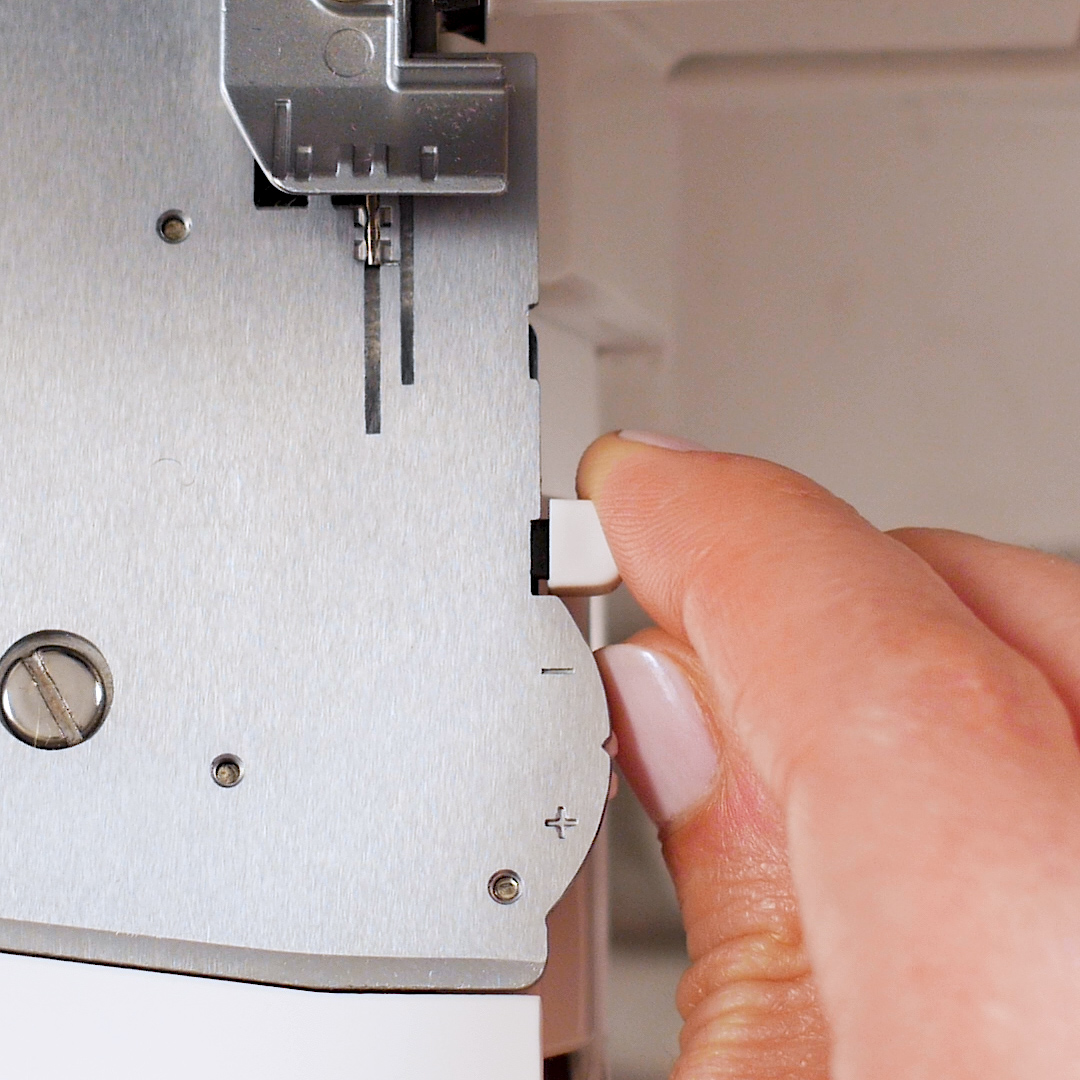
In addition to moving the rolled hem lever, you will want to adjust your cutting width to the smallest number, 5. Then you will need to move the stitch length knob to a lower number. On the L 450 and L 460 machines, the rolled edge range is indicated with the letter “R” and it is variable. For standard threads and fabrics, setting the knob on the “R” works well, but for thicker threads you would need to adjust so that the thread doesn’t build up too much in one place—this is similar to setting a satin stitch on your sewing machine.
The rolled hem is a beautiful way to finish the edge of napkins and linens. It can be a fun application on knit fabrics too. Since the stitch is so densely formed it can be used to create your own serger yarn or fringe for other projects.
Tip: Using decorative threads such as: Woolly Nylon, Maxi-LockStretch, Pearl Crown Rayon or any variegated thread creates a fun decorative edge finish using the rolled hem stitch.
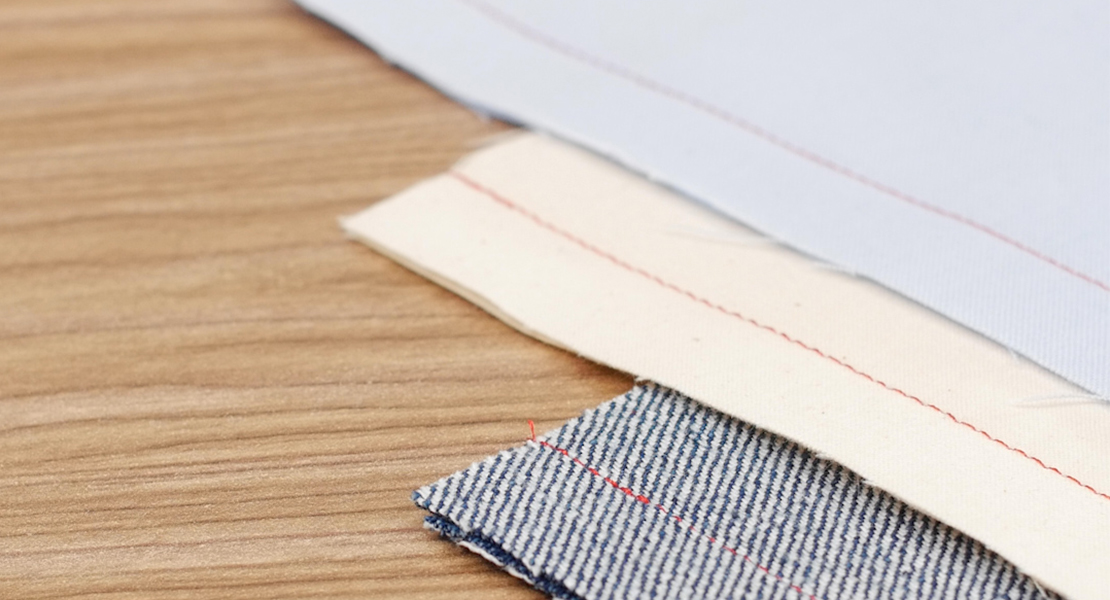
3-Thread Rolled Hem (right needle)
Remember the three basic stitches and start thinking of all the creative ways you can use them. The overlocker has many variables that can change the look and application for these three stitch formations. Even though I only used the right needle to illustrate these stitches, you can also use the left needle to create wide overlock and flatlock stitches. Adjusting cutting width, stitch length and differential feed can allow for the same stitch to have a very different look. Additionally, the ability to add decorative threads into the loopers can provide many opportunities for stitch creations that cannot be duplicated on a sewing machine. Let this simple lesson launch you into many fun and creative serger adventures!
Used Products

What you might also like


One comment on “How to Use Three Threads Three Ways with the BERNINA Overlocker”
Leave a Reply
You must be logged in to post a comment.

This was a terrific overview. I’m printing it out to keep with my manual.