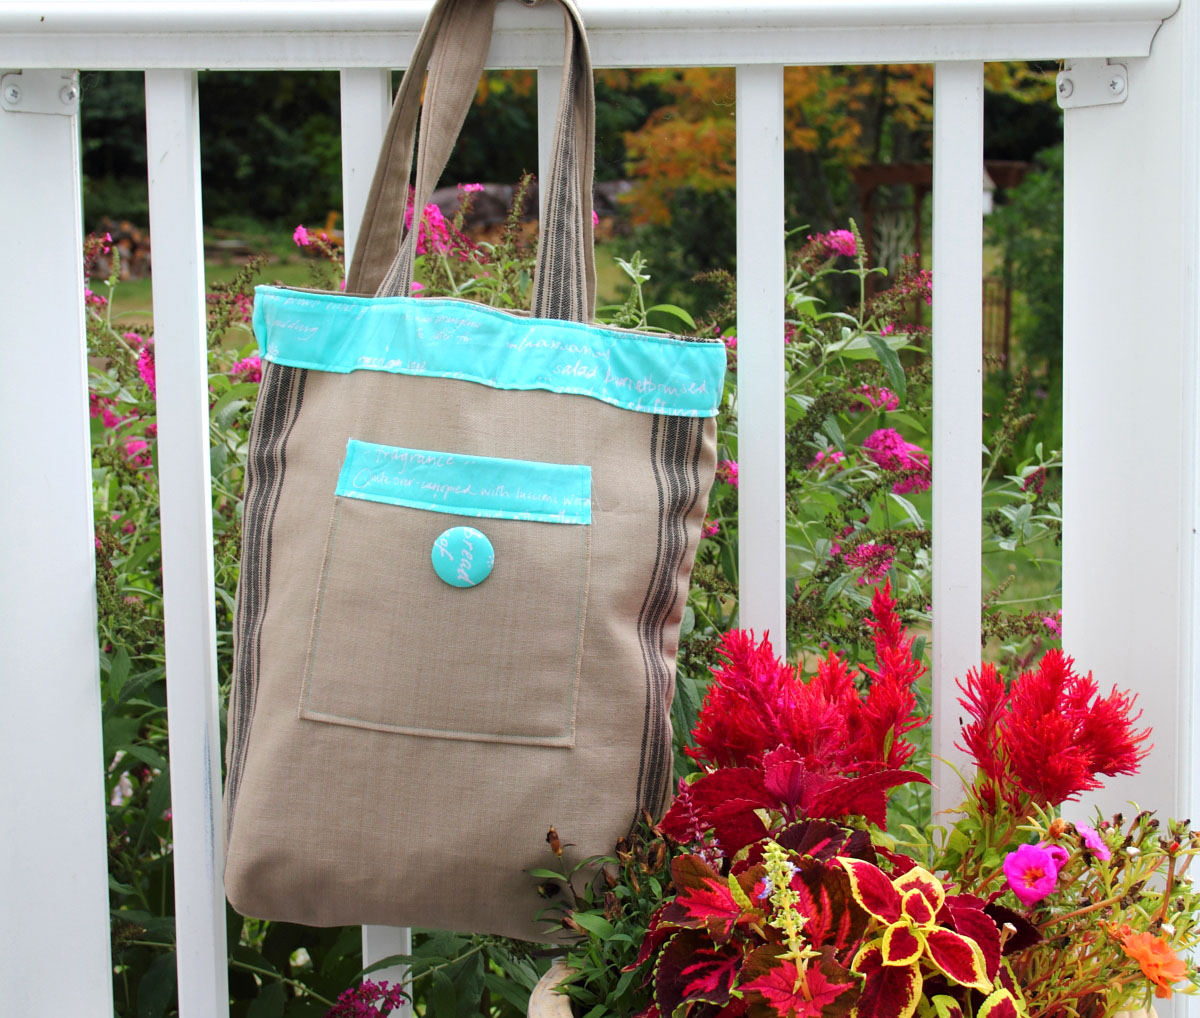
A Nod to Furoshiki│Laundry Bag

It’s that wonderful time of the year and I know some of you are getting ready for the holidays purchasing gifts and prepping a wonderful dinner with the family. So what should you gift for that maker of the house? What about this unique and stylish bag? Well, I am going to teach you how to create A Nod to Furoshiki│Laundry Bag. I received so many messages from people loving my last tutorial that I decided to use the quilt-as-you-go technique for this project as well. Have fun and happy sewing.
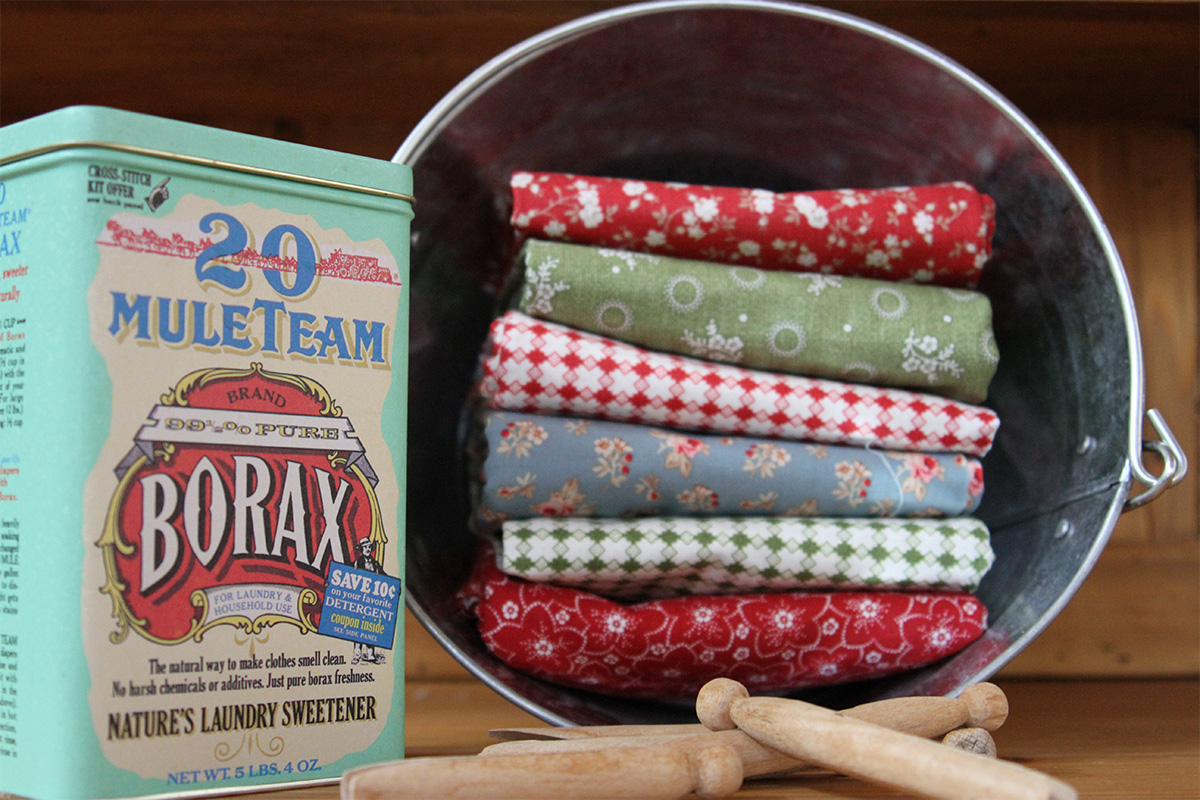
Materials to sew the A Nod to Furoshiki│Laundry Bag:
- ⁵/₈ of DAR-64311
- Fat Quarter of DAR-54301
- Fat Eight of DAR-54305
- Fat Quarter of DAR-64306
- Fat Quarter of DAR-64305
- Fat Eight of DAR-64303
- Fat Quarter of DAR-54309
- Fat Quarter of PE-405
- Fat Eight of PE-434
- 2¼ yard of PE-420
- Fat Quarter of DAN-S-2004
- 1 ½ yard of DAN-L-4000
- 1 yard of batting
- 1 yard of pattern making paper
- Iron and ironing board/surface
- Universal needles, size 80/12
- Your sewing machine: I sew on a BERNINA 790
- All-purpose presser foot (BERNINA Reverse pattern foot # 1D) and open embroidery foot (BERNINA Open embroidery foot #20C)
- AURIFIL thread 2021, 2530 and 2785
- Jute Cord
Cutting Insructions:
DAR = Dare Fabrics
PE = Pure Elements
DEN = The Denim Studio
- DAR-54301
Cut one (1) 15″ by 11″
Cut one (1) 21″ by 3″ - DAR-54305
Cut one (1) 5″ by 7″
Cut one (1) 5″ by 6″ - DAR-64311
Cut one (1) 21″ by 3½”
Cut one (1) 10″ by 5″
Cut one (1) 7½” by 6″
Cut two (2) 2″ by 36″ for casing - DAR-54309
Cut one (1) 7″ by 5″
Cut one (1) 5″ by 6″ - DAR-64303
Cut one (1) 8″ by 6″ - DAR-64306
Cut one (1) 6″ by 5″
Cut one (1) 11″ by 15″ - DAR-64305
Cut one (1) 5″ by 15″
Cut one (1) 10″ by 14″ - DEN-S-204
Cut one (1) 21″ by 3″
Cut one (1) 21″ by 1½”
Cut one (1) 14″ by 3½” - DEN-L-4000
Cut one (1) 5″ by 10″
Cut one (1) 4½” by 14″
Cut the 22 diameter circle from template - PE-405
Cut one (1) 15″ by 5″
Cut one (1) 5’’ by 5’’ - PE-420
Cut one (1) 22” by 72” for lining
Cut one (1) 7″ by 5″
Cut one (1) 14″ by 3″ - PE-434
Cut one (1) 6″ by 6″
Cut one (1) 5″ by 6″
Cut one (1) 5″ by 5″ - Batting
Cut one (1) 6″ by 6″
Cut one (1) 5″ by 6″
Cut one (1) 7″ by 5″
Cut one (1) 14″ by 3″
Cut one (1) 5″ by 5″
Cut one (1) 15″ by 5″
Cut one (1) 5″ by 5″
Cut one (1) 5″ by 10″
Cut one (1) 4½” by 14″
Cut one (1) 21″ by 3″
Cut one (1) 21″ by 1½”
Cut one (1) 14″ by 3½” - Lining
Cut one (1) 32″ by 22″
Step 1- Create Diameter Template
Take the 30” by 30” square of pattern making paper and create a center in the middle of the square followed by an 11” horizontal line. 11” will be your radio while your diameter is 22” (double of the radio). Continue creating vertical and horizontal 11” lines in order to form a pie (this will be an easier way to draft the circle) as explained in the image below.
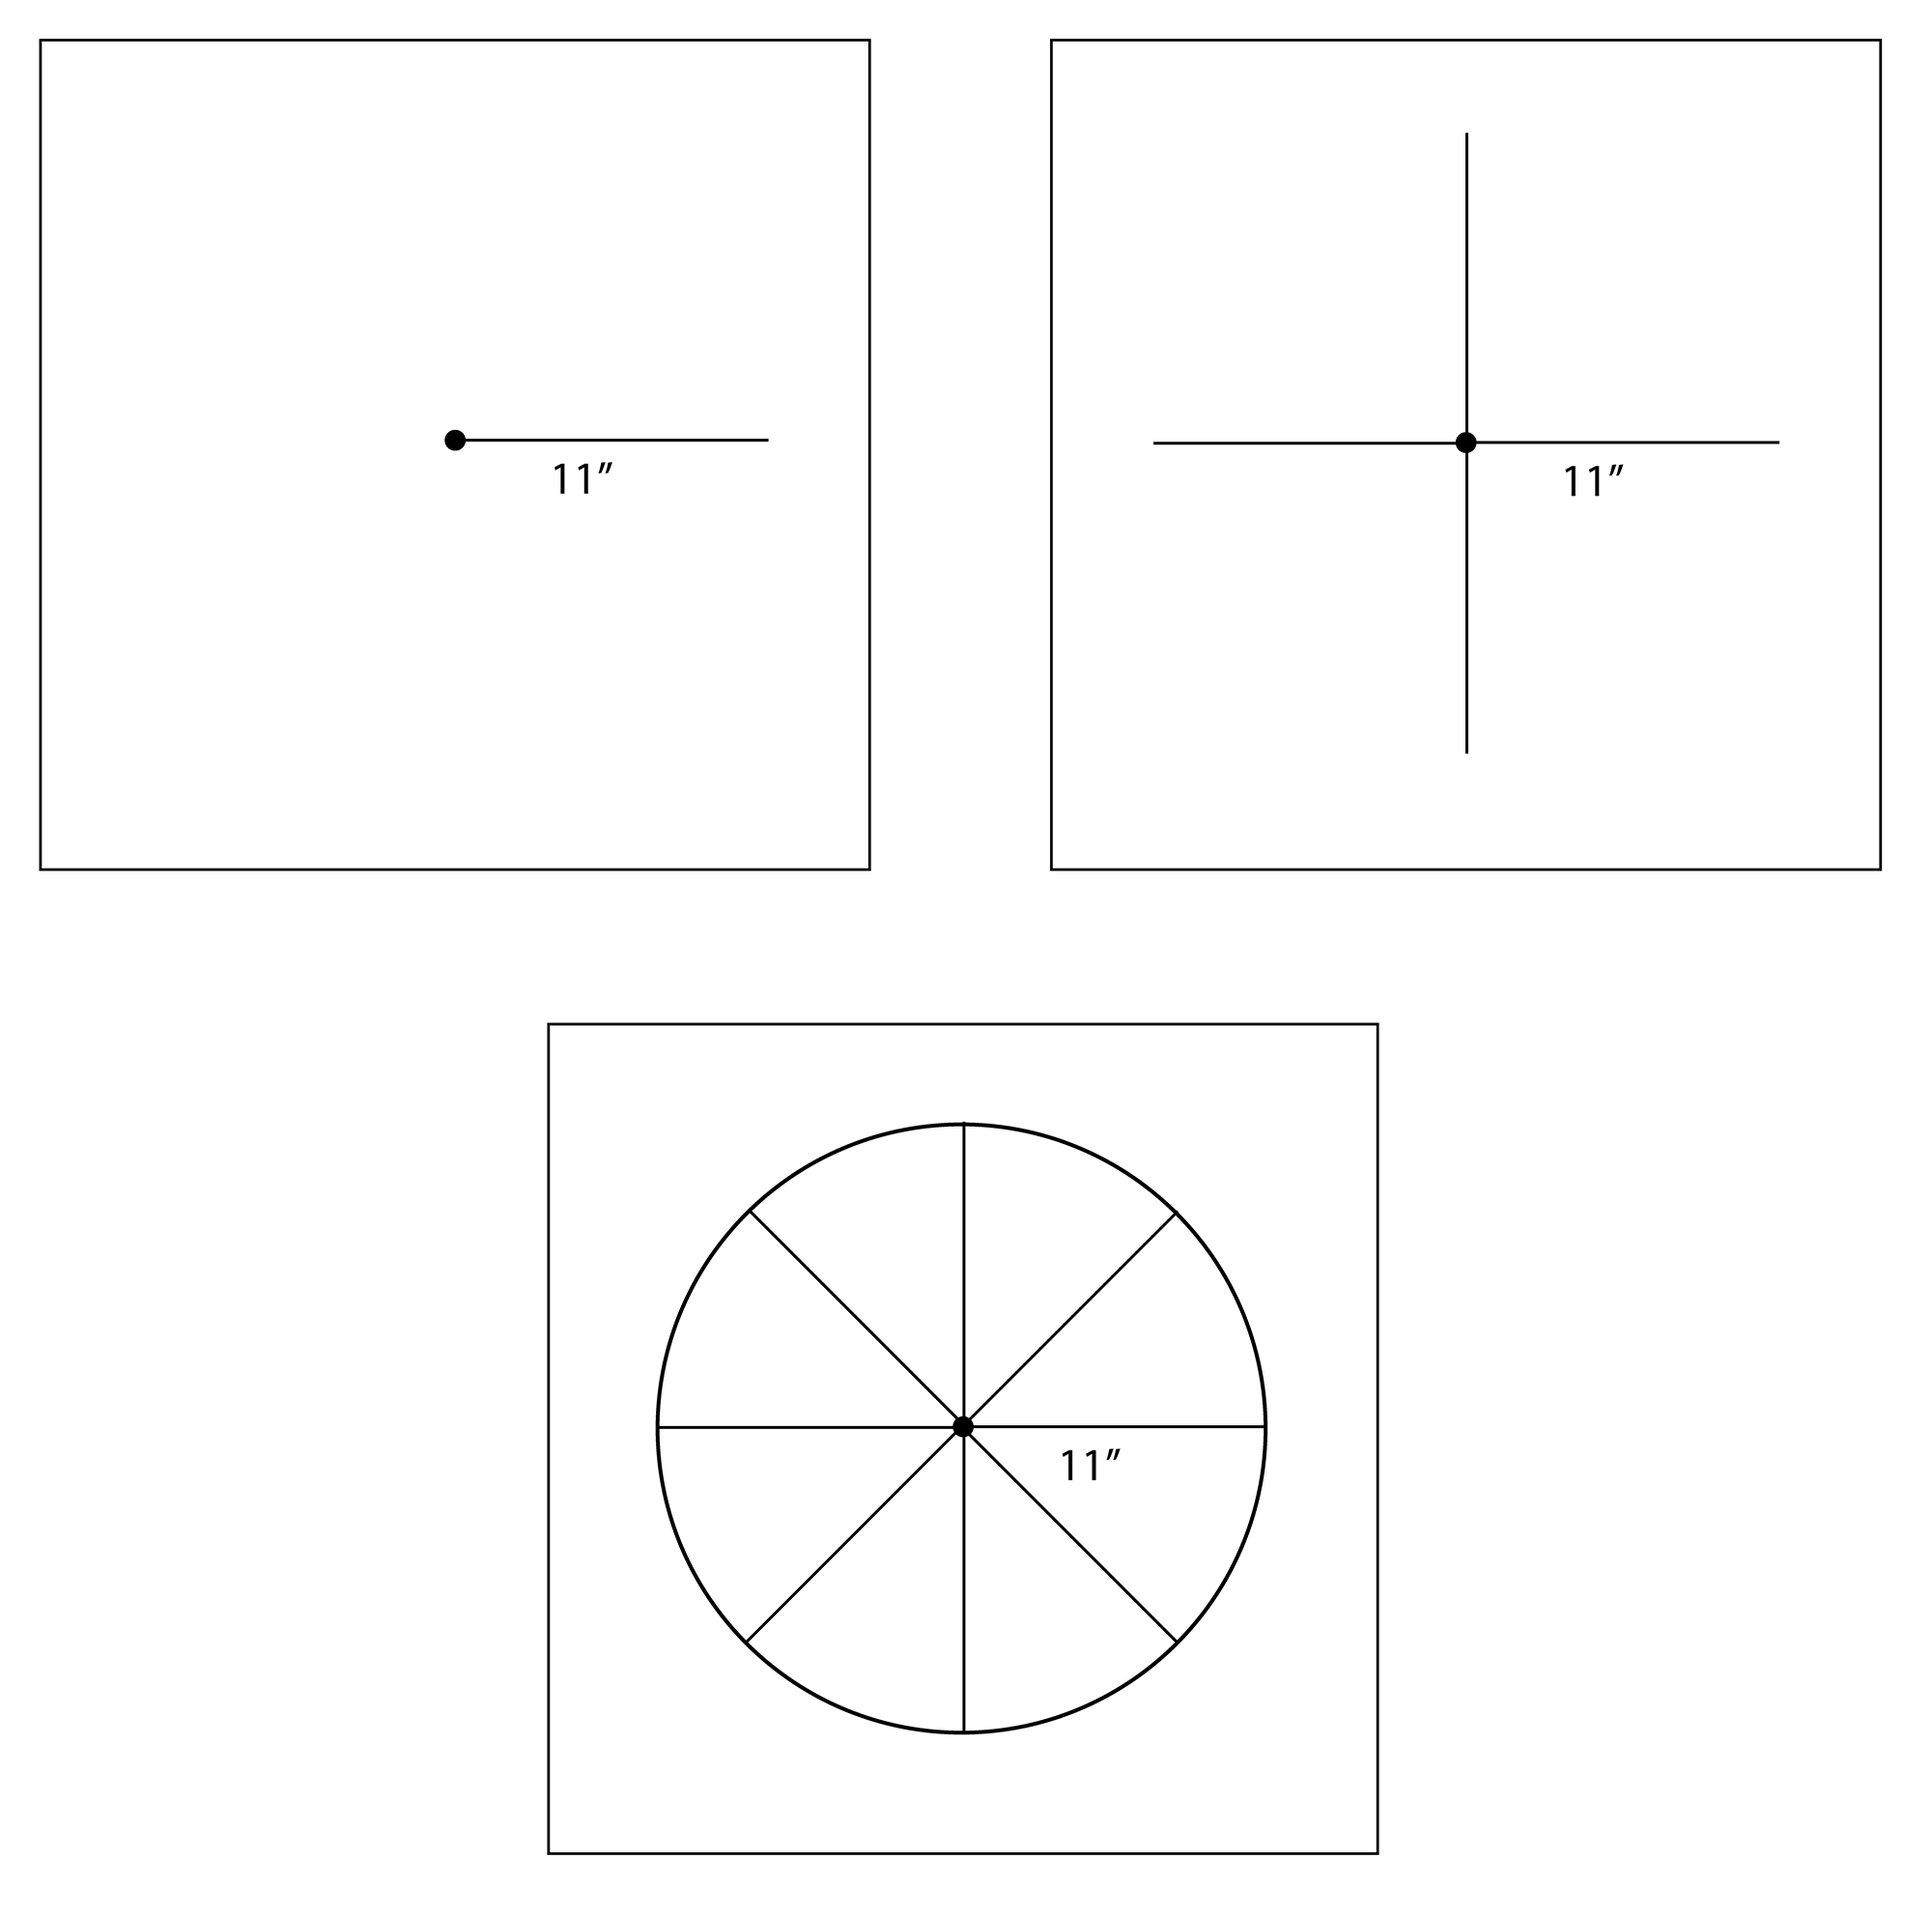
Once your pattern is complete, cut the circumference to DEN-L-4000 and set aside.
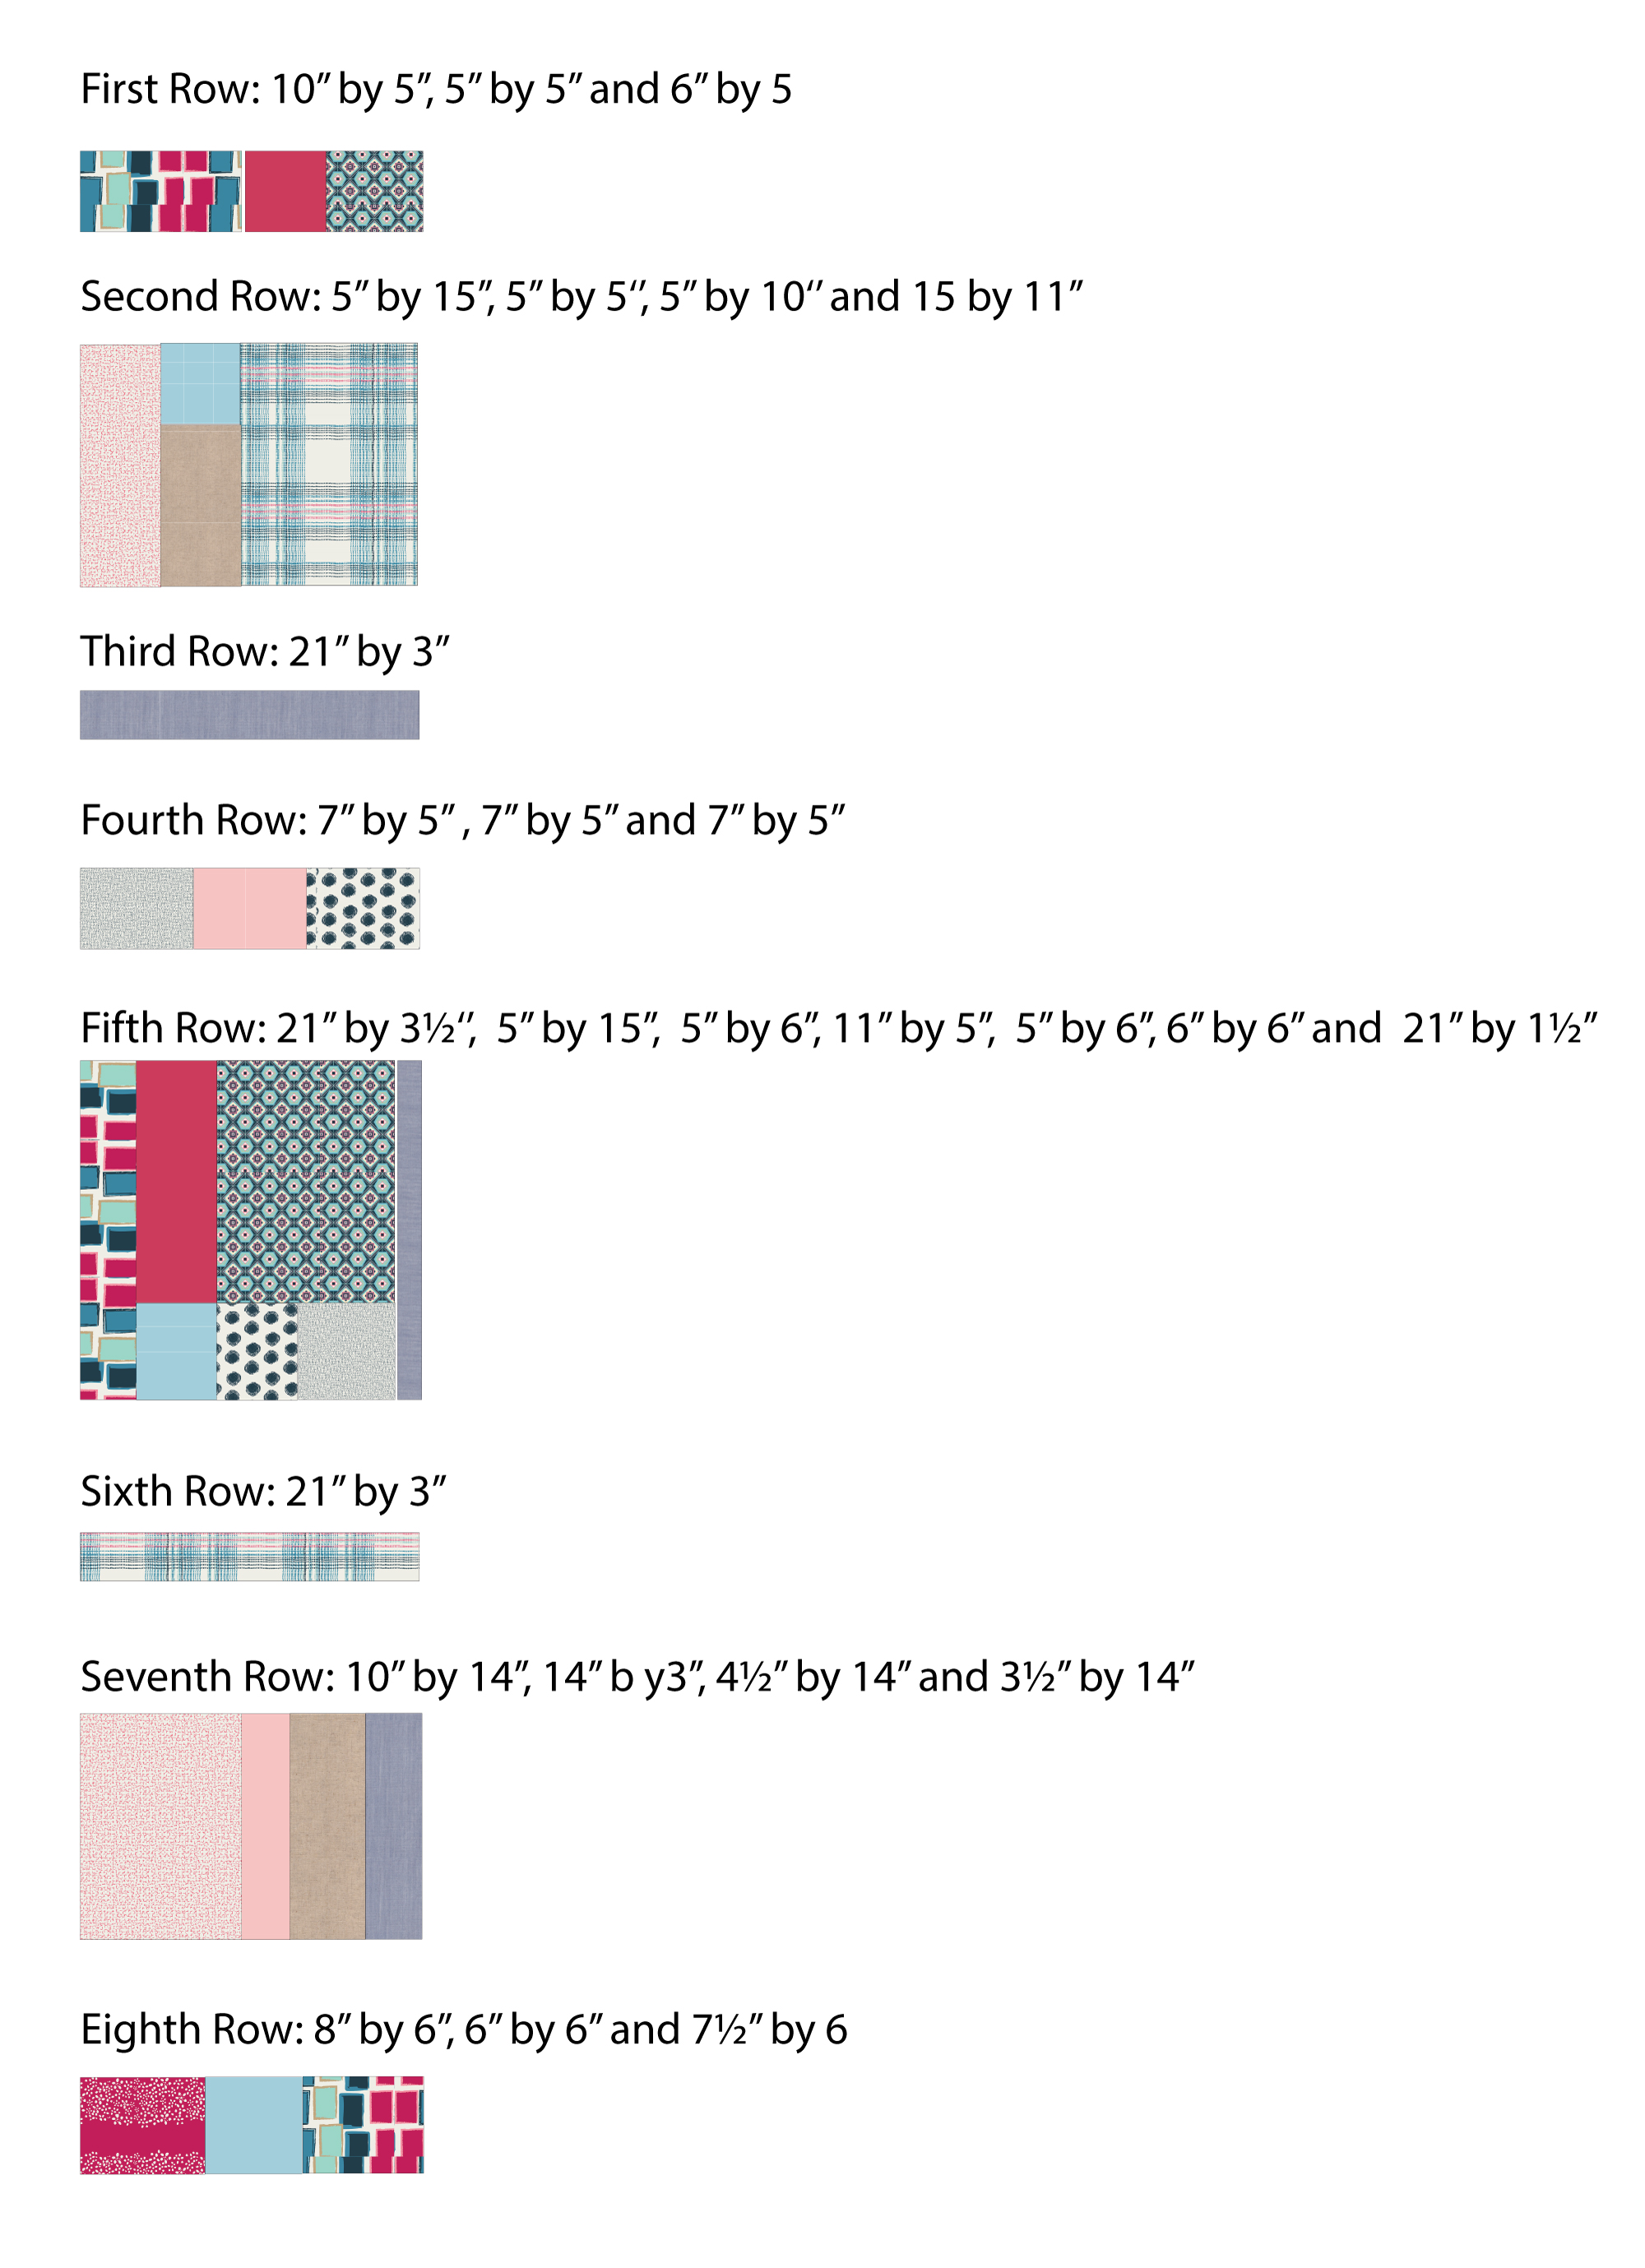
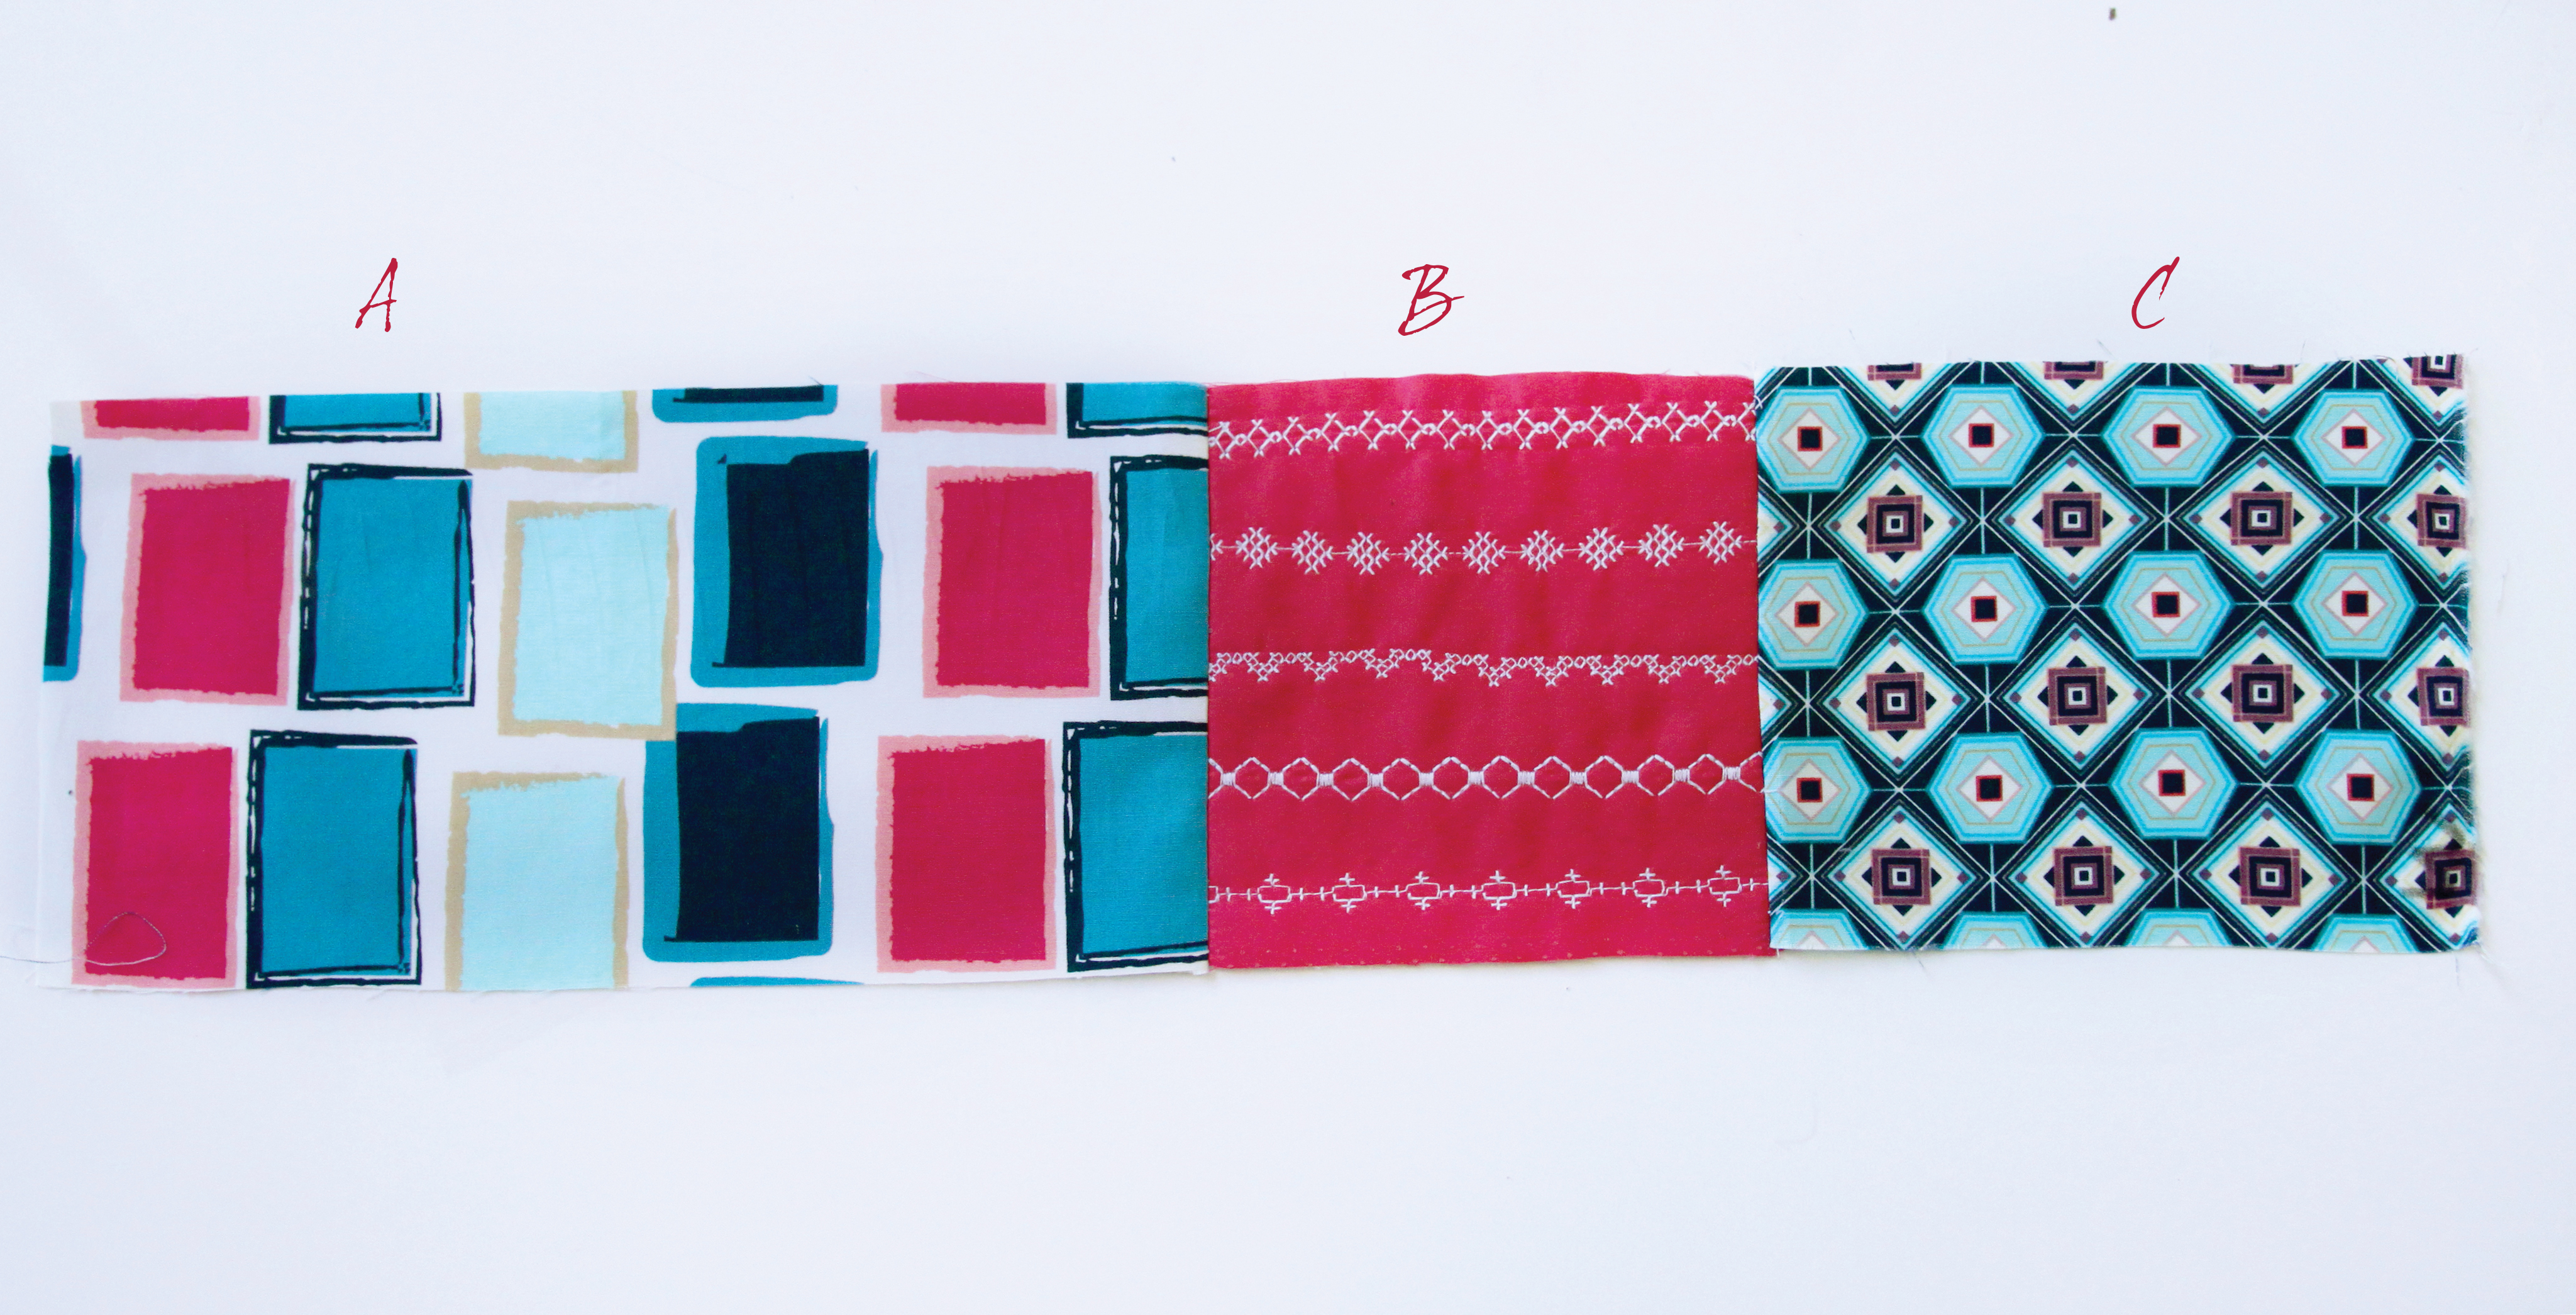
Below you will find each Row Combination of the project design. I am specifying each piece’s measurements by row for easy understanding.
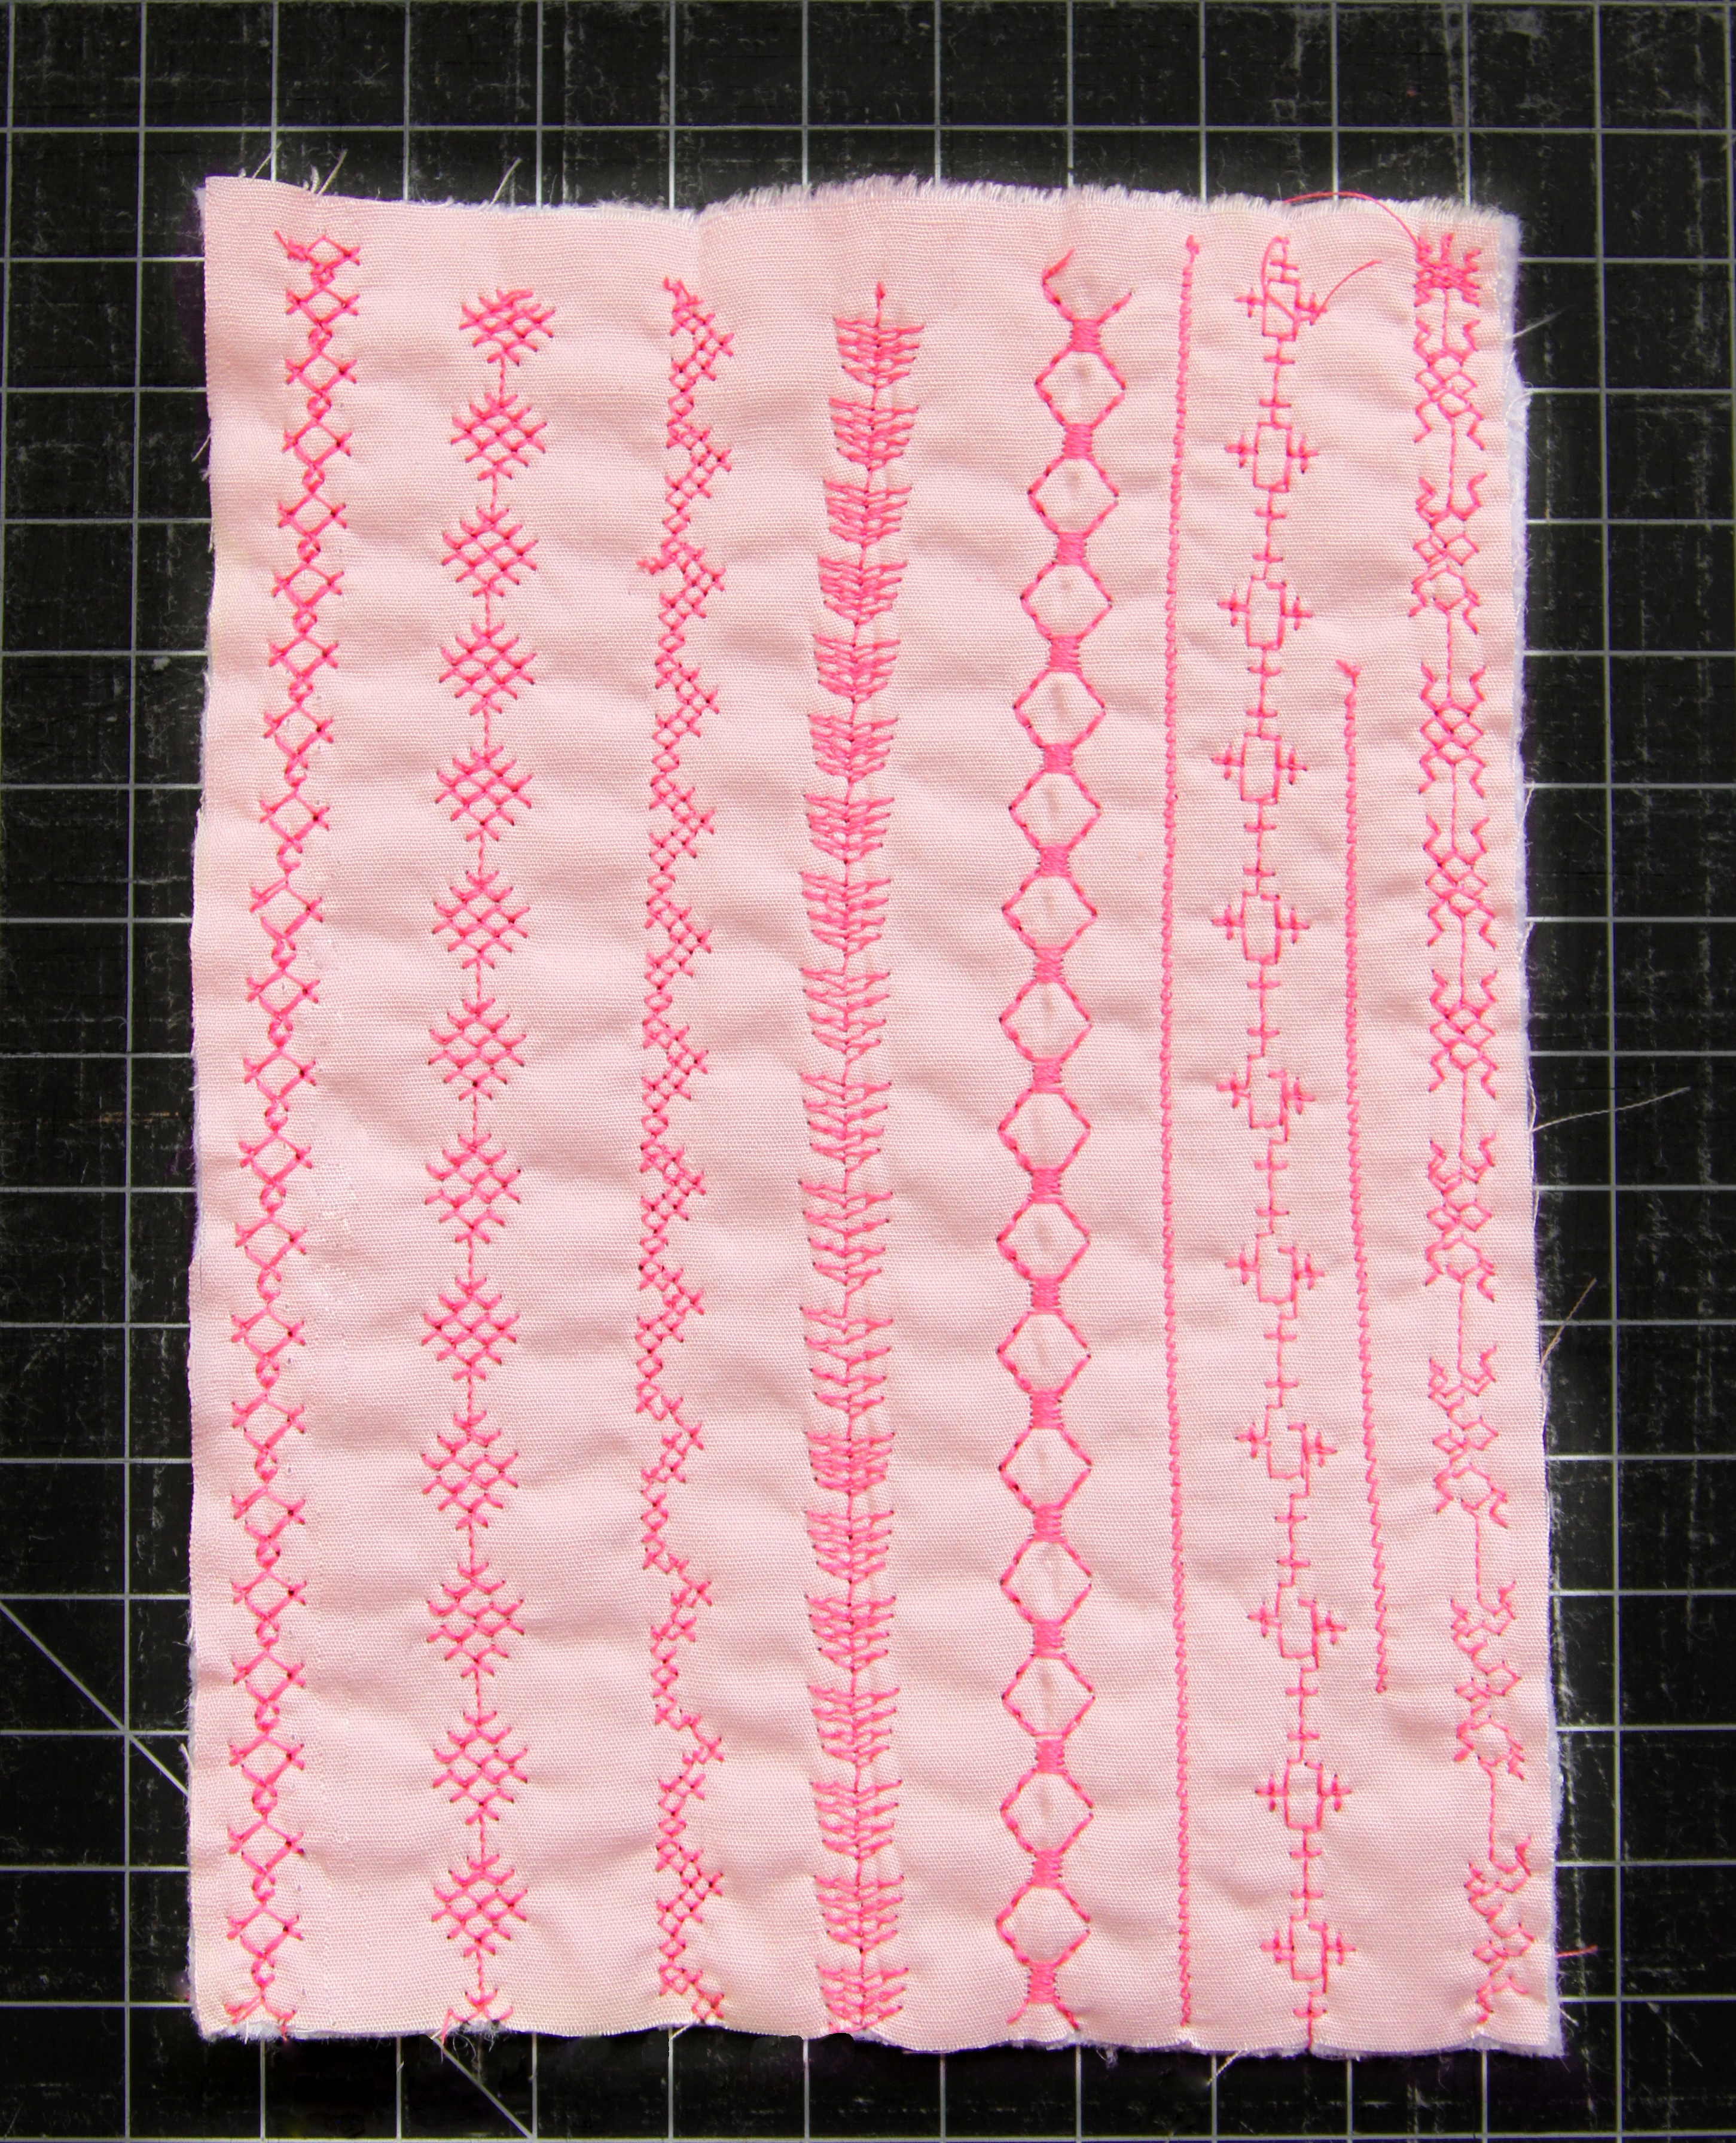
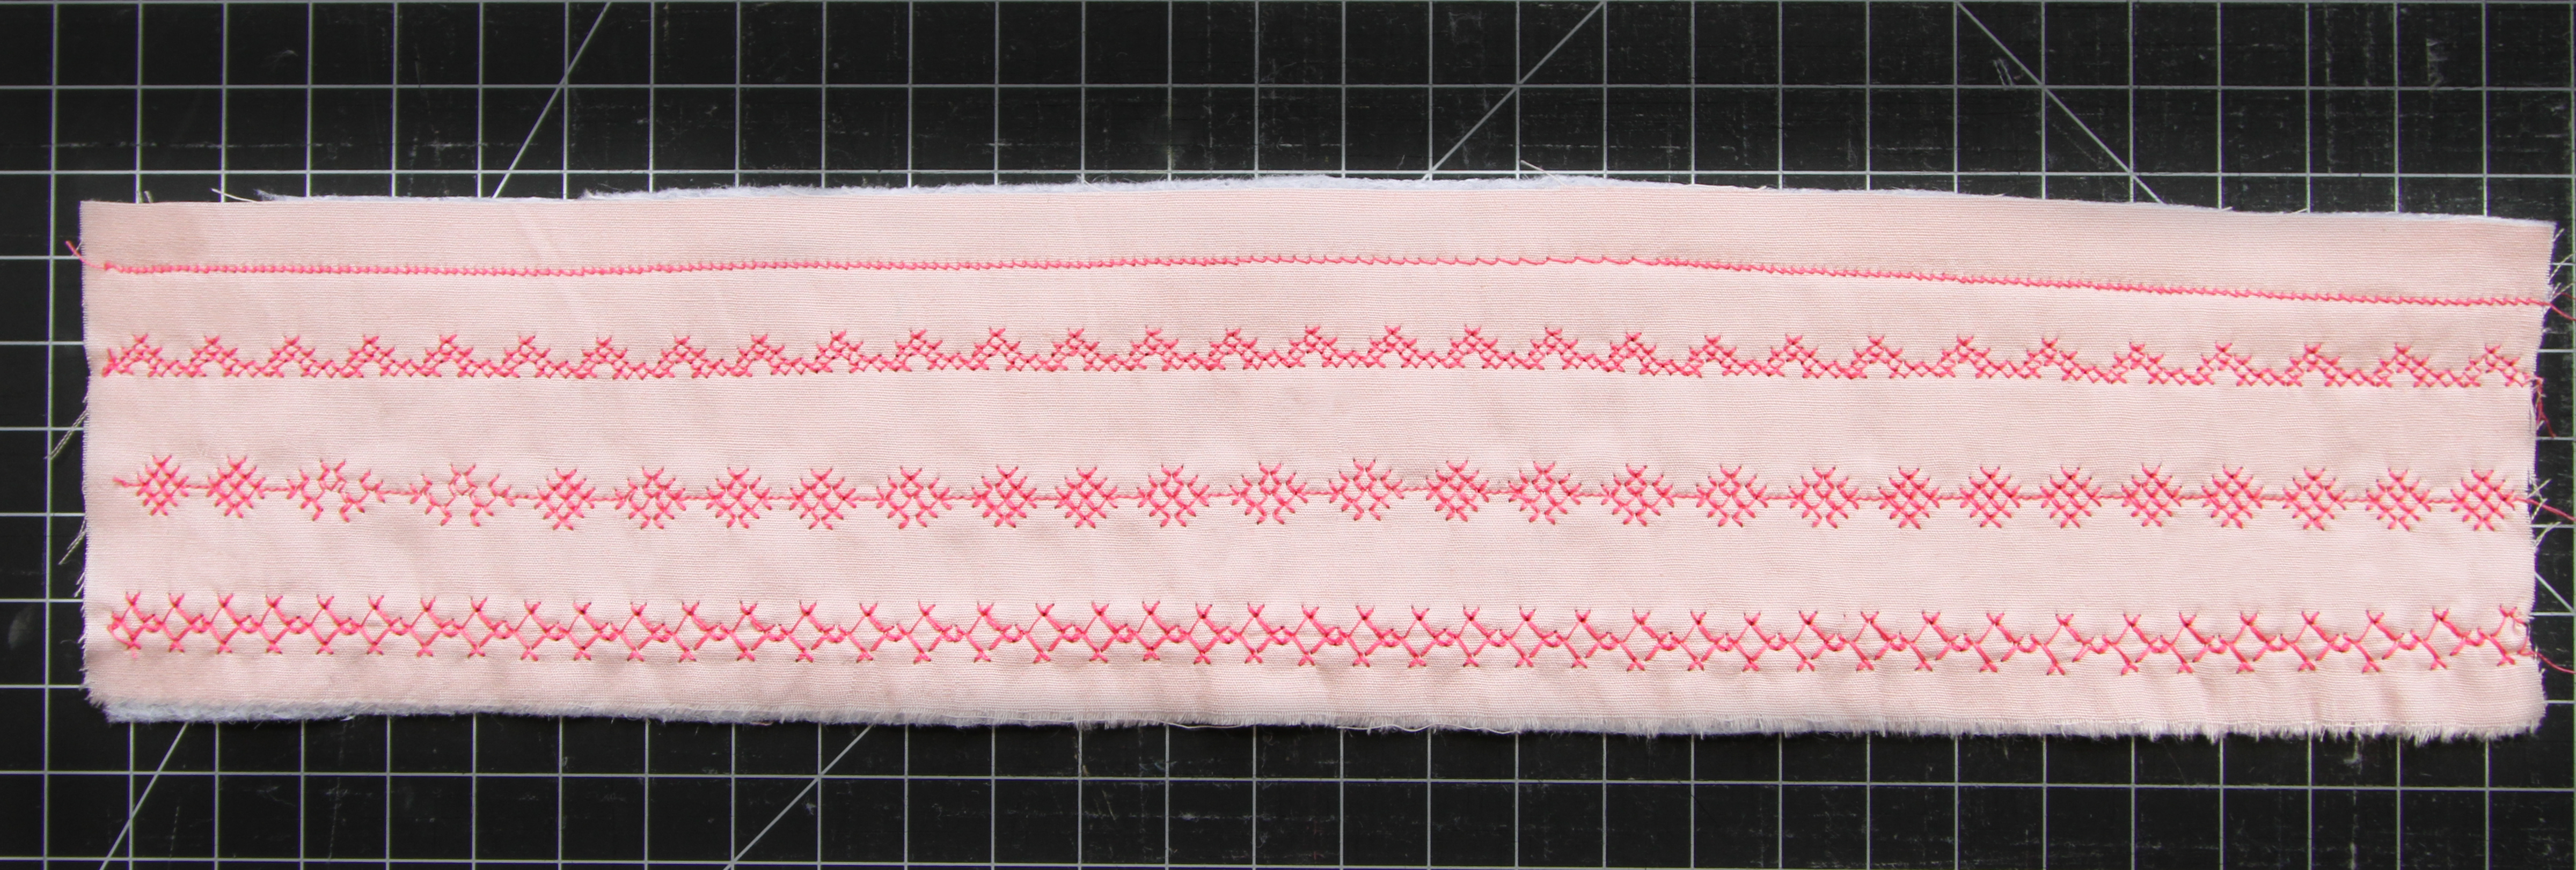
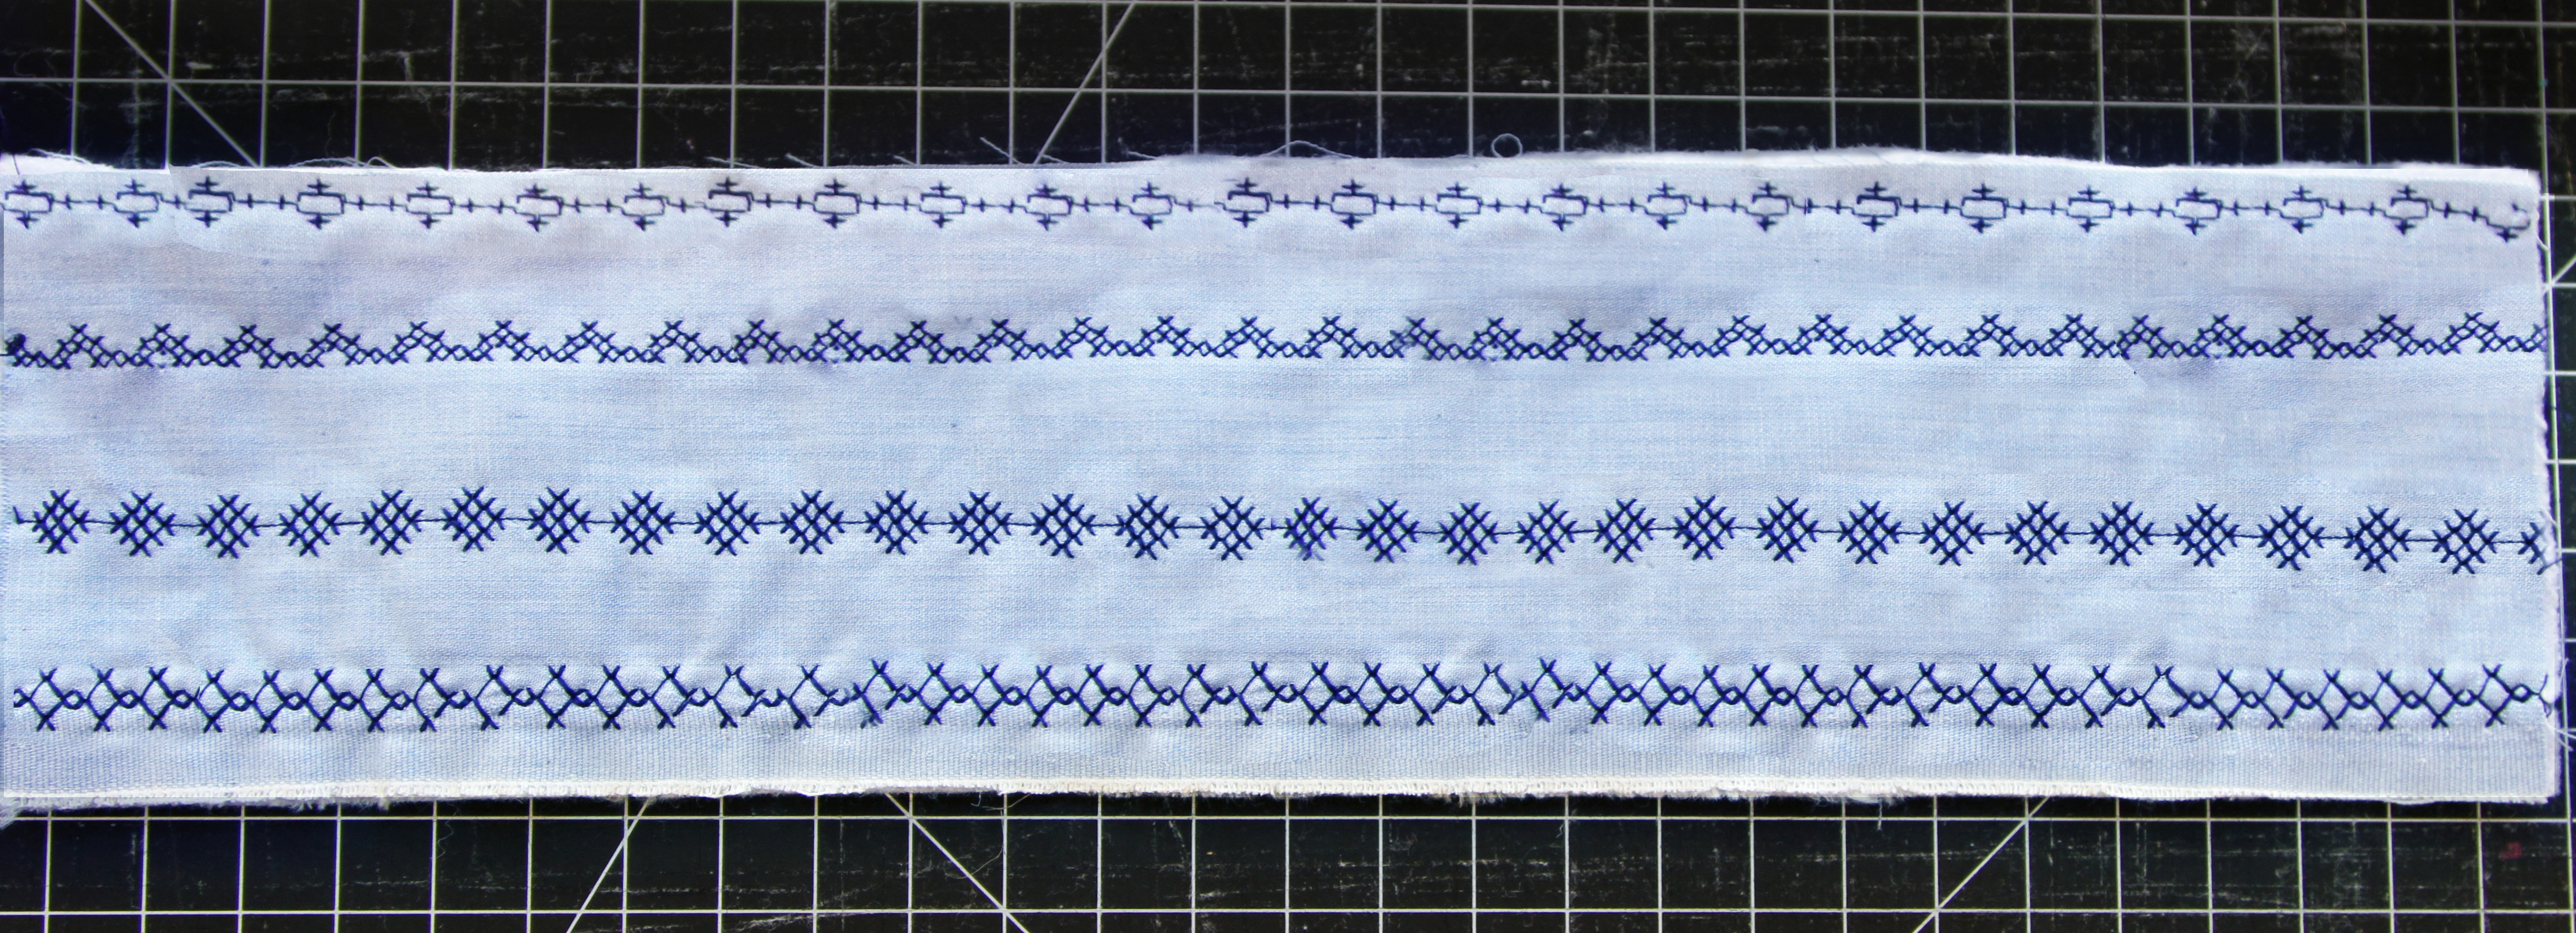
Step 2—Cross Stitches
Once all your pieces are cut and arranged as explained above, get all the solid pieces (AGF Pure Elements and AGF Denim Studio) and batting. Set aside to begin stitching. Make sure each piece is paired with its matching size batting for stitching.

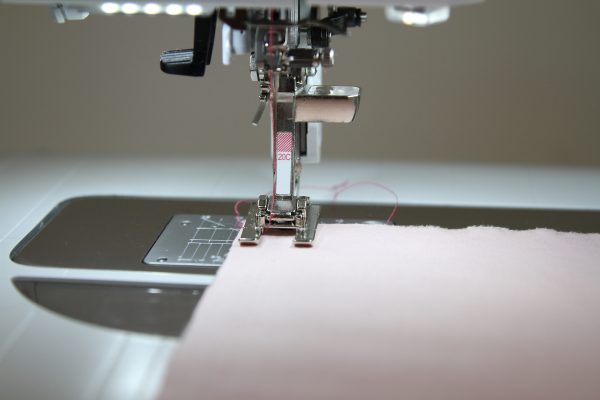
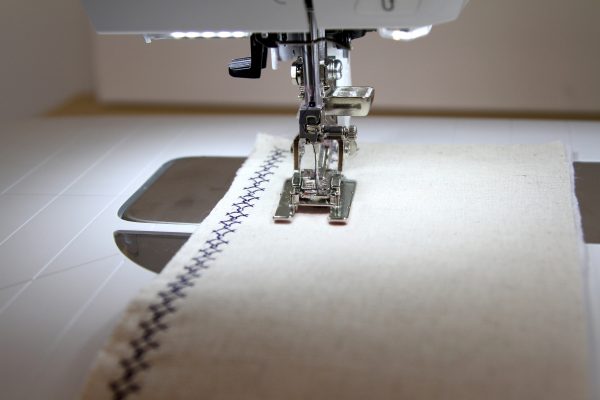
Prep your sewing machine with the BERNINA Open embroidery foot #20 C and thread it using Aurifil 2530. Get all the PE-420 pieces and begin stitching.
For this piece, we will use cross stitches #301, #332, #376, #156 (Decorative Stitch), #302, #11 (Practical Stitch), #316 and #333 respectably.
NOTE: You can use as many stitches as you prefer at in any given piece.
For the last PE-420 piece, I used cross stitches #301, #332, #376, and practical stitch #11.
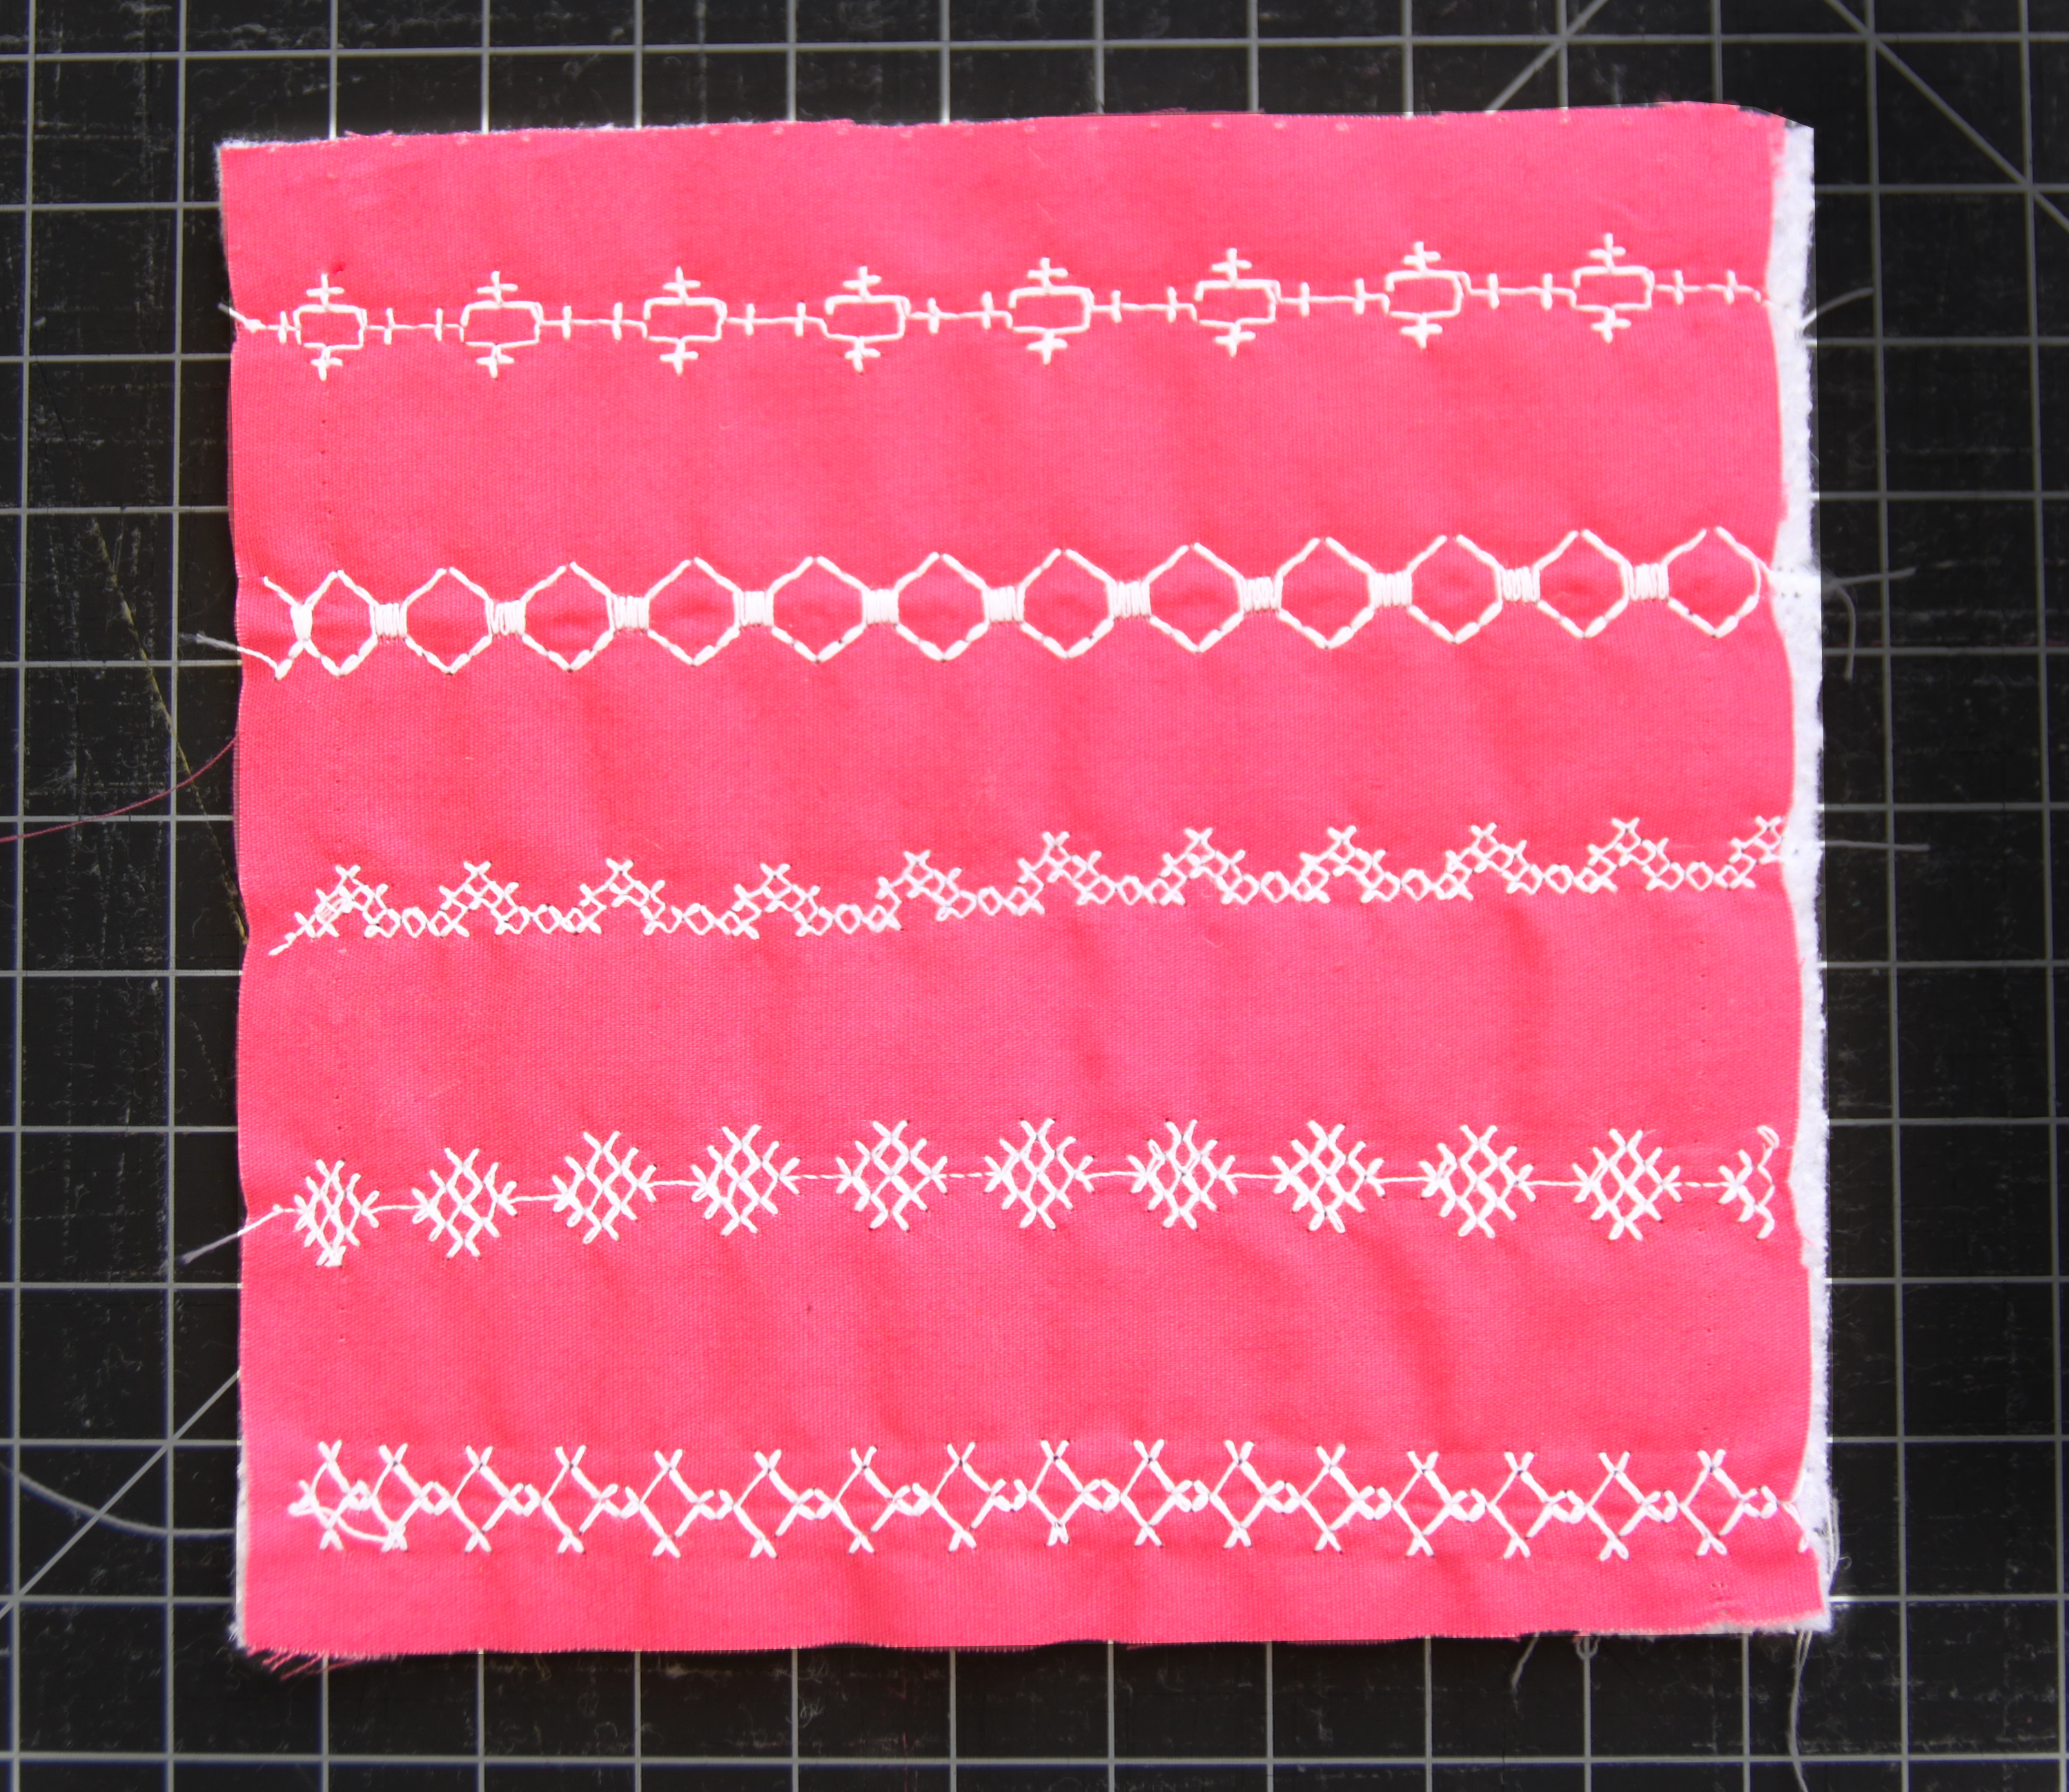
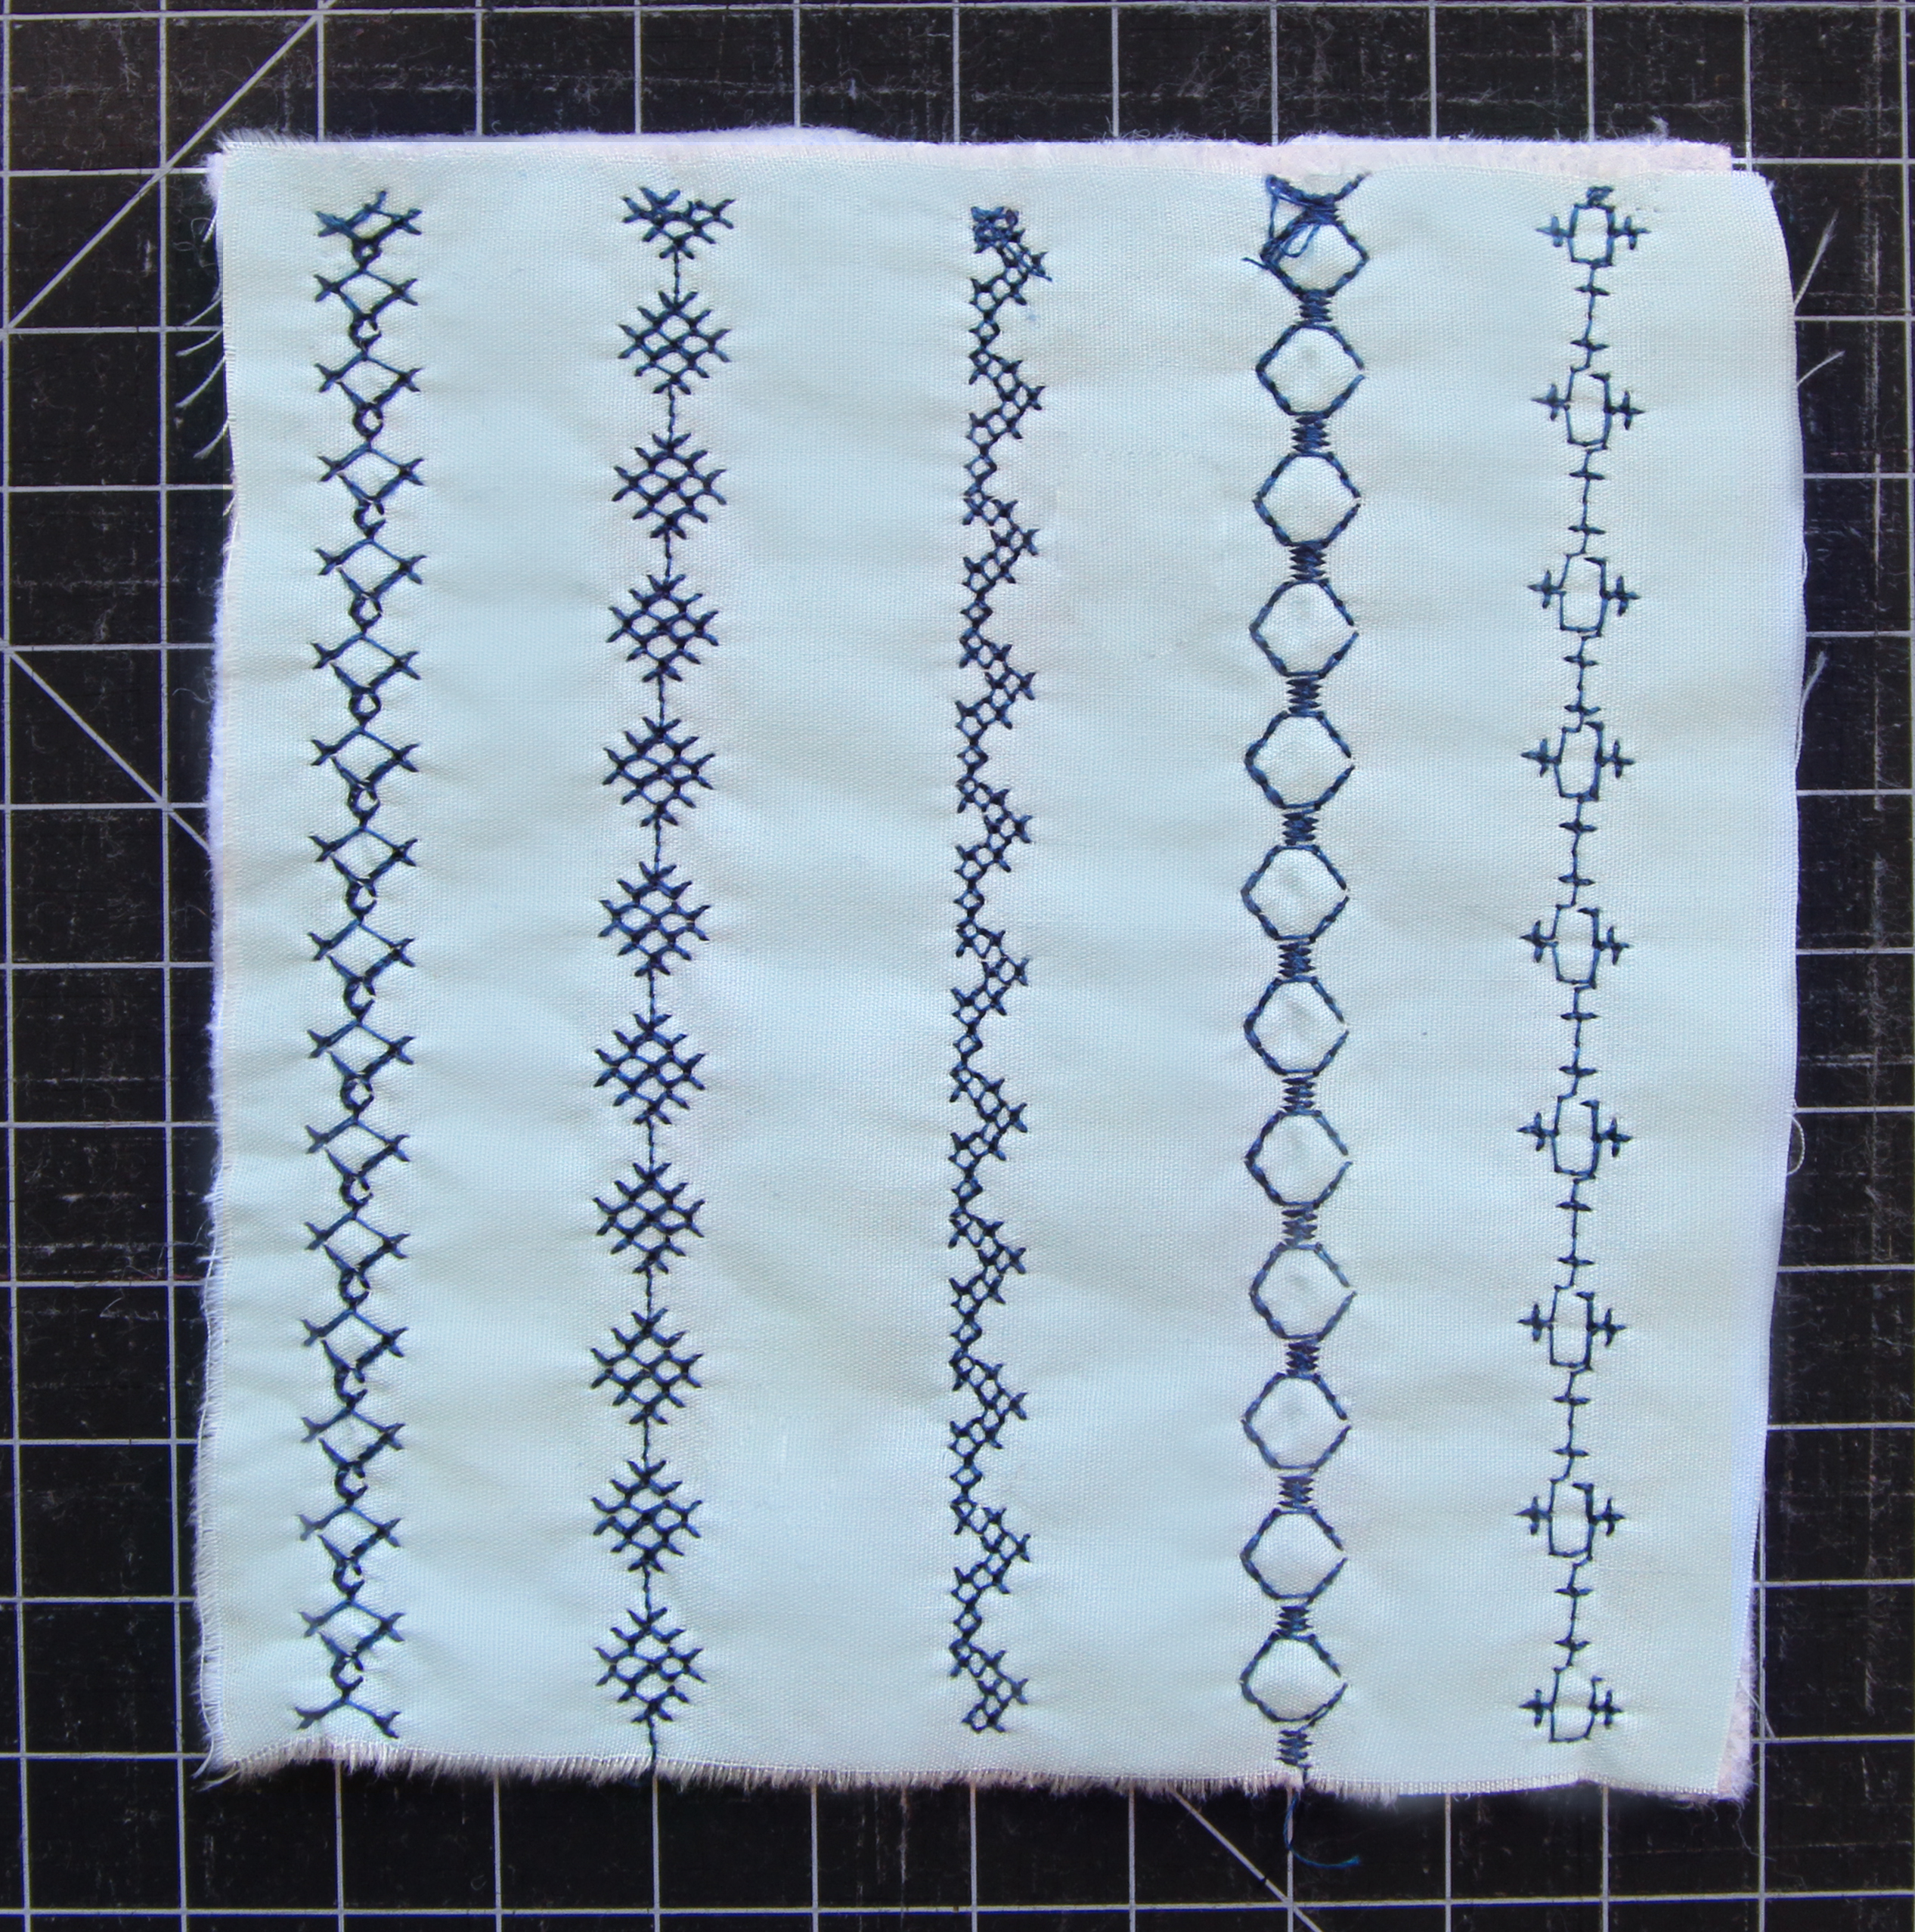
Now it’s PE-405 turn, change the thread to Aurifil to #2021 and begin stitching using:
Cross stitches #301, #332, #376, #302 and #316 respectably.
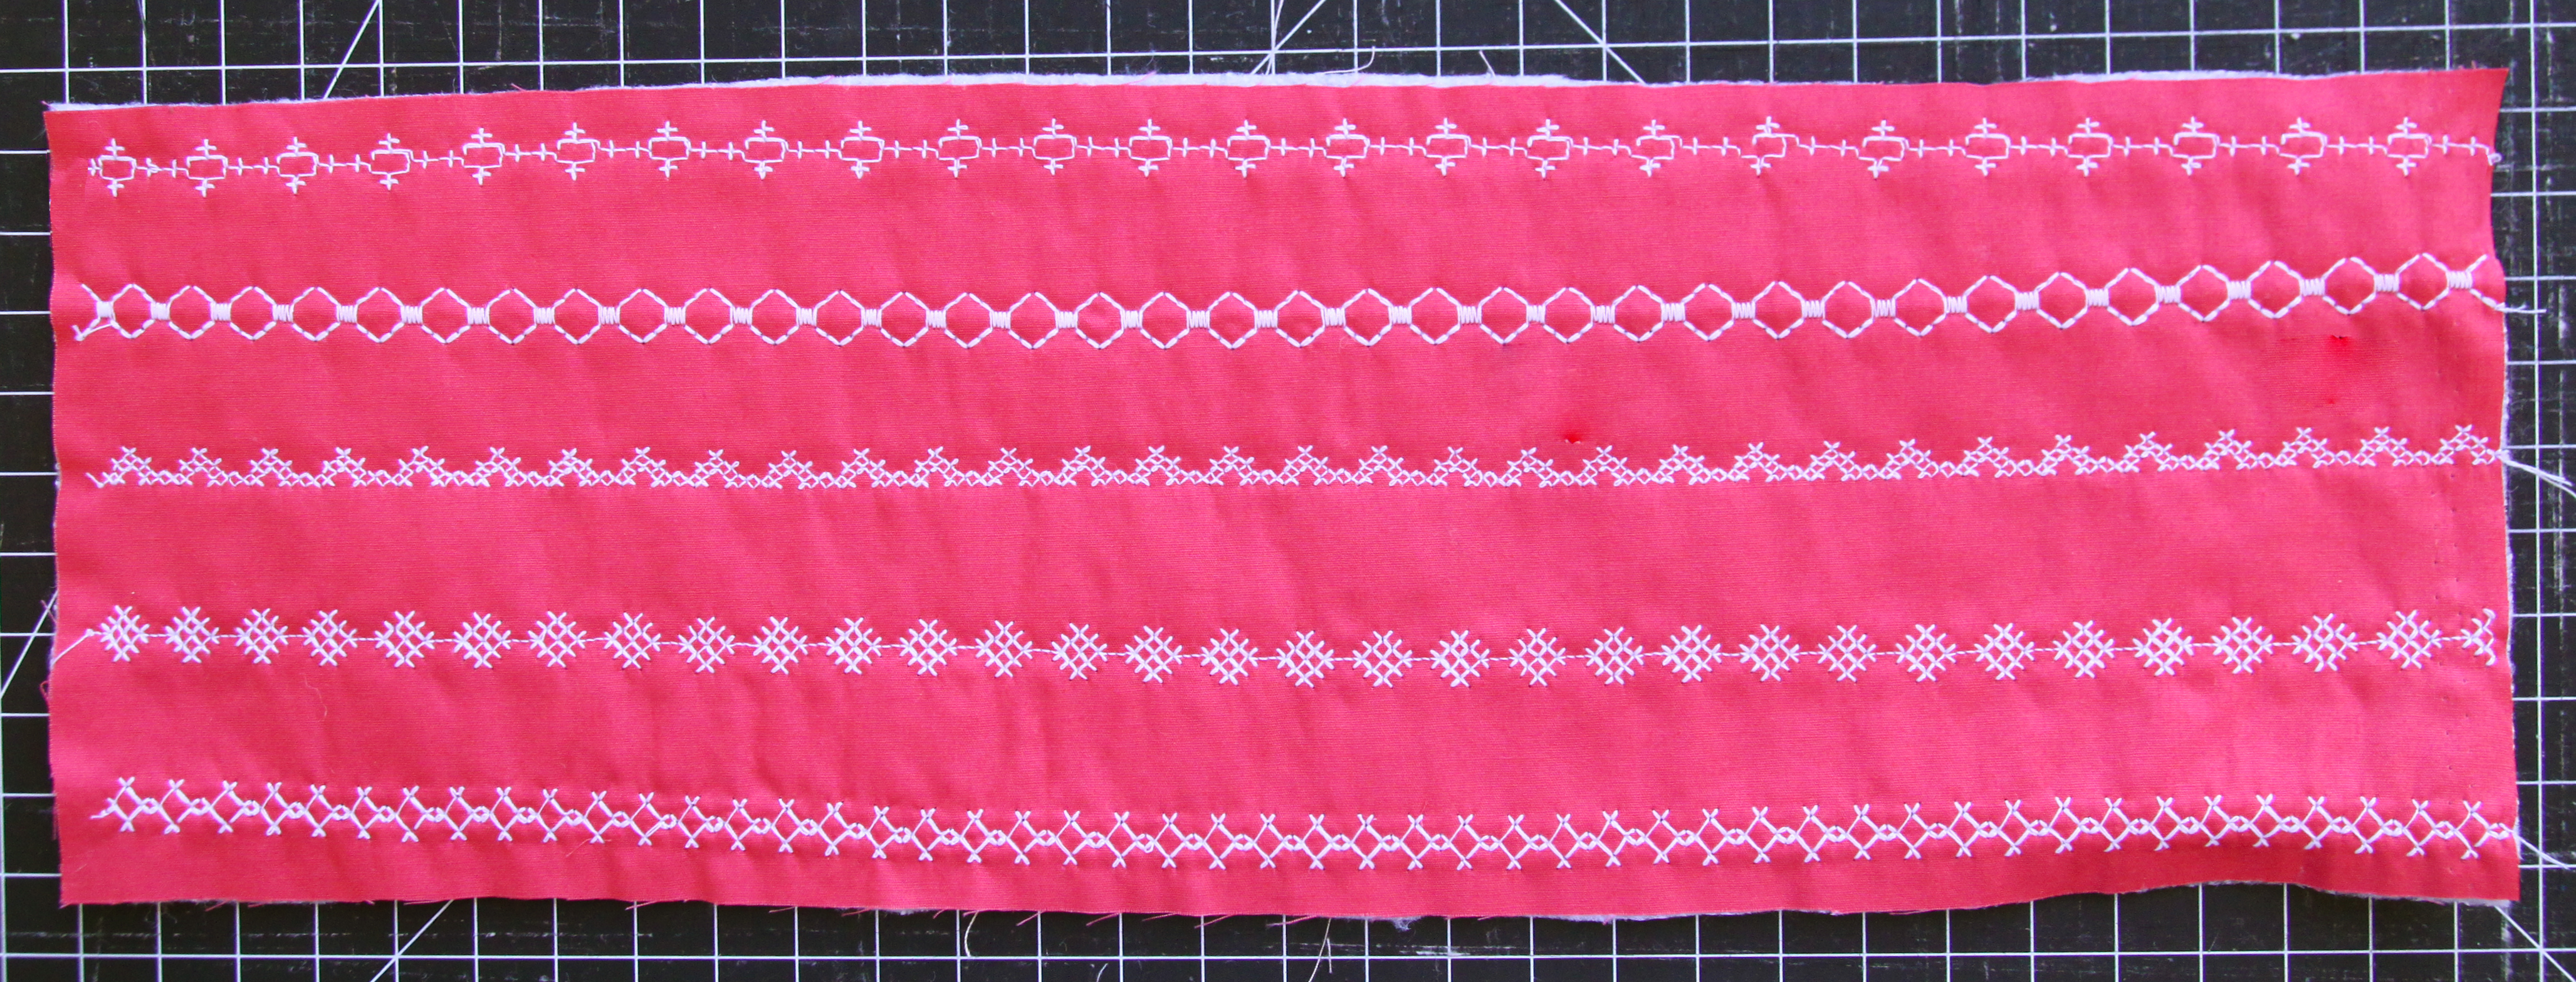
The same stitches are repeated for the last piece.
For DEN-S-204 change your machine thread to to Aurifil 2785 and stitch as instructed:
Cross stitches #301, #332, #376.
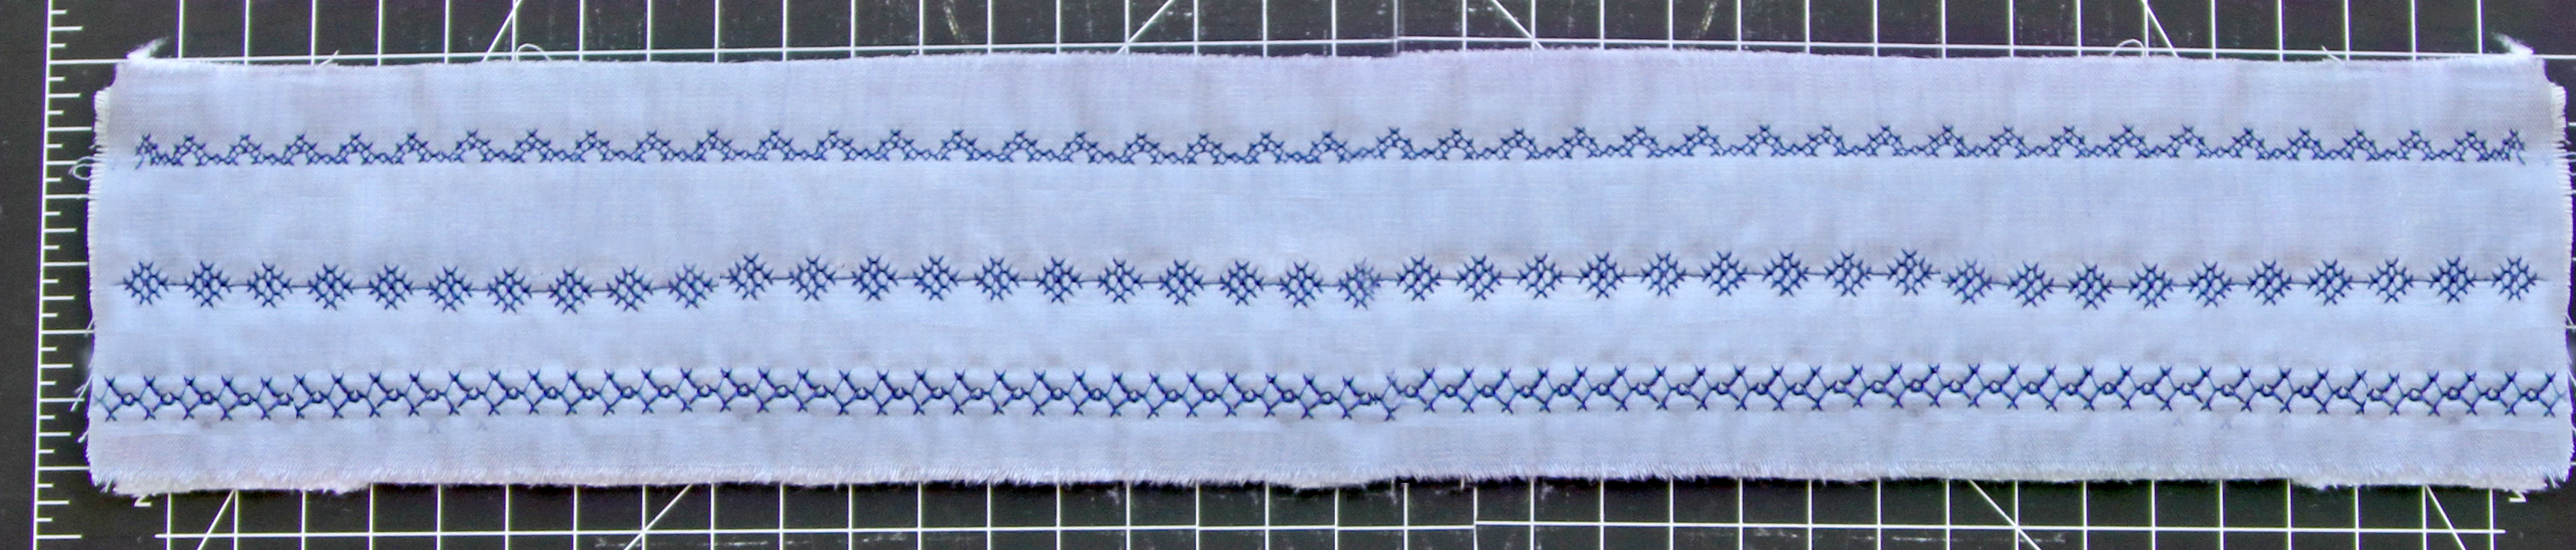
Cross stitches #301 and #332.

Cross stitches #301, #332, #376 and #316.
For DEN-L-4000, maintaining the same thread as before (Aurifil 2785) and start stitching.
Cross stitches #301, #332, #376, #302, #316 and #33.
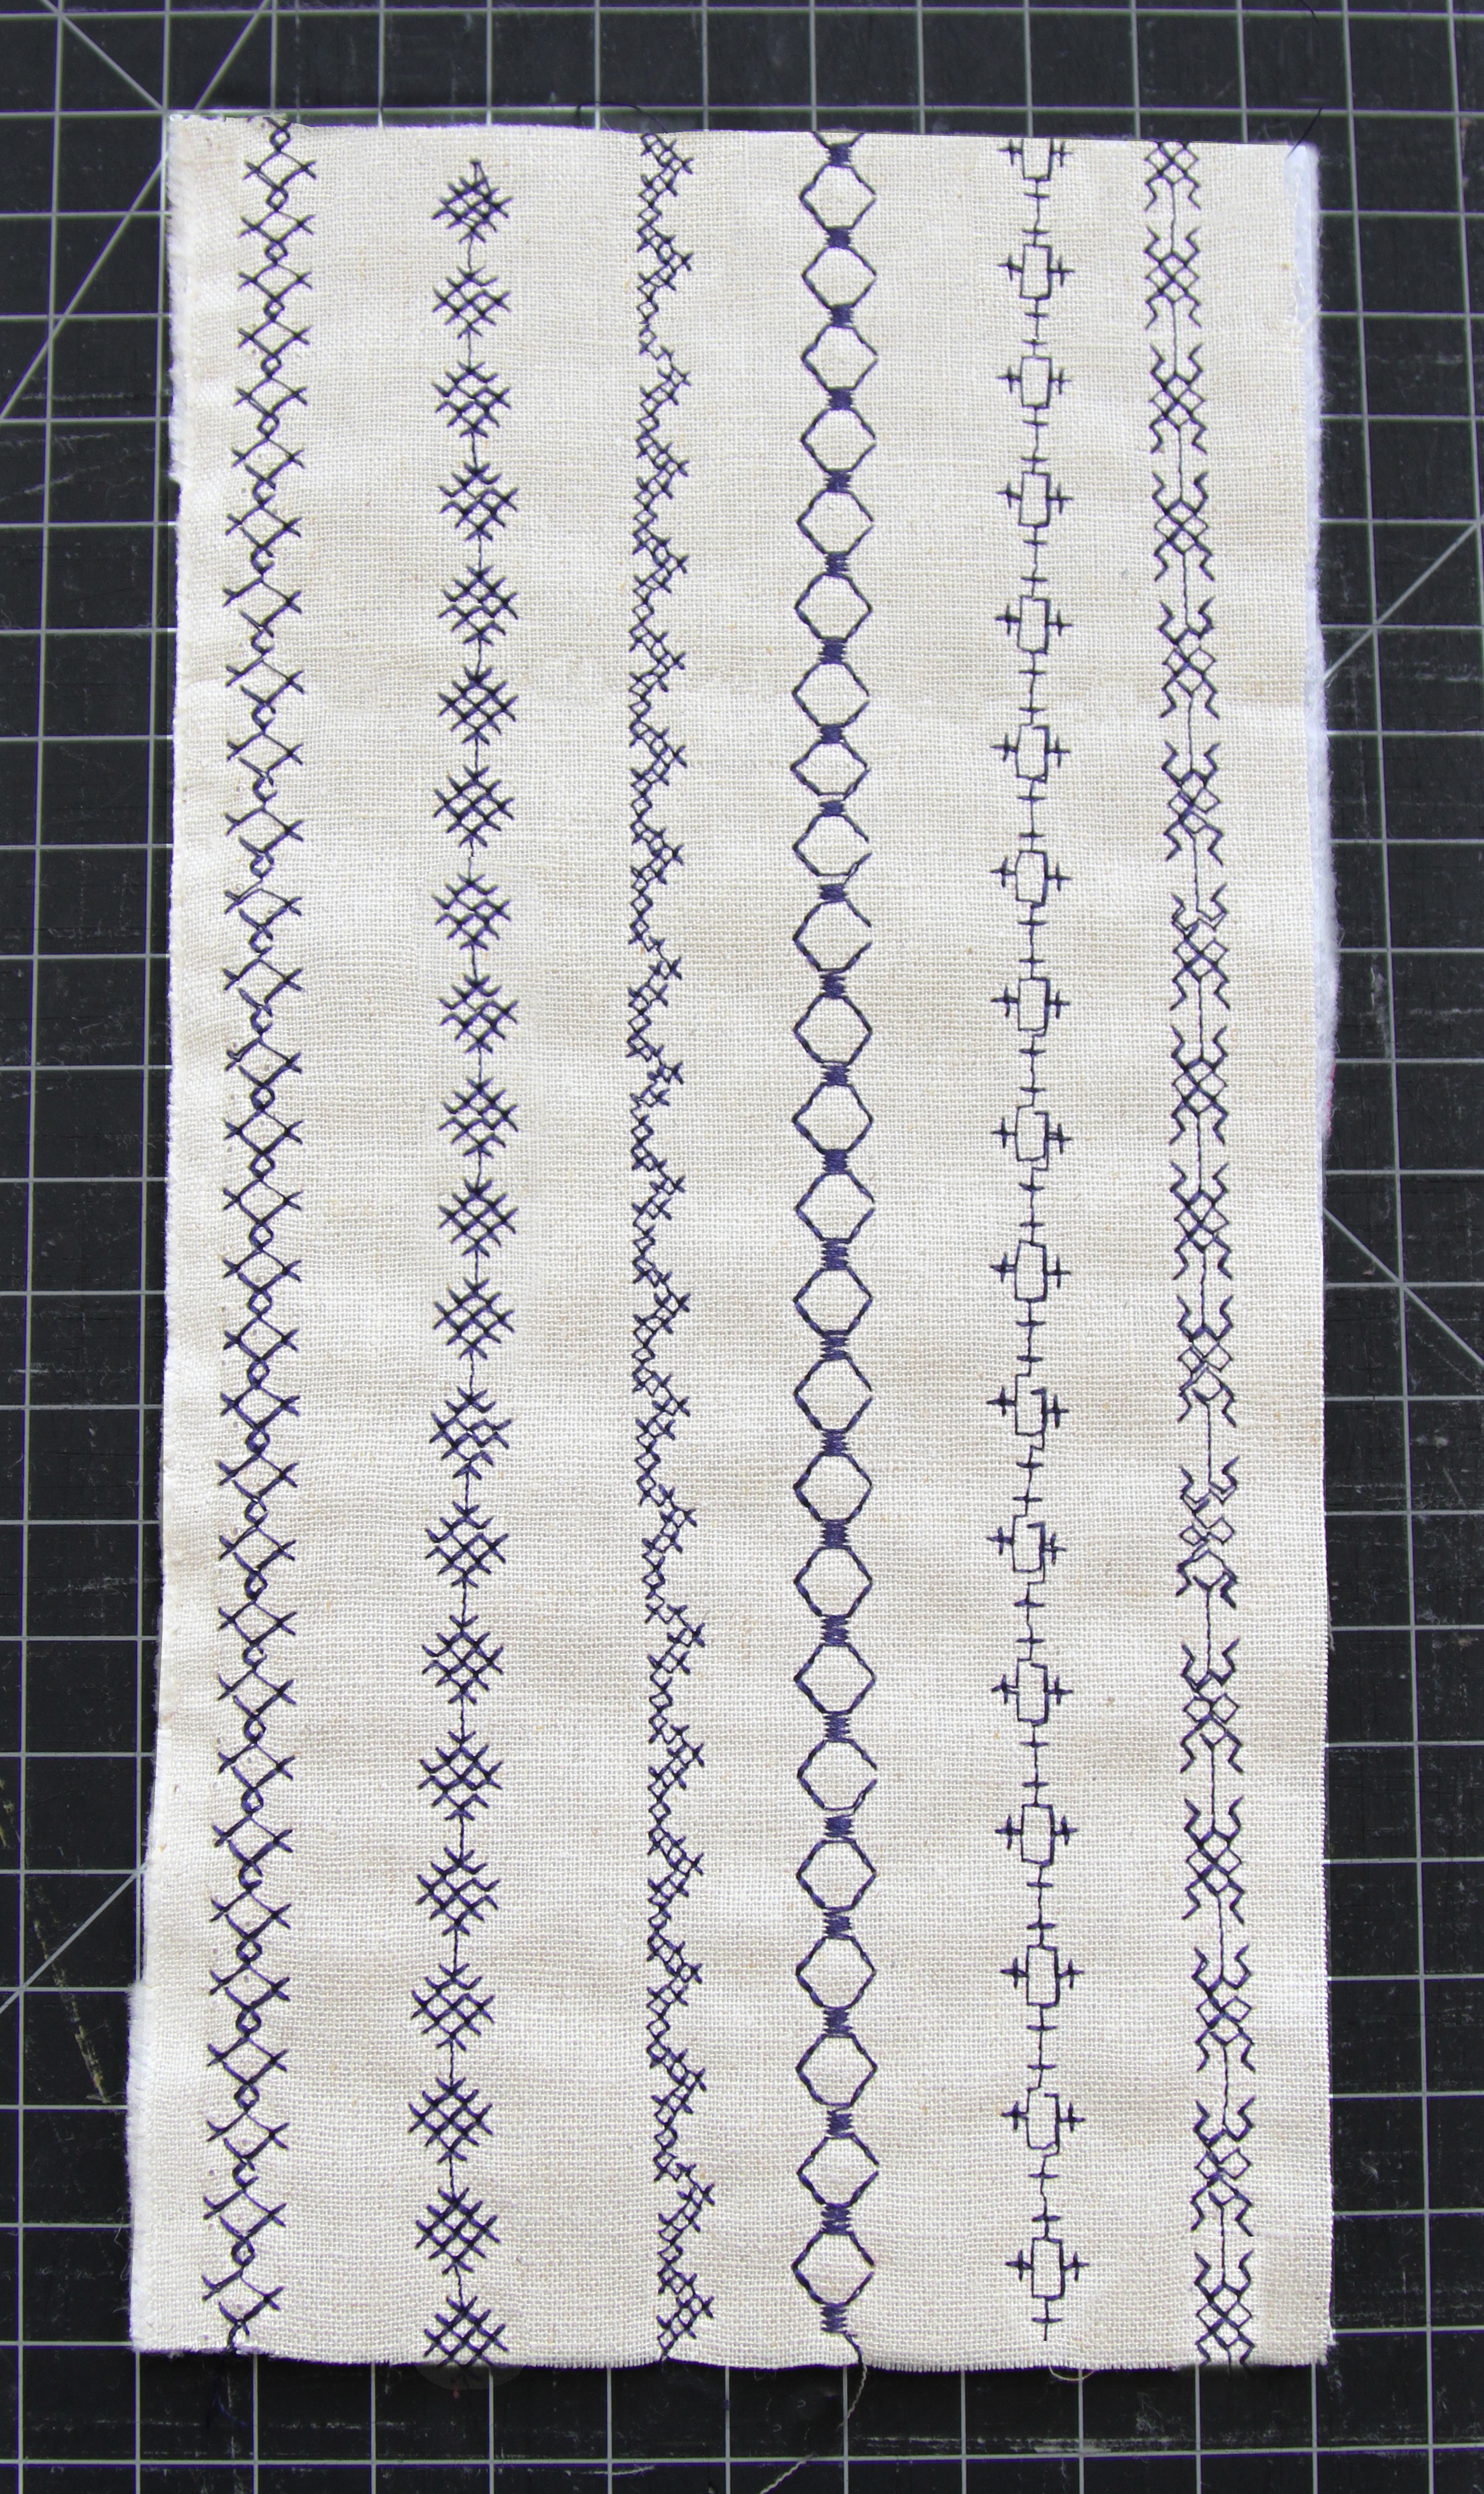
Cross stitches #301, #332, #376, #302 and #316.

With the same thread stitch the last pieces of PE-434, all of them with the same cross stitches.
Cross stitches #301, #332, #376, #302 and #316.
Step 3—Connect Pieces
NOTE: We use 1/4 seam allowance
Prep your machine with (BERNINA Reverse Pattern Foot # 1D) and thread it with Aurifil #2021.
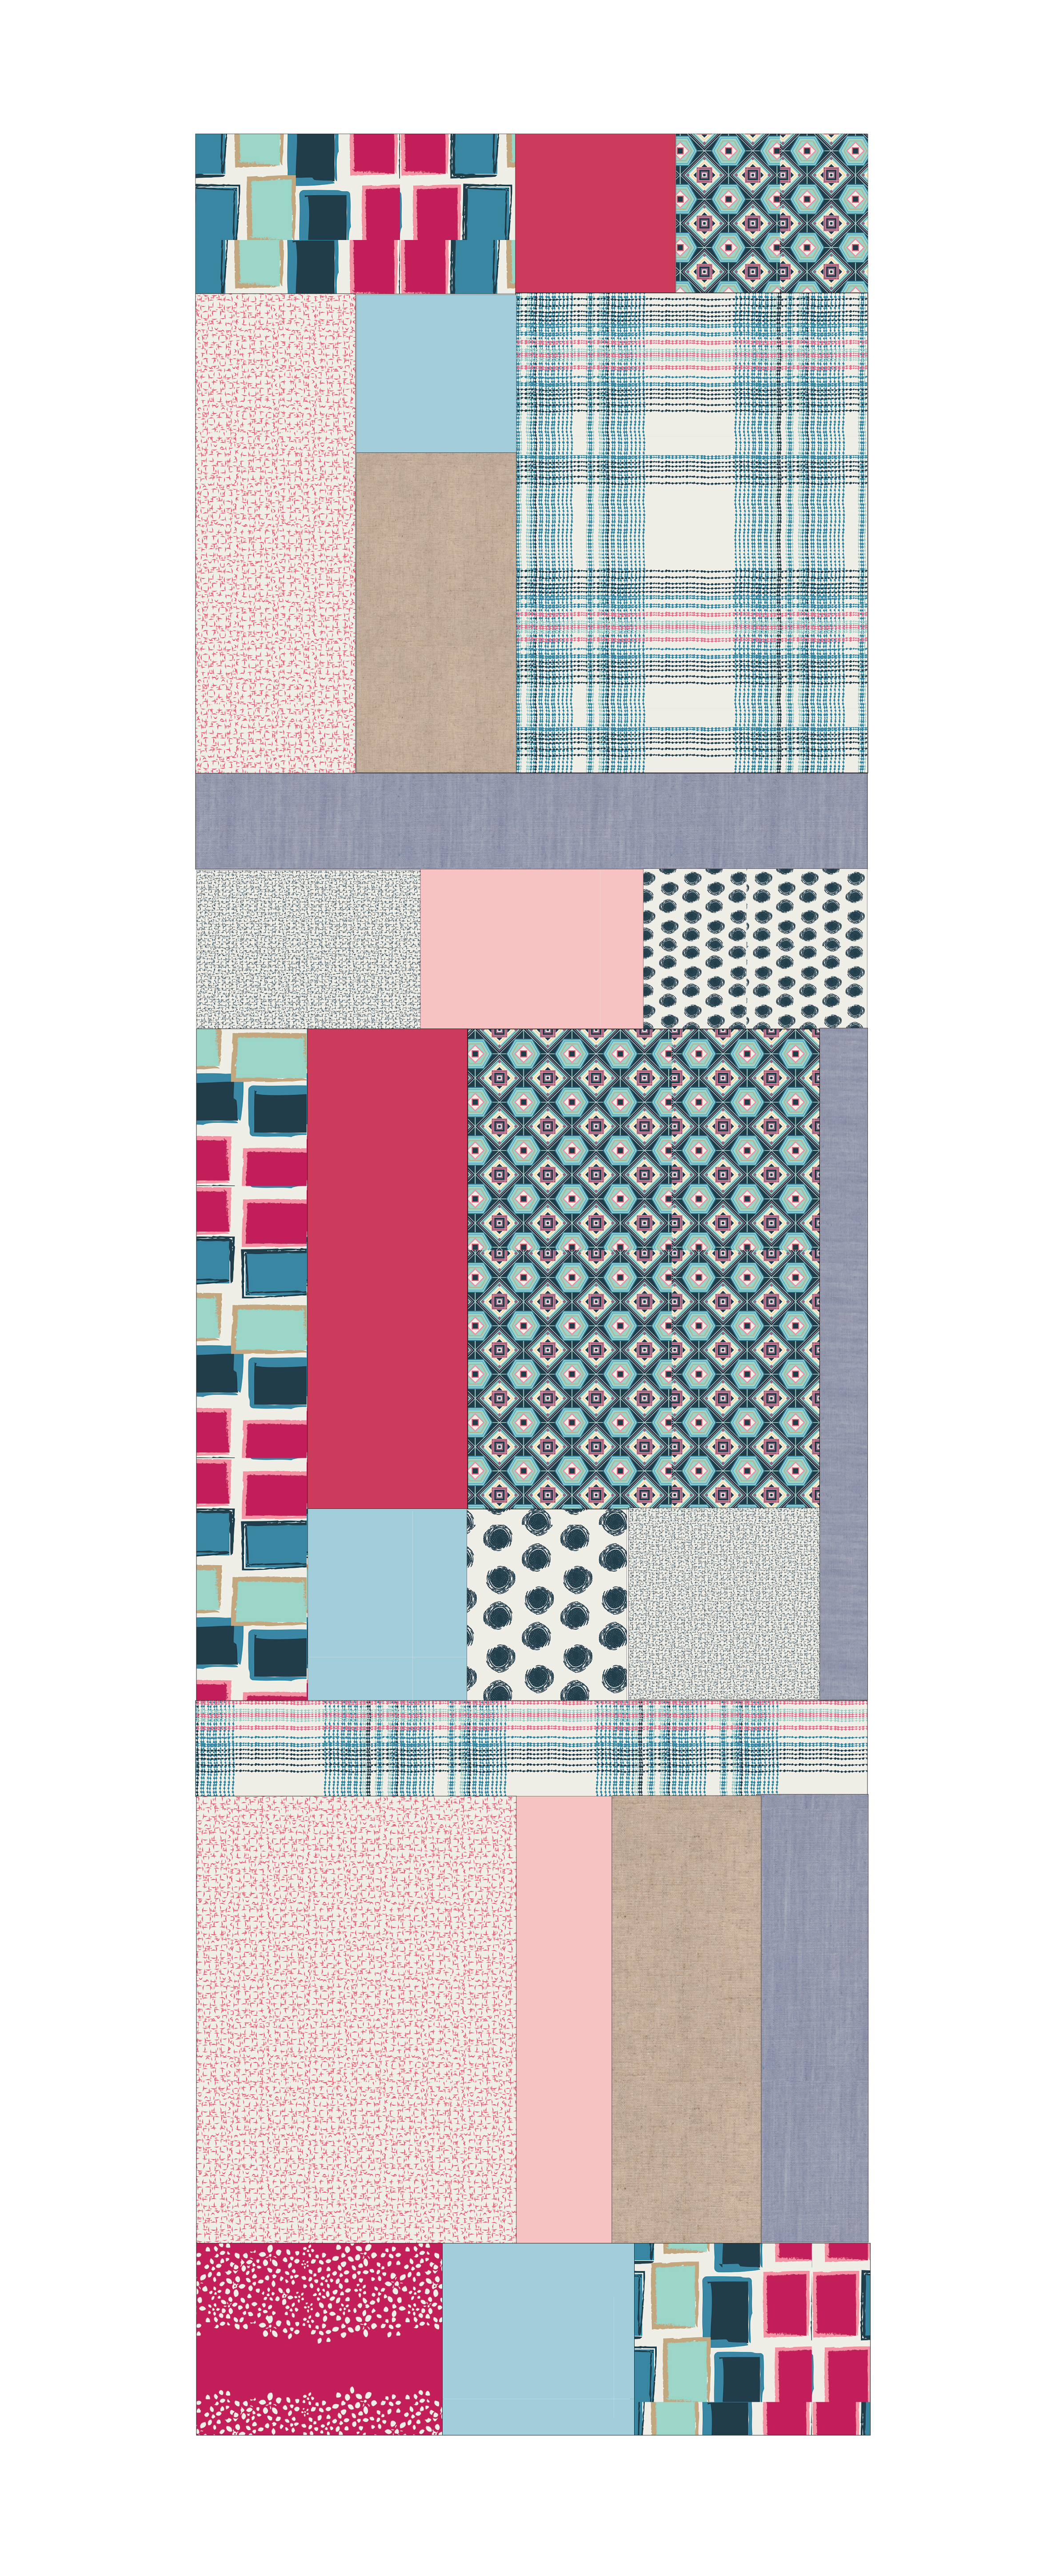
As the name it states, the quilt-as-you-go method is a quilting technique that will allow you to quilt freely. However, in this case I made a quilt-as you-go design to follow while quilting (row combination). Start by connecting the first row (see step 1 row combination image). Connect A piece to B and lastly B piece to C piece. You will follow this direction with every row combination.

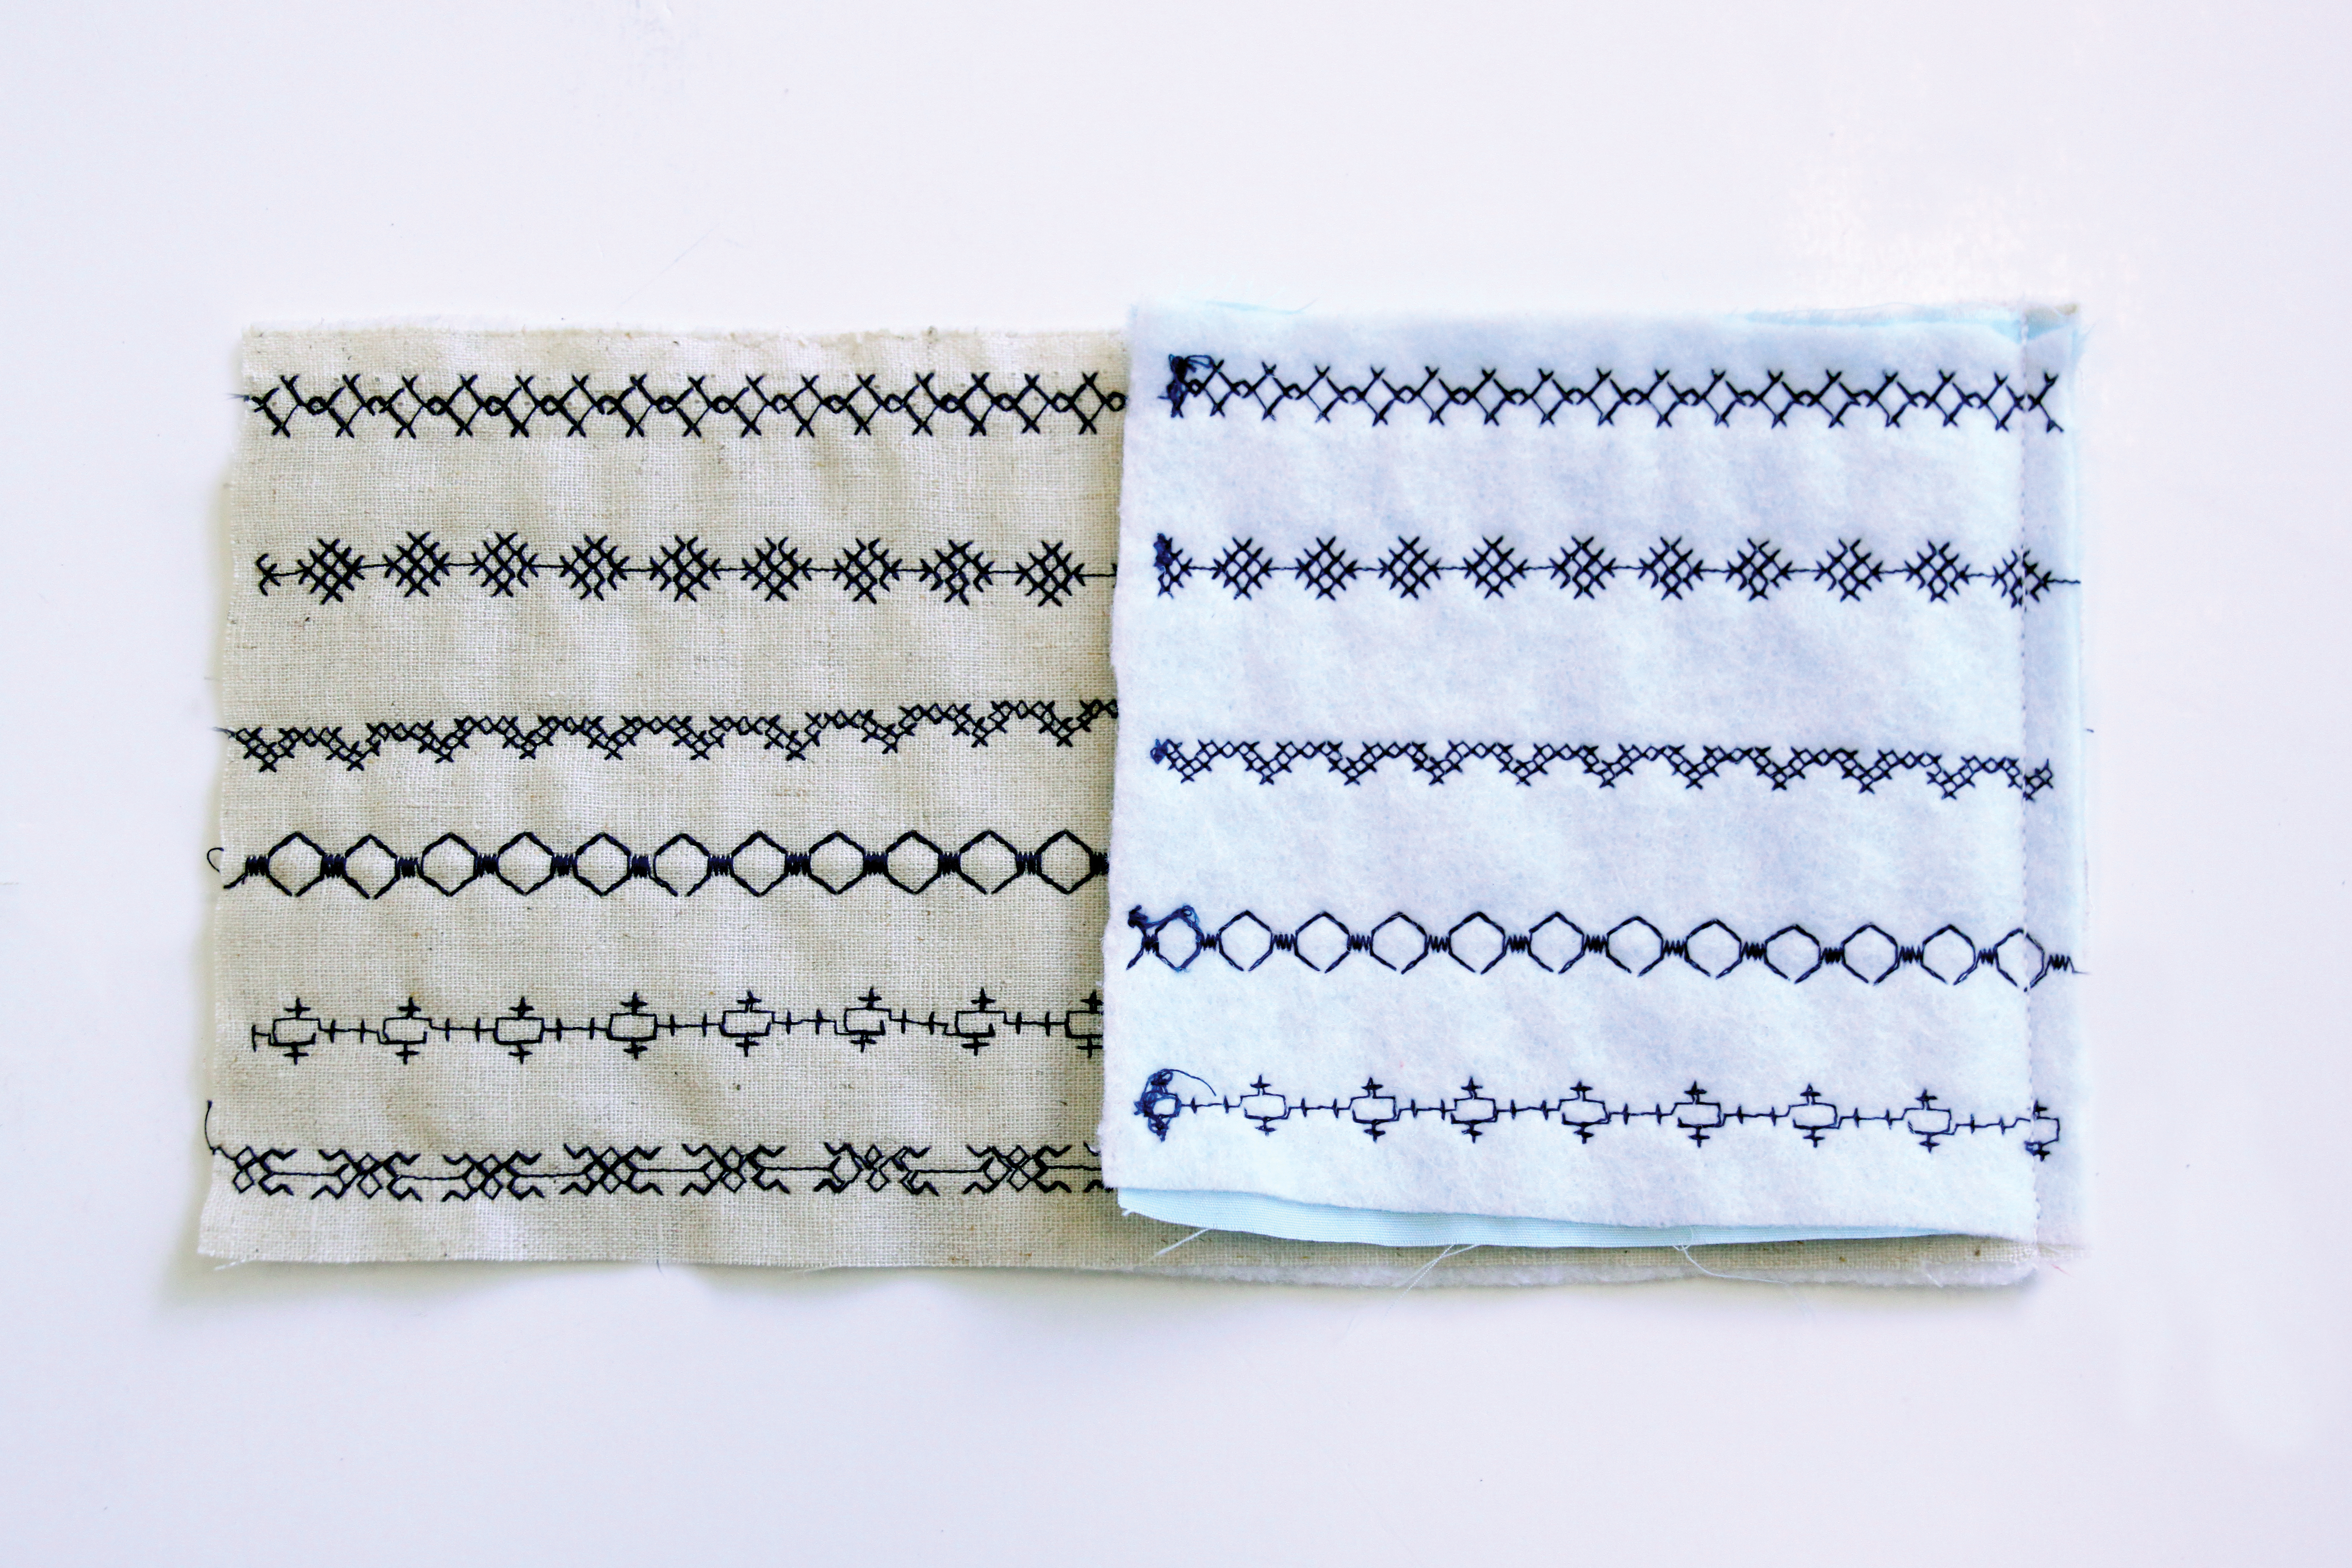
For the second row, first attach the 5” by 10” piece of DEN-L-4000 and the 5” by 5” piece of PE-434.
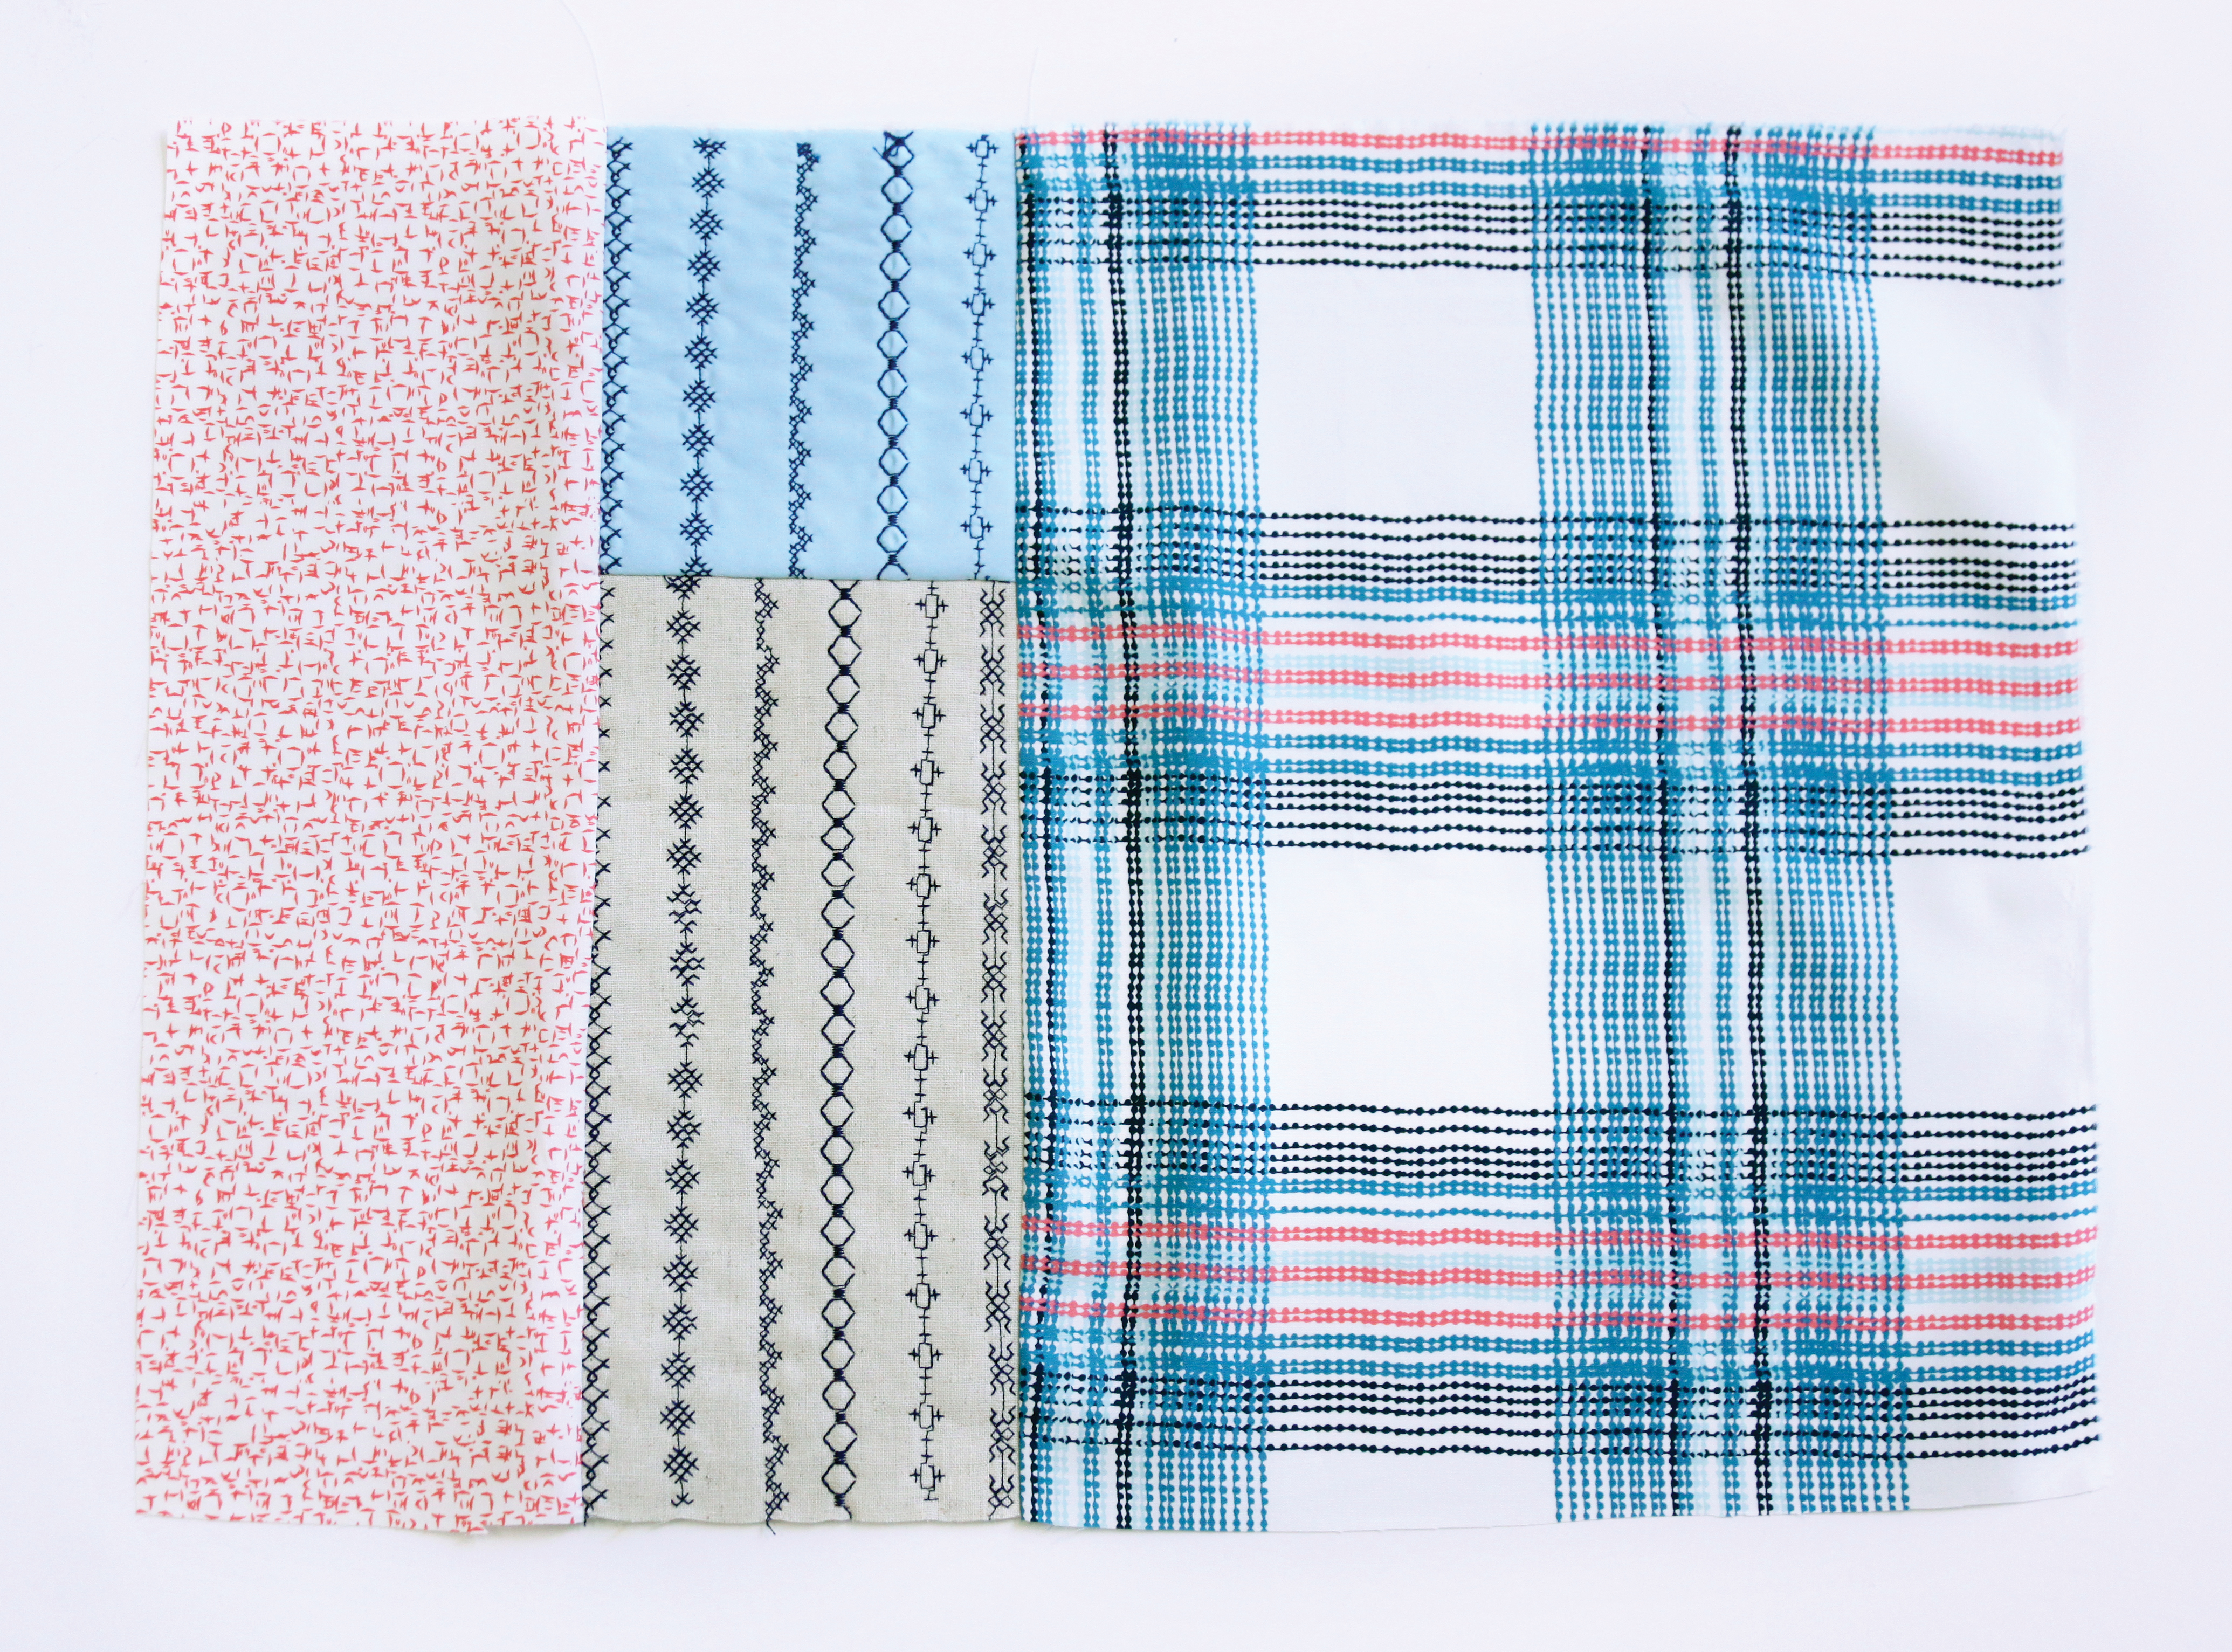
Later, attach the 5” by 15” of DAR-64305 to the piece created above. Stitch the 15” part.

Finish the second row by attaching the 15” by 11” piece of DAR-54301.
The third row it’s just one 21” by 3” strip so we connect that to the second row, as instructed on the diagram below.

Now lets begin the fourth row. Take the 7” by 5” pieces of DAR-54305, PE-420 and DAR-54309. Sew them together as explain in the image below.
Now the fifth row it’s a bit tricky but not hard. First, grab the two 5” by 6” of PE-434 and DAR-54309, and the 6” by 6” of DAR-54305. Sew them together and set aside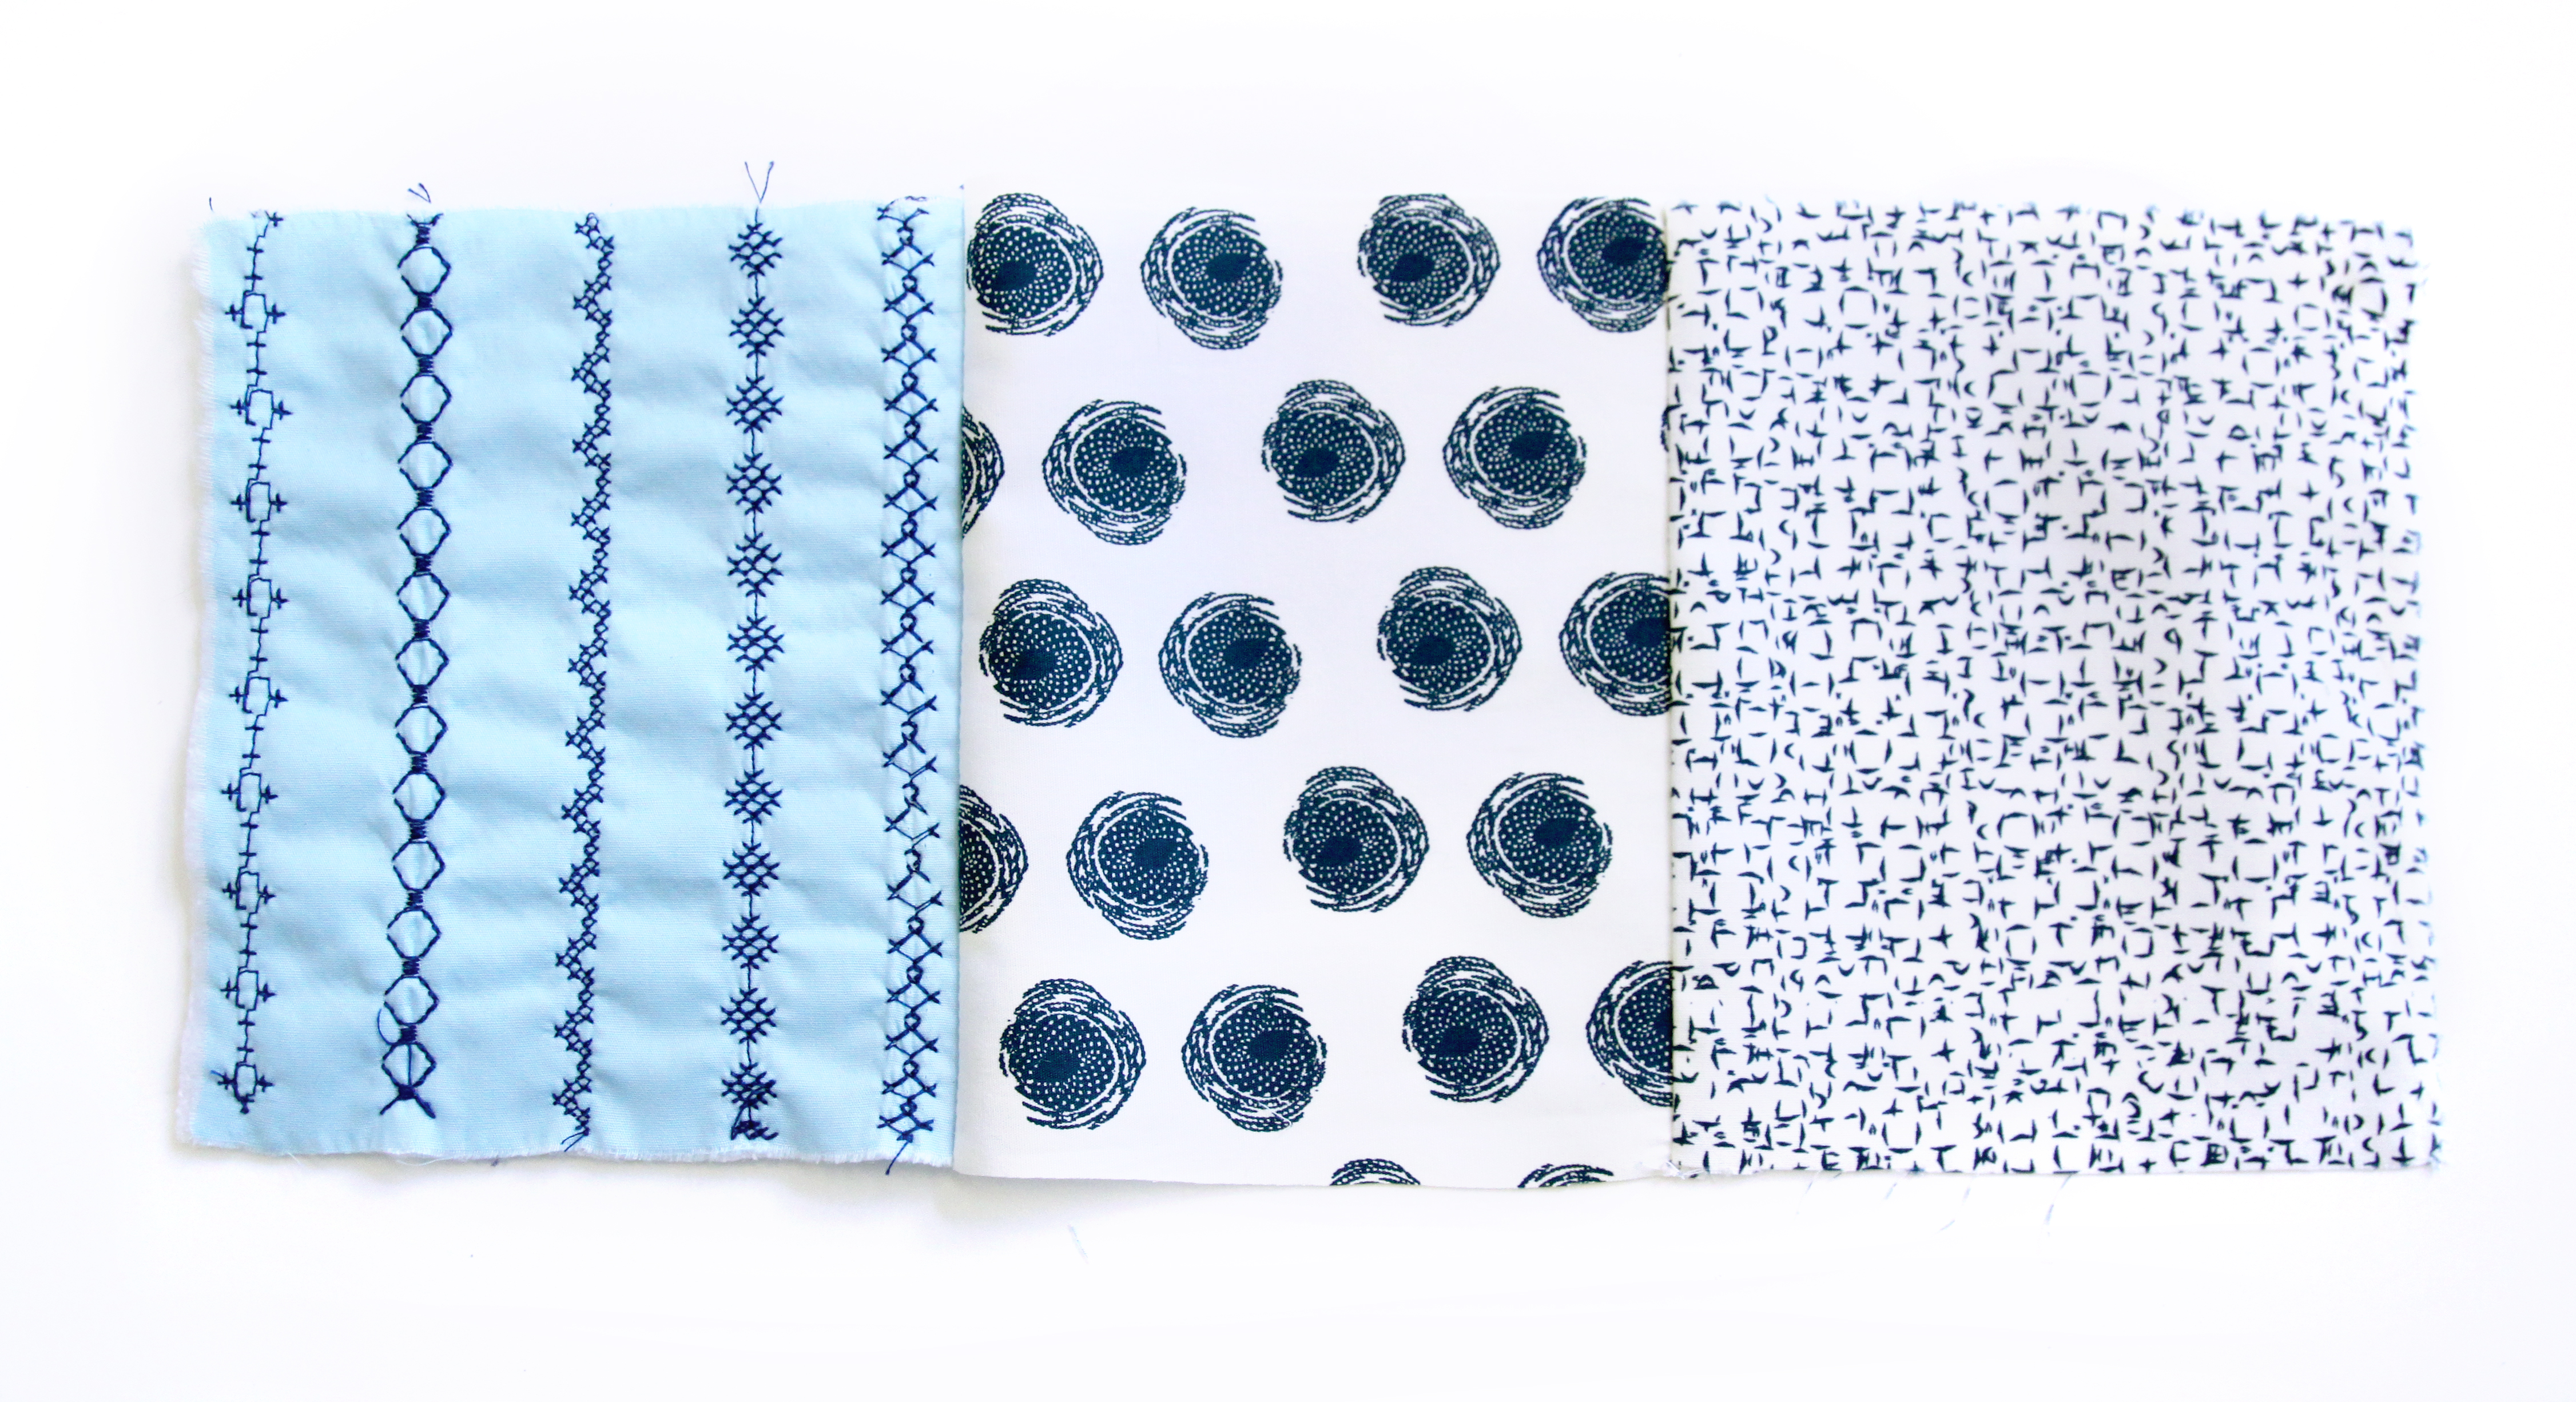
Then take the 11” by 5” of PE-405 and the 5” by 15” of DAR-64306 and sew them together.
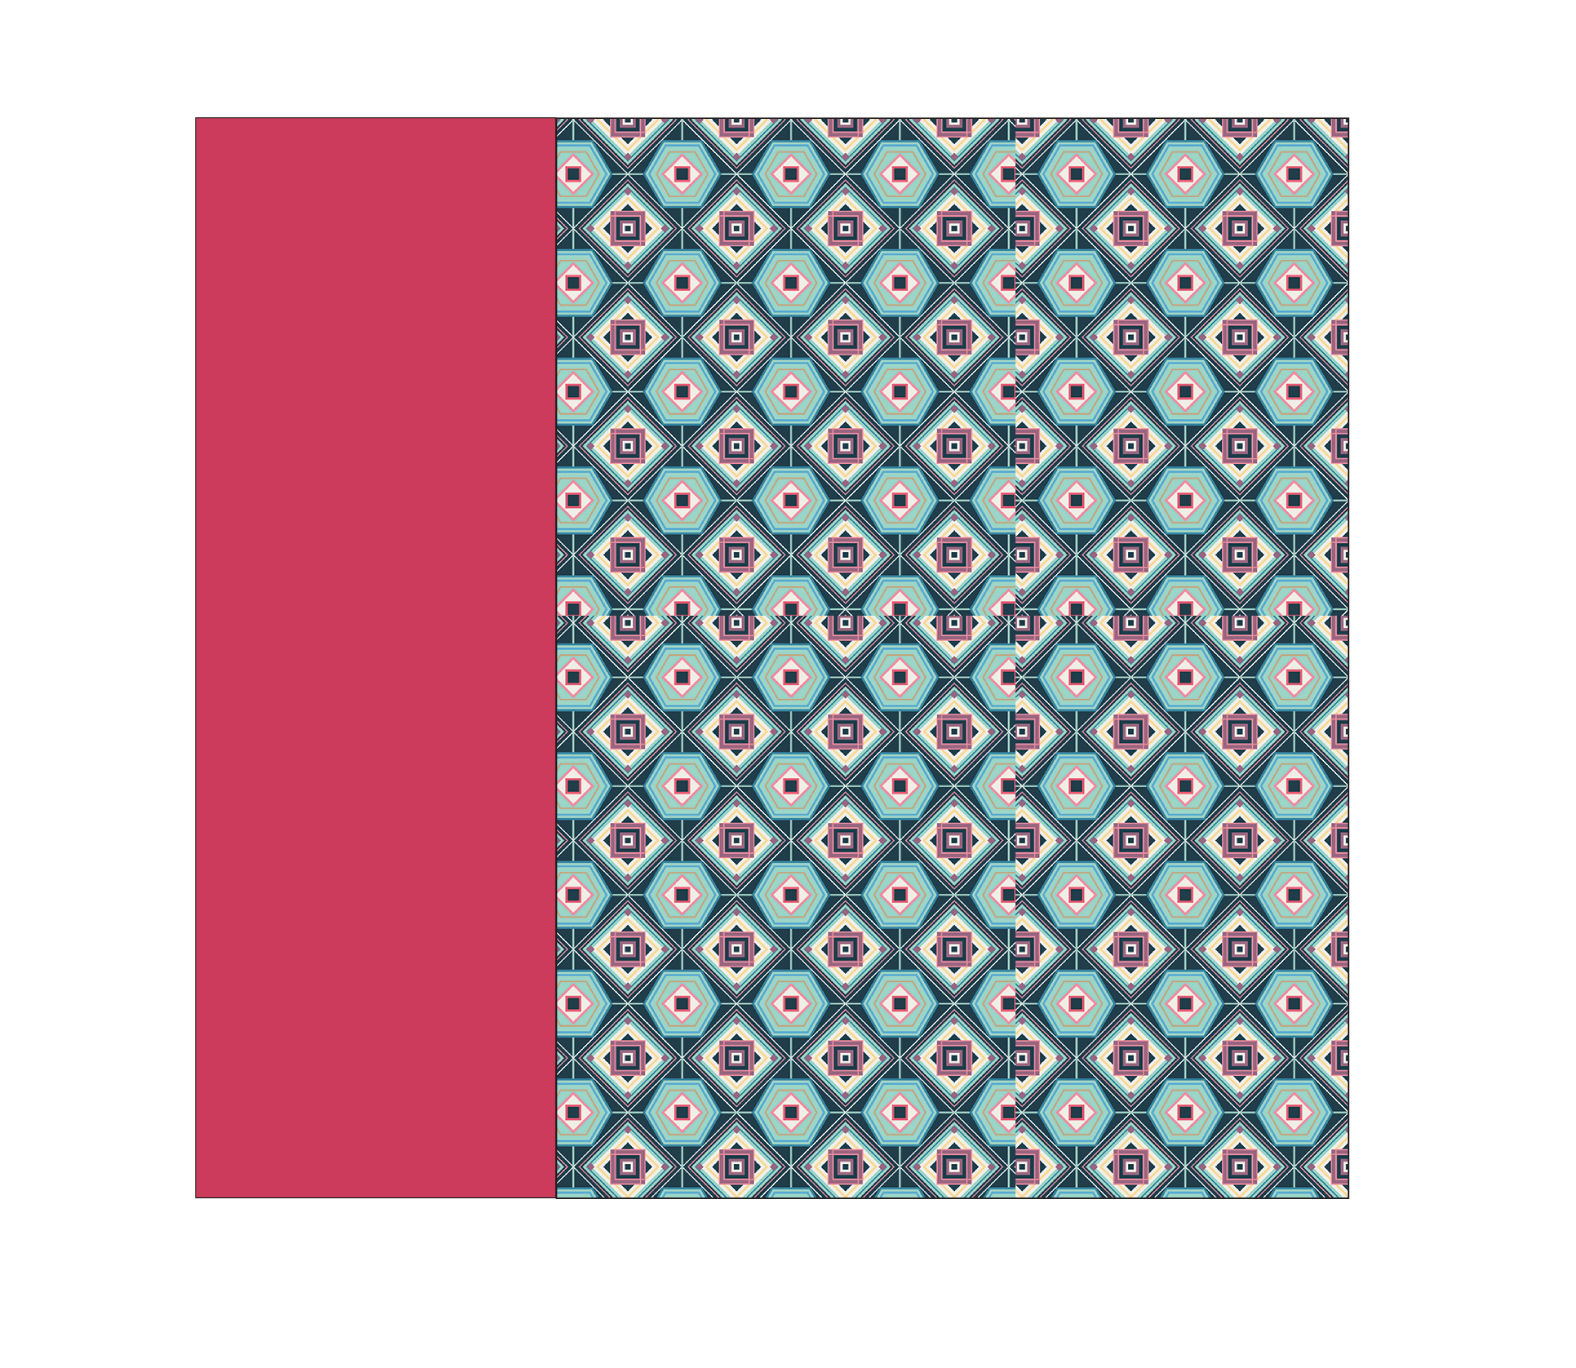
Attach the two pieces that you just created together as explained on the diagram below.

Lastly, grab the 21” by 3 1/2” of DAR-64311 and the 21 by 1 1/2 of DEN-S-2004. Attach all pieces together to complete the fifth row.

The sixth row is just one strip of 21” by 3” of DAR-54301. We will attach that later to the seventh row.
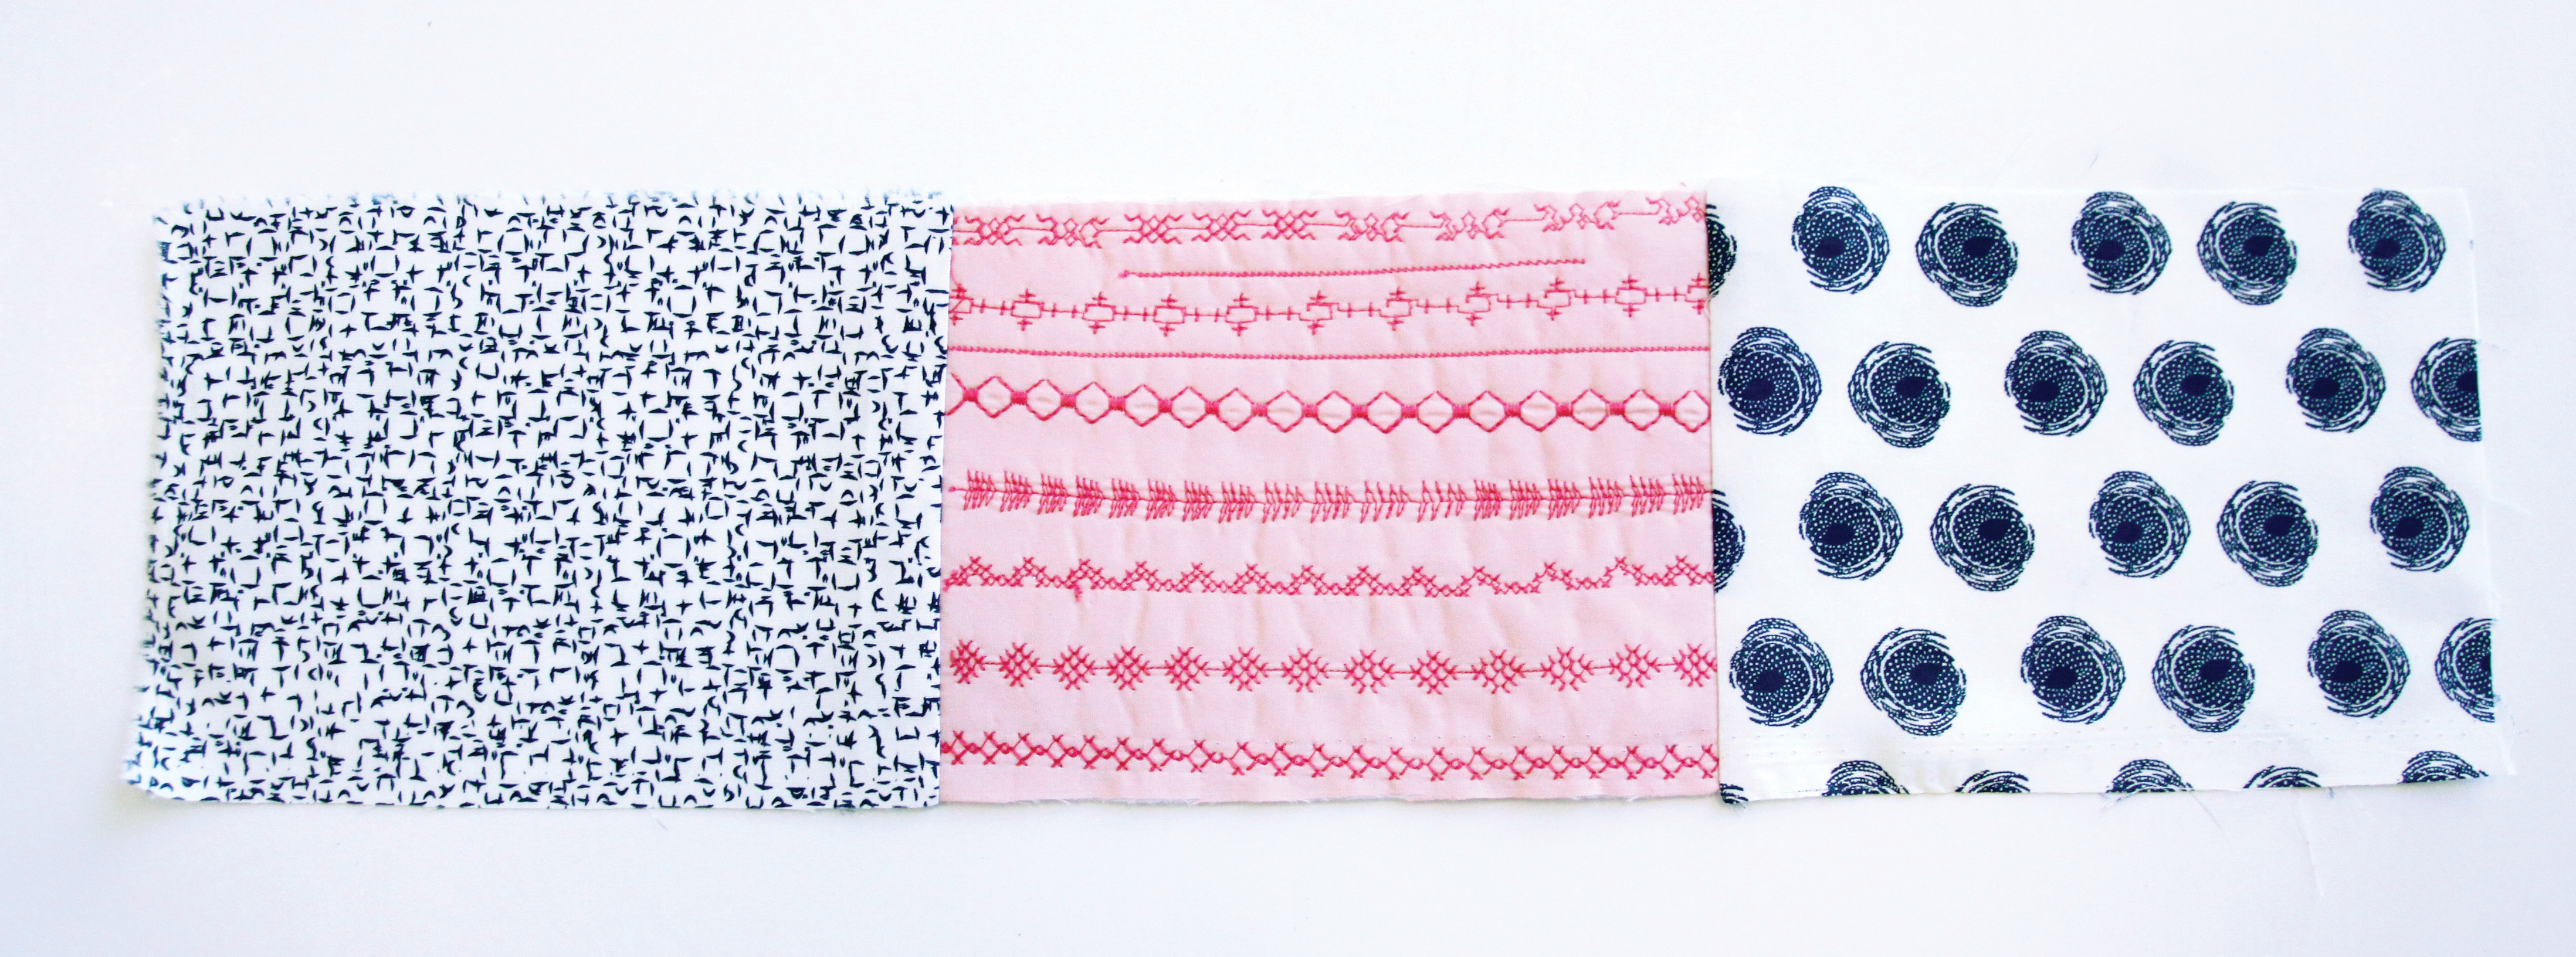
Get all the pieces from the seventh row (see step 1 row combination image) and sew them together as shown below.

Easy right? Now we attach the sixth row to the piece we just completed.
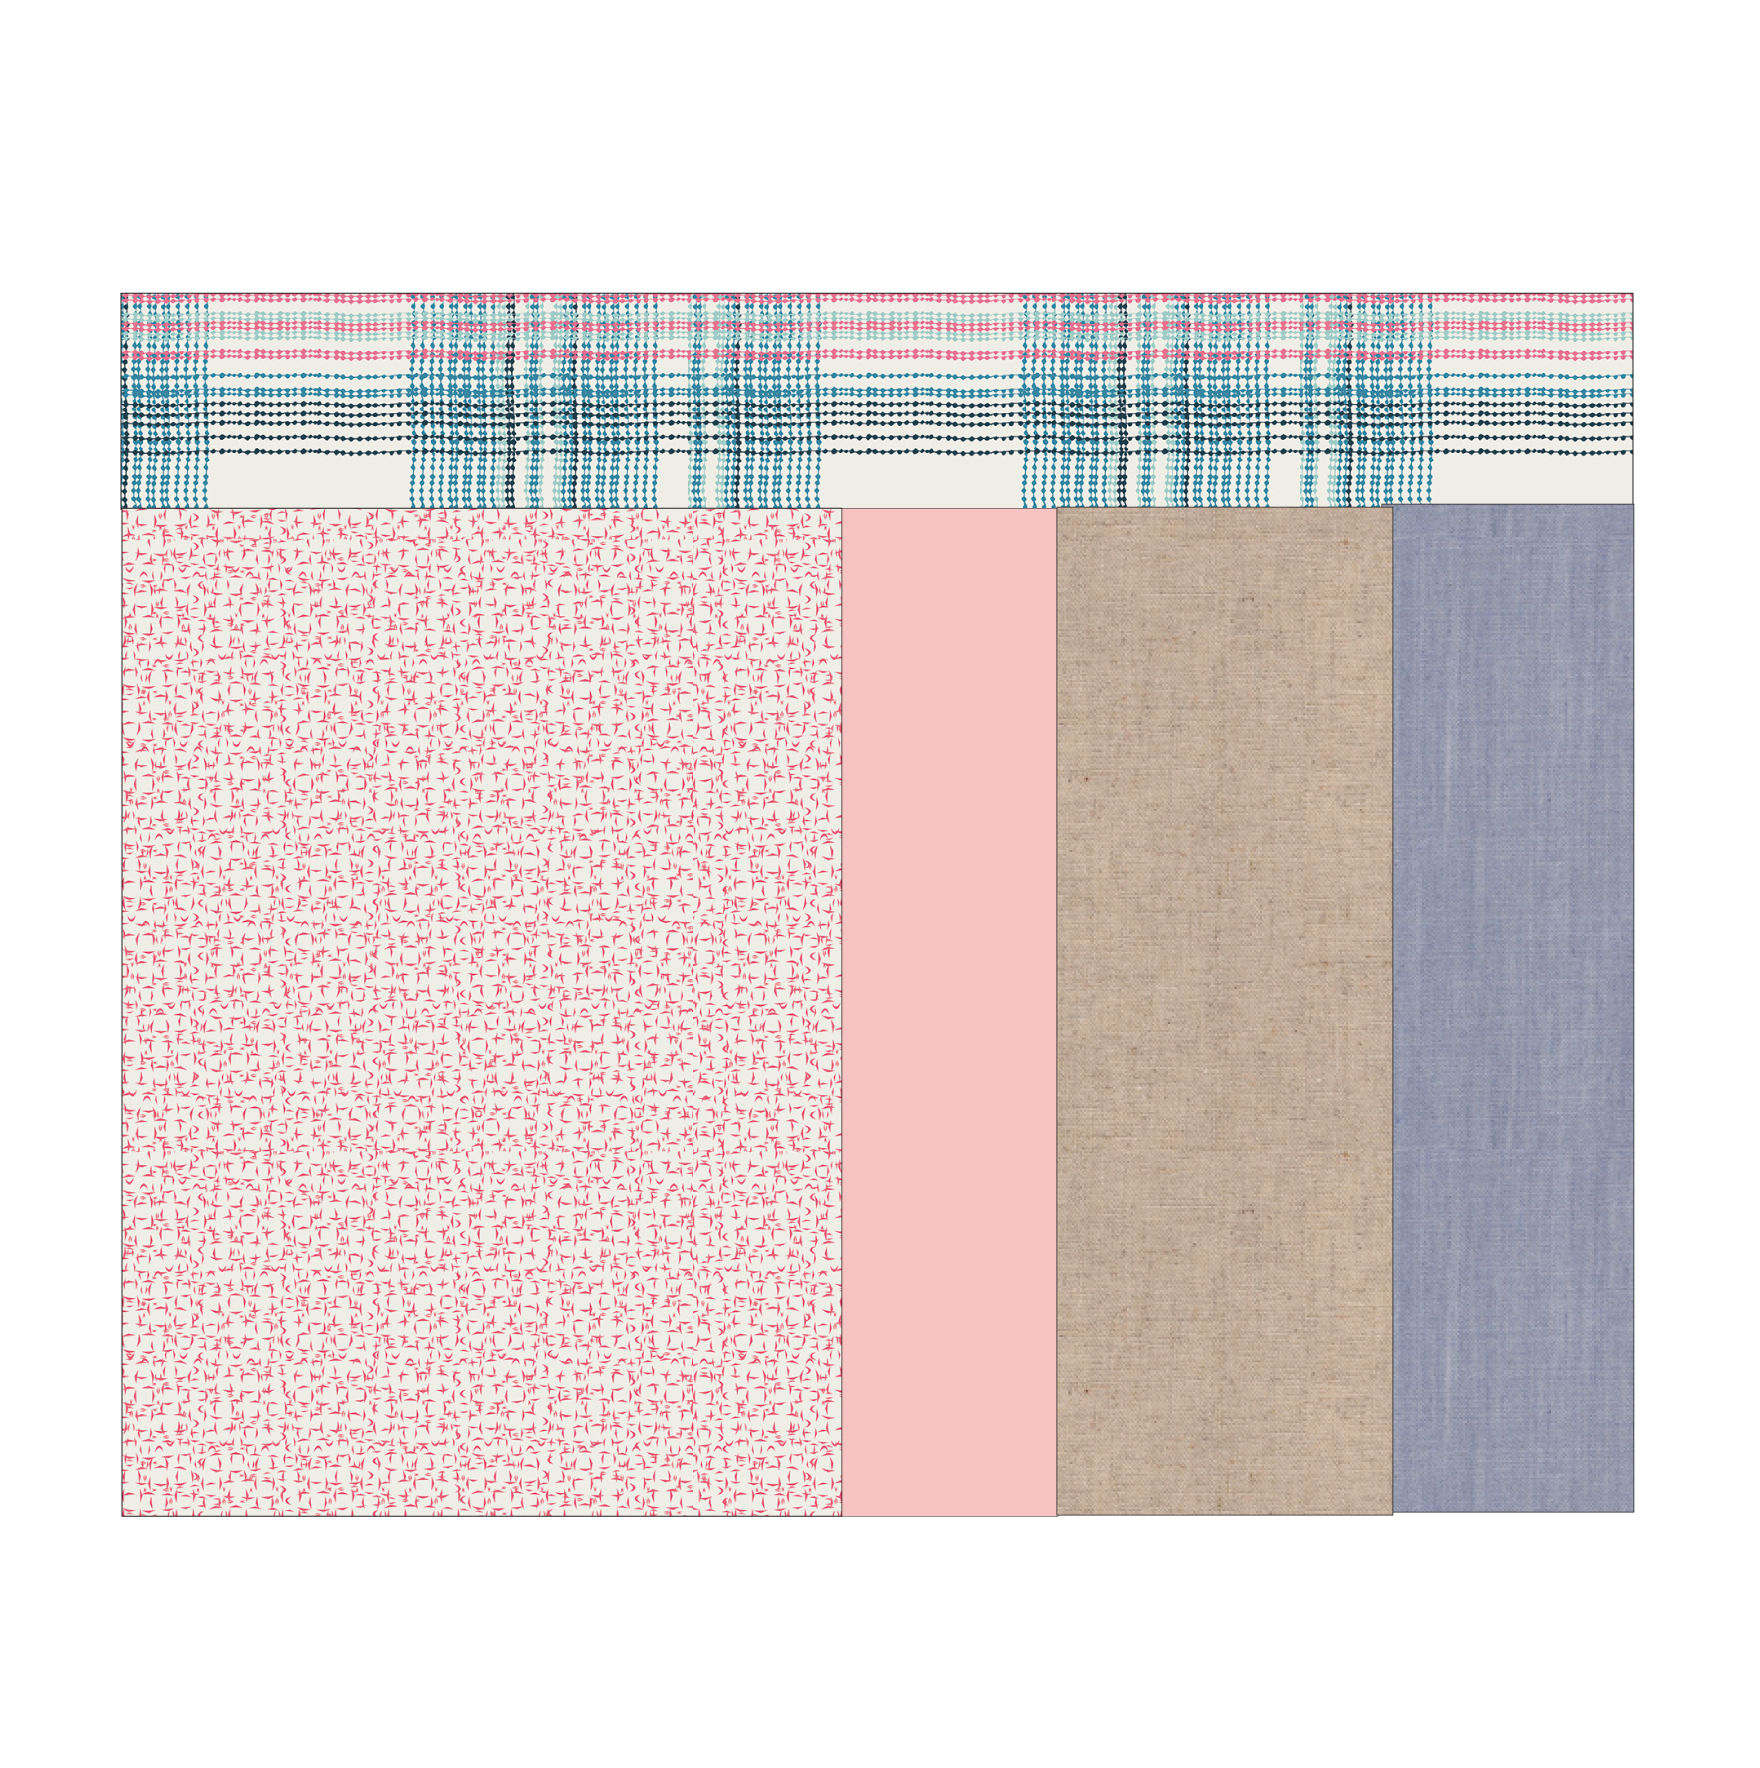
Lastly, get all the pieces from the eighth row (see step 1 row combination image) and sew them together as shown below.

Finally, we get all of our completed rows and attach them together, we should end up with a piece looking like this.
NOTE: You can use this image as reference of how your final piece should look
Step 4—Attaching Lining
With the same Aurifil thread and presser foot, take the the one (1) 22” by 72” piece of PE-420 and attach it to the complete piece from the previous step as instructed in the picture below (right side with right side)
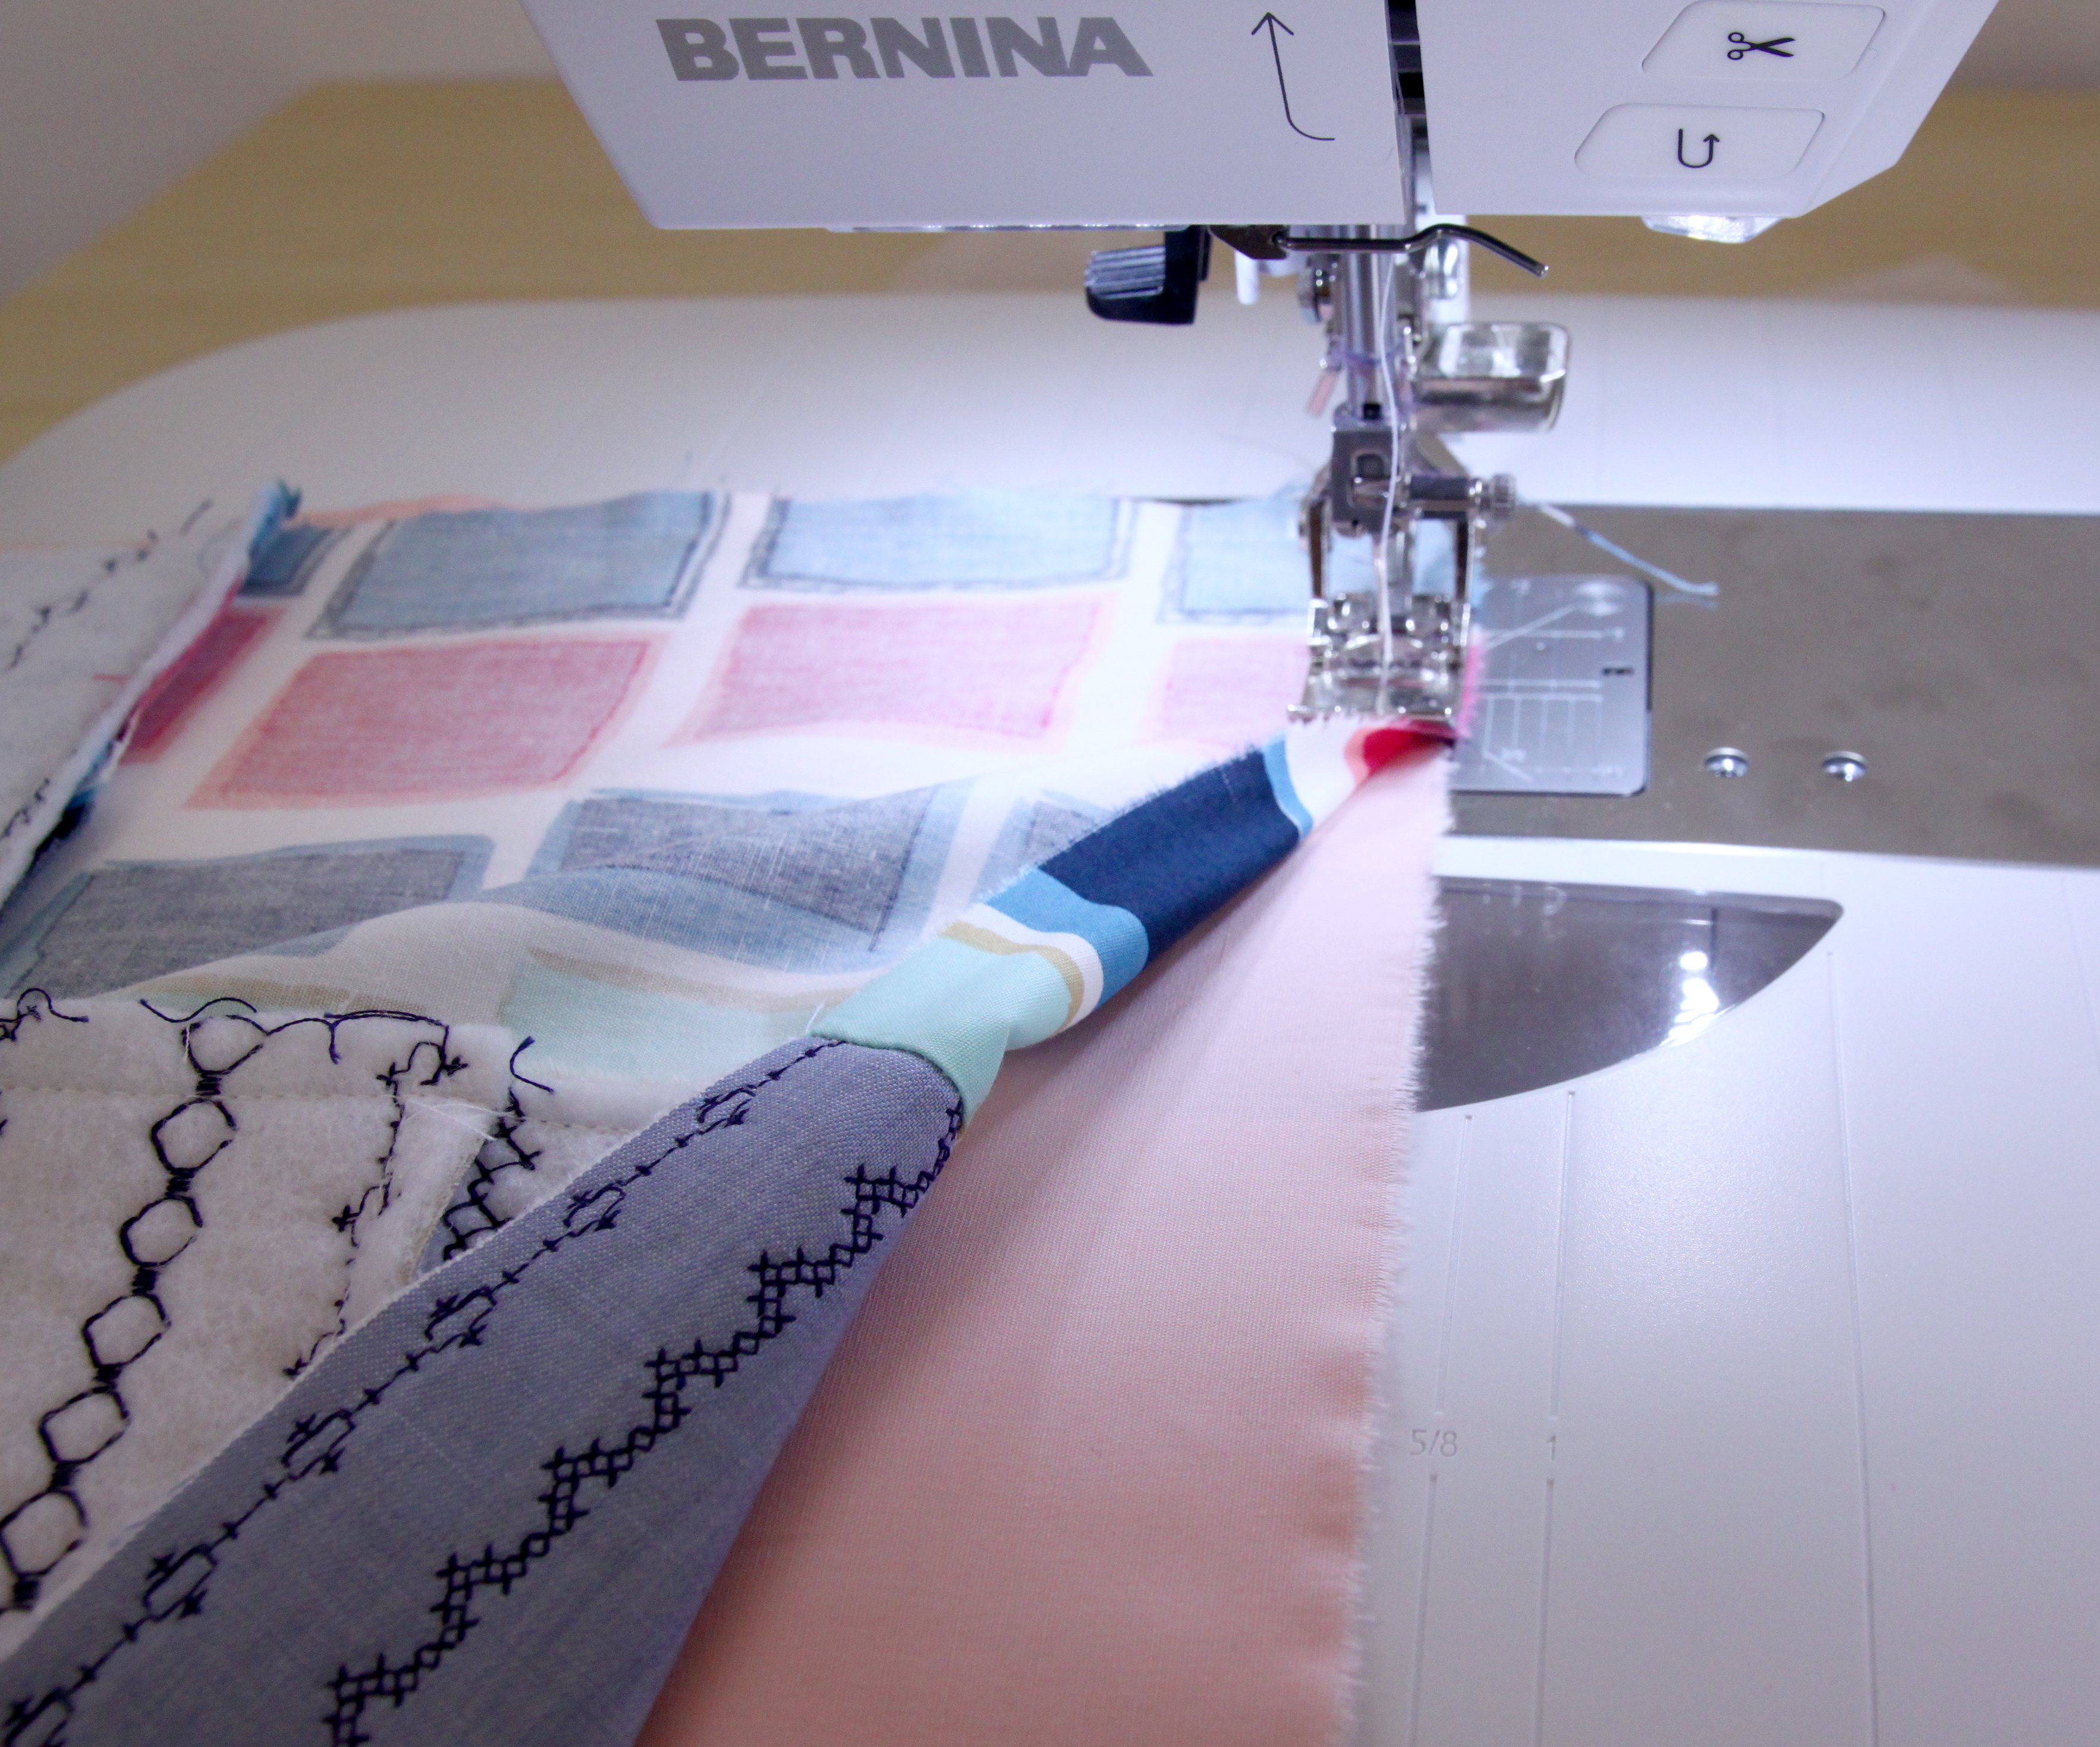
Sew around leaving a 5” opening. Once it’s complete, pull the piece through the 5” opening. You will be looking at the right side of your almost complete Furoshiki Laundry Bag. Pull the corners out, press and machine close the 5” opening.
Step 5—Attaching String Casing
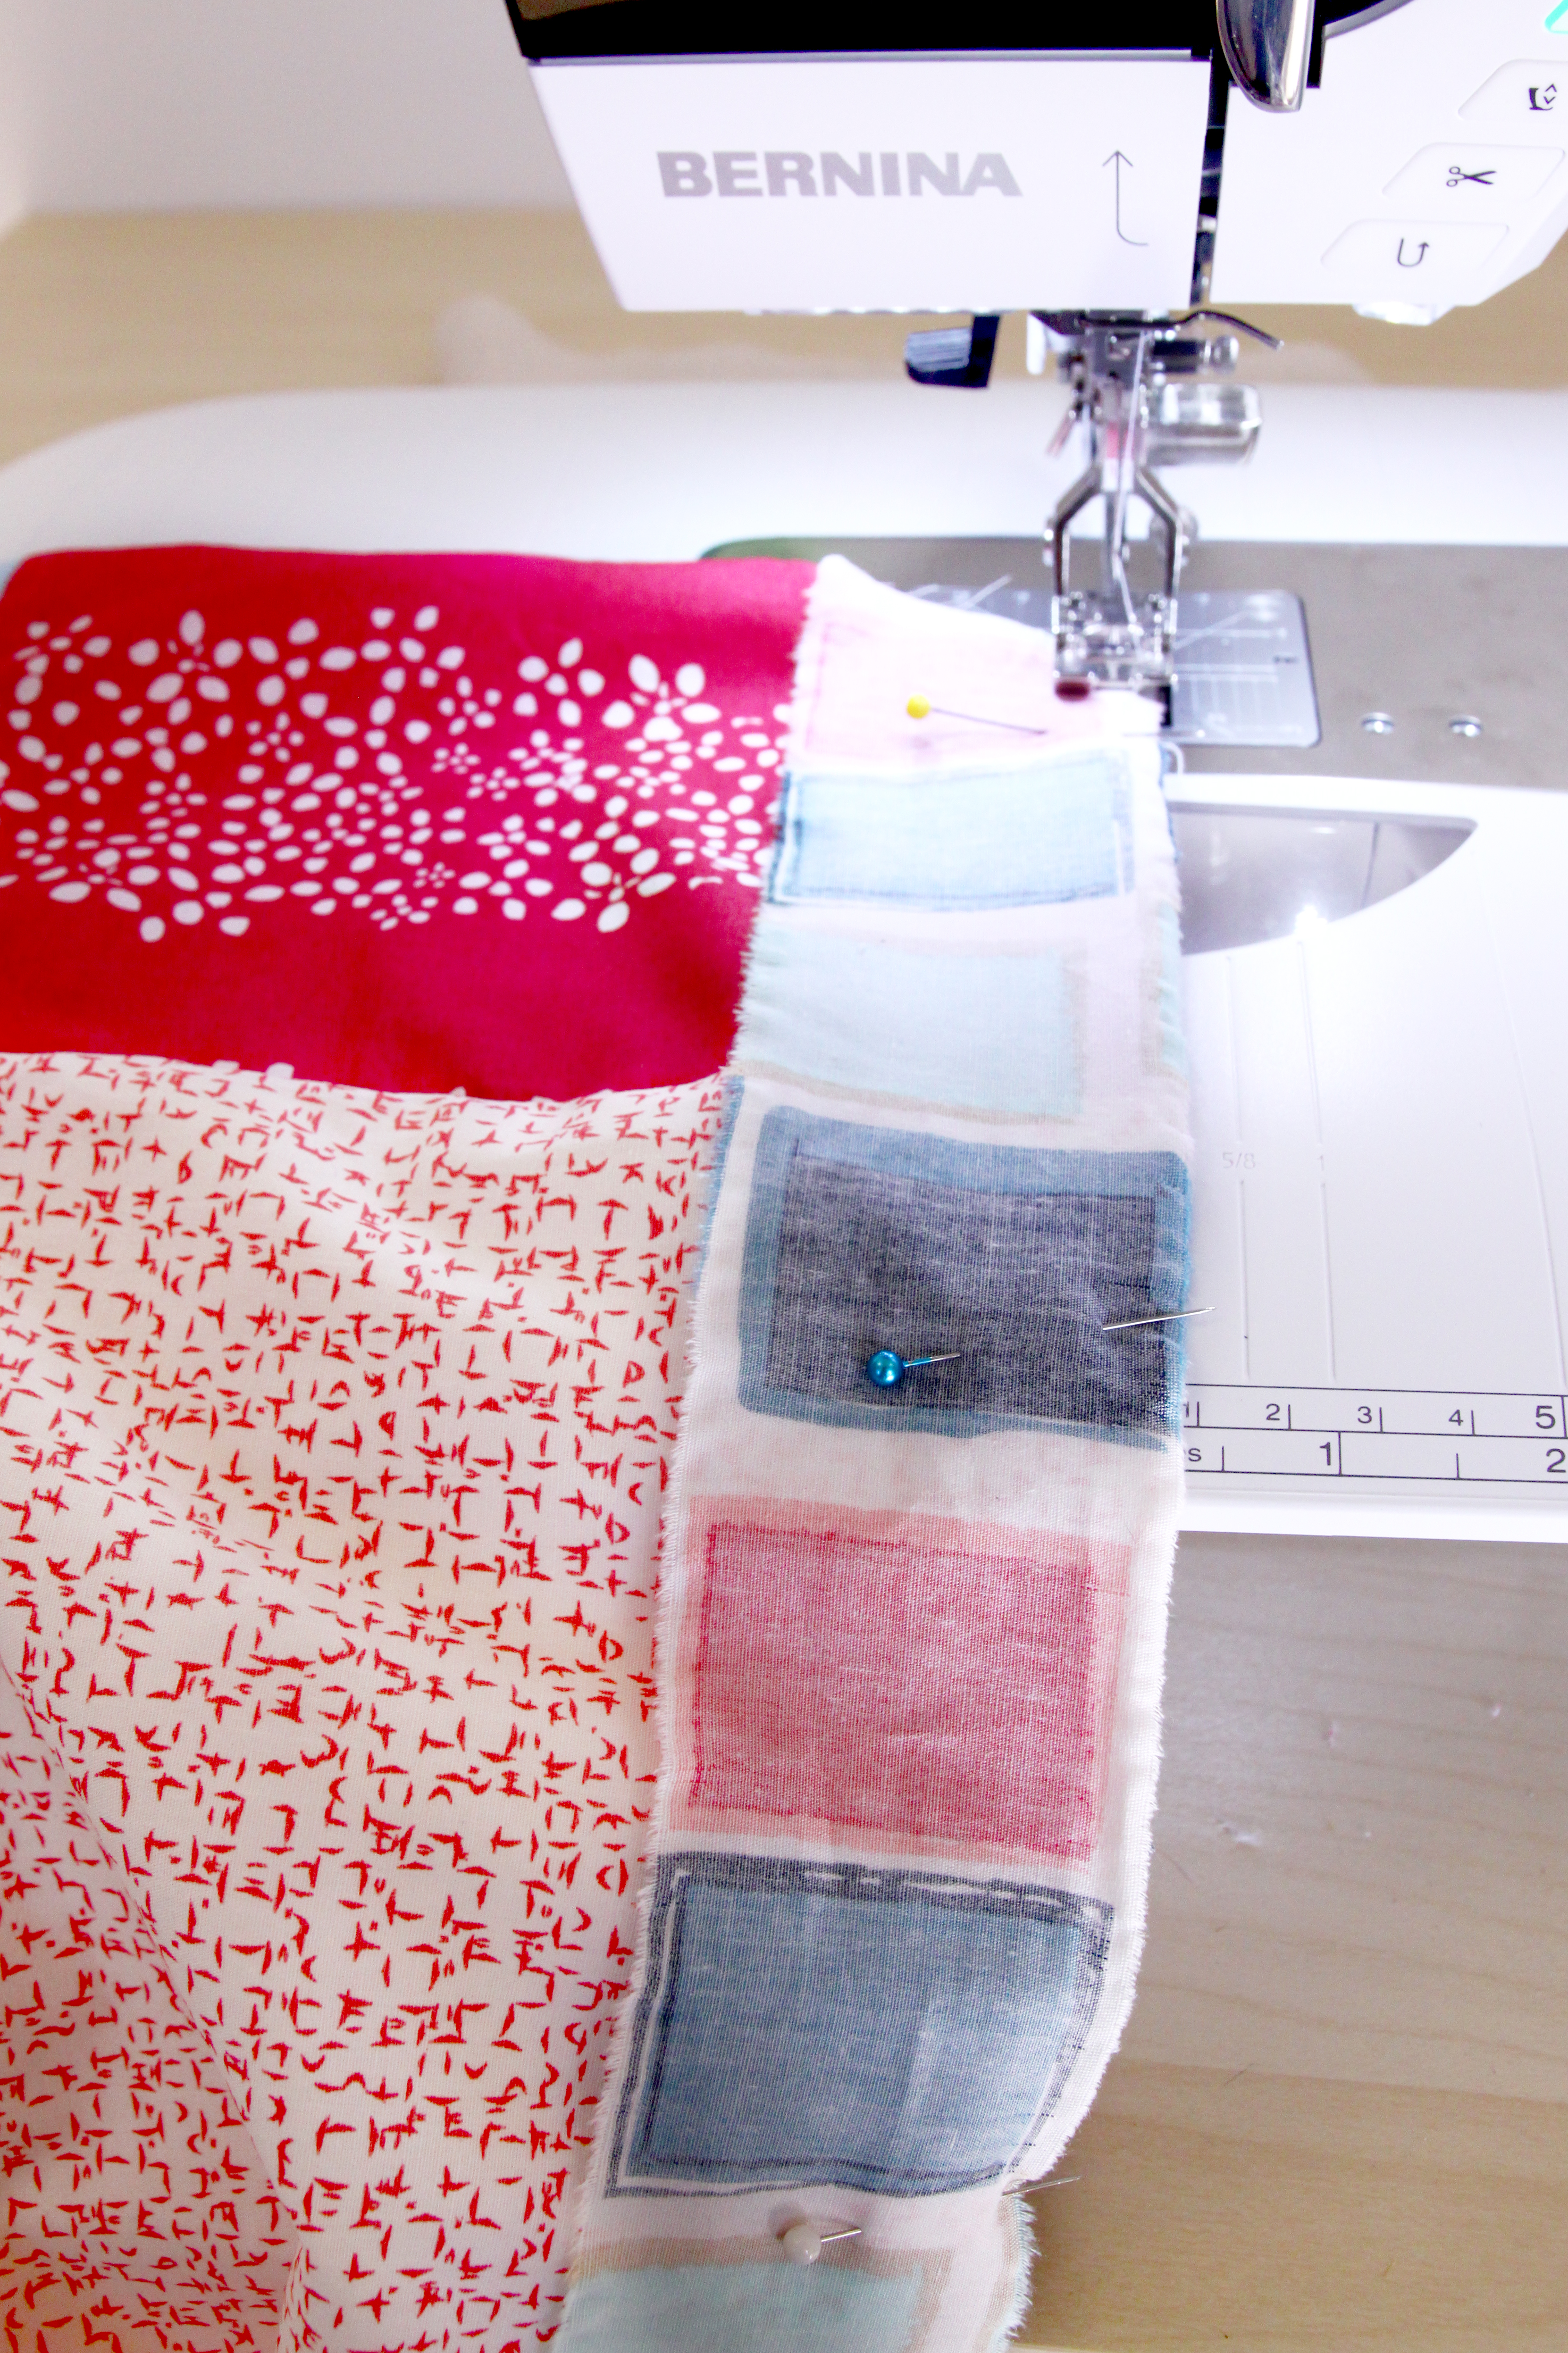
Take the two (2) 2’” by 36’” piece of DAR-64311 and attach them together to make one whole strip. Later, pin the strip to the edge of the piece just completed in Step 4 (as shown in image) and straight stitch lengthwise with a 1/4 seam allowance.
Press seams as instructed below, folding the edge of the strip to 1/4”.

Now fold the strip once more and make sure the folded edge matches the stitches just created in the previous step. Keep in mind that a jute string will pass through the casing, so make sure there is enough space in between. Pin in place.

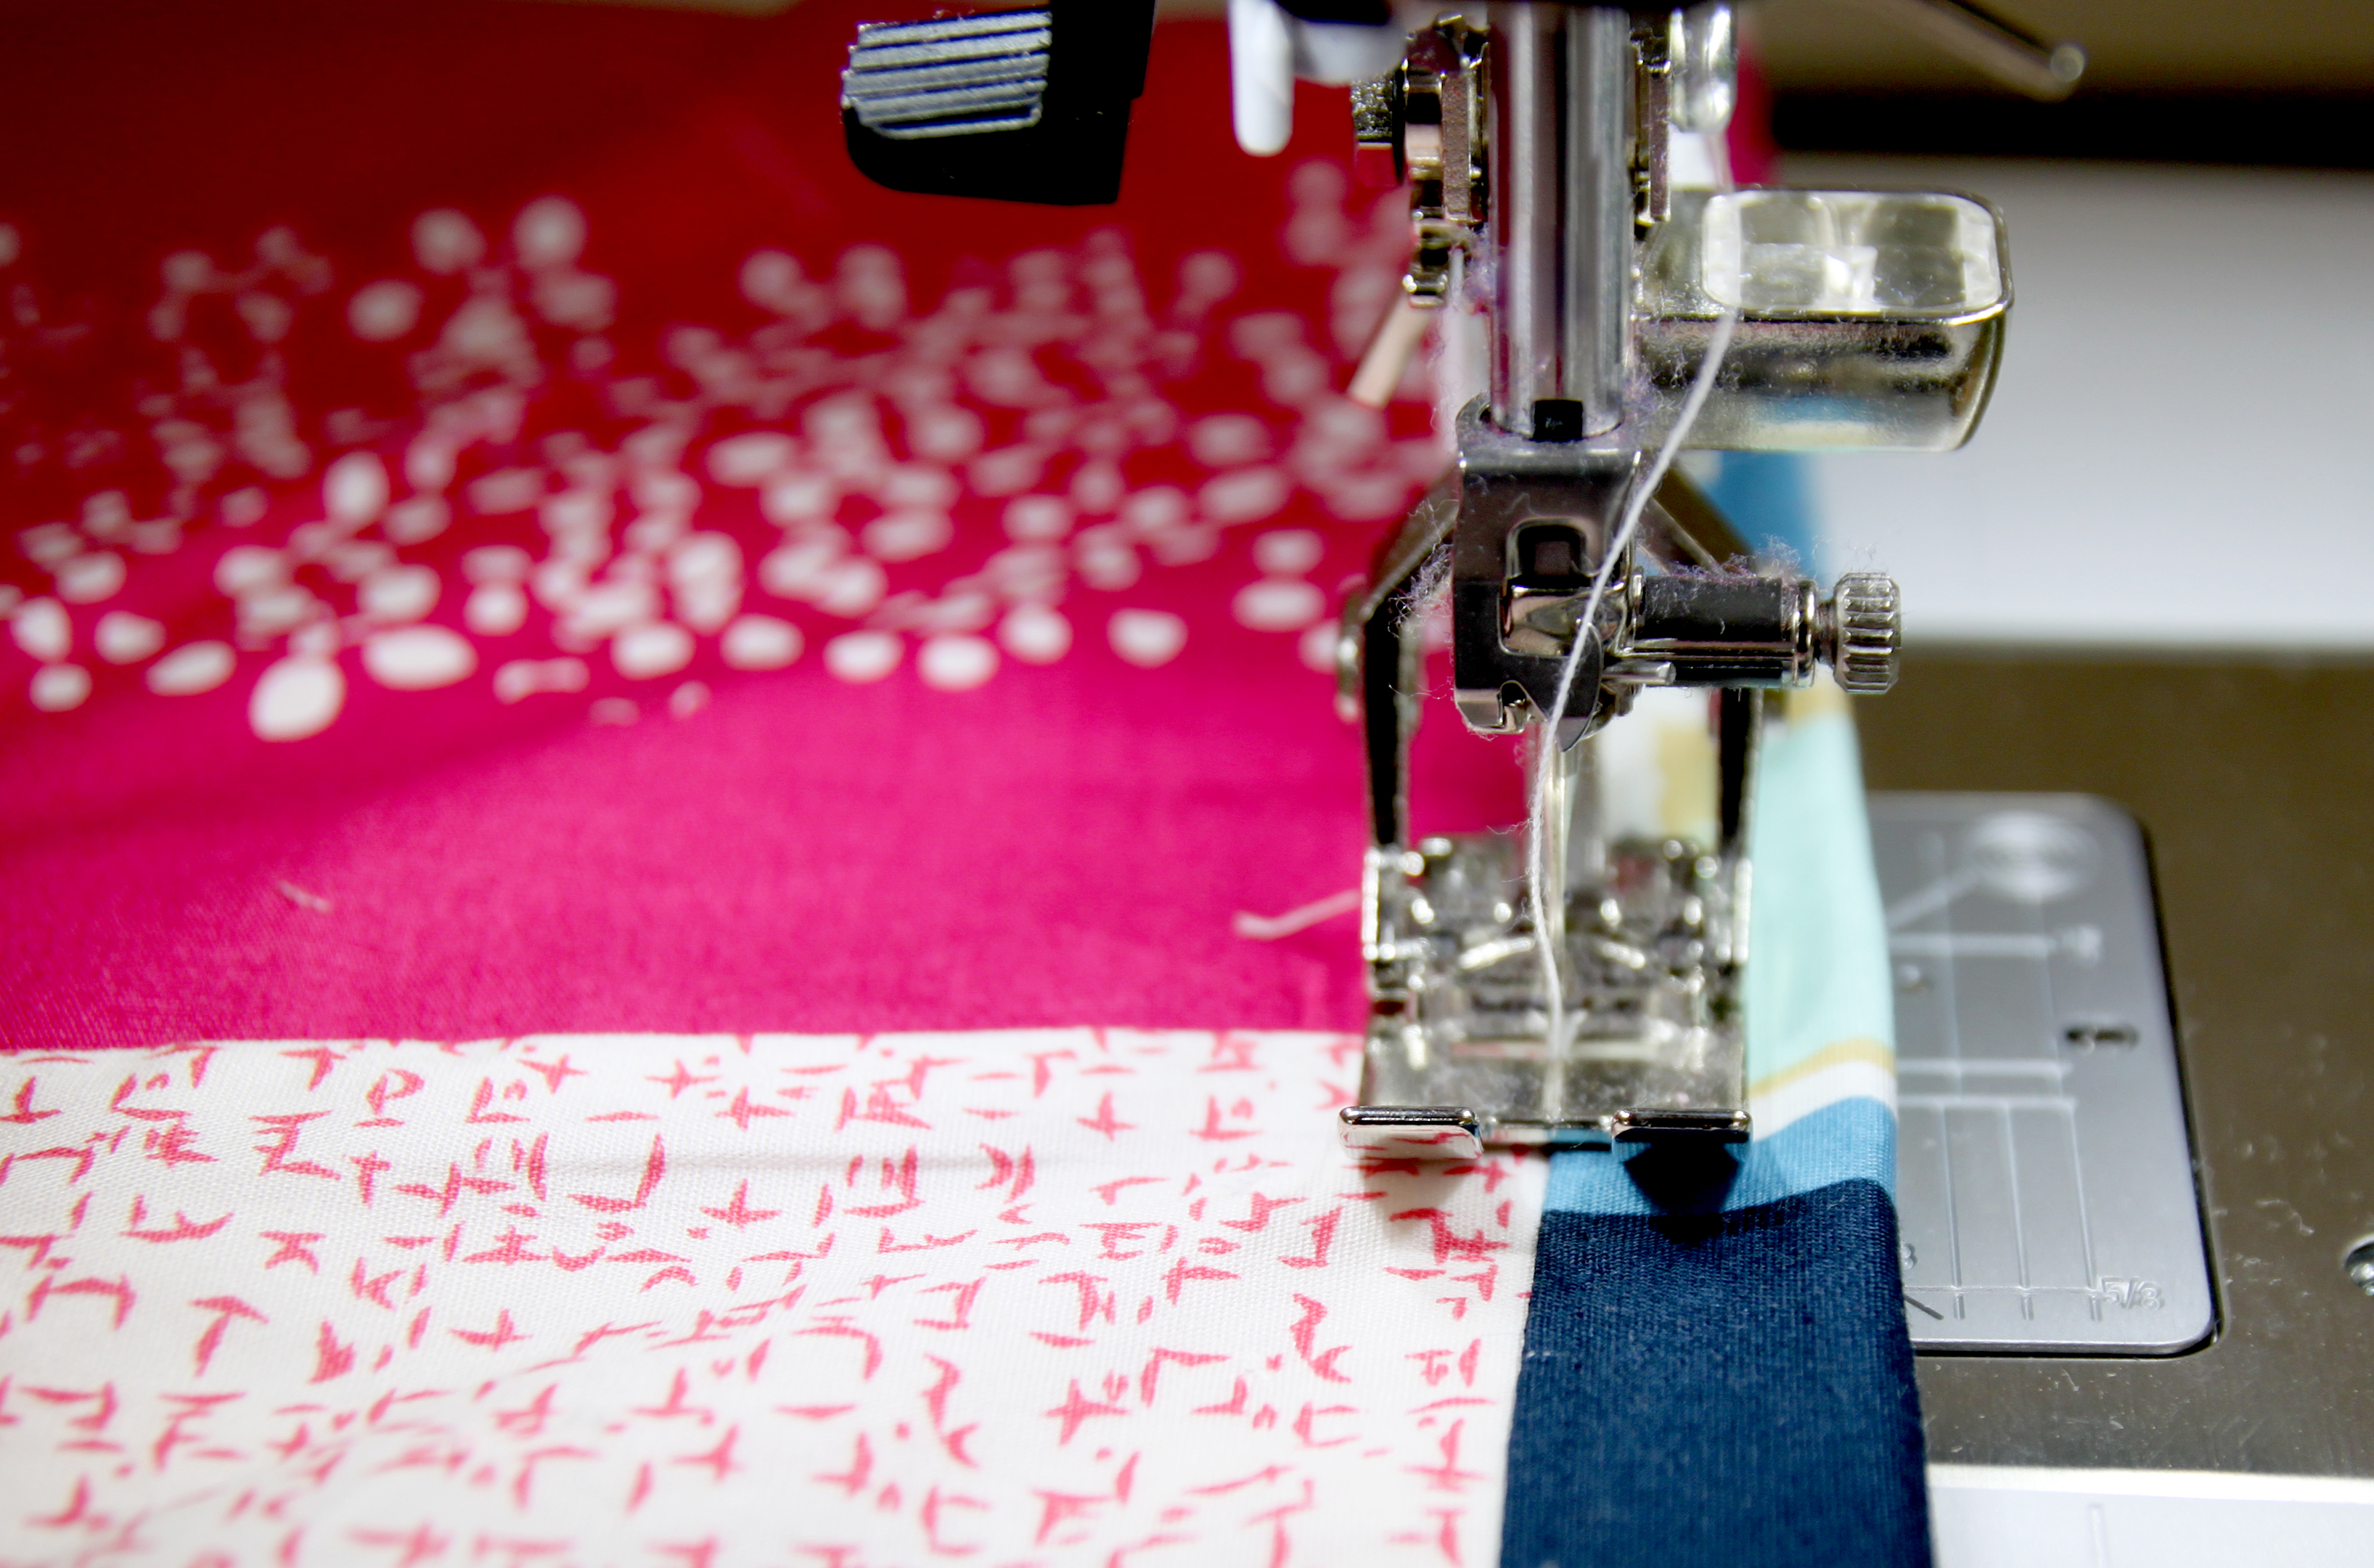
Now it is time to machine stitch the right side of our piece. Make sure you are stitching on the edge of the strip.
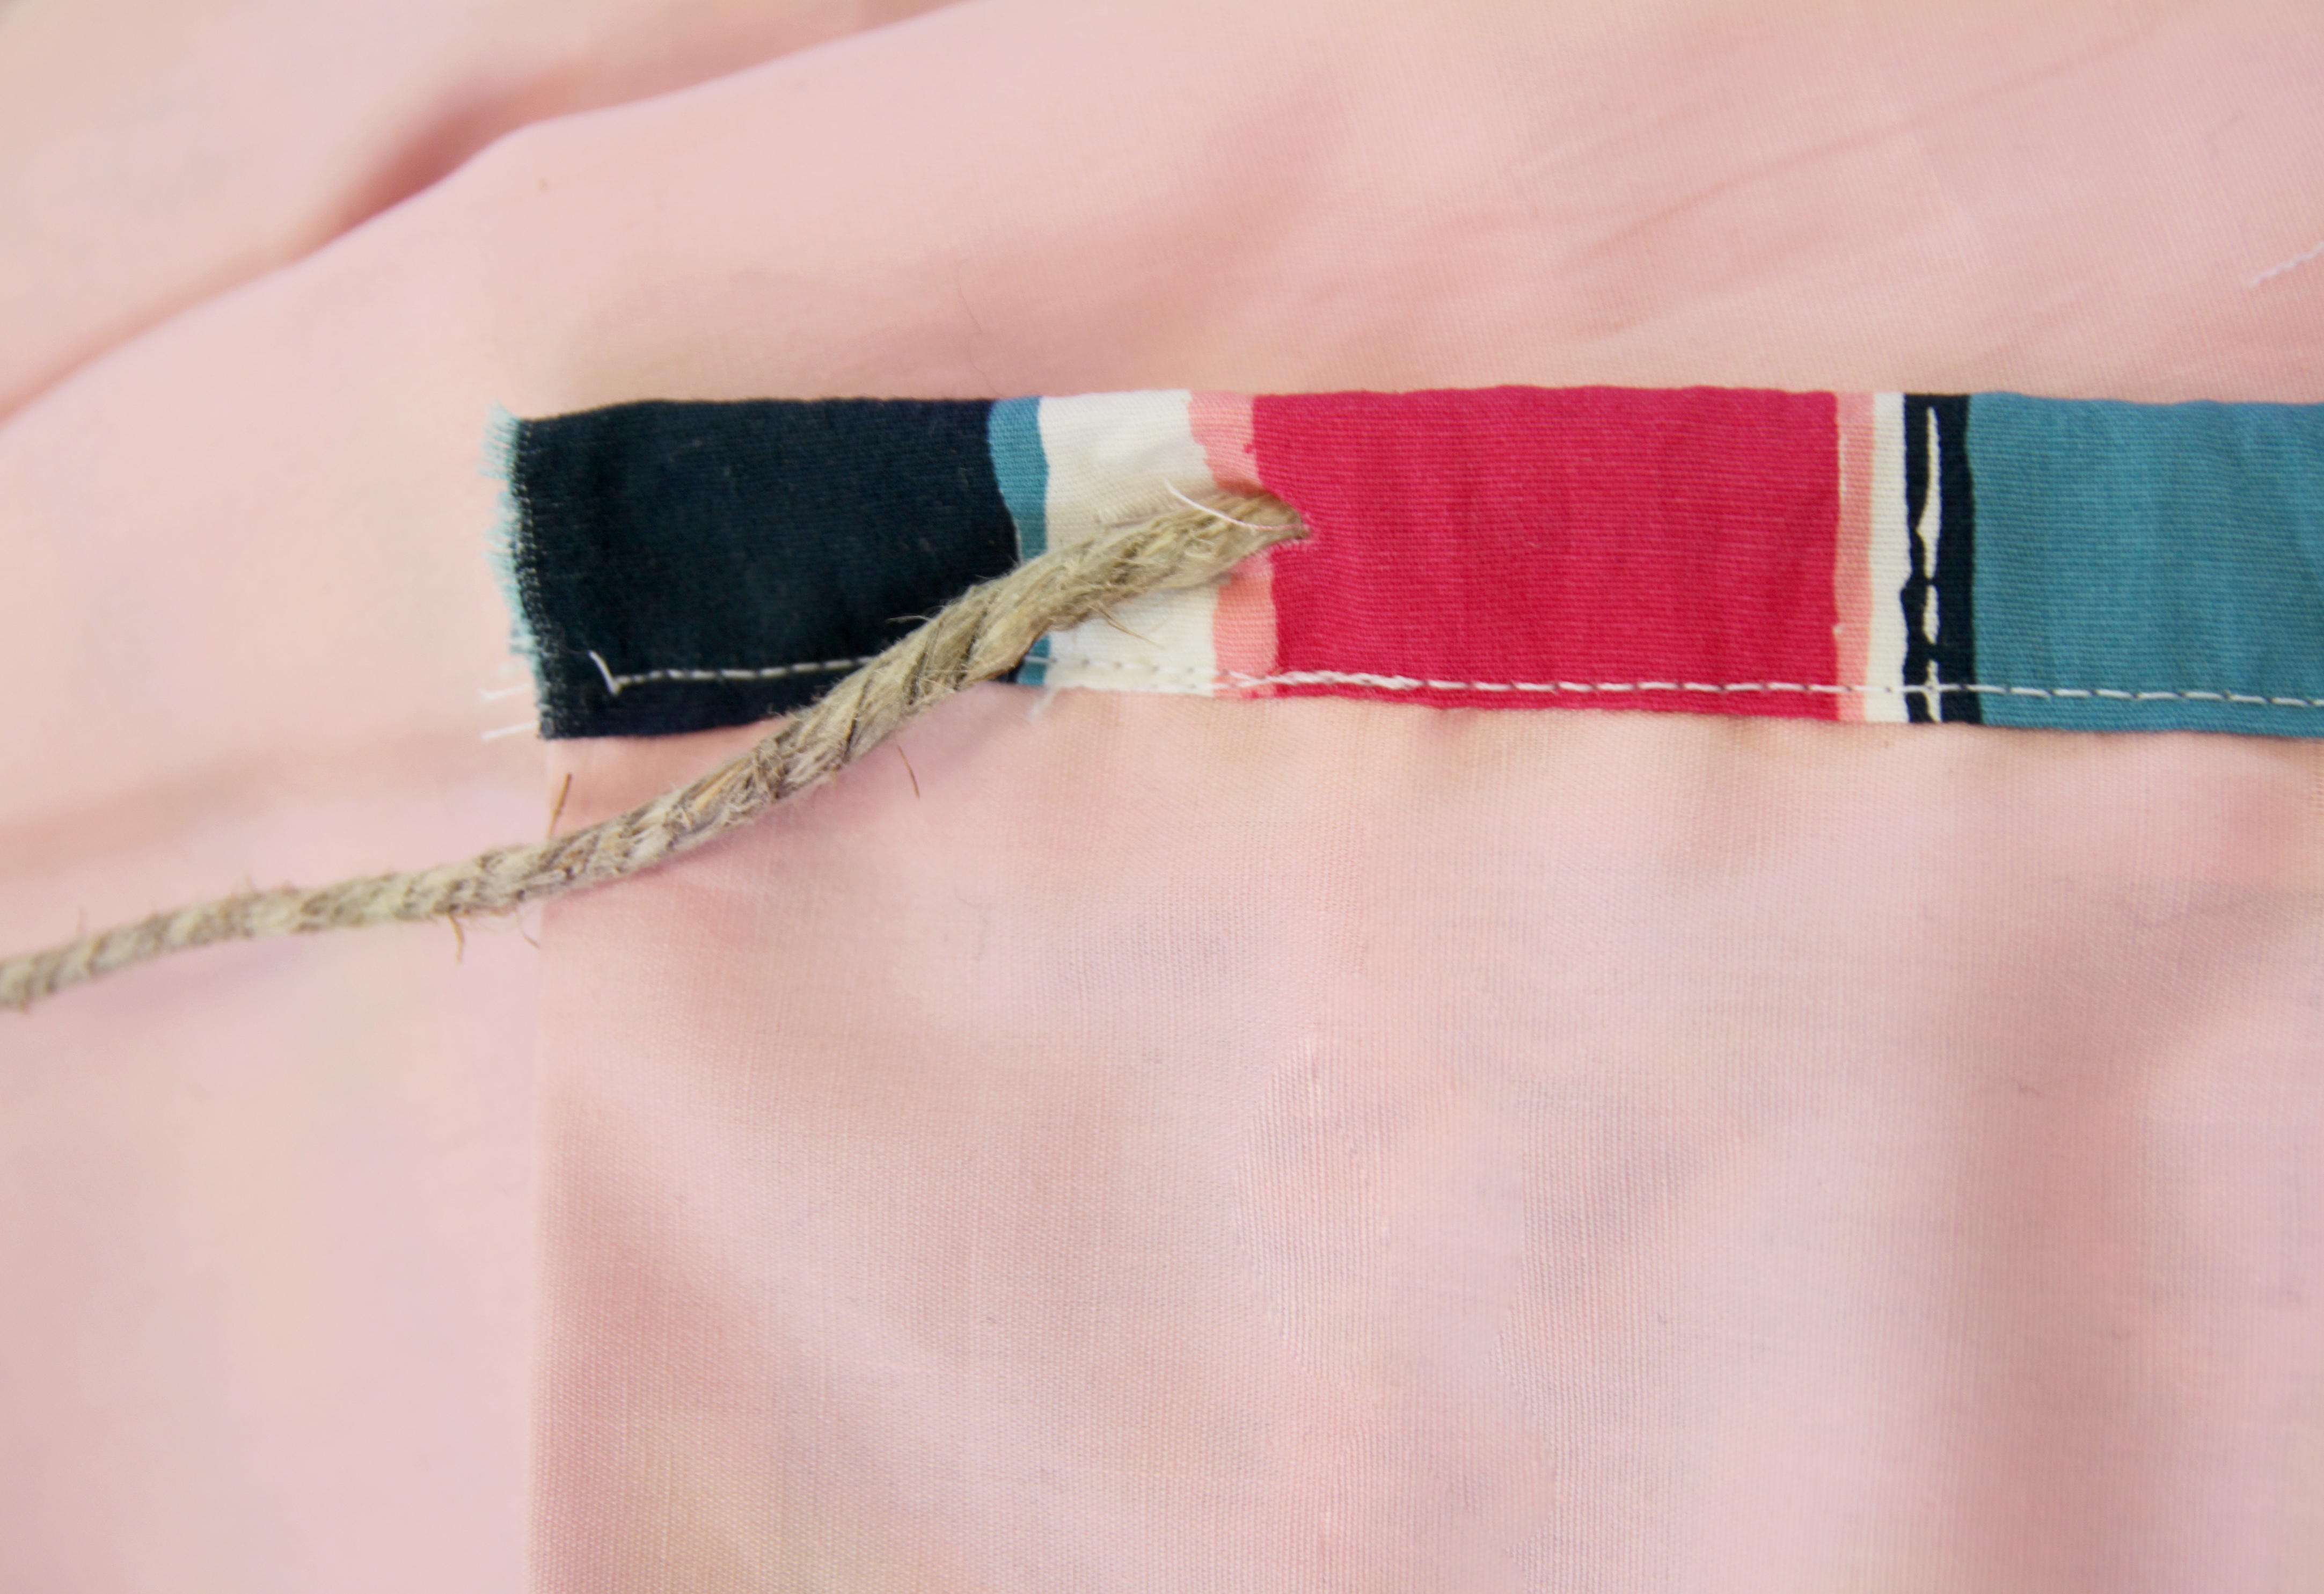
Take your jute string and use a safety pin to pin the side. TIP: This will help you to pass the string through the casing.

Now insert the jute string to the casing opening as shown below. The safety pin will aid you to pass it all the way through the length of the casing.
It is time to make holes on our casing for the jut string. Approximately 2” away from each end, create a 1/2” hole, and pass the string thorough it. Repeat this step for the other end of the casing.
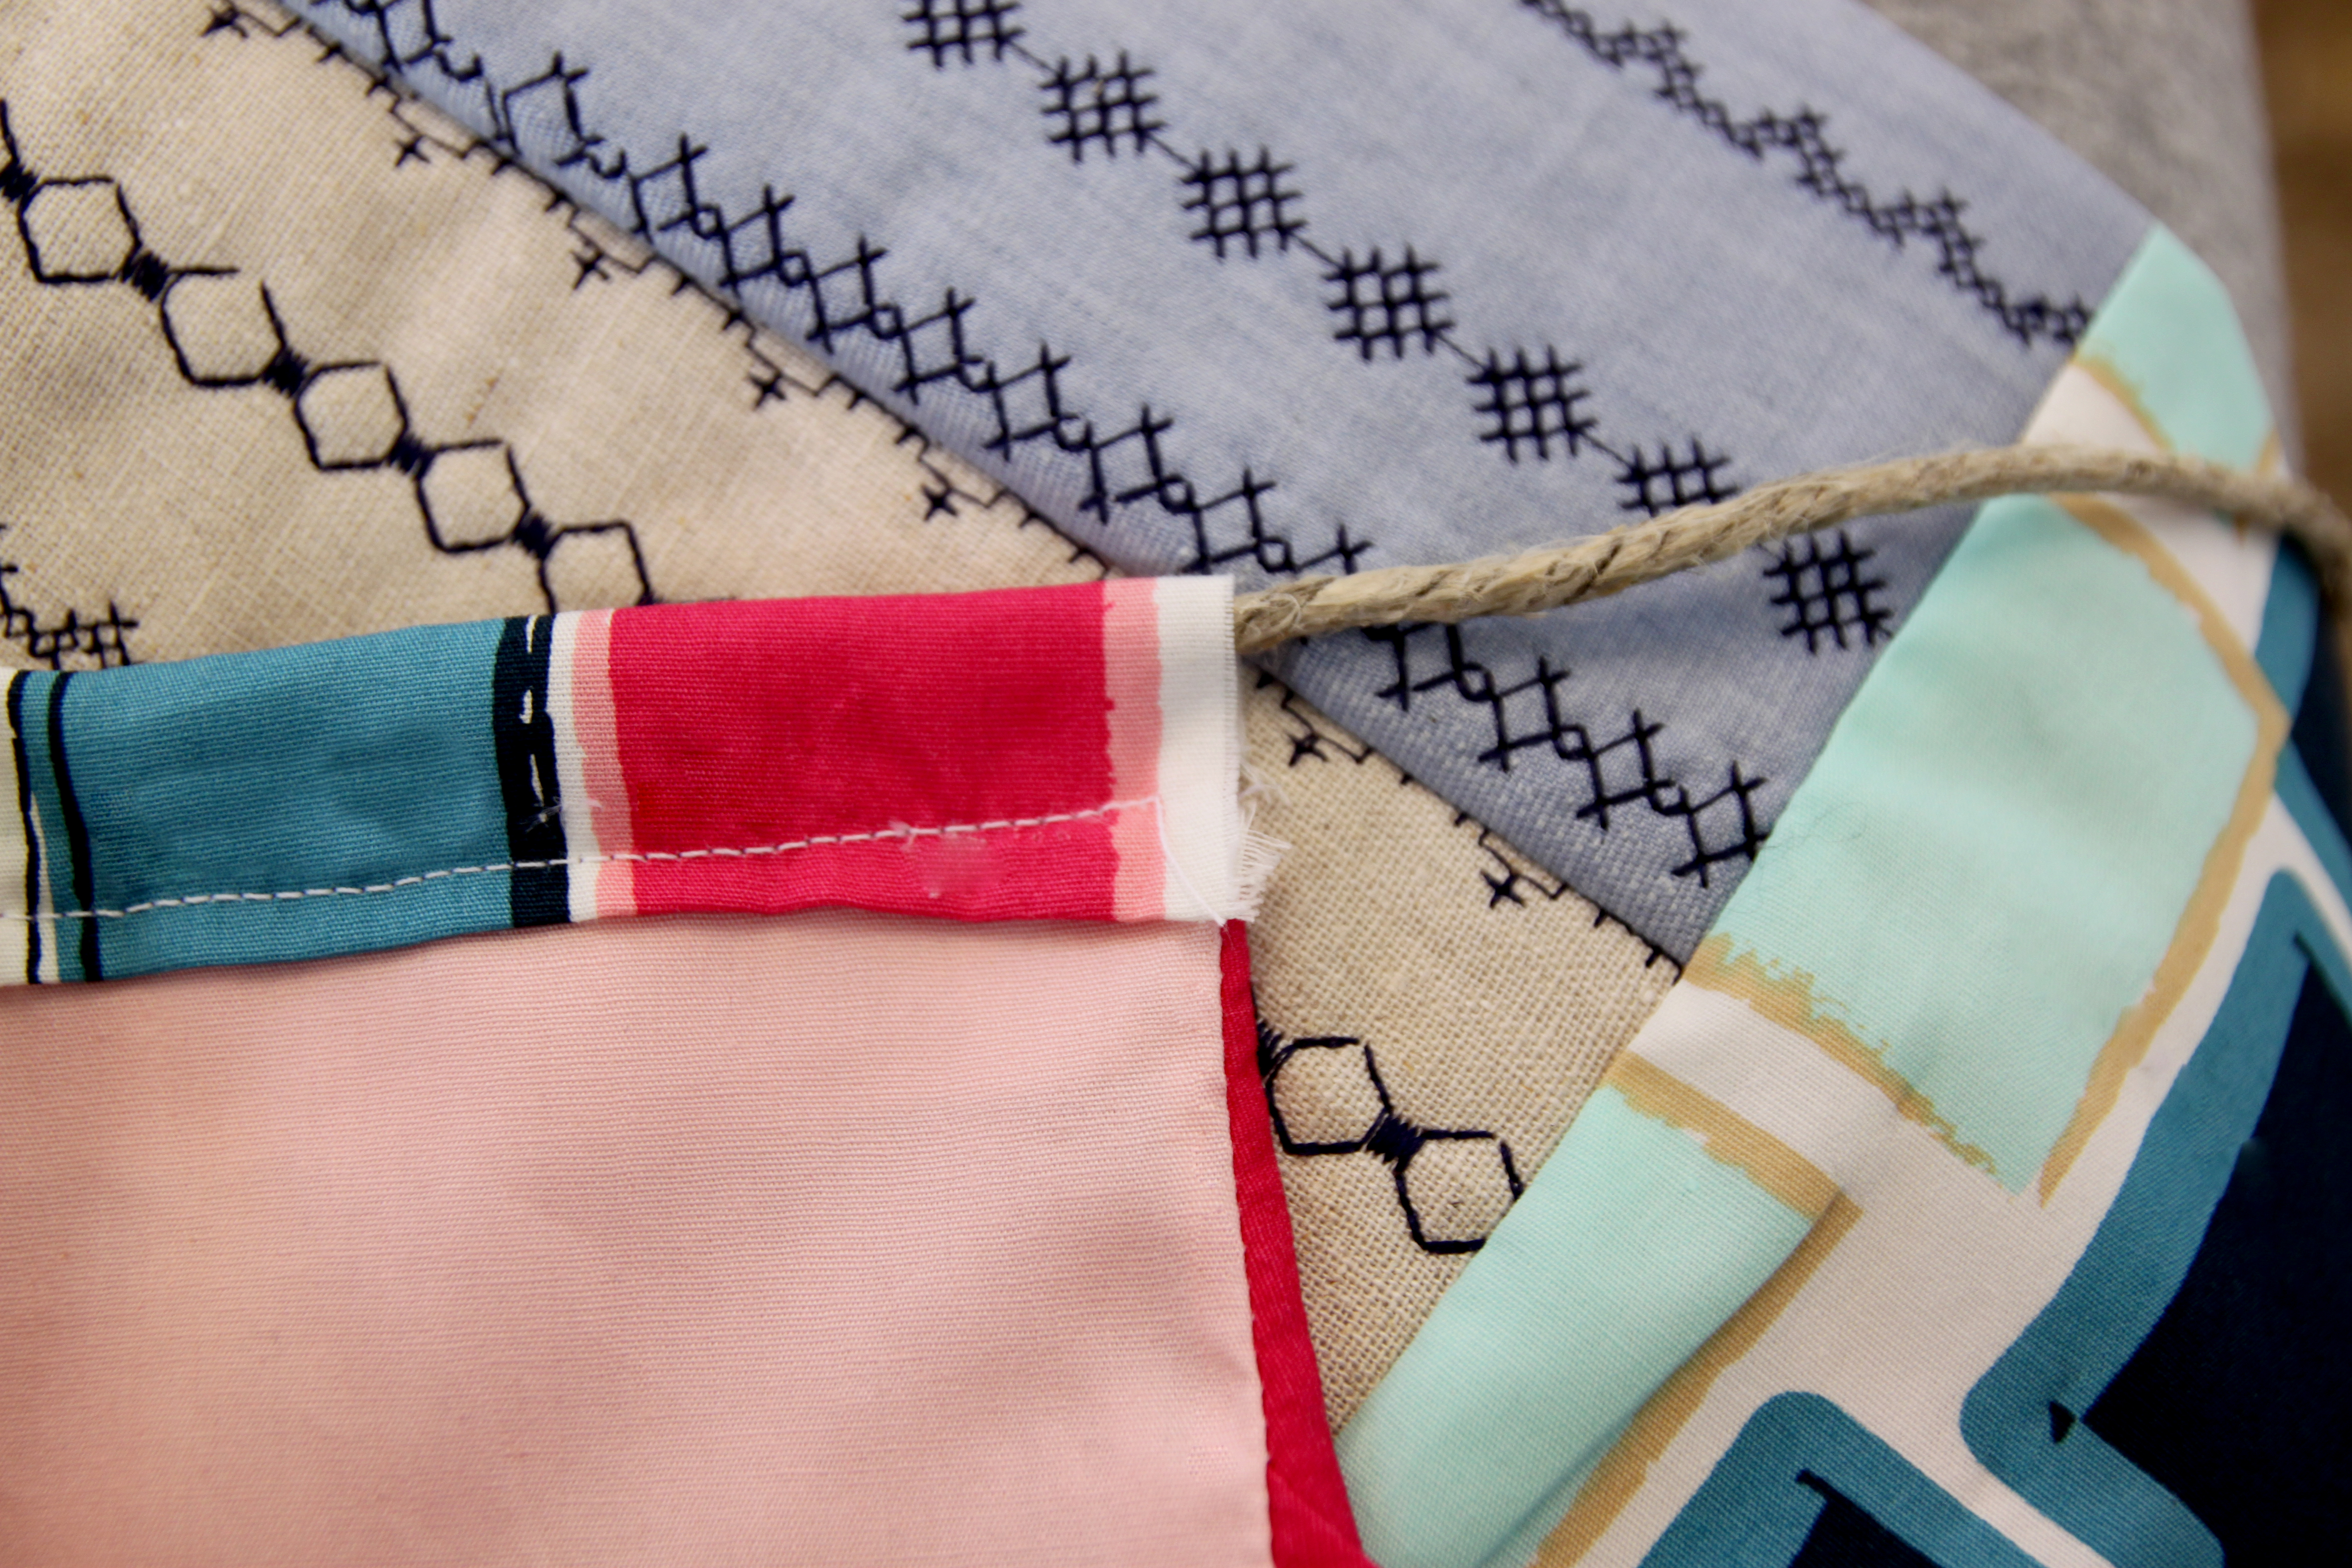
Lastly, lets close the Furoshiki Laundry bag by taking each small side, pin in place and straight stitch from top to bottom.

You will have your piece almost ready just missing the bottom circumference piece. Grab the 22 diameter of DEN-L-4000 and pin in place at the bottom of your piece (side without the jute string and casing) going around the circumference. Carefully, stitch around the circumference with a 1/4″ seam allowance.

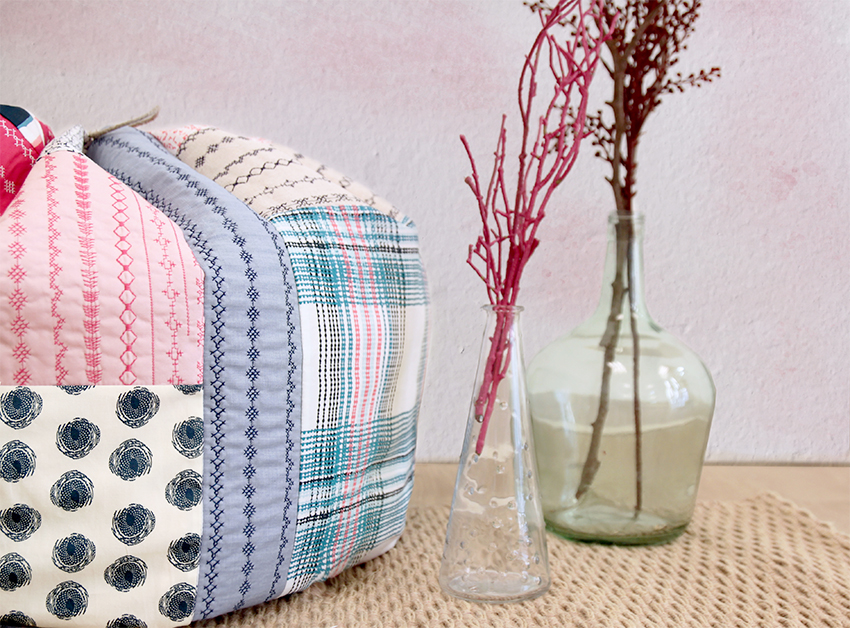
Cut the extras, if you have, turn it over and voila! You have your Nod to Furoshiki Laundry Bag ready!
Our December 22 Gift For You
Today’s gift is a BERNINA seam ripper and the Inspiration Magazine No. 63 to one awesome WeAllSew fan. All you have to do is post a comment below answering the following question:
Where would you place this cute laundry bag in your home?
A winner will be chosen at random on December 23, 2015 and announced later this week!
Good luck!
Congratulations to our WeAllSew reader “chelle0399”, the winner of the December 22 gift. Enjoy!

What you might also like


52 comments on “A Nod to Furoshiki│Laundry Bag”
-
-
Love that this project uses a multitude of stitches and presser feet. I hope this project stays on the site for the next few months. Thank you for this awesome project!!
-
i would give it a different use of a catch all in the car
-
-
In my daughters bedroom – make it easy for her to keep organized.
-
Yes, I wouldn’t want to hide this laundry bag, so it would be in plain site in my bedroom.
-
-
That is a lot of work for a laundry bag, BUT it is SO cute! I’d hang it on my closet doorknob.
-
In the closet! I would like to make a couple of these and use them whenever I have to go to the laundry mat
-
I love furoshiki– ebay has helped me to collect some vintage fusoshiki , that I hope to make into a quilt
I have a laundry shoot, so I would use this for my sewing projects, next to my sofa
thanks for the pattern and the giveaway -
It’s too pretty to use as a laundry bag. I’d find another use for it
-
In my bedroom
-
It is just so cute. Would use this in my sewing room. I believe I already have some pieces if fabric that I have stitched some of these stitches on. Thank you.
-
My husband and I have learned how to put our clothes in the hamper. But my granddaughters have not matured enough for that task! I would make one for each of them and put it in their closets where they dress.
-
This would make a fun bag to keep in your gym bag to keep clean and used clothing separate.
-
This is way too cute for laundry ! One would go in my guest room for an extra blanket or towels, but the other goes in my sewing area for fat quarters or fabric scraps !!
-
I think it would great in the bathroom. What a fun way to use some of the amazing stitches on our machines.
-
That would have to go in my sewing room and I could keep all sorts of bits and bobs in it – in fact I could have more than one and keep half finished projects in the other one!
-
What a wonderful idea. I have a room at each of my daughters homes so I would make one for each house. I would have a great place to store items instead of those plastic bags like the ones you get at a hotel. Love this idea.
-
I’d put in the bathroom to pretty it up. The stitches make it spectacular.
-
I think I’ll make 2 but maybe not for laundry…. I love this and would make one for my sewing room for those small scraps of fabric that I save to make doll clothes for my granddaughter. I know my mom the knitter would also love this for skeins of yarn.
-
I would hang it in my closet for easy access.
-
In the kids bathroom to help keep it neat and tidy. What a beautiful laundry bag. Thanks for the great tutorial!
-
I would put it in the corner of my bathroom. Would be cute there.
-
This is a very cute idea for those on the go. Would have to take this with me when traveling. Great way to keep clothes separated. But it doesn’t have to be for dirty clothes. It could be a mini cushion for those hard seats LIke a restaurant, ball games, or wherever you happen to be.
-
That would look so cute in the bedroom. No need to hide it!
-
I’d probably give it as a gift to my grandson who is going to college in the coming new year. Or, to
my son’s family (4 kids) who will be leaving on a 3 year LDS mission. We’ll really miss them but it’s
a great opportunity for them. -
I would keep this laundry bag in my bedroom.
-
The laundry bag is too cute for dirty laundry. I would use the bag in my sewing studio. I could put fabric scraps or batting in the bag.
-
These would make great reusable Christmas gift bags!
-
In the guest room… nice way to help guests feel organized! Thanks for the idea!
-
Great Project!!!
I would use it in my guest bedroom.
Would also, like to make it for my friends for there birthday’s.
Happy Holiday’s -
This would look cute in colors to match the bathroom, then hang it on the back of the door.
-
I would put the laundry bag in the kids’ room.
-
This project is so cute. I would make one to use in our second home–Our R. V.
I can hardly wait to get started. -
In my sewing room
-
I think I would put in our bedroom or our daughter’s room. Thanks for the great tutorial!
-
Love the stitches, I’d have one next to my favorite chair.Thanks sew much–a fabulous project.
-
It is beautiful and sturdy! I would make this to coordinate with the quilt I just made for my 4 year
old. The quilt may be stored in the bag during hot summer months, and in the winter used for storing beach towels, water toys, snorkeling equipment,etc.
It would coordinate with both the room and quilt. Now I can practice with my new Bernina 790. Thanks!-
It is beautiful and sturdy! I would make this to coordinate with the quilt I just made for my 4 year
old. The quilt may be stored in the bag during hot summer months, and in the winter used for storing beach towels, water toys, snorkeling equipment,etc.
It would coordinate with both the room and quilt. Now I can practice with my new Bernina 790. Thanks!
-
-
I love it. What fun it will be to make it. I’ll hang it on a door know in my bedroom.
-
I agree with mettawallbeings, this would be great in a guest room, or to take when traveling to put dirty clothes in. Keep things nice and neat instead of a plastic bag.
-
This would be adorable in the bathroom for guests to use when they are visiting.
-
Most likely it would be sitting on my bed with clean laundry in it. I have tried to be conscientious about putting away clean laundry, but most times I end up getting my laundry out of the bag instead of the dresser. I have one of those old homes that didn’t see a need for closets and not enough space for wardrobes. Why waste space on closets when you can put 2 nails on the back of a door…one for daily wear and one for Sunday? Even my bathroom seems to be somewhat of an afterthought. lisajcowell(at)cs(dot)com
-
This would be a great dirty clothes bag for travel! This is my favorite tutorial yet! Thanks!
-
Cute bag, great way to play with all the stitches! You could use one in a lot of places, even make one for your child for college.
-
I would give it to my granddaughter to use it as a sleep over bag.
I always wash her clothes before sending them home, so all mom has to wash is the clothes she is wearing. -
I would put this in my bedroom next to my dresser. Cute idea!
-
I would put her right next to my bathroom door. What a cutie!
-
On my bathroom vanity so cute! Never seen anything like it.
-
A lovely place for extra storage. There is precious little of it in this old house.
-
This would be the perfect bag for my young granddaughters to help keep their room clean. No more dirty clothes strewn all over the room.
-
This is much too nice to hide. I think I would put it on a bench in my bedroom.
-
This bag would work anywhere and I would even take it on a trip. At home probably in my sewing so I would be inspired by it.
Leave a Reply
You must be logged in to post a comment.

What a great way to play with the stitches on my machine.
This is to cute to hide in the closet, how about in the bathroom?