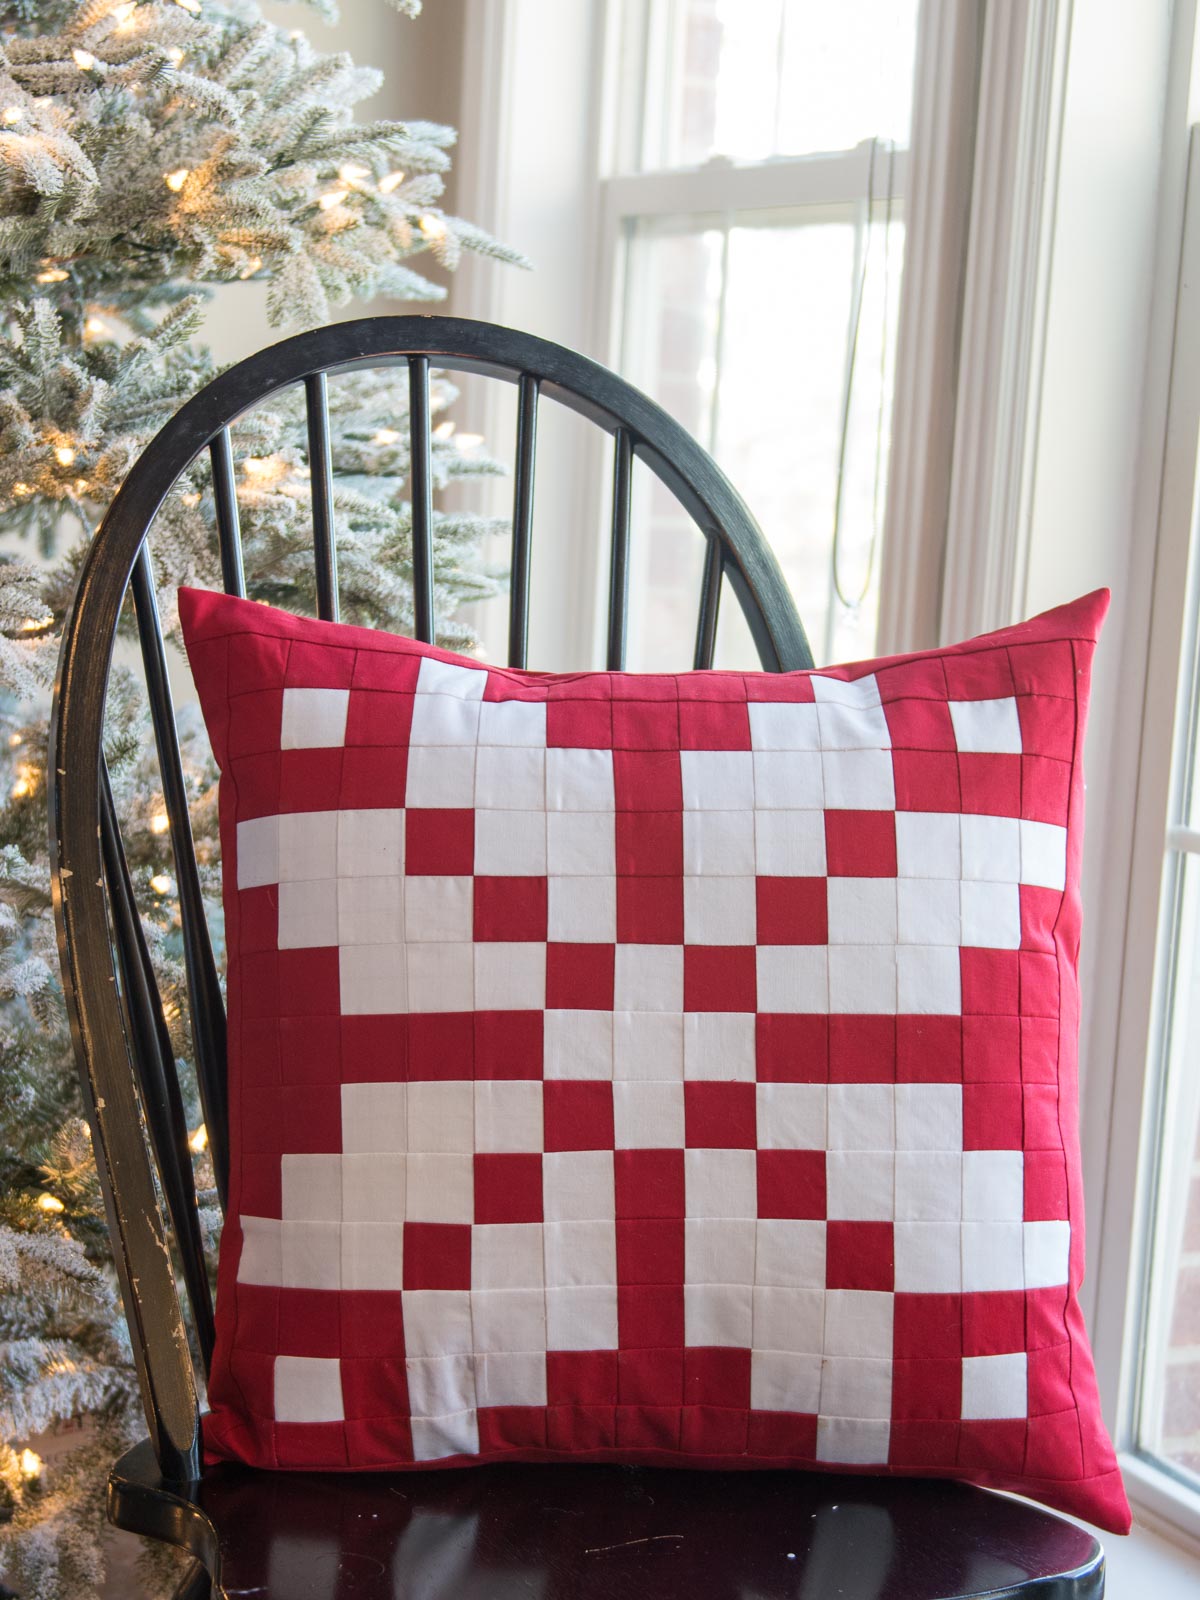
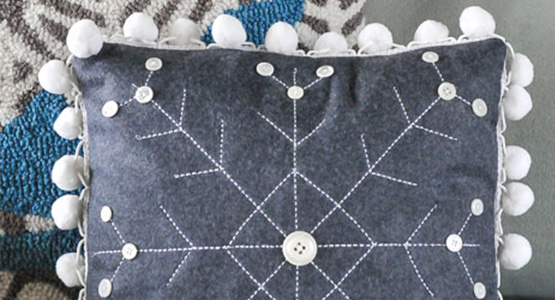
Norwegian-inspired Snowflake Patchwork Pillow
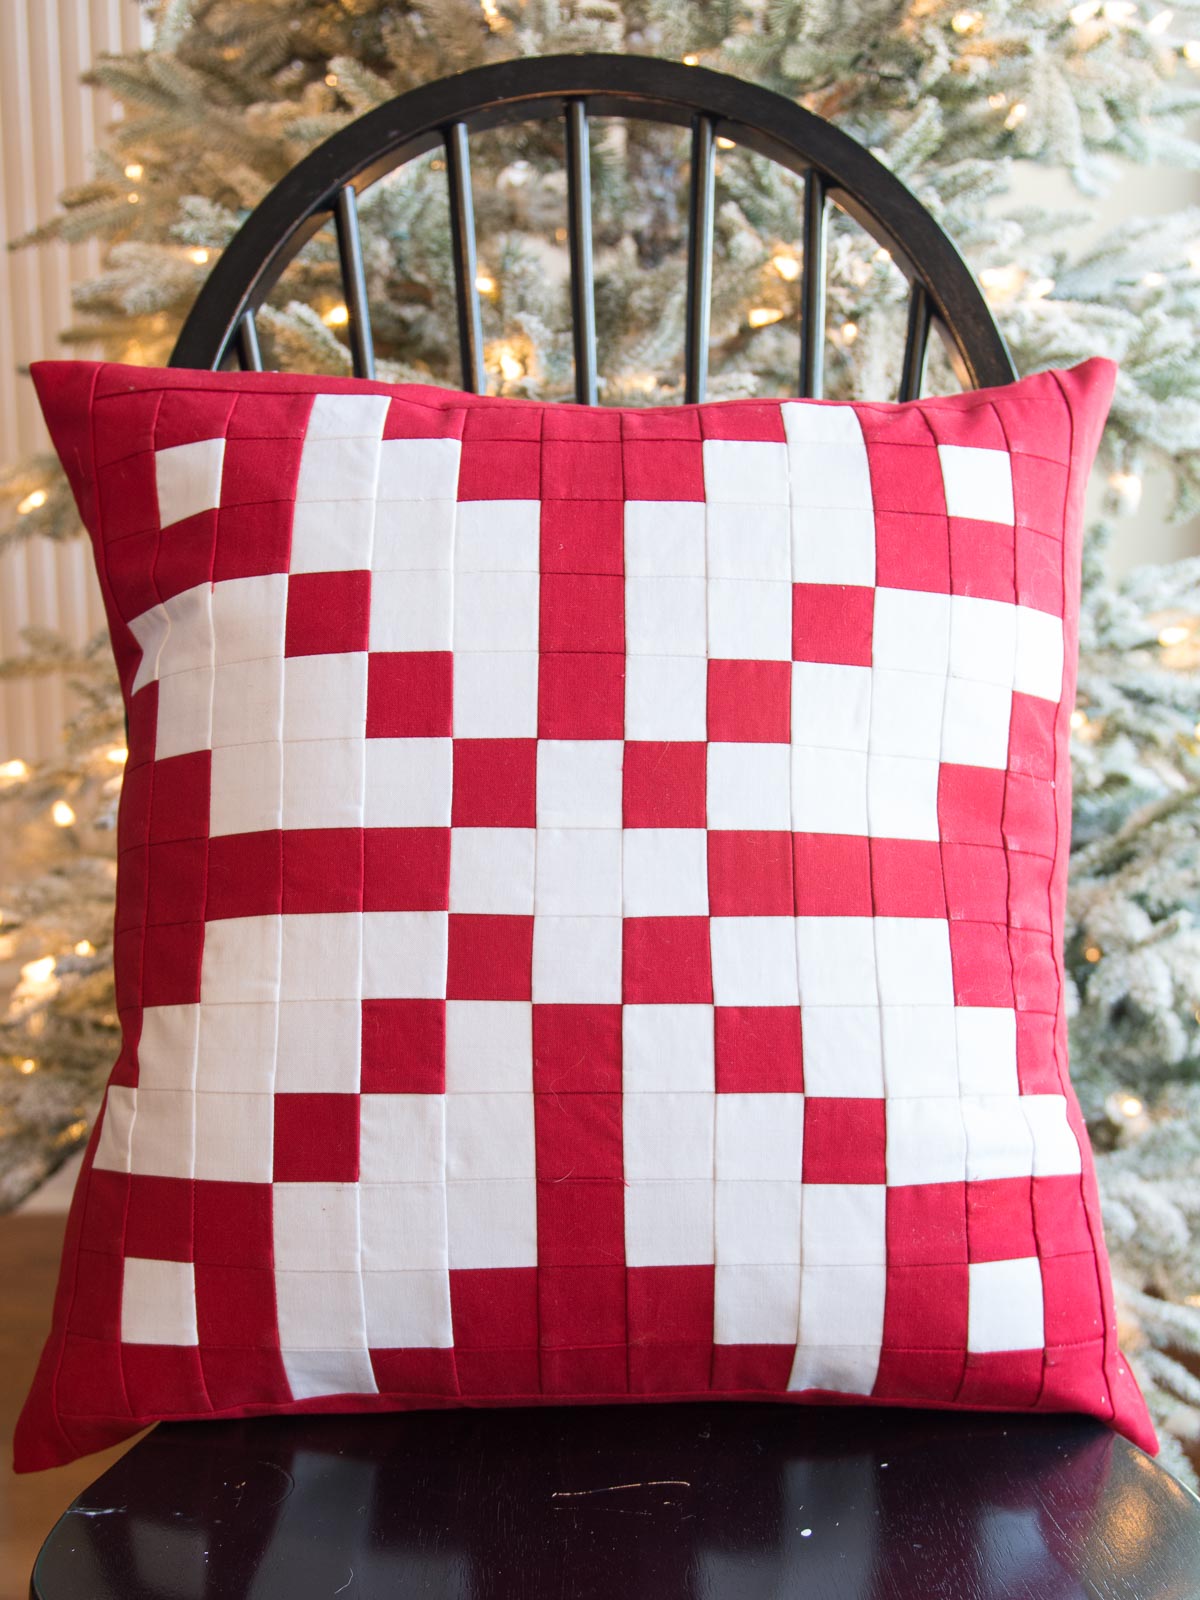
Hello WeAllSew readers! My name is Melissa Mortenson and I’m the girl behind the Polka Dot Chair Blog. Last summer I had the opportunity to visit Norway with my family. It was an amazing trip, made even more amazing by the fact that my Great Grandfather was born in Norway. I’ve always had a soft spot in my heart for the country, and I am so grateful that I was able to visit a place that has so much historic significance to my family.
While I was in Norway I became enamored with all of the gorgeous knit work that is everywhere. We visited several yarn and knitting shops, and I just wandered around in awe. I’ve tried to knit before but just can’t seem to get the hang of it. The trip made me think that I should give it a second try. I was very inspired by all of the intricate patterns that were knit into the sweaters. With Christmas coming up I thought it would be fun to create a Norwegian-inspired patchwork snowflake pillow. I took one of the knitting patterns that I spotted in Norway, and simplified it a lot so that I could turn it into a patchwork project. I used gridded interfacing to make the prospect of stitching 169 squares of fabric together a bit easier! Want to make one? Here’s what you’ll need to do it.
Materials to make the Snowflake Patchwork Pillow
- 1 yard 1″ Quilters Gridded Fusible Interfacing
- 1/2 Yard Red Fabric
- 1/2 Yard White Fabric
- 1 Yard Fabric for Pillow back
- 22″ Pillow Form
- BERNINA Patchwork foot #97D Foot & Seam Guide
- Straight Stitch Plate
- Thread
- Iron
- Pressing Cloth
- Small Scissors
- Basic Quilting Supplies
Cutting instructions to make the Snowflake Patchwork Pillow
- Gridded Interfacing; 26″ x 26″
- 88 Red Squares each 2″ x 2″
- 81 White Square each 2″ x 2″
- 2 strips red fabric 22″ x 2″
- 2 strips red fabric 25″ x 2″
- 2 strips interfacing each 22″ x 2″
- 2 strips interfacing each 25″ x 2″
- 1 piece fabric 22″ x 22″ for pillow back
We are going to use the quilters grid interfacing as a “short cut” way to ensure that we get even points when stitching our pillow top together. Since the piece we are working with is so large, I am going to show you how this technique works on a smaller piece of fabric, so that you get a better idea of how to construct the pillow. I also underexposed the photos a bit so that you can see the grid on the interfacing clearly.
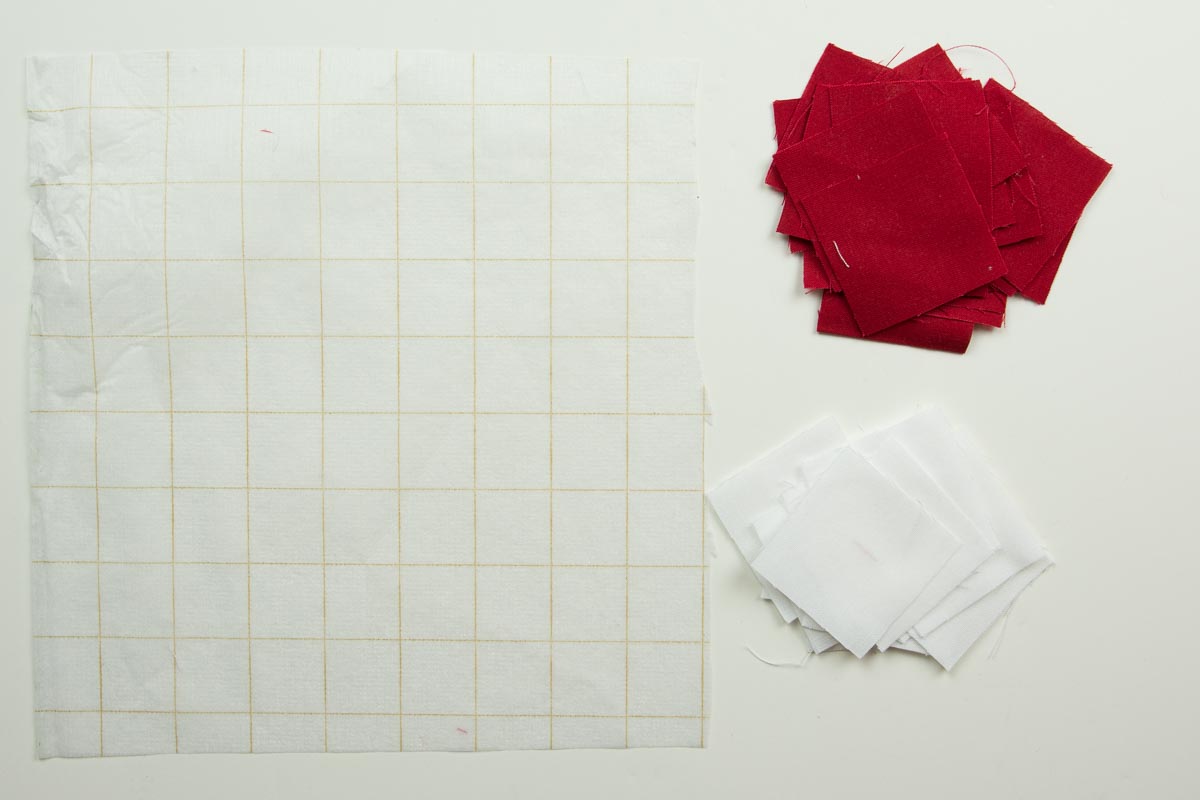
The gridded interfacing is double sided. One side has fusible adhesive. Begin by placing the fusible side up. The grid is broken down into 1″ squares. Since we are working with 2″ squares of fabric, each fabric square will cover 4 squares on the grid.
Begin laying out your design. Work in small batches, and place the squares on top of the interfacing so that the edges of the fabric line up with the lines on the interfacing. The wrong side of the fabric will be touching the fusible side of the interfacing.
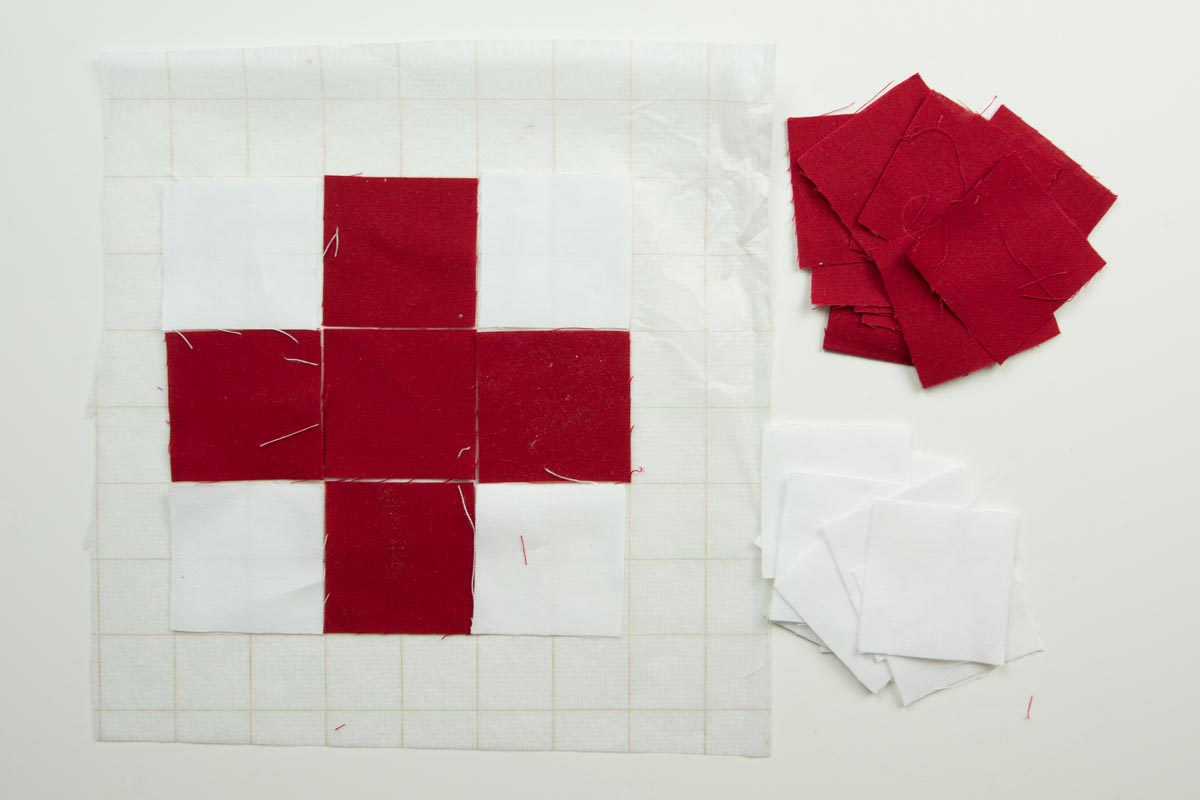
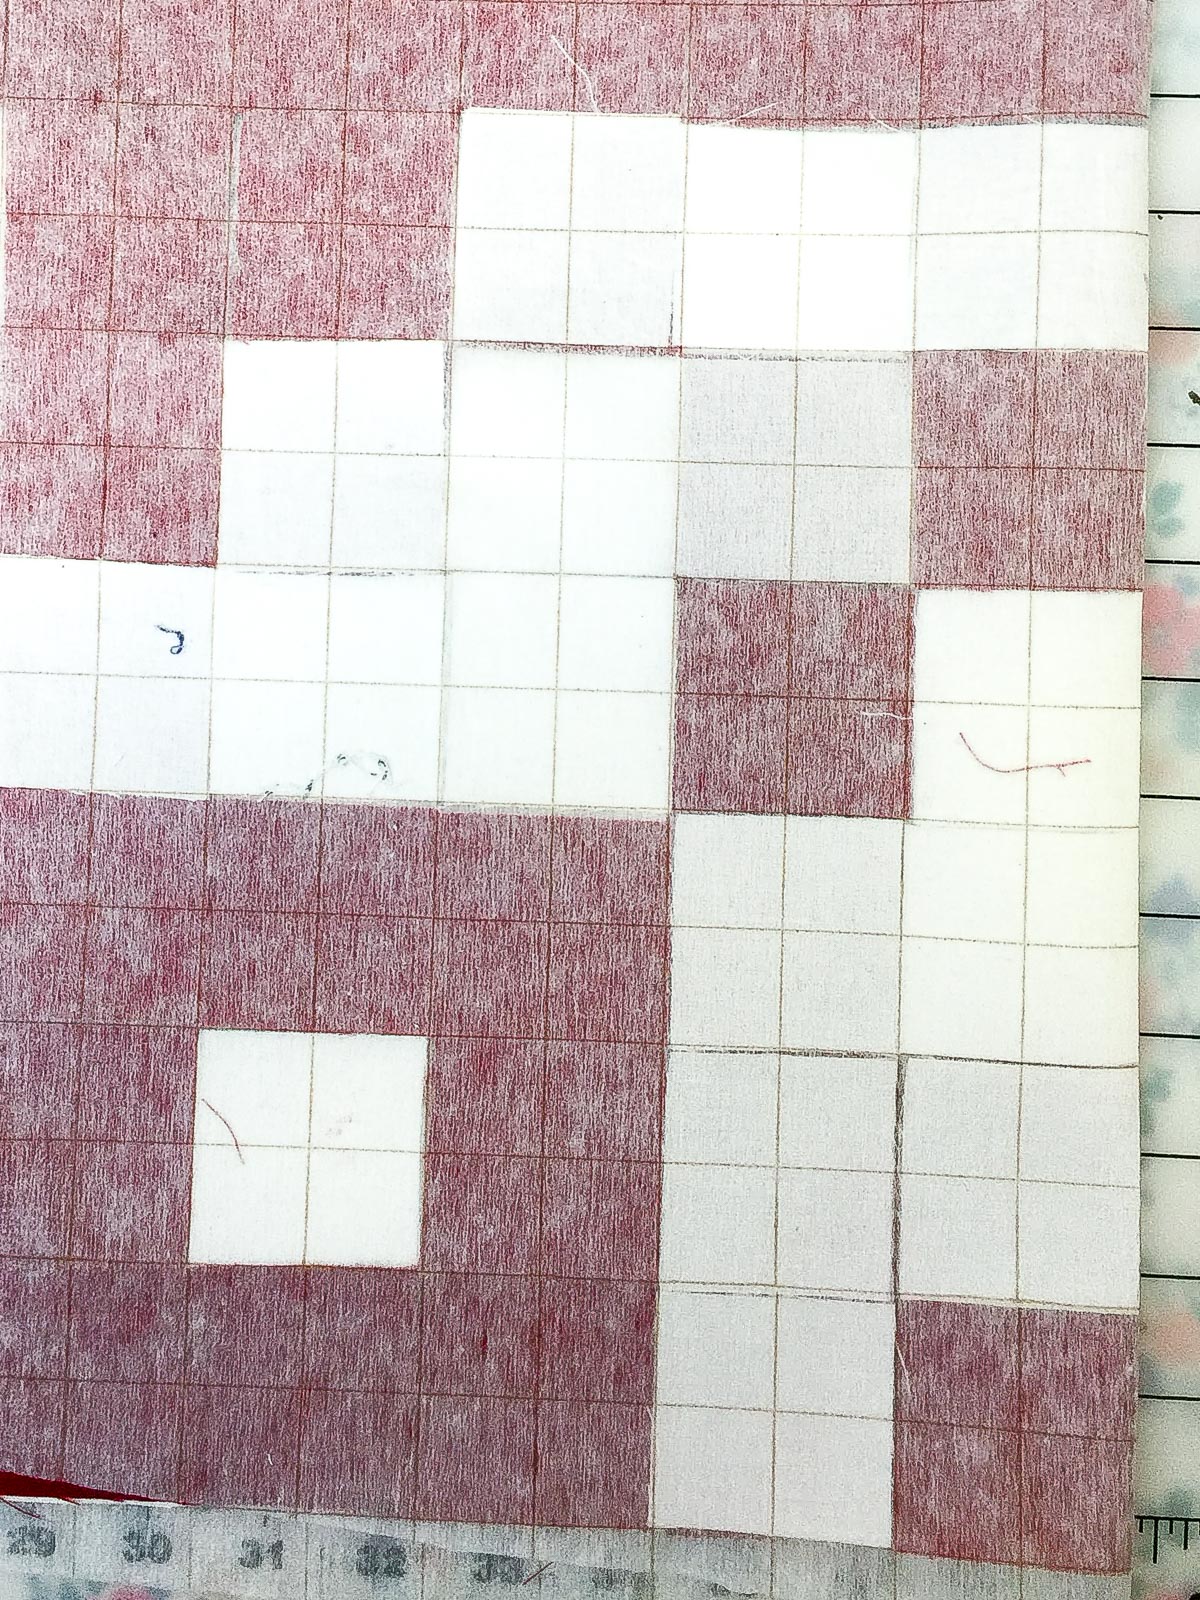
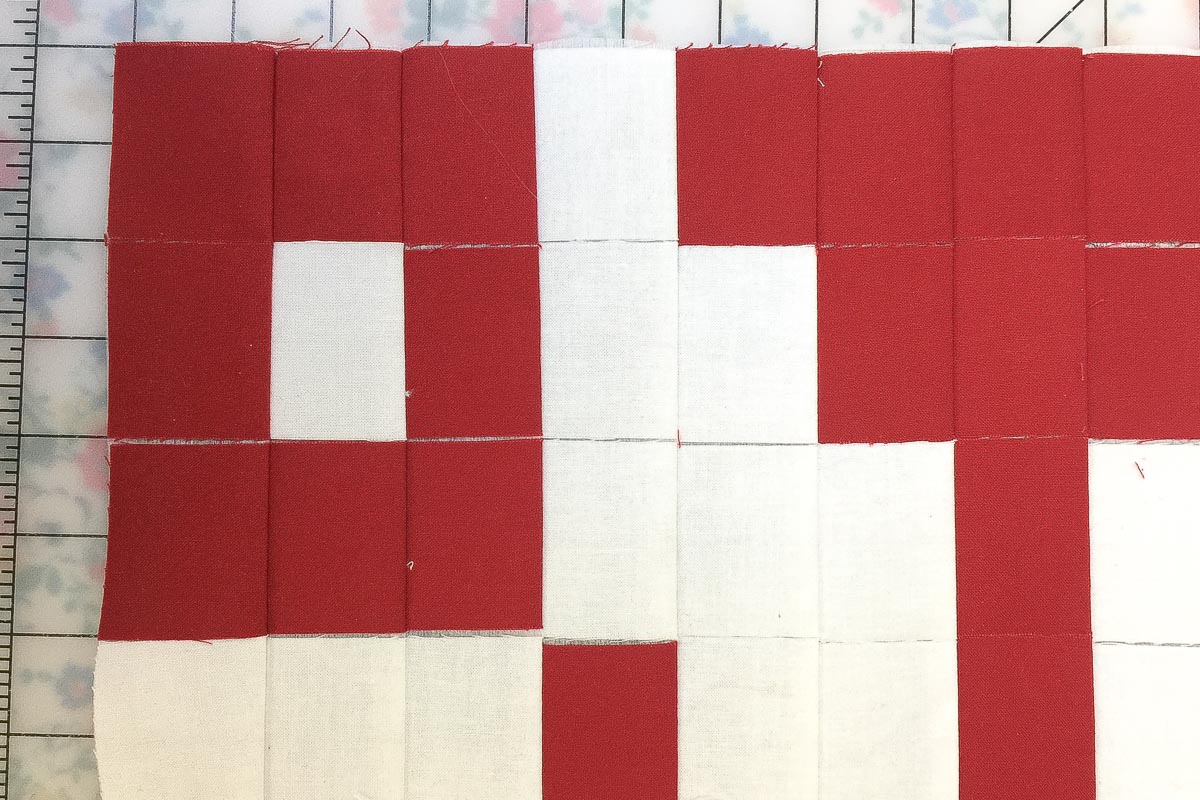
Here you can see how I made a simple plus design using white and red blocks.
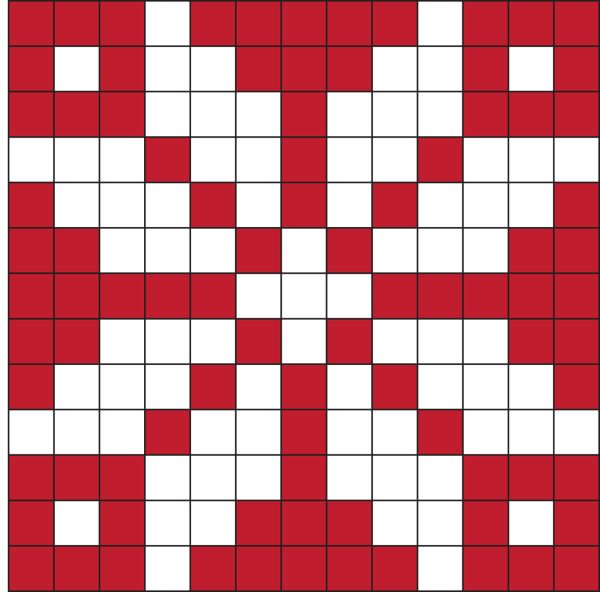
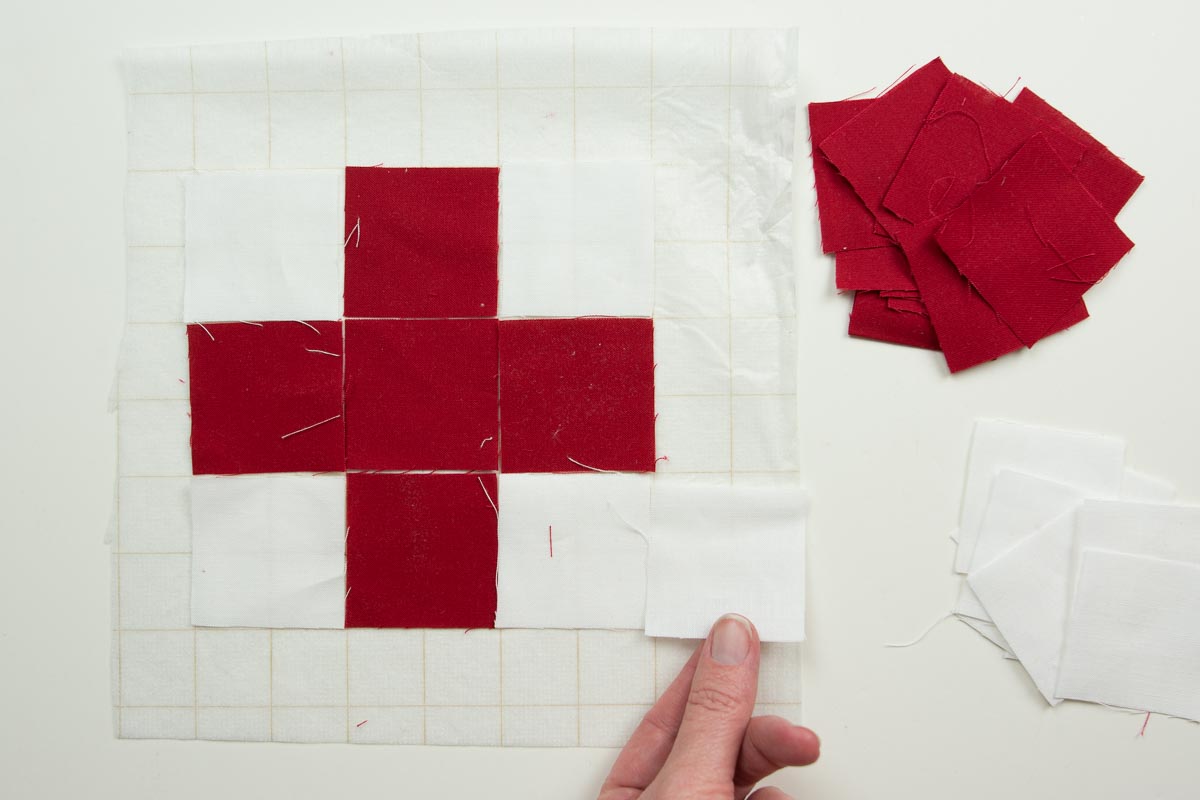
The pillow top that we are making today is larger, but the technique is the same. Place one square at a time on the interfacing to make a pattern as pictured in the illustration above.
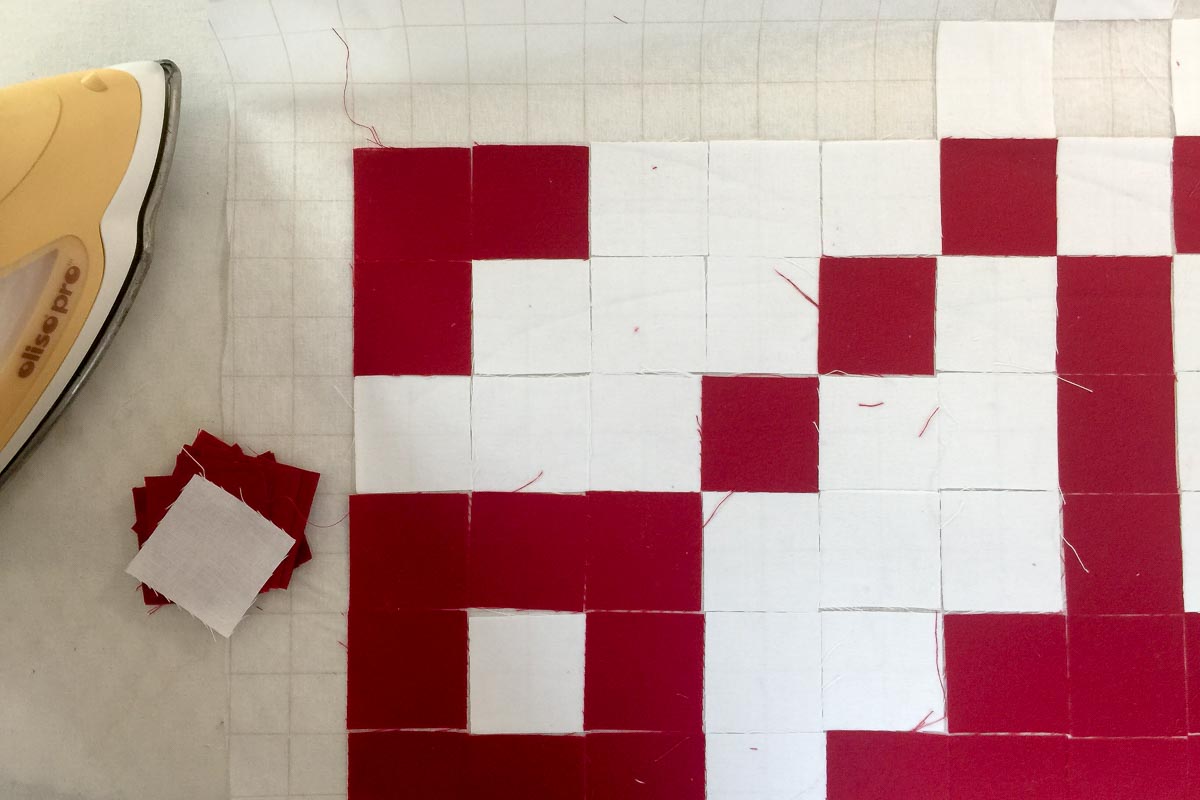
I recommend dividing the pattern into 4 equal parts and working on one quadrant of the top at a time. Place the squares on the interfacing. Once you’ve filled up the quadrant, use your iron to adhere the squares in place. Be careful that the iron does not touch any part of the interfacing not covered by fabric. Also, be careful that your squares don’t move around as you press. You can use a pressing cloth for this step to help you keep interfacing off of your iron. Read the directions on your package of interfacing to see the manufacturer’s recommended pressing settings.
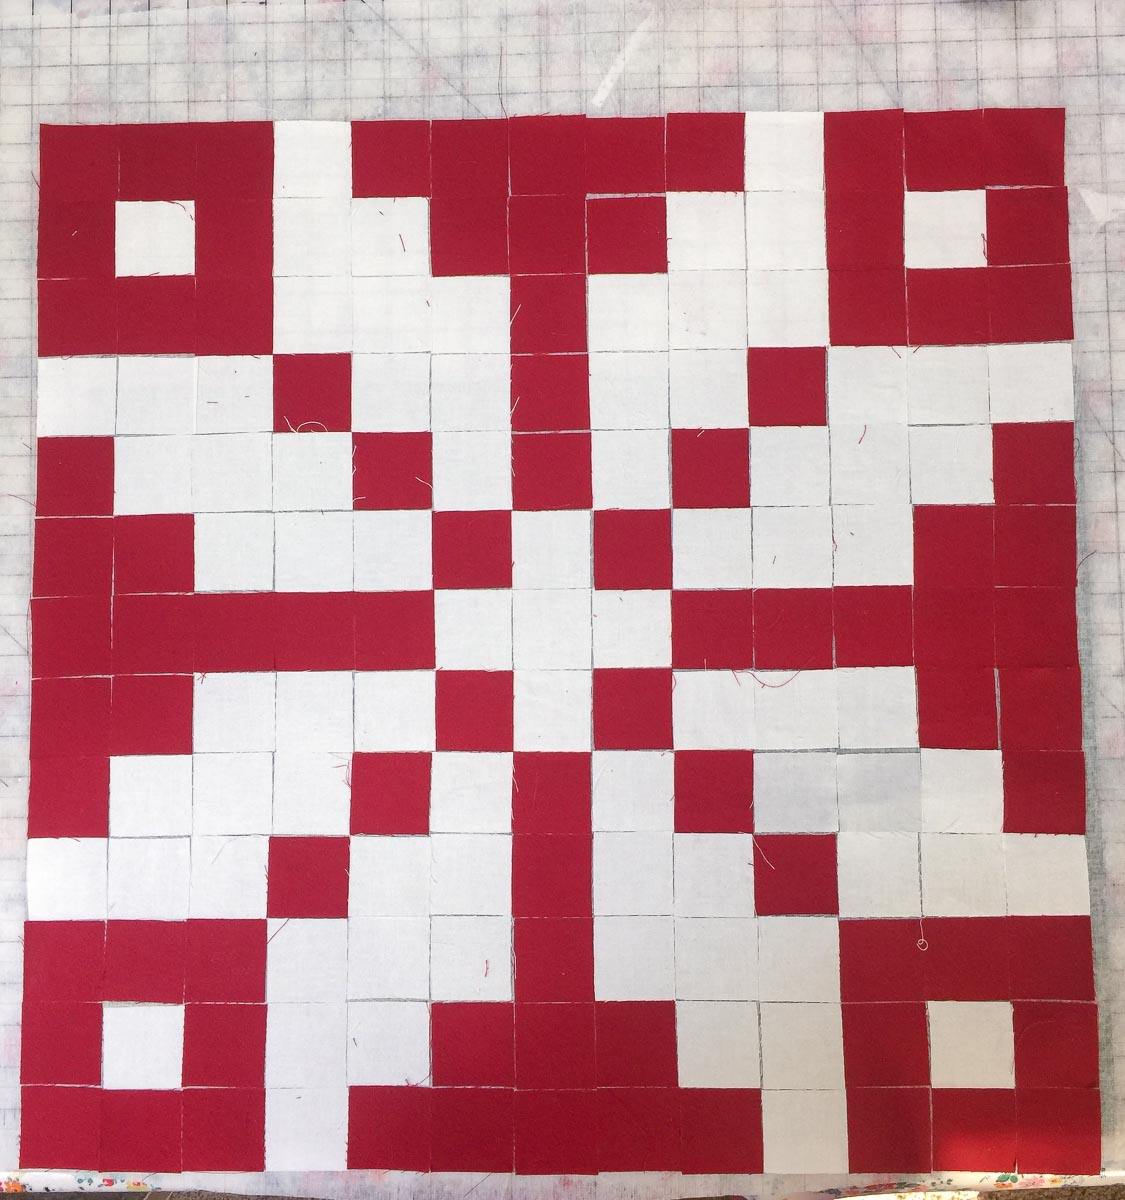
After you’ve finished pressing the squares onto the interfacing, your pillow top will look like this. All of the squares should be securely adhered to the interfacing.
Fold the pillow top right sides facing close to the center line (it won’t be the exact center since we have an odd number of squares). Make sure that you’ve folded it exactly along the grid line in the interfacing.
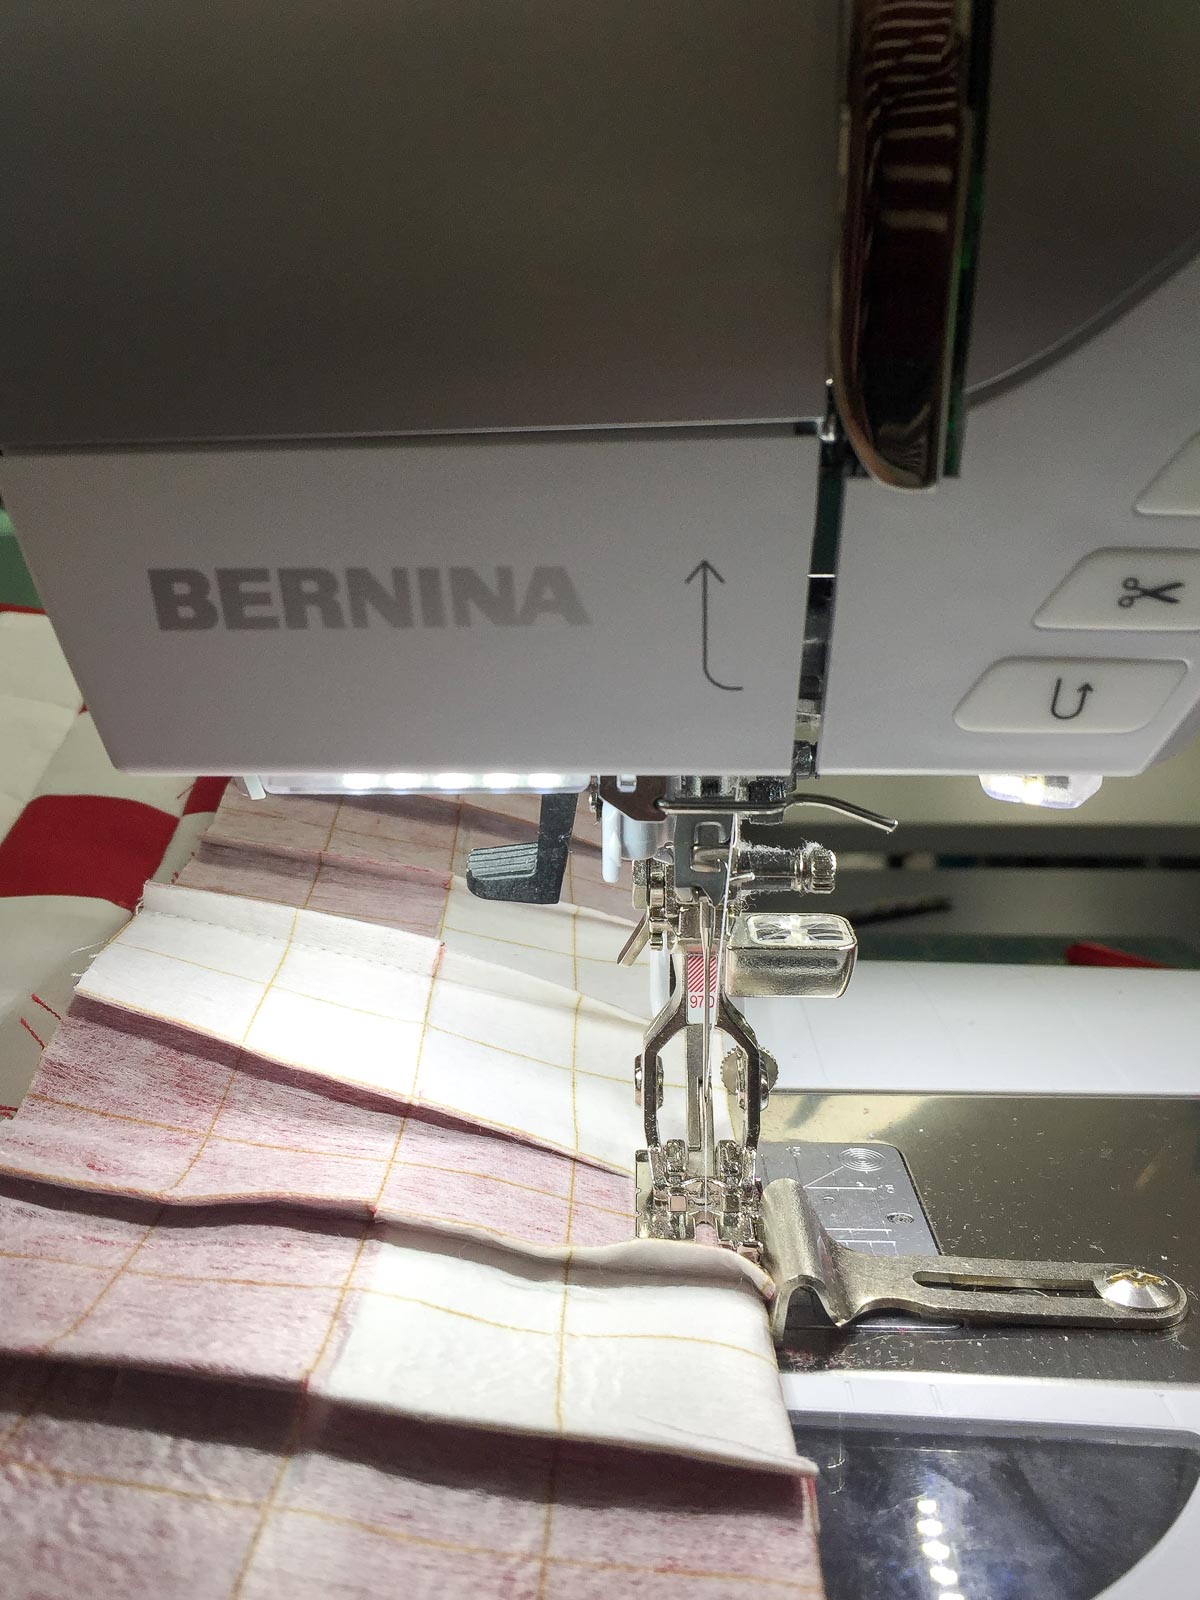
With the Patchwork foot #97D on your machine, the seam guide at 1/4″, and the Dual Feed engaged, stitch along this line 1/4″ in from the folded edge. Unfold and refold at the next row of squares. Keep repeating until you’ve sewn all the rows of squares together (all going in the same direction).
It will look like this when you are done. Flip it over to the front and make sure you didn’t miss any squares.
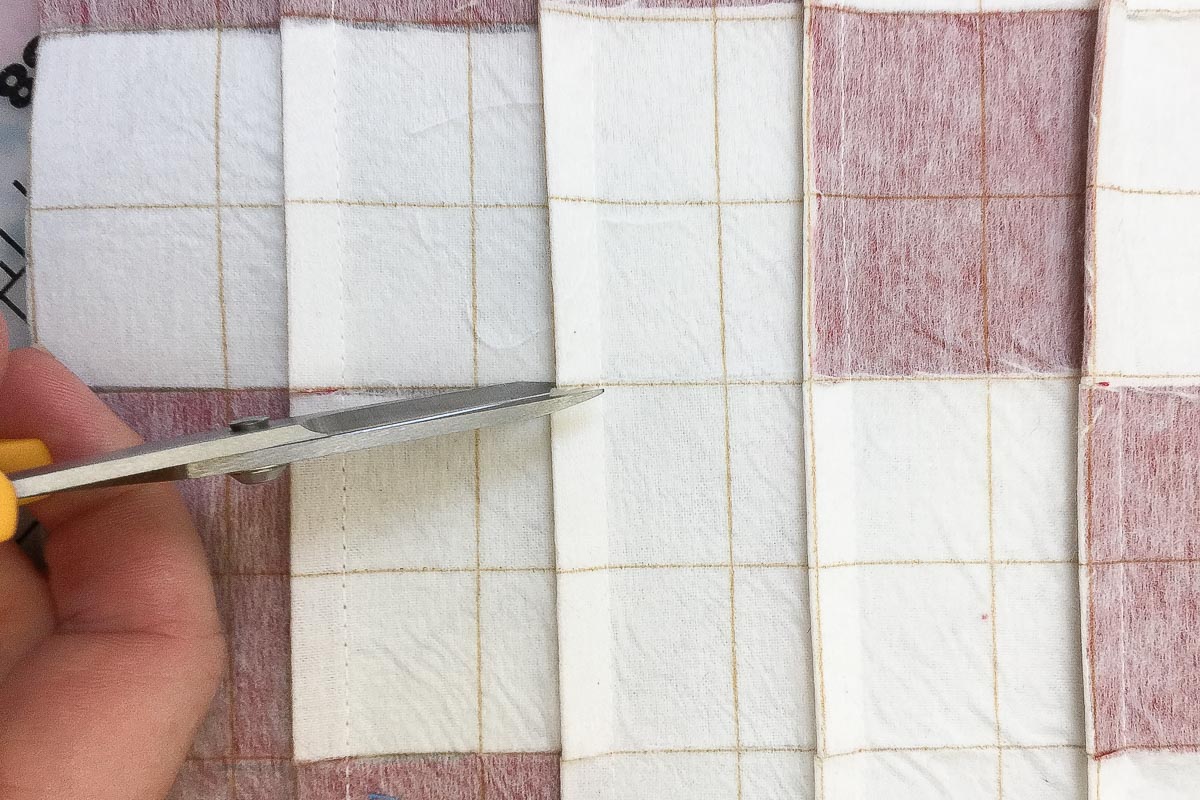
Flip it back over to the wrong side and clip the seams you just stitched at the intersection of the rows running in the opposite direction (this will all you to more easily fold the fabric in the opposite direction).
Next begin stitching the rows of squares together, this time working in the opposite direction. Begin close to the center again and work your way out.
When you are done, trim all of the excess interfacing off of the pillow top.
Iron the 2″ wide pieces of interfacing to the corresponding 2″ strips of fabric. Stitch the 22″ long strips of fabric to the pillow top and bottom. Press seam to one side. Stitch the 25″ long strips of fabric to the two sides of the pillow. Press seam to one side.
Layer the 22″ x 22″ piece of backing fabric onto the pillow top, right sides facing. Stitch together using a 1/4″ seam allowance. Leave a 10″ opening in one side of the pillow. Turn right side out. Feed pillow form into the pillow, and slip stitch the opening closed.

Used Products


What you might also like


7 comments on “Norwegian-inspired Snowflake Patchwork Pillow”
-
-
Very pretty! What line of fabric is this? I love the red.
-
Love this pattern..putting on my to do list for the year 2017. Beautiful…
-
Hi Melissa,
I love this pattern and plan to make it, however, I have a question. You call for 1inch gridded interfacing but then call for 2inch squares. The squares will be too big to fit into the grids on the interfacing. I just made a bag using the gridded interfacing and it was printed in 2.5 in grids as were my squares. It worked perfectly so I’m trying to figure out how this one would work.-
She says one 2” square will cover 4 of the squares on the fusible interfacing.
-
-
I’m about to start my Patchwork journey starting from scratch. Coming across this article has got my sewing head buzzing. There are so many possibilities in this beautiful type of design work. I will be putting at the top of my 2021 projects.
-
I too visited Norway for my ancestral past in 2018. Beautiful country, gorgeous fjords. Even though this Newsletter is almost 7 years old the content is ageless. I have quilted for many years but have never used quilted fusible interfacing. I like to challenge myself with learning new techniques for unique quilting projects. Thank you for bringing this project back around to all of us Bernina lovers once again.
Leave a Reply
You must be logged in to post a comment.

What a beautiful yet simple pillow, colors that delight year round.