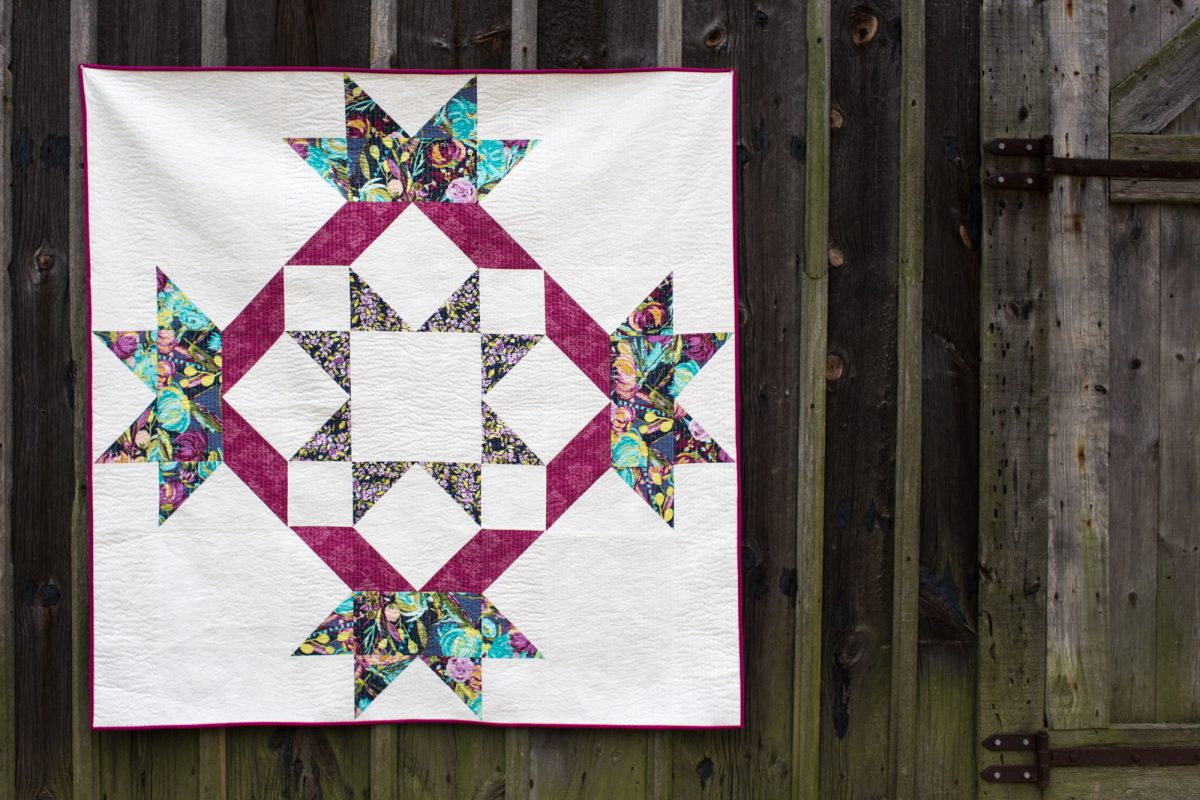
Radiant Splendor Supersized Quilt-along: Week 2
Welcome back to Week 2 of the Radiant Splendor Supersized Quilt-along. Last week, we discussed your Fabric Selection, Fabric Requirements, and Cutting Instructions. This week we are going to piece our block units.

As a reminder, the Radiant Splendor Supersized Quilt-along will follow the below schedule:
Week 1 : Fabric Selection, Requirements, Cutting
Week 2: Piecing Block Units
Week 3: Quilt Top Assembly, Quilting, Finishing Up
Piecing Block Units for the Radiant Splendor Supersized Quilt
Create Flying Geese
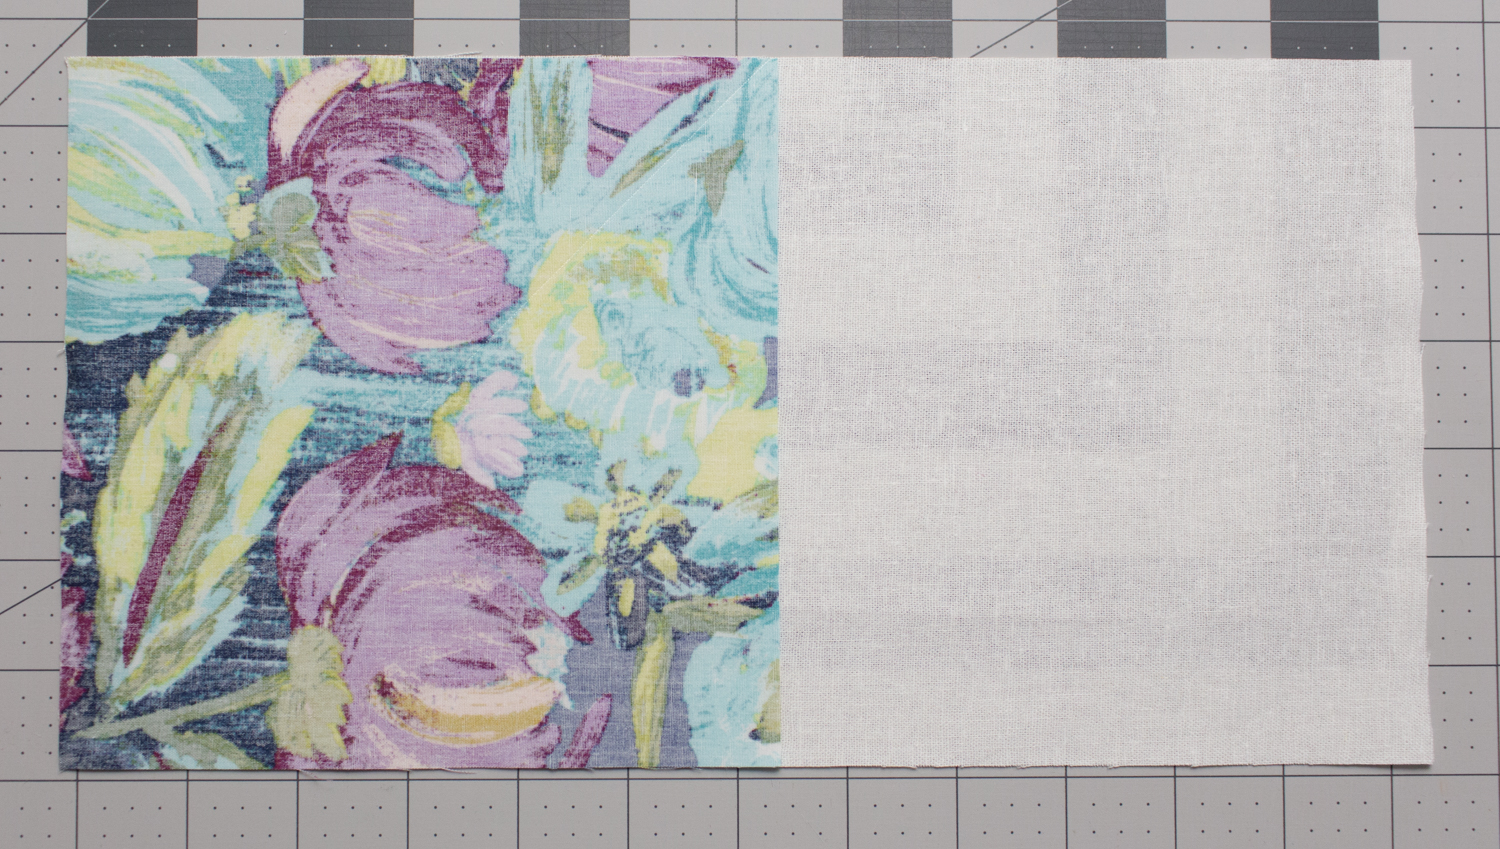
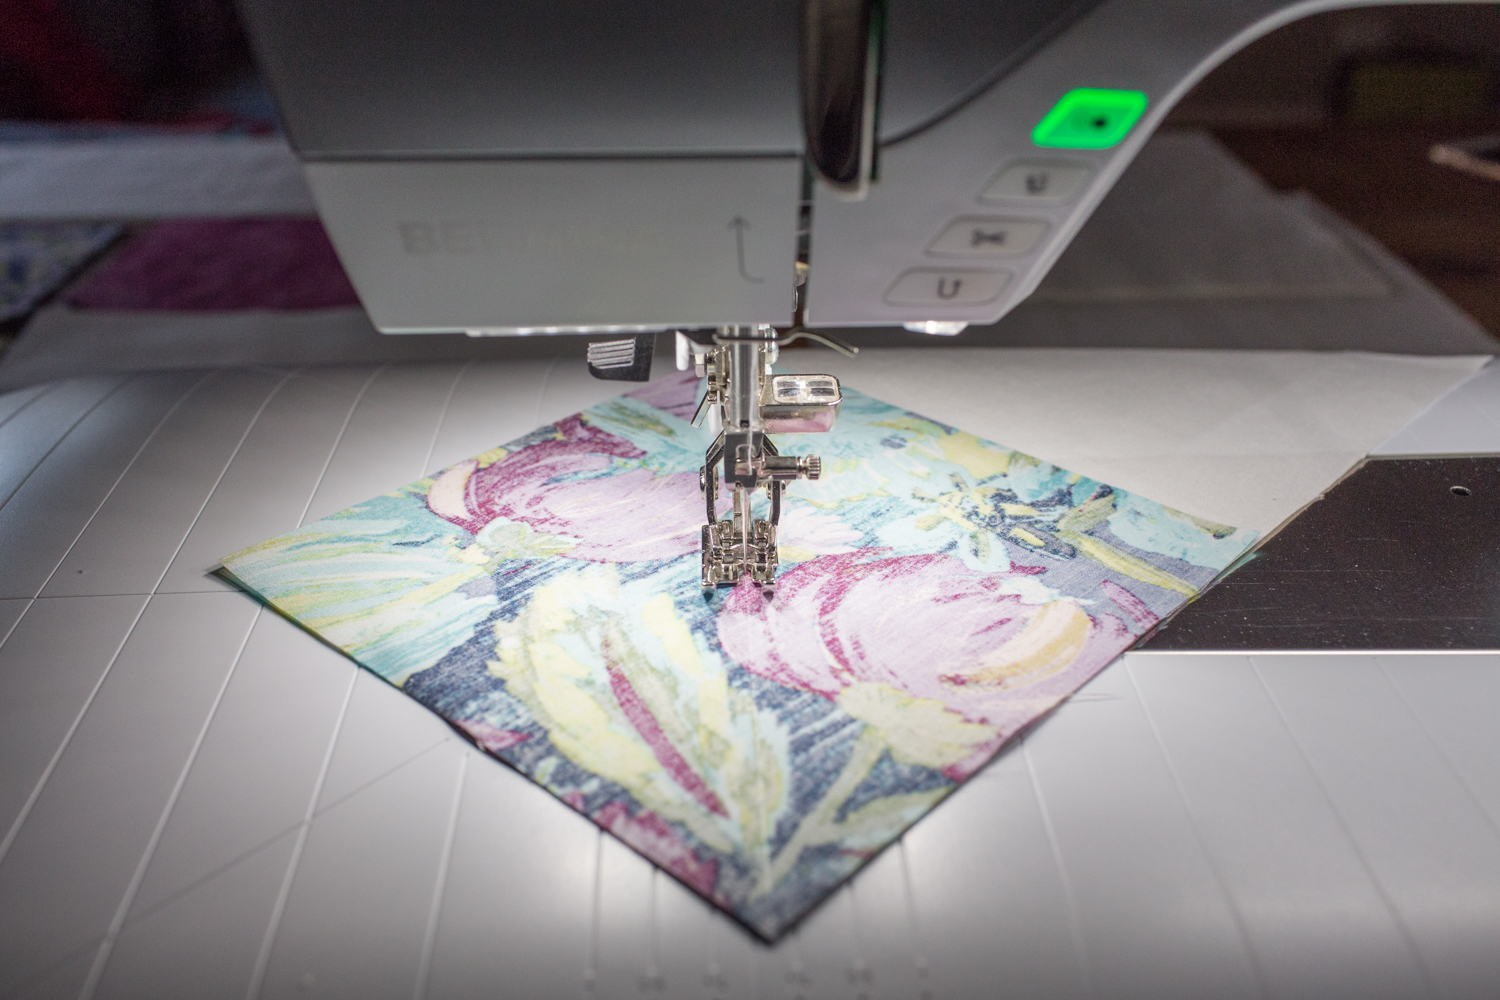
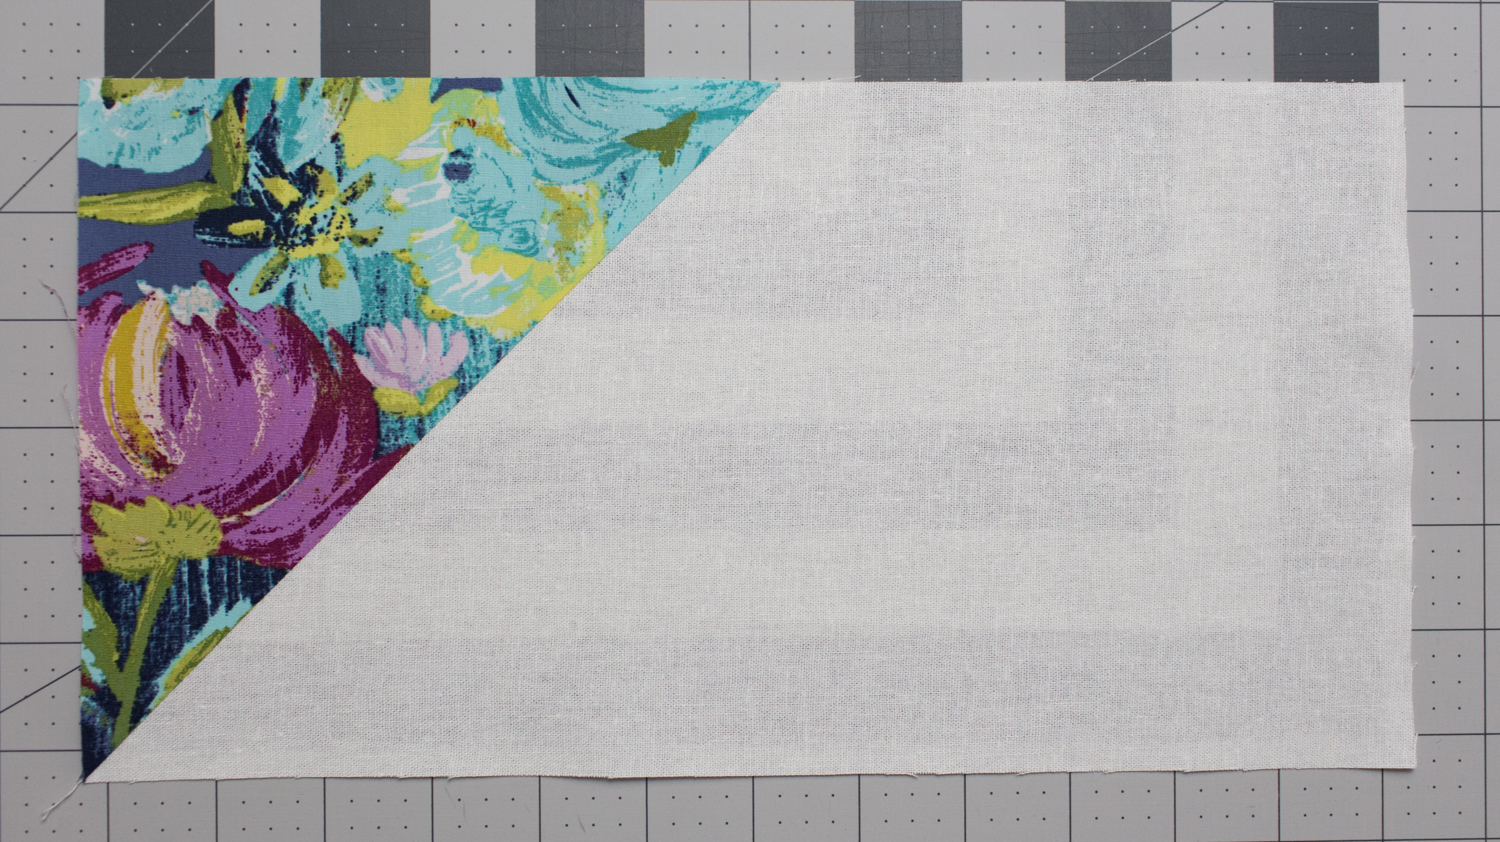
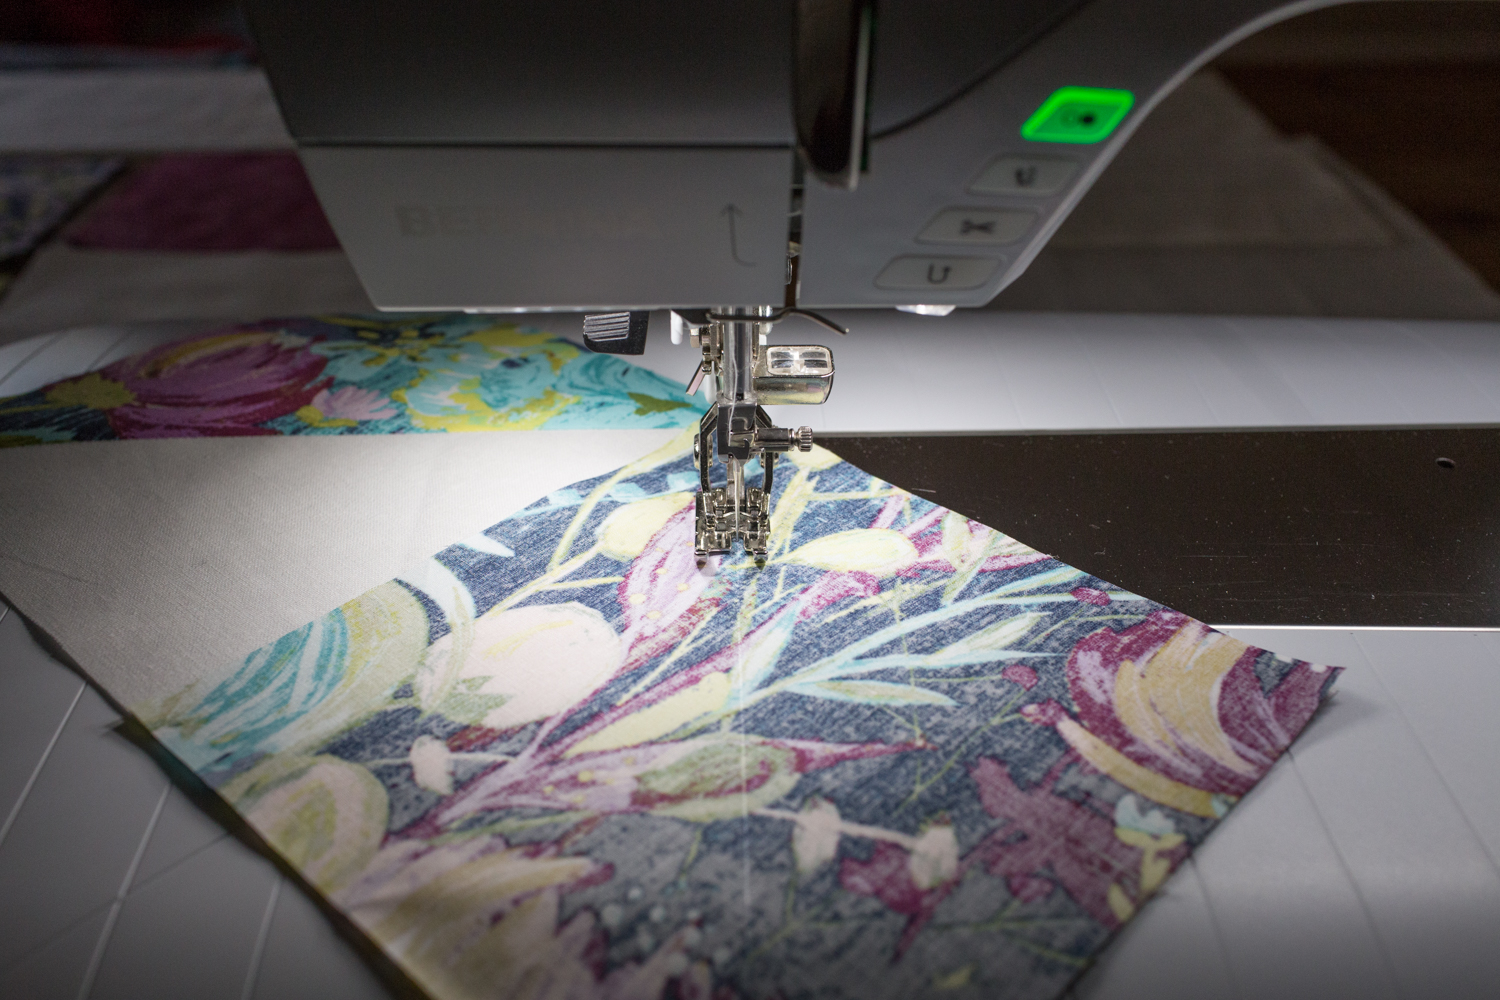
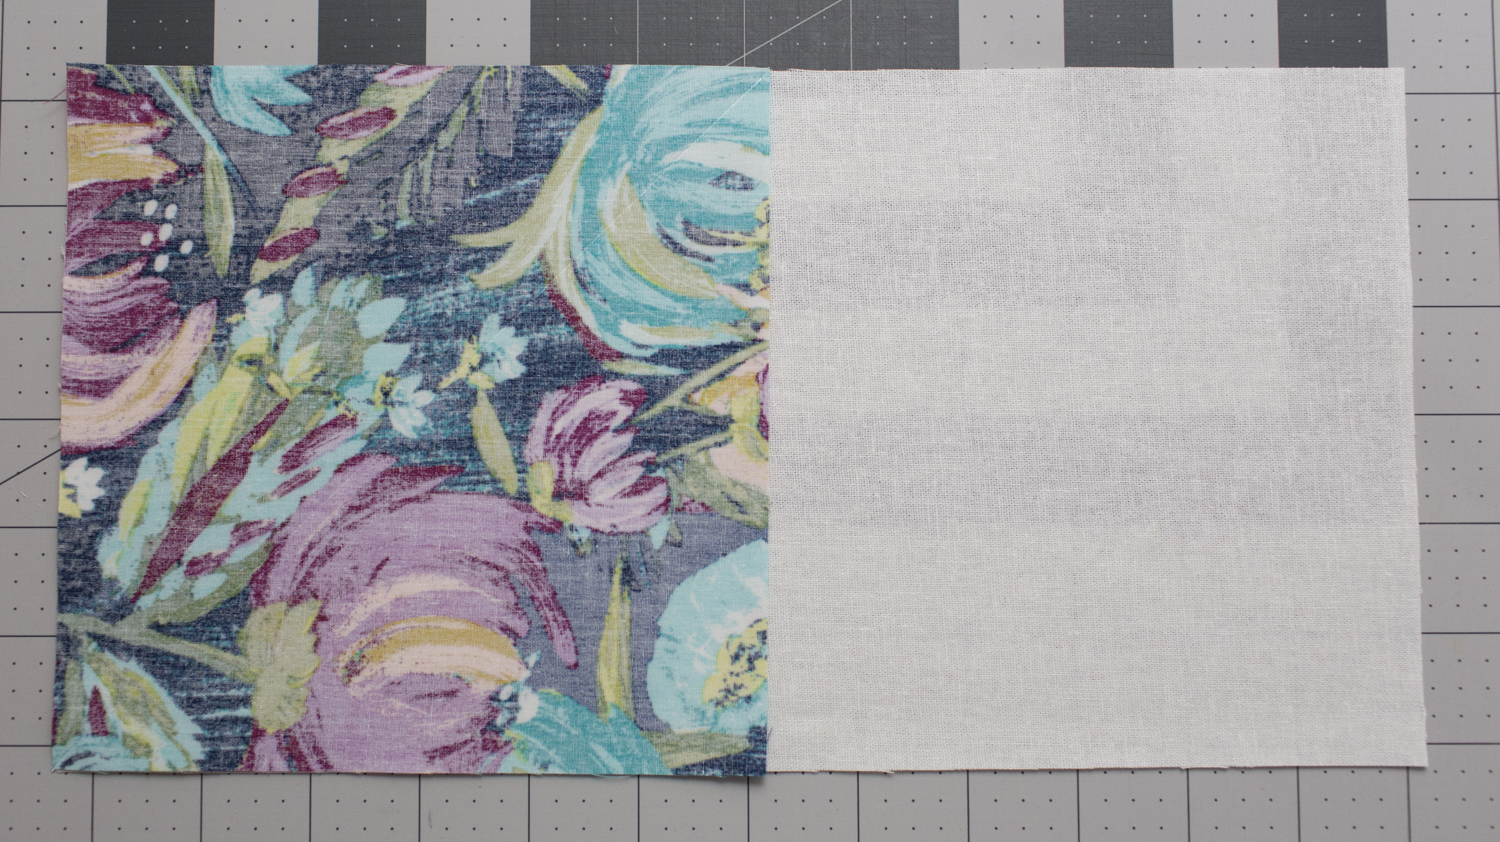
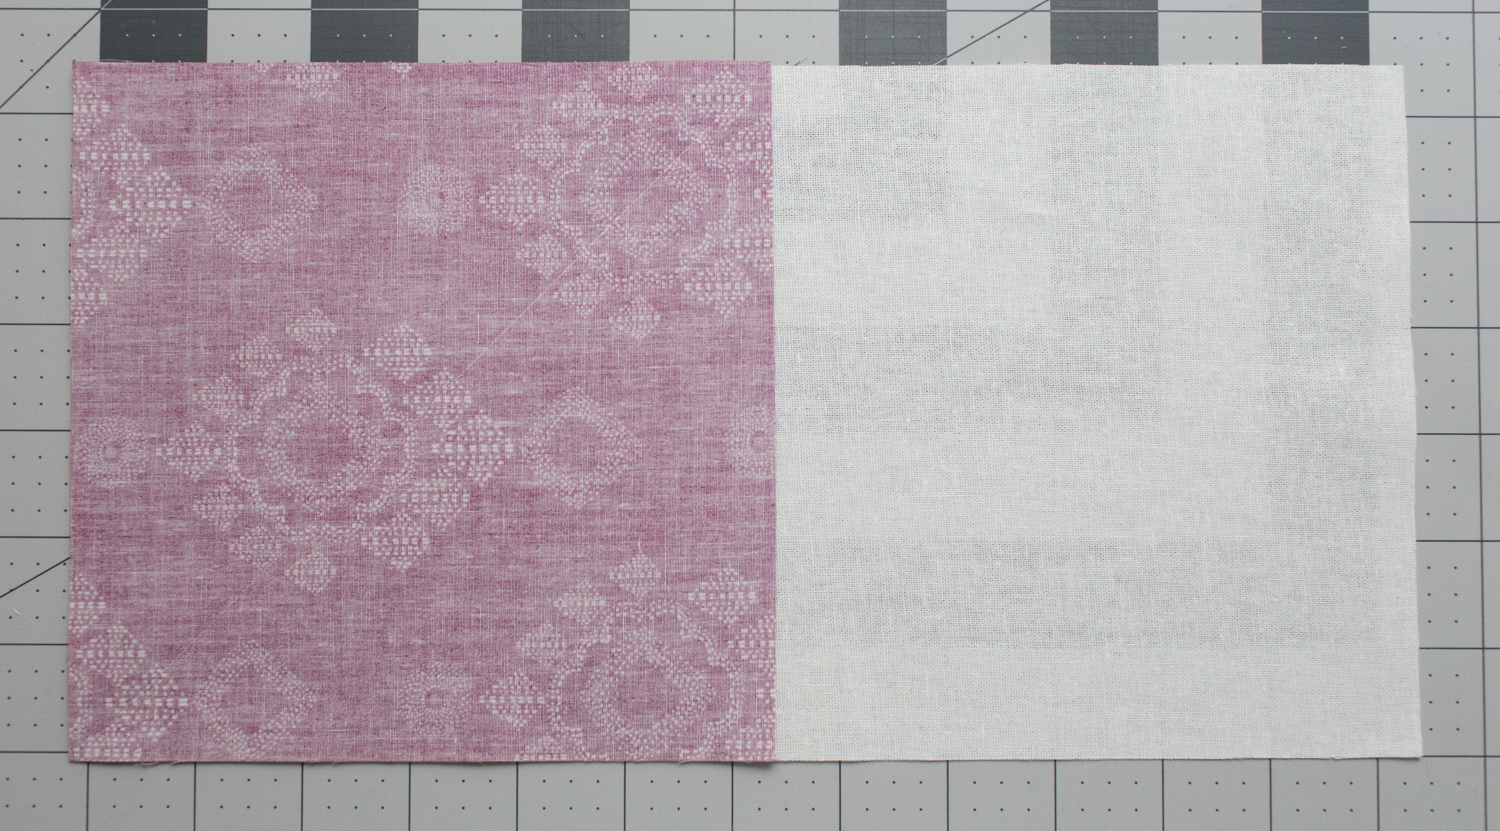
Step 1: Draw a diagonal line across the wrong side of (2) Painted Desert Night 6-1/2″ x 6-1/2″ squares. Lay (1) Painted Desert Night square right sides together with (1) Linen 6-1/2″ x 12-1/2″ rectangle, as shown. Sew on the drawn line.

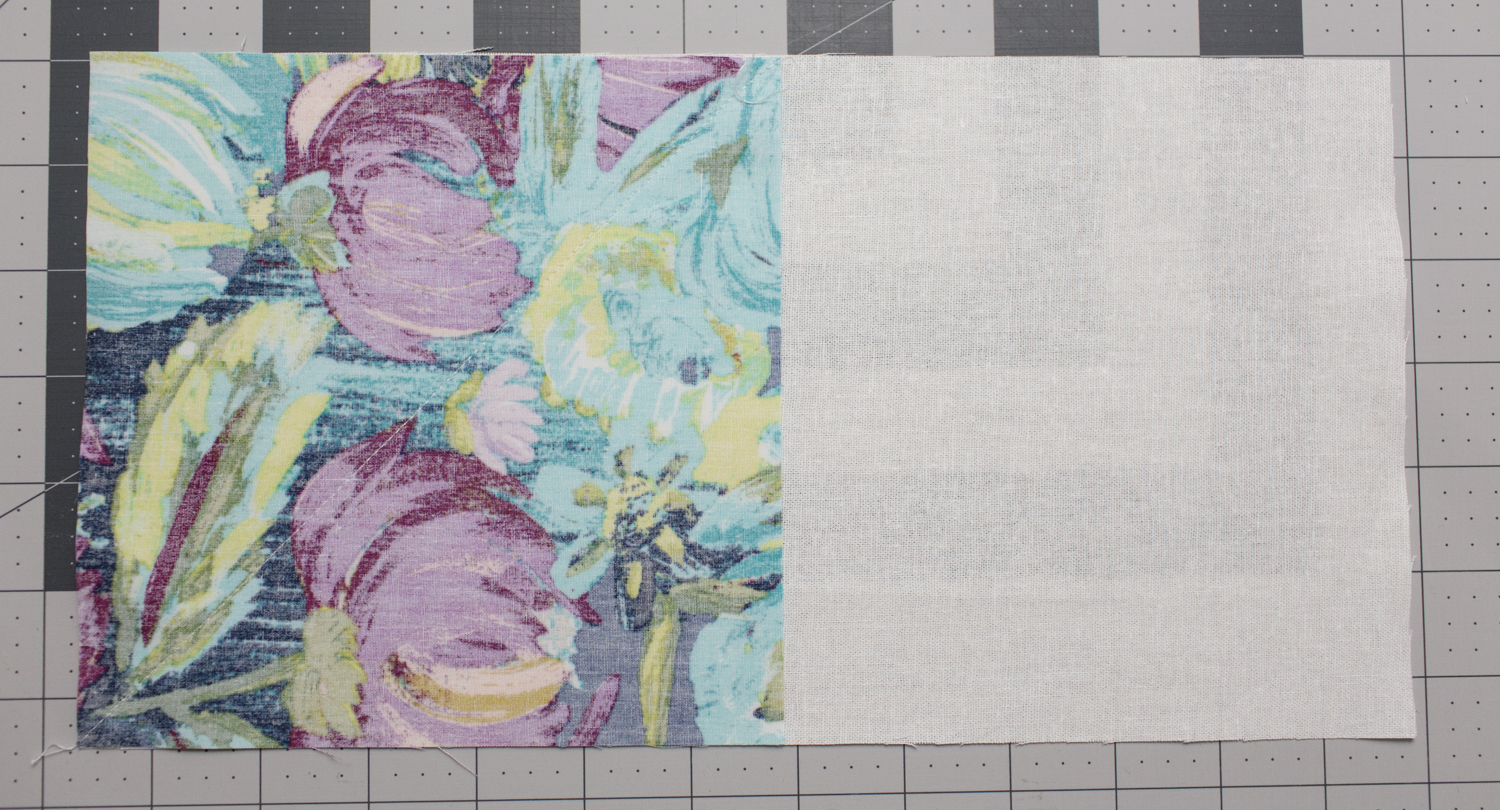
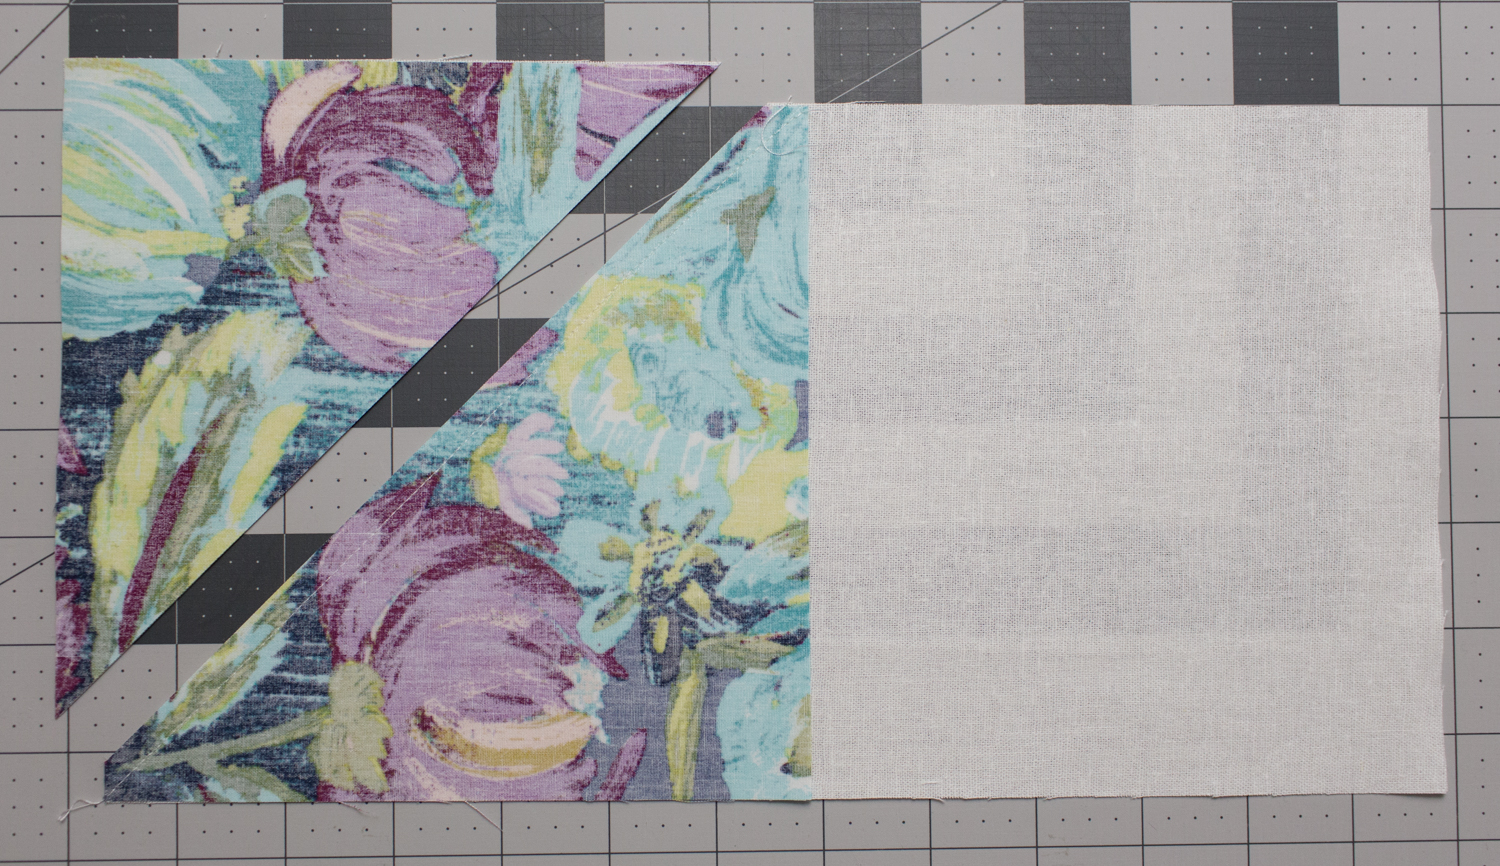
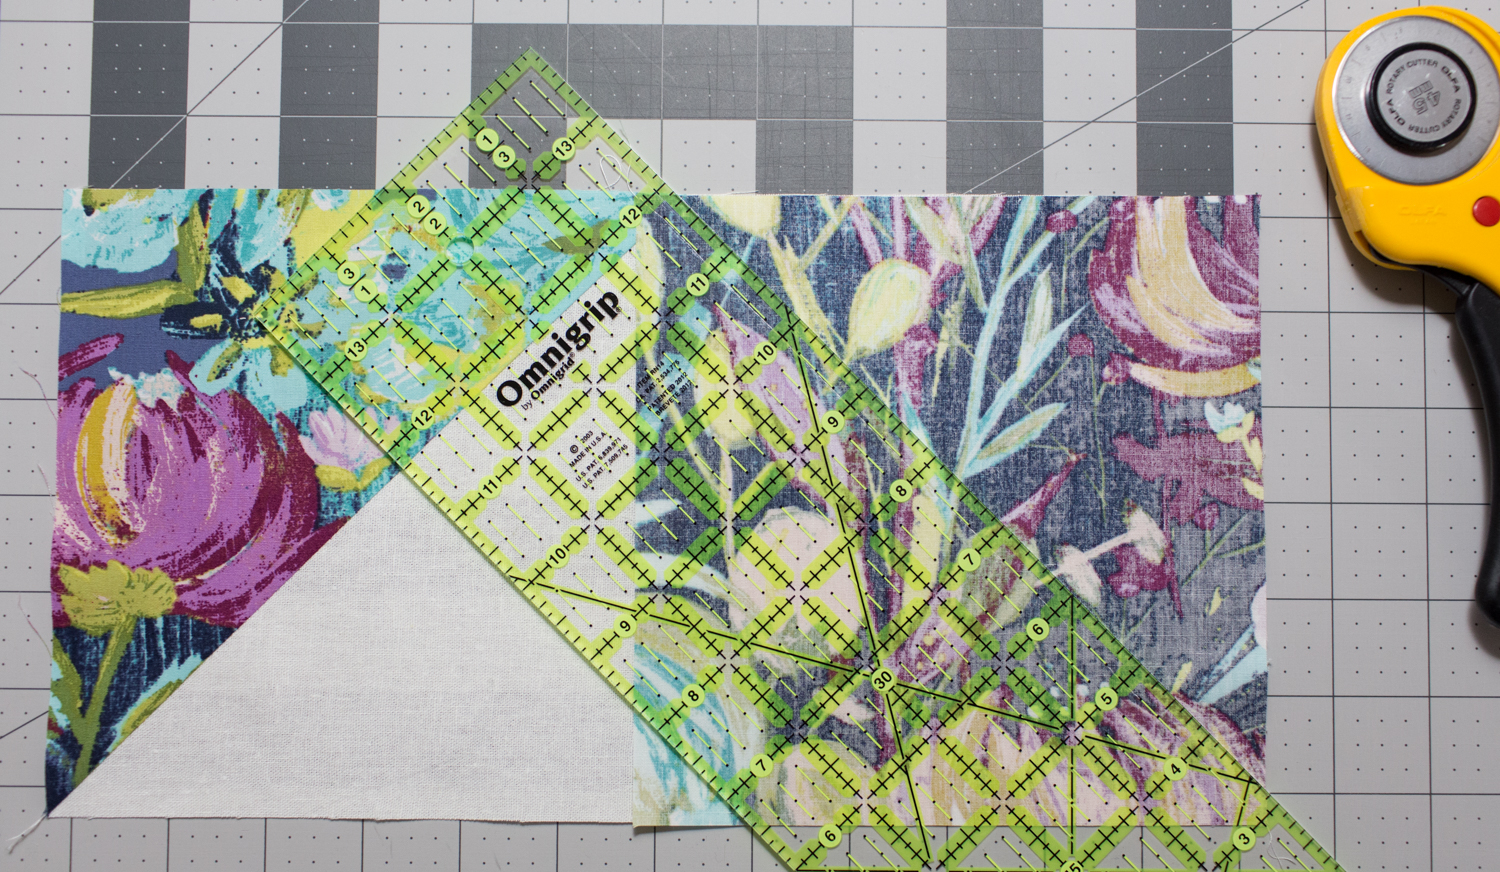
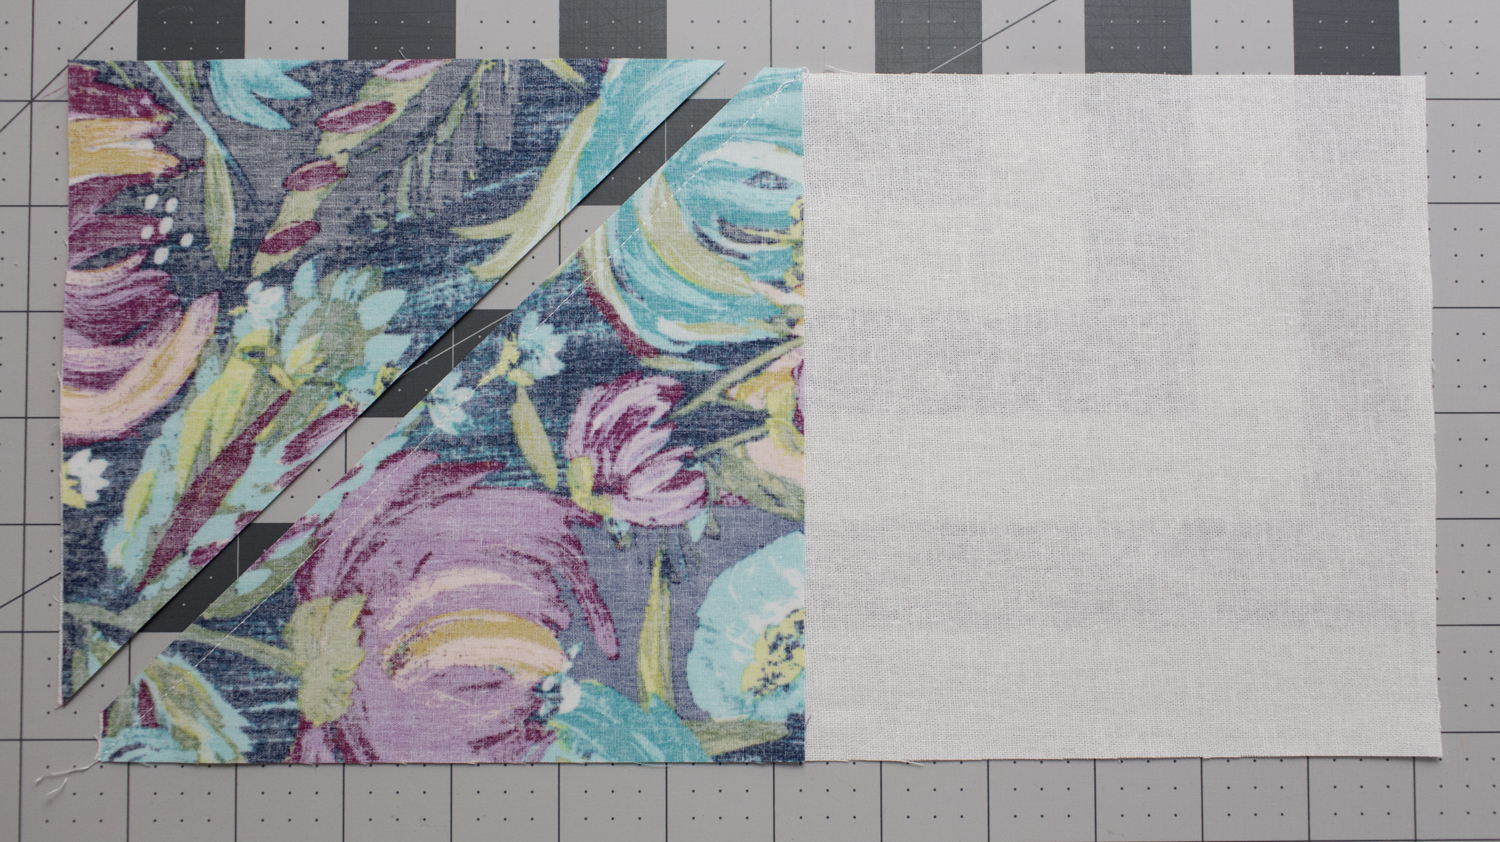
Step 2: Trim the excess fabric by cutting 1/4″ away from the stitching, as shown. Press open.

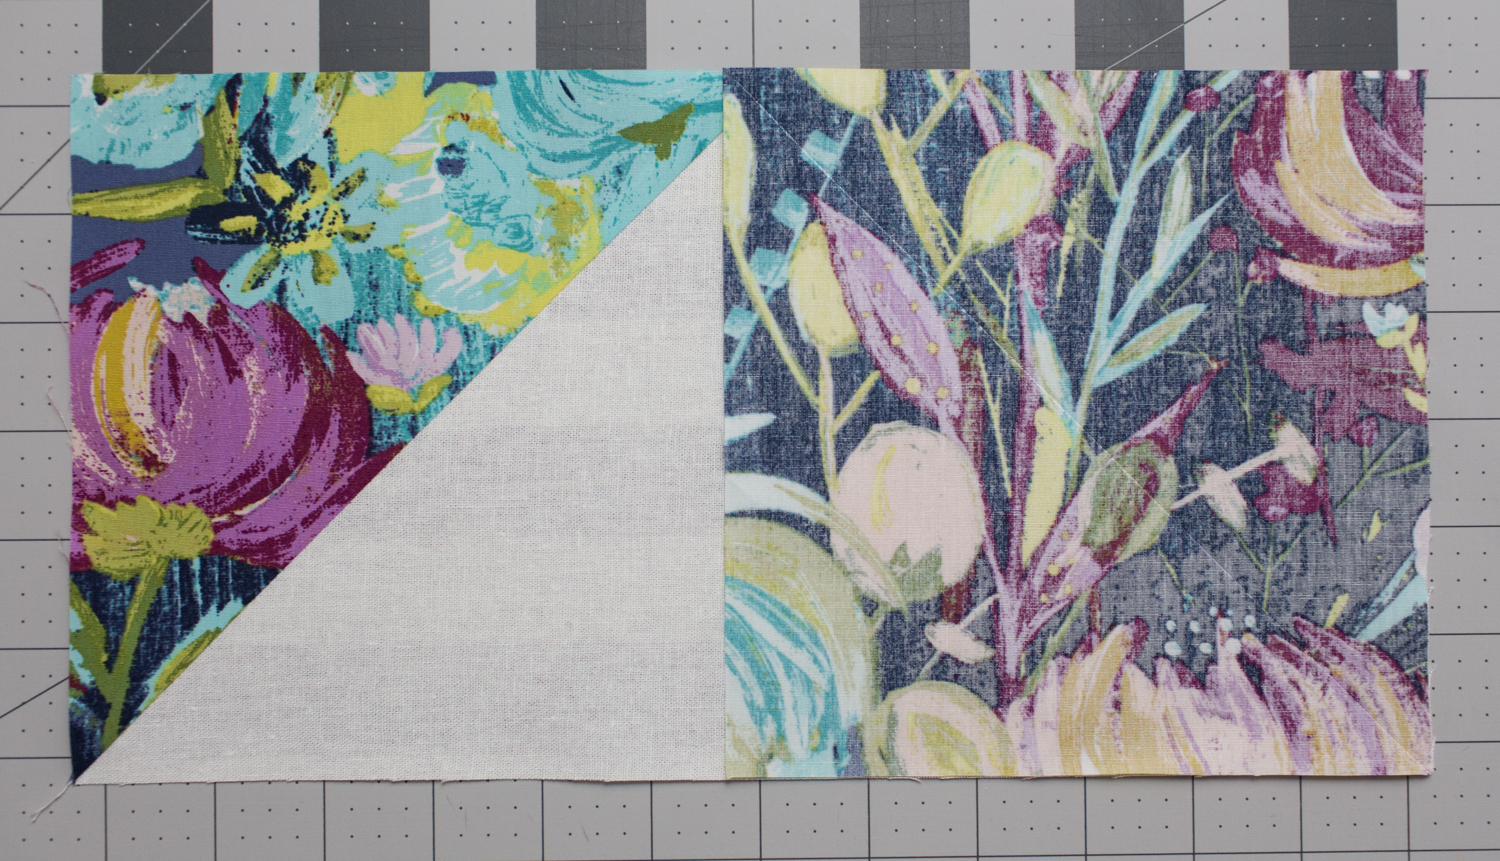
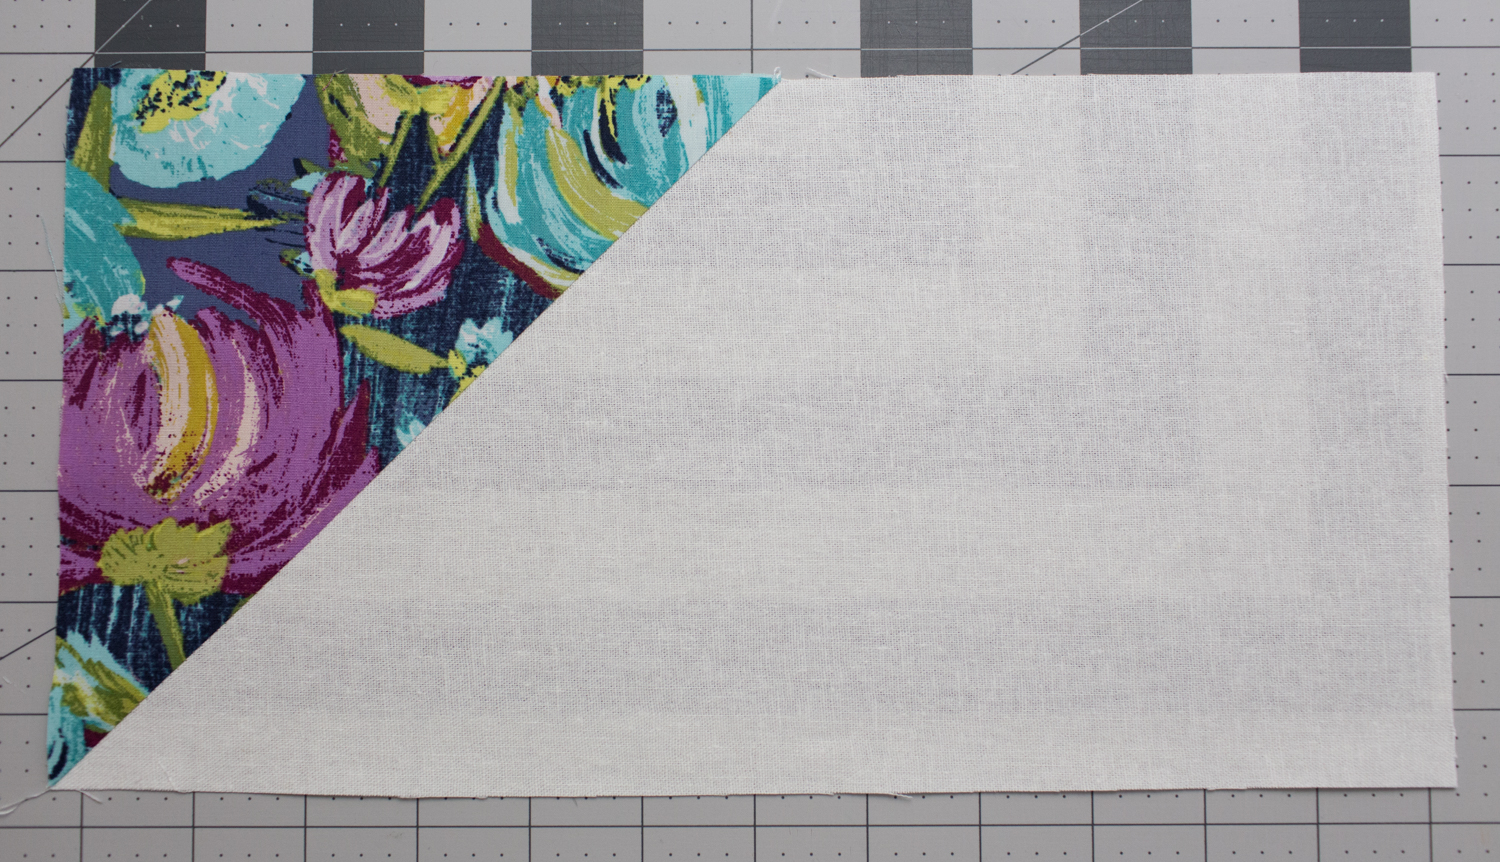
Step 3: Place the second Painted Desert Night square on top of the unit with right sides together. Sew on the drawn line and trim the excess by cutting 1/4″ away from the stitching, as shown. Press open.

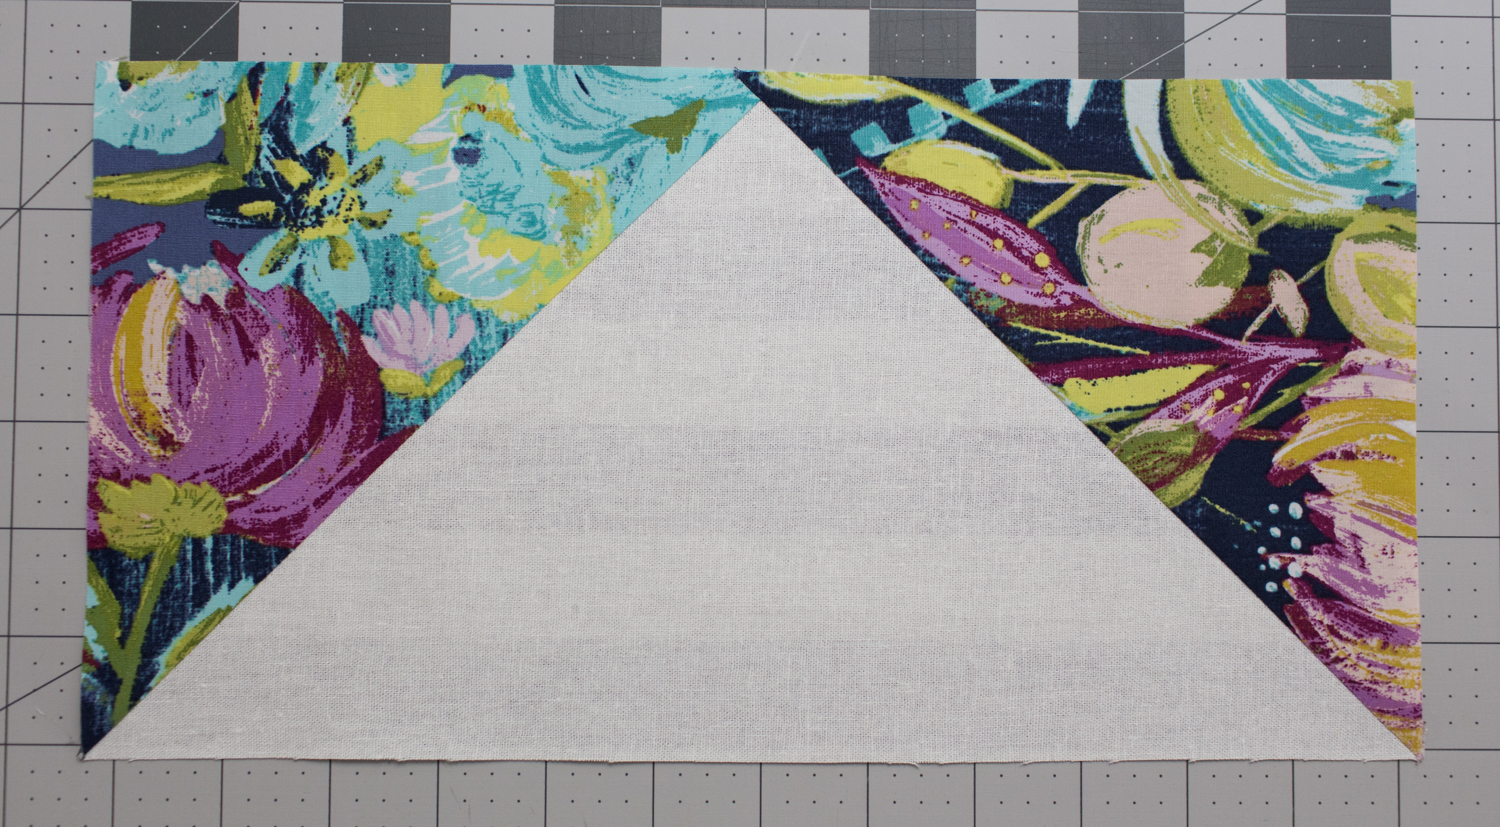
Step 4: Repeat steps 1 – 3 to make (4) Painted Desert Night/Linen Flying Geese units.
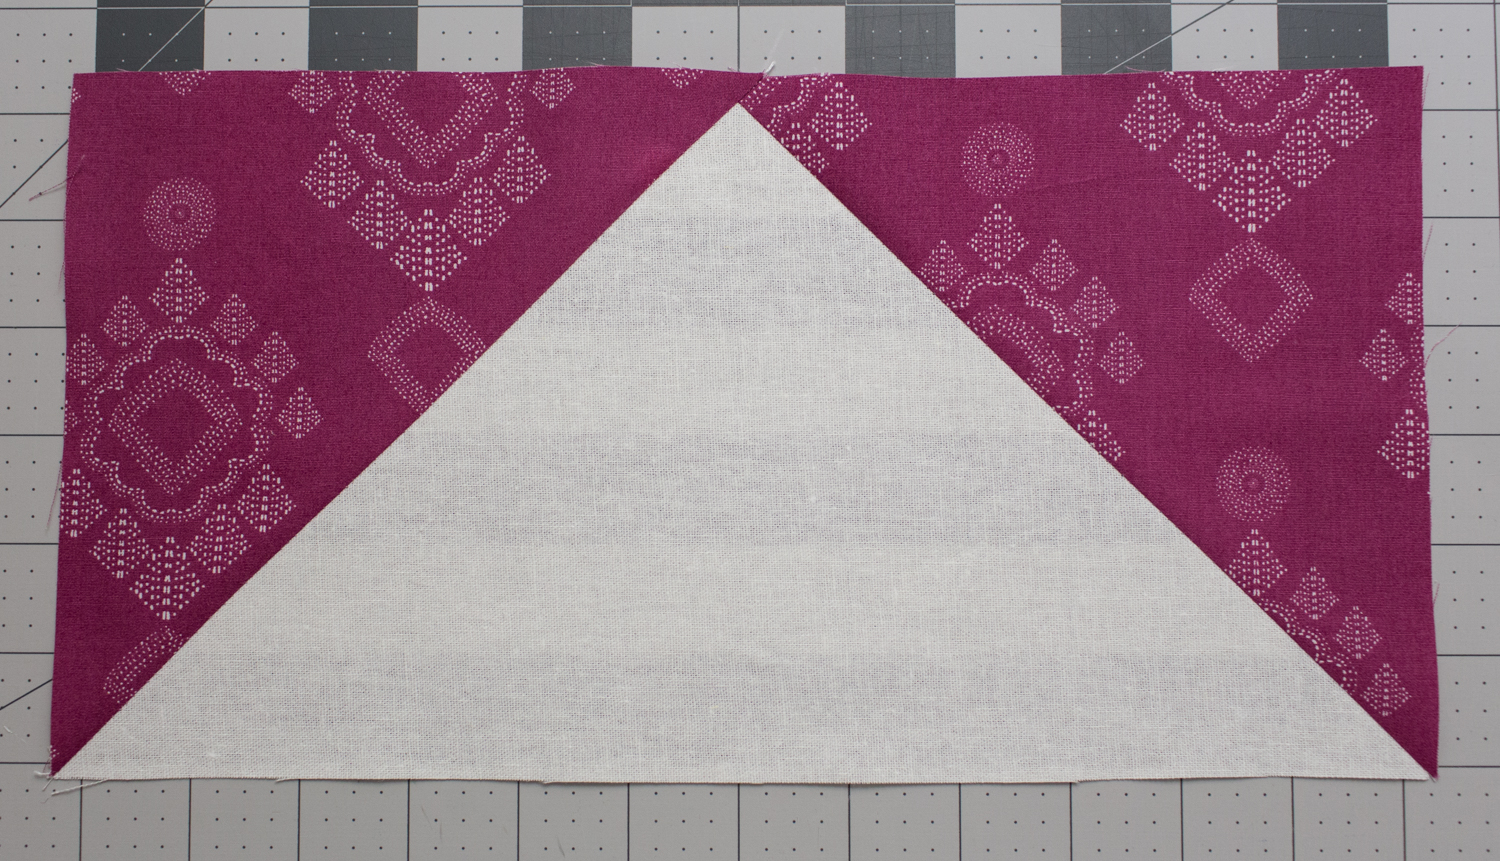
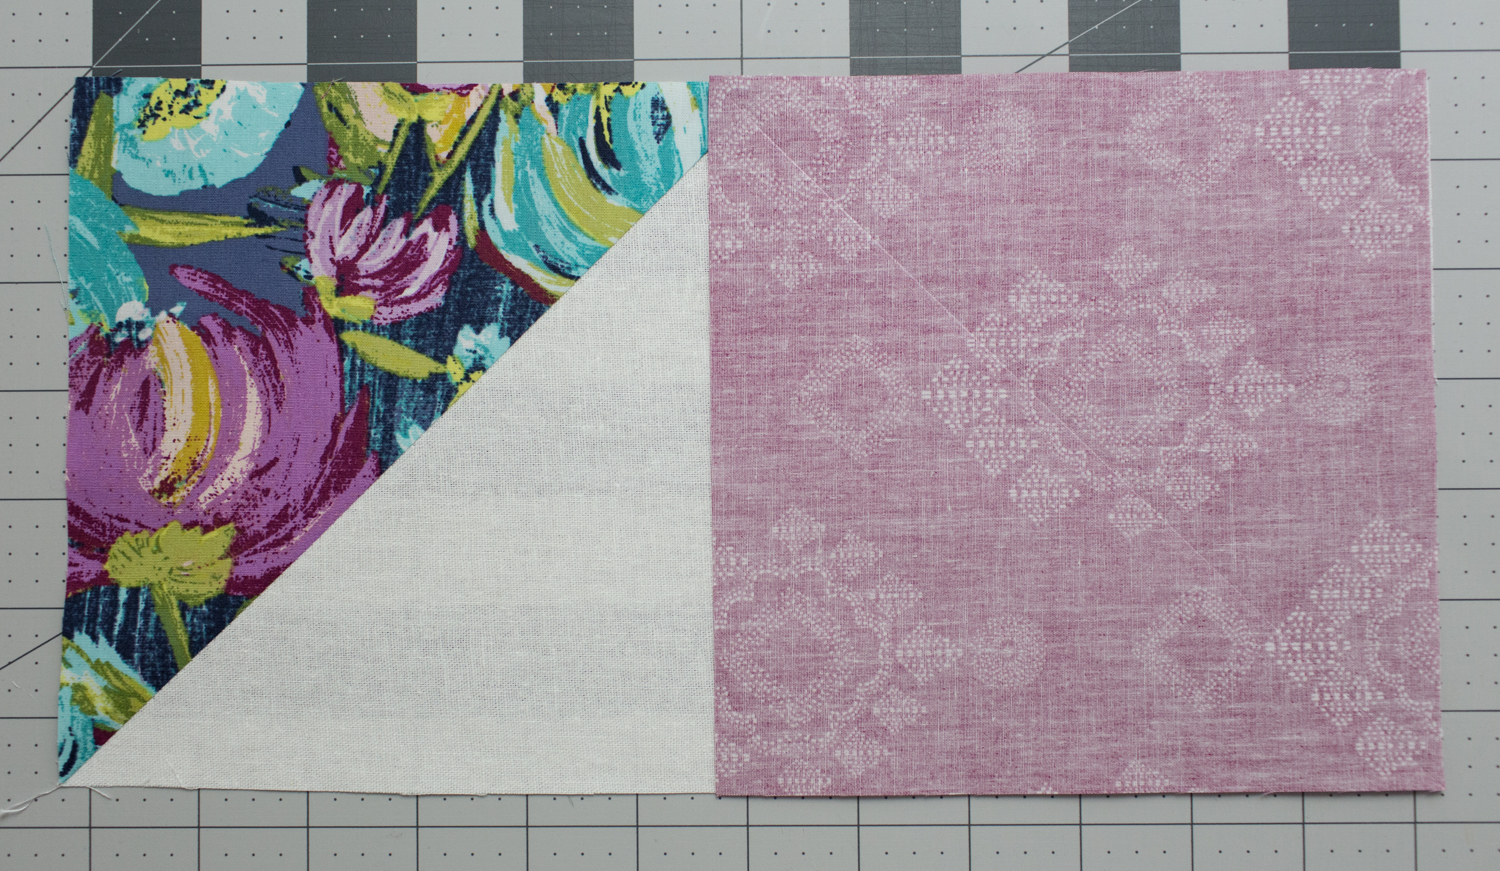
Step 5: Repeat steps 1 – 3 again, this time using the (8) Stitched Diamant Verve 6-1/2″ x 6-1/2″ squares, to make (4) Stitched Diamant Verve/Linen Flying Geese units.
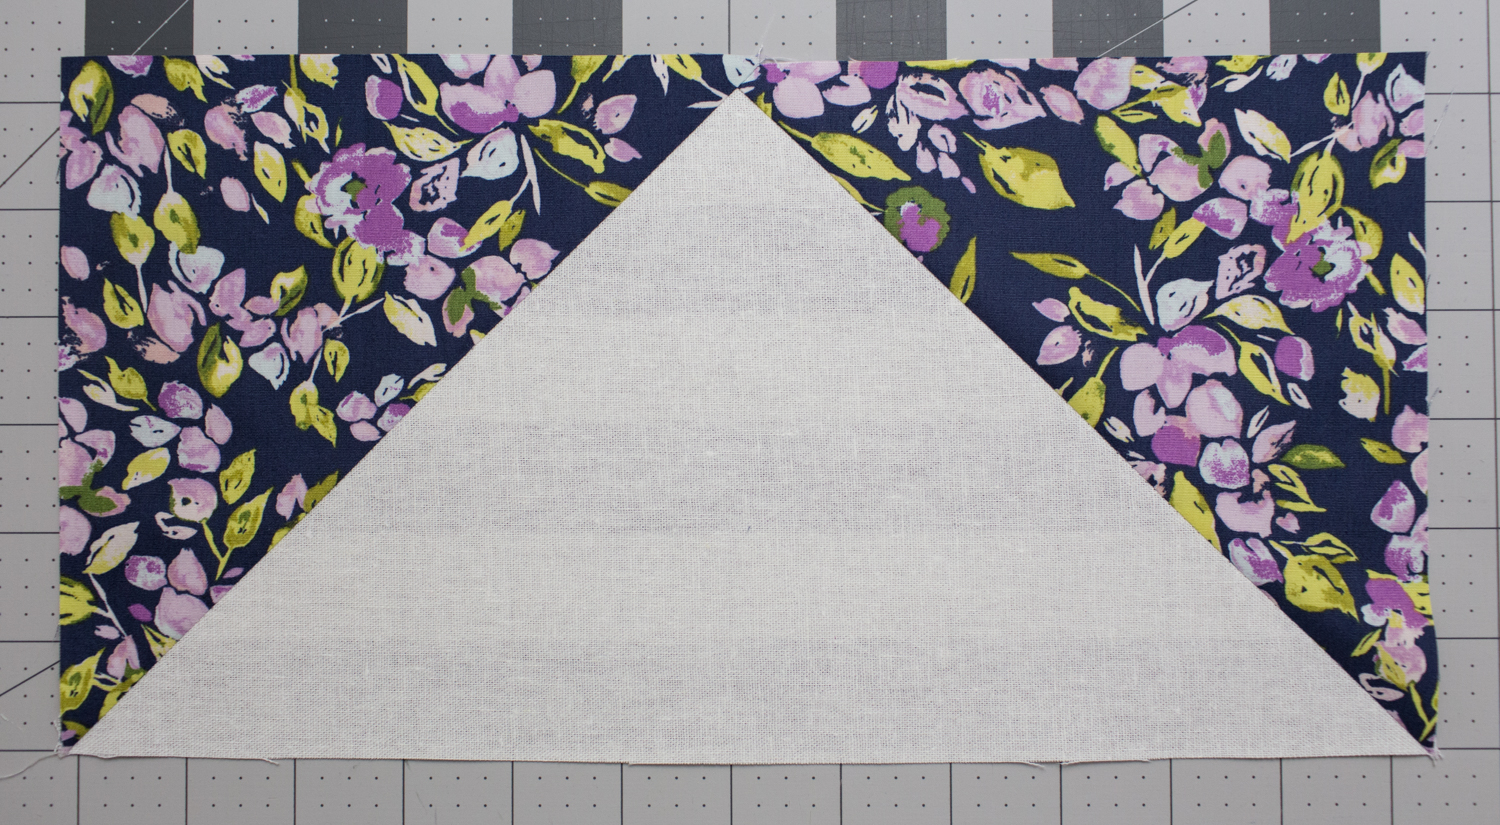
Step 6: Repeat steps 1 – 3 again, this time using the (8) Bougainvillea Lilac 6-1/2″ x 6-1/2″ squares, to make (4) Bougainvillea Lilac/Linen Flying Geese units.
Next we will make the flying geese units from a combination of Painted Desert Night and Stitched Diamant Verve fabrics.
NOTE: Fabric placement is important when making these flying geese.
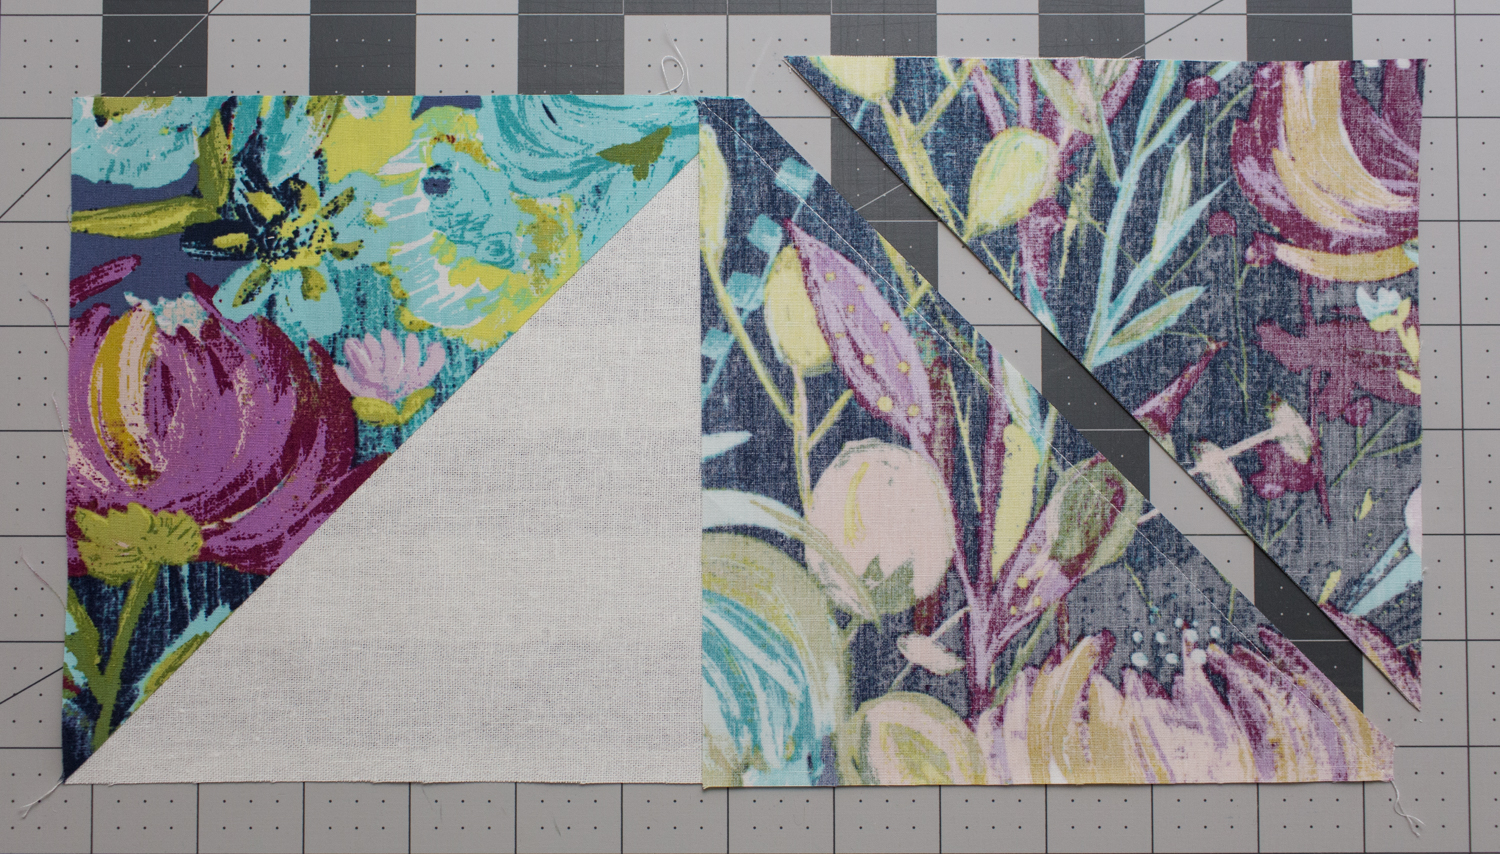
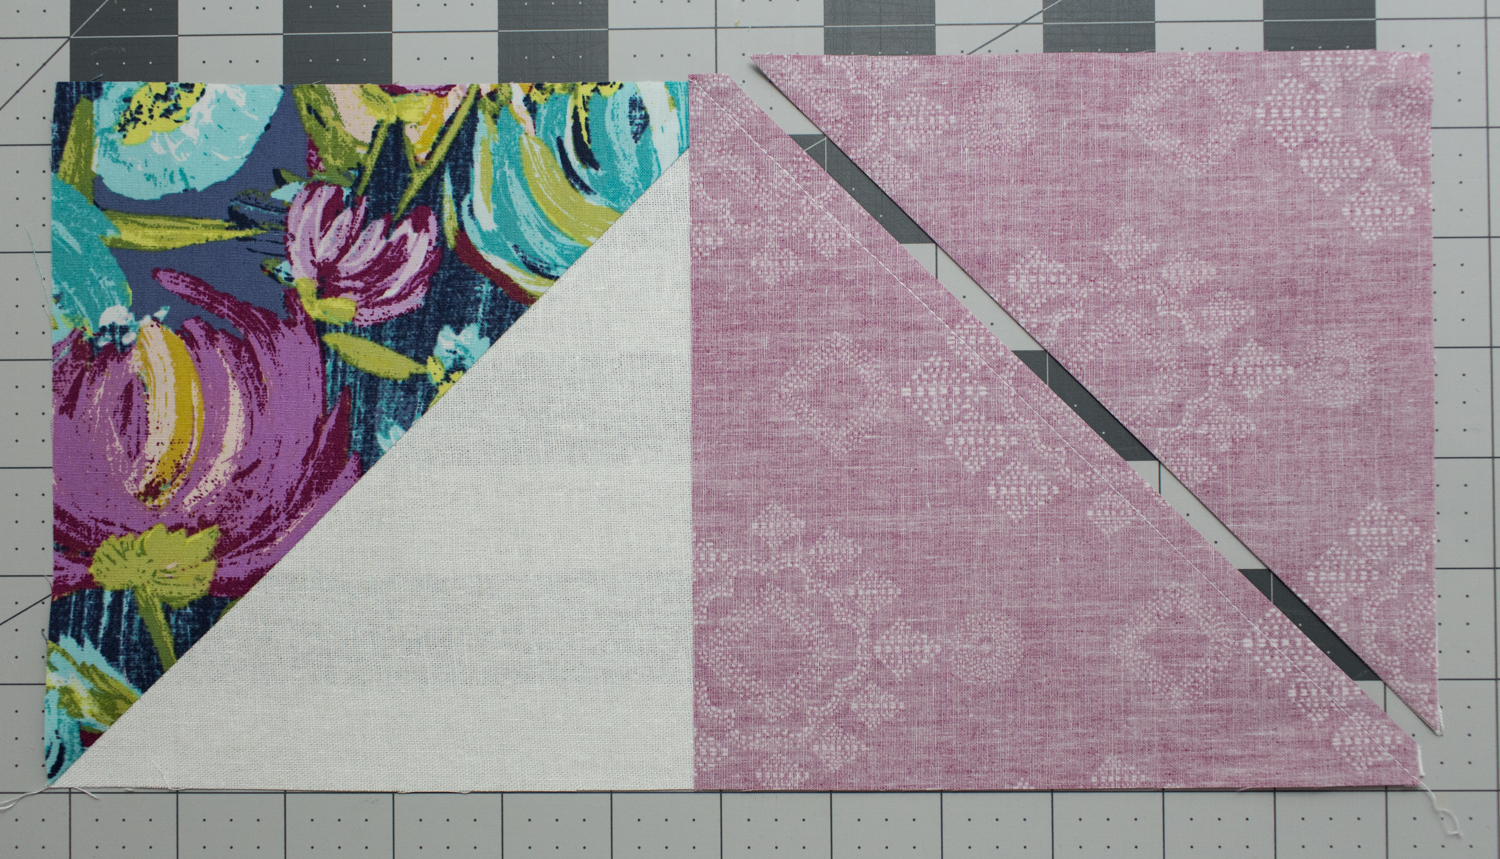
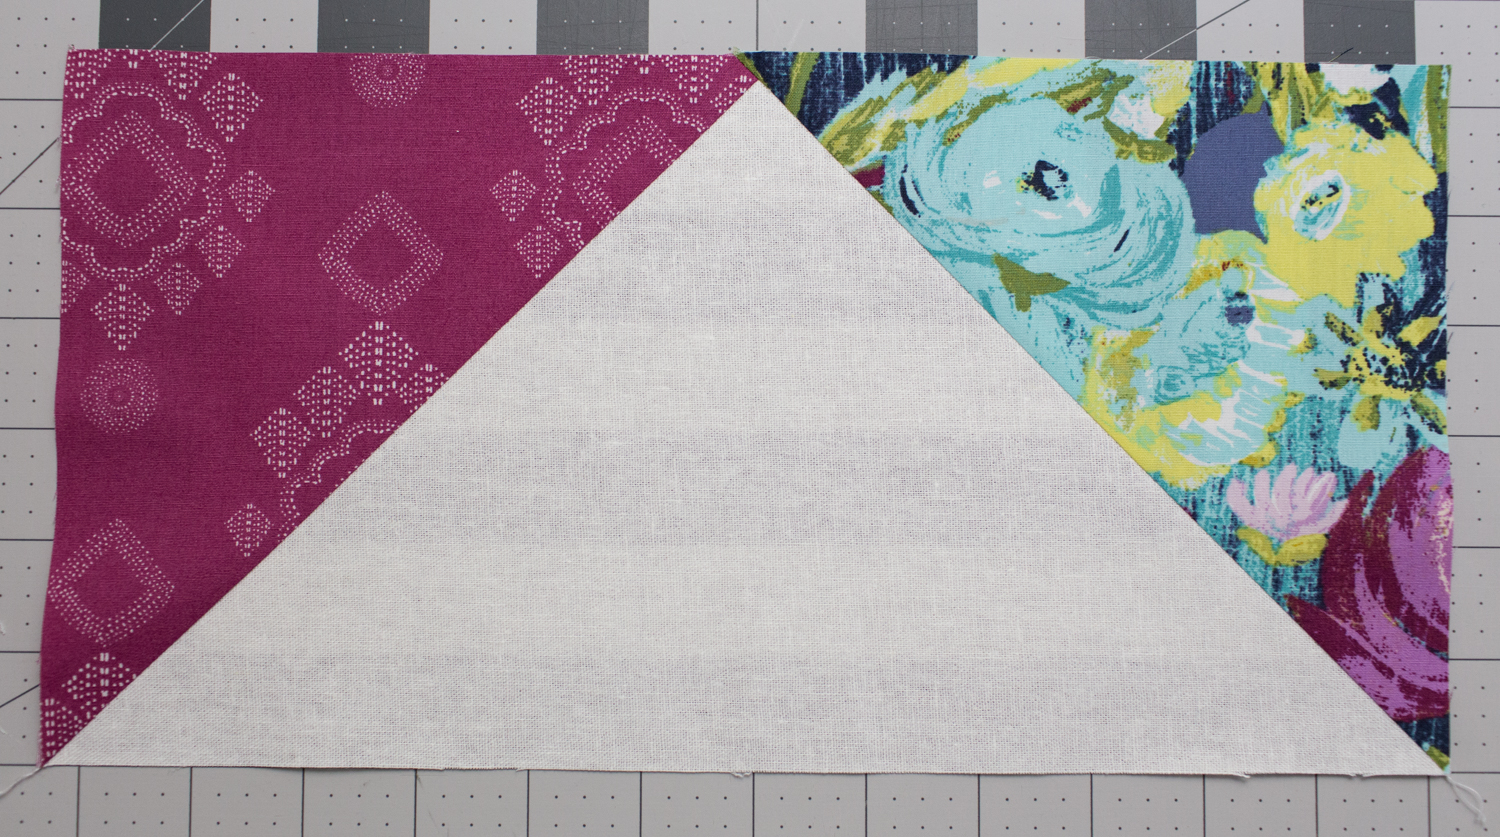
Step 7: Select (1) Painted Desert Night 6-1/2″ x 6-1/2″ square, (1) Stitched Diamant Verve 6-1/2″ x 6-1/2″ square, and (1) Linen 6-1/2″ x 12-1/2″ rectangle. Draw a diagonal line on the wrong side of the squares. Lay (1) Painted Desert Night square right sides together with the LEFT side of the Linen 6-1/2″ x 12-1/2″ rectangle, as shown. Sew on the drawn line.
Step 8: Trim the excess fabric by cutting 1/4″ away from the stitching, as shown. Press open.
Step 9: Lay (1) Stitched Diamant Verve square right sides together with the RIGHT side of the Linen 6-1/2″ x 12-1/2″ rectangle, as shown. Sew on the drawn line and trim the excess by cutting 1/4″ away from the stitching, as shown. Press open.

Step 10: Repeat steps 7 – 9 to make (4) Painted Desert Night/Stitched Diamant Verve/Linen Flying Geese units.
Now we will reverse the placement of the squares when making our flying geese.
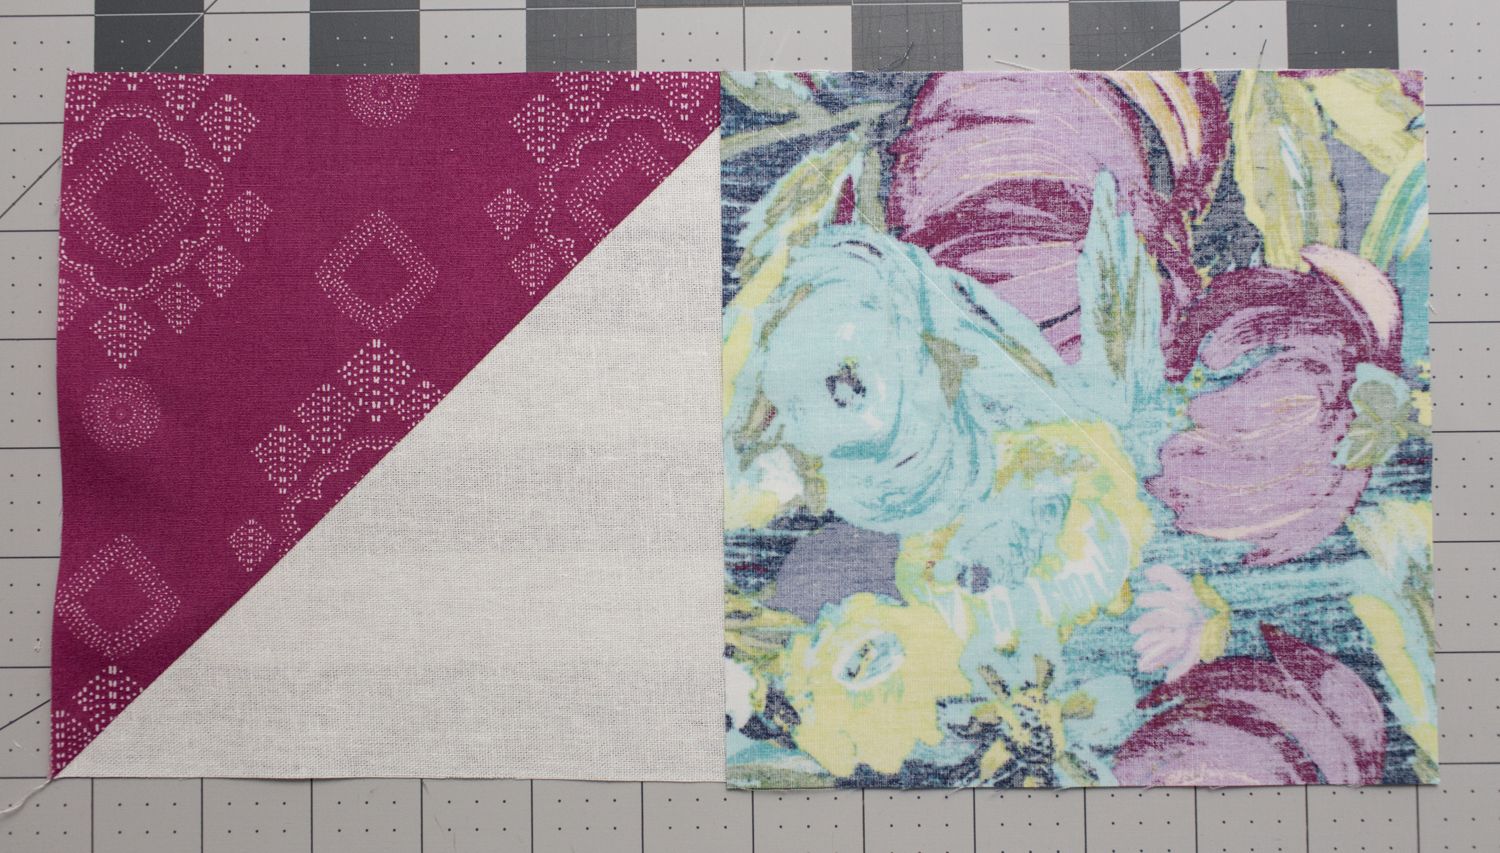
Step 11: Select (1) Painted Desert Night 6-1/2″ x 6-1/2″ square, (1) Stitched Diamant Verve 6-1/2″ x 6-1/2″ square, and (1) Linen 6-1/2″ x 12-1/2″ rectangle. Draw a diagonal line on the wrong side of the squares. Lay (1) Stitched Diamant Verve square right sides together with the LEFT side of the Linen 6-1/2″ x 12-1/2″ rectangle, as shown. Sew on the drawn line.
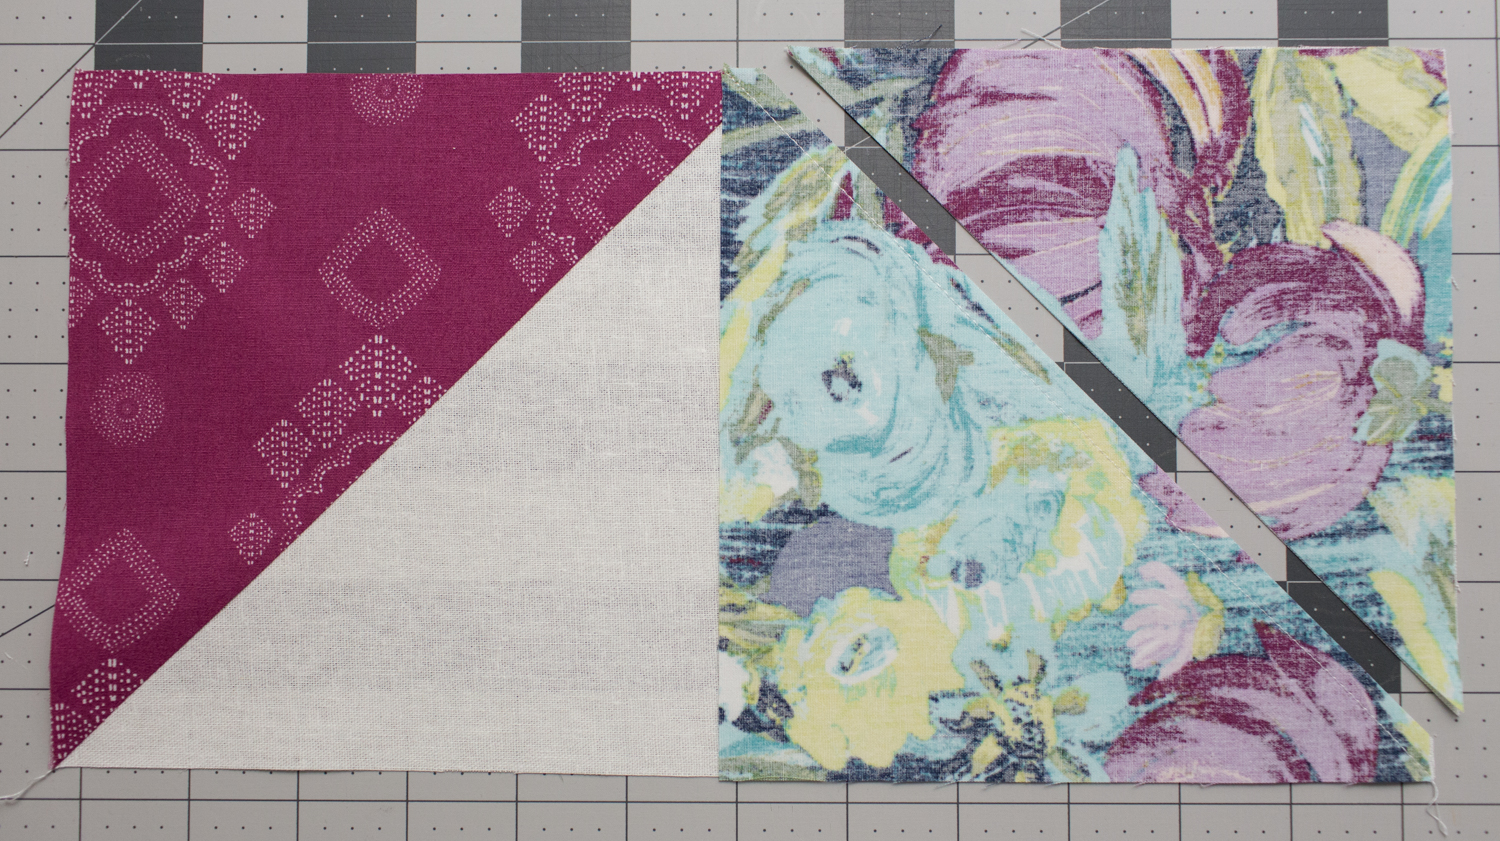
Step 12: Trim the excess fabric by cutting 1/4″ away from the stitching, as shown. Press open.

Step 13: Lay (1) Painted Desert Night square right sides together with the RIGHT side of the Linen 6-1/2″ x 12-1/2″ rectangle, as shown. Sew on the drawn line and trim the excess by cutting 1/4″ away from the stitching, as shown. Press open.
Step 14: Repeat steps 11 – 13 to make (4) Stitched Diamant Verve/Painted Desert Night/Linen Flying Geese units.
The (20) Flying Geese units are: 6-1/2″ x 12-1/2″ unfinished
Stop back next week when we will put these units together to complete our quilt top!