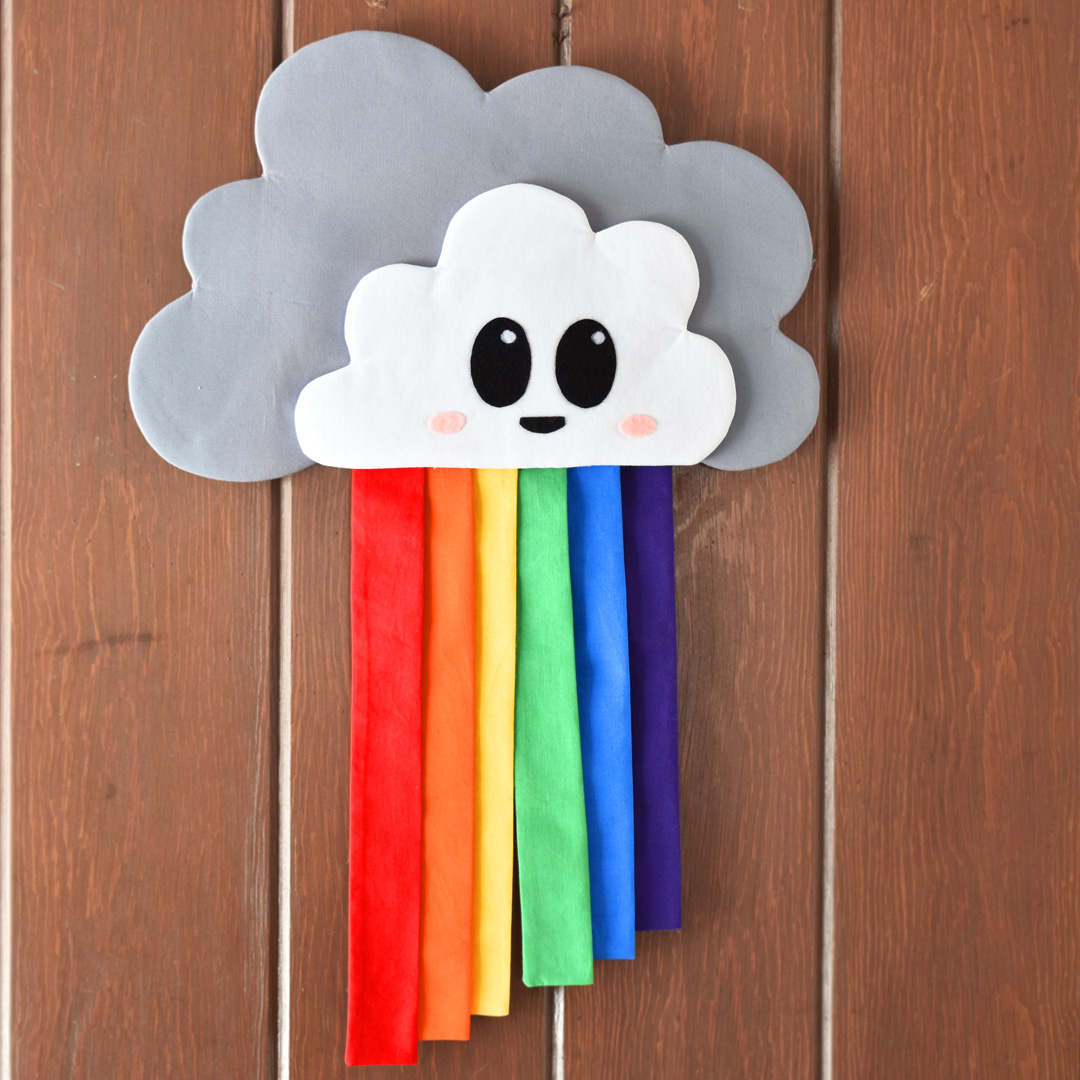
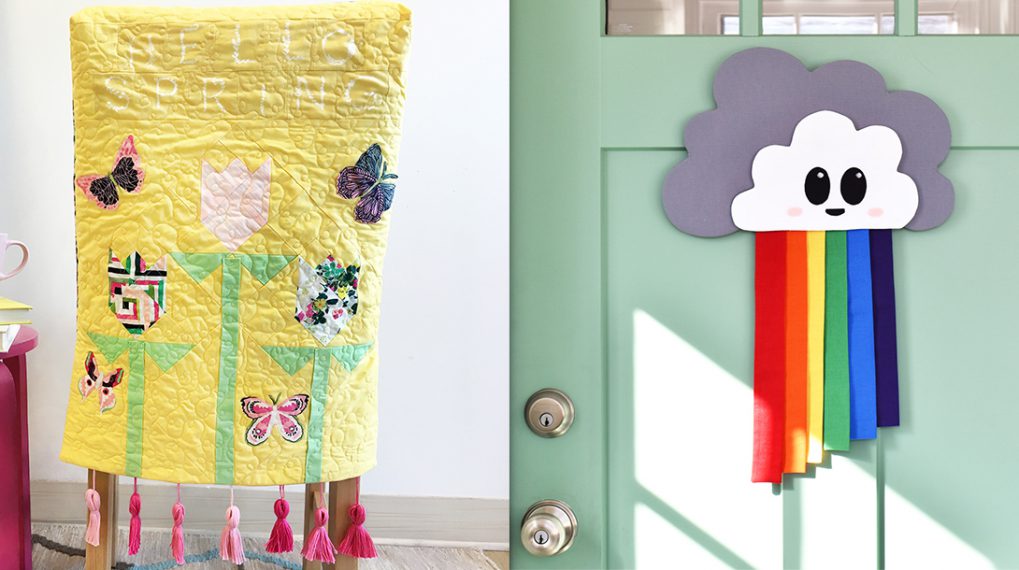
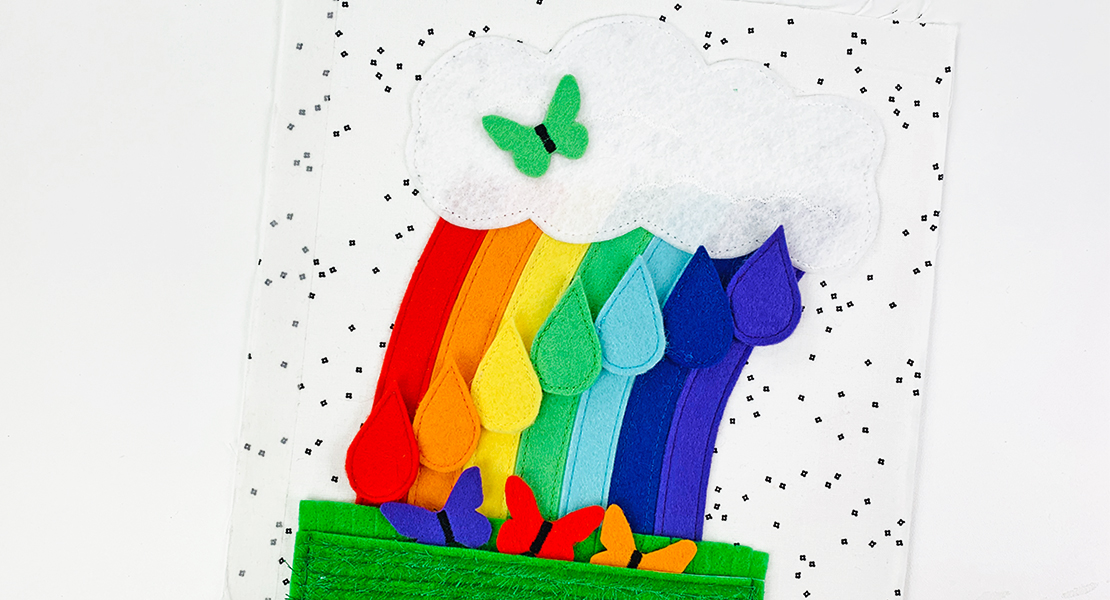
Rainbow Door Hanger Tutorial
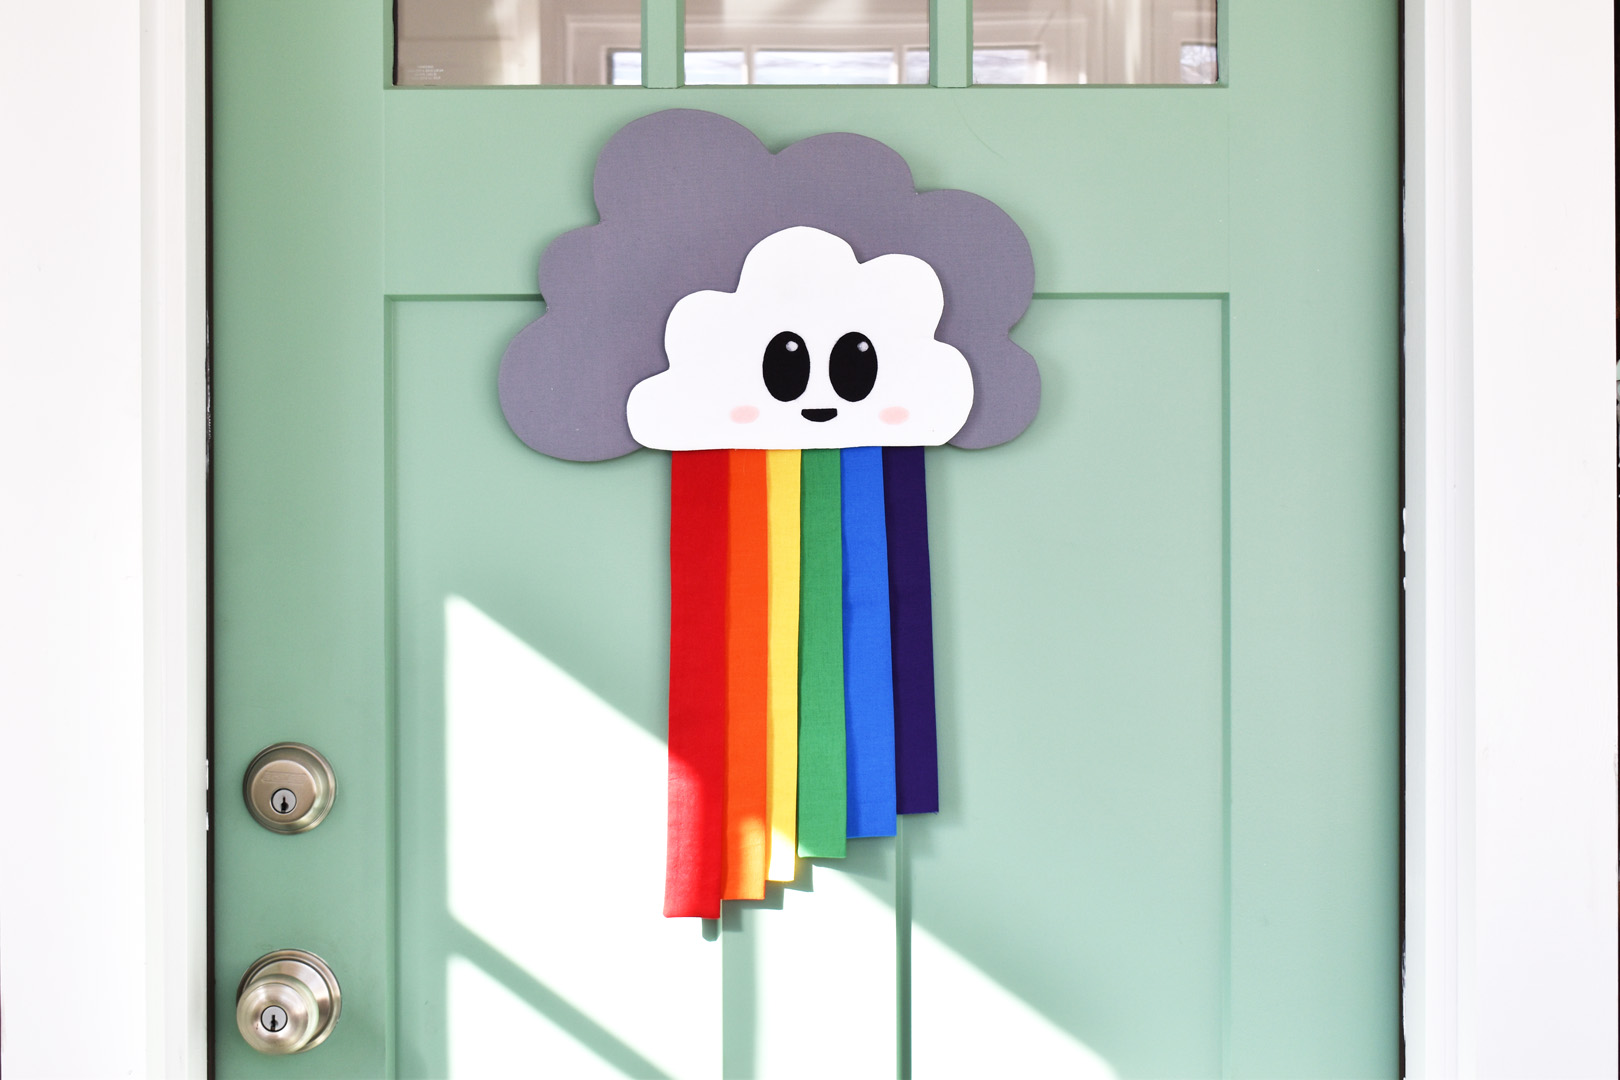
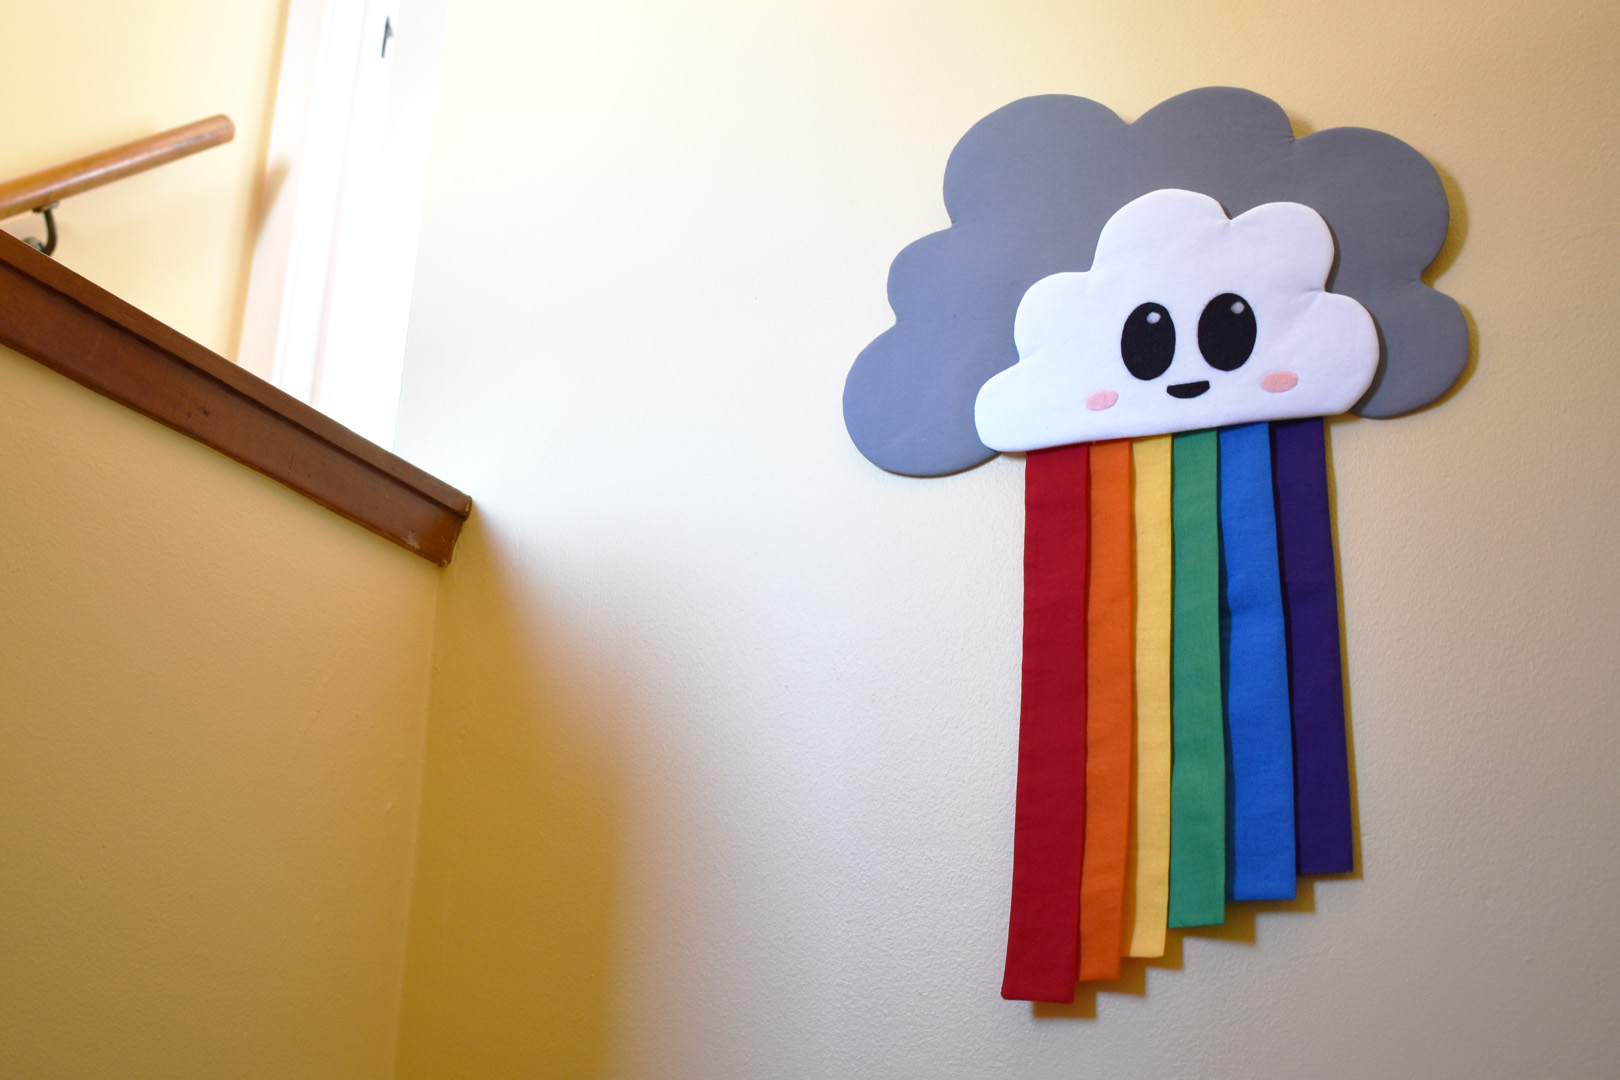
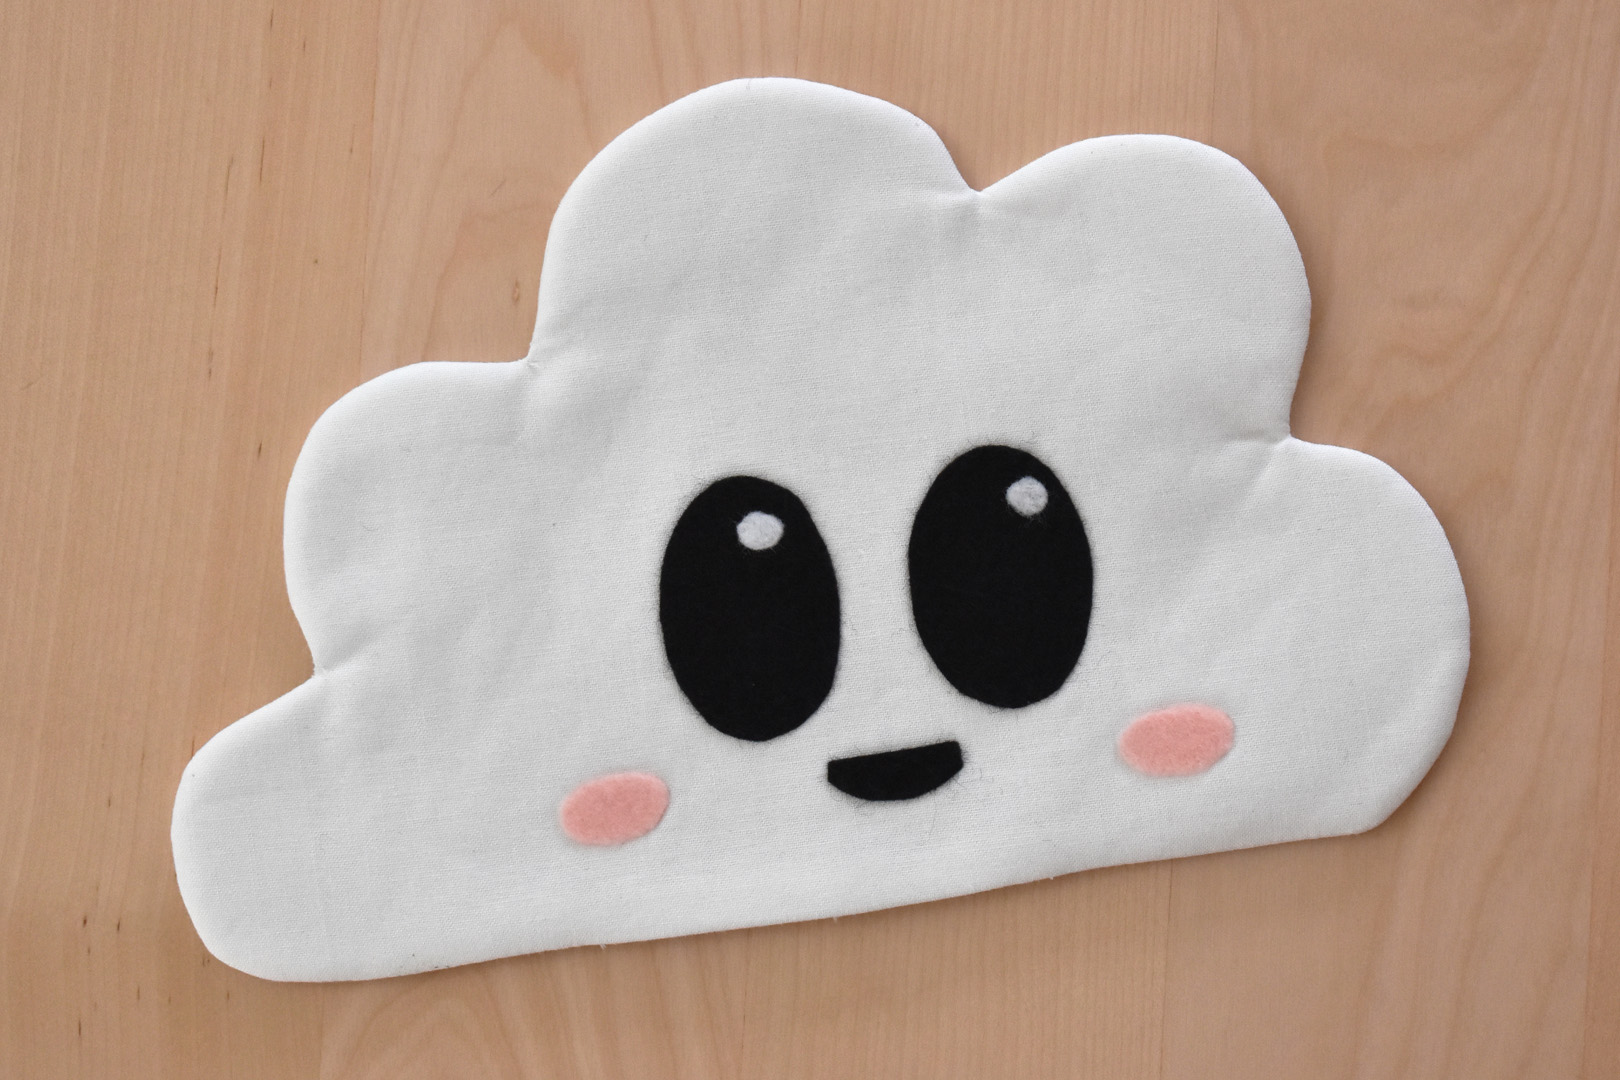
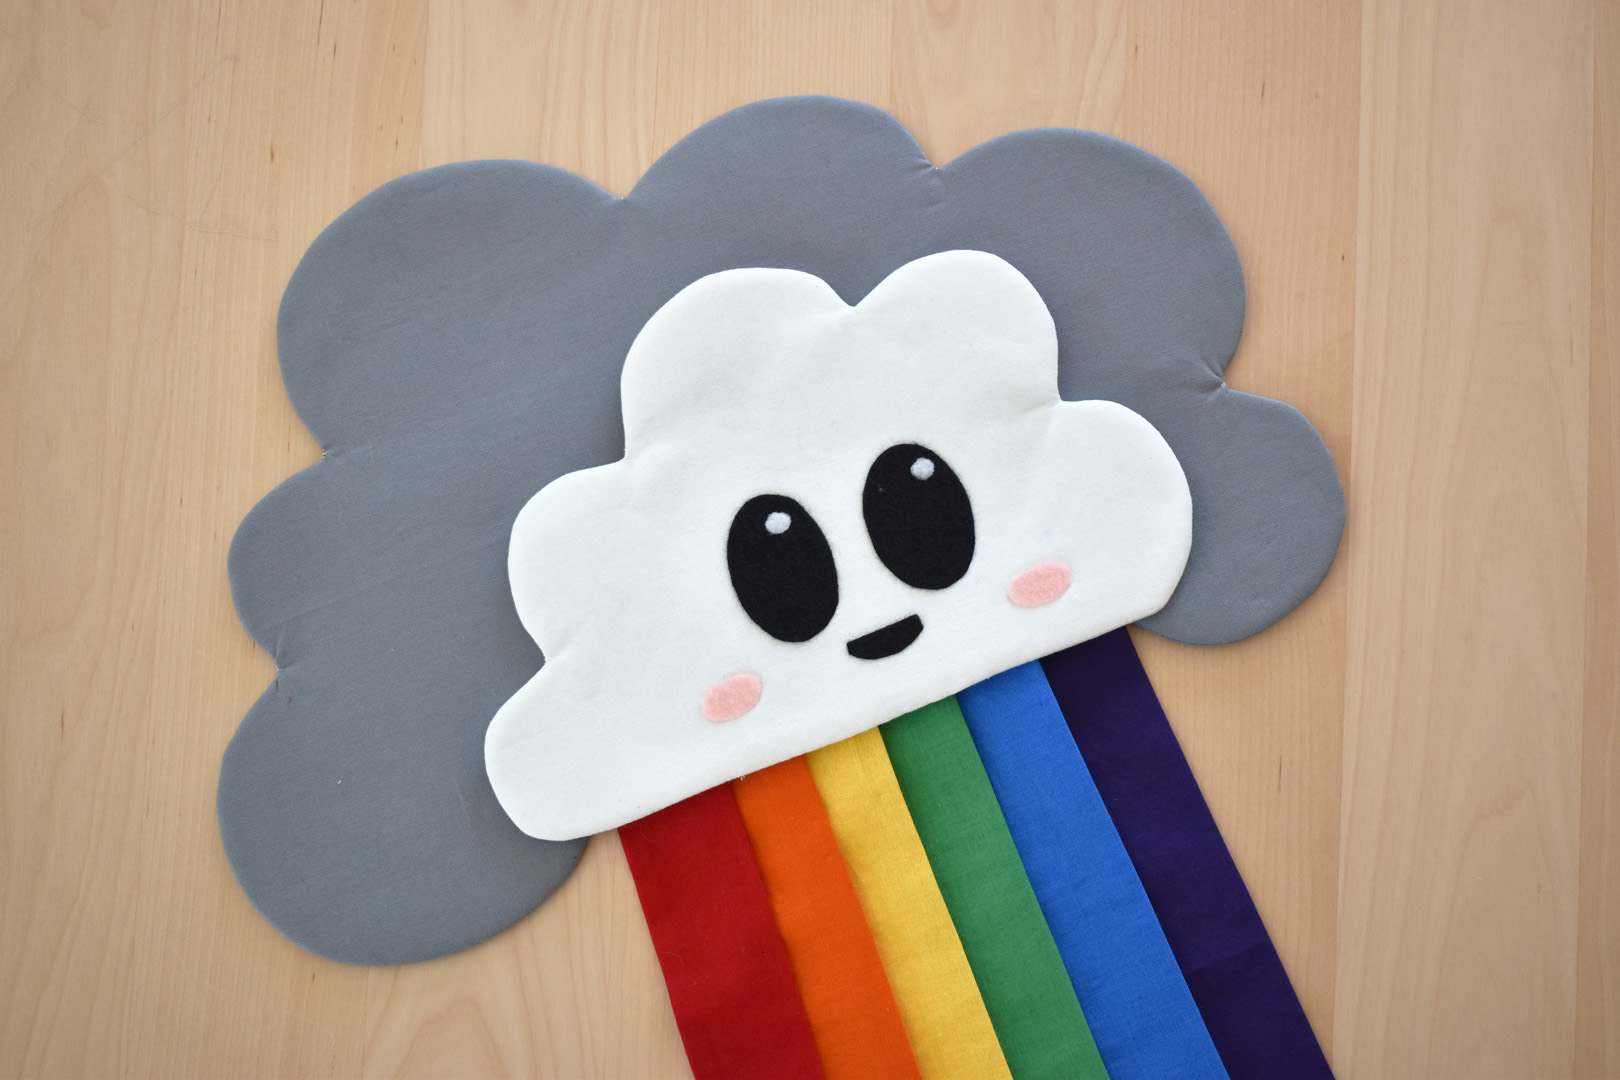
This door hanger features a happy little cloud who knows that every dark cloud has a silver lining! Make this cute rainbow hanger for your front door, or any corner of your home that could use a little brightening up.

Finished Rainbow Door Hanger measures 14″ across and about 21″ tall.
Materials to Make a Rainbow Door Hanger
- Download and print the Rainbow Door Hanger pattern here (do not shrink to fit, print at 100%)
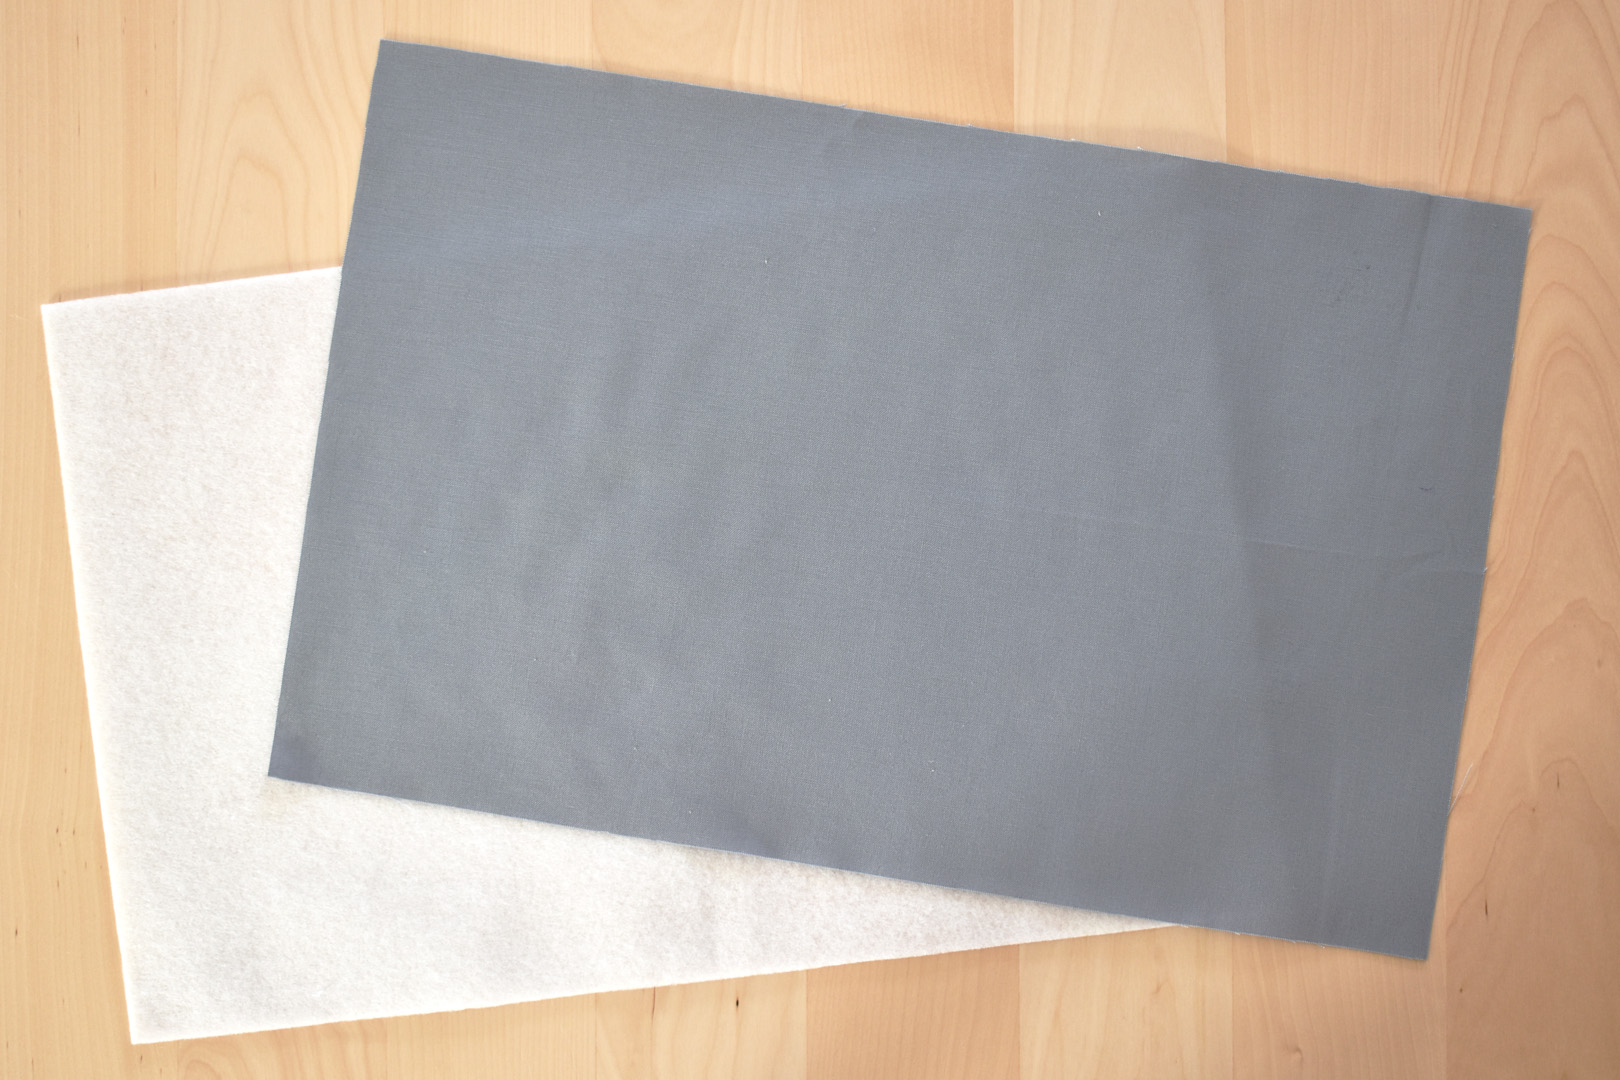
- Two pieces of medium gray color quilter’s 100% cotton fabric cut 10″ x 16″
- Two pieces of white color quilter’s 100% cotton fabric cut 8″ x 11″
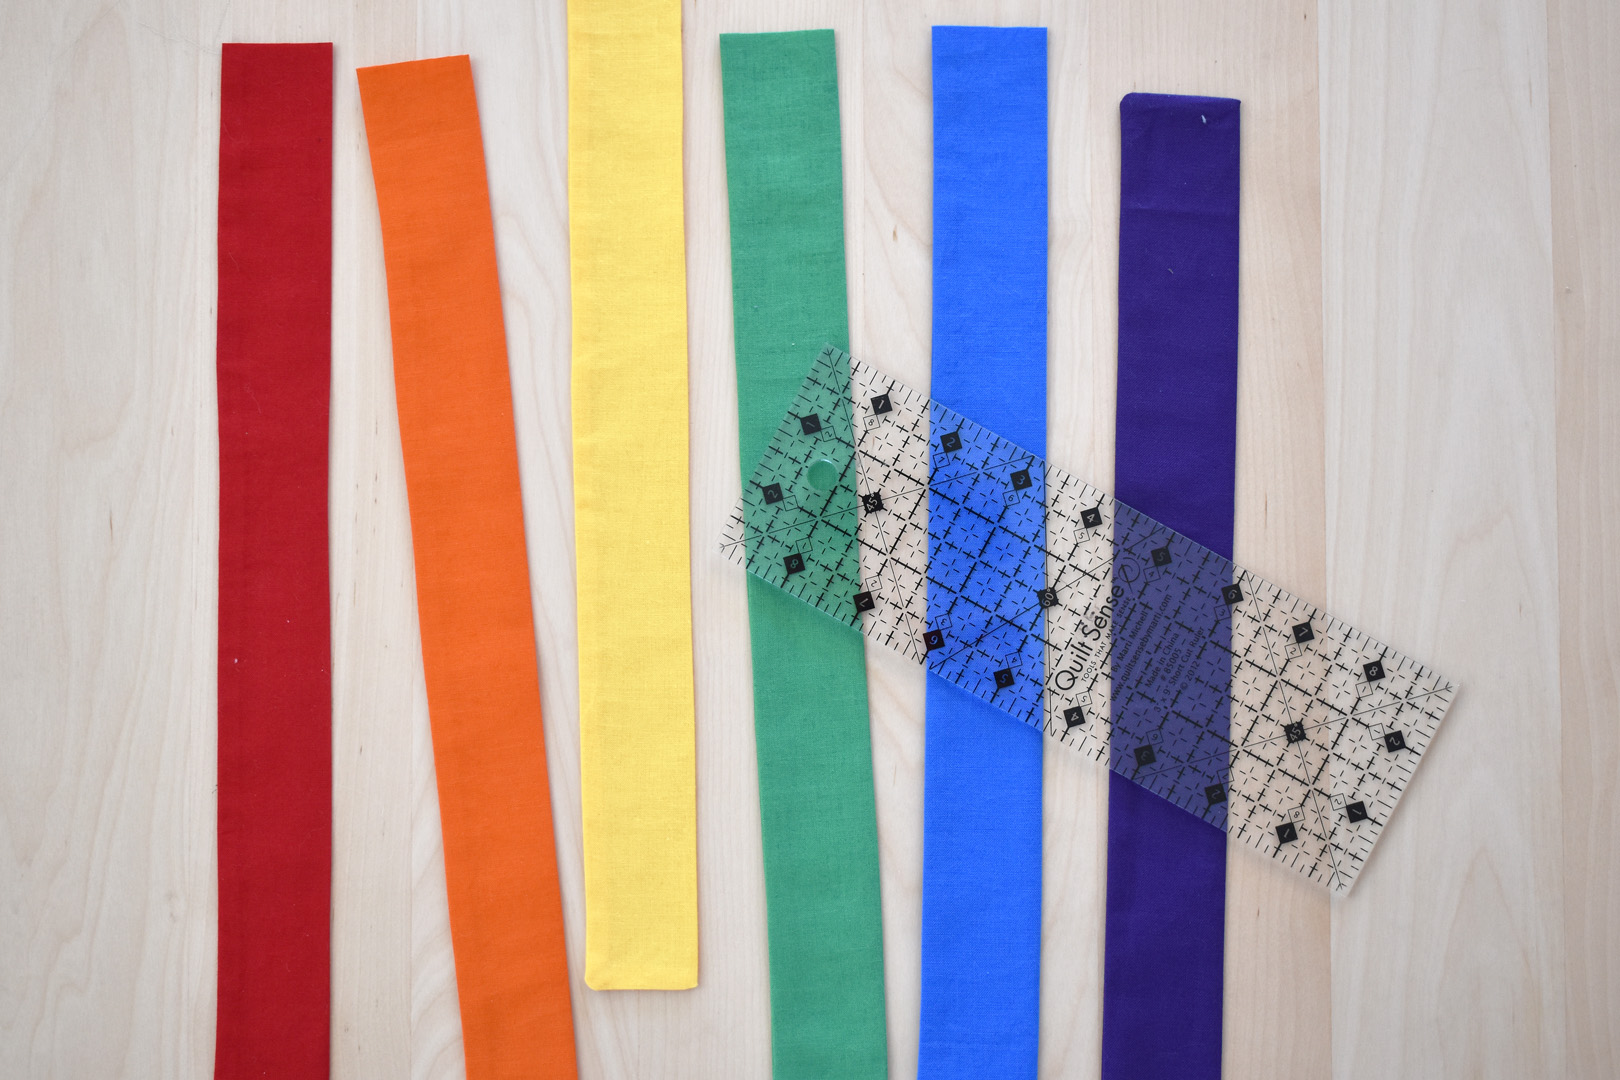
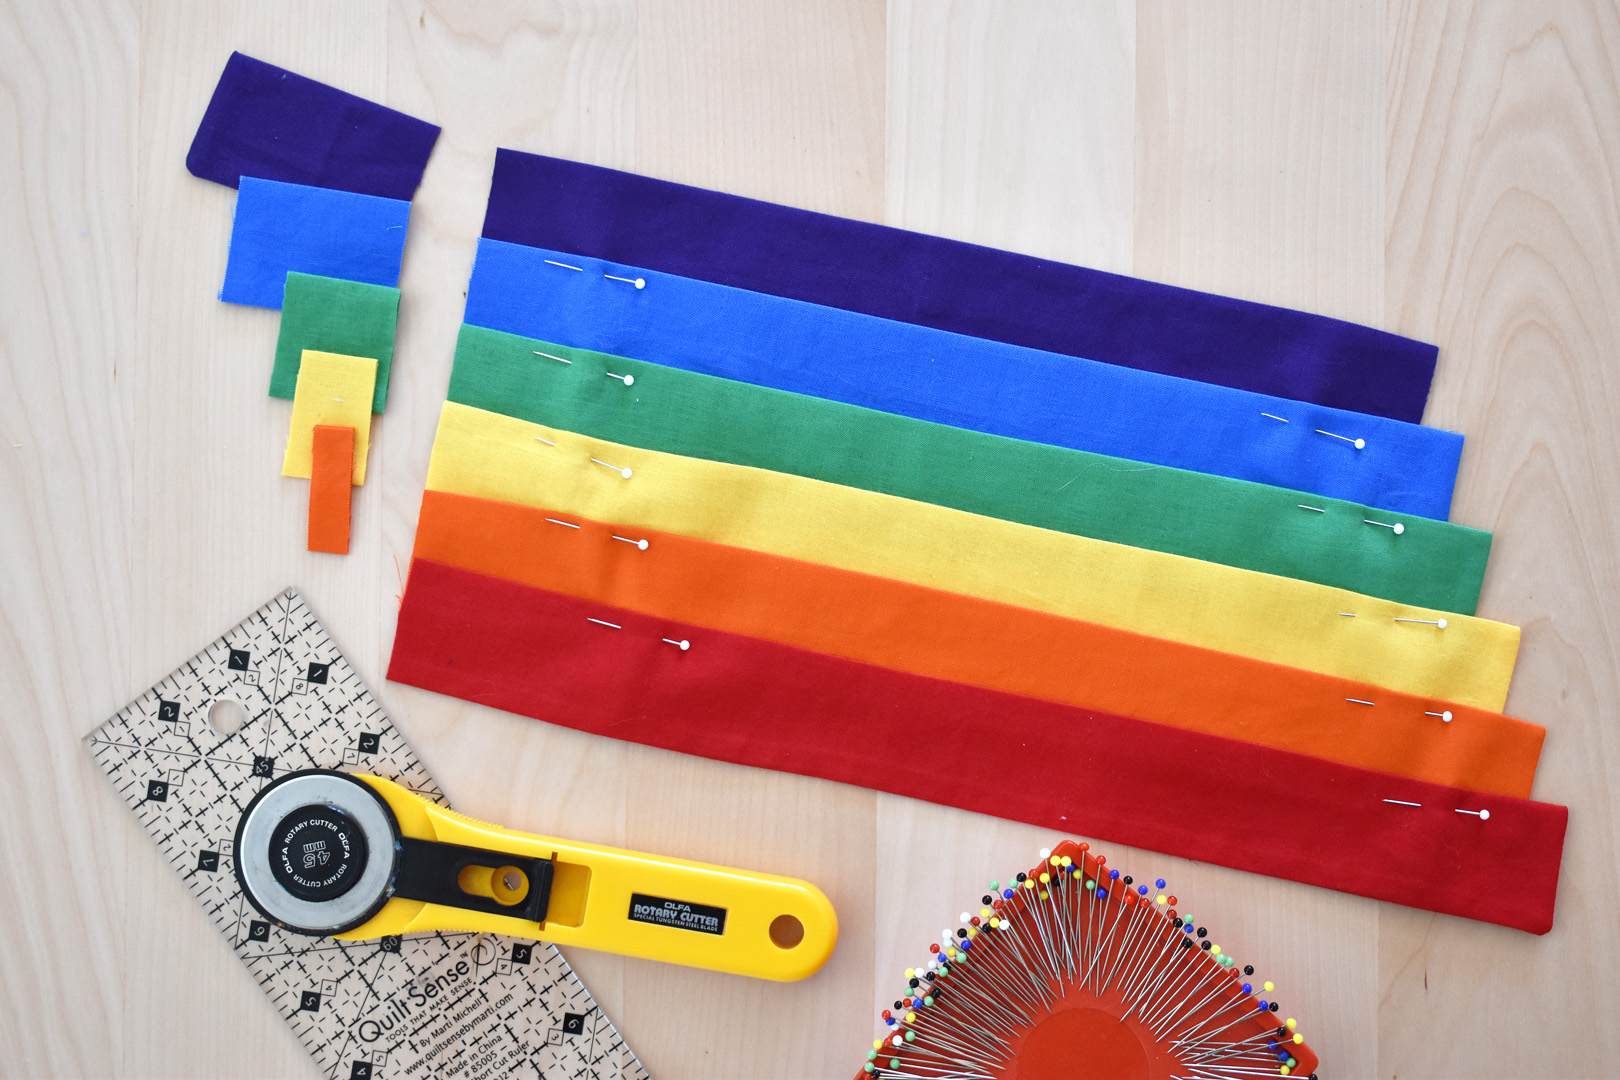
- One piece each of red, orange, yellow, green, blue, and violet of quilter’s 100% cotton fabric each cut 14″ x 3 1/2″
- One piece of medium gray color quilter’s 100% cotton fabric cut 6″ x 2″
- One piece of fusible Peltex craft interfacing cut 10″ x 16″
- One piece of fusible fleece cut 10″ x 16″
- Two pieces of fusible fleece cut 8″ x 11″
- One small piece of fusible webbing
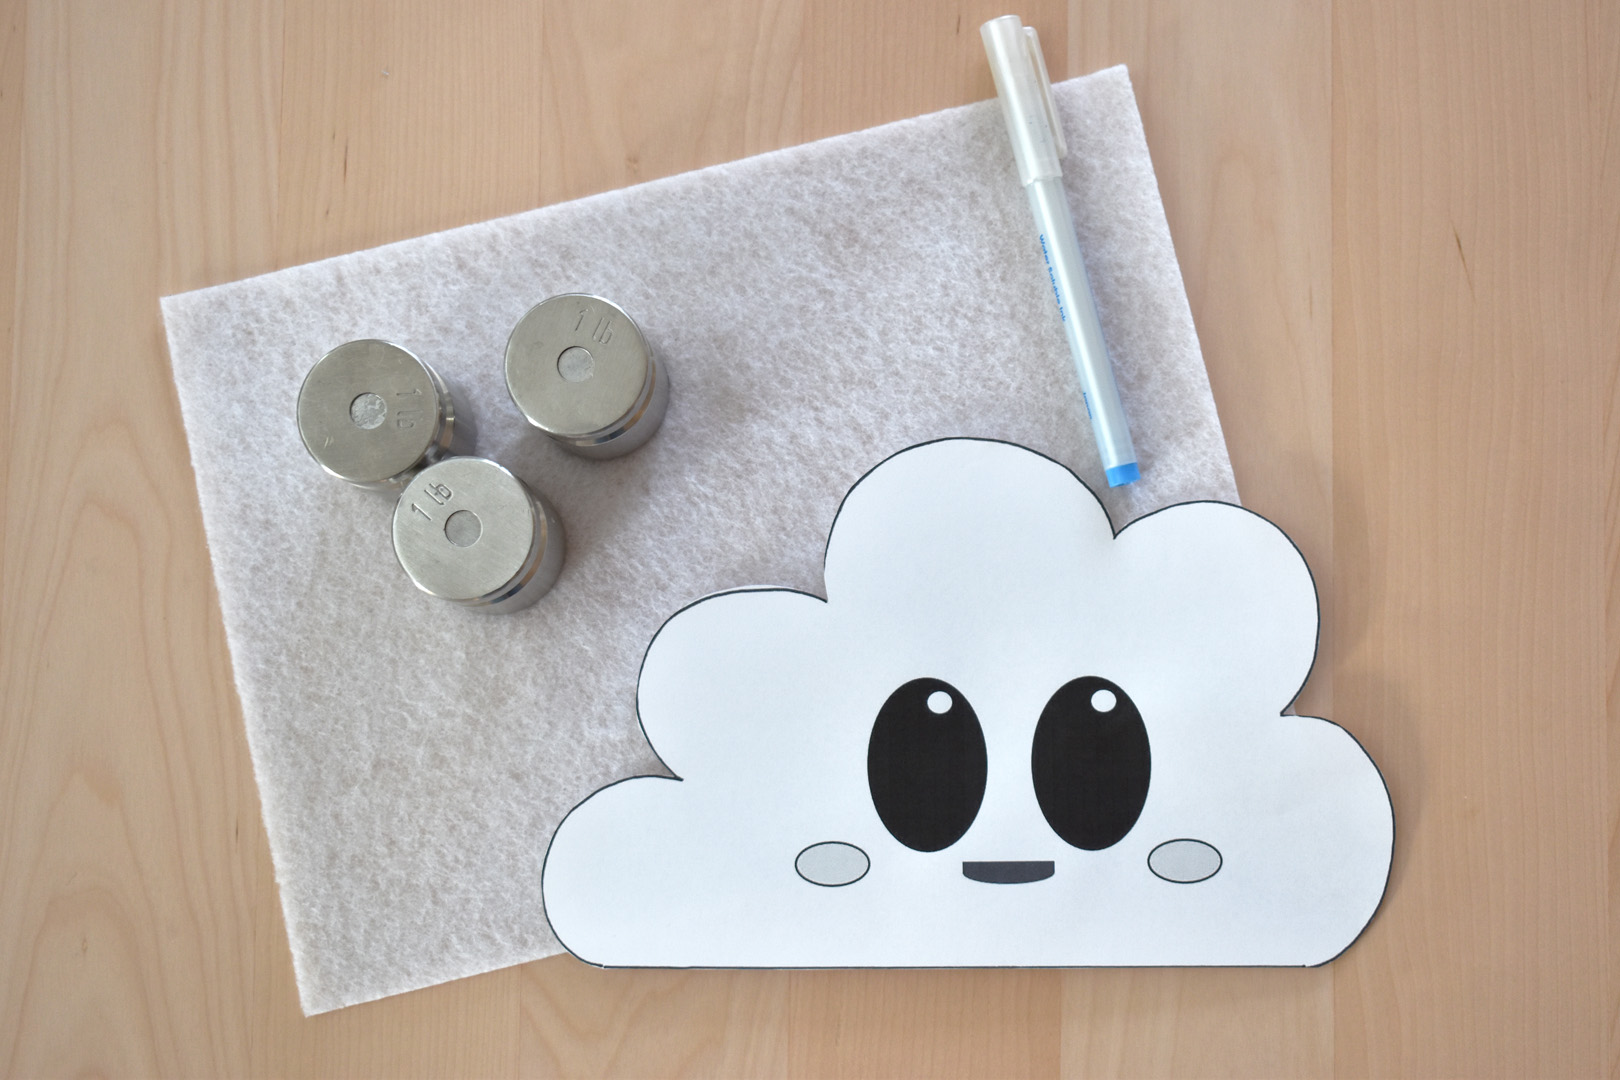
- Small scraps of felt in black, pink, and white
- All-purpose thread in a neutral color (white, off-white, or light gray)
- Rotary cutter, cutting mat, and 6″ x 24″ quilter’s ruler
- Fabric cutting shears, pinking shears, and thread snips
- Pins and pin holder
- Paper or craft scissors and tape
- Fabric marking pen or pencil
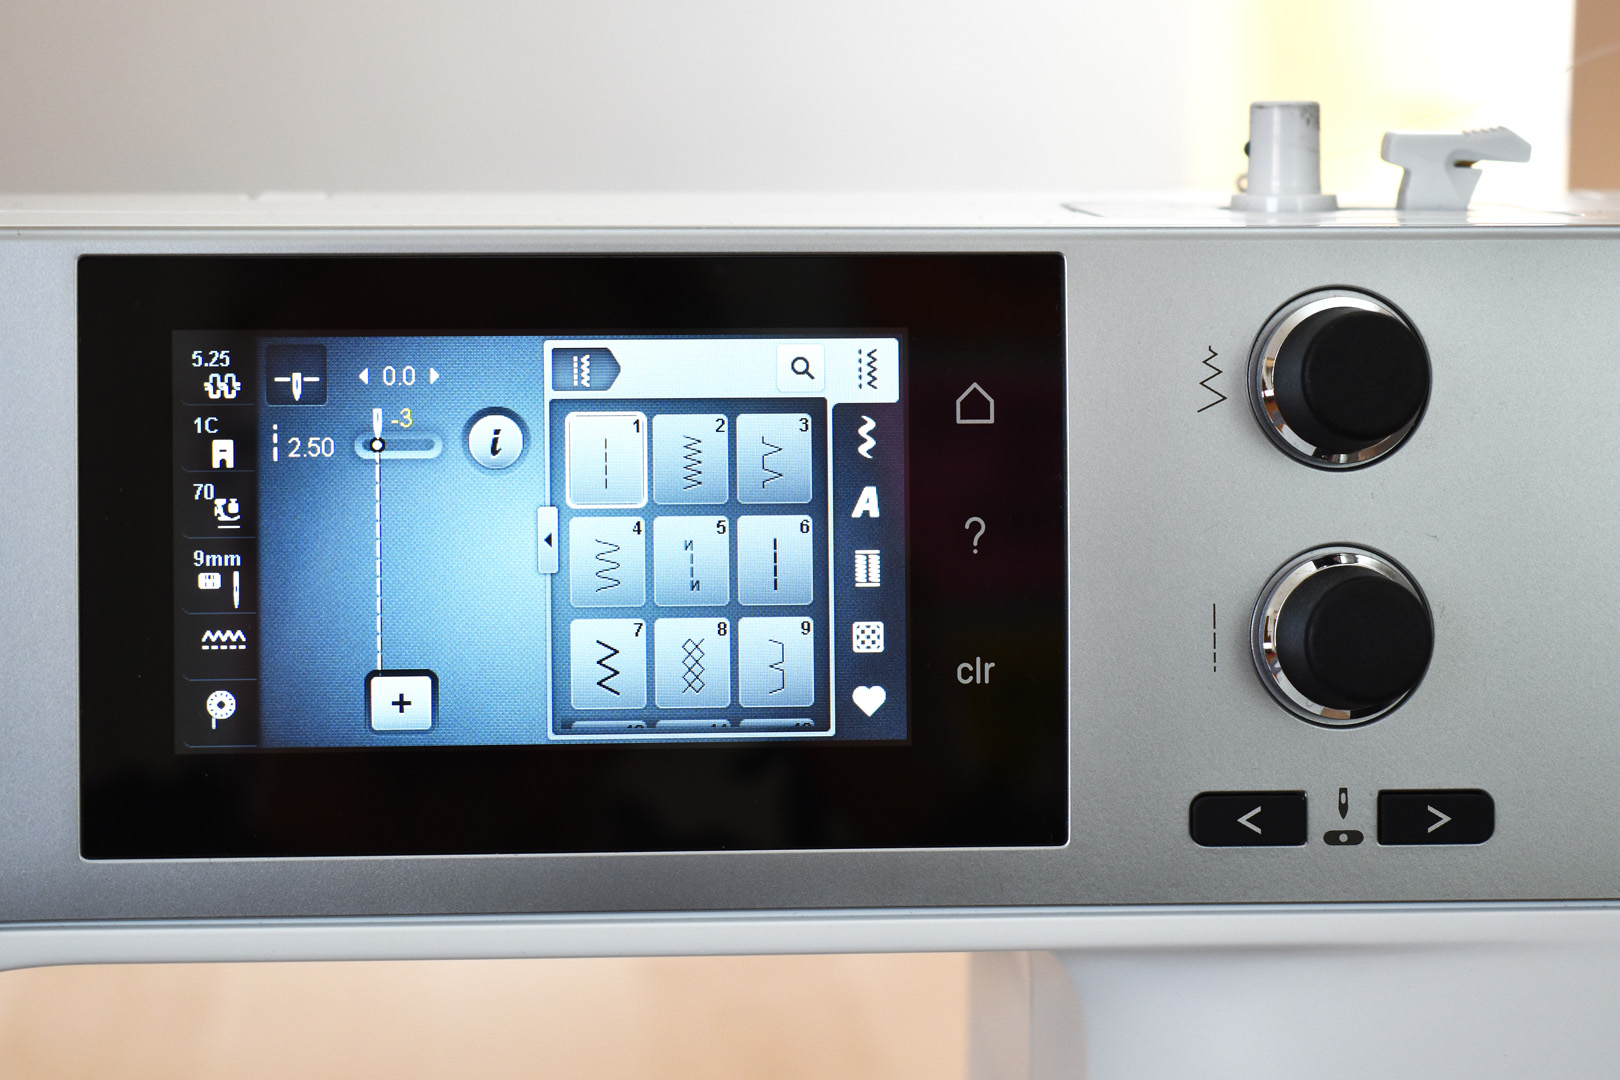
- Sewing machine (I use a BERNINA 570 QE)
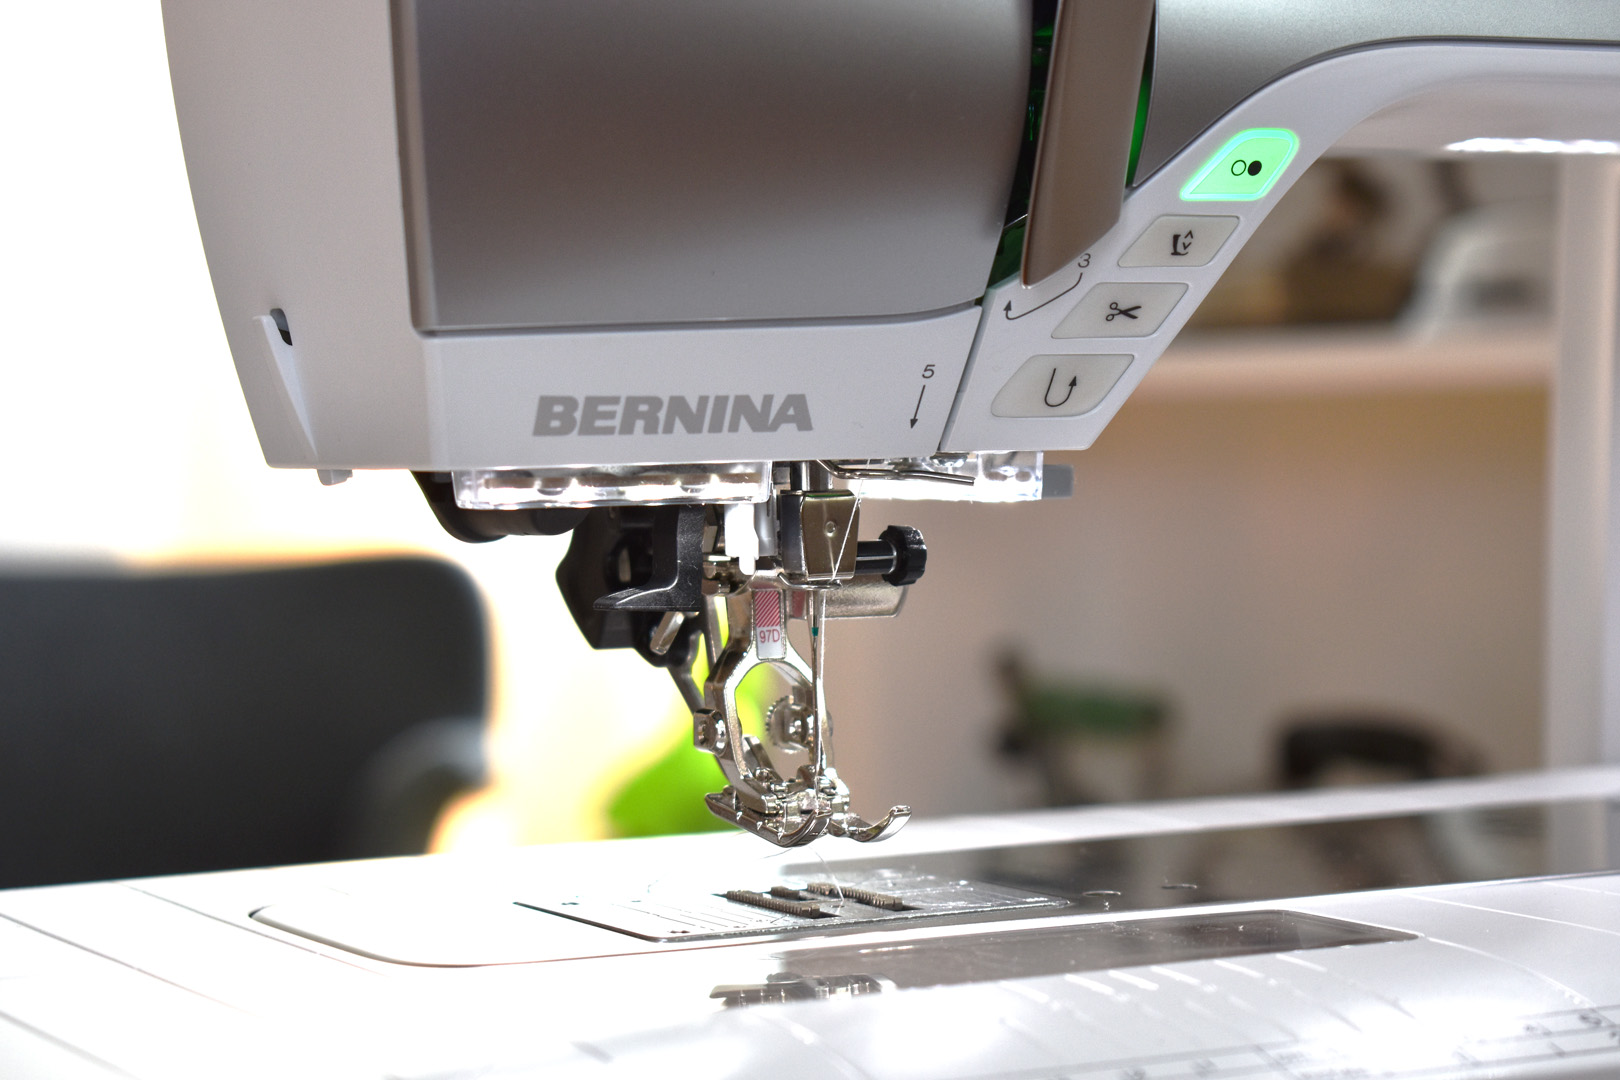
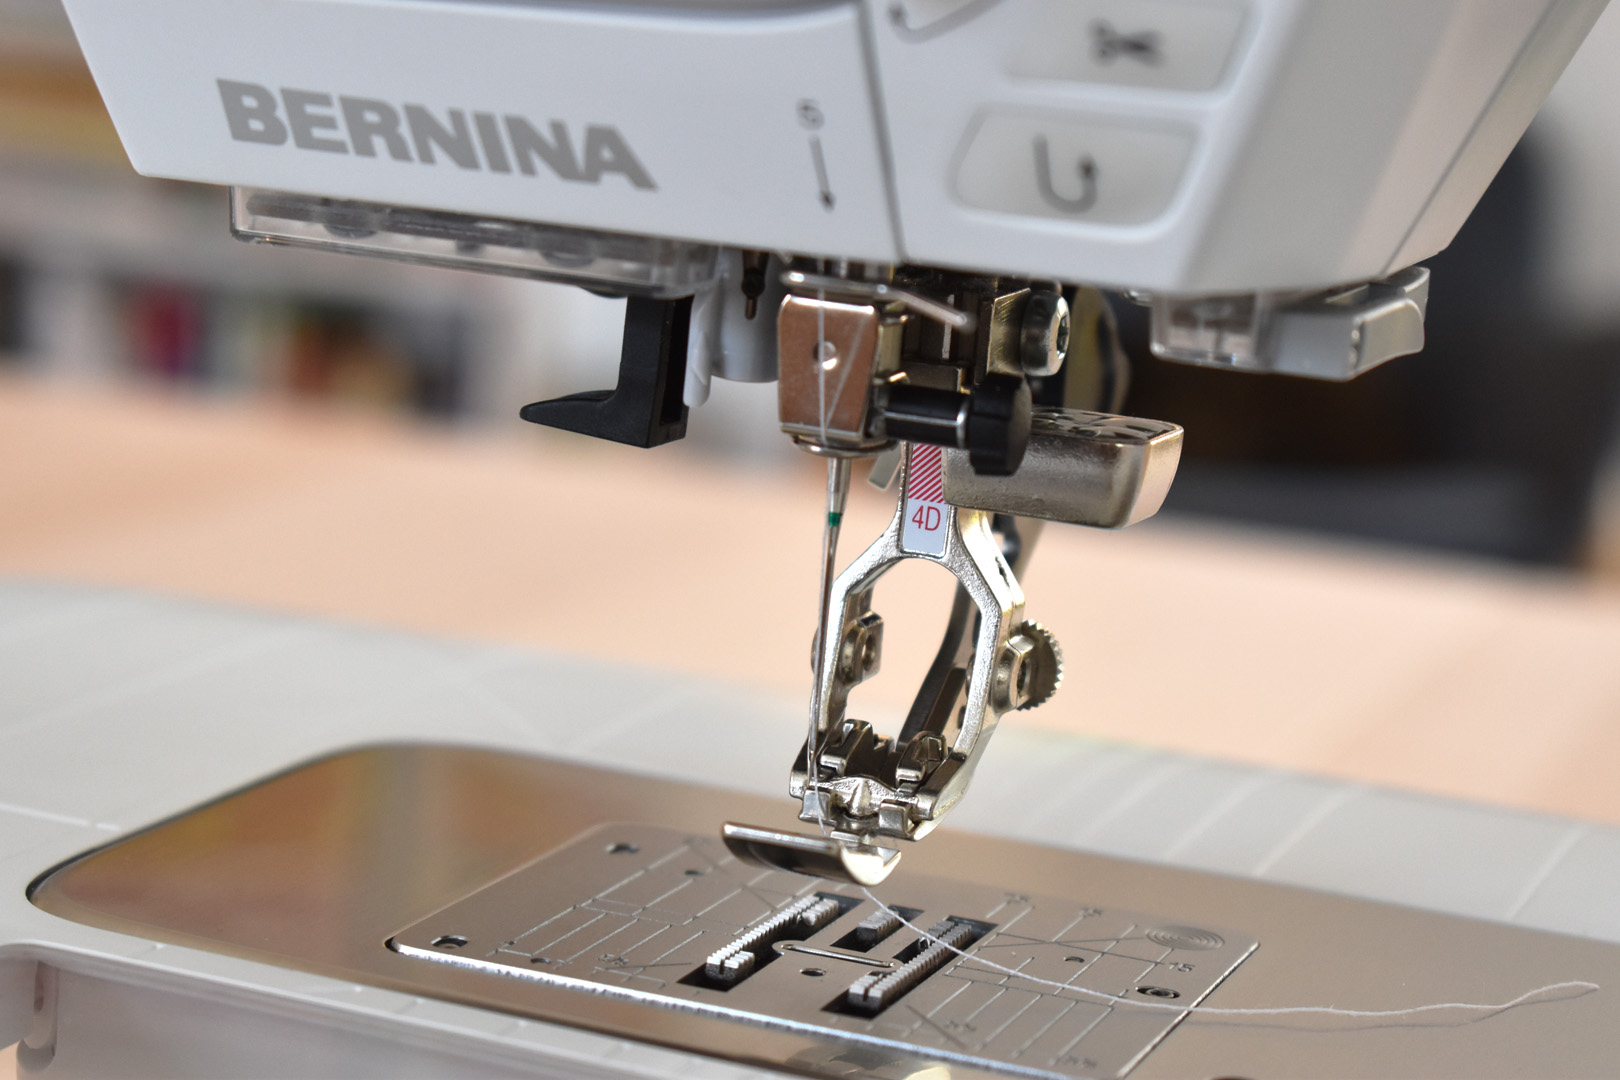
- Quarter-inch or straight stitch presser foot (I use the BERNINA Patchwork foot #97D)
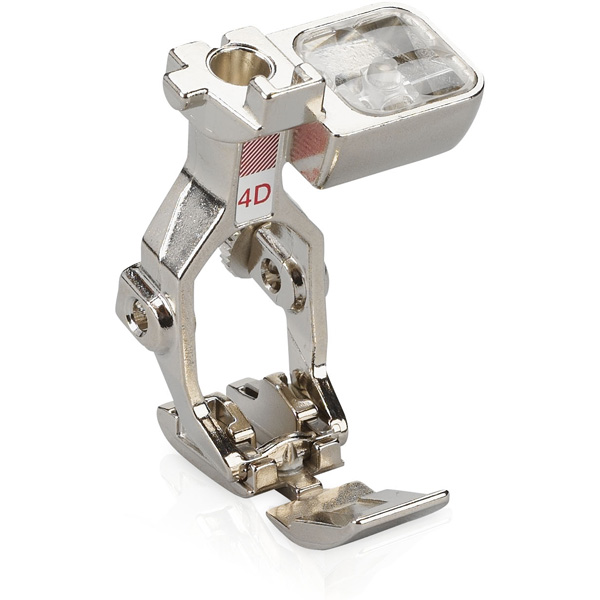
- Adjustable zipper foot (I use the BERNINA Zipper foot #4D)
Prepare the Rainbow Door Hanger Pattern
Print the three-page pattern at 100%, do not fit to page to avoid distorting the pattern.

With craft or paper scissors, carefully cut each pattern out along the outside solid and dashed lines.
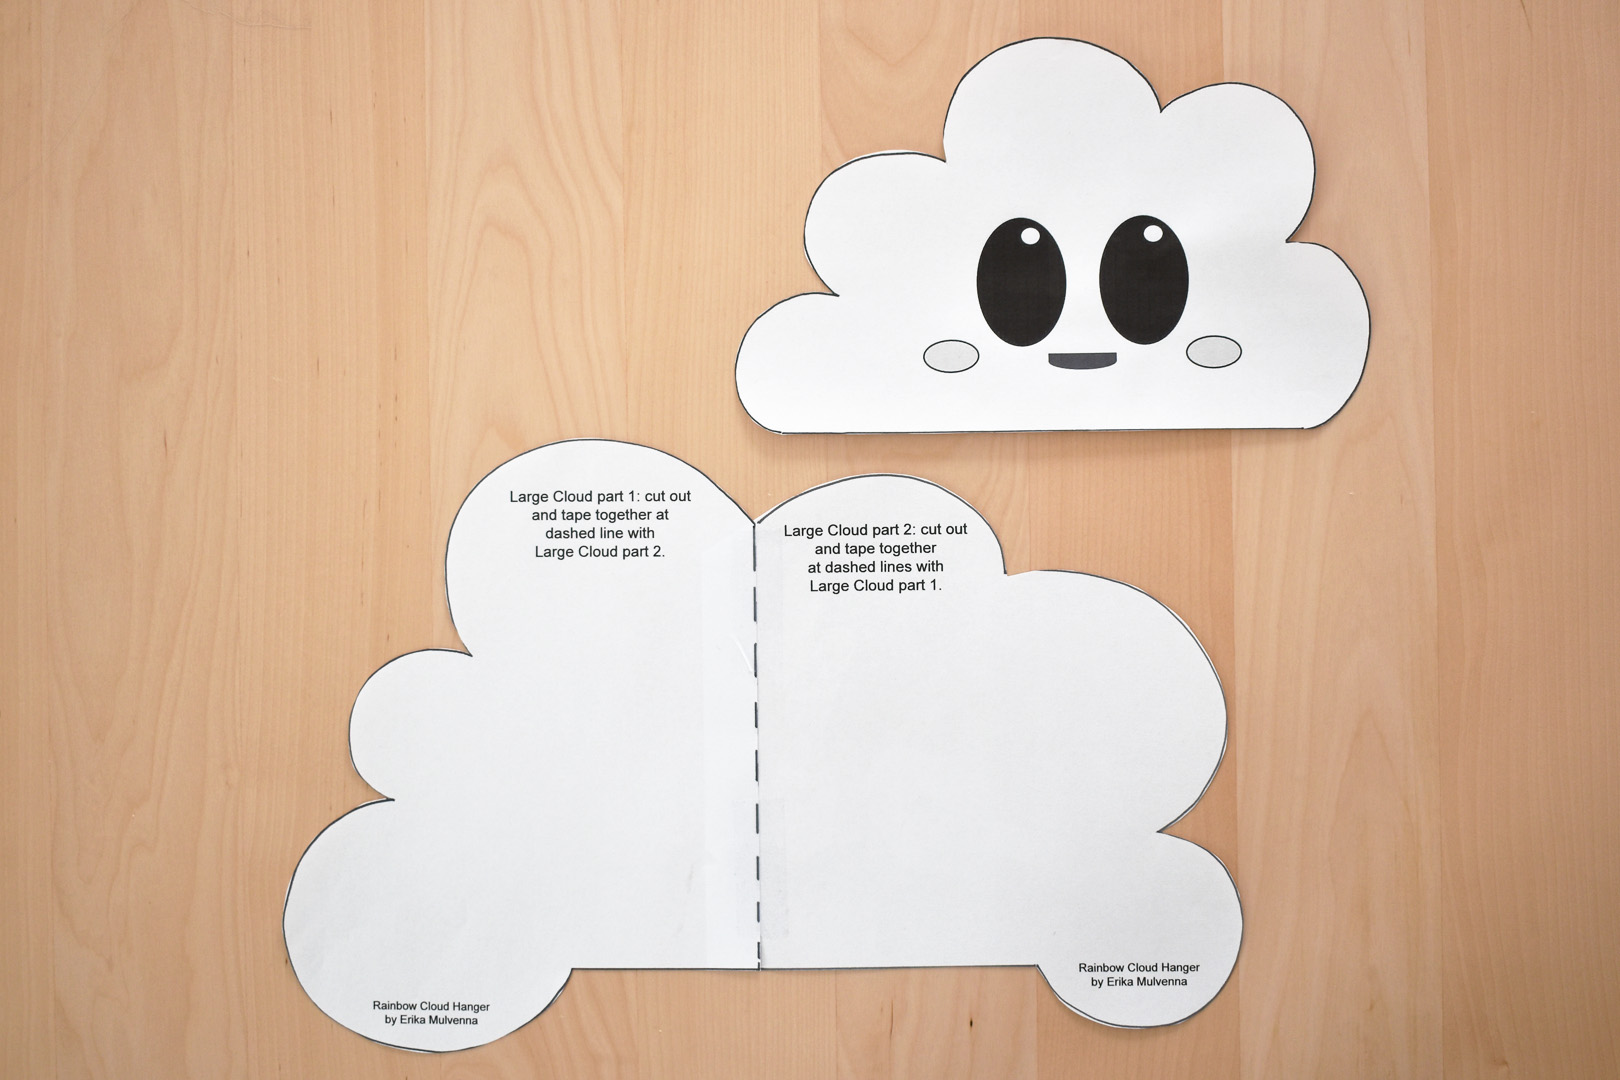
Tape together both pieces of the Large Cloud, matching the dashed lines together.
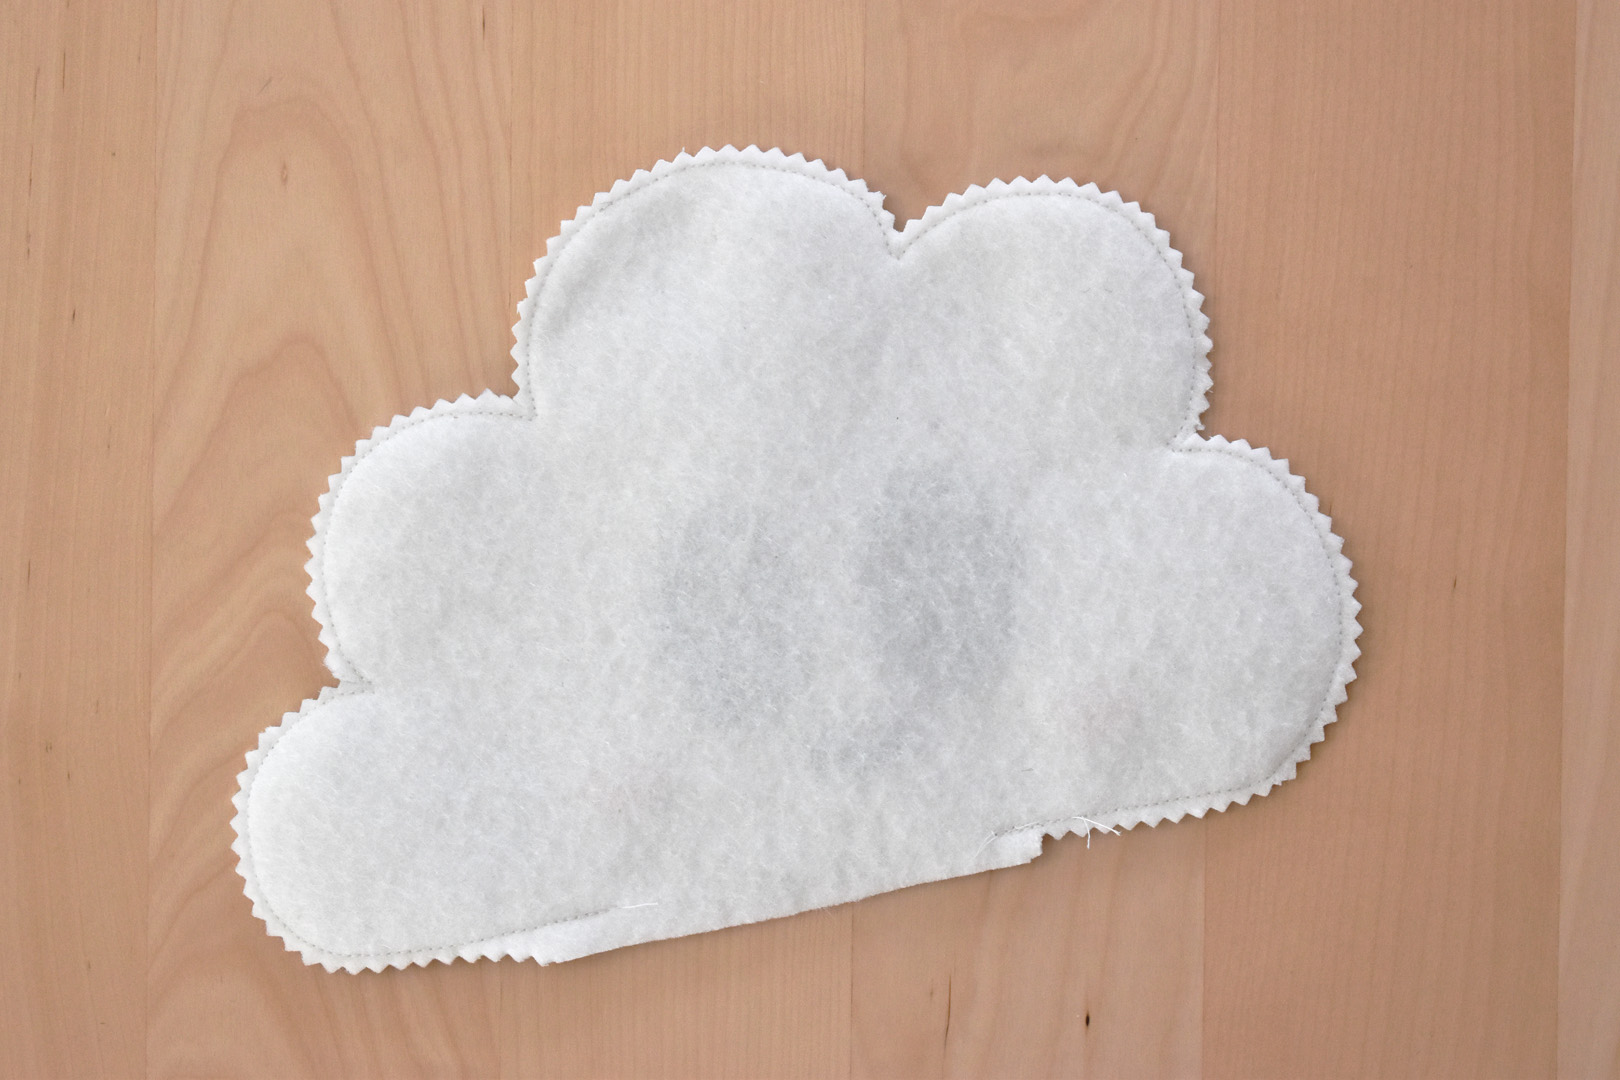
Create the Large Cloud for the Rainbow Door Hanger
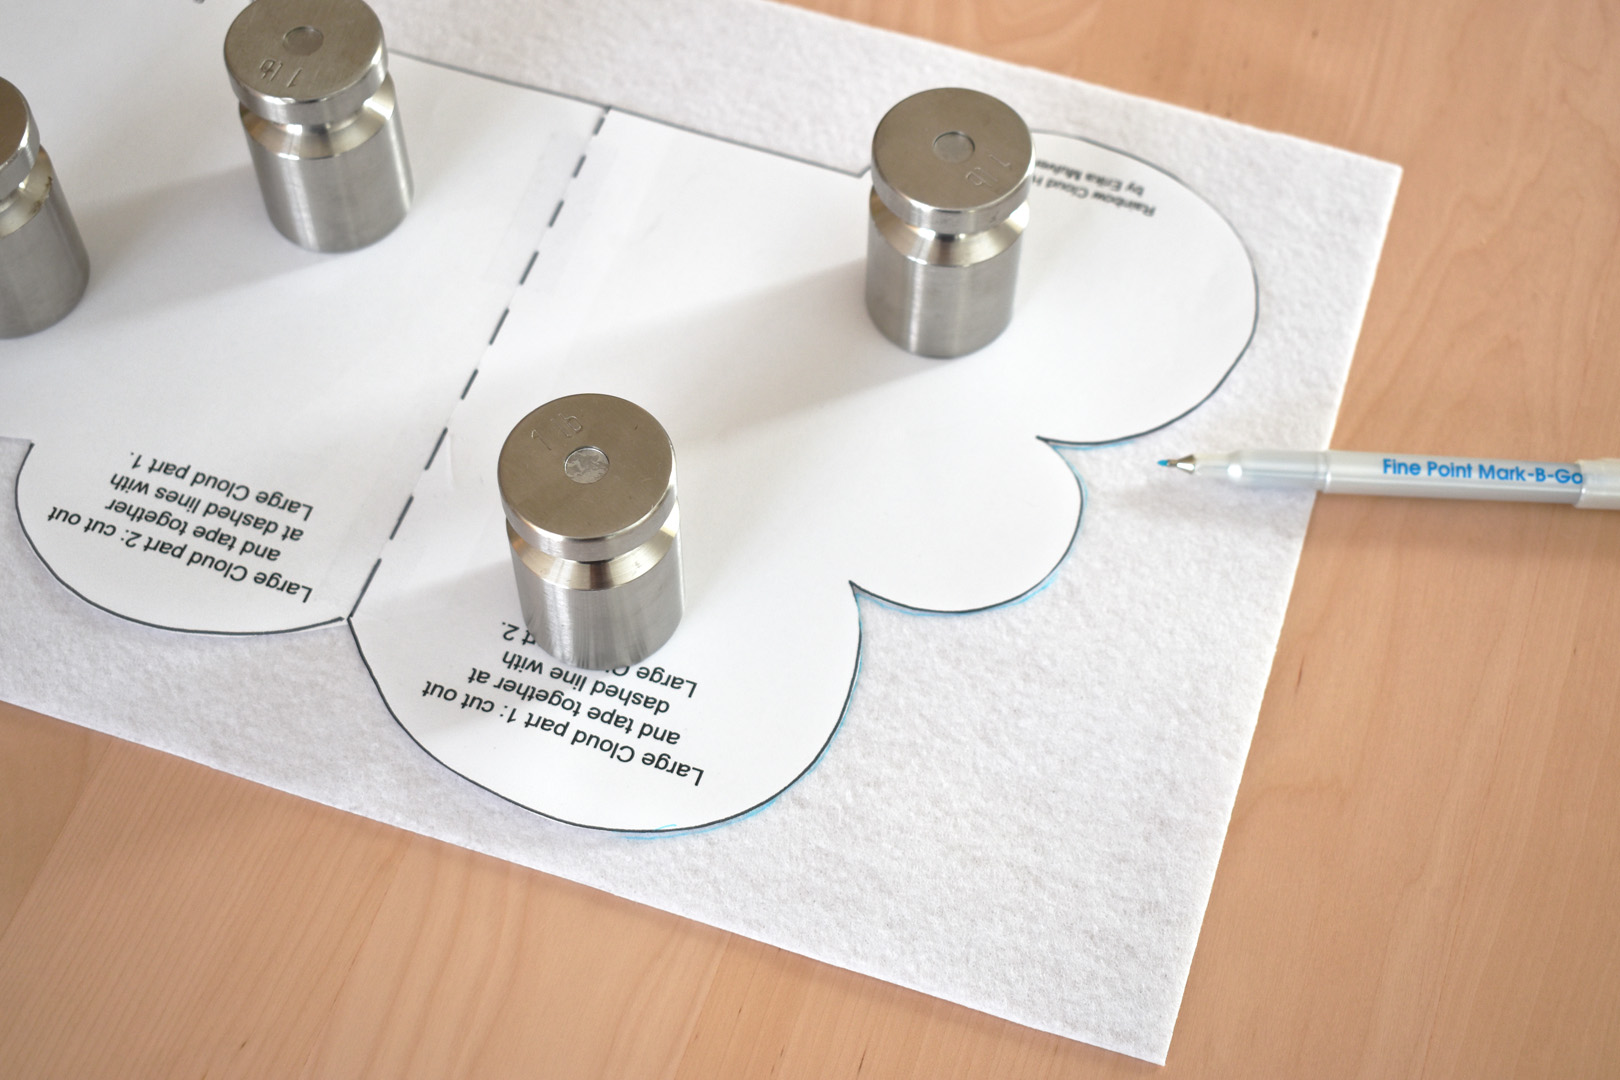
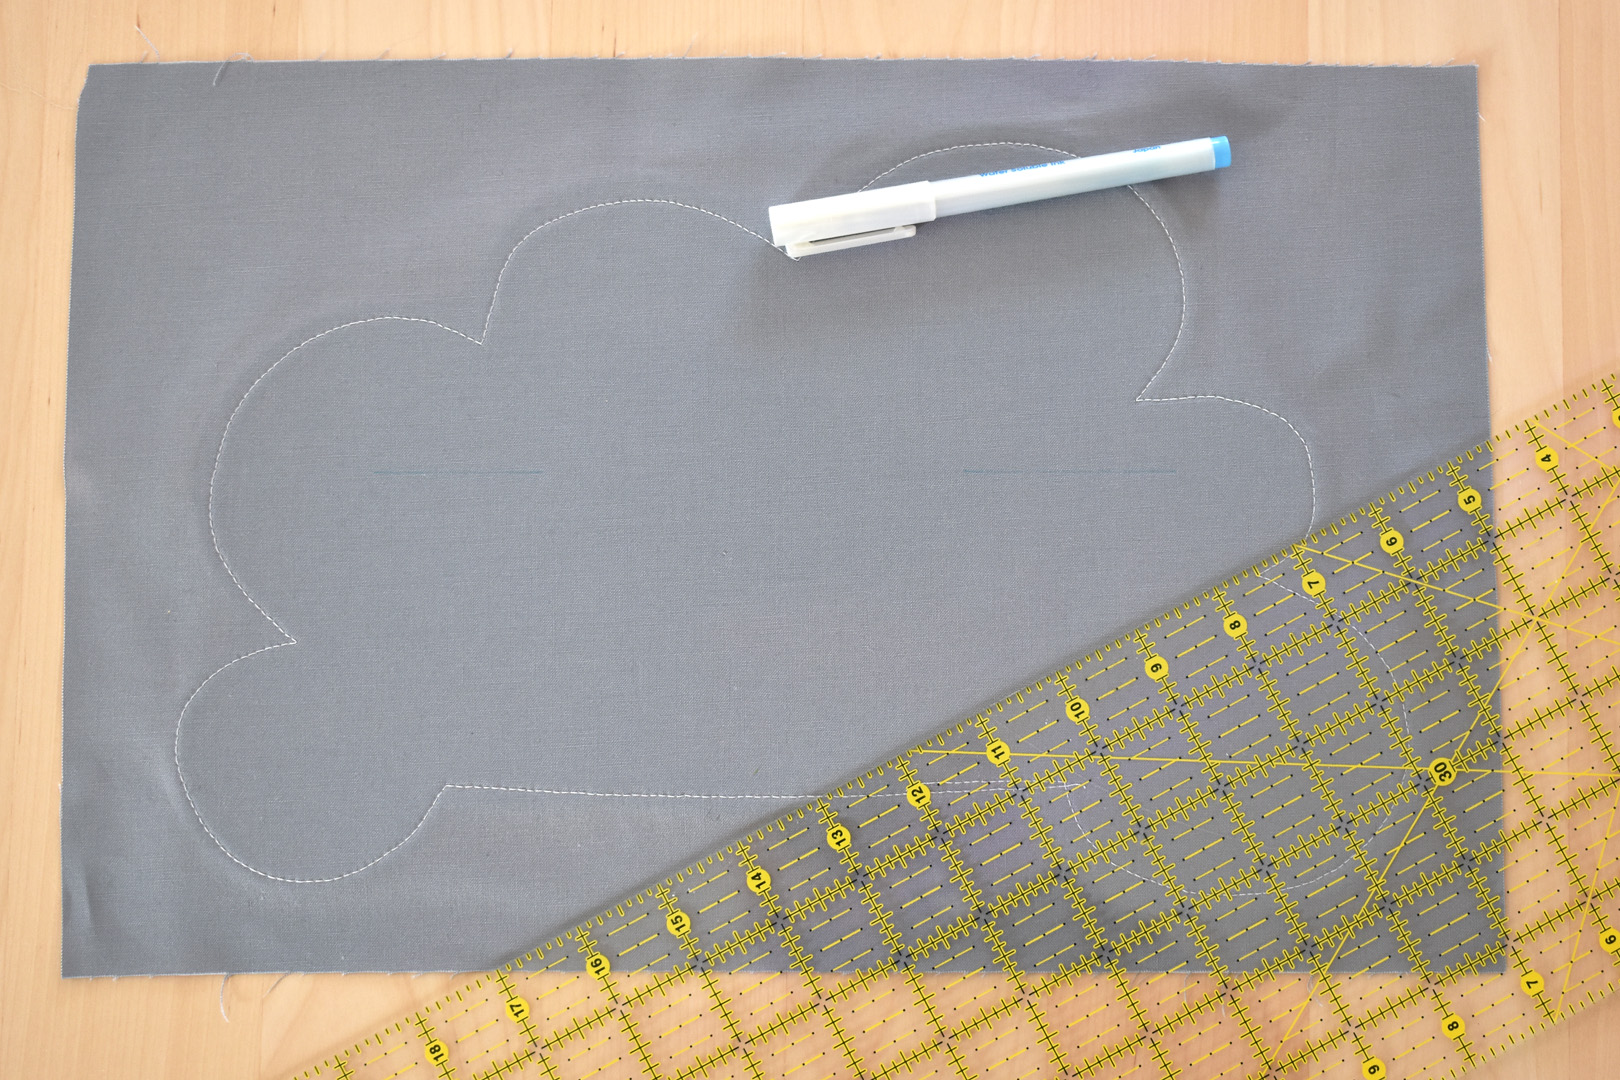
Use pattern weights to center the large cloud pattern on the back, non-fusible side of the Peltex craft interfacing. Trace around the outside edge of the pattern with a fabric marker.
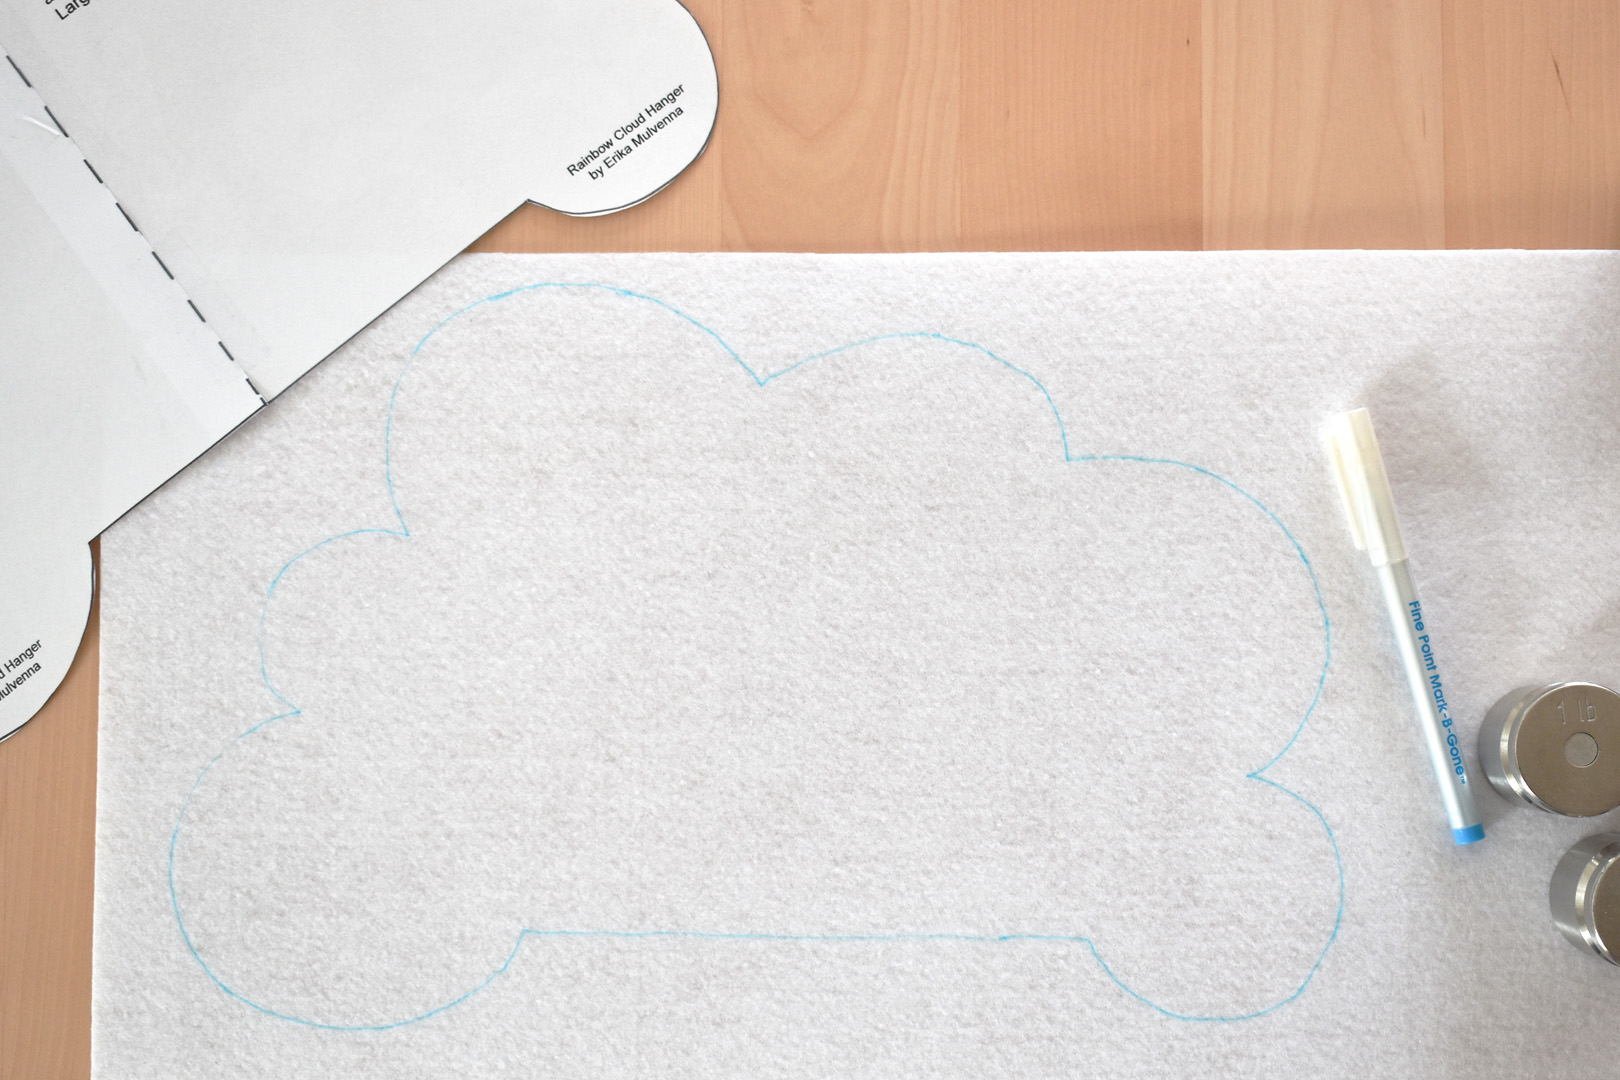

Carefully cut the large cloud shape out using craft scissors (the stiff interfacing will dull your sharp fabric shears).
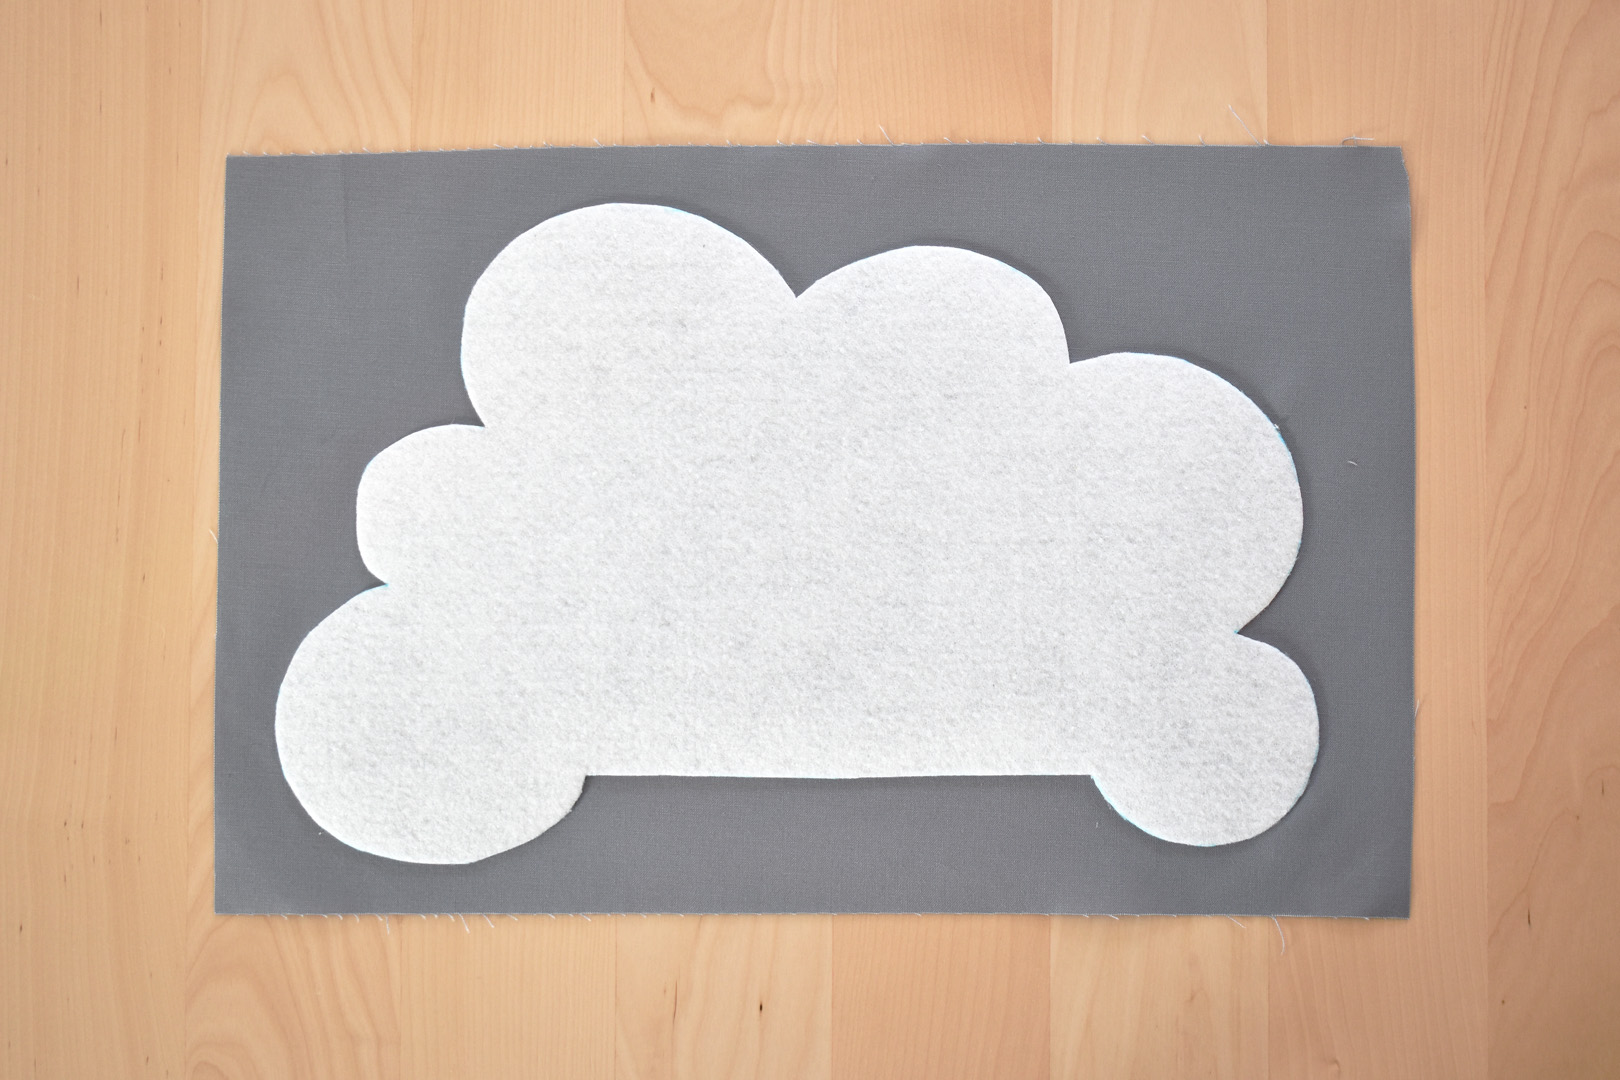
Following manufacturer’s directions, center the large cloud on the back of one 10″ x 16″ piece of gray fabric and fuse in place.
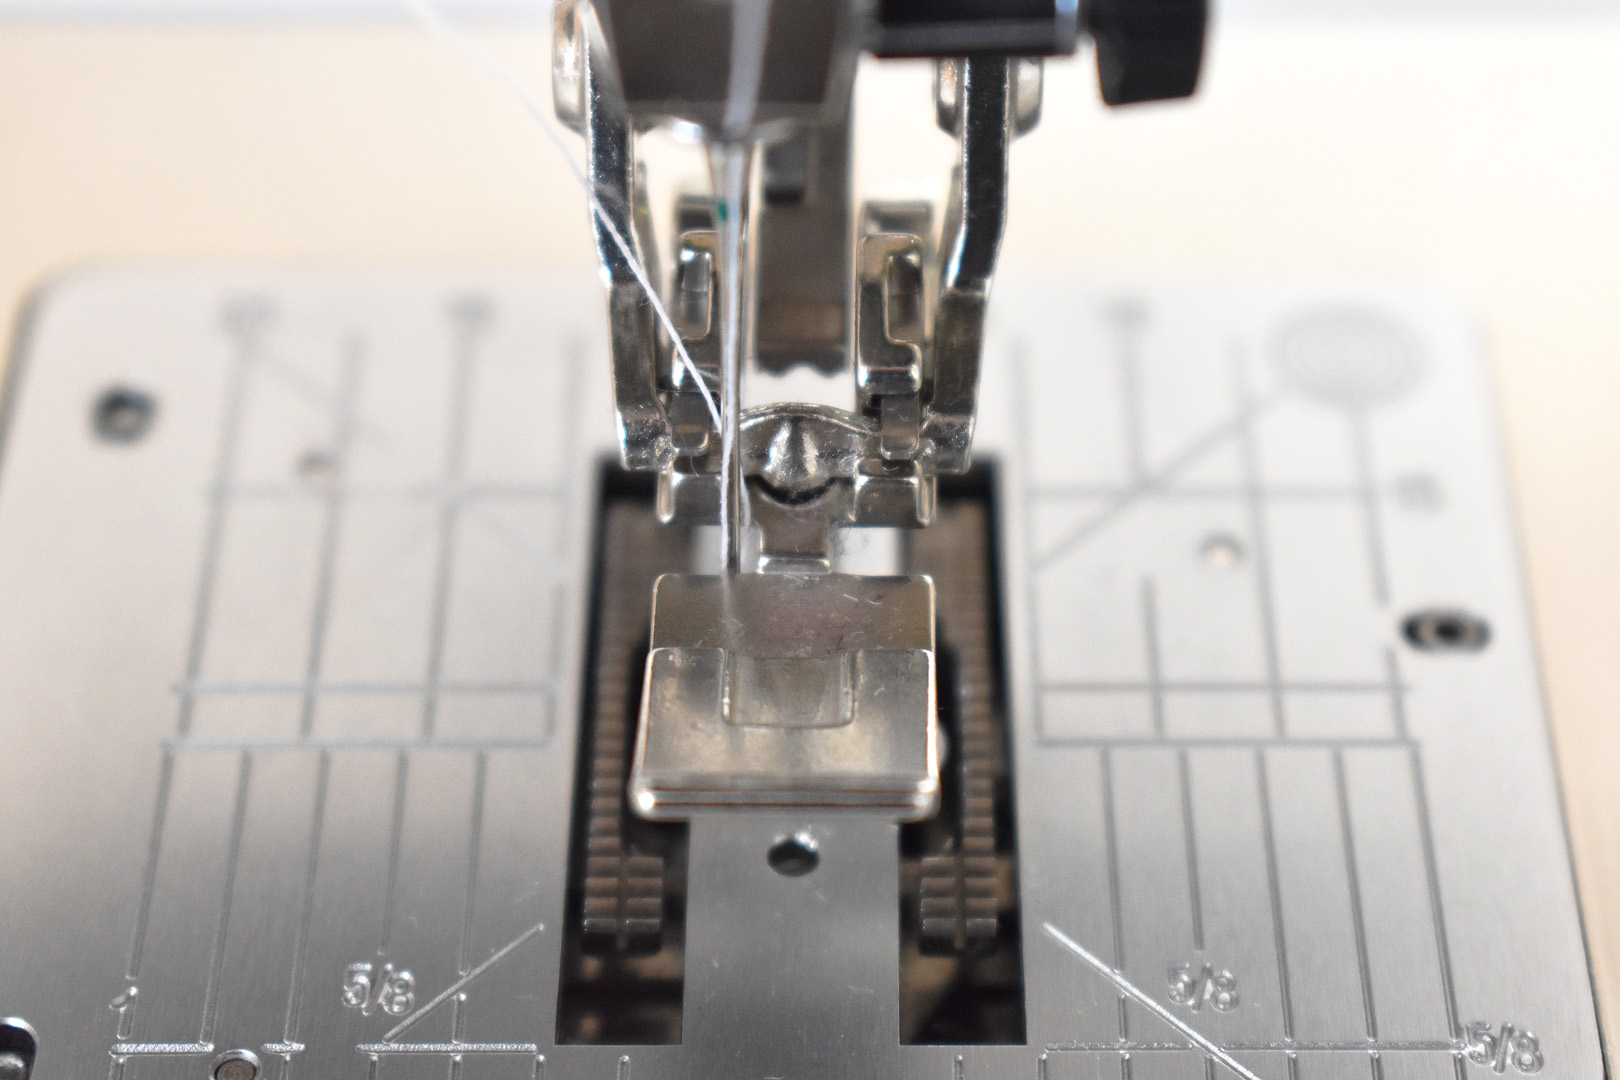
Set up your sewing machine to stitch a standard straight stitch with a quarter-inch or straight stitch foot. I am using the Patchwork foot #97D with Dual Feed.
Stitch all along the outside edge of the Large Cloud shape about 1/4″ from the edge.
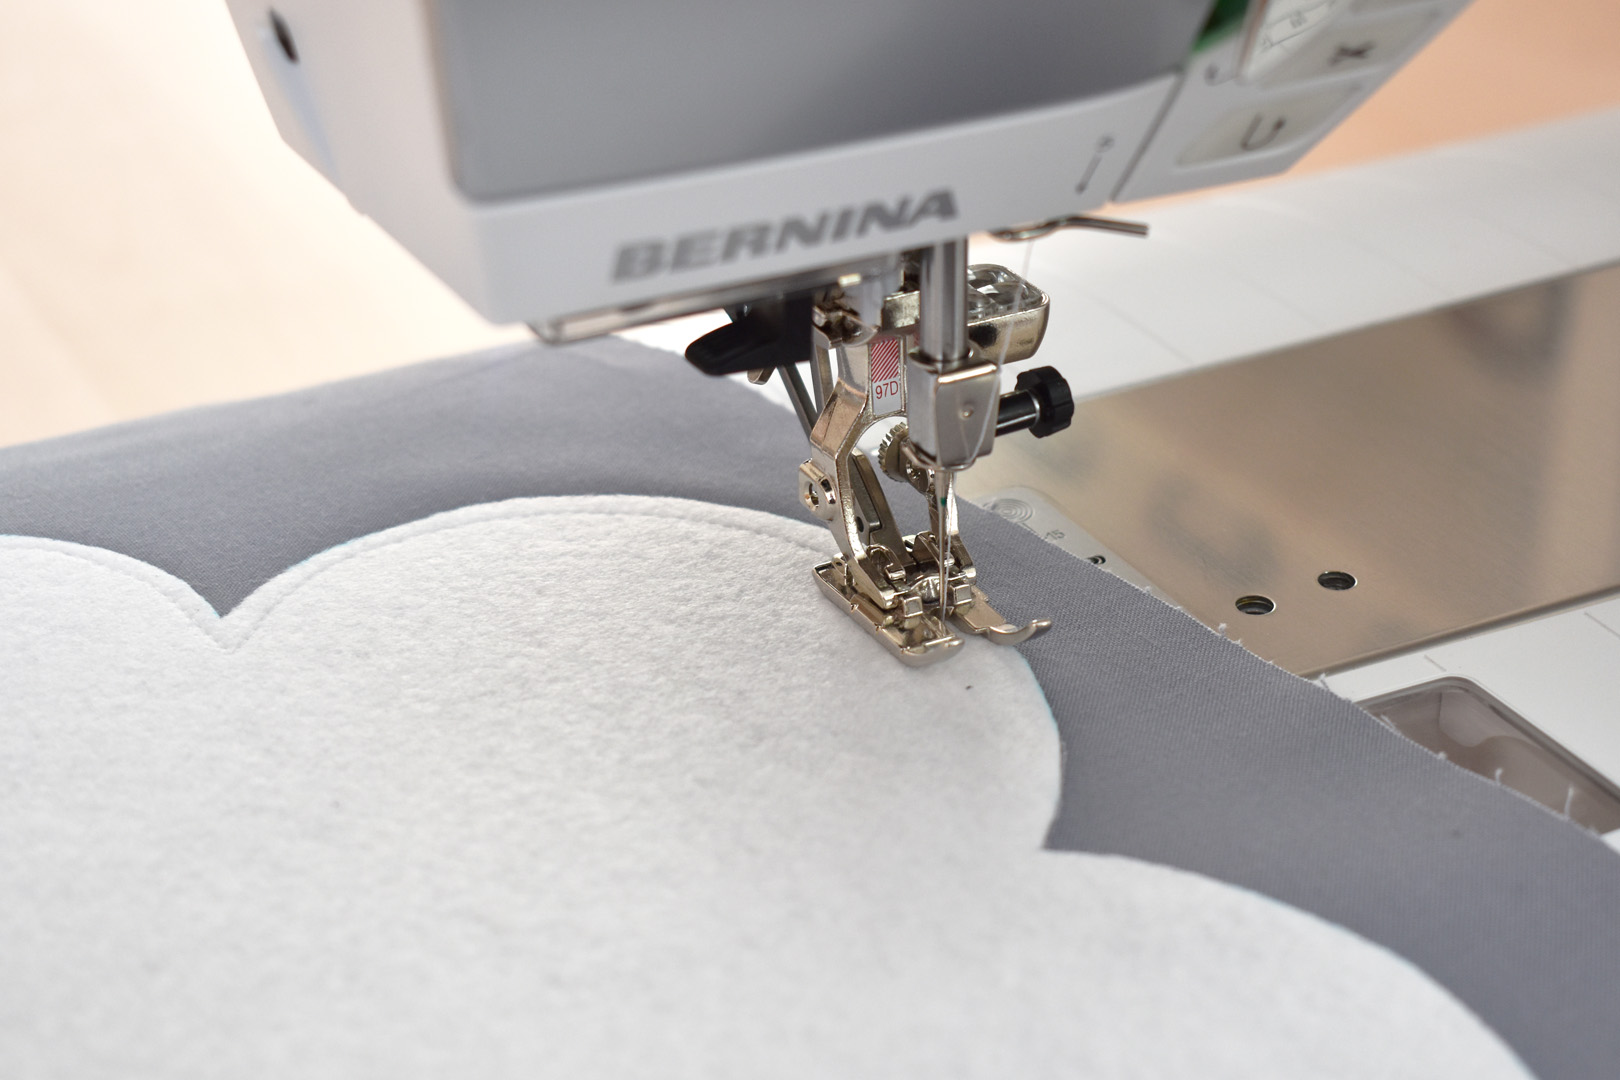
Pivot around corners by leaving the needle dropped down at the corner, lift the presser foot, and turn to continue sewing.
Stitch completely around the entire shape. These stitches will help keep the shape flat during the last step of construction when you are turning the cloud inside out.
After stitching, flip the cloud over, Peltex side down and fabric side up. Grab a fabric marker, straight edge, and the large cloud pattern.
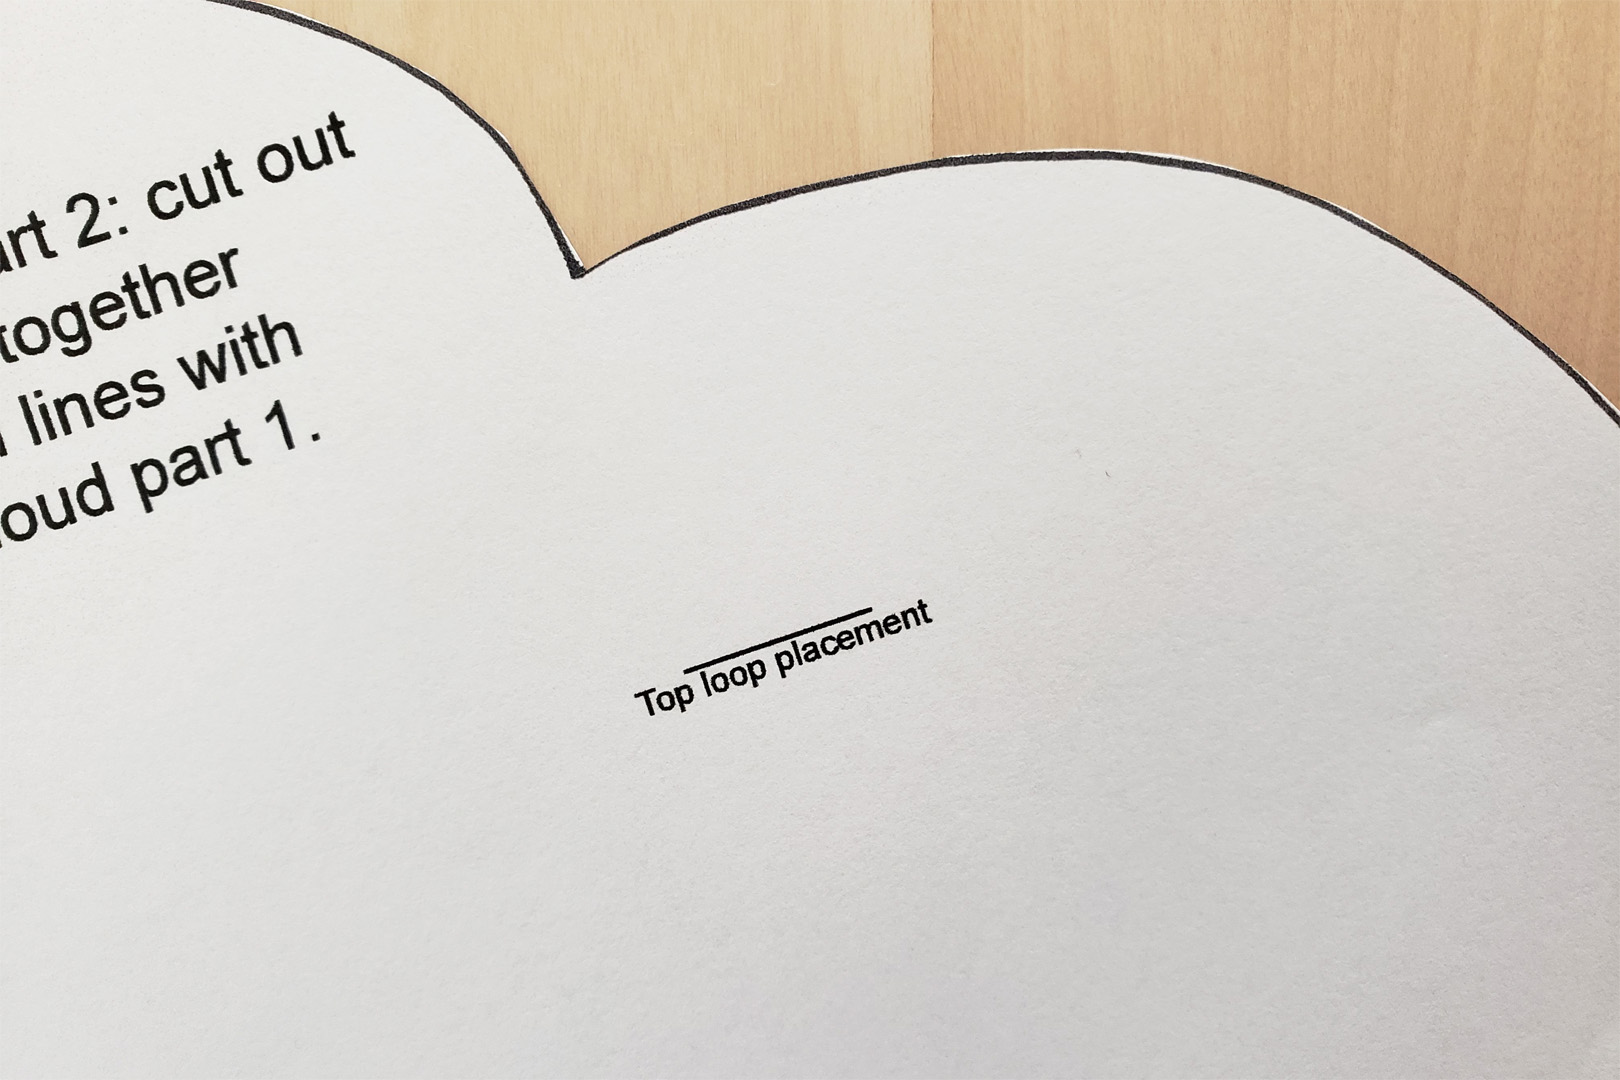
Transfer the loop placement marks from the pattern to the fabric side of the cloud.
Use the straight edge to help make sure you are adding the marks parallel to each other. Use the bottom straight edge of the cloud as a guide. Mark a small, straight line for each top loop directly on the fabric.
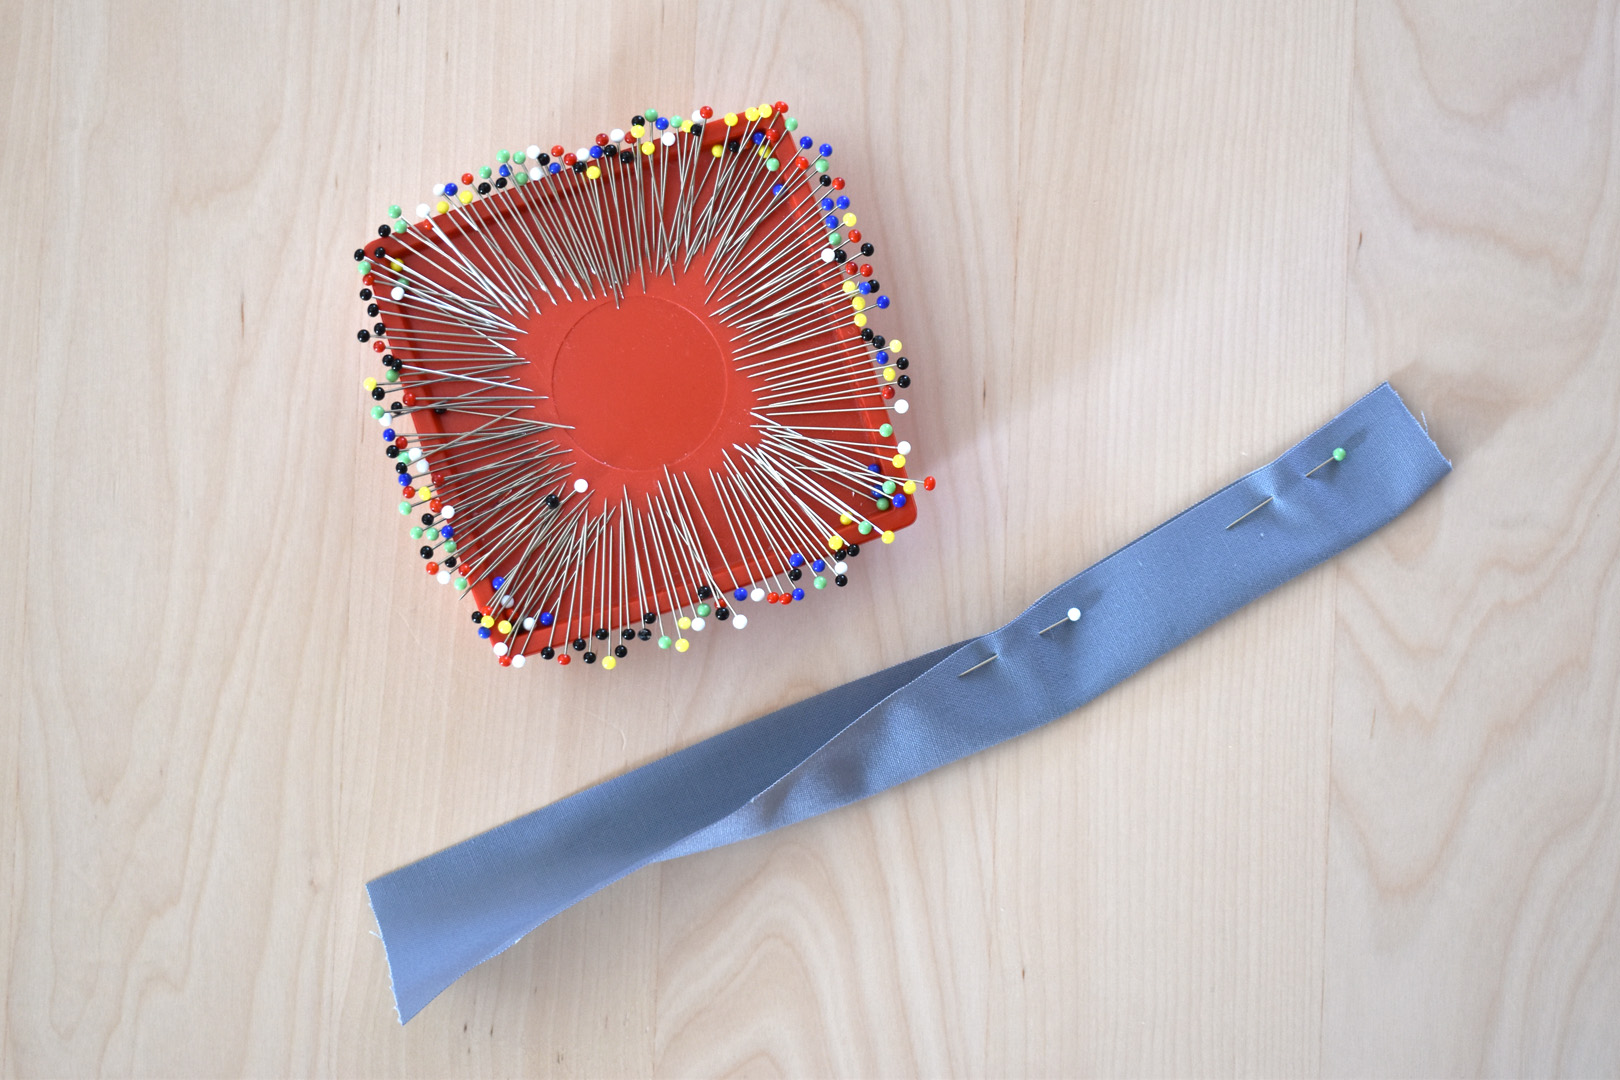
The gray 6″ x 2″ piece of fabric is used to make the hangers. Fold the piece of fabric in half lengthwise and pin.
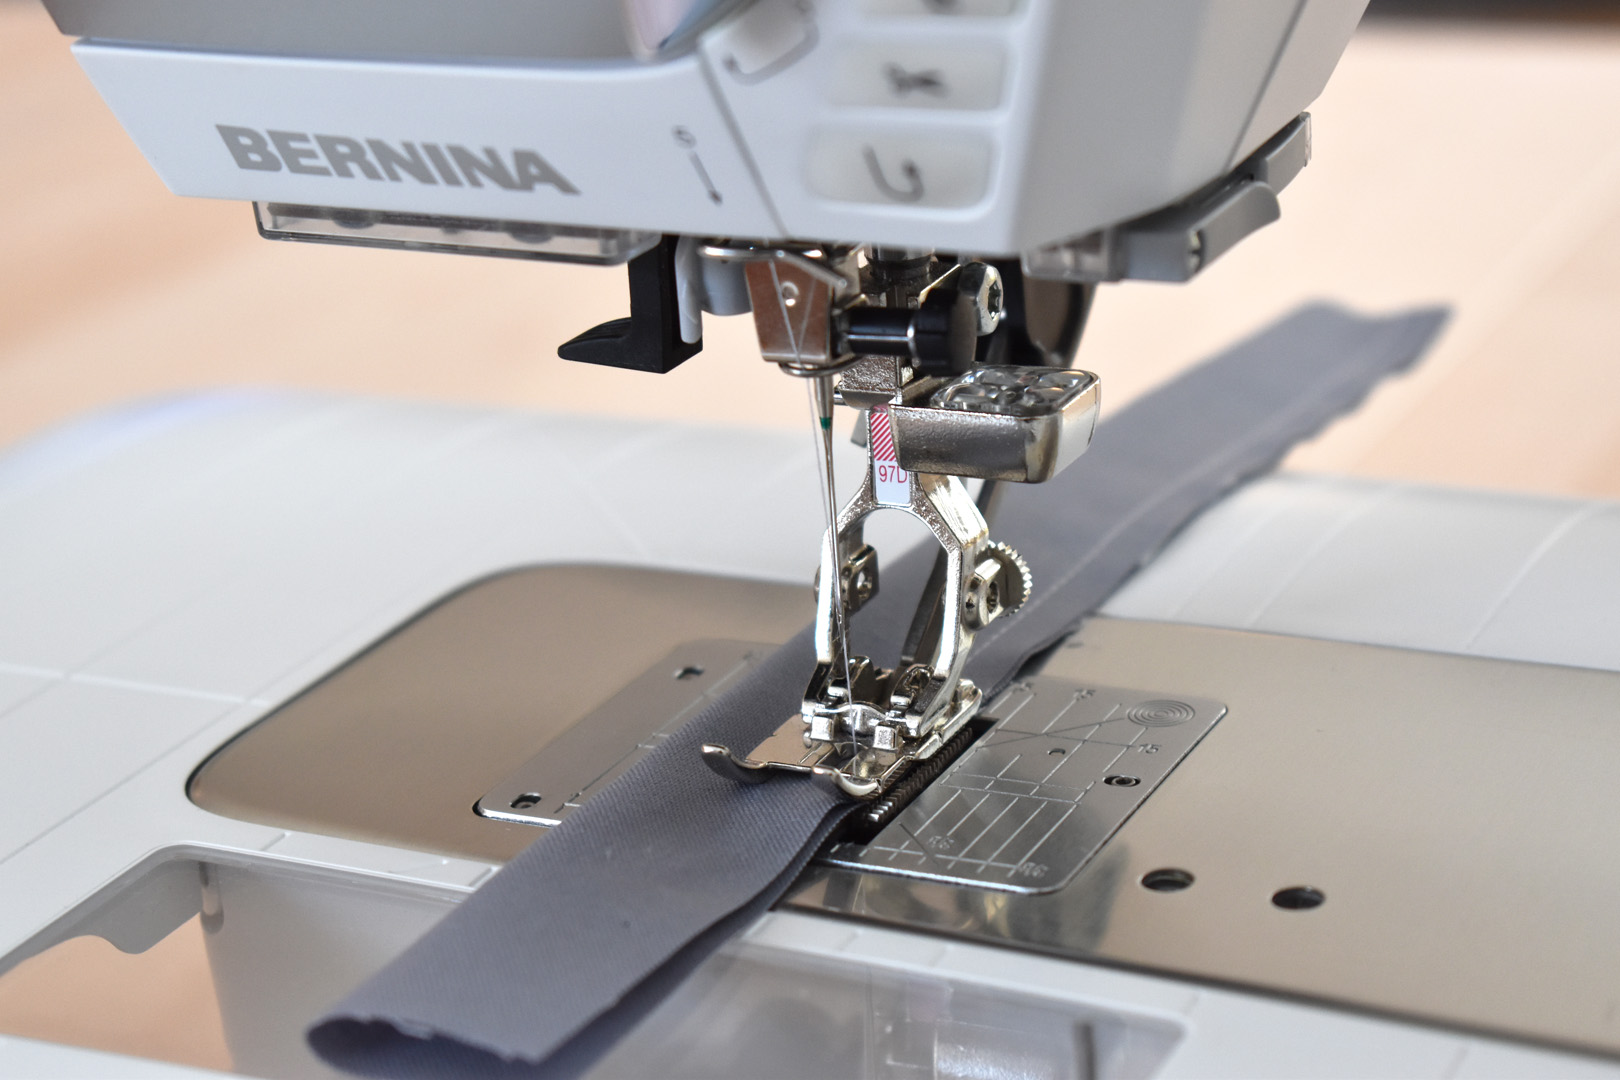
Using the same quarter inch or straight stitch foot, sew along the long edge with a 1/4″ seam.
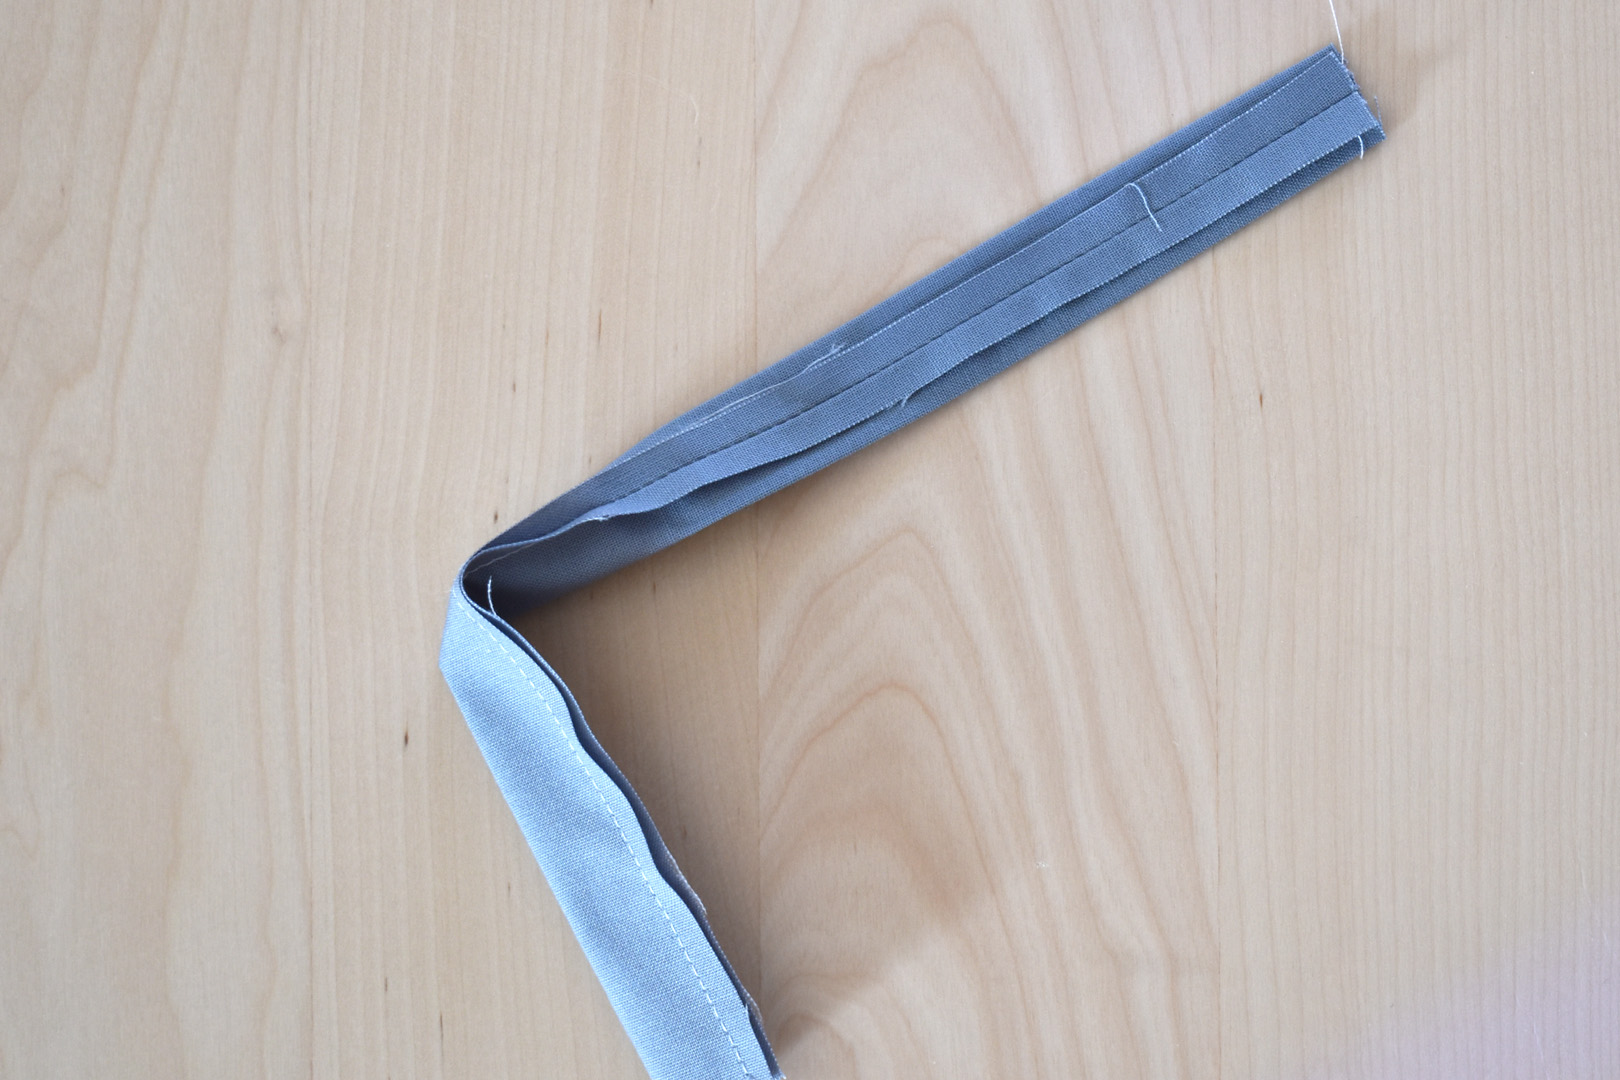
Press the fabric strip flat, centering the seam and pressing seam allowance open. Cut the flat strip in half to create two, 3″ long strips for the hangers.
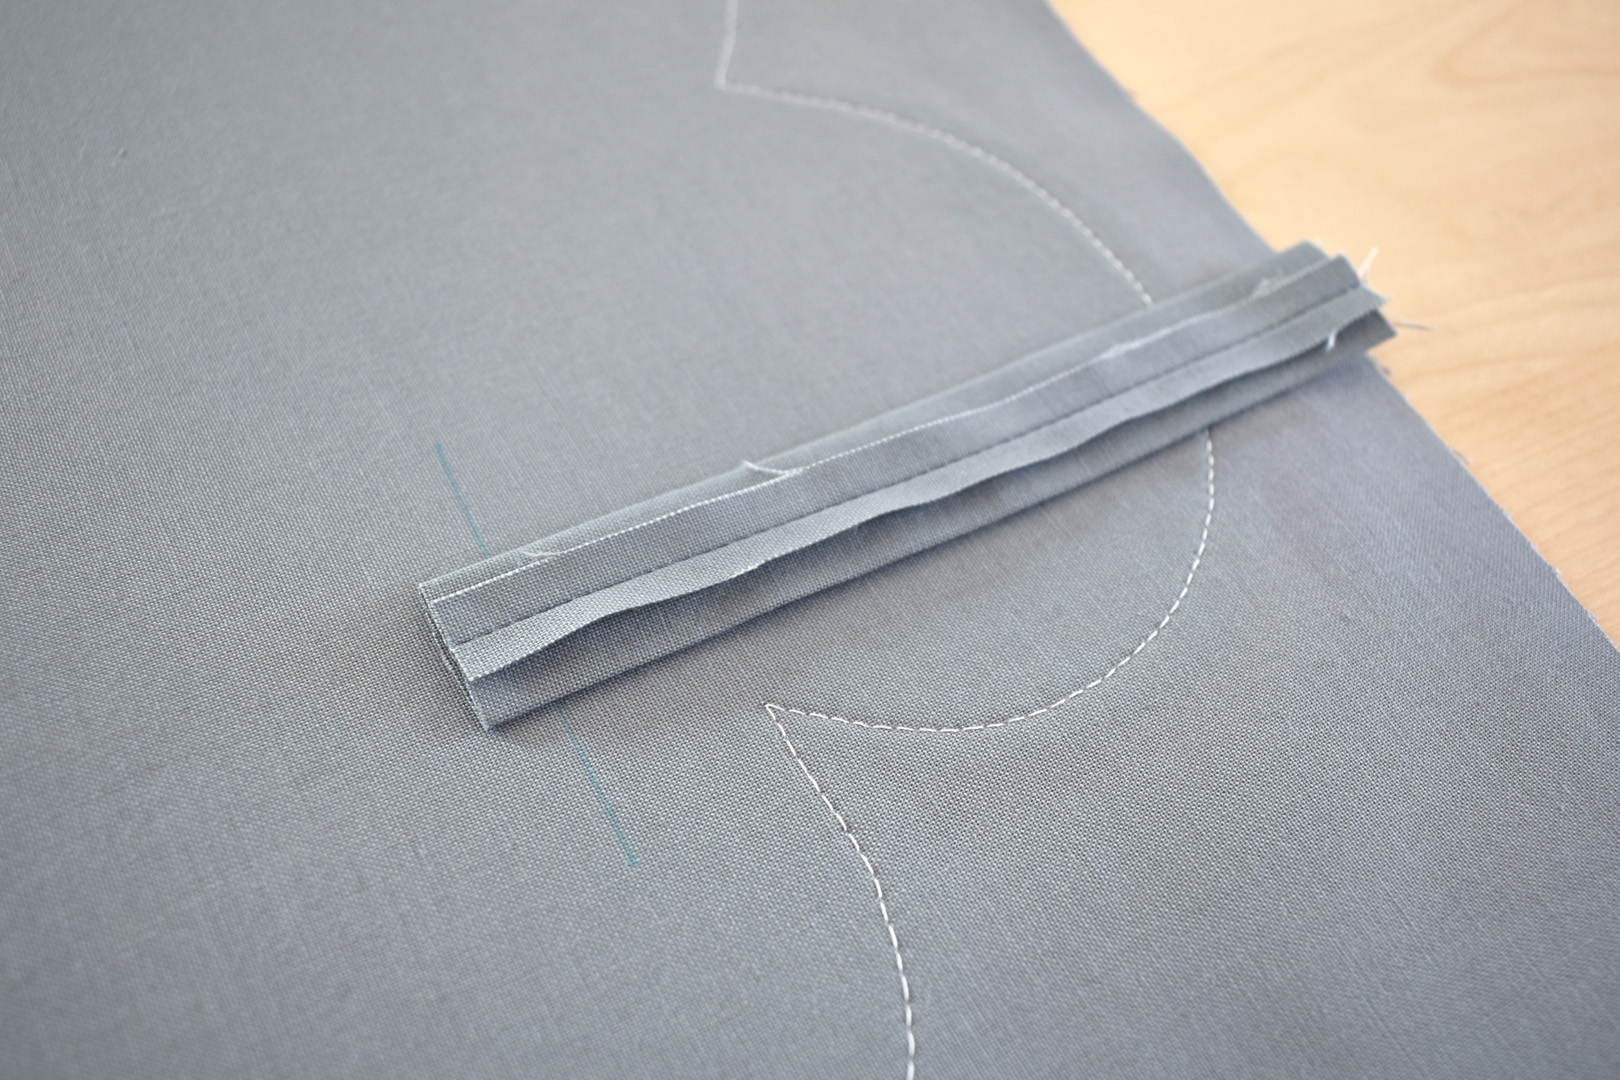
Center each strip on the loop marks, with the strips facing to the top of the cloud, overlapping the mark 1/2″.

Stitch across each loop following the mark, backstitching a few times to create a secure stitch.

Finger fold the top edge of each strip over 1/2″.
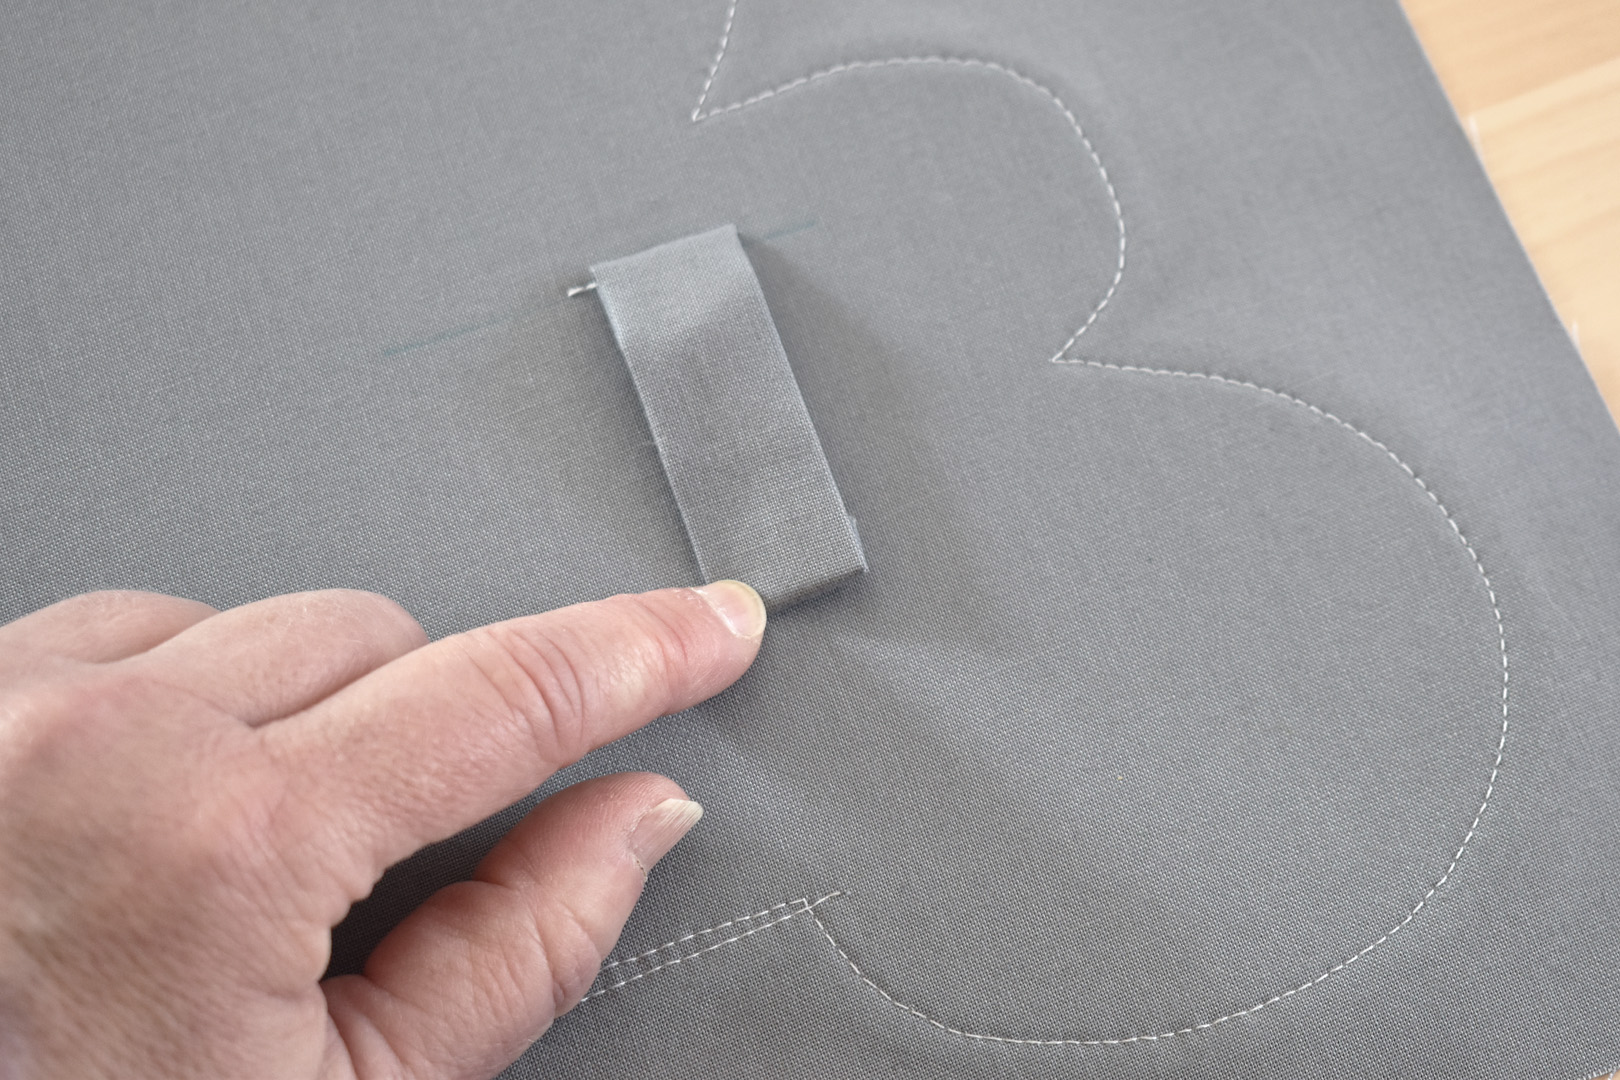
Fold the strip over the stitched side, and pin in place. Don’t pull the strip tight, but leave some slack in the strip to create the loop. Pin in place.
Stitch across the folded end of the strip, backstitching a few times to create a strong stitch. The loops are now complete.
Fuse the other piece of 10″ x 16″ piece of gray fabric to the 10″ x 16″ piece of fusible fleece following the manufacturer’s instructions. Layer this fused rectangle on your worktable, right side up.

Place the rectangle with the Peltex craft interfacing cloud shape on top, right sides together. Pin all around the outside of the cloud shape through all layers.
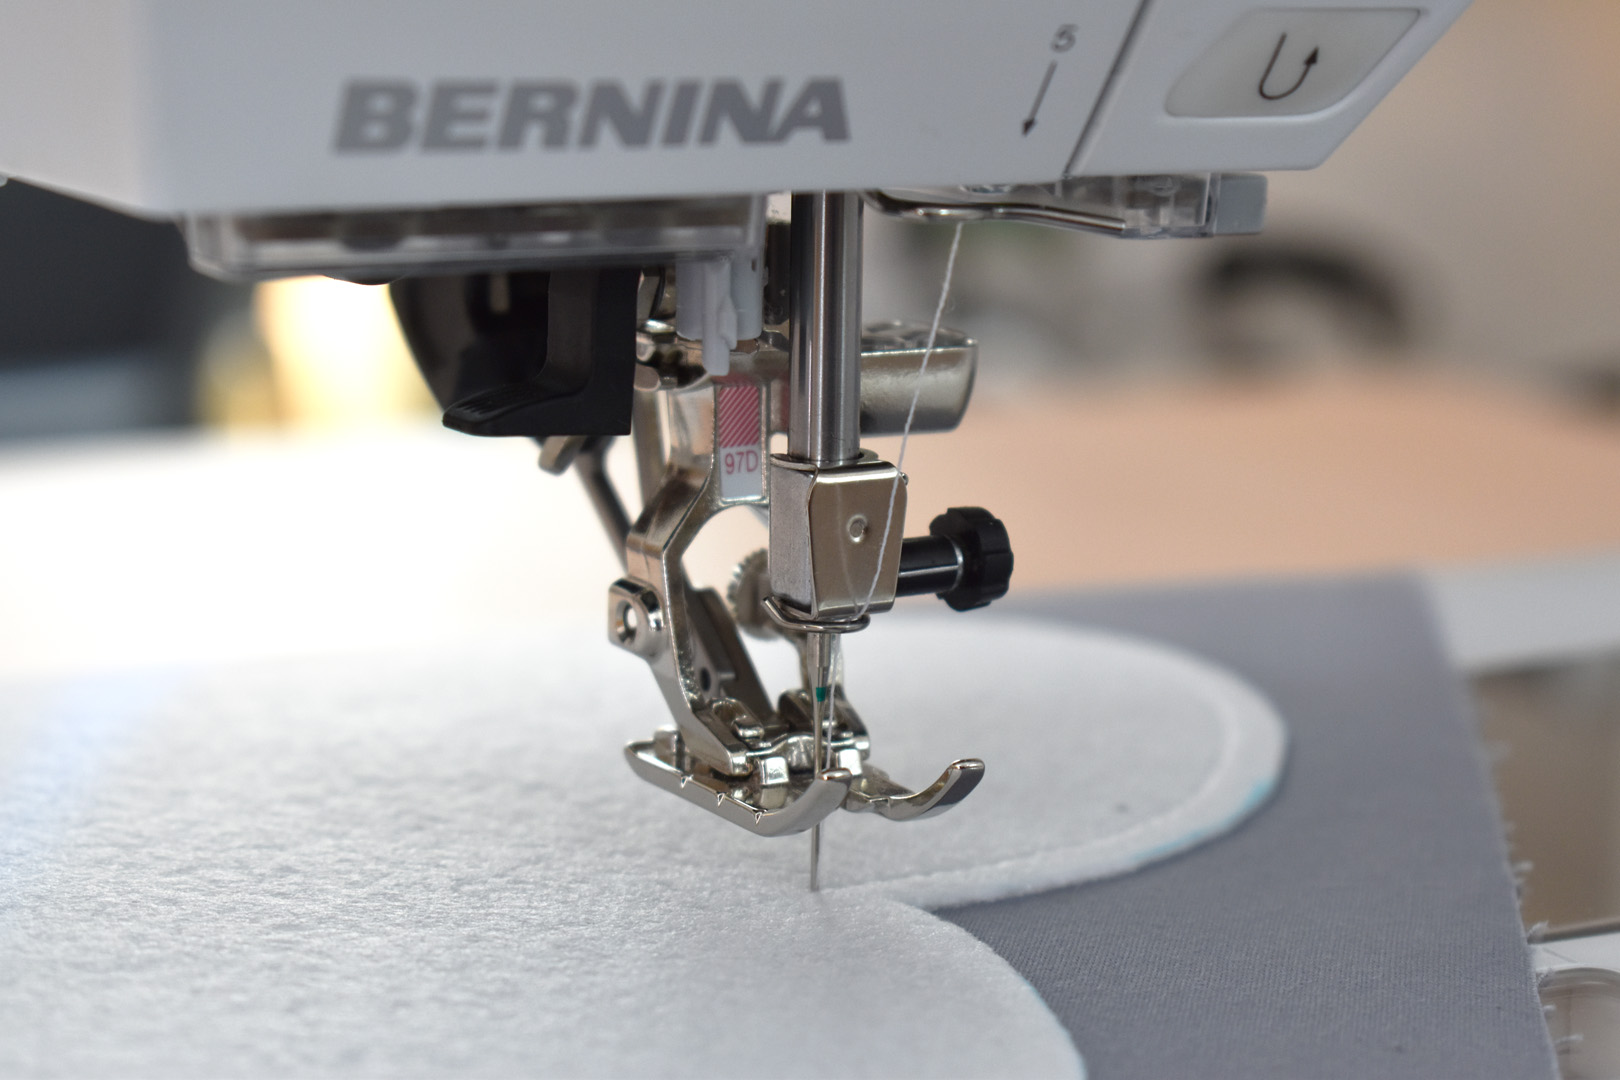
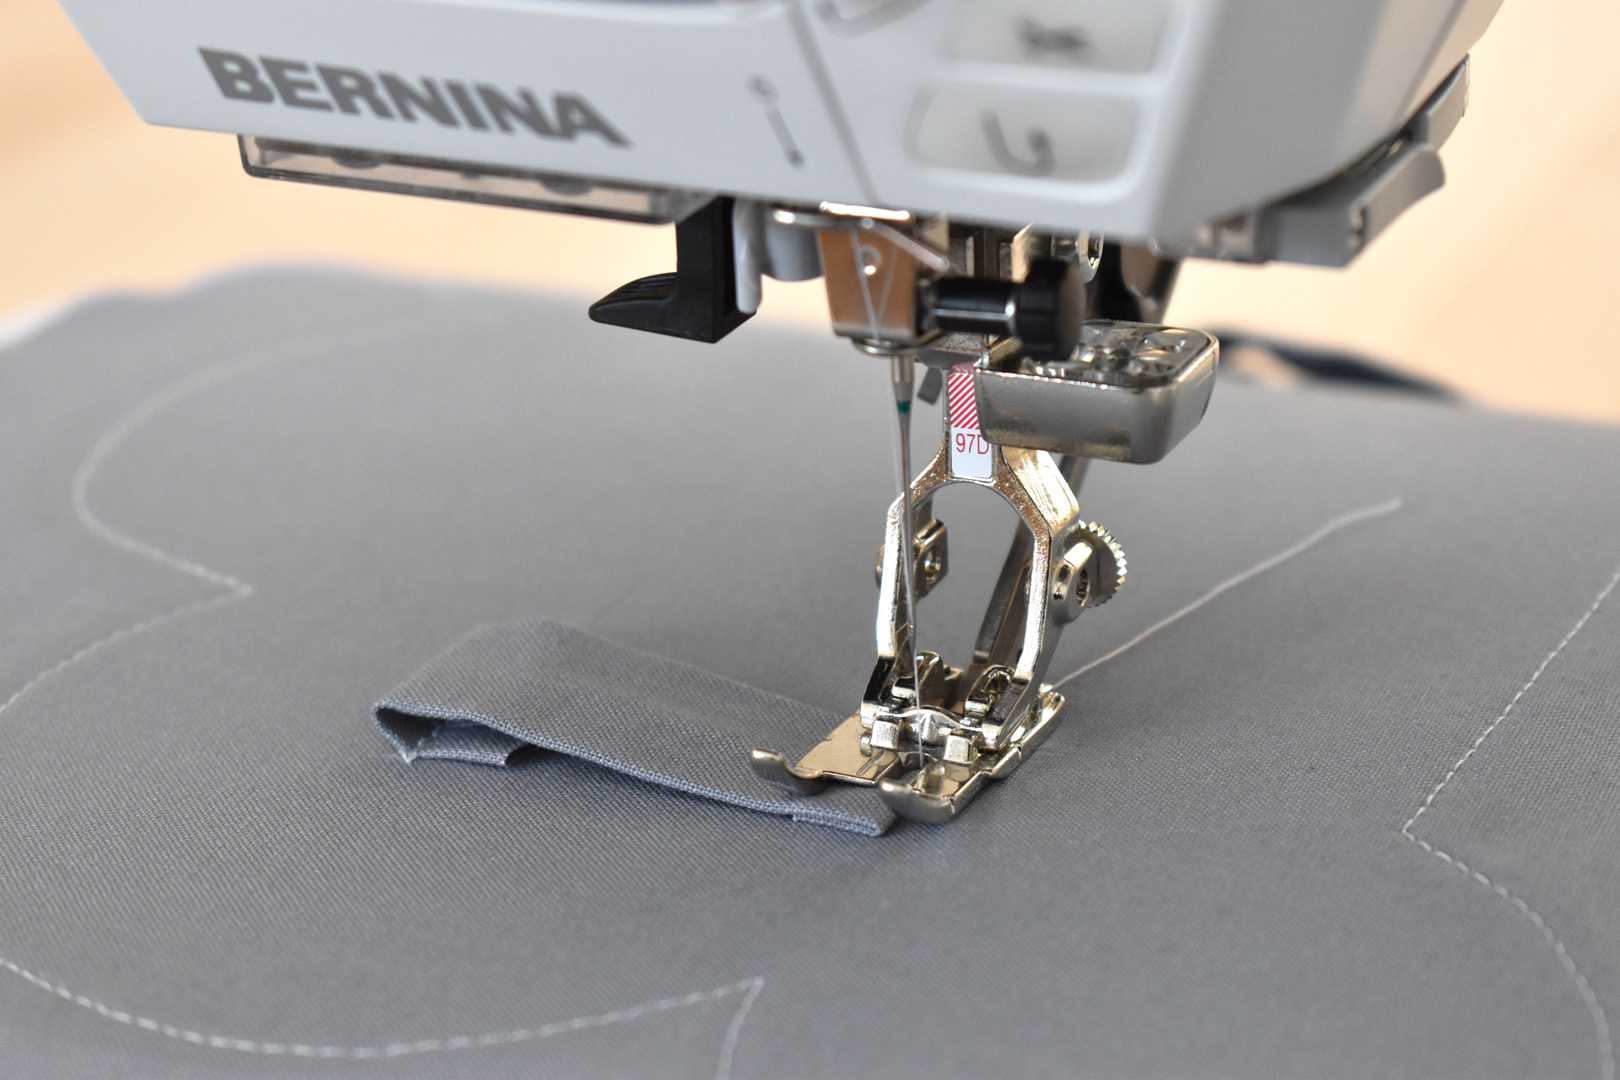
Change feet on your sewing machine from the straight stitch foot to the adjustable zipper foot. I am using the Zipper foot #4D.
Move the needle over to the left a few clicks. Make sure the needle can clear the middle of the zipper foot.
The ideal needle position for sewing this step is not to have the needle all the way to the left, but to move it over to the left just enough to be clear of the middle support on the foot. Move the needle down slightly with the hand wheel to check that the needle will not hit the foot when sewing.
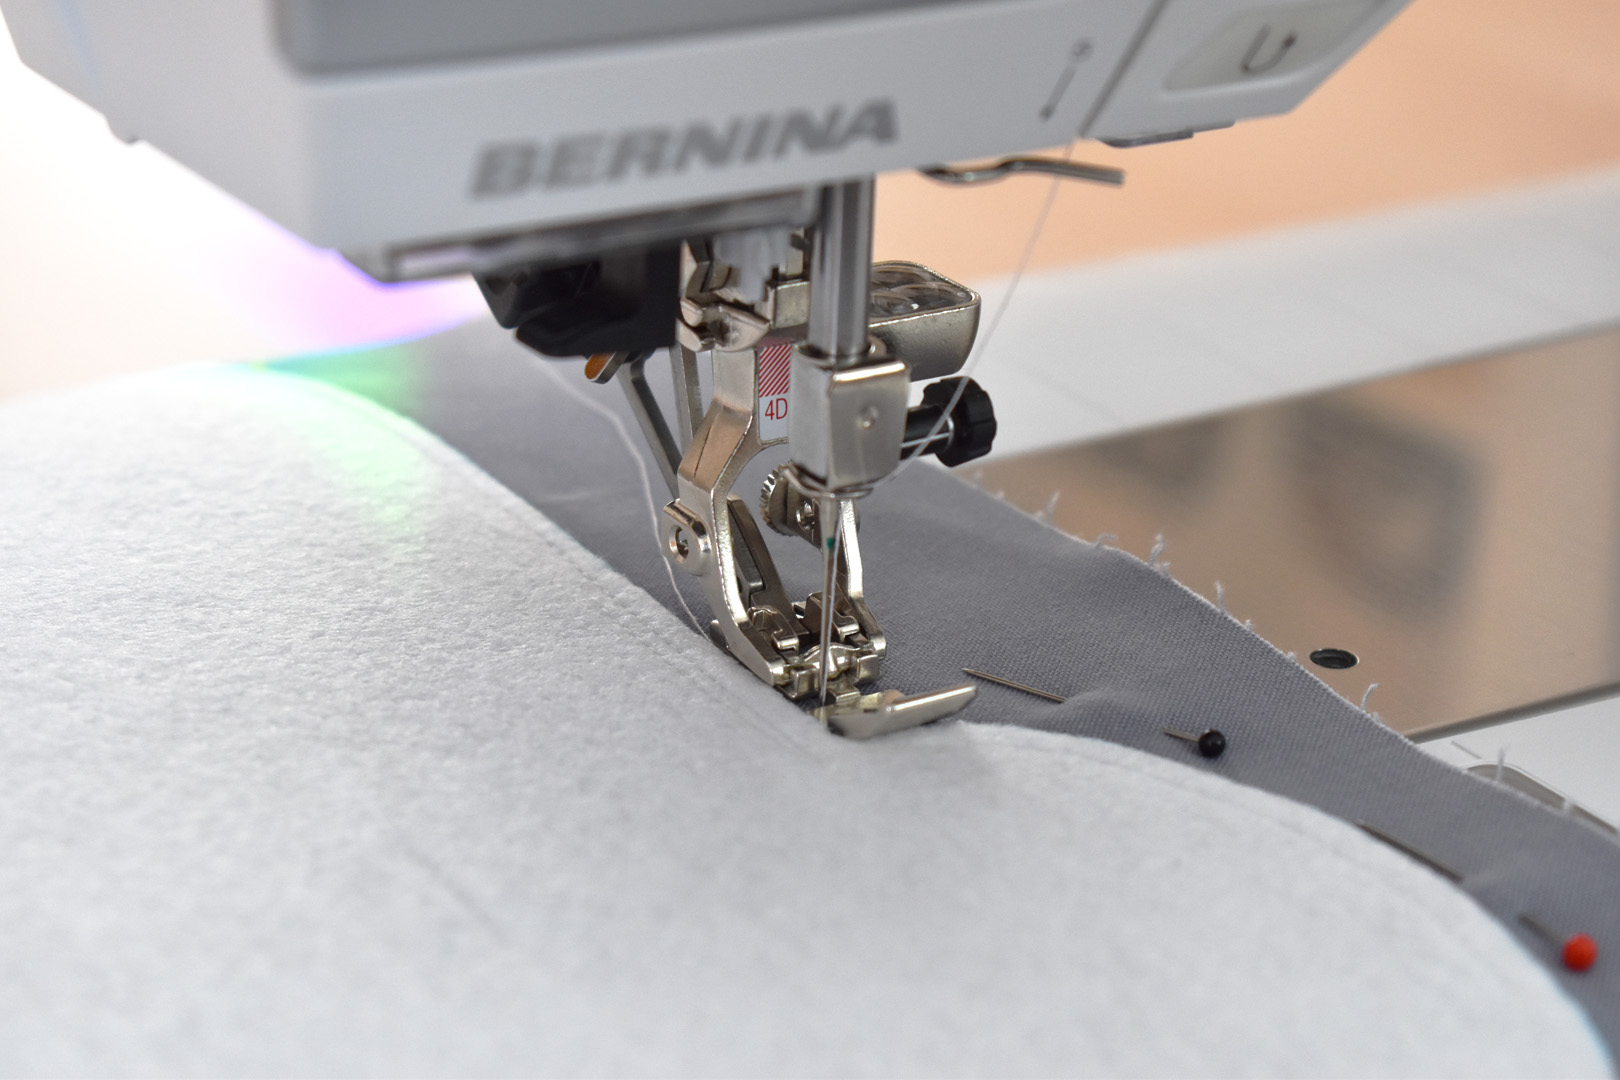
Using a standard straight stitch, sew around the cloud shape with the zipper foot riding close enough to the Peltex shape to allow for a scant seam allowance. The goal is to leave about 1/8″ – 1/4″ seam allowance when sewing around the Peltex shape to allow a space for the seams to sit when the shape is turned inside out. Leave the large, flat shape on the bottom of the cloud open several inches for turning inside out. Start sewing about an inch from one end of the flat shape, backstitching to create a strong seam.
Pivot in the corners by leaving the needle down, raising the presser foot, moving the fabric, and continuing to sew. Make sure to stop sewing and leave several inches open on the flat end of the cloud shape (see next photos).
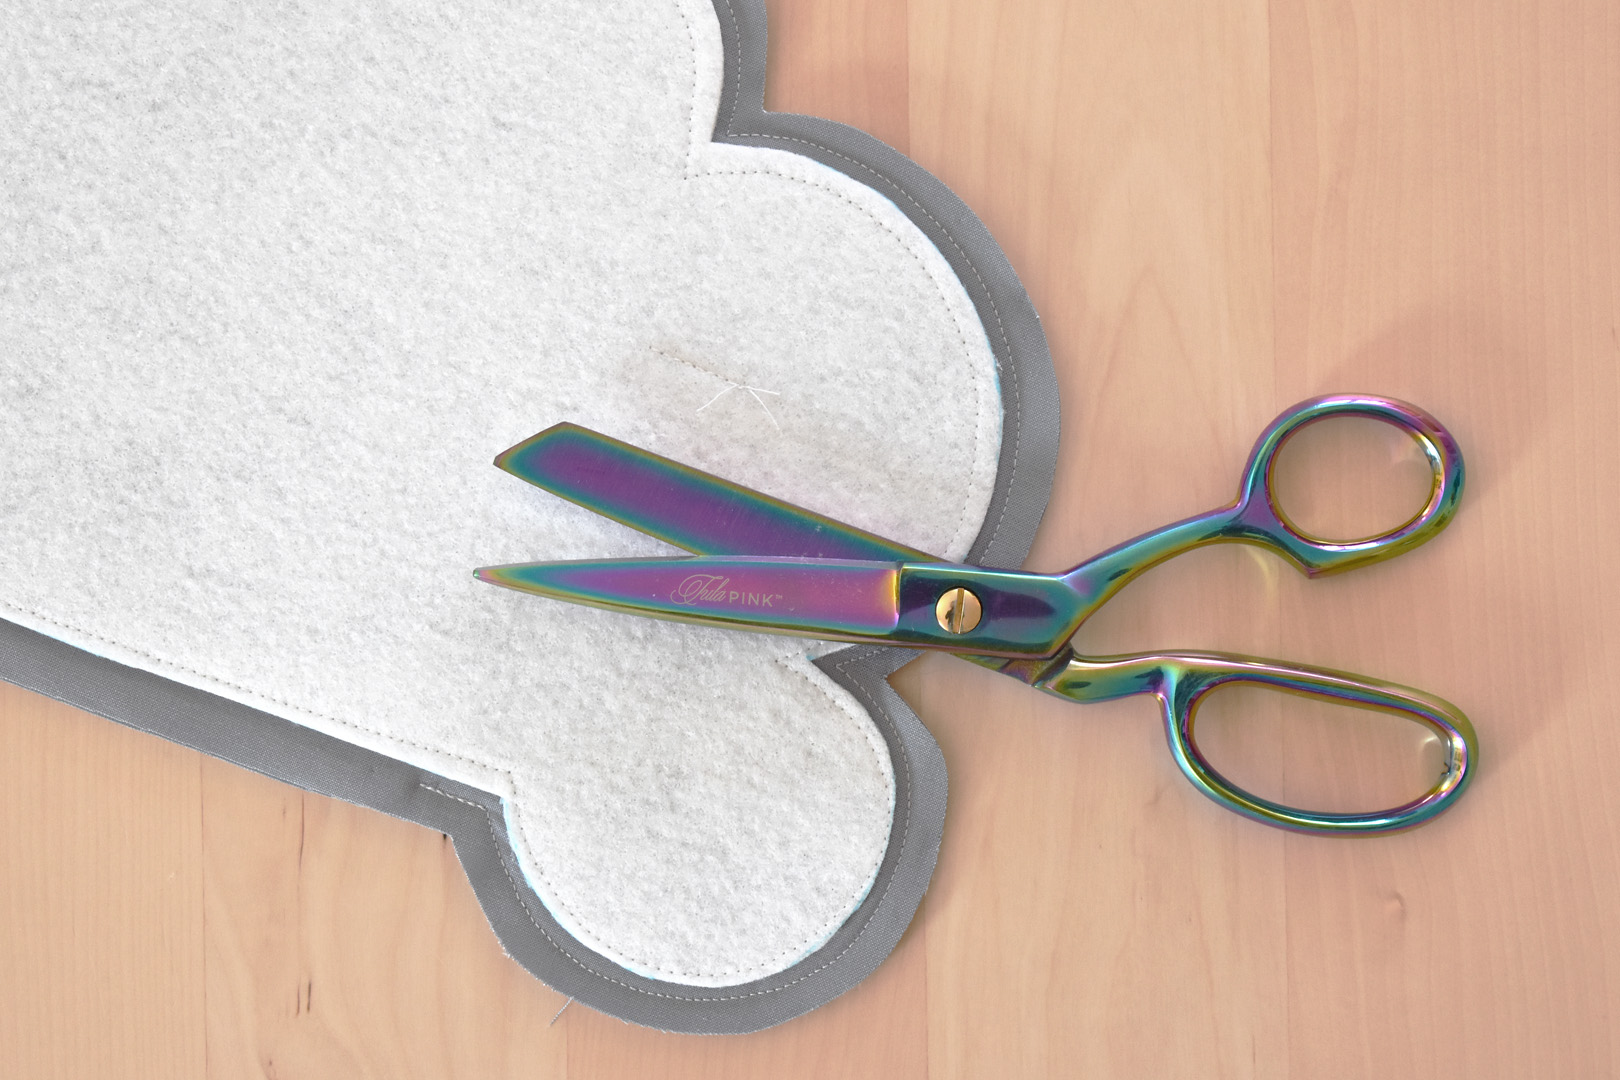
Using sharp fabric shears, trim seam allowance to about 1/4″ all around the shape. Clip close to stitching in the tight corners.
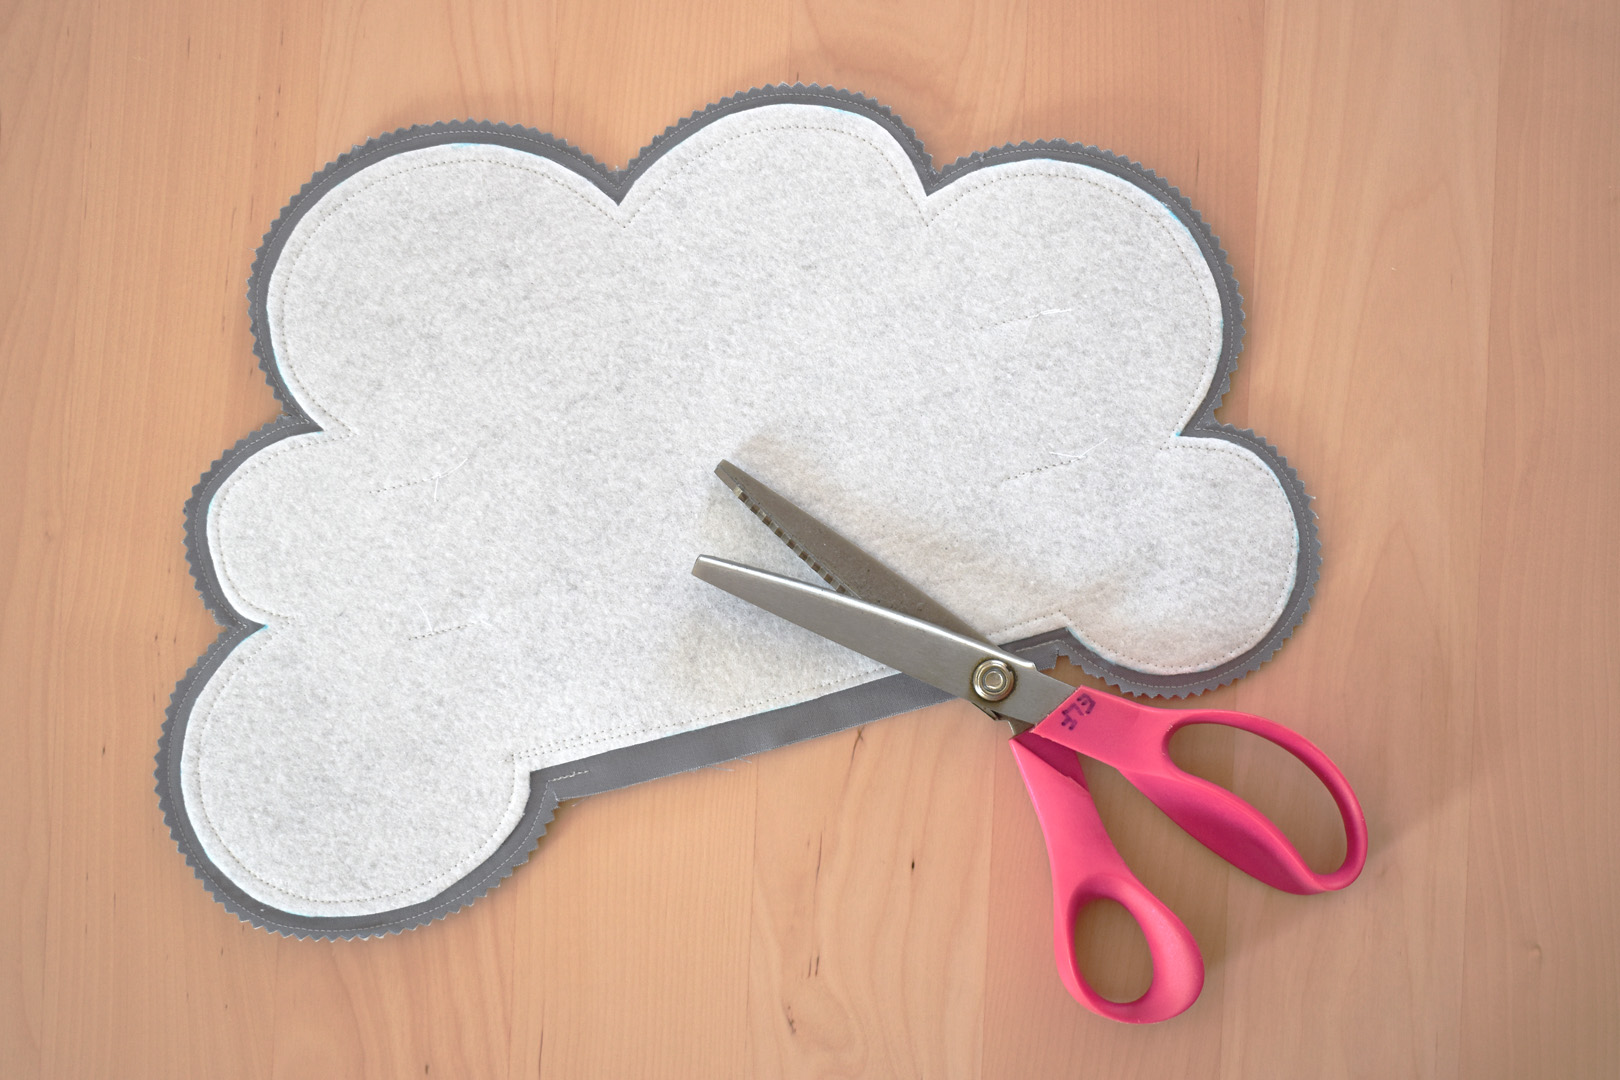
Notch out around the curved shapes. If you have a pair of pinking shears, you can use them to trim into the seam allowance close to the stitching around all the curves.
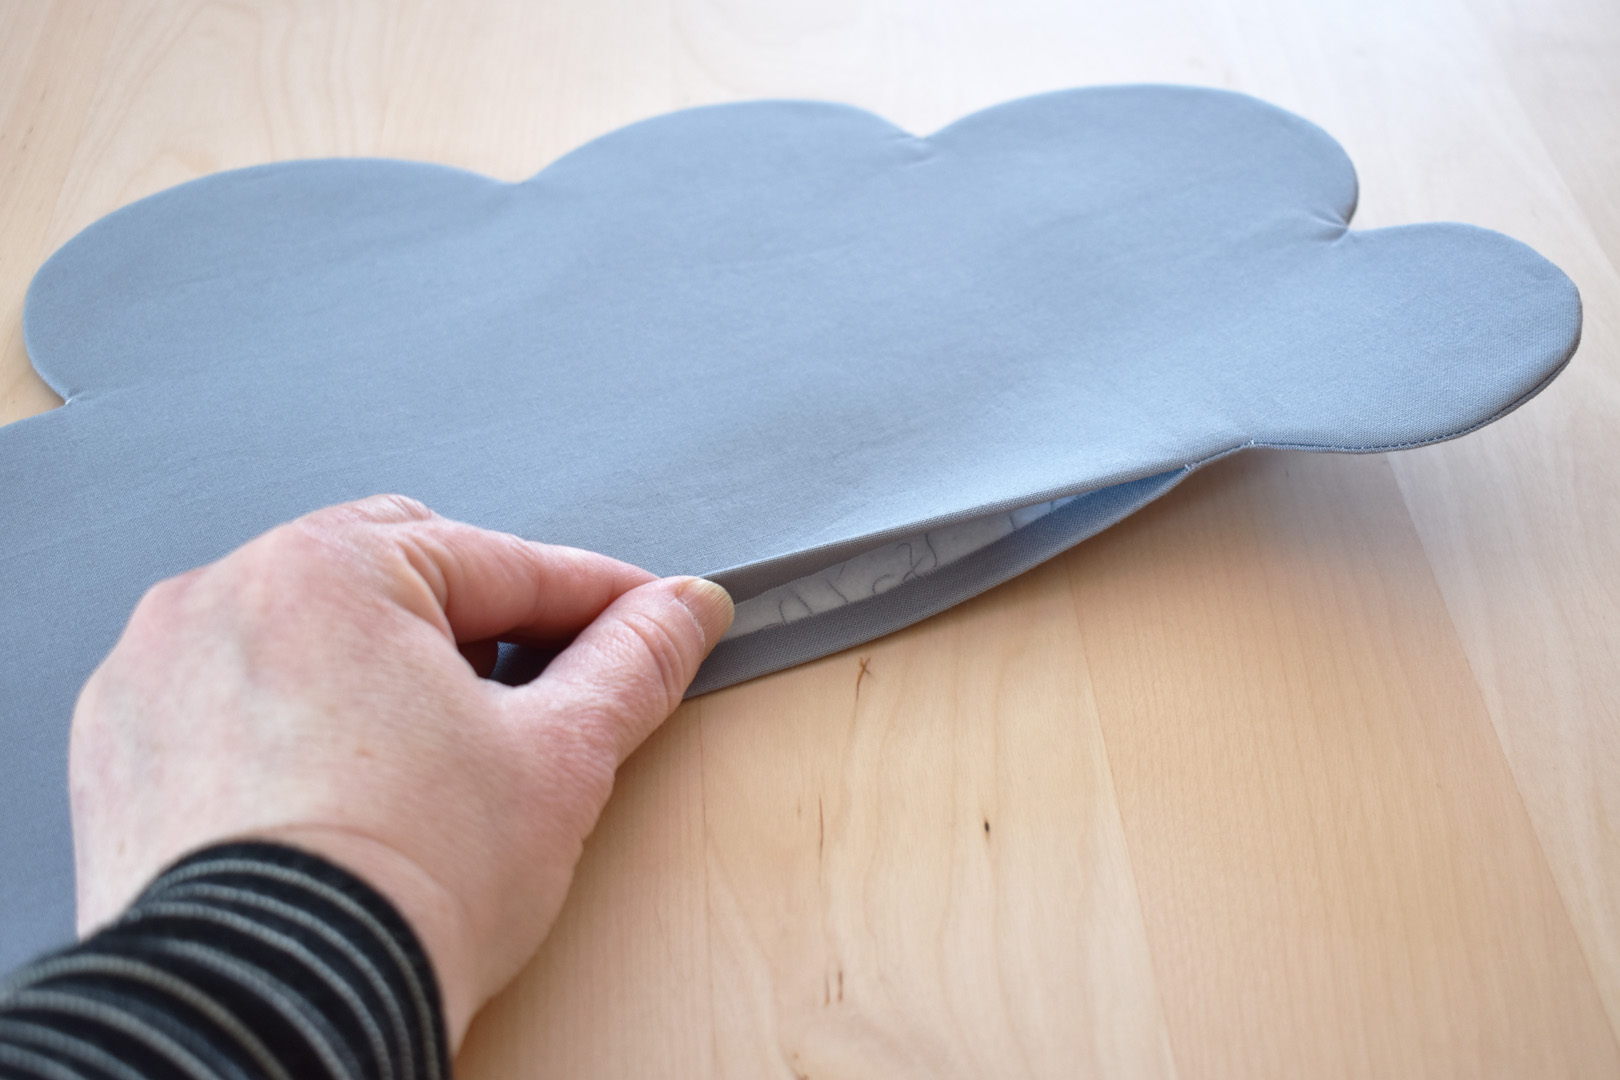
Turn the cloud shape inside out through the opening and press well. Press seam allowance of opening towards the inside.
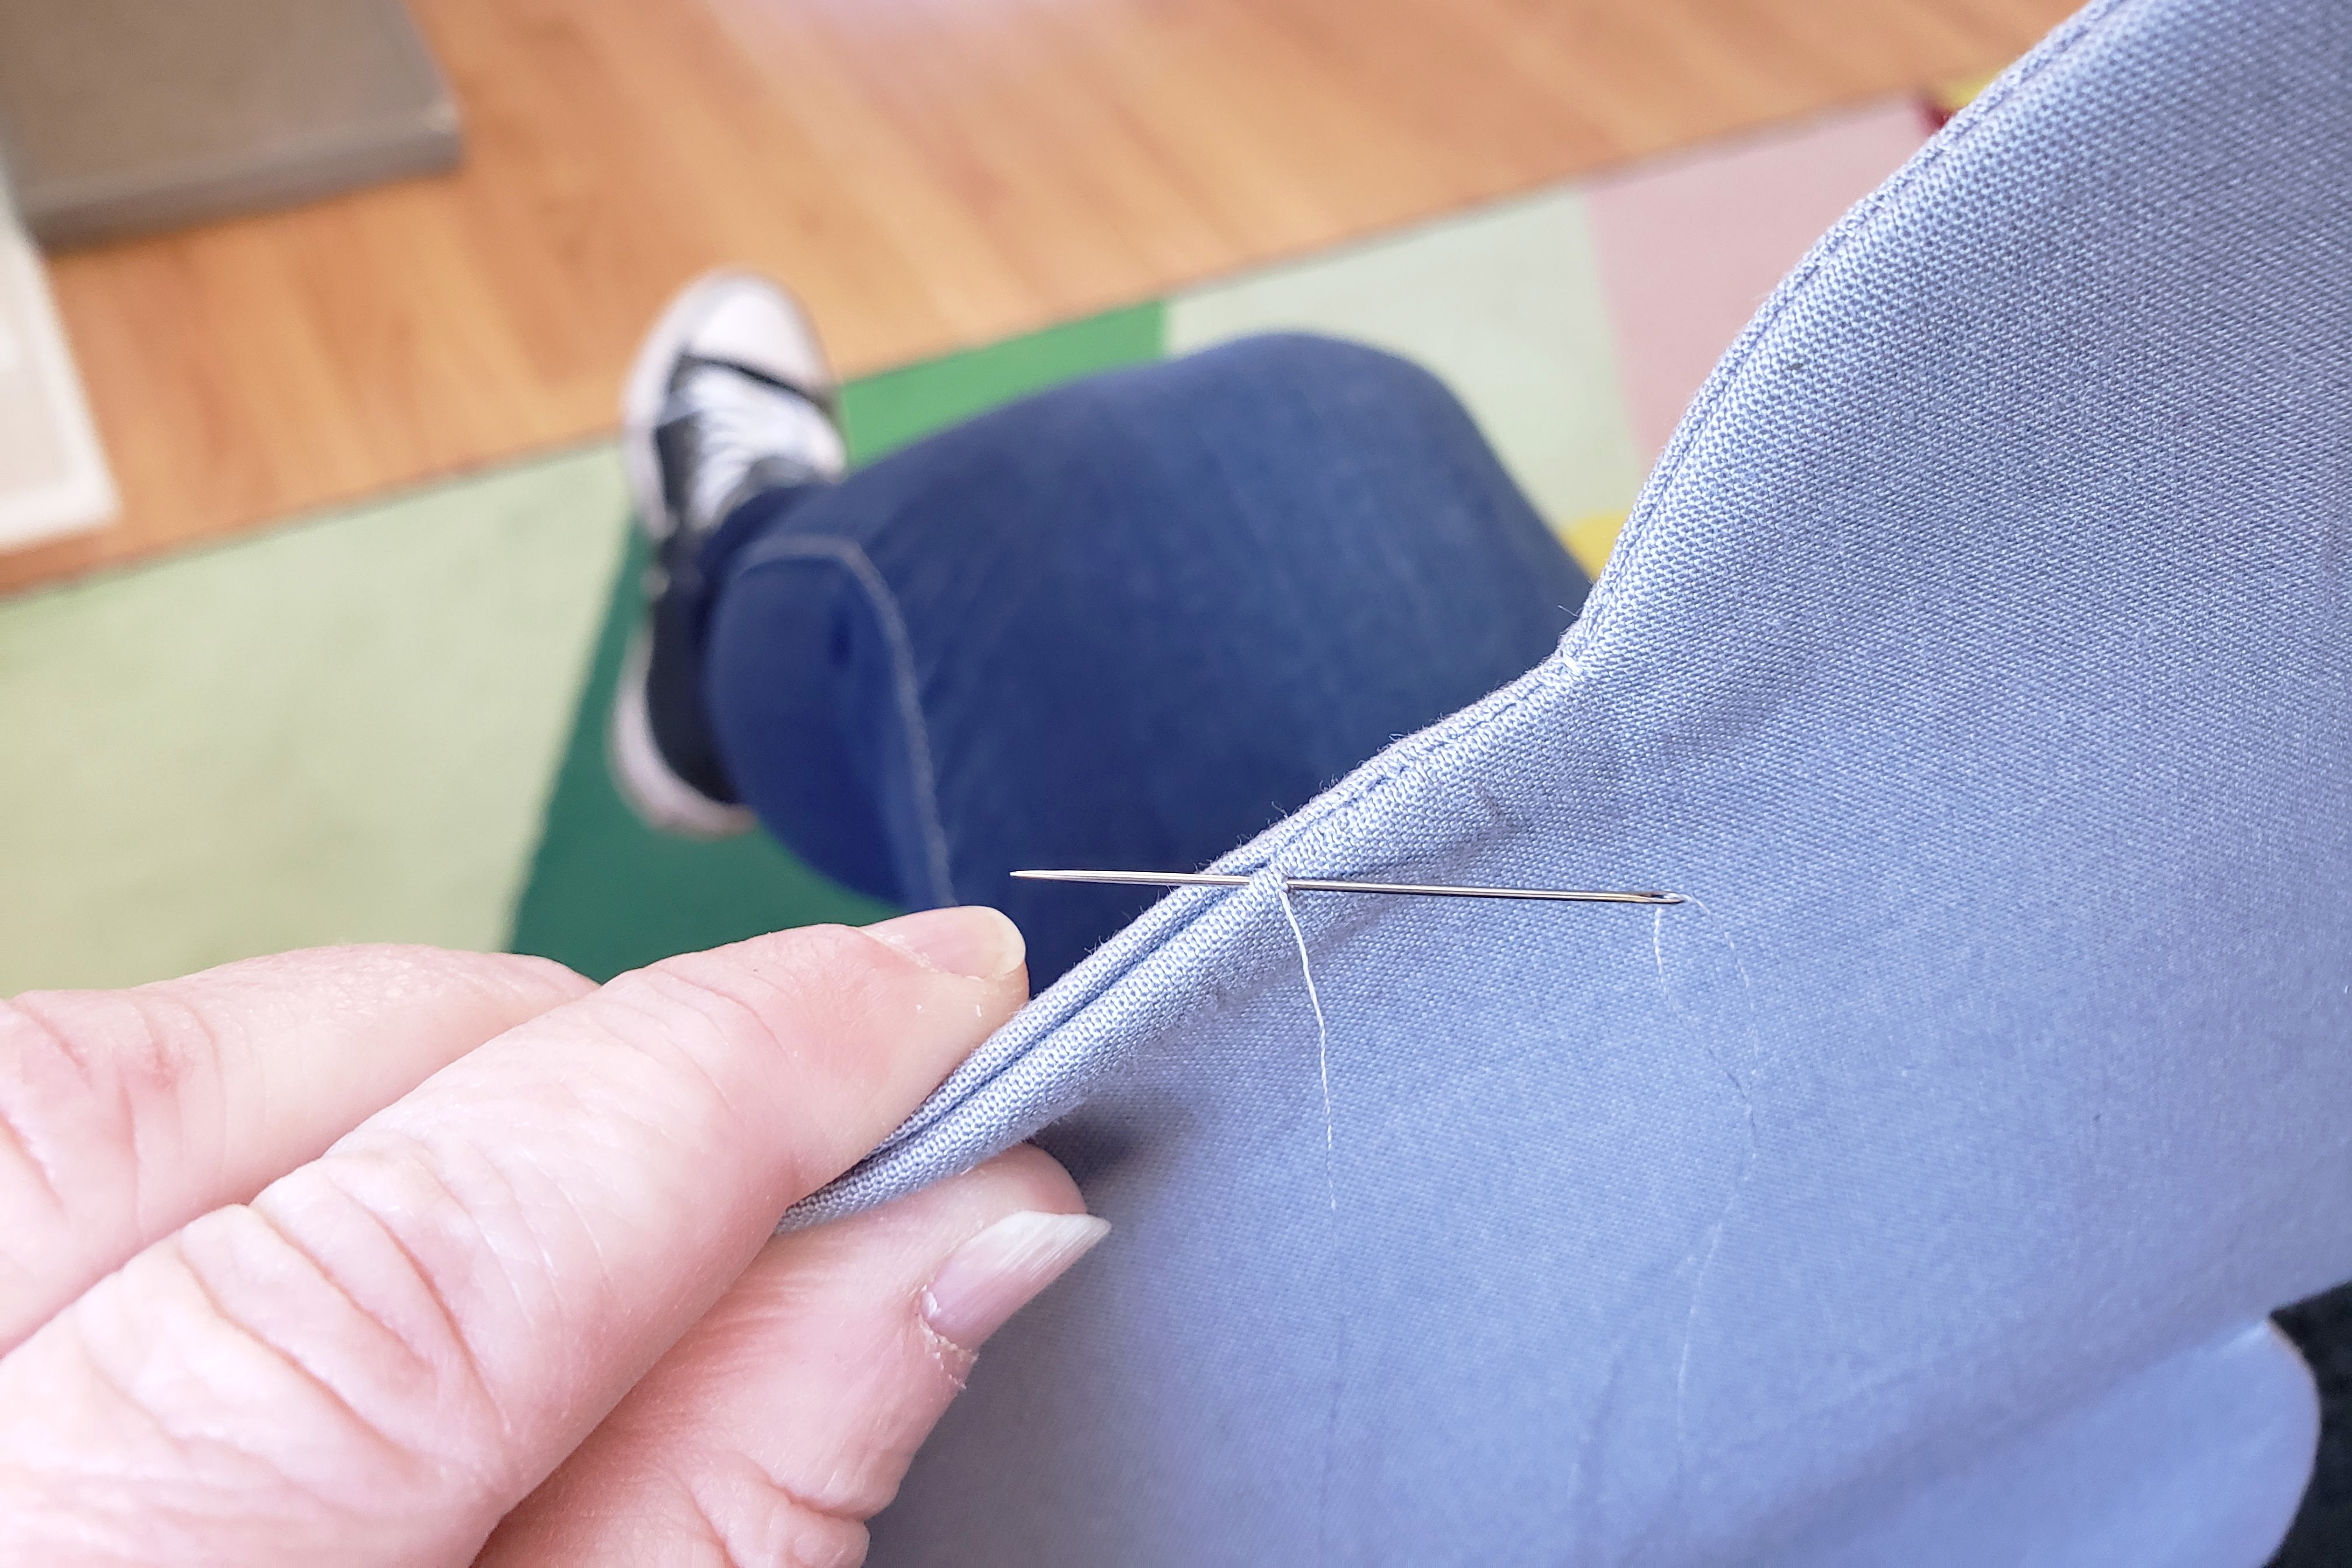
Hand stitch the opening closed. Set the completed gray cloud aside until the last step.
Create the Small Cloud for the Rainbow Door Hanger
Grab the small cloud pattern, one piece of 8″ x 11″ fusible fleece, a fabric marker, and pattern weights.
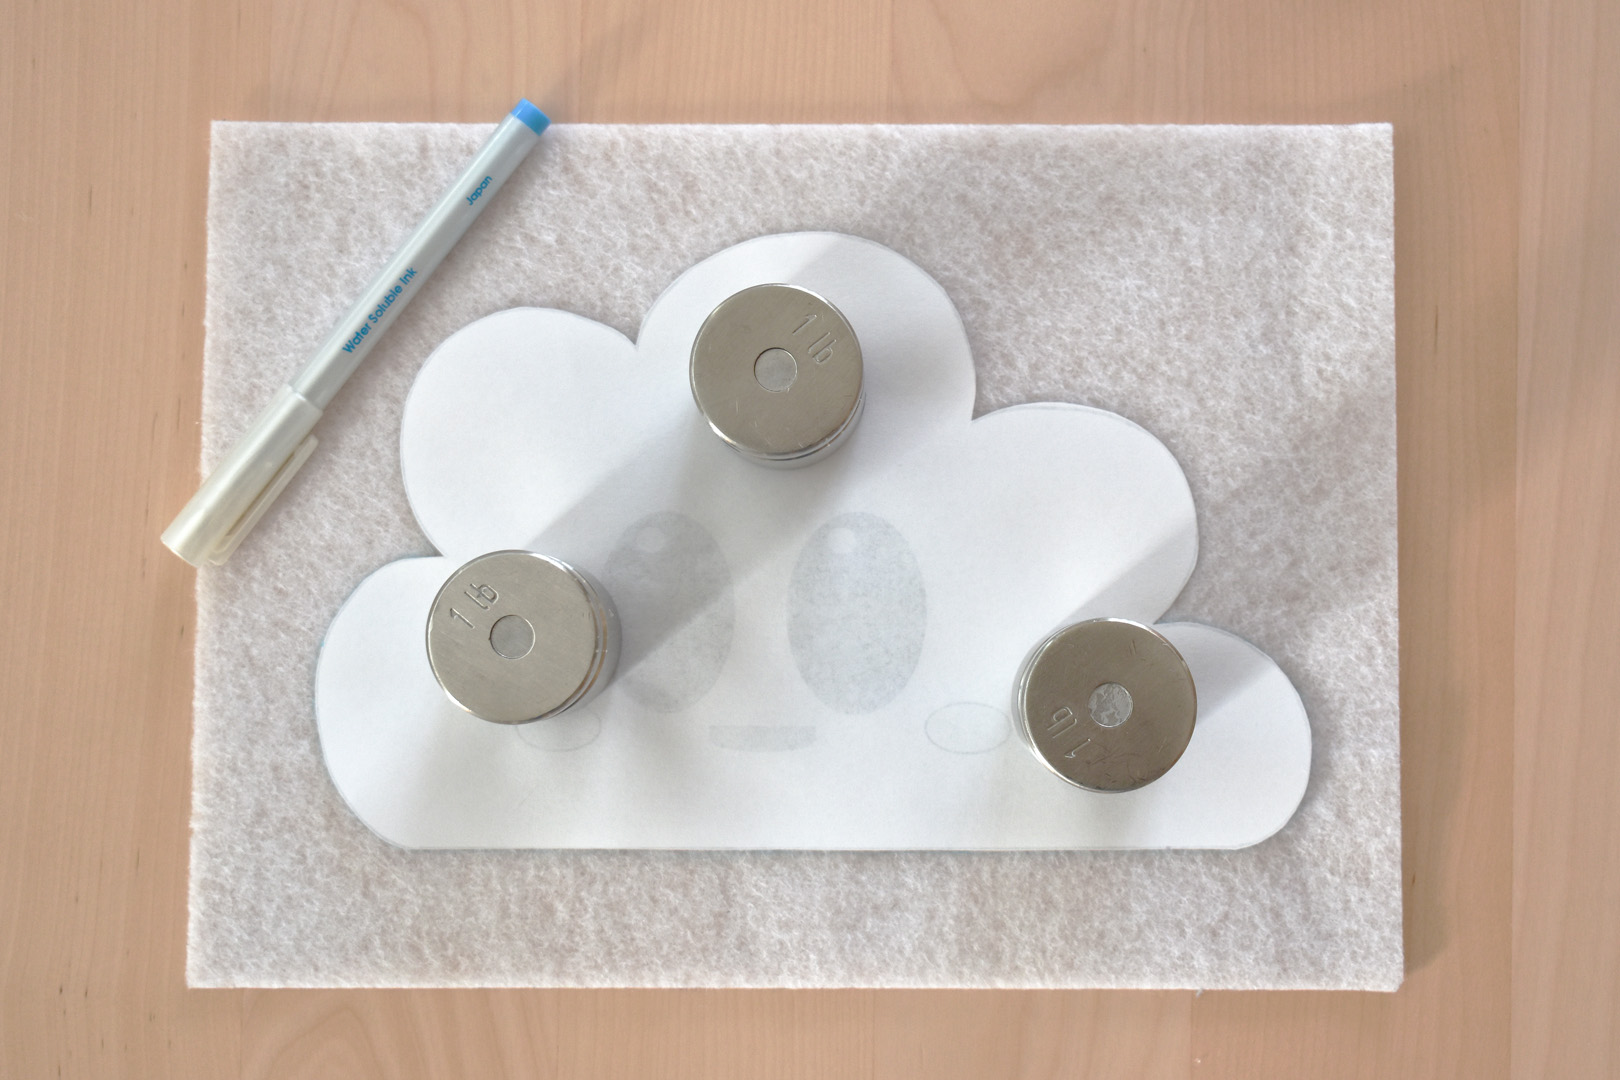
Flip the small cloud pattern over, right side down, on top of the non-fusible side of the fusible fleece. Center the pattern in place with pattern weights. Trace around the outside of the pattern on the fusible fleece with the fabric marker.

Cut carefully around the shape and fuse to the back of one 8″ x 11″ piece of white cotton.
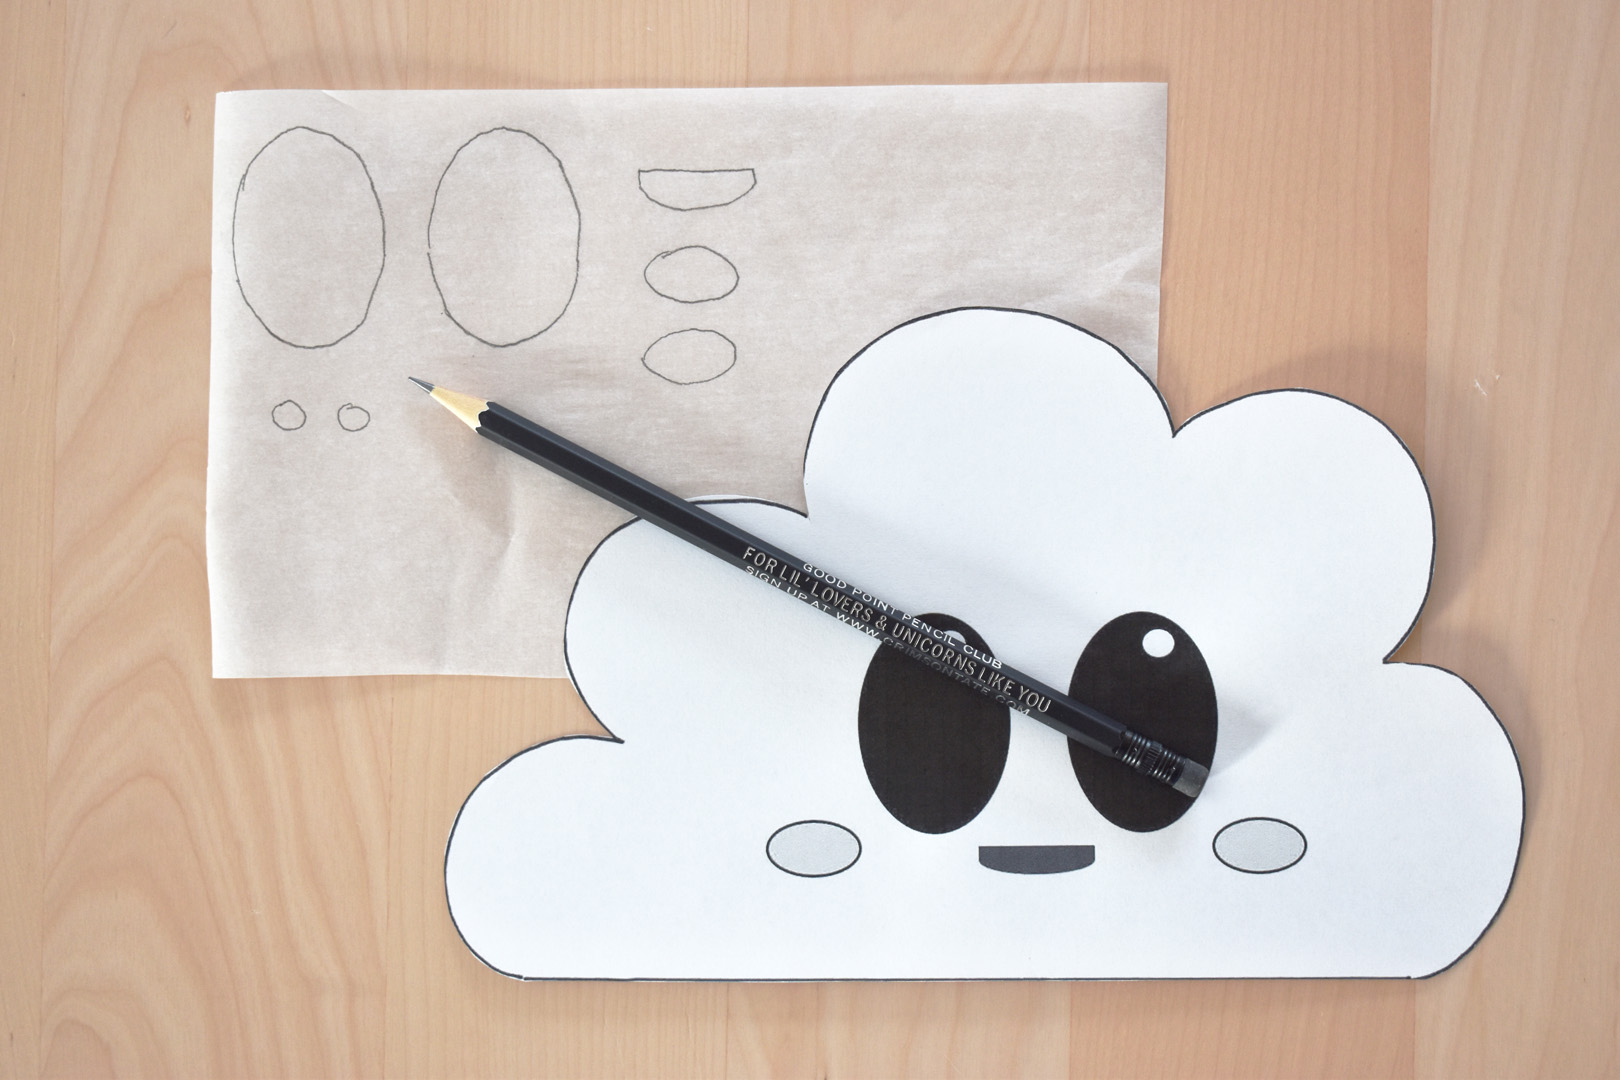
To make the face, use a small piece of fusible webbing to trace all the elements of the face on the paper side. Two large eye shapes, two small eye highlight shapes, two cheeks, and one mouth.
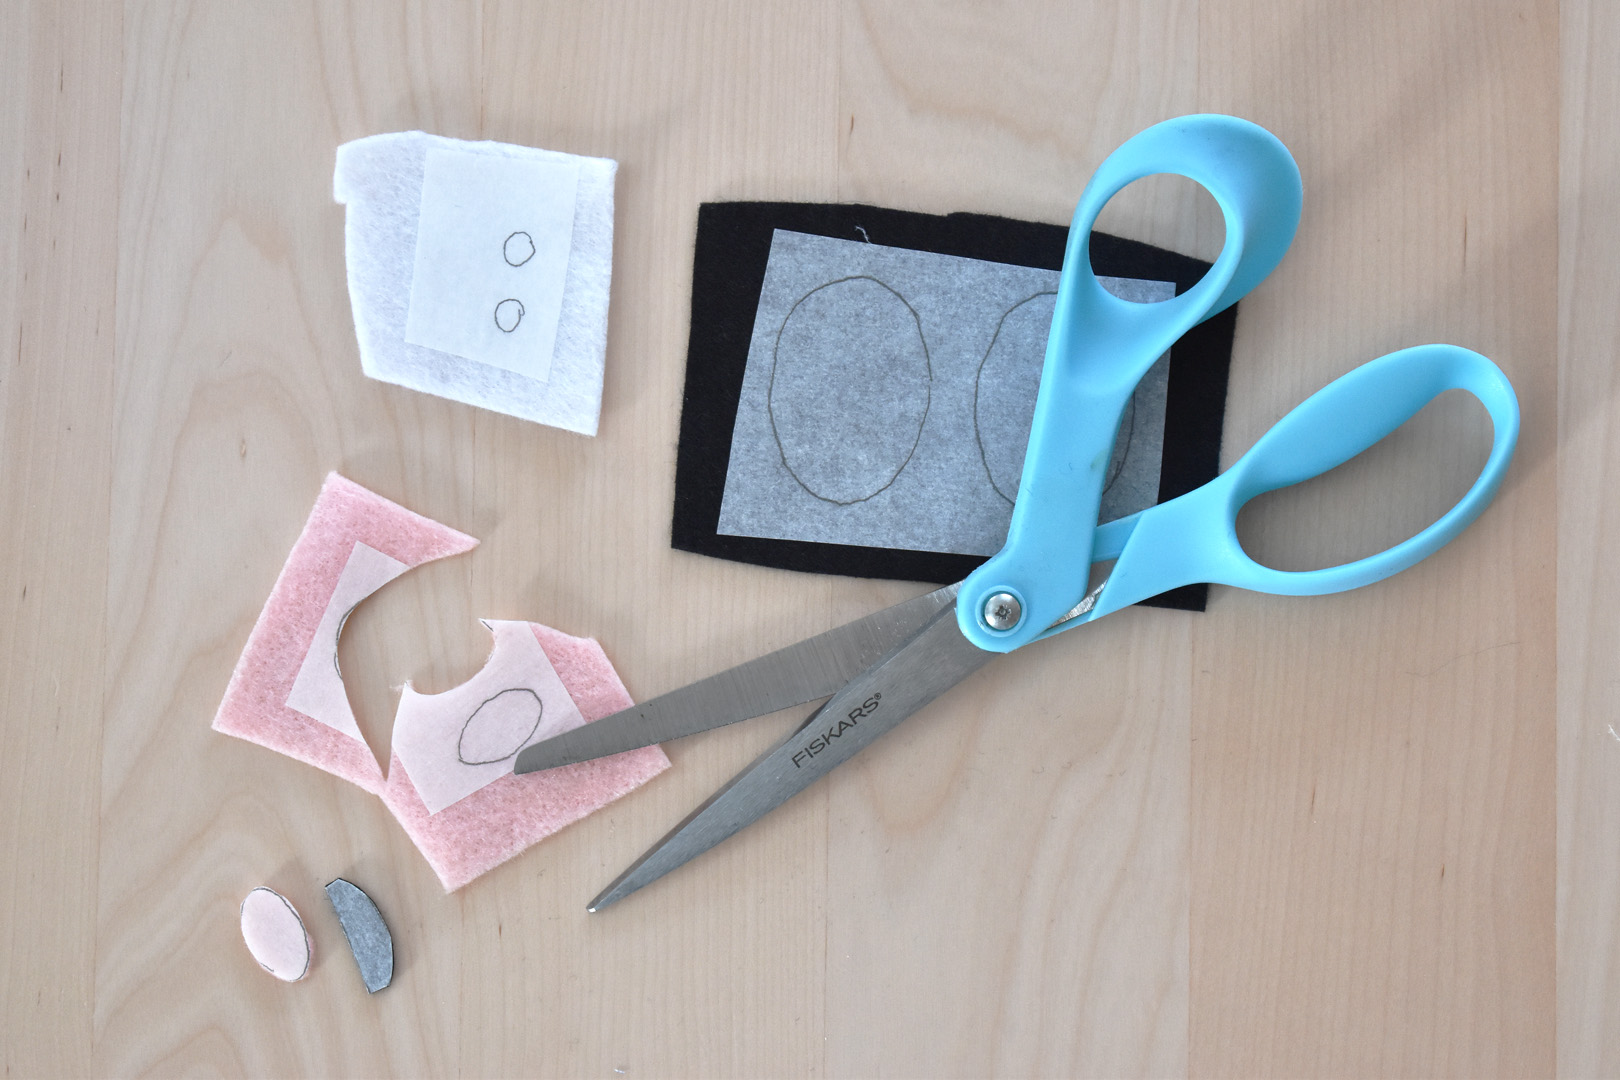
Fuse to the back side of the colored felt scraps. Carefully cut the shapes out along the pencil lines.

Place the pattern underneath the cloud shape fused to the cotton, you will be able to see the outline of the face to use as a guide. Remove the paper backing from the felt shapes, and arrange them on the cloud shape. Fuse in place.
Fuse the other piece of 8″ x 11″ white cotton and fusible fleece together. Layer the plain piece of white cotton/fusible fleece on your work table, right side up. Layer the small cloud with the face on top, right sides together (wrong side up).

Pin all around the cloud shape through all layers. You will be leaving an opening about 3″ long at the bottom of the cloud for turning inside out.

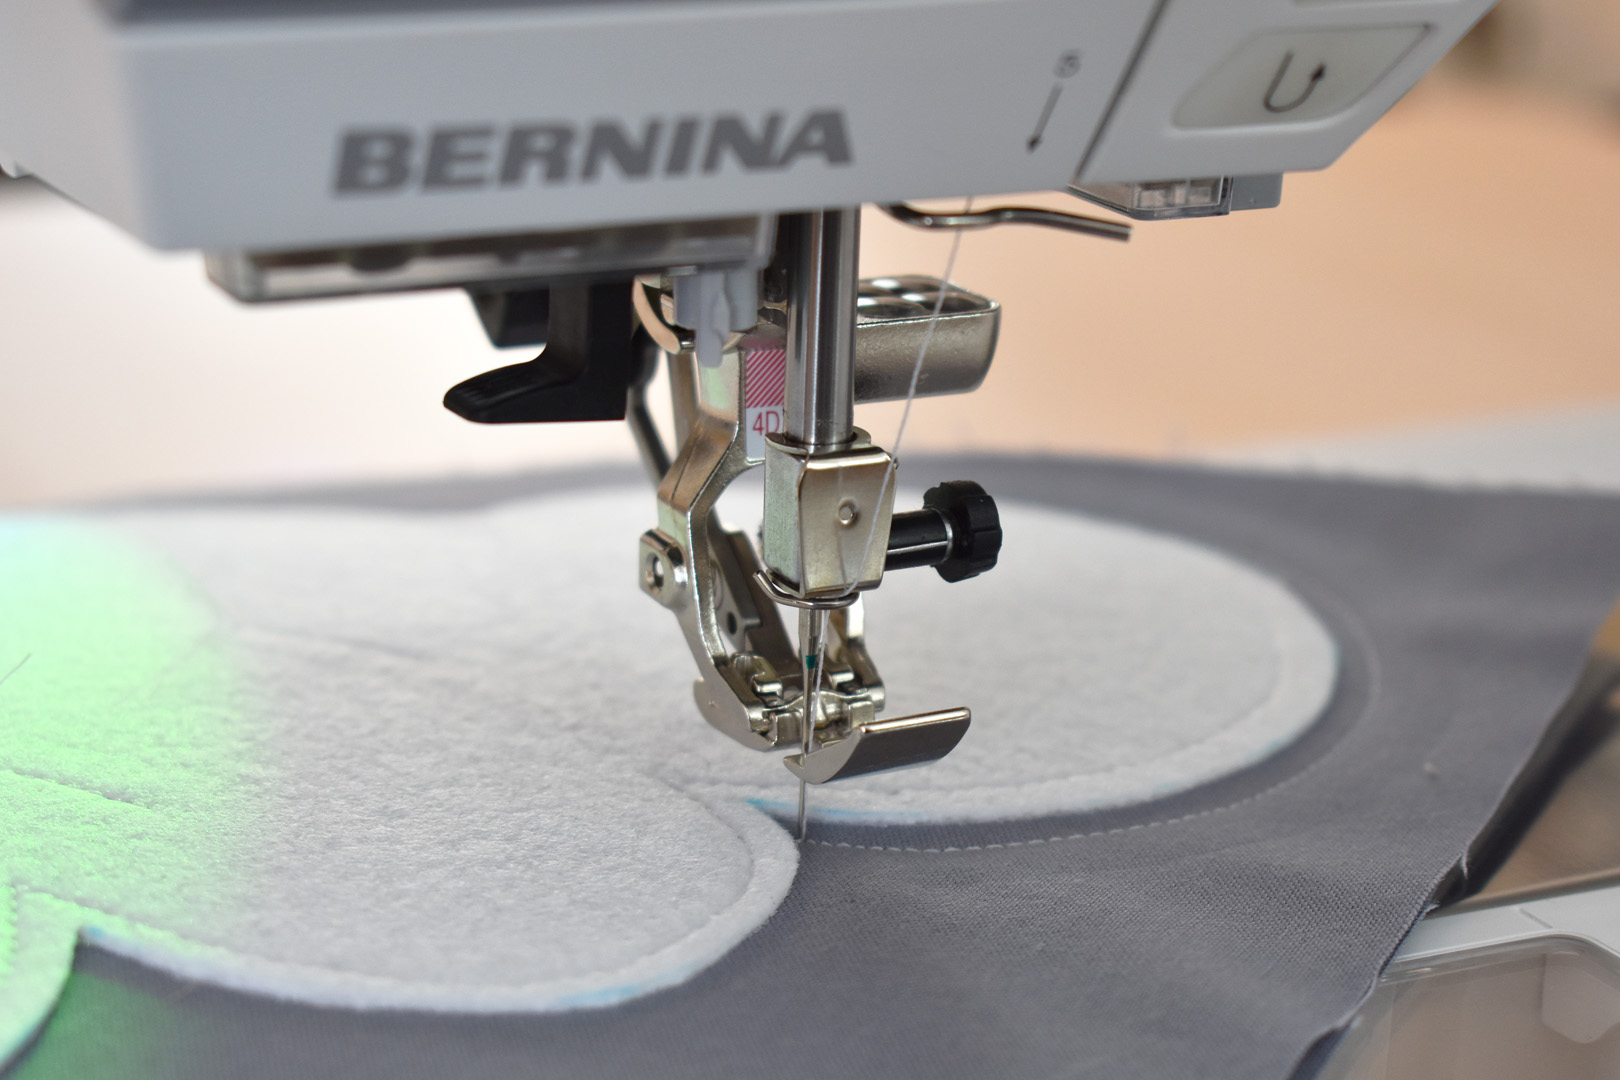
Switch back to the straight stitch or quarter inch foot for the remaining steps, and be sure to reset the needle position to center. Sew right along the very edge of the cloud shape, making sure to leave the opening on the bottom for turning. As in the steps above, pivot around the corners with the needle down.
Trim the seam allowance just as in the steps for the large cloud, finishing with pinking shears or notching around all curves. Turn the cloud right side out through the opening.
Press well all around the small cloud. Press seam allowance around opening to the inside, and hand stitch closed.
Create the Rainbow for the Rainbow Door Hanger
Follow the steps below for each of the red, orange, yellow, green, blue, and violet 14″ x 3 1/2″ strips.

Pin each strip together lengthwise and across one short side.
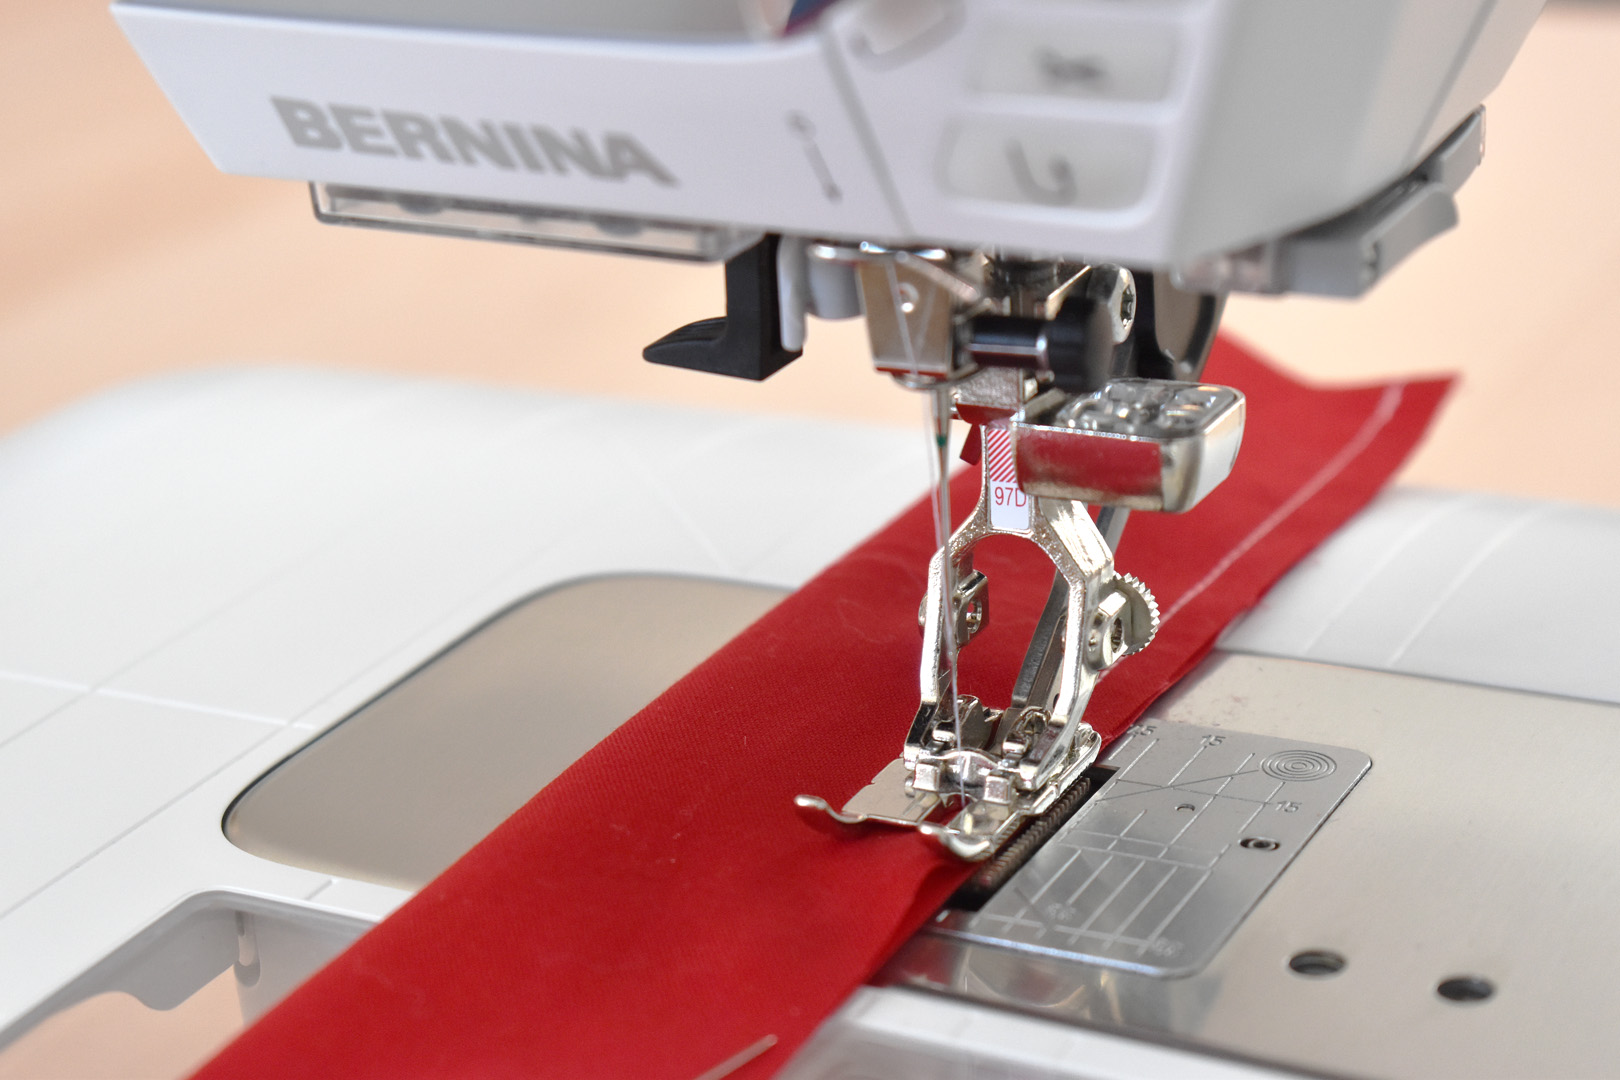
Sew the strip together with a 1/4″ seam down the long edge.
Then pivot at the corner and sew across the short edge.

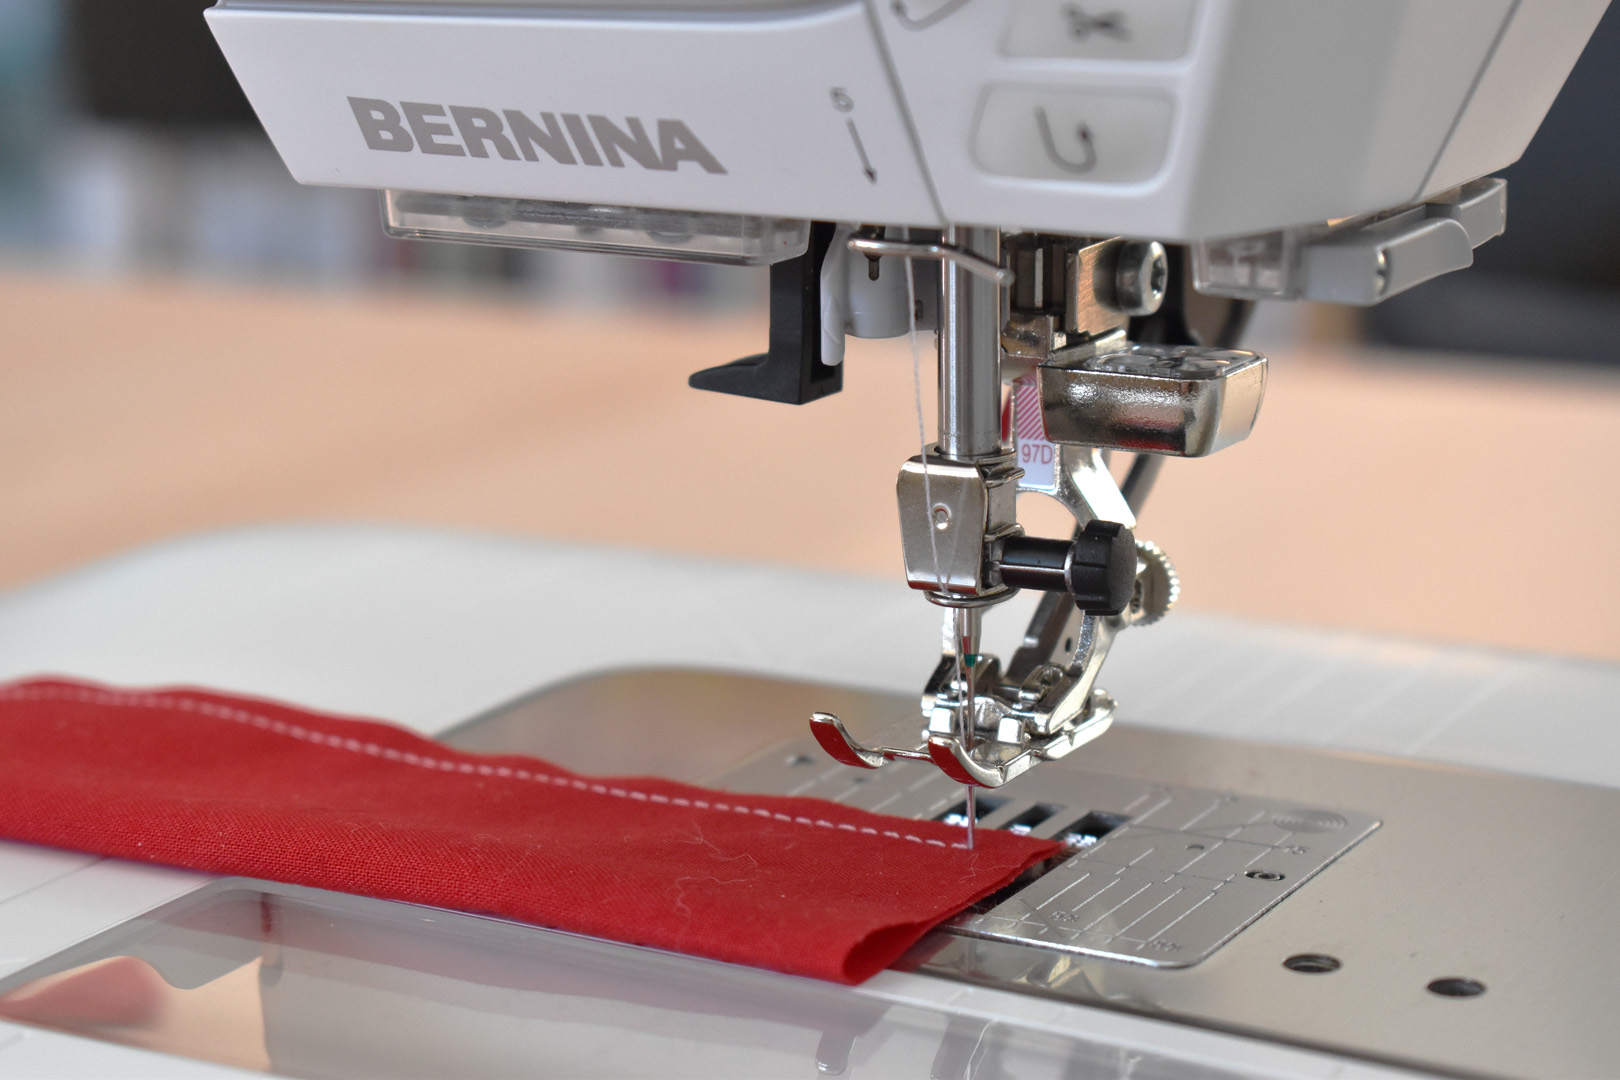
Clip corners and turn inside out.
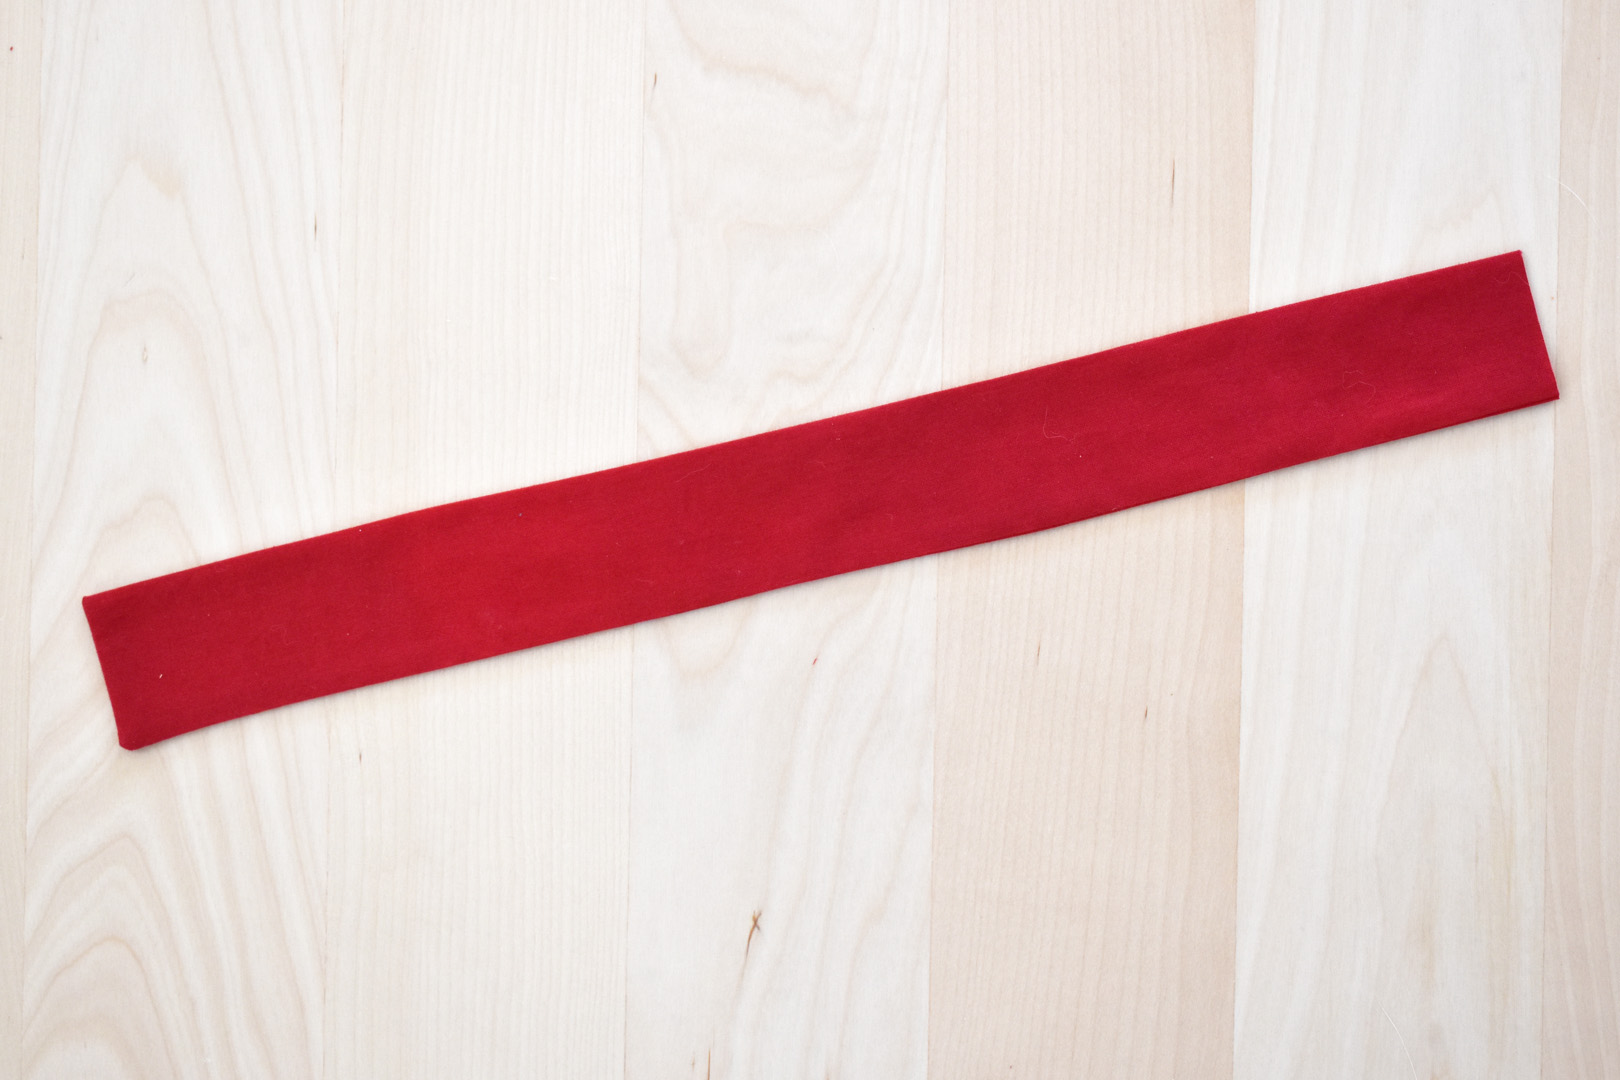
Press the strip flat.
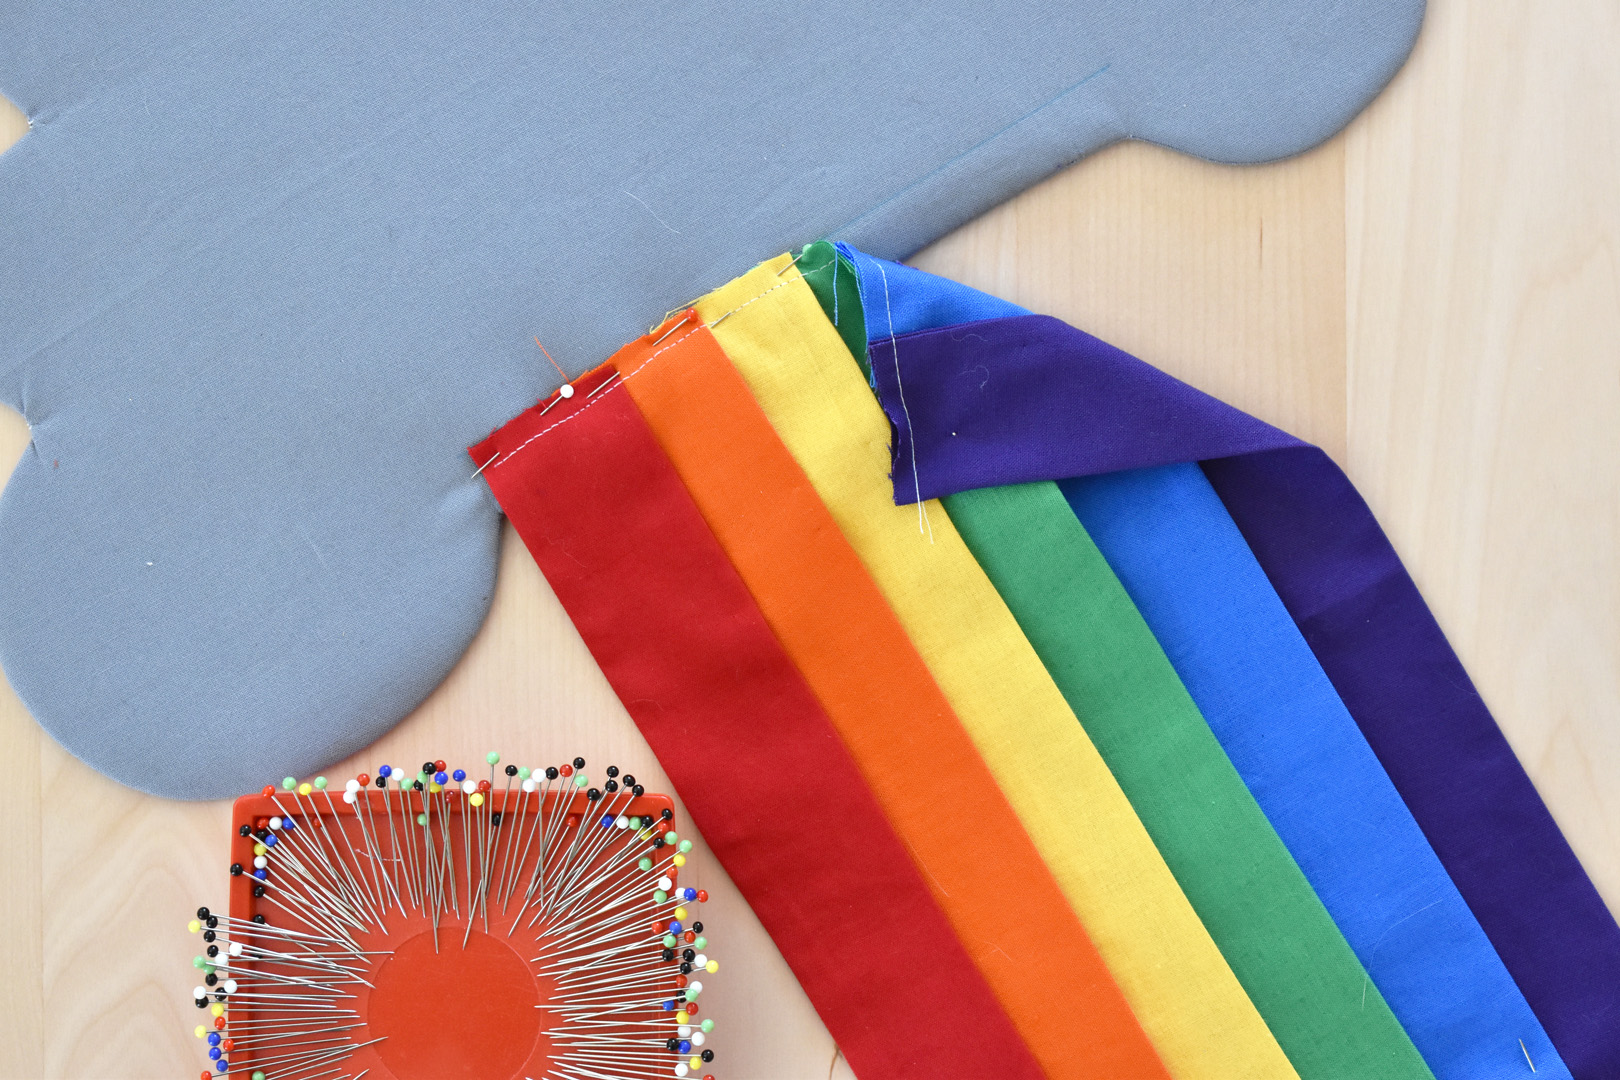
Gather together all the rainbow strips. In this step, each rainbow strip will overlap the next by 1/2″, and you can decide how the strips will hang from the cloud (they can hang at an angle as pictured, or you can leave the strips even at the bottom). You can audition the strips by placing them between the gray and white clouds to see what you like best. I created a 1/2″ drop between each strip starting with red as the longest and violet as the shortest. Follow the directions below to create this spacing.

Each strip will overlap the next by 1/2″ with violet at the back. Start with the violet strip and a ruler with clear 1/2″ marks, and overlap the blue strip 1/2″ over the violet. If you want the diagonal drop in the rainbow, also bring the blue strip 1/2″ over from the end of the violet strip.
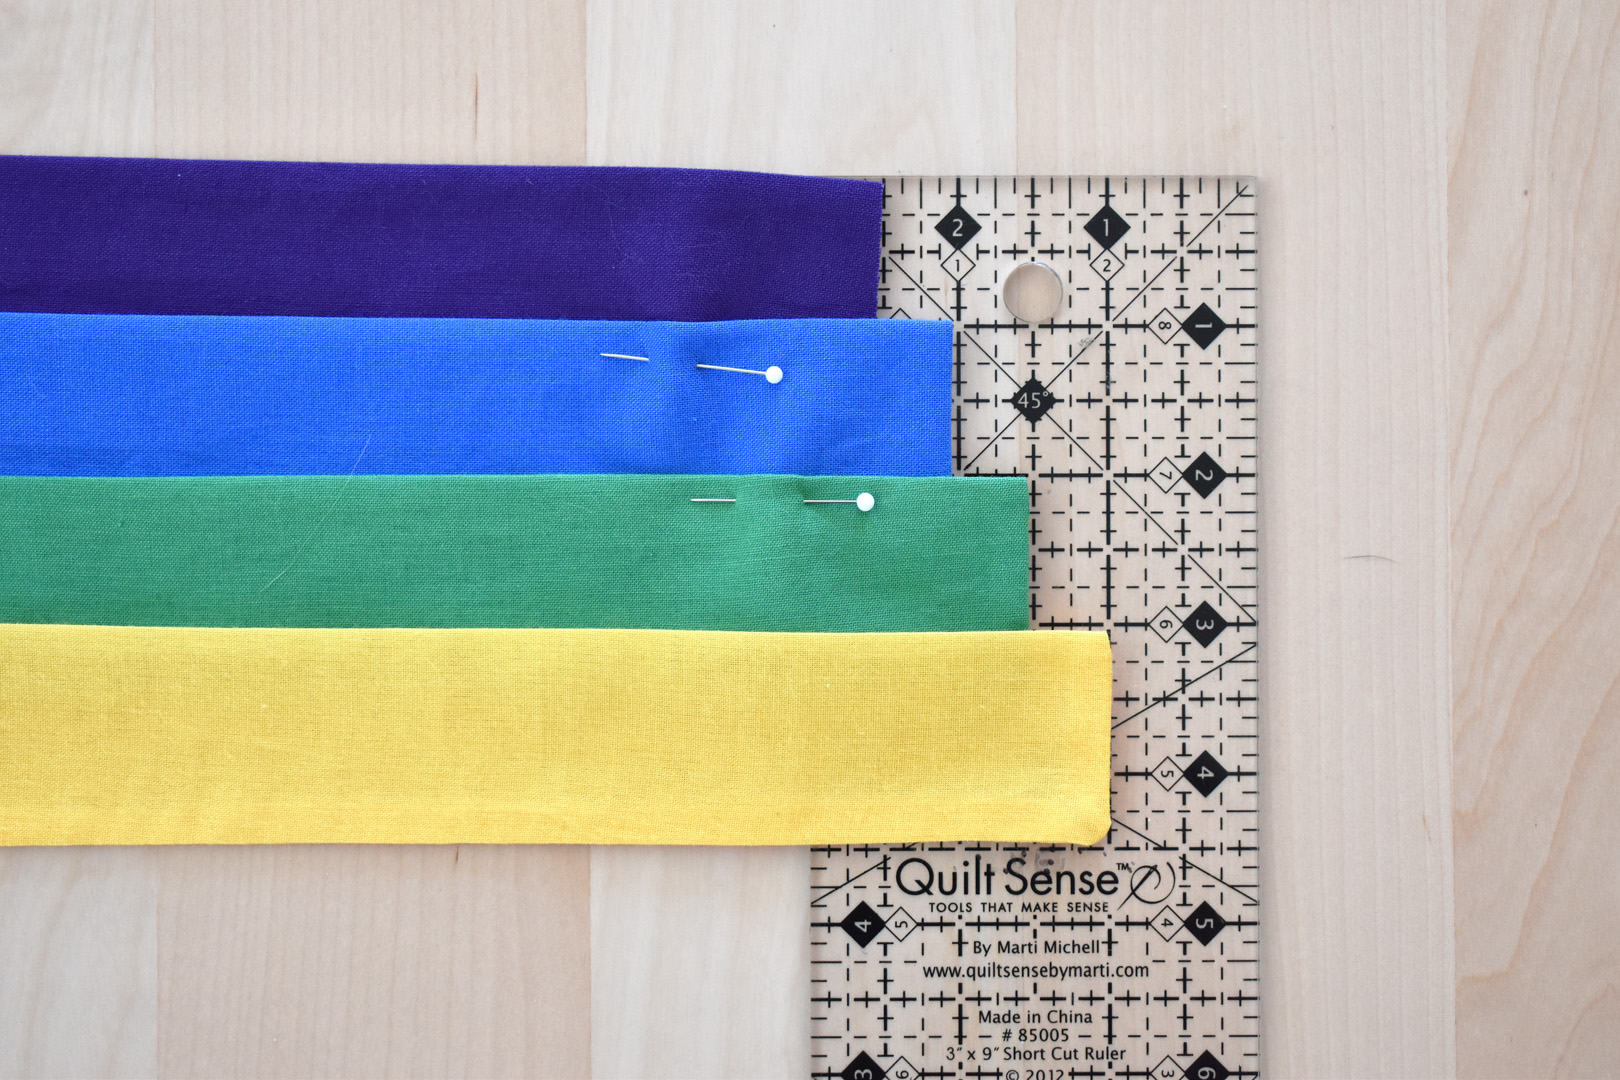
Continue layering the strips with an overlap of 1/2″ over the previous color (violet is first, then follow with blue, green, yellow, orange, and red). To create the diagonal rainbow, continue to bring each additional strip 1/2″ over from the last. Pin each layer on top of the last to hold them all in place.
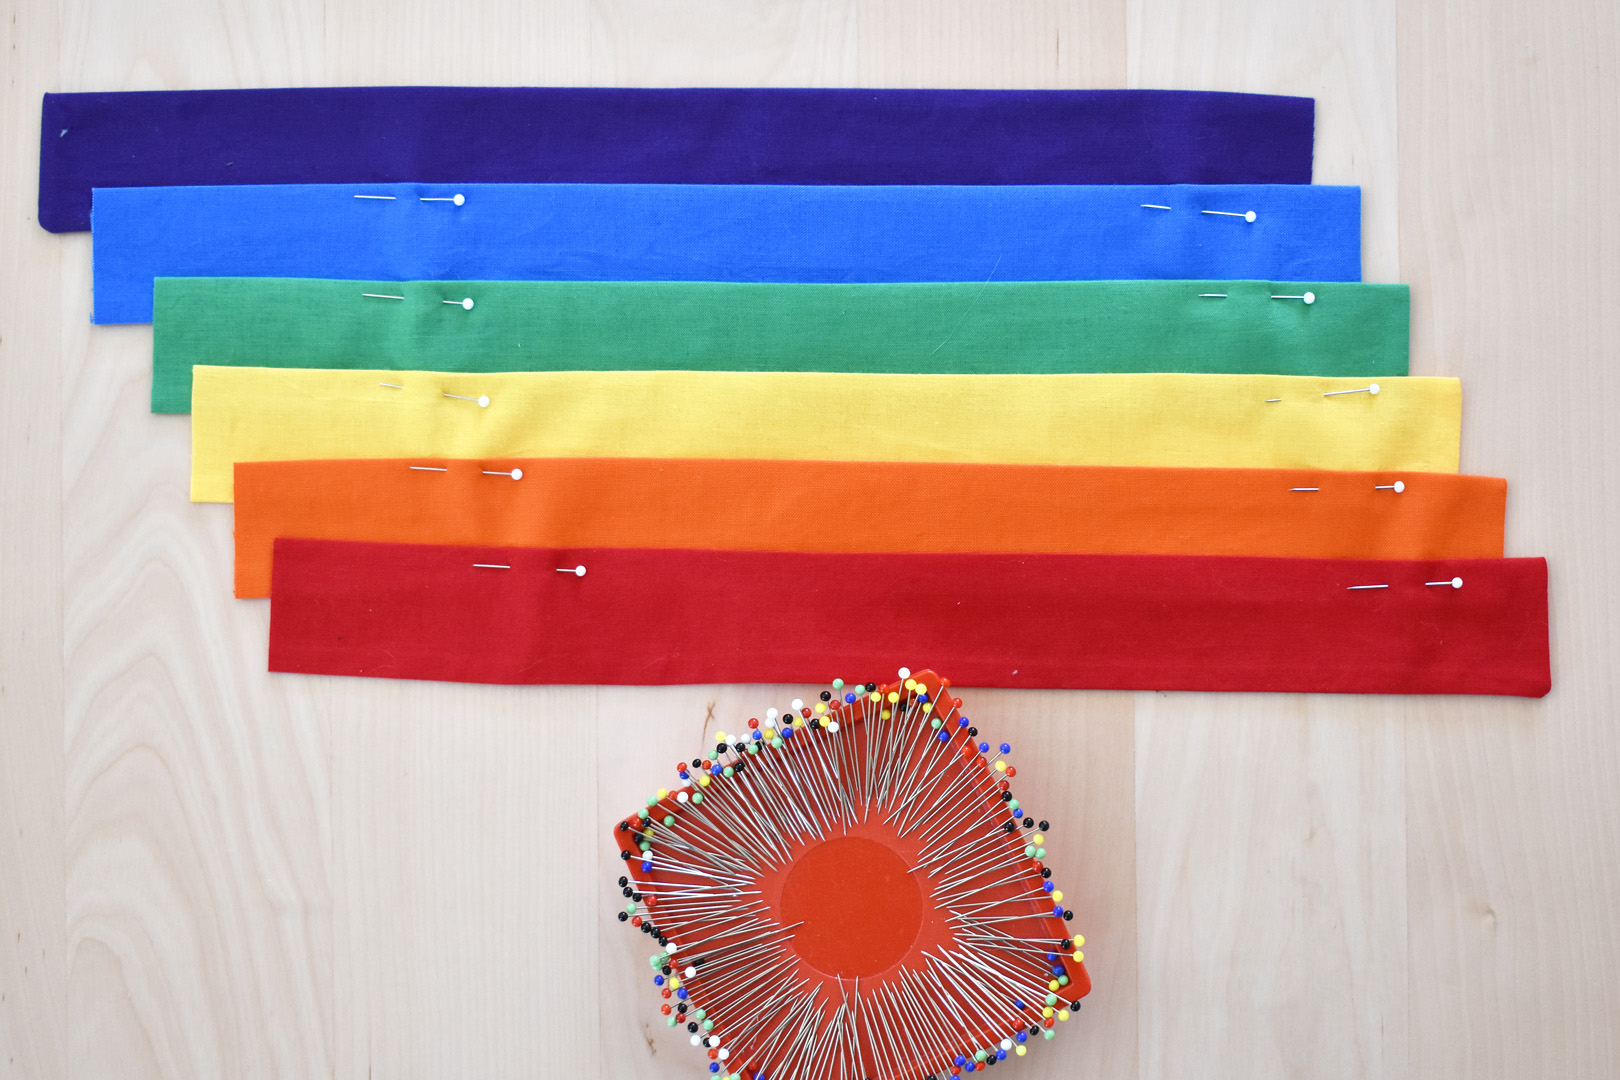
When finished, add pins towards the top of the rainbow strips to carefully hold all the layers in place.
If you are creating a diagonal rainbow, use a rotary cutter and ruler to cut the strips even with the red color on the top, raw edges of the rainbow.

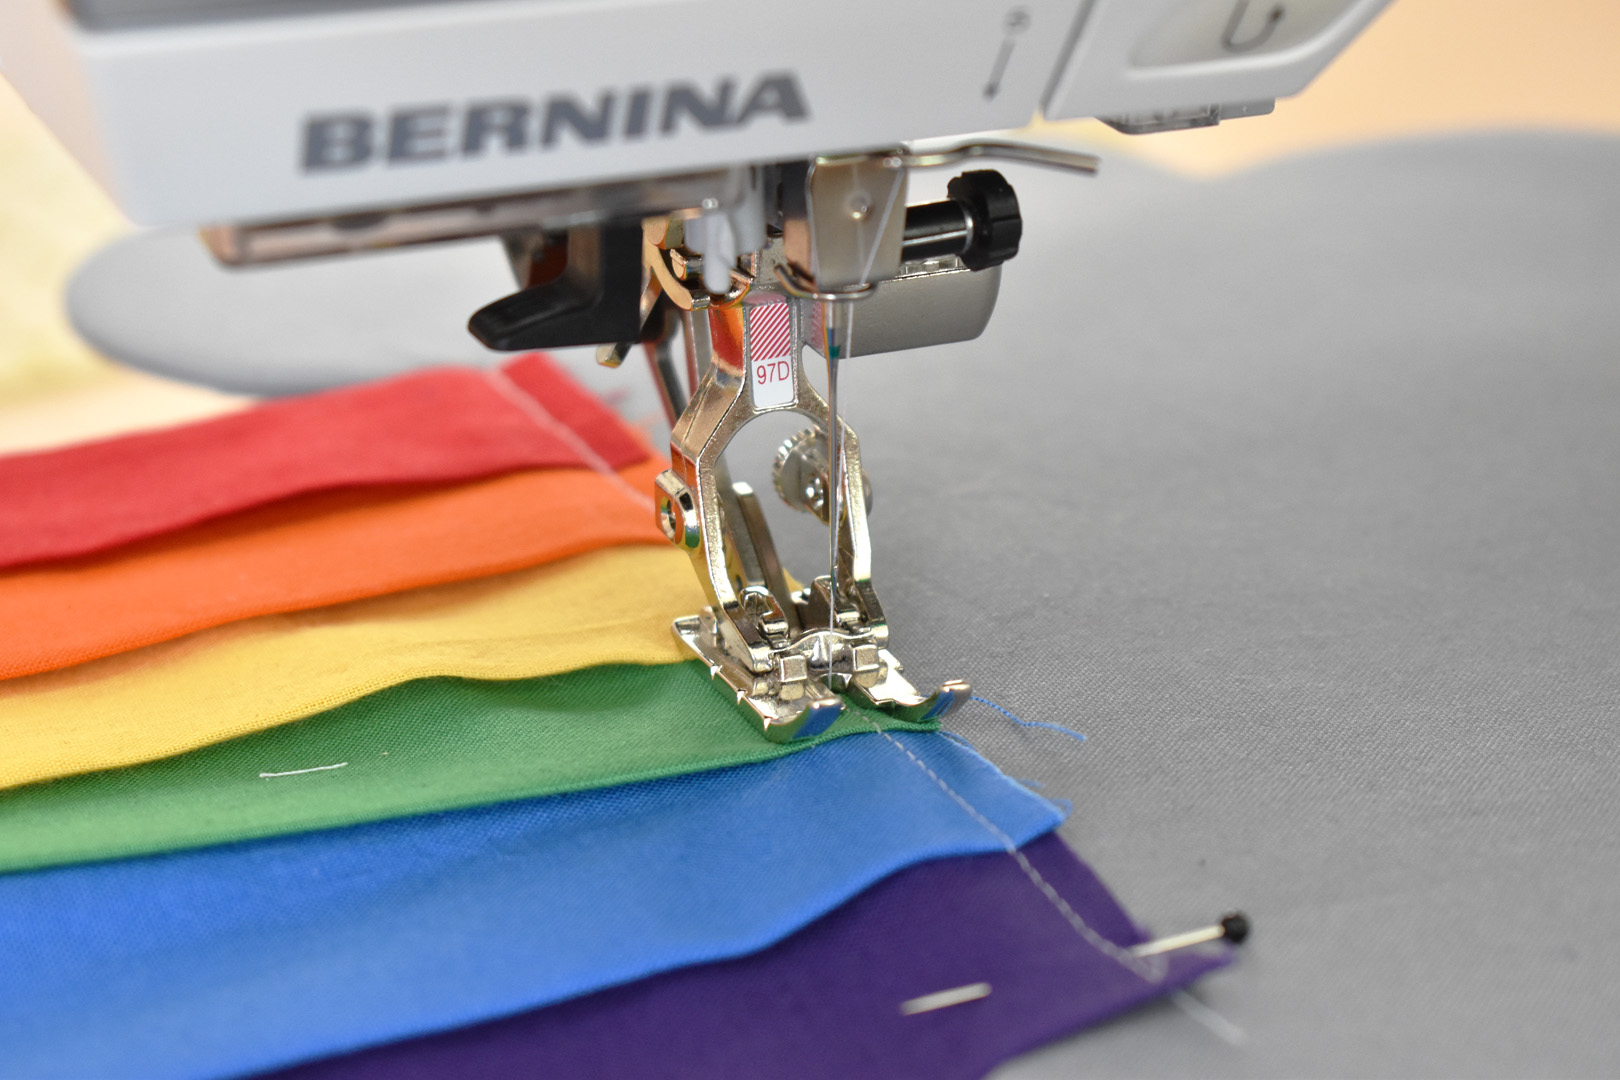
Take the rainbow to the sewing machine and sew a row of basting stitches 1/4″ from the raw edges.
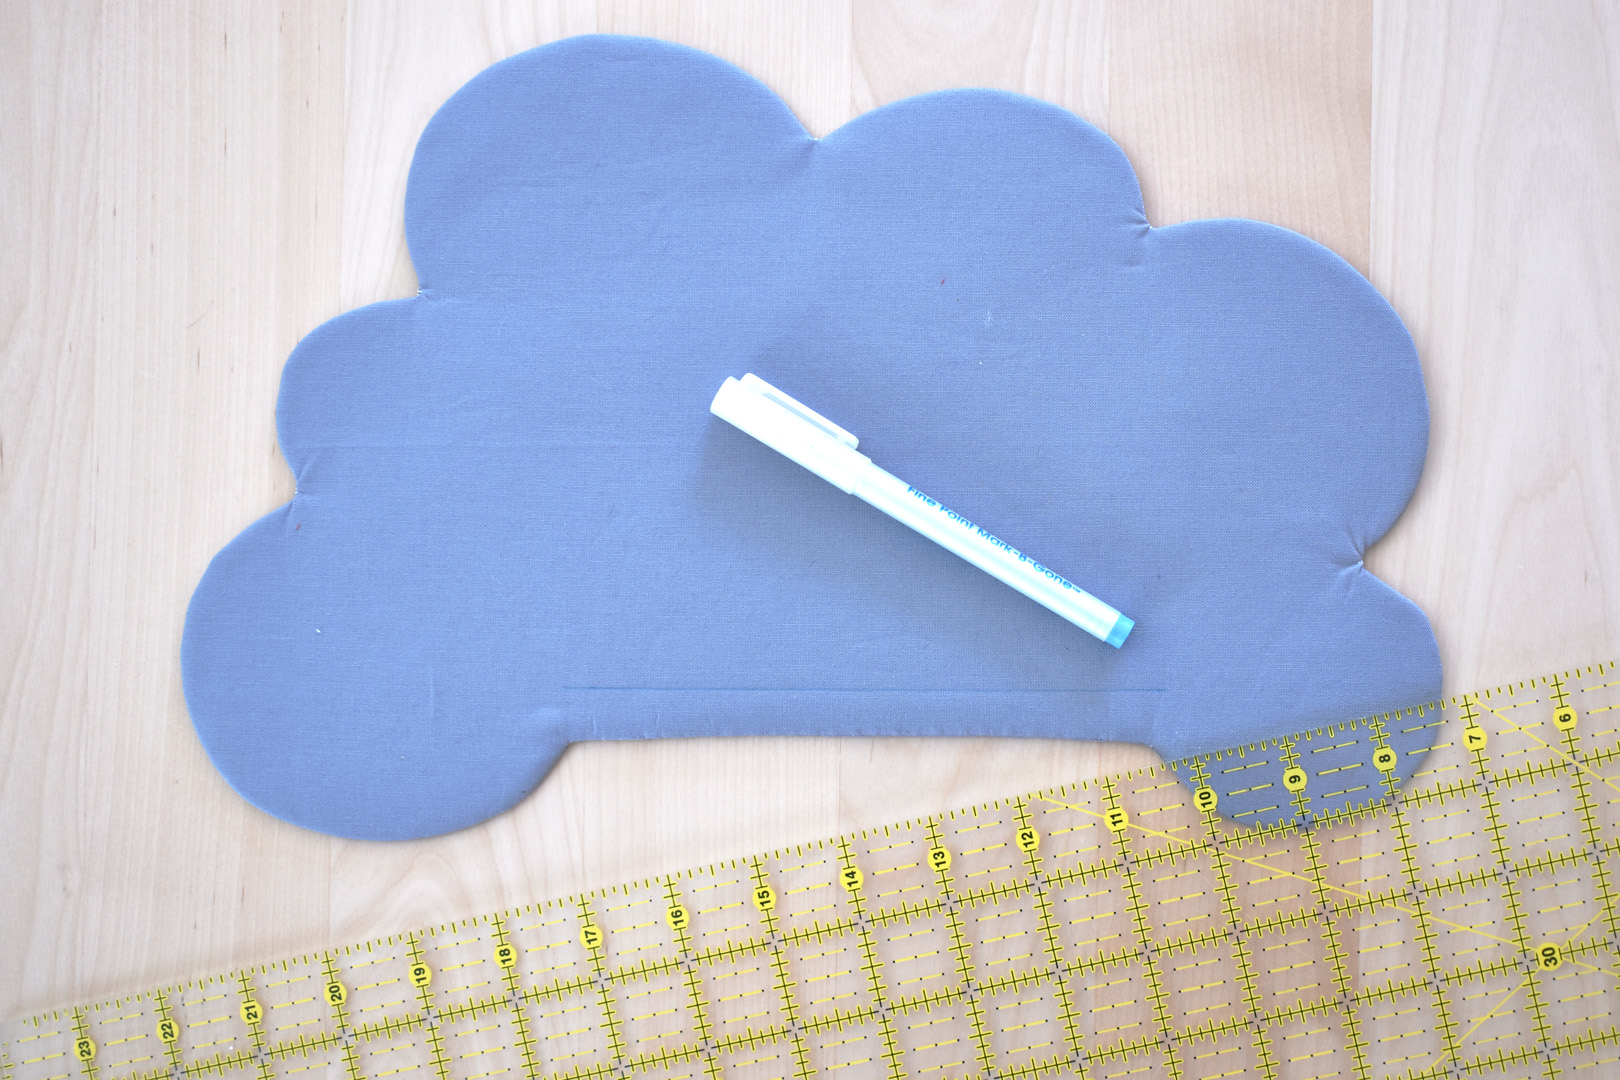
Next, grab the finished large cloud, a clear ruler, and a fabric marker. Make a mark 1/2″ up from the bottom edge, all along this straight area of the cloud.
Pin the raw edges of the basted rainbow along this mark, centering the rainbow strips before pinning. It’s okay if your strips are either a bit shorter or longer than the straight area on the large cloud.
Stitch the rainbow to the large cloud along the basting stitches, backstitching at each end to create a strong seam.
Place the small cloud on top of the rainbow so the rainbow is centered below the cloud. Work with the placement of the small cloud until you are happy with where it will live. Pin in place along the small cloud’s rounded poofs.
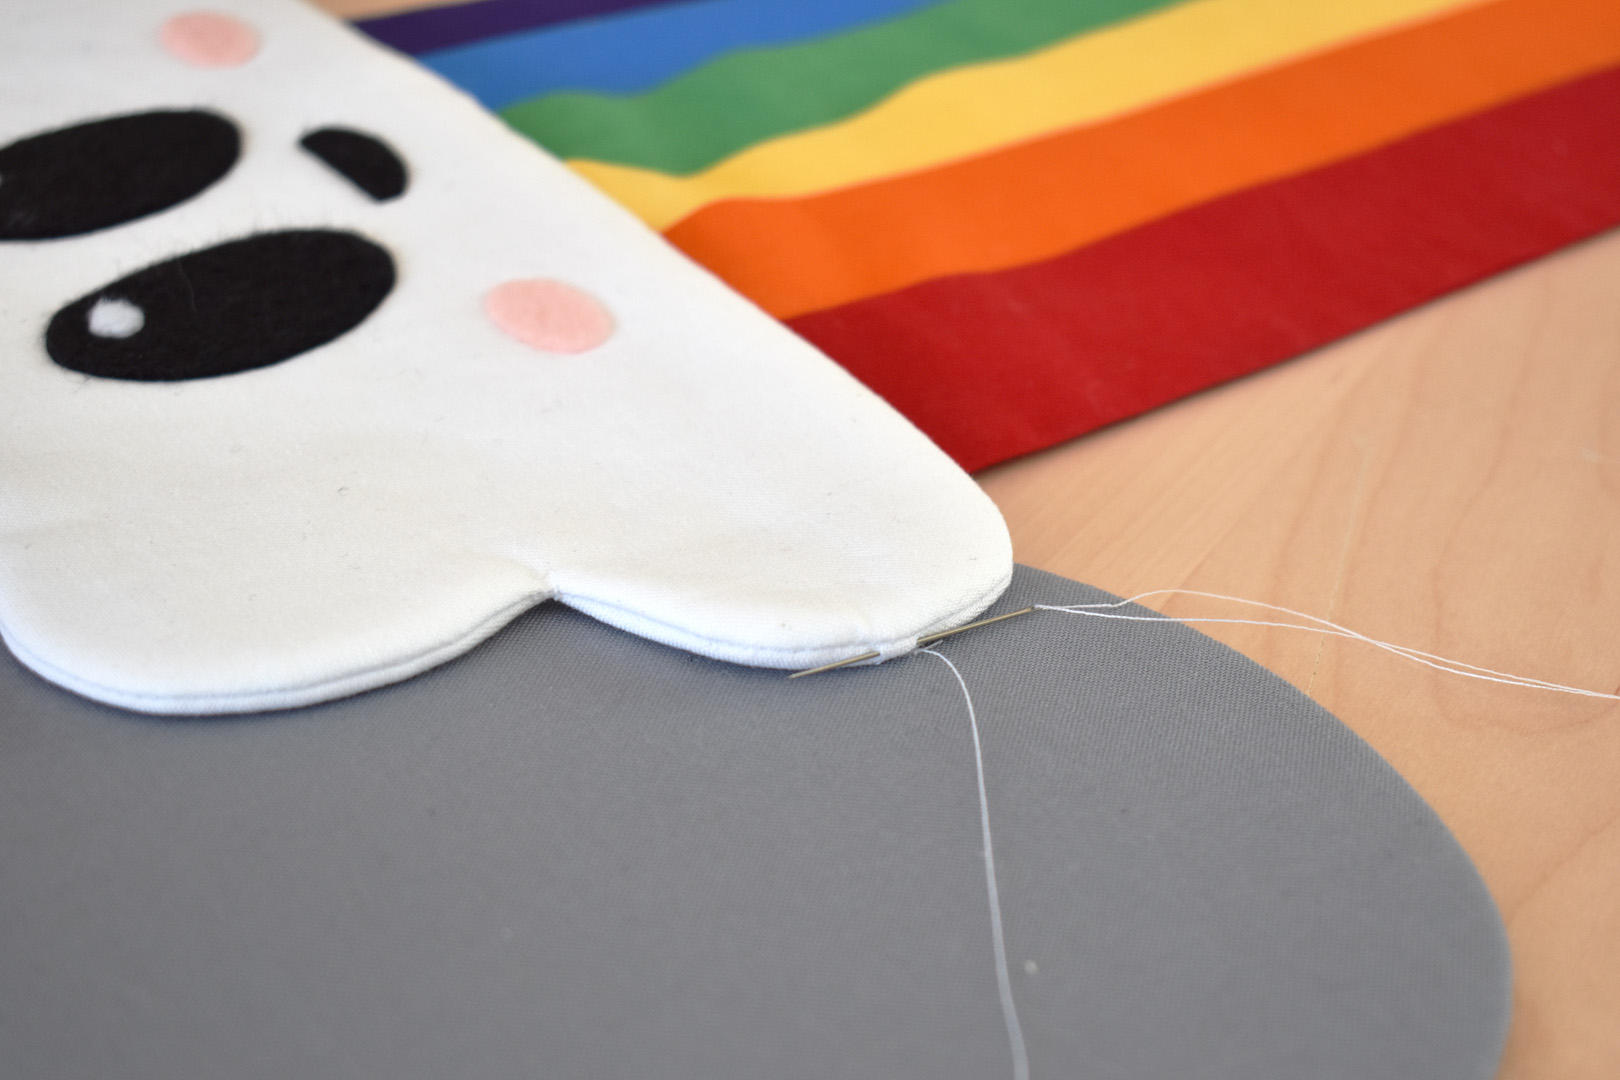
Hand stitch the small cloud on the large cloud. Use white thread and a tacking stitch placed where you won’t see the stitches on the underside of each rounded poof. No need to add any stitches underneath the small cloud, this will let the rainbow strips hang freely.

Add a hanger to the back of the rainbow hanger. You can attach a ribbon to each hanger if you like, or use a small dowel rod.
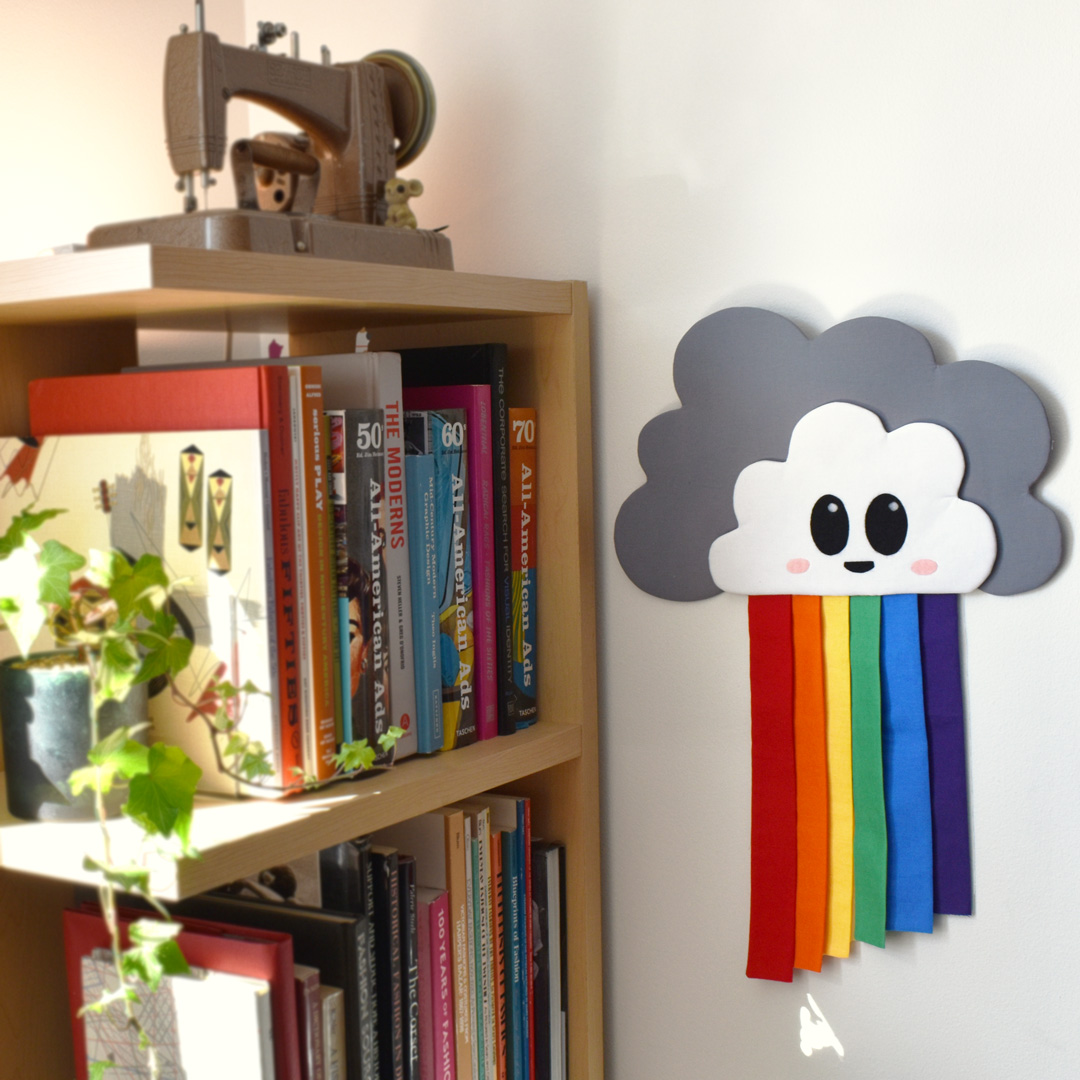
Hang this little happy guy anywhere ⛅??, guaranteed to bring a smile!
Used Products


What you might also like
![Have a habit of misplacing your keys. Losing your iPod? Forgetting your coupons? Now, with this handy organizer, all your little necessities are in one convenient spot when you're ready to head out the door - right on the door knob! How to Make a Door Organizer Supplies 1/3 yard or heavyweight fabric such as twill, canvas, or denim 1/3 yard of fusible interfacing Coordinating thread Scissors Water-soluble marking pen or tailor's chalk Ruler 1/4" presser foot (BERNINA Patchwork Foot #37 or Patchwork Foot with Guide #57) Download and print the keyhole template: [download id="88"] Step 1) Prepare the fabric pieces. Cut from the heavyweight fabric: Two 5" x 11" rectangles for the organizer body One 5" x 12" rectangle for the large pocket One 5" x 7" rectangle for the small pocket One 6" x 7" rectangle for the hanging pocket Fuse interfacing to the wrong side of both 5" x 11" fabric rectangles following the manufacturer's directions. How to Make a Door Organizer Cut the keyhole: Measure down 1" from the top edge of one 5" x 11" rectangle. Center the top of the keyhole template on this mark. Trace the template. Cut along the traced line. Repeat for the second 5" x 11" rectangle. How to Make a Door Organizer Step 2) Make the large and small pockets. With wrong sides together, fold the large pocket in half to create a 6" x 5" rectangle. Topstitch close to the folded edge. How to Make a Door Organizer Place the large pocket on top of the right side of one 5" x 11" rectangle, matching the raw edges along the sides and bottom edges. Baste in place. How to Make a Door Organizer With wrong sides together, fold the small pocket in half to create a 3 1/2" x 5" rectangle. Topstitch close to the folded edge. Place the small pocket on top of the large pocket, matching the raw edges along the sides and bottom edges. Baste in place. How to Make a Door Organizer Step 3) Make the hanging pocket. With wrong sides together, fold the 6" x 7" rectangle in half lengthwise. Press. How to Make a Door Organizer Unfold the strip and then fold the long raw edges to the center fold line. Press. Refold the strip along the center crease. Topstitch close to both long edges. How to Make a Door Organizer Fold under 1" on both edge of the finished 7" strip. Measure up 1-1/4" from the lower edge on the right side of the second 5" x 11" piece. Center the bottom of the strip on this mark. How to Make a Door Organizer Sew close to the folded ends of the strip, then again 1/2" away from the first stitching. How to Make a Door Organizer Step 4) Construct the door organizer. With right sides together, place the two 5" x 11" rectangles together, matching the raw edges and the keyhole opening. How to Make a Door Organizer Stitch around the entire rectangle, leaving the keyhole open. Do not stitch around the keyhole area! Clip the corners. How to Make a Door Organizer Turn the organizer right side out through the keyhole opening. Press. How to Make a Door Organizer Topstitch close to the finished edges. How to Make a Door Organizer Baste the raw edges of the keyhole opening together. How to Make a Door Organizer Satin stitch close to the keyhole edges. Position the fabric so the needle goes just barely to the right of the raw edges and encloses them in stitches. Tip: A satin stitch is a zigzag stitch with a very short stitch length, so the stitches are very close to each other. How to Make a Door Organizer How to Make a Door Organizer Fill your organizer with keys, pens, letters, etc. so you never leave home without your essentials! How to Make a Door Organizer](https://weallsew.com/wp-content/uploads/sites/4/2011/10/How-to-Make-a-Door-Organizer-WeAllSew.jpg)


3 comments on “Rainbow Door Hanger Tutorial”
-
-
Thanks so much @shoover20603! I’m so glad you like my little cumulus cloud friend tutorial. Cheers – Erika
-
-
I guess it would be easy to adjust for the seven colors of the rainbow
Leave a Reply
You must be logged in to post a comment.

Adorable! Looks like clear-cut directions!