Rulerwork With Adjustable Ruler Foot #72

For some of us, figuring out how to “quilt” our quilts can be the most challenging part of the process. Free-motion requires lots of practice (and patience) to perfect smooth curves and intricate designs. If you’ve ever felt discouraged as a beginner in this art, give rulerwork a try! By using acrylic rulers alongside your presser foot at the machine, this technique still allows you to create completely customized quilting on your work but lets you use some tools to help bring your imagination to the fabric.
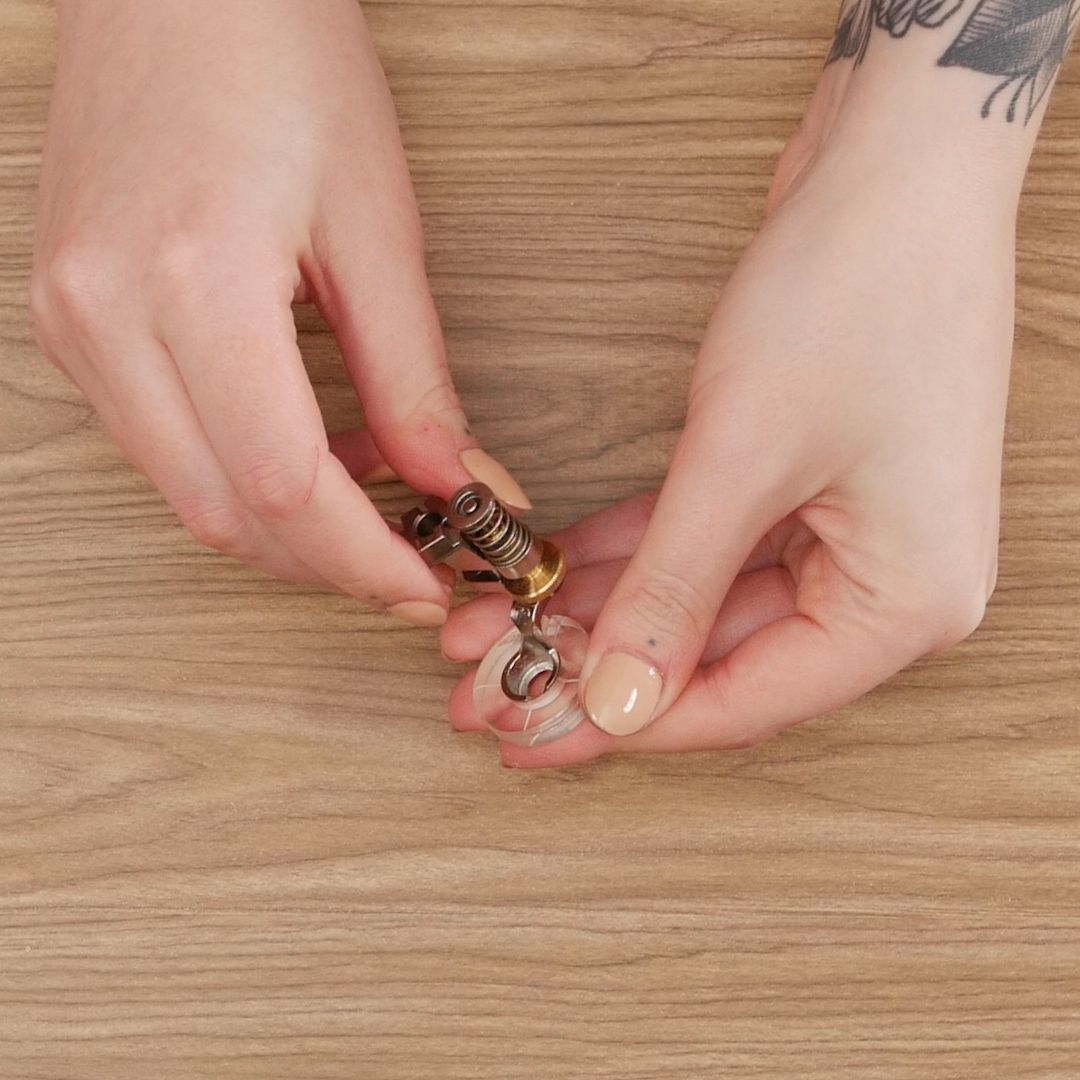
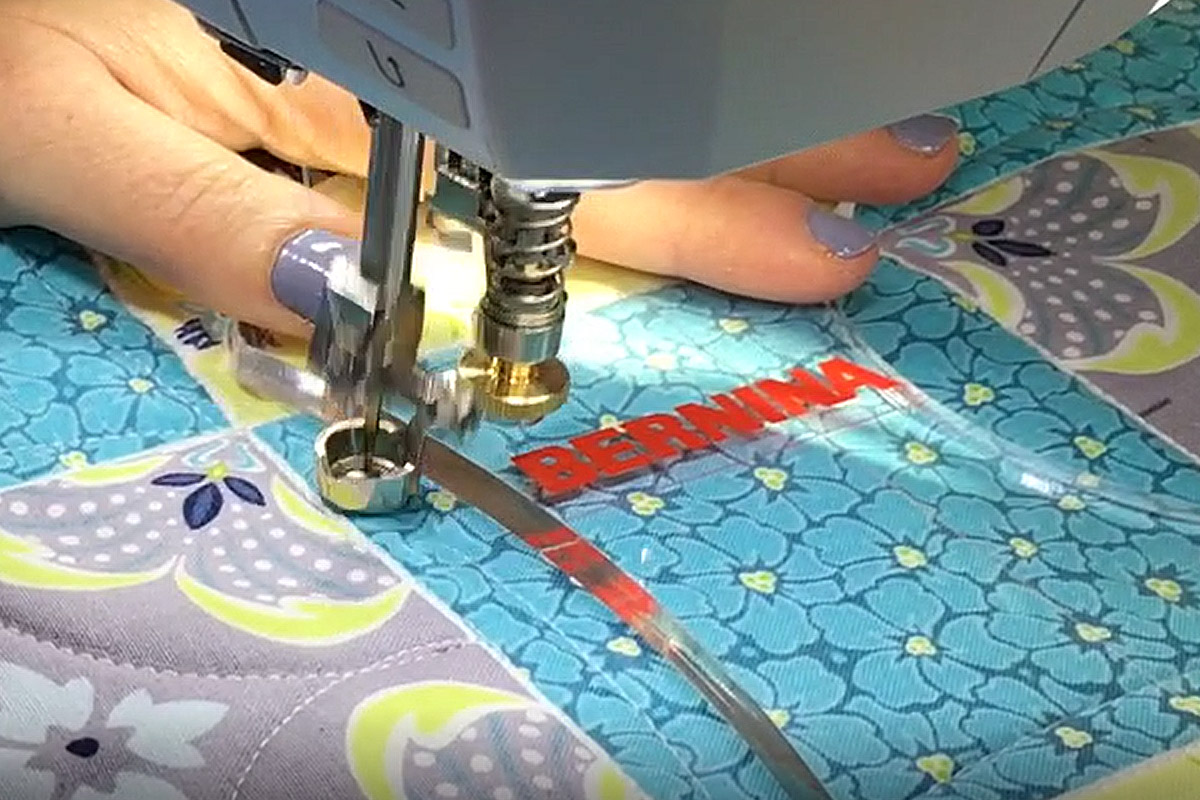
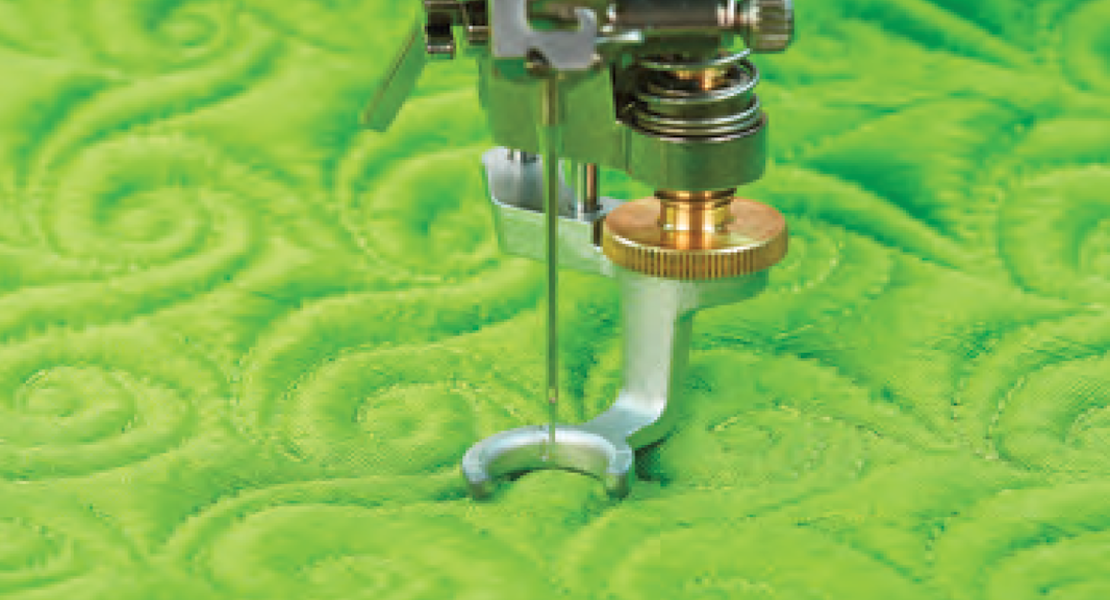
While rulerwork has the benefit of having extra help to get straight lines and clean curves, learning this technique still requires a unique skill set. The most beneficial tool for this technique is Adjustable Ruler Foot #72. This presser foot was specifically designed for working with acrylic rulers.
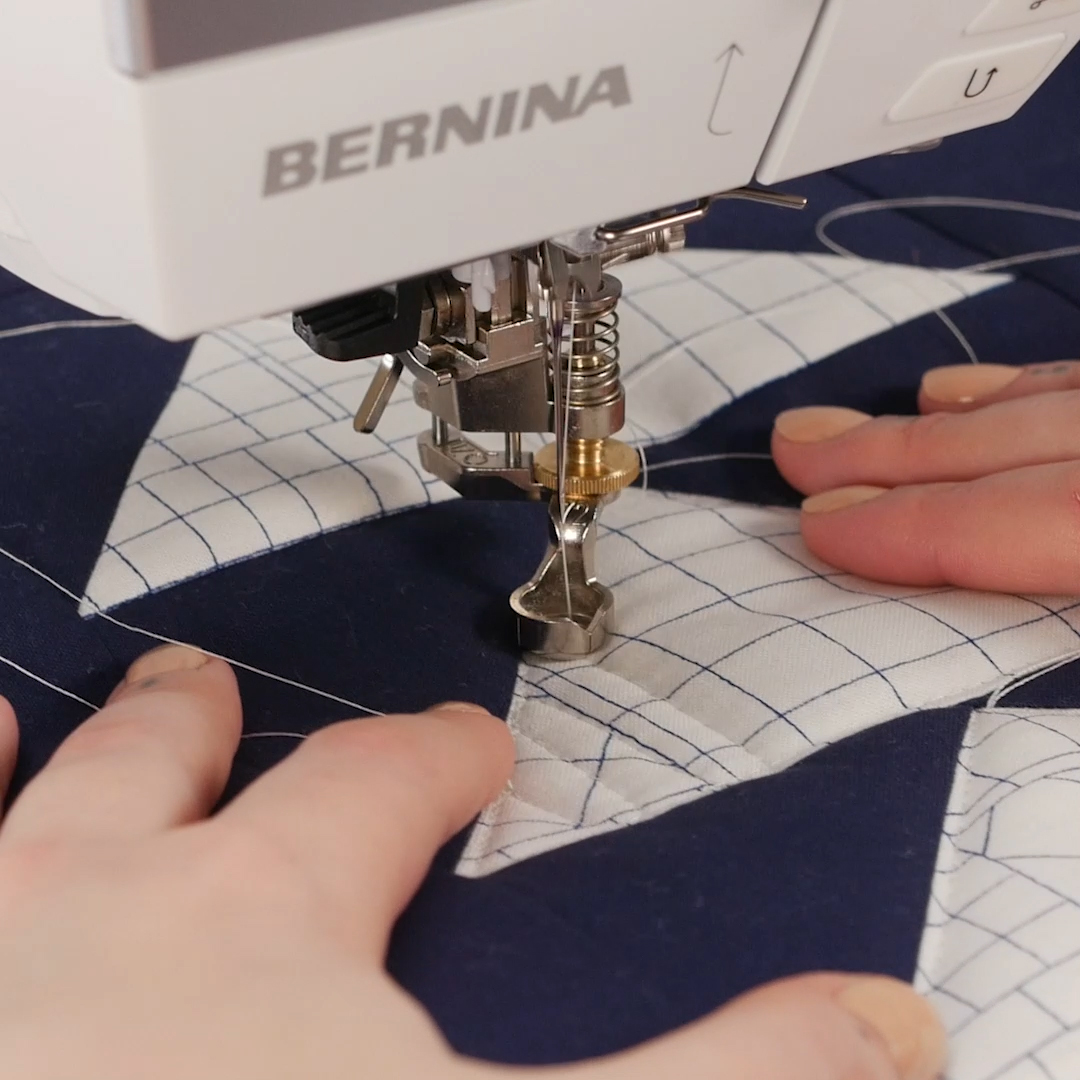
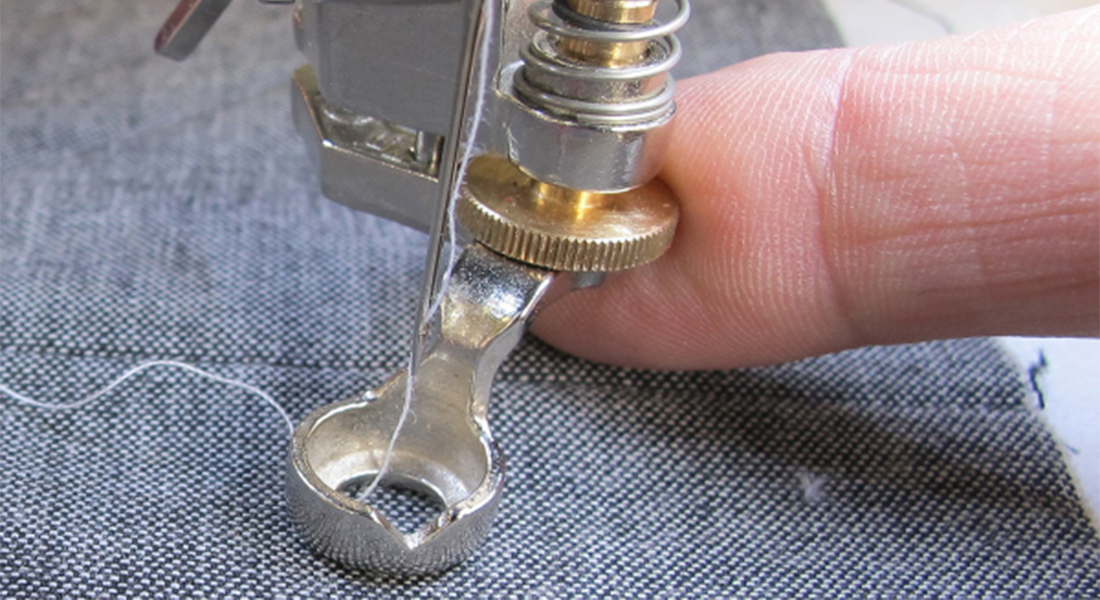
The first thing you notice about this foot is the high “fence” around the needle area. This is much higher than a traditional free-motion foot to protect the needle from the ruler. It creates a sturdy edge to hold your ruler against without fear of the ruler slipping over the presser foot and breaking a needle.
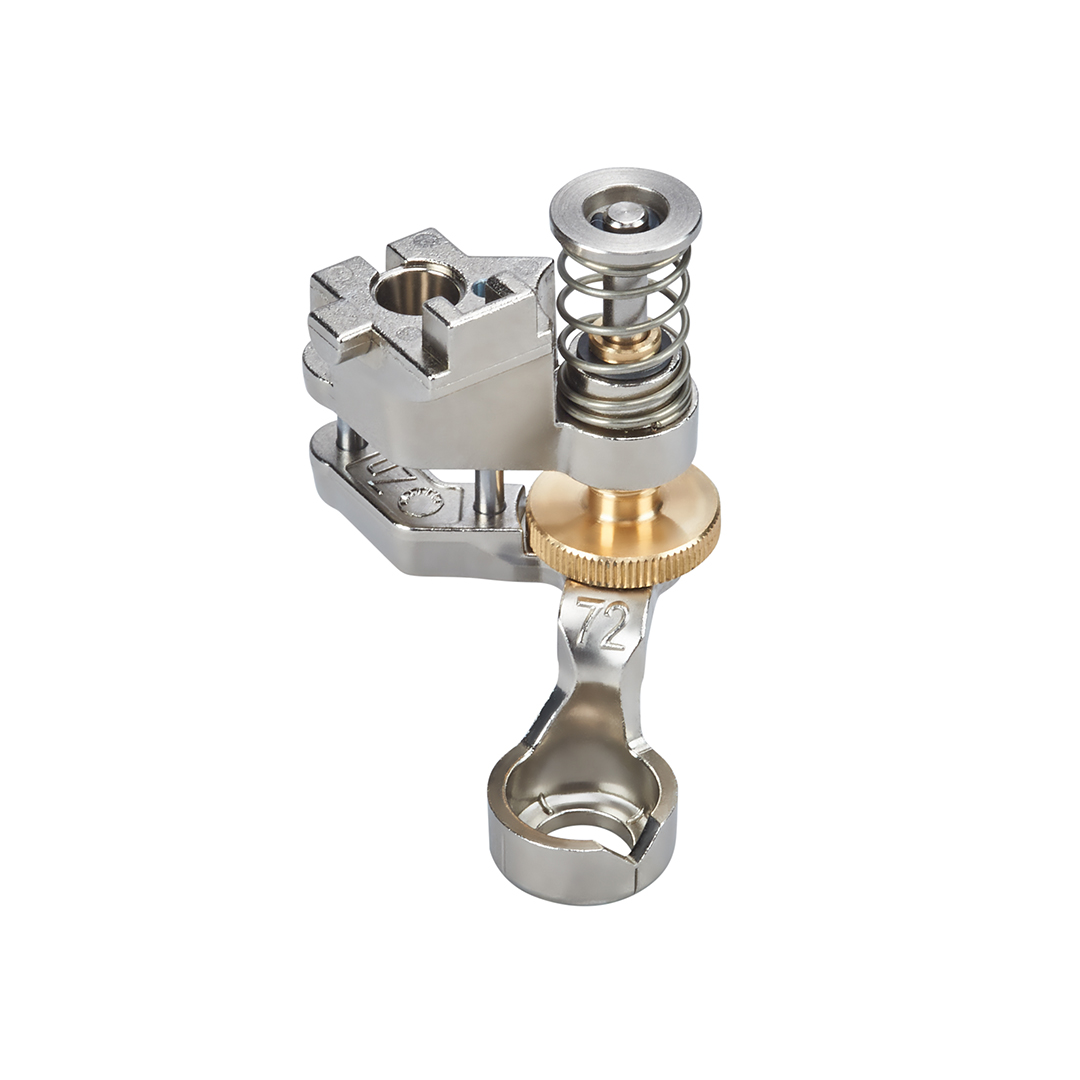
The other great feature of this foot is that it is height-adjustable. Whether you’re using a delicate, low loft batting or thick, puffy batting, you can be sure the edge of your presser foot will just skim the surface of your quilt.
Let’s have a brief intro to the basics of using this presser foot and technique! You can use this as a warm-up when you first sit down to quilt or just make some swatches to go back and reference motifs, techniques, or batting. For more information about creating different quilting motifs with your rulers, check out this blog post by Susan Beck.
Materials for Rulerwork with Adjustable Ruler Foot #72
- Fabric
- You can use pieced blocks or just use whole cloth for practice
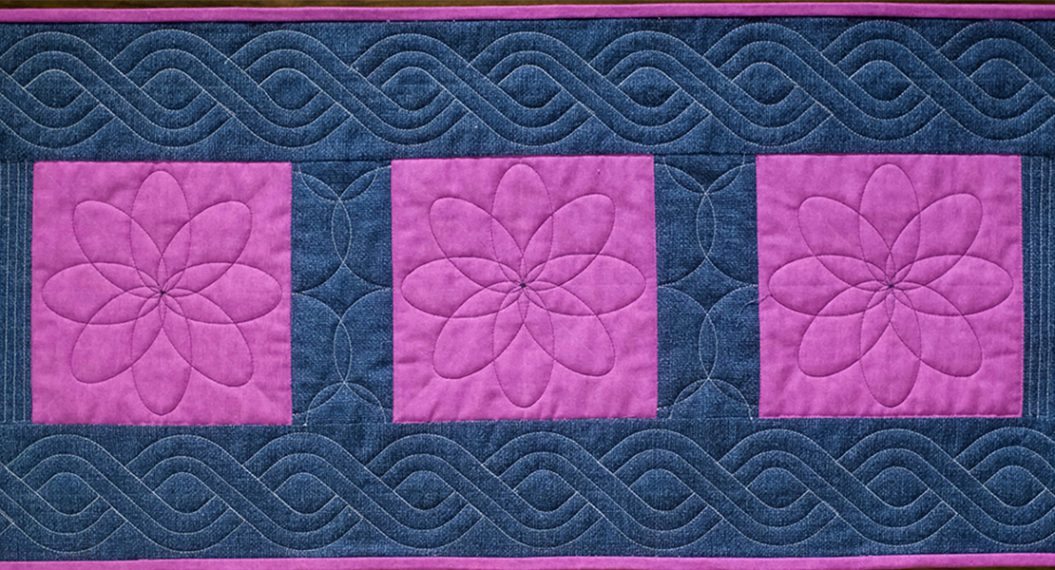
- I used two 16” pieced blocks for quilt tops and two fat quarters for backing
- Batting
- One 18″ square low loft 100% cotton batting
- One 18″ square high loft 100% polyester batting
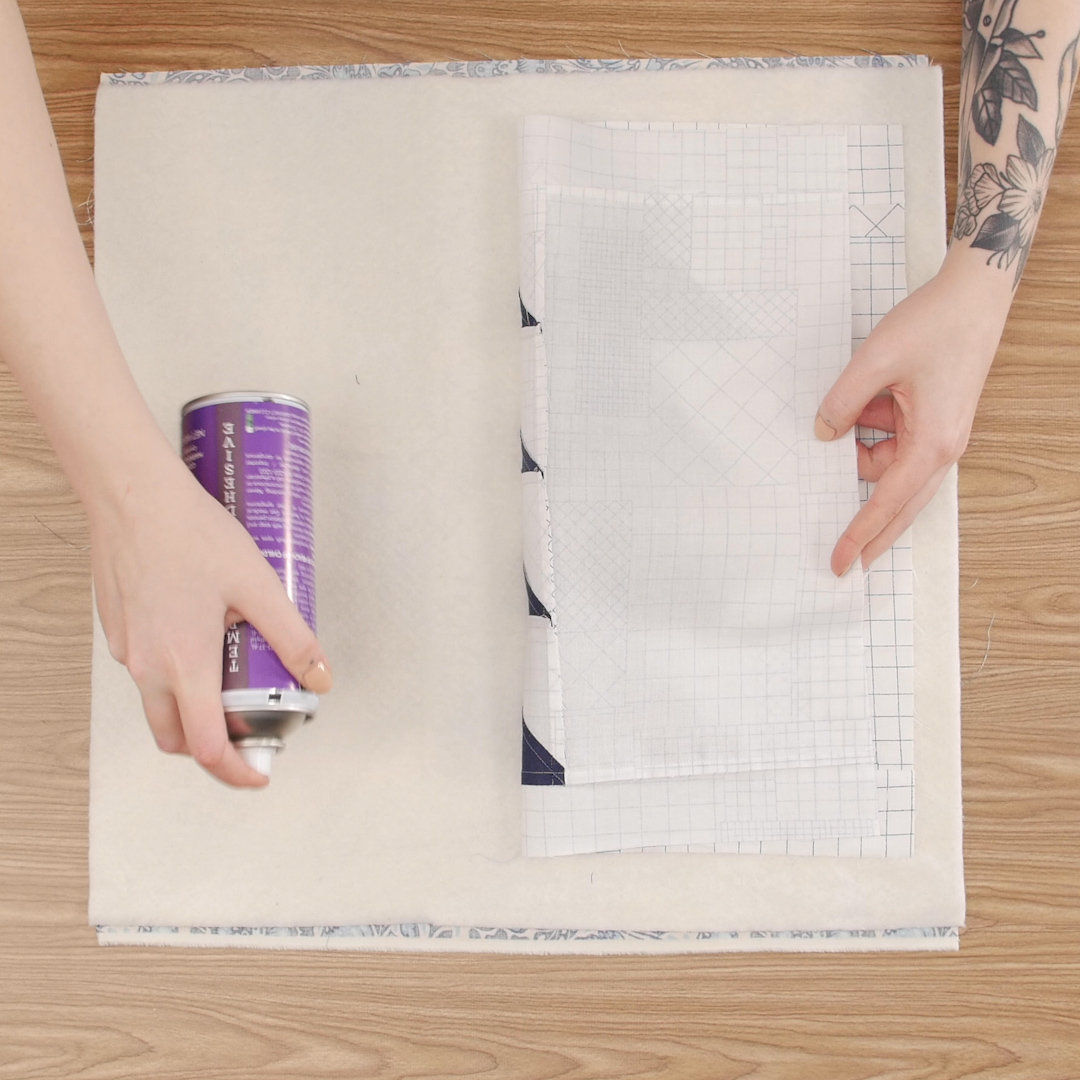
- QuicKraft Spray adhesive
- Thread
- Acrylic quilting rulers
- Adjustable Ruler Foot #72
- Echo-quilting clips
- Straight stitch plate
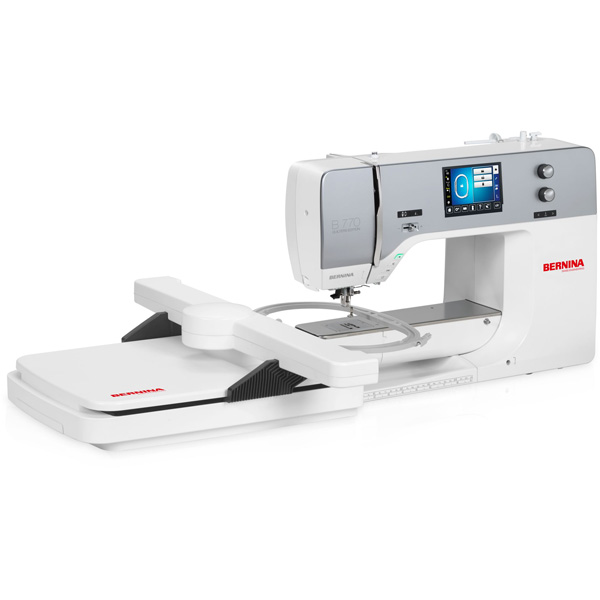
- BERNINA 770 QEE
Sample 1: Low loft cotton
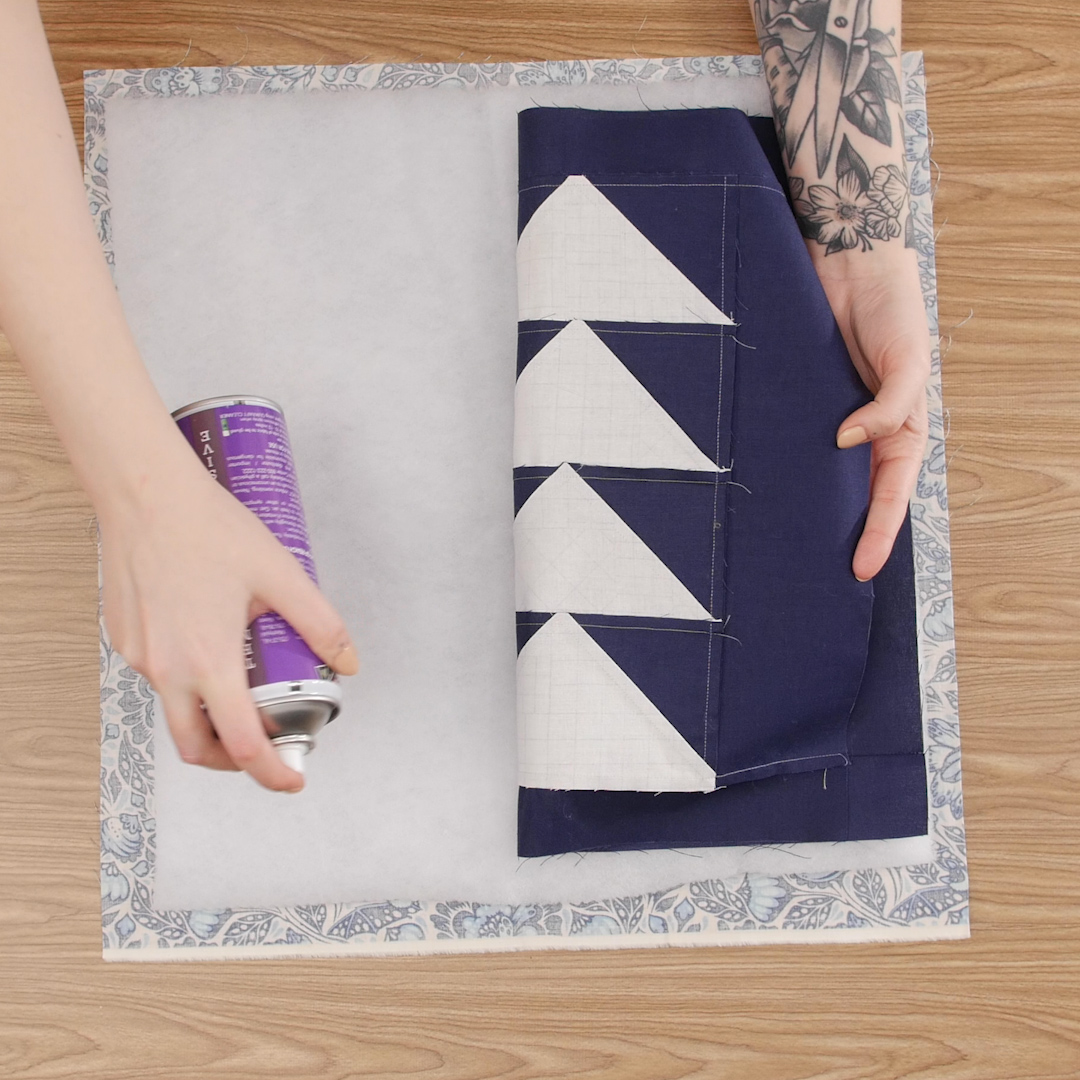
Prepare your first sample by making a small quilt sandwich. Place your backing fabric right side down on a tabletop. On top of that, layer your cotton batting, then the quilt top right side up. Baste the three layers together with spray adhesive.
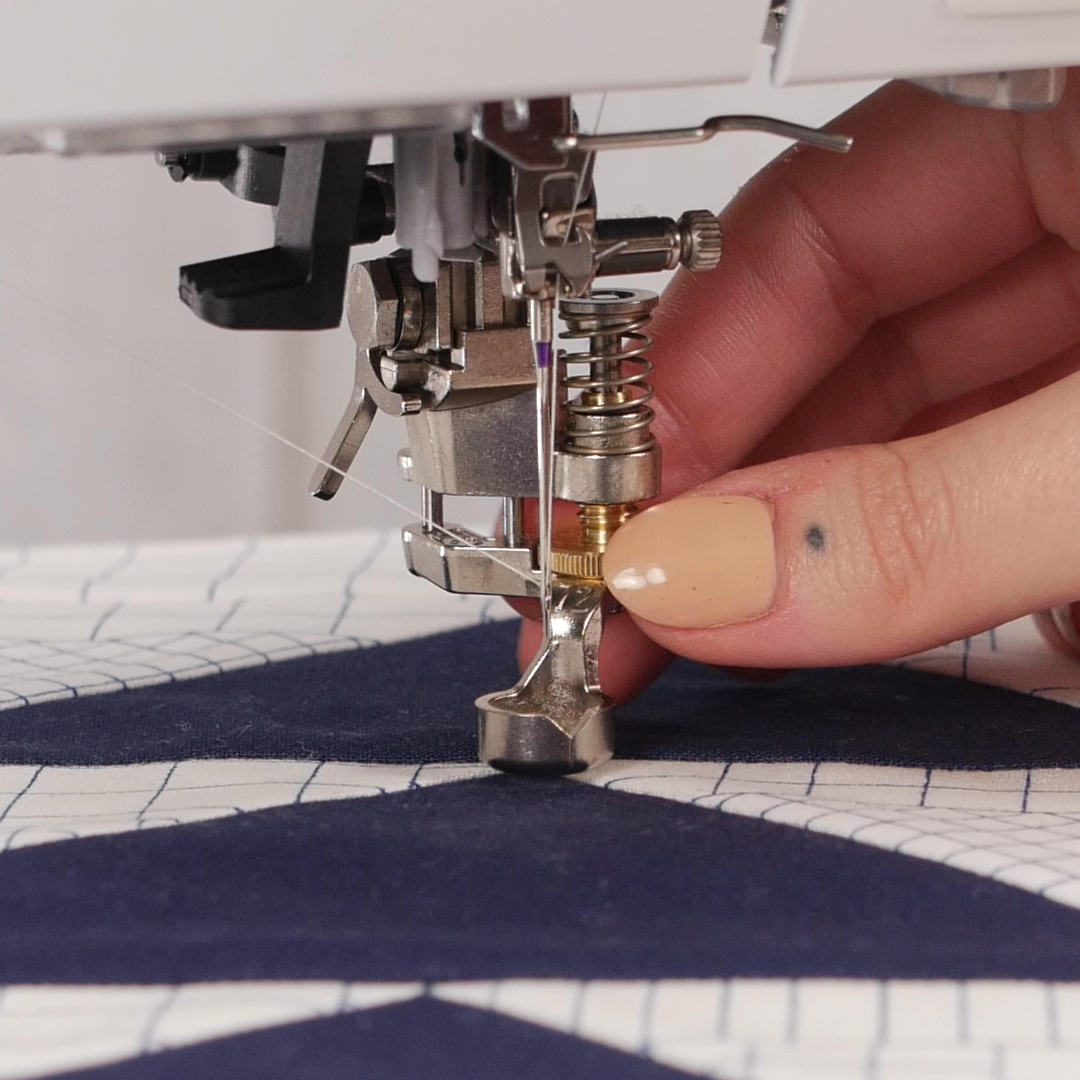
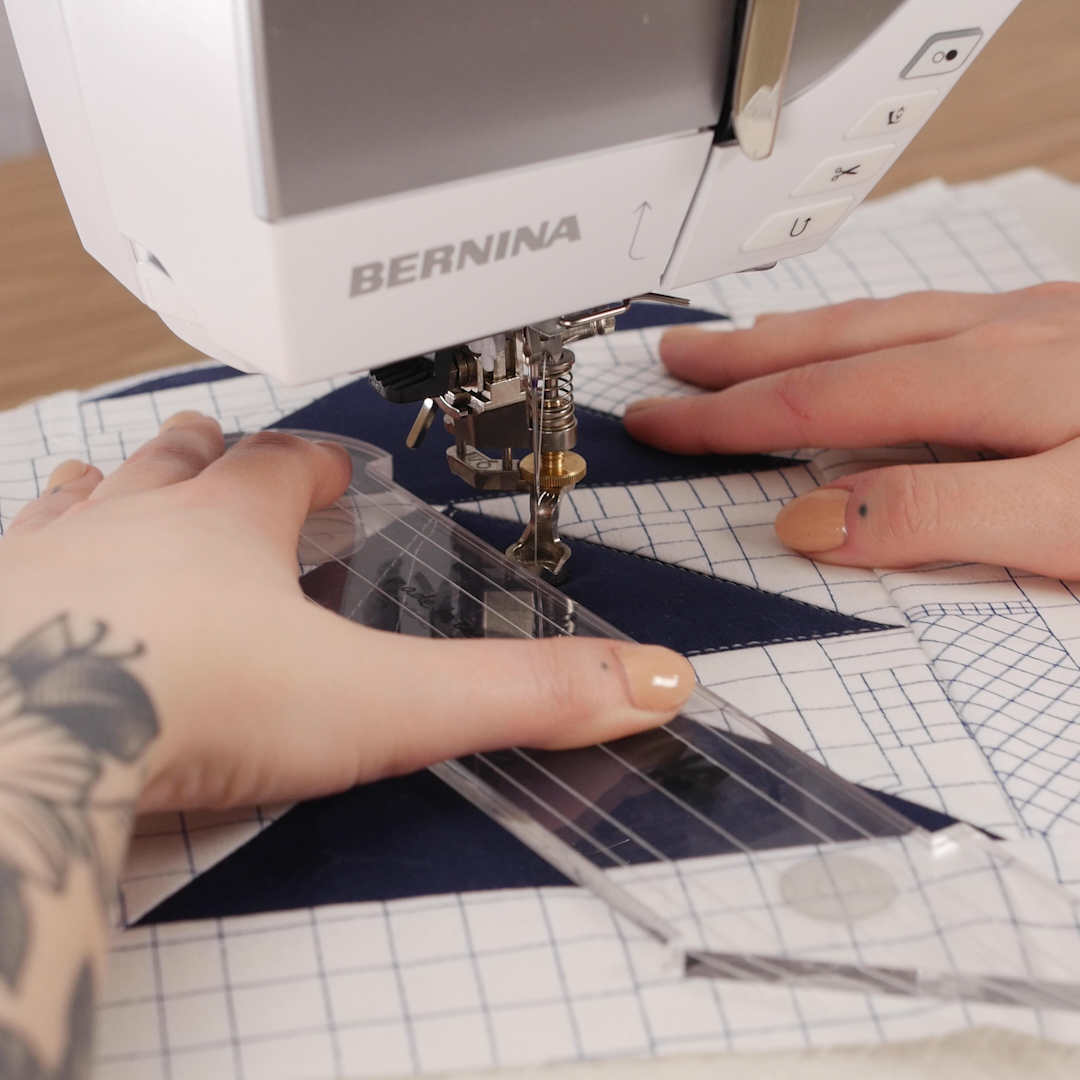
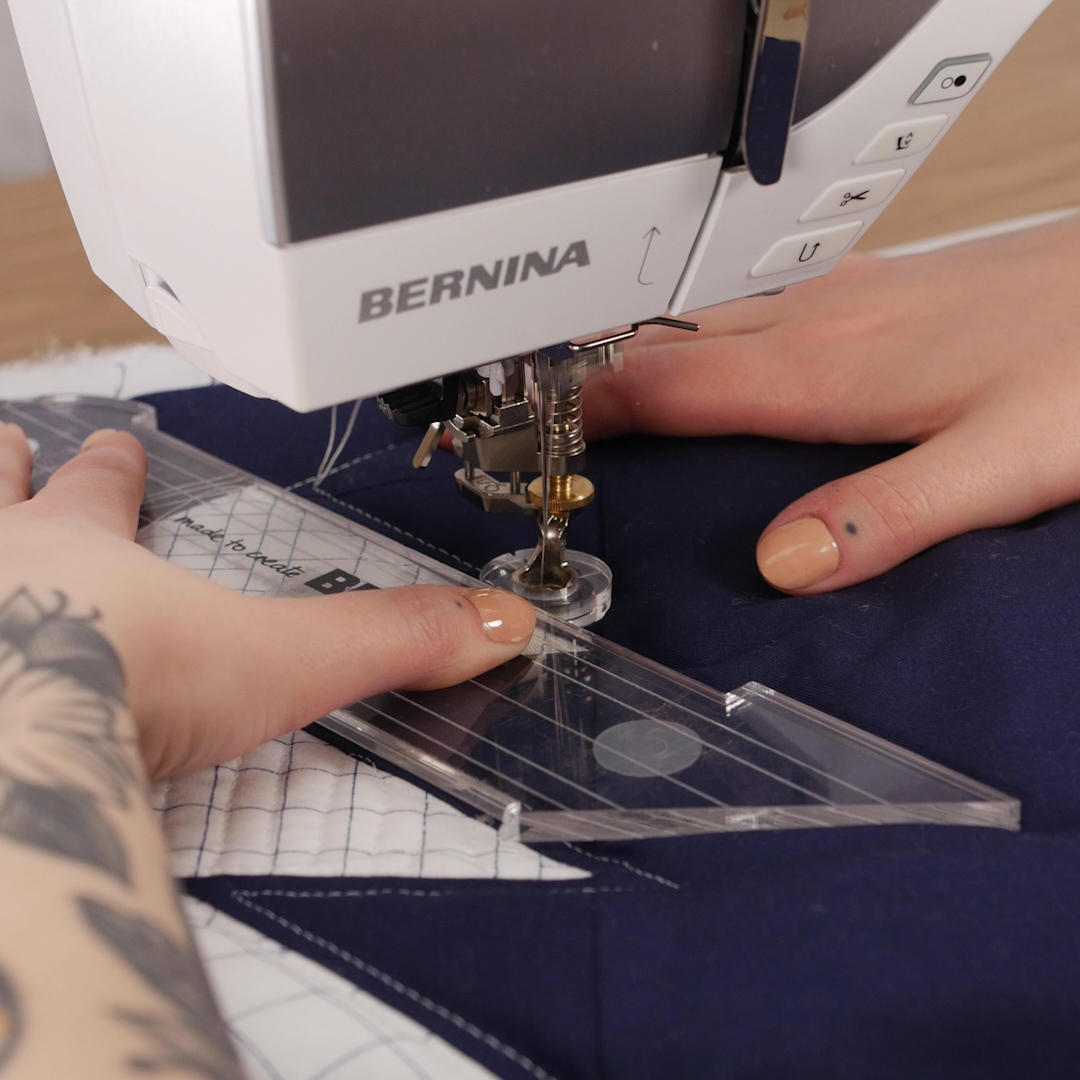
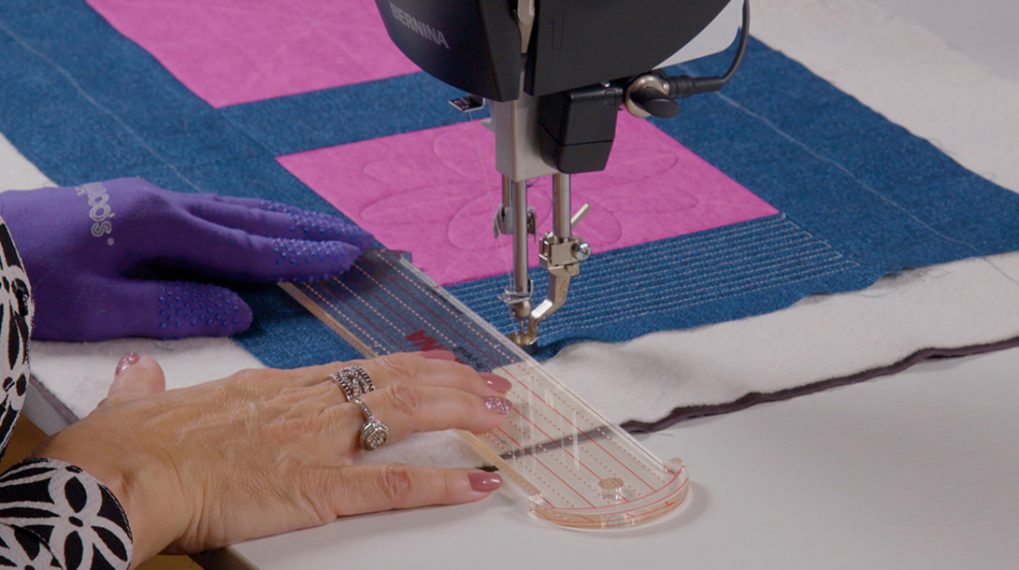
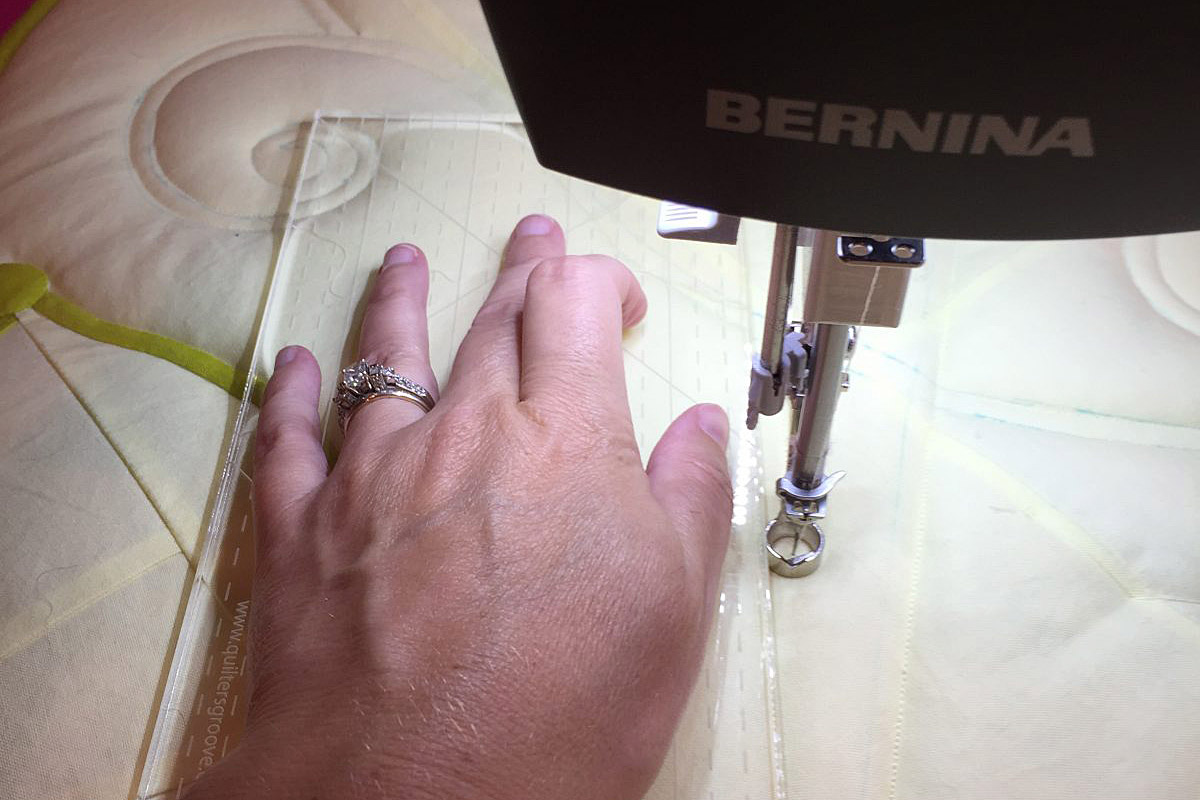
Lower the feed dog on your machine. Attach Adjustable Ruler Foot #72 and lower the presser foot. Turn the gold dial clockwise to lower the bottom edge of the foot. The bottom of the presser foot should just skim the surface of the quilt.
Use the Needle Up/Down button to pull up the bobbin thread. Take three or four stitches in place to secure your thread. Now line up your first ruler (I suggest a straight ruler as the most simple to practice with).
Before you start stitching, notice the alignment of your ruler. Because of the guard on the presser foot, your needle sits ¼” away from the edge of the ruler. It may be tempting to align your ruler directly on the line you want to stitch just as you would for cutting (for example, the seam in your piecing) but you will need to break that habit for rulerwork.
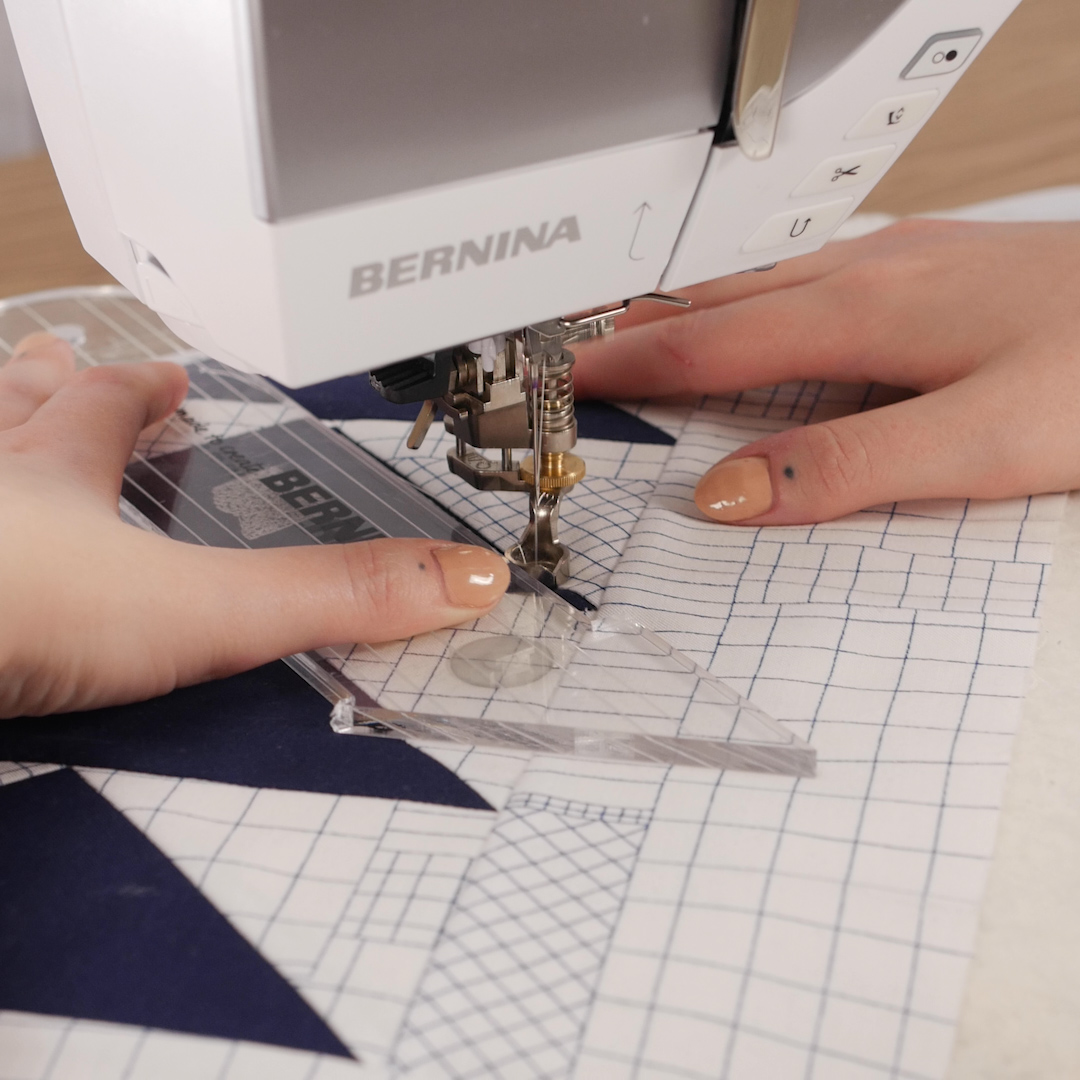
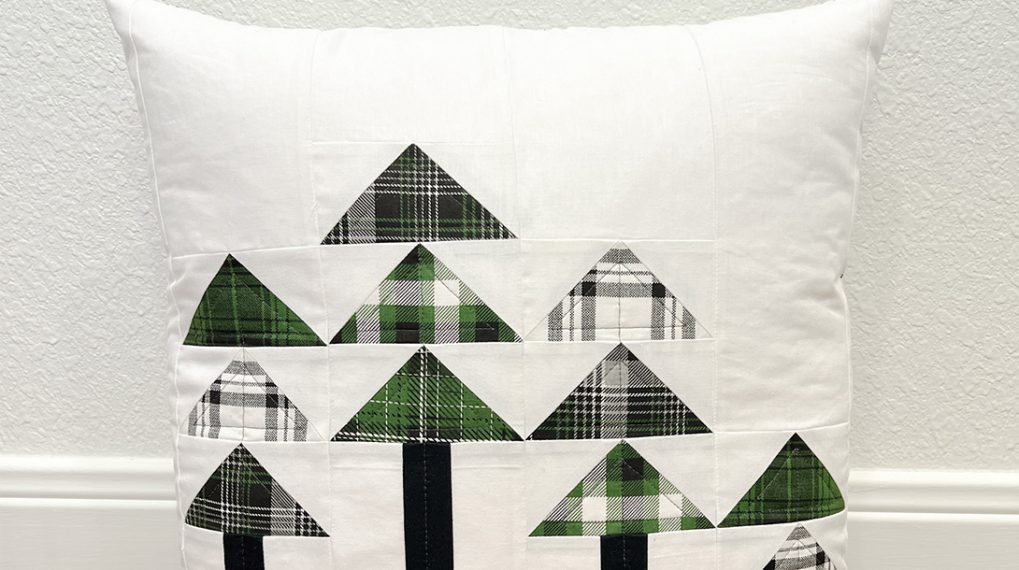
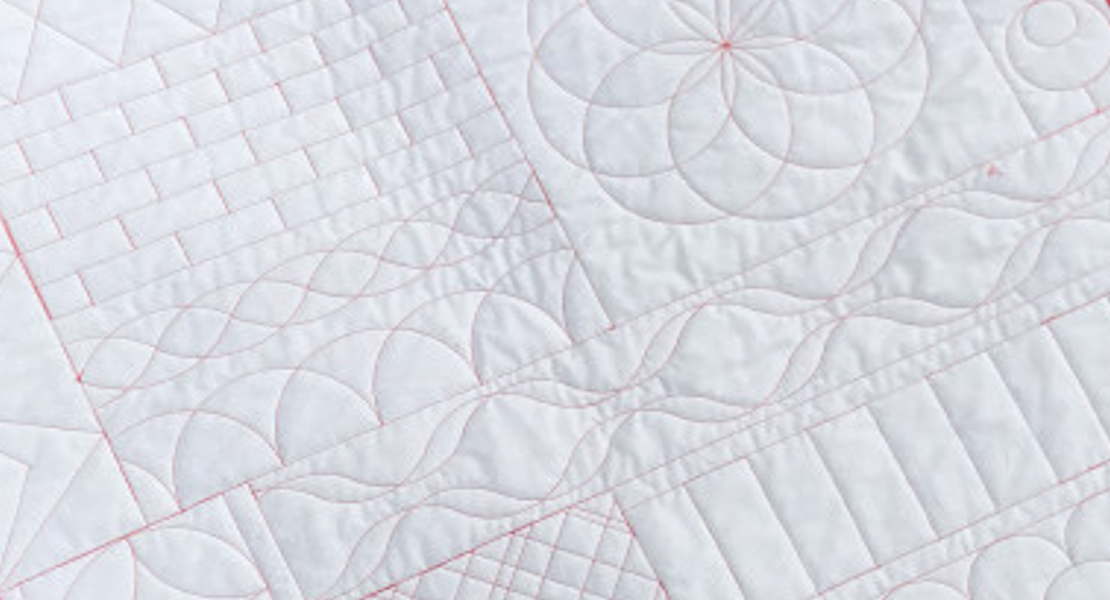
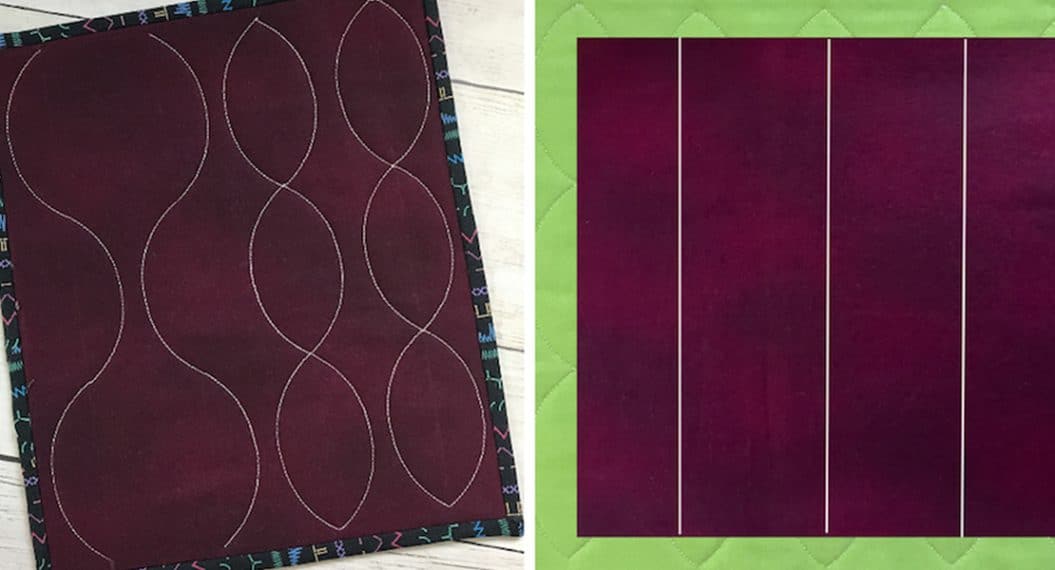
Start your quilting by simply stitching in the ditch around already pieced shapes (or if stitching whole cloth, create some squares or triangles with your straight ruler). Then, work on filling those segments with different motifs. Try radiating lines from points on a triangle, using your ruler for crisp straight lines.
Quilt the rest of your block using the straight ruler and simple free-motion motifs like swirls or stippling.
Sample 2: High loft polyester
Prepare your high loft sample the same way you did for the cotton. Sandwich the batting between your fabrics and baste with spray adhesive. Spray adhesive can be a little finicky to stick to polyester batting so if you need to, you can also add a few safety pins to baste securely.
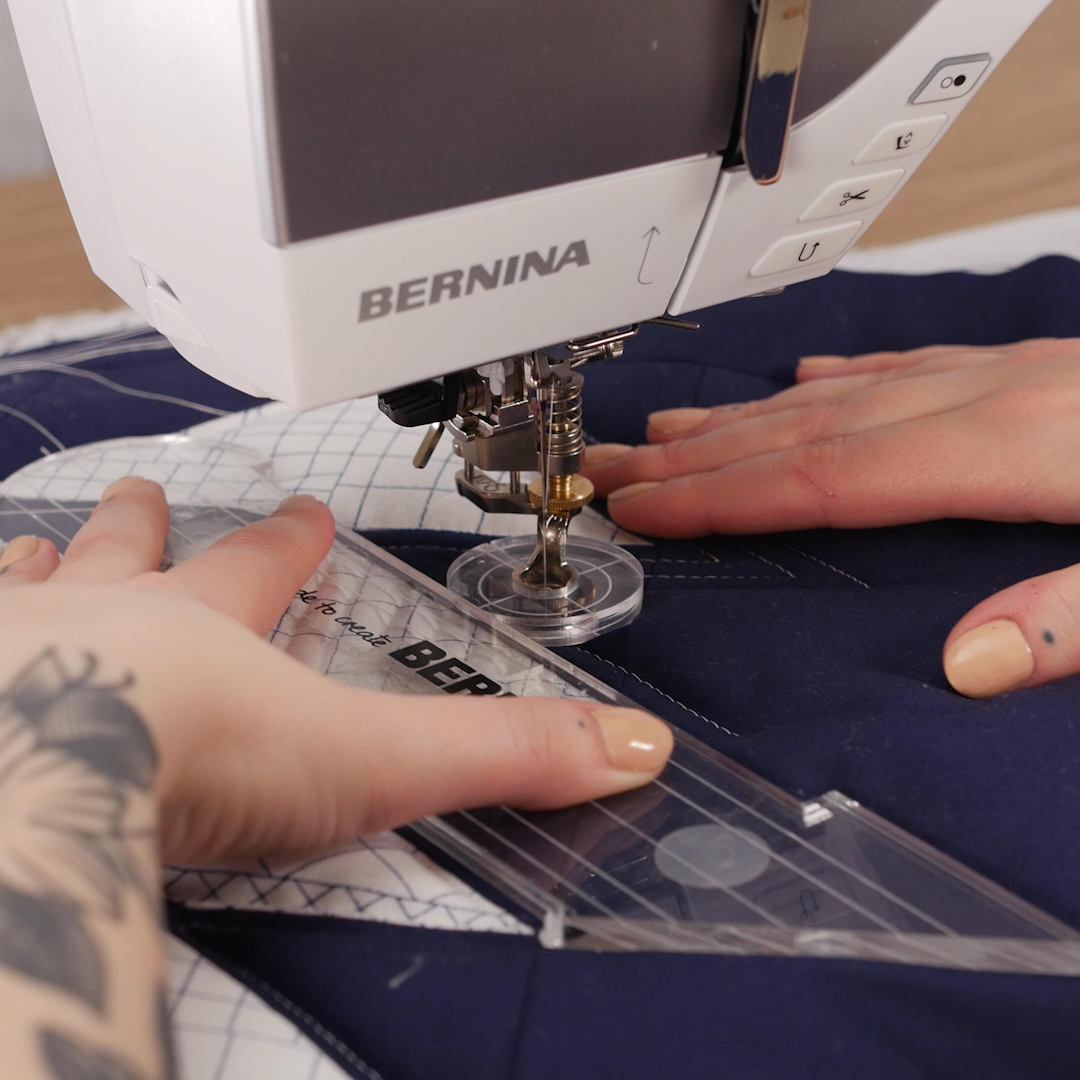
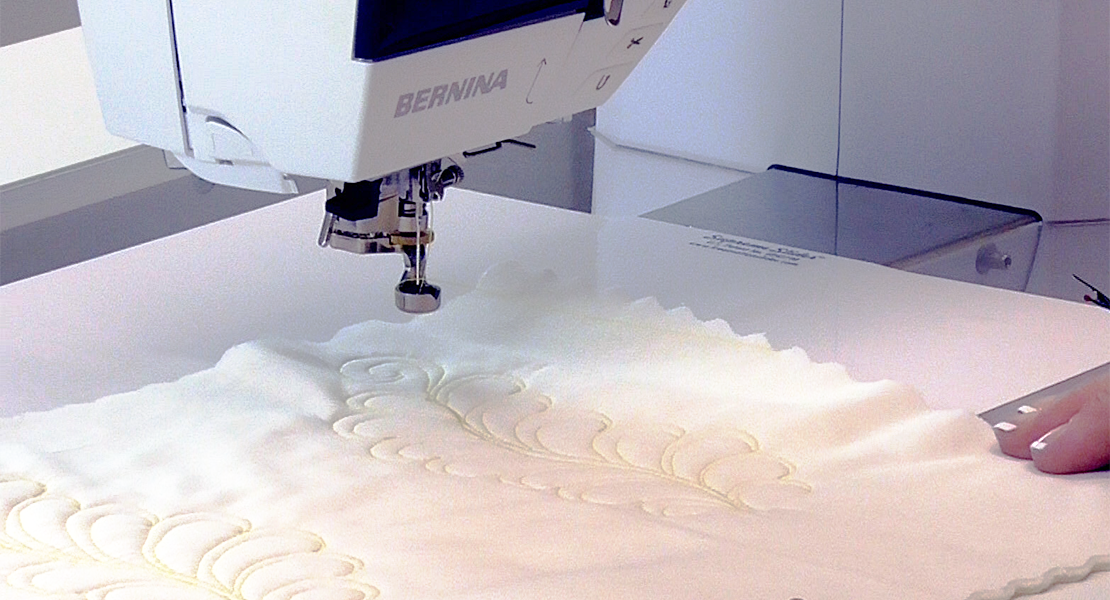
Place your quilt sandwich underneath the presser foot and lower the foot. With this batting, and at the current height of the presser foot, the foot squishes down the batting quite a bit. Again, we want the bottom of the presser foot to just skim the surface of the quilt. Turn the gold dial on the presser foot counter-clockwise to bring it up a few millimeters.

Start the same way you did with the cotton batting sample, by stitching in the ditch with your straight ruler.
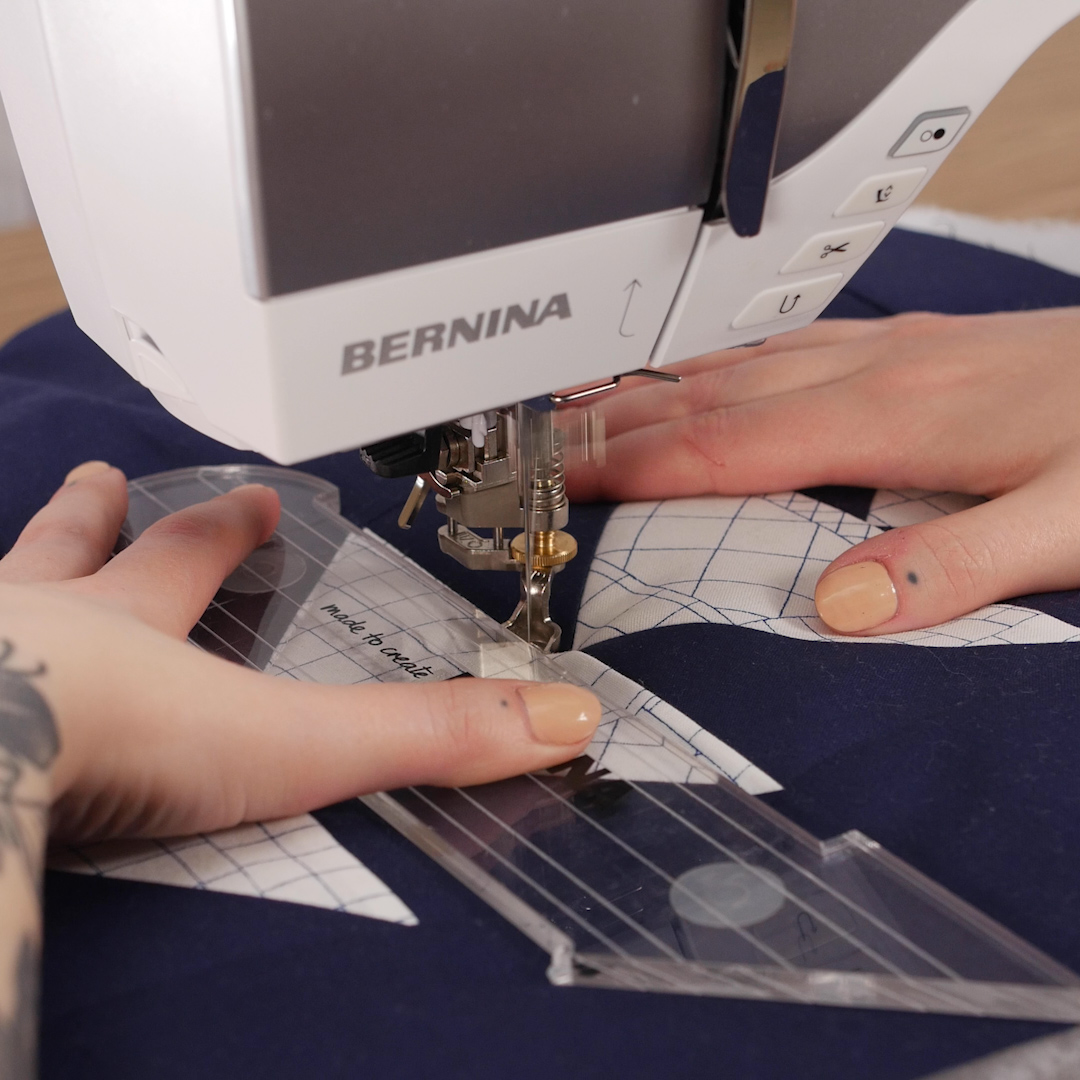
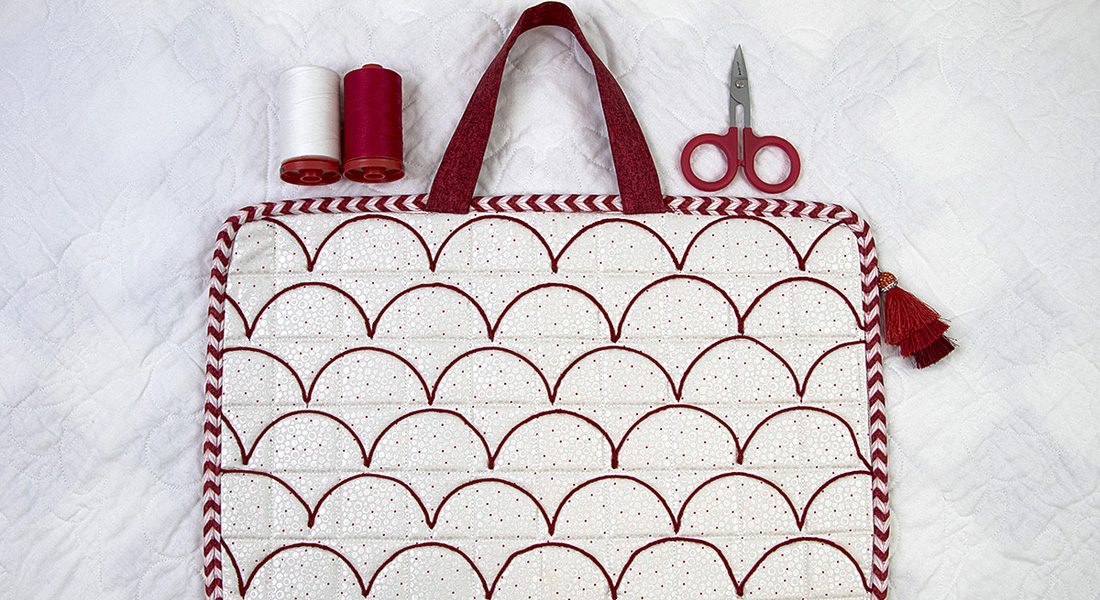
Fill in the outlined shapes with whatever motif you like. My favorite is with these snake-like straight passes down, curving around, and back up. Using the edge of my presser foot as a guide, I can ensure my lines stay ¼” apart.
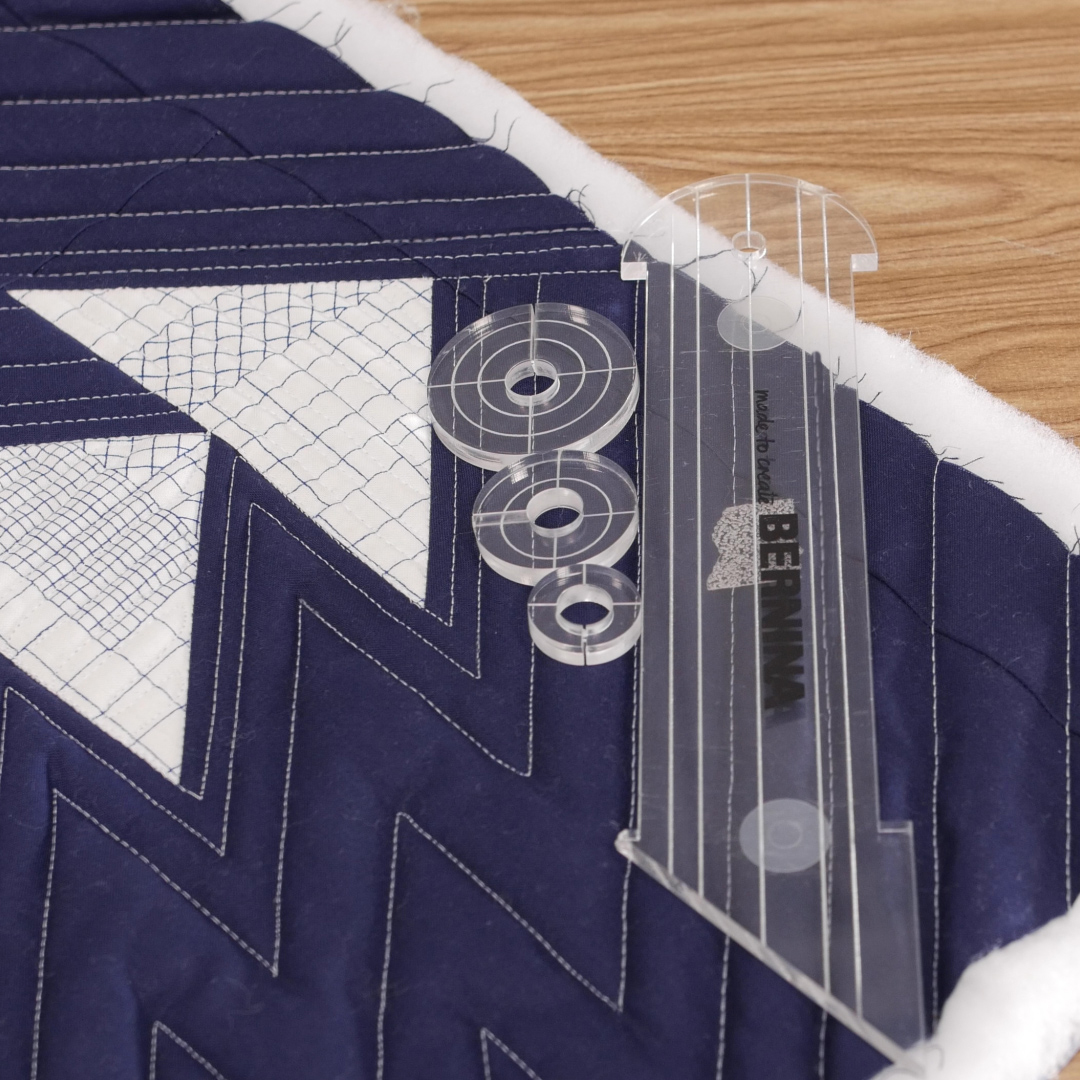
Echo Quilting
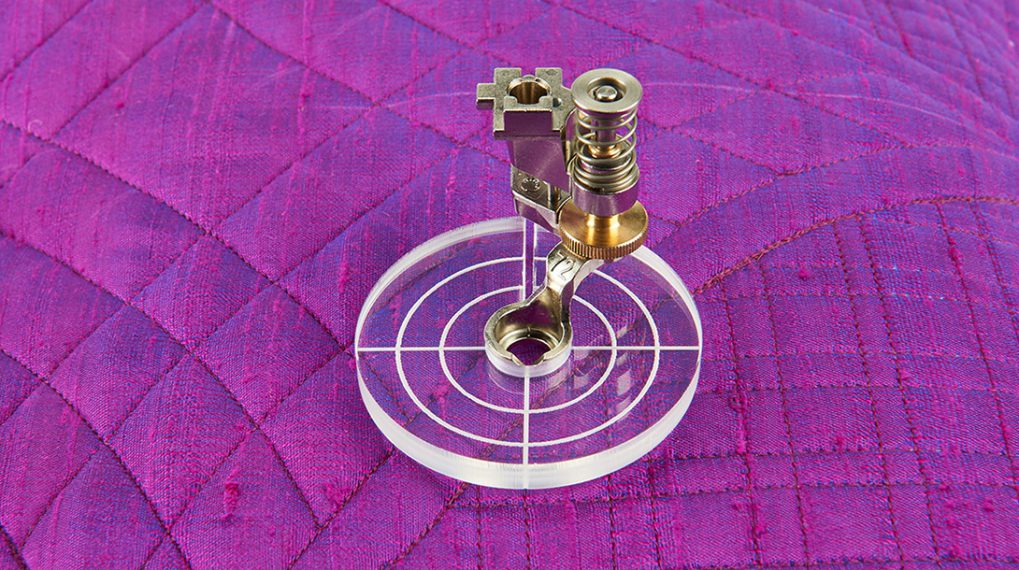
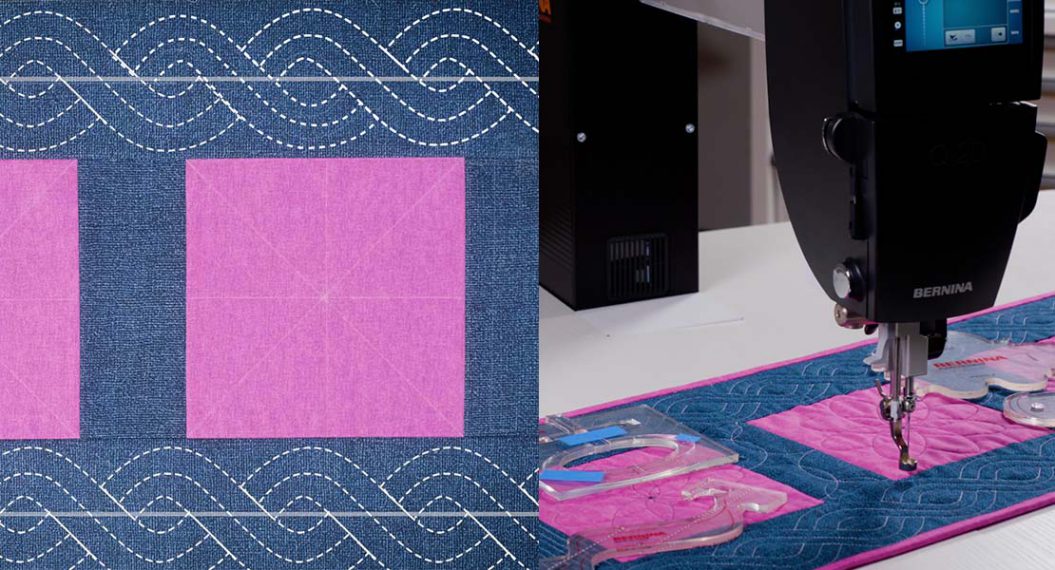
If you want to echo your lines but want to stitch more than ¼” apart, I have the perfect solution for you: Echo-quilting Clips. These acrylic rings slide on to the bottom of the #72 foot (or Ruler foot #96, which is the ruler foot for if you’re working on a Q Series machine setup on a frame). These allow you to echo ½”, ¾”, or 1″ from your ruler or guideline.
Attach the smallest clip (1/2″) to the presser foot by sliding on to the bottom of the presser foot. It should be snug and securely in place.
Keeping your ruler in the same place as the last row of echoing, align the edge of the echo clip with the edge of the ruler and sew.
Repeat with the remaining two clips. The echo quilting clips make it so easy to either create wider gaps between rows of stitching or to work your way out while maintaining the same static points to echo.
Next time you try your hand at rulerwork, you’ll be ready to tackle any batting! What are your favorite tips & tricks for quilting with rulers?
Used Products

What you might also like


14 comments on “Rulerwork With Adjustable Ruler Foot #72”
-
-
It looks like you can. https://www.bernina.com/en-US/Accessories-US/Accessories-search
-
It sure is! The #72 foot is compatible with any of our domestic machines as well as the Q 20 when set in a table.
-
-
When I purchased my Q20 sit down model I was told by my dealer NOT to use the #72 foot as it was not recommended with the Q20. I needed to purchase the #96 foot for ruler work.
-
Hi Deborah! The Ruler Foot #96 is in fact designed exclusively for Q Series models, whether they are setup on a frame or set in a table. However, because of the adjustable feature on the #72 foot, it can be used on the Q 20 as well as our domestic sewing machine models. There are a number of our free-motion presser feet that can be used on the Q Series models, on a frame or in a table, but the key is that the #96 is not to be used on domestic machines. Let me know if you have any other questions!
-
-
I have the set & good to see a video on the use of rulers & different methods to use the #72 foot.
-
Do I need to deactivate the scissors & hover, & adjust the heel down/up feature of the foot pedal when doing the ruler? If so, how do I adjust the foot pedal?
Thanks.-
Hello @nonni47, you can deactivate Hover and automatic cutting when you are using the rulerwork technique. Please check in your user’s manual or connect directly with your BERNINA store for help with the Hover and automatic cutting features on your machine.
-
-
Can the BSR be used with the rulers?
-
Did you ever get a reply to this inquiry? I’d like to know the answer as well.
-
I think in order to use the BSR you would need to use a Sew Steady table that has the cutout and adapter for the BSR. I just heard about it from my local Bernina dealer newsletter. The BSR attaches to the underside of the table, and then the ruler (or any) foot can be used and the stitches are regulated. I’m pondering about whether to purchase this as its $200-300. and wouldn’t work with my cabinet.
-
-
hi Quilting Delights invented an attachment to be used with the BSR. So you can use with some of the open rulers.
https://www.quiltingdelights.com/shop/c/p/BSR-Compatible-Ruler-Work-Attachments-with-FREE-Ruler-x67295583.htm
-
-
Cool echo disks!
-
I’m having trouble with the top thread breaking. I have reduced top thread pressure and changed needle . Any suggestions?
Leave a Reply
You must be logged in to post a comment.

Is the #72 foot compatible with BERNINA 570QE?