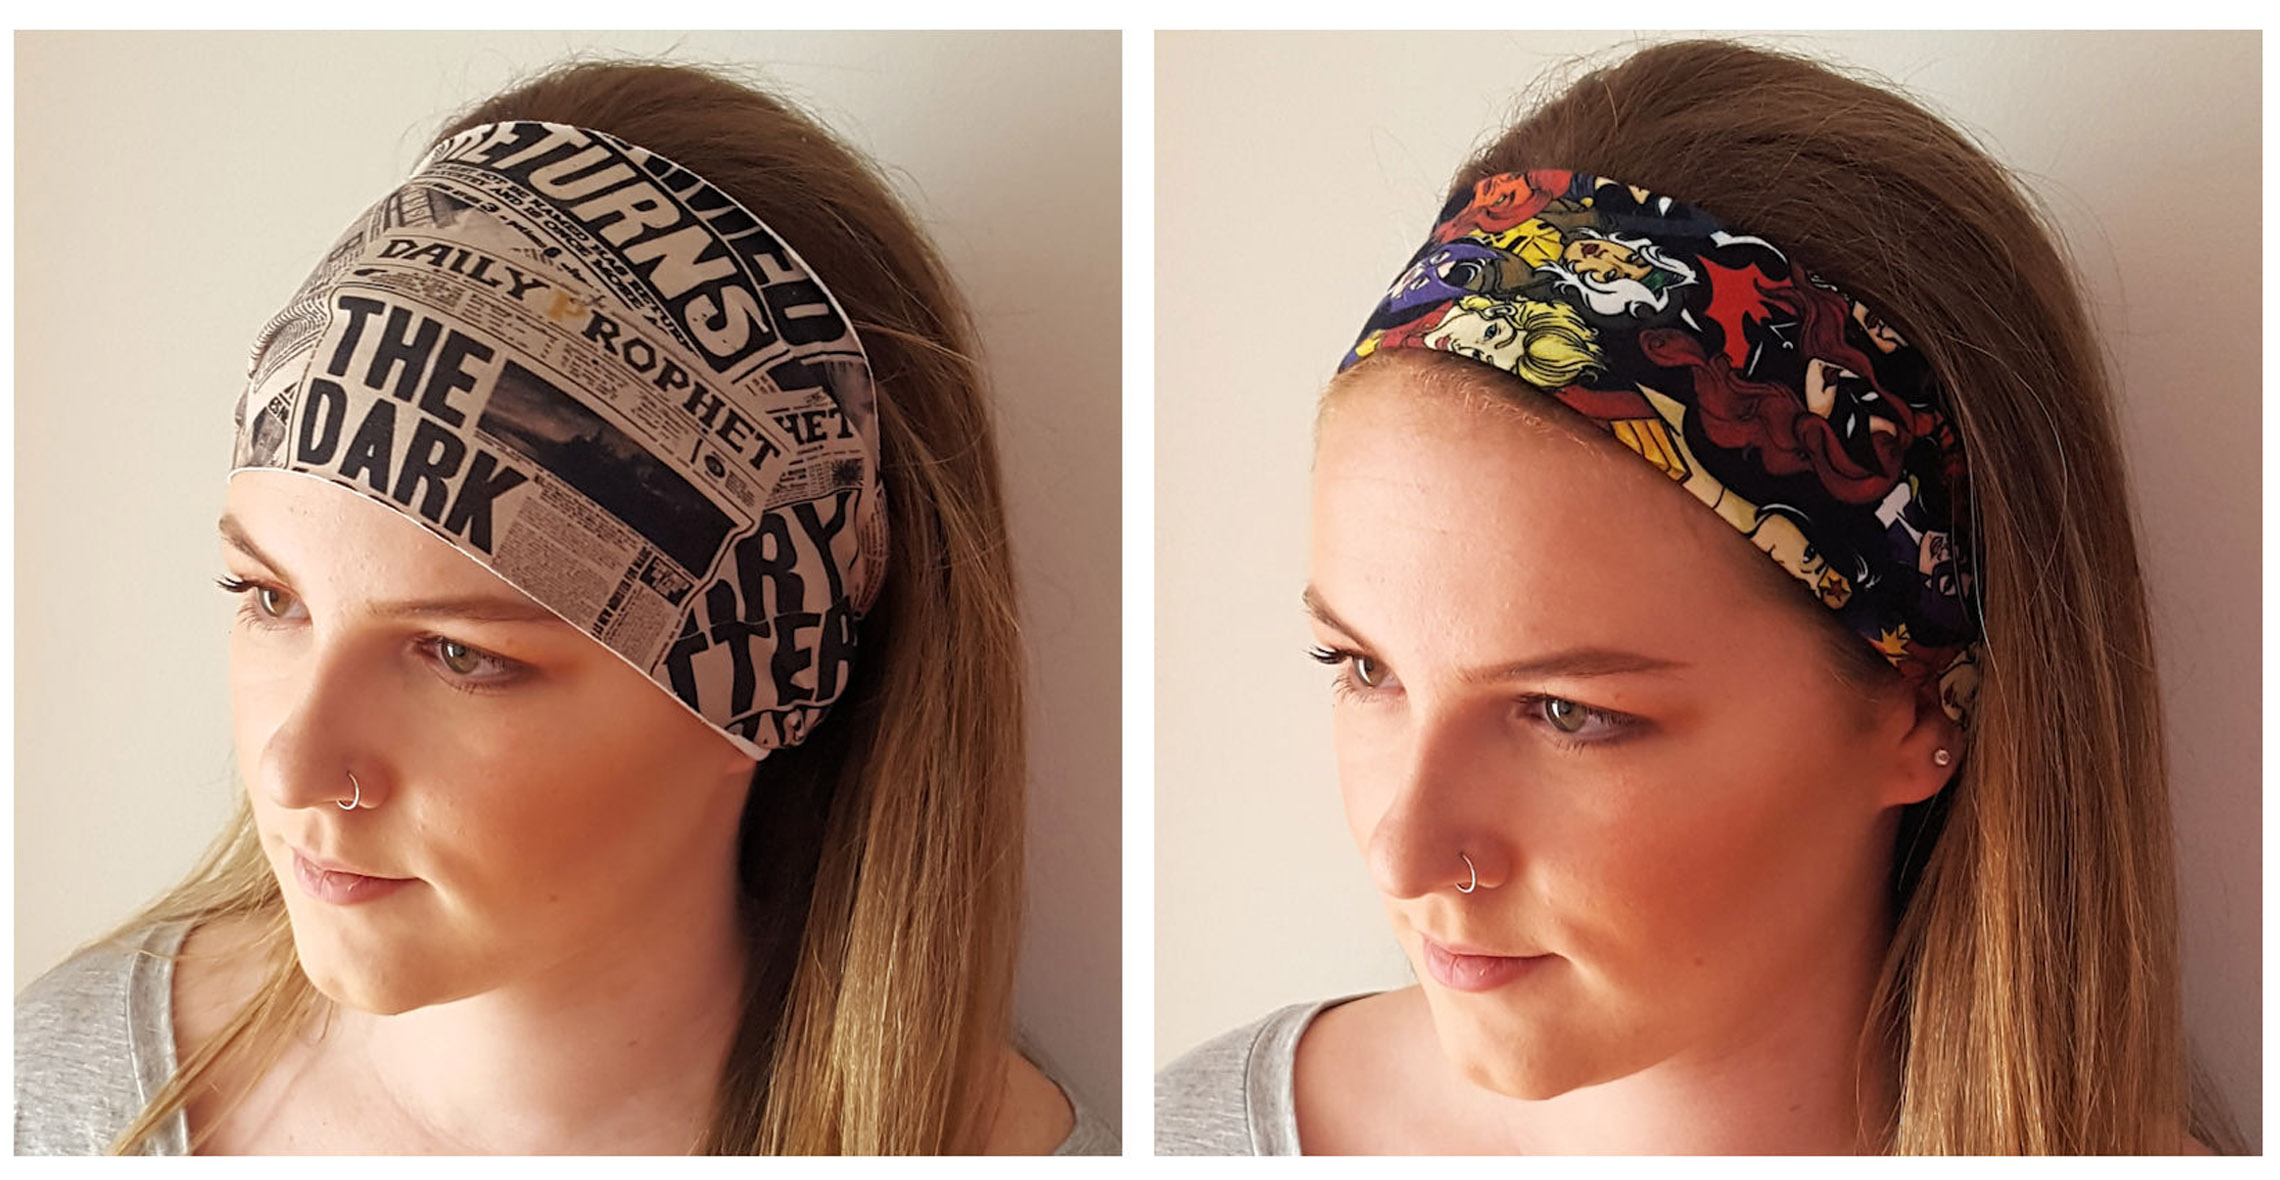
Sew a Faux Knot Headband
A knit headband is a comfortable way to accessorize, especially when you’ve got curls or coils to keep out of your face! These are incredibly quick and easy to stitch up and use up small cuts of jersey or other knit fabrics. Adding a faux knot to the center of your headband adds an extra unique touch.

This headband is created entirely with an overlocker, like the BERNINA L 890. We’ll use only two threads and two different stitches to stitch up our headwrap in a matter of minutes!
Supplies to Sew a Faux Knot Headband:
- 1/2 yard jersey knit fabric
- 1 spool polyester serger thread
- 1 spool of texturized serger thread (woolly poly or nylon)
- Wonder Clips
- Fray Check
- Large blunt-tipped tapestry needle
- Soft tape measure
- Rotary cutter + cutting mat
- BERNINA L 890

Steps to Sew a Faux Knot Headband:
-
Measure and Cut Fabric
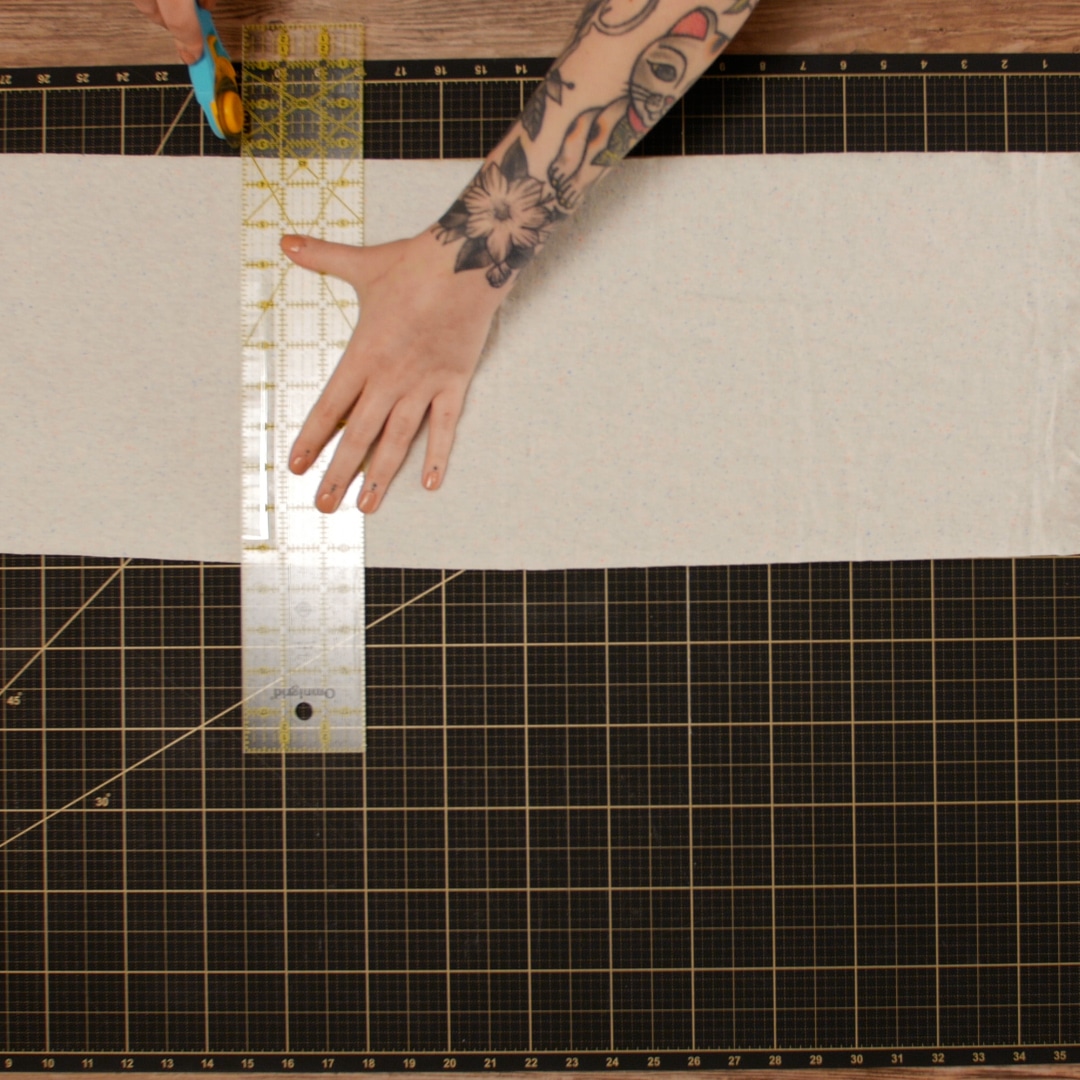
Our first step is to determine the size to cut our fabric, both in the width of the headband and the proper length to fit your head. If you have thicker hair or prefer a wider headwrap (finishing about 4 1/2″ wide), cut a strip of your jersey knit 10” x WOF. If you have finer hair or prefer a narrower headband (finishing about 3 1/2″ wide), cut a strip of jersey knit 8” x WOF. You can certainly cut fabric wider or narrower than this as well to suit your taste and style.

Next, use a soft tape measure to measure the circumference of your head at the point you would wear the headband. Then subtract 1” from that measurement. Trim your strip of fabric to this length.
-
Flatlock Seam
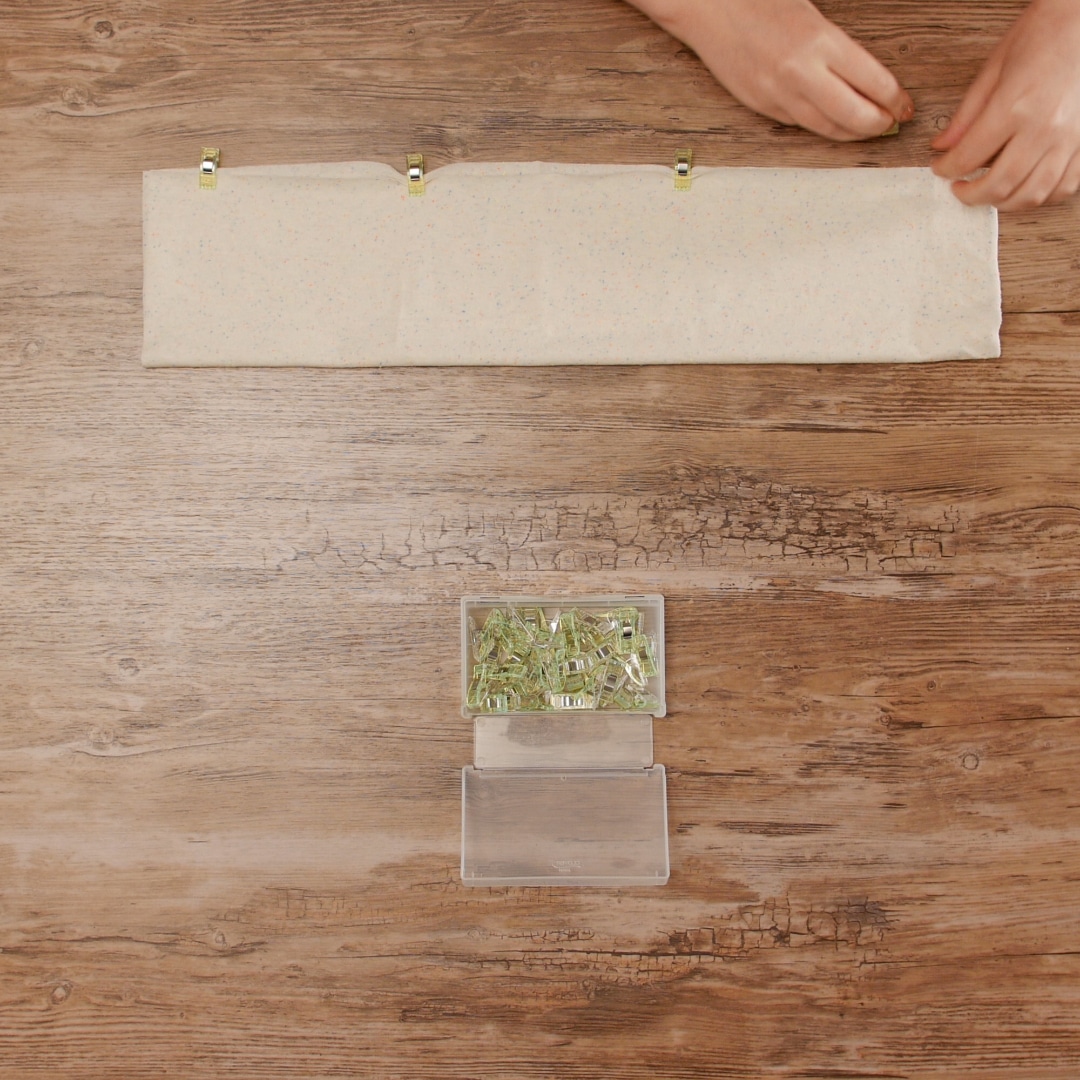
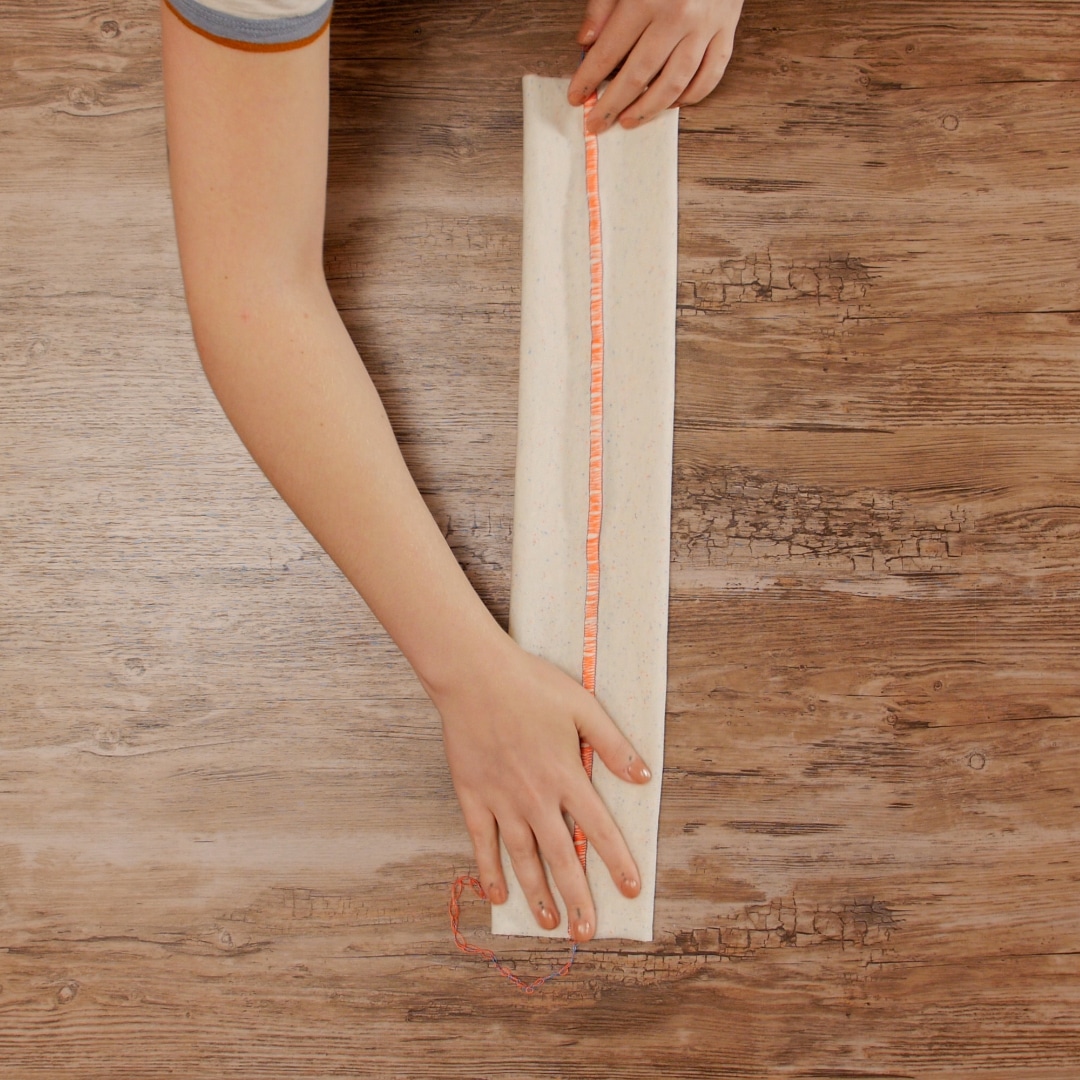
Fold your strip of fabric in half lengthwise and use Wonder Clips to hold aligned raw edges together.
Setup the L 890 for a two-thread flatlock stitch. You can do this through either Guided Mode or Expert Mode. Let’s go through Guided Mode today.
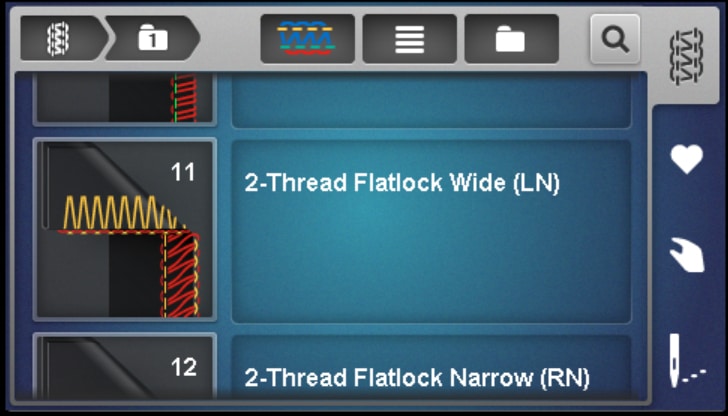
Start by selecting the overlock stitch folder and then the 2-Thread Flatlock Wide stitch (#11.)
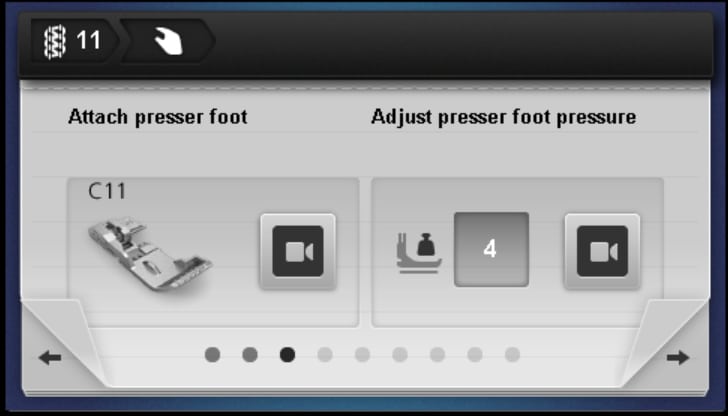
Now the Wizard will walk you through each step to set up this stitch. It will first prompt you to raise the presser foot on the machine, and then tell you which thread paths need to be unthreaded. This will depend on what stitch was last used on the L 890. The machine will indicate the suggested presser foot (C11 for this stitch) and presser foot pressure setting.
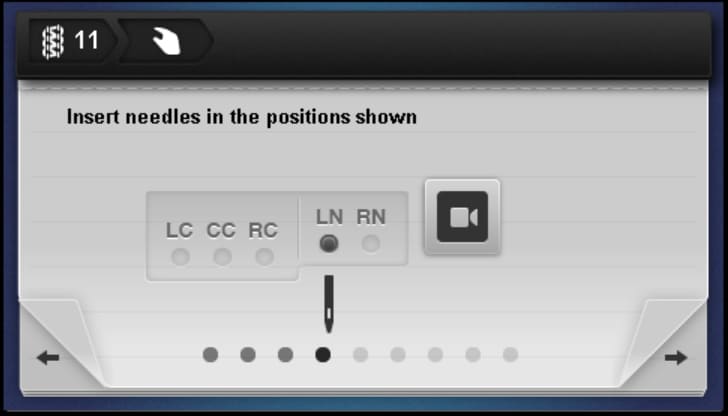
Next, we need to insert our needle(s) into the correct position. Because this is a combination machine (Overlock and Coverstitch machine), there are five possible needle positions. We need only one needle for this stitch, inserted into the Left Needle position (LN). The screwdriver for releasing needles and a Needle Threader/Inserter tool are both stored in the front cover.
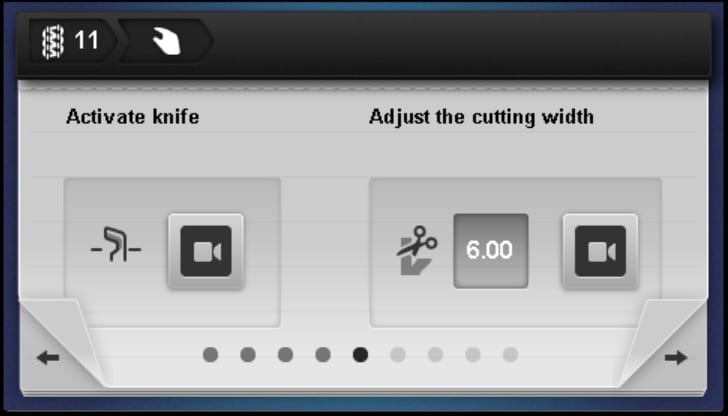
Next, we set our manual cutting settings by activating the knife and setting the cutting width. The suggested cutting width for this stitch is 6 mm, but for our project, we want to use a little bit wider flatlock for a bolder, more decorative look. Set your cutting width to 8 mm.
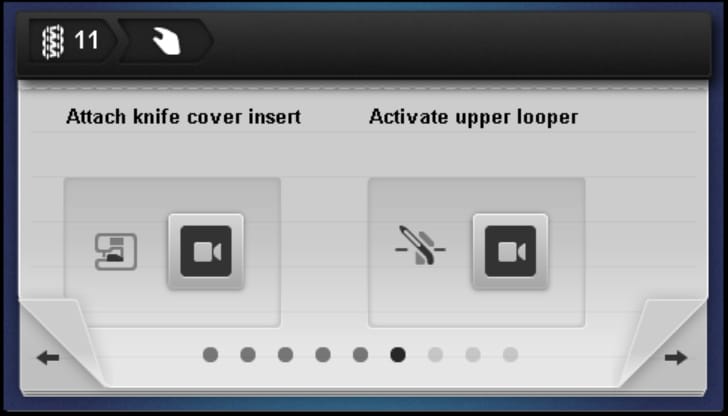
Our next screen will indicate that we need to use the knife cover insert and activate the Upper Looper. Unless you are coming from a cover or chainstitch, both of these will already be in place and require no action.
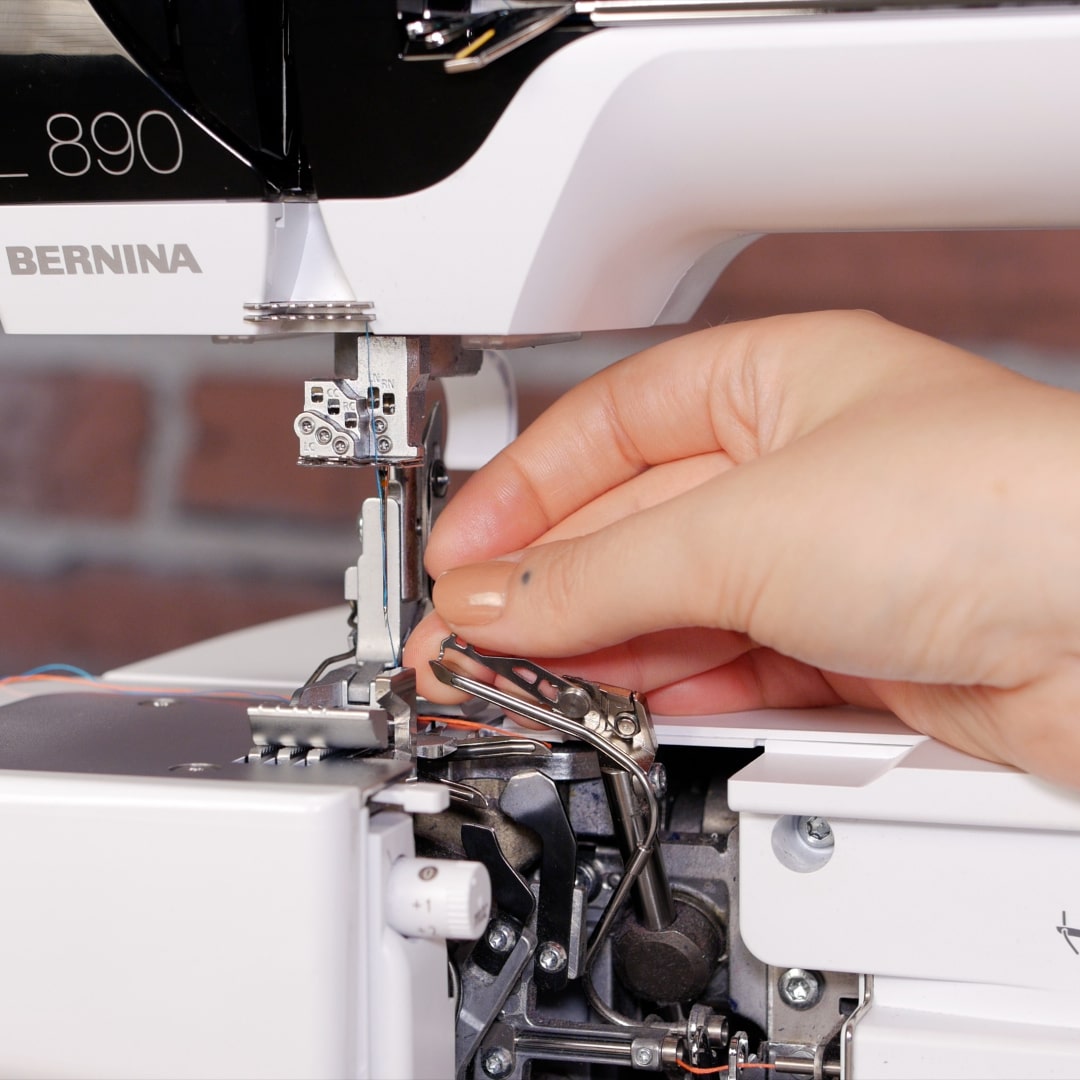
Since we are using a two-thread stitch, using only the Left Needle and Lower Looper, we need to engage the Upper Looper Converter (ULC.) On the L 8 Series overlockers, this is actually attached to the Upper Looper on a hinge. Simply flip the ULC up and over to the left, hooking into the looper eye.
Now we need to check our Rolled Hem Selection Lever. This should be set at O (for overlock). Your Micro Thread Control (mtc) should be set at 0 as the default. We may adjust this later, but for now, we’ll try out the recommended setting.
The last step is to thread the machine! Thread the Left Needle (the yellow path) using a standard polyester serger thread. Thread the Lower Looper (the red path) using a soft, texturized thread like a woolly poly or woolly nylon. You can watch an animation on screen illustrating the threading process if this is your first time using the One-Step BERNINA Air Threader!

All of this seems like a lot of steps, but in live-action, it only takes a minute or two to go through. When everything is set up and you reach the sew-out screen, test your stitch on a folded scrap piece of fabric. When testing a stitch, make sure that you sew at least four to six inches of a seam with the stretch of the fabric in the same direction as your project. Not all knits stretch the same amount in all directions, and this can affect your stitch.
Give the two layers of fabric a gentle tug to open up the flatlock. Your seam should lay flat with the fabric edges encased in the seam laying on top of each other smoothly. You can increase the mtc to create a little bit more room for those layers to move and flatten out if necessary. You can read more about fine-tuning your flatlock stitch here.
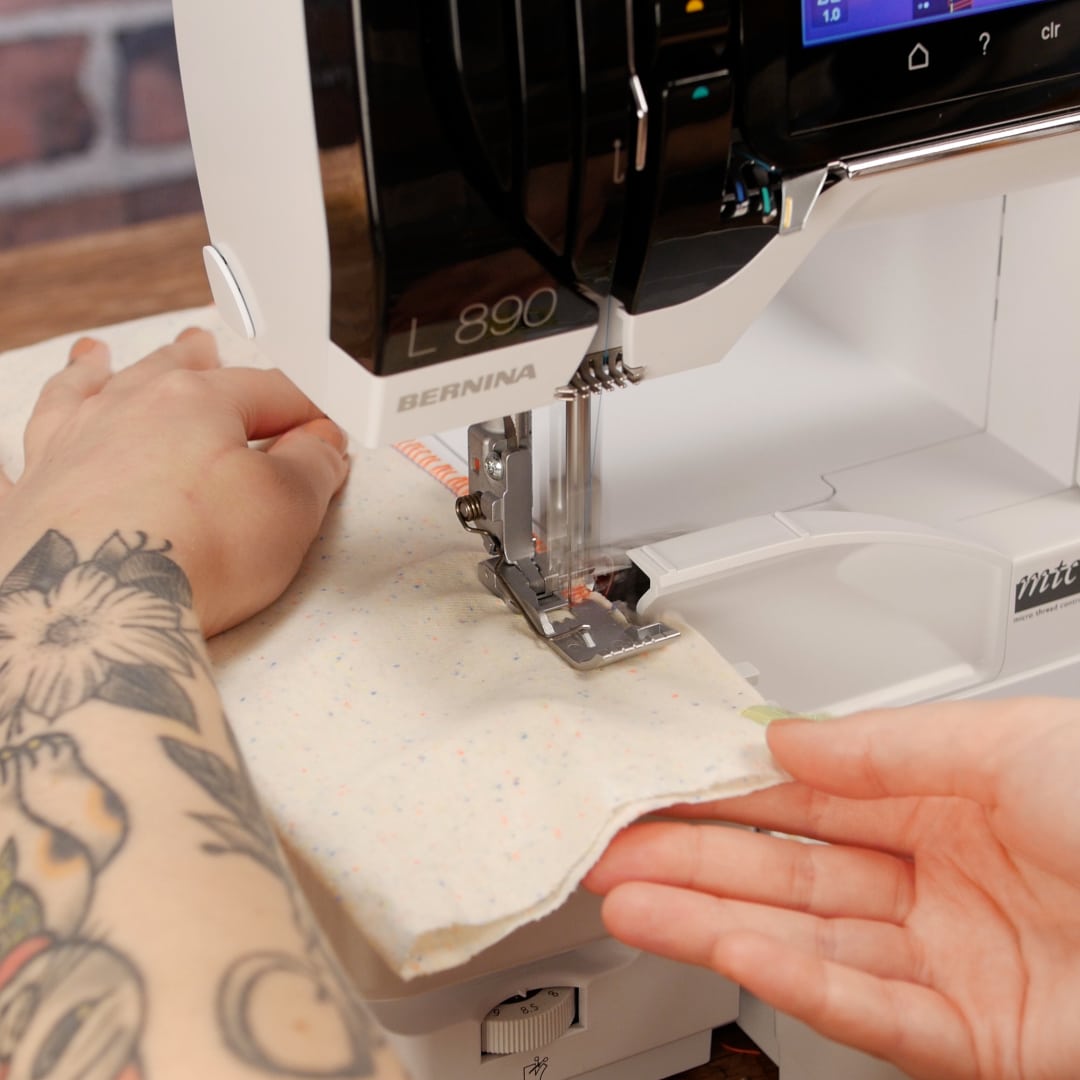
With your stitch perfected, sew the 2-Thread Flatlock stitch down the length of your fabric strip for the headband, trimming about 1/8” as you serge, then open the flatlock stitch to lay flat. Your looper threads should be visible from the right side of the fabric.
-
Save the Stitch
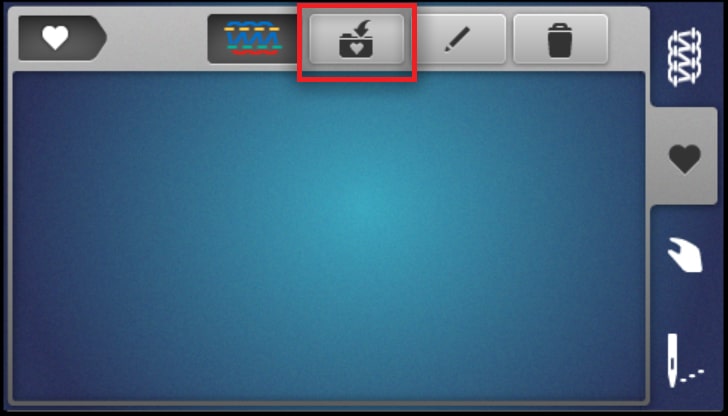
At this point, you may choose to save your stitch to Personal Memory. If you want to use this exact stitch in the future, you can save all the details of the stitch for future use. This is particularly helpful if you find yourself making the same projects multiple times or have a fabric you use often.
Select Personal Memory, indicated by the heart icon. Select Save Stitch.
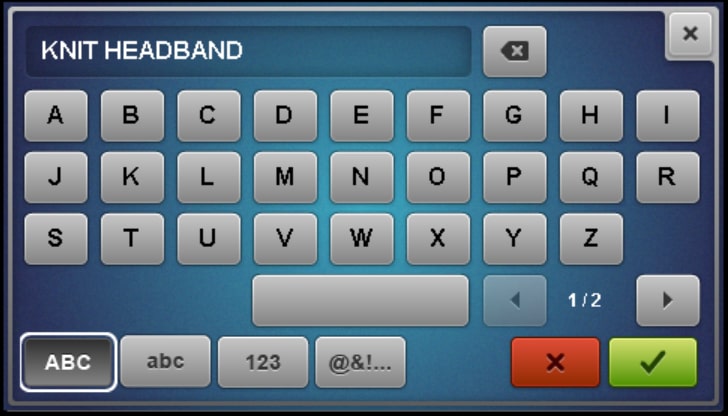
Select the stitch.
Here you can name your stitch. You may choose to name it by the project, the fabric, or anything that indicates to you what the stitch is used for.
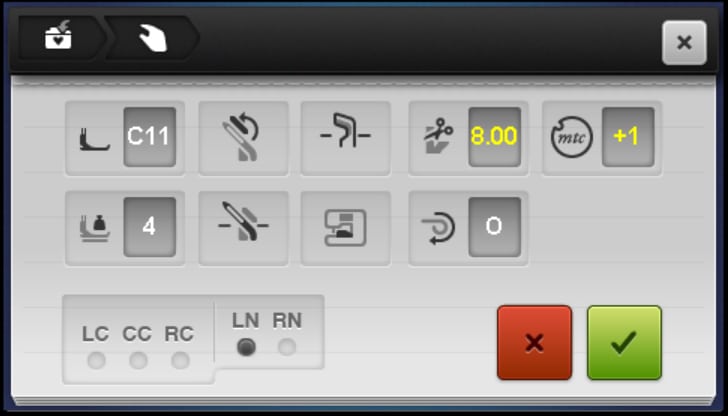
If any manual settings were changed, you can indicate those here. For example, we increased our cutting width so that would need to be set to 8. If you increased your mtc, you can note that here as well. When all the settings are correct, select the green checkmark to save the stitch.
-
Create Faux Knot
Flatten the tube of fabric you have just sewn so that the flatlock stitch is centered on one side and the fabric is solid on the other. Press with an iron.
Now fold the fabric in half with the right sides (the side with the flatlock seam) together and lay it on your work table. Offset the raw ends so that one folded edge of the end laid on top aligns with the flatlock seam of the end on the bottom. The folded edge of the end on the bottom will line up with the flatlock seam of the end laid on top. The result should be the two ends laying on top of one another just overlapping through the middle.
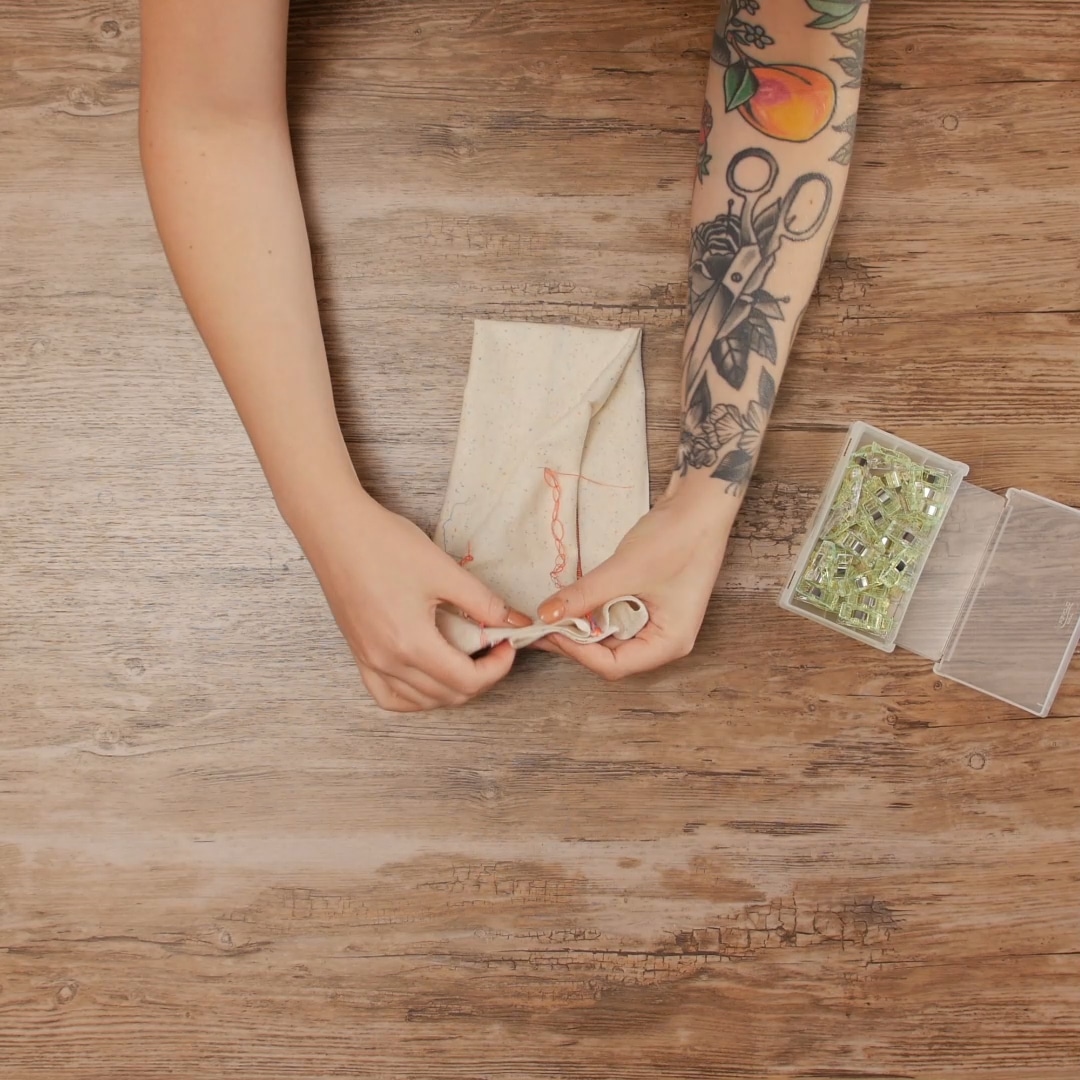
Now take the loose edge of the end laid on top and wrap it underneath the end on the bottom.

Finally, take the edge of the end on the bottom and fold it up and over the edge of the end laid on top. Use Wonder Clips to hold all these layers together.
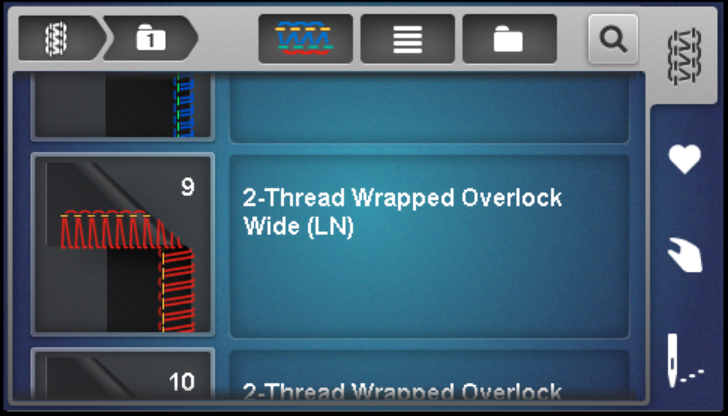
On the machine screen, go to Stitch Selection. Select the Overlock Stitch Menu and then the 2-Thread Wrapped Overlock Wide (stitch #9.)
Follow the prompts through the Wizard to set this stitch. The only settings you may need to change from the last stitch would be the cutting width and mtc. When you reach the sew-out screen, be sure to test this new stitch on a scrap of fabric.
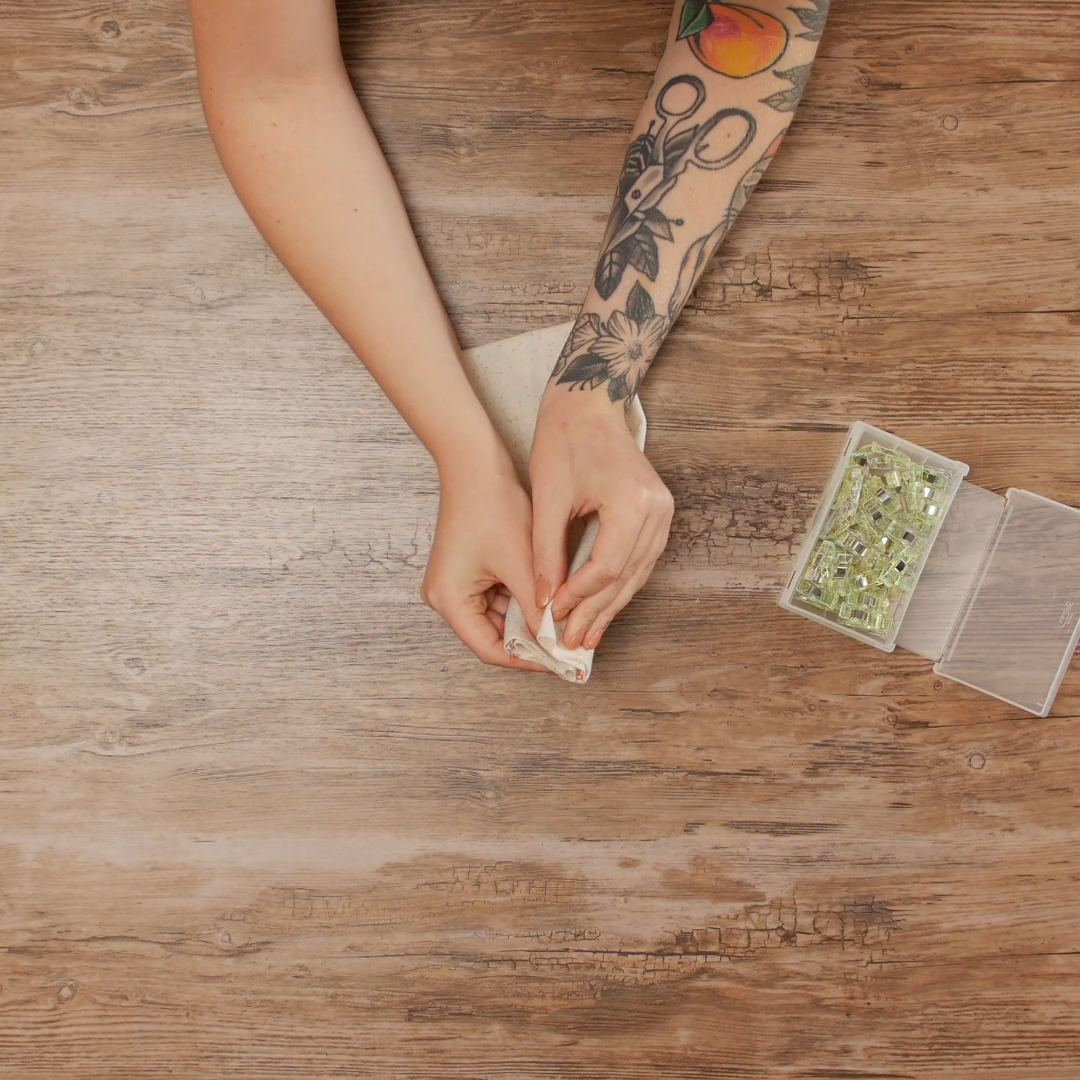
Serge over the raw edges of your headband, trimming about 1/4” from the edge as you sew, to create the faux knot.
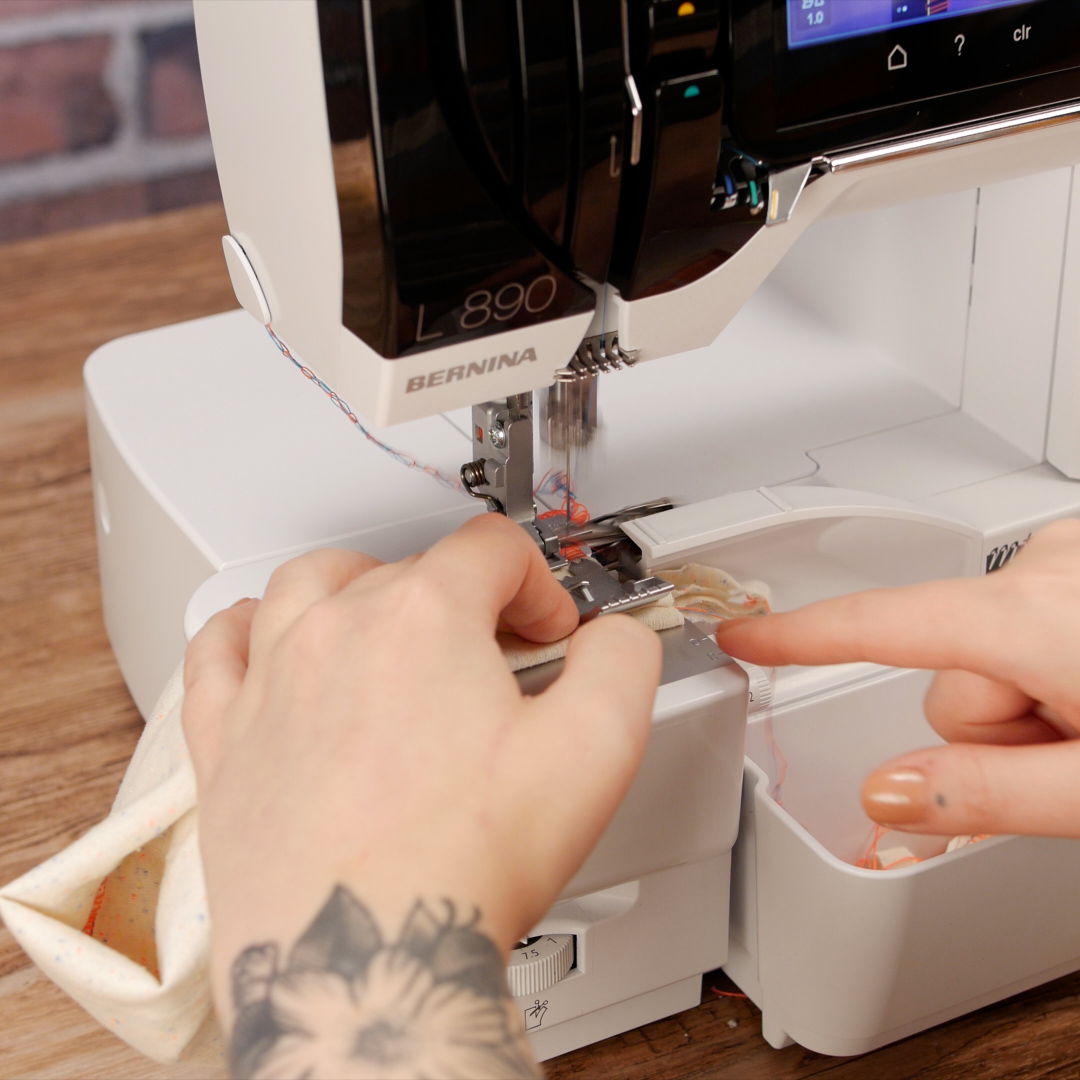
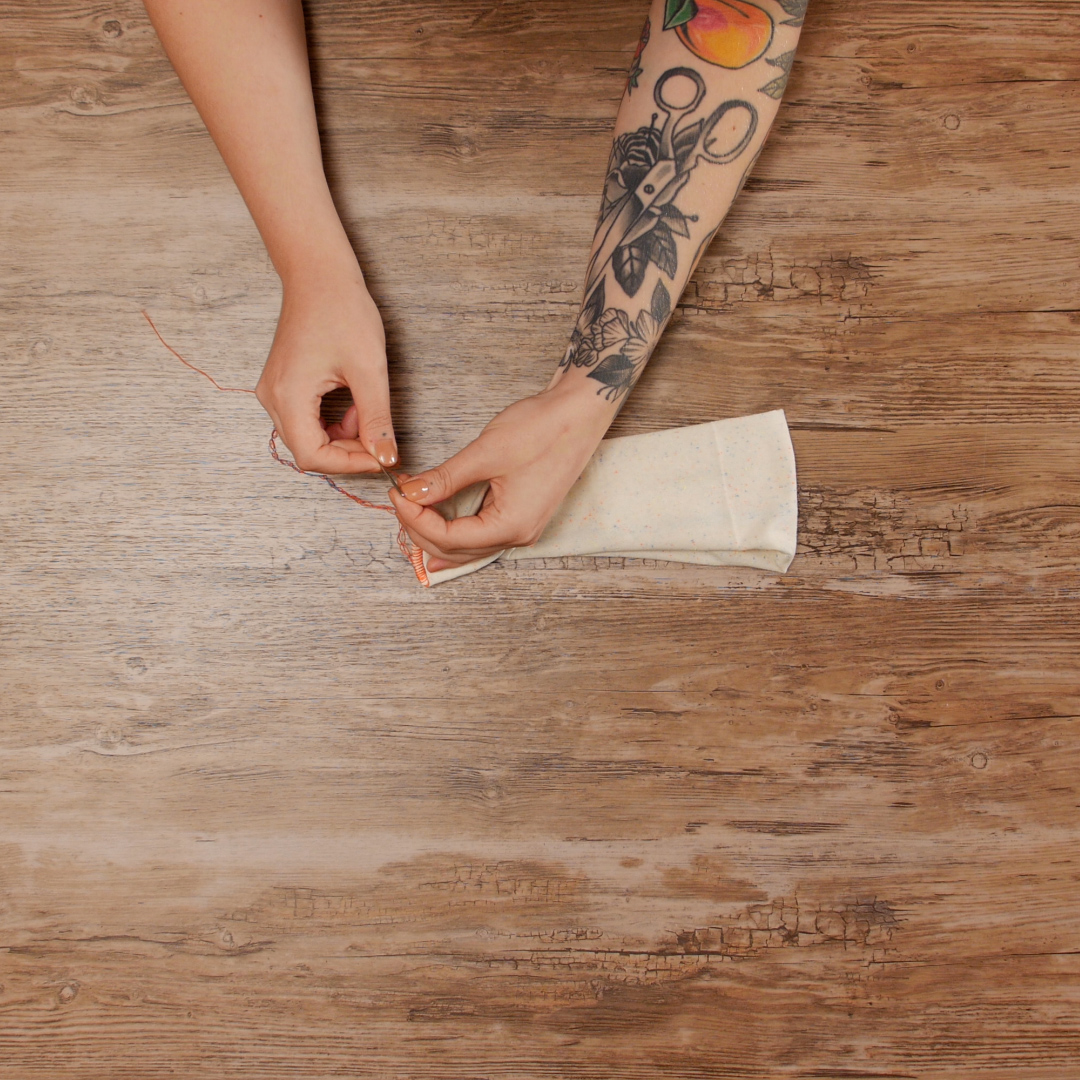
Using a large tapestry needle, weave the thread chains into the seam and trim. Add a small amount of Fray Check to the beginning and end of the seam for added security.
When you open up the headband, you’ll see the faux knot our folding created!

Used Products

What you might also like


2 comments on “Sew a Faux Knot Headband”
-
-
It does not– this project is designed to be sewn with knit fabrics that should have plenty of stretch on their own!
-
Leave a Reply
You must be logged in to post a comment.

In making the headband, does the fabric get cut on the bias to give extra flexibility?